The Xposed Framework is still alive and kicking despite the fact that development has slowed down a bit lately. Rovo89 is the only true developer behind Xposed, so it’s really a one-man show. This means the popular root mod doesn’t typically support the latest Android version, but it’s usually only one version number behind.
For example, Xposed for Nougat is looking like it’s almost ready, and that means it’ll be released around the same time as Android 8.0. So this mod isn’t for the folks who always run the latest Android versions, but it’s still very handy for the vast majority of users whose phones don’t get updated as fast as a Pixel or Nexus.
There are actually two parts to Xposed. First is the Xposed Installer app, which is a central hub for installing and managing modules. But behind it all, there’s the Xposed Framework, which is a code base that modules use to perform all of their various tweaks. Installing both of these elements is actually pretty simple nowadays, so I’ll show you how it all works below.
Requirements
A Note About Android Versions & OEM Skins
For this guide to work as written, your phone will need to be rooted and running either Android Lollipop (5.0–5.1.1) or Android Marshmallow (6.0–6.0.1).
On top of that, it’s best if your phone is running stock Android with little or no manufacture skinning. If you’re using a Samsung device, know that TouchWiz is not officially supported by Xposed.
You can attempt to install Xposed on a device with heavy manufacturer skinning, but there’s a good chance you’ll experience bugs. As a result, we only recommend proceeding if you have a full NANDroid backup on standby in case things go wrong.
Step 1: Download the Xposed Installer App
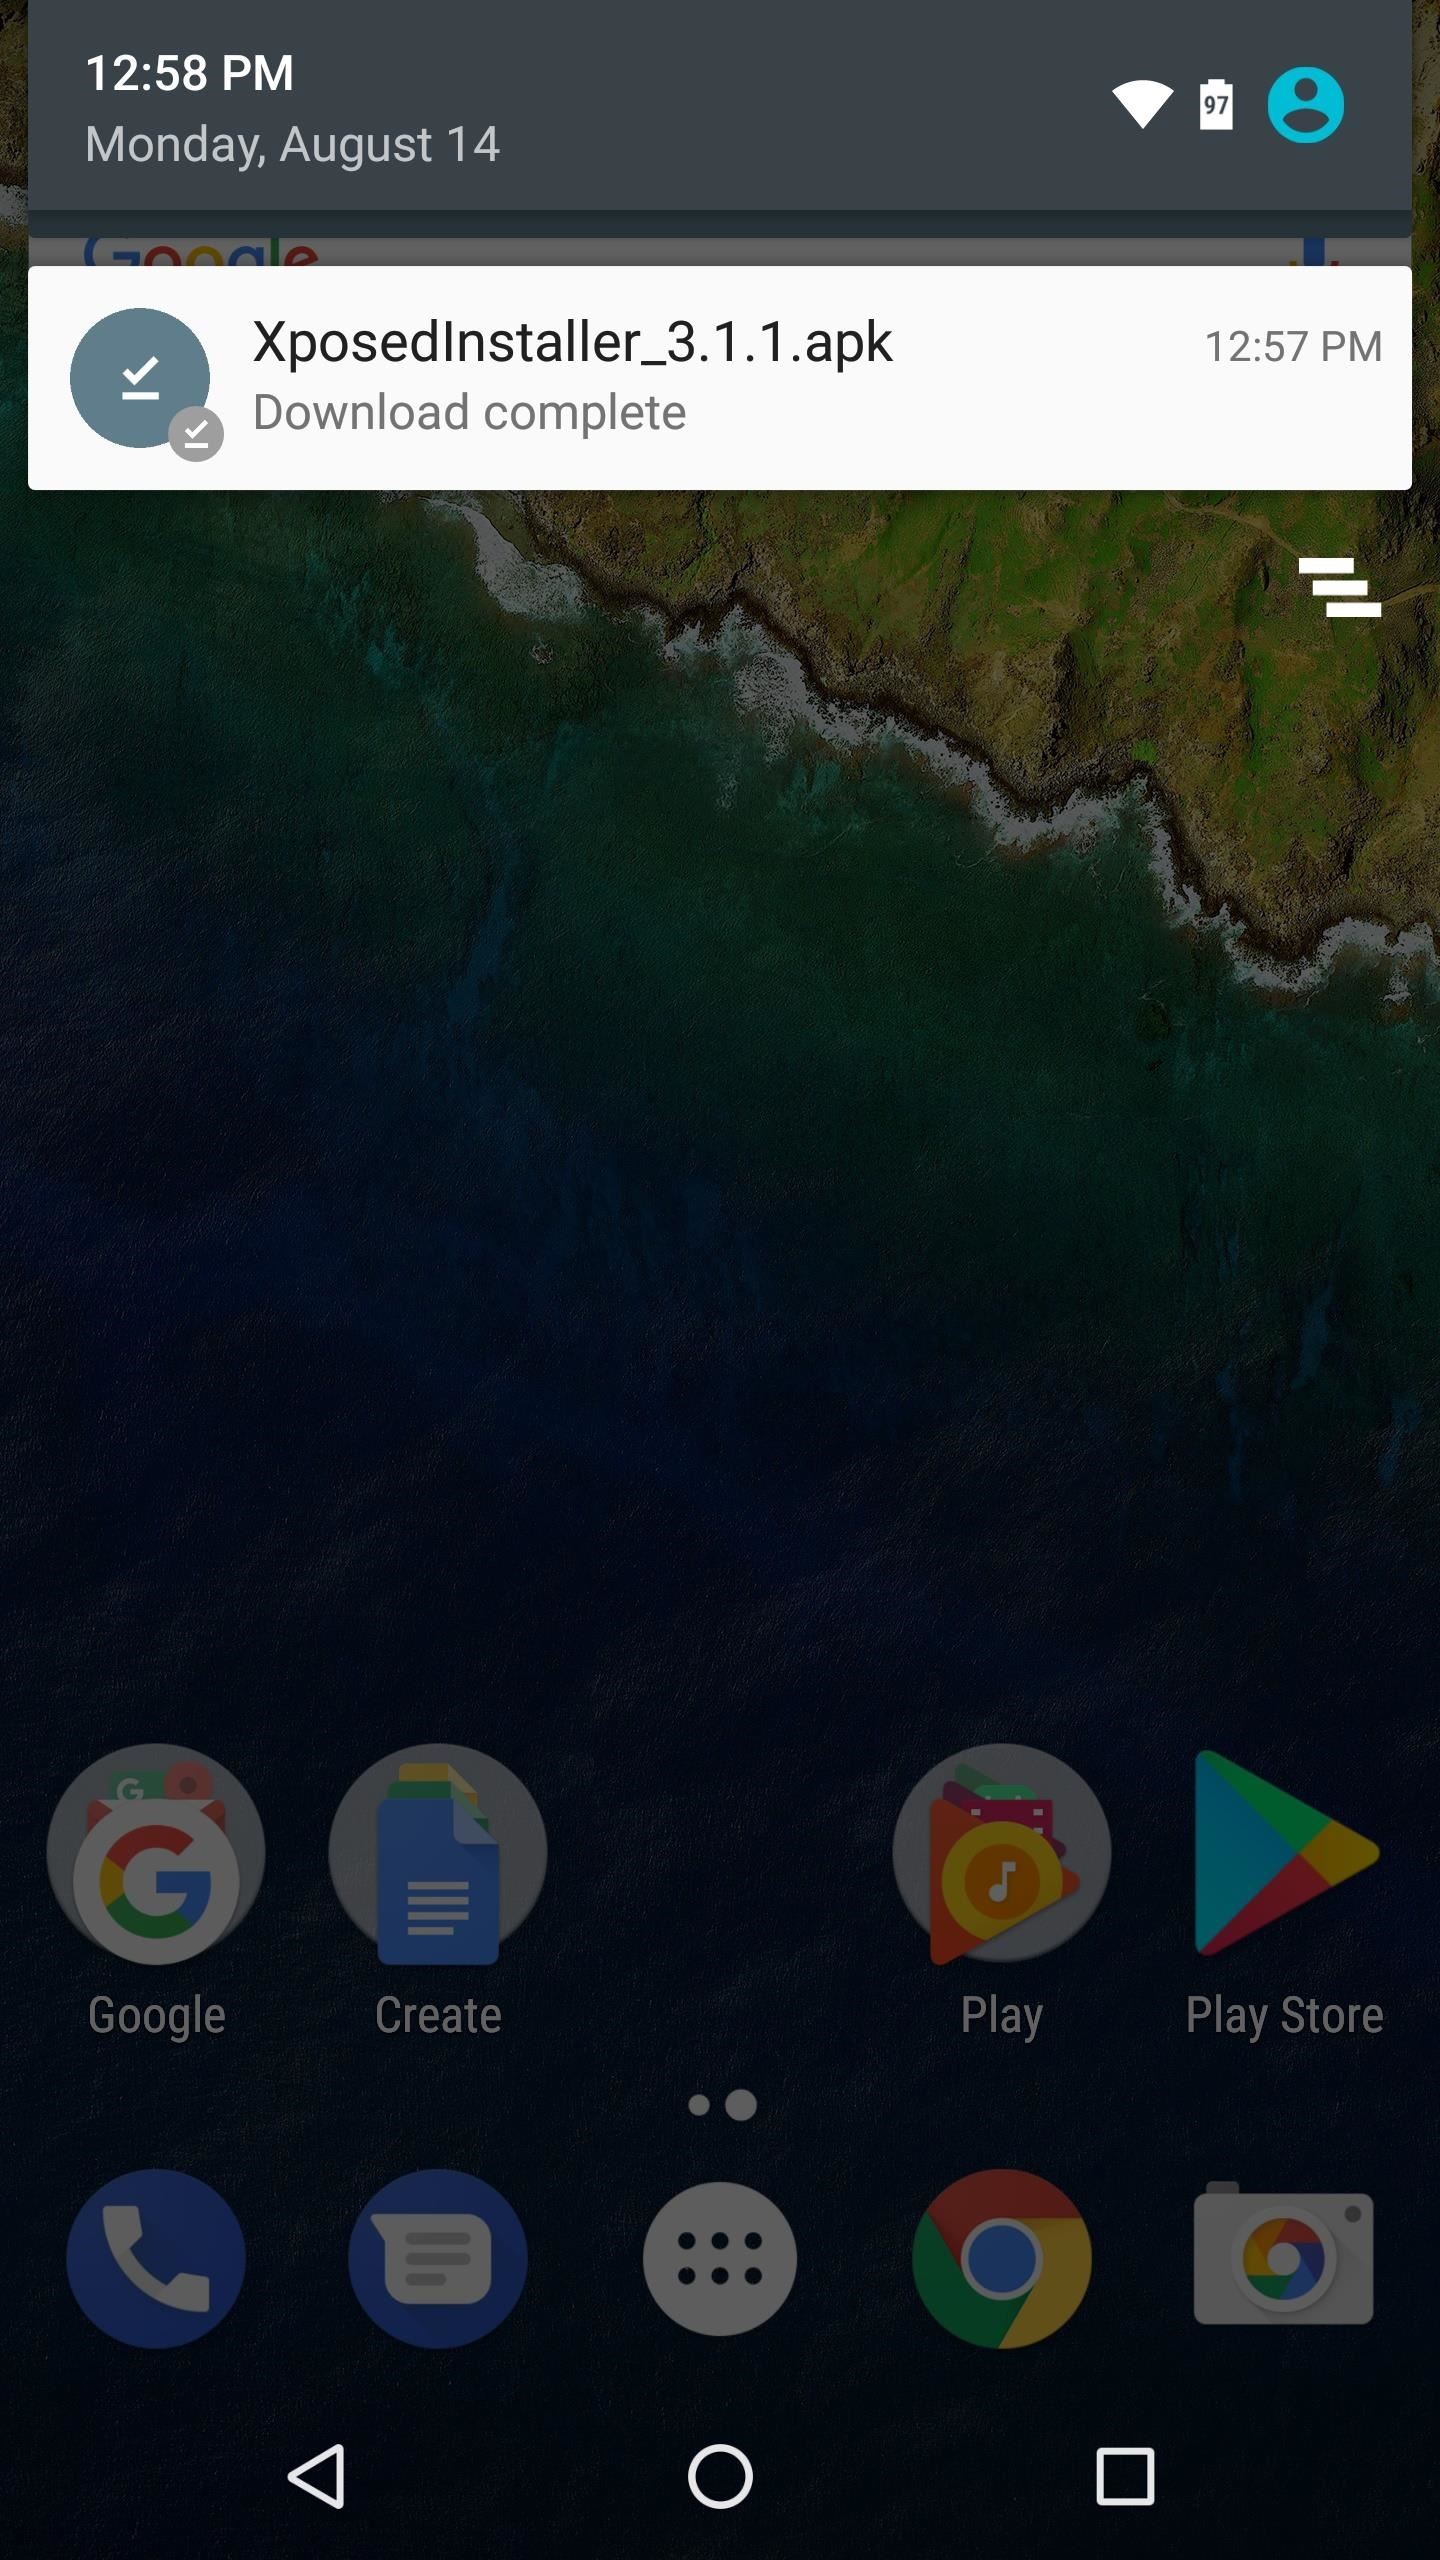
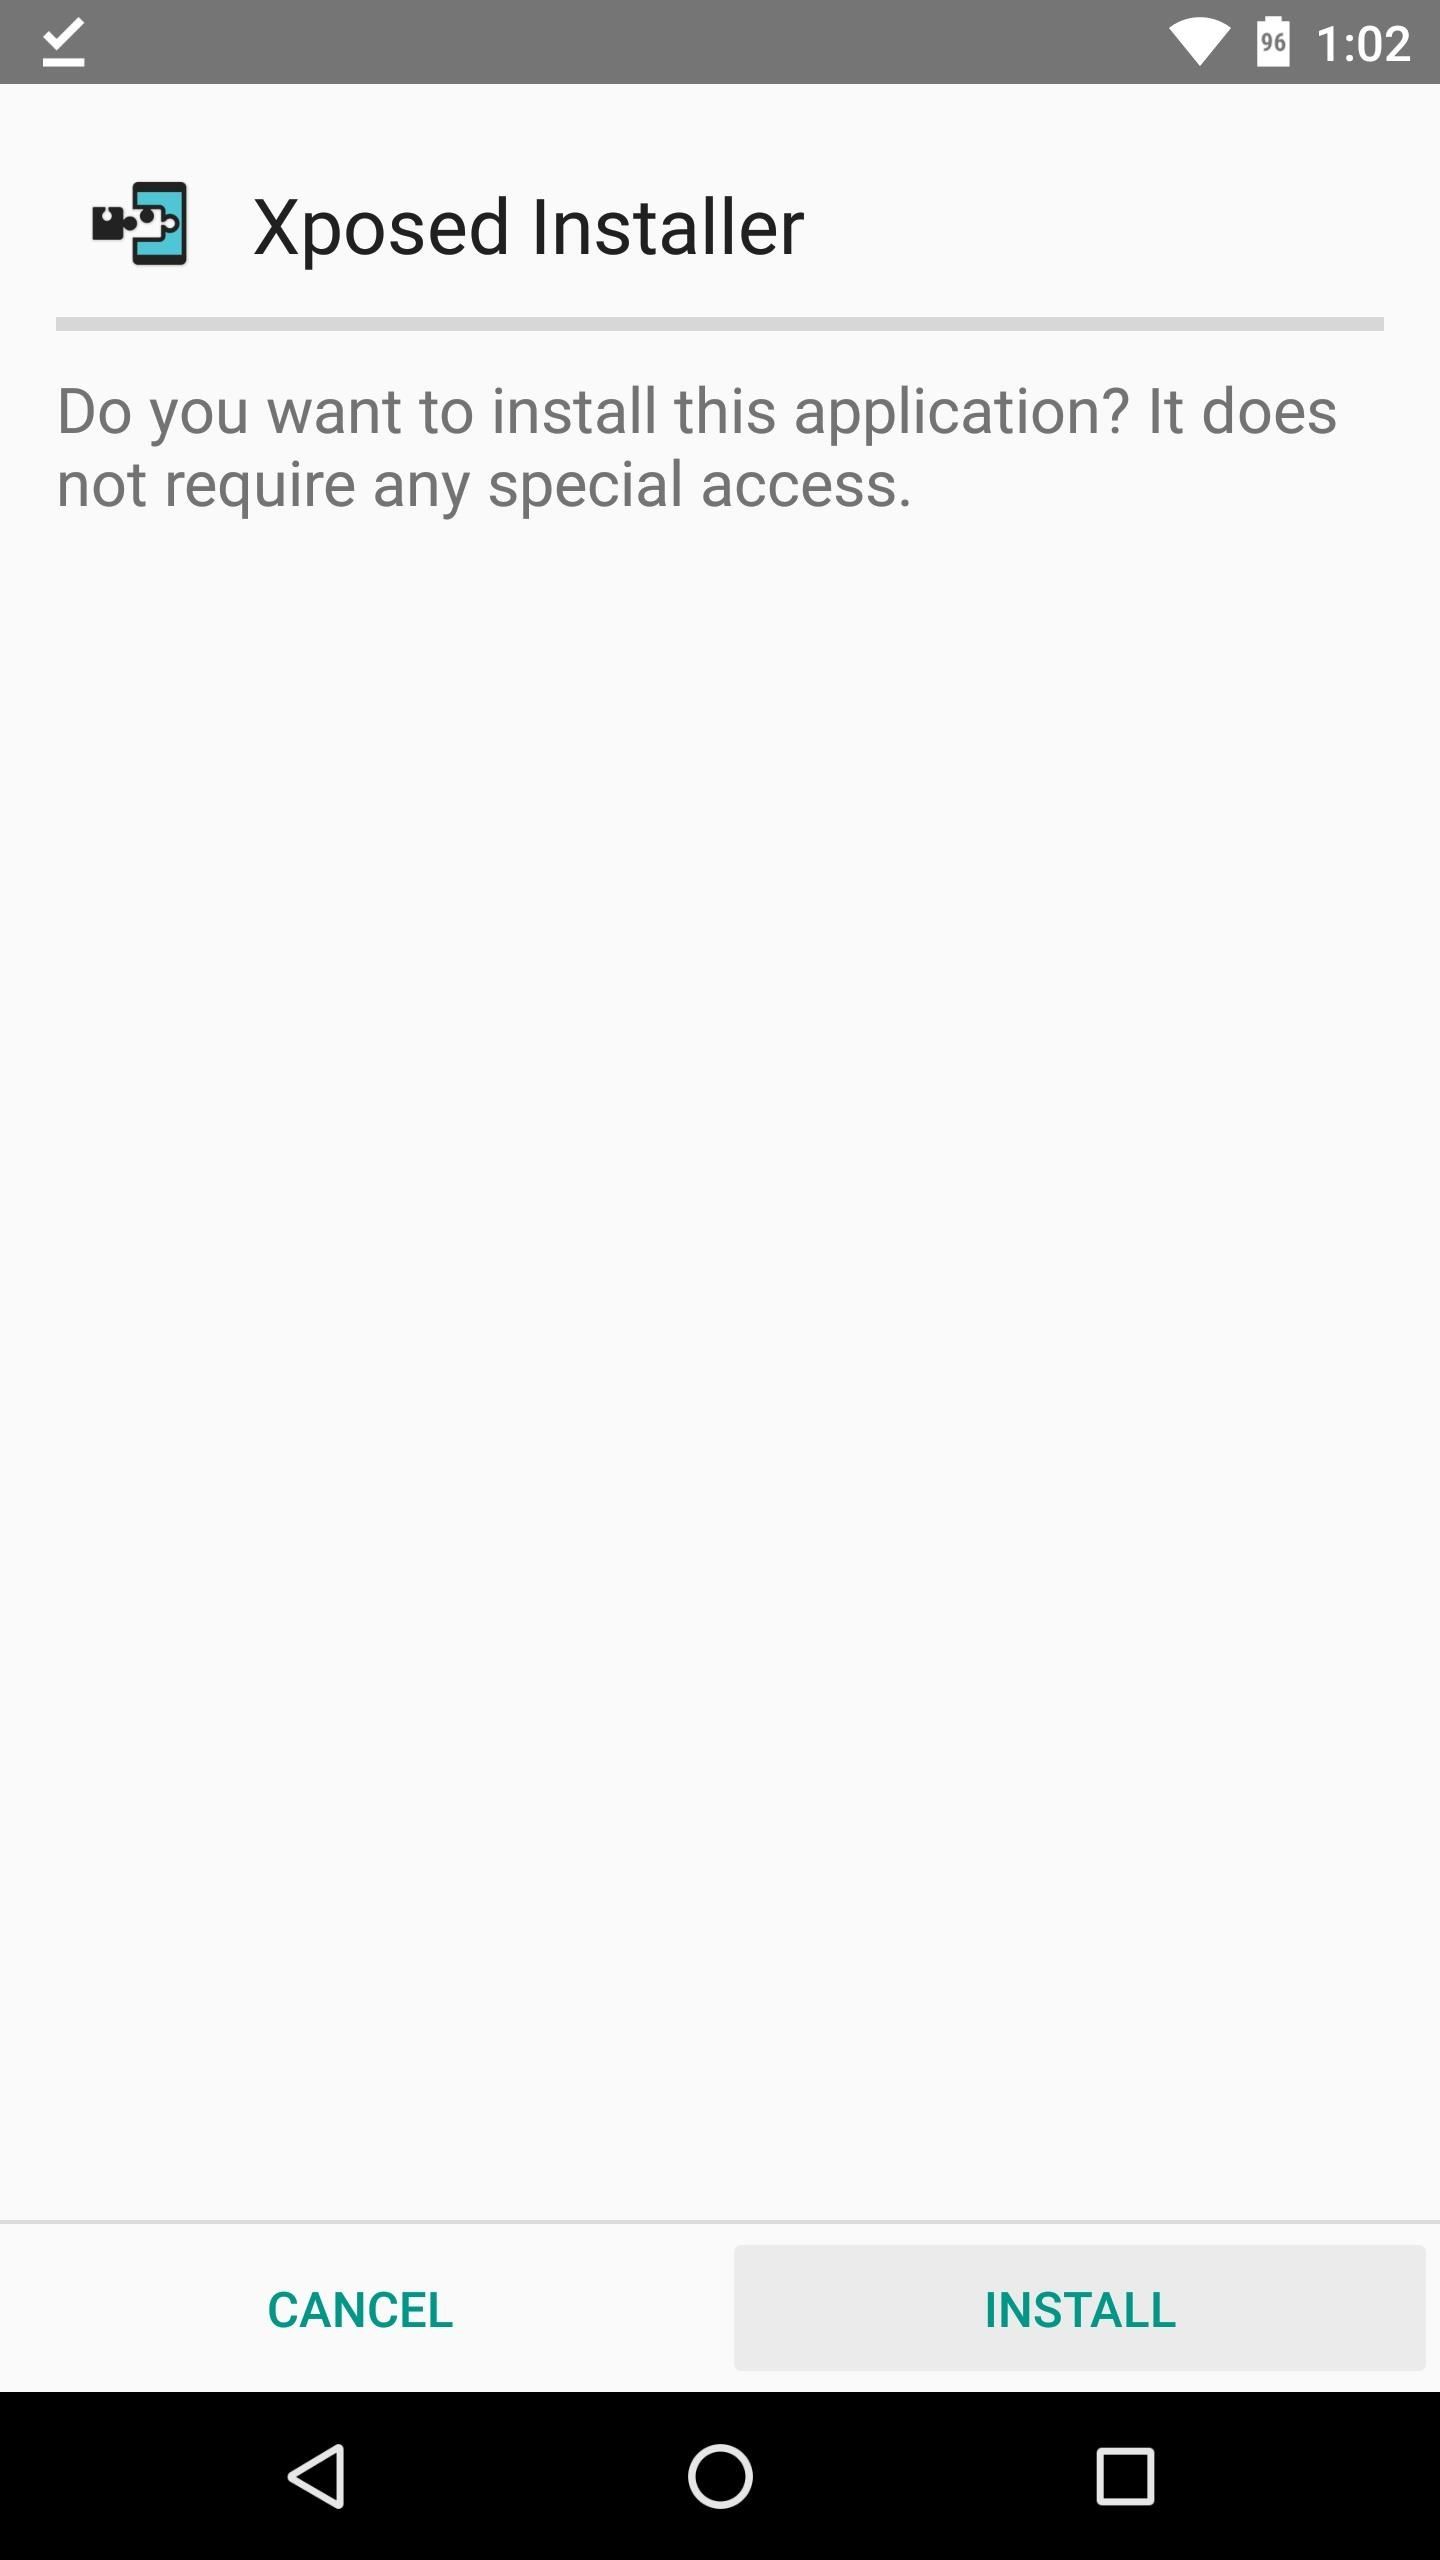
First up, you’ll need to download the Xposed Installer app. This app lets you download and install Xposed modules, and it even lets you install the Xposed Framework itself. So to start, make sure “Unknown Sources” is enabled, then tap the following link. From there, just tap the Download complete notification, then press “Install” when prompted.
Step 2: Install the Xposed Framework
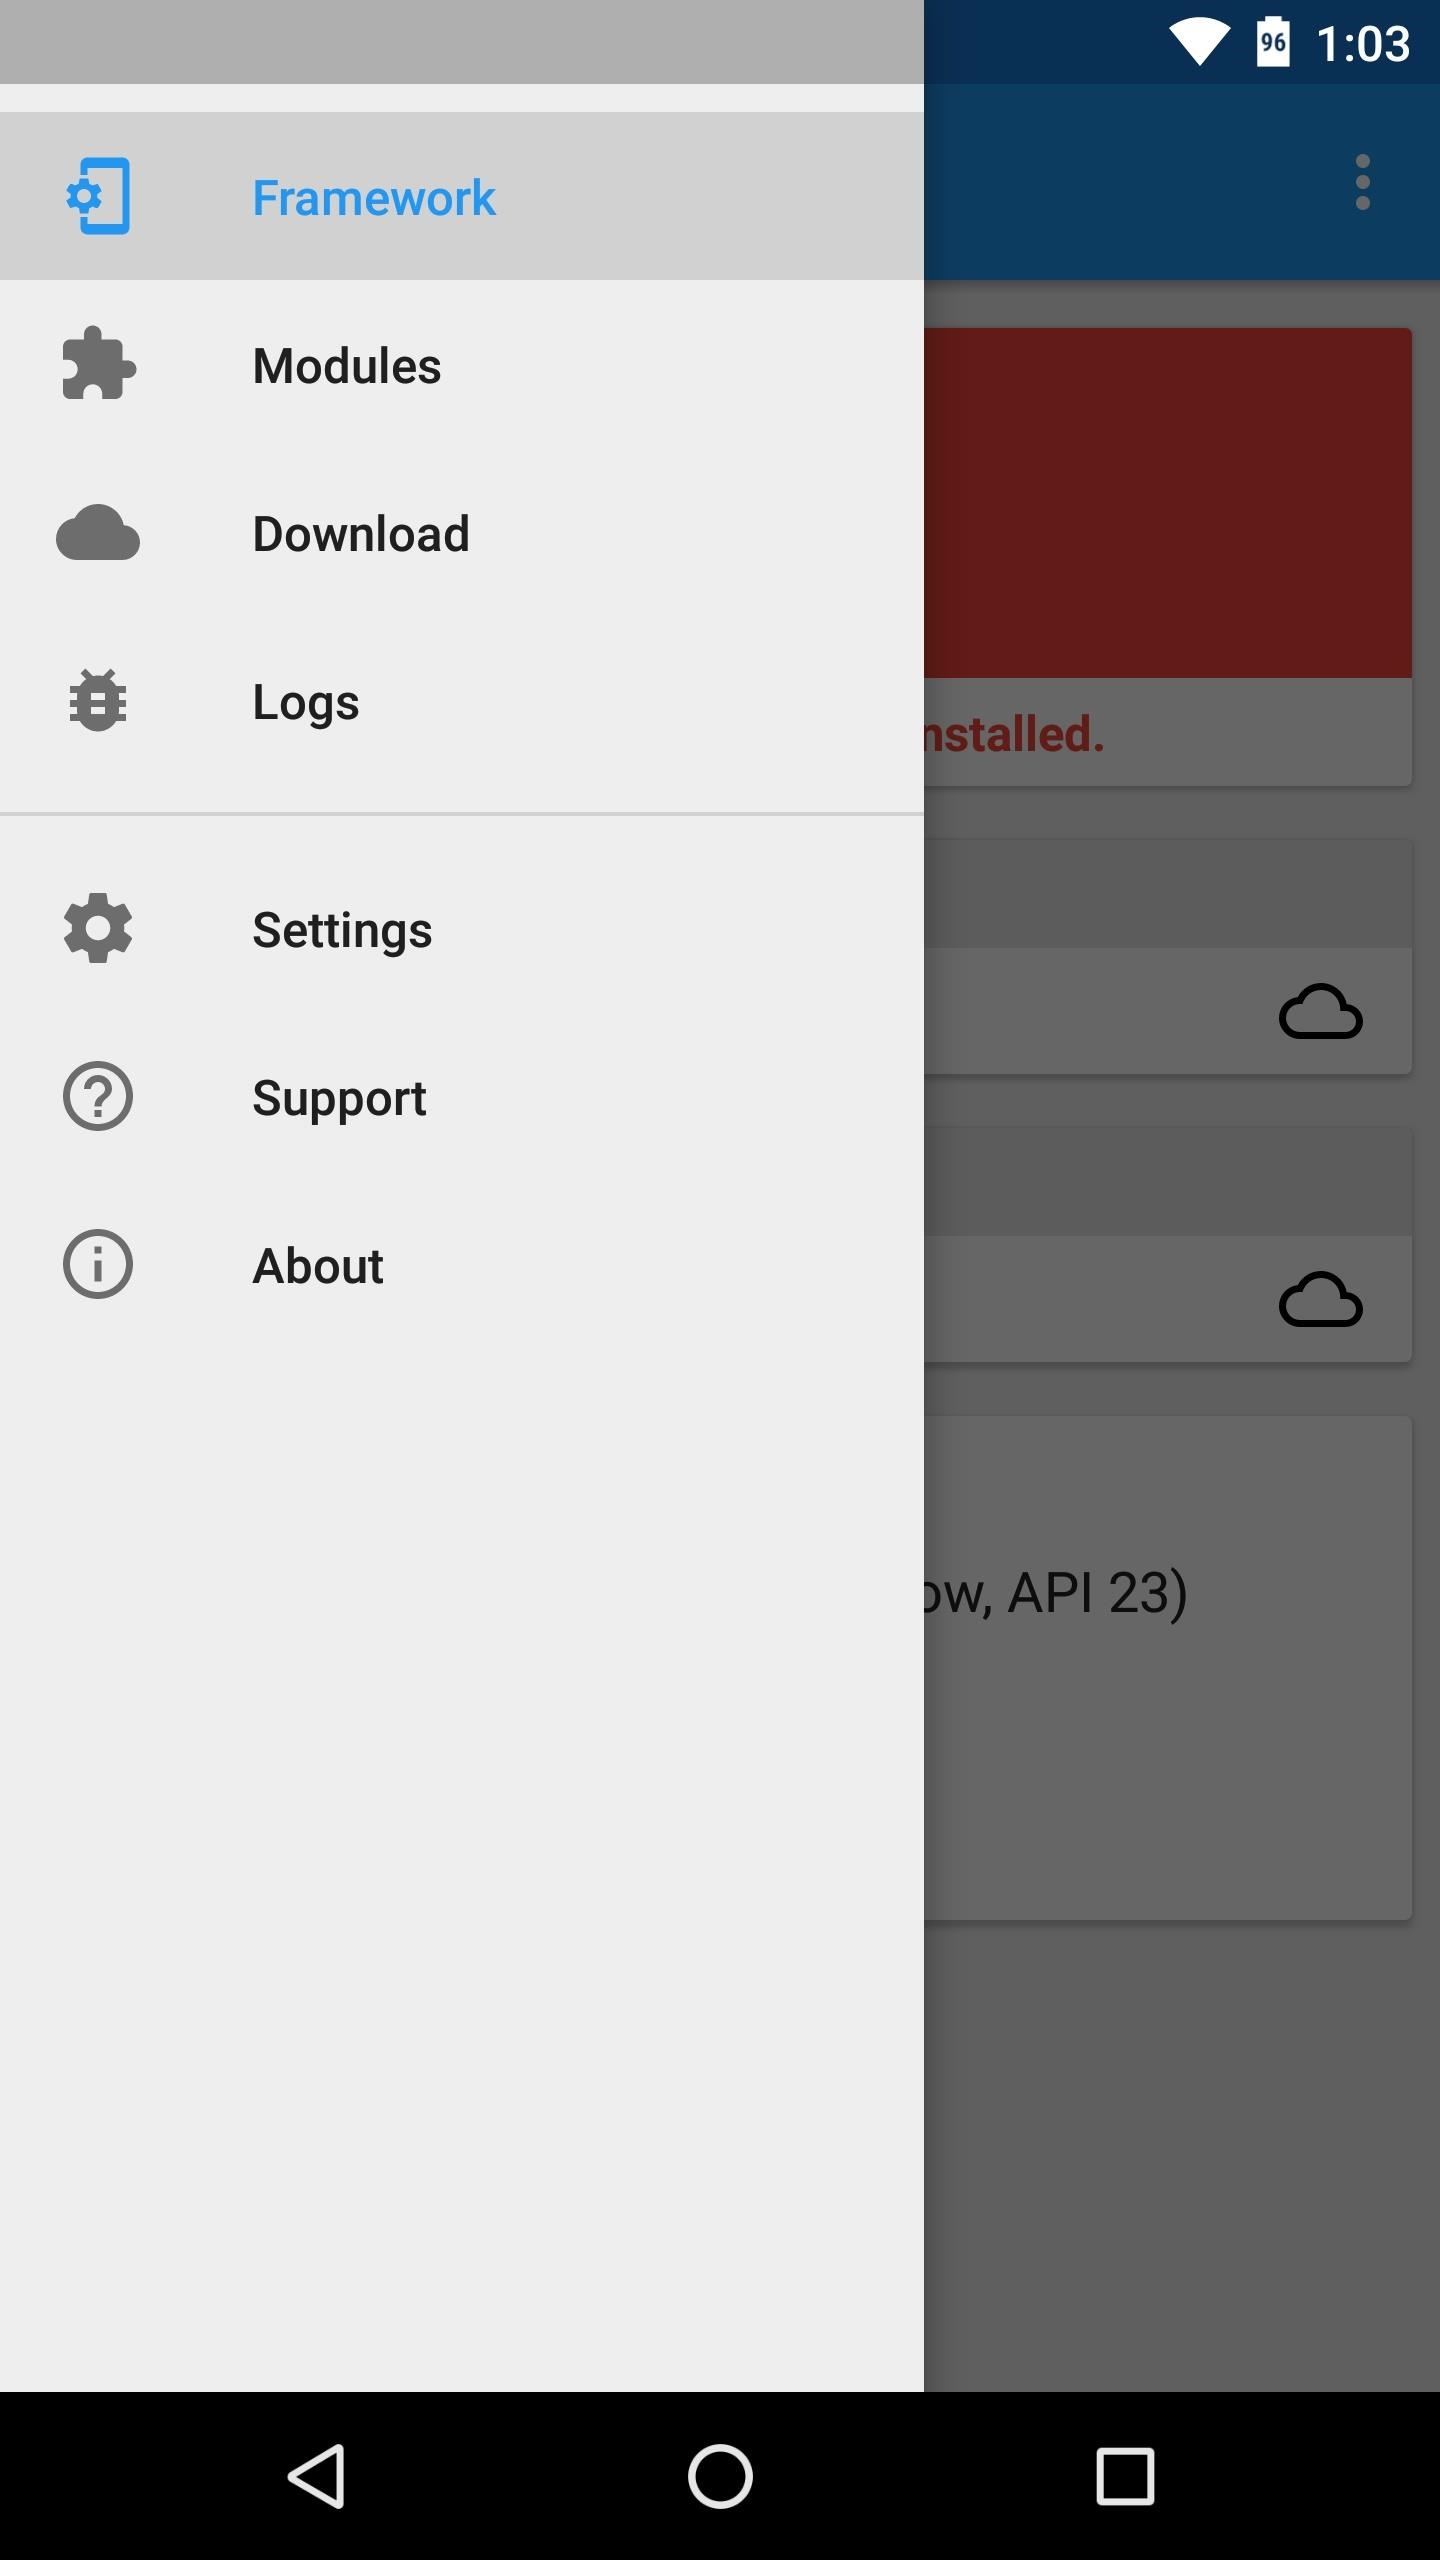
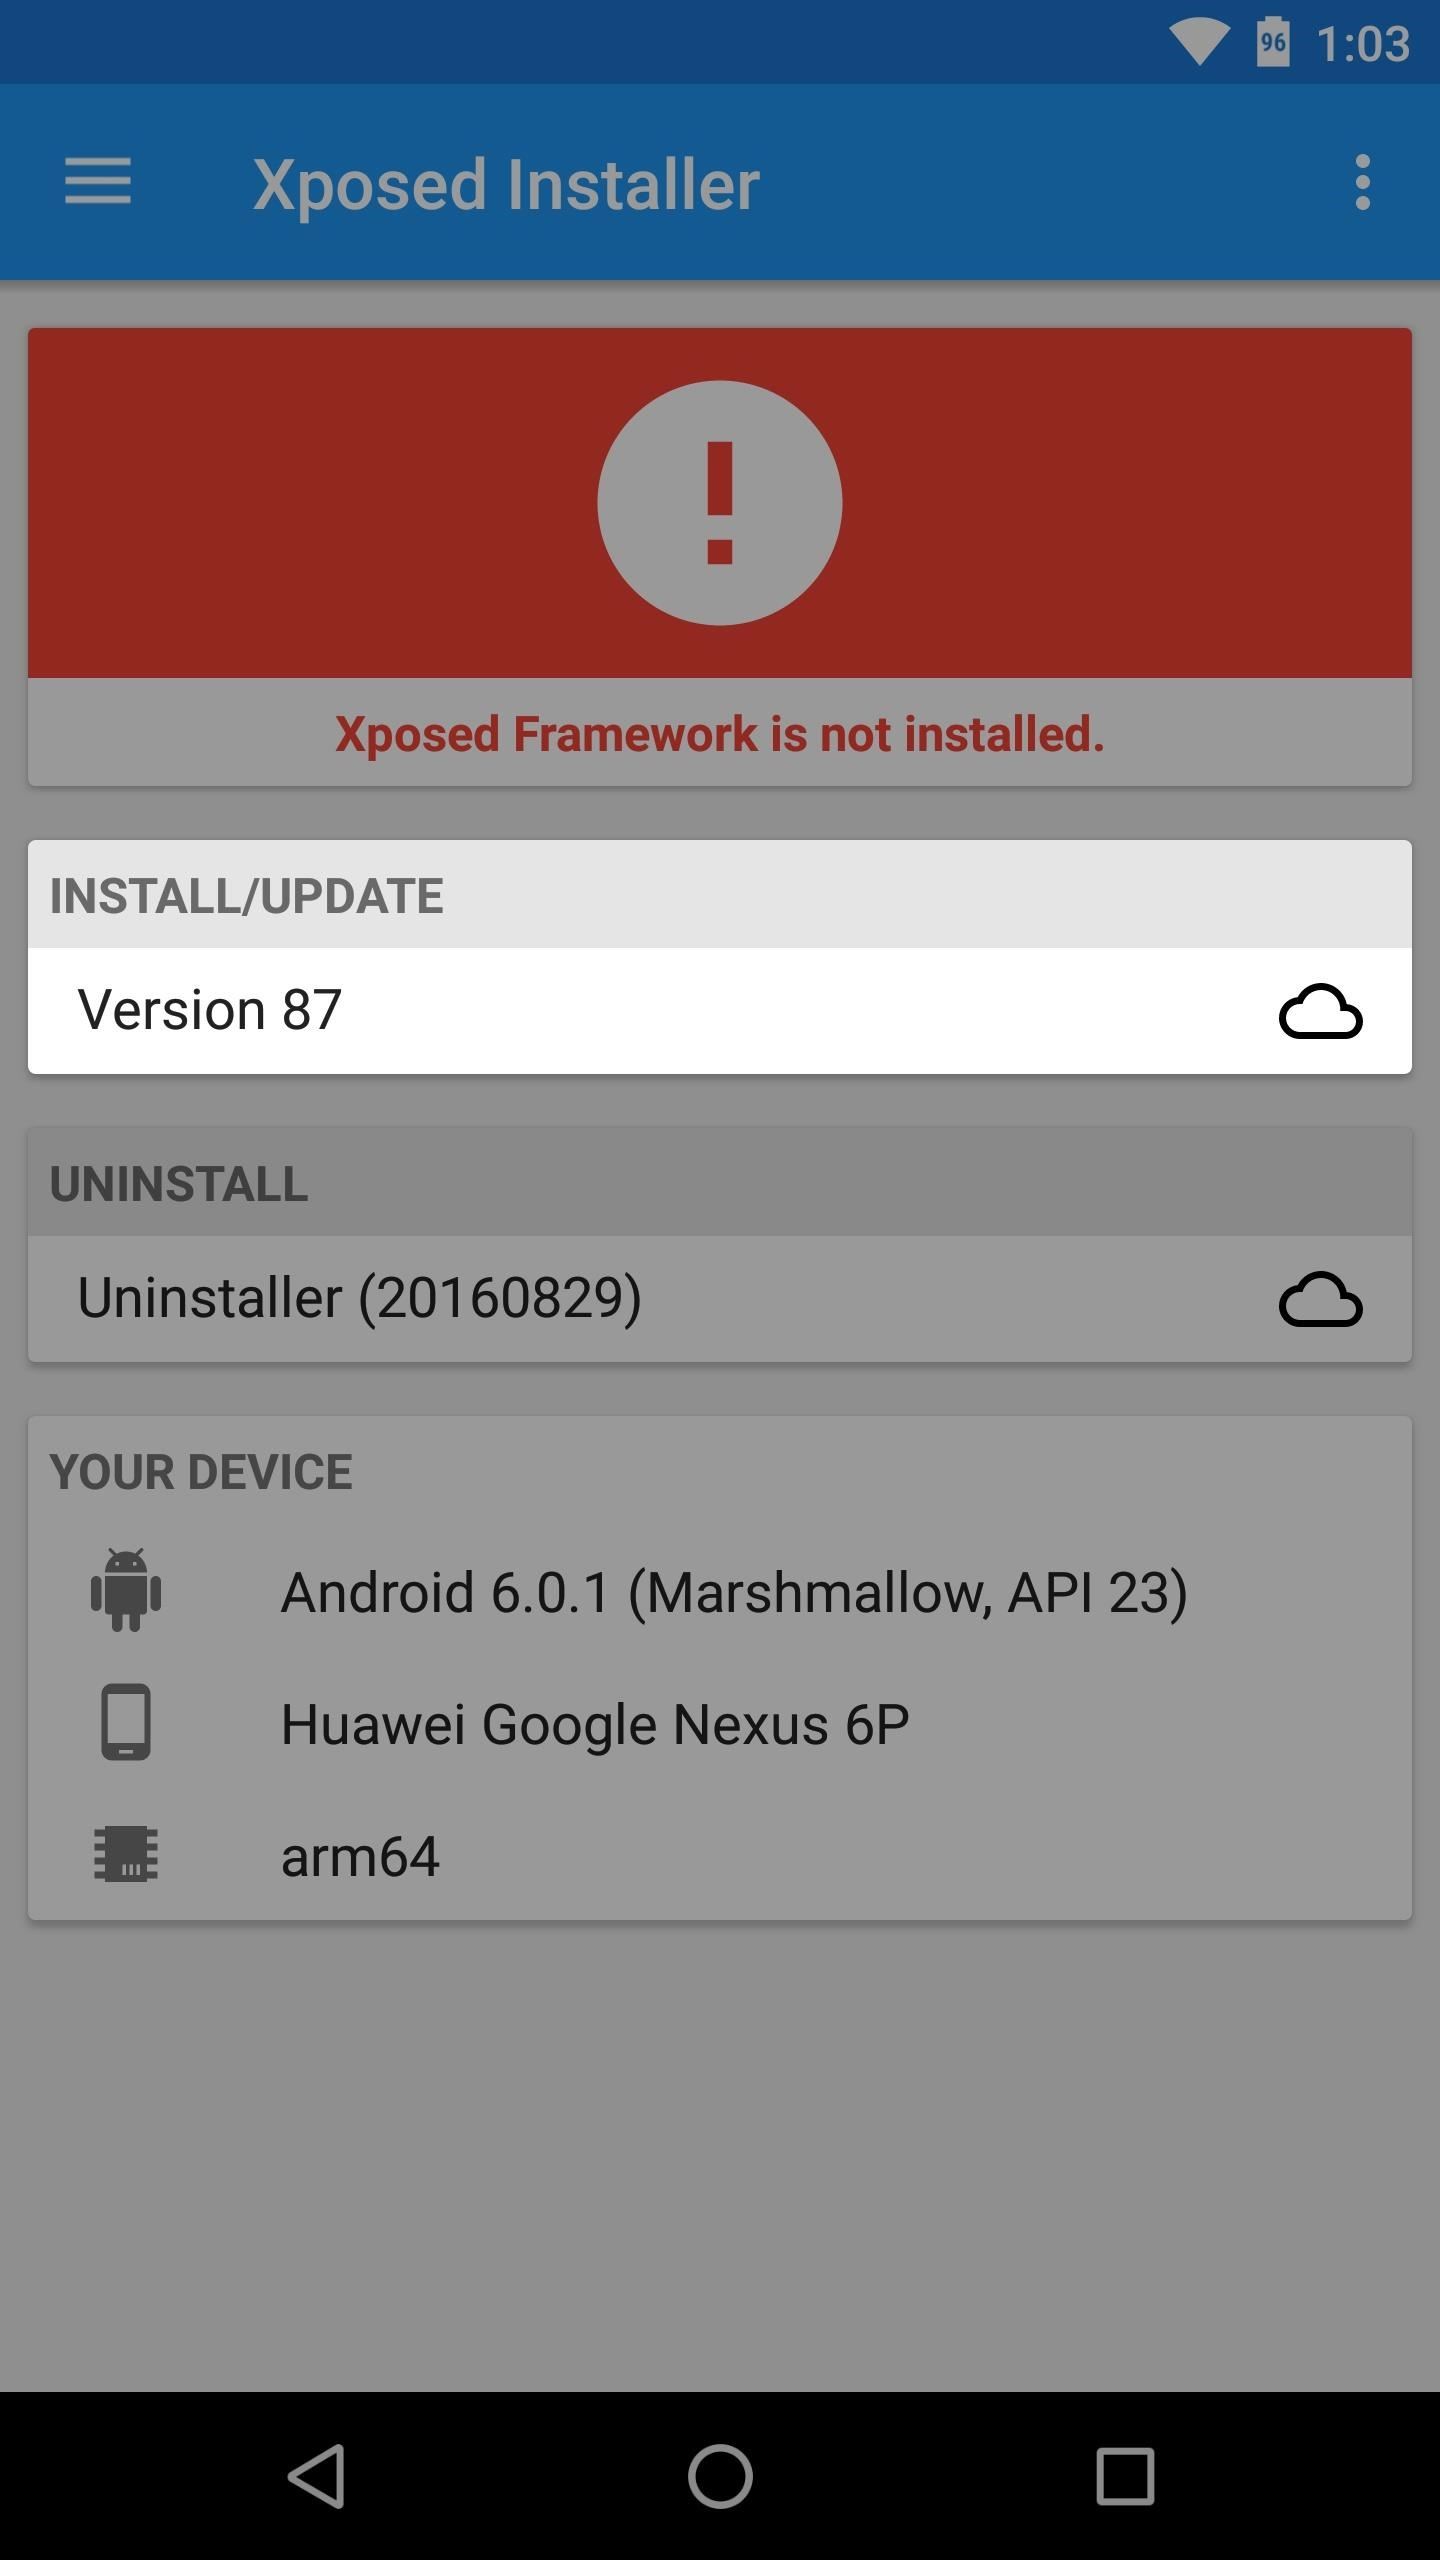
Next, open the Xposed Installer app and head to the Framework section in the side navigation menu. From here, tap the “Install/Update” button towards the top of the screen, then select “Install” when prompted.

Next, the Xposed Installer will ask for root access, so tap “Grant” on the Superuser request popup. From there, wait about 30 seconds while the app installs the actual Xposed Framework, then you’ll see a screen with a reboot countdown. To speed things up, go ahead and tap “Reboot” here. Note that this first time rebooting after installing Xposed will take longer than usual.

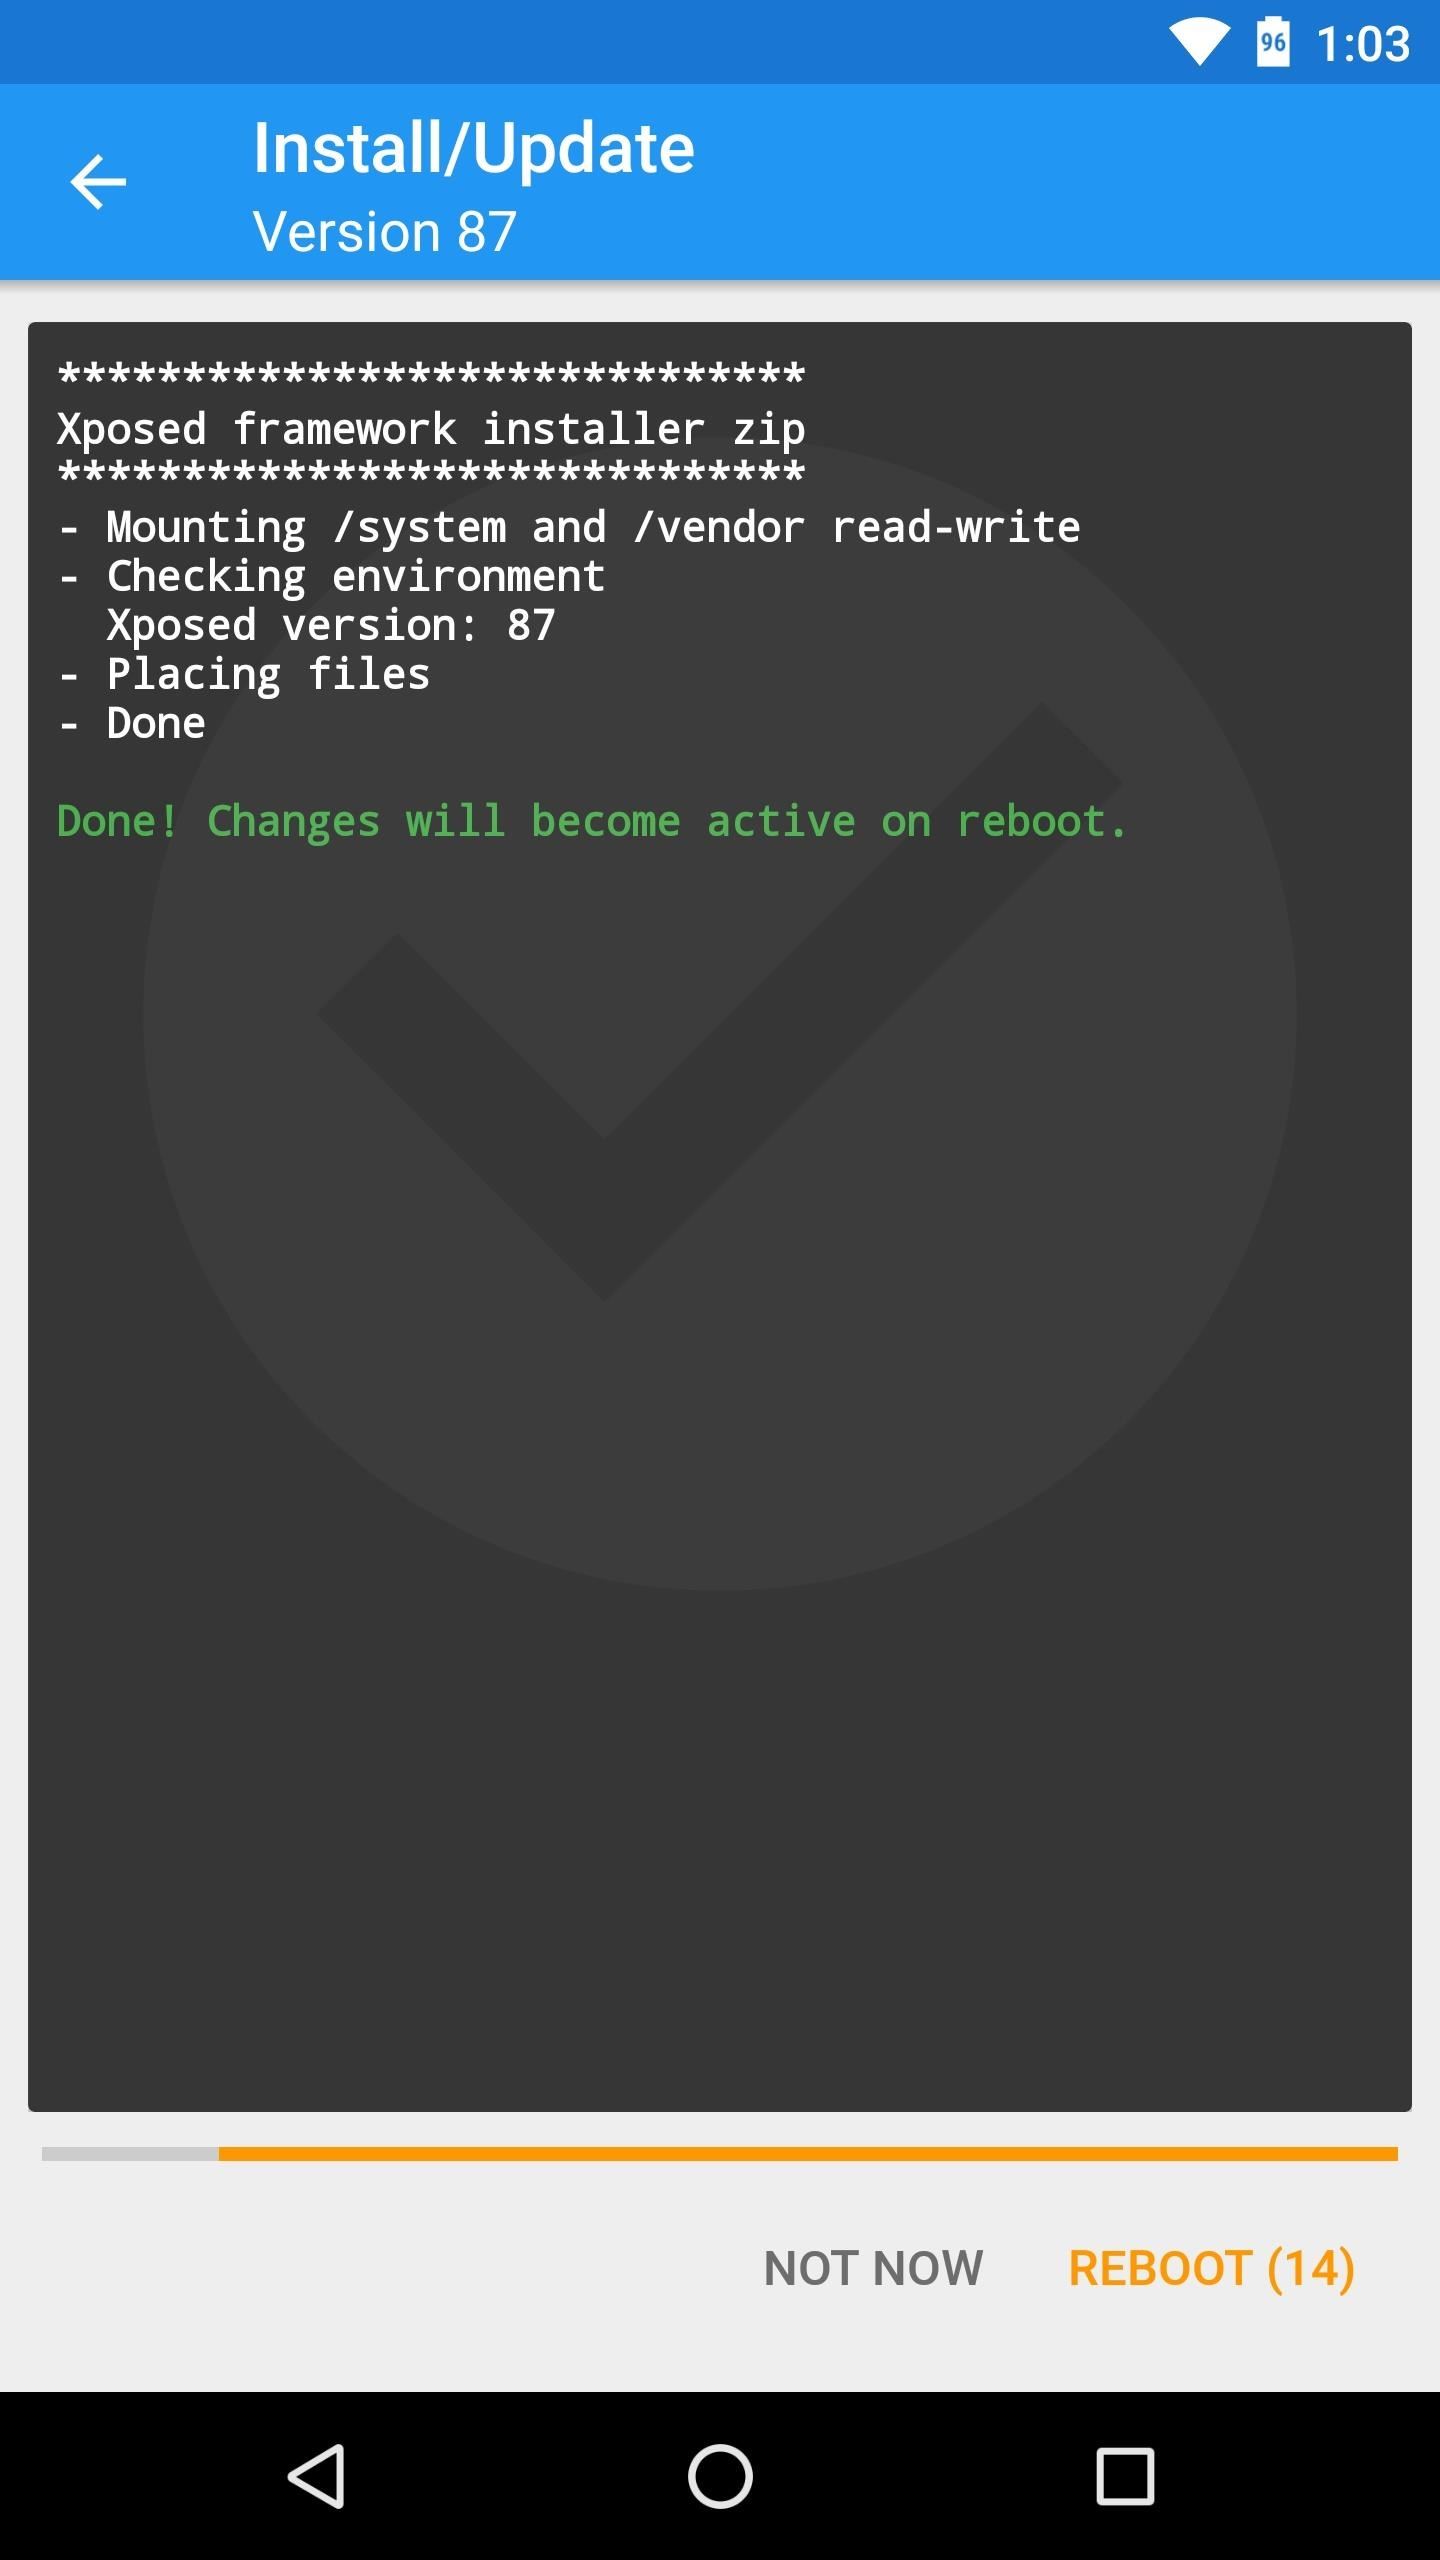
Note: If the above method fails for any reason, repeat this step, but choose “Install via recovery” to automatically install Xposed from within TWRP.
Step 3: Install Modules & Enjoy Xposed
When you get back up, you should be all set to go. To double check that everything went off without a hitch, head to the Framework section in the Xposed installer app, and if you see a message saying “Xposed Framework version XX is active,” you’ll be ready to install Xposed modules.
To try it out, head to the Download section in the Xposed Installer app and browse the wide selection. When you find a module you want to install, simply select it, then swipe over to the Versions tab and hit the “Download” button. After that, just make sure to activate the module and reboot.


What are some of the first modules you installed after setting up Xposed on your device? Personally, GravityBox is always the first one I grab, but what about you? Let us know in the comment section below.
Hot Deal: Set up a secure second phone number and keep your real contact details hidden with a yearly subscription to Hushed Private Phone Line for Android/iOS, 83%–91% off. It’s a perfect second-line solution for making calls and sending texts related to work, dating, Craigslist sales, and other scenarios where you wouldn’t want to give out your primary phone number.
“Hey there, just a heads-up: We’re part of the Amazon affiliate program, so when you buy through links on our site, we may earn a small commission. But don’t worry, it doesn’t cost you anything extra and helps us keep the lights on. Thanks for your support!”


