Want to Dust Your PC? Turn Up the Fans
A dusty PC takes hours to clean… or does it?
Key Takeaways
- Running your PC fans at 100% for a few minutes helps dislodge and remove dust.
- Set the fan speed manually in the BIOS and use MSI Afterburner to set the graphics card fan speed.
- While this trick is helpful for maintenance, a thorough dusting with compressed air and brushes is still recommended from time to time.
Do you dread cleaning out the dust inside your PC as much as I do? If the answer is yes, you’ll be delighted to hear that I have a trick that doesn’t involve manual labor and compressed air dusters.
Running Fans at 100% for a Few Minutes Dislodges Dust
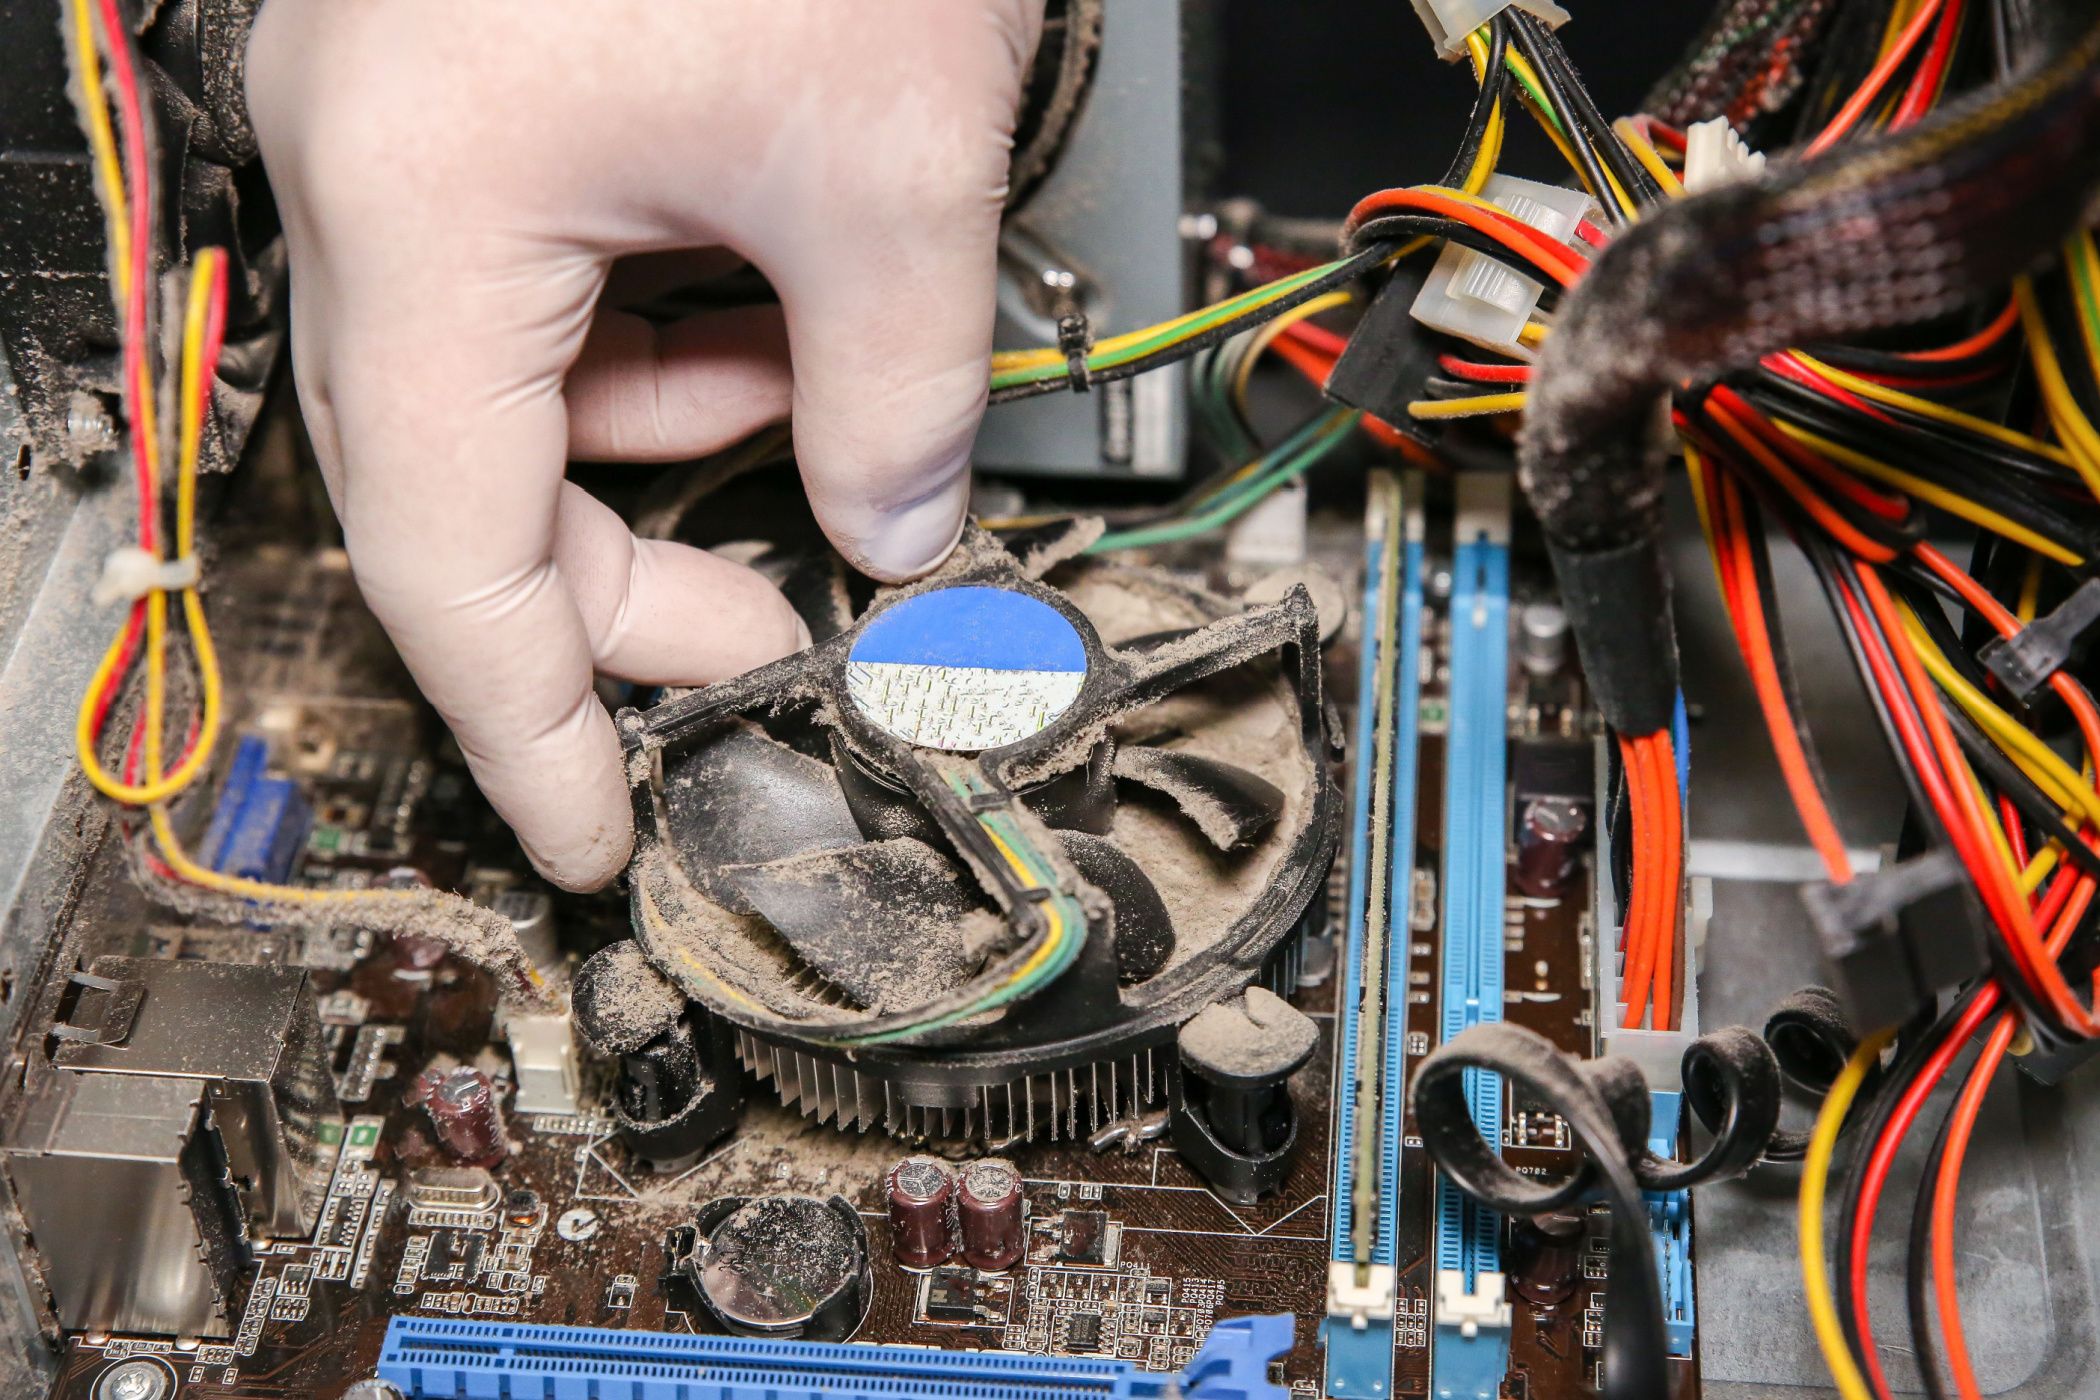
Dust is harmful to your PC in a few ways. If a thick layer builds up on your fans, heatsinks, and PCBs, it creates an insulating layer that can make your computer overheat. Clogged up fans spin more slowly, so the problem is exacerbated. If the dust is particularly bad, and you move the PC from a warm to a cool area, it can cause condensation to form and short-circuit your components. So, you want to get rid of dust frequently. I recommend dusting it at least once a month.
However, taking out your PC outside and blasting it with compressed air isn’t always practical. The good news is that you can get rid of a good amount of dust by simply setting all of your PC fans to 100% and letting them run for 5–10 minutes. Large clumps of dust stuck in your heatsinks and around your fans will break loose and fly around the case.
Assuming you have sufficient exhaust fans and good airflow, some dust will fly out of your PC. Still, after letting the fans do the heavy lifting, you should shut down your PC completely by turning it off and switching off the power supply. Next, remove the left side panel and carefully pick up any large clumps of dust sitting on your PC parts.
Just like that, you’ve managed to remove a large portion of the dust from your PC in less than 15 minutes and almost no effort. You’ll likely still have a thin layer of dust on all components, but their effect on cooling performance is negligible. You’ve eliminated most of the dust with the least amount of effort, and that’s what this trick is all about.
How to Set the Fan Speed Manually
Your motherboard is responsible for managing fan speeds, so the easiest and most reliable way to change both the case and CPU fan speed is through the BIOS. We have guides on how to open your BIOS on Windows 10 and Windows 11. Once you’re in the BIOS, look for any options that mention fan speed or temperature. The exact BIOS layout varies between brands and motherboard models, so you might have to check the user manual to know where to find it.
Once you do, change the fan speed of all fans from Auto to 100%. Save the changes and restart your computer to boot into Windows. You should now hear your CPU and case fans spin loudly, but we’re not done yet. The next step is to set the graphics card fans to 100% as well.
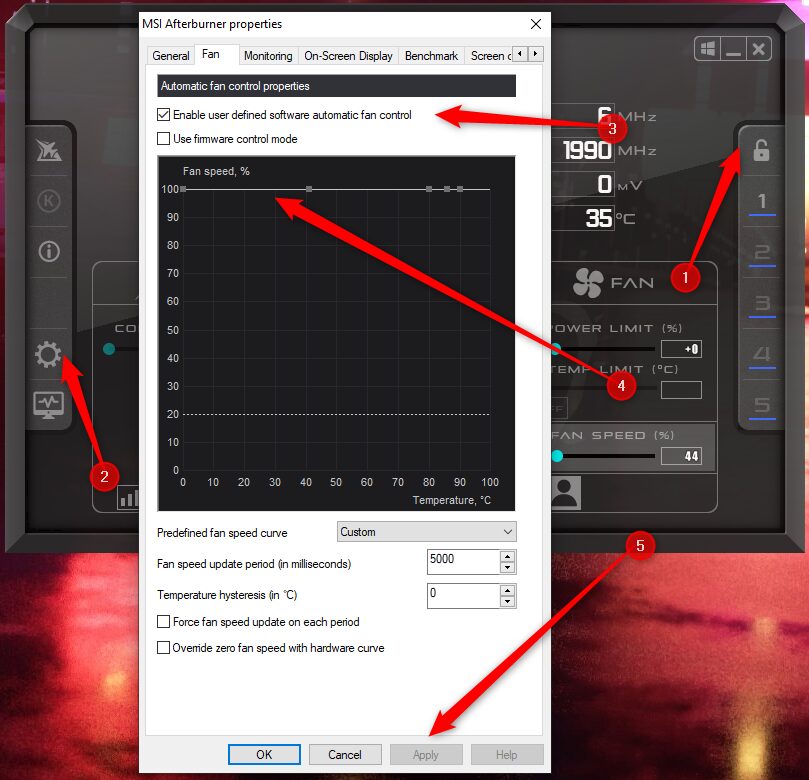
Your graphics card vendor might have a first-party app that lets you control the fan speed, but you might find it easier to use a universal third-party tool, such as MSI Afterburner. After downloading and installing it, make sure the lock icon to the right is set in the unlocked position by clicking on it, then click on the gear icon and go to “Fan.” Check “Enable user defined software automatic fan control,” drag all the tiny square boxes to the top, and hit “Apply.” Your fans will now start to spin at 100%.
Let the fans run for a few minutes. Feel free to walk away from the PC and grab a cup of coffee—or just use the computer while the fans are dusting out the PC for you. Thanks to the maximized airflow, your PC will be extra cool during heavy workloads like games and rendering. Remember to set the fan speed back to automatic once you’ve finished. For case and CPU fans, follow the same steps from above in the BIOS, and for the graphics card, click the auto fan speed icon followed by the save icon.
Your PC Still Needs a Thorough Dusting From Time to Time
While this trick is an easy way to get rid of dust fast, it’s not particularly thorough. Your fans can only do so much. You’ll find that the individual fan blades still have dust stuck on them, and the heatsinks won’t be 100% clean, either.
Even if you use this method to keep the dust buildup manageable, your PC can still benefit from a more thorough dusting, especially if the dust is caked on. For thorough cleaning, take your PC outside and blast it with a can of compressed air. Remove stubborn dust from fan blades and PCBs by gently brushing it off with anti-static brushes.


