There are many different reasons that you might want to revert your Samsung Galaxy S5 back to stock. The main one would probably be that you need to return your device to the manufacturer for warranty purposes. And if you’ve used root to modify system-level files and components, you’ll need to undo those changes before you send the phone back.
Rather than just unrooting your device, returning to stock also will revert any changes that you’ve made. Afterwards, from a software standpoint at least, everything will be exactly as it was when you first took your phone out of the box.
Requirements
- Windows PC
- USB cable
Step 1: Download Necessary Files
To get started, there are a few files that you’ll need to download to your Windows PC.
First, grab the Samsung USB drivers from this link. Once downloaded, just open the file and follow the prompts to install the drivers.
Next, you’ll need to download Odin, which is software for Windows that allows you to install firmware on a Samsung device. You can find Odin at this link, and once you have it downloaded, extract the two files in the ZIP to a folder that you can access easily.
Finally, you’ll need to download the stock firmware for your variant. A great site to find that is SamMobile. Just head over there and create an account with the website, then use the search function to find the firmware file for your model number.

Once you have the firmware file downloaded, extract the md5 file within the ZIP to the same folder that you stored the Odin files.
Step 2: Boot Your Phone into Download Mode
For Odin to be able to access the system partitions of your device, you’ll need to put your phone into Download Mode.
Start by powering your phone completely off. When the screen goes black, press and hold the Home, Volume Down, and Power buttons simultaneously. After a few seconds, a warning message will appear, but like it says, press the Volume Up button to confirm your choice.
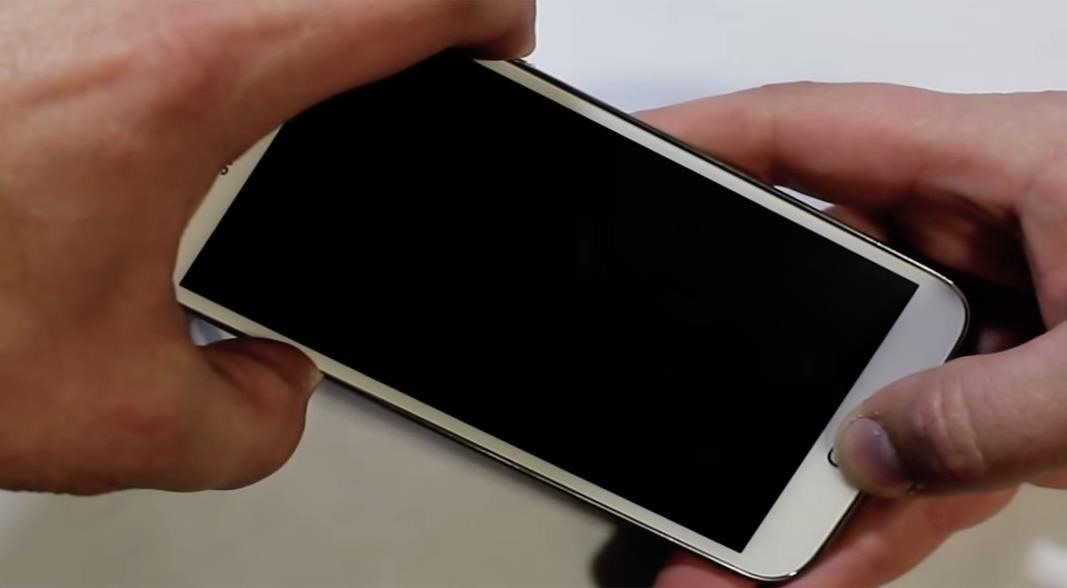
When you have successfully entered Download Mode, plug your phone into your PC with a good quality USB cable.
Step 3: Install the Factory Firmware
From your PC, right click the Odin3 v3.09.exe file and select Run as Administrator.

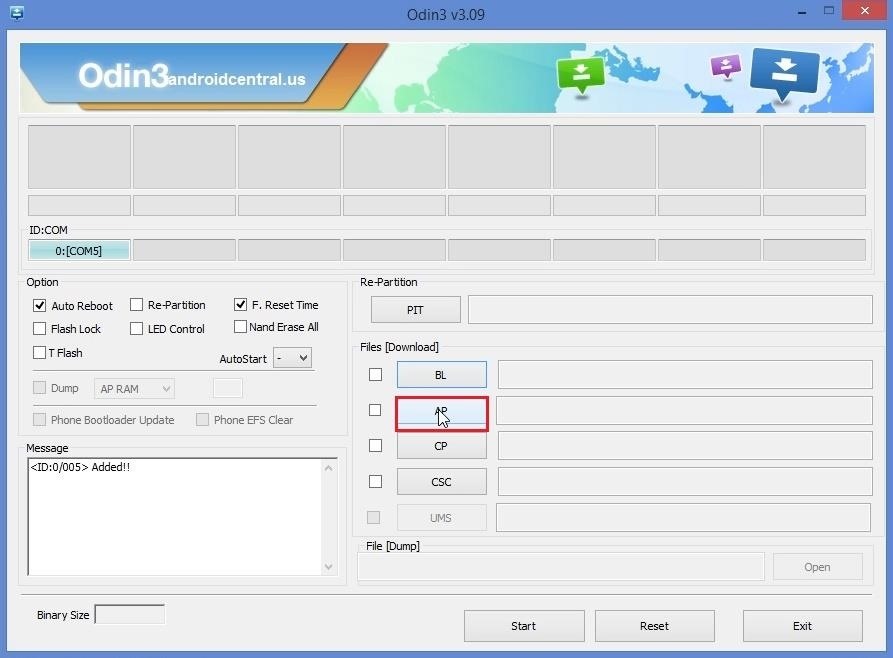
When Odin starts up, wait for the Message window to say Added, then click the AP button without changing any settings.
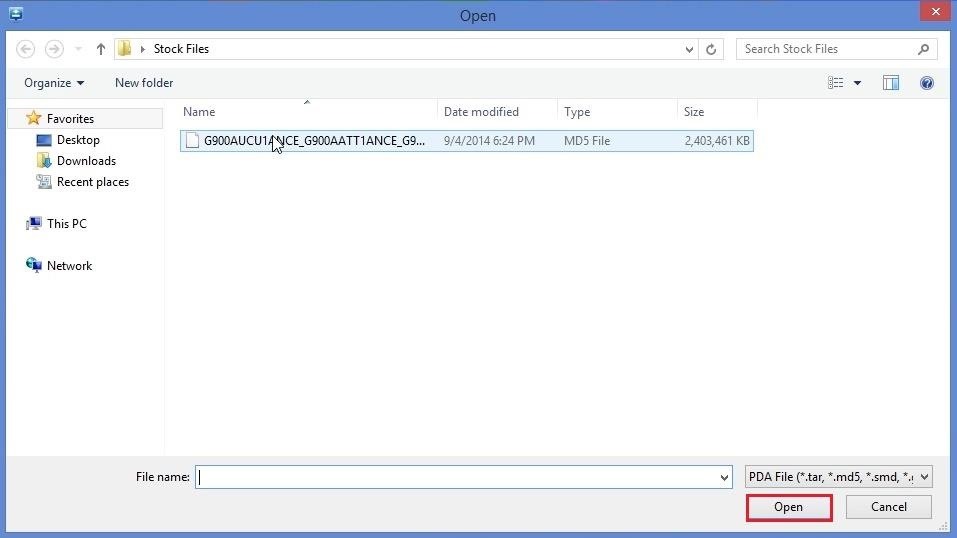
Use the next window to browse to the stock firmware md5 file that you extracted earlier. With it selected, click Open.
Give Odin a few seconds to verify the file’s integrity, and when it’s finished with that, the Message window at the bottom-left will say Leave CS.
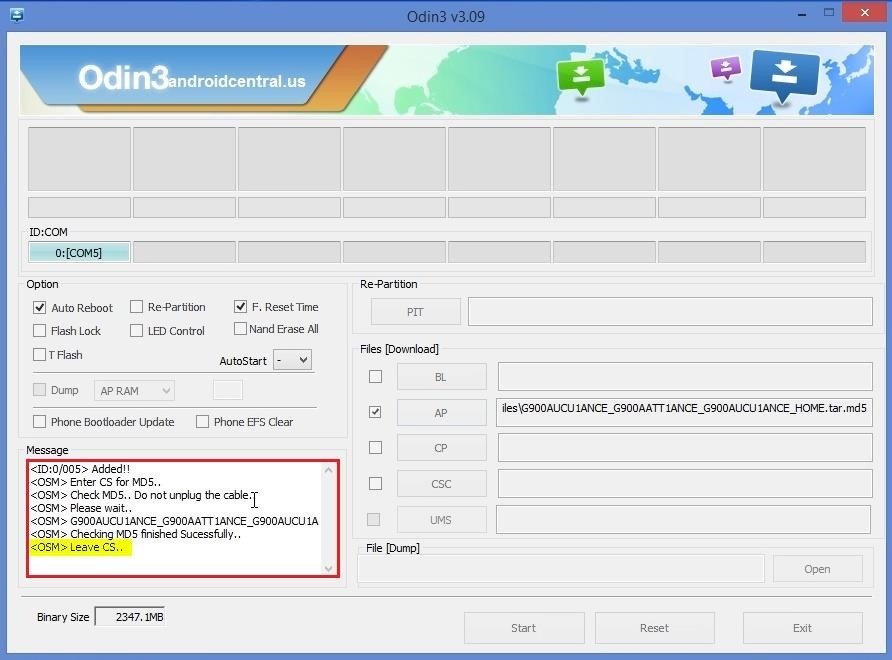
If you’re ready to revert to stock (and keep in mind that you will lose all of your data if you do), go ahead and click the Start button at the bottom of the screen.
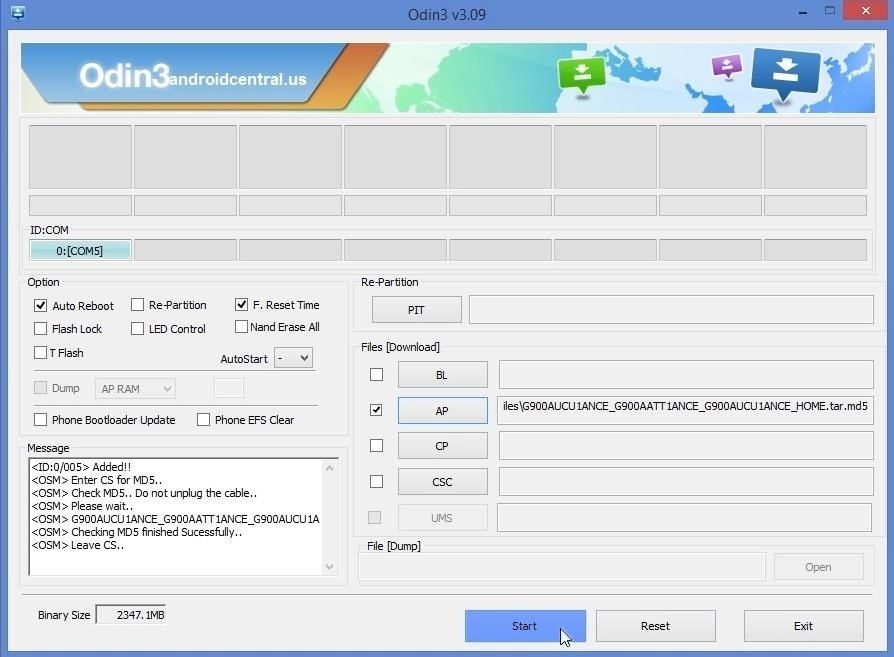
The process will take at least 10 minutes, depending on your computer. But when it’s finished, the box in the top-left corner of Odin will read Pass, and your phone will automatically reboot.
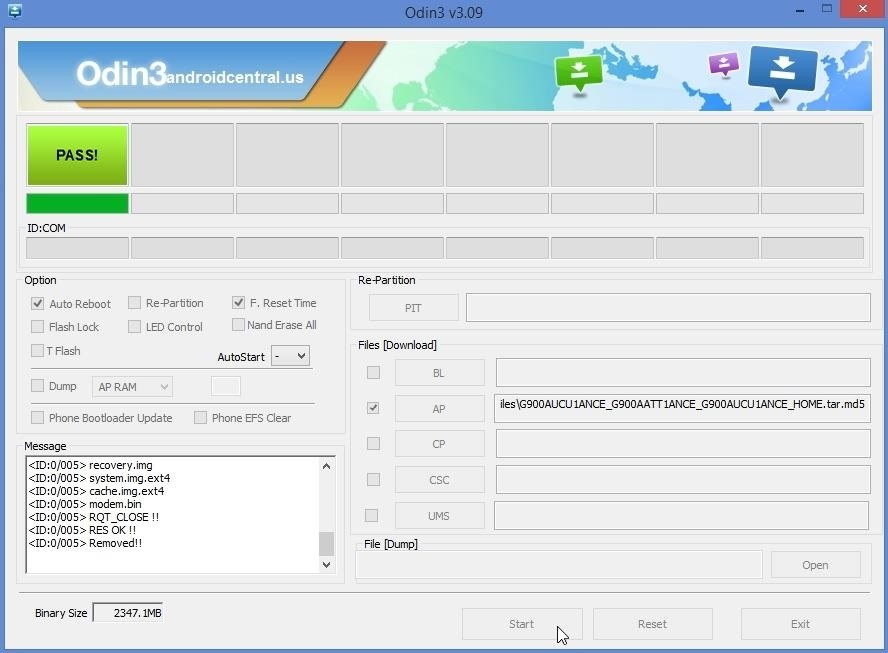
It will take longer than usual for your phone to finish booting back up, but when it does, your firmware will have been reverted to stock.
If you experience any issues after the procedure, boot your phone into Recovery Mode and perform a factory reset. Recovery Mode can be accessed by powering your phone off, then pressing and holding the Home, Volume Up, and Power buttons.
With a fully stock device, your warranty can be honored. Why did you revert to stock? Let us know in the comments section below as well as on Facebook and Twitter.
Just updated your iPhone? You’ll find new emoji, enhanced security, podcast transcripts, Apple Cash virtual numbers, and other useful features. There are even new additions hidden within Safari. Find out what’s new and changed on your iPhone with the iOS 17.4 update.
“Hey there, just a heads-up: We’re part of the Amazon affiliate program, so when you buy through links on our site, we may earn a small commission. But don’t worry, it doesn’t cost you anything extra and helps us keep the lights on. Thanks for your support!”


