Okay, so you’re rooted and need to return your Nexus 5 to its stock firmware. Whether it’s because you need to send your phone in to the manufacturer to fix a defect or you just want to use the device’s over-the-air updating feature, unrooting and returning your Nexus 5 back to its fresh-out-of-the-box state is a fairly simple process with the right tools.
Step 1: Connect Your Nexus 5 to a PC
Plug your Nexus 5 into your Windows PC using any USB cable. Make sure the cable you’re using has no visible damage to either connector and that it plugs in firmly to your phone, as an accidental disconnect during this procedure could lead to a bricked device.
Step 2: Enable USB Debugging
In order to get access to this setting, we’ll need to unlock the Developer Options menu. To do that, head to Settings, then About Phone. Scroll down to the bottom of this list and tap Build Number 7 times in rapid succession.
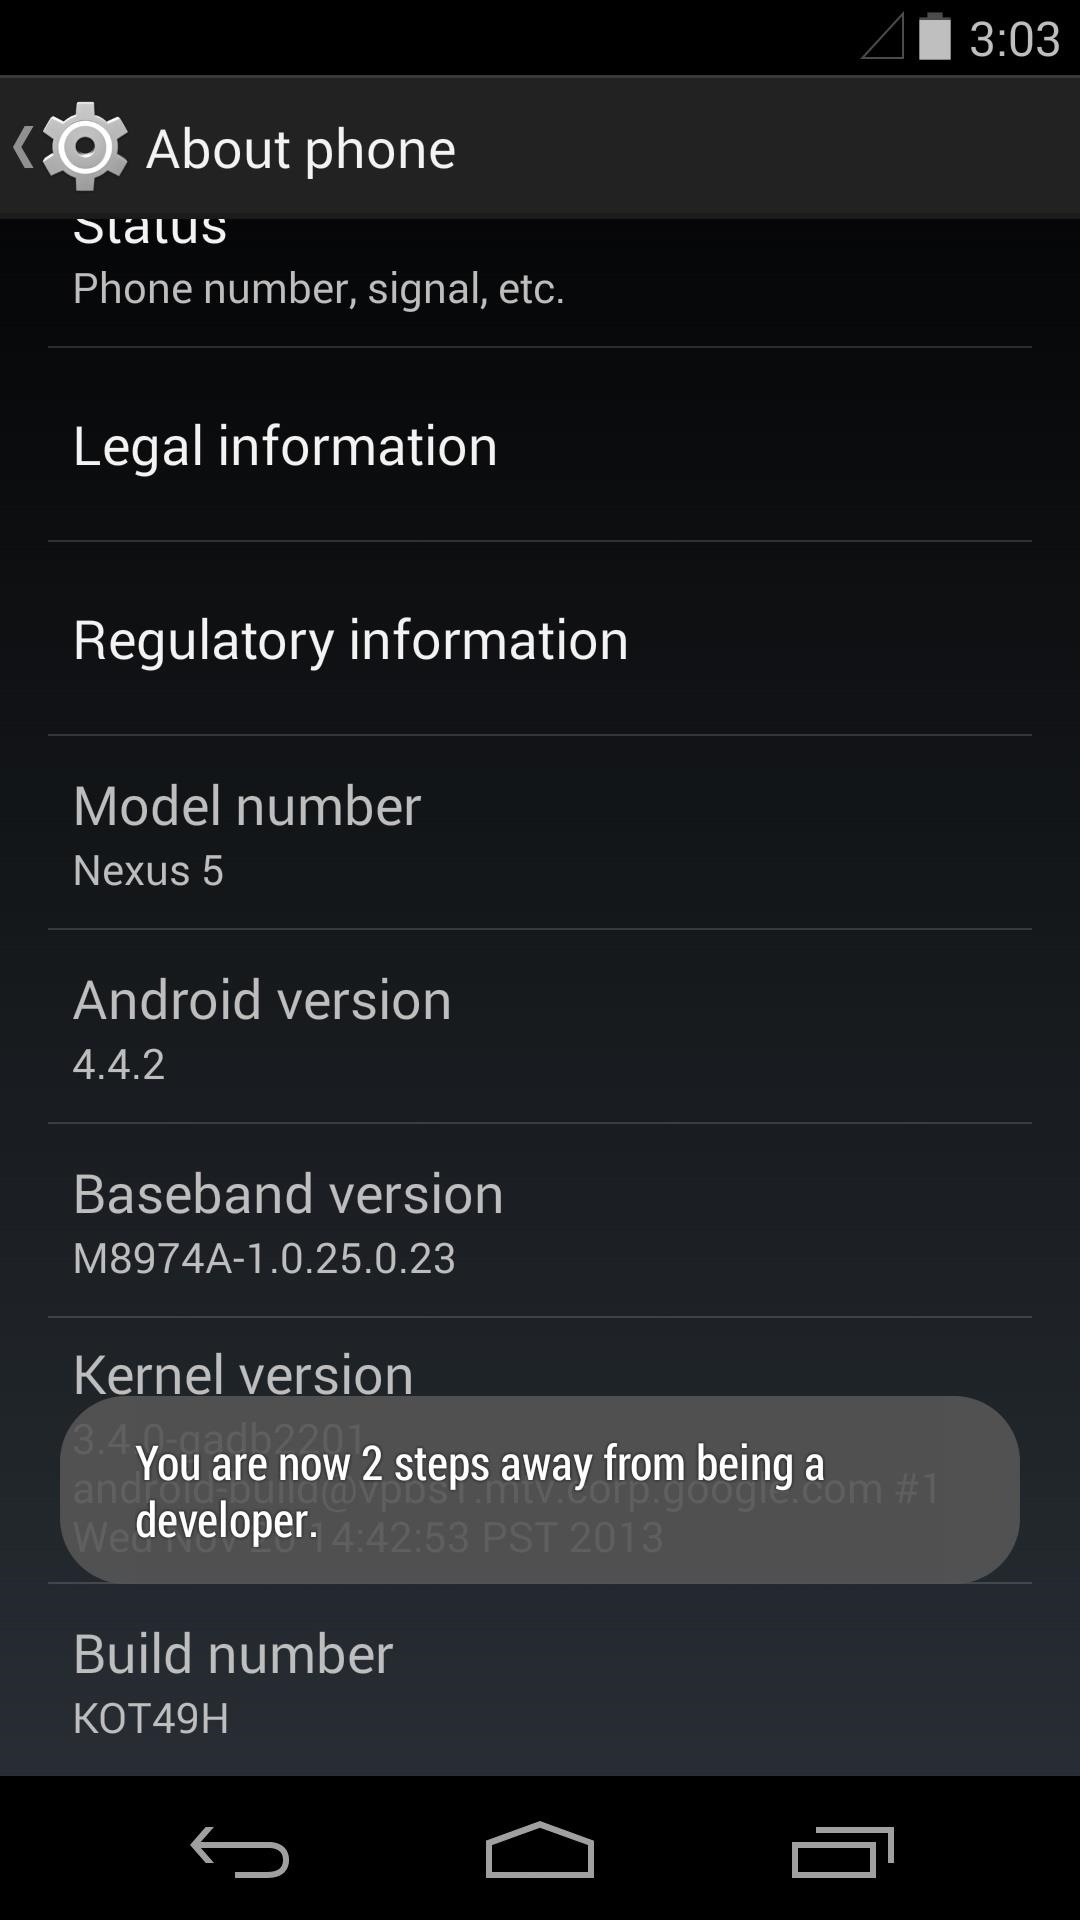
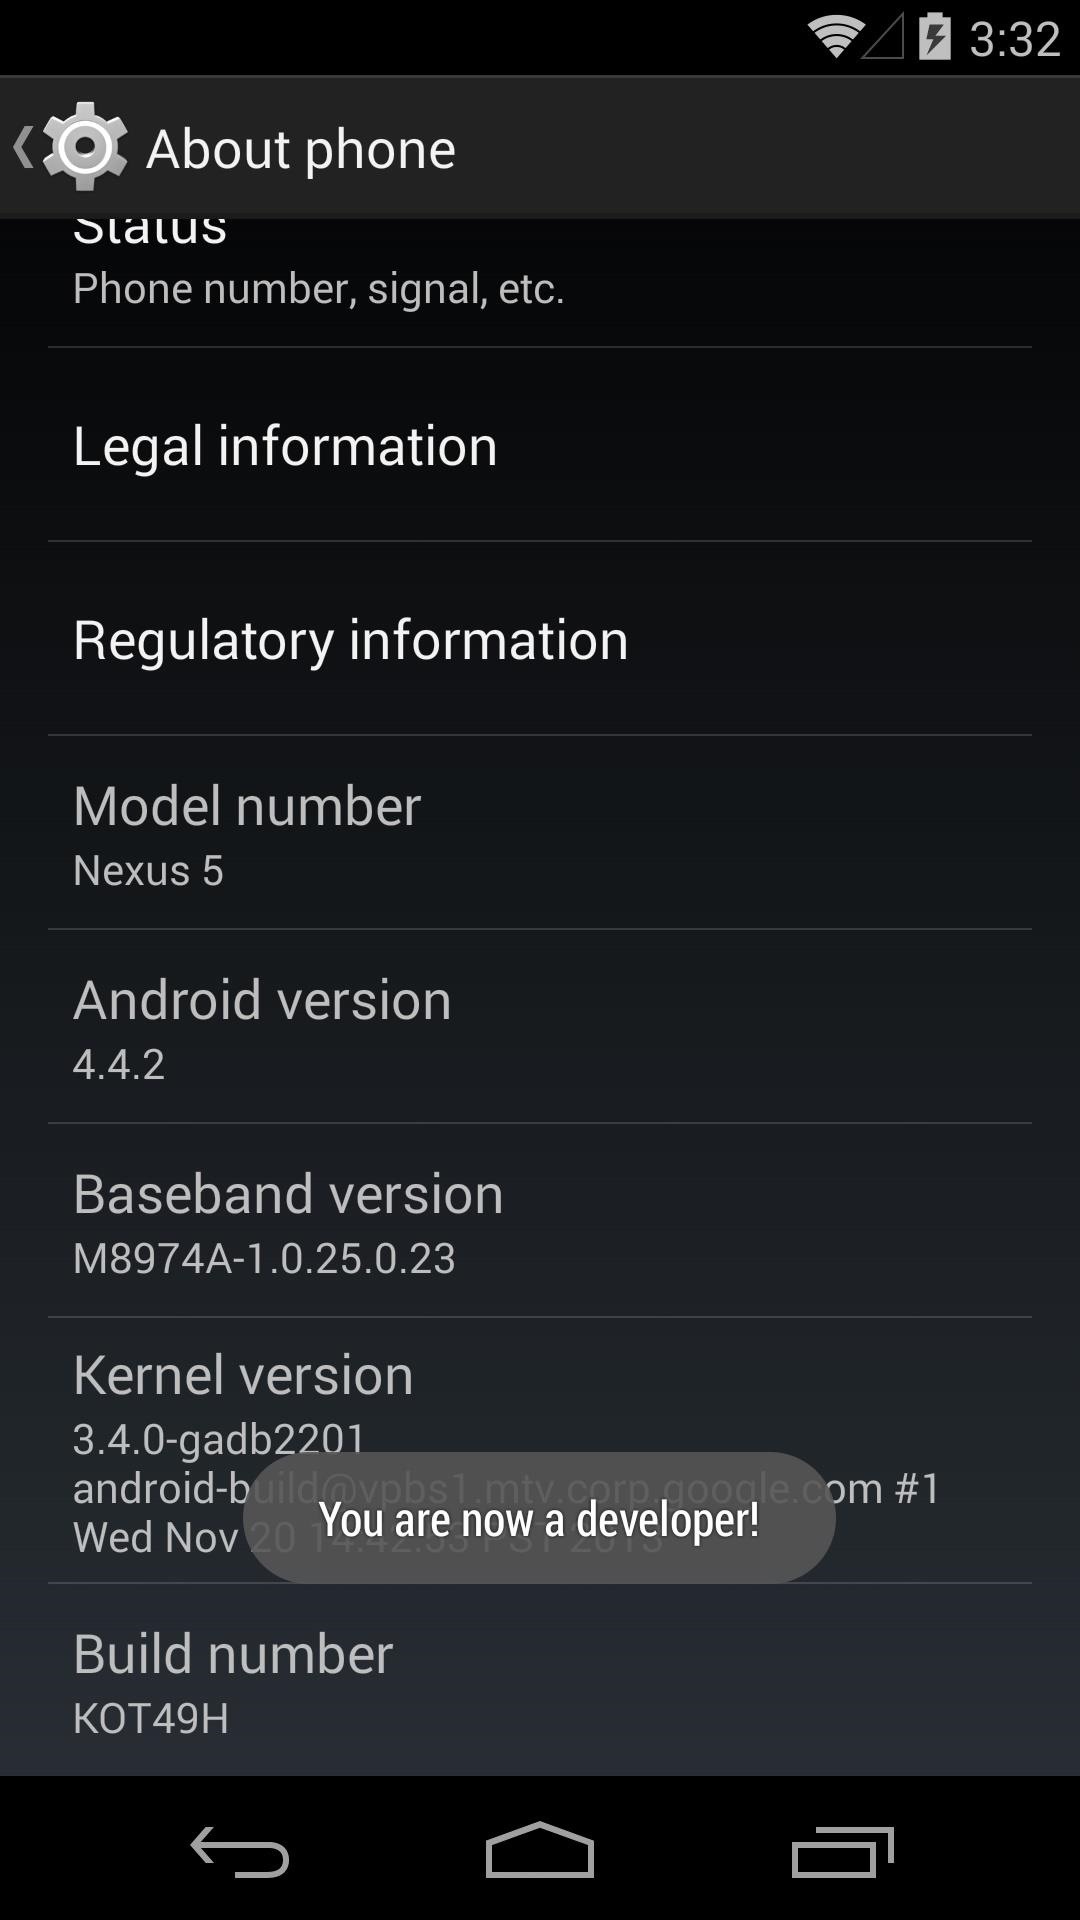
Note: Take this opportunity to jot down your Build Number, it will come in handy later.
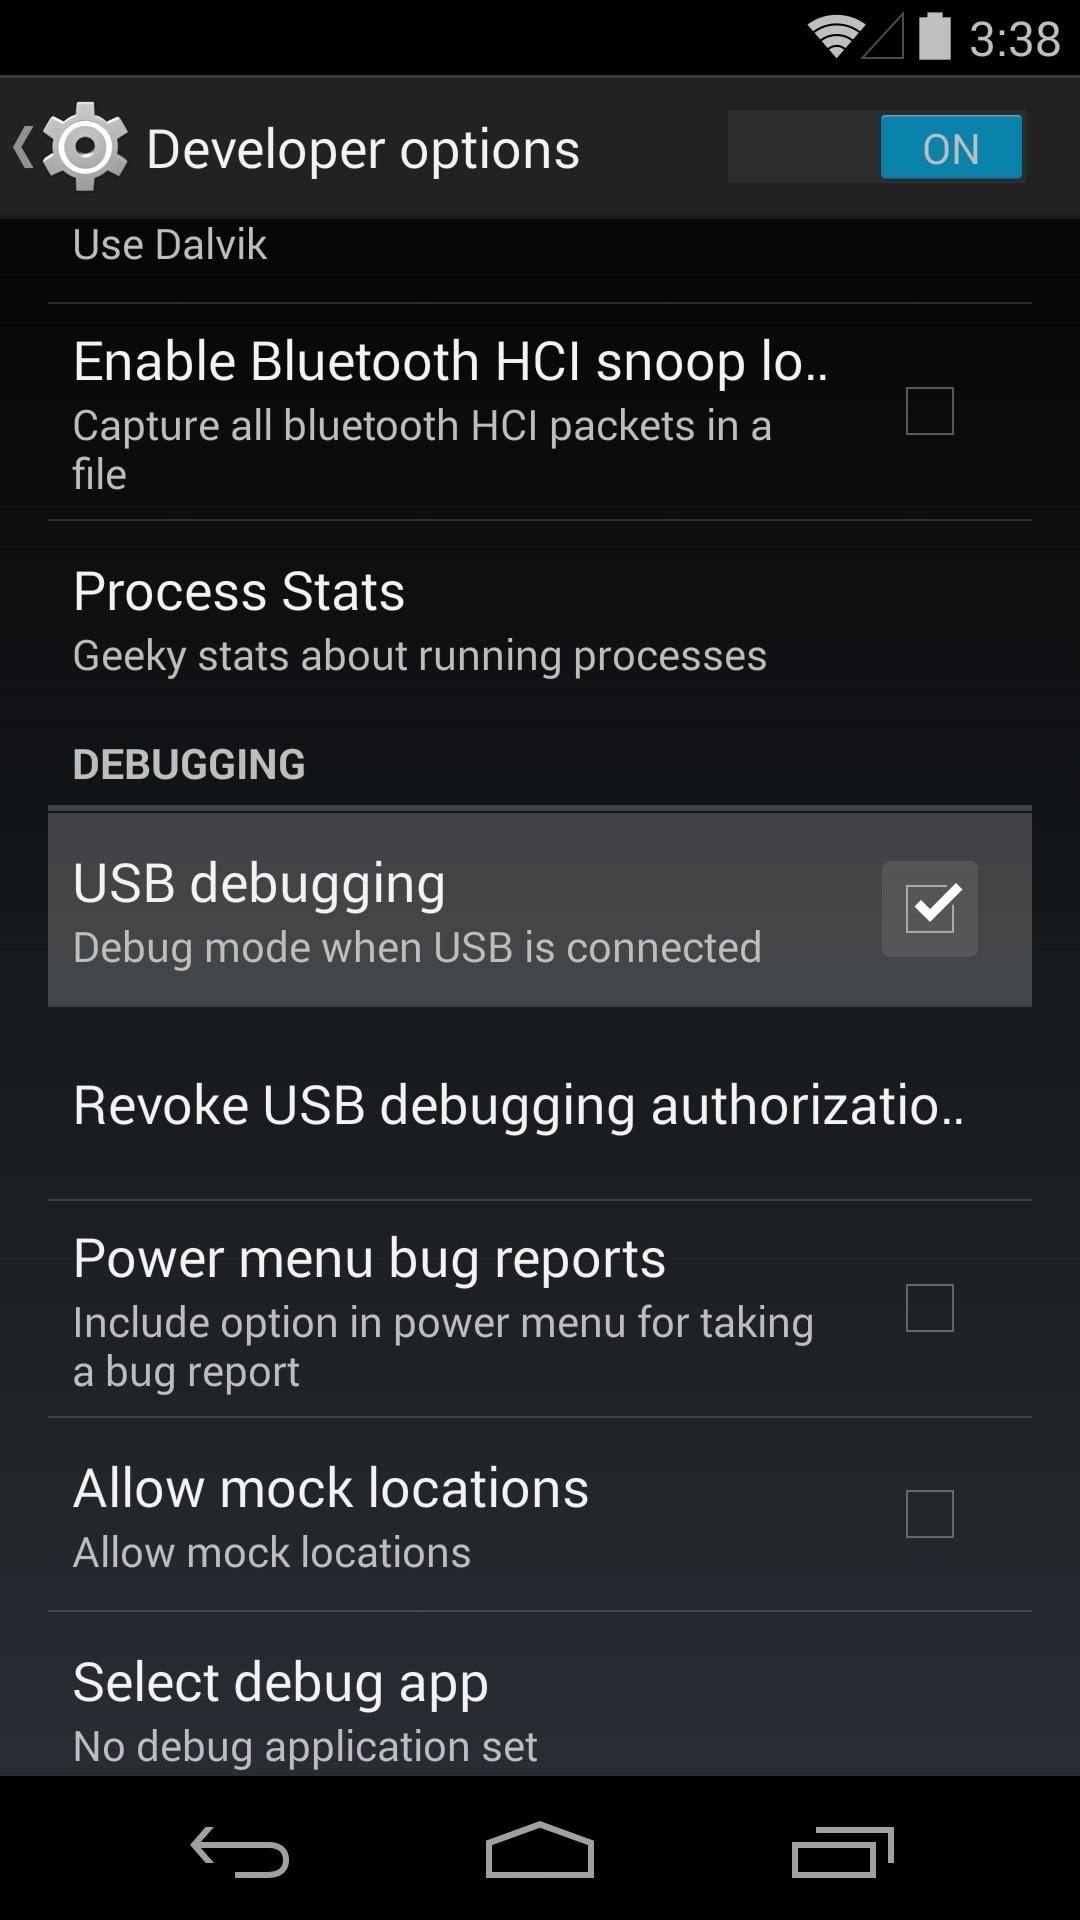
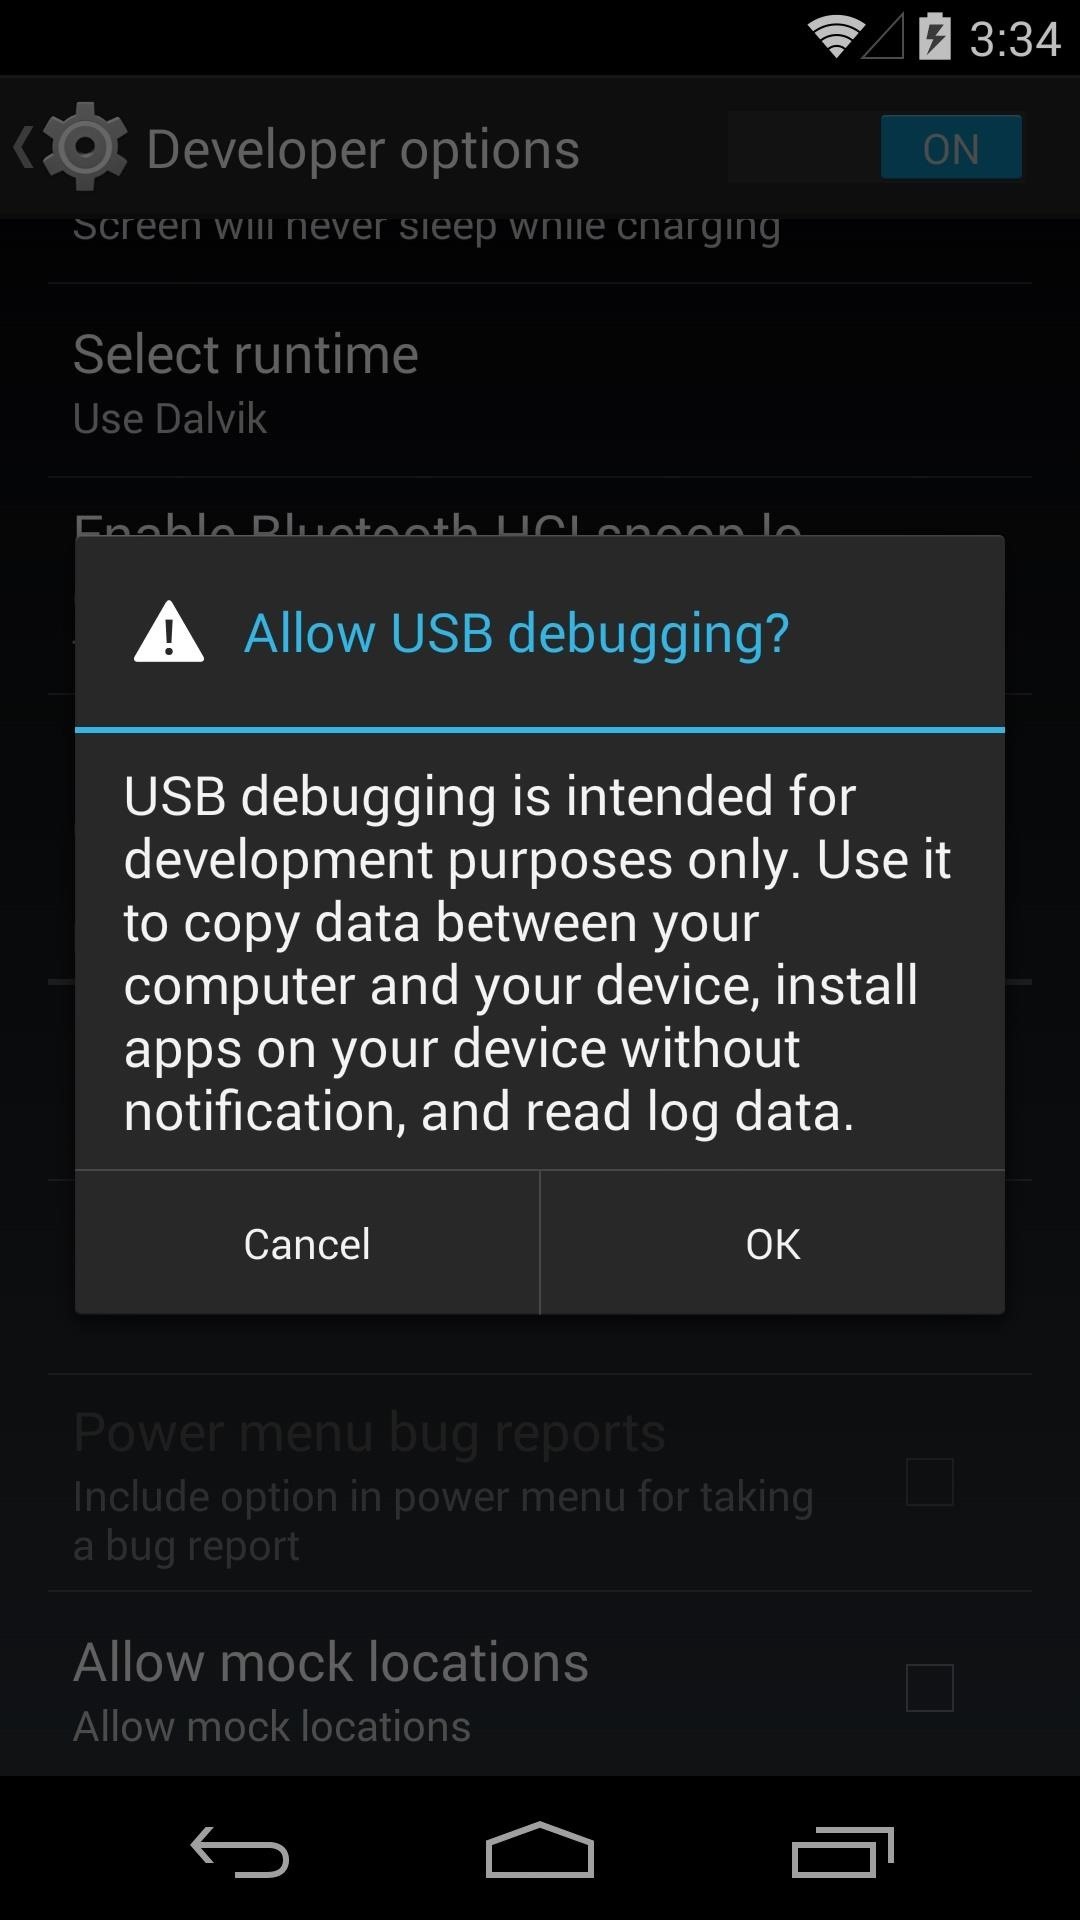
From here, back out to the main Settings page and tap Developer Options. Tick the box next to USB Debugging, then select OK from the dialog that appears next.
Step 3: Install Nexus Root Toolkit on Your PC
From your Windows PC, click on this link to download the install file for the Wugs Nexus Root Toolkit app. This is version 1.8.2, but you can always get the latest version on the WugFresh website.
Once the download has finished, install by double-clicking the file in your browser’s download folder. Click Run on the following window.
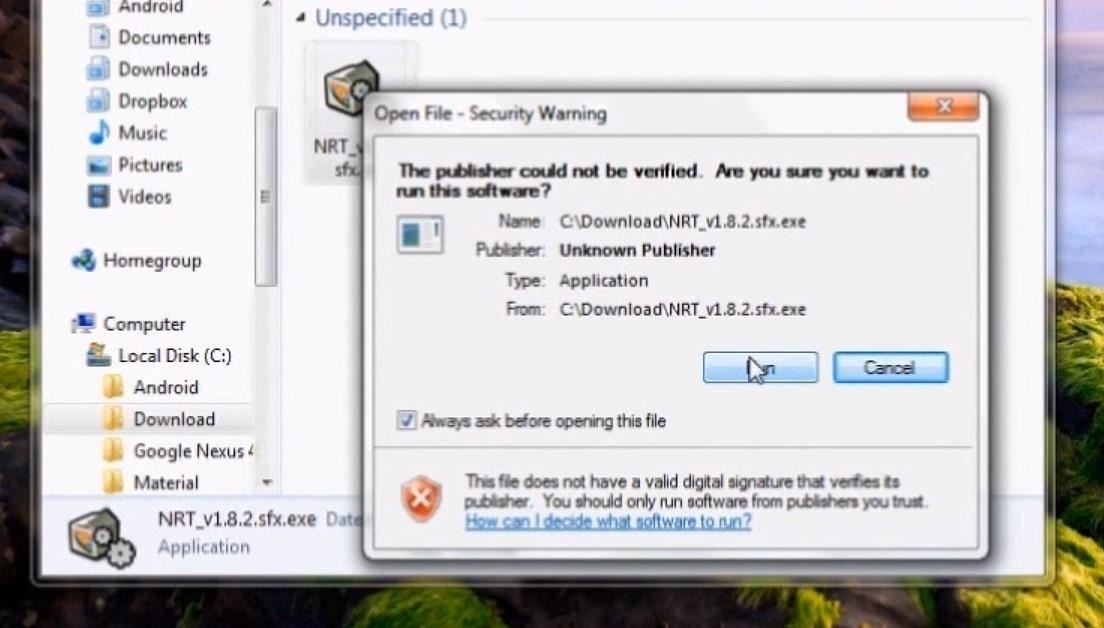
Follow the prompts for installation, allowing the toolkit to download additional files when it asks.
Step 4: Allow USB Debugging
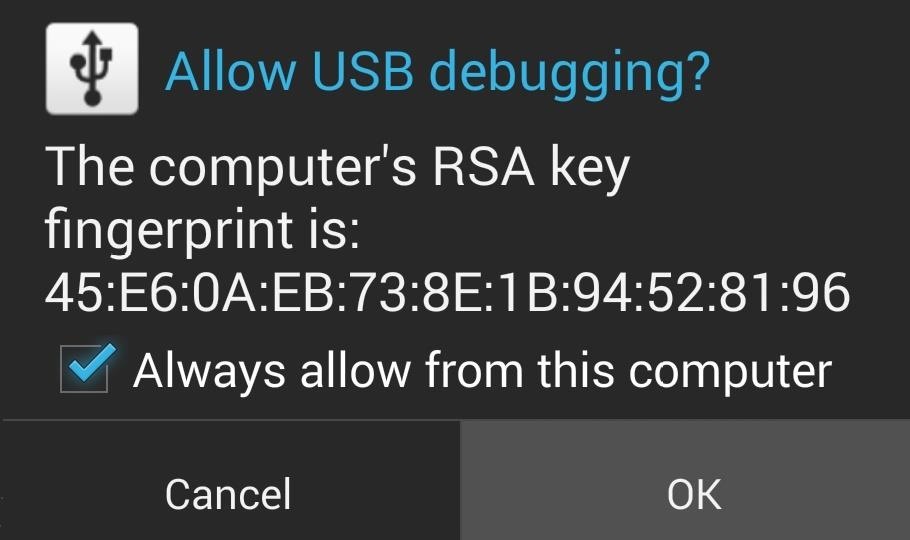
As the installation process finishes on your PC, a dialog will appear on your Nexus 5 asking you to allow USB debugging access from the computer you’re connected to. Tick the box next to Always allow from this computer and press OK.
Step 5: Set Up the Root Toolkit
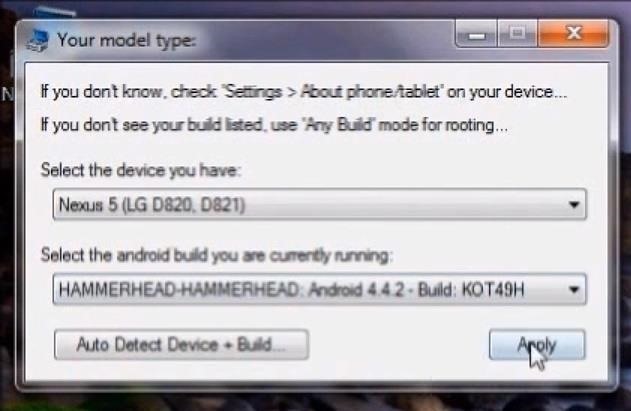
When the installation is complete on your PC, you will be prompted to enter your phone’s Model and Android Build. Enter Nexus 5 as the model, and refer to the build number you jotted down in Step 2 for the Android Build.
Next, click the button labeled Full Driver Installation Guide – Automatic + Manual near the top-right of the toolkit’s main screen.
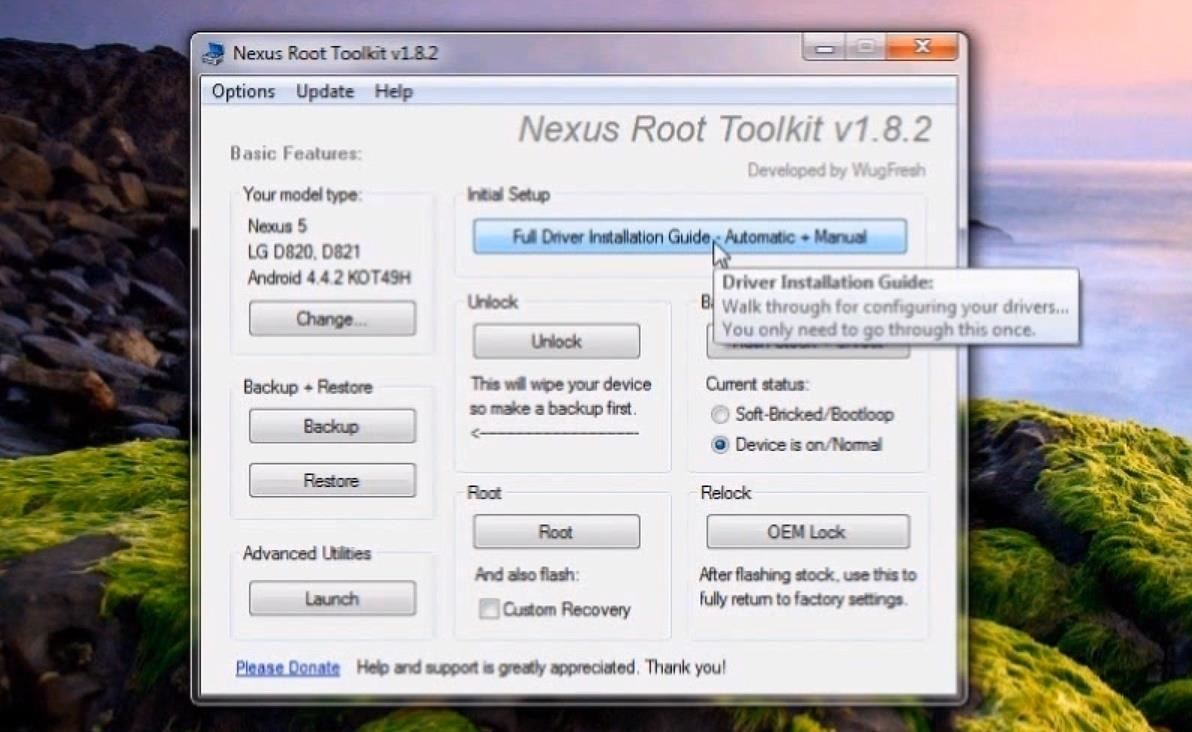
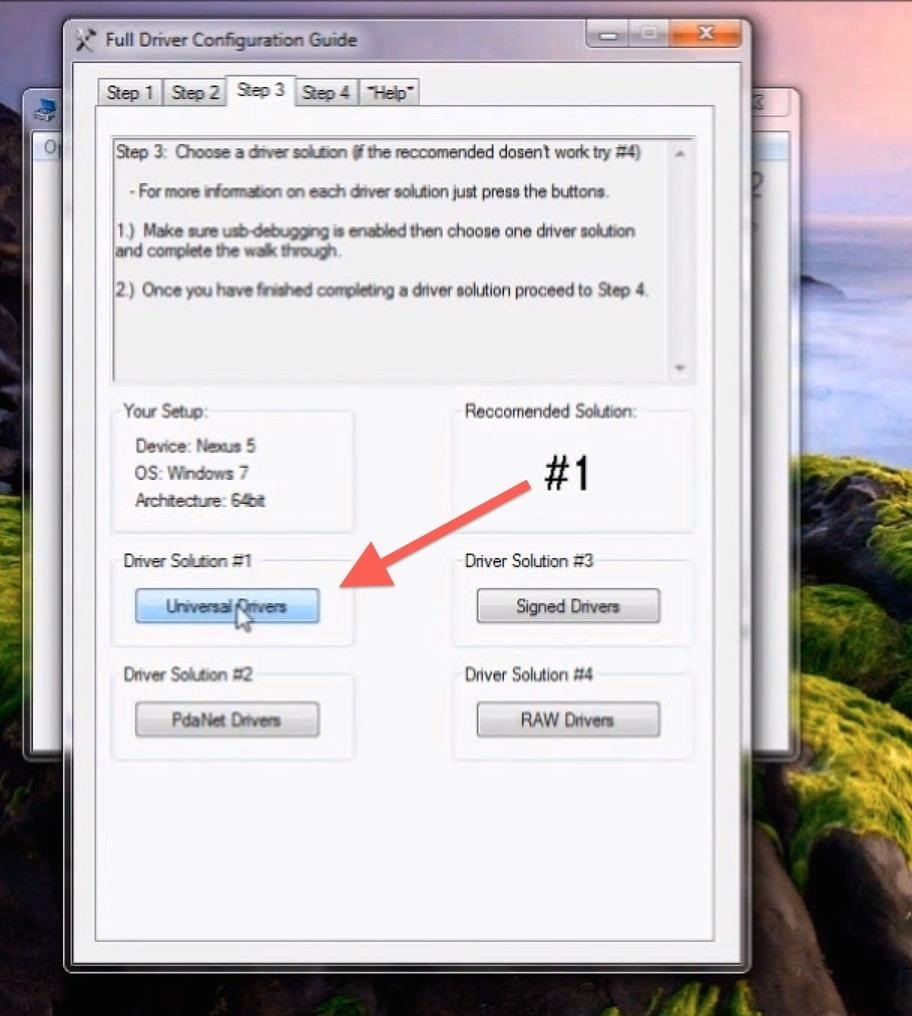
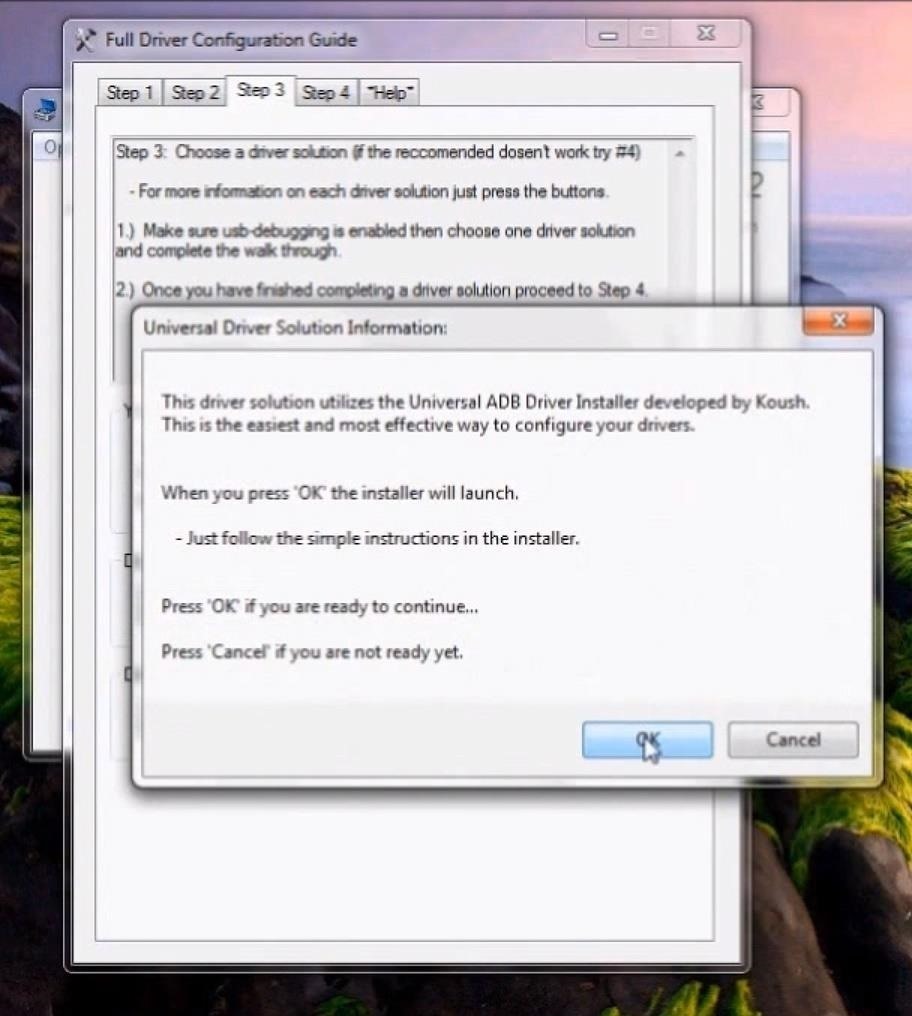
Follow the instructions provided by the toolkit to install the proper device drivers. On the “Step 3” tab in the dialog box that appears, take note of the Recommended Solution it provides and install the corresponding set of drivers.
Step 6: Back Up Your Data and Apps (Optional)
As you probably remember, the process of unlocking your Nexus 5 deletes all of your phone’s apps and data. The same applies when re-locking and returning to stock.
There are several methods available to back up your data, but most won’t be able to restore anything without root or a custom recovery. The best option to back up your music, photos, videos, and other data is to copy them to your PC temporarily using Windows Explorer. When you have returned to stock, you can then copy these files back to your phone.
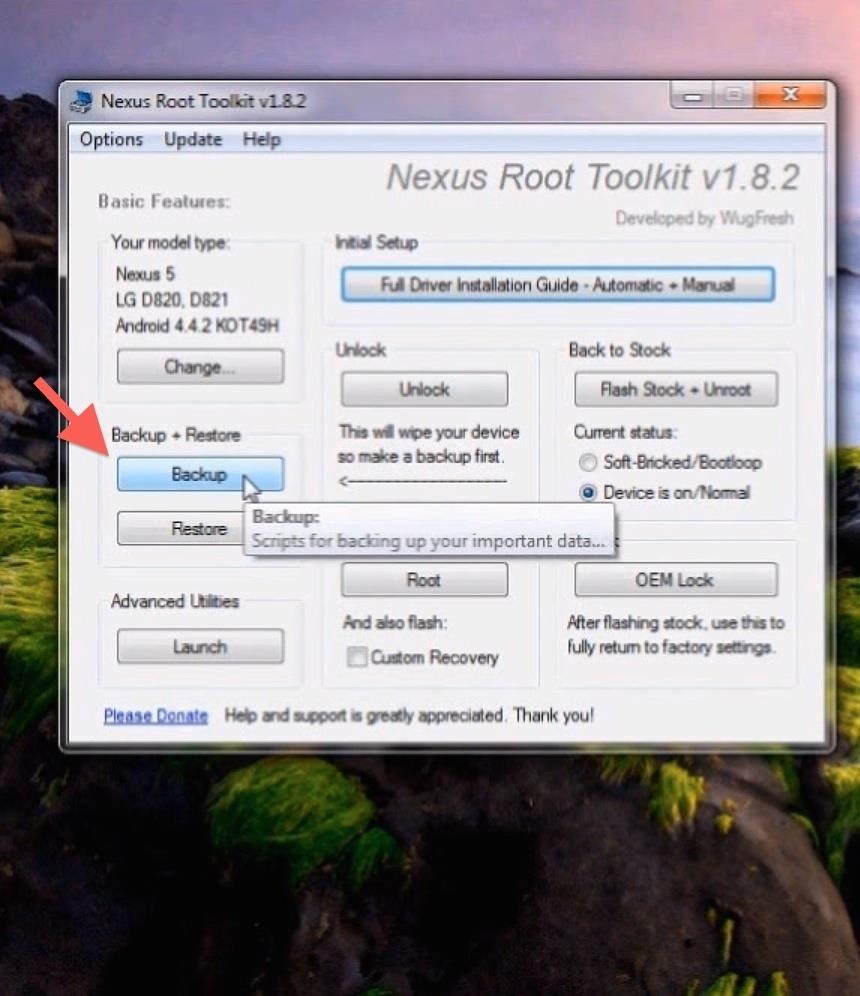
For backing up apps, however, there is an automated option provided by the Nexus Root Toolkit. Simply click Backup from the toolkit’s main menu, then select Create Android Backup File on the following screen.
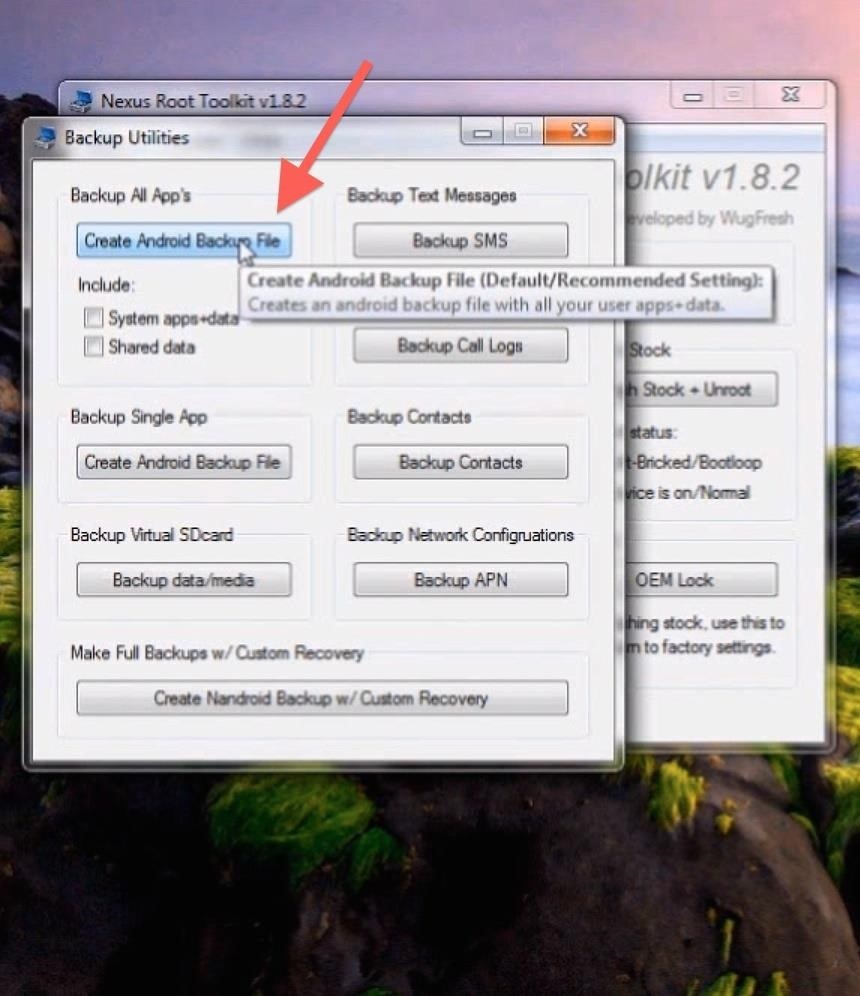
Follow the toolkit’s instructions through the backup process. Be sure to note the save location of the backup file so that you can find it when it comes time to restore.
Step 7: Flash the Stock Firmware
Before proceeding, remember that THIS PROCEDURE WILL DELETE ALL APPS AND DATA FROM YOUR PHONE.
From the main menu of the toolkit, select Flash Stock + Unroot.
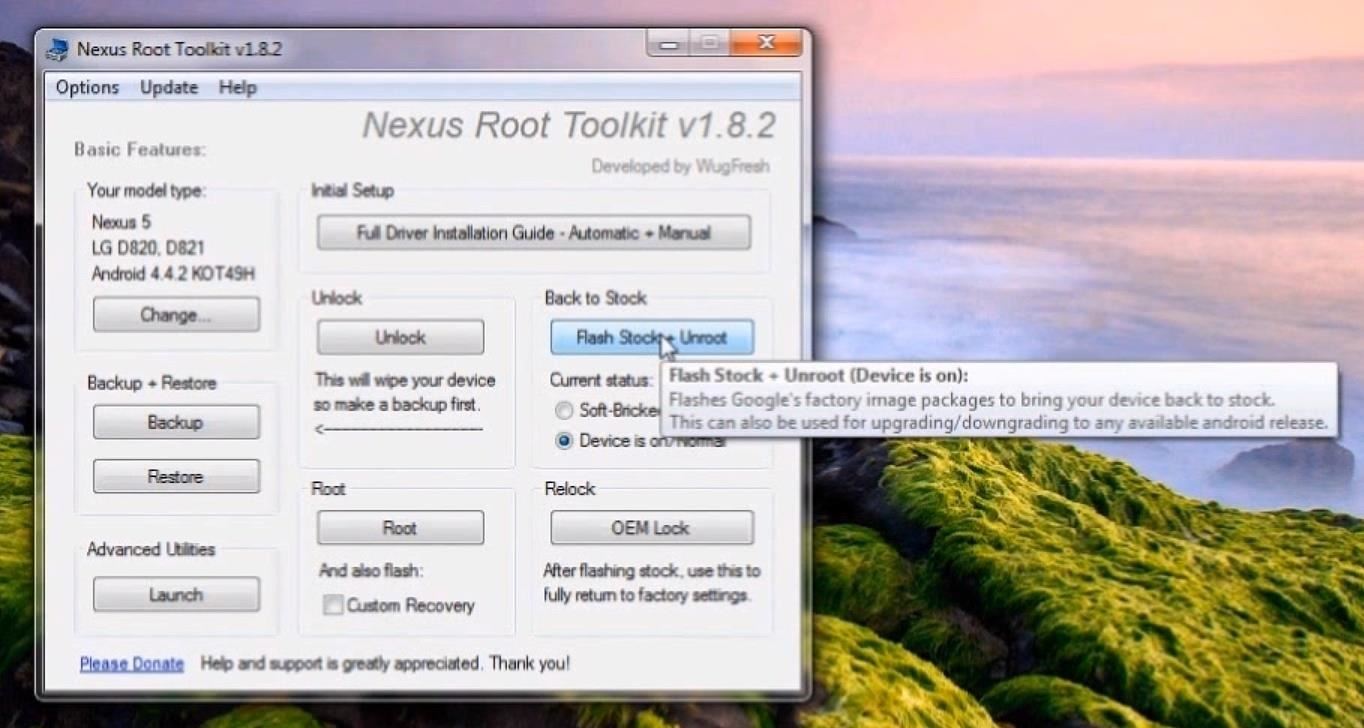
Press OK to continue, and on the following screen, make sure Automatically download + extract the factory image selected above for me is selected.
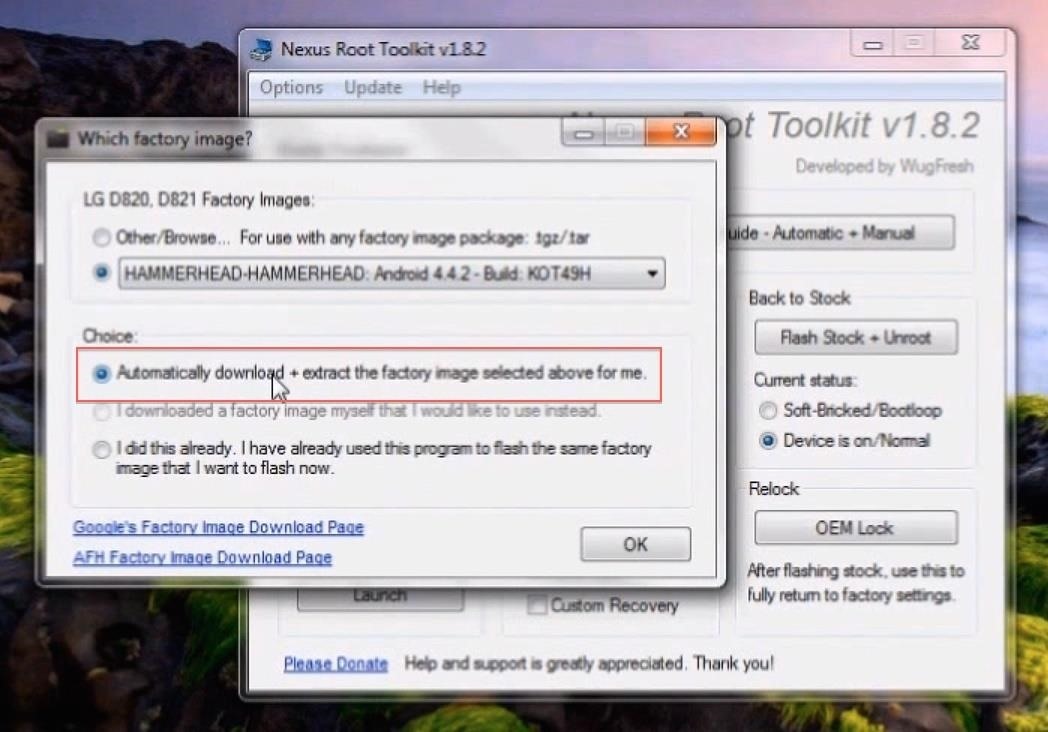
Click OK, then follow the instructions to flash the factory images. DO NOT DISCONNECT THE USB CABLE DURING THIS PROCESS.
Step 8: Enable USB Debugging Again
Now that you’ve flashed the stock firmware, all of your previous settings have been reset. This includes the USB Debugging option we enabled earlier, so refer back to Step 2 of this guide to enable it once again.
The dialog on your Nexus 5 asking to allow your computer to connect should appear right away this time. Tick Always allow from this computer and select OK again.
Step 9: Lock the Bootloader & Reset the Tamper Flag
Not only will this part of the process put the bootloader back into its original state, but it will also destroy any evidence of the phone having been modified in the first place. This is important if you are returning your phone to the manufacturer or your wireless carrier for warranty purposes.
From the main menu of the toolkit, select OEM Lock, then OK from the following prompt.
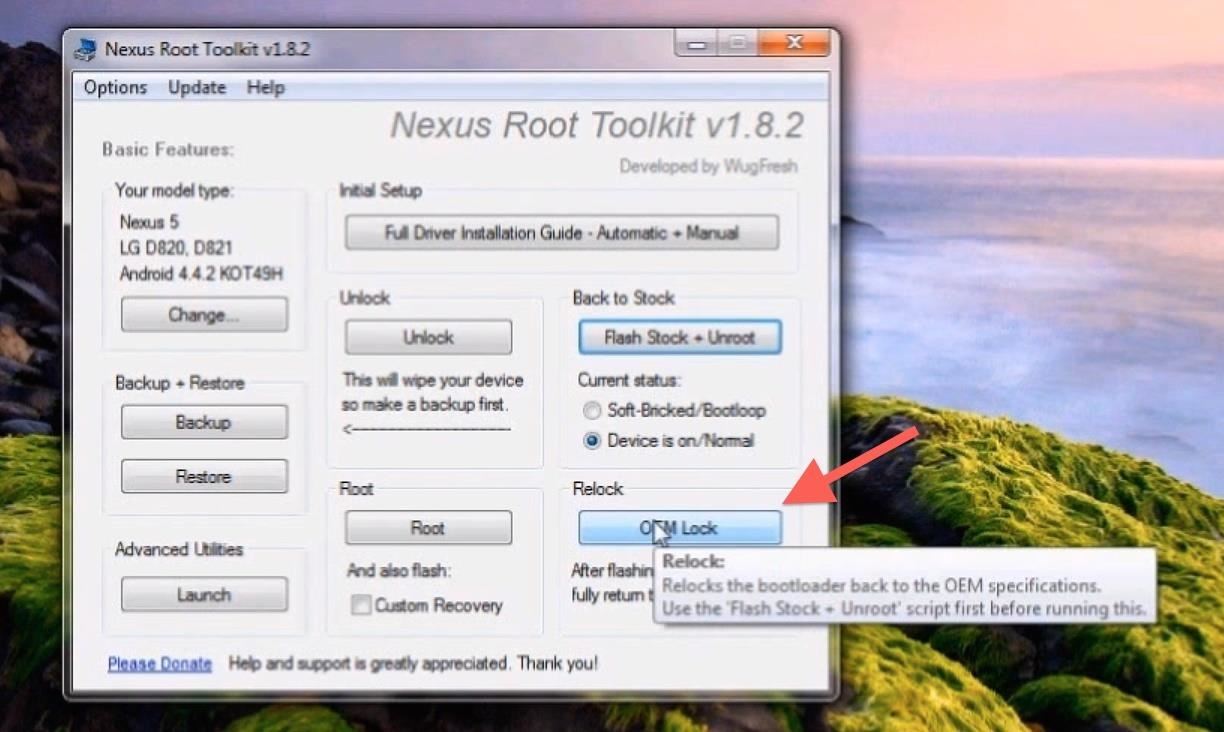
This process will automatically reboot your phone several times, so be patient.
Step 10: Restore Your Backups (Optional)
At this point, it’s safe to go ahead and restore any backups you’ve made. If you copied any data to your PC, you can now copy that back to your Nexus 5.
To restore any apps you backed up with the toolkit, click Restore from the main menu, then Restore Android Backup file from the next screen.
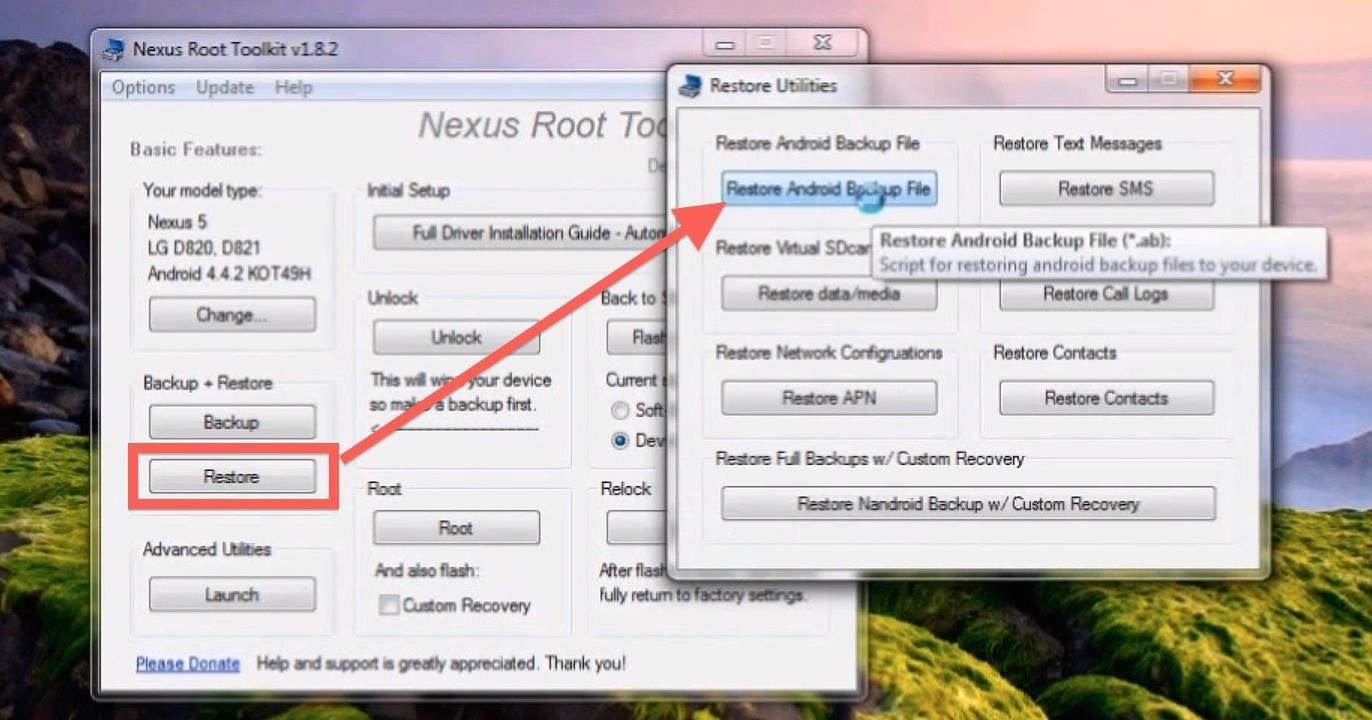
Follow the toolkit’s instruction to complete the process.
Savor the Stock Flavor
You should now be holding a completely stock Nexus 5. Your phone is now ready to be sent back to the manufacturer or carrier if need be. Otherwise, enjoy your fresh-out-of-the-box device.
New Nexus 5 image via Phandroid
Just updated your iPhone? You’ll find new emoji, enhanced security, podcast transcripts, Apple Cash virtual numbers, and other useful features. There are even new additions hidden within Safari. Find out what’s new and changed on your iPhone with the iOS 17.4 update.
“Hey there, just a heads-up: We’re part of the Amazon affiliate program, so when you buy through links on our site, we may earn a small commission. But don’t worry, it doesn’t cost you anything extra and helps us keep the lights on. Thanks for your support!”


