Your voice is the key to unlocking many features on your iPhone. For example, you can ask Siri to send a text message to a friend, add items to a list, run a custom shortcut, or turn on your lights, but Apple does not allow you to unlock your iPhone with a Siri voice command. Instead, you can turn to a lesser-known feature to unlock your iPhone without Face ID, Touch ID, or typing your passcode.
A few years ago, Apple reinvented Voice Control as an accessibility feature that lets you control nearly every aspect of your iPhone using just your voice. There are over 300 voice commands that allow you to perform basic tasks like returning to your home screen or zooming in on the screen, but there’s also a way to use Voice Control to unlock your passcode-locked iPhone with a custom voice command.
- Don’t Miss: 24 Voice Control Features That Let You Use Your iPhone Totally Hands-Free
When you manually enter your passcode to unlock your iPhone, you tap on the screen in the same place every time since the number pad’s position is fixed. With this knowledge, a custom Voice Control command can be created that makes your iPhone type your passcode in for you. You just need to record the gesture and come up with a voice command that no one else would ever guess.
Why Would You Even Need to Do This?
Maybe your fingers are dirty, and you don’t want to touch your iPhone to read the transcriptions for your newest voicemails. Perhaps you don’t want to or can’t use Face ID or Touch ID to unlock and aren’t within arm’s length of your iPhone. Maybe you’re absorbed in some major gameplay that requires the attention of both your hands and face, and you just want to listen to what your last received message was.
There are many reasons this could be useful, but it’s also just freaking badass to be able to do this whether you need it or not. I mean, what could be cooler than telling people you can unlock your passcode-locked iPhone without even holding or looking at it?
Note: In iOS 14.6 and later, this trick will work on the passcode screen even after restarting the iPhone or powering it down and turning it back on, and that’s because Voice Control is still actively listening when the iPhone is booted back up. However, before iOS 14.6, you’re limited to using this trick after Face ID or Touch ID is disabled or when using Siri actions since Voice Control is still active in those states.
- More Info: How to Unlock Your iPhone After a Restart Using Just Your Voice
Step 1: Start a New Custom Voice Control Command
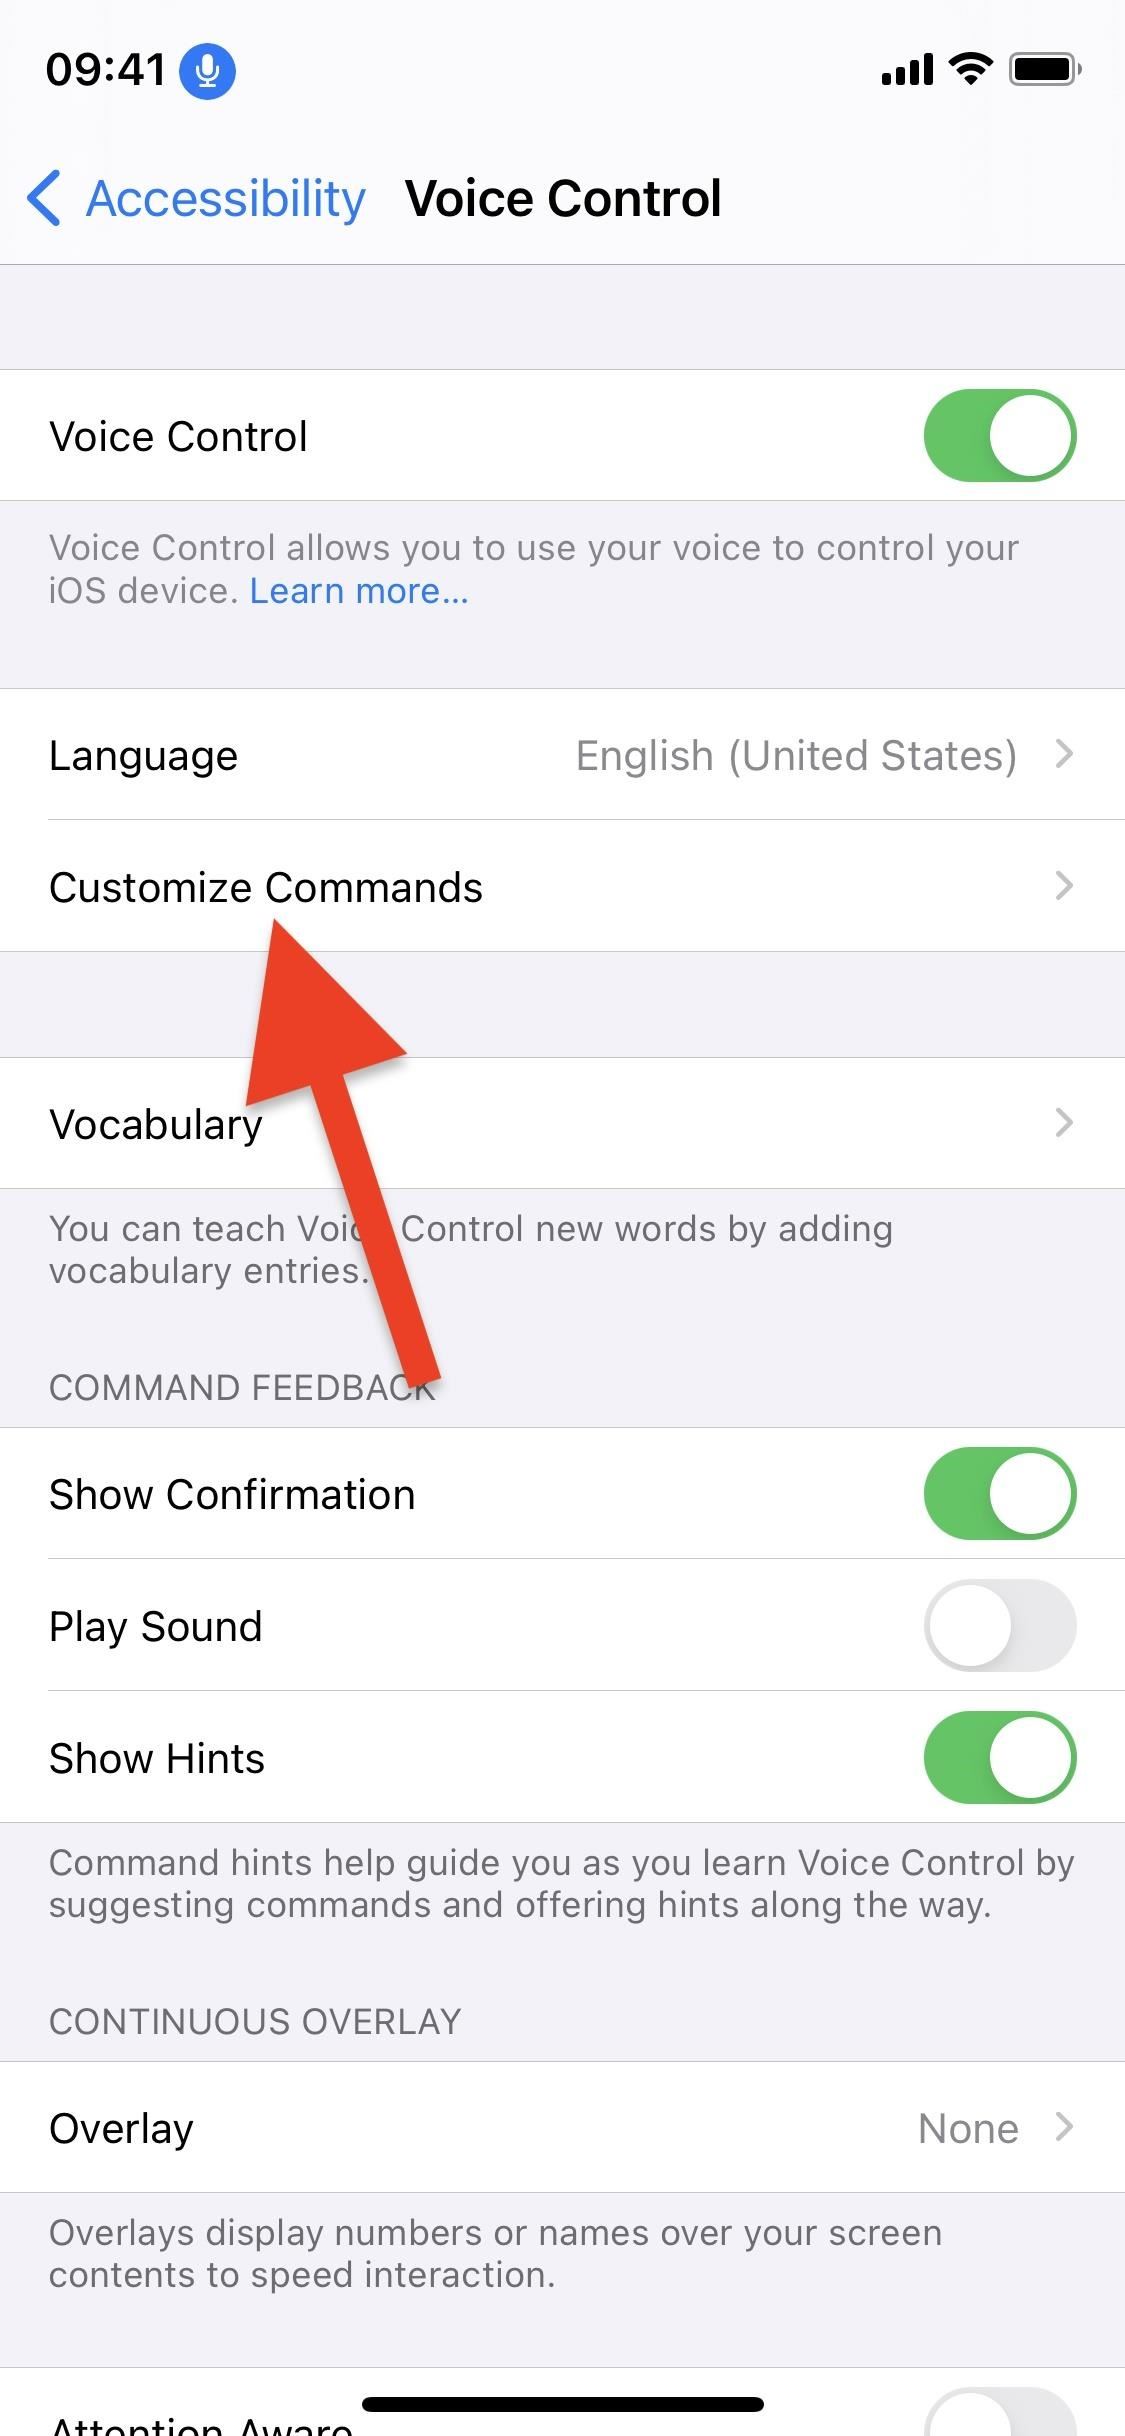
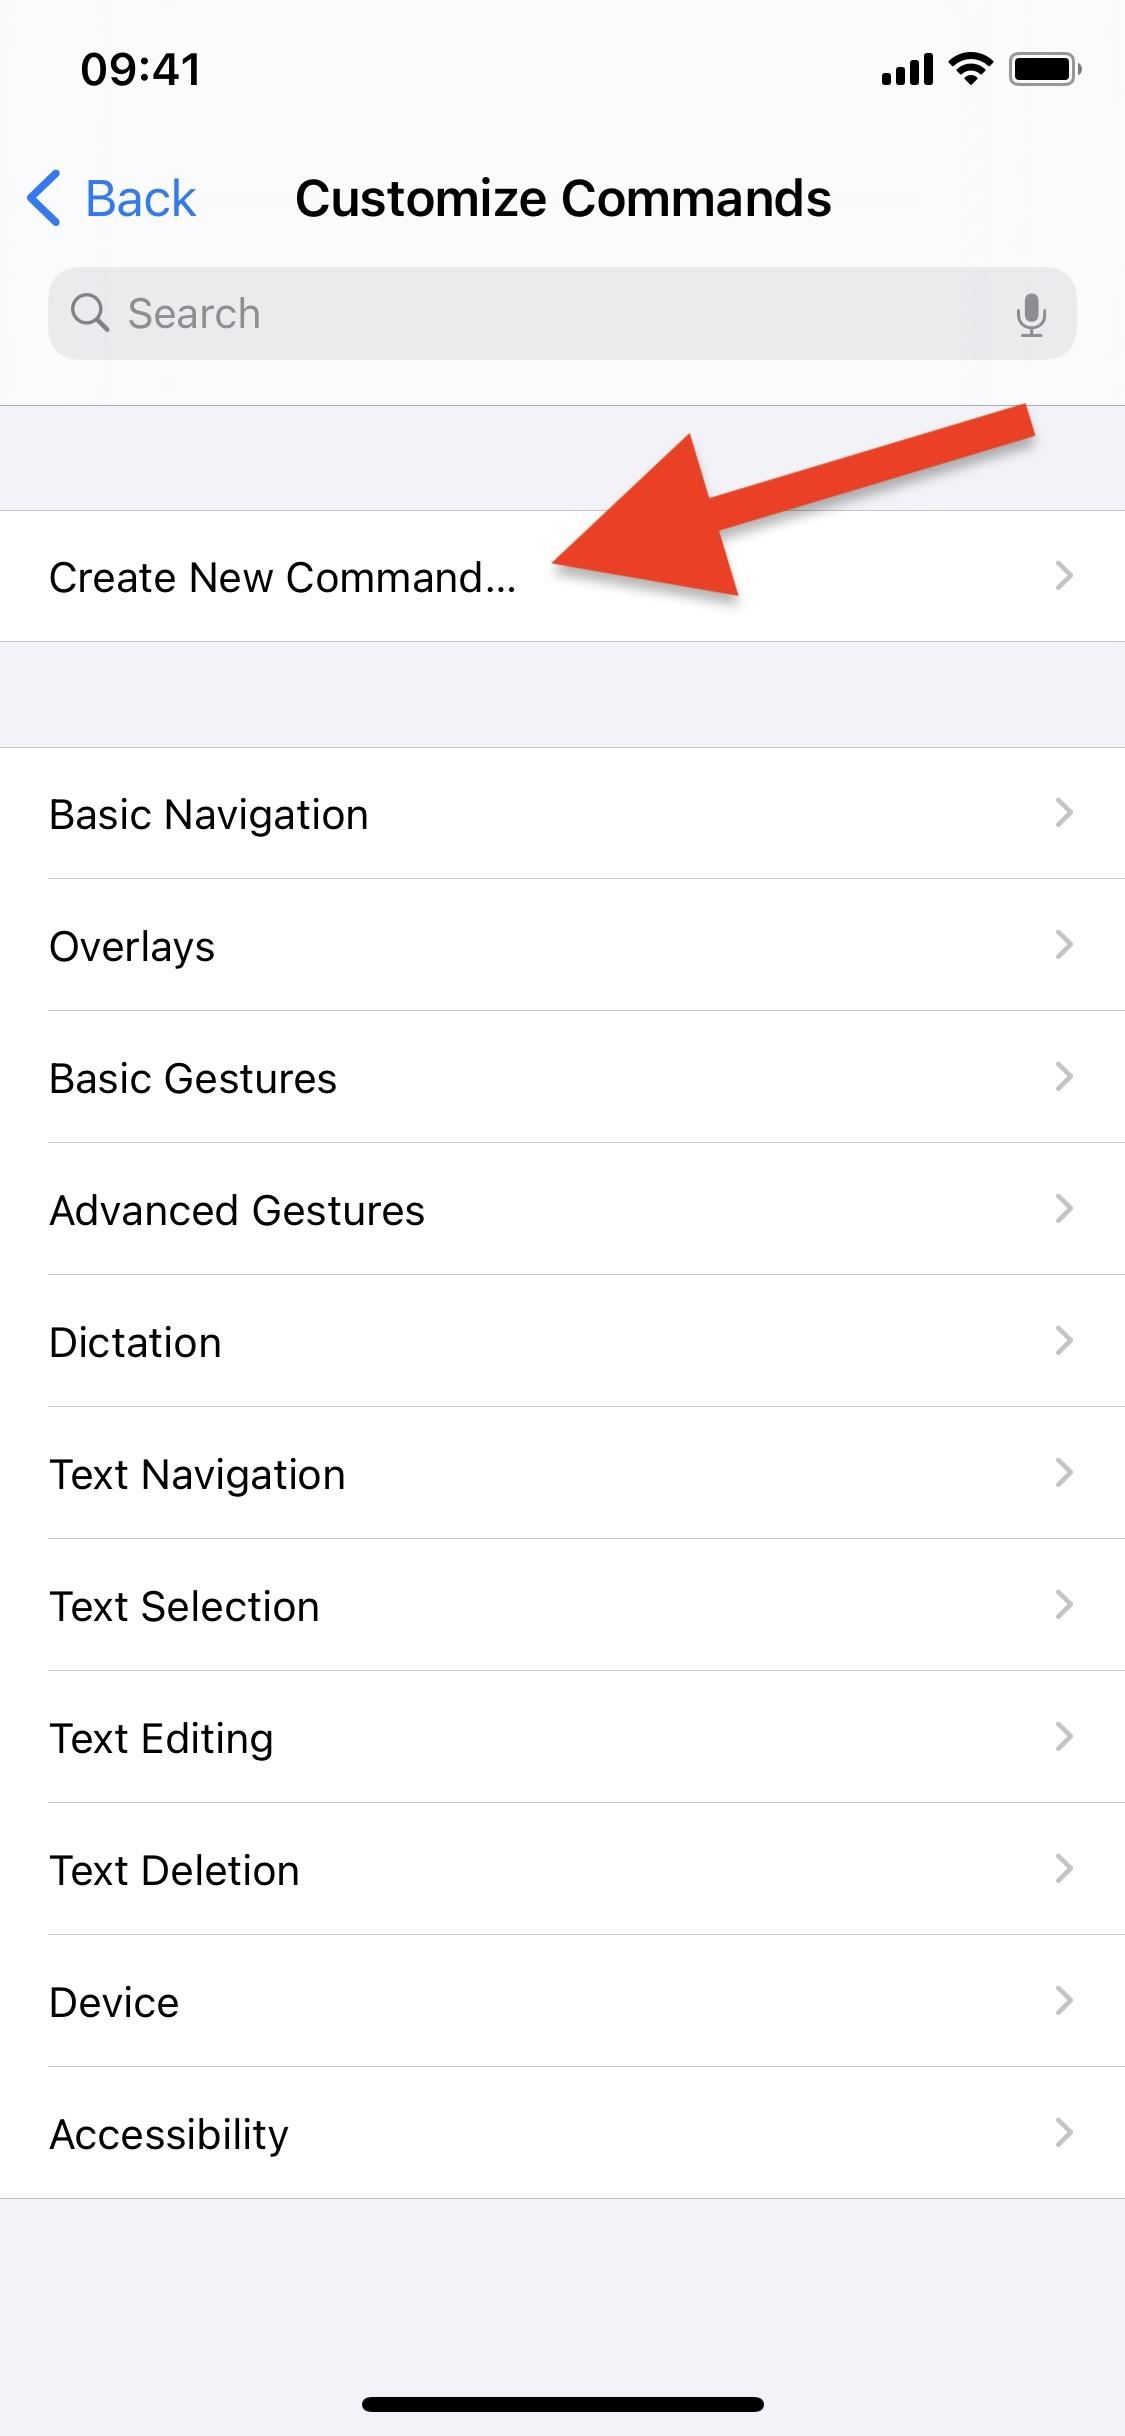
To create a custom Voice Control command, you need to be in the Voice Control preferences. Go to Settings –> Accessibility –> Voice Control, or say “Voice Control settings” to Siri to jump there. Next, tap “Customize Commands,” then “Create New Command.”
If you see “Custom” instead of “Create New Command,” that means you’ve already created one or more custom Voice Control commands. In that case, tap “Control,” then “Create New Command.”
Step 2: Name Your Custom Voice Control Command
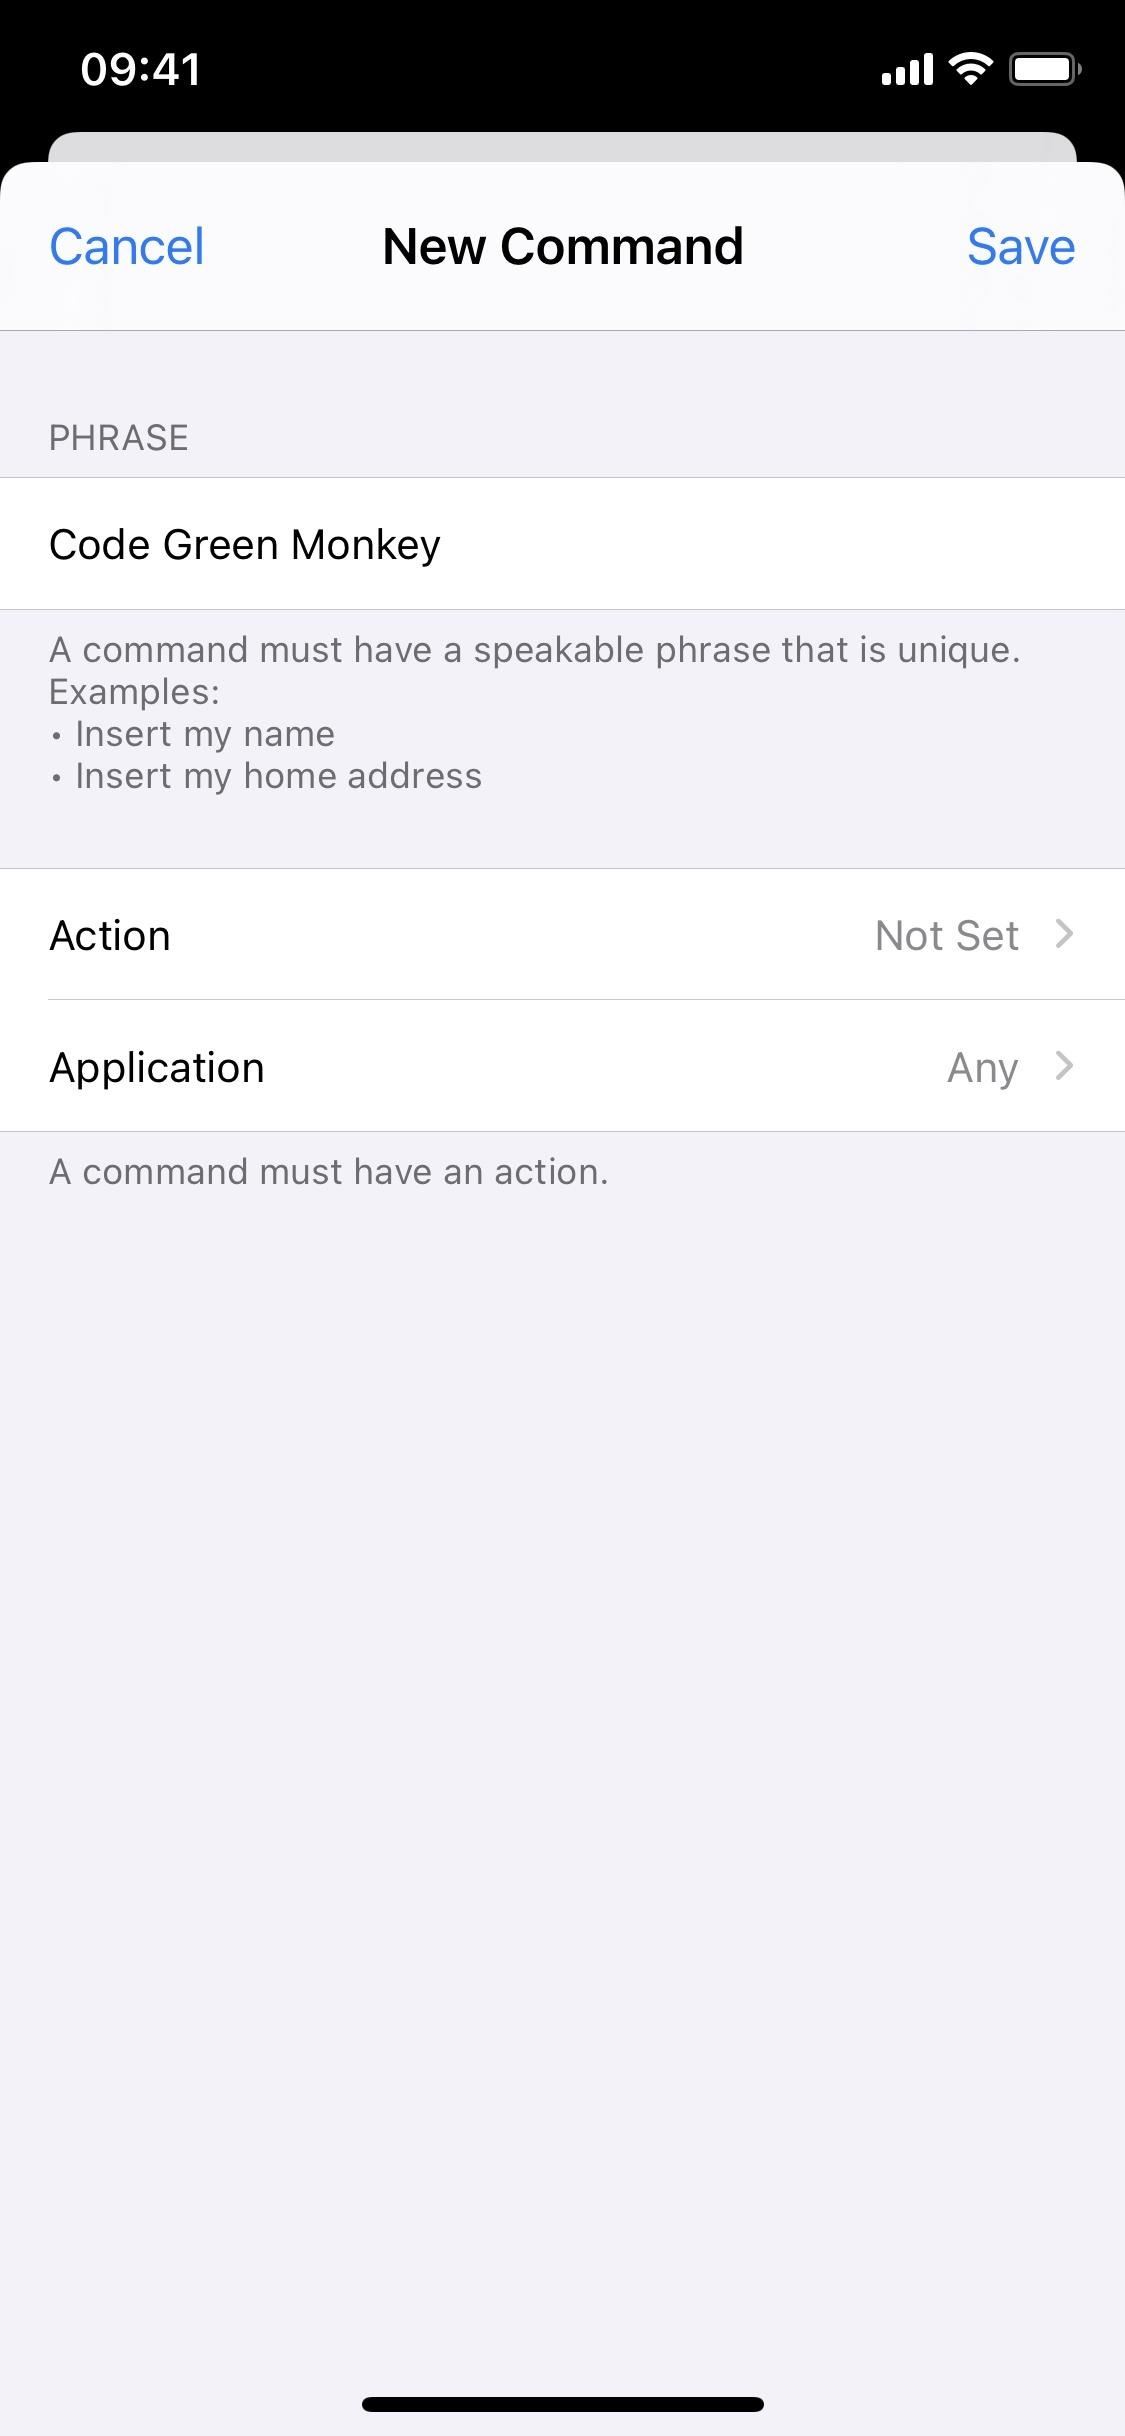
For the “Phrase” in the New Command editing window, type in a unique phrase that you’ll use to run the unlocking gesture. Your iPhone will be listening 24/7 whenever Voice Control is on, so make the phrase something that you don’t often say, or else the command will constantly run when you don’t want it to.
Unfortunately, unlike with Siri, anyone can say the command to unlock your iPhone using Voice Control since there is no voice recognition behind the scenes. Needless to say, don’t make it something easy enough that anyone can guess it. Phrases like “open sesame” or “open iPhone” should be avoided.
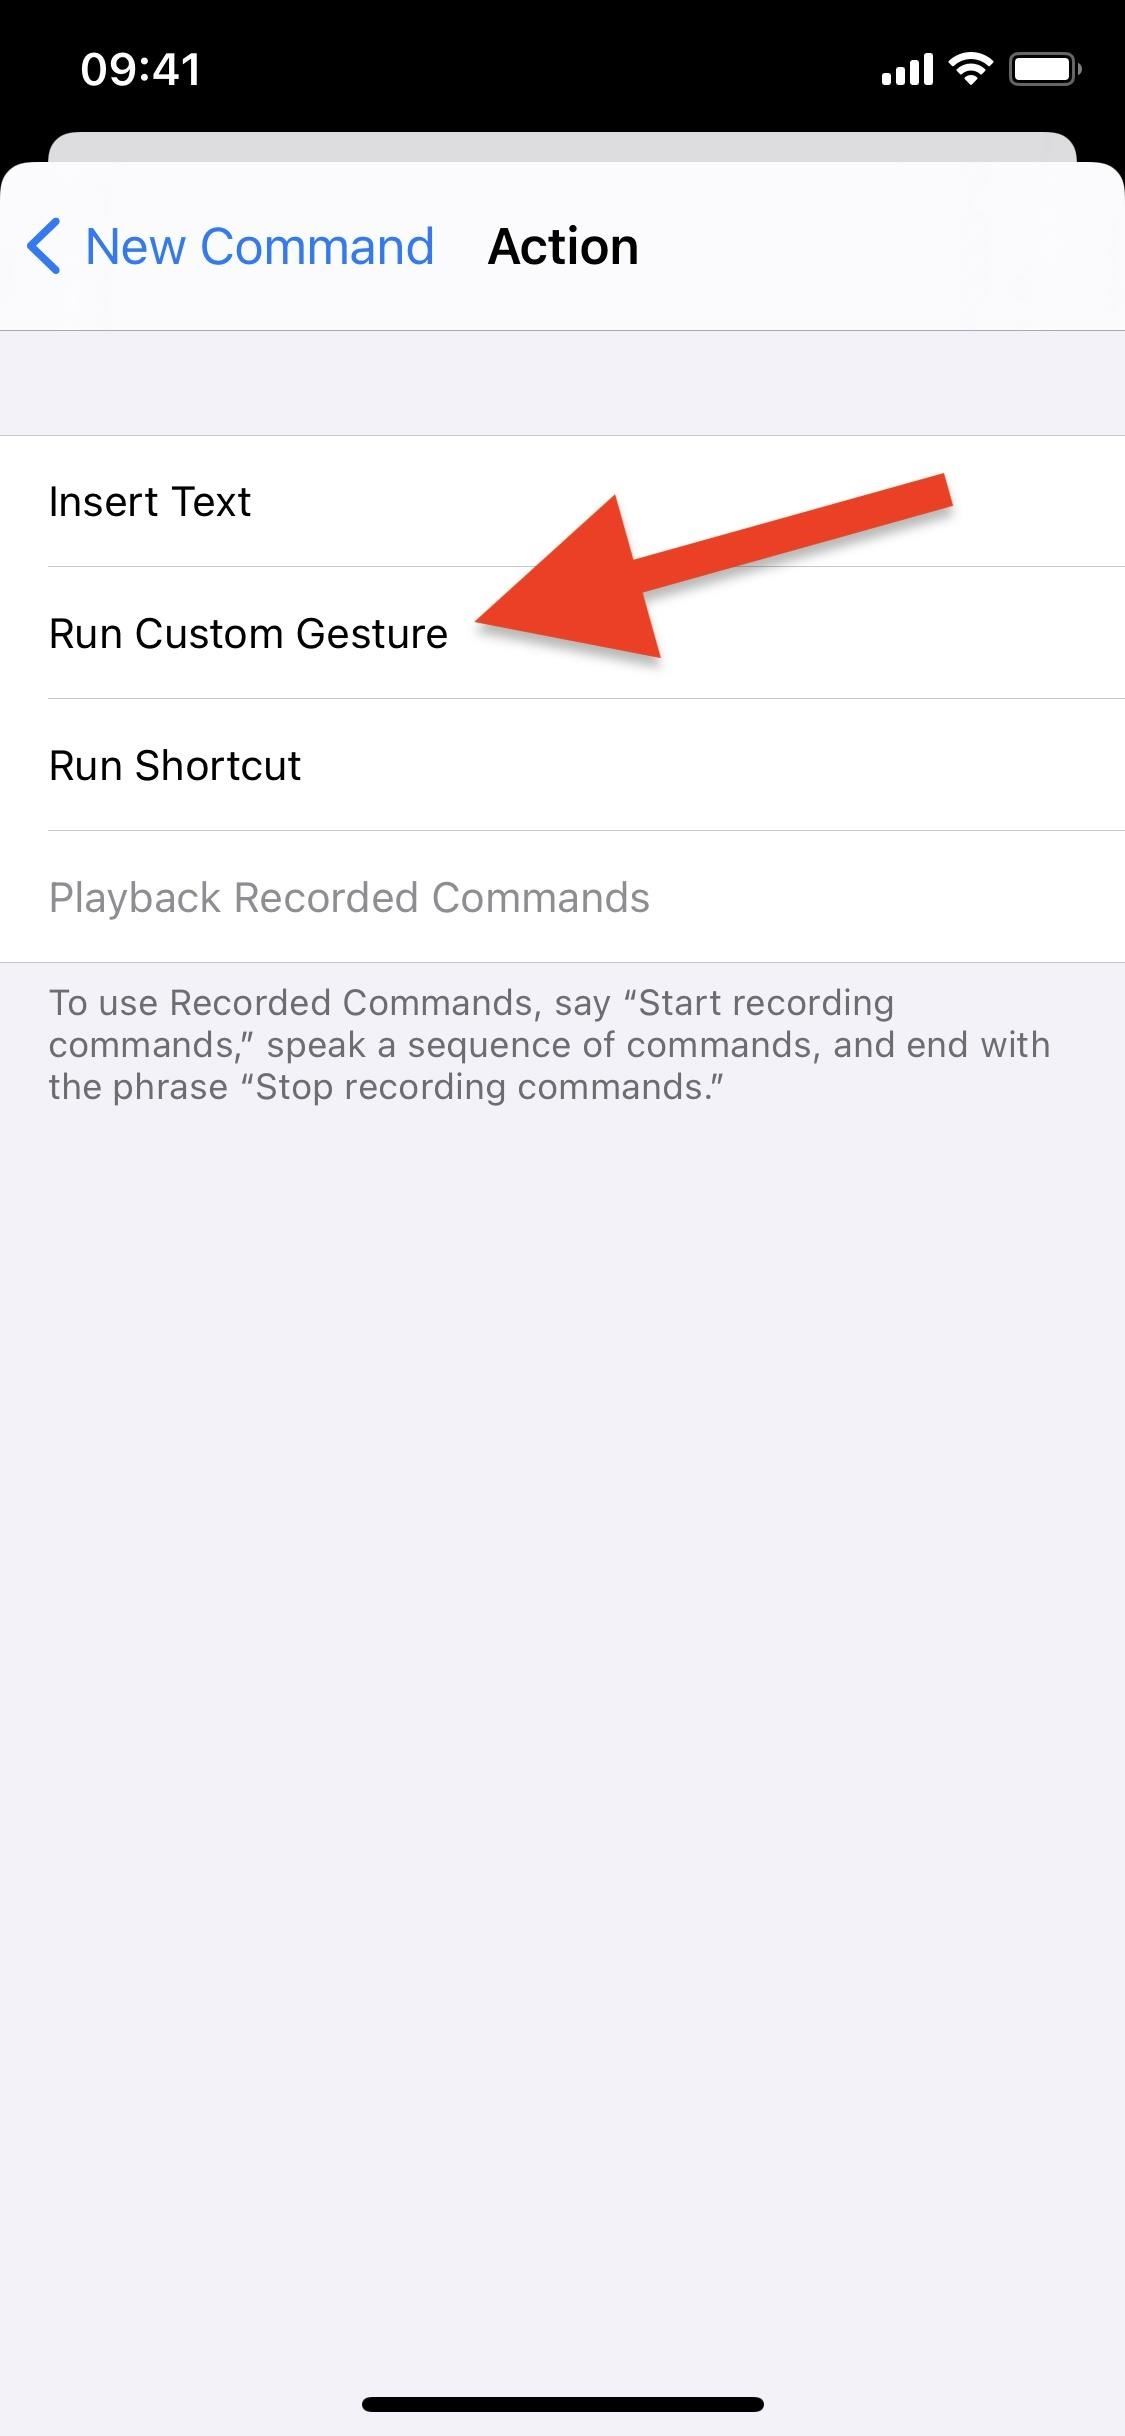
After entering your unique phrase, tap “Action” and choose the “Run Custom” gesture option. This brings us to the hard part of the control creation process.
Step 3: Create the Passcode-Entering Gesture
Whatever your passcode is, you’ll need to tap on your screen exactly where you tap, in the same order as you do when you unlock your iPhone manually. To practice, hit the Side button to sleep your display, wake it, and input your passcode. You should be back on the New Gesture screen. Do this as many times as necessary until you get it right.
If it’s still too difficult to do, grab someone else’s iPhone, bring up the passcode screen, then compare that to your screen to figure out where you need to tap when recording the gesture. You can also take a screenshot of the passcode screen, then switch between the New Gesture screen and the screenshot in Photos.
Note that due to Apple’s limitations on custom gestures, you’re limited to five taps, so you can only use this trick on a four-digit passcode. If you use an alphanumeric passcode instead of a numeric one, as long as it’s five characters or less, you could record a gesture for it; you’ll just have a smaller margin of error when it comes to where you need to tap.
If you want to use a six-digit passcode to keep your security strong, you’d need to use two separate custom gestures with different voice commands, each entering part of the passcode. It’s slower, but it’s still fun to try out. Alternatively, you could also use one custom gesture to enter five numbers of your passcode, then simply say “Tap” and the last number to finish entering the passcode. That may be ideal since it’s faster than two custom Voice Control commands.
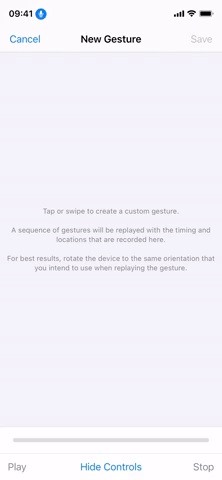
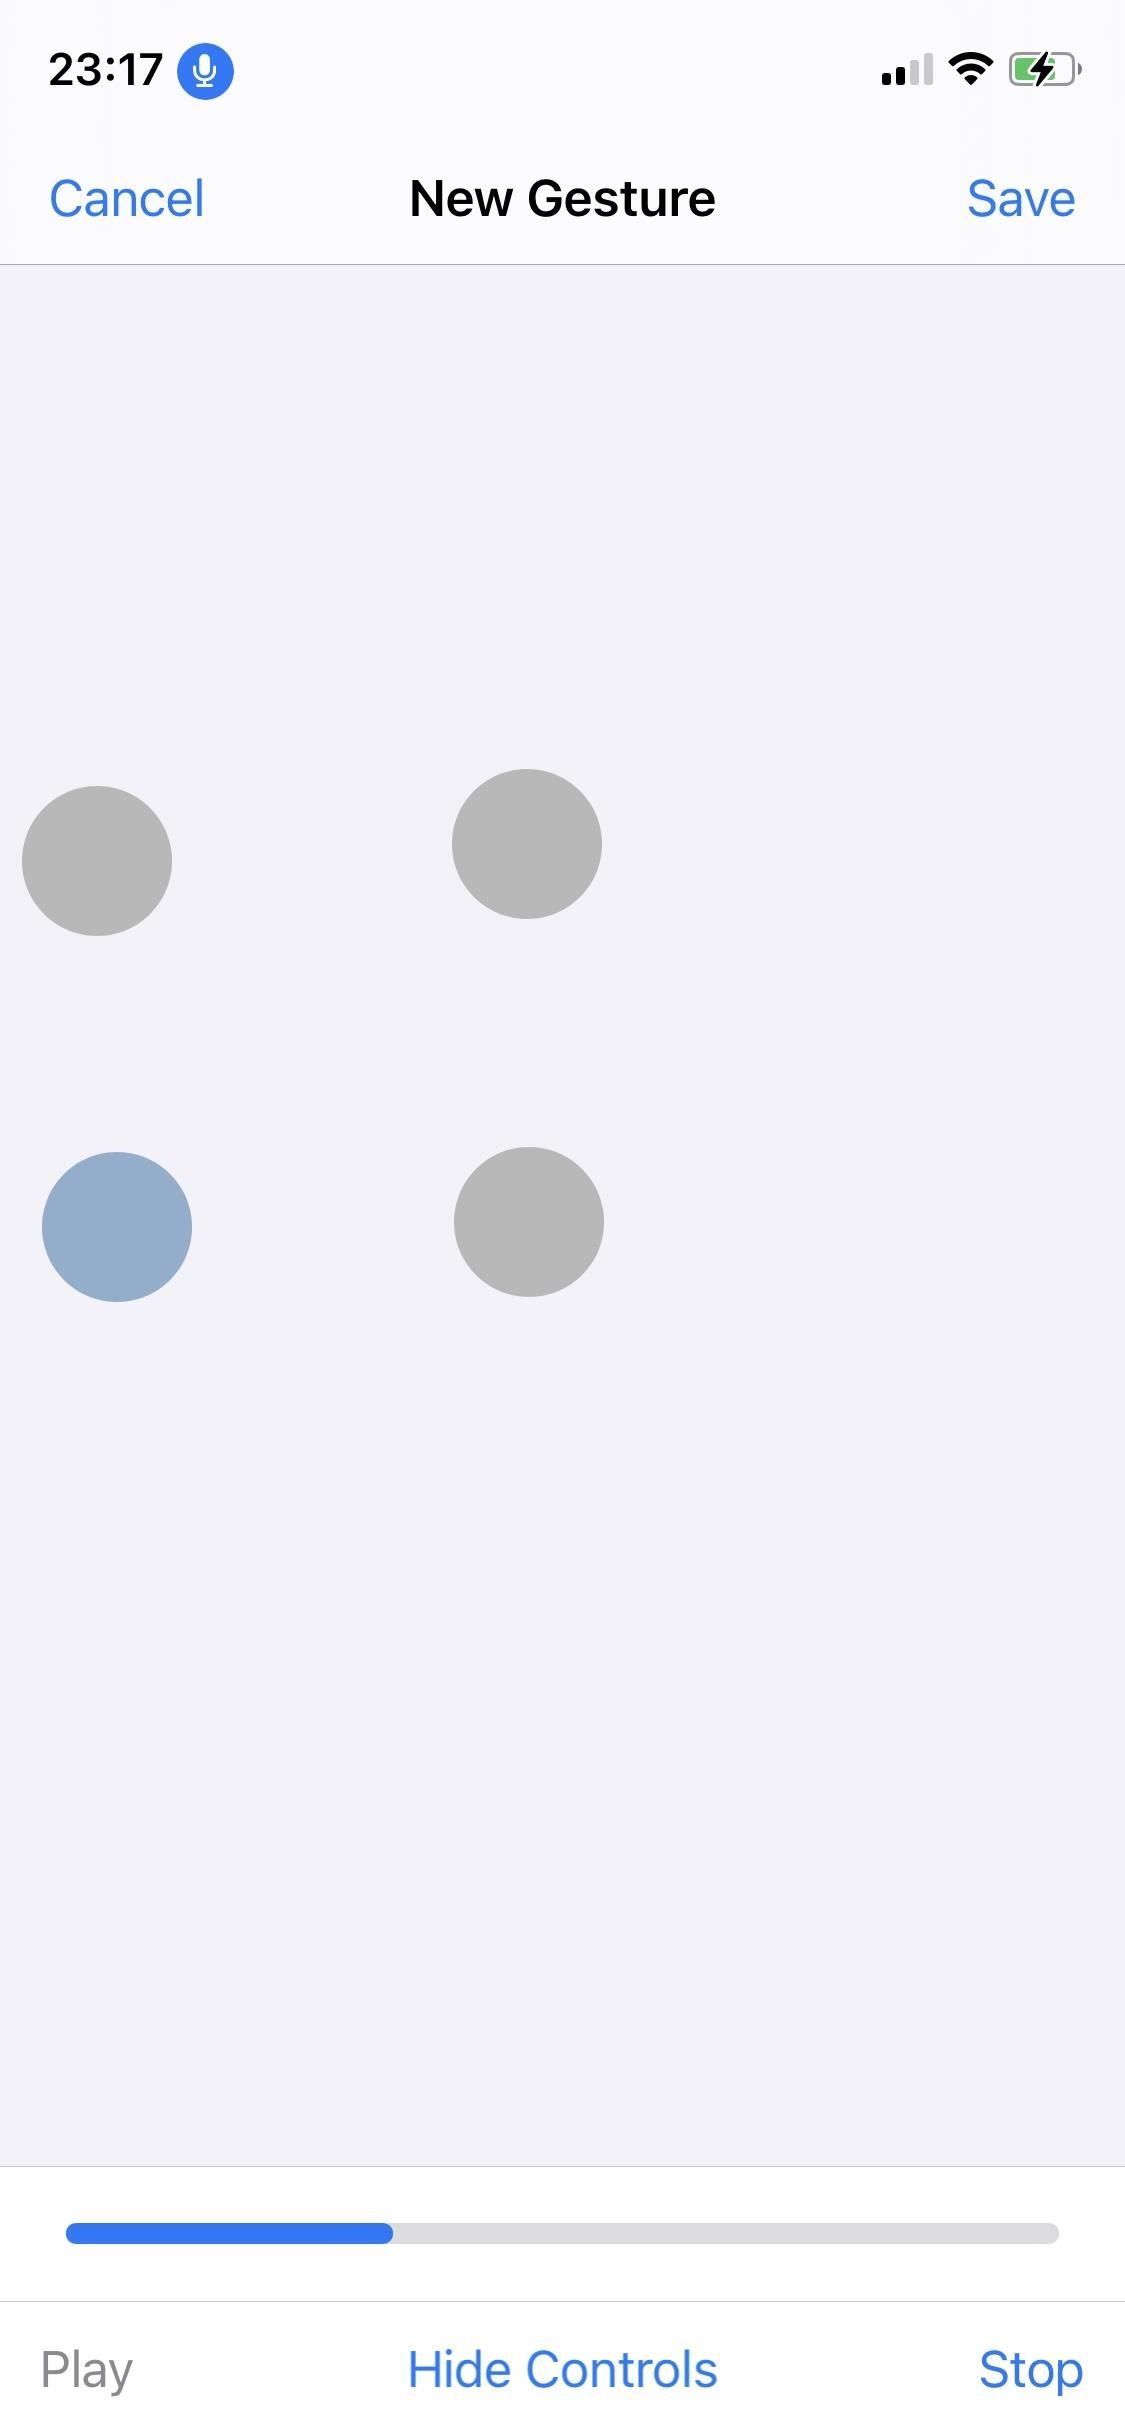
As an example, you can see me creating my gesture above, tapping on the screen to emulate typing my passcode, which is 1254 for this guide.
Once you get it right, tap “Save.”
Tip: Consider Hey Siri When Making Your Gesture
If you plan on using this with Hey Siri to perform actions when your iPhone is locked, take that into account. Whenever you use Hey Siri to do something on a locked iPhone, it will attempt to scan for biometrics using Face ID or Touch ID. However, there is a button available to “Use Passcode.” So you’ll want to add that to the beginning of your gesture.
Now, if Face ID or Touch ID is locked down because you’ve restarted the device, disabled it temporarily, activated Emergency SOS, had too many failed scans, etc., it will show the passcode screen right away. However, as stated before, Voice Control only works on a restarted device on iOS 14.6 and later.
You could build two different commands to account for the extra process of hitting “Use Passcode” if that makes things easier for you. Or you can just say “Tap Use Passcode” before speaking your custom passcode-entering custom Voice Control keyword. If you don’t even use Face ID or Touch ID, you’ll always see the passcode screen right away, so you won’t have to worry about any of this.
Step 4: Save Your Custom Voice Control Command
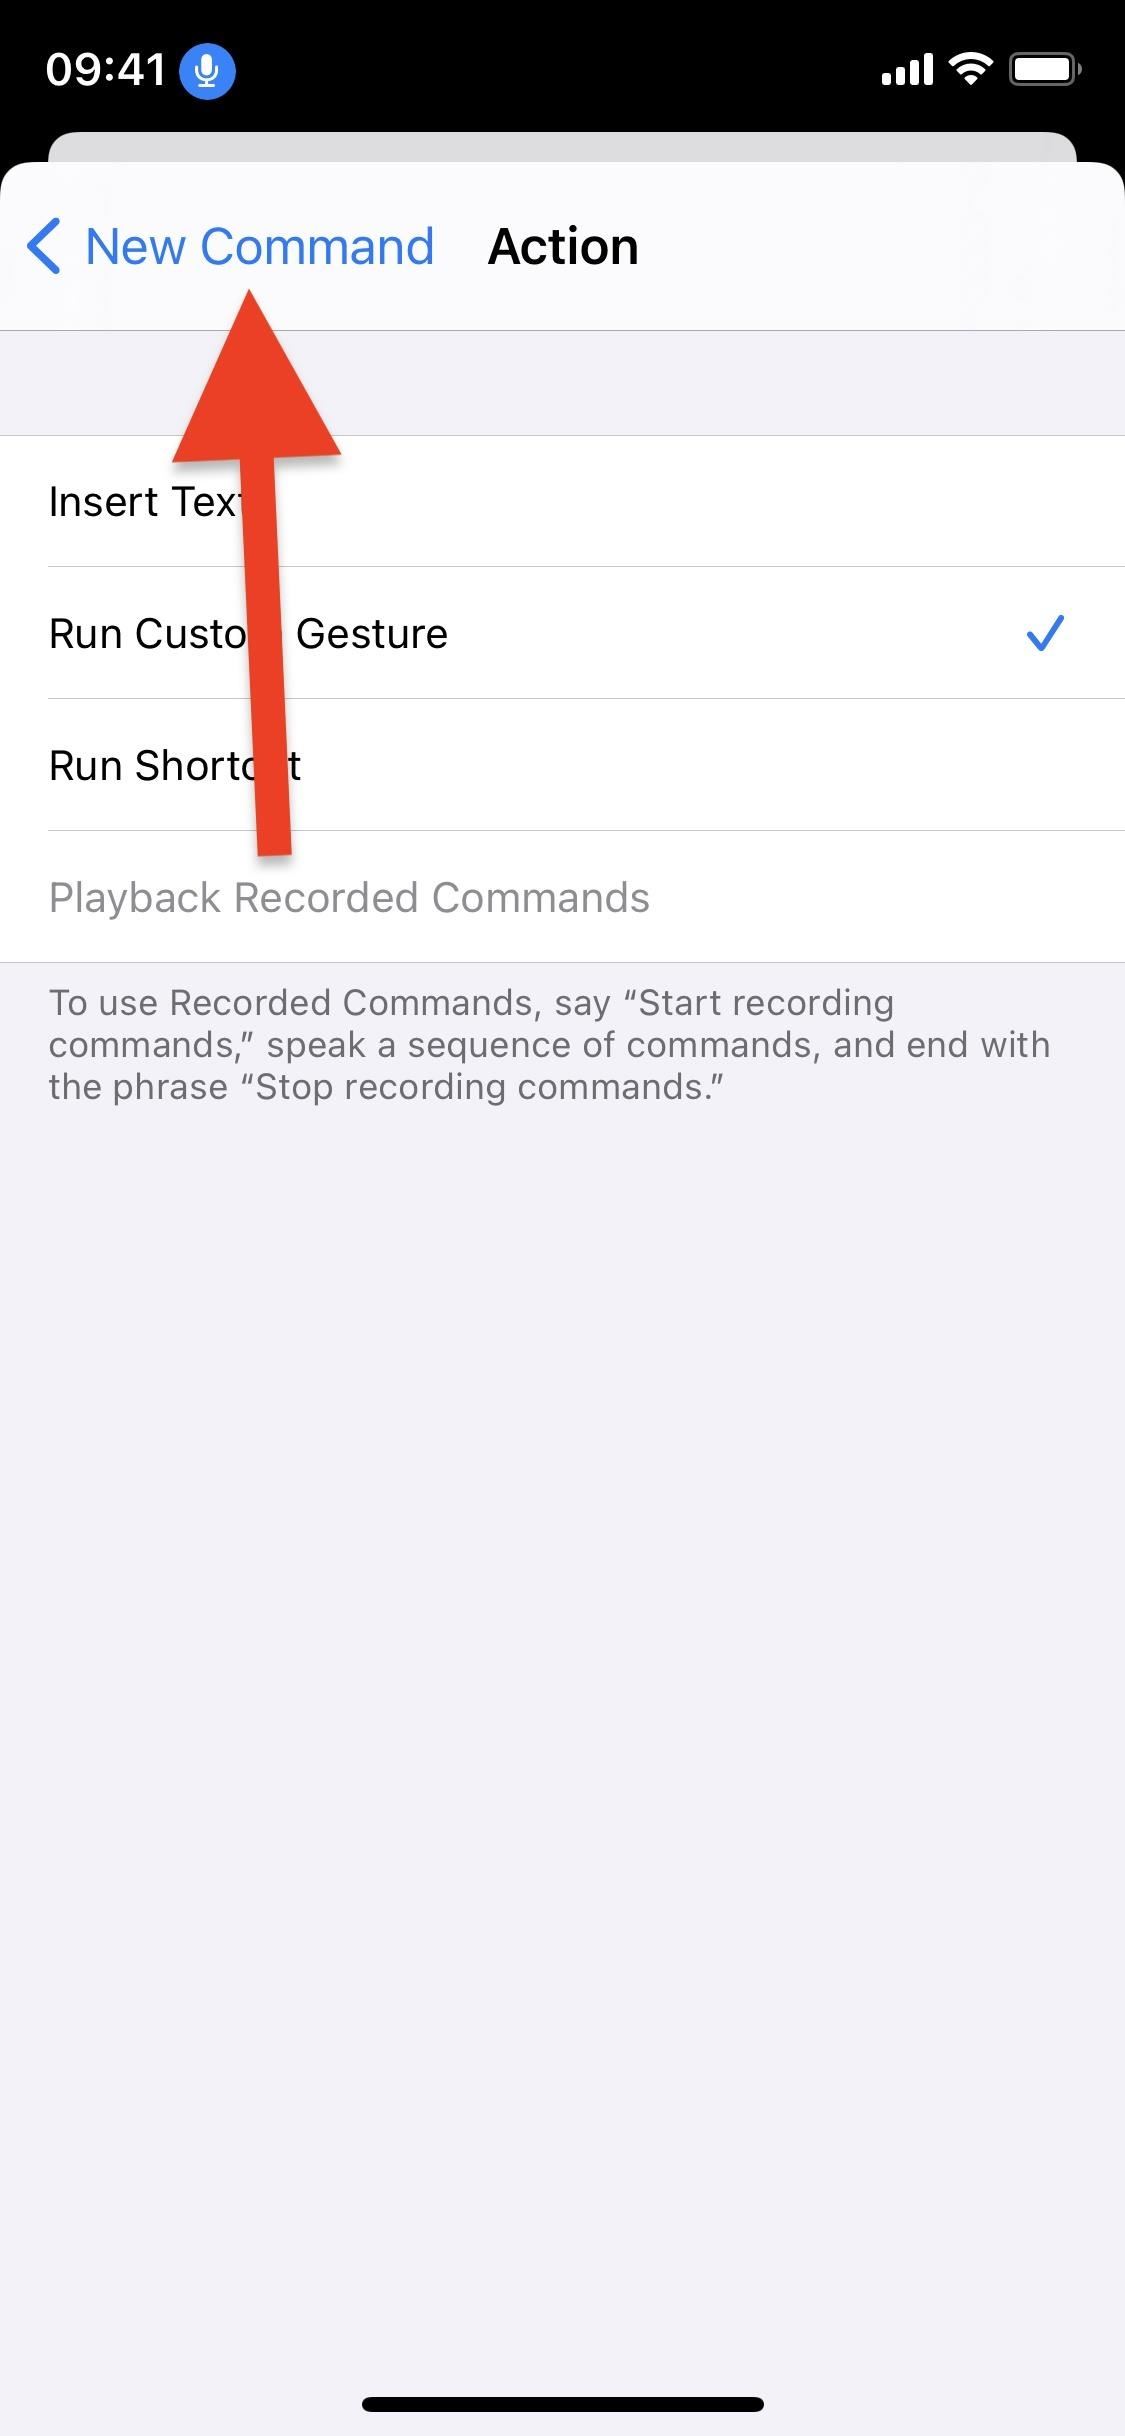
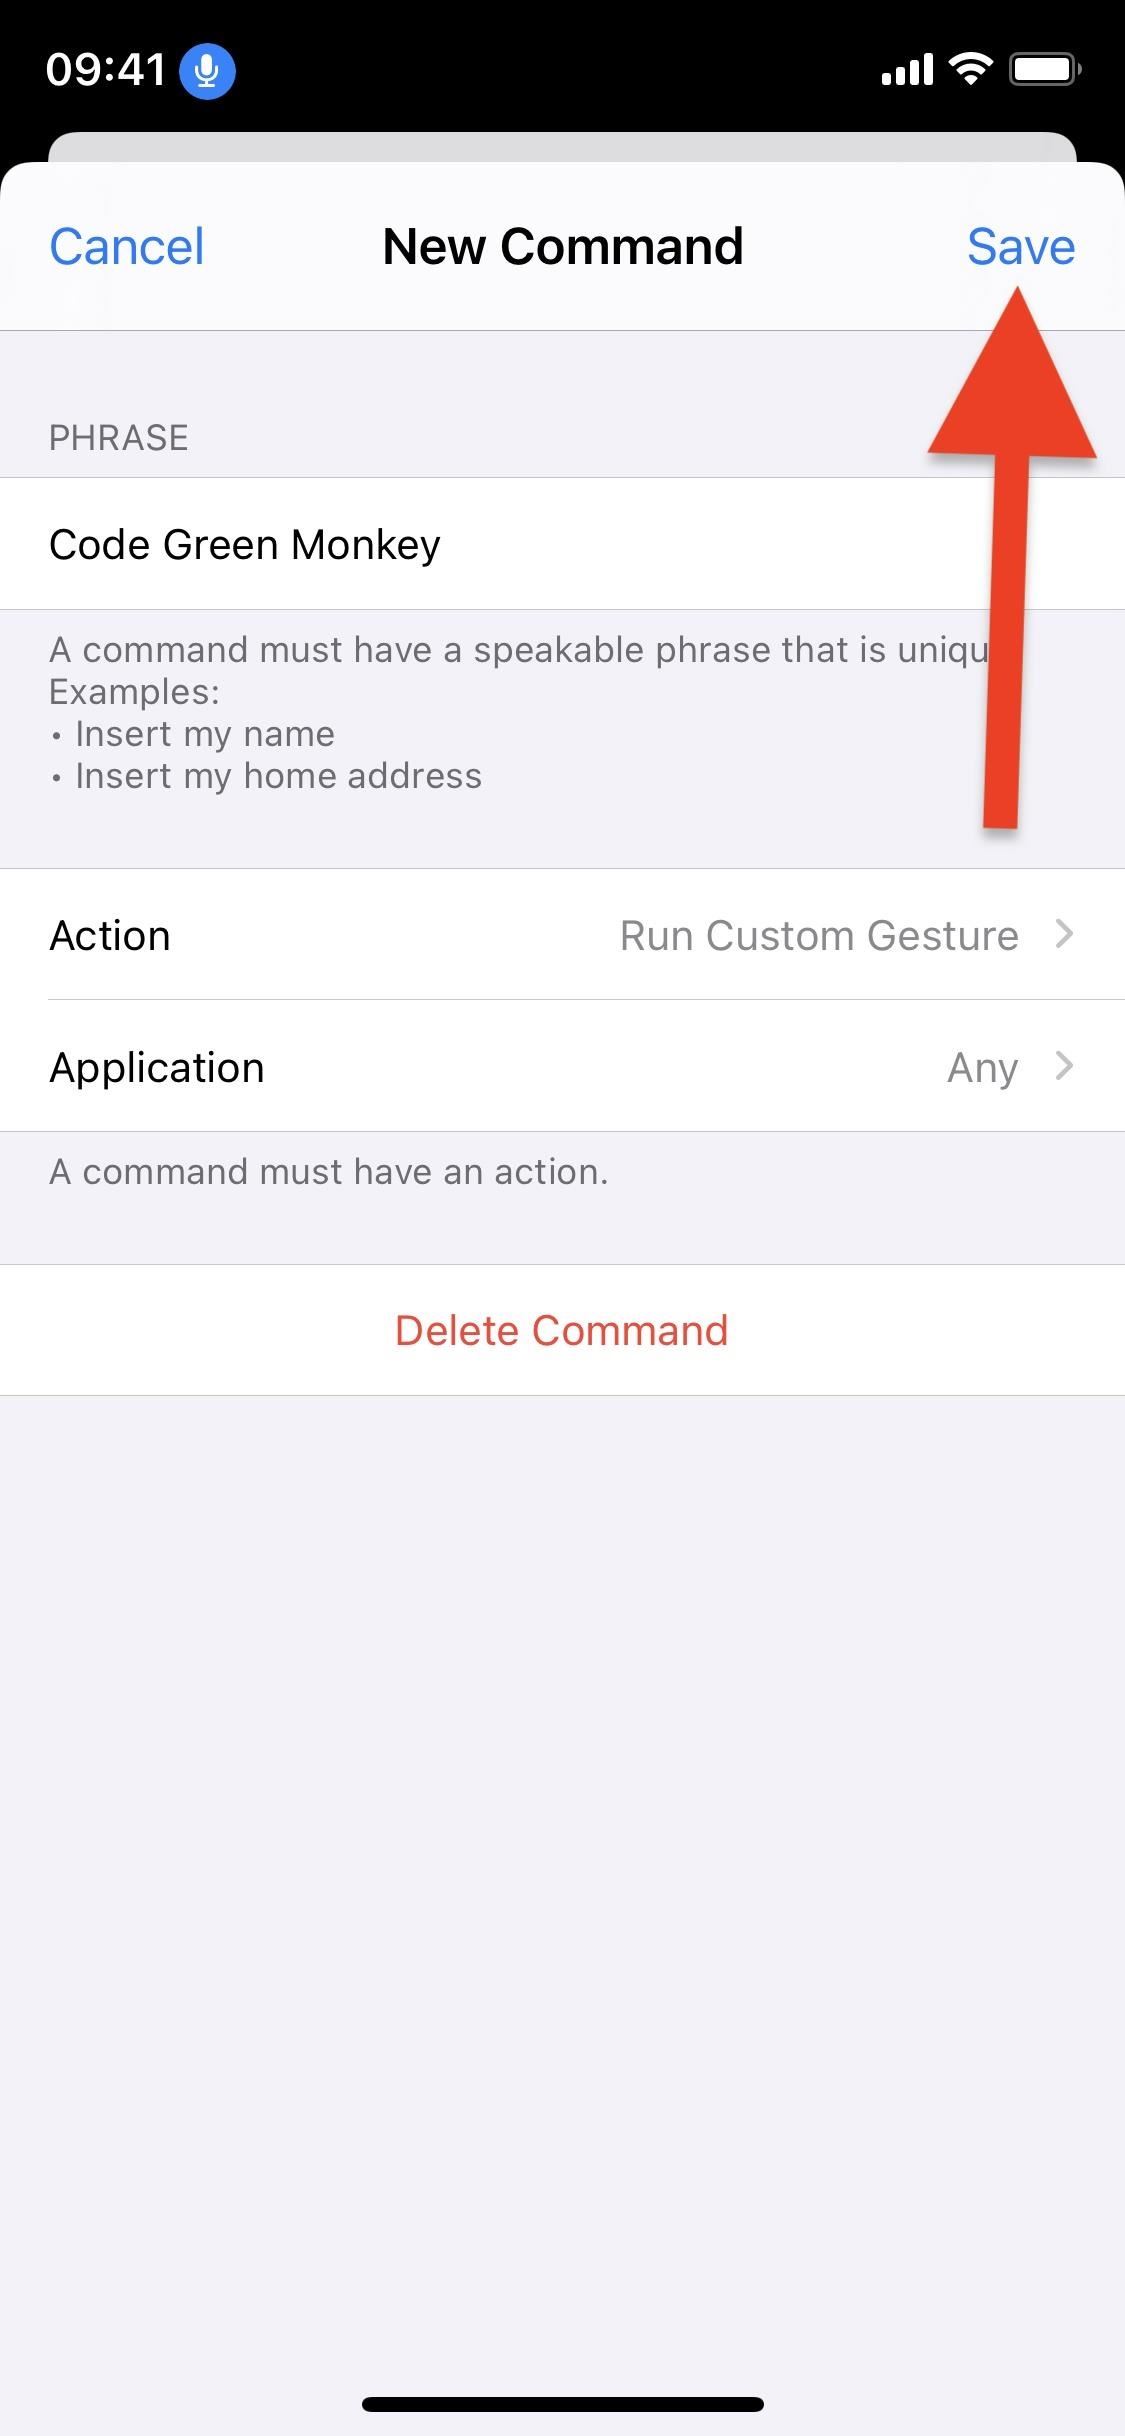
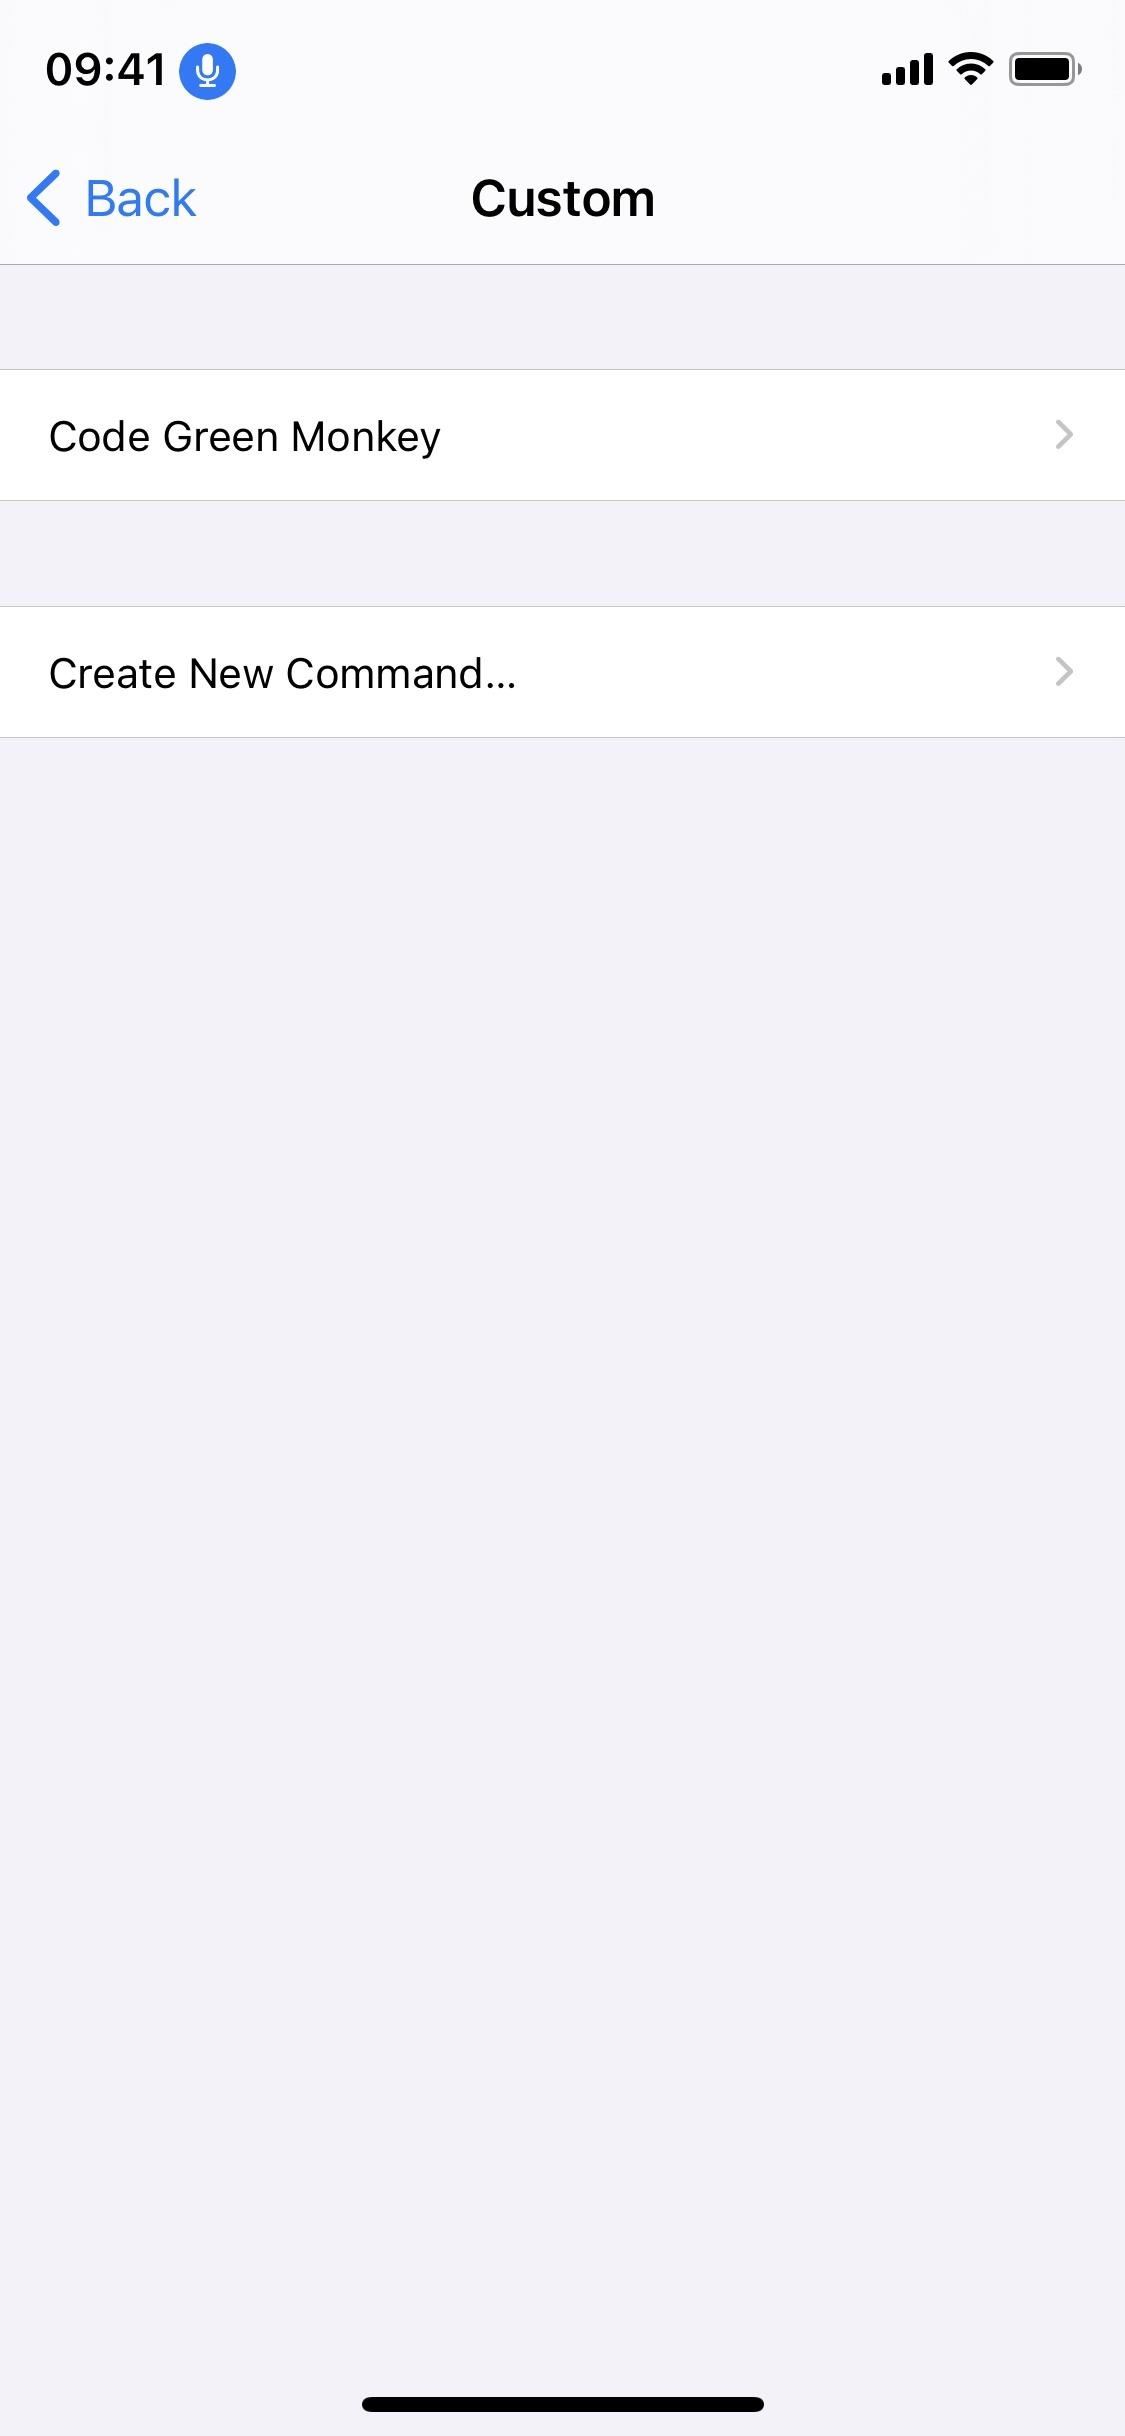
Although you just saved the gesture, you’ll need to also save the command. Tap on “New Command” to go back, then hit “Save” on the New Command page. You should then see your new custom command listed with your phrase as its title.
Step 5: Enable Voice Control
To take advantage of this iPhone-unlocking trick, you need to have Voice Control enabled. There are multiple ways you can do this, and each method below can also be used to disable Voice Control when you no longer need it.
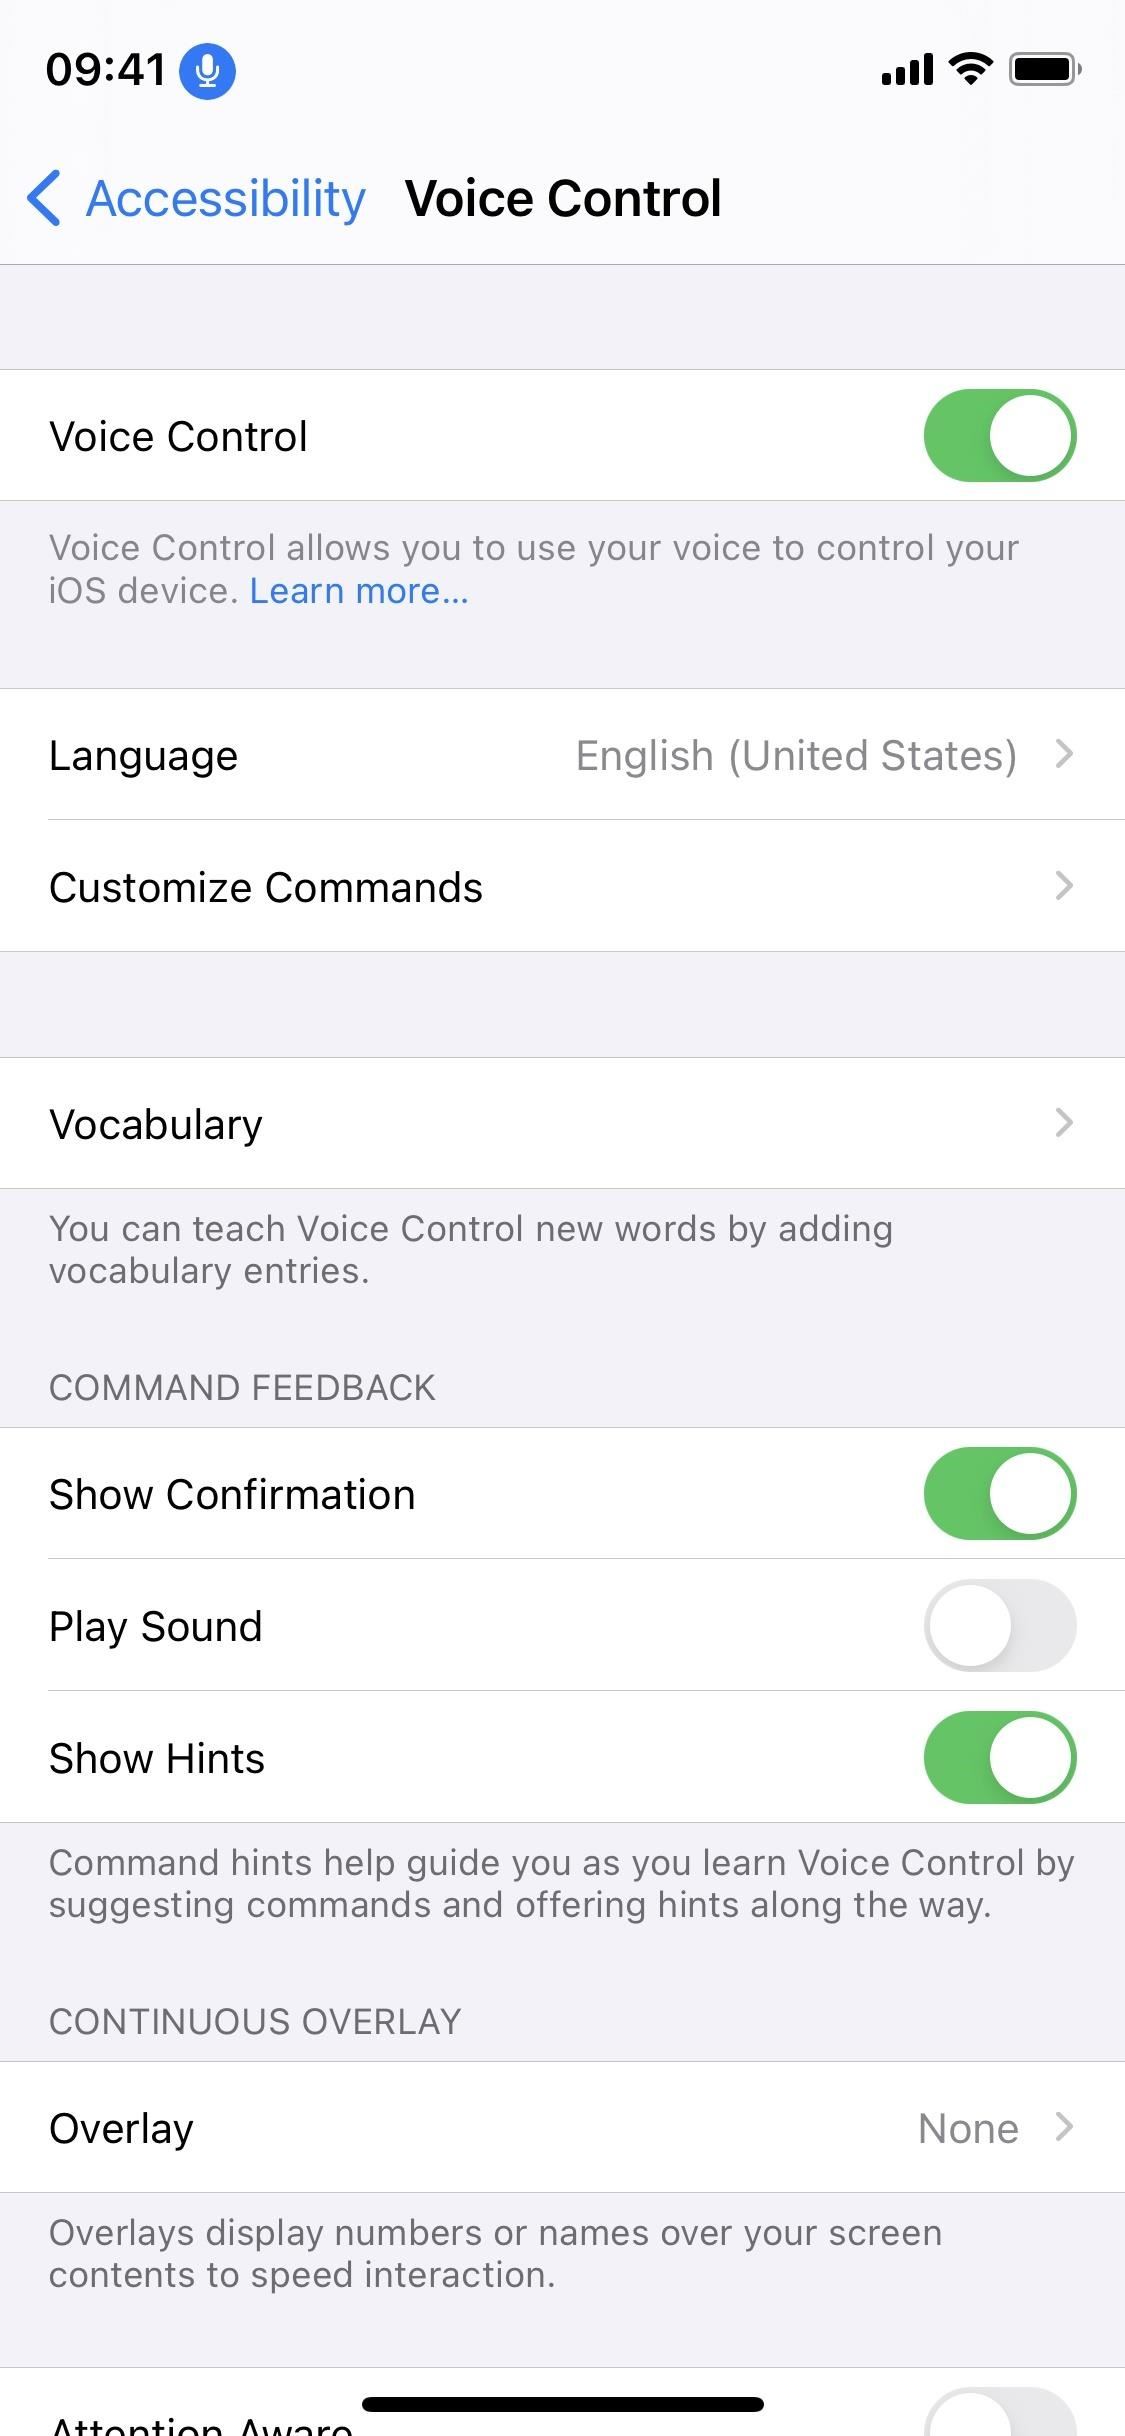
- Go to Settings –> Accessibility –> Voice Control, then toggle the “Voice Control” switch on.
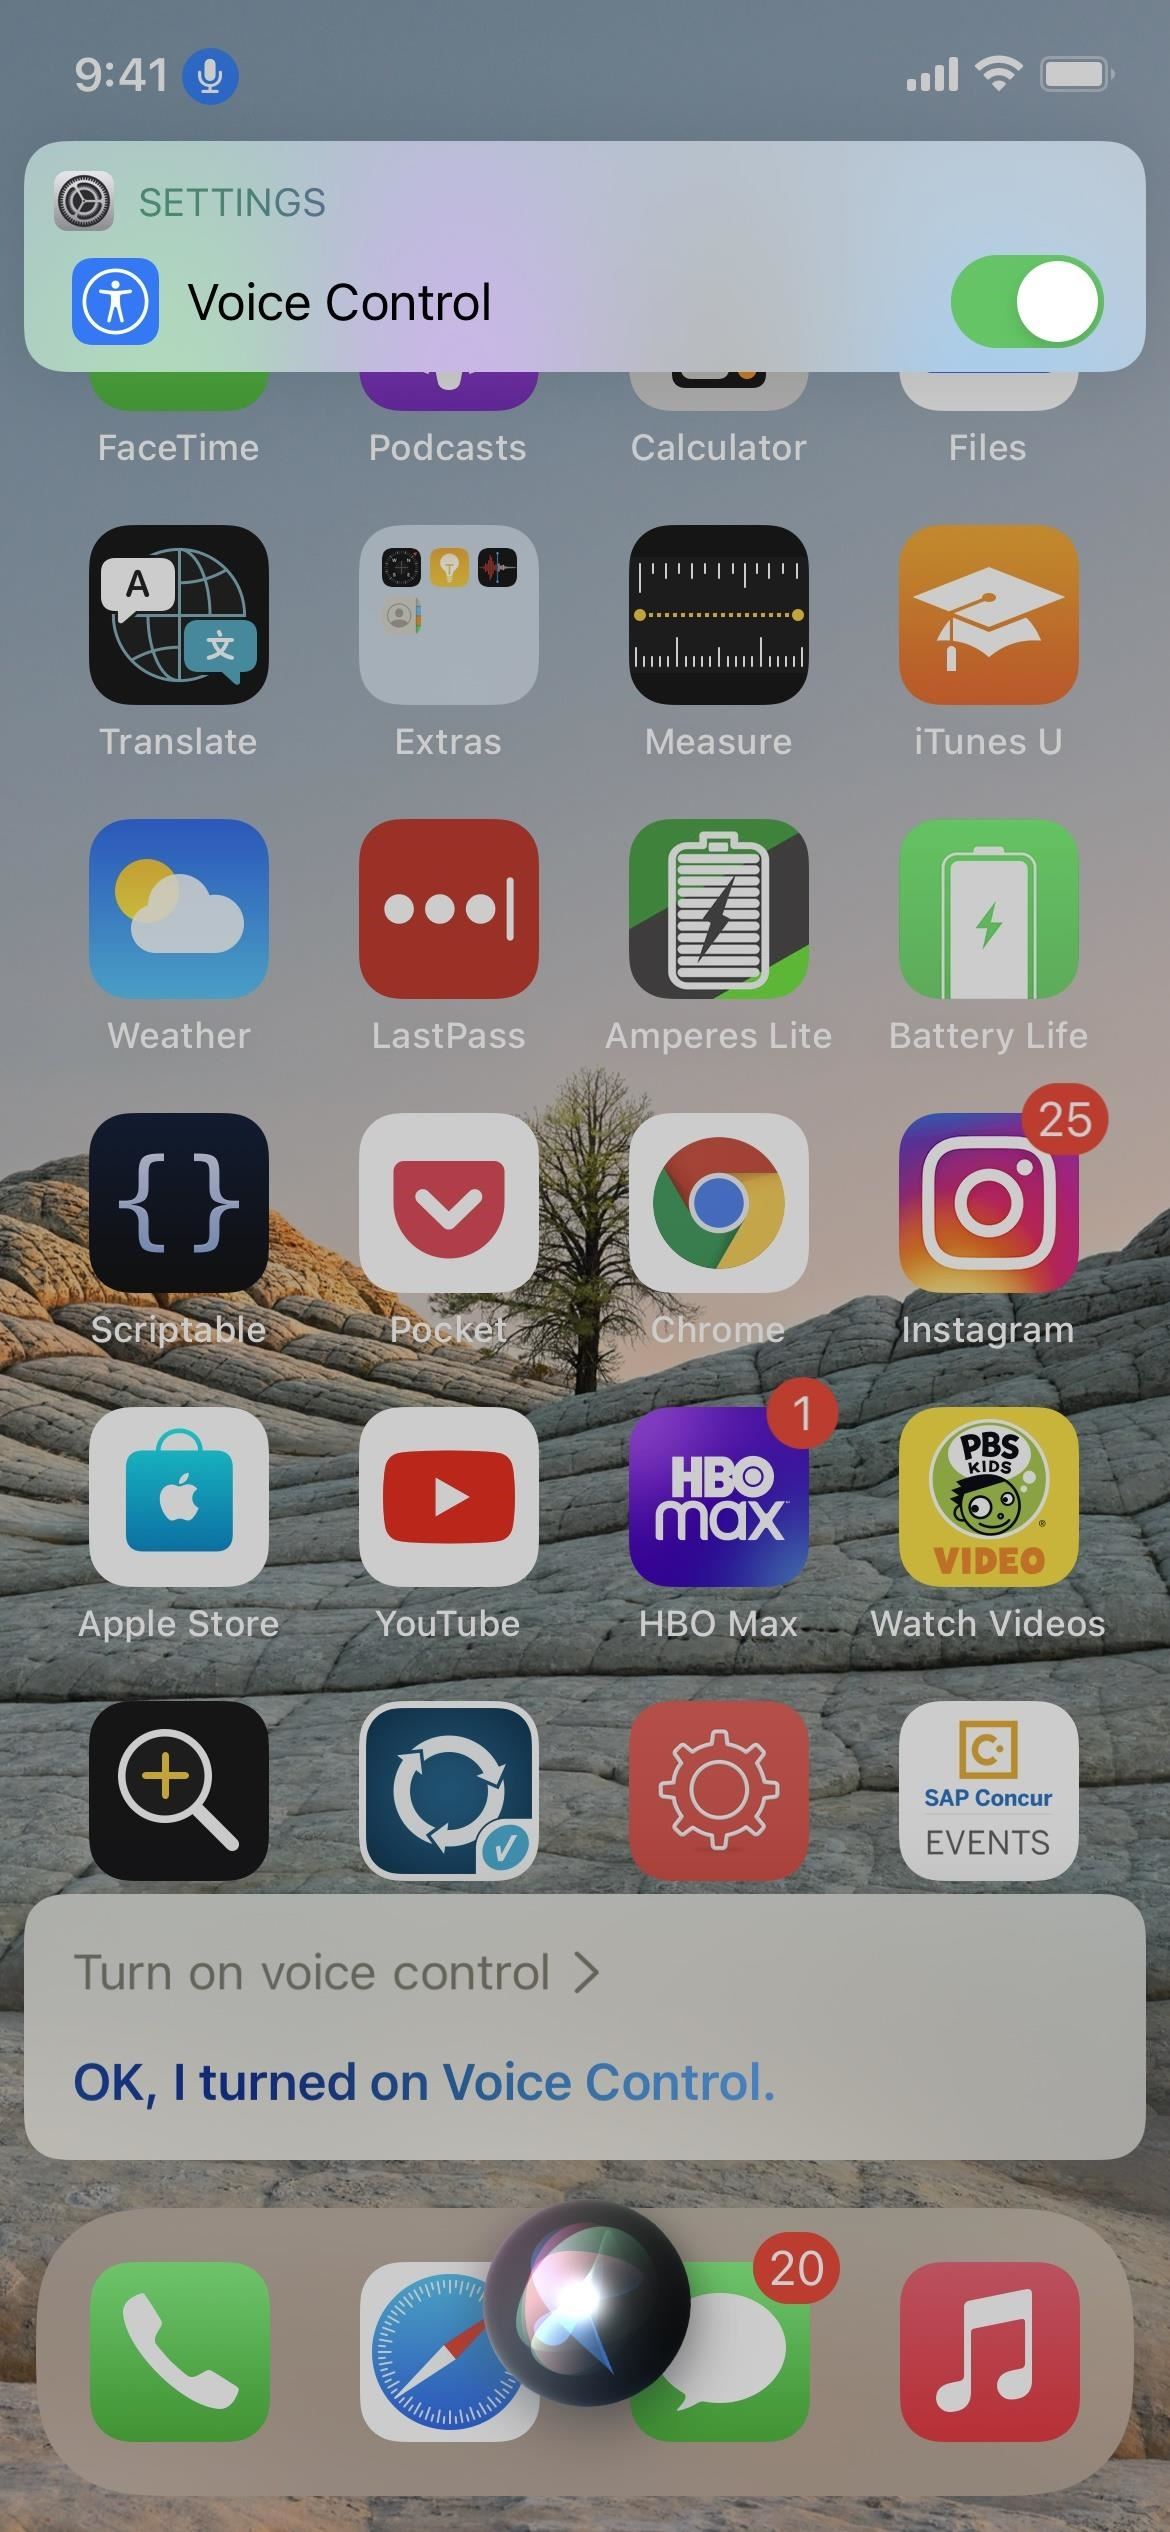
- Ask Siri to “Turn on Voice Control.”
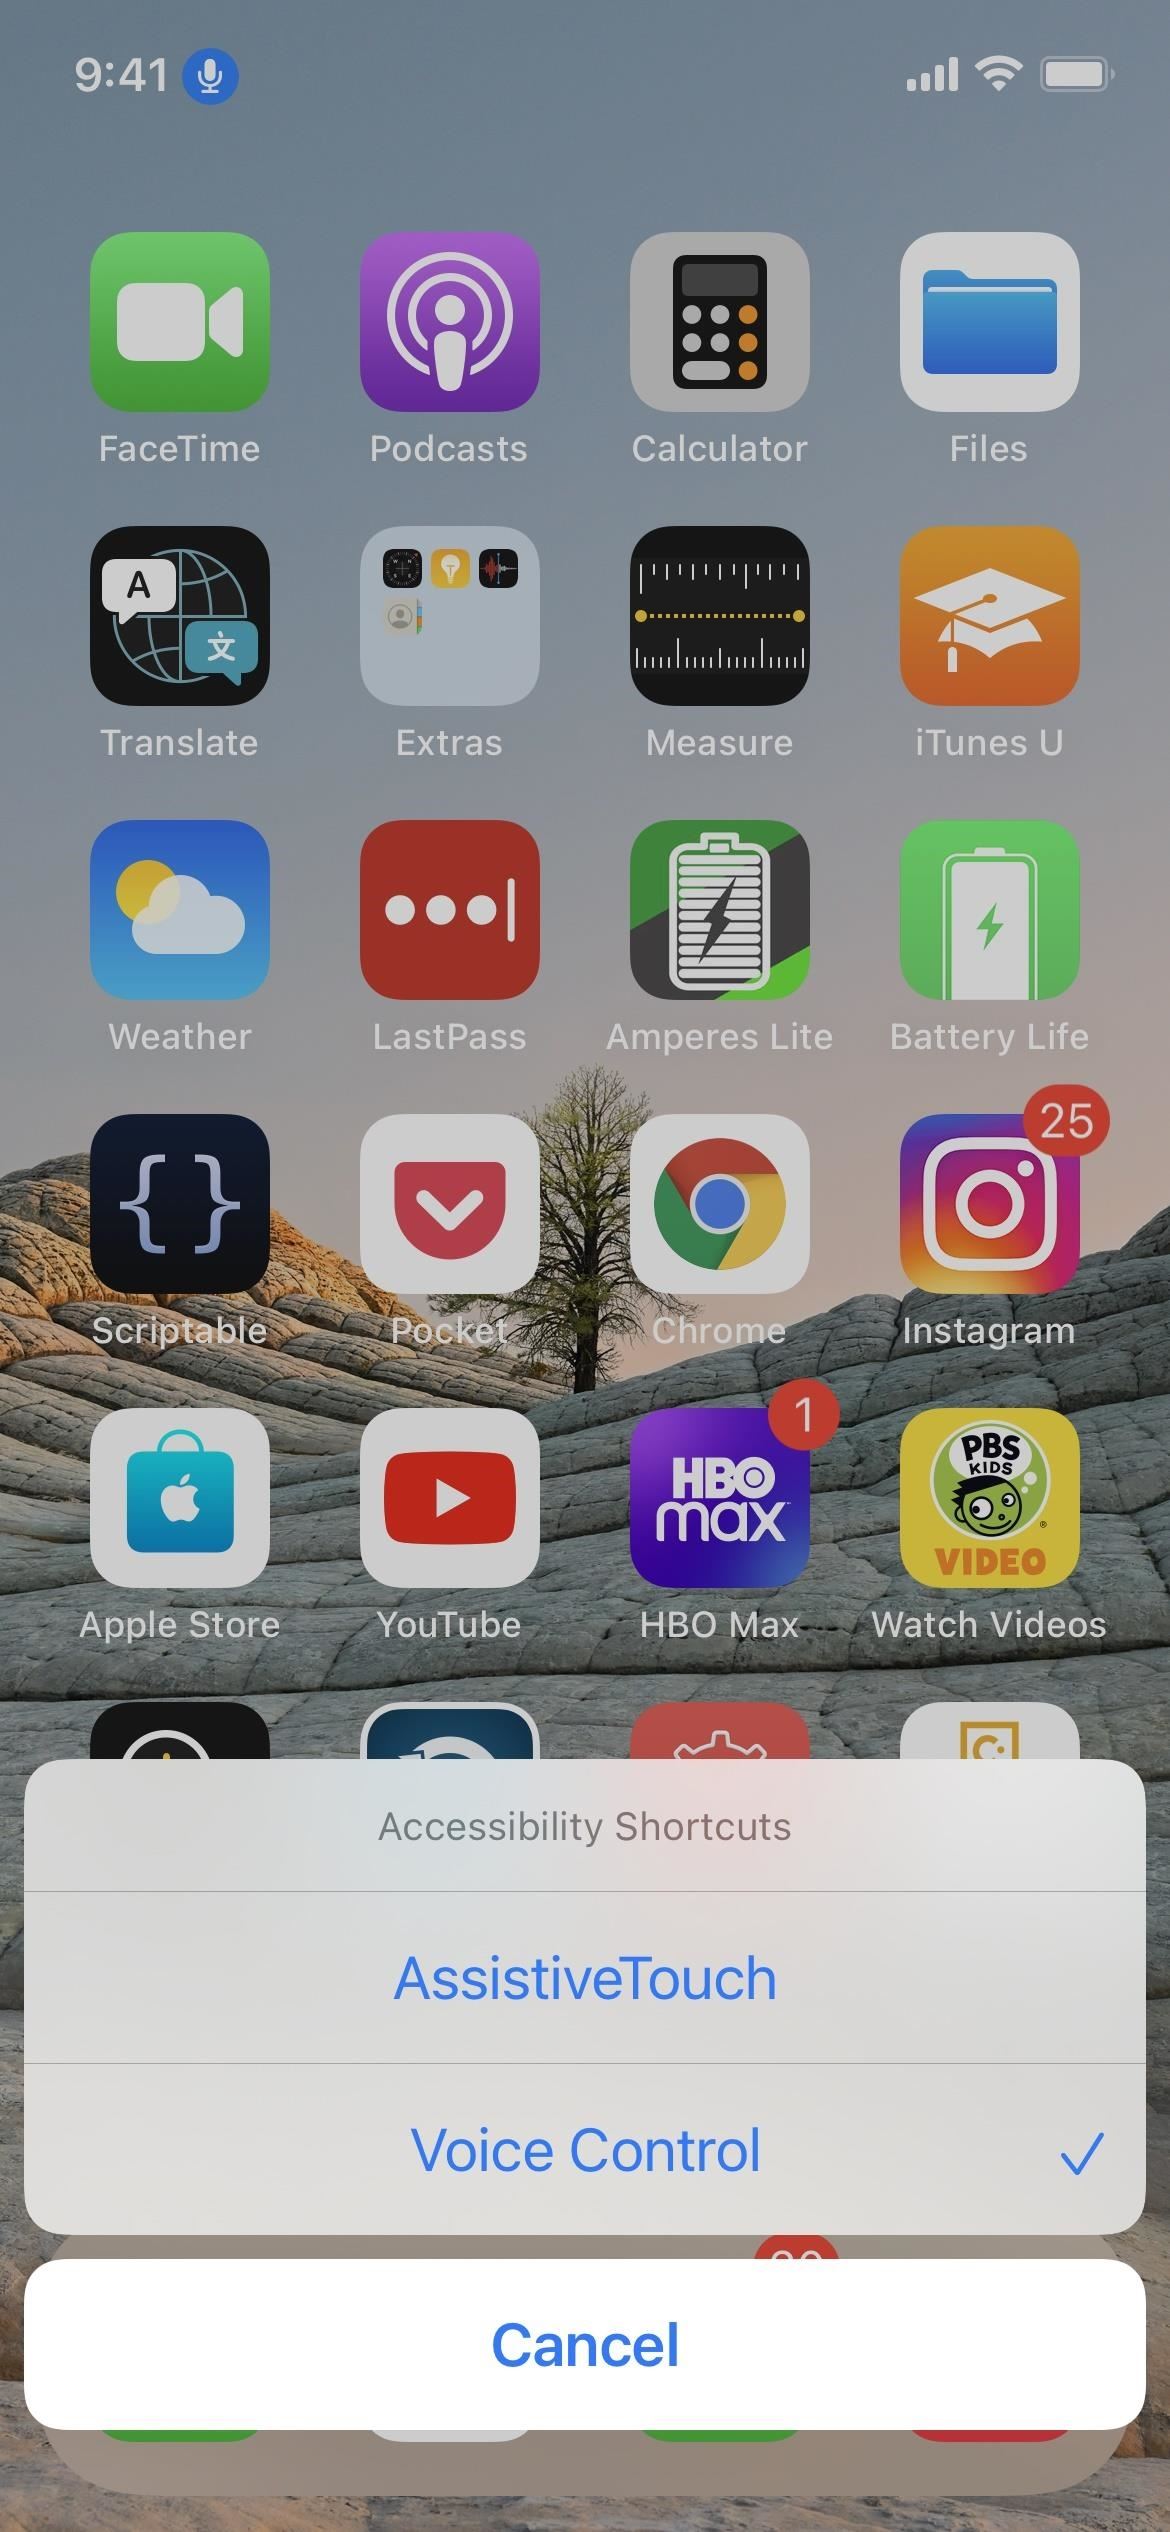
- Set up an Accessibility Shortcut. Go to Settings –> Accessibility –> Accessibility Shortcut, then check “Voice Control.” Then, any time you triple-click the Side or Home button, it will turn Voice Control on/off. If you have more than just Voice Control assigned to the shortcut, you’ll have to select it from the menu after triple-clicking.
A blue microphone icon will appear in your status bar, indicating that Voice Control is active and listening for your commands.
Step 6: Unlock Your iPhone with Your Voice
Now it’s time to use your secret phrase to run the command, emulate your gesture, and unlock your iPhone. Bring up the passcode screen on your iPhone however you want, then say your phrase. After a second or so, you should see the gesture appear on your screen, entering your passcode. After the gesture is finished, your iPhone should be unlocked, and you’ll also see a tiny notification indicating the command has successfully run.
What to Do When You Have a 6-Digit Passcode?
Unfortunately, Voice Control does not allow you to create a command with more than 5 gestures, meaning it’s not possible to use this feature to unlock an iPhone with a 6-digit passcode. However, what you can do is create one custom command to enter the first five or last five digits of your passcode, then use the “Tap” command to enter the last or first digit of the passcode.
Alternatively, you can create two different commands: one with the first half of the passcode and the other with the second half. How you split the gestures doesn’t matter (3 gestures + 3 gestures, 4 gestures + 2 gestures, etc.), but you must split the passcode in two.
When creating the two voice commands, give them each a distinctive phrase. Anything easy to guess will cause the command to go off when anyone around your iPhone says it, so keep it unique. Also, when recording the gesture, make sure to stop the recording as soon as you enter the gestures so that the command is short and concise (there’s a stop button in the bottom right). The shorter the command, the better.
Finally, to use the two voice commands in tandem, say the first one and allow it to enter the first half of your passcode. Then, give it a second or so and say the second voice command to enter the other half of the passcode. If the second voice command doesn’t work the first time you say it, give it another second and try again, because the voice commands cannot overlap. After you finish saying the second voice command, your iPhone should unlock.
Just updated your iPhone? You’ll find new emoji, enhanced security, podcast transcripts, Apple Cash virtual numbers, and other useful features. There are even new additions hidden within Safari. Find out what’s new and changed on your iPhone with the iOS 17.4 update.
“Hey there, just a heads-up: We’re part of the Amazon affiliate program, so when you buy through links on our site, we may earn a small commission. But don’t worry, it doesn’t cost you anything extra and helps us keep the lights on. Thanks for your support!”


