A custom recovery is a very powerful tool. You can flash ZIPs that modify your Android device in ways that not even root can accomplish, and of course you can use it to install custom ROMs. But when you’re applying all of these cool mods, there’s always a chance that something could go wrong, and you might even end up bricking your device.
But with TWRP recovery, the NANDroid backup feature makes sure that all is never lost, even in the bleakest situations. Once you’ve created a backup, you’ll always have peace of mind knowing that if anything goes wrong, you’ll be able to restore all of your apps and settings to working order in no time. It’s something every custom recovery user should take the time to do, so I’ll show you how it works below.
Creating a NANDroid Backup
First, start by booting your phone into TWRP (of course this means you’ll need to have TWRP installed in the first place). This process will vary depending on your device, but for most phones, start by powering the device completely off. When the screen goes black, press and hold the volume down and power buttons simultaneously. If that doesn’t do it for you, let me know your phone model in the comments.
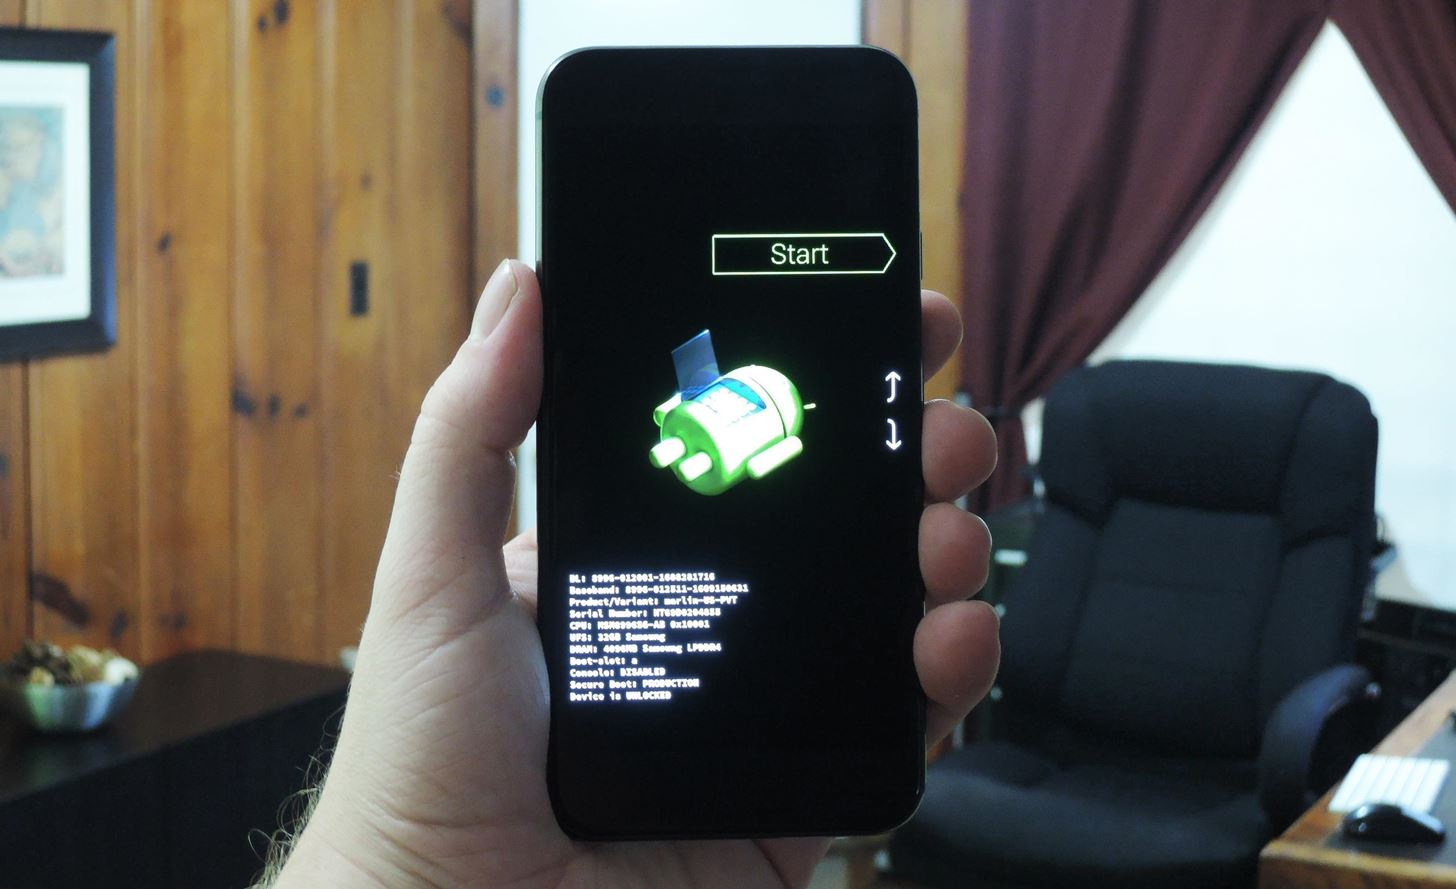
Within a few seconds, you’ll be greeted by Android’s bootloader menu (pictured below). From here, use your volume buttons to highlight the “Recovery Mode” option, then press the power button to select it.
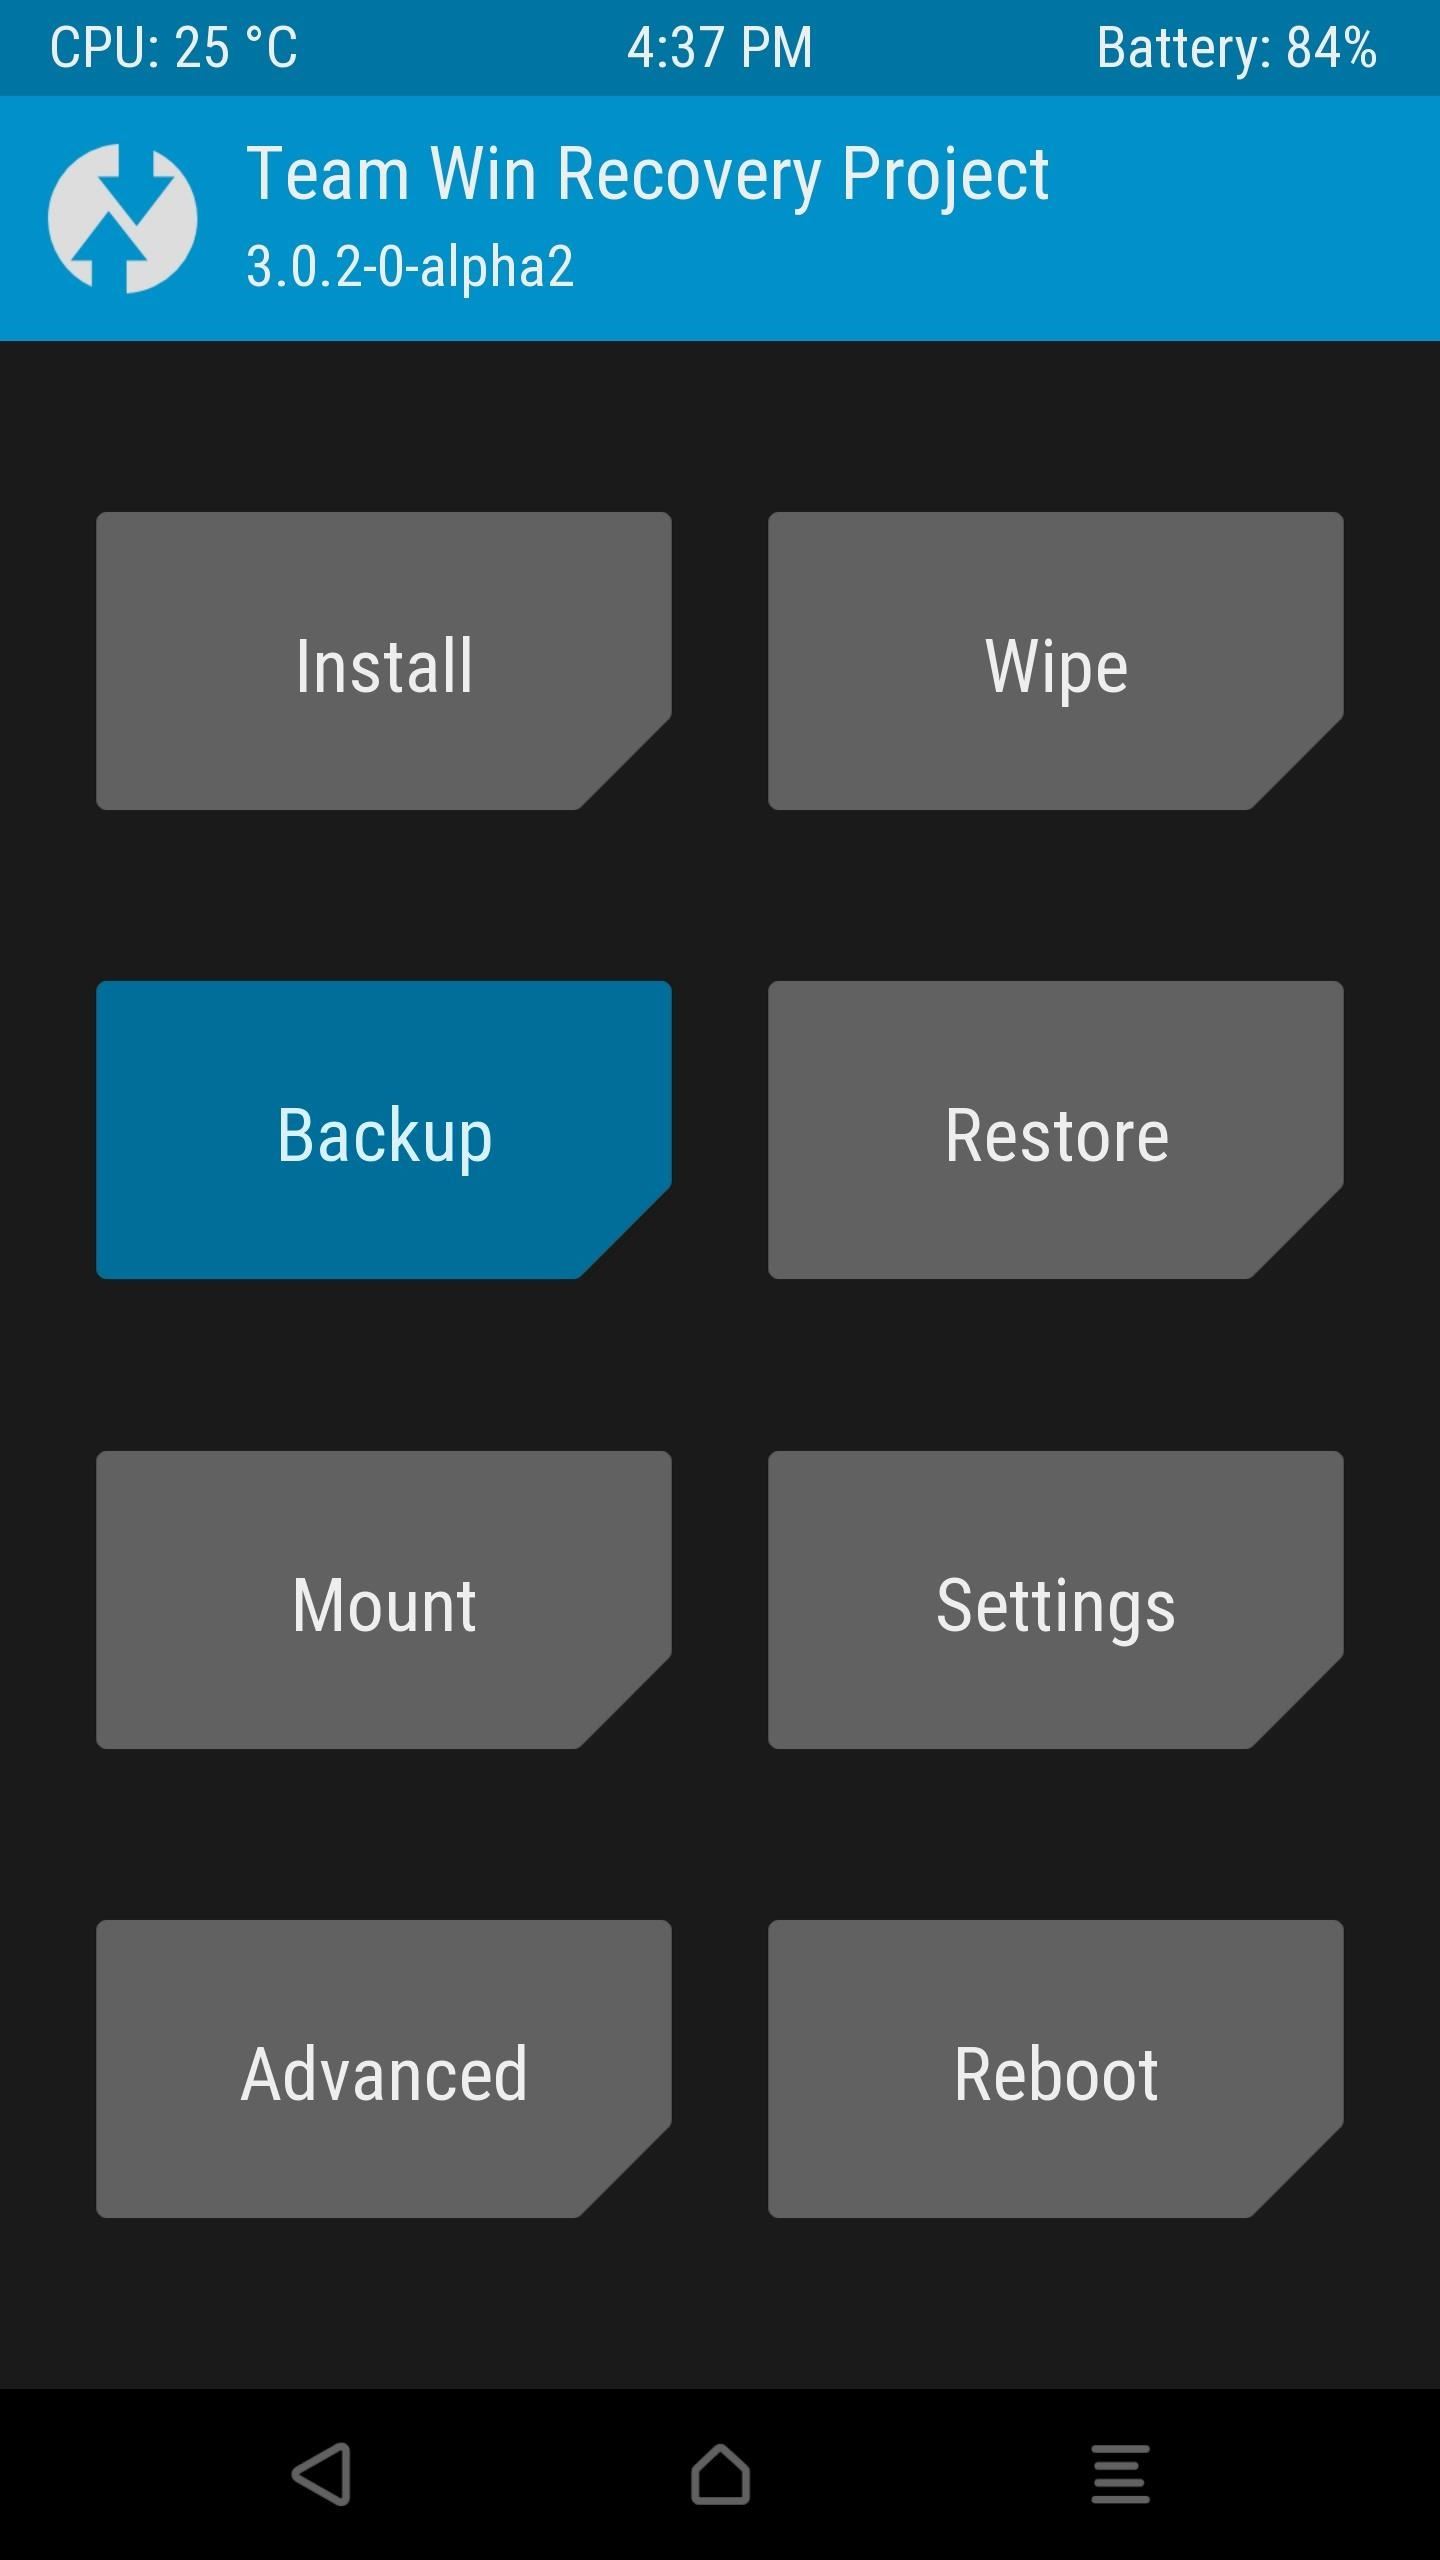
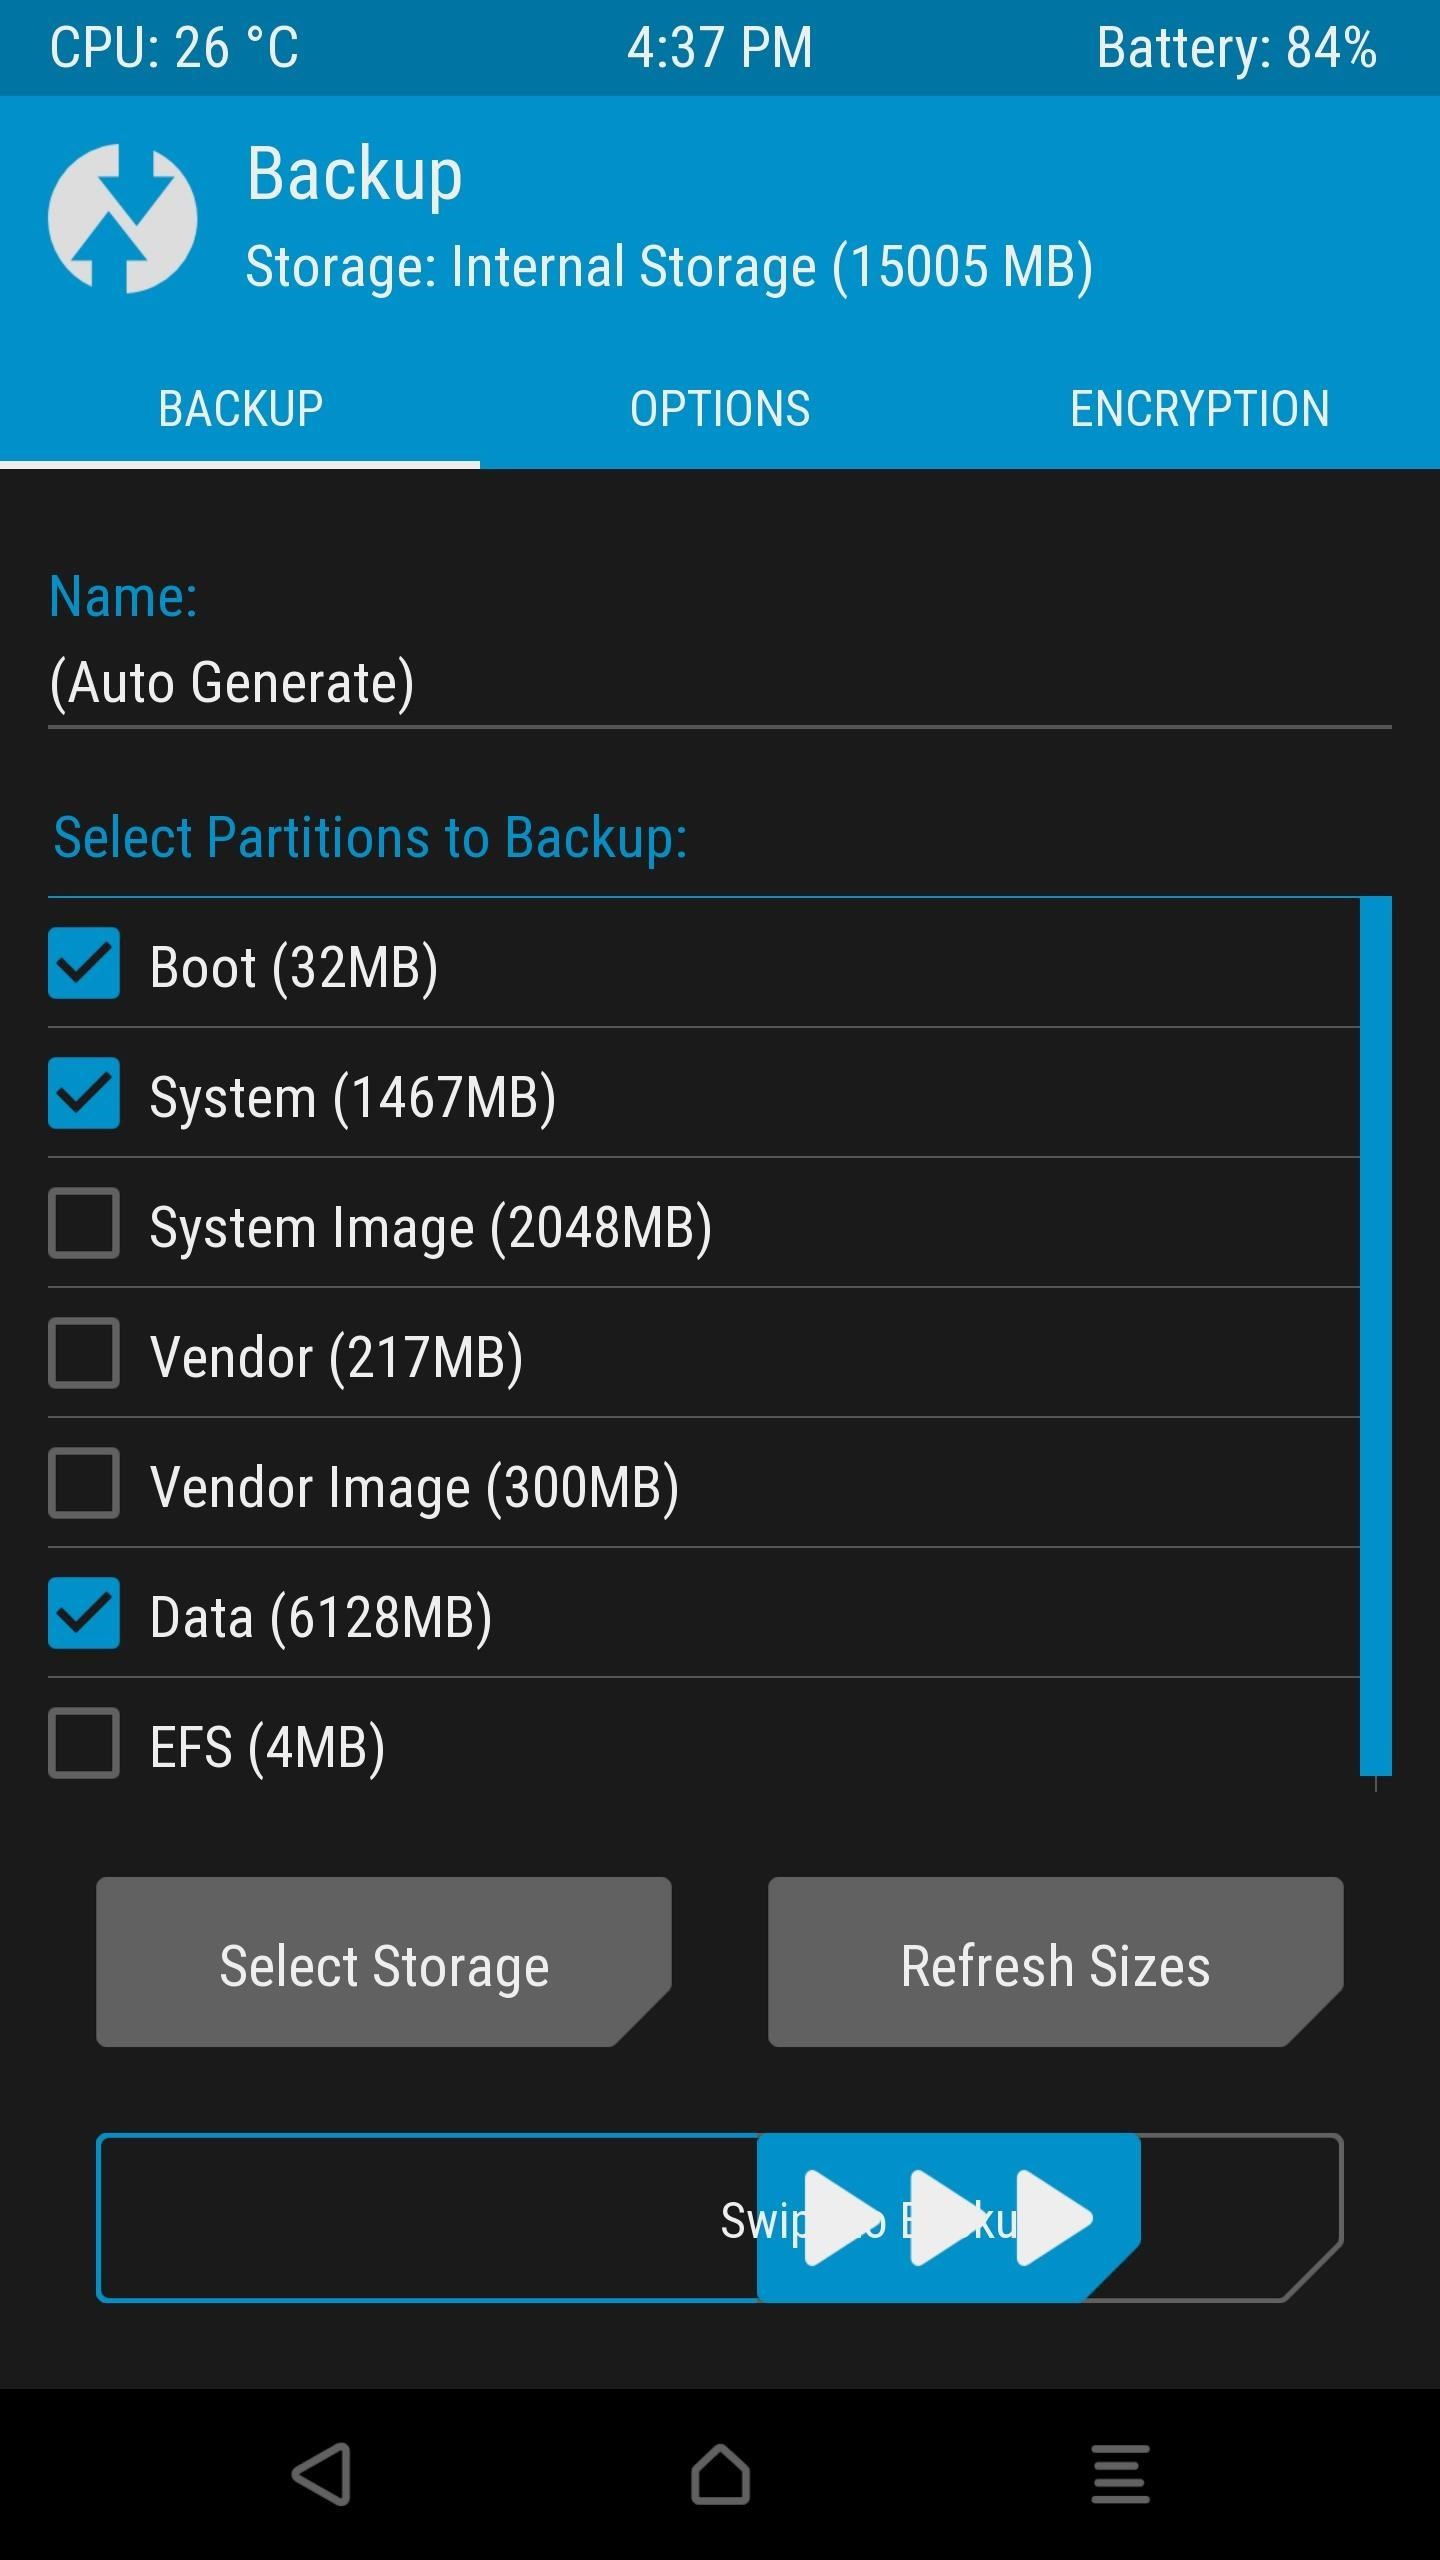
Next, from TWRP’s main menu, start by tapping the “Backup” button. After that, you see a list of check boxes—make sure that the “Boot,” “System,” and “Data” options are selected here. Finally, just swipe the slider at the bottom of the screen to start the backup process, which can take as long as 15 minutes. When it’s done, simply tap “Reboot System” to wrap things up.
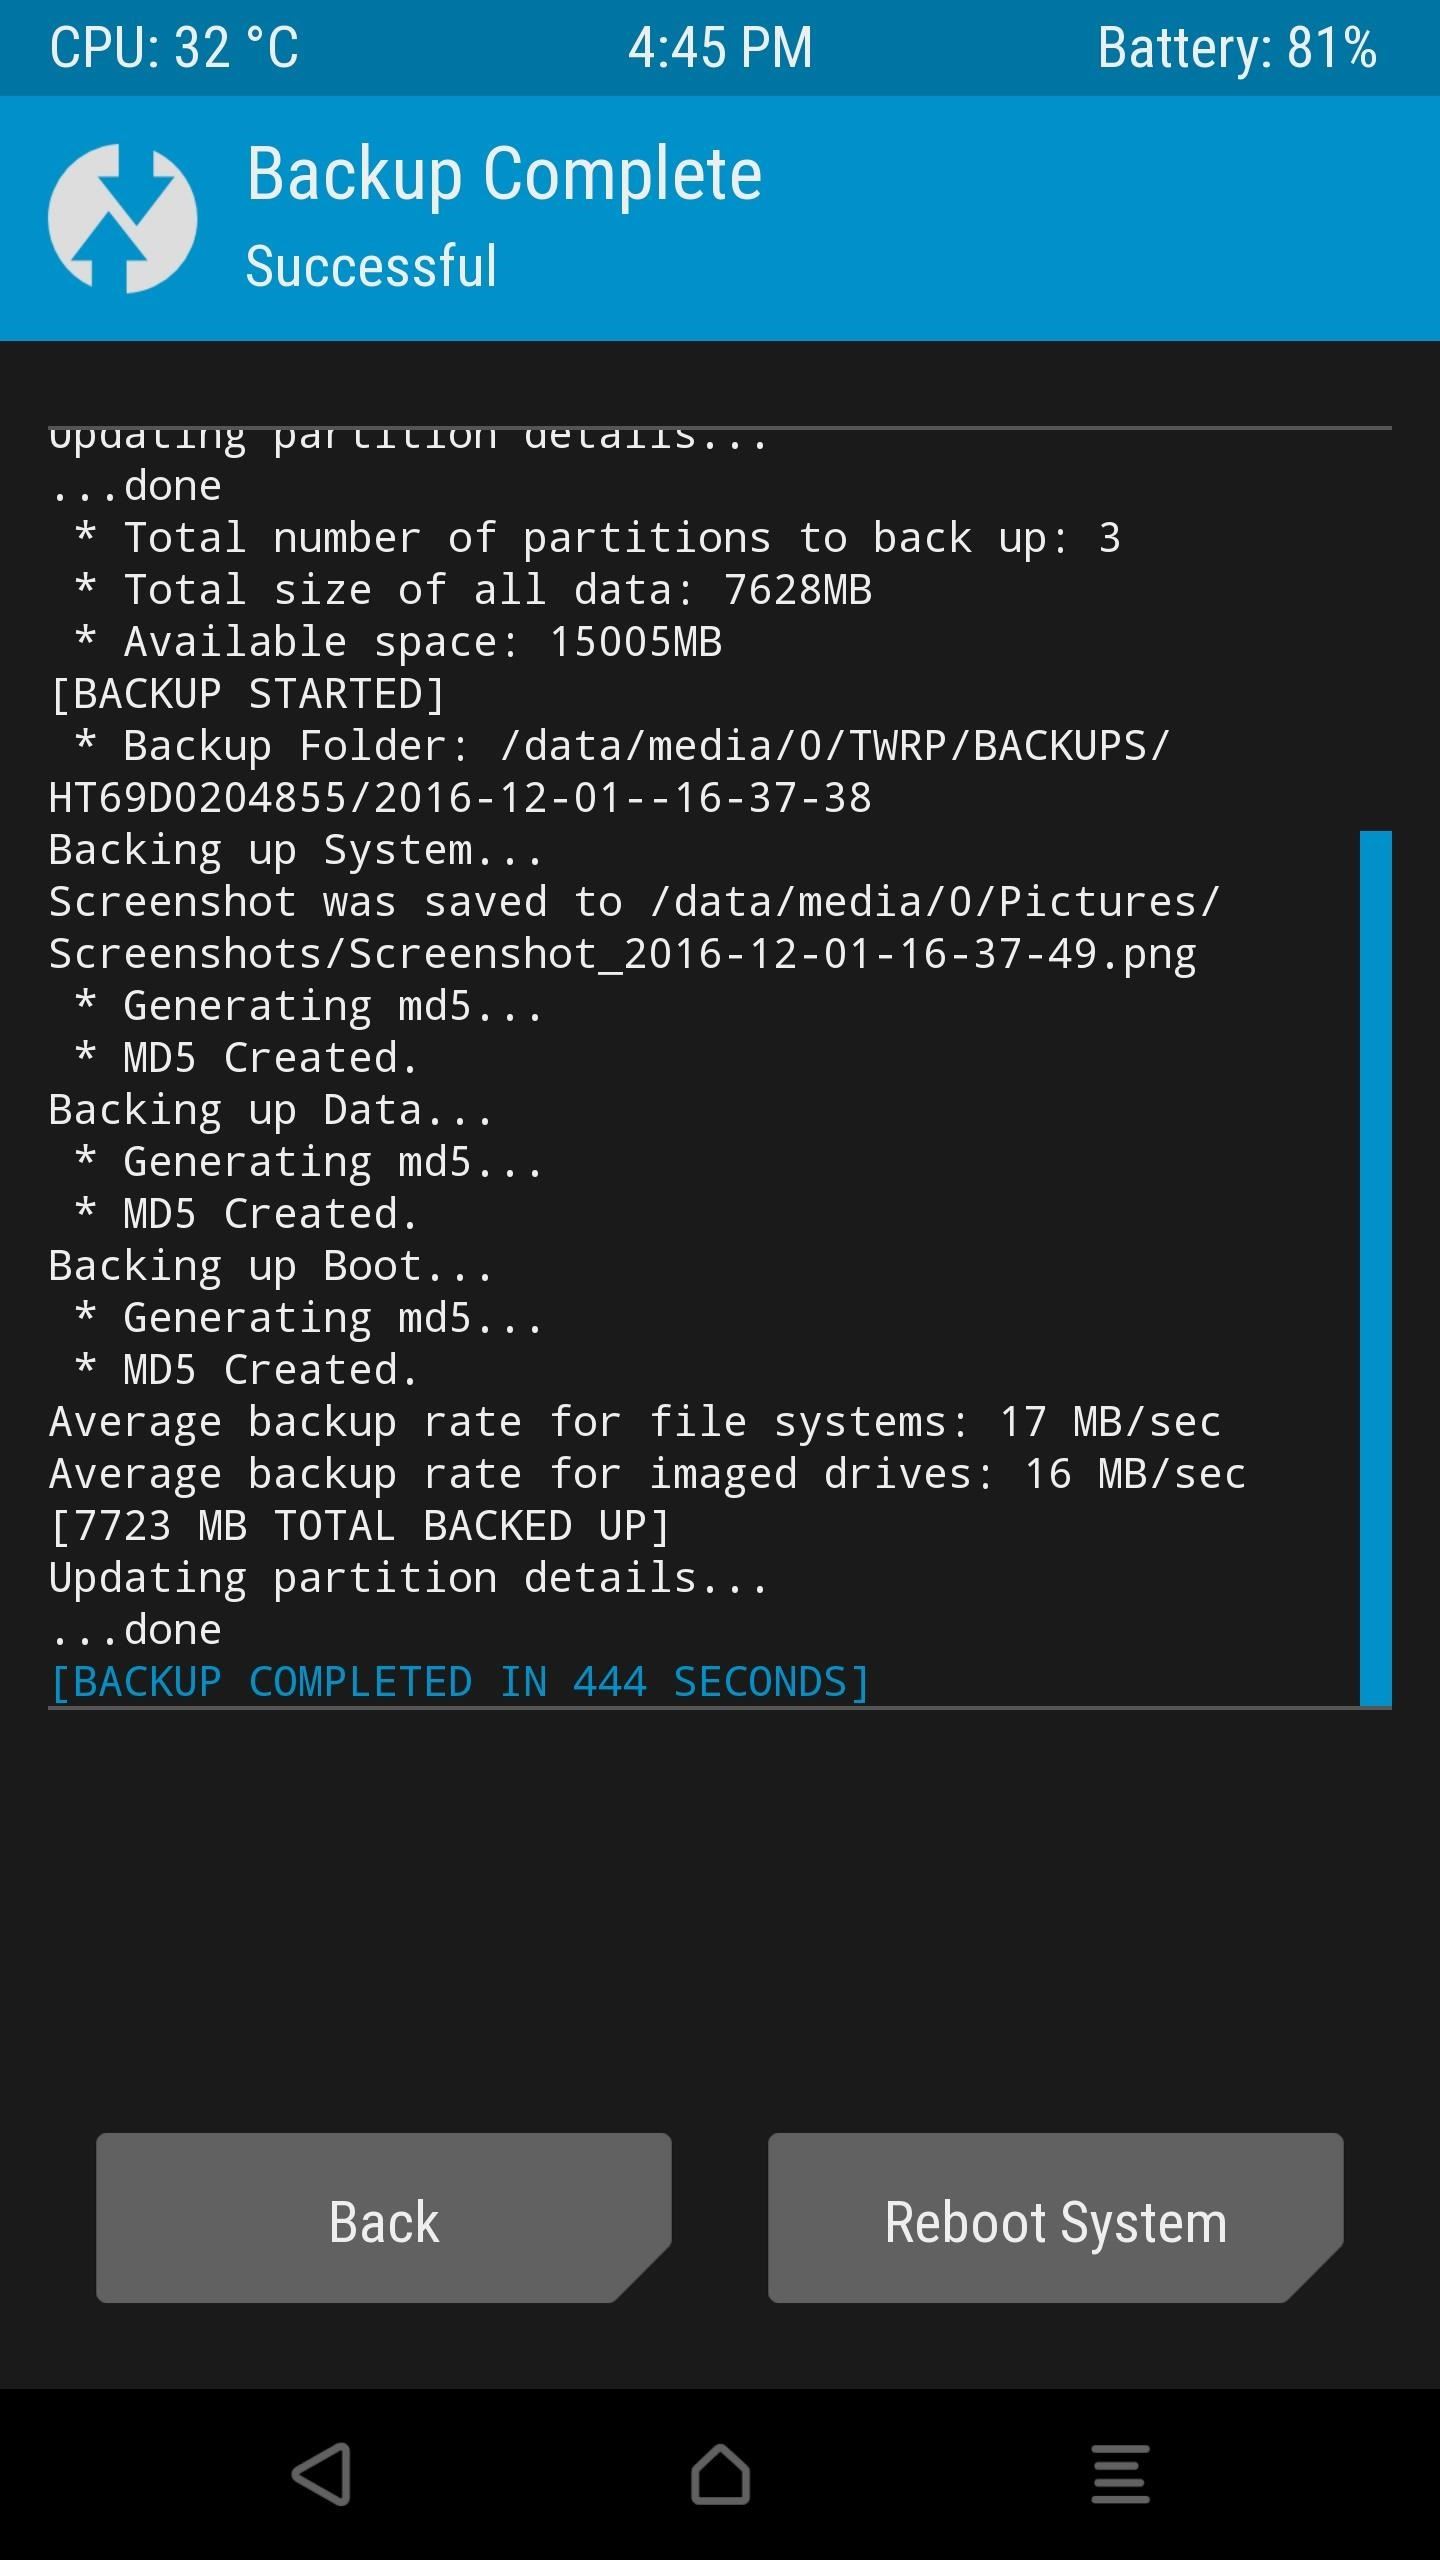
At this point, you can rest a bit easier knowing that your ROM, apps, and all associated data are safely backed up (note that files saved on your SD card or internal storage are not included in the backup). You’ll want to repeat this process every so often to ensure that you always have a recent NANDroid backup on standby.
Restoring a NANDroid Backup
Should you ever need to fix a software problem with your phone, your NANDroid backup serves as a restore point. That means that when you restore the backup, every setting, app, and Android-related file will revert to the way it was when you made the backup.
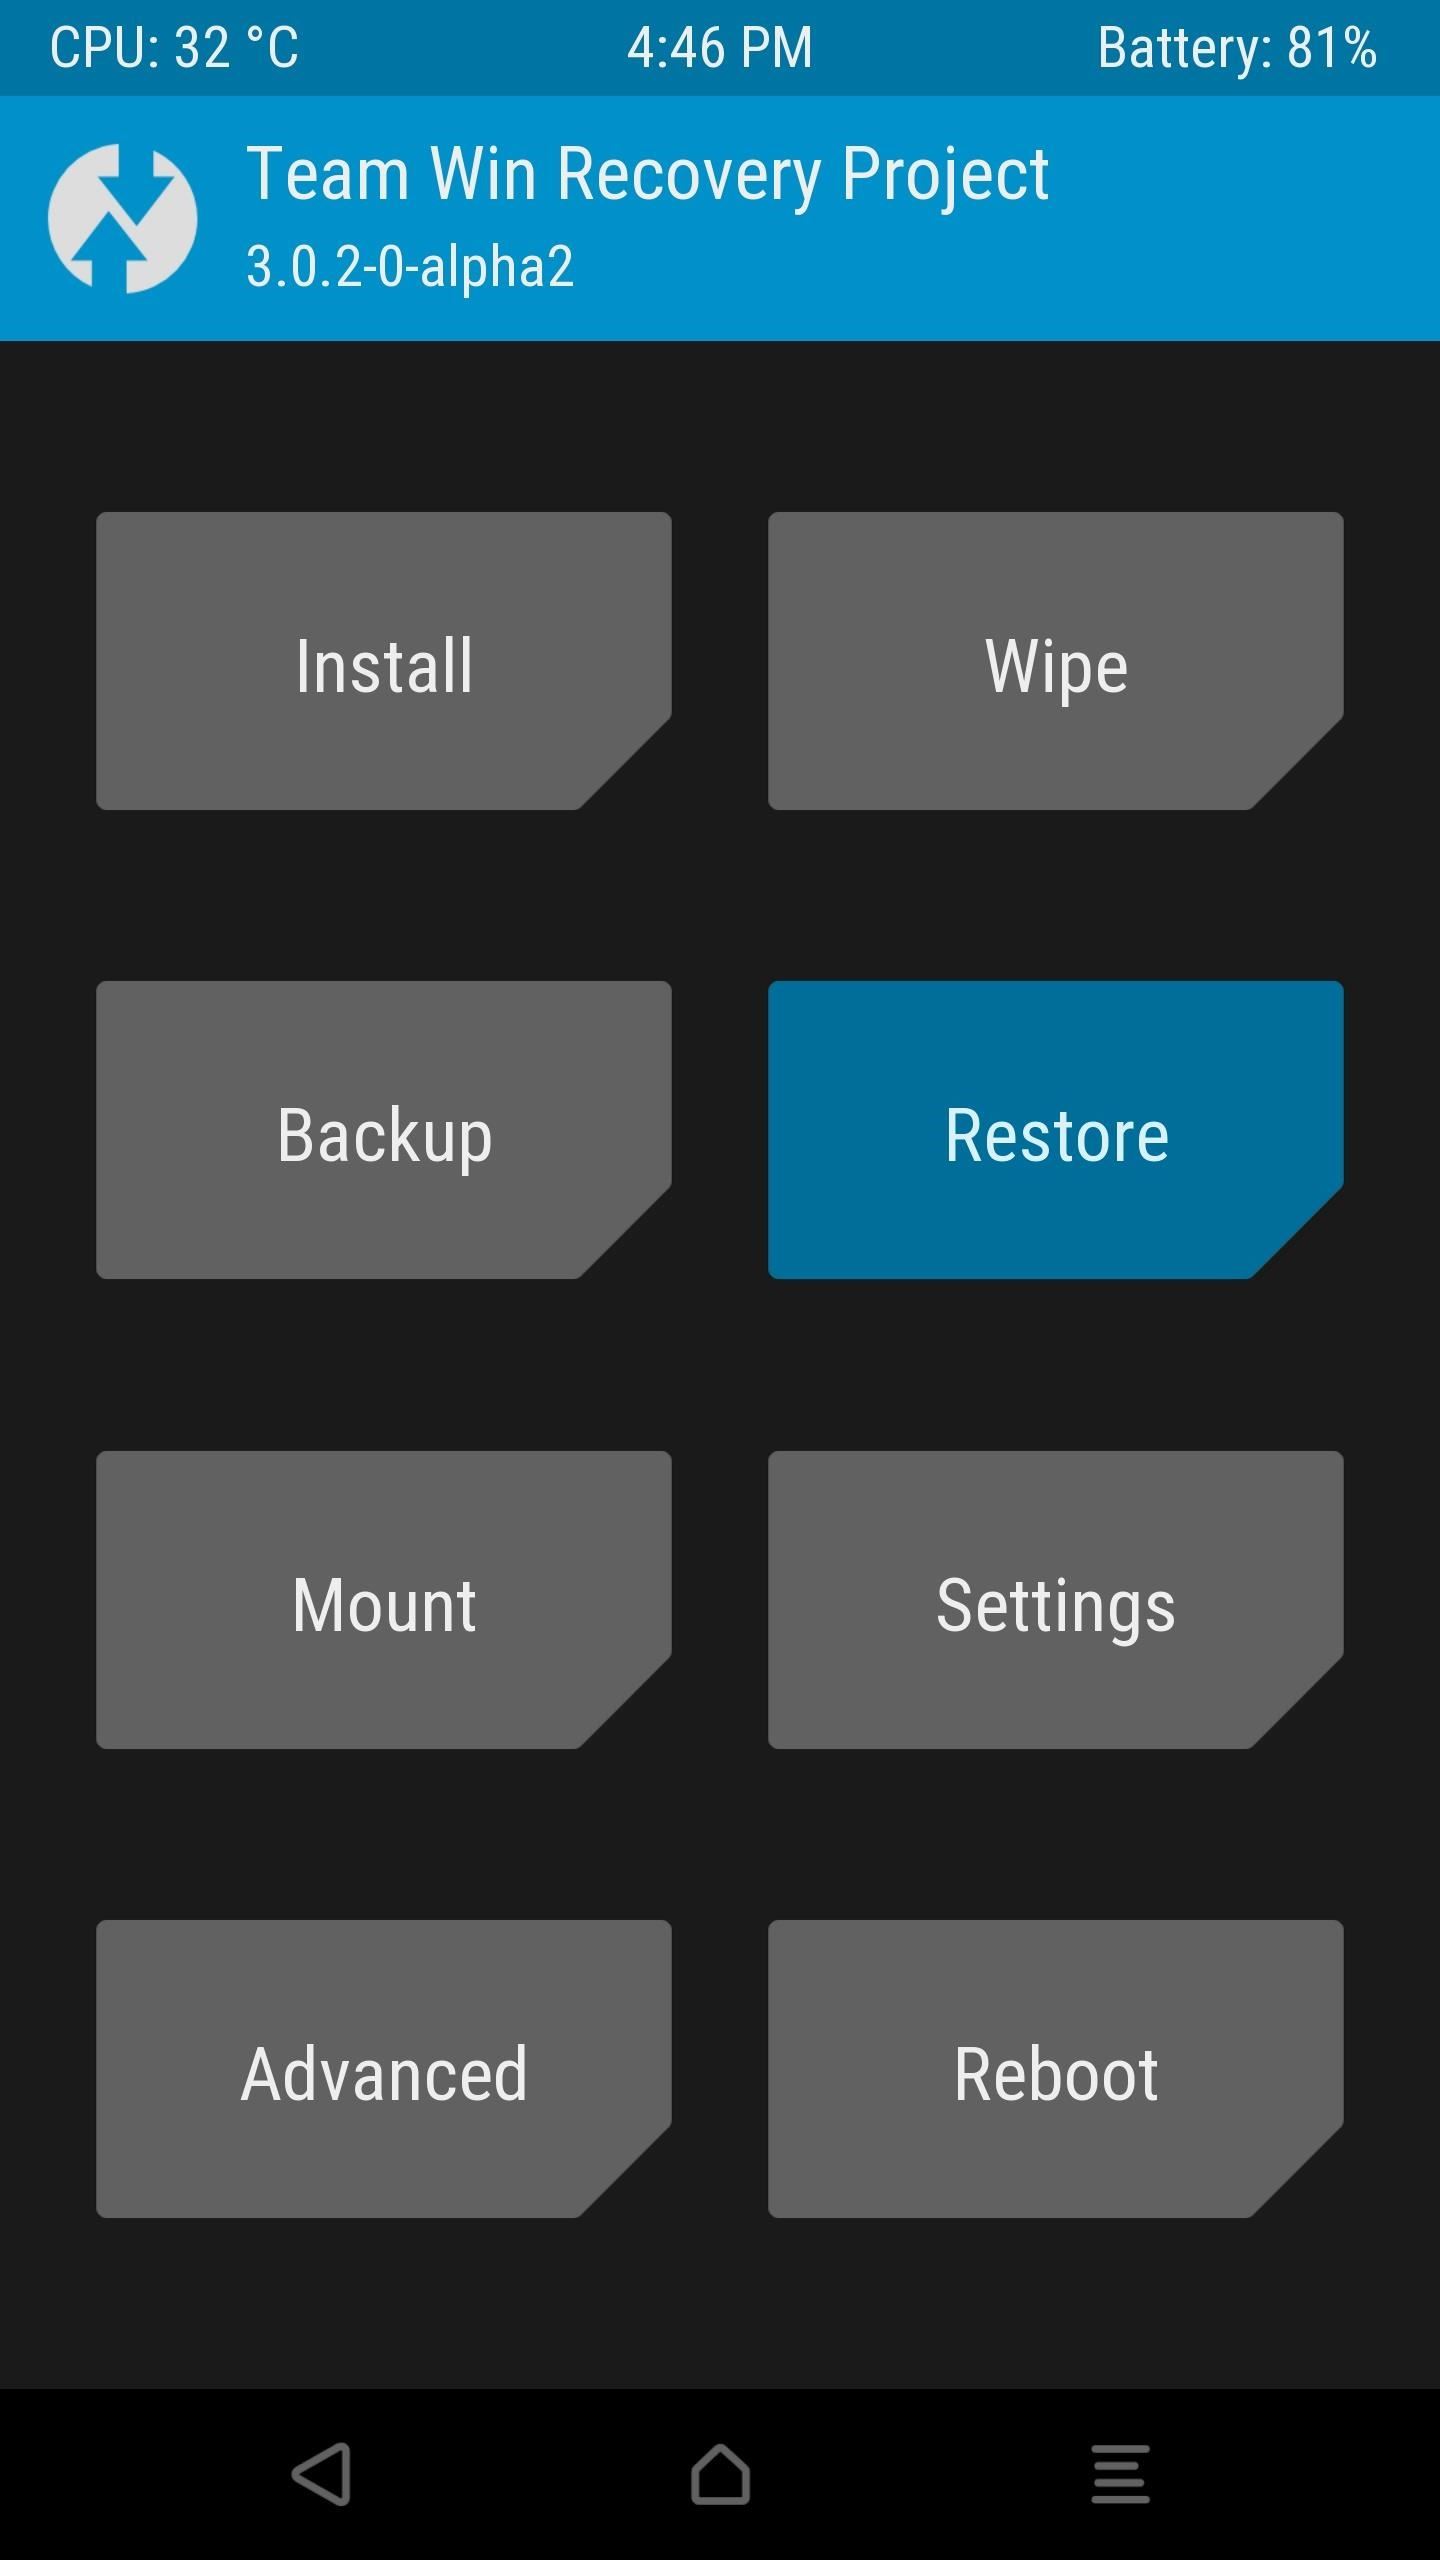
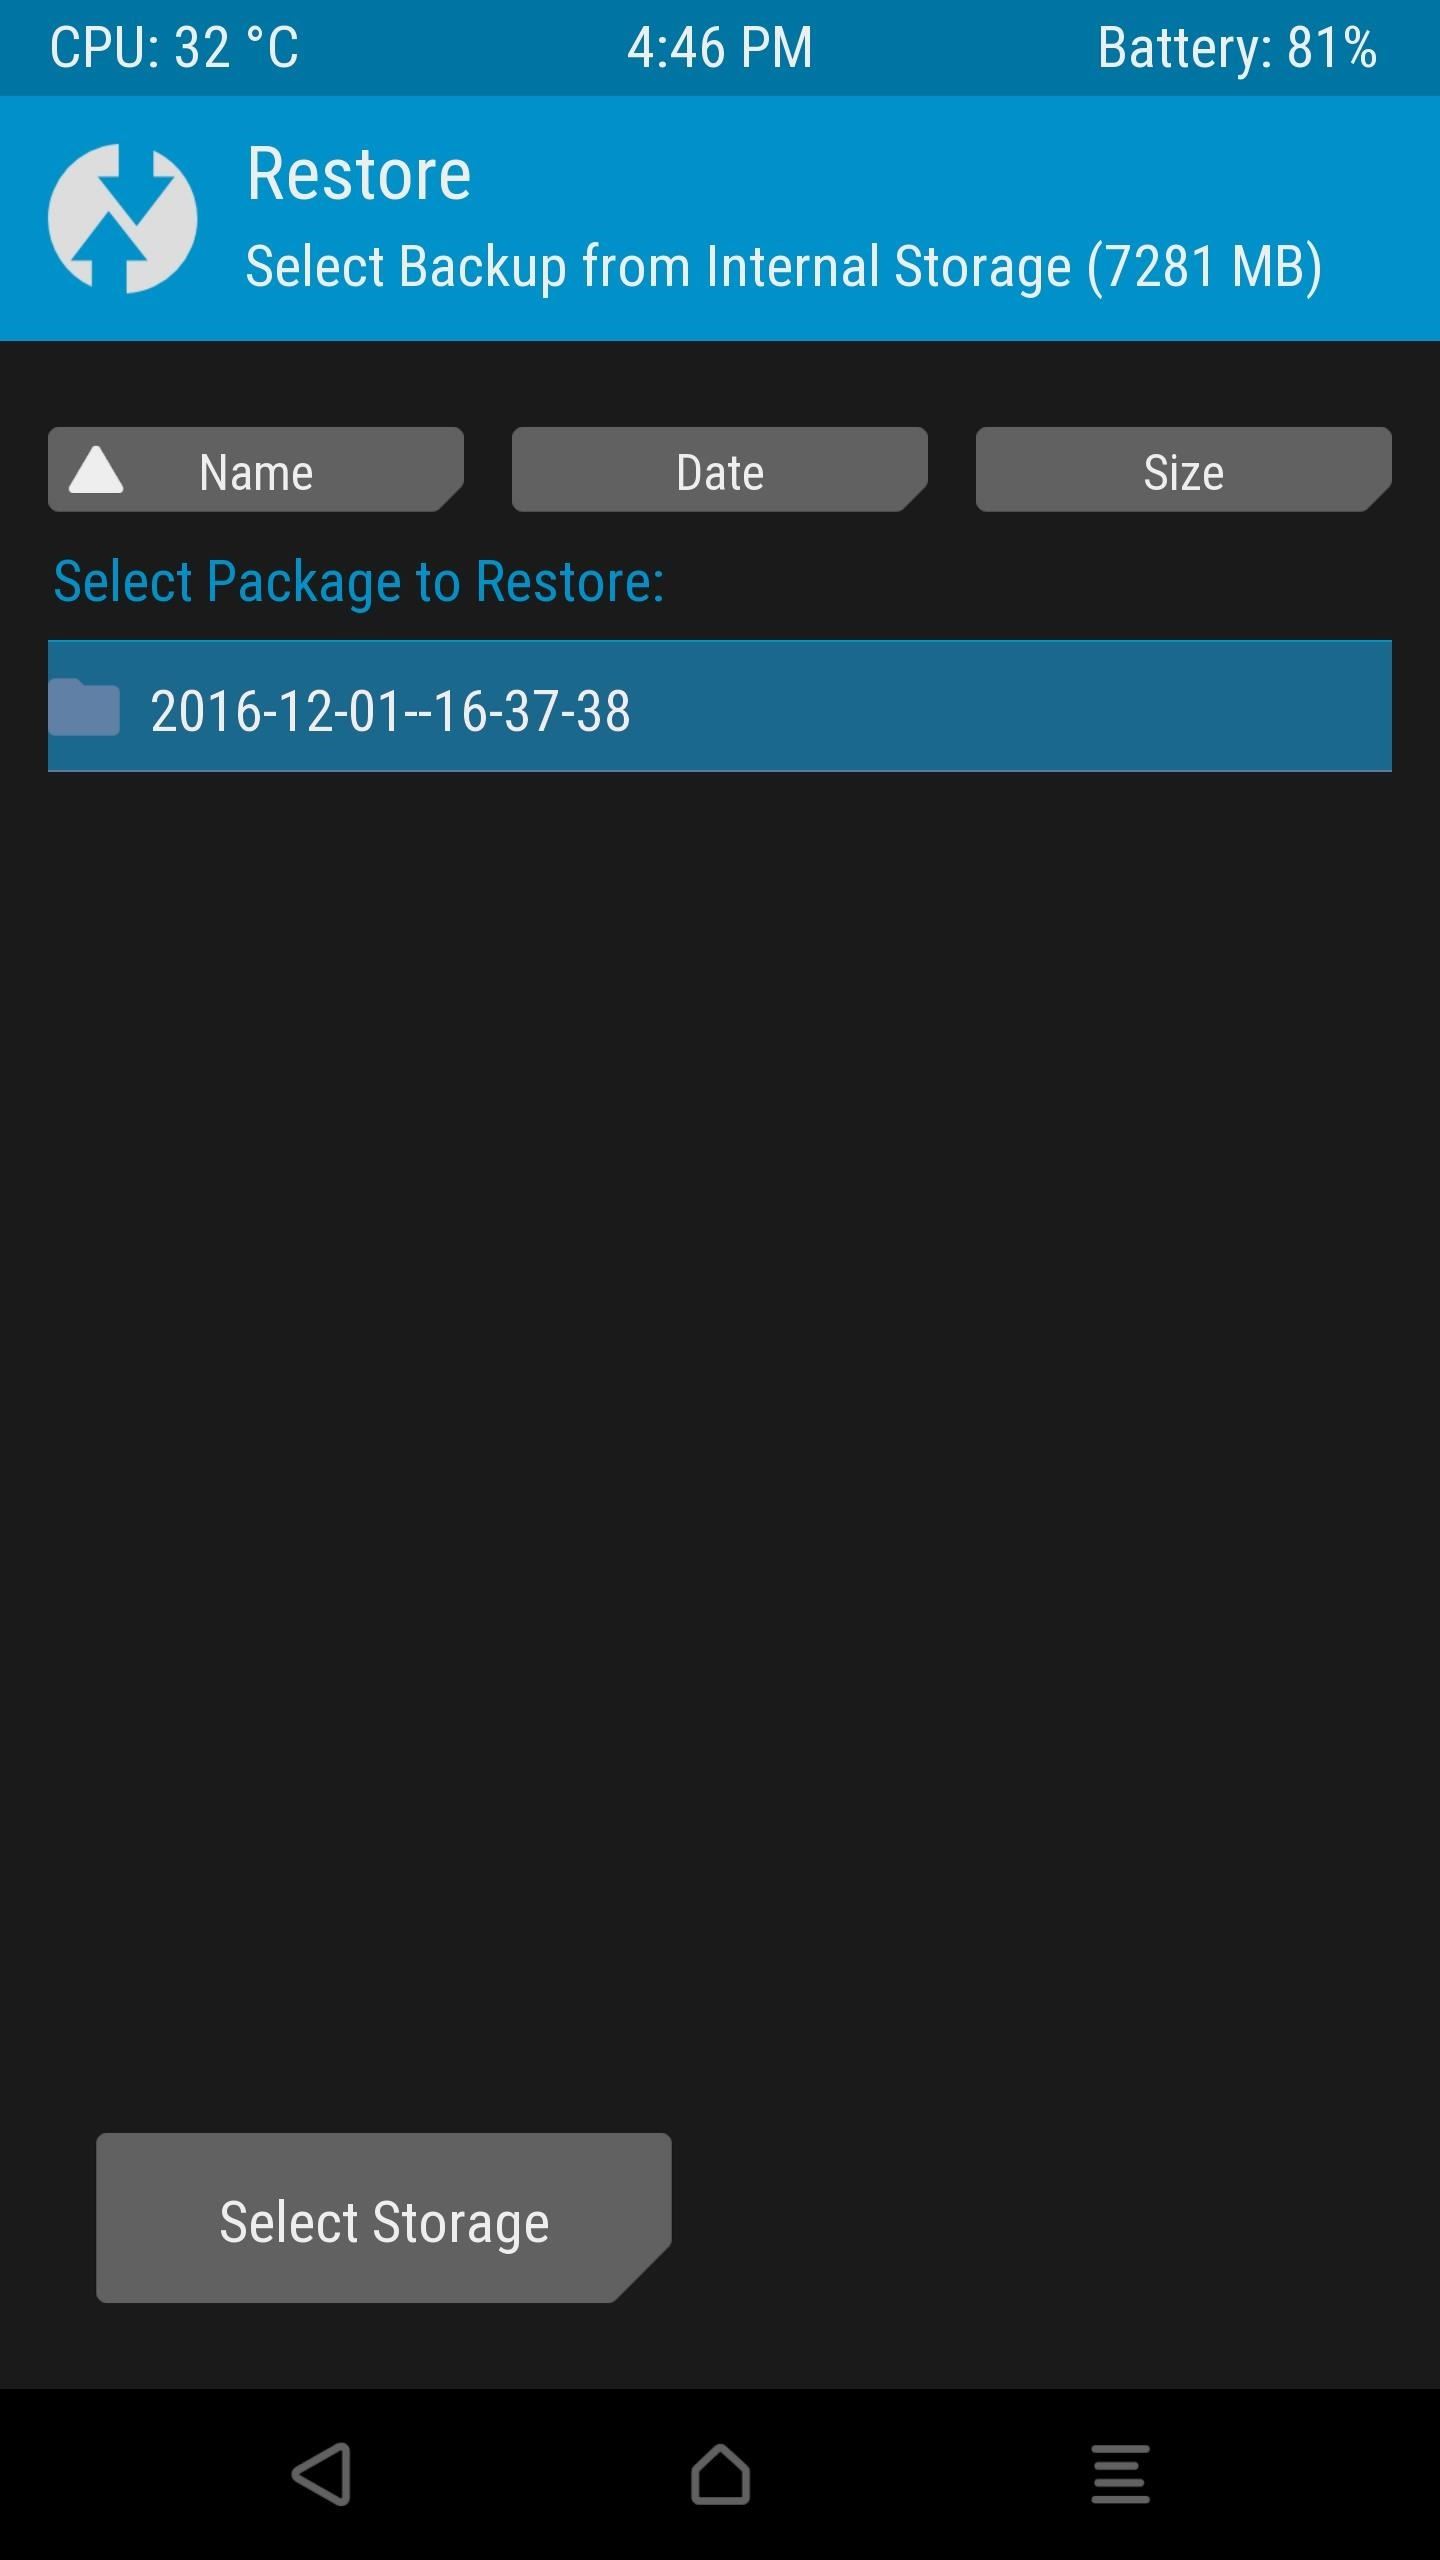
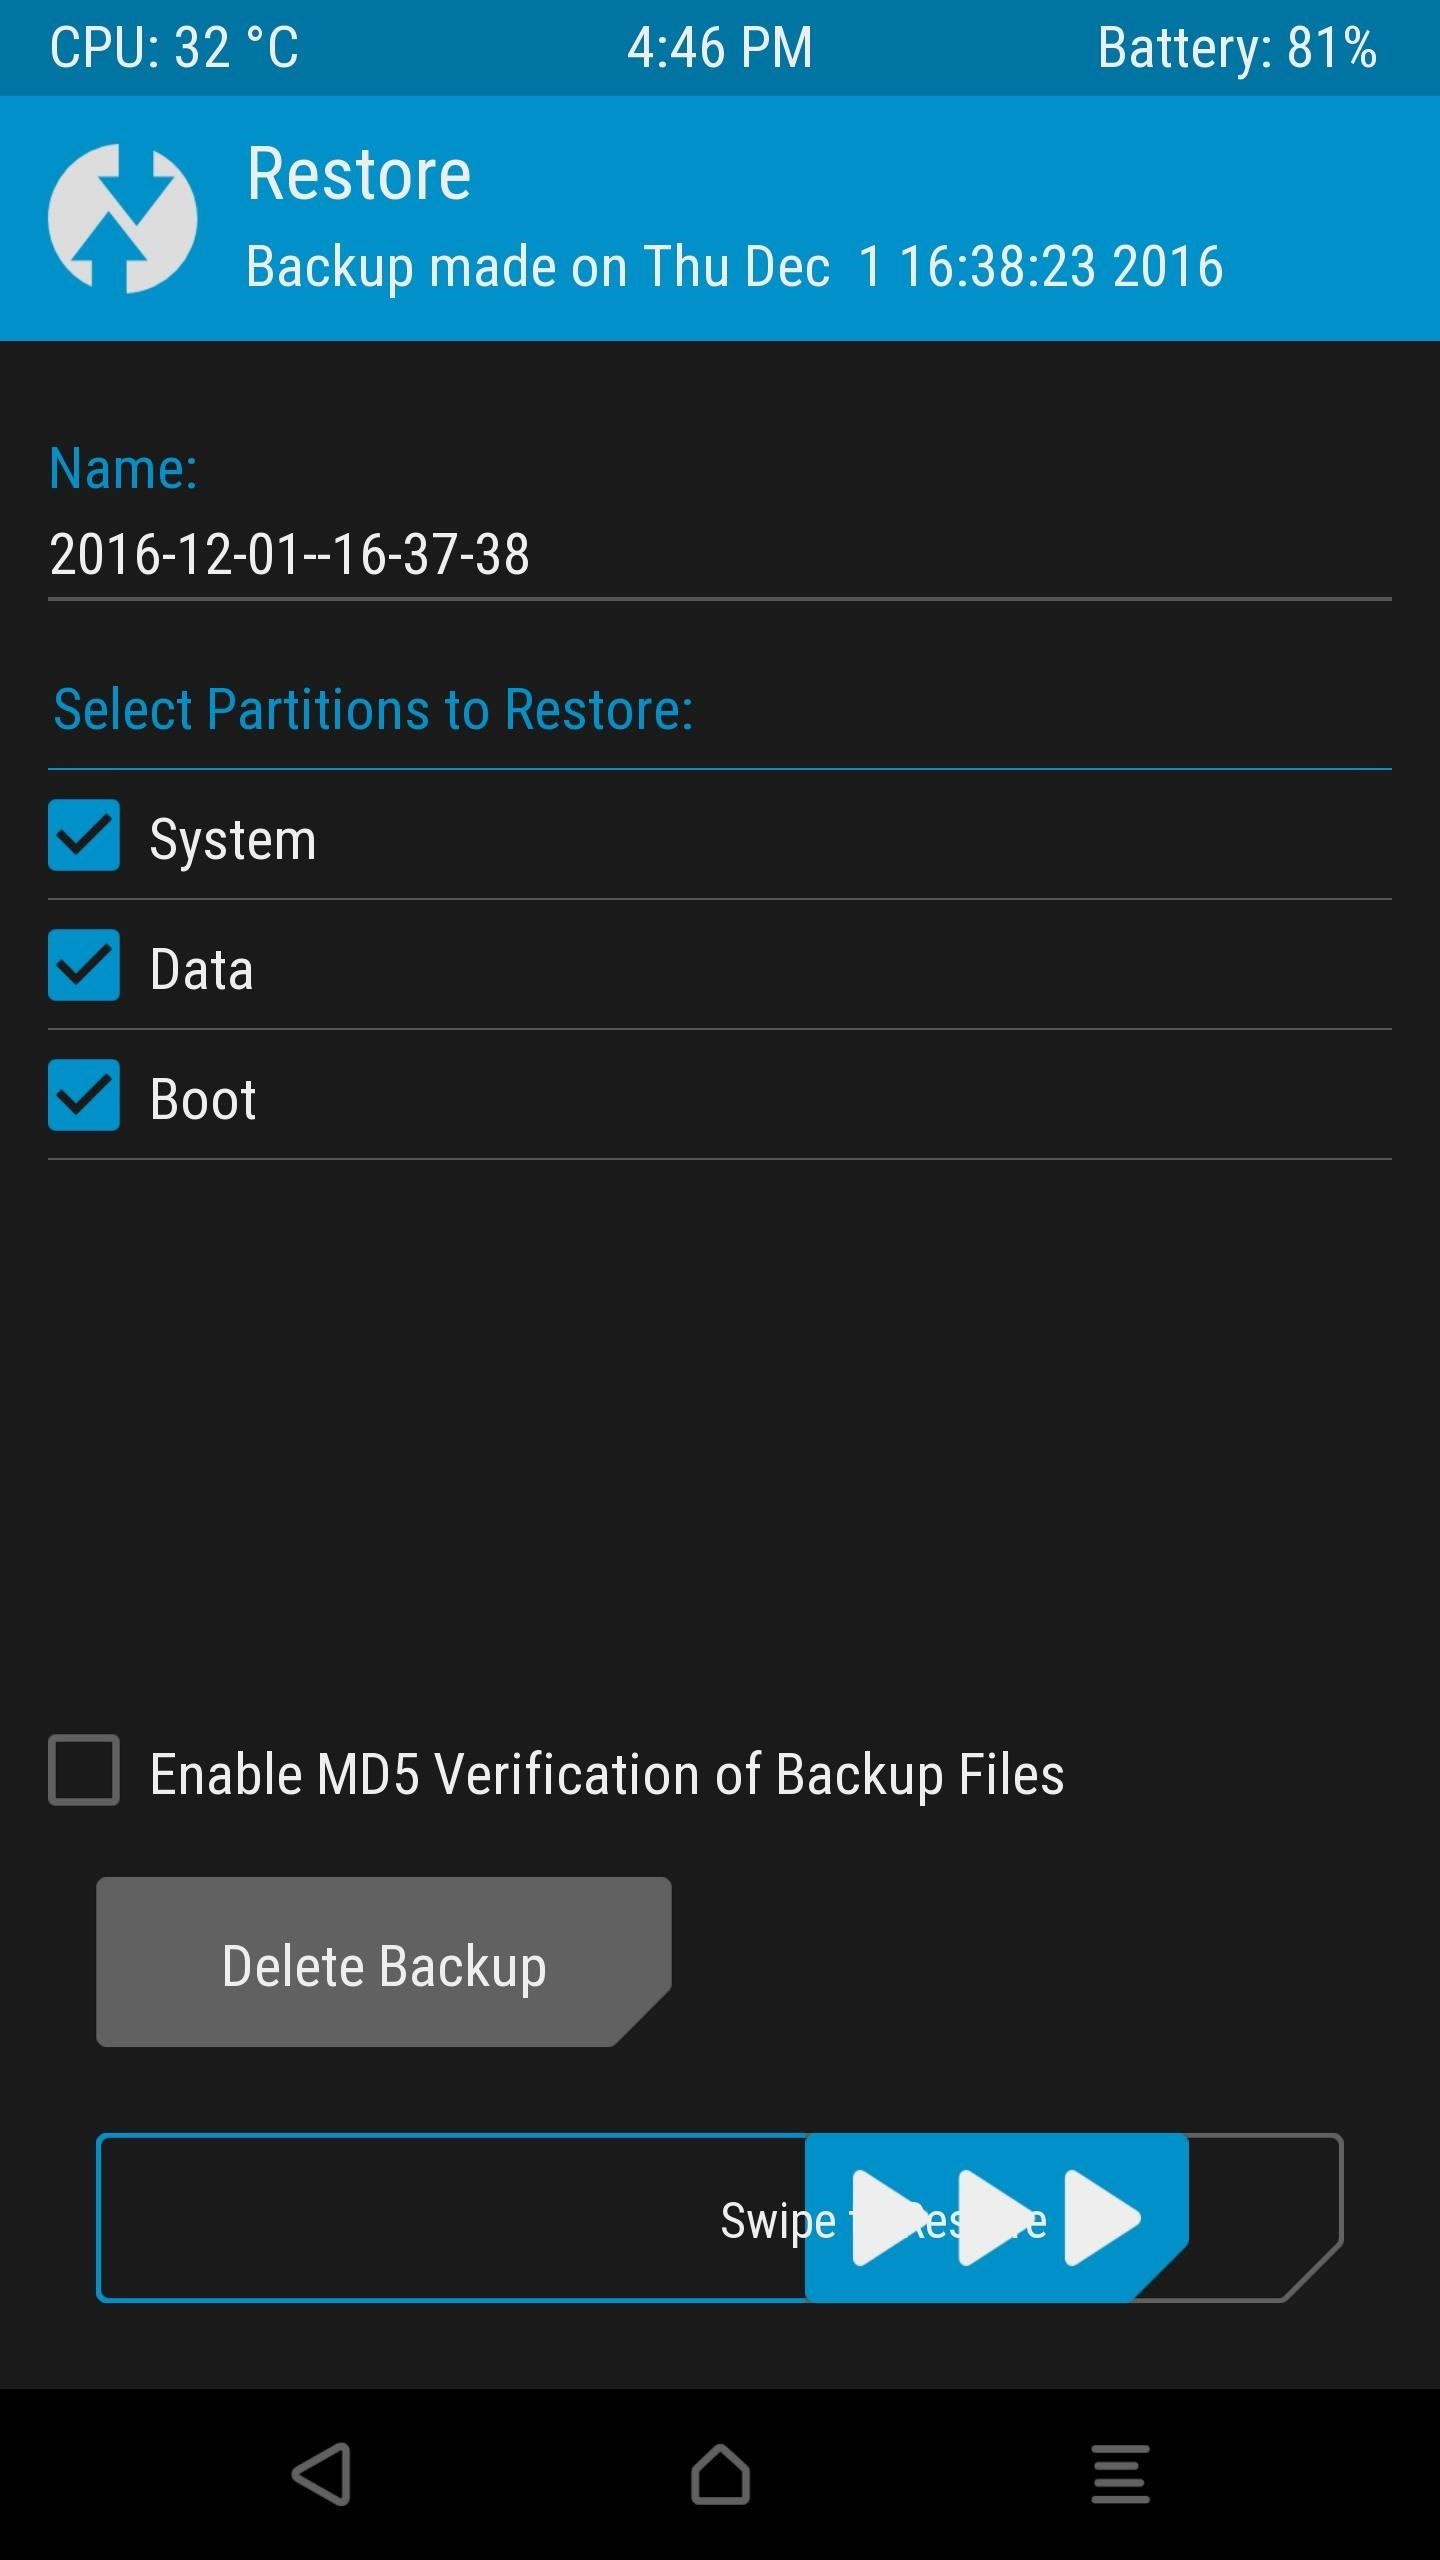
So to fix any modding-related issues, boot your phone into TWRP, then press the “Restore” button. From here, select your backup from the list (it will be named based on the date it was created), then simply swipe the slider at the bottom of the screen. The restore process can take up to 15 minutes, but when it’s done, just tap “Reboot System” and everything will be back the way it was.
Hot Deal: Set up a secure second phone number and keep your real contact details hidden with a yearly subscription to Hushed Private Phone Line for Android/iOS, 83%–91% off. It’s a perfect second-line solution for making calls and sending texts related to work, dating, Craigslist sales, and other scenarios where you wouldn’t want to give out your primary phone number.
“Hey there, just a heads-up: We’re part of the Amazon affiliate program, so when you buy through links on our site, we may earn a small commission. But don’t worry, it doesn’t cost you anything extra and helps us keep the lights on. Thanks for your support!”


