When you create a profile in Tasker, it will run a task as soon as all of the conditions in your profile are met. But what happens when the profile’s conditions stop being met? By default, nothing will happen, but if you create an exit task, the automation tool will run that instead.
Exit tasks are just like regular tasks, but they will only run when the rules you defined in your profile are no longer in effect. Think of it this way: If you tell Tasker to make your device run a task when you receive a phone call, you could also have it run an exit task when you hang up.
Adding an exit task is a fairly simple process, but it’s one that made Tasker finally “click” for me. So if you’d like to learn more about one of the most basic, yet most important features of Tasker, I’ll show you how exit tasks work below.
Step 1: Create Your Exit Task
I’m of the opinion that it’s usually best to create your tasks before doing anything else in Tasker. Since tasks are what you want your phone to do, you probably have a rough outline of each step in your task already. Profiles, on the other hand, represent when (or why) you want Tasker to run your task, so they’re somewhat secondary. Therefore, “task, then profile” is a logical order, particularly for beginners. The same can be said for exit tasks.
Most exit tasks will essentially accomplish one thing: Putting everything back to normal. For instance, if your initial task turned Wi-Fi off when you left home, your exit task would turn it back on when you got back to the house.
Aside from that, the actual process of creating an exit task is exactly the same as it was for creating your initial task. If you need to brush up on that, we’ve covered the entire undertaking with a separate guide, so check it out at the link below.
Step 2: Create Your Profile & Attach Your First Task
Once you’ve got your tasks in order, you’ll need to create a profile that triggers them. Profiles, of course, are a set of conditions that must be met before your tasks will run. When creating a profile, you’ll be prompted to associate a task with it — this is the primary task, not the exit task. In other words, the task that will run when your profile’s conditions are true.
So before you can add an exit task (i.e., the task that will run when your profile’s conditions are false), you’ll need to have a profile associated with your first task. If you need help on that front, make sure to hit up the following link.
Step 3: Add Your Exit Task
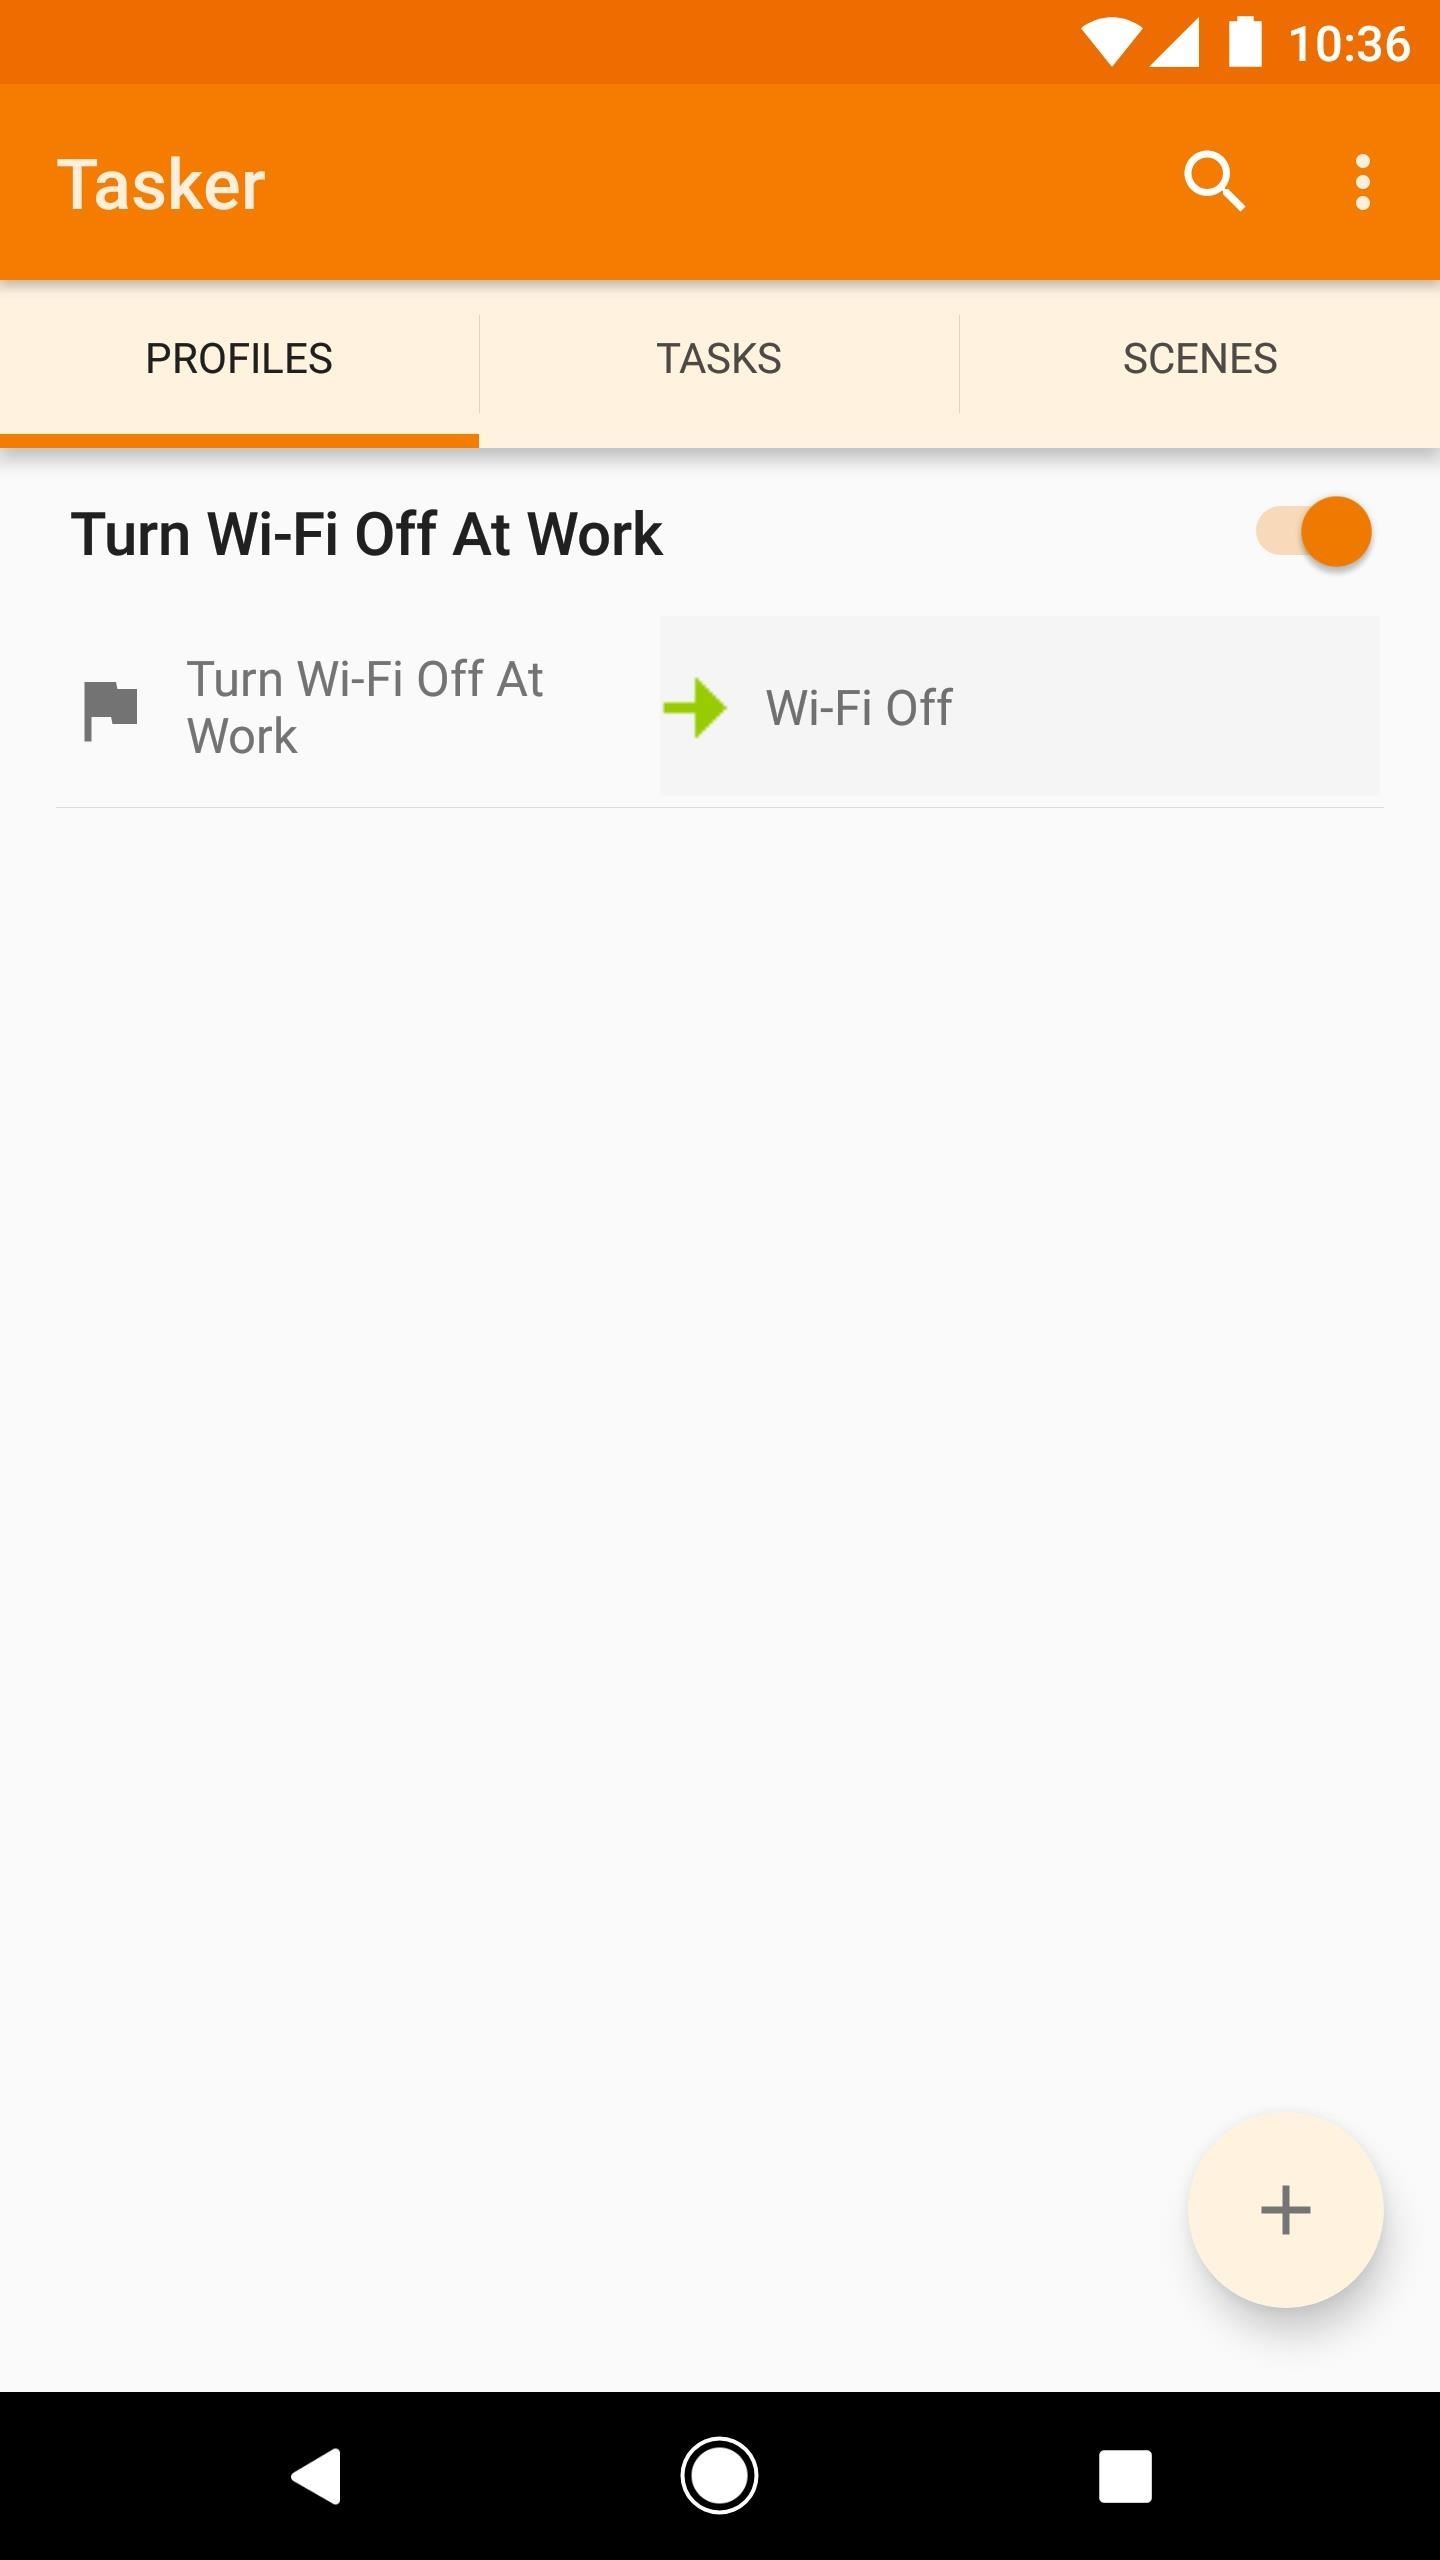
Now it’s time to get down to business. From Tasker’s Profiles tab, locate the profile you’d like to add an exit task to. If it only shows the name of the profile, tap the name to expand it and view more details.
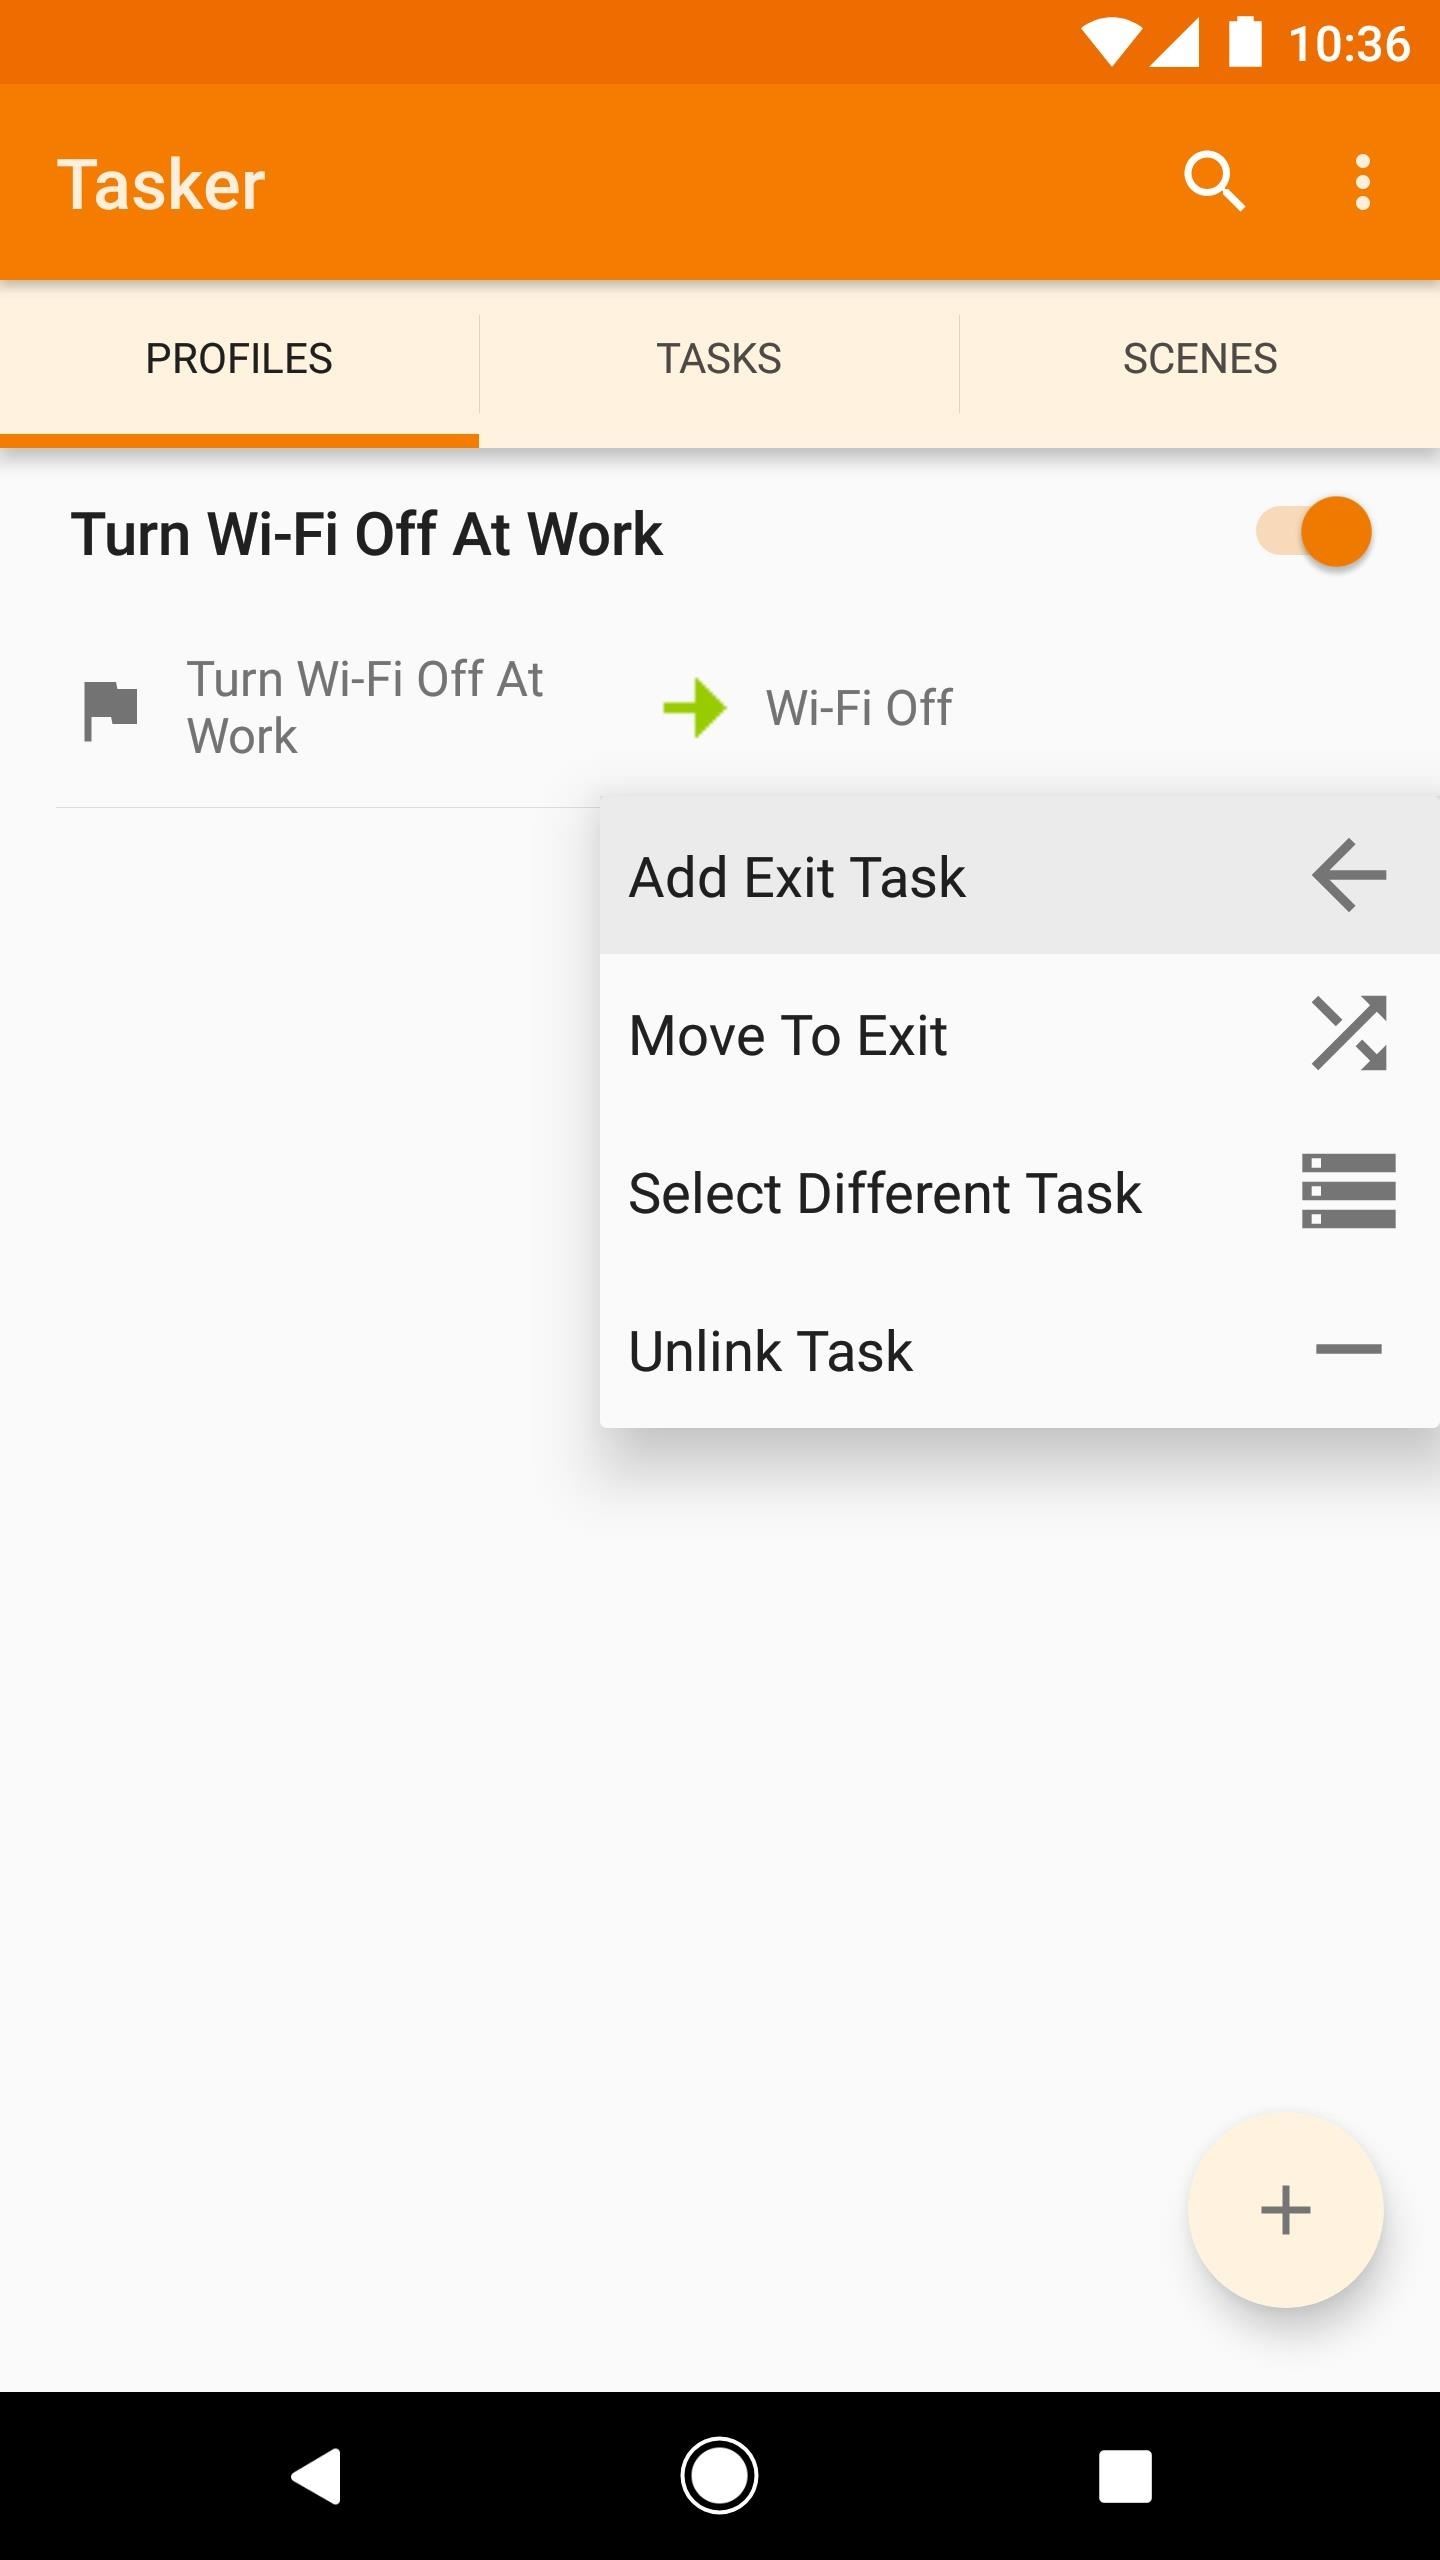
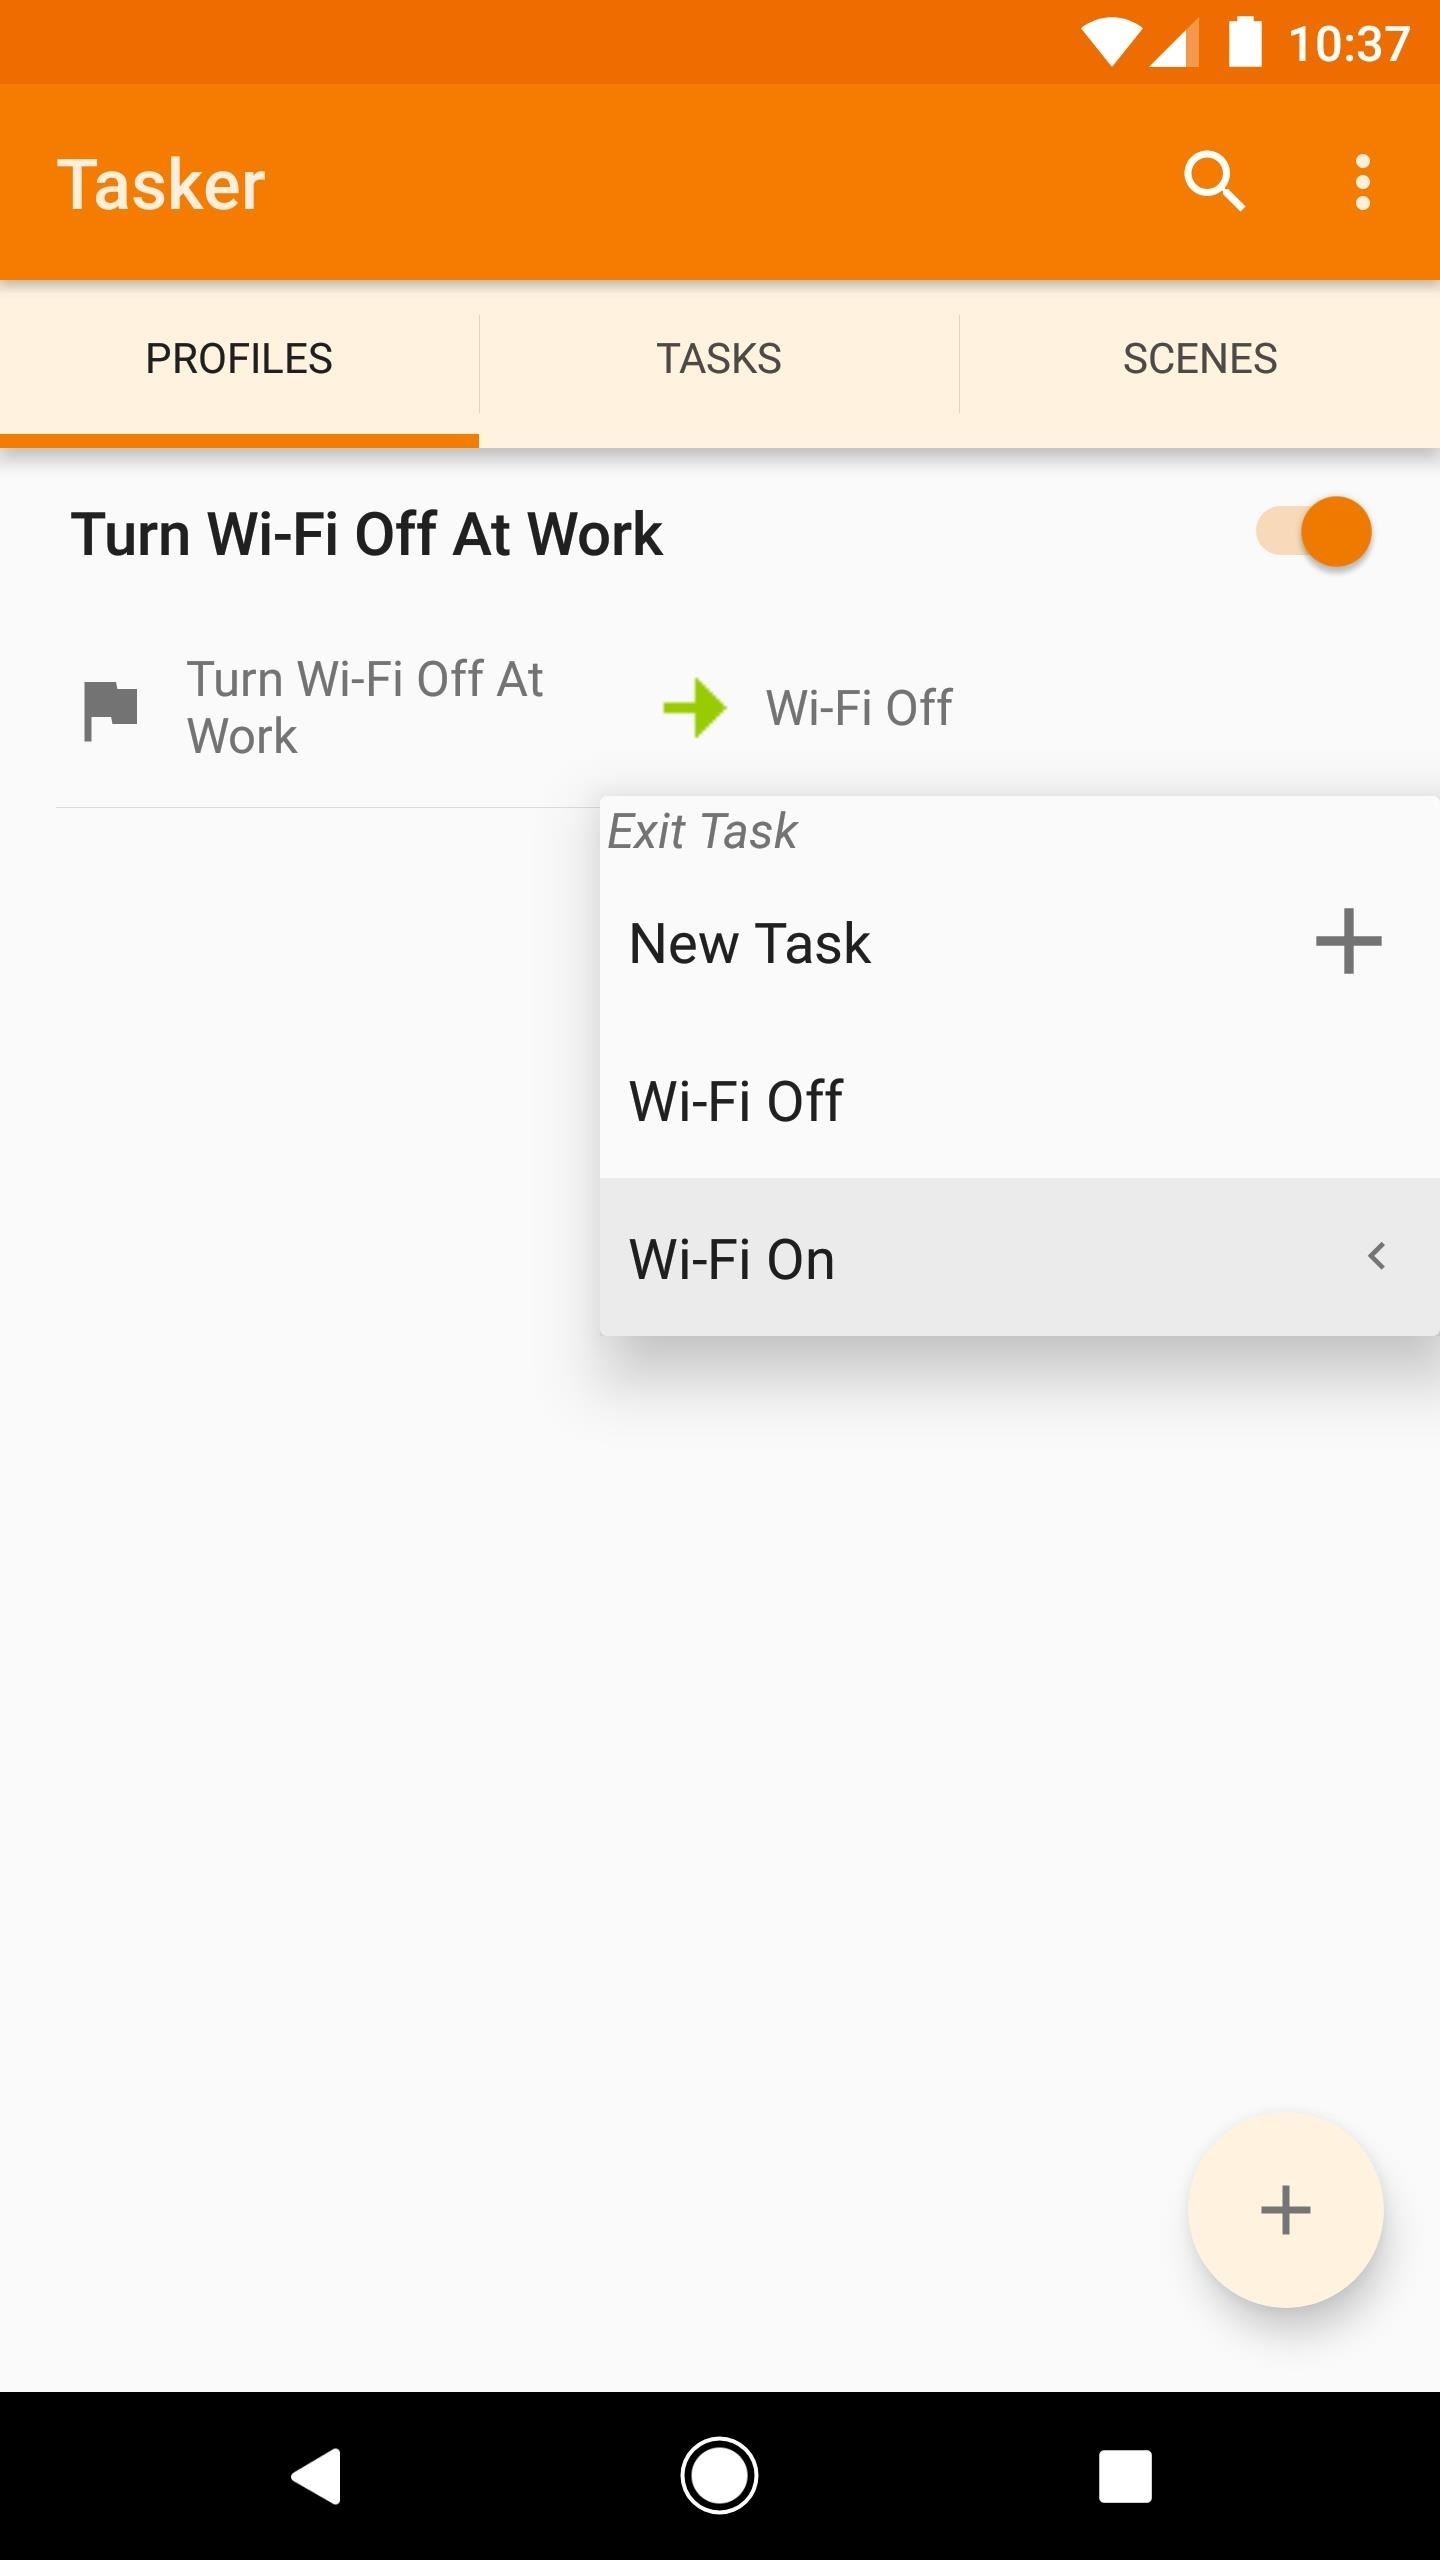
From here, long press the task portion of your profile (the text to the right). When you do that, a menu will appear — pick “Add Exit Task” here. At this point, you can choose the exit task you created in Step 1, or if you opted to skip that step, you can tap “New Task” to create the exit task at this point. But if your exit task already exists, simply select it from the popup menu.


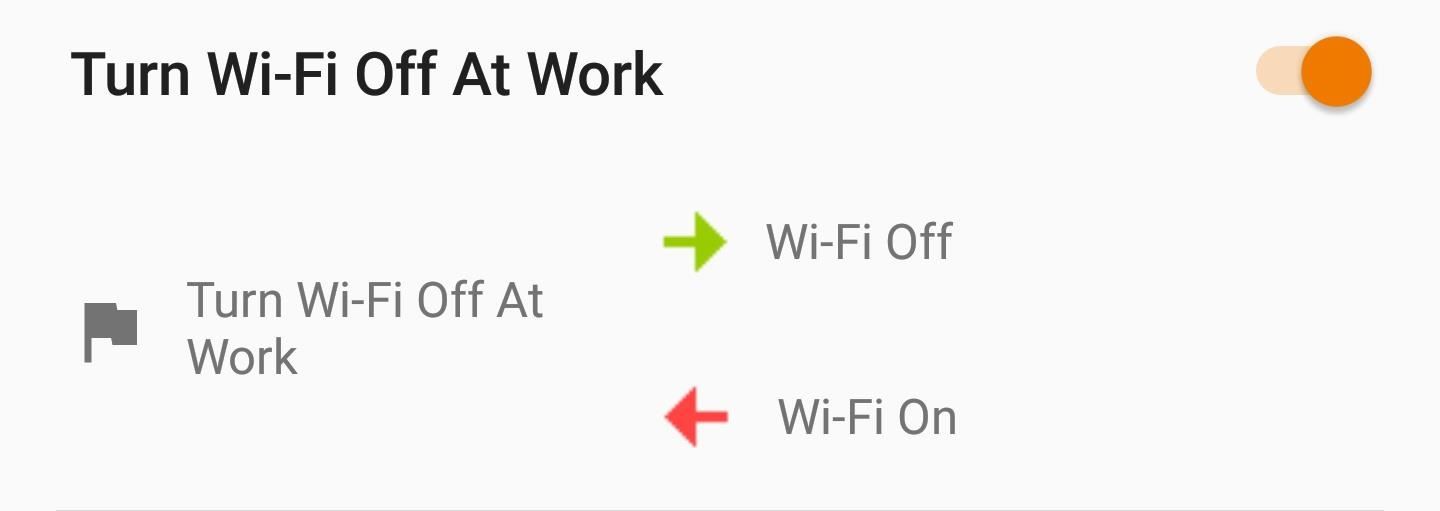
Now if you take a look at your full profile, you’ll see how it all works. Beneath the title on the left, you’ll see the name of your profile. If you tap this portion, it will show the conditions you set that will trigger your primary task.
The primary task is shown beneath the title on the right with a green arrow next to it — this is what Tasker will do when your profile’s conditions are being met. But when those conditions stop being met, your exit task will run, which is the task with a red arrow next to it.

What are you using exit tasks to accomplish? Have you created any cool Tasker profiles that you’d like to share? Let us know in the comment section below.
Hot Deal: Set up a secure second phone number and keep your real contact details hidden with a yearly subscription to Hushed Private Phone Line for Android/iOS, 83%–91% off. It’s a perfect second-line solution for making calls and sending texts related to work, dating, Craigslist sales, and other scenarios where you wouldn’t want to give out your primary phone number.
“Hey there, just a heads-up: We’re part of the Amazon affiliate program, so when you buy through links on our site, we may earn a small commission. But don’t worry, it doesn’t cost you anything extra and helps us keep the lights on. Thanks for your support!”


