So, your grandmother finally wants to ditch her flip phone for a shiny new smartphone? Congratulations. But helping her get used to her new device, even when it’s an iPhone, is no small task. Grandma mastered checking her email in late-2012 and just recently learned there’s a thing called “Facebook.” But we love grandma, and thanks to this guide, we can definitely make this happen for her.
In this guide, we’re going to be looking at aspects of the latest version of Apple’s mobile operating system, iOS 11, that you’ll want to help grandma out with. We’ll cover everything from signing in, to enabling hidden accessibility settings, to installing new apps. There’s even some advice on how to prevent grandma from going over her data allotment — without sacrificing talk-time with the grandkids.
Note that this guide isn’t exclusively for onboarding grandmothers onto the iPhone bandwagon. Rather, this will help you set up and teach any technically-challenged friend or family member how to start out with iOS for the first time, whether it’s your mother, grandfather, great uncle, or aunt.
Step 1: Set Up Grandma’s Apple ID
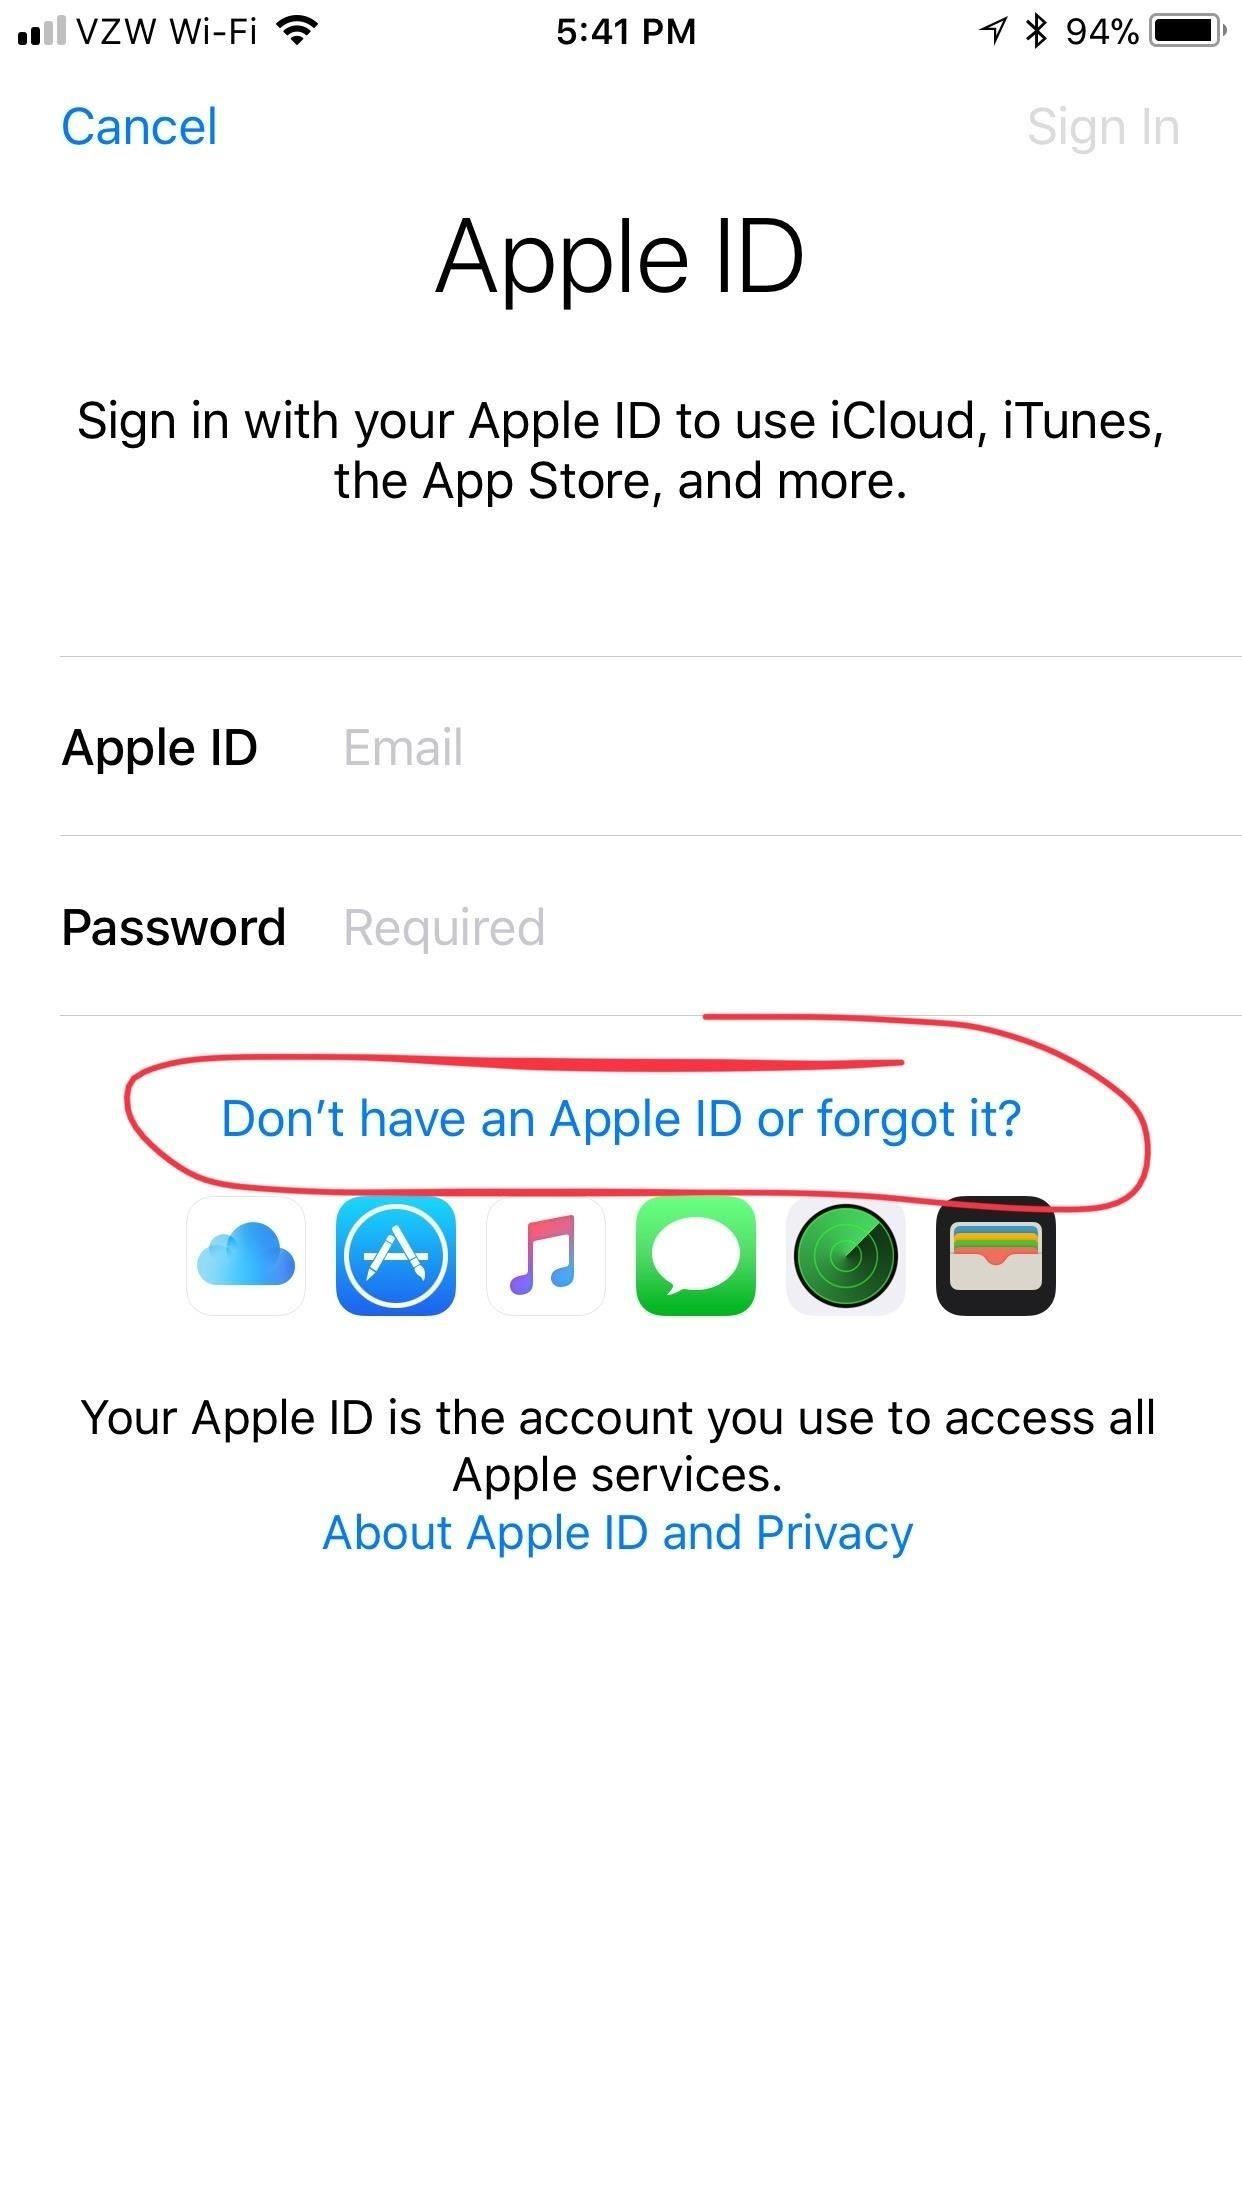
When you turn on an iPhone for the first time or after it’s been factory reset, there’s a setup process iOS will walk you through to get everything set up. The most important part is signing in with an Apple ID, as this will activate a ton of important features on the device, including the ability to make an easy backup or locate the device, should something happen.
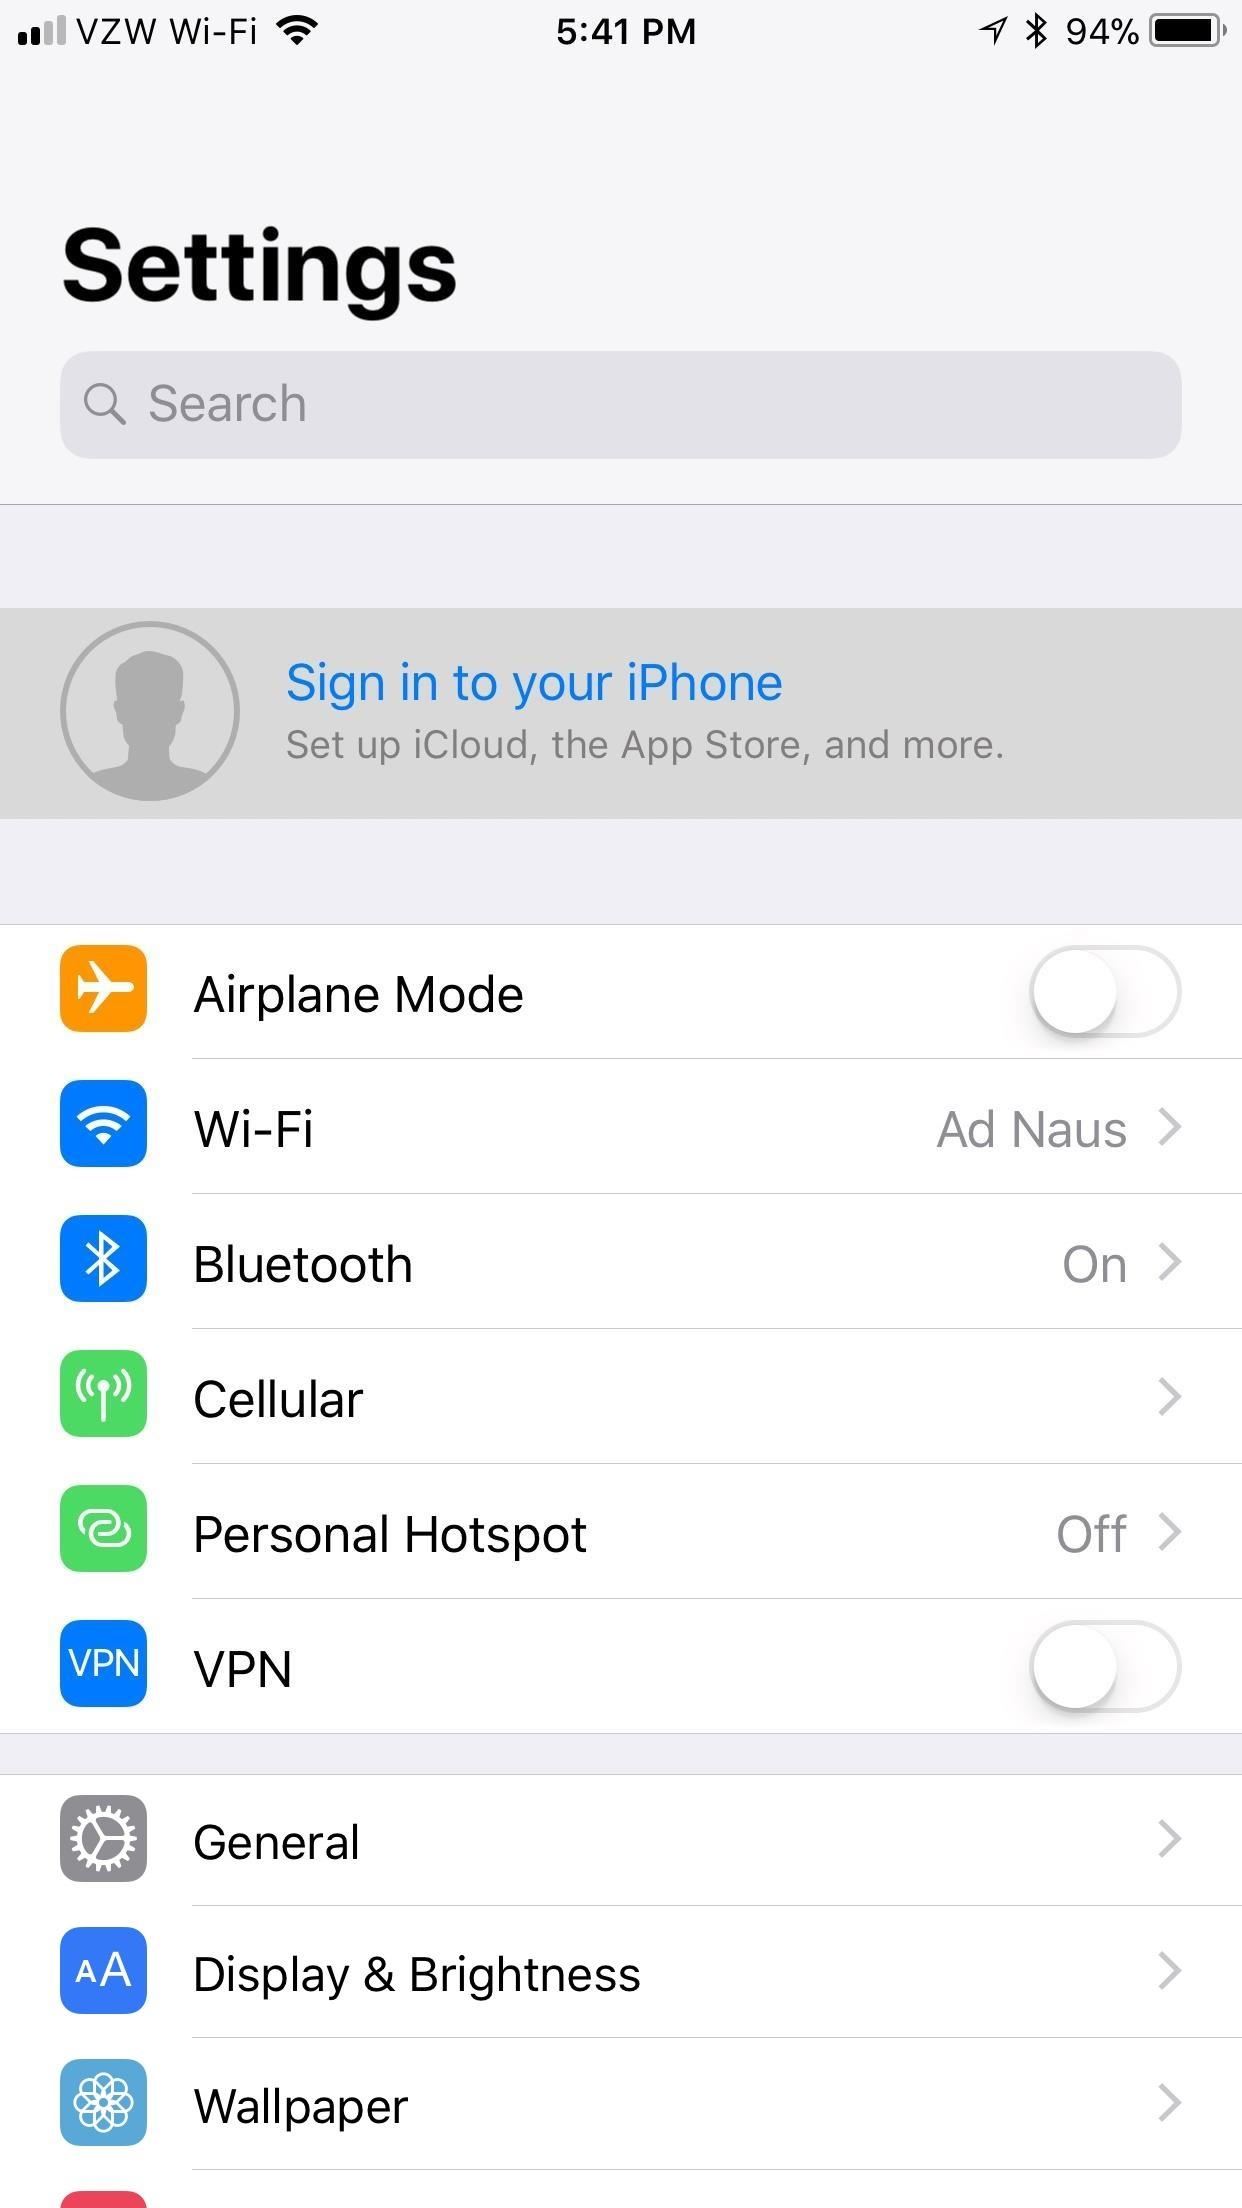
Your grandma probably doesn’t have an Apple ID yet, and there are a number of ways to get one for her. You can create one before she gets her iPhone using Apple’s “Create Your Apple ID” page online, then sign her in during the setup process. You can also just create an Apple ID during the initial setup process by following the on-screen prompts. Lastly, if you skipped both of those options, you can make one afterward on the iPhone; It’s as easy as tapping on “Sign in to your iPhone” at the top of the Settings app and following the prompts from there.
No matter which way you choose to create an Apple ID and sign in for your grandma, make sure you record her email and password for her, as well as her security questions, in case she loses them. Keep them someplace safe.
Step 2: Choose Between Standard or Display Zoom
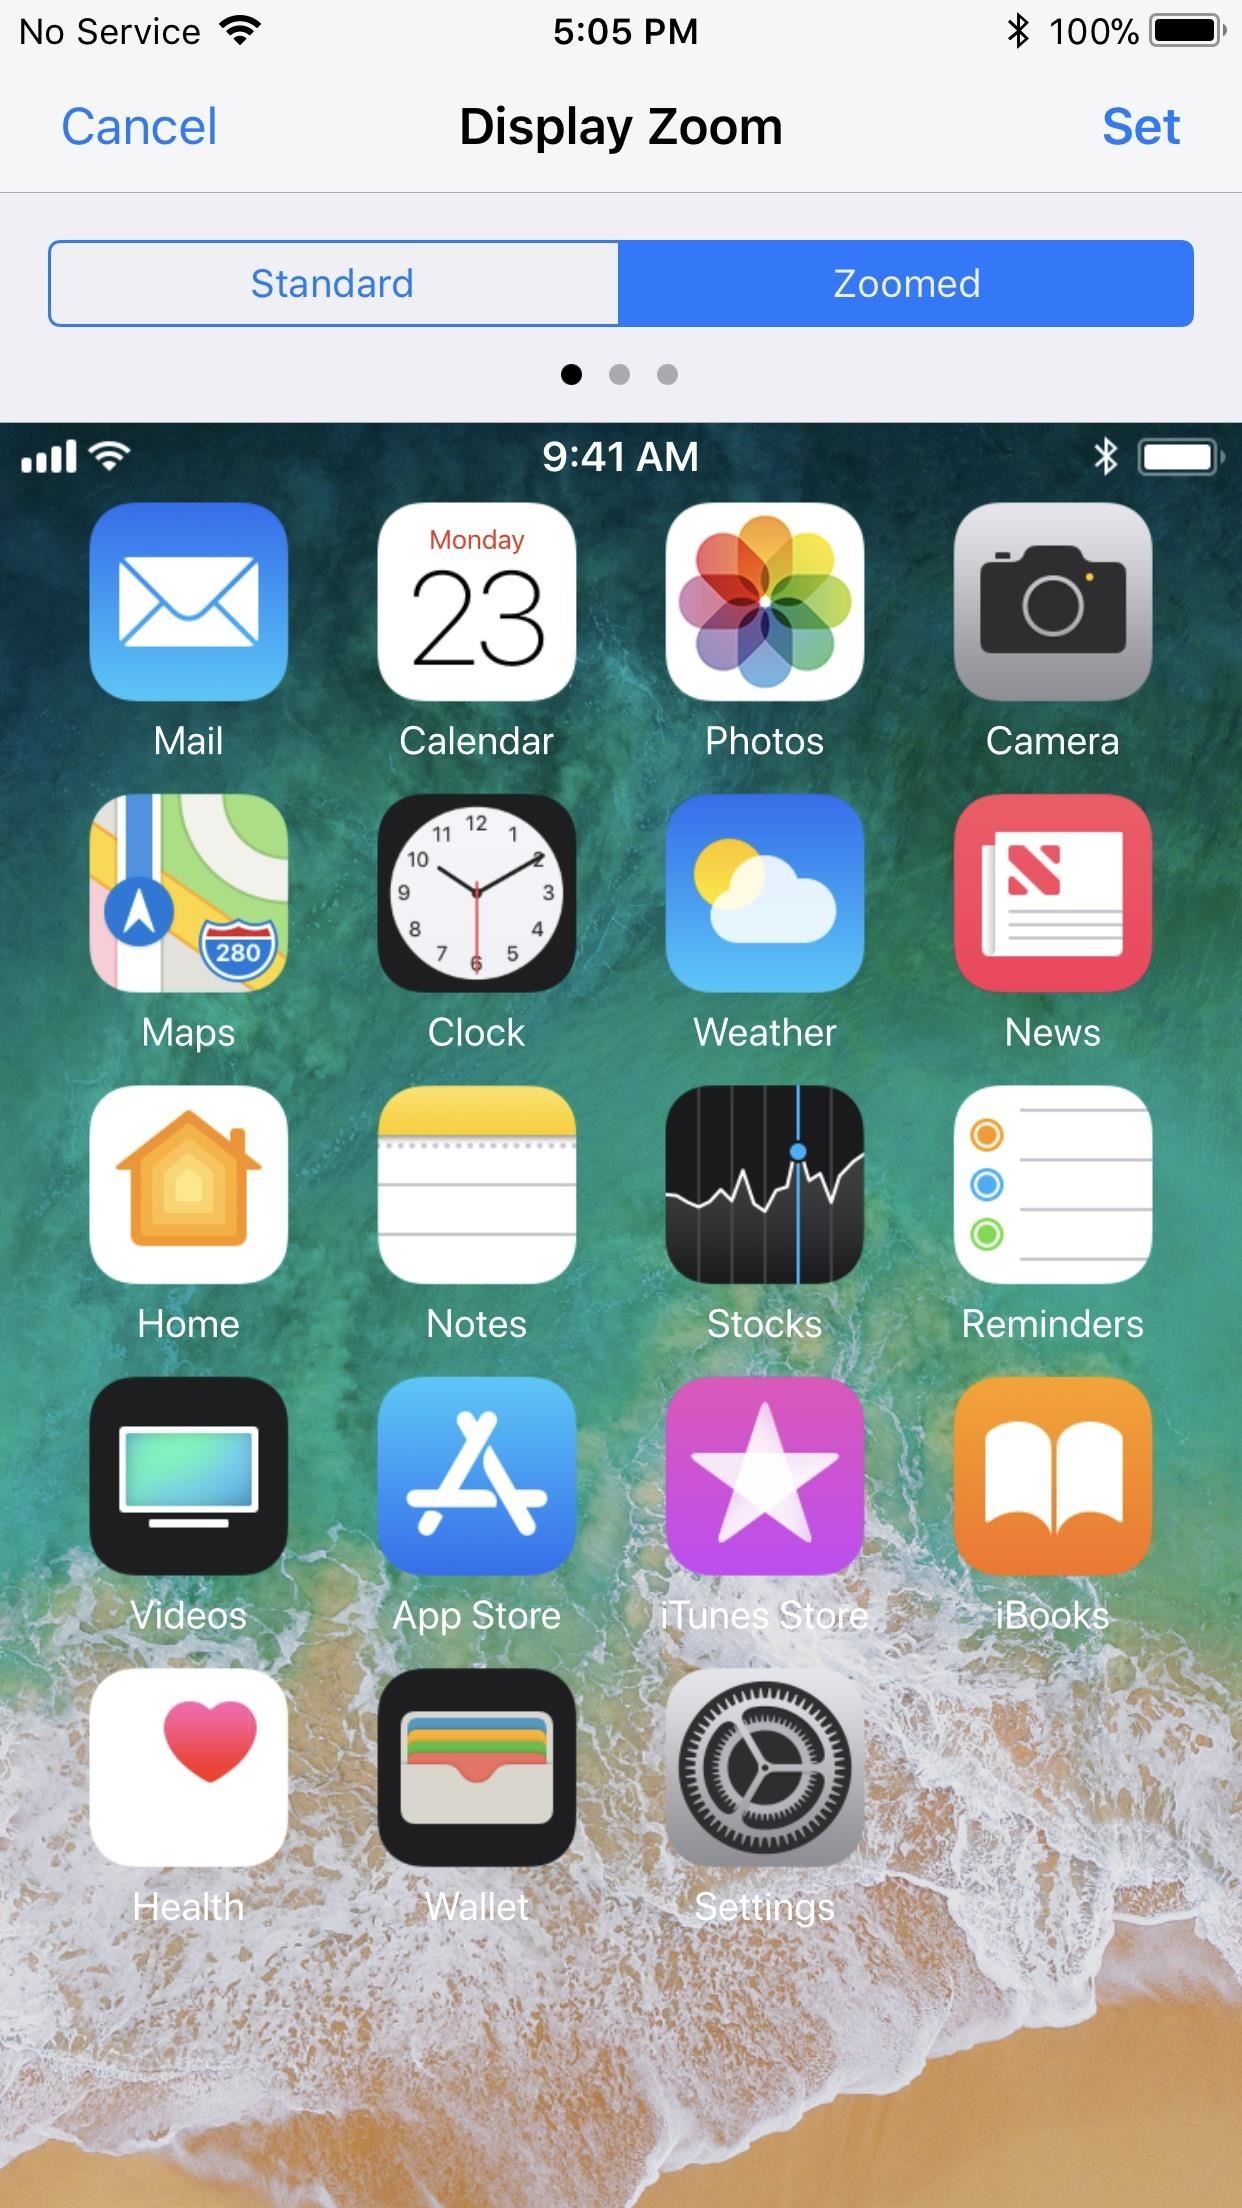
While you’re setting up the iPhone for the first time, iOS will likely ask you if you’d like to use the “Standard” or “Zoomed” appearance on the screen, if the device is an iPhone 6, 6 Plus, 6S, 6S Plus, 7, 7 Plus, 8, or 8 Plus. The new iPhone X and other models not mentioned do not have this feature.
The first option shows more content on the screen, but your grandma might have a hard time seeing things that are shrunken down, so the latter would probably be better so controls and icons are larger.
If you skipped this during the initial setup, you can go to “Settings,” then “Display & Brightness.” Just change the “View” from “Standard” to “Zoomed.”

Step 3: Tailor the Accessibility Settings to Grandma’s Needs
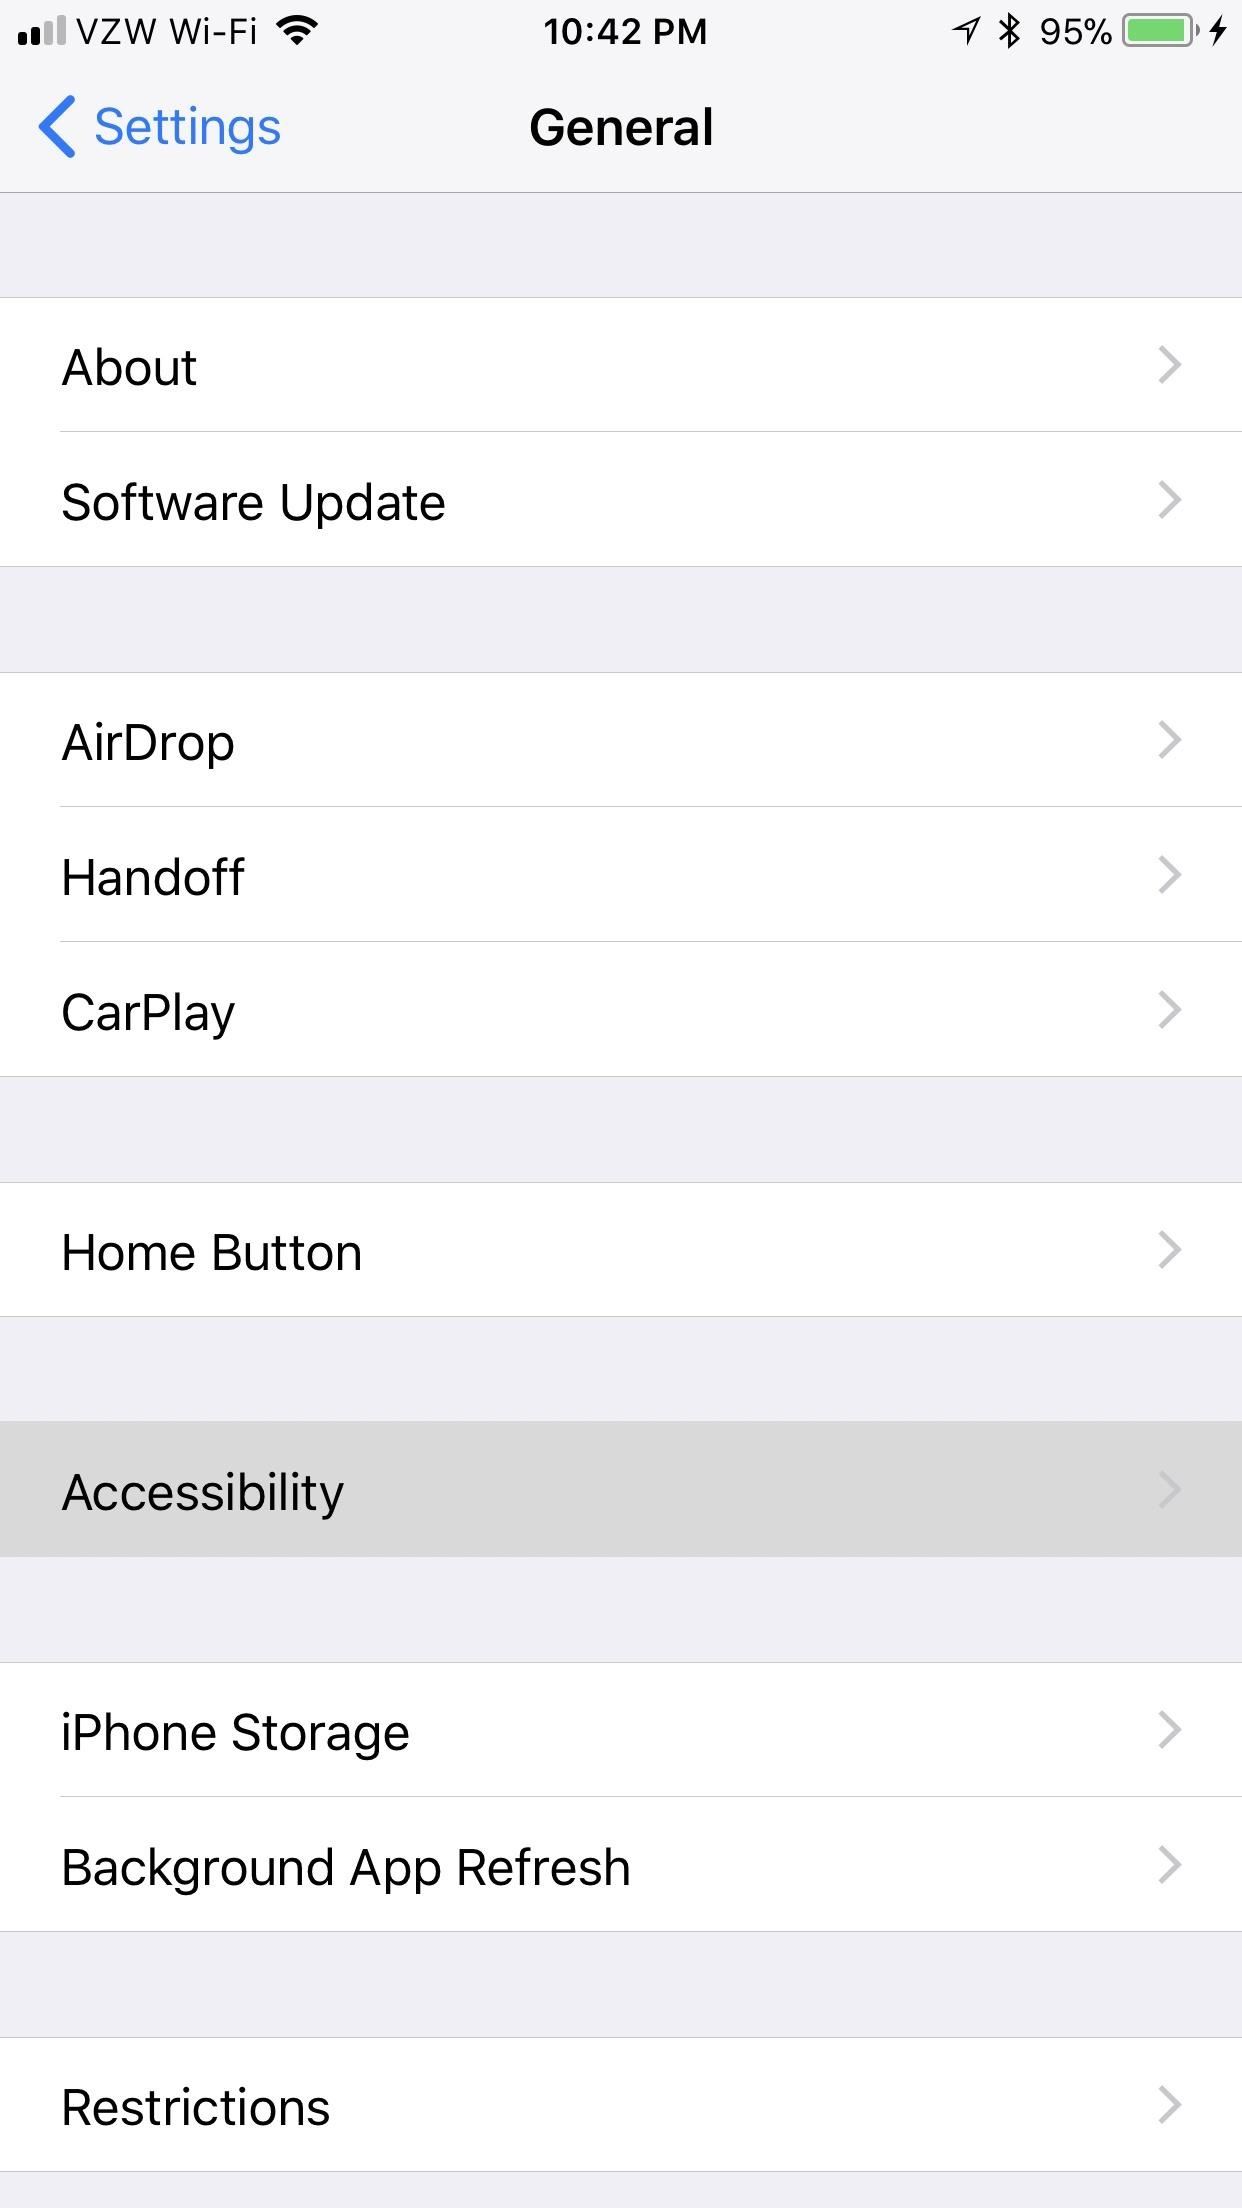
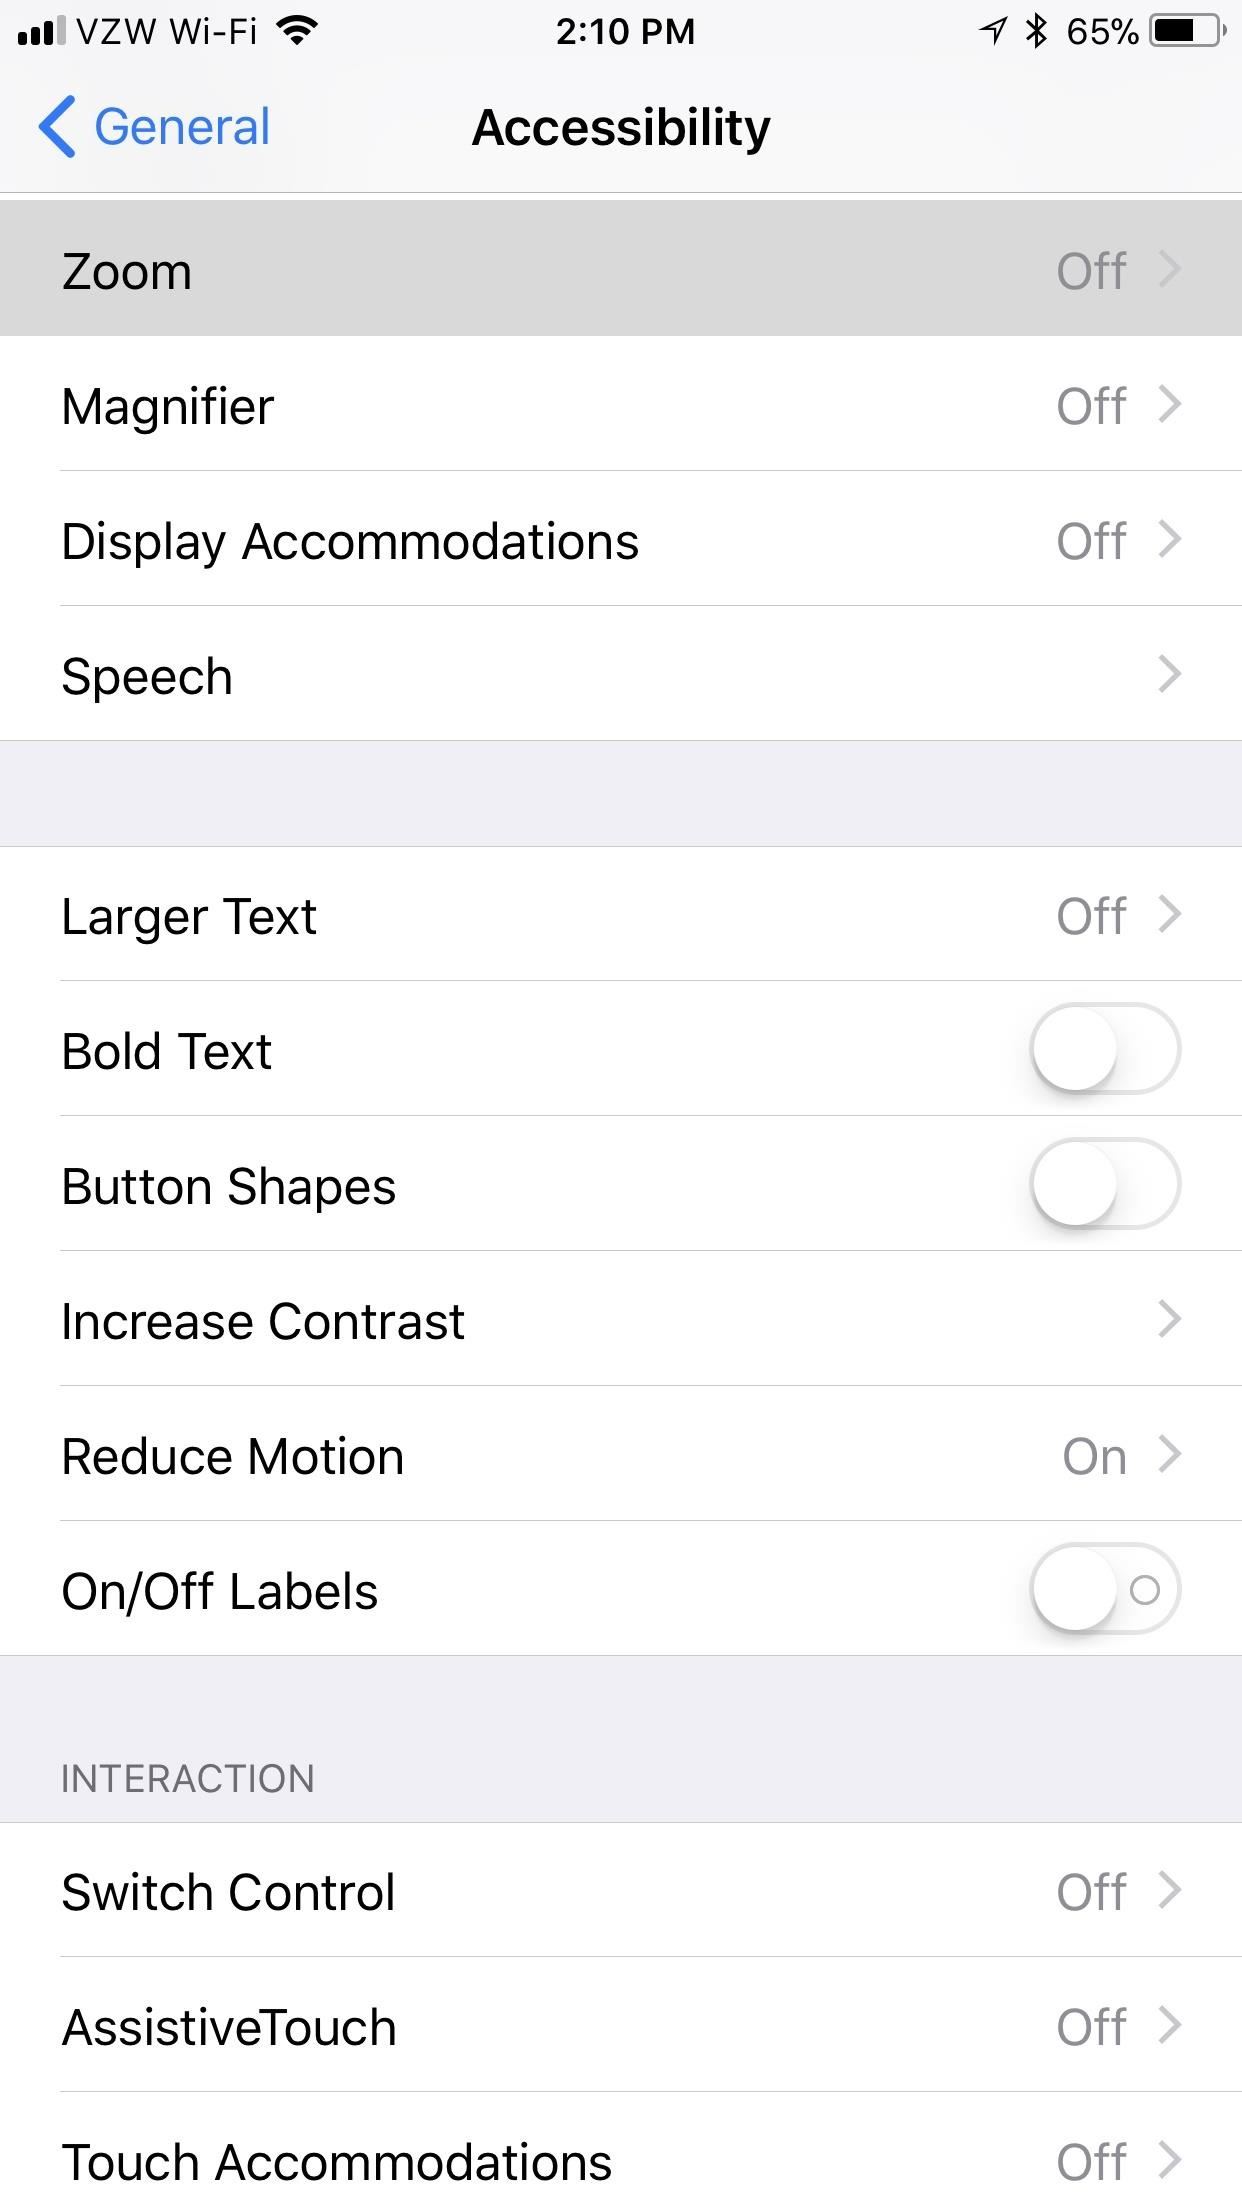
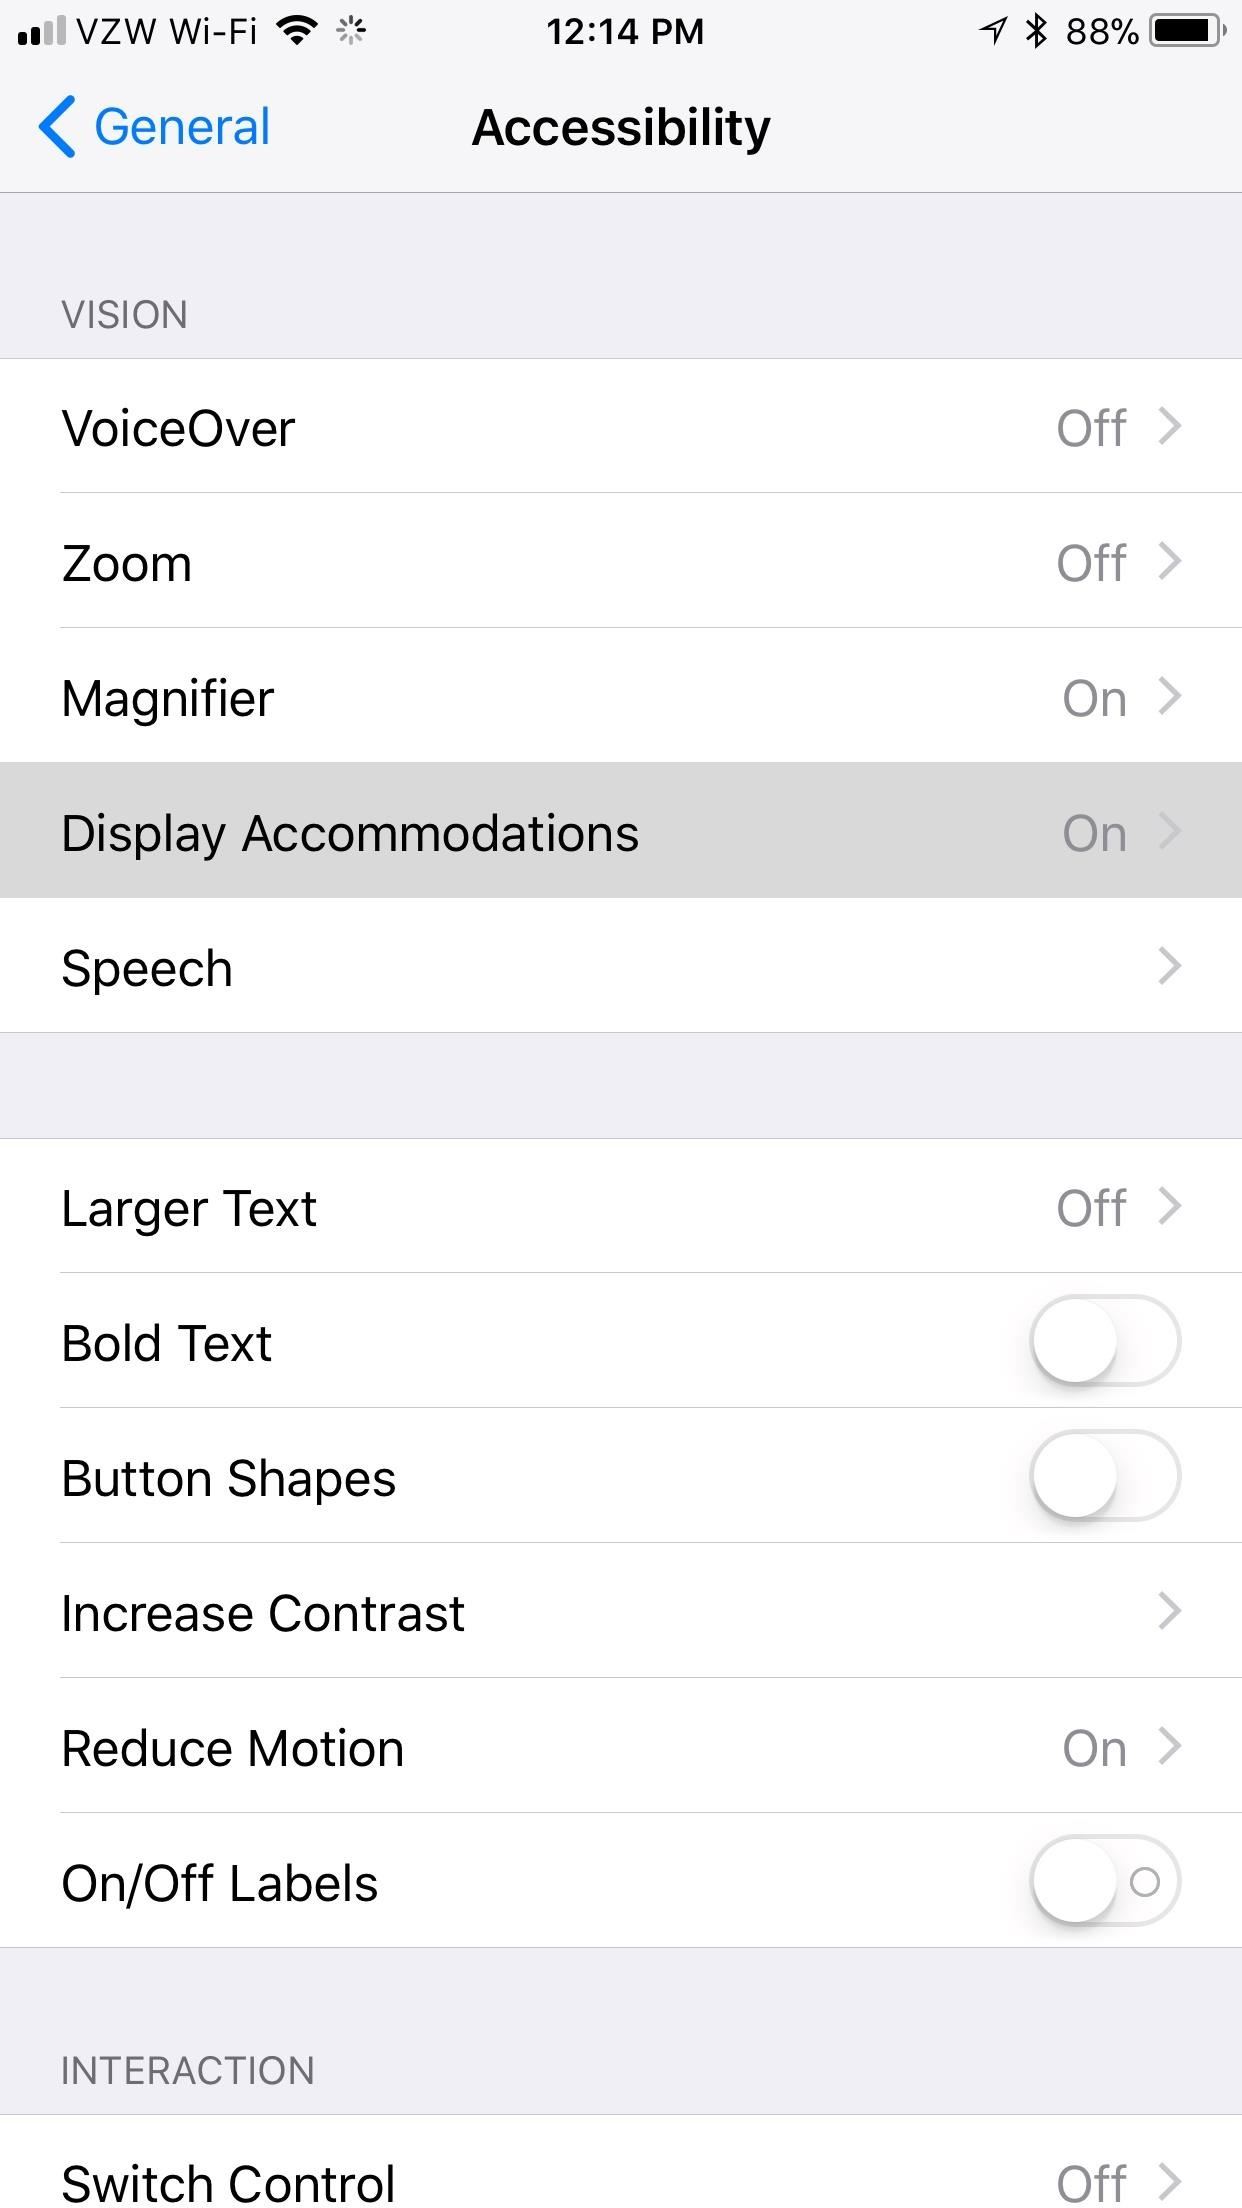
Most of what you’ll need to adjust on grandma’s iPhone is located in the “Accessibility” menu. This menu allows you to change preferences related to vision, hearing, and even touch.
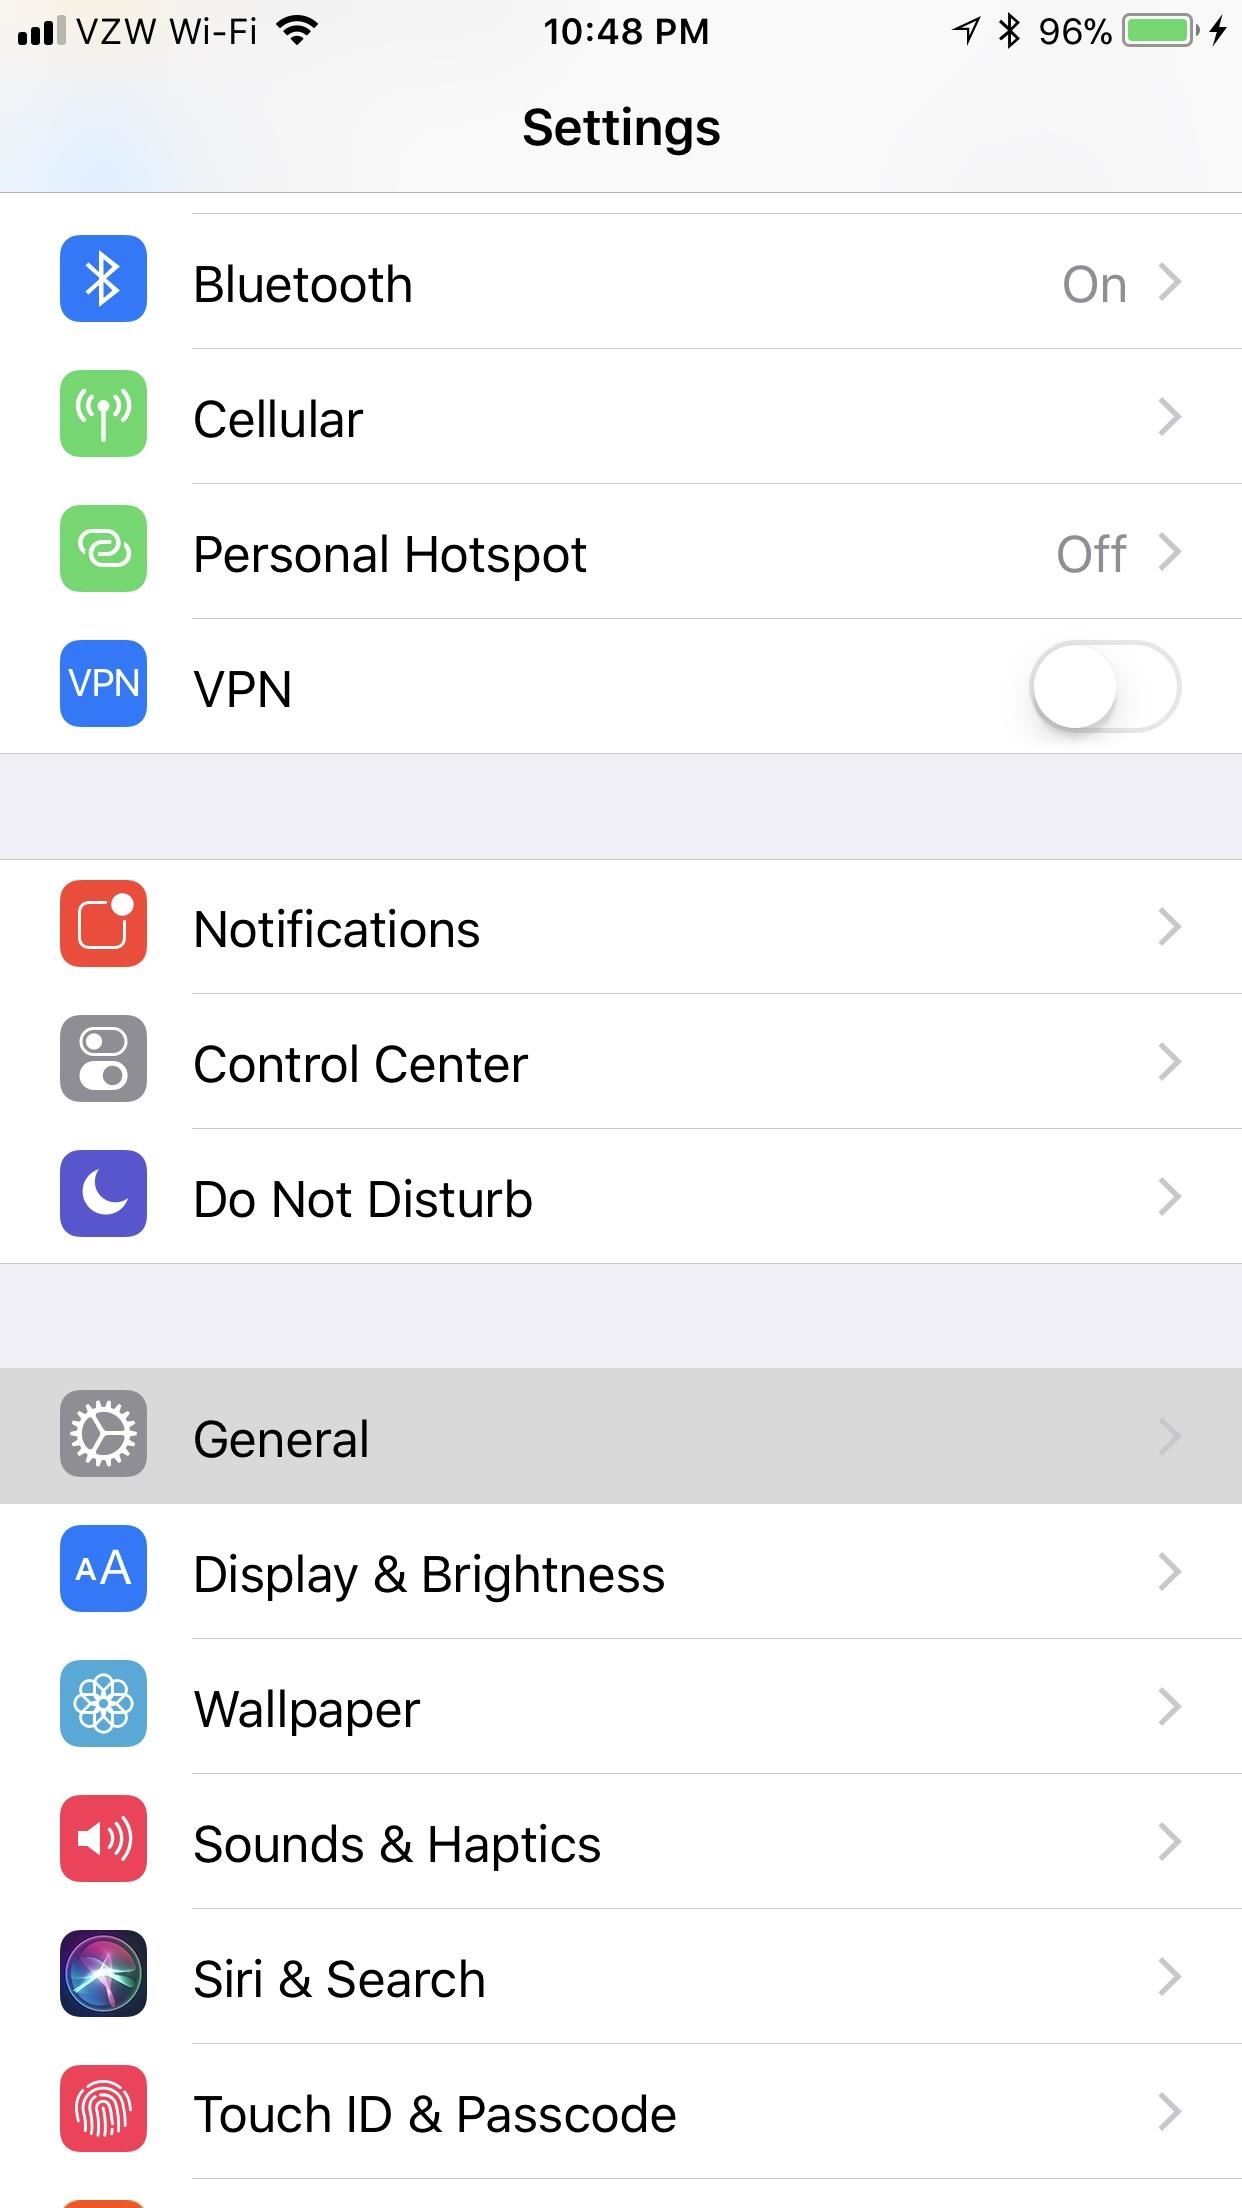
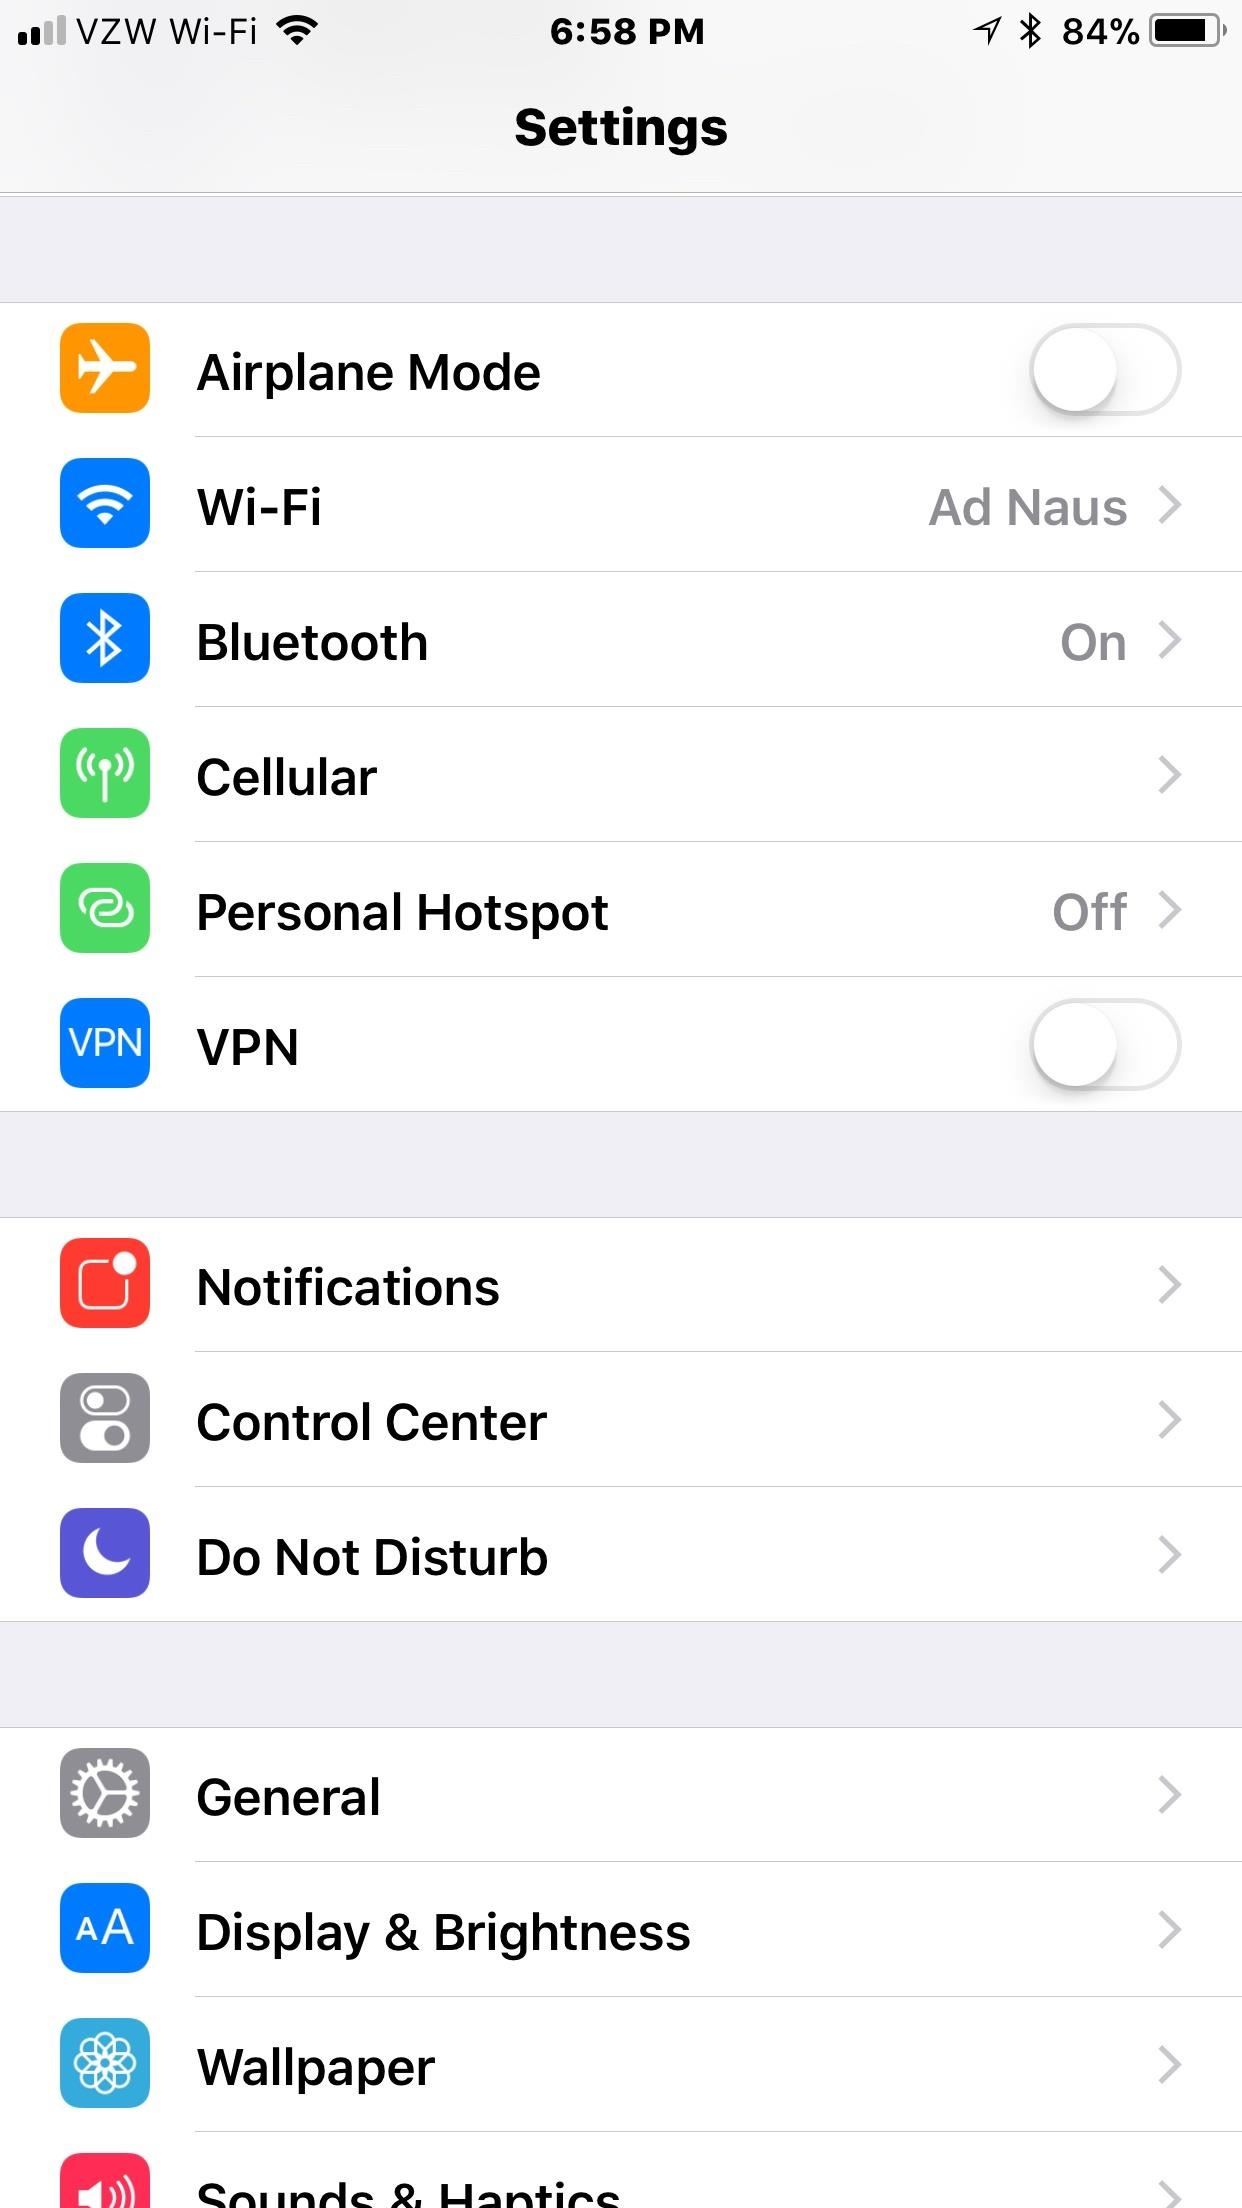
To get there, head over to “Settings,” then “General,” and finally “Accessibility.” From here, you can pick and choose what’s best suited for your particular grandmother’s needs. We’ll go over some of the more important ones below.
Tip 1: Make Text Bigger (Vision)
You’ve already seen your grandma squint at the font of her favorite luncheonette menu, so why force her to do the same with her phone?
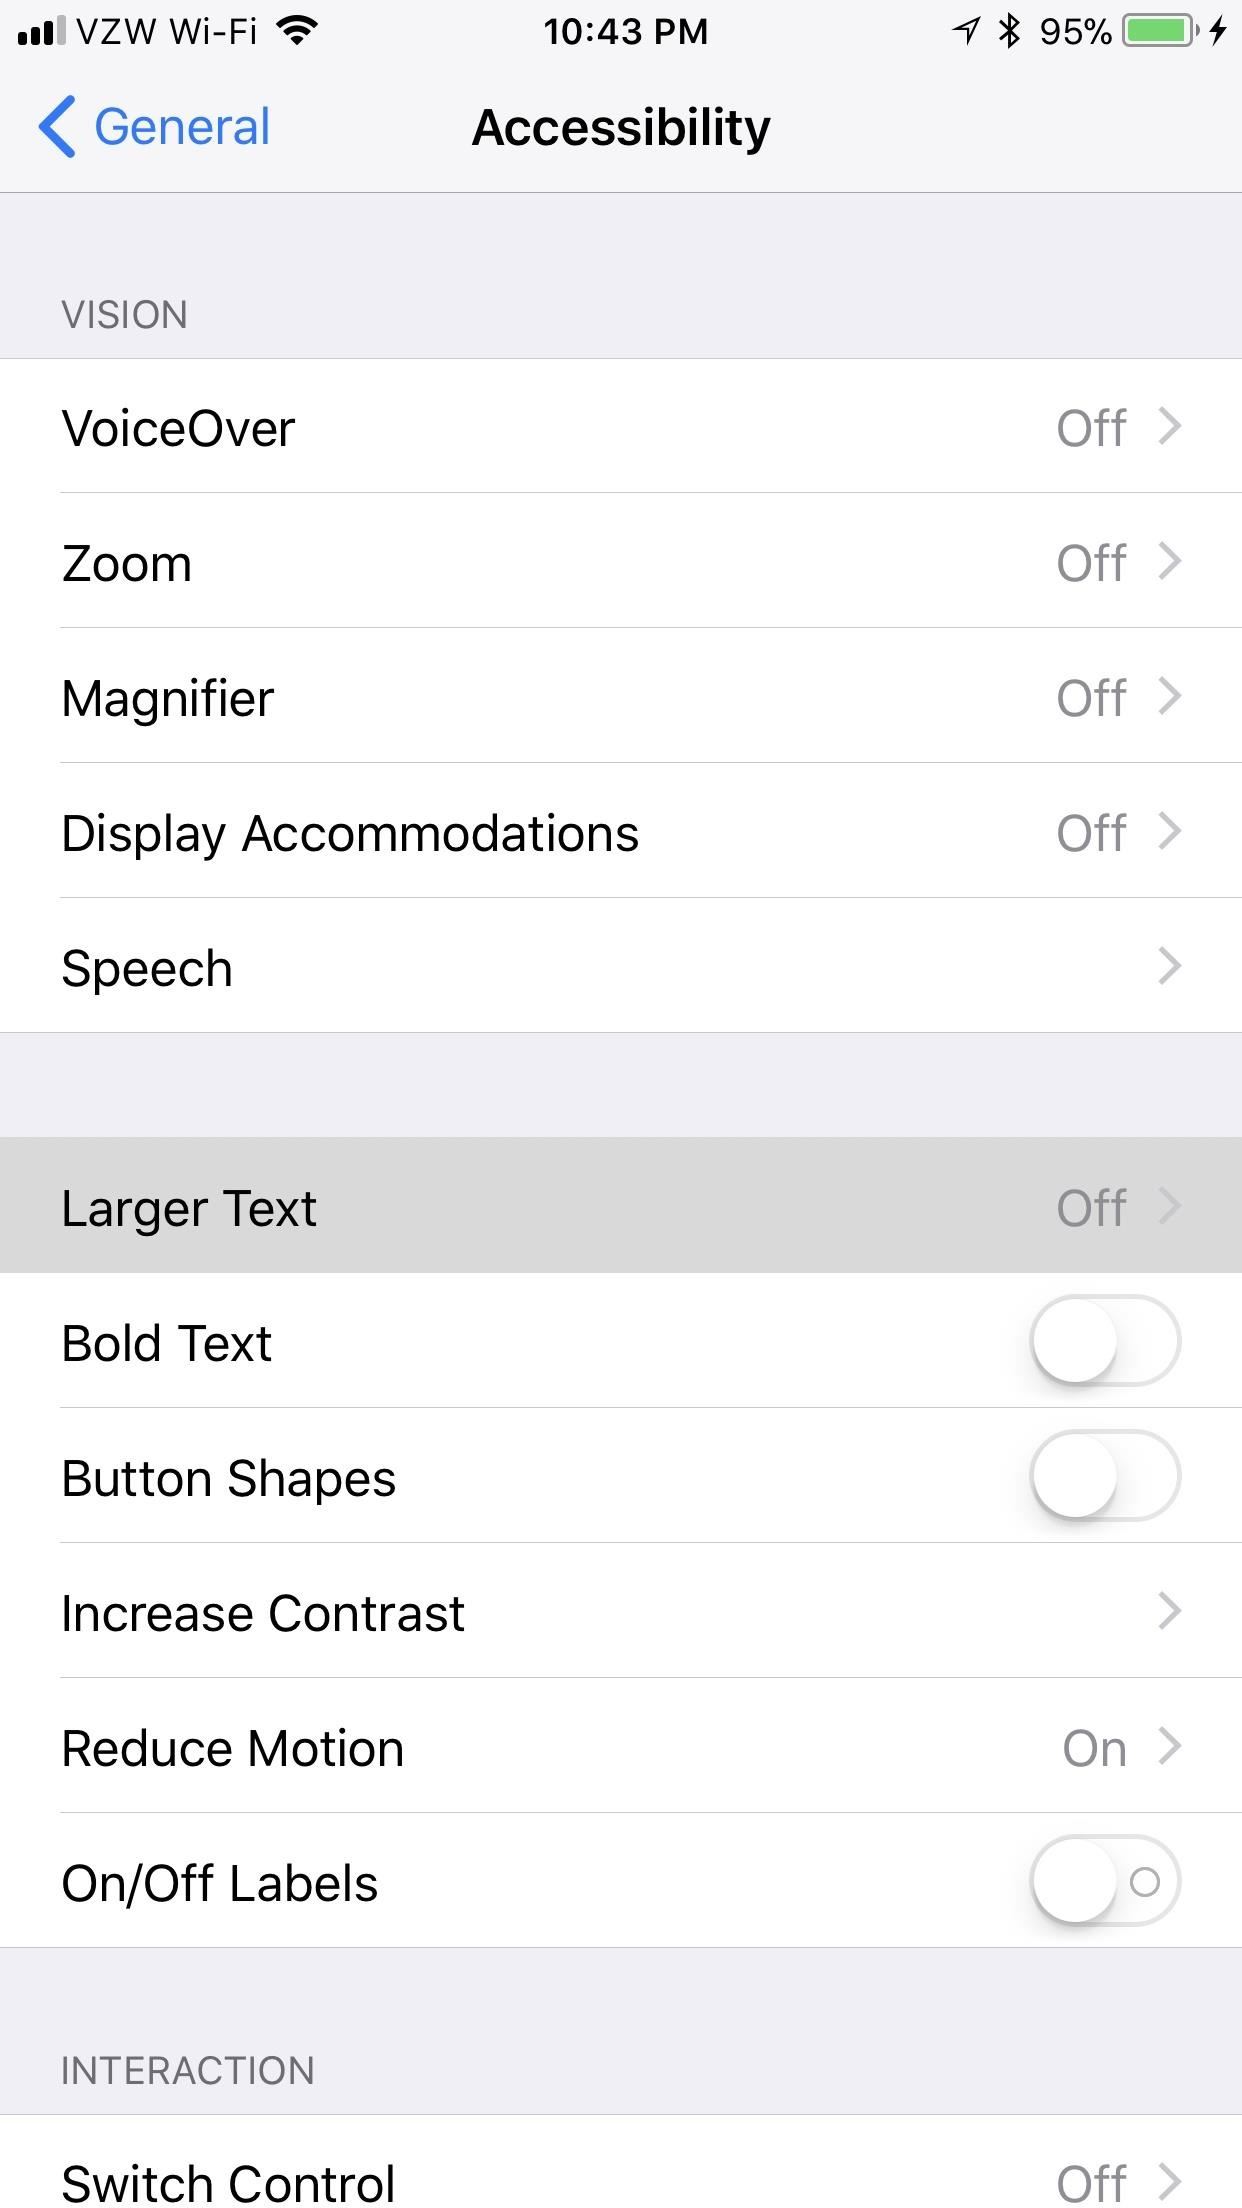
To make the font bigger, simply select “Larger Text” under Vision, and the slider at the bottom can be used to adjust the font size. If it needs to be made even bigger, hit the button that says “Larger Accessibility Sizes.” After you do so, you’ll have the freedom to make the font massive with the slider.
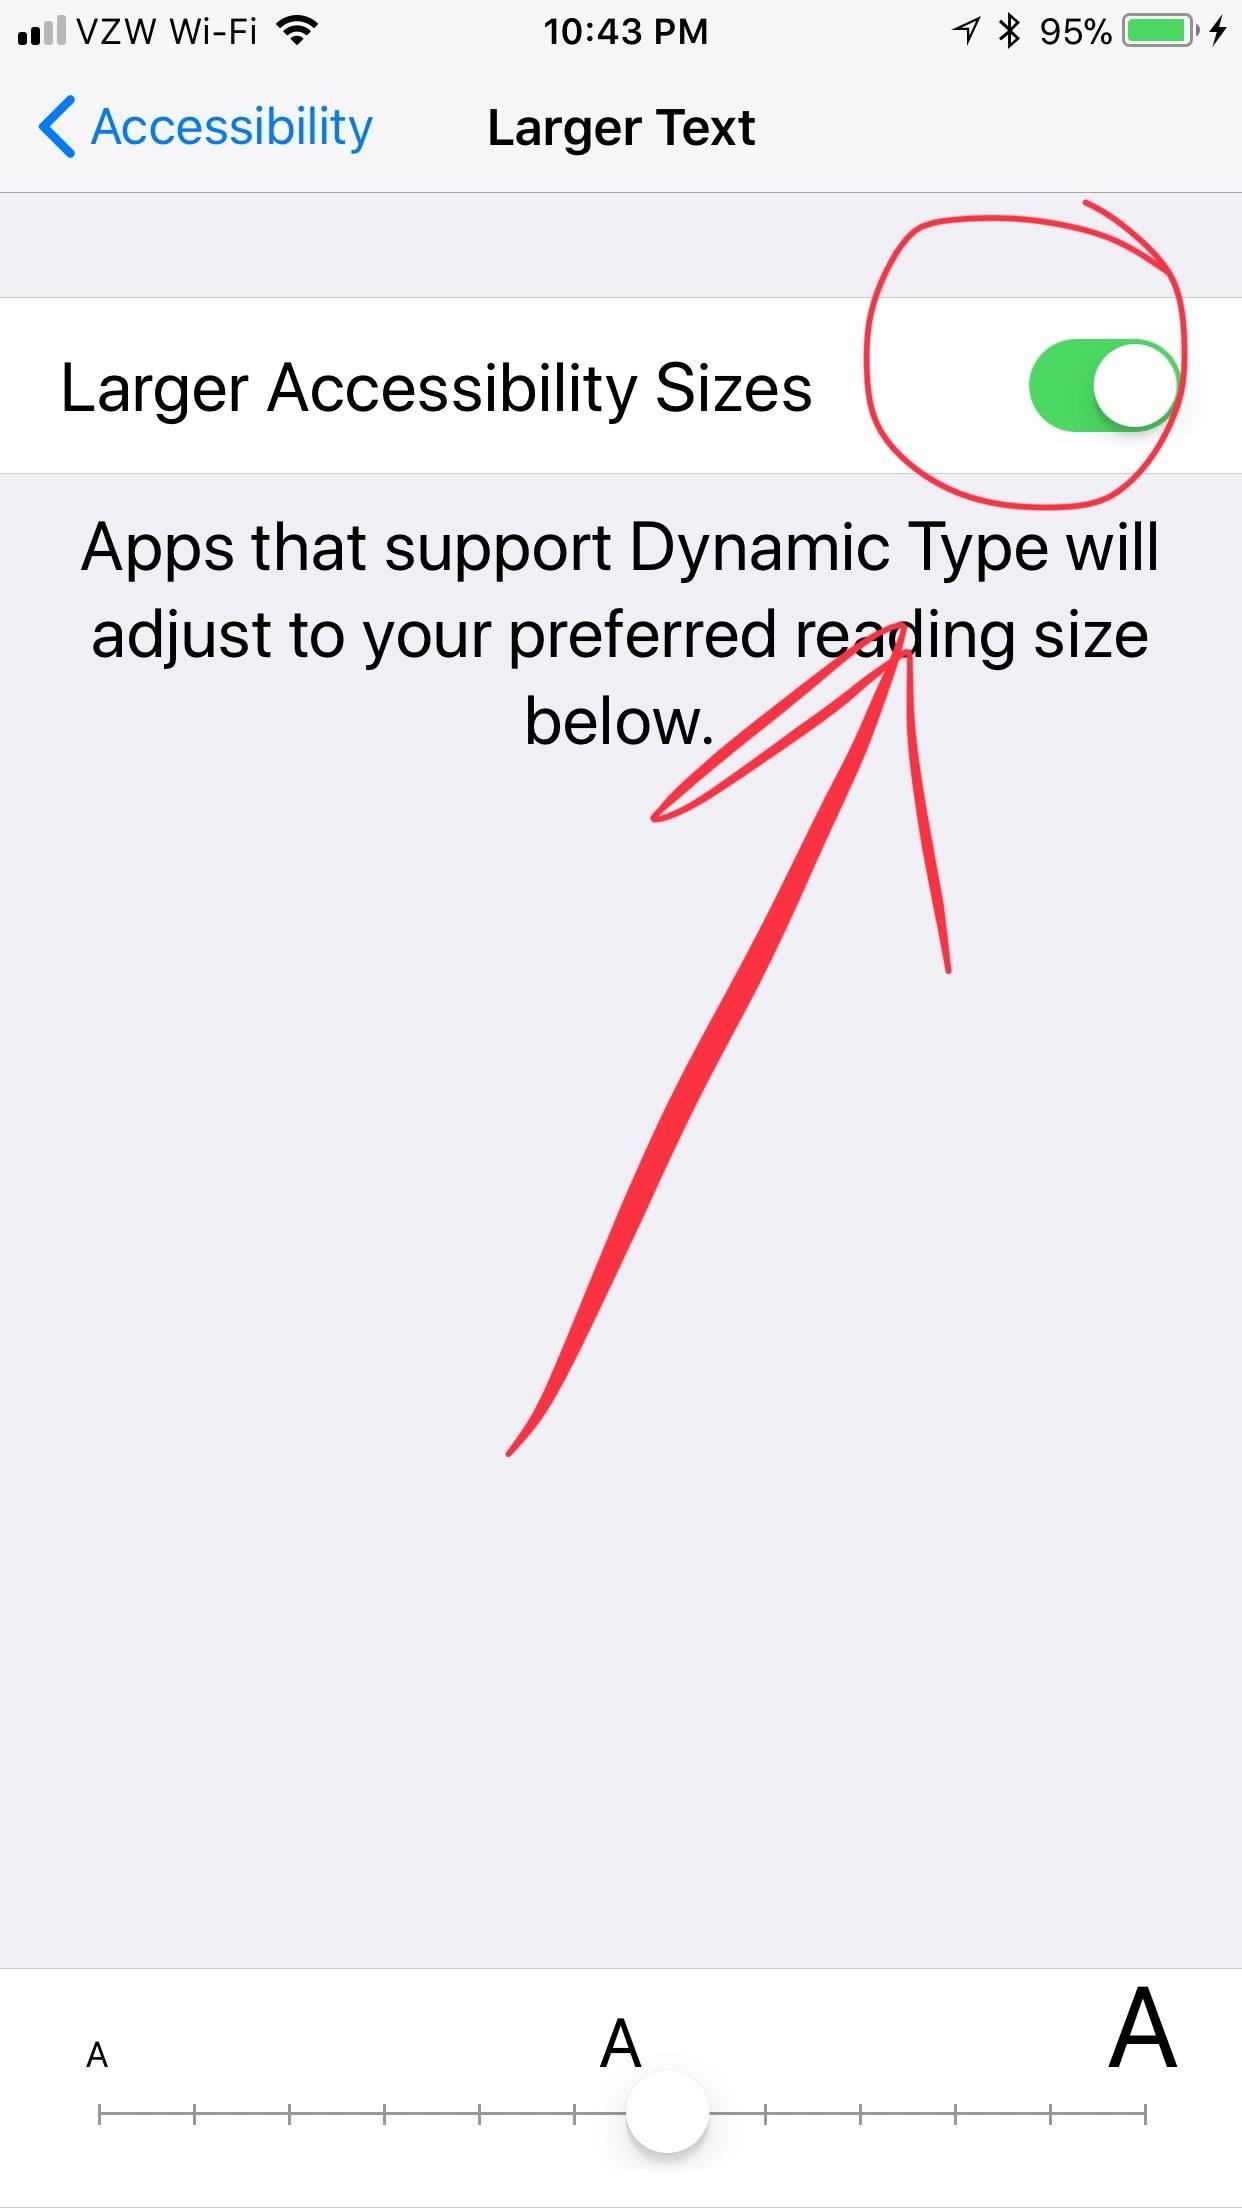

This fix will make almost everything larger around iOS. The font across Apple’s apps is larger, as well as in most third-party applications that support Dynamic Type. However, you’ll still need to manually increase the size of webpages viewed in Safari (and even Google Chrome). For what it’s worth, Safari’s text is larger inside the app itself, but the webpages themselves are the same size as they were before.
Tip 2: Make Text Bolder (Vision)
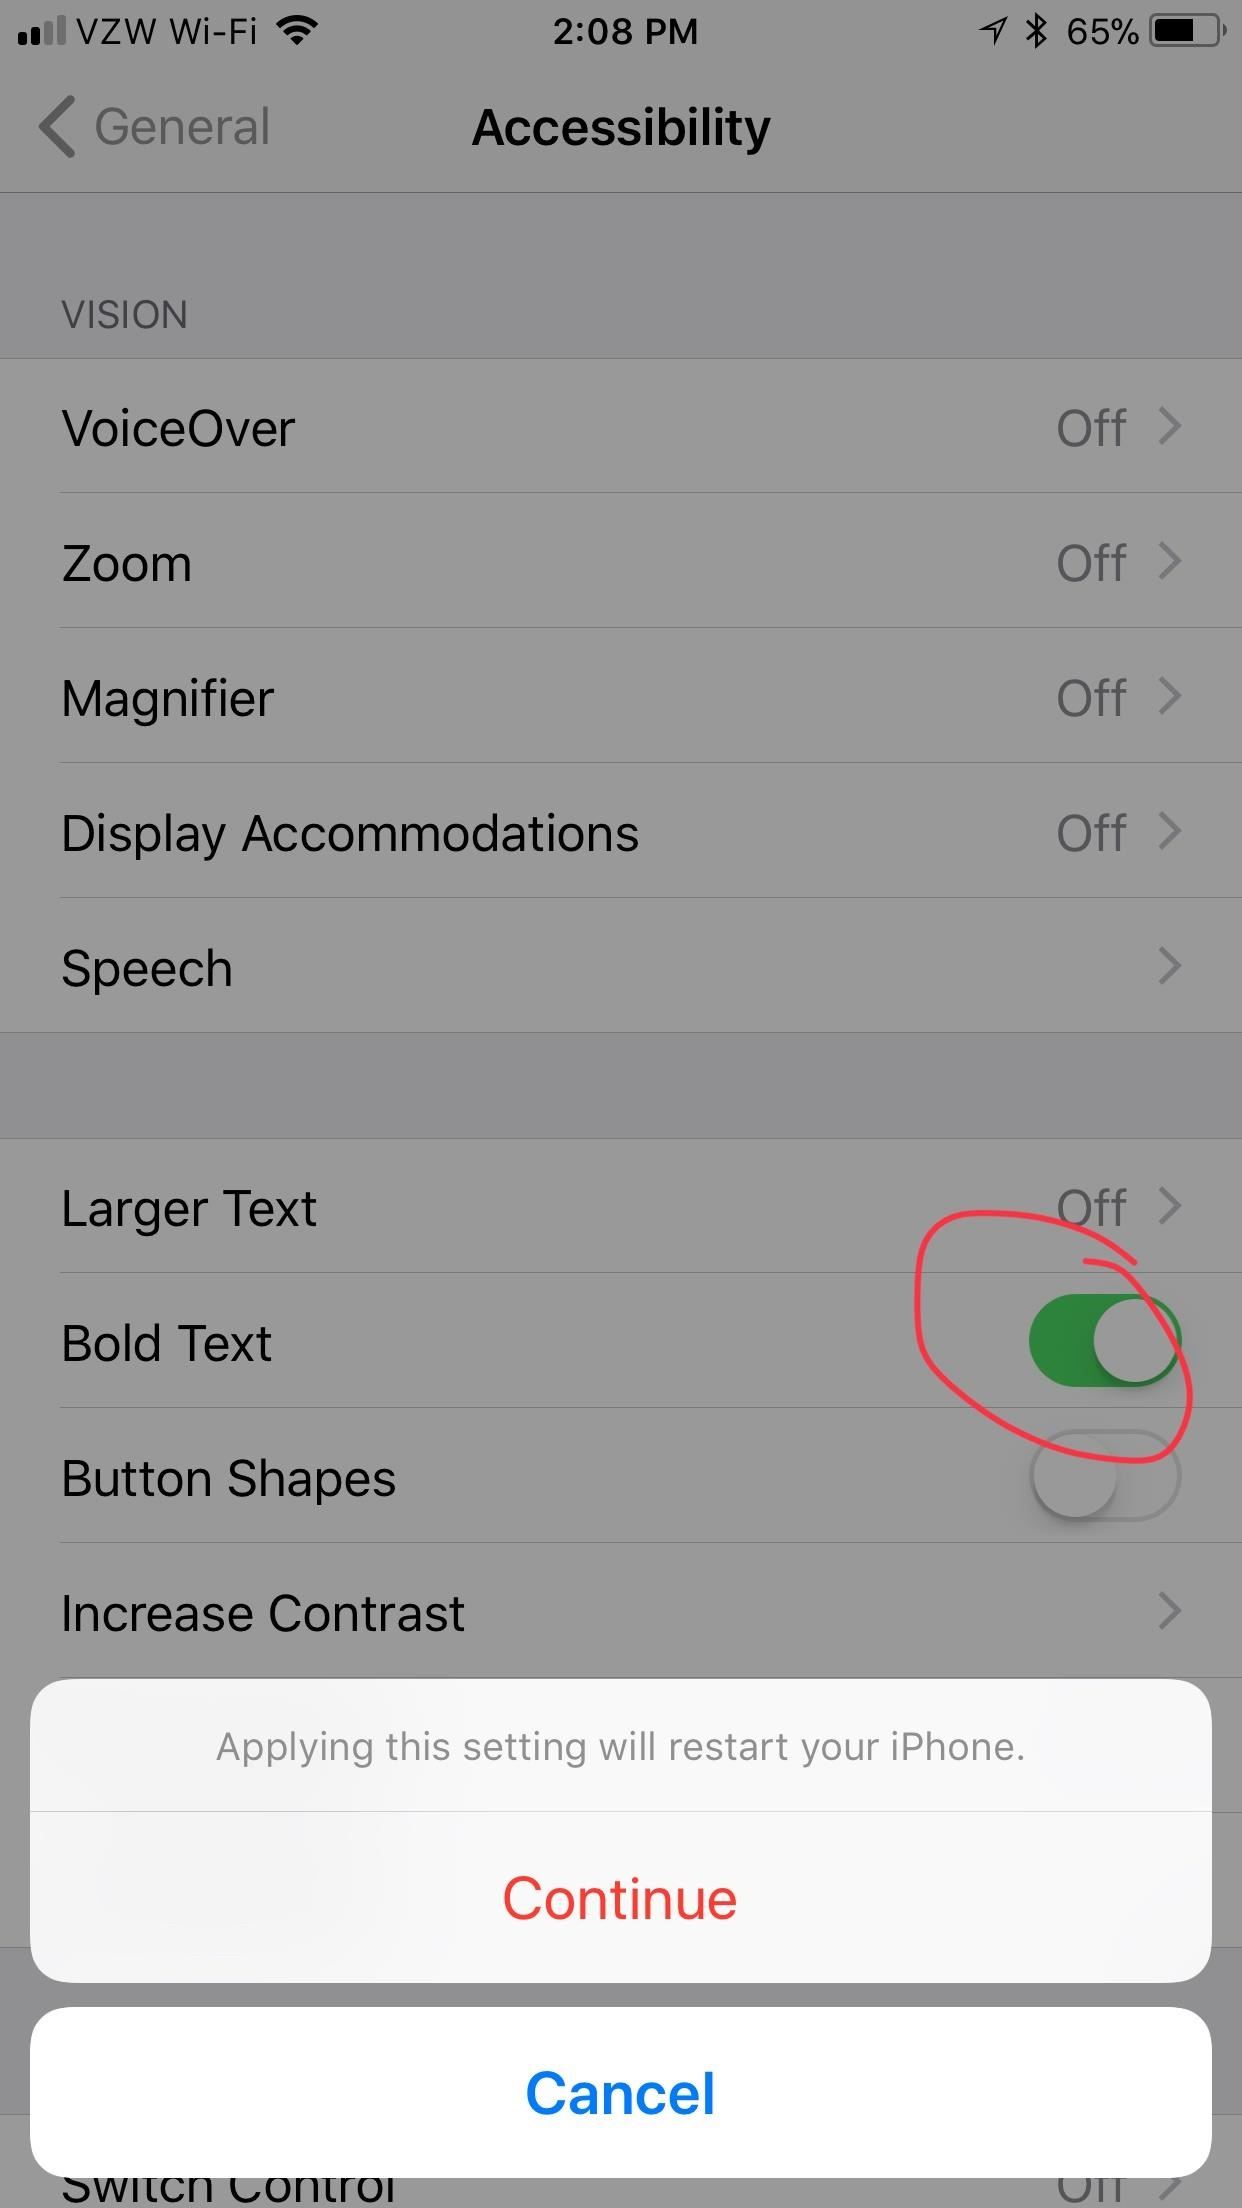
The “Bold Text” option makes text bigger and more defined, but you will need to restart your device to enable it. Text will appear bold almost exactly where it is larger when “Larger Text” is enabled.
Tip 3: Enable Zoom (Vision)
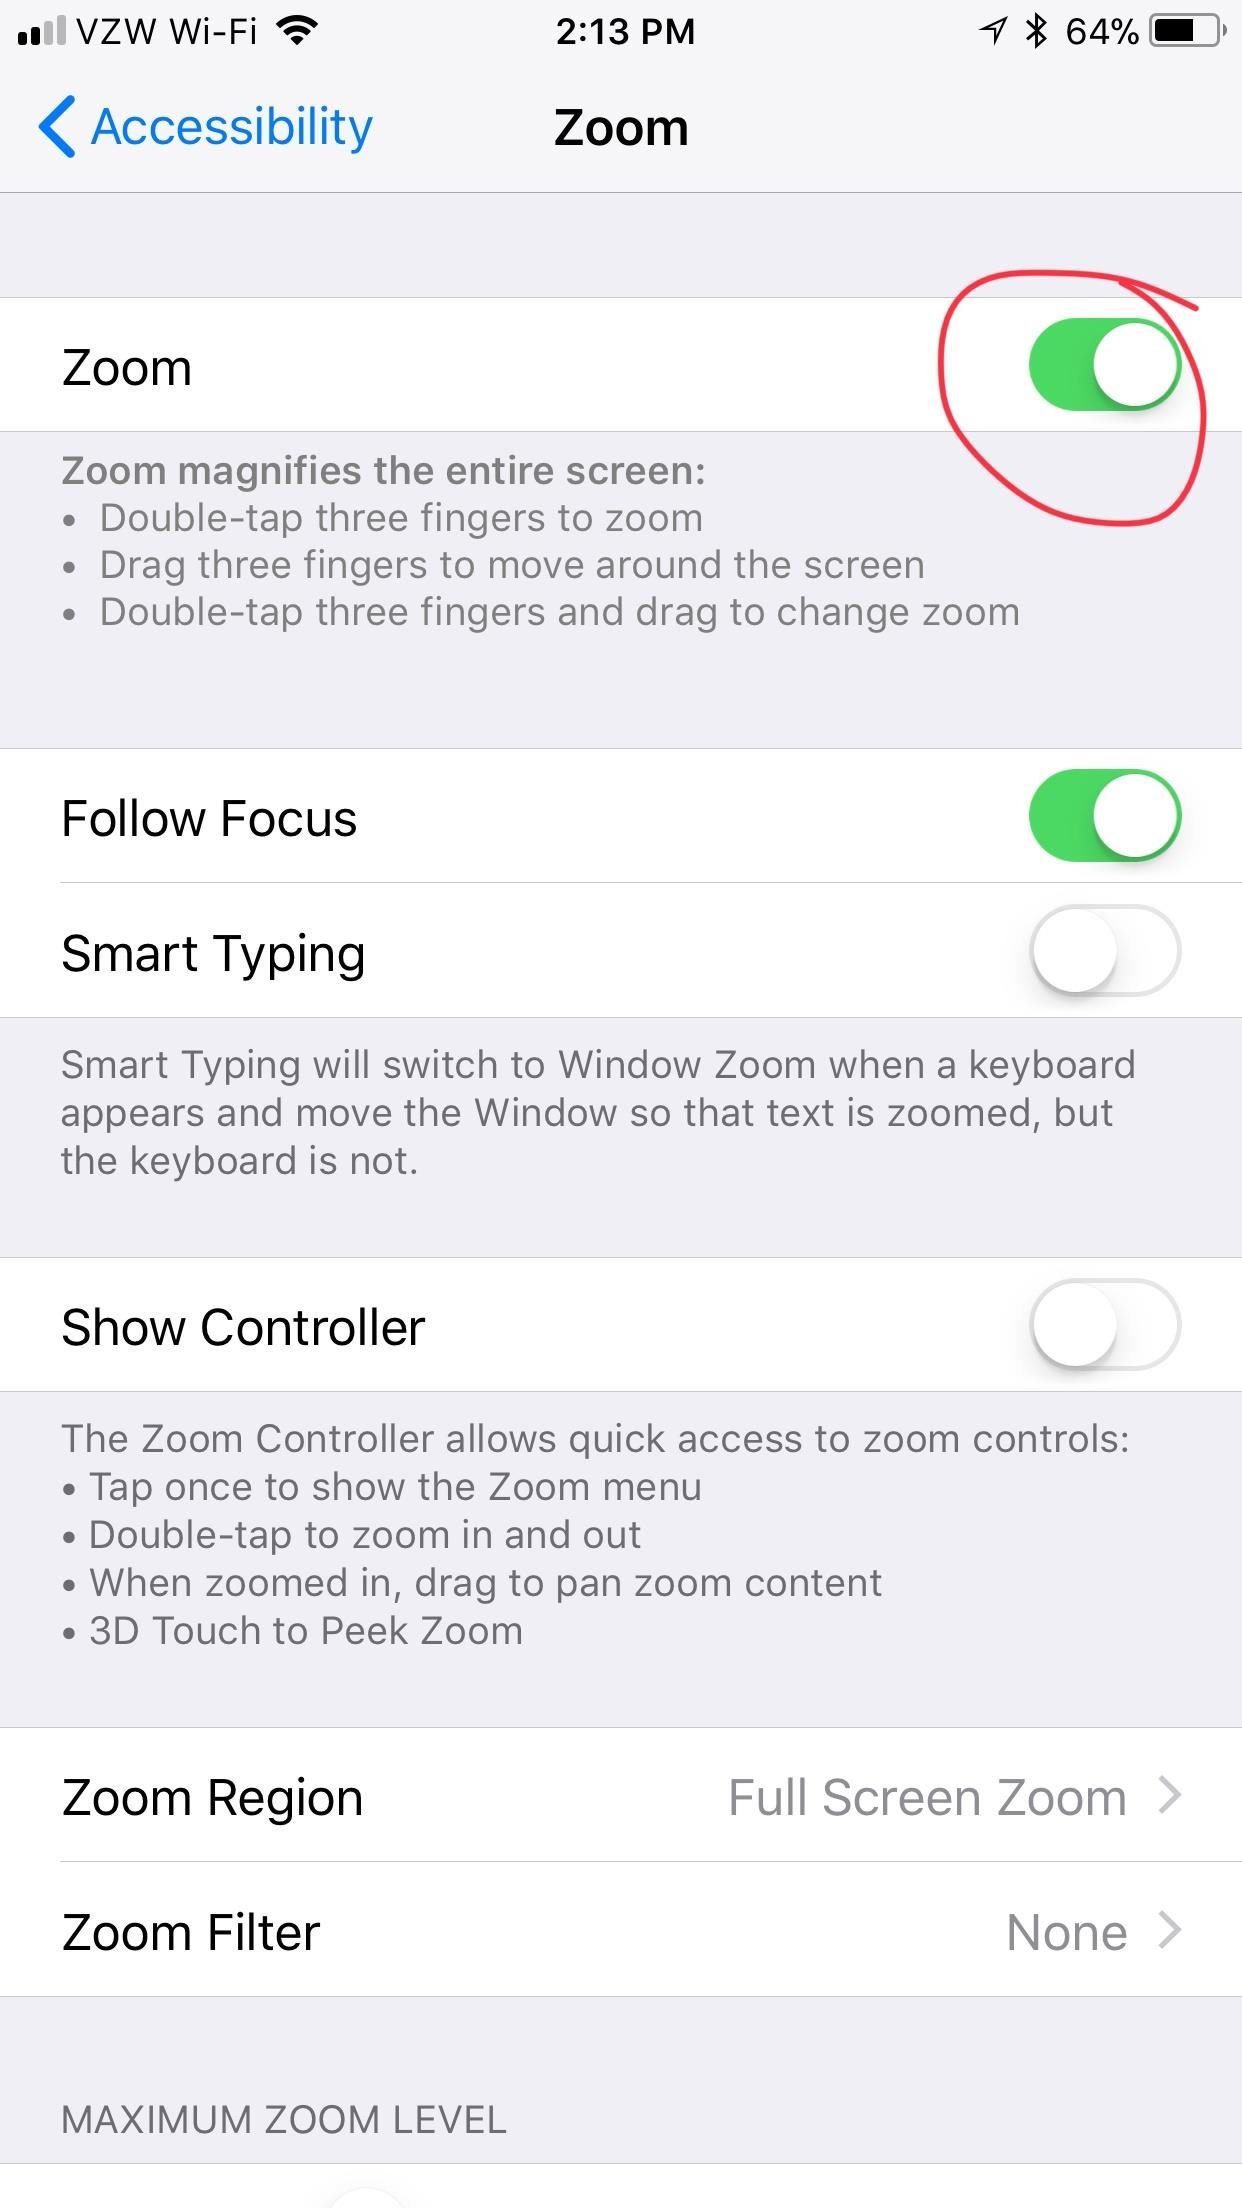
After tweaking the font size and making it bold, your grandma may still struggle to see, so try enabling “Zoom.” With it enabled, a double-tap with three fingers on the screen creates a small, magnifying glass box on the screen. With other three-finger-driven gestures, you can move the box around, zoom in further, and dismiss it.
If your grandma will have a hard time activating it, check out Step 4 below for another (easier) way to enable it.
Tip 4: Turn on Magnifier (Vision)
Another modification to consider in “Accessibility” is “Magnifier,” which, when activated, will turn the iPhone into a digital magnifying glass. Input from the camera will be displayed on the screen, and your grandma can use the zoom slider to increase or decrease the magnified amount. This is helpful for things in the physical world with small print, such as books or laundry tags. Check out our in-depth article on the topic for more information.
- More Info: How to Activate Your iPhone’s Hidden Magnifying Glass


Tip 5: Eliminate Harsh Colors (Vision)
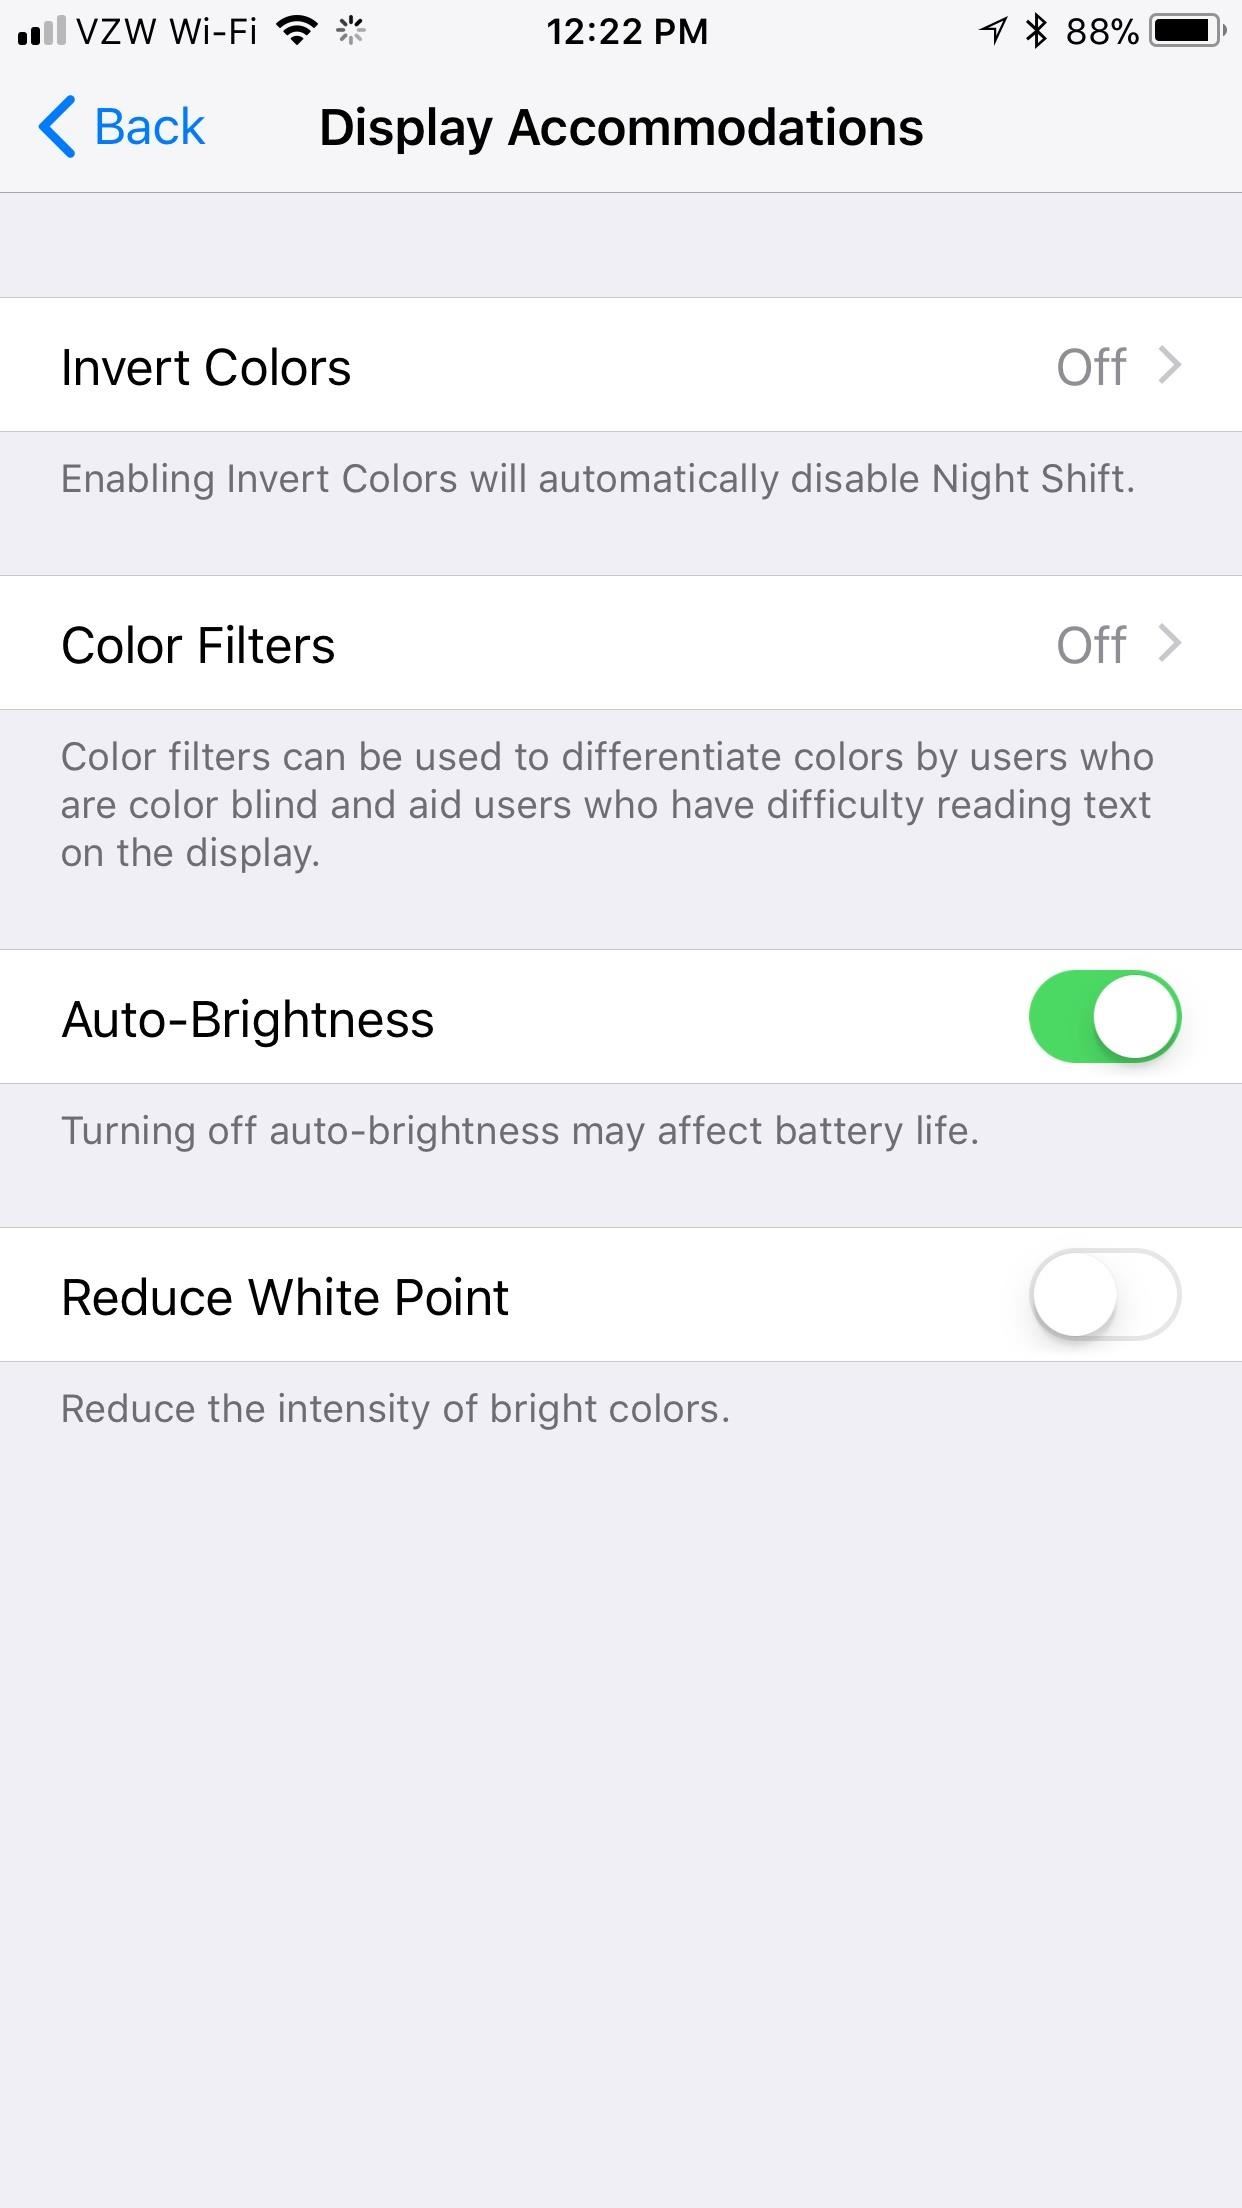
If your grandma finds the colors too bright (even after adjusting the brightness), she can use the “Reduce White Point” feature found in the “Display Accommodations” settings. This feature will reduce the intensity of bright colors, useful if your grandma has sensitive eyes. To make the most of it, it’s probably best to turn off auto-brightness. See Step 4 below for a way to enable/disable “Reduce White Point” more easily.
- Don’t Miss: How to Turn Your iPhone’s Auto-Brightness Off in iOS 11
Tip 6: Enable VoiceOver (Vision)
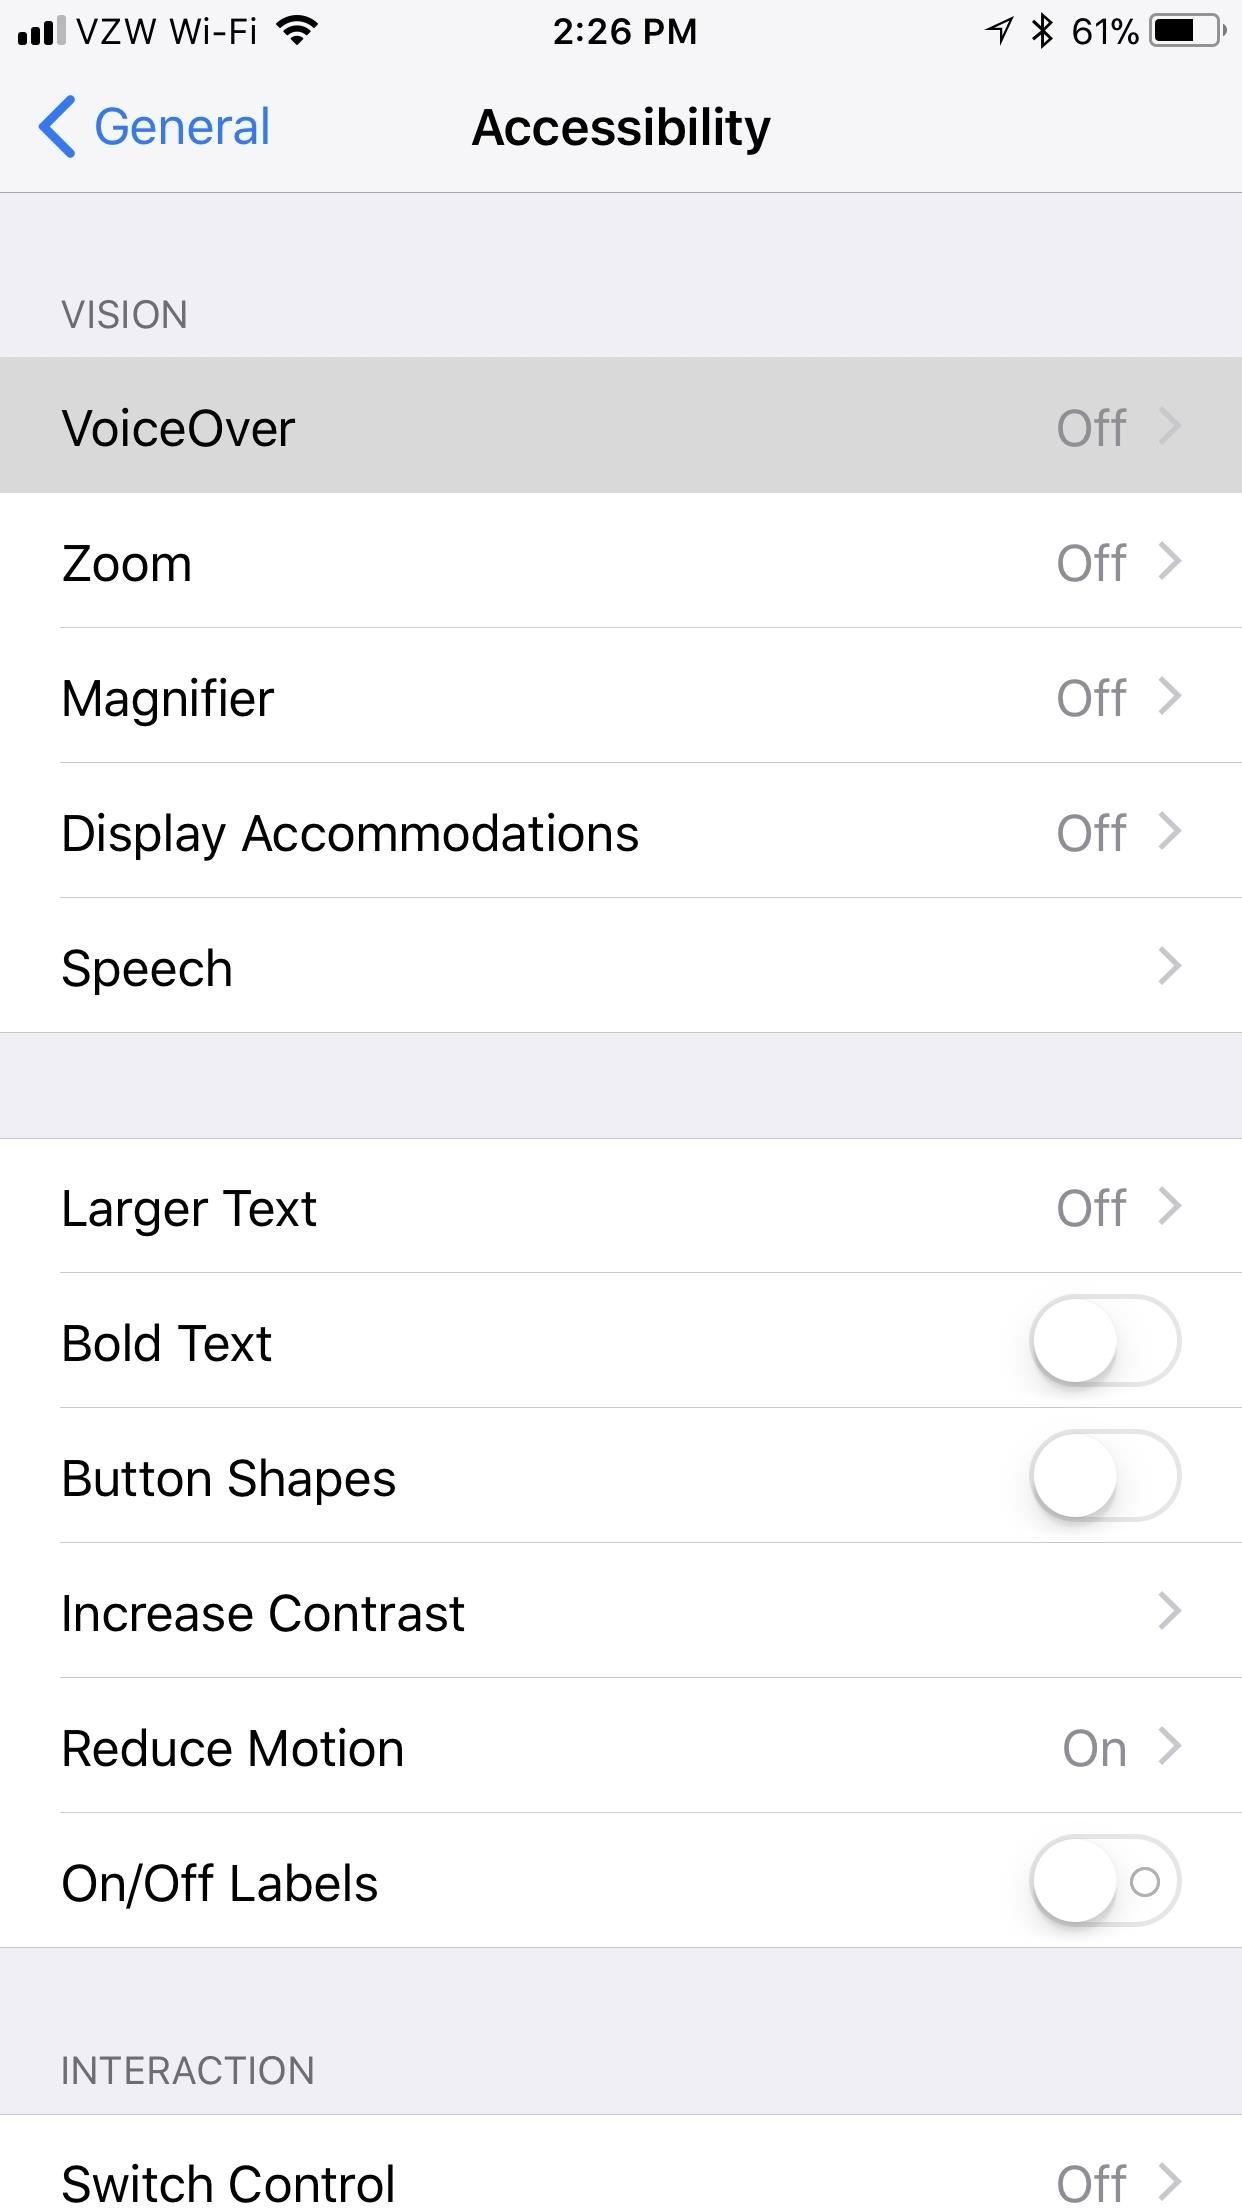
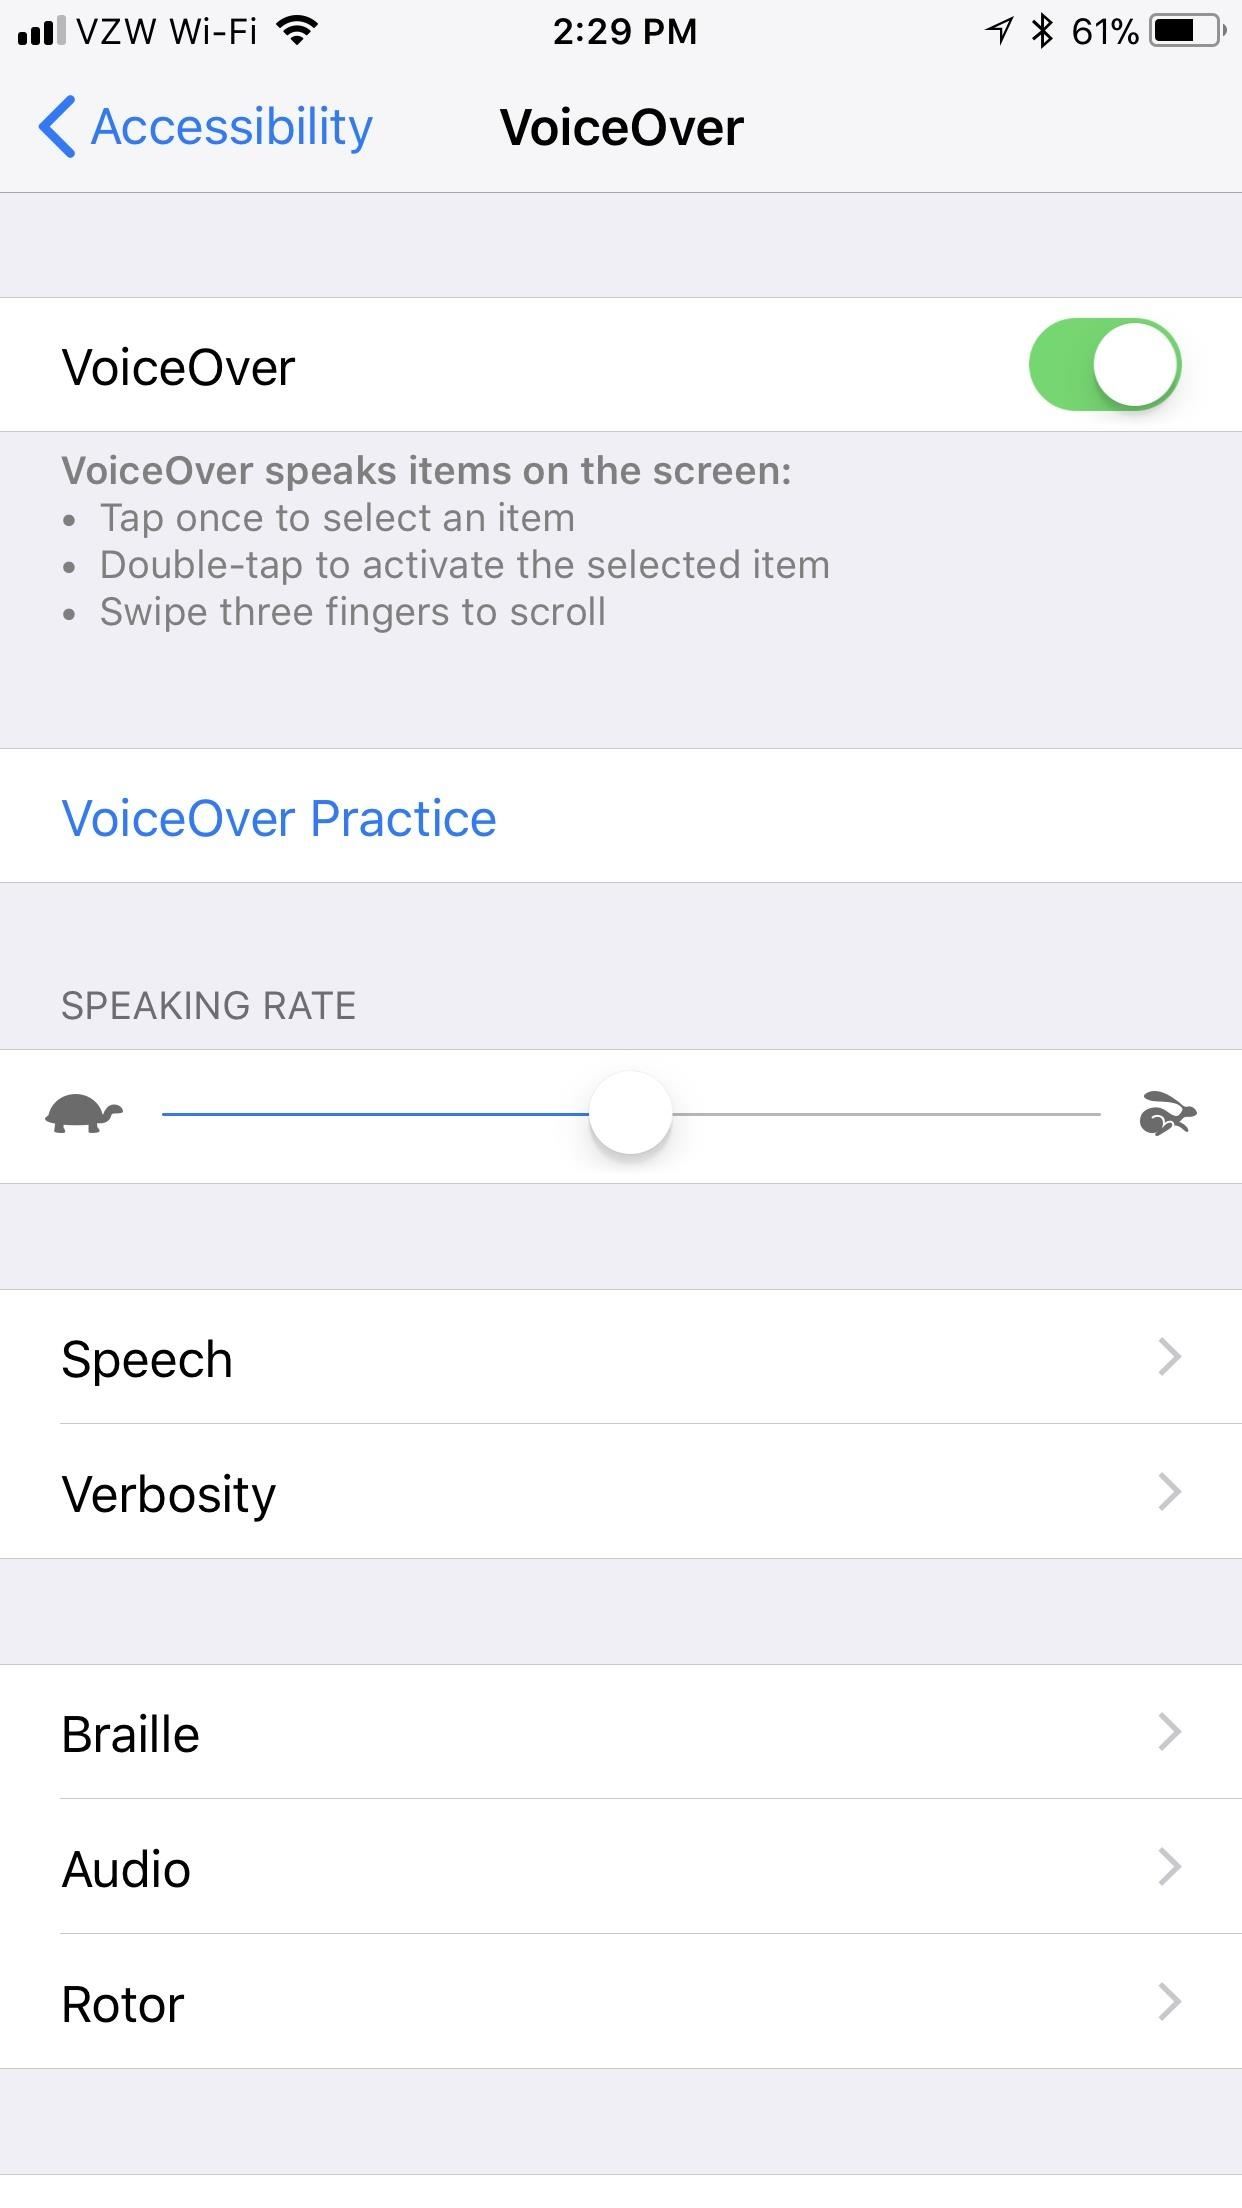
If your grandma is severely visually impaired, then “VoiceOver” is for her. This feature narrates every option on the screen as you tap on it. Tapping on an item no longer produces an action other than having the iPhone describe the selection. A double-tap activates the selected item and three-fingered-swipes scroll for you. The speaking rate can be adjusted as well, to accommodate the needs of your grandma. Again, check out Step 4 for an easy way to activate/deactivate this feature on the fly.
Tip 7: Use AssistiveTouch (Interaction)
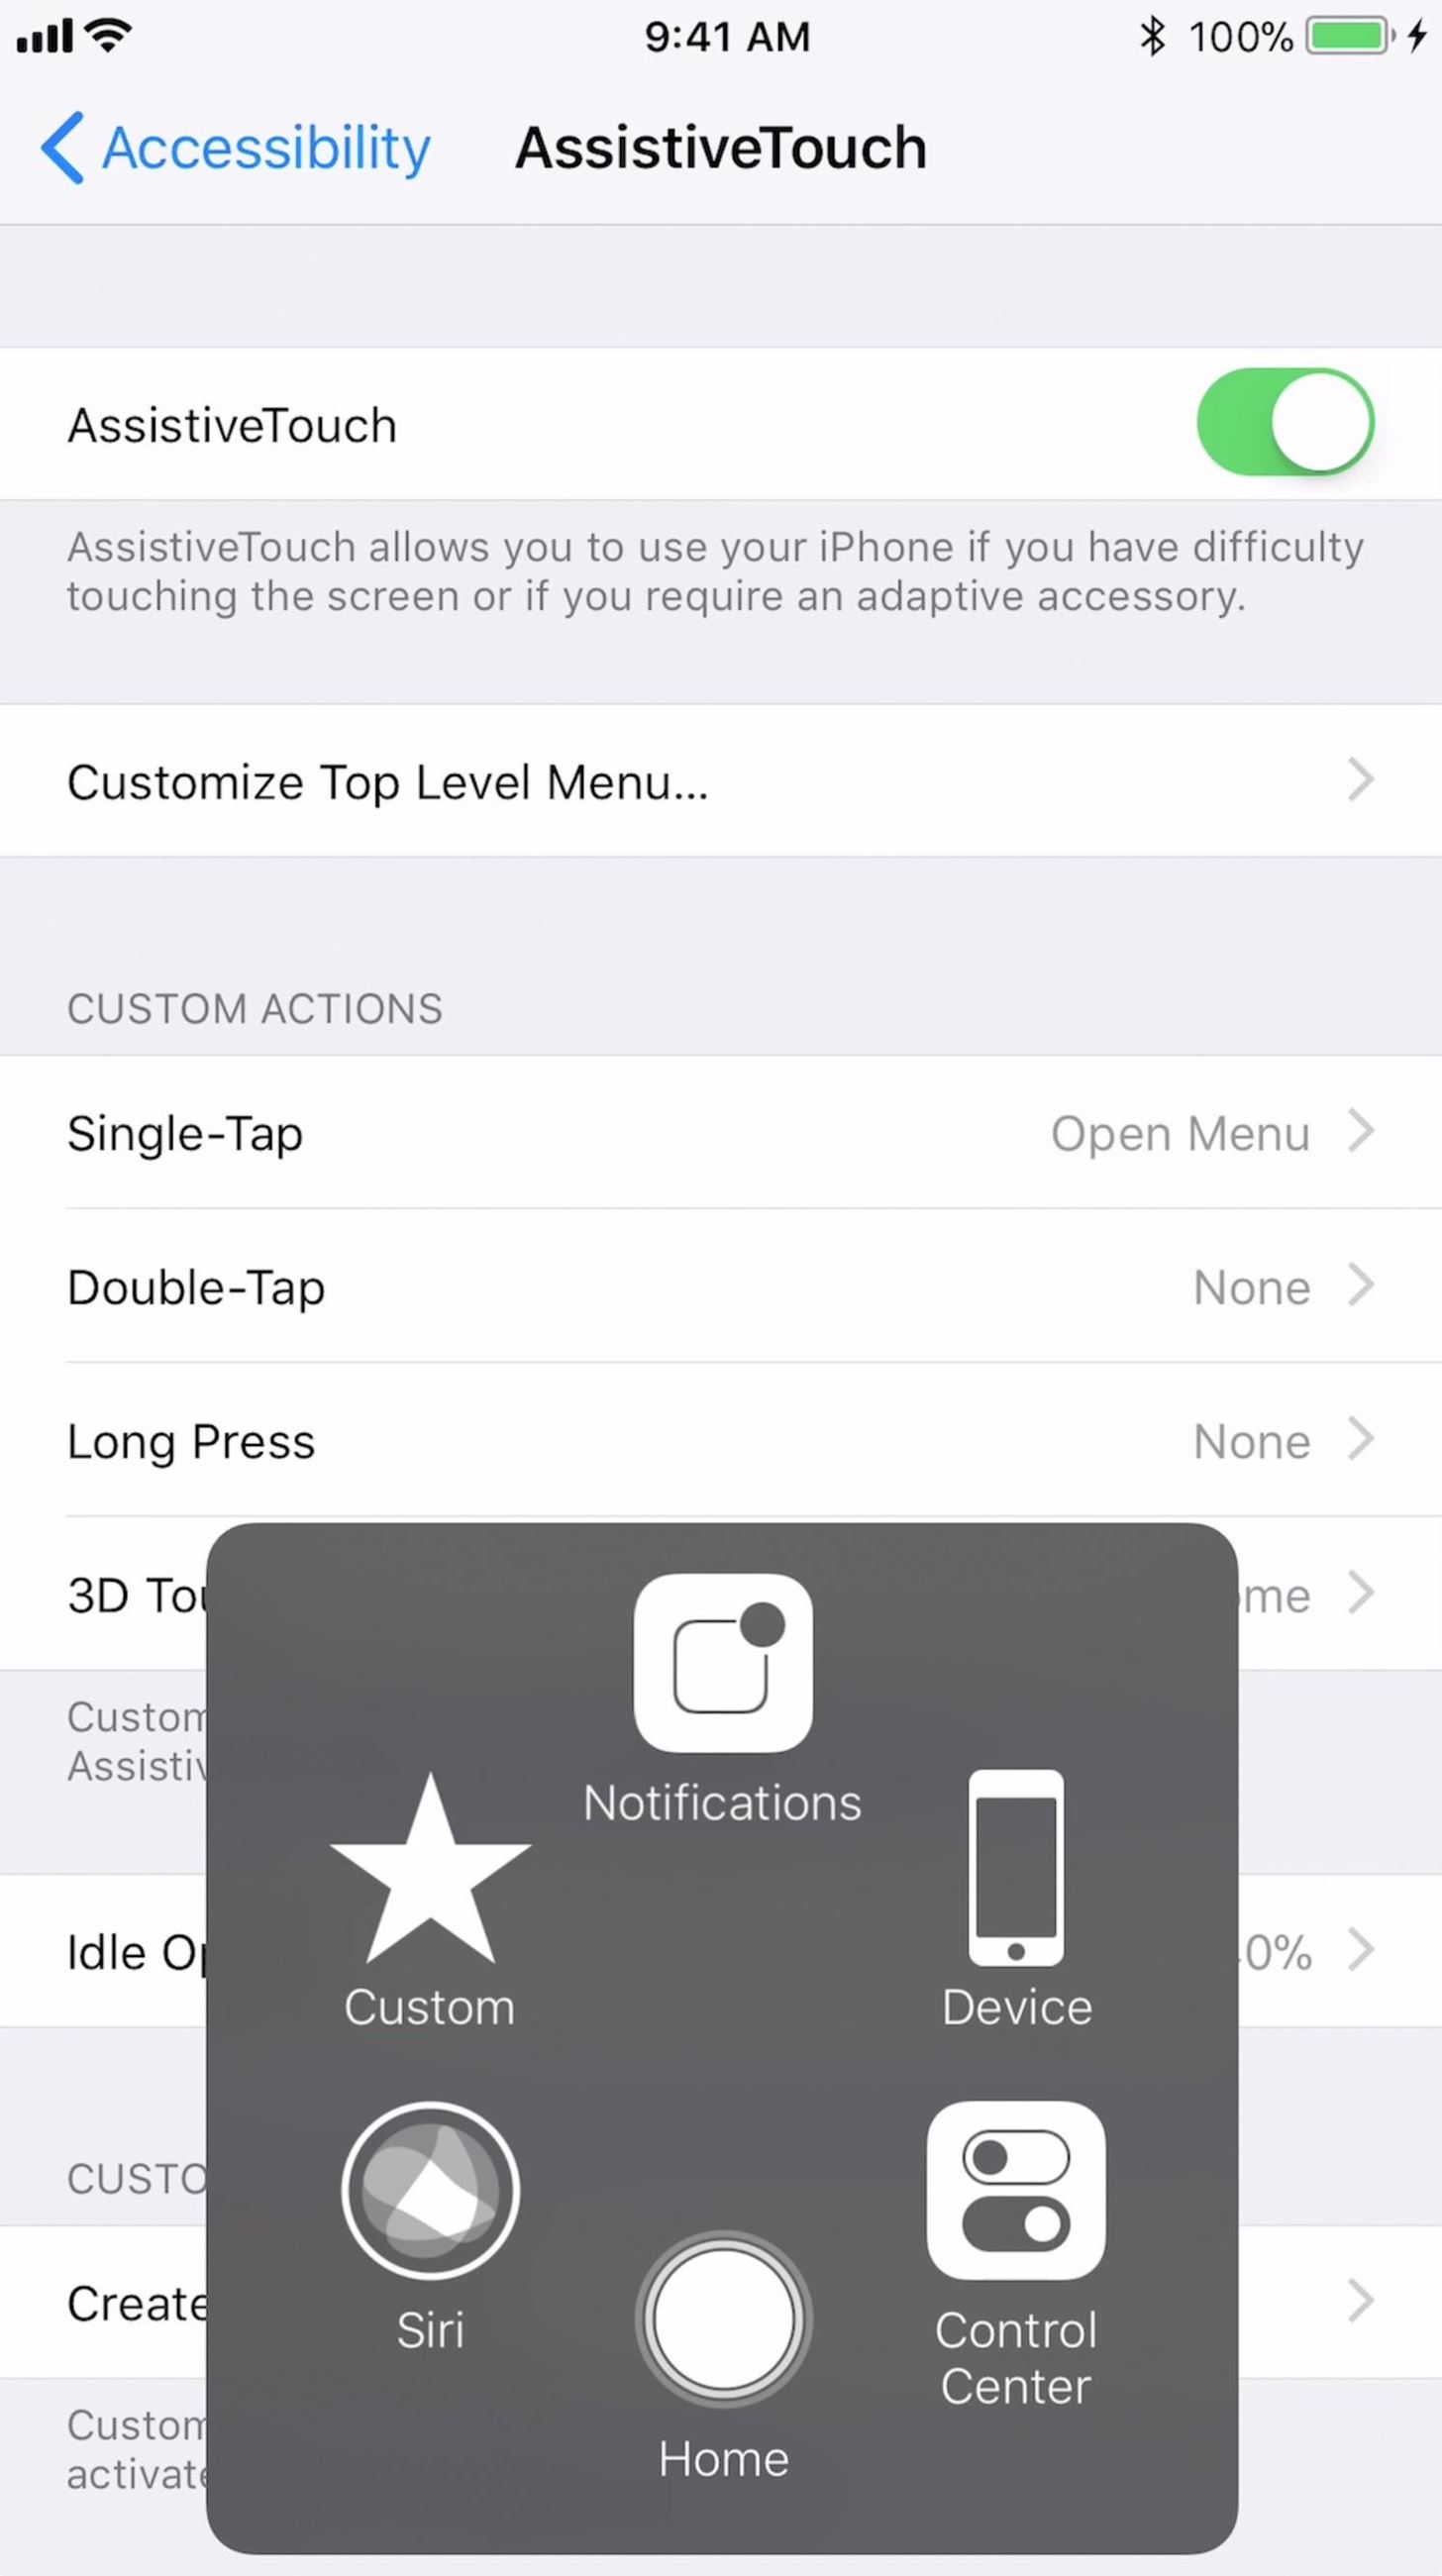
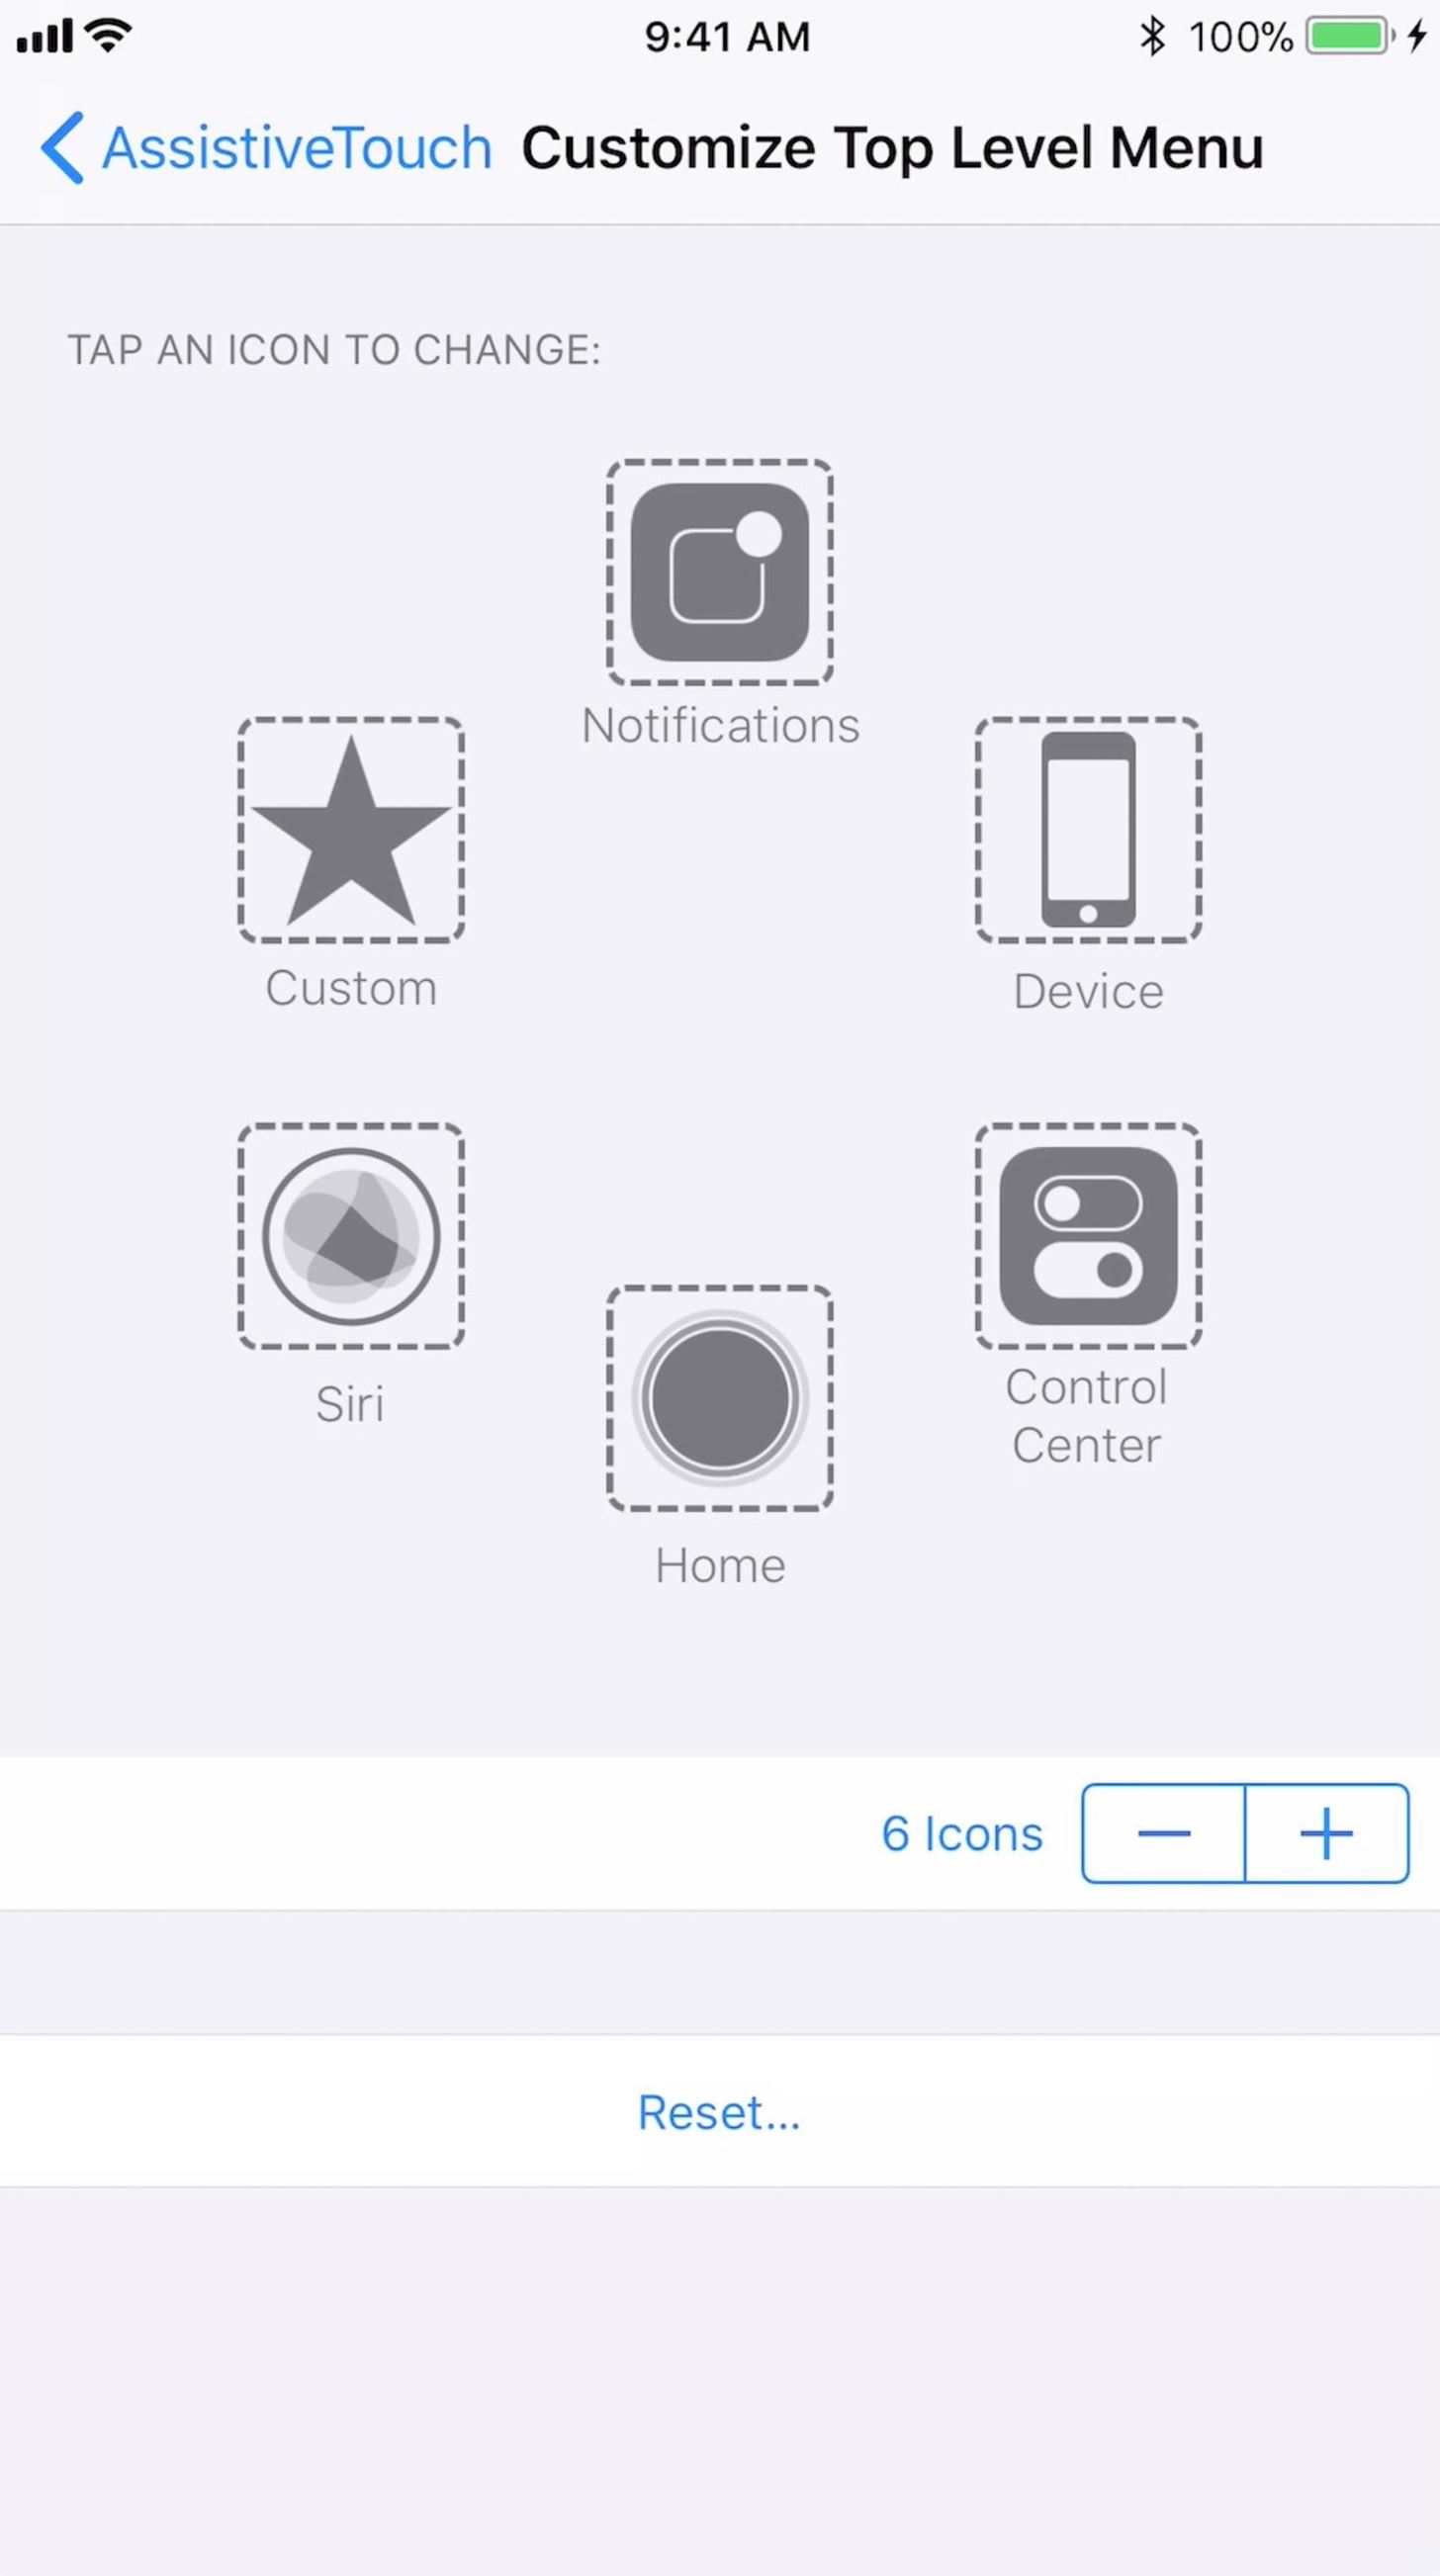
Another useful feature your grandma might benefit from is “AssistiveTouch,” (found under the Interaction section), which toggles a magic little box that can be customized to perform a number of useful actions and gestures. When enabled but inactive on the screen, a small home-button-looking translucent icon will persist, which can be tapped to open up the menu.
Your grandma can bring down the notifications, activate Siri, bring up the Control Center, and even generate a tool that helps pinch and move the screen around. AssistiveTouch is an auto-include feature for any grandma that has trouble with iOS gestures. And again, check out the next tip to see how to quickly open up the AssistiveTouch tool.
- Don’t Miss: How to Add a Virtual Home Button to iPhone X with AssistiveTouch

Tip 8: Toggle on Mono Audio (Hearing)
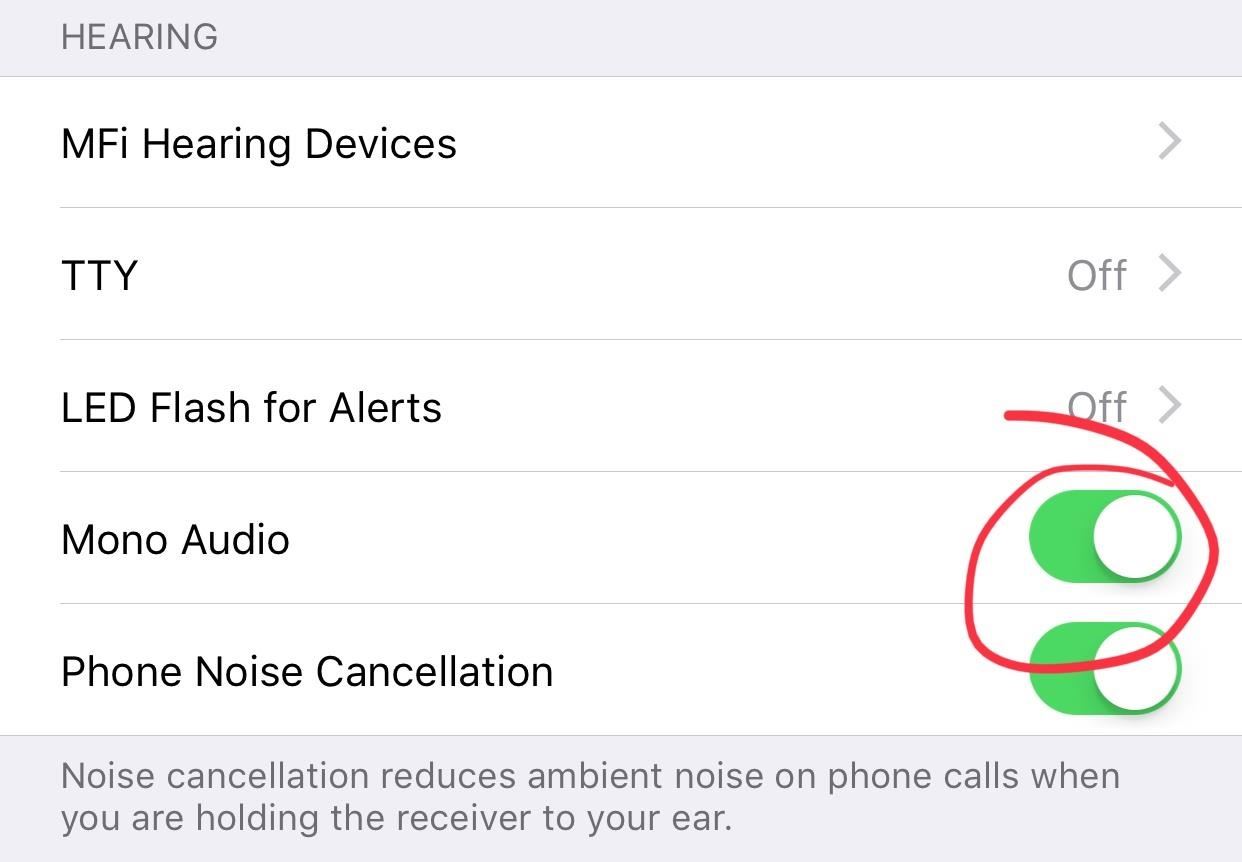
You can turn on “Mono Audio” under the Hearing section if your grandma can only hear in one ear. This will prevent stereo mixes from playing different information in different channels. This is particularly helpful when using headphones, not just for iPhones with stereo speakers, since all tracks in a mix will come out the same in each channel.
Tip 9: Adjust Audio Balance (Hearing)
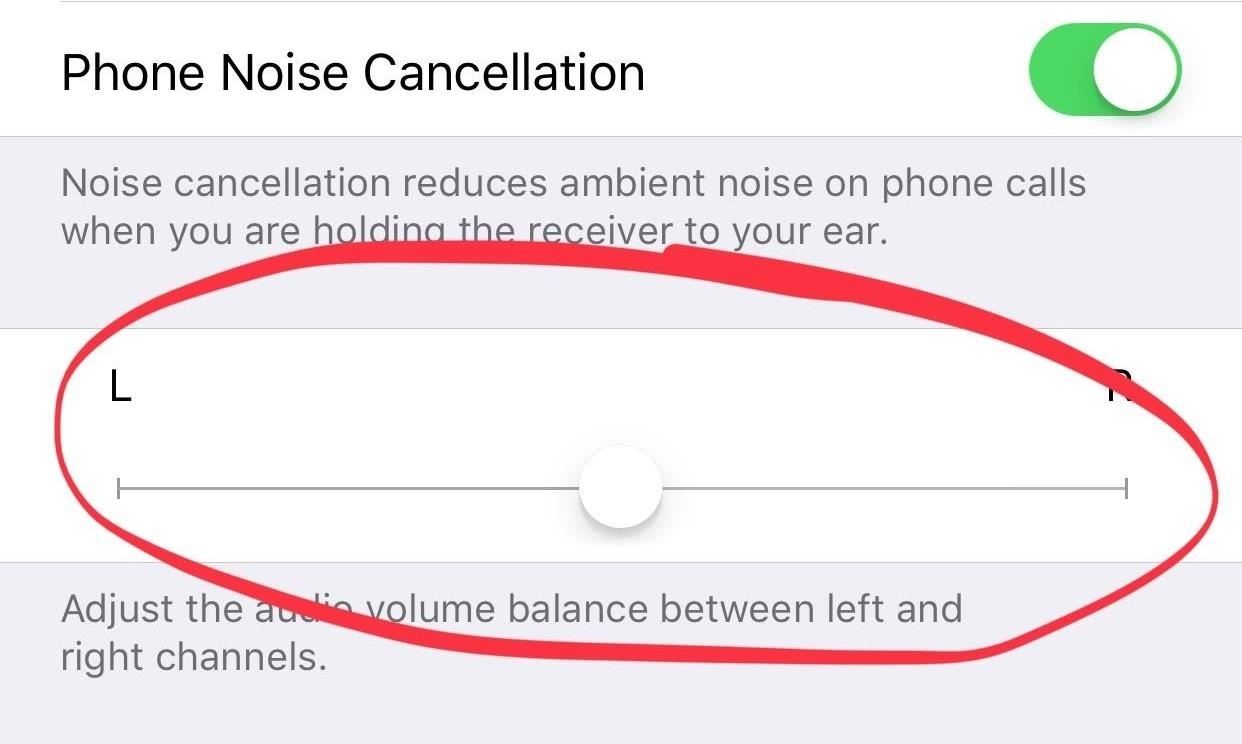
You can also adjust the audio balance if the hearing loss isn’t quite as severe, which puts a greater emphasis on one ear over the other. For example, if your grandma has a partial hearing loss in the left ear, emphasize that ear for sound. It’ll increase the volume, putting it at parity with the stronger right ear.
Tip 10: Explore the Other Accessibility Tools
We just covered some of the more common Accessibility features that people end up using for one reason or another, but as you could probably tell, there are a ton of possibilities here. So, keep your grandma’s needs in mind and figure out what other options she may require.
If she has hearing aids, there are settings to get them working on her iPhone. If she needs help listening to videos, there’s subtitles and audio descriptions available. If she can’t see the color green very well, turn on the “On/Off Labels” so she can see a symbol instead of a color. The list goes on and on.
Step 4: Create Accessibility Shortcuts for Grandma
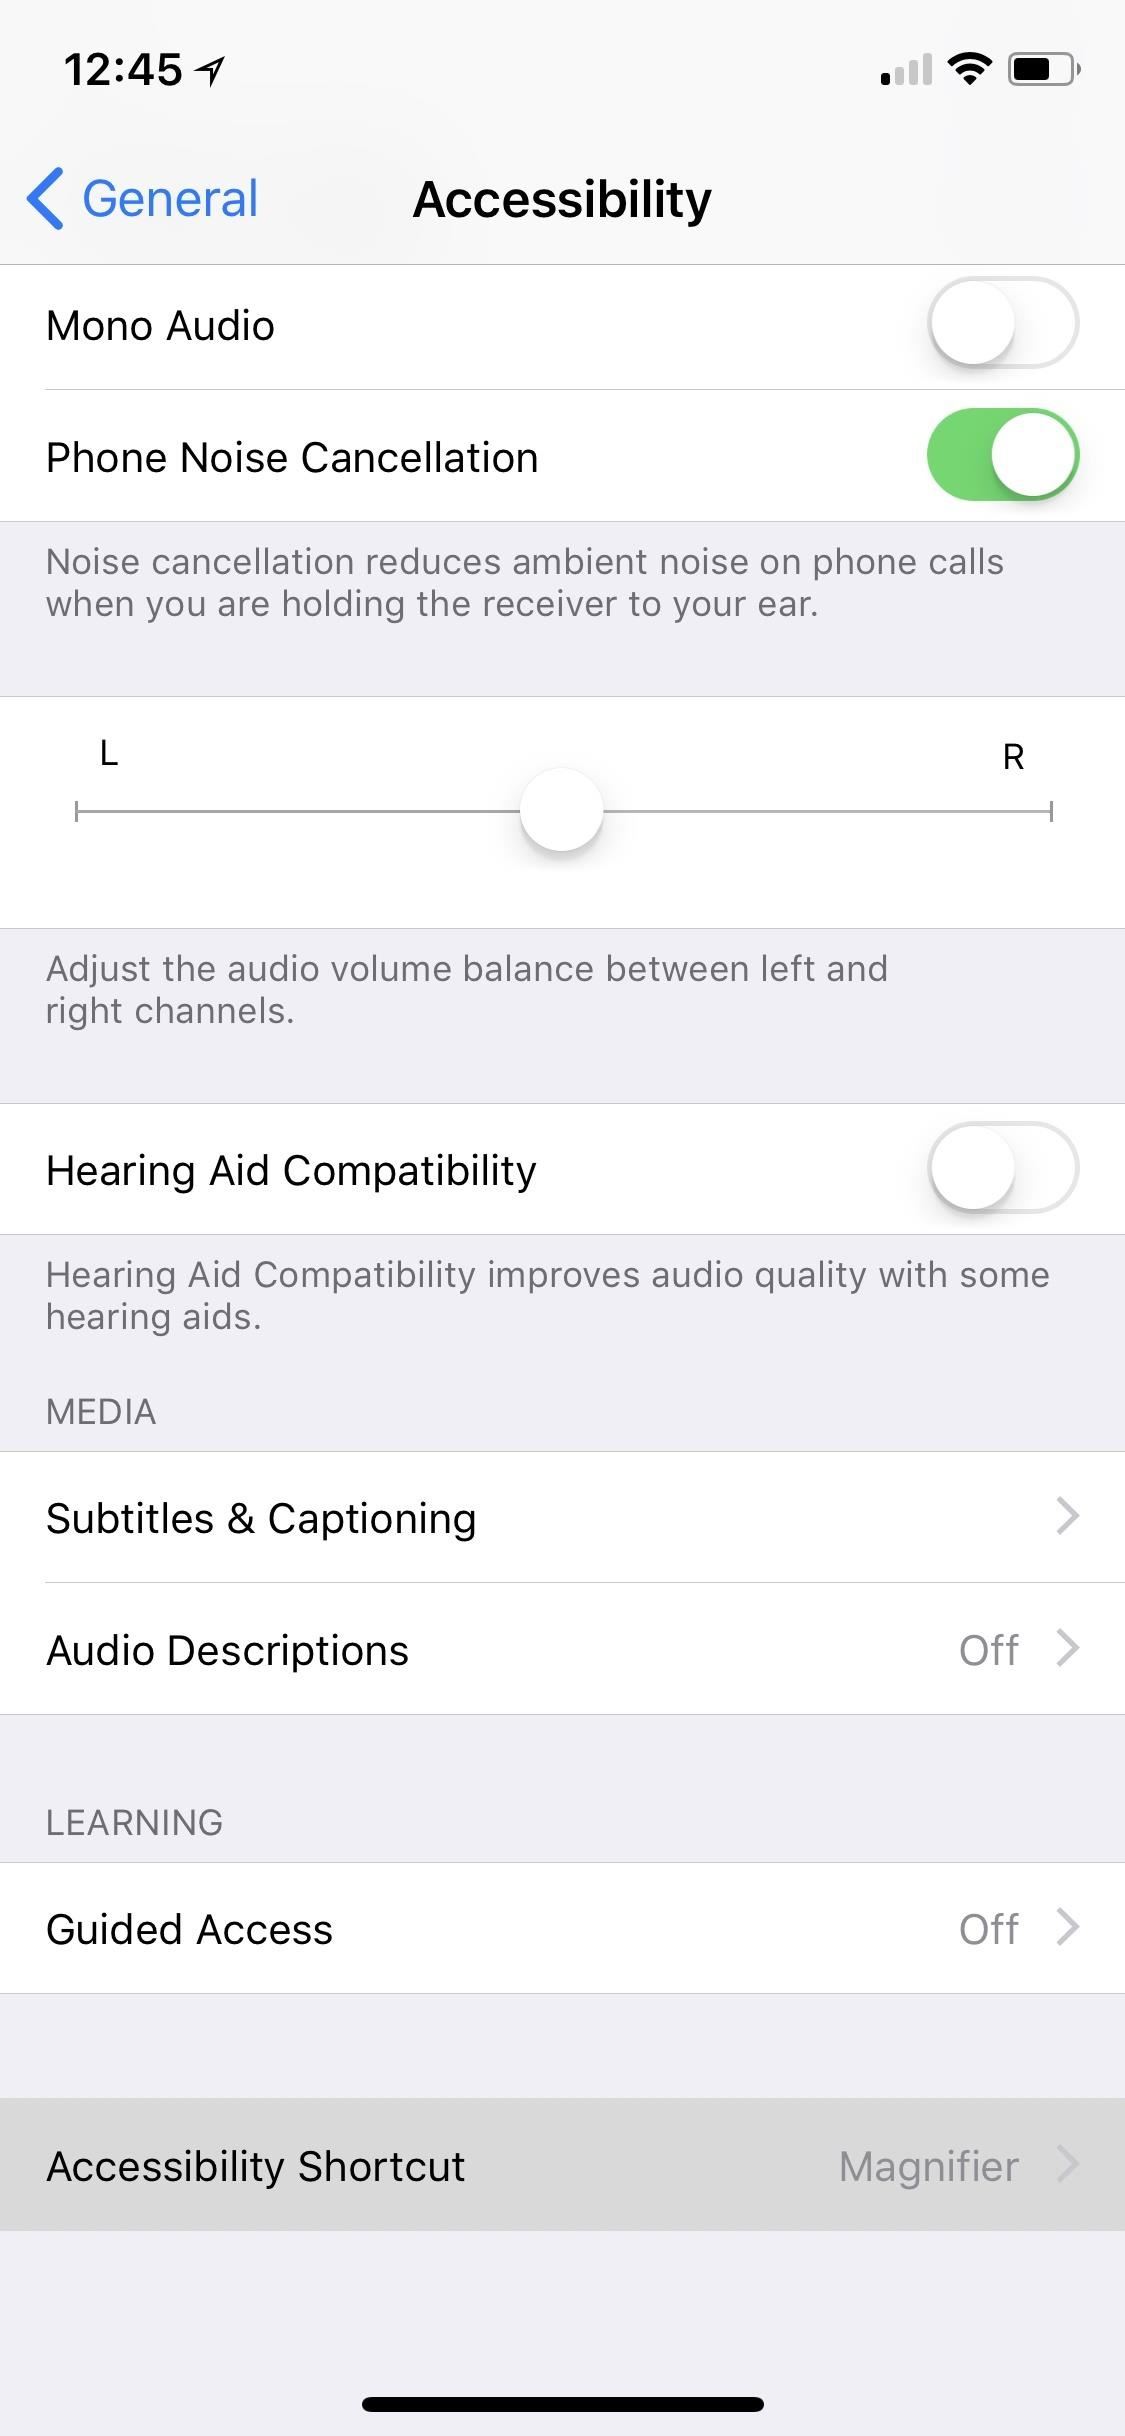
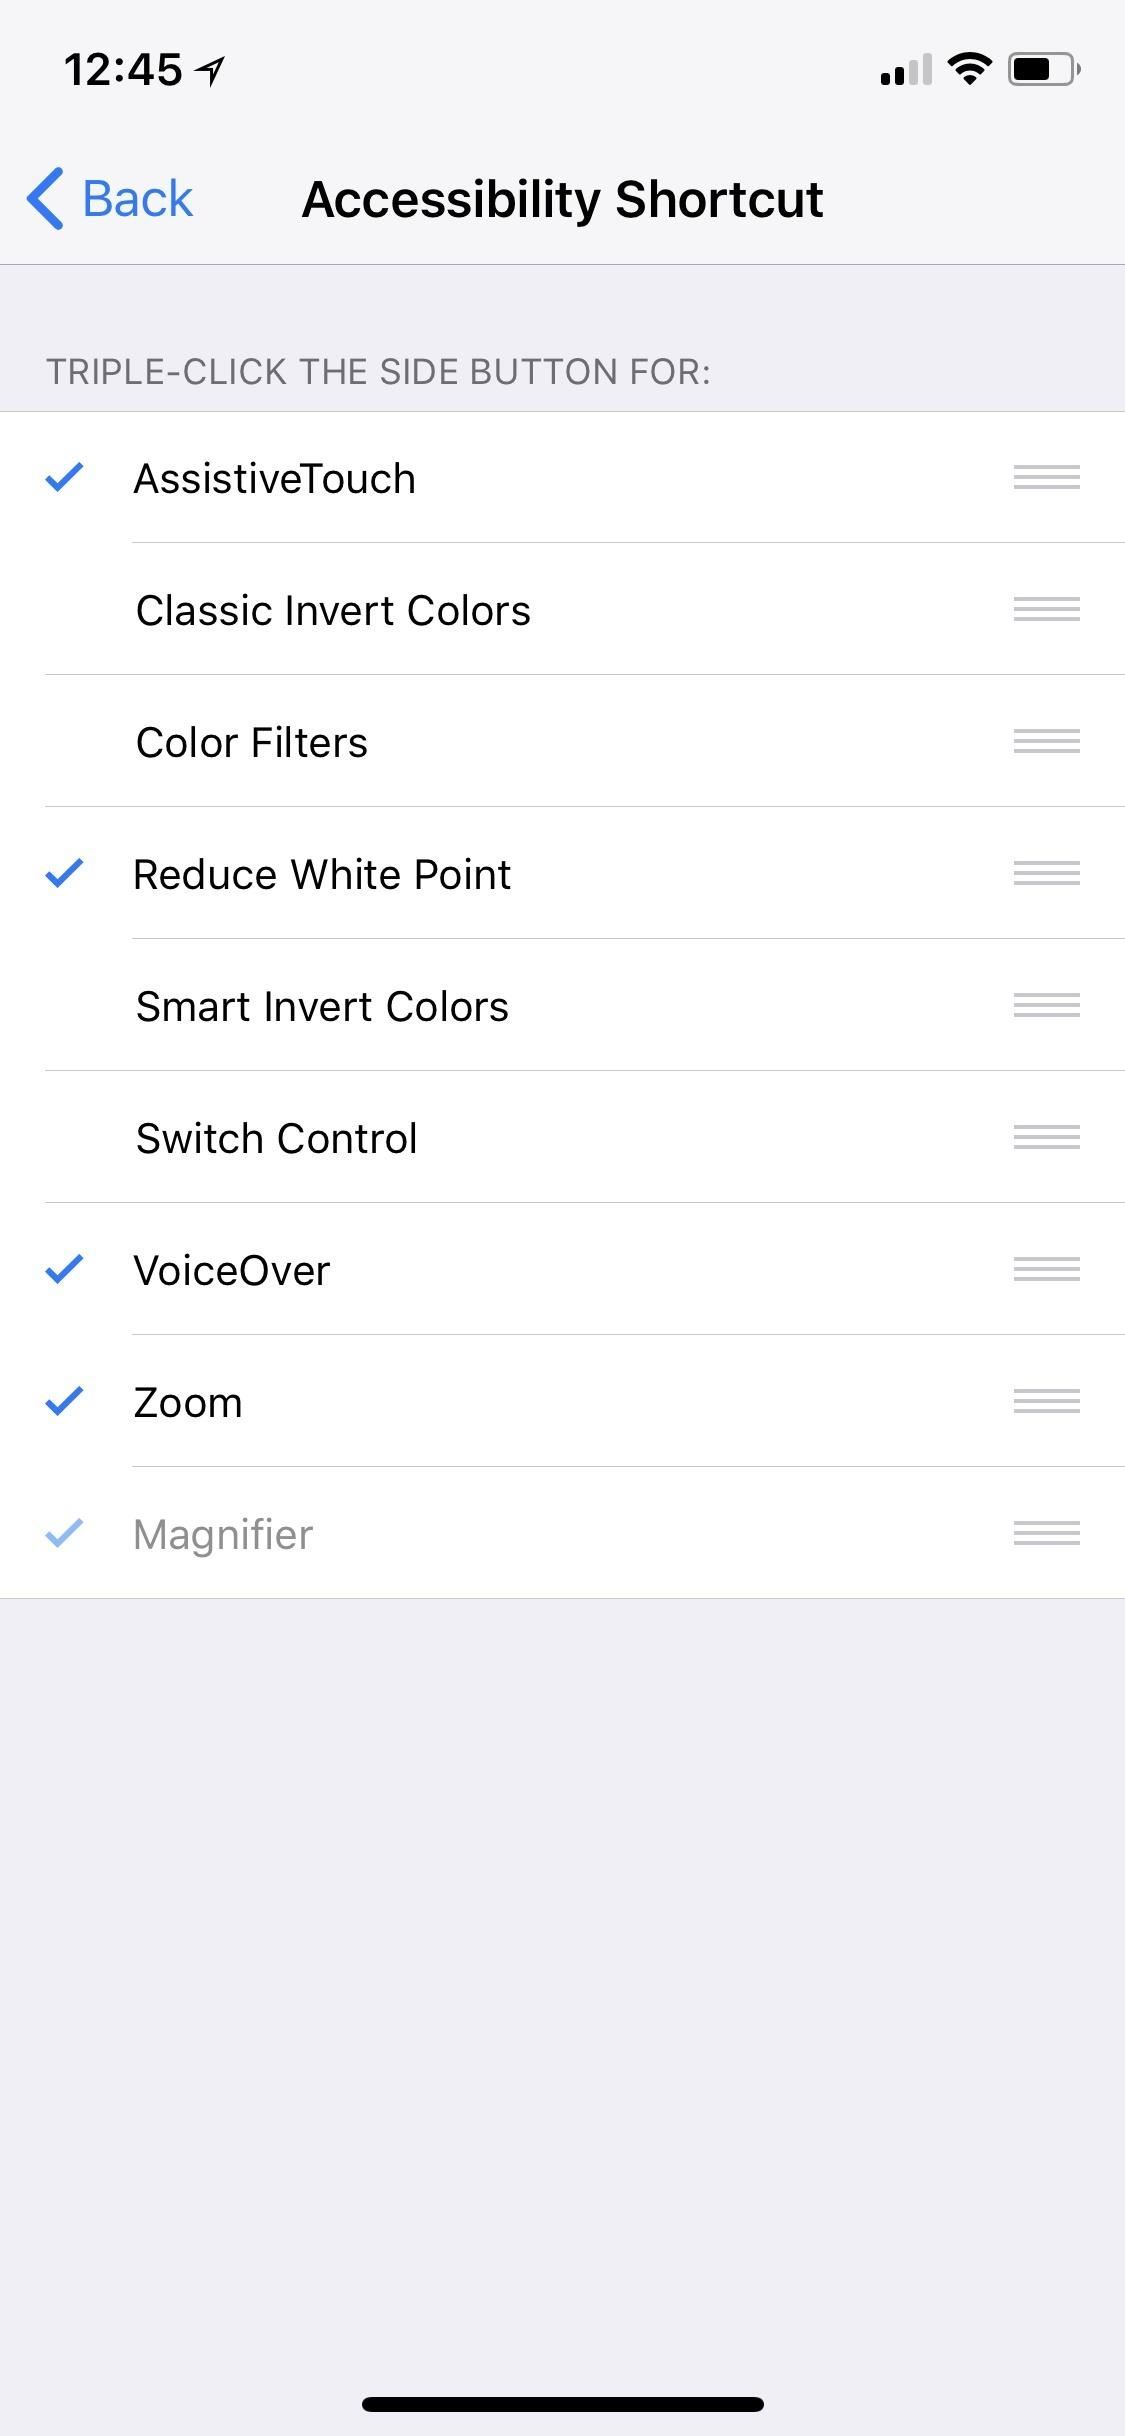
Your grandma likely won’t want to keep going into the Accessibility settings to enable or disable some of the above options, nor would she remember how probably. So, it’s a great idea to assign a shortcut for her to use to bring up a lot of these options, and you can do that with “Accessibility Shortcut.”
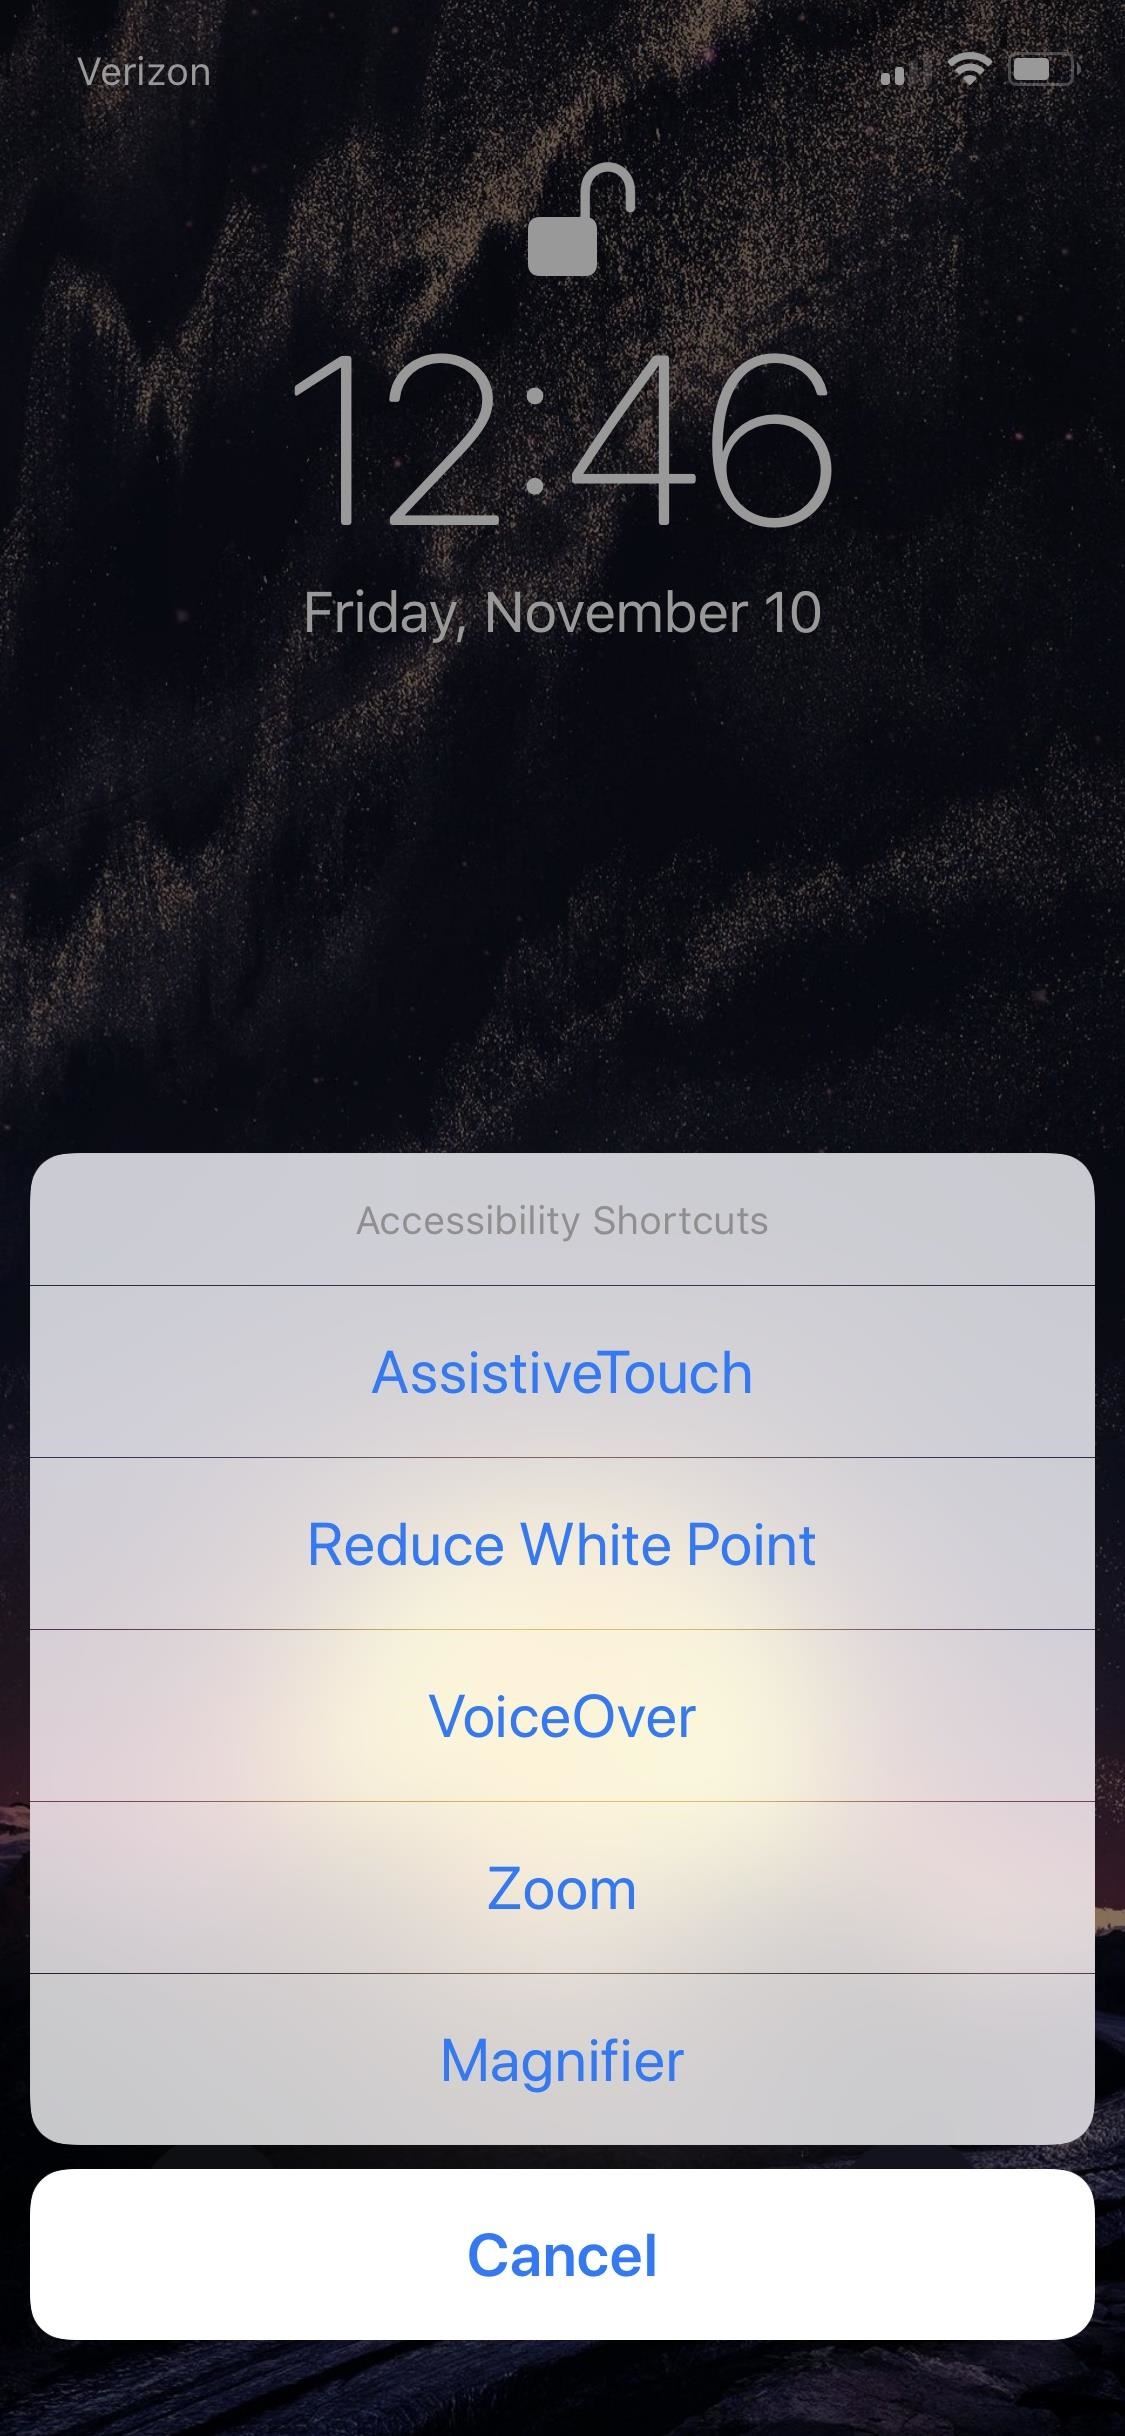
In this menu, you can assign AssistiveTouch, Reduce White Point, VoiceOver, and Zoom, among other features we haven’t discussed that might be helpful for your grandma, to either a Home button or Side button gesture (depending on what iPhone model she has). Also, the Magnifer will show up checked here if toggled on from Tip 4 above.
To activate the gesture, triple-click the Side button on an iPhone X. On all other iPhone models, triple-click the Home button instead. If only one item is checked, then it will open that tool right away. If more than one is checked, a menu will pop up where she can quickly choose the one she wants.
Step 5: Install Apps That Grandma Loves
My grandmother only uses a handful of apps that weren’t preinstalled by Apple. For the most part, your grandma may not need any other apps besides the defaults that are already on the iPhone, but there are a few you could think about.
- Google Maps: Depending on how much you grandmother needs directions, Apple Maps may be all she needs, and it’s already installed. However, Google Maps may be easier to use (and more accurate). It’s less functional than something like Waze, but also way less complicated.
- Facebook: Facebook is the only social media app that most grandmothers will use, so she can check up on her children and grandchildren. Also consider Messenger, if she likes to chat with friends and family on Facebook.
- YouTube: YouTube is the best place to watch shorter videos, as well as instructional videos should your grandmother need them. She can use this with or without an account, if she’s only watching and not rating/saving/etc.
- Netflix: Netflix is the best place to watch TV and movies, by far. There are just so many choices, but you may want to skip this app if she doesn’t have an actual Netflix subscription or if she doesn’t live with you and can use yours.
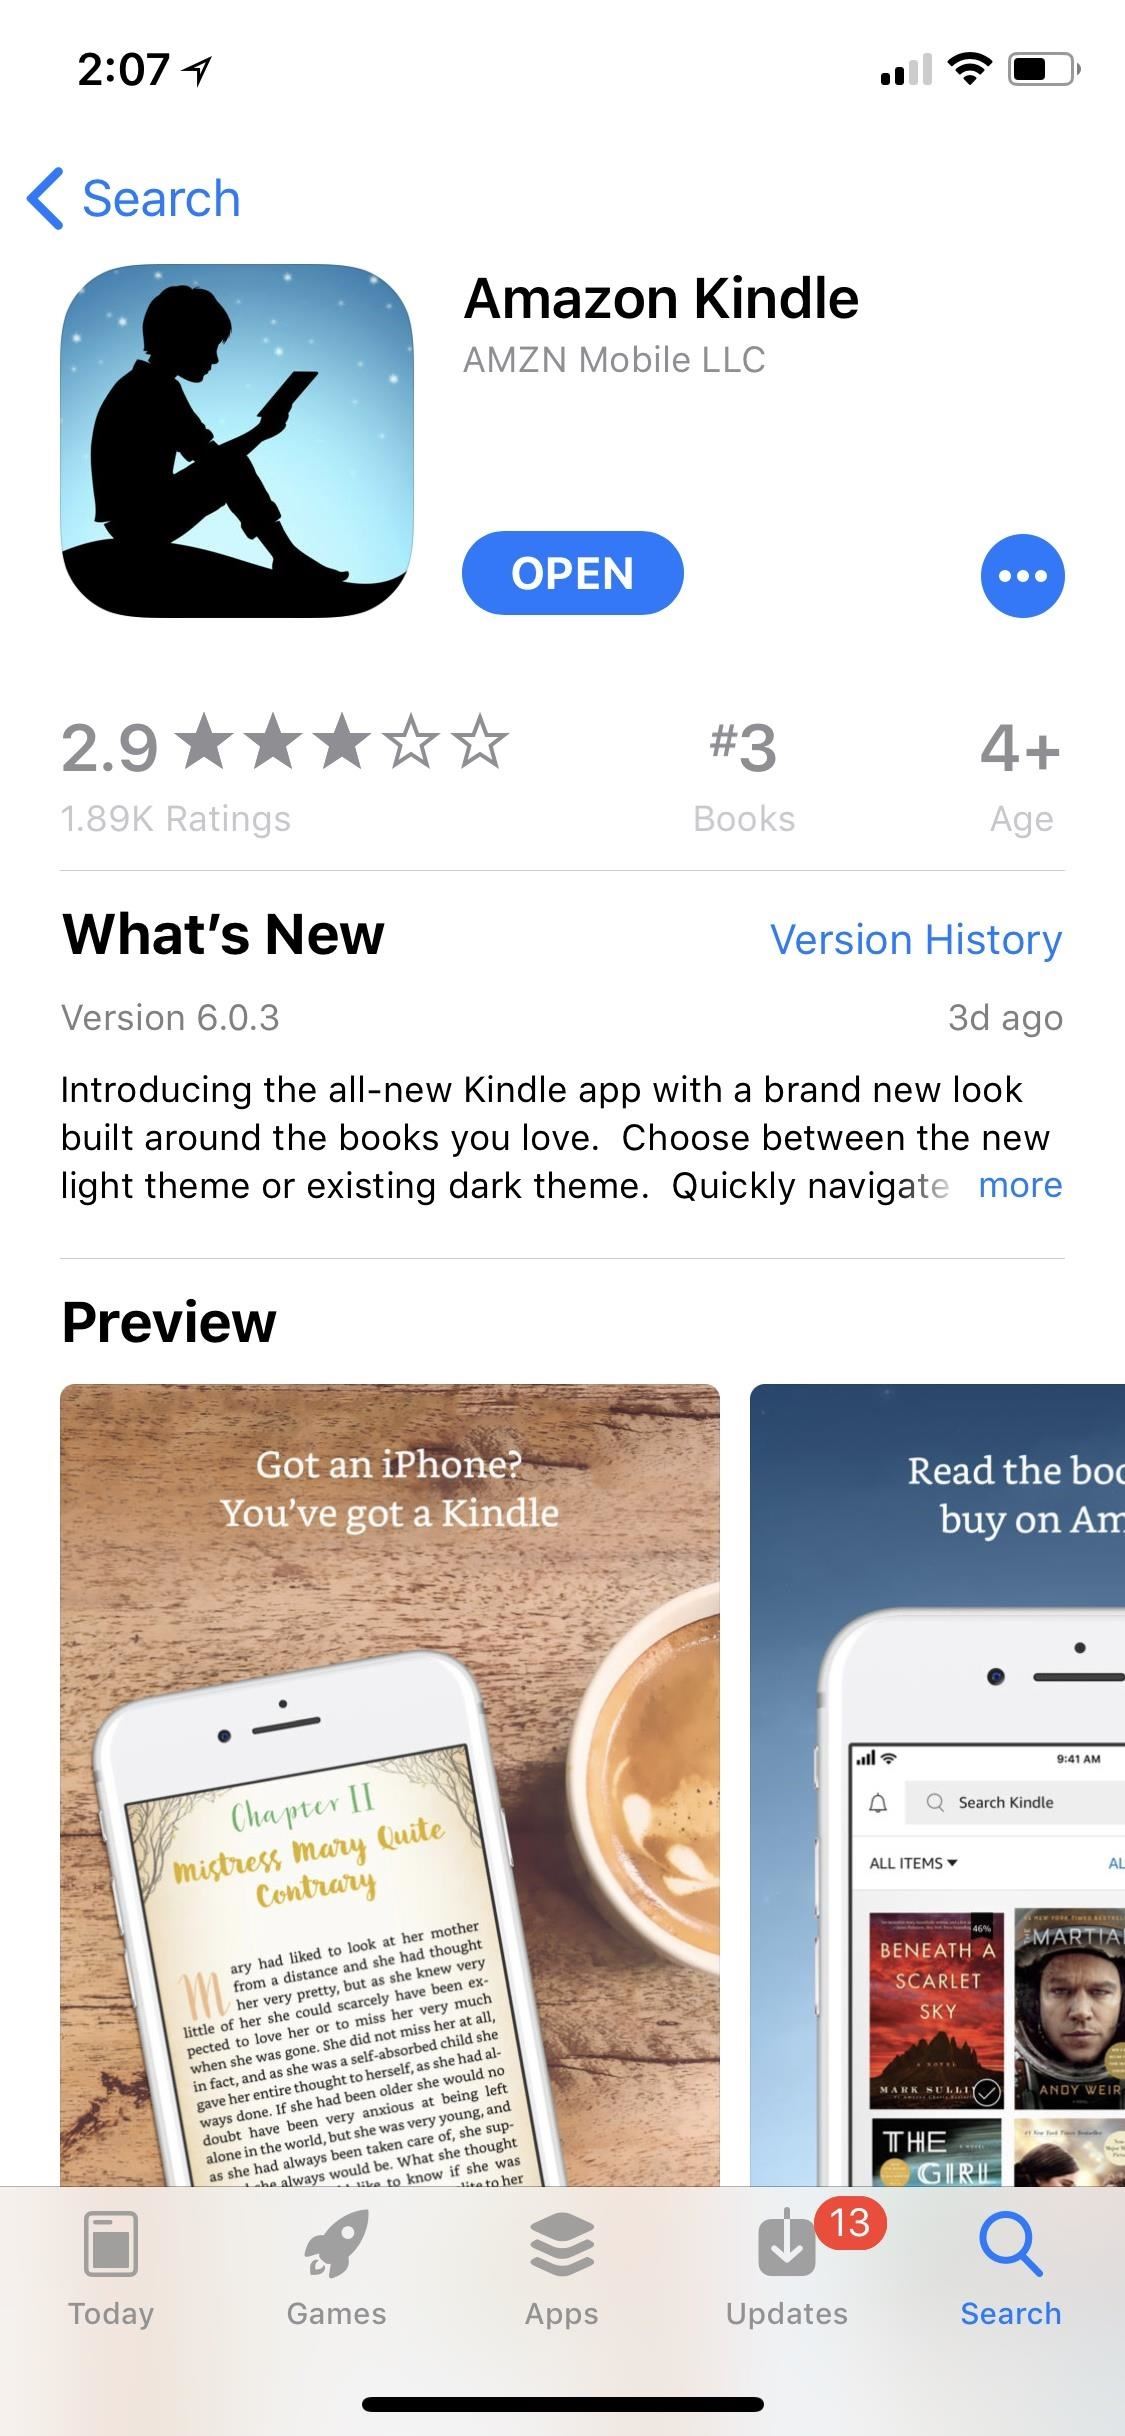
- Amazon Kindle: Kindle is a free app, but many of the Dean Koontz and Stephen King novels that your grandma loves won’t be free. However, Kindle offers the ability to adjust the font, font size, and even the background color. Even though it’ll cost her for most books, reading on the Kindle app is an easy and enjoyable experience, even with vision problems.
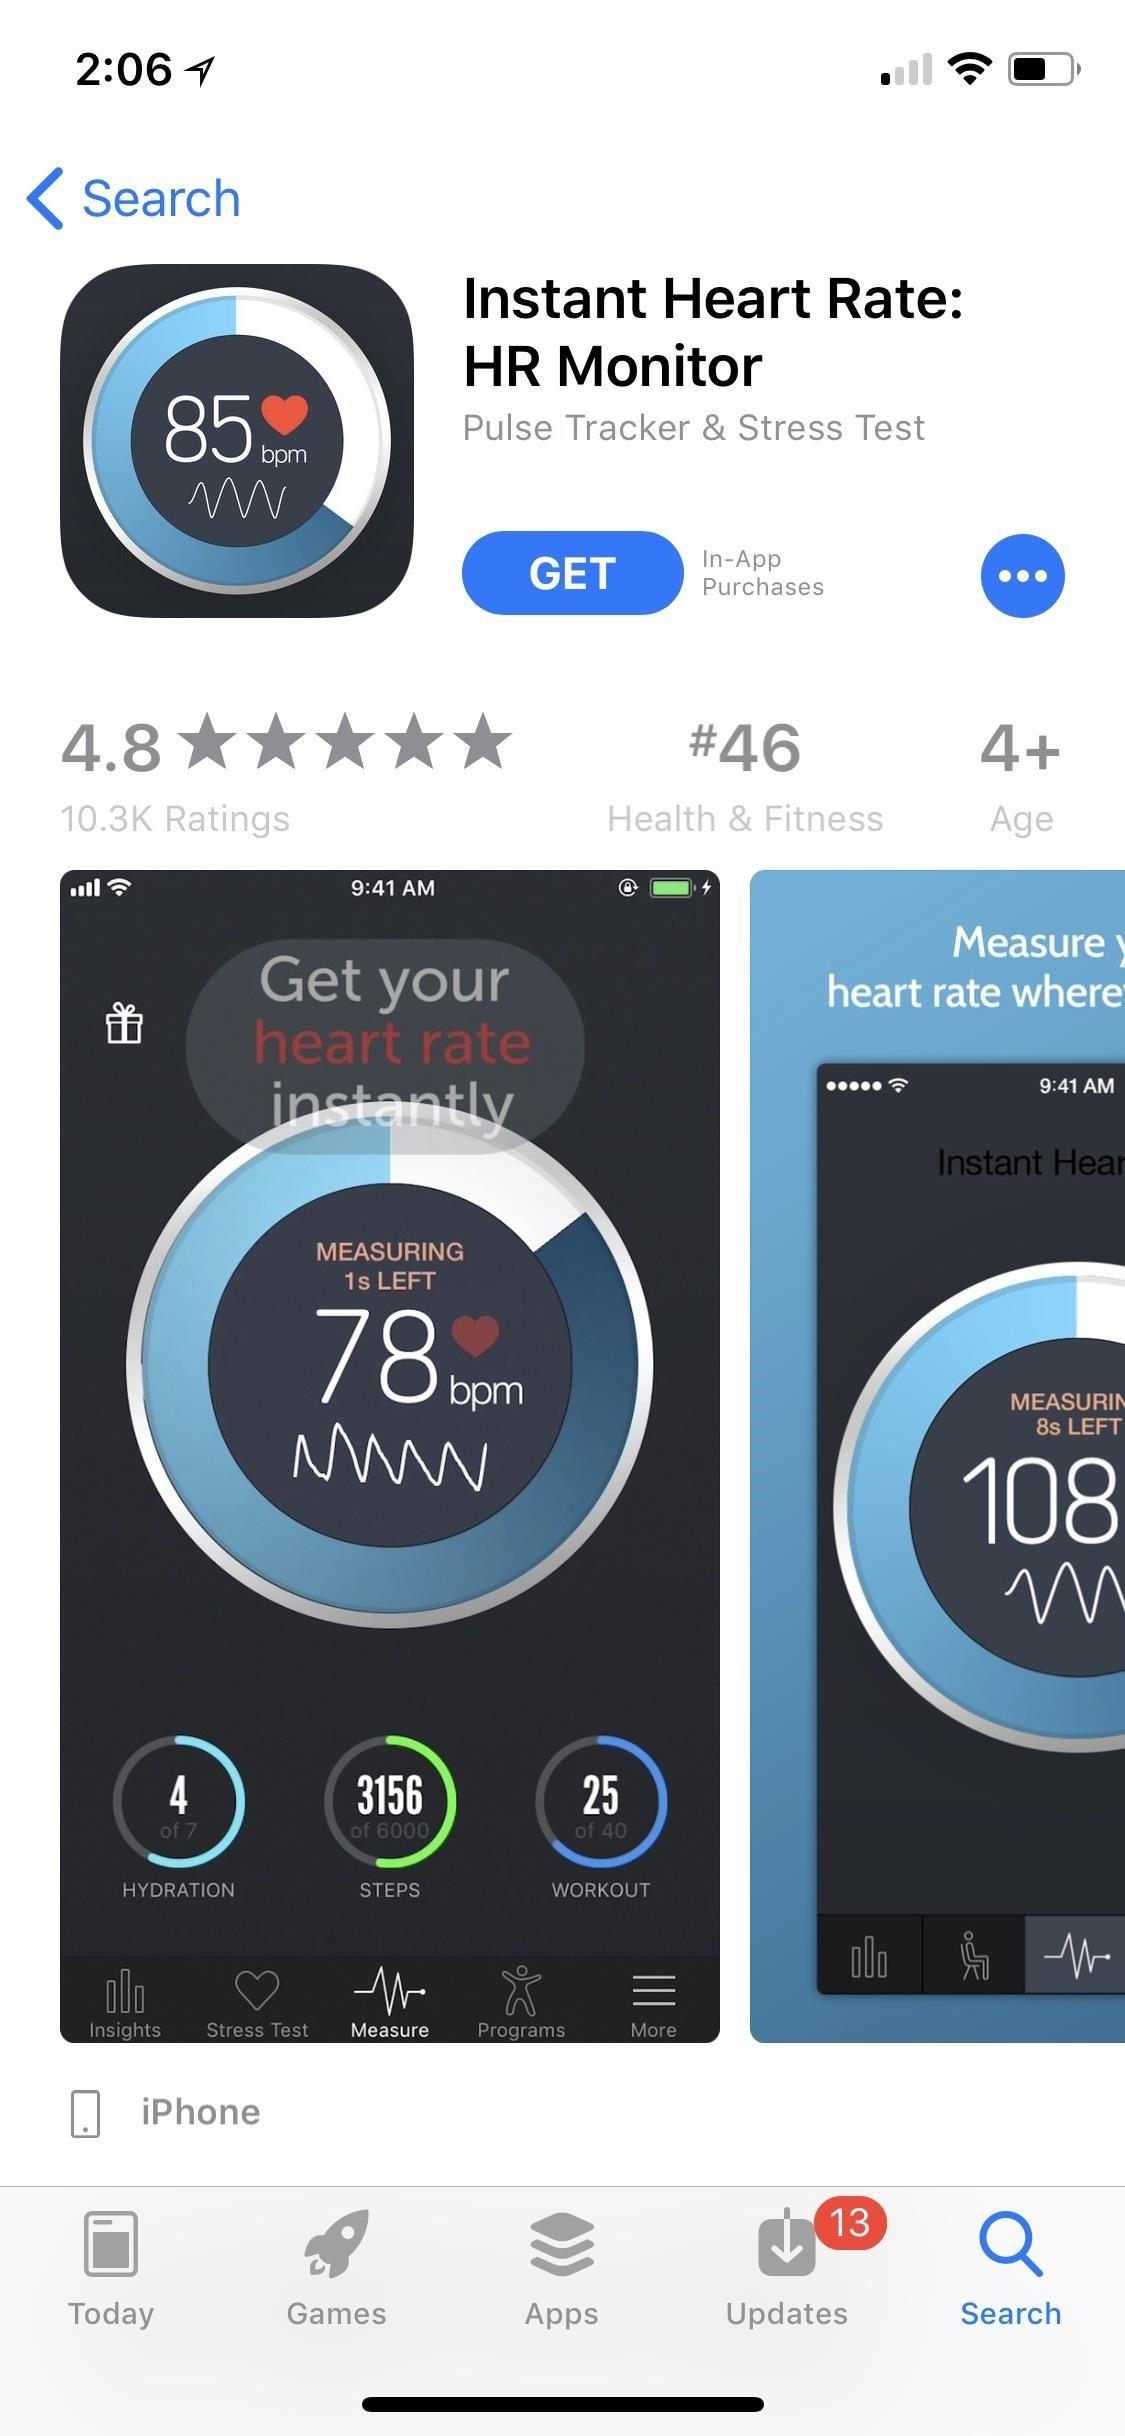
- Instant Heart Rate: HR Monitor: This app uses the camera to track your grandmother’s heart rate, an invaluable tool for someone older who needs to keep close tabs on their vitals. Just be careful that she doesn’t buy unnecessary in-app purchases, which range from $0.99 for a single feature upgrade to $59.99 for an annual subscription to premium features.
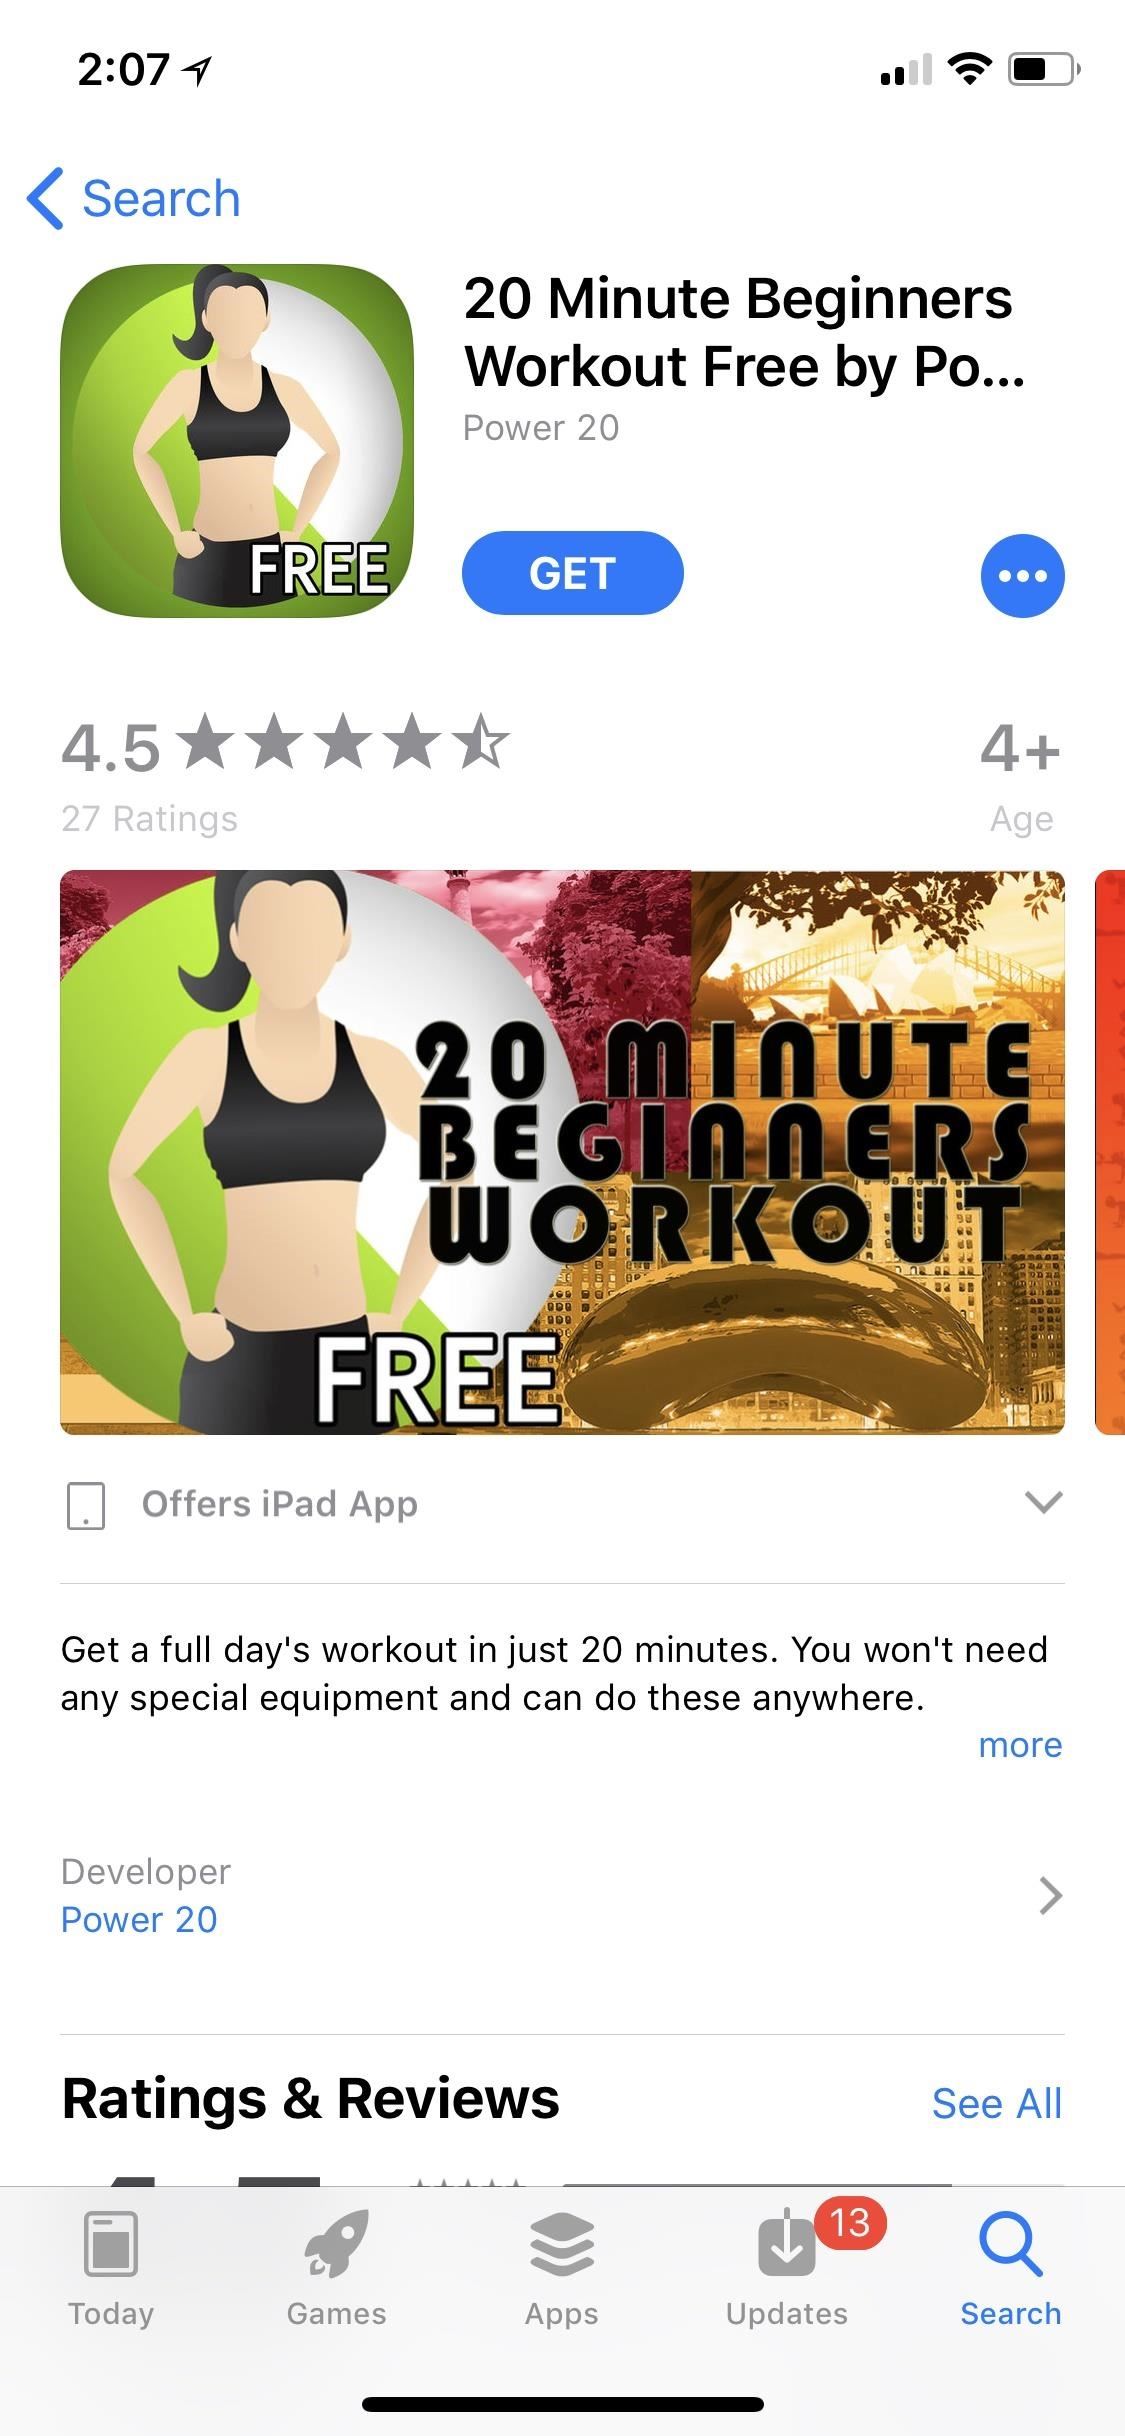
- 20 Minute Beginners Workout Free: This free application presents the user with simple exercises to keep their blood flowing. She’ll even be prompted to tell the app how long she can walk without rest, so it can tailor a workout to your grandma’s health.
You can download these of apps (or ones like them) from the iOS App Store, and simply log in to them for her if she has or needs an account. None of the apps above may apply to your grandma, so talk with her to see what she enjoys. What games does she like to play on her computer or in real-life? What hobbies does she have? What apps does she already use on her computer or tablet? What email service does she use?
Step 6: Clean Up Grandma’s Home Screen
By default, the home screen in iOS houses every app preinstalled or downloaded, so there can be multiple home screen pages to navigate through depending on how many apps are installed. If your grandma only uses a handful of apps, this can obviously be confusing, unless she’s already handy with Spotlight search.
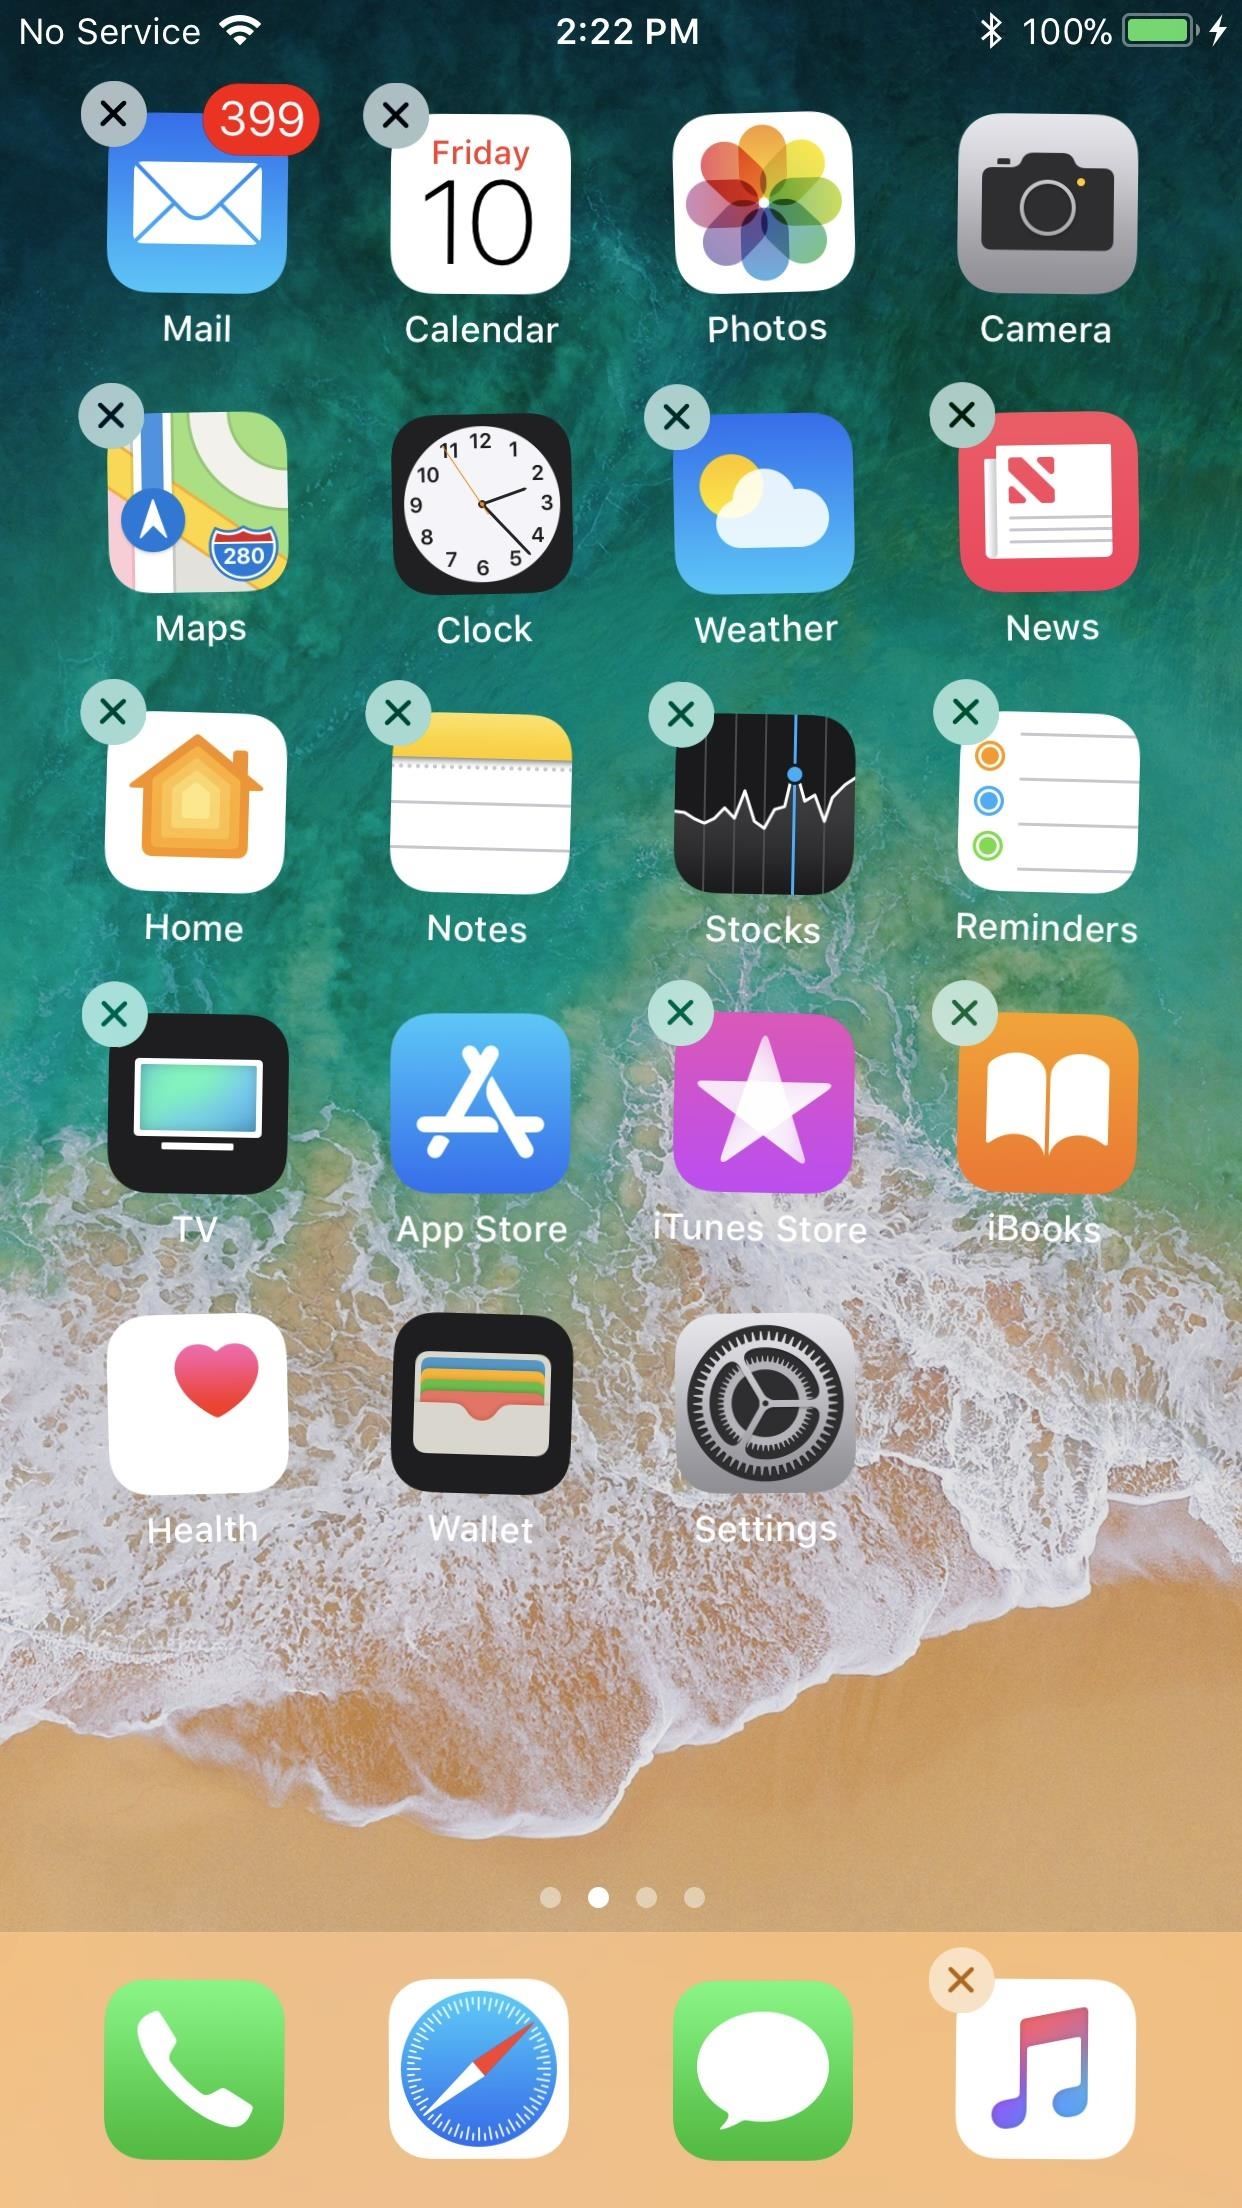
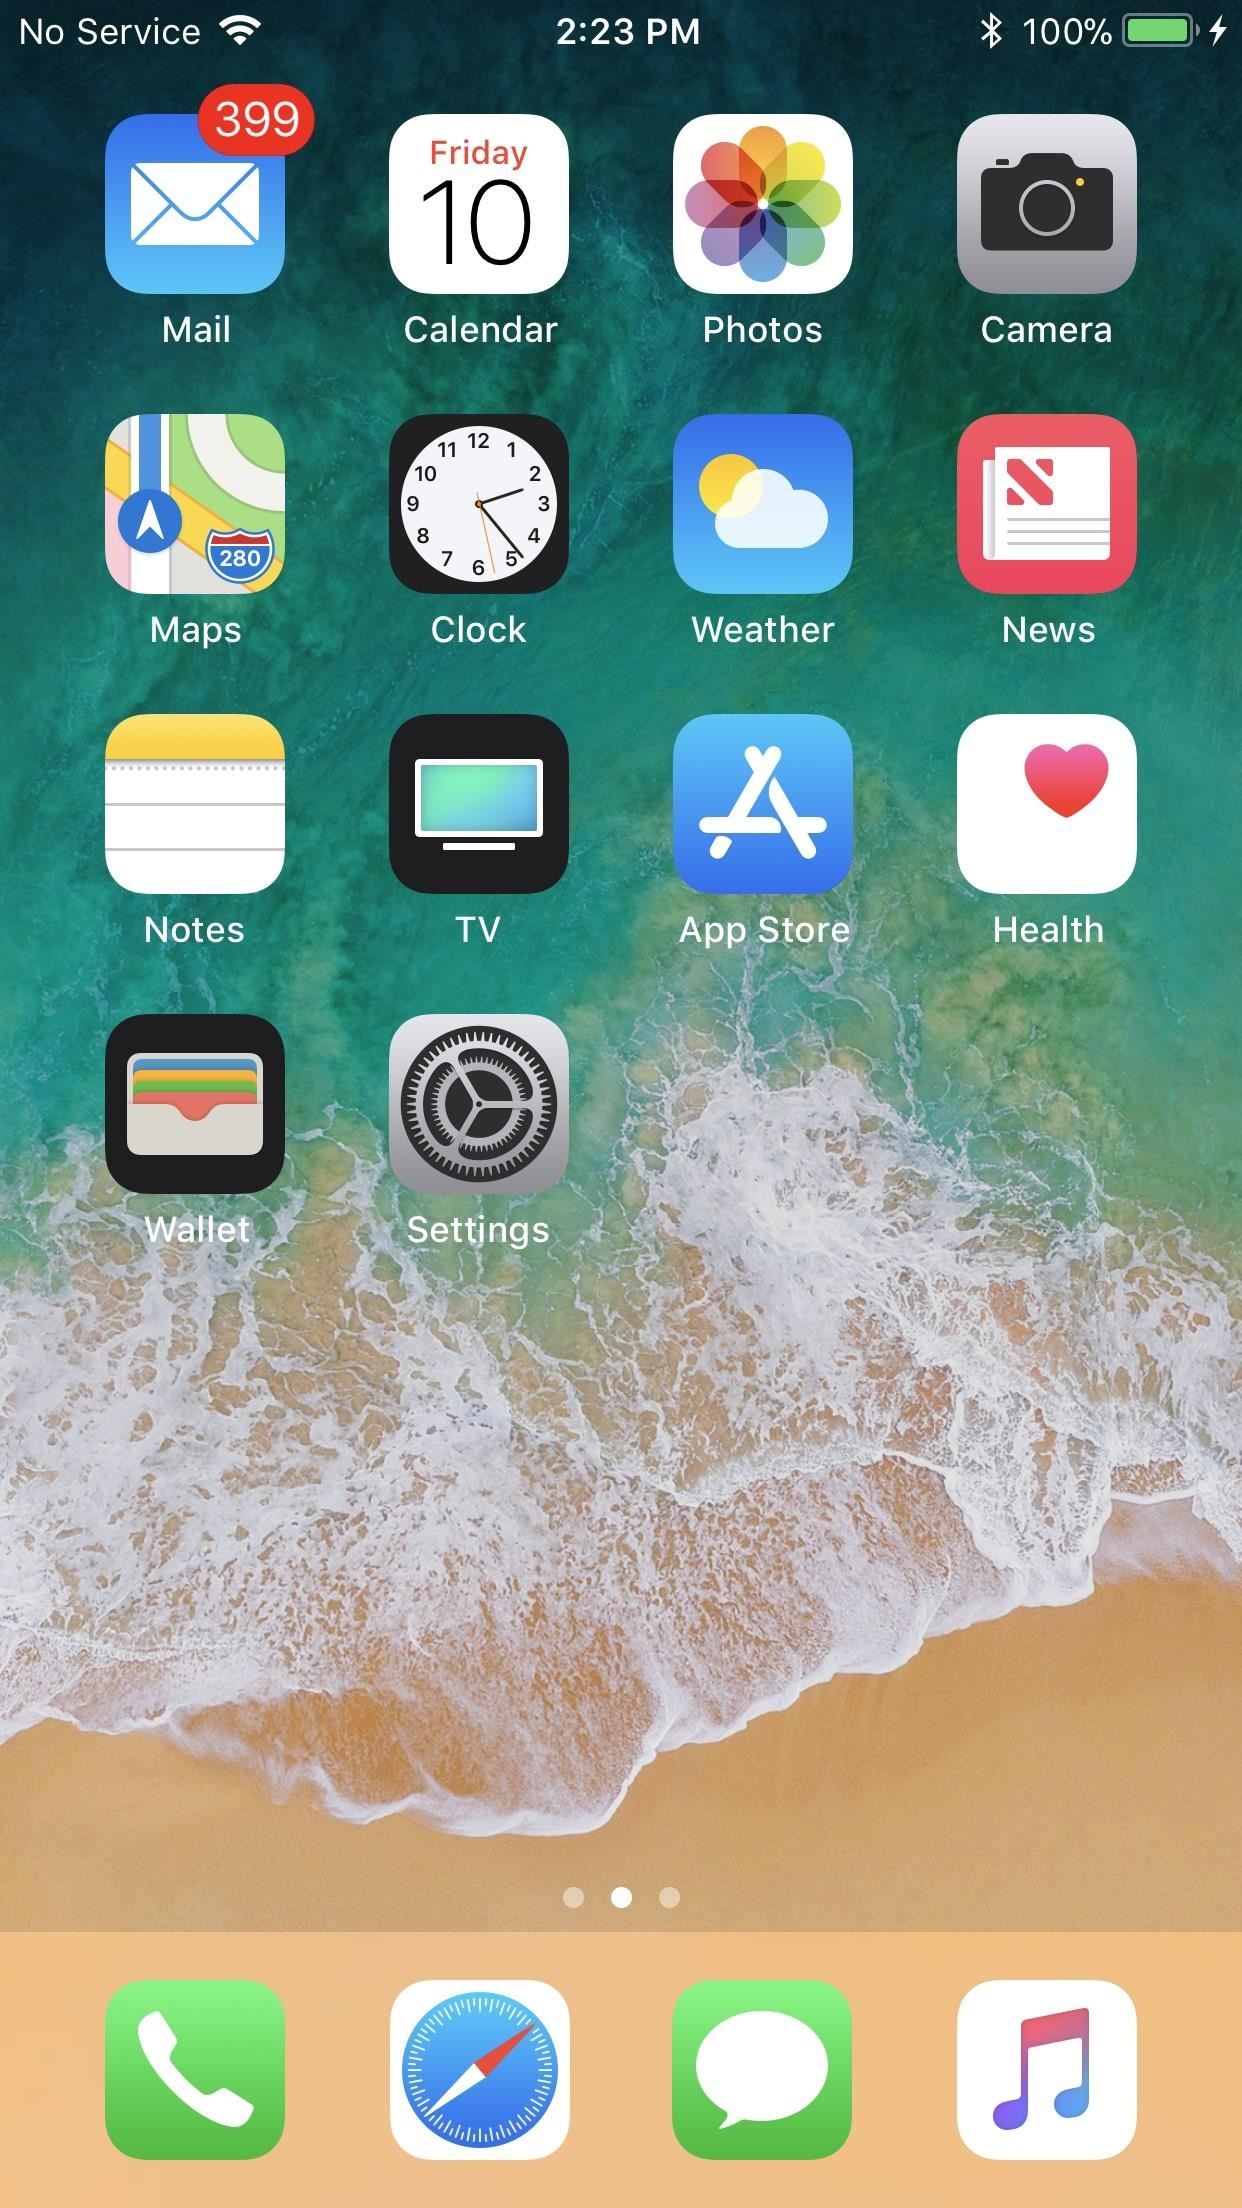
There shouldn’t be any third-party apps that are installed that haven’t been warranted in the previous step, so the main thing you have to worry about here is stock Apple apps. A lot of these you can actually delete off the iPhone, such as Maps, Calendar, Calculator, Compass, Weather, and Notes, to name a few.
- More Info: How to Remove Stock Apps on Your iPhone
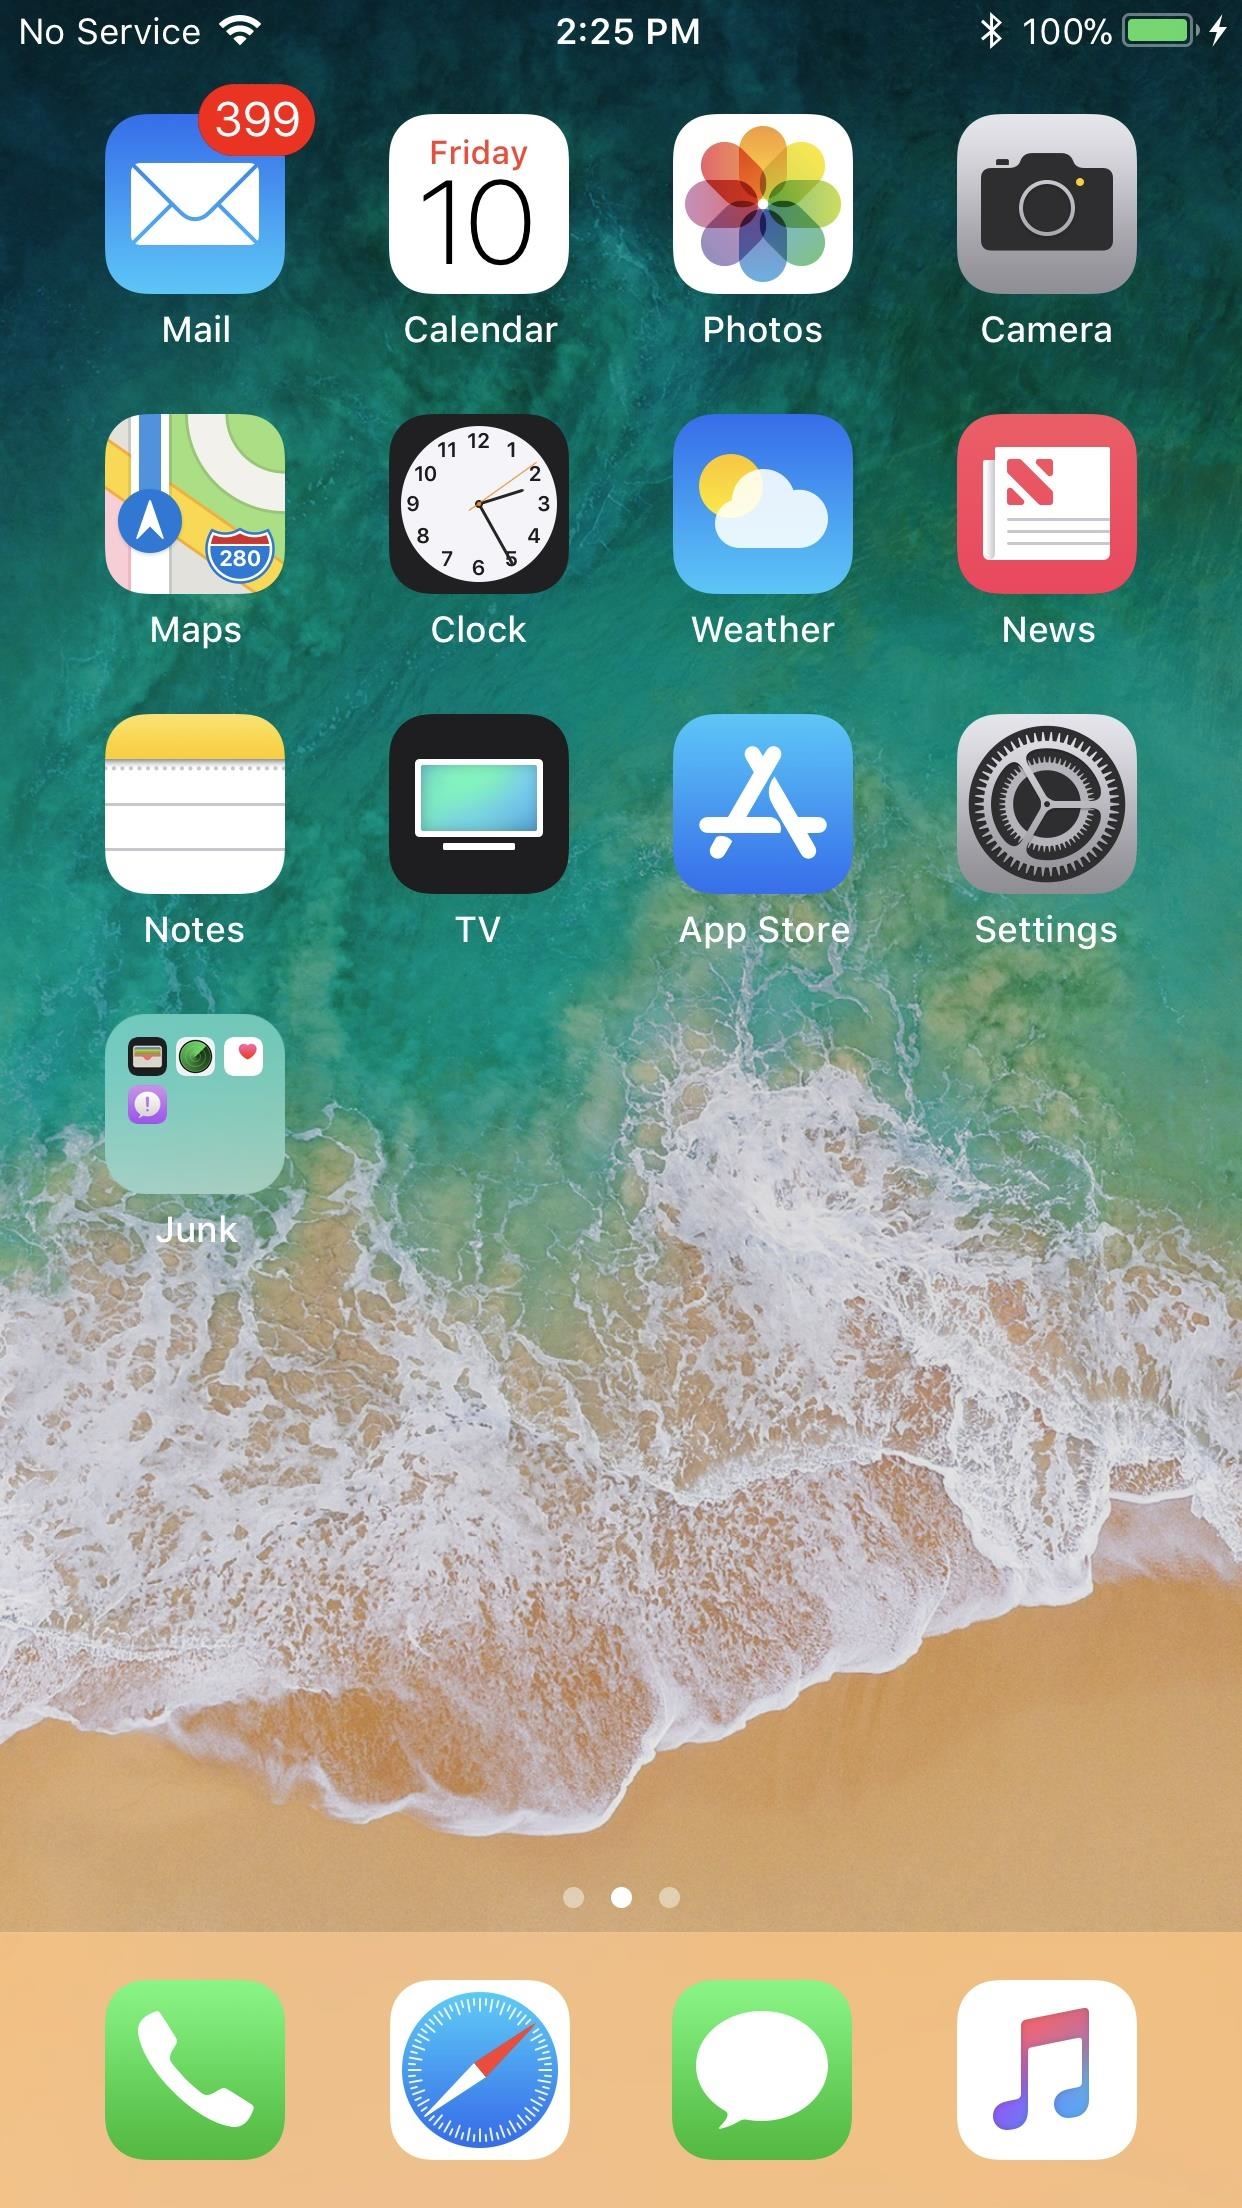
For those you can’t delete, such as Find iPhone, Wallet, and Clock (there are more), you can banish them to a “Junk” folder she’ll never have to open. This should be the only folder on her iPhone, unless she for some reason wanted 20 games from the previous step, then she’ll probably need a “Games” folder, too. The “Junk” folder can also be moved to a separate home screen page, so she’ll never even have to look at it.
Step 7: Teach Grandma How to Use Important iOS Features
Now that we’ve set up Grandma’s Apple ID, got the display preferences ready, combed through “Accessibility” for relevant tweaks, create a shortcut gesture, and downloaded apps she likes, it’s time to teach her how to use some of the most common apps in iOS (that you didn’t already delete).
Tip 1: Create Some Contacts for Her
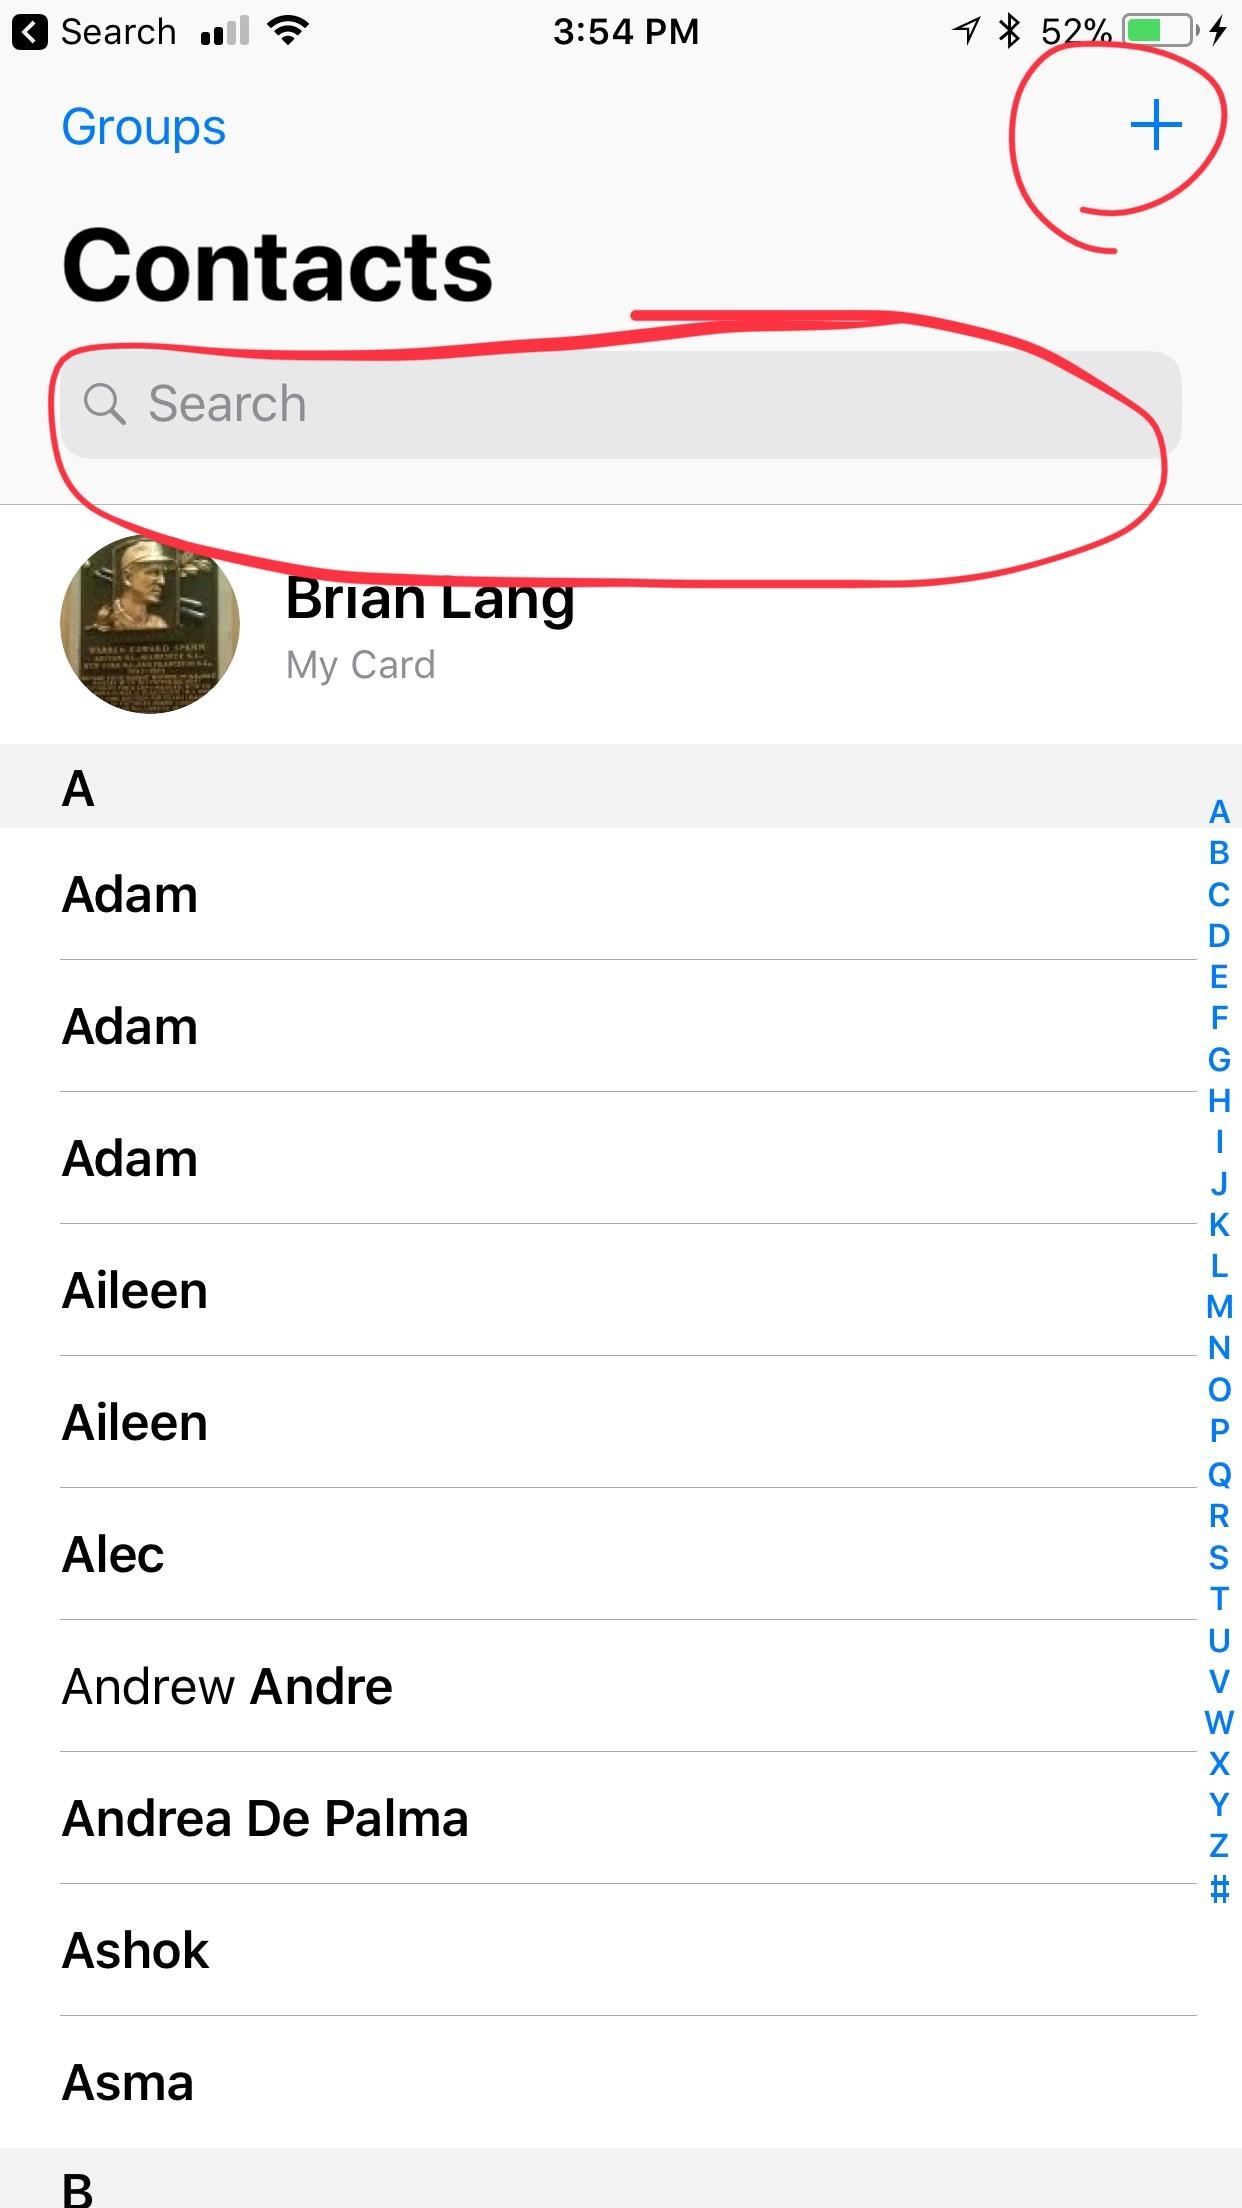
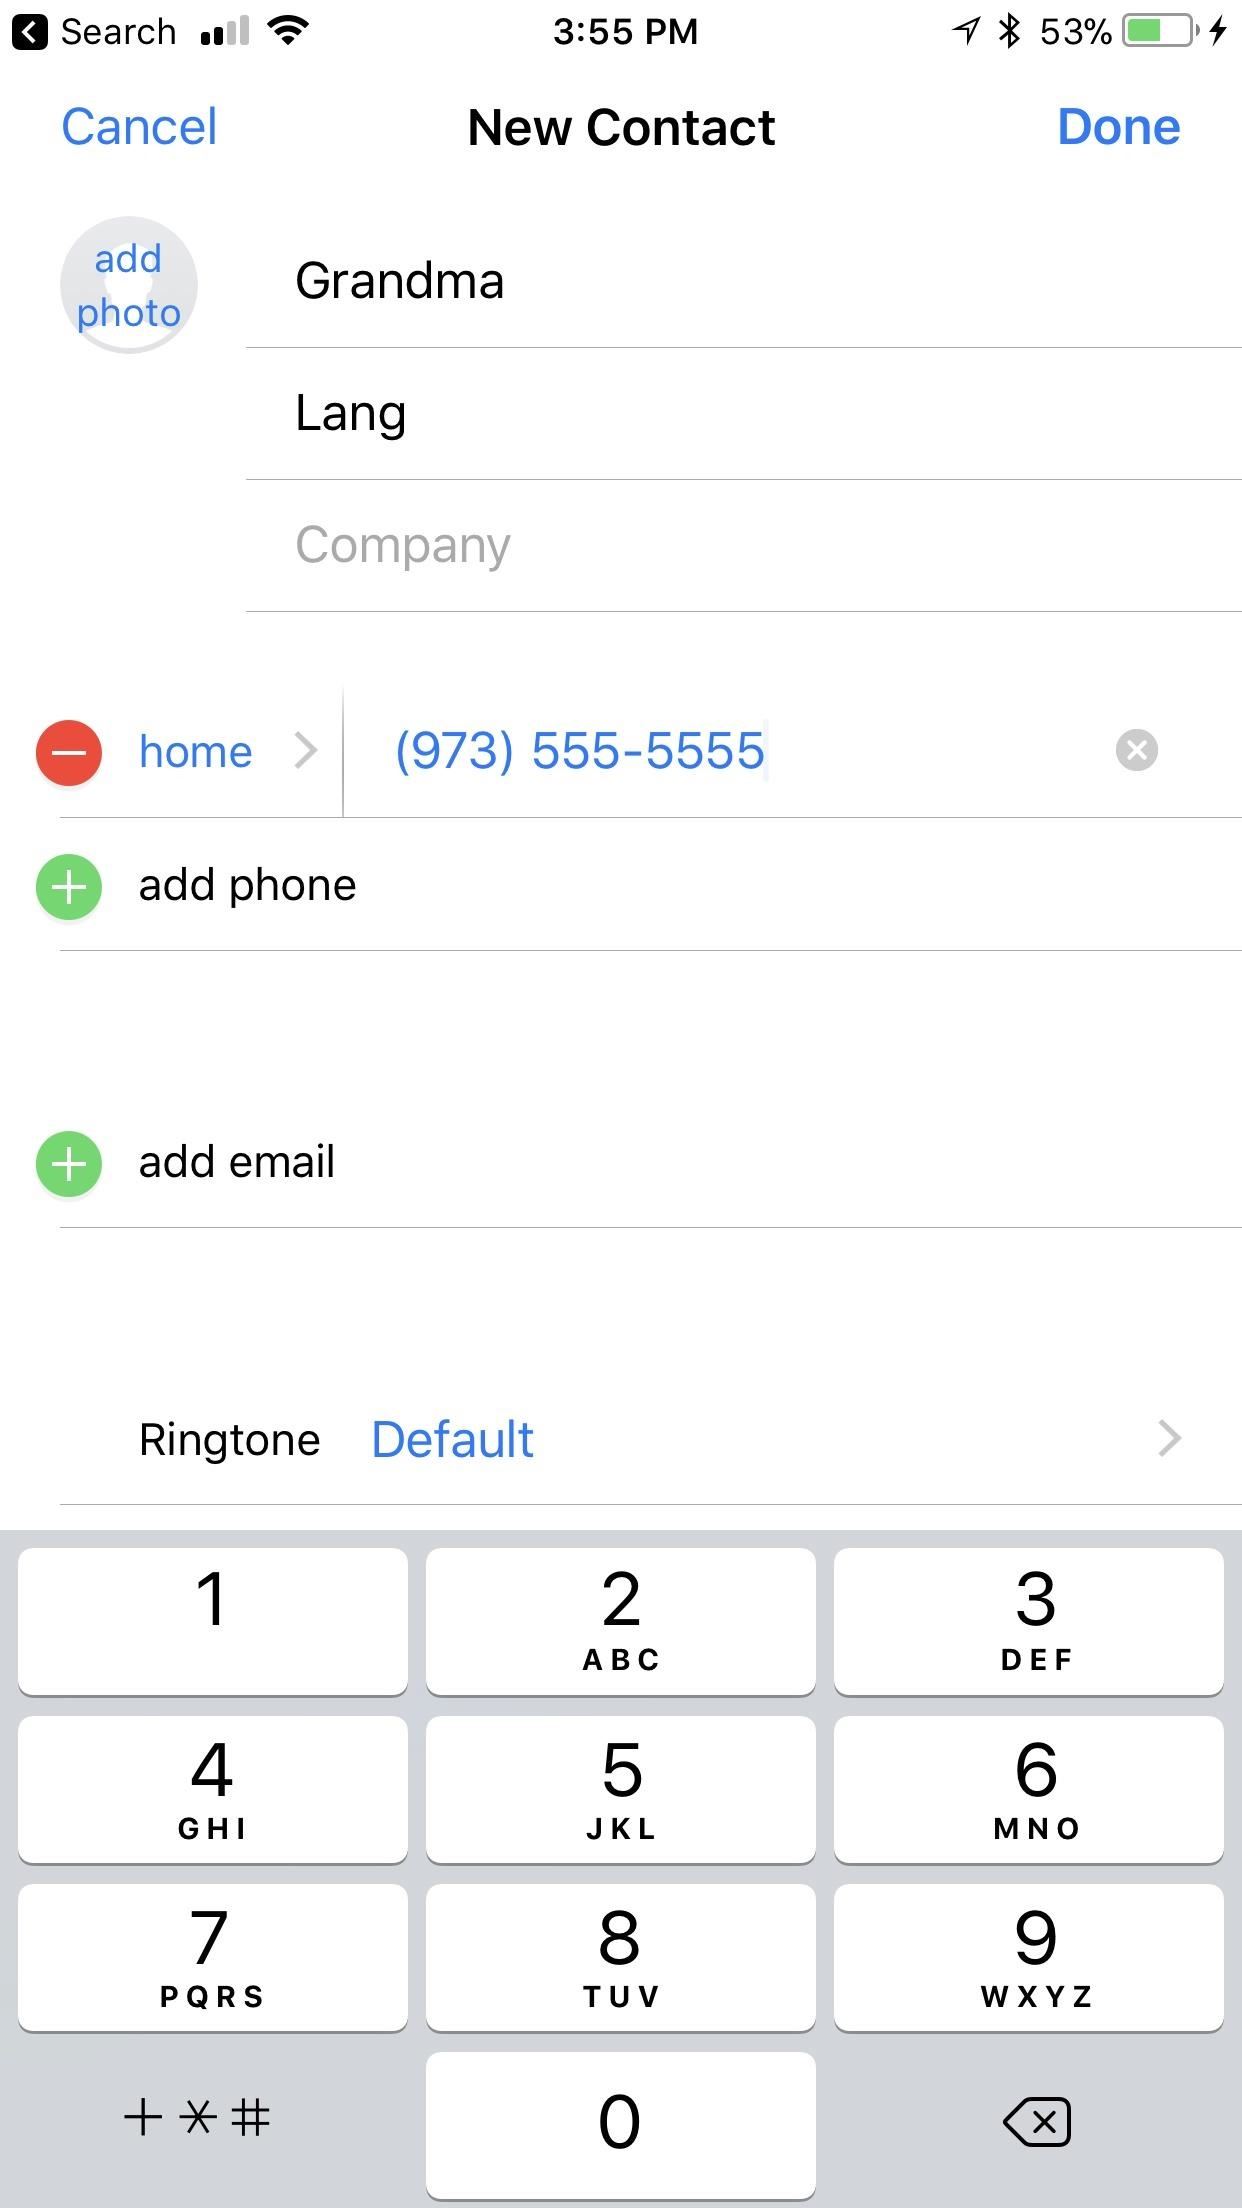
Your grandma is going to want to start talking to people, so begin by adding some of her favorite people in the Contacts app. From there, she can send messages (texts or iMessages) to people, call them, email them, or FaceTime them.
In my experience, some technologically challenged people prefer to curate their communications exclusively though the Contacts app (which will then direct them to the appropriate app for the action). Honestly, it doesn’t matter how they initialize the call or message — it’s more important that they understand how to do it.
Tip 2: Set Up Her Email
If your grandma is anything like mine, her time on the internet revolves around her email. This isn’t to say that she’s constantly checking it. Rather, she spends maybe 30 minutes per day on the internet, and half of that is spent checking her email.
Unless your grandmother has more than one email address or didn’t create an iCloud email account when setting up her Apple ID, you could probably skip this step and just install the third-party email app that’s specific to her email provider — Gmail, Yahoo Mail, Microsoft Outlook, etc. This would have probably been done in Step 5 above.
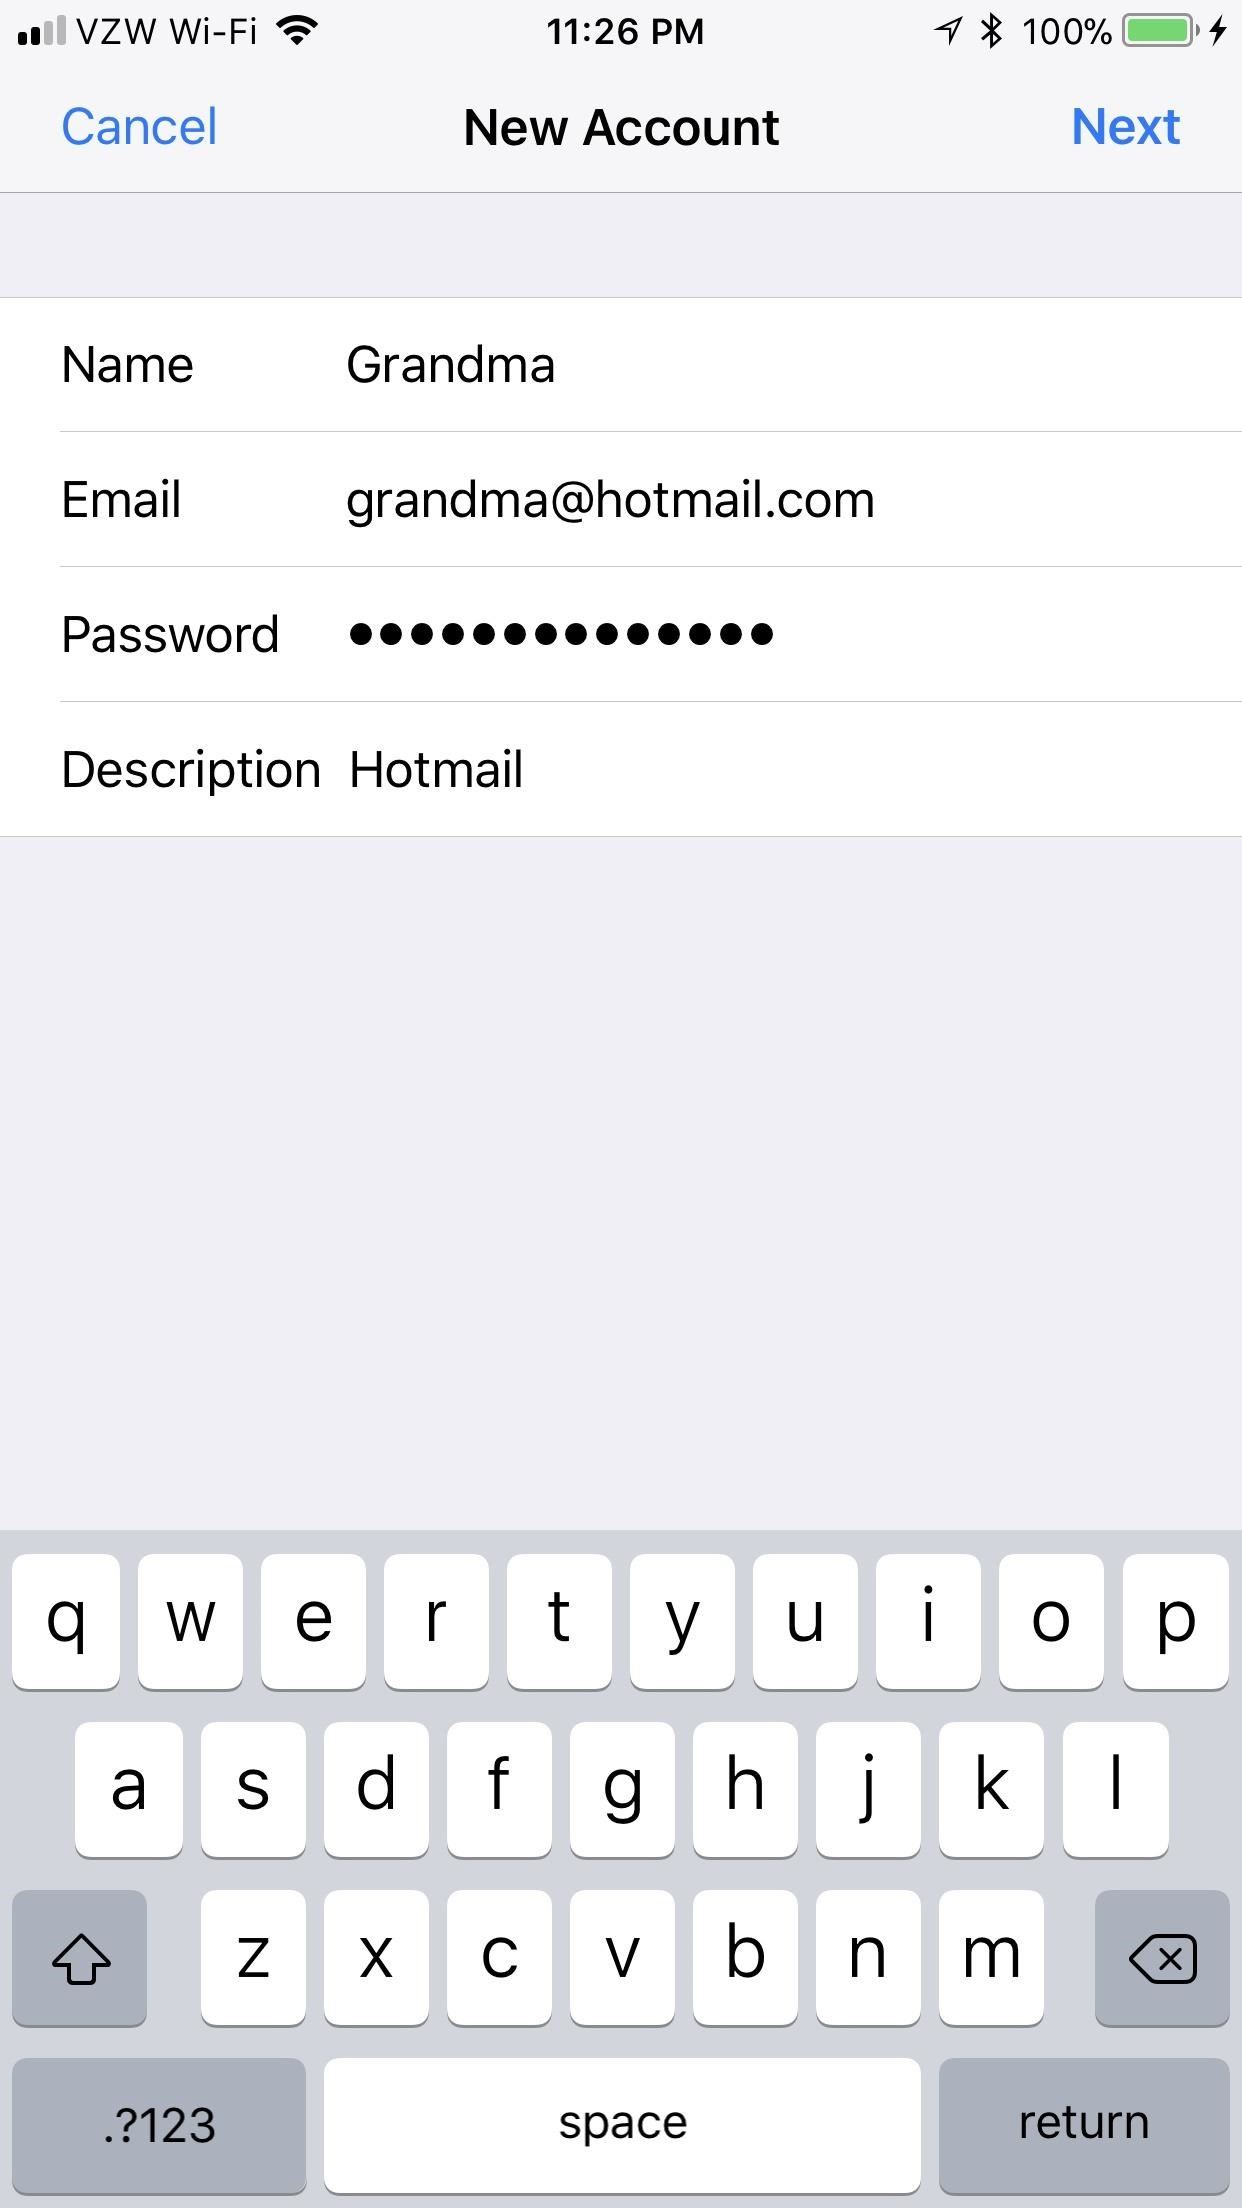
Otherwise, Apple’s Mail app is super intuitive, but you’ll still probably need to actually set up her email for her since this is basically just an email client — especially since iOS 11 made it slightly more complicated to add more than one email account. After setting it up, walk her around its features and tools.
- More Info: How to Add Email Accounts to Mail in iOS 11 on Your iPhone

Tip 3: Show Her Messages
With regards to Messages, we’re going to keep this as simple as possible. Show her how to create a new message (by tapping the pad-and-paper icon in the top right corner), then how to fill out the To: box (by either entering a phone number or searching for a contact). From there, type the message out in the appropriate sot, then hit the up arrow at the bottom to send the message.
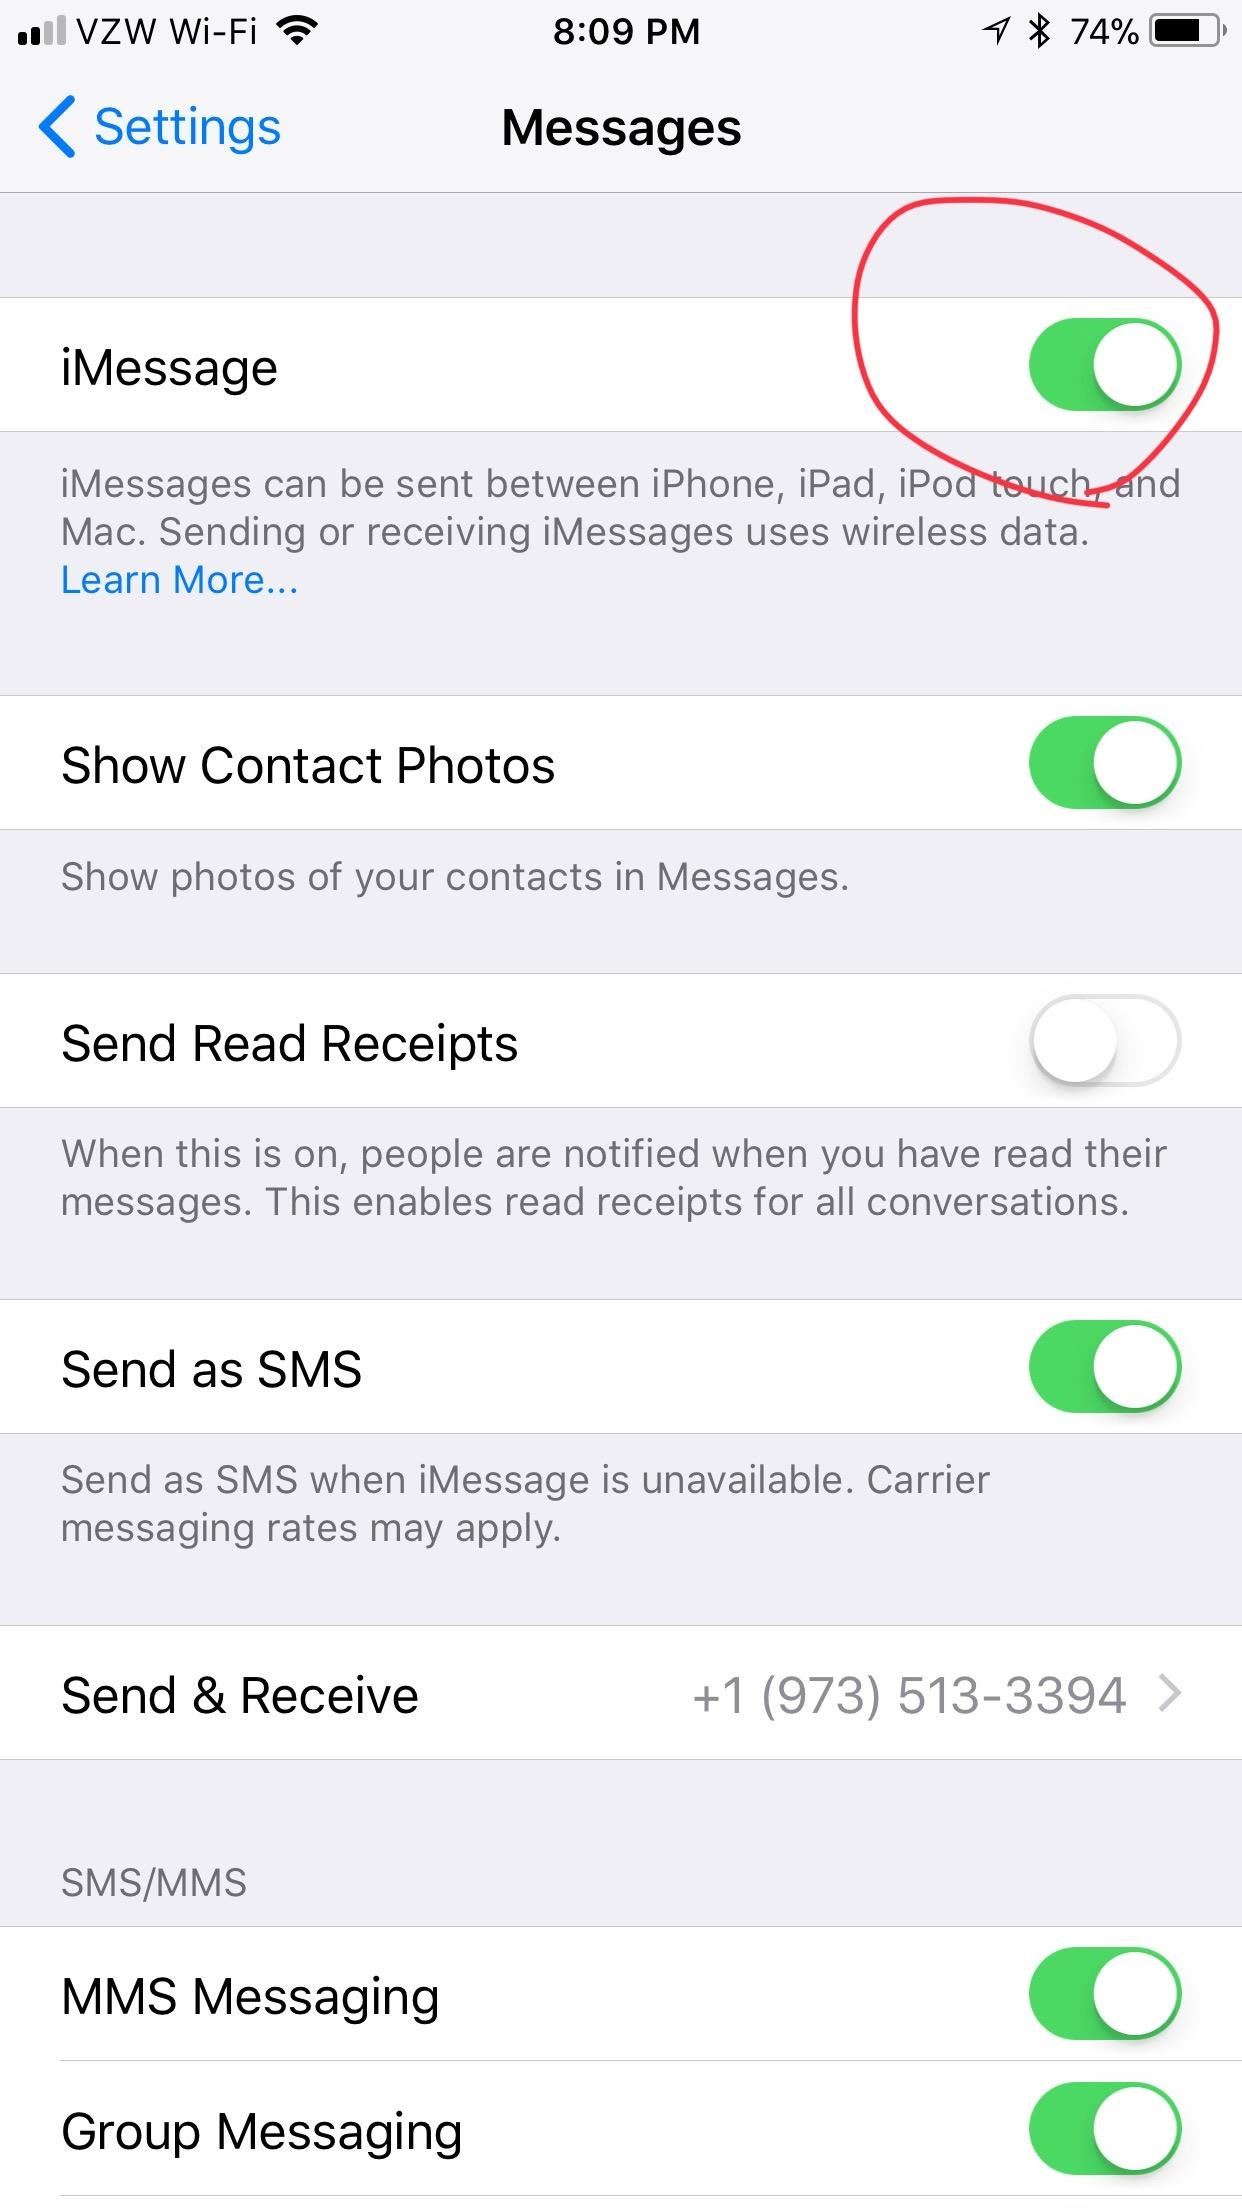
Make sure “iMessage” is enabled (“Settings” –> “Messages”), though, because there are a variety of features she won’t be able to use otherwise. Plus, they will not count against her text allotment with her cellular carrier (although, what carrier doesn’t provide unlimited texts these days?).
- Don’t Miss: 8 Great New Messages Features in iOS 11 for iPhone

Tip 4: Show Her FaceTime
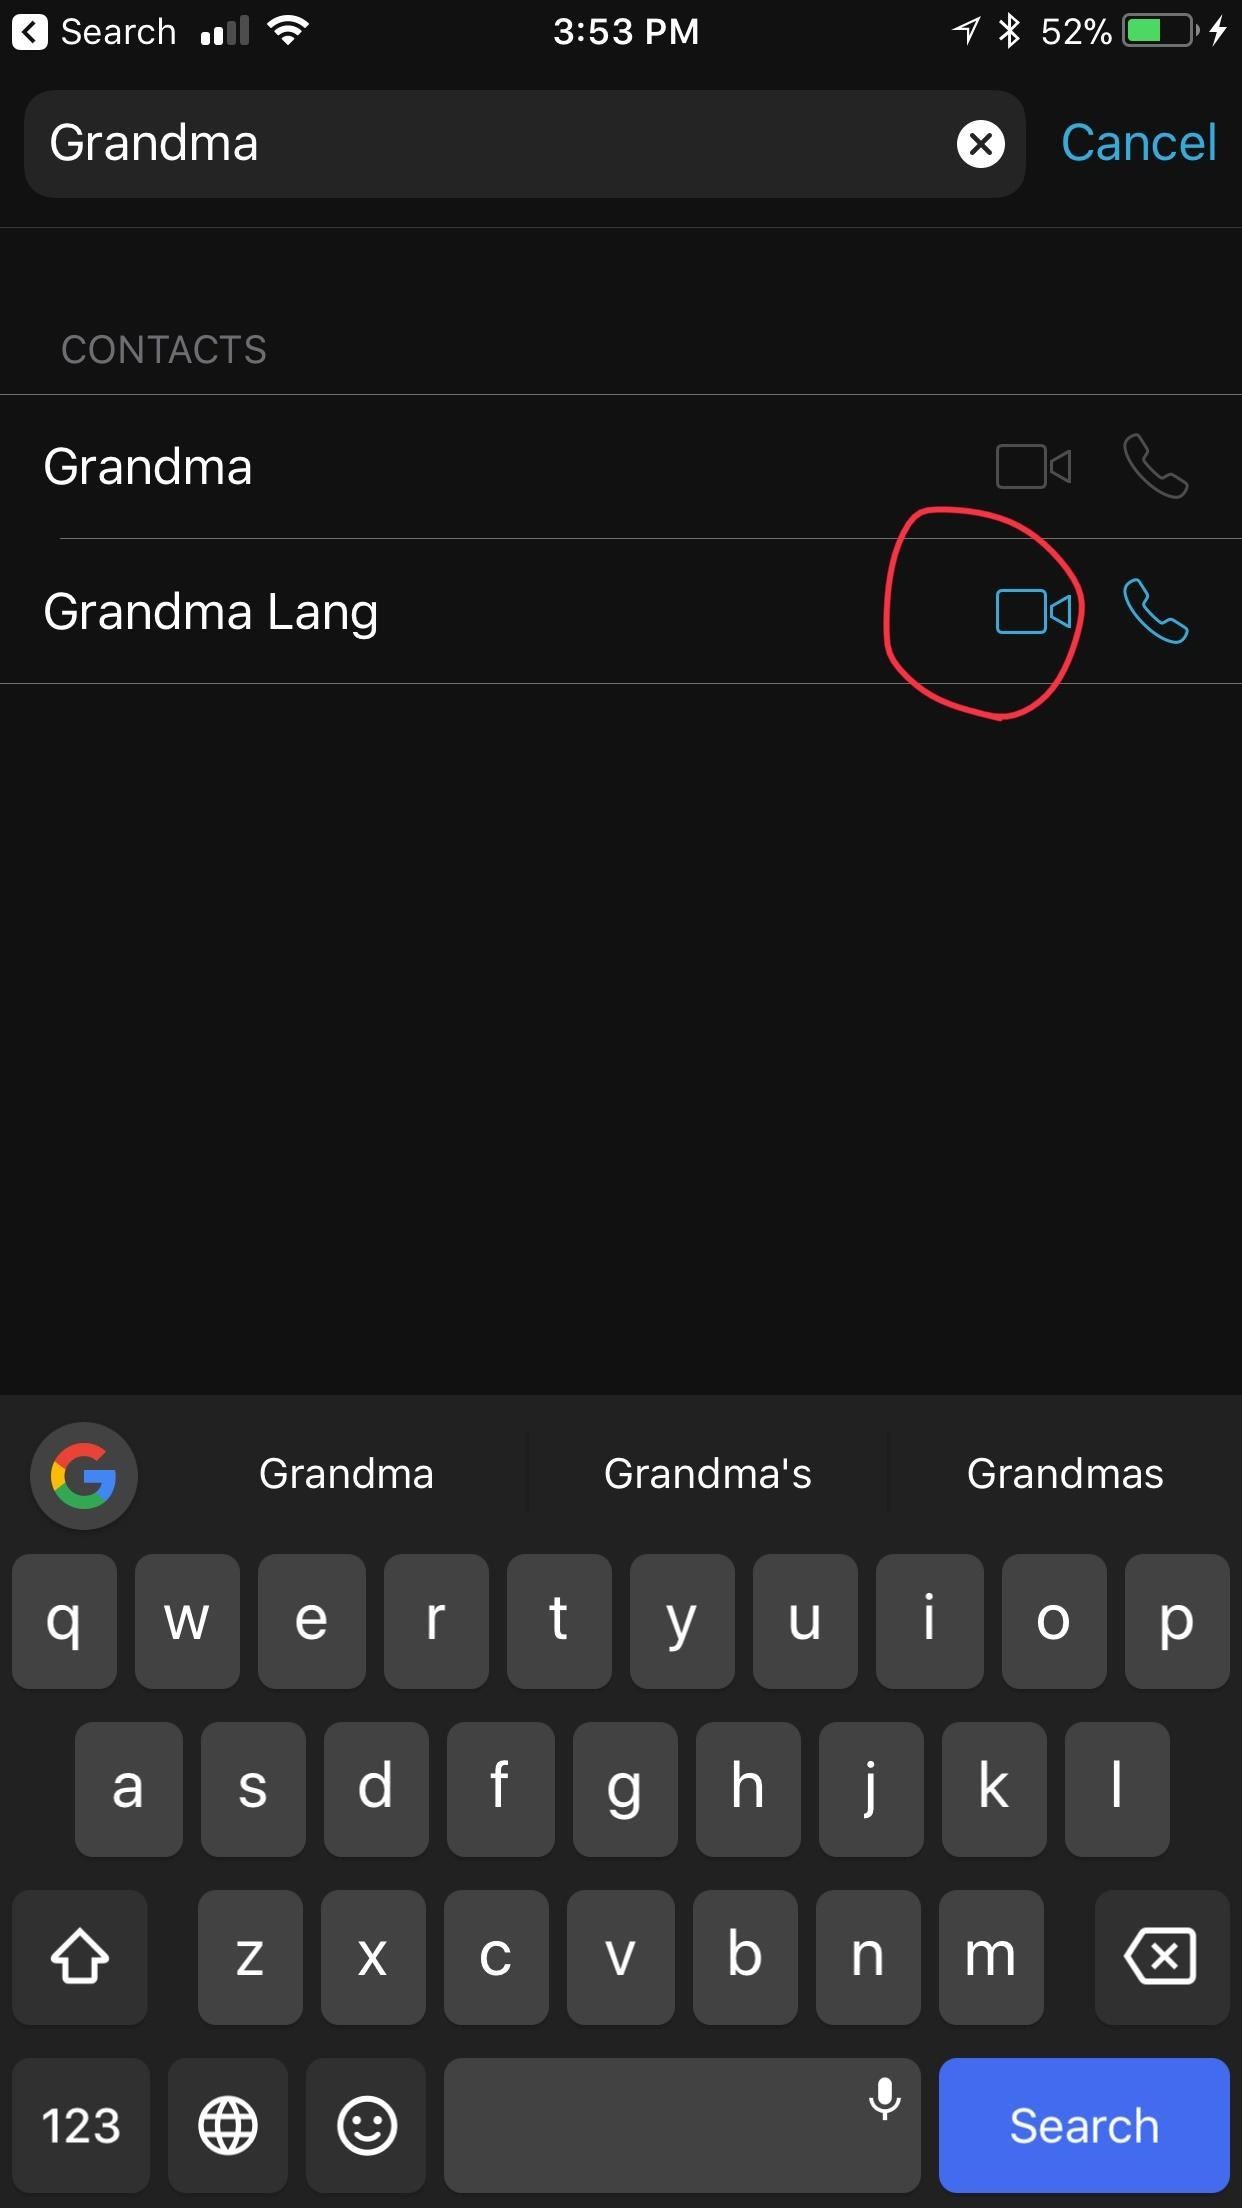
FaceTime is similar to Messages, however, your grandma can only FaceTime with people with iPhones or Macs that are connected to the internet.
- Don’t Miss: How to Take or Disable Live Photos During a FaceTime Video Call

Tip 5: Show Her How the Phone App Works
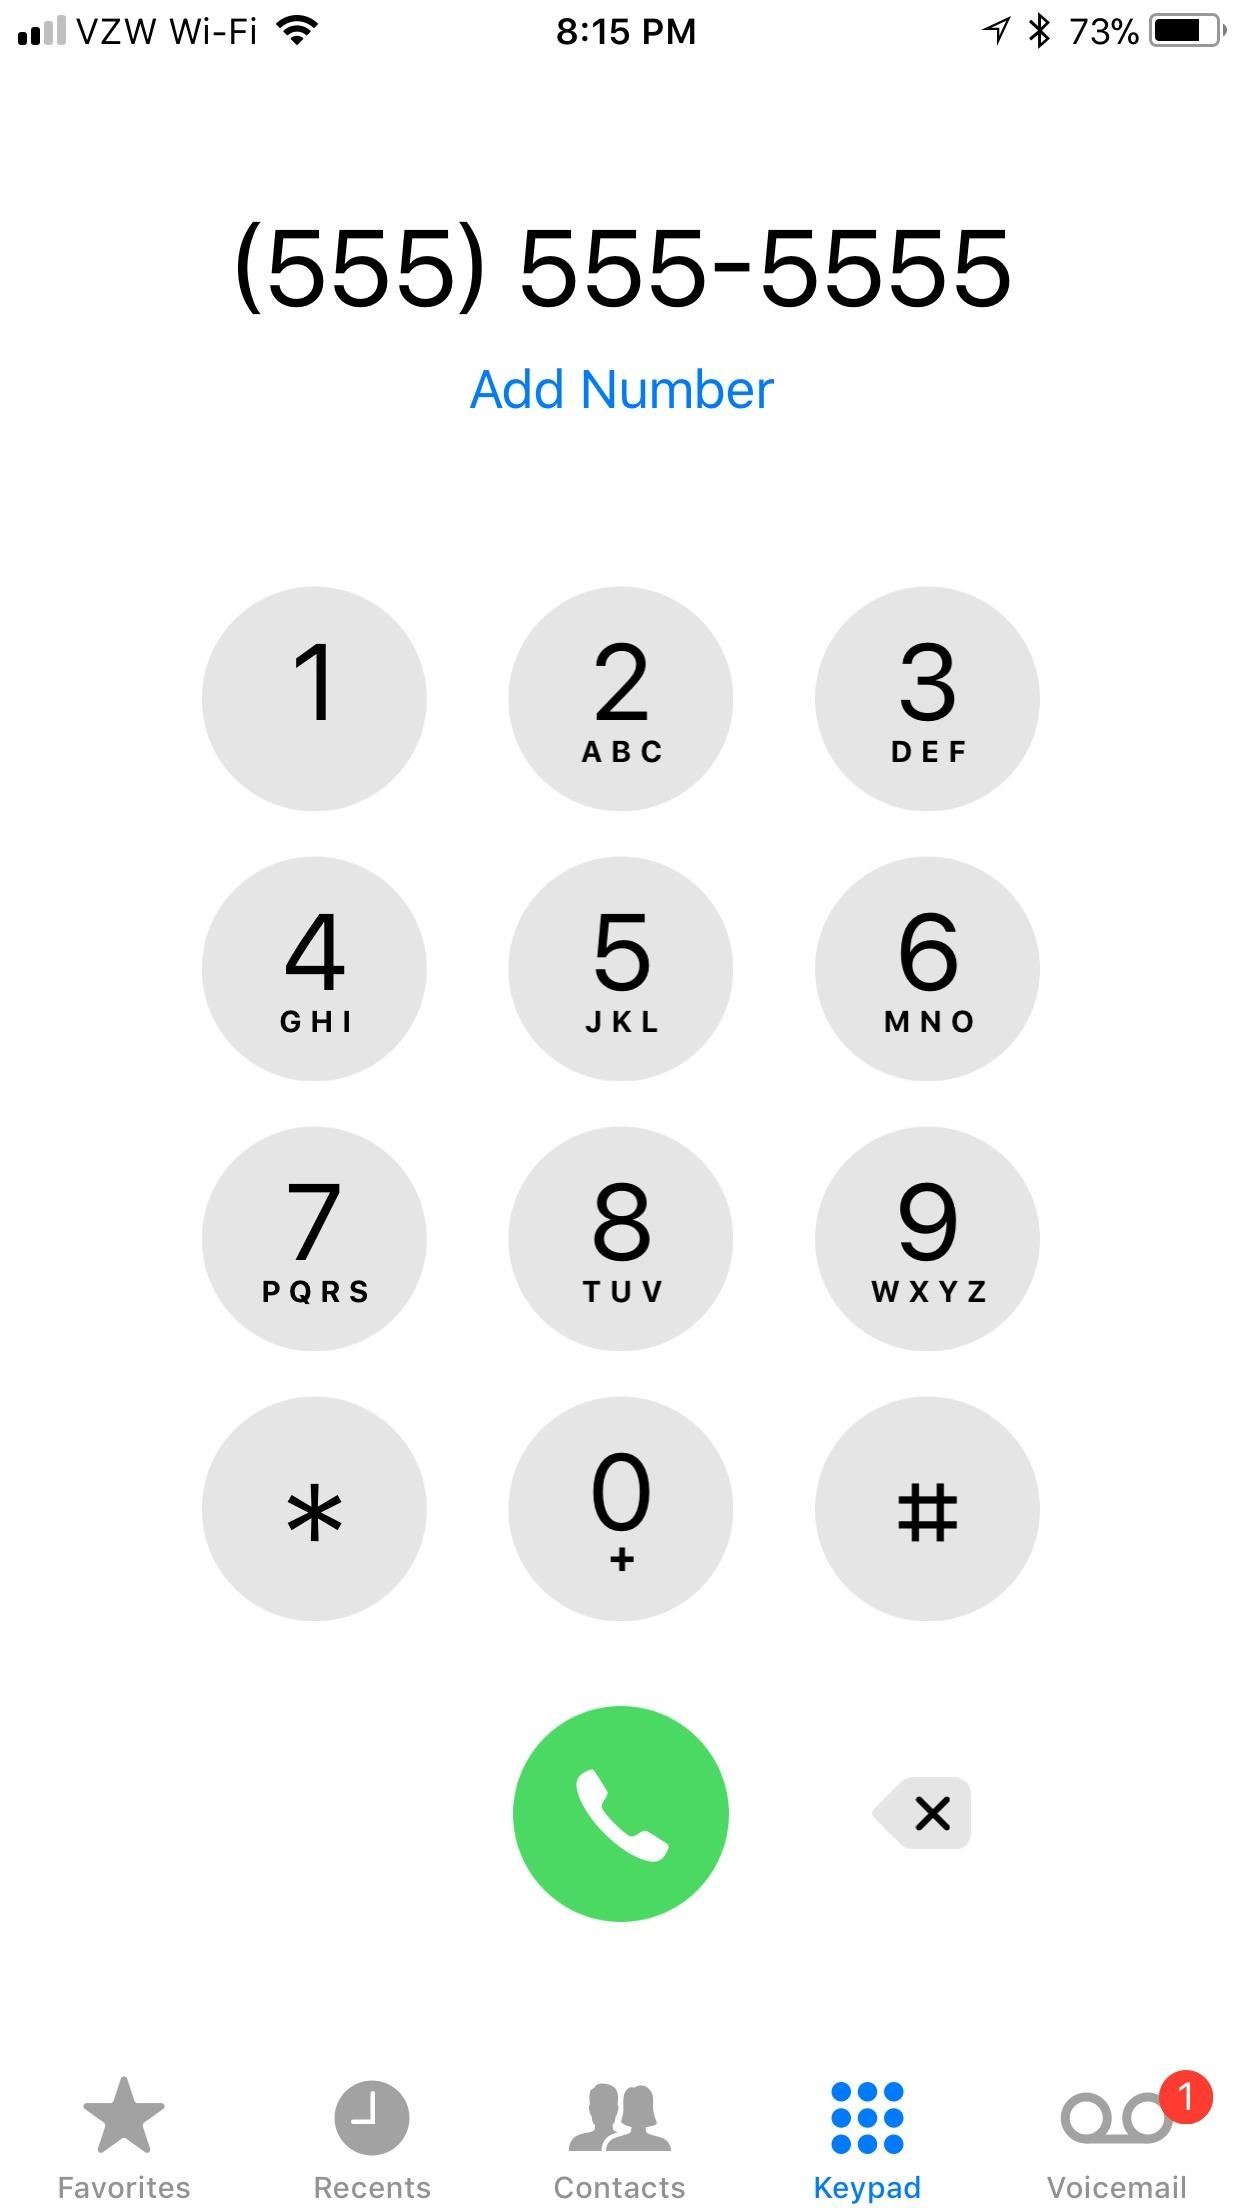
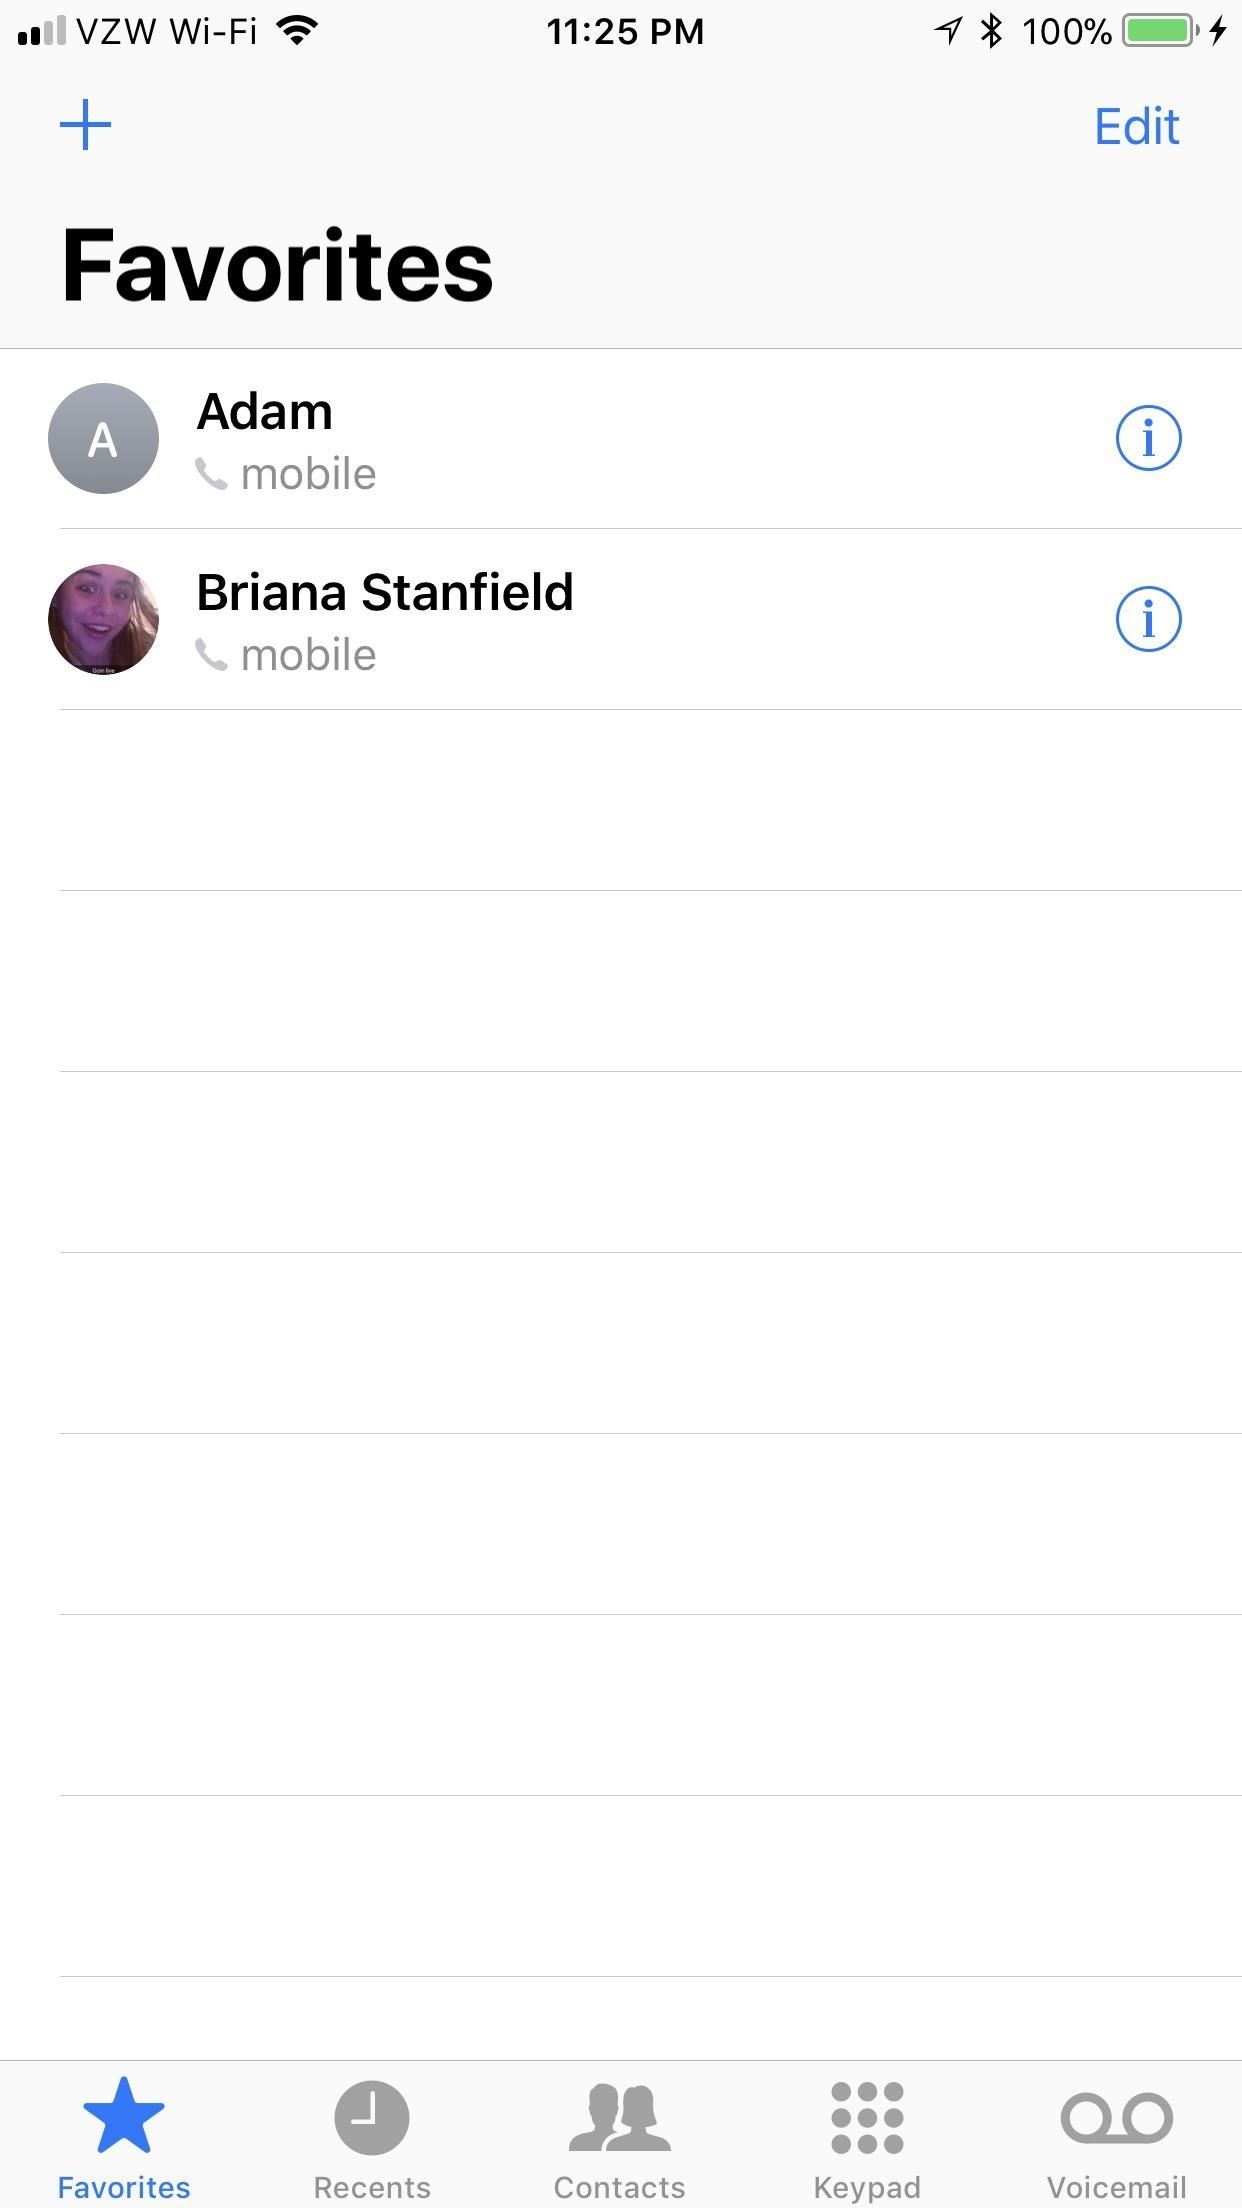
The Phone app is probably the easiest for grandma to understand, as it works so similarly to her previous “dumb phone.” Set her up with some “Favorites” and show her where the keypad is hiding.
Tip 6: Get Her Used to the Control Center
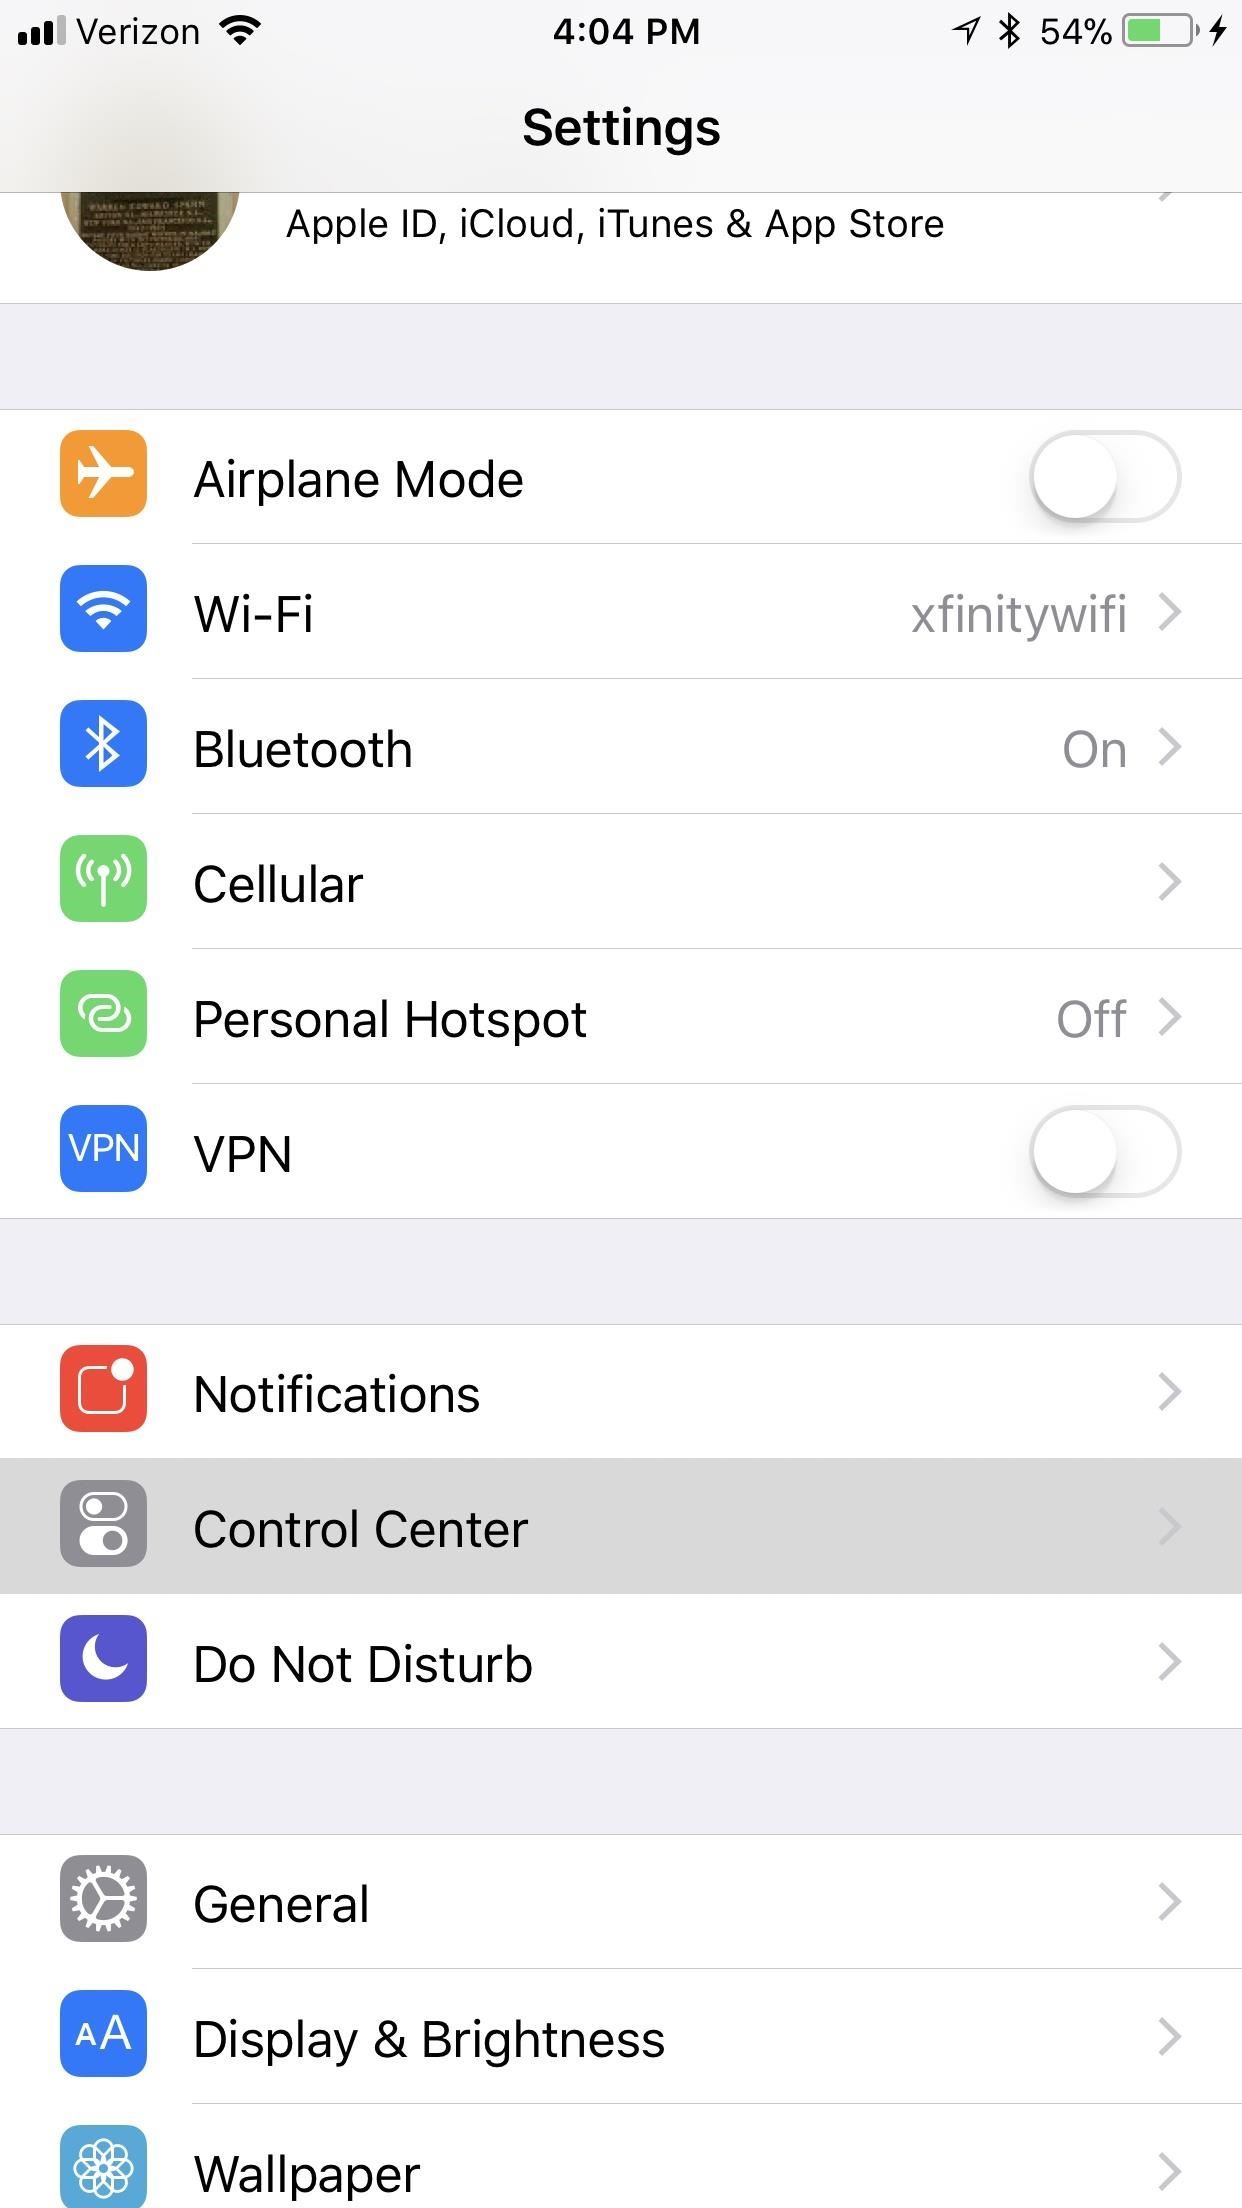
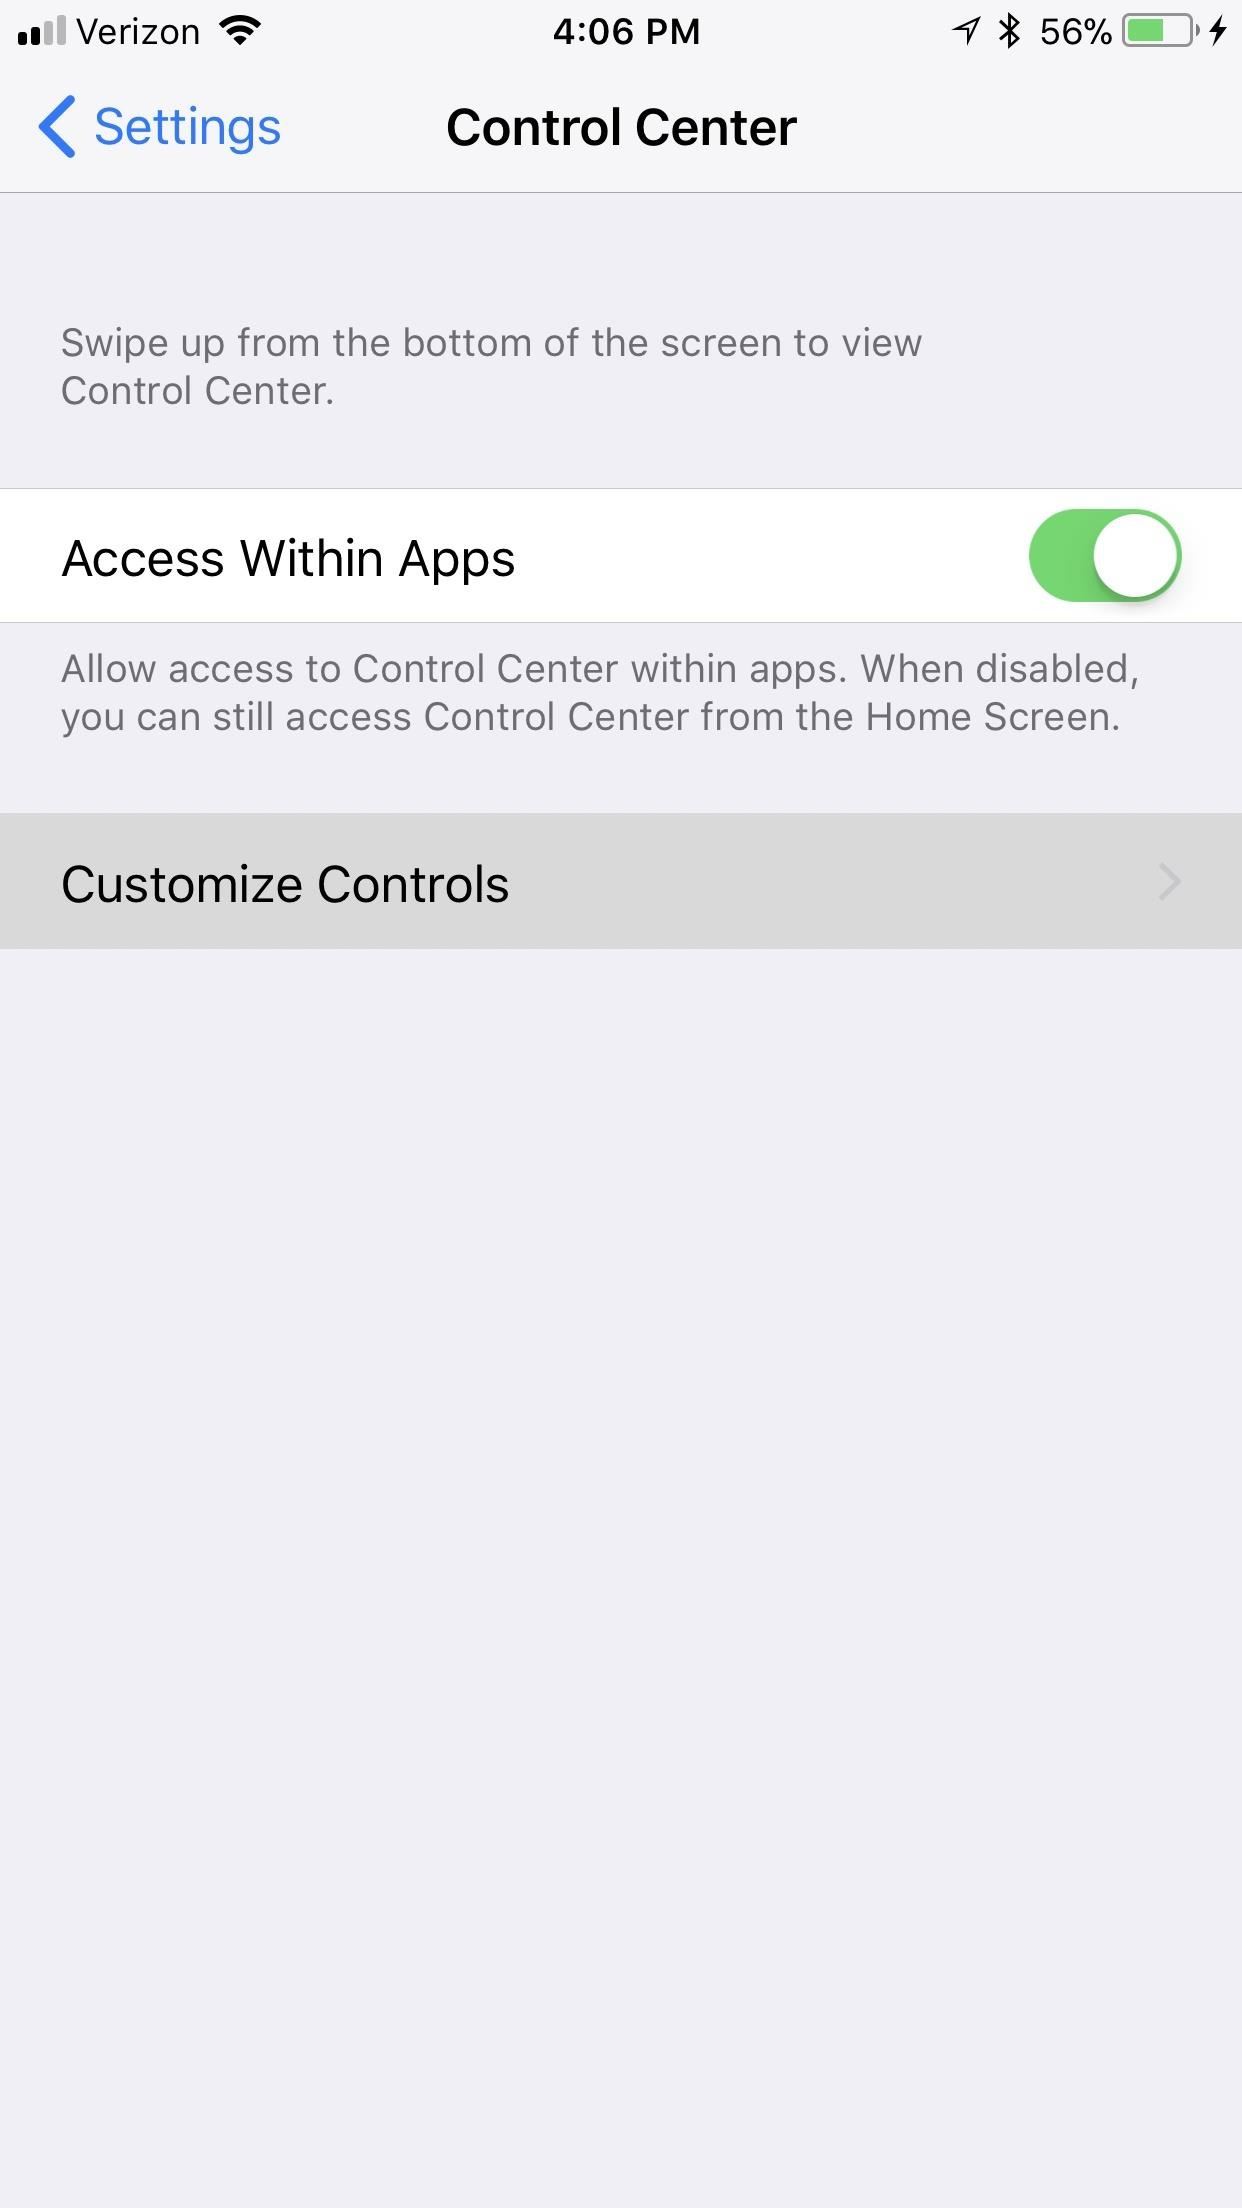
Now, let’s talk about the Control Center, which is a quick-access screen on your grandma’s iPhone that includes a number of toggles and quick settings. On an iPhone X, it’s accessed by swiping down from the top right of the screen. On all other iPhones, it’s a swipe up from the bottom of the screen.
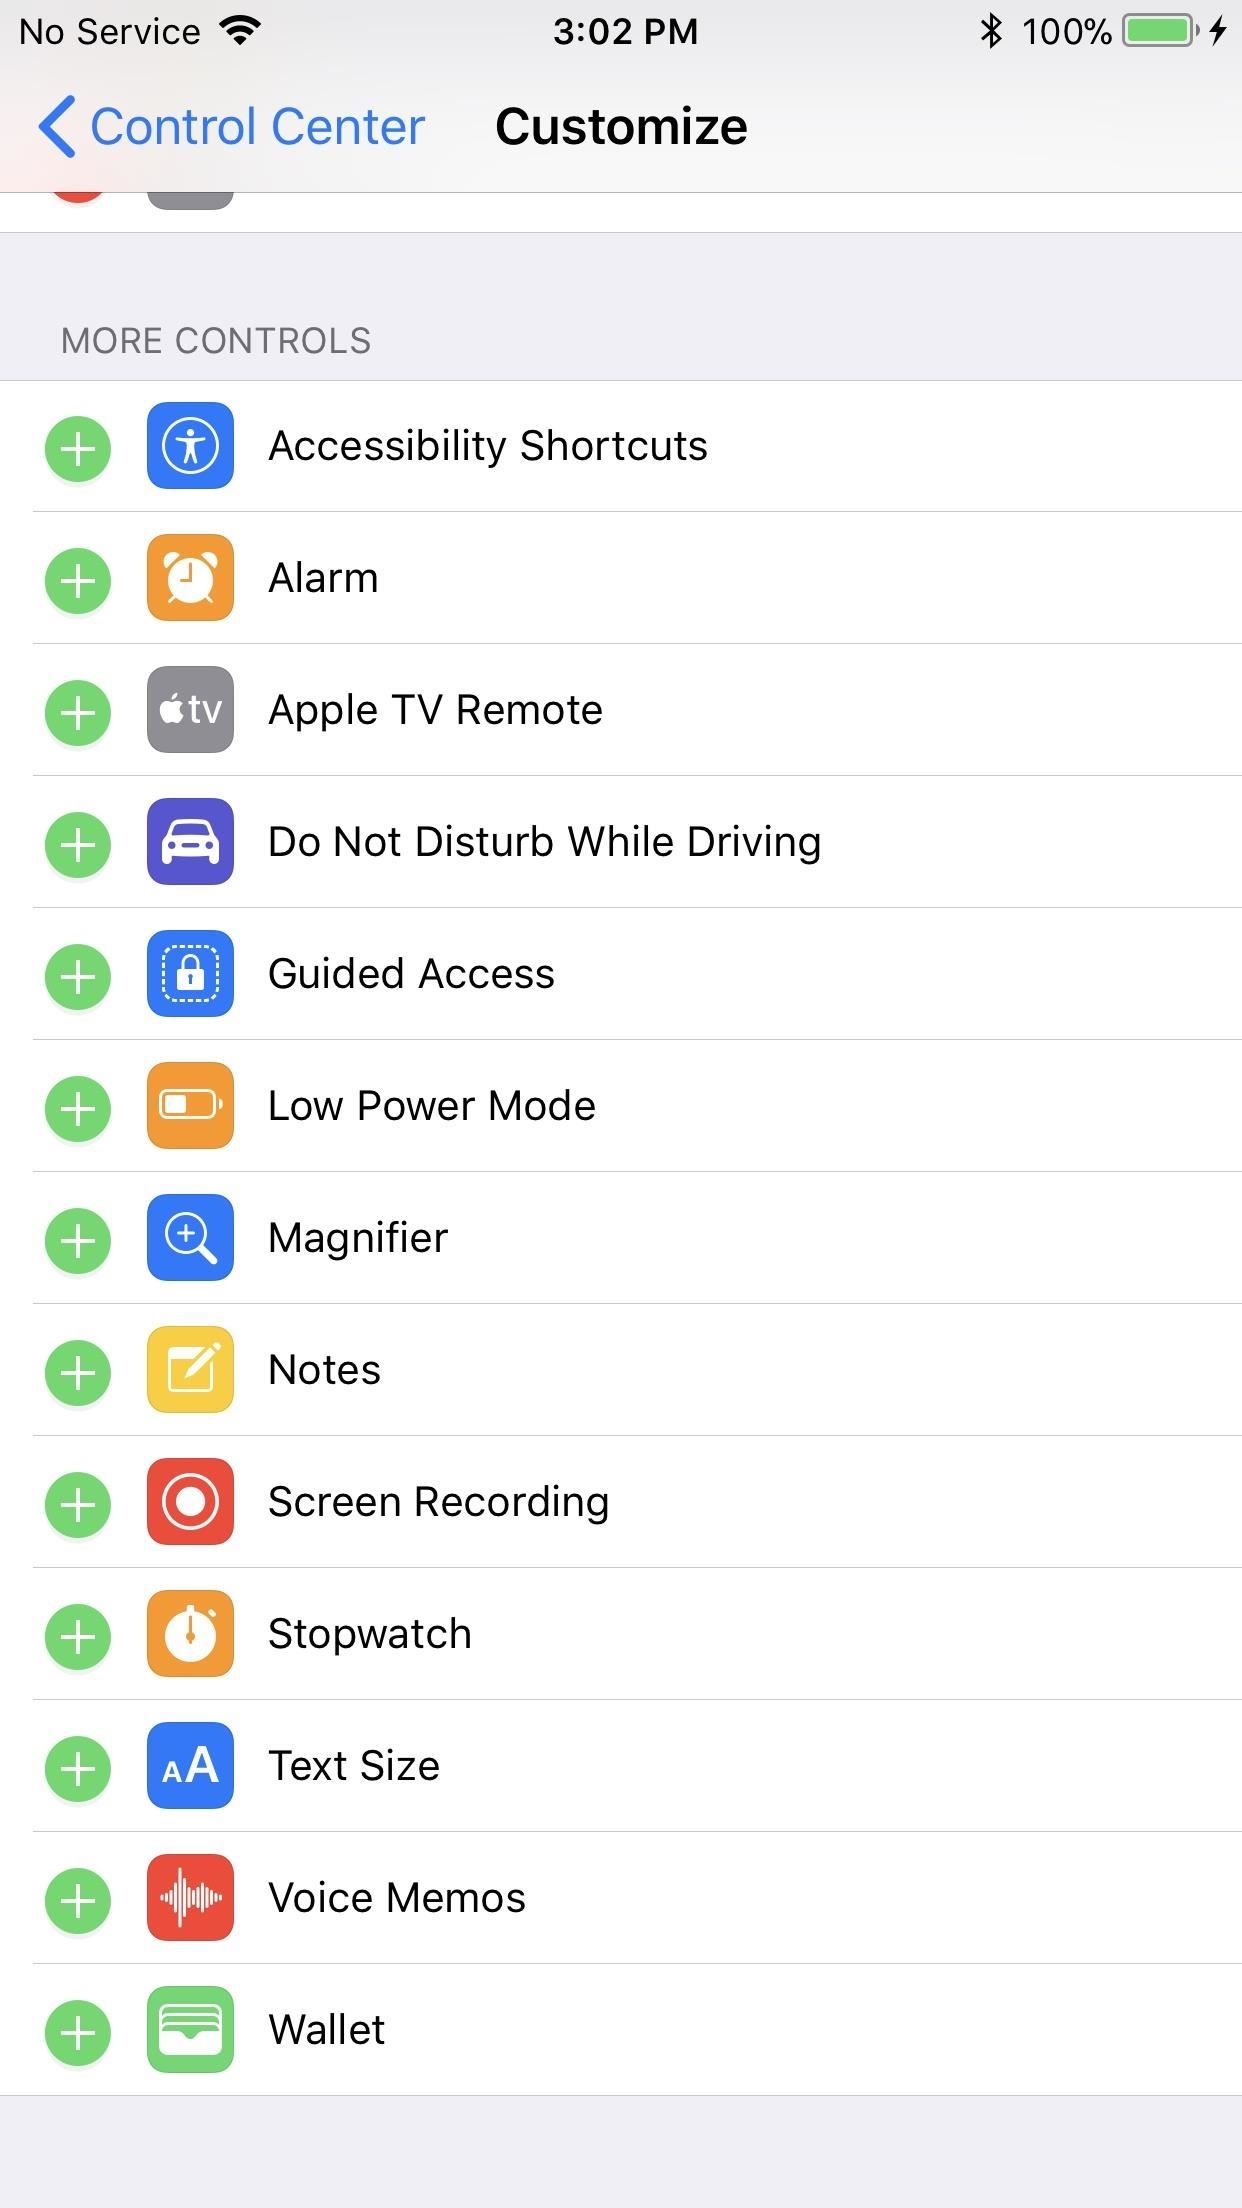
Advise her against clicking on the Wi-Fi and Cellular toggles, but show her that she can easily access the Camera, Calculator, and Flashlight from here (on an iPhone X, the flashlight is also on the lock screen and notifications screen). In iOS 11, you can also enable the “Accessibility Shortcut” and a few more quick settings that will help you troubleshoot her problems in the future, such as screen recording.
- More Info: How to Use & Customize the Control Center on Your iPhone
Step 8: Prevent Grandma from Going Over Her Data Limit
For the most part, iOS won’t help your grandma from going over her monthly allocated date from her carrier, but there are a few settings you can tweak to prevent her from spending more money each month.
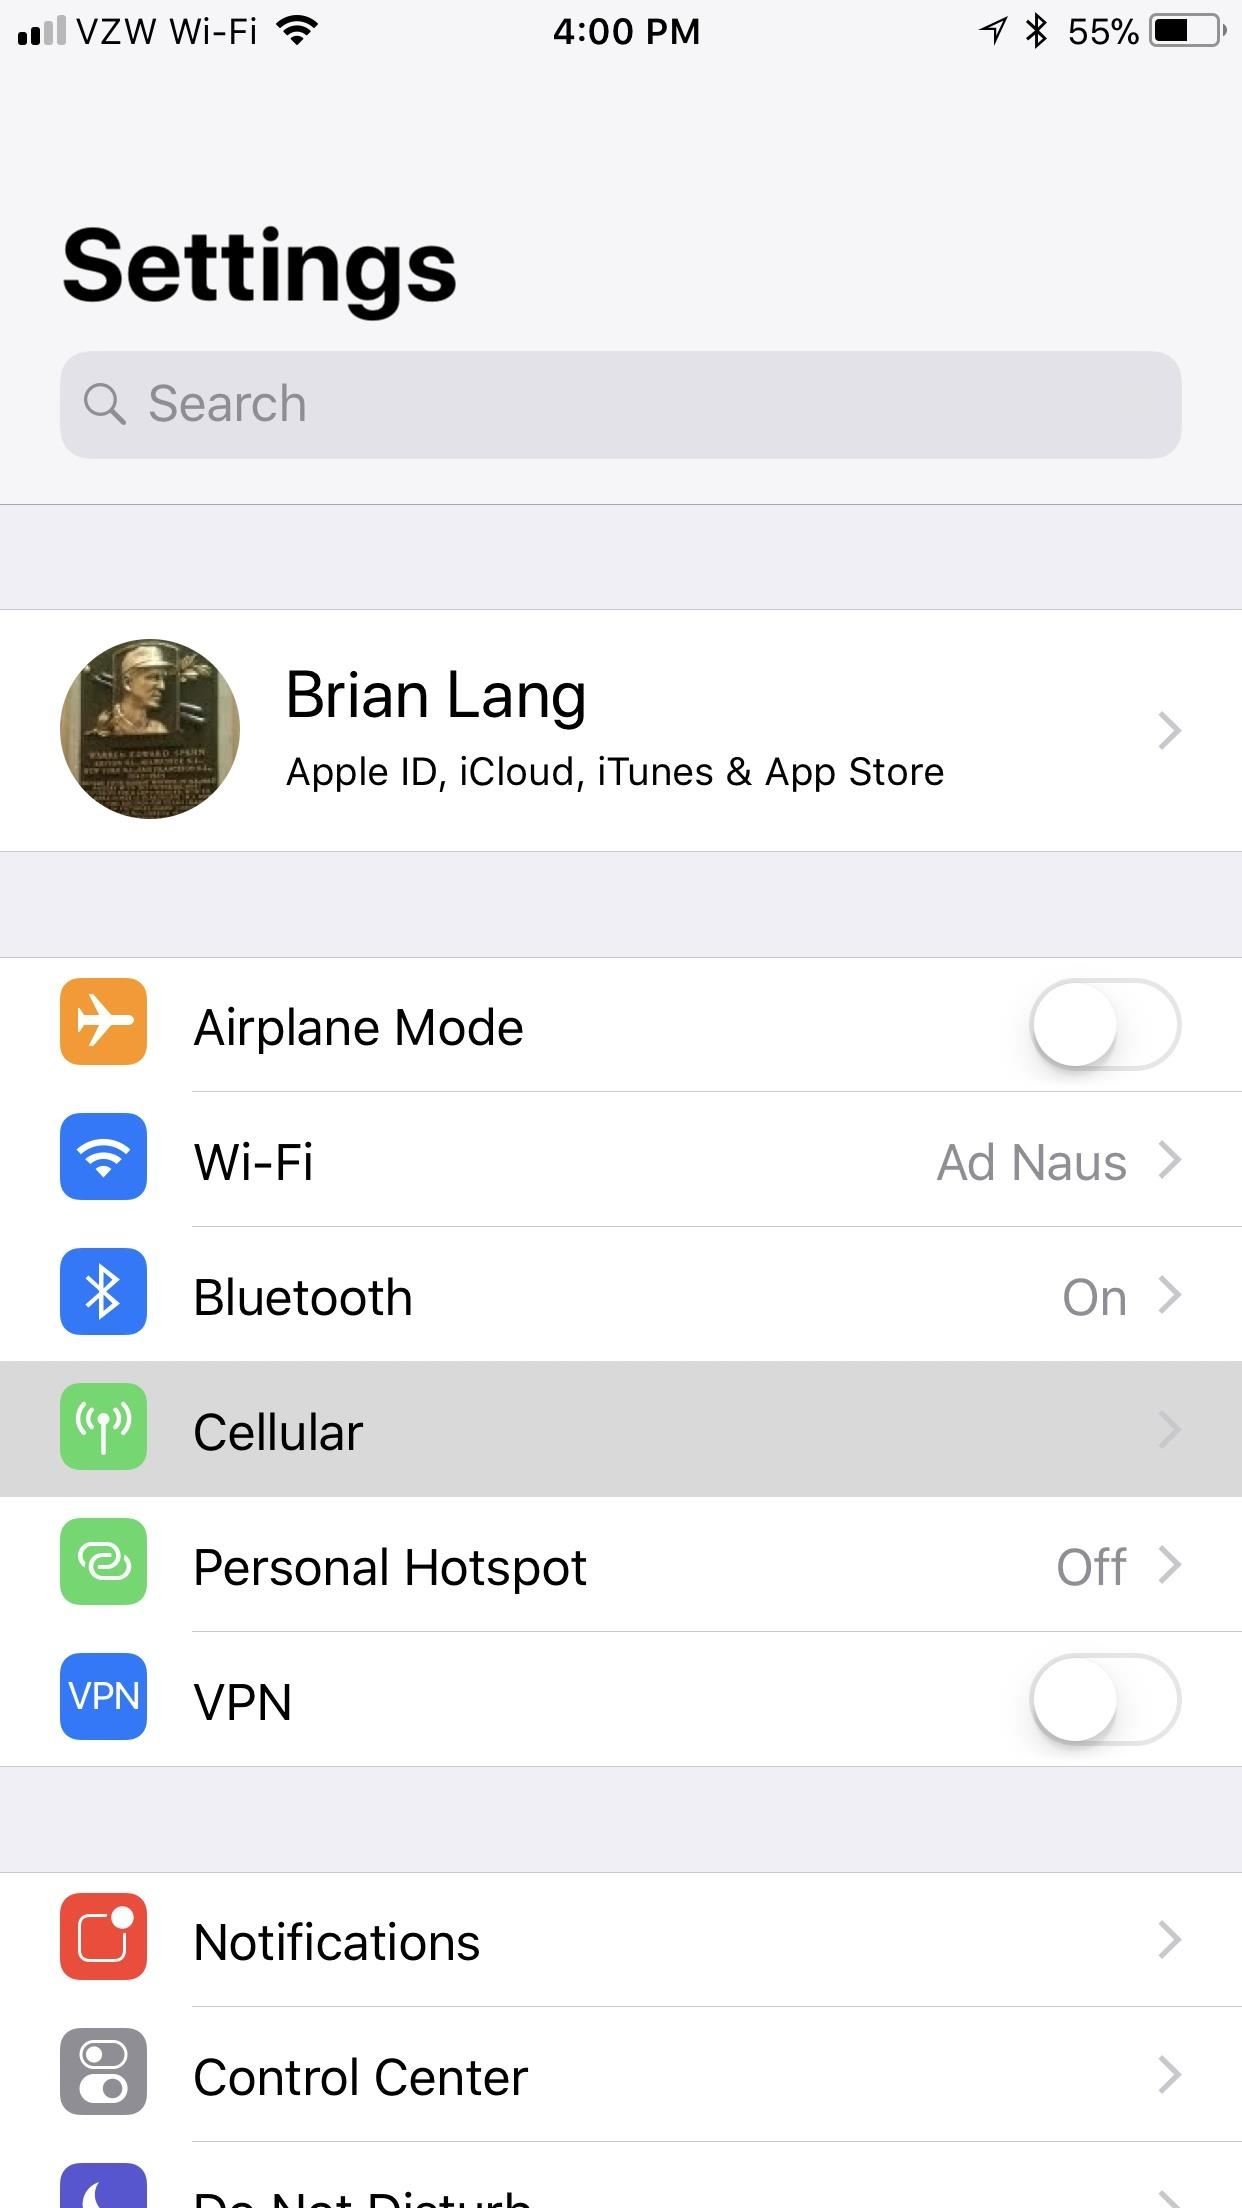
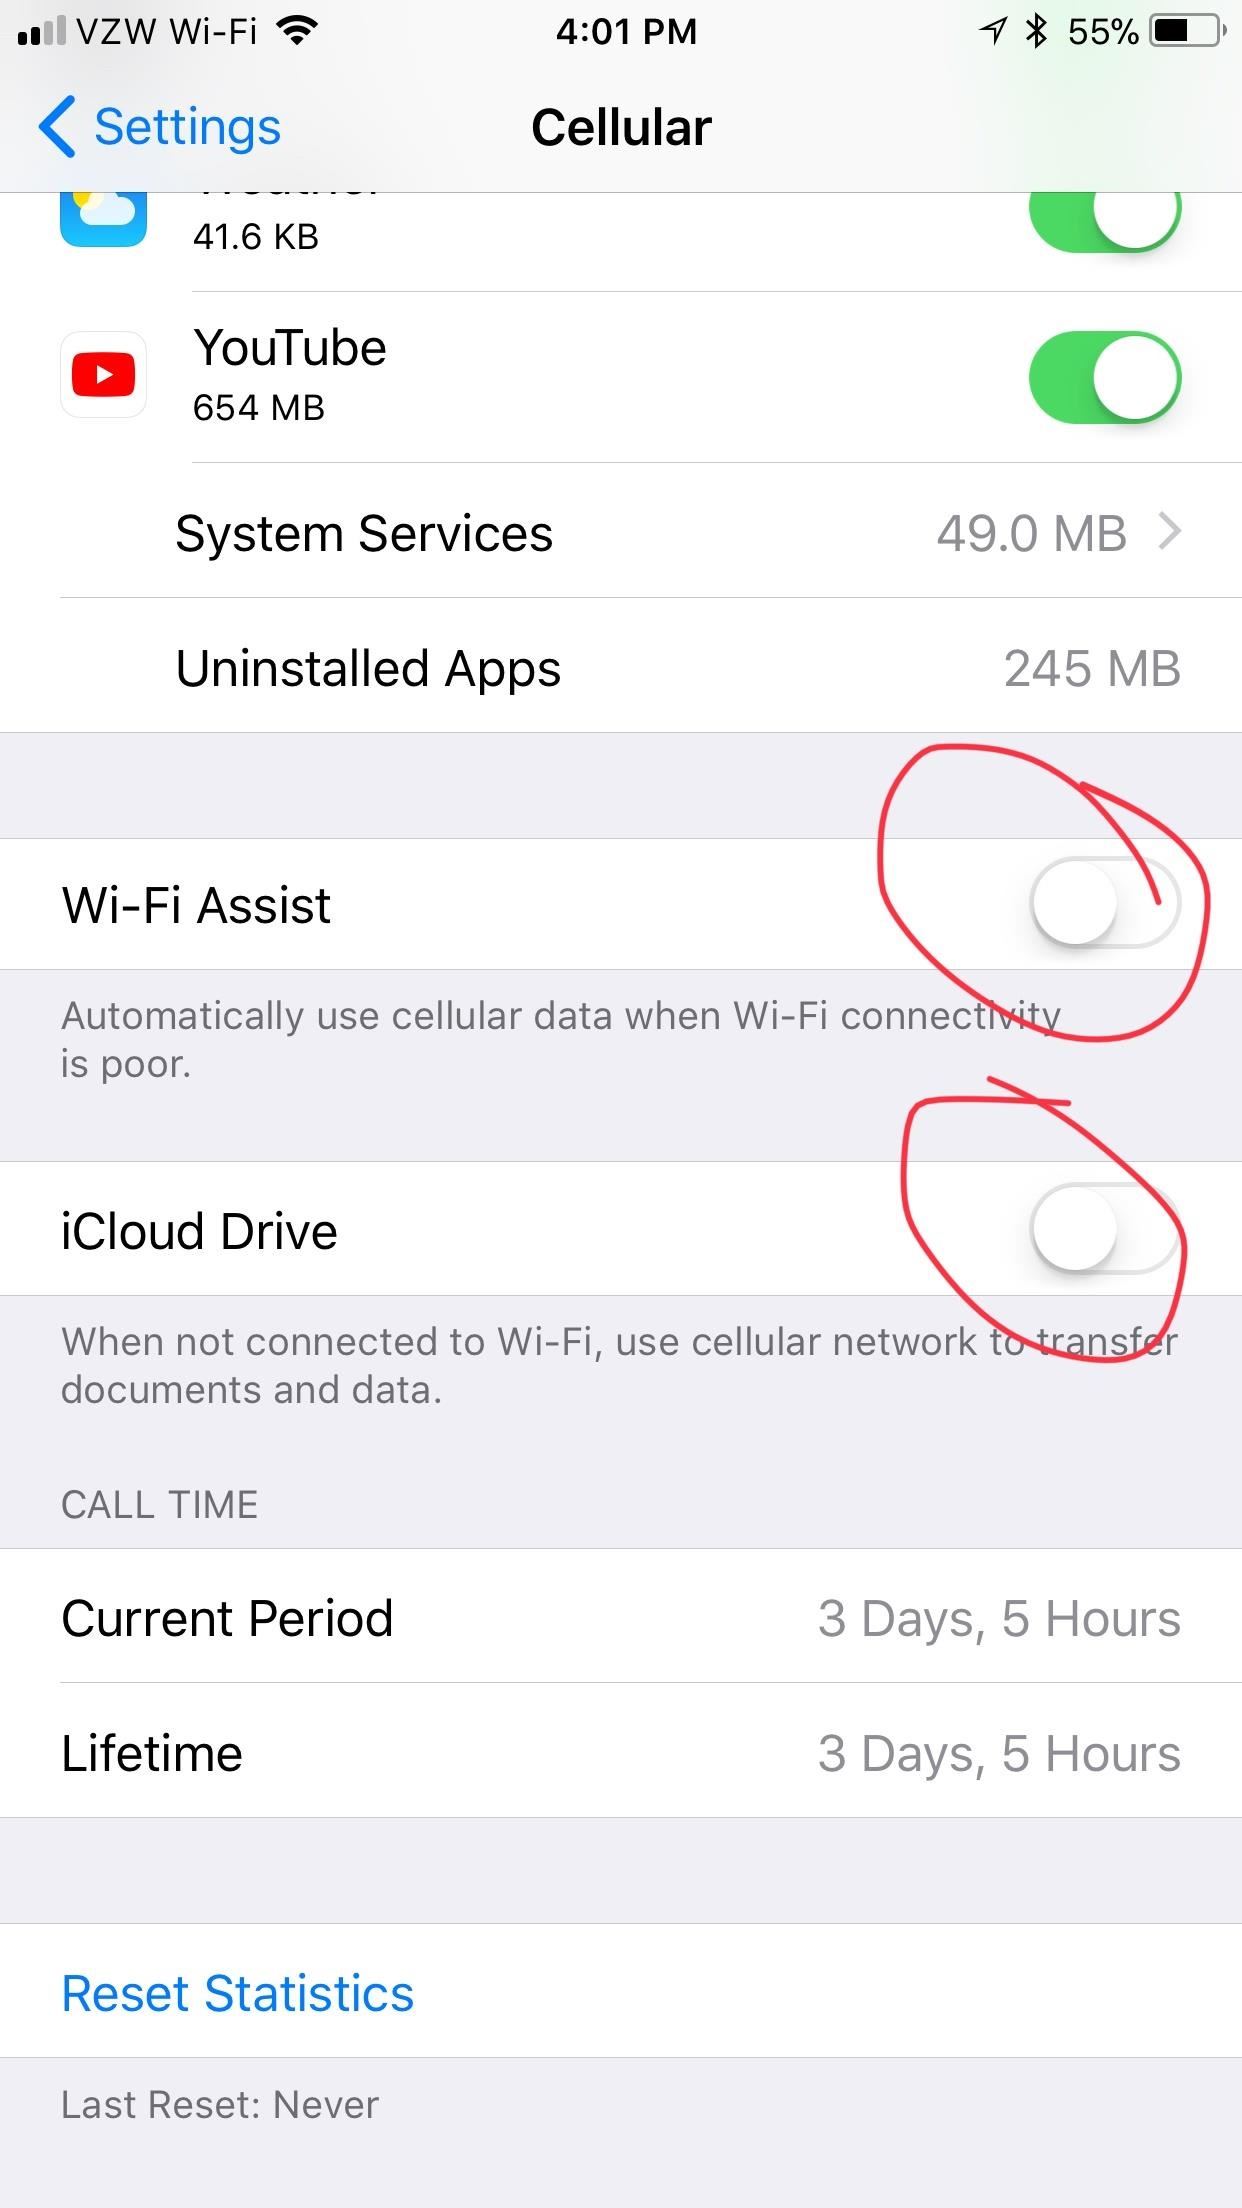
Enter the “Cellular” section in the Settings app. From here, un-toggle any apps you think your grandma won’t need cellular data for, such as Netflix, YouTube, and any other data drainers. In particular, the “App Store” might be a good one to disable, so she doesn’t download a 100 MB game. This can always be changed later.
Also, scroll all the way to the bottom and turn off “Wi-Fi Assist” and “iCloud Drive.” The former prevents grandma’s cellular connection from being used to patch up a poor Wi-Fi connection, and the latter keeps iCloud Drive from updating unless on Wi-Fi.
Next, go to “iTunes & App Store” in the Setting app and turn off “Use Cellular Data.” This prevents the iPhone from automatically installing app updates, as well as apps, games, and music if they were installed on a device using the same Apple ID. This likely won’t be an issue for your grandmother, unless she has a Mac and/or an iPad, but app updates will definitely cause her data headaches if “Use Cellular Data” is not turned off.

If she still needs help, there are third-party apps that can help her manage her data better. And you can also think about disabling “Fetch New Data” in her Mail app, as well as “Background App Refresh,” but that’s only if your grandma is on a seriously limited data plan.
Step 9: Keep Grandma’s Battery Going Strong
If your grandma is keen on saving some battery life, or just doesn’t have the self-motivation to charge her iPhone every day, you can change some settings to keep her iPhone running longer per charge. Also, if she has an iPhone 8, 8 Plus, or X, you should consider getting her a wireless charging station so she can just drop her iPhone on top of it when she’s not using it.
- More Info: The Best Wireless Qi Chargers for Your New iPhone
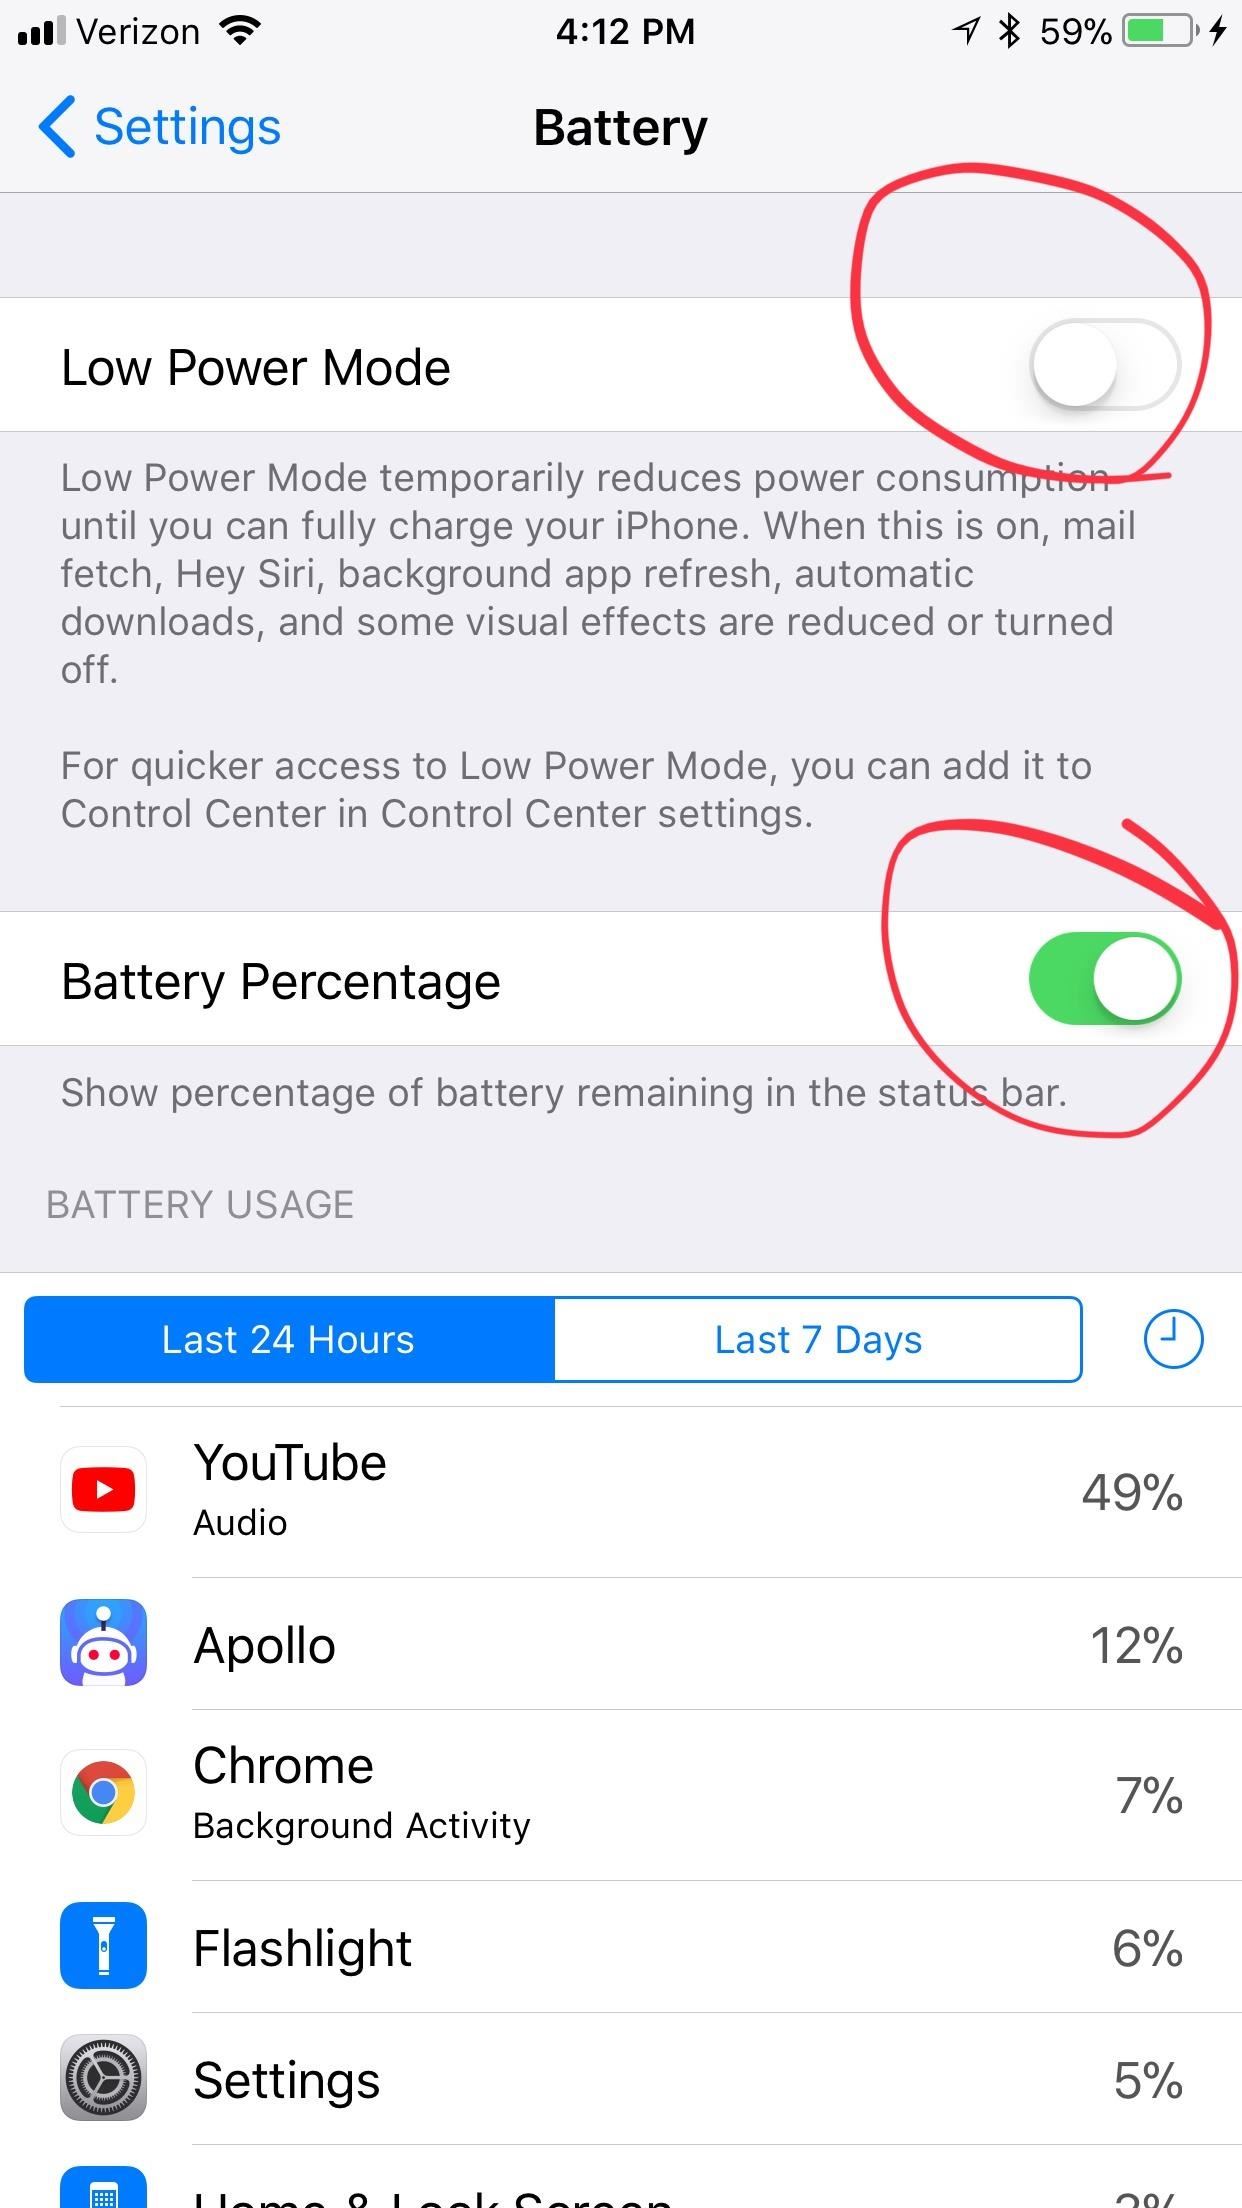
You can also show her where “Low Power Mode” is located, in case she ever gets too low on juice. It’s in the “Battery” section in the Settings app. Also, there’s a new control for it in the iOS 11 Control Center, which makes it super easy to toggle on and off.
Also, you can enable “Battery Percentage” if your grandma is just as crazy as the rest of us about knowing exactly how much battery life she currently has. That’s also done in the “Battery” menu, though, on an iPhone X, it’s default in the Control Center view.
- More Info: How to Improve Battery Life on Your iPhone in iOS 11

While your grandma may have a hard time adapting to some of these changes, she’ll get the hang of it eventually. You just might need to show her a few things multiple times until she gets the hang of it. If you take the time to teach her about her new iPhone, she’ll have a fantastic experience with iOS.
Just updated your iPhone? You’ll find new emoji, enhanced security, podcast transcripts, Apple Cash virtual numbers, and other useful features. There are even new additions hidden within Safari. Find out what’s new and changed on your iPhone with the iOS 17.4 update.
“Hey there, just a heads-up: We’re part of the Amazon affiliate program, so when you buy through links on our site, we may earn a small commission. But don’t worry, it doesn’t cost you anything extra and helps us keep the lights on. Thanks for your support!”


