As I’ve said before, slowing down is not an option for me. At one point, I realized that there were plenty of files on my Mac that I didn’t need any more, but too many to delete individually. In other cases, your Mac can be experiencing some major malfunctions: constant crashing, locked controls, slow boot times, missing files, etc.
Often, the best option to fix these problems would be to reformat your computer and reinstall your OS, but since most of us don’t plan on ever taking this drastic measure, we don’t obtain a recovery disc or thumb drive.
Thankfully, the geniuses over at Apple have made the process easy for us—no need for a disc; no need for a drive—all you need is a decent internet connection. With just a few clicks of some buttons and your Mac is gonna be running like it did the day you got it. Best of all, this will work with Lion, Mountain Lion, Mavericks, Yosemite, and El Capitan.
Step 1: Back Up Your Files!
Okay, so you may have a lot of files that you want to get rid of, but you definitely have some files you want to keep. In my case, I even have programs I want to keep so I don’t have to re-download them after the process is over.
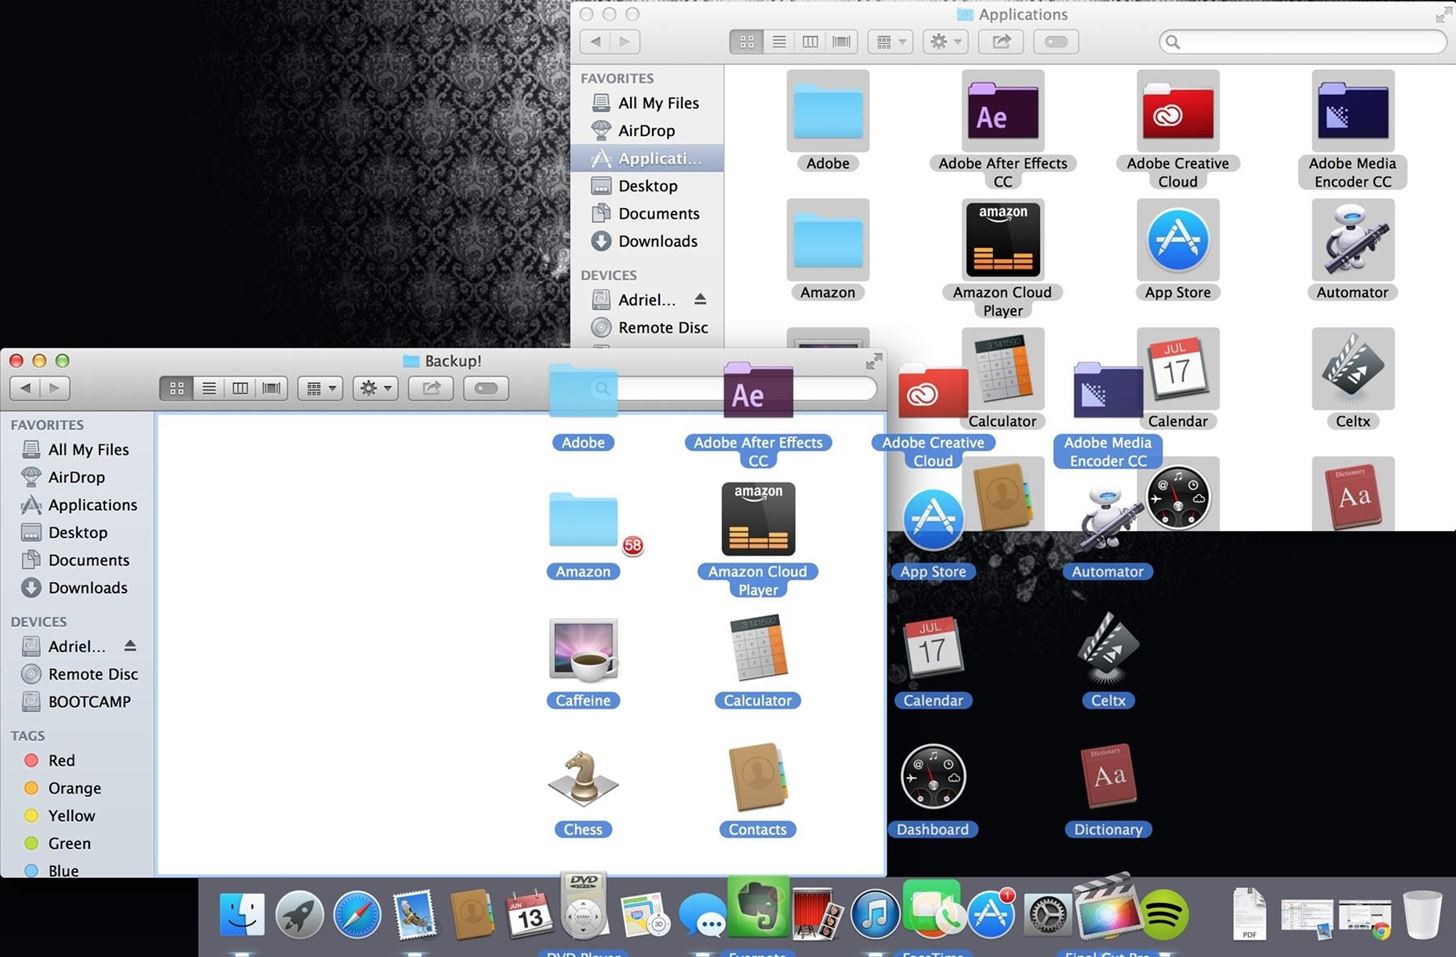
Use a writable CD/DVD, a USB drive, or any of the multitude of cloud options to keep your important files backed up. You could also create a Time Machine backup, but I wouldn’t do a full restore later—just pick and choose things you want back after a fresh install—otherwise it could run just as sluggishly or erratic as it did before.
Step 2: Restart Your Computer
Once you’ve double-, triple-, and quadruple-checked your backups, restart your computer.
Step 3: Press CMD+R
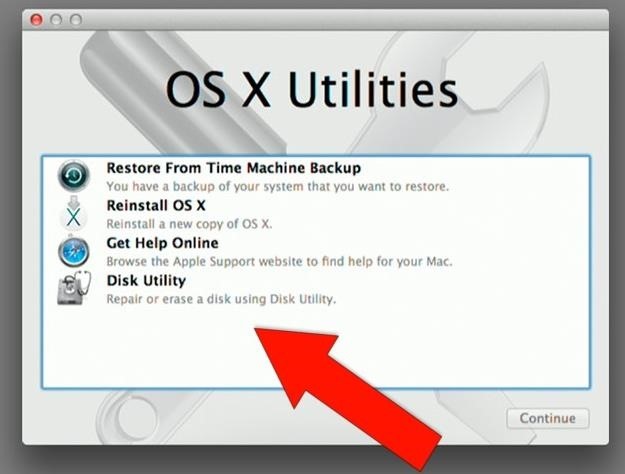
The second you see a grey screen, hold the CMD and R keys down for about 15 seconds, then let go and you’ll be taken to OS X Utilities recovery.

Step 4: Open Disk Utility
Double-click on Disk Utility and a menu will pop up.
Step 5: Wipe Your Hard Drive
Then proceed to highlight your computer’s hard drive; select the Erase tab, make sure OS X Extended (Journaled) is selected, then hit the Erase button.
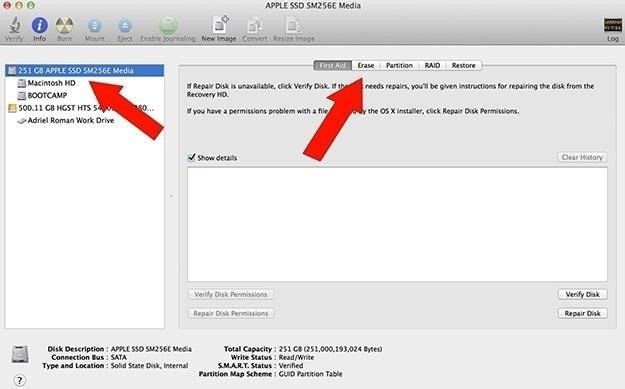
In El Capitan, Disk Utility looks slightly different, as you can see below.
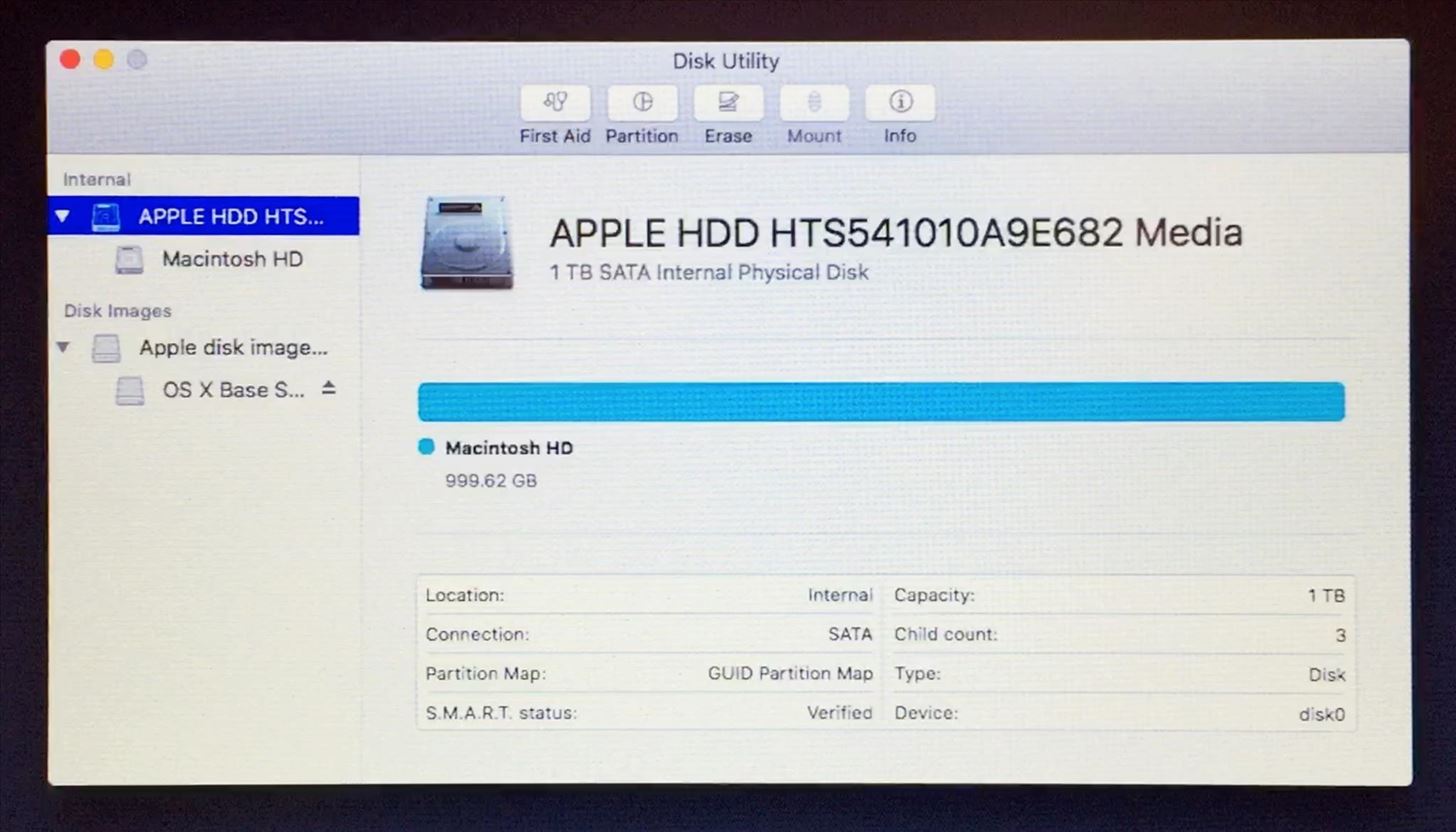
In El Capitan, after you select the Erase tab, a pop up will appear with the details. Keep the default settings and select Erase.
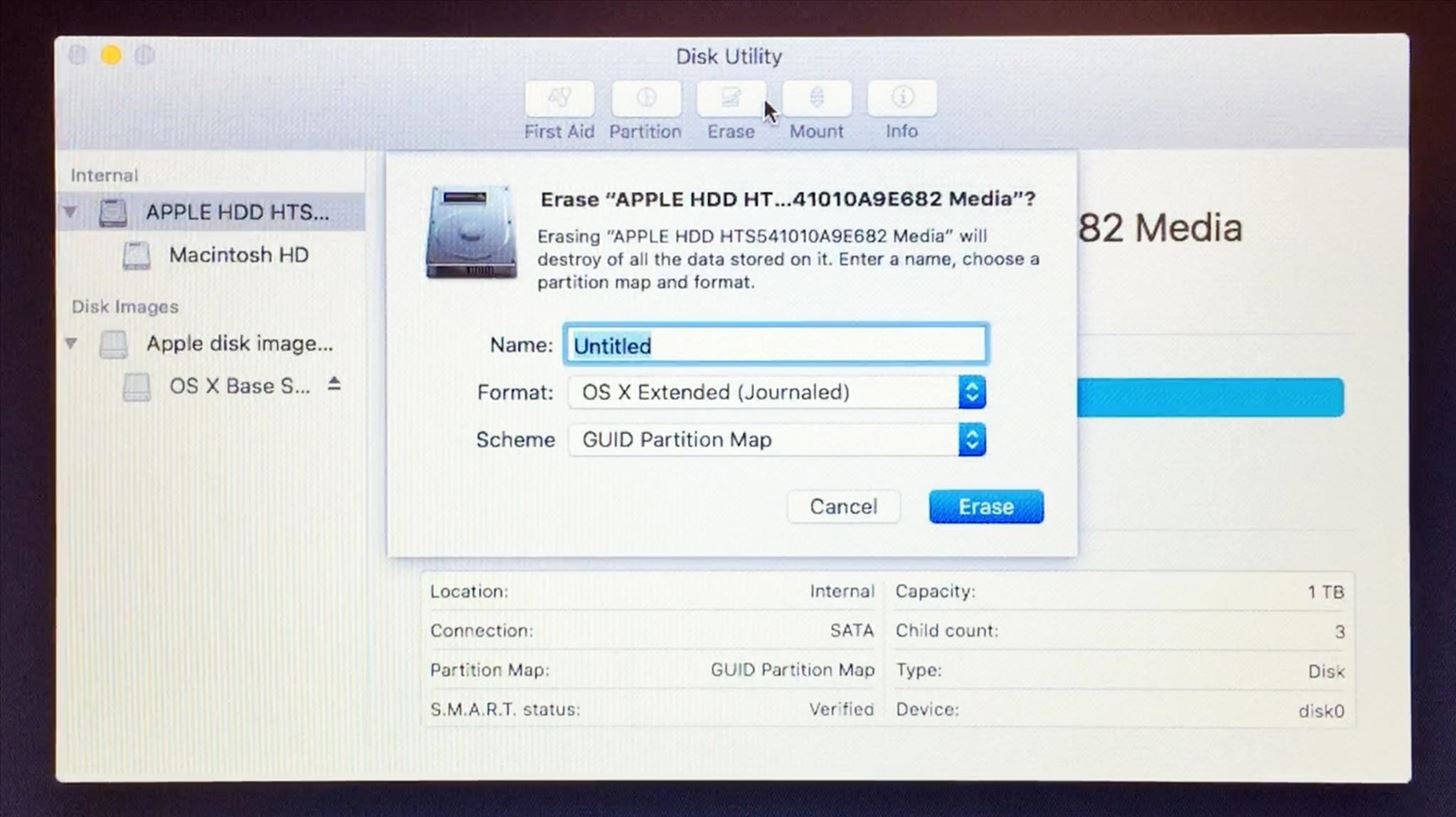
Once erased, exit Disk Utility.
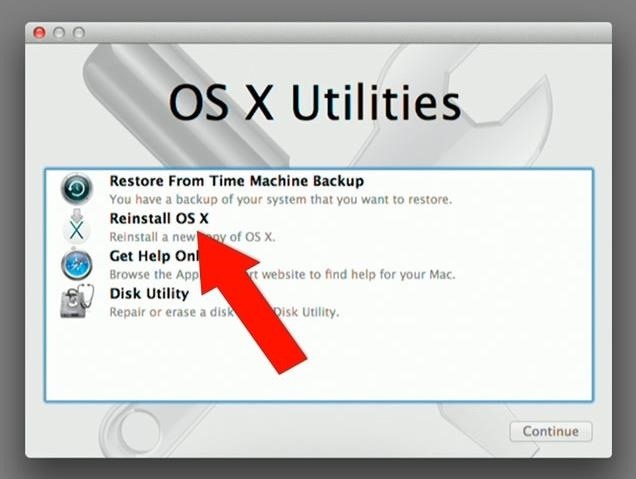
Step 6: Reinstall OS X
Click the Reinstall OS X option in the menu and proceed to follow the directions. You will need to be connected to the Internet, so make sure you’re plugged in via Ethernet, or are connected to a Wi-Fi network.
Voilà! You Have a Fresh Install of OS X
You should now have a fresh copy of Mac OS X installed, and your computer is back to its factory settings. All without the need for a recovery disc or thumb drive. If you want to play it safe and create a bootable install drive for Mac OS X, you can do so using our guides here for Lion/Mountain Lion, Mavericks, Yosemite, and El Capitan.
Just updated your iPhone? You’ll find new emoji, enhanced security, podcast transcripts, Apple Cash virtual numbers, and other useful features. There are even new additions hidden within Safari. Find out what’s new and changed on your iPhone with the iOS 17.4 update.
“Hey there, just a heads-up: We’re part of the Amazon affiliate program, so when you buy through links on our site, we may earn a small commission. But don’t worry, it doesn’t cost you anything extra and helps us keep the lights on. Thanks for your support!”


