In the US, law enforcement officials can make you unlock your smartphone with a fingerprint, but they can’t force you to input a password or PIN, which would violate your Fifth Amendment rights. To help you from ever being in a scenario where you’re forced to put your finger on the Touch ID sensor, Apple has a built-in way for you to disable biometrics on your locked or unlocked iPhone in mere seconds.
It’s not known whether or not Apple intended for its feature to be used as a “cop button,” but it definitely does the trick. And while there were other ways to disable the Touch ID fingerprint scanner on an iPhone before, such as registering the wrong fingerprint several times in a row or just restarting your iPhone, the newest way is by far the easiest and fastest when you’re in a pinch.
- Don’t Miss: How to Quickly Turn Off Face ID on Your iPhone
The feature made its first appearance in iOS 11, but it works the same way in newer iOS versions as it did back then. It uses Emergency SOS, which gives you a quick way to dial 911 and lets you assign emergency contacts to be sent your location periodically until you disable it. However, you don’t need to make an emergency call or send anyone your coordinates to disable Touch ID on your iPhone.
How you disable Touch ID depends on which iPhone model you have:
Option 1: How to Disable Touch ID on iPhone 7 & Older
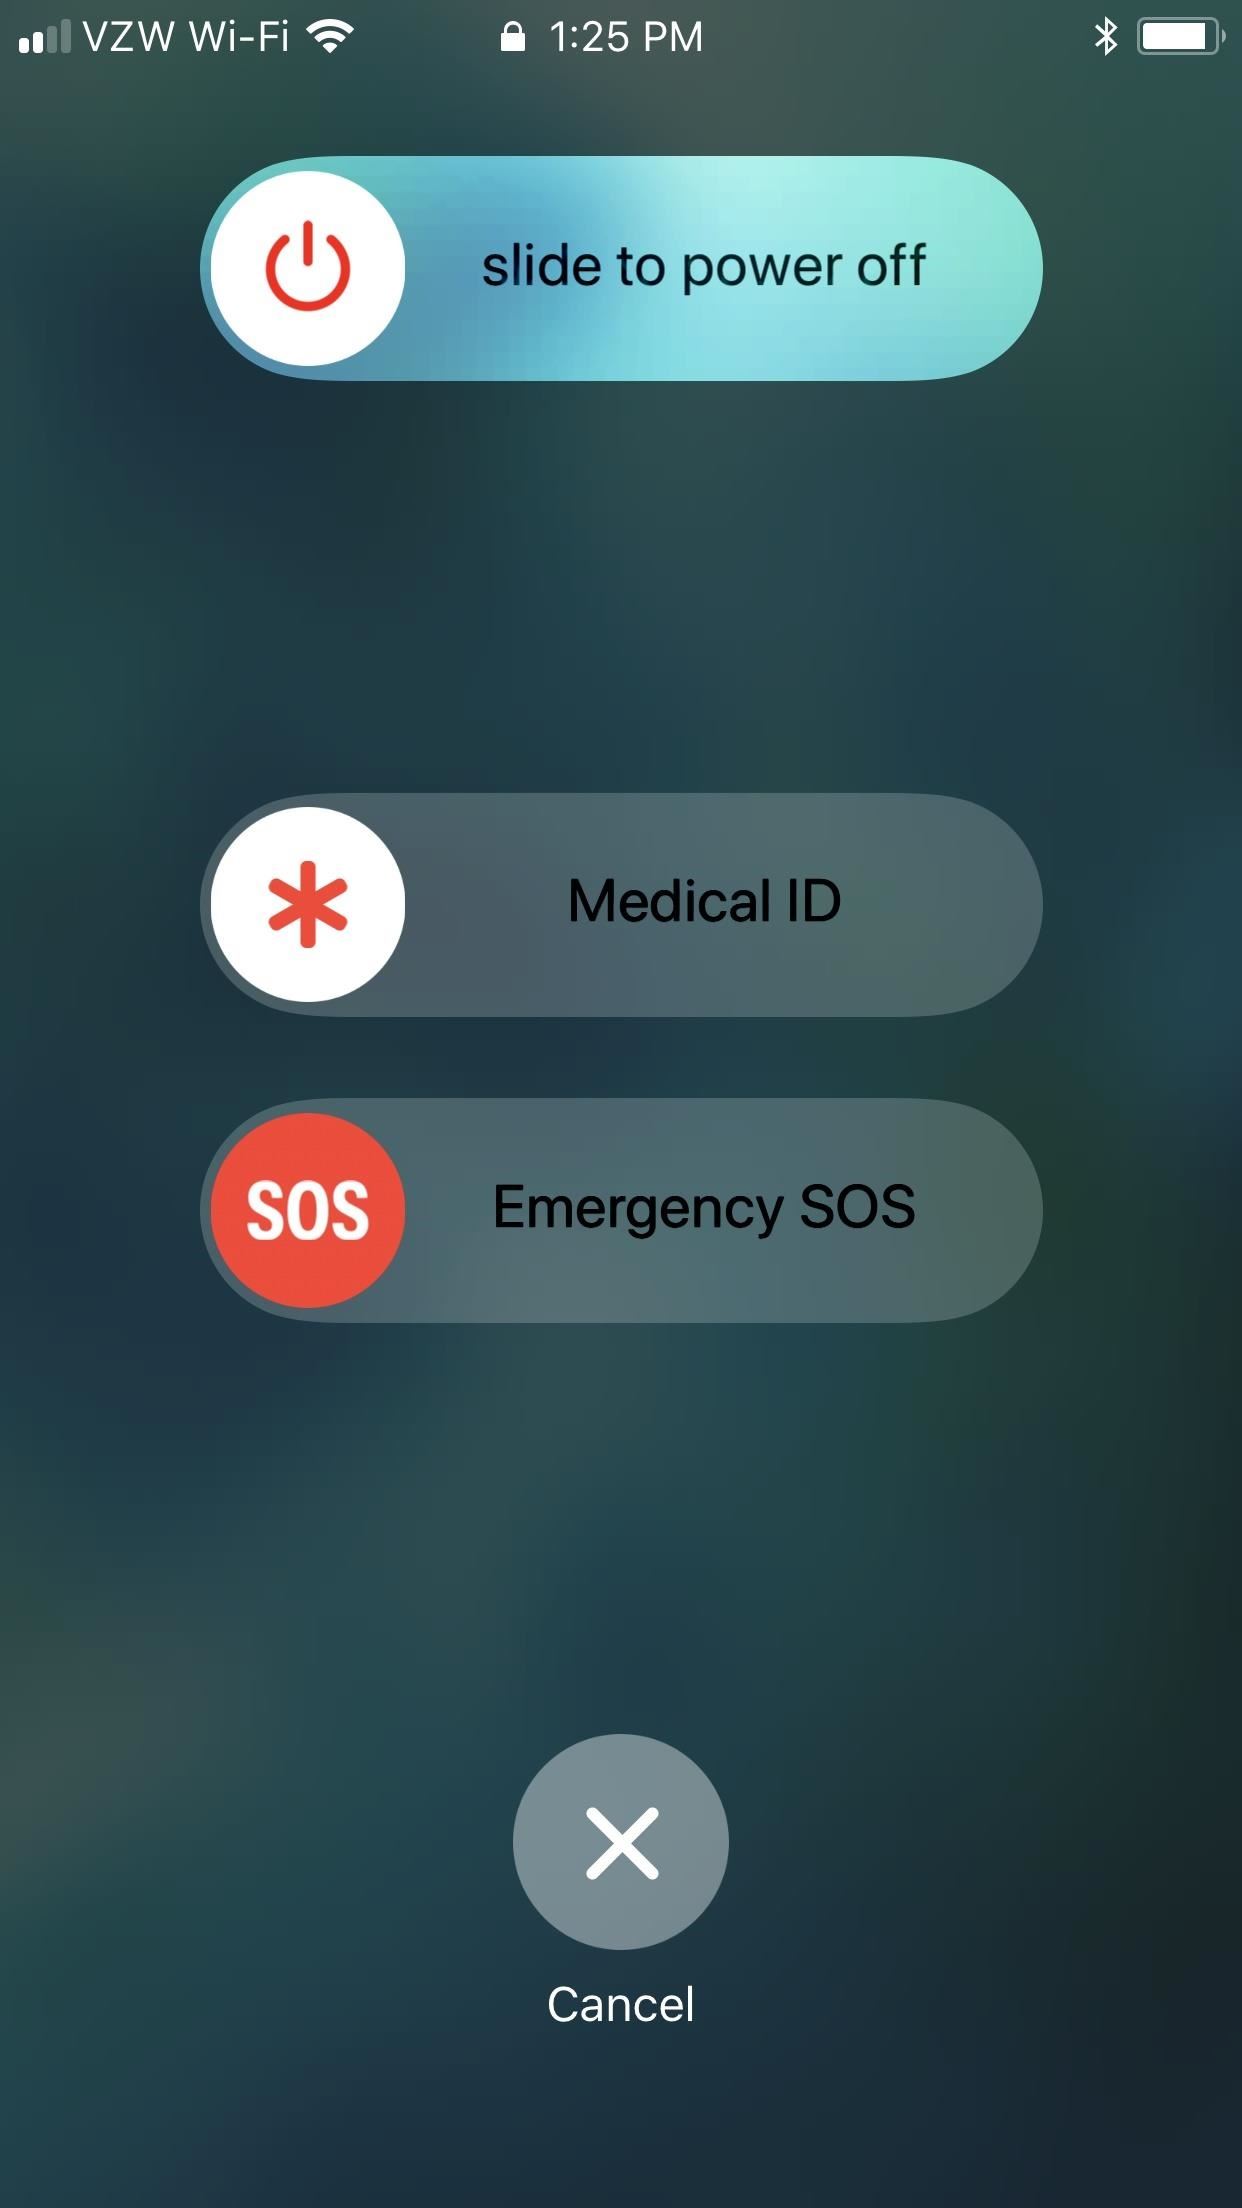
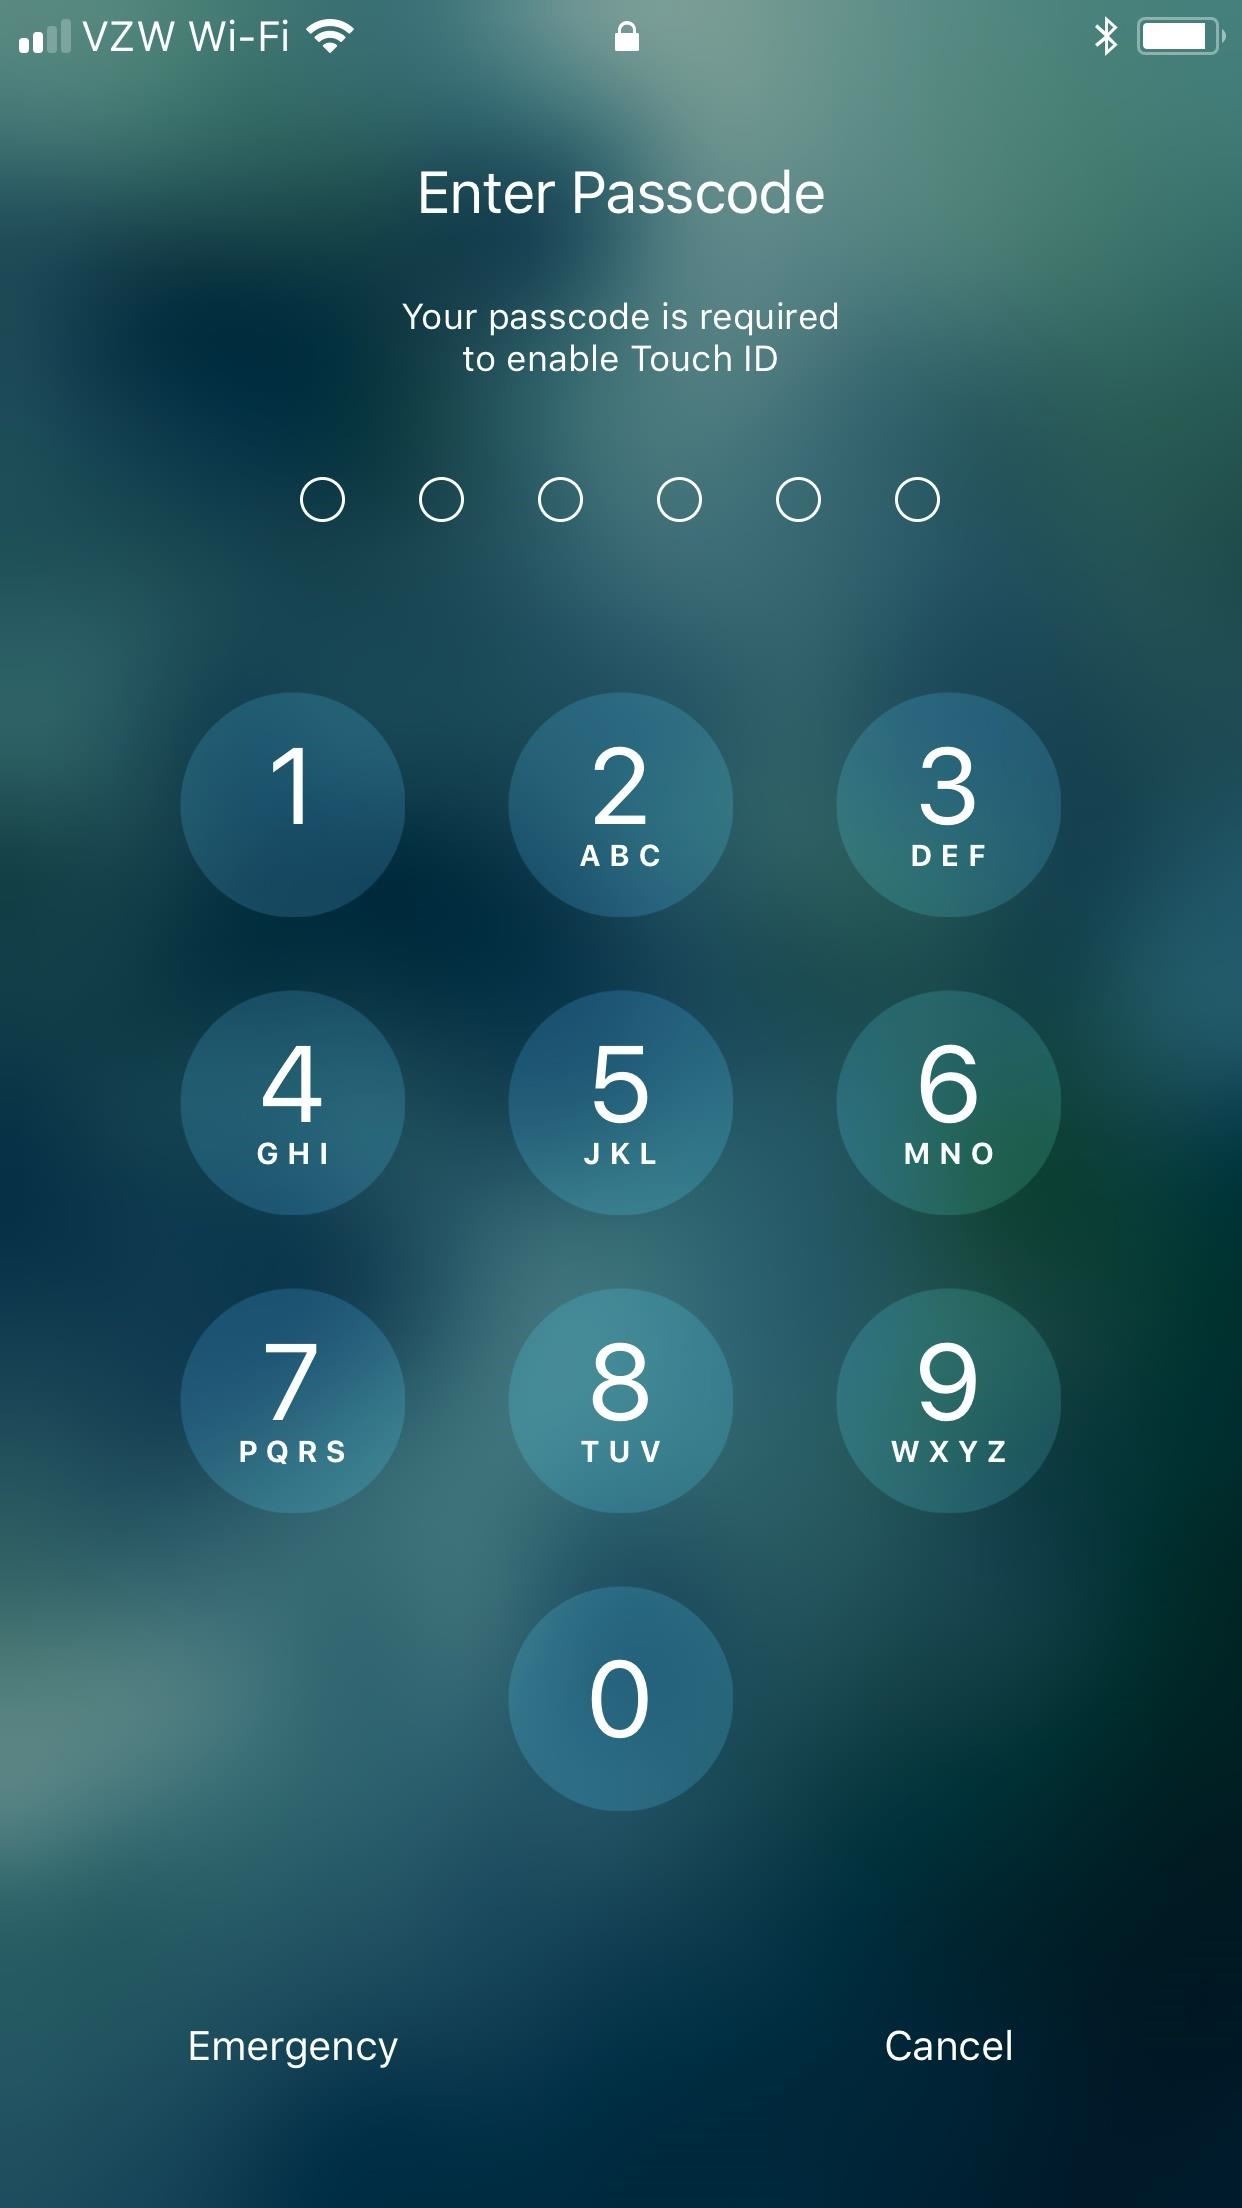
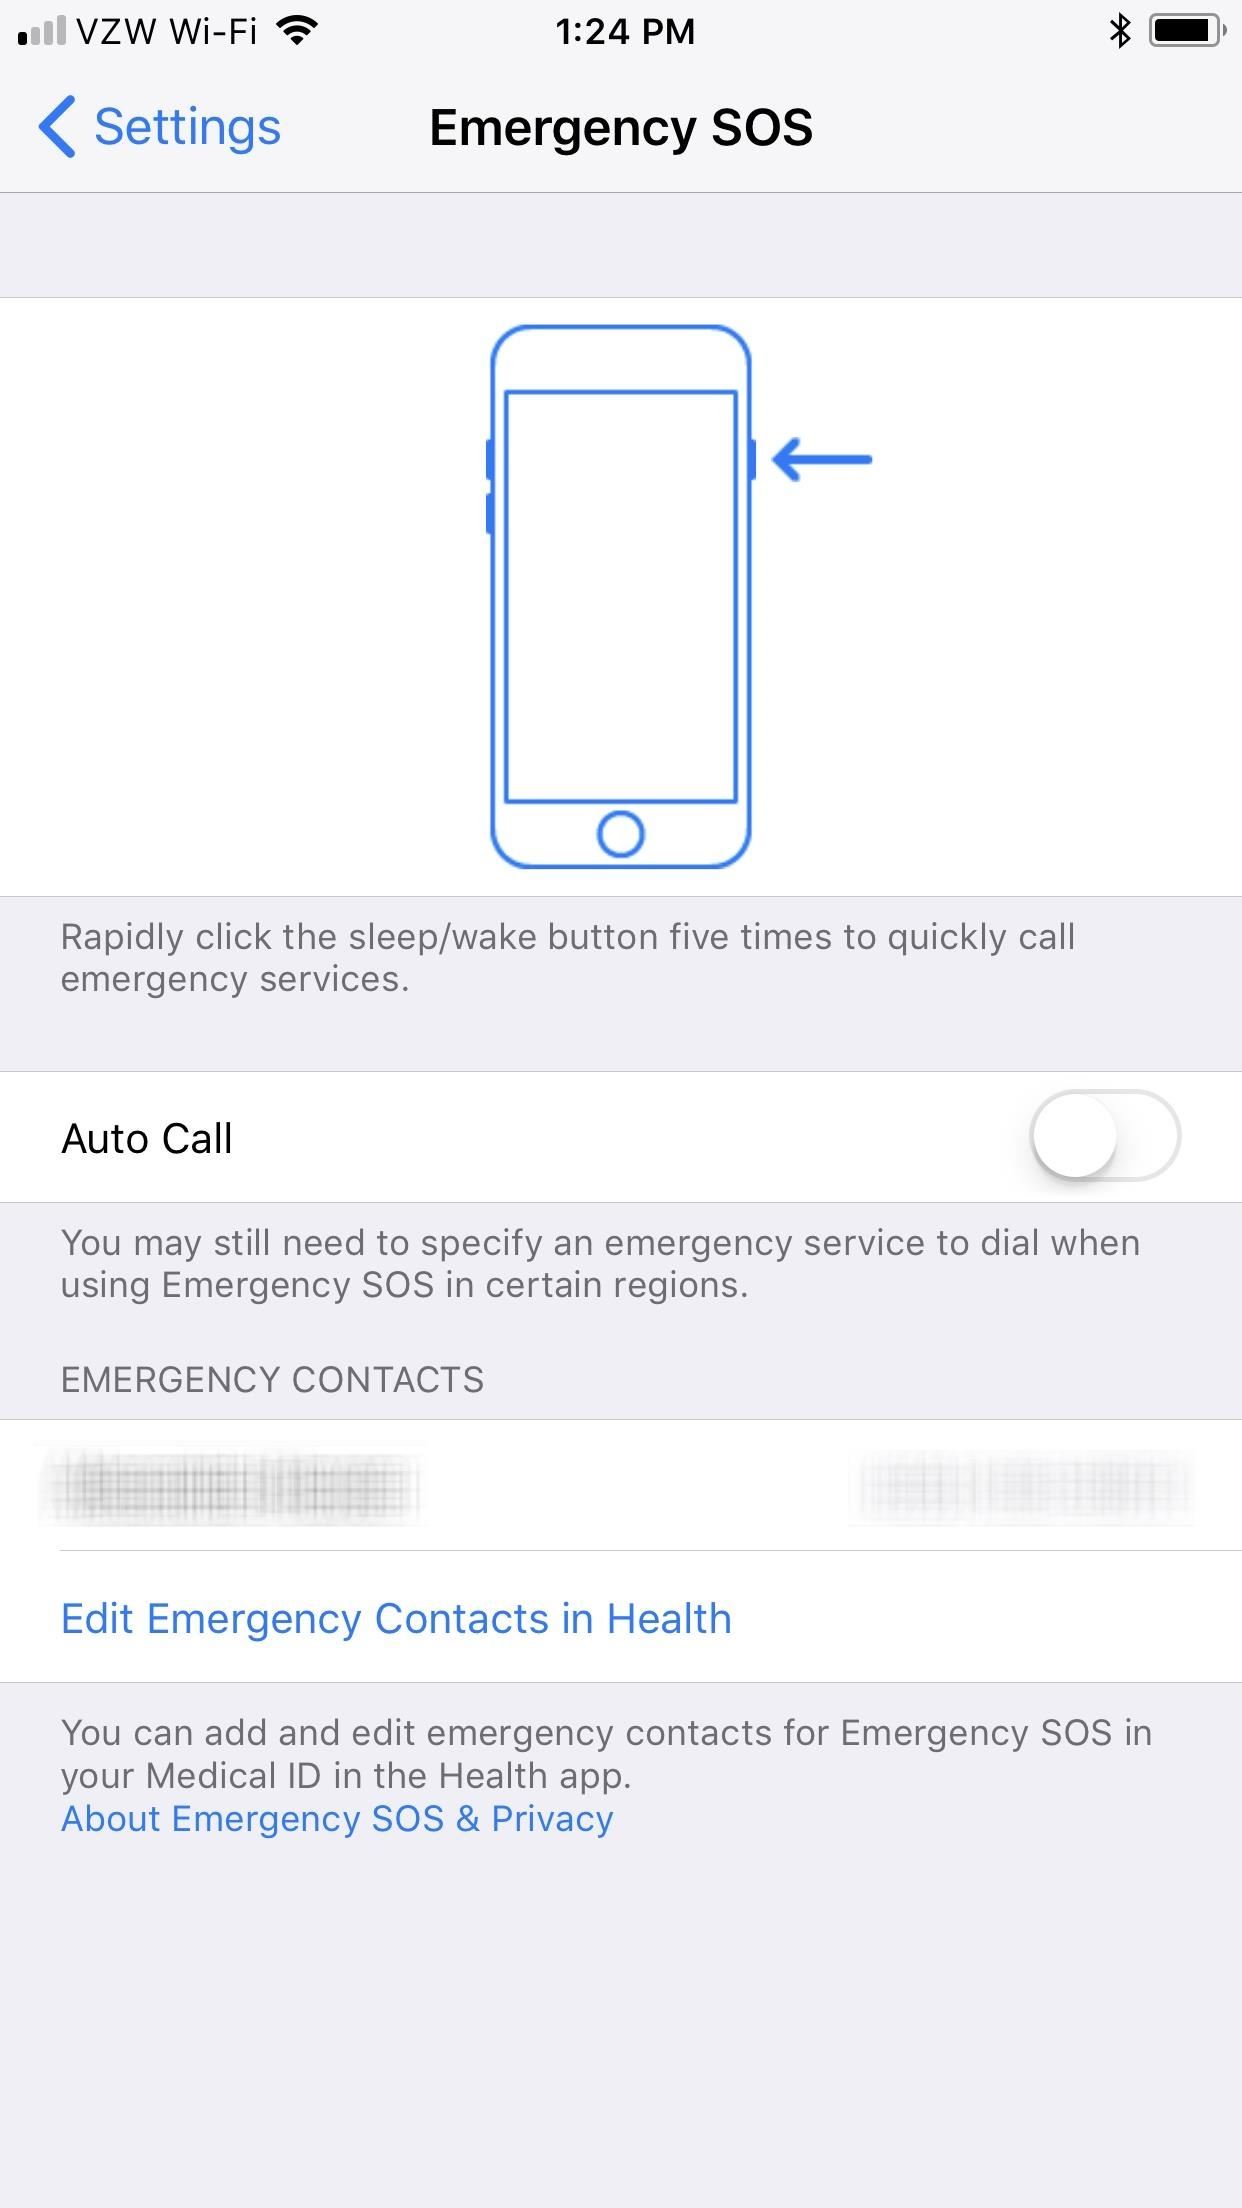
Click the Side button five times in a row. After the fifth click, the “slide to power off” screen will appear with the “Emergency SOS” slider. Tap “Cancel” to view the Enter Passcode screen. Your passcode is required before you can use Touch ID again.
So, the next time you try to use a registered fingerprint with Touch ID, it will tell you that “your passcode is required to enable Touch ID,” and there’s nothing law enforcement can do about it — even with a warrant.
Note: There is no way to turn off the five-click gesture.
- Works on: iPhone 5S, iPhone 6, iPhone 6 Plus, 6S, iPhone 6S Plus, iPhone SE (1st Gen), iPhone 7, and iPhone 7 Plus


Option 2: How to Disable Touch ID on iPhone 8 & Newer
Press-and-hold the Side button and either Volume button together for two or three seconds. The “slide to power off” screen will appear with the “Emergency SOS” slider. Tap “Cancel,” and the Enter Passcode screen will appear. Your passcode is now required before you can use Touch ID biometrics again.
The next time you use a registered fingerprint with Touch ID, it will tell you that “your passcode is required to enable Touch ID.” Law enforcement can’t do anything at that point, even with a warrant.
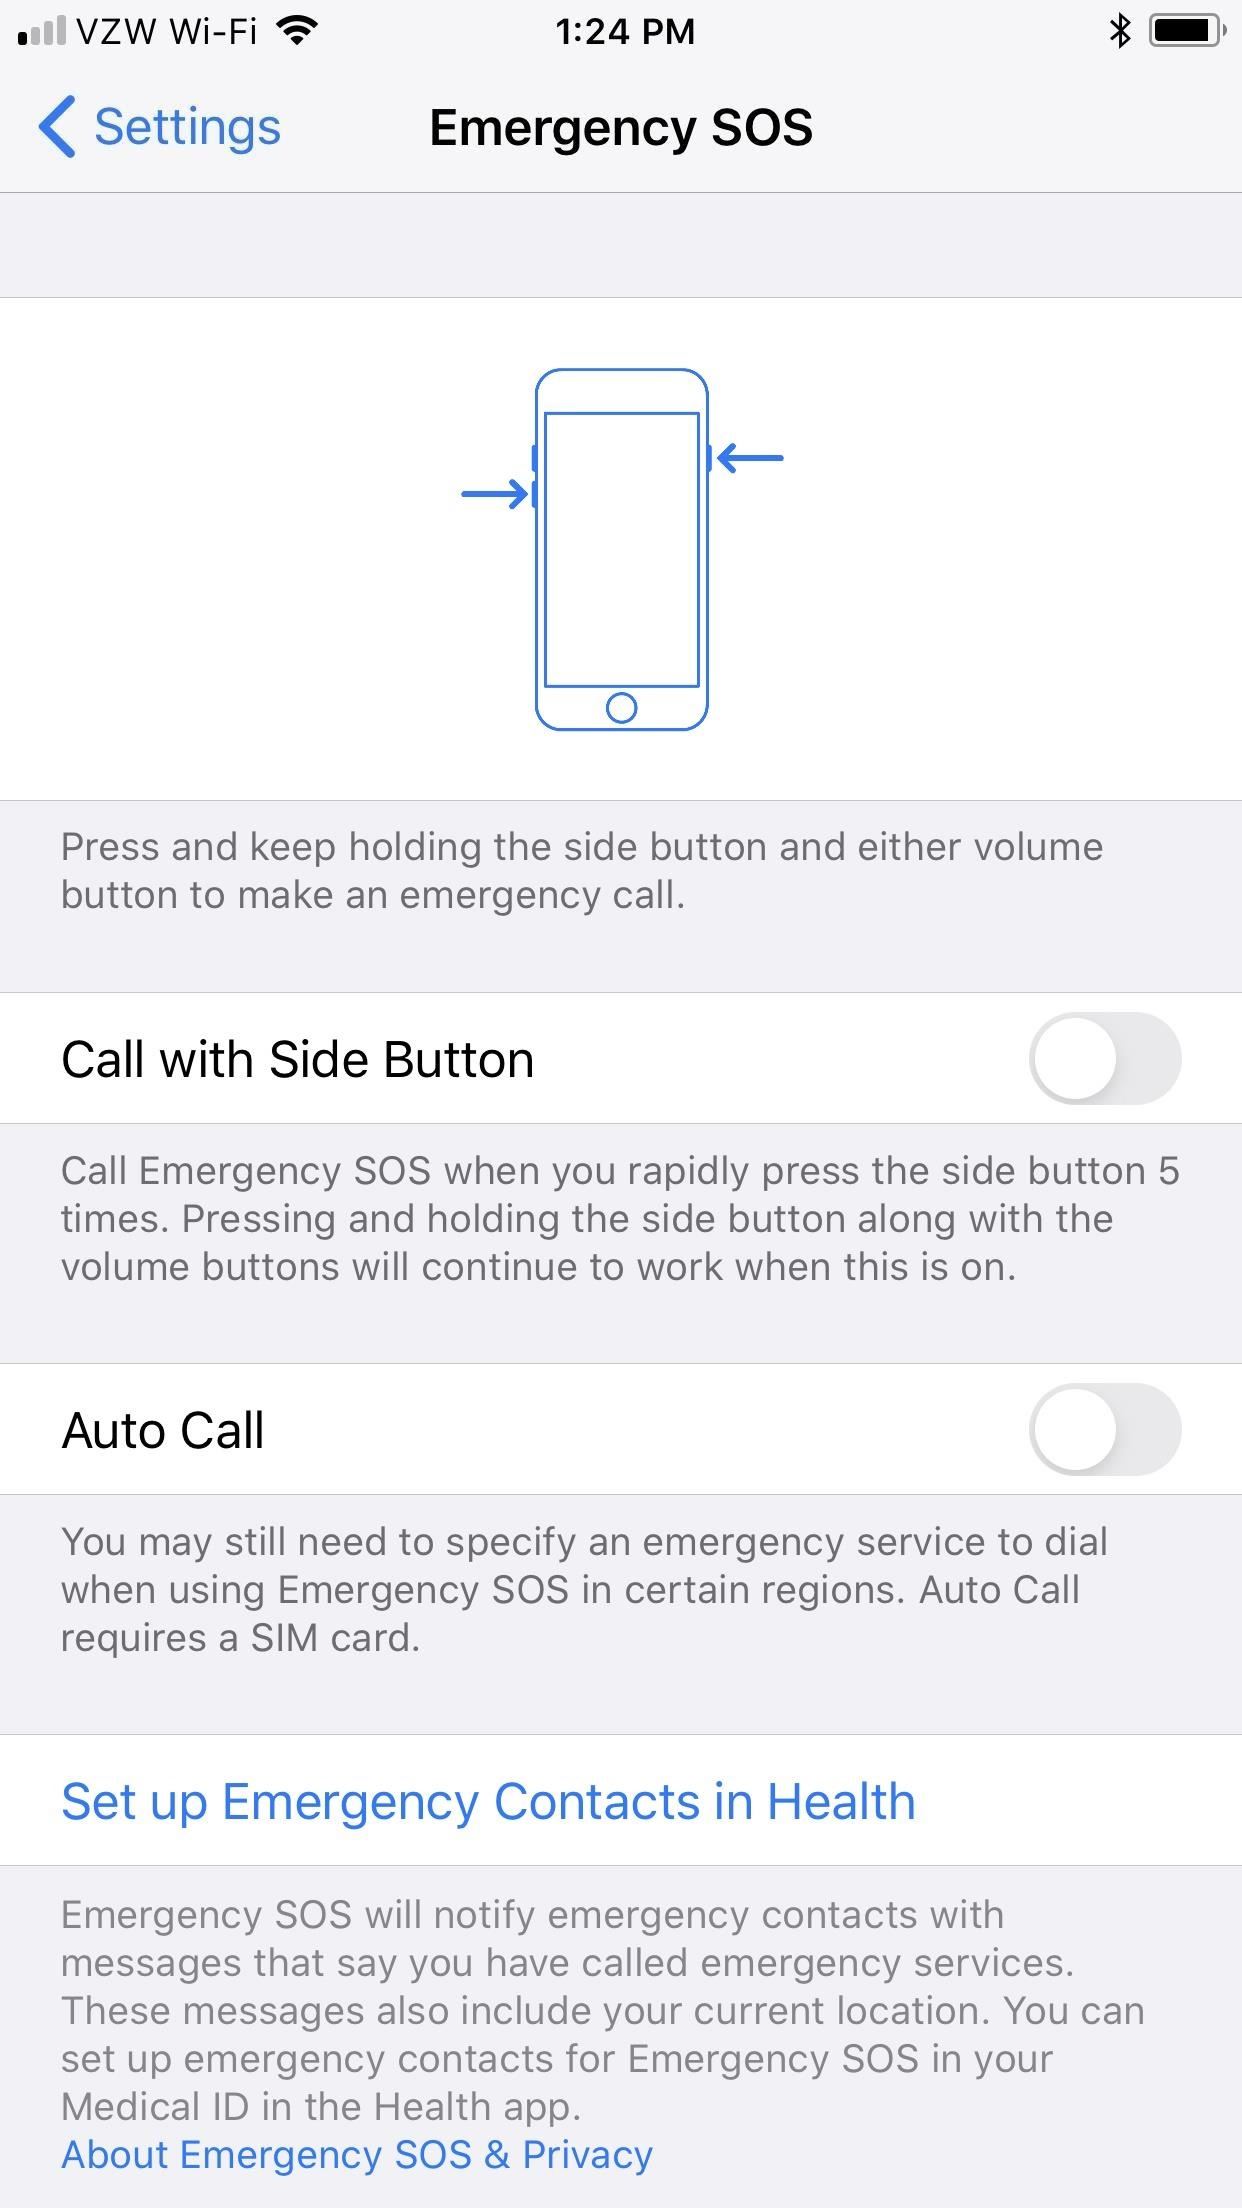
You can also use the five-click gesture that older iPhone models use. In your Settings app, tap “Emergency SOS,” then toggle on the “Call with Side Button” switch. Now, whenever you click the Side button five times in a row, the “slide to power off” screen will appear, and Touch ID will be disabled.
Note: There is no way to turn off the press-and-hold gesture.
- Works on: iPhone 8, iPhone 8 Plus, iPhone SE (2nd gen)


Tip: Disable the ‘Auto Call’ Feature
In the Emergency SOS settings, you can choose whether or not it automatically calls 911 or just gives you the option to call using the “Emergency SOS” slider on the power screen. We suggest making sure “Auto Call” is toggled off if you want to use the shortcut as a certified “cop button.”


Just updated your iPhone? You’ll find new emoji, enhanced security, podcast transcripts, Apple Cash virtual numbers, and other useful features. There are even new additions hidden within Safari. Find out what’s new and changed on your iPhone with the iOS 17.4 update.
“Hey there, just a heads-up: We’re part of the Amazon affiliate program, so when you buy through links on our site, we may earn a small commission. But don’t worry, it doesn’t cost you anything extra and helps us keep the lights on. Thanks for your support!”


