When Apple wanted to bring their Notification Center to Mac OS X, I loved the idea. But after using it since its integration in Mountain Lion, it’s been more annoying and distracting than anything. More and more apps incorporate notifications, so I’m constantly getting sound alerts and banners in the top right corner that I don’t want.
To solve the constant barrage of alerts, Do Not Disturb mode can be turned on right from the Notification Center, but it only lasts a day. The Notification Center can also be completely obliterated with a Terminal command, but that’s probably overkill if you still like the Notification Center itself.
To tame the amount of banners, sounds, and alerts you receive, you can go into the Notification Center’s settings and change them one-by-one, app-by-app. But if all you’re looking for is to silence notifications and keep all popups from appearing indefinitely, while still being able to use the Notification Center when you need it, use the following trick to turn on an “eternal” Do Not Disturb mode.
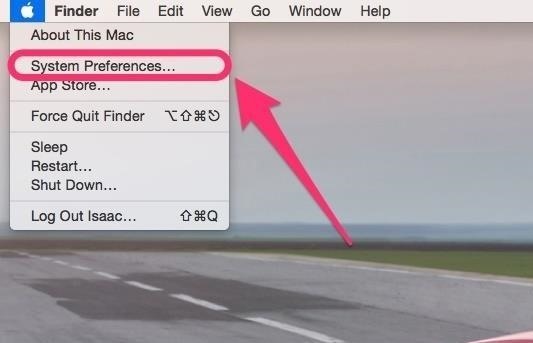
Step 1: Go to System Preferences
Go to the Apple icon in the menu bar, and select System Preferences. Of course, if you prefer, you can use other methods to get to System Preferences such as Spotlight, Launchpad, your Dock, or the Applications folder.
Step 2: Get to the Do Not Disturb Settings
Inside System Preferences, go to the Notifications preference.
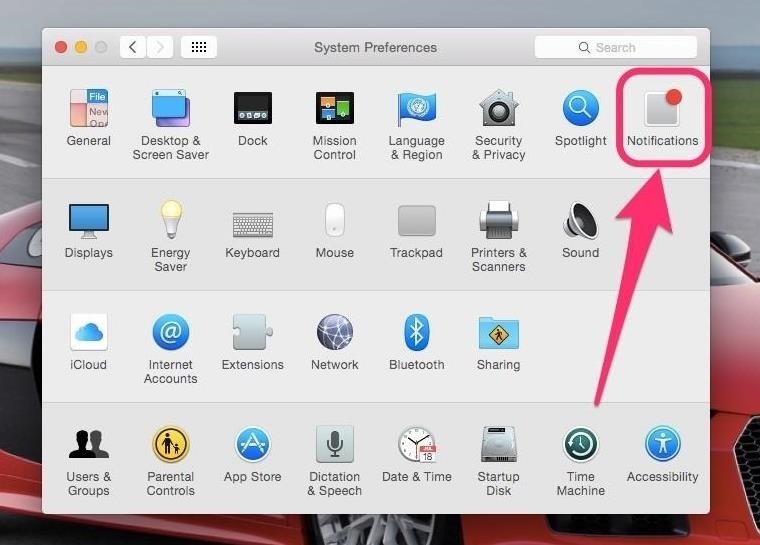
Then, select the Do Not Disturb option from the left sidebar.
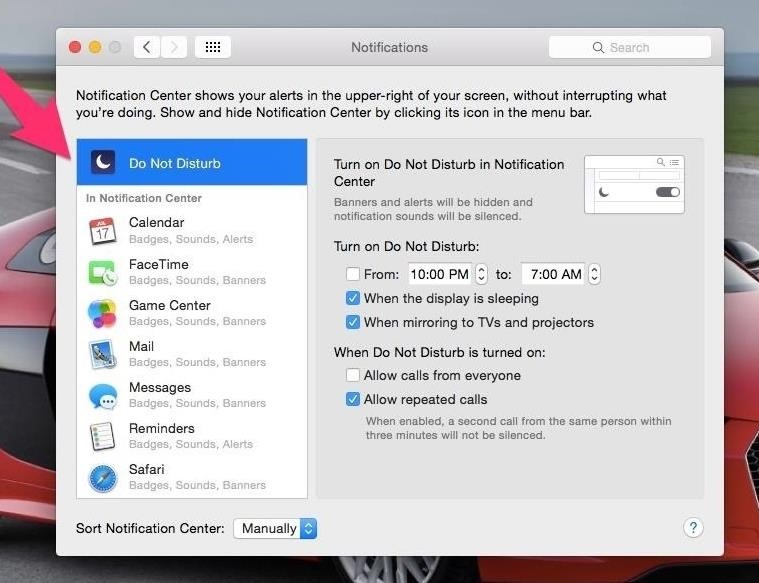
Step 3: Say Hello to Sleeping Beauty
Under Turn on Do Not Disturb select the From button. Then in the time fields, choose whatever time you want, as long as the first time is one minute ahead of the second time box.
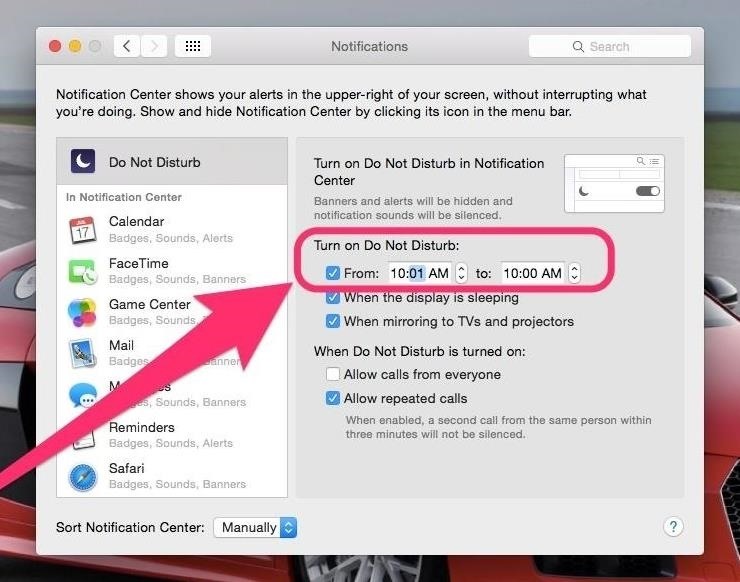
In the example above, I put from 10:01 AM to 10:00 AM. This format is critical in ensuring this trick works. Configured as such, your Notification Center should now be on a perpetual Do Not Disturb mode.
Close out of System Preferences and enjoy the silence.
How to Disable Eternal Do Not Disturb Mode
Of course, if you want to rollback to normal Notification Center behavior, then simply toggle off Do Not Disturb or go back into the settings and change the times to be something else less constricting.
As you see, this trick ensures Do Not Disturb runs almost forever. It ends at 10:00 AM, and starts back up at 10:01 AM. So, there is technically about 59 seconds every day that a in-your-face notification might slip through, but if you change to a time when you’re always sleeping, it shouldn’t be an issue.
The best part about this trick, as declared earlier, is that you still have complete usage possible of the Notification Center!
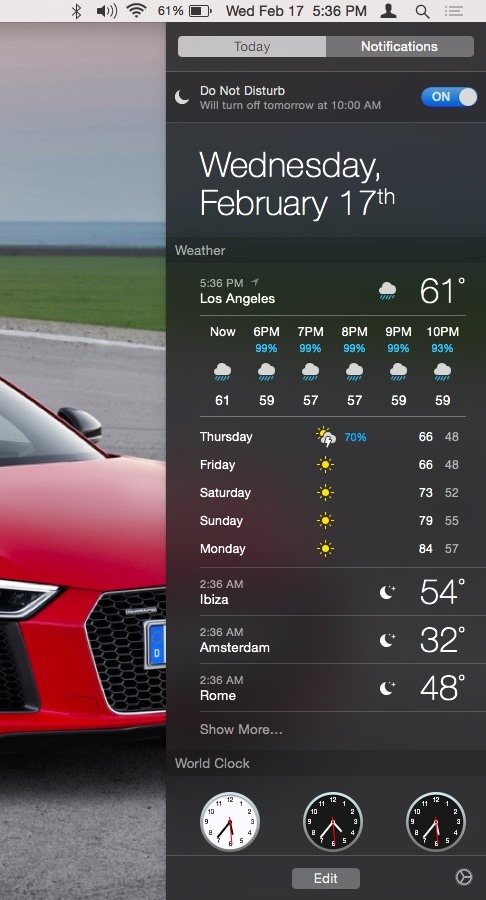
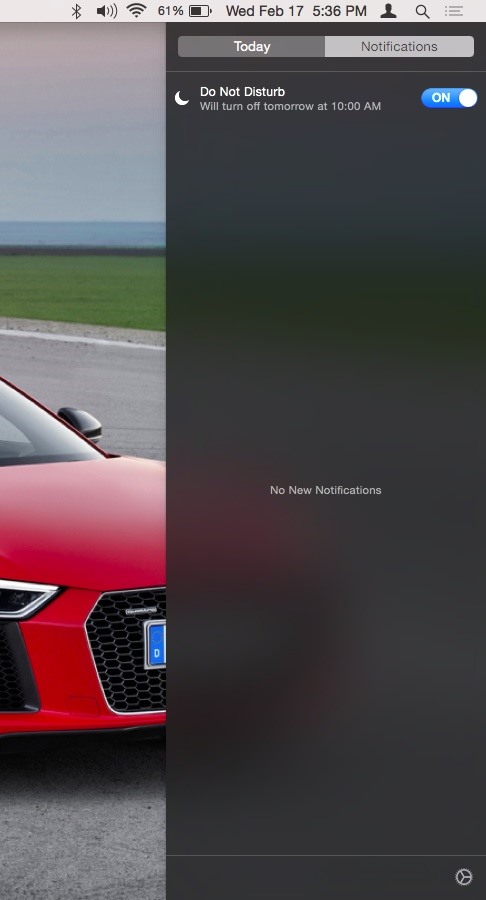
Now, you can enjoy all the benefits that Notification Center offers without any of the nagging. Enjoy.
Just updated your iPhone? You’ll find new emoji, enhanced security, podcast transcripts, Apple Cash virtual numbers, and other useful features. There are even new additions hidden within Safari. Find out what’s new and changed on your iPhone with the iOS 17.4 update.
“Hey there, just a heads-up: We’re part of the Amazon affiliate program, so when you buy through links on our site, we may earn a small commission. But don’t worry, it doesn’t cost you anything extra and helps us keep the lights on. Thanks for your support!”


