Because of Android’s new SafetyNet system, certain apps can now block rooted users or prevent you from accessing them altogether — but at least for now, there are still ways around these restrictions.
You can pass most of SafetyNet’s checks with Magisk and systemless root, but Google’s Compatibility Test Suite (CTS) remains a hurdle in some cases. With certain setups, you’ll still get a “CTS Profile Mismatch” error that causes the SafetyNet check to fail, even with Magisk installed.
If this has happened to you, there are a number of potential causes, ranging from incompatible root management apps to issues with Magisk Hide. So to help you get to the bottom of the issue, we’ll go over seven solutions below.
Before You Begin
This guide assumes you’ve already installed Magisk, which is a systemless root utility that can hide its presence from SafetyNet. If you haven’t already done this, head here to get started.
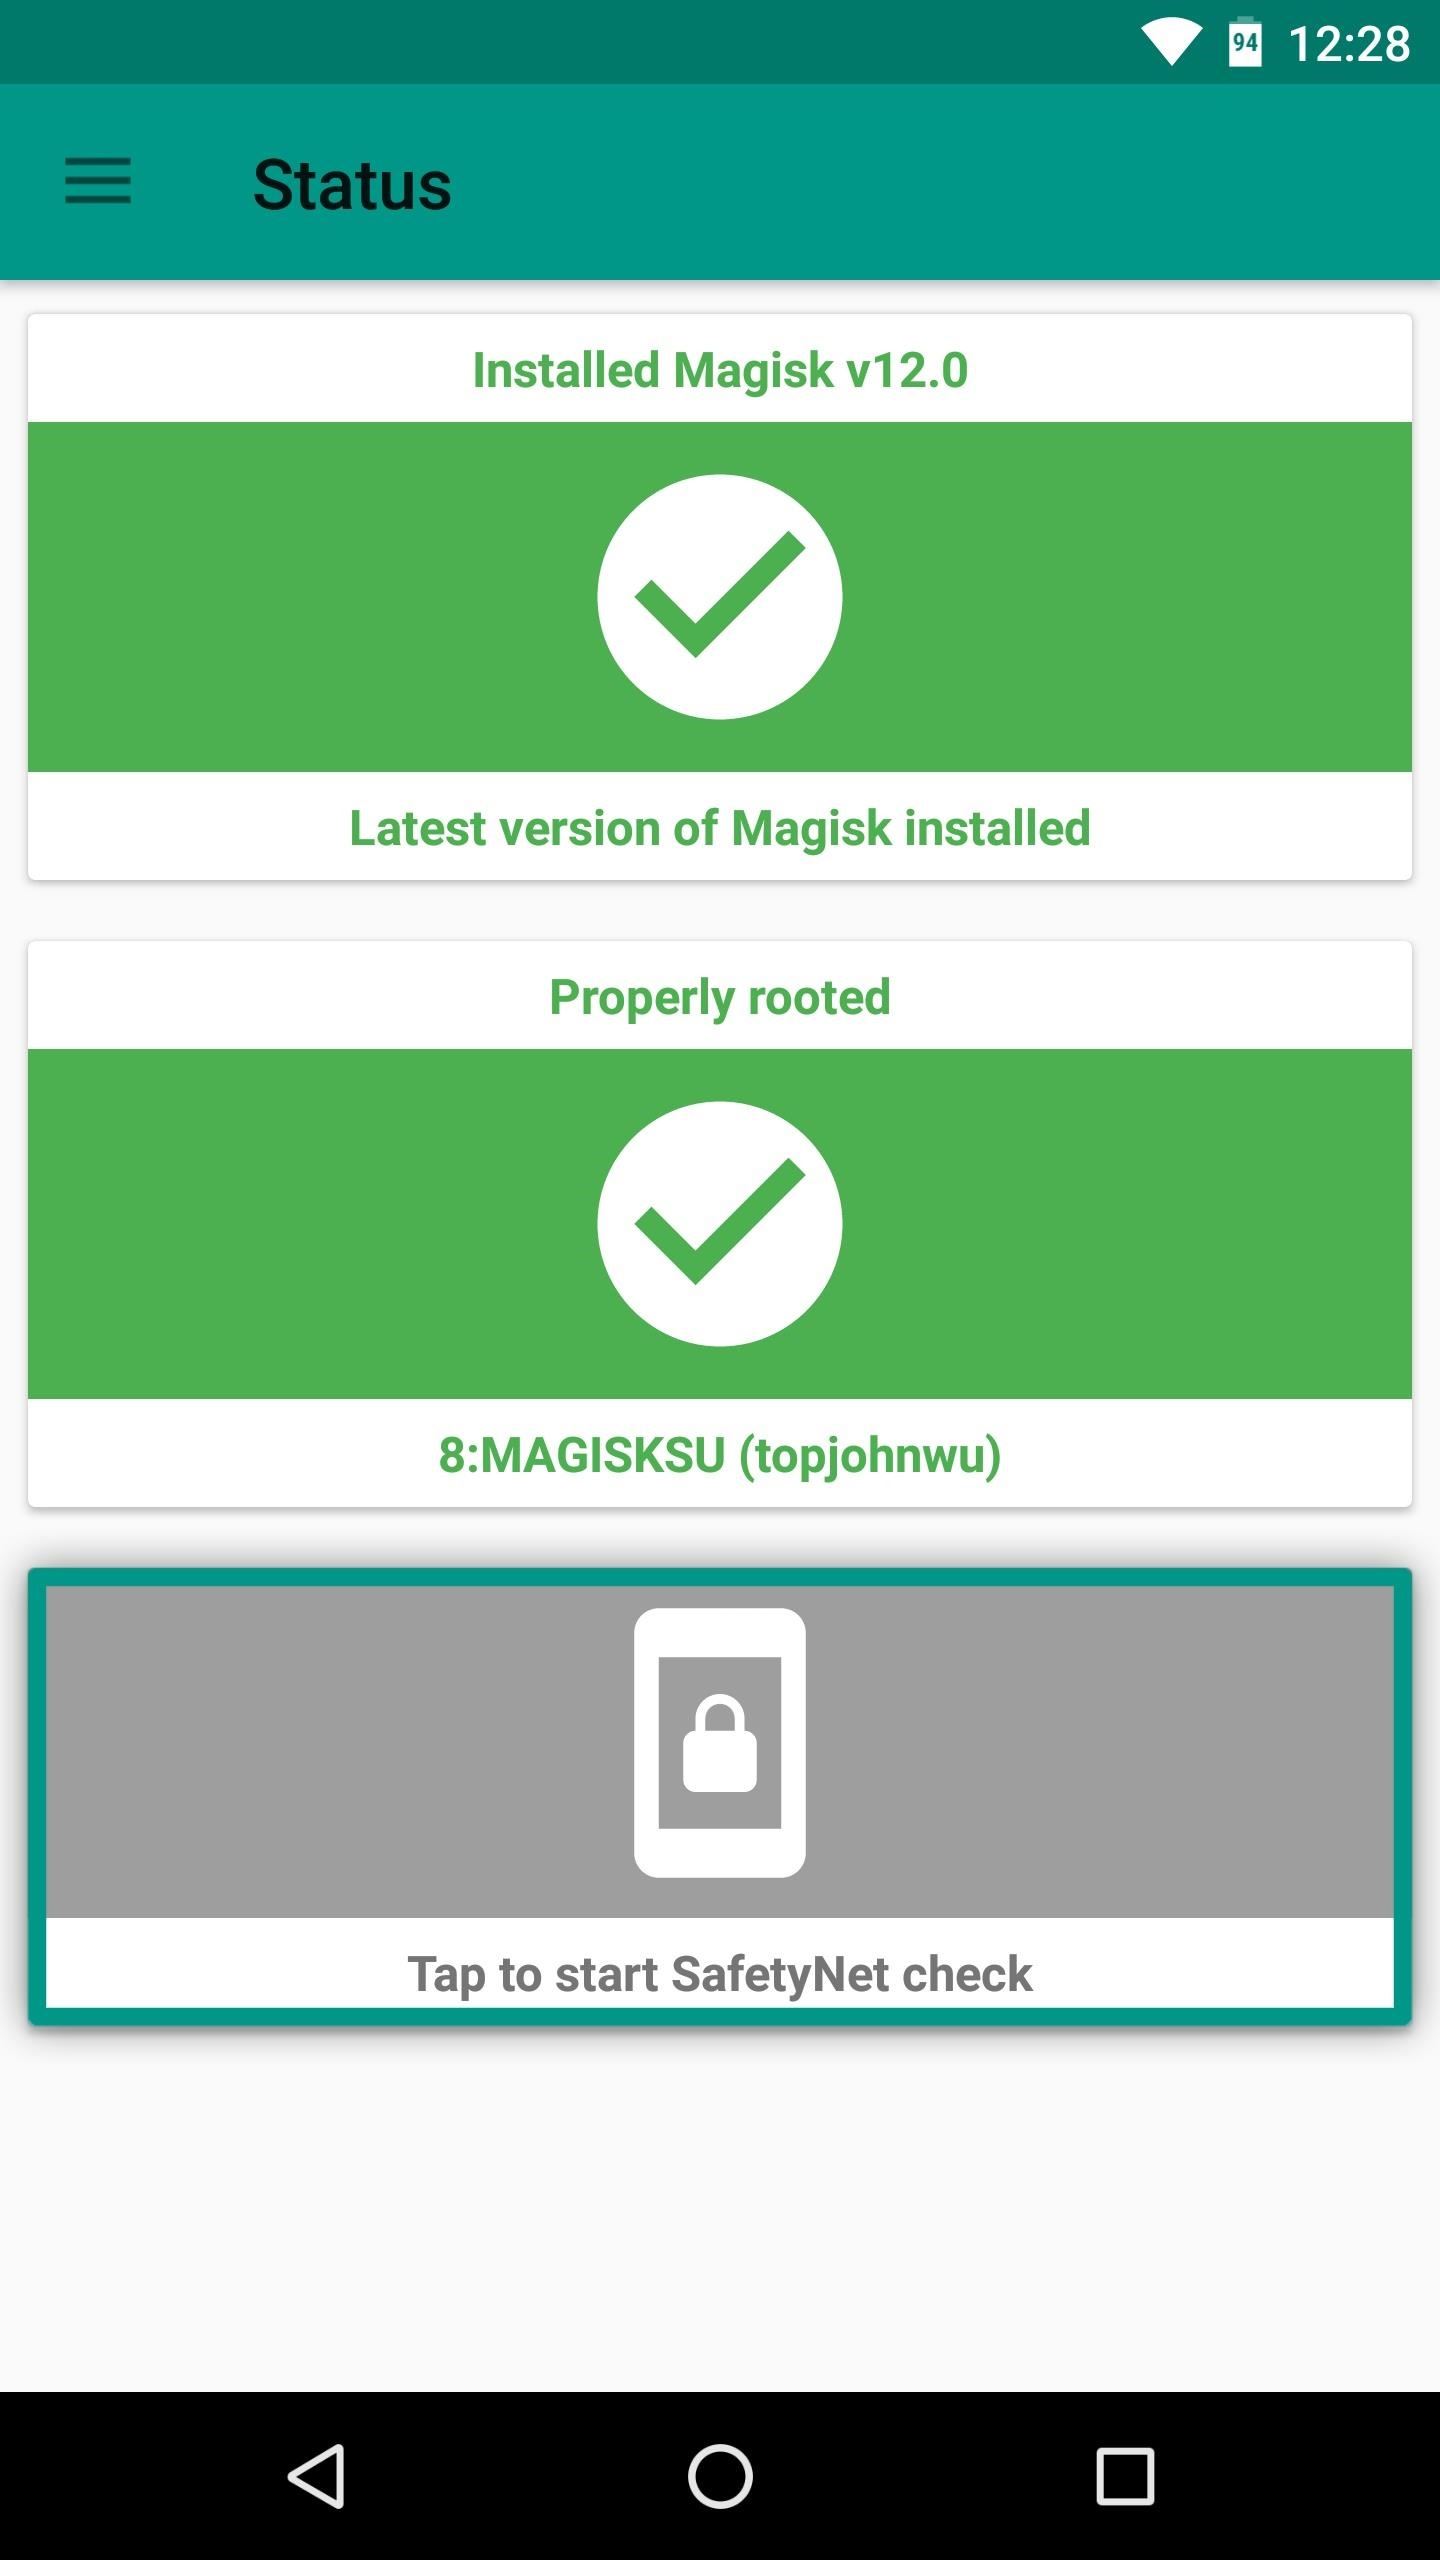
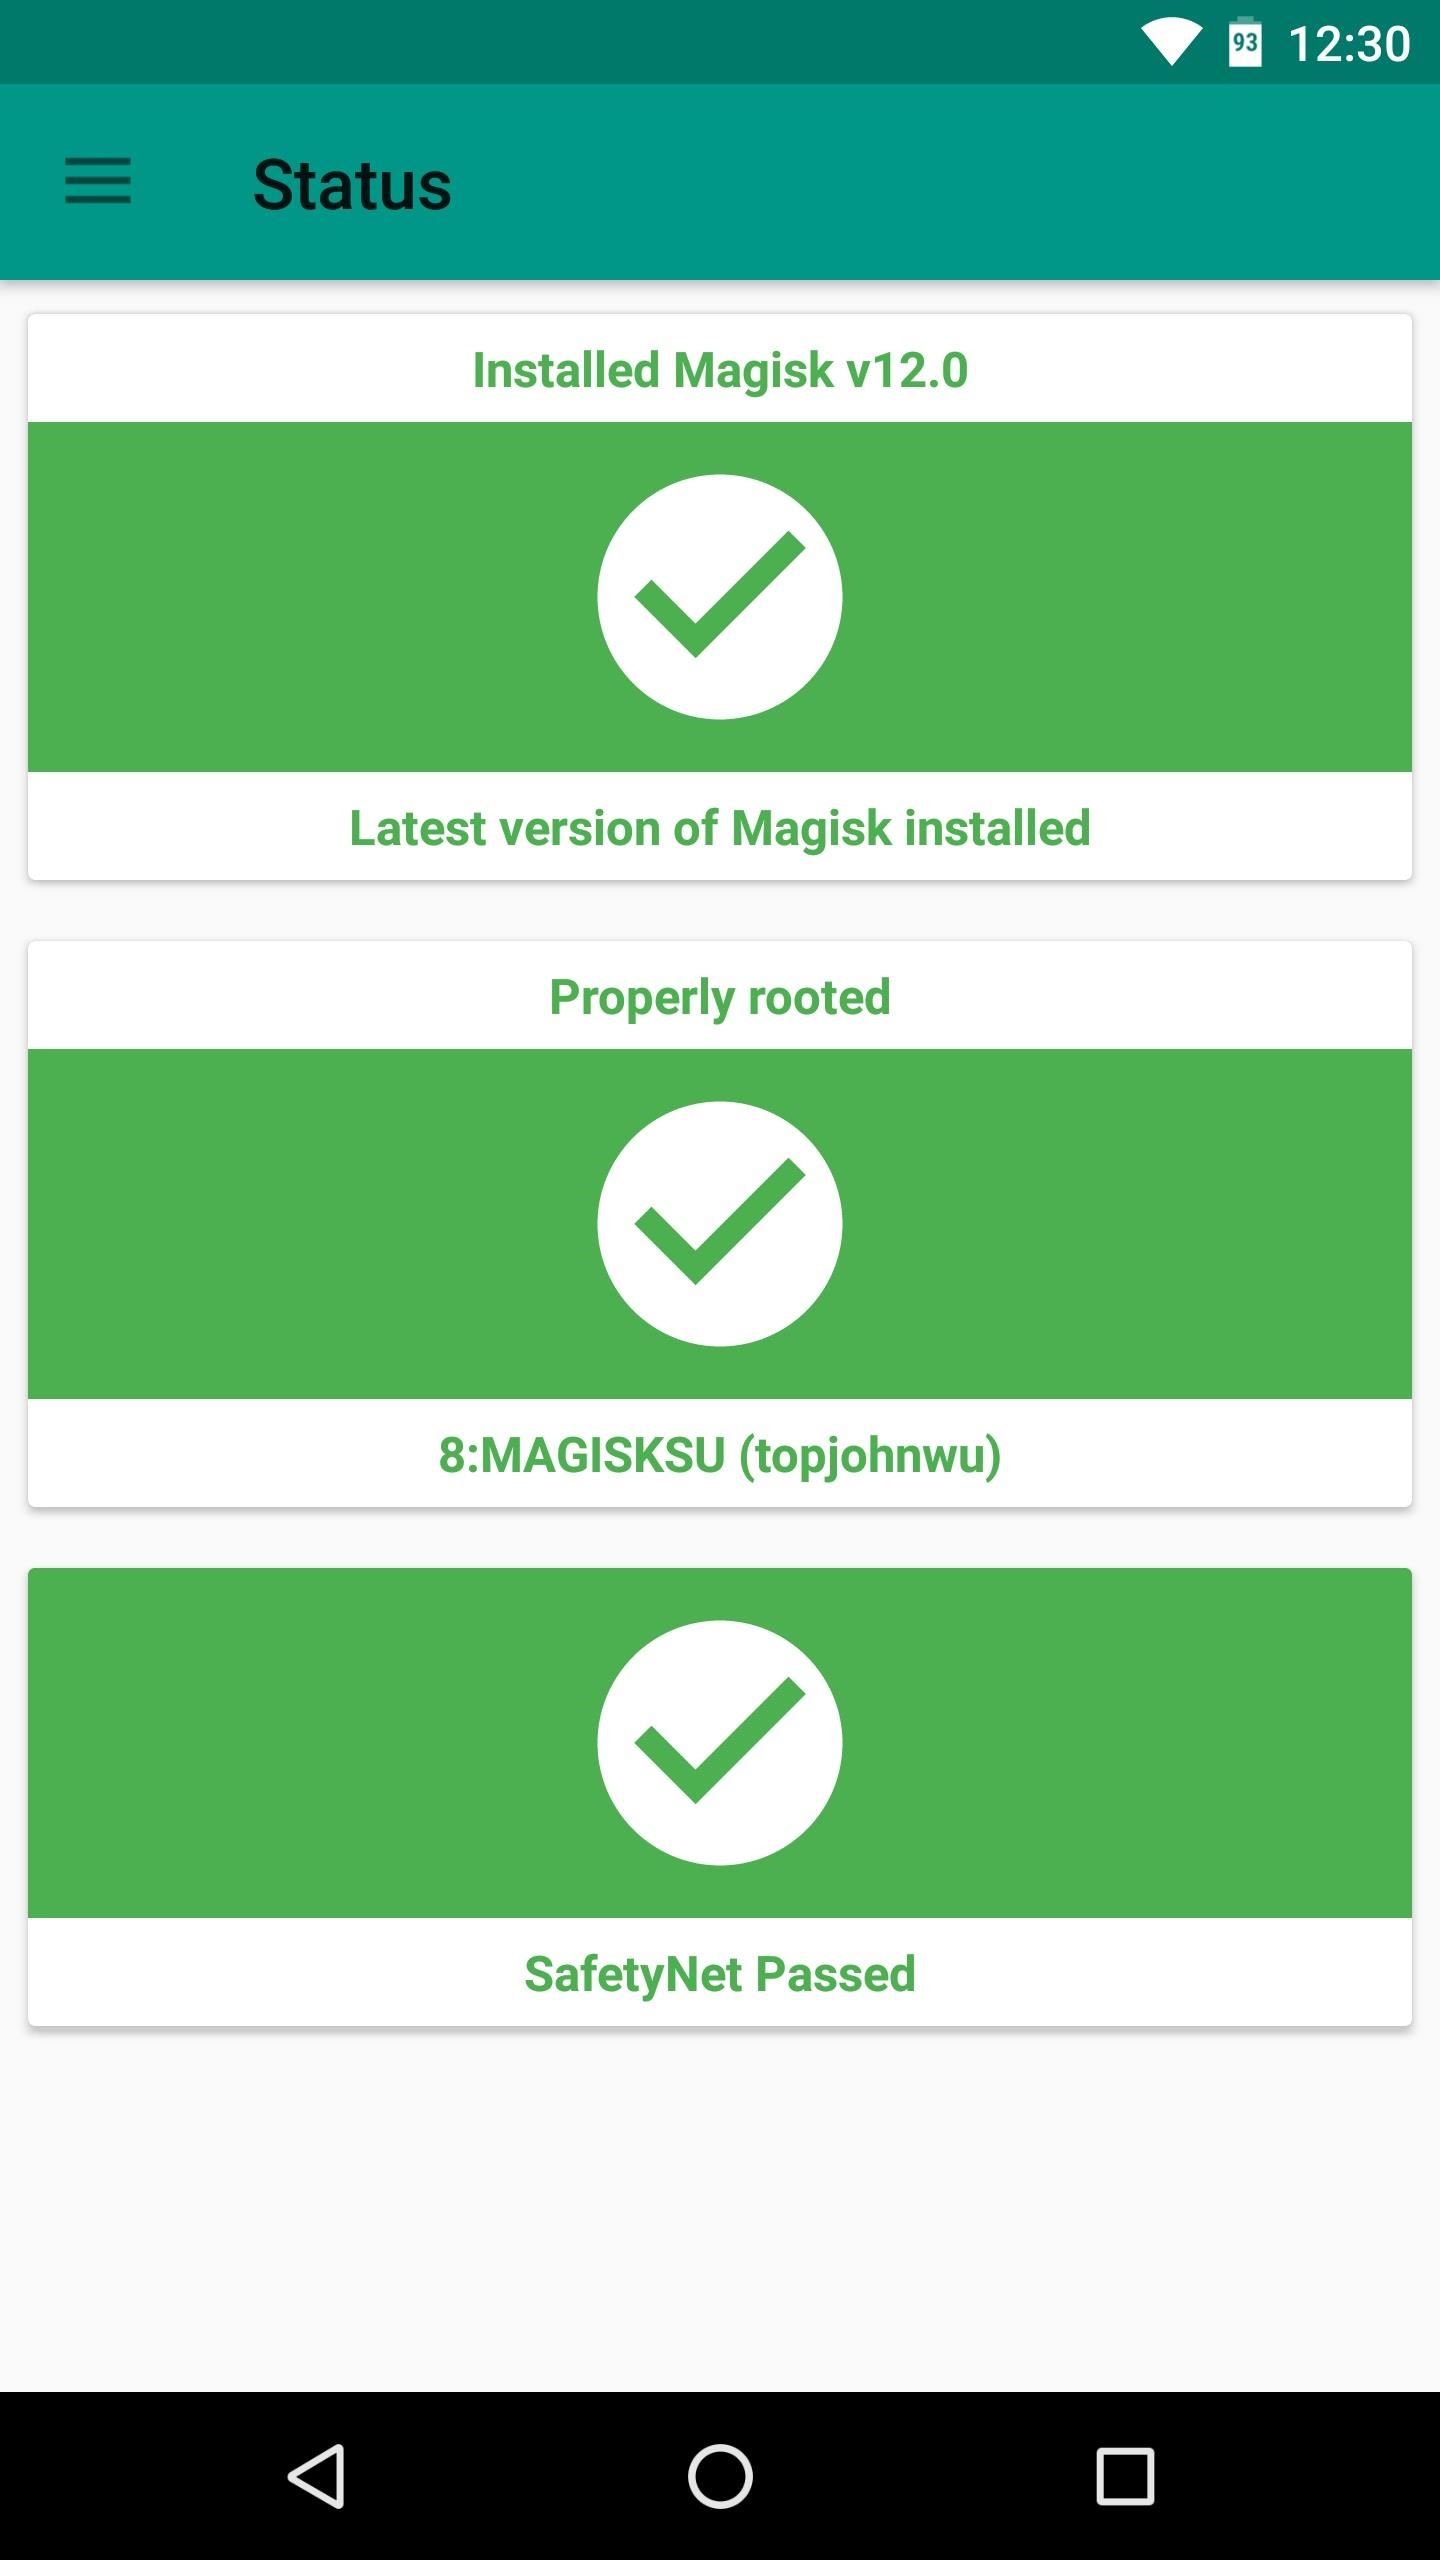
When it comes to actually checking your SafetyNet status, the easiest way to do that would be to open the Magisk Manager app and tap the “SafetyNet Check” button at the bottom of the screen. So while following this guide, periodically re-check your SafetyNet status by opening the Magisk Manager app, swiping down to refresh, then tapping the “SafetyNet Check” button again.
Step 1: Get Rid of SuperSU and Use MagiskSU with Magisk Hide
The most likely cause of a CTS profile mismatch is a root management app that doesn’t hide itself from SafetyNet. This is the case with Chainfire’s SuperSU, which is the most popular root management out there.
Chances are, you originally rooted your phone using the SuperSU ZIP or CF Auto Root, which both install SuperSU as the default root management app. If you did that, and then installed Magisk, the leftover root binaries from SuperSU will cause SafetyNet to trip.
So if this is the cause of your CTS issues, you’ll need to uninstall SuperSU’s binaries and replace them with Magisk’s built-in root management app. But there’s one more wrinkle: If you have the Xposed Framework installed or if you’ve modified any system files using root access, you’ll need to undo those changes as well. Not to worry, though, we’ve outlined that entire process with a separate guide, so head to the following link to get squared away.
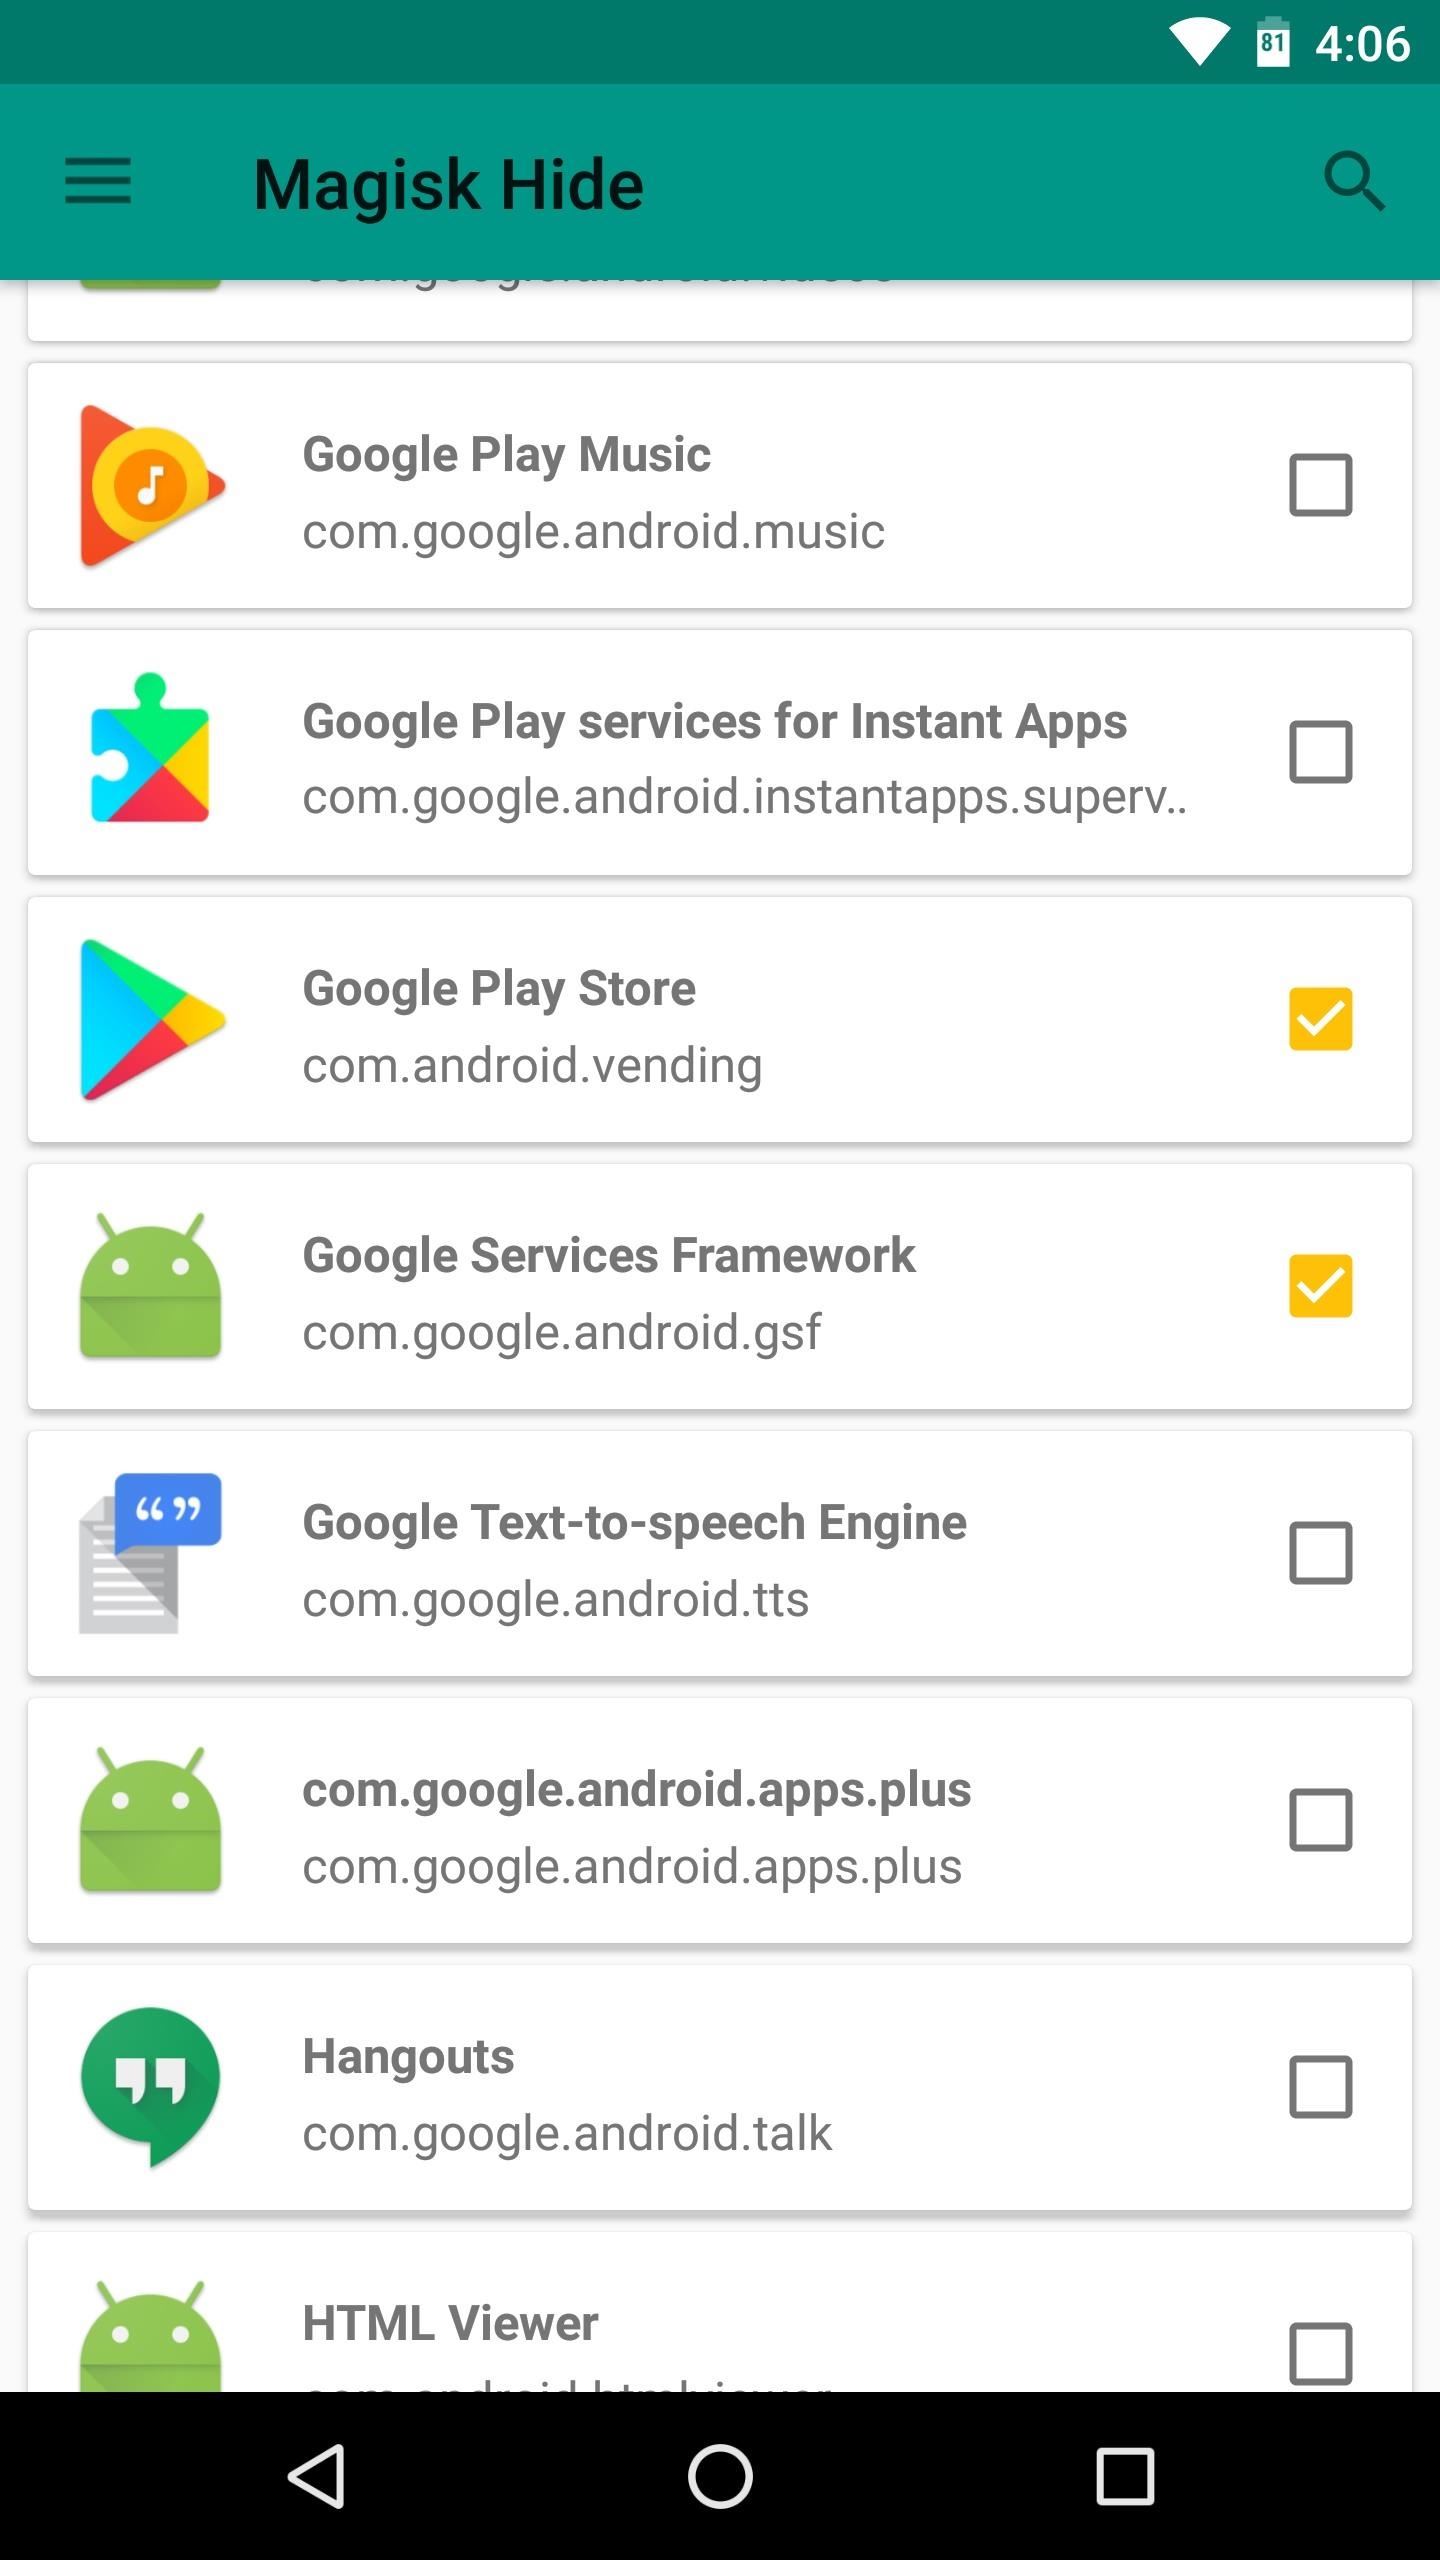
Once you’ve done that, make sure the “Magisk Hide” option is enabled in your Magisk Manager app. From there, you may want to hide additional apps using Magisk Hide, which essentially prevents the apps from knowing that you’re rooted.
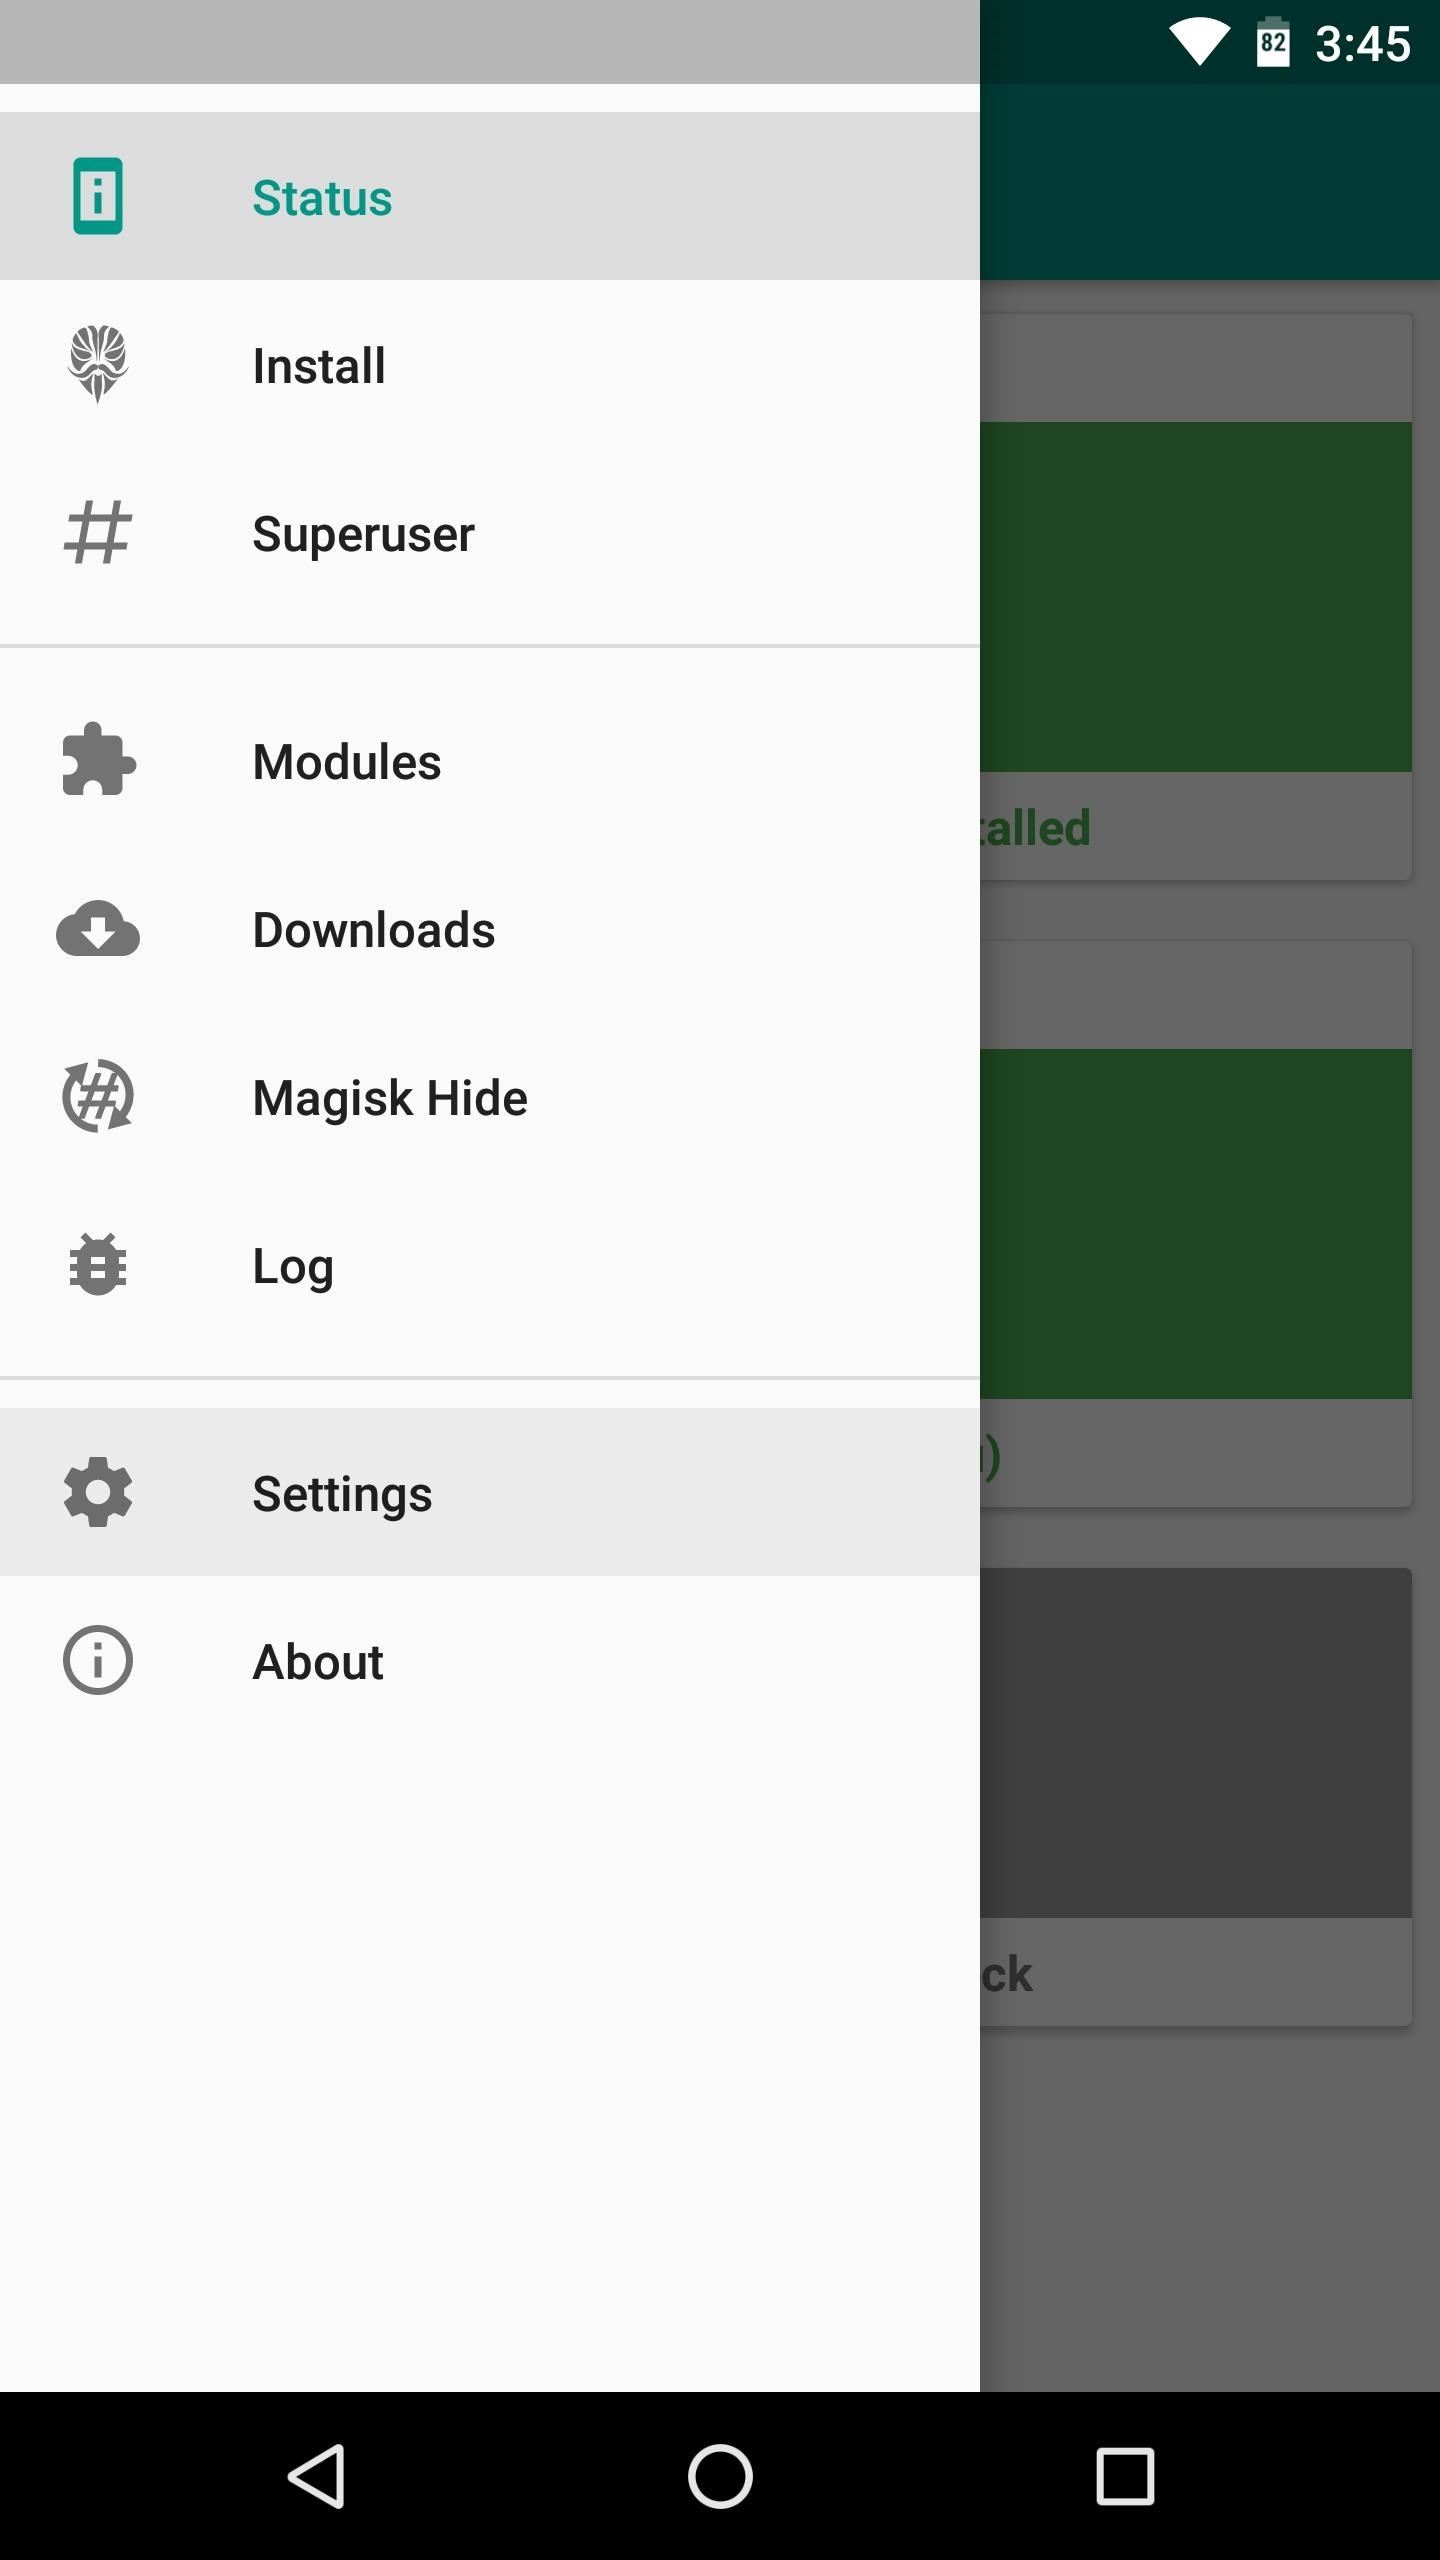
To do that, head to the side navigation menu in your Magisk Manager app and select “Magisk Hide.” From here, it may be helpful to tick the boxes next to Google Play Store and Google Services Framework as well as any other app you’re having SafetyNet issues with.

Step 2: Still No Good? Try Flashing unSU
If the above guide didn’t fix your CTS profile mismatch problems and you’re certain you’ve undone any system mods, it’s possible that you still have a few bits of data left over from SuperSU. The “Full Unroot” option in the SuperSU app is supposed to get rid of everything, but it’s not always perfect.
So to make sure you’ve completely eradicated SuperSU and its binaries, you can use a flashable ZIP created by developer osm0sis. To start, just tap the following link from your Android device, then boot into custom recovery.
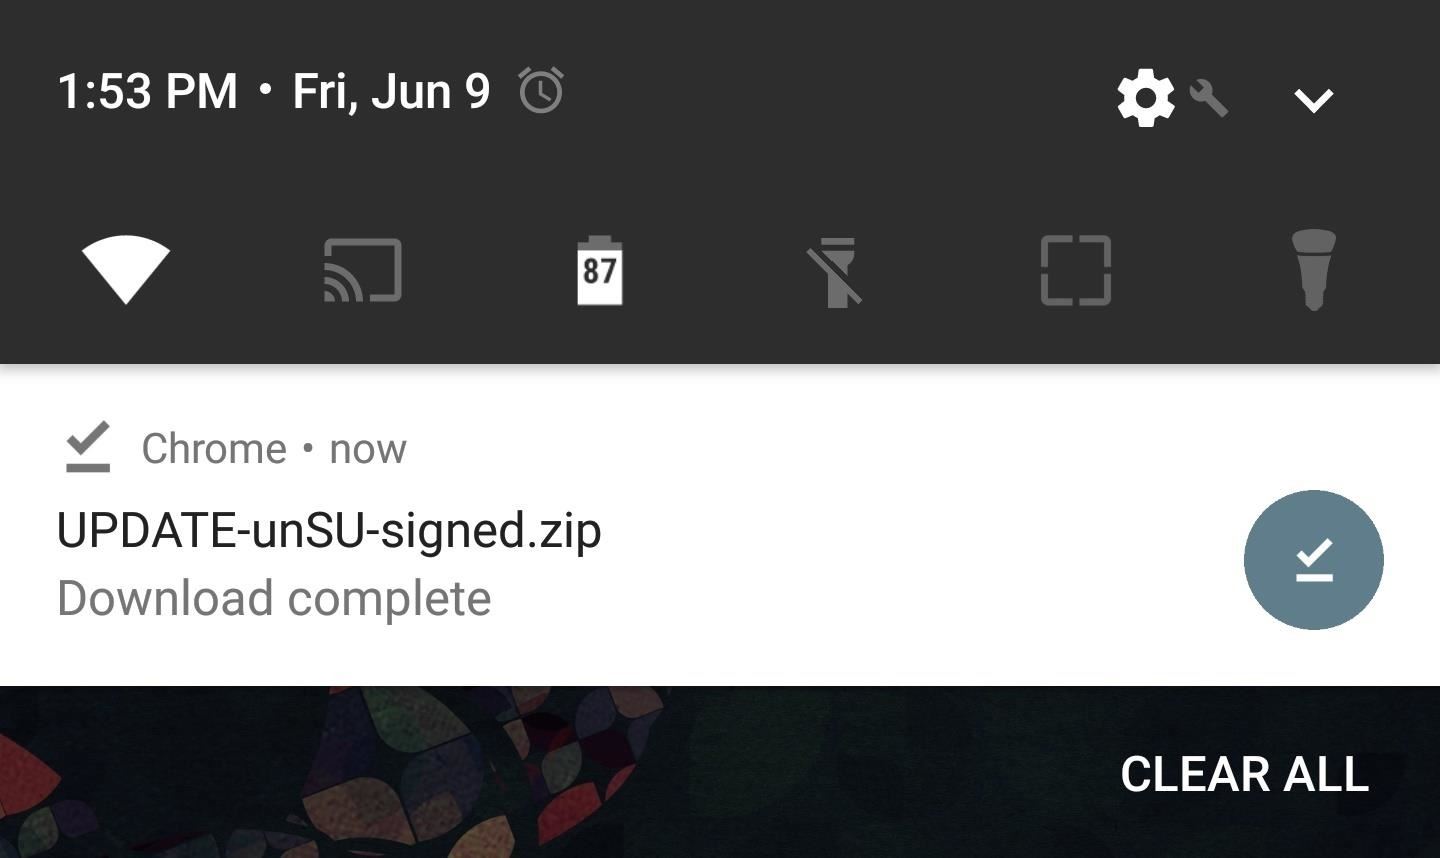
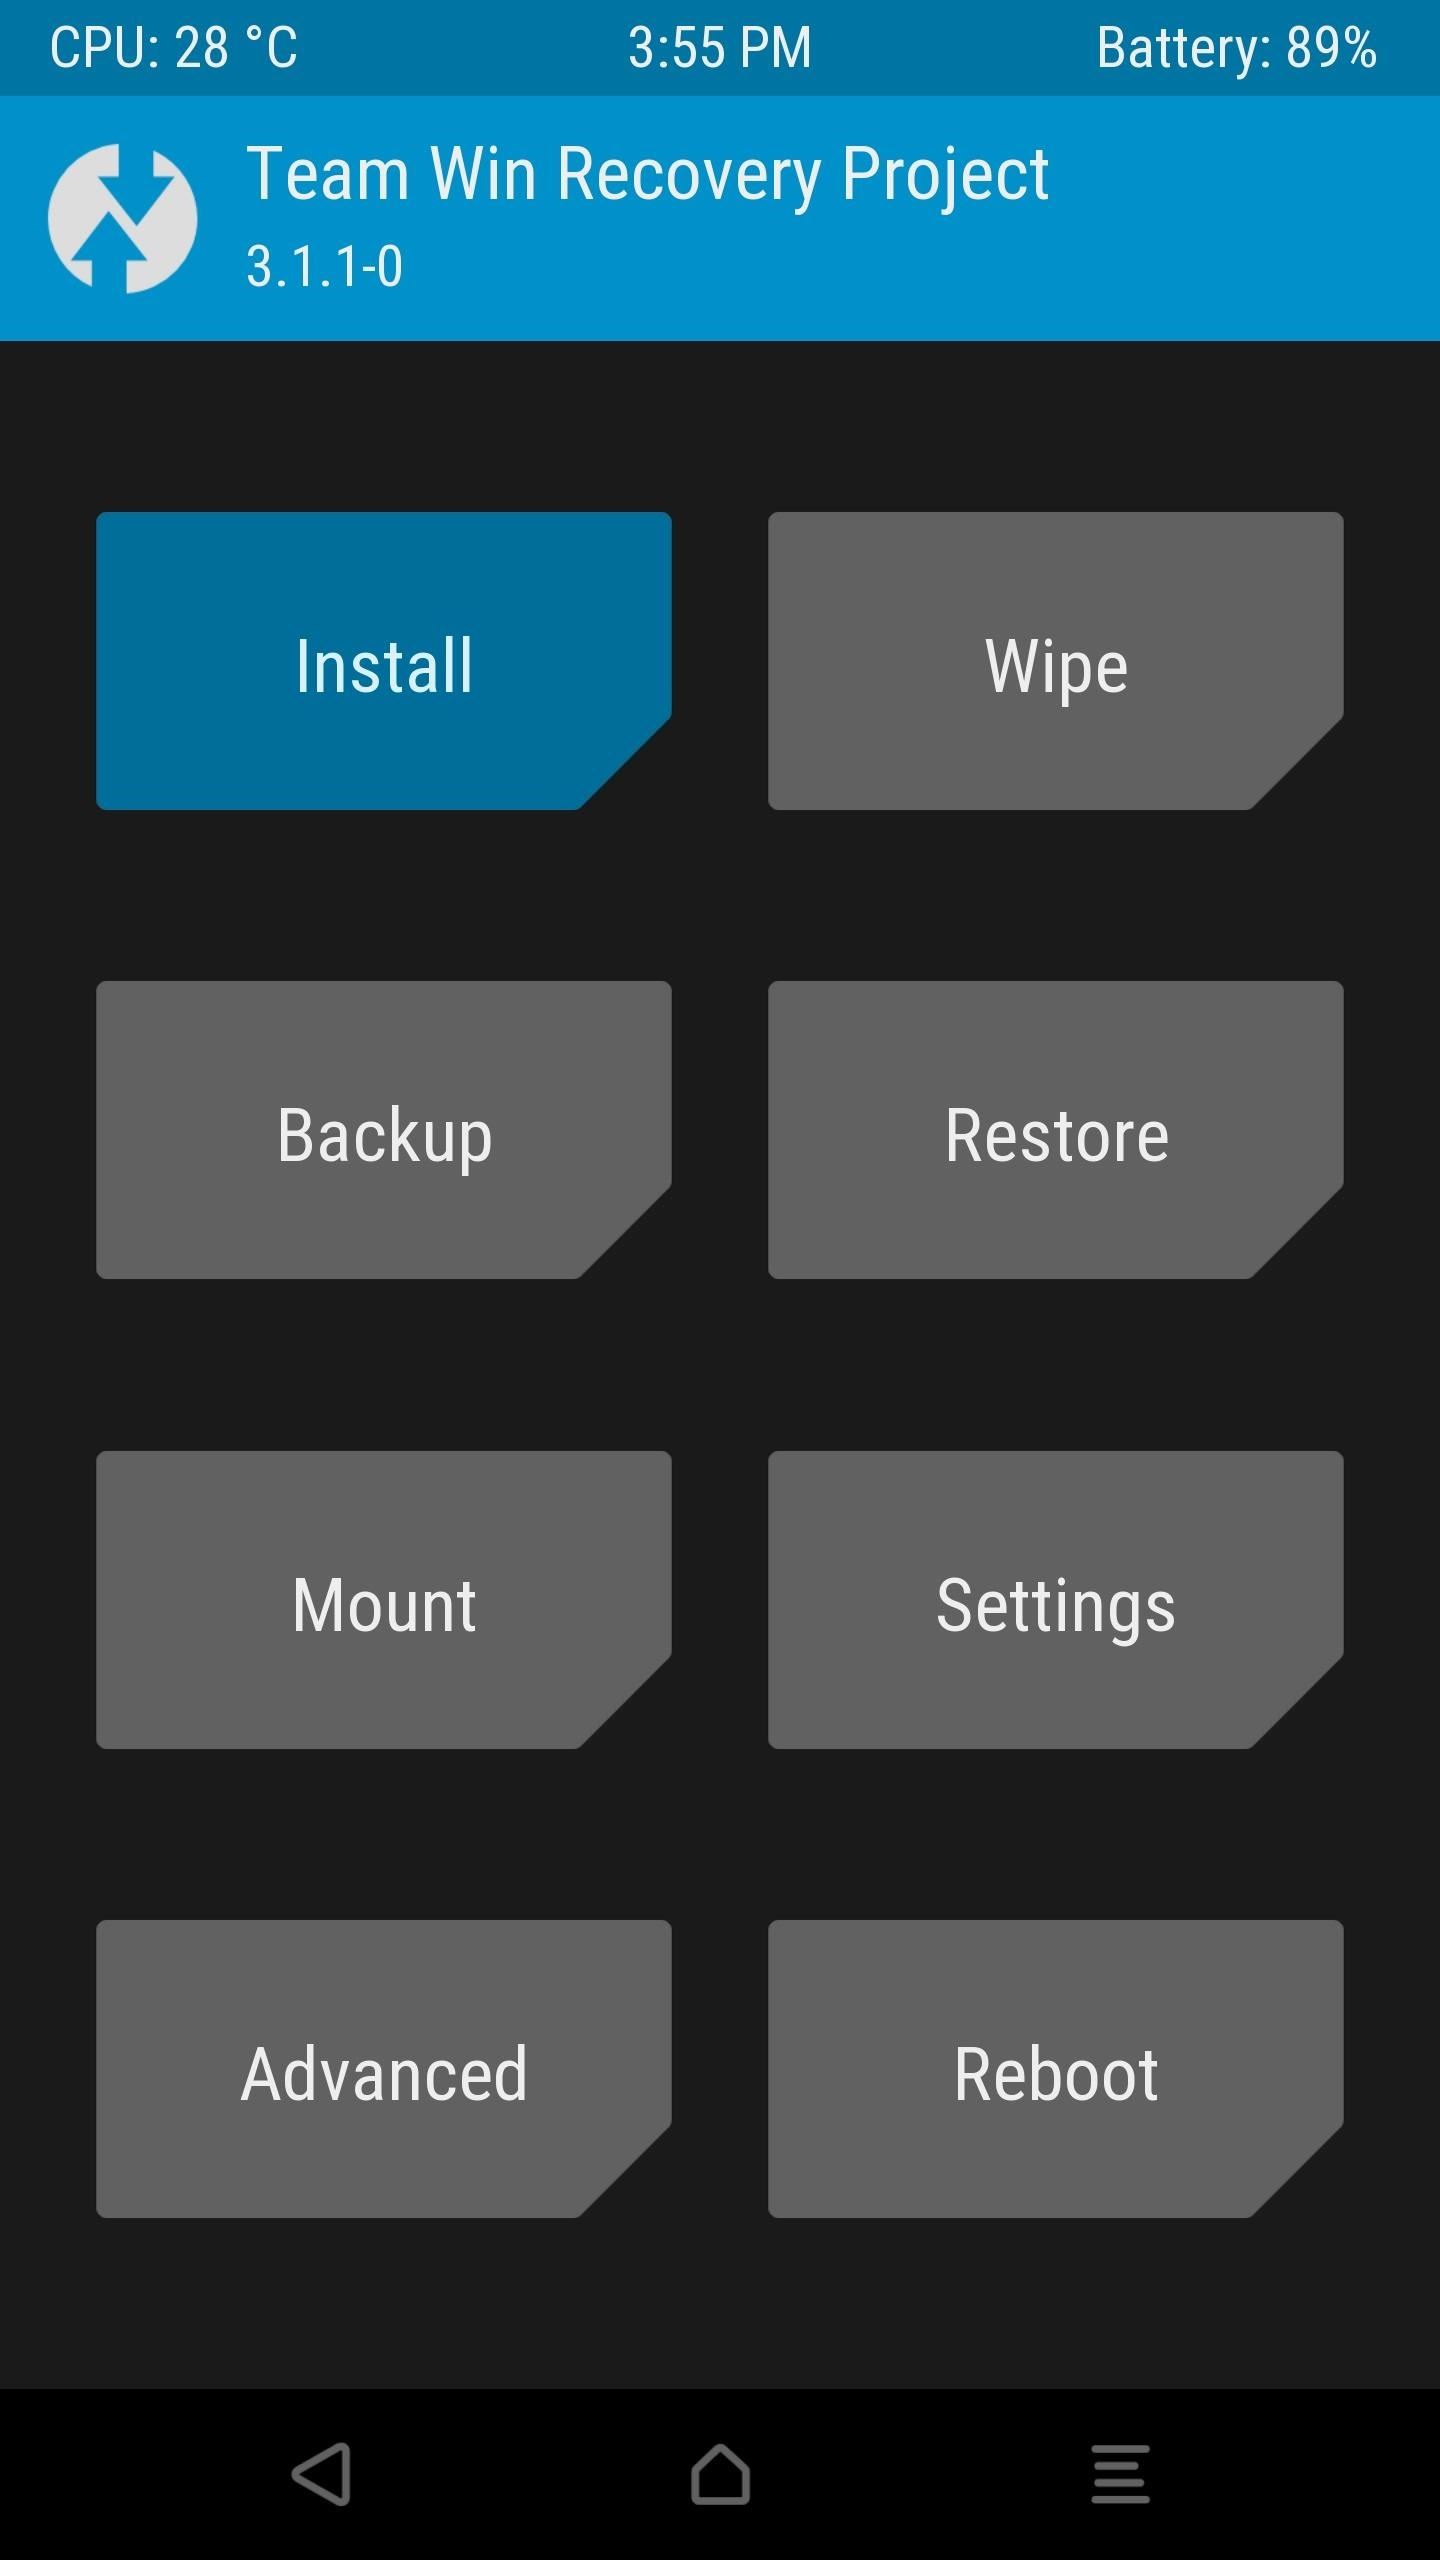
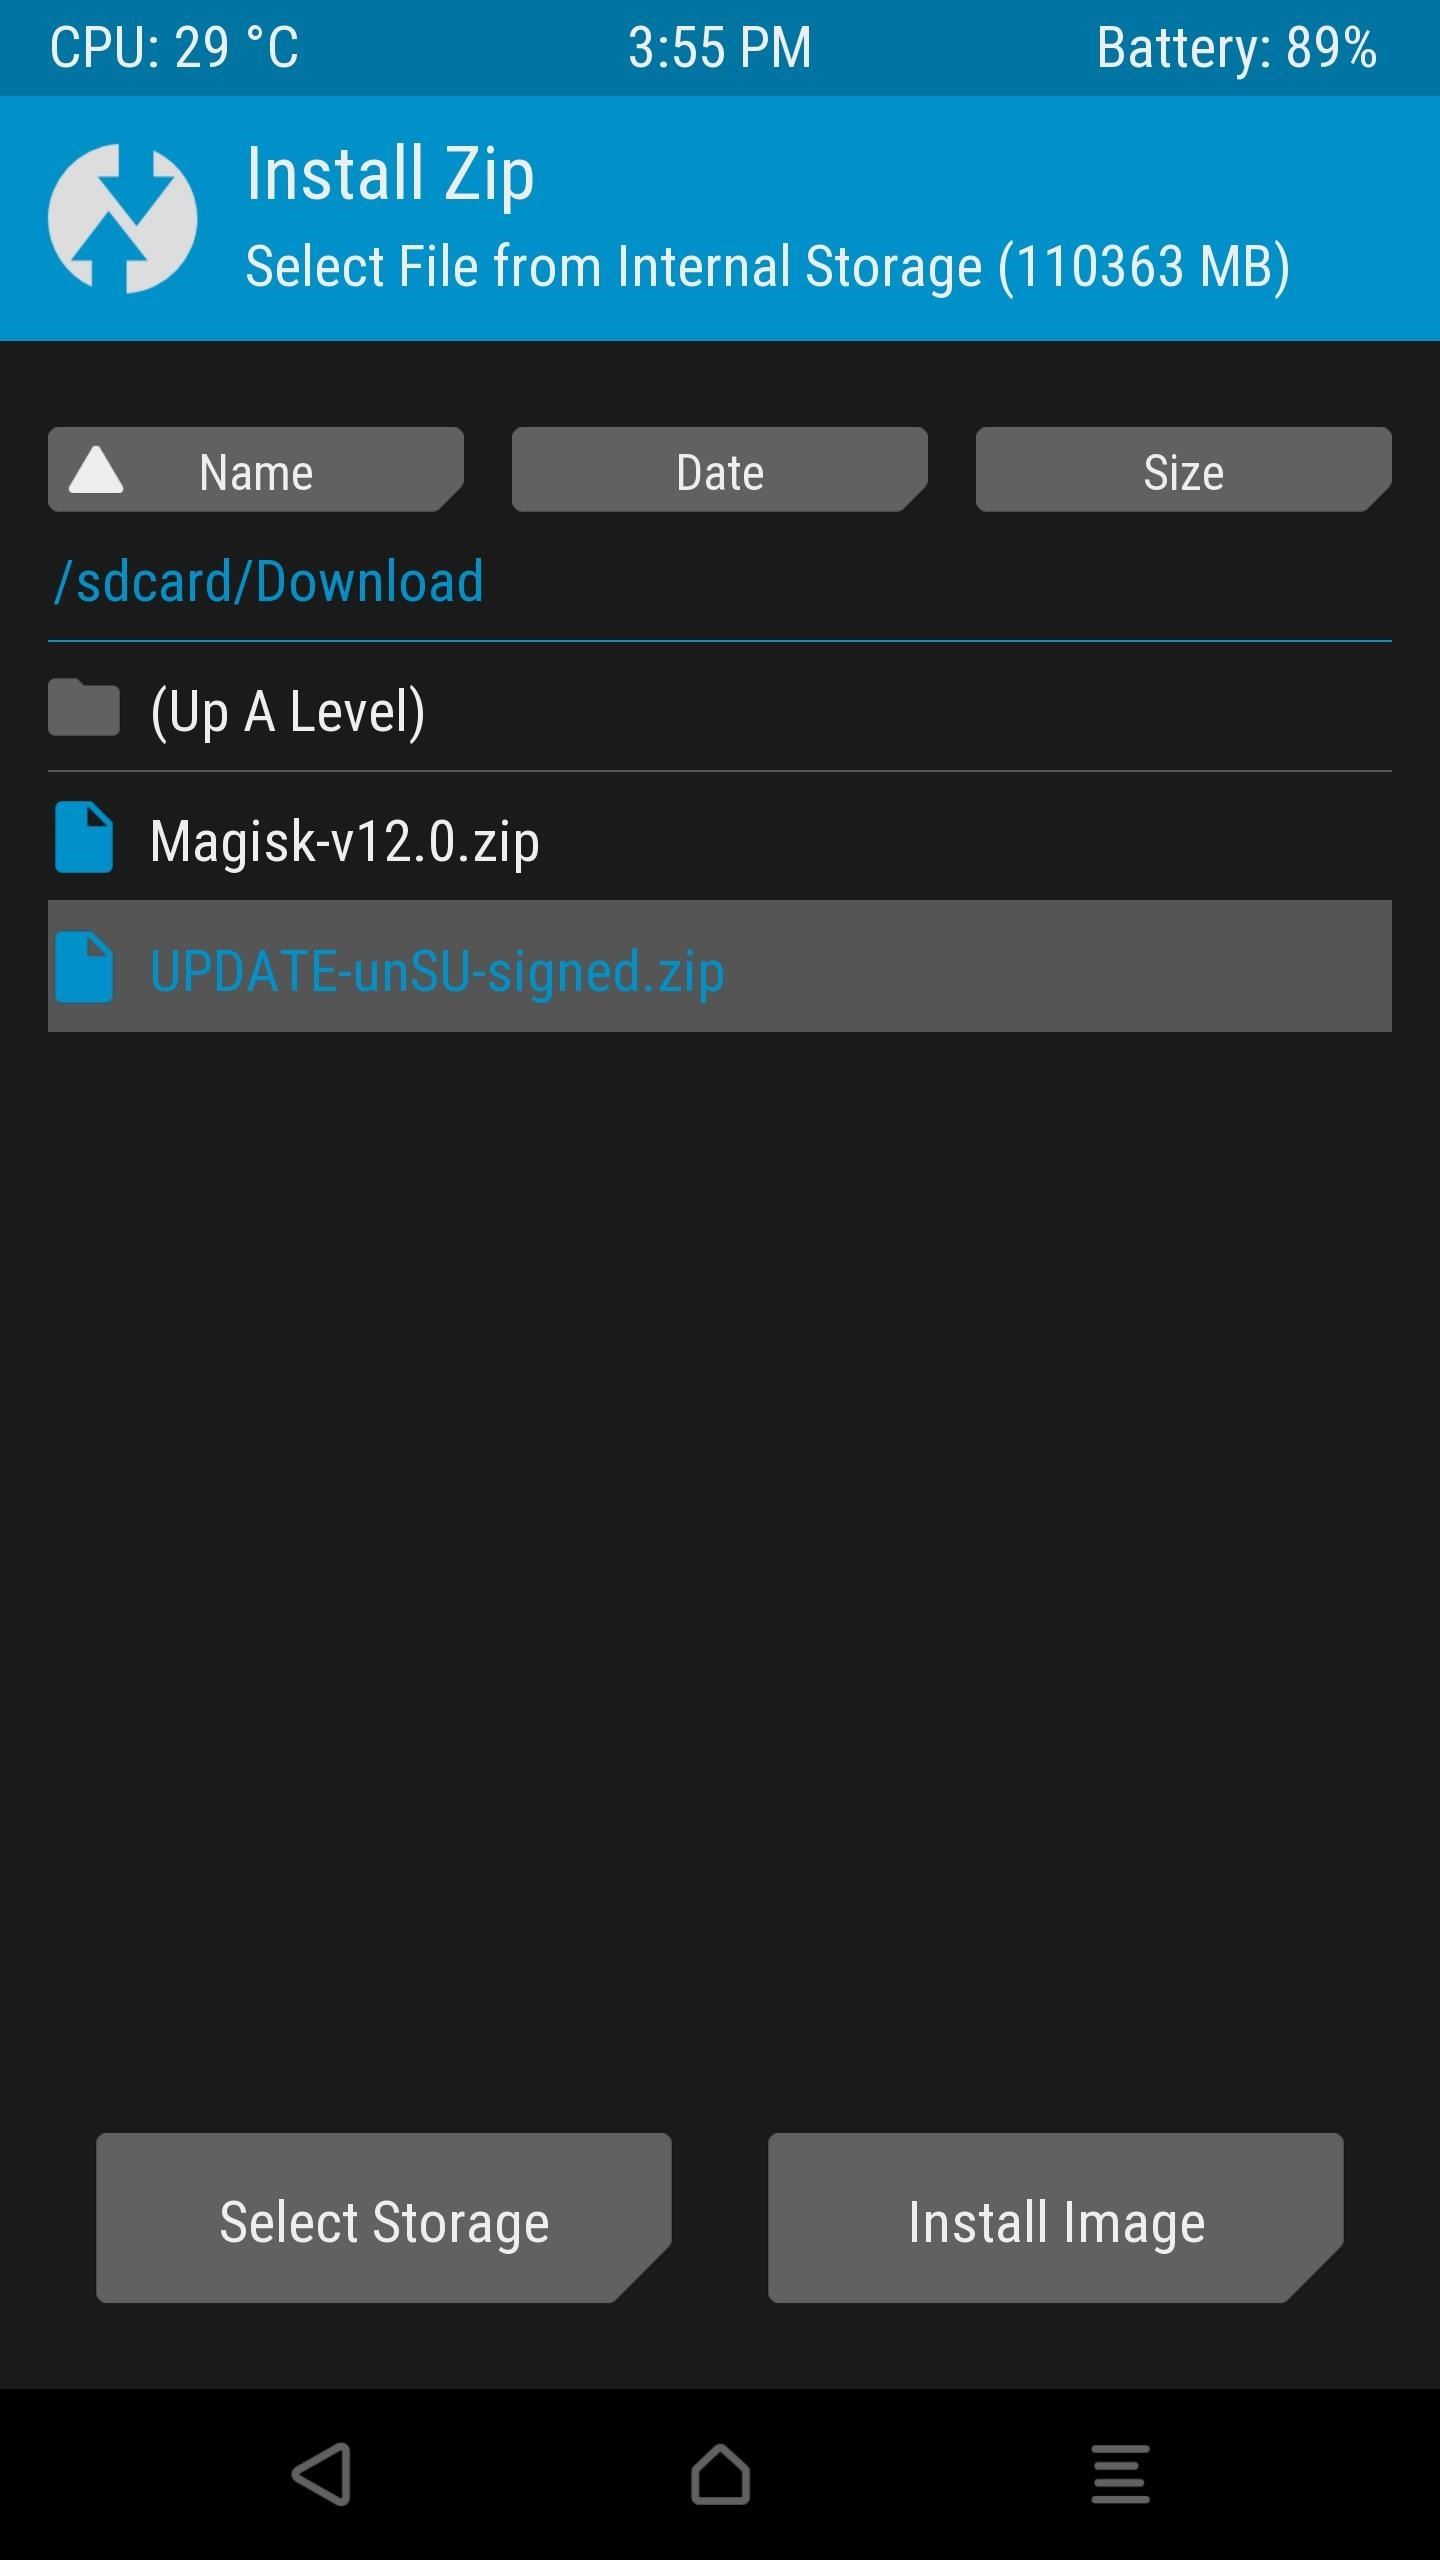
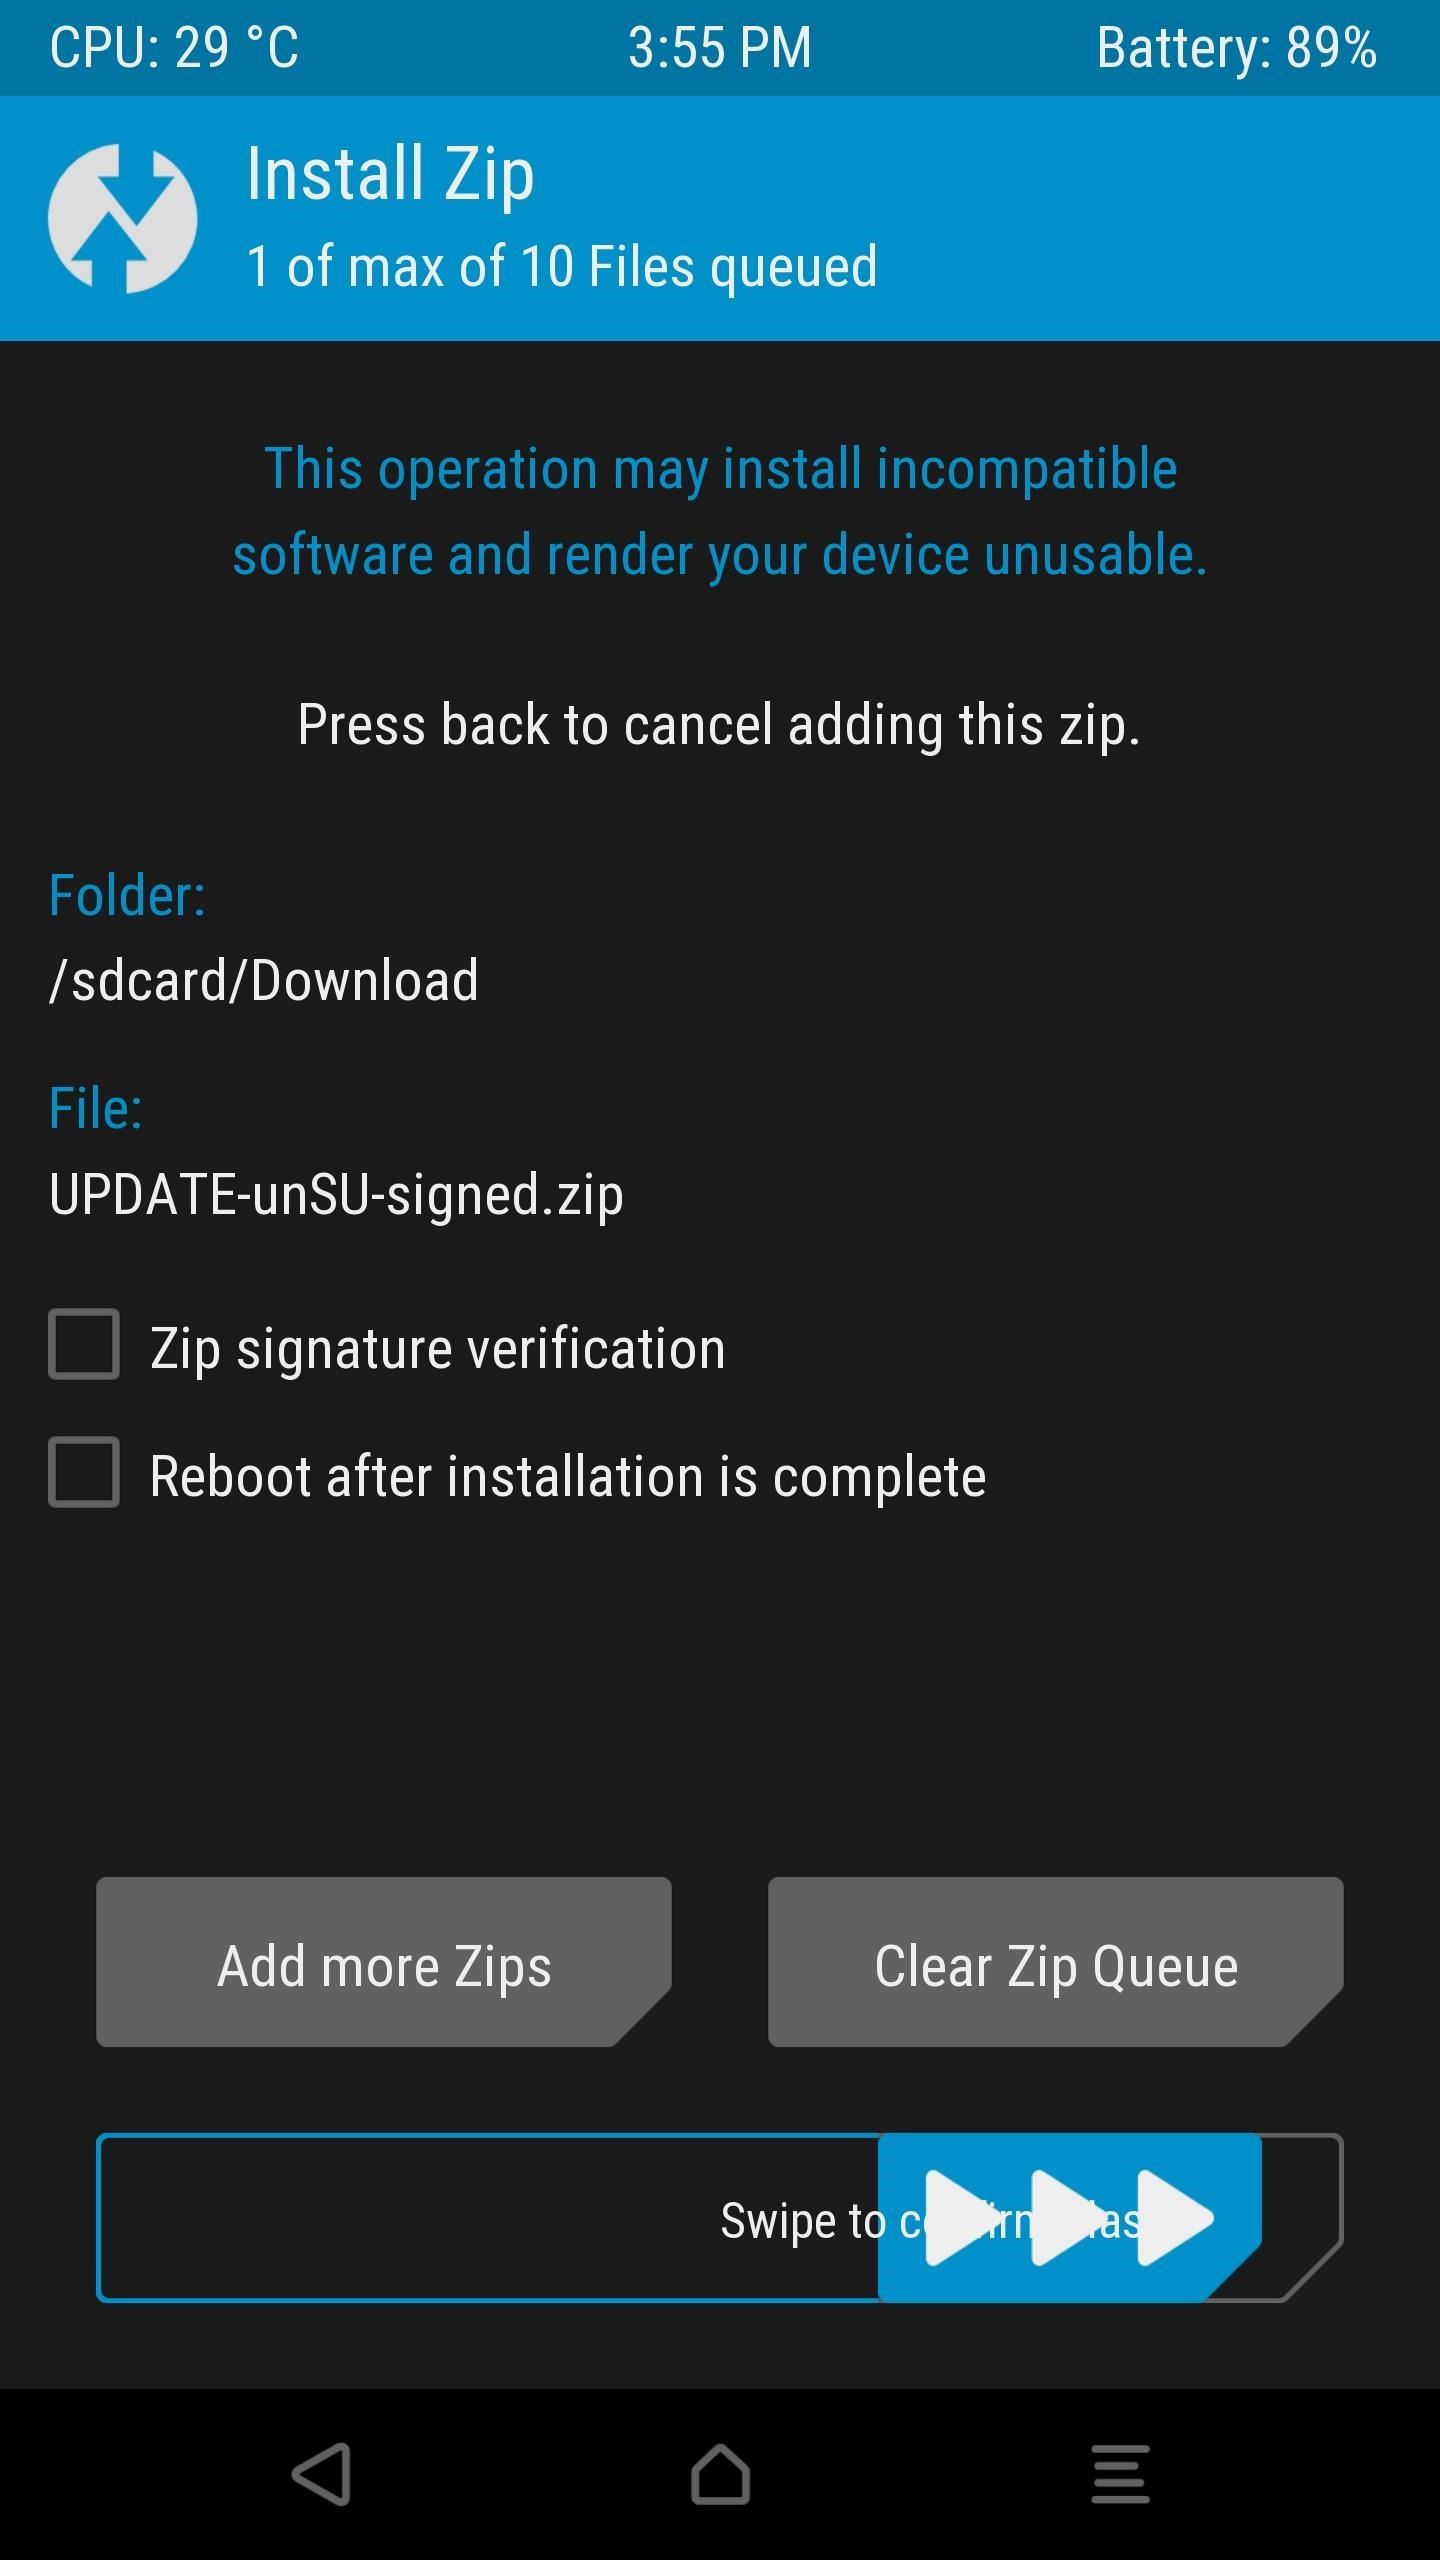
From there, tap the “Install” button in TWRP’s main menu, then navigate to your Download folder and select UPDATE-unSU-signed.zip. After that, swipe the slider to flash the ZIP and eradicate all traces of SuperSU, and when you’re done, go back and re-flash the Magisk ZIP. After rebooting, check your SafetyNet status again — if you still don’t pass, move onto the next step.
Step 3: Change SELinux to Enforcing
If you’re still stuck, this next step is rather simple, though it would only apply if you’ve previously used an app to set your SELinux mode to “Permissive.” Magisk attempts to hide your SELinux status from SafetyNet, but it’s not always perfect, so your best bet is to set SELinux back to its default mode of “Enforcing.”
So open whichever SELinux mode changer app you used to set the mode to “Permissive” in the first place, then toggle the setting back to “Enforcing” and reboot. Sadly, we can’t share apps that change SELinux modes since Google blacklists sites that do, so if you’ve uninstalled the app, you’ll have to find it again on your own. That’s easy, though — just head to the XDA forums and search for “SELinux.”
Step 4: Turn Off USB Debugging
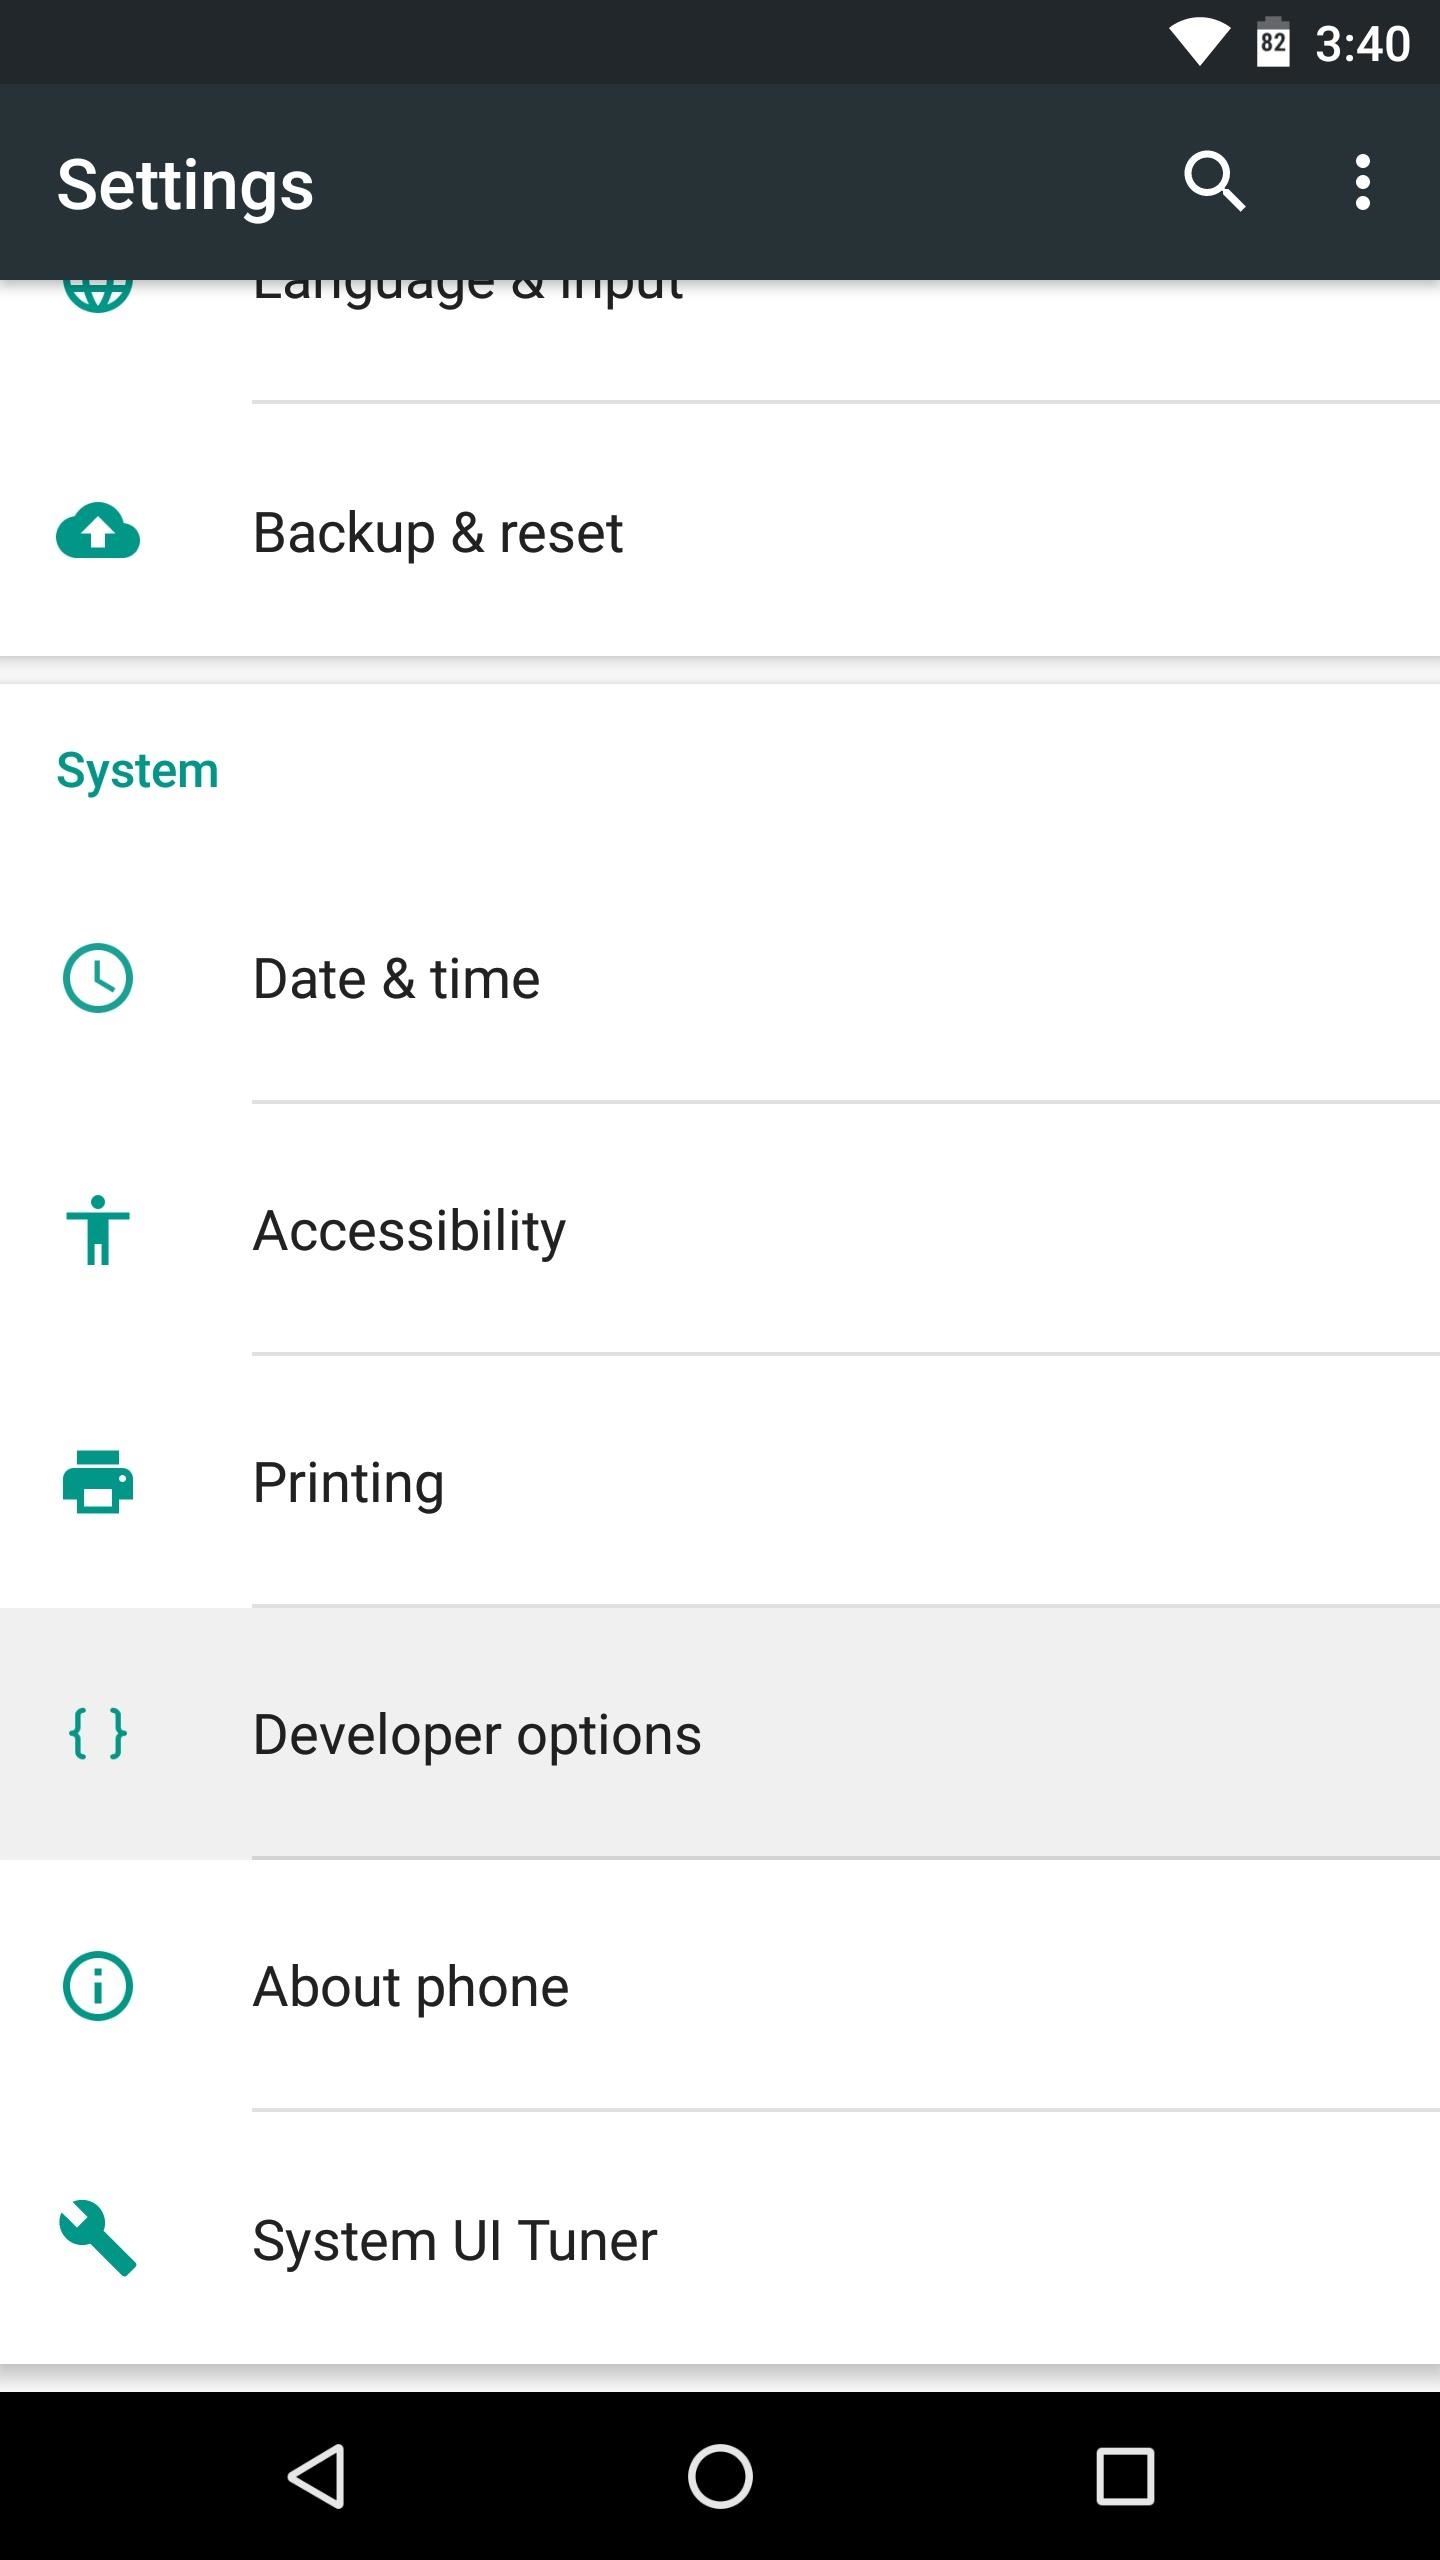
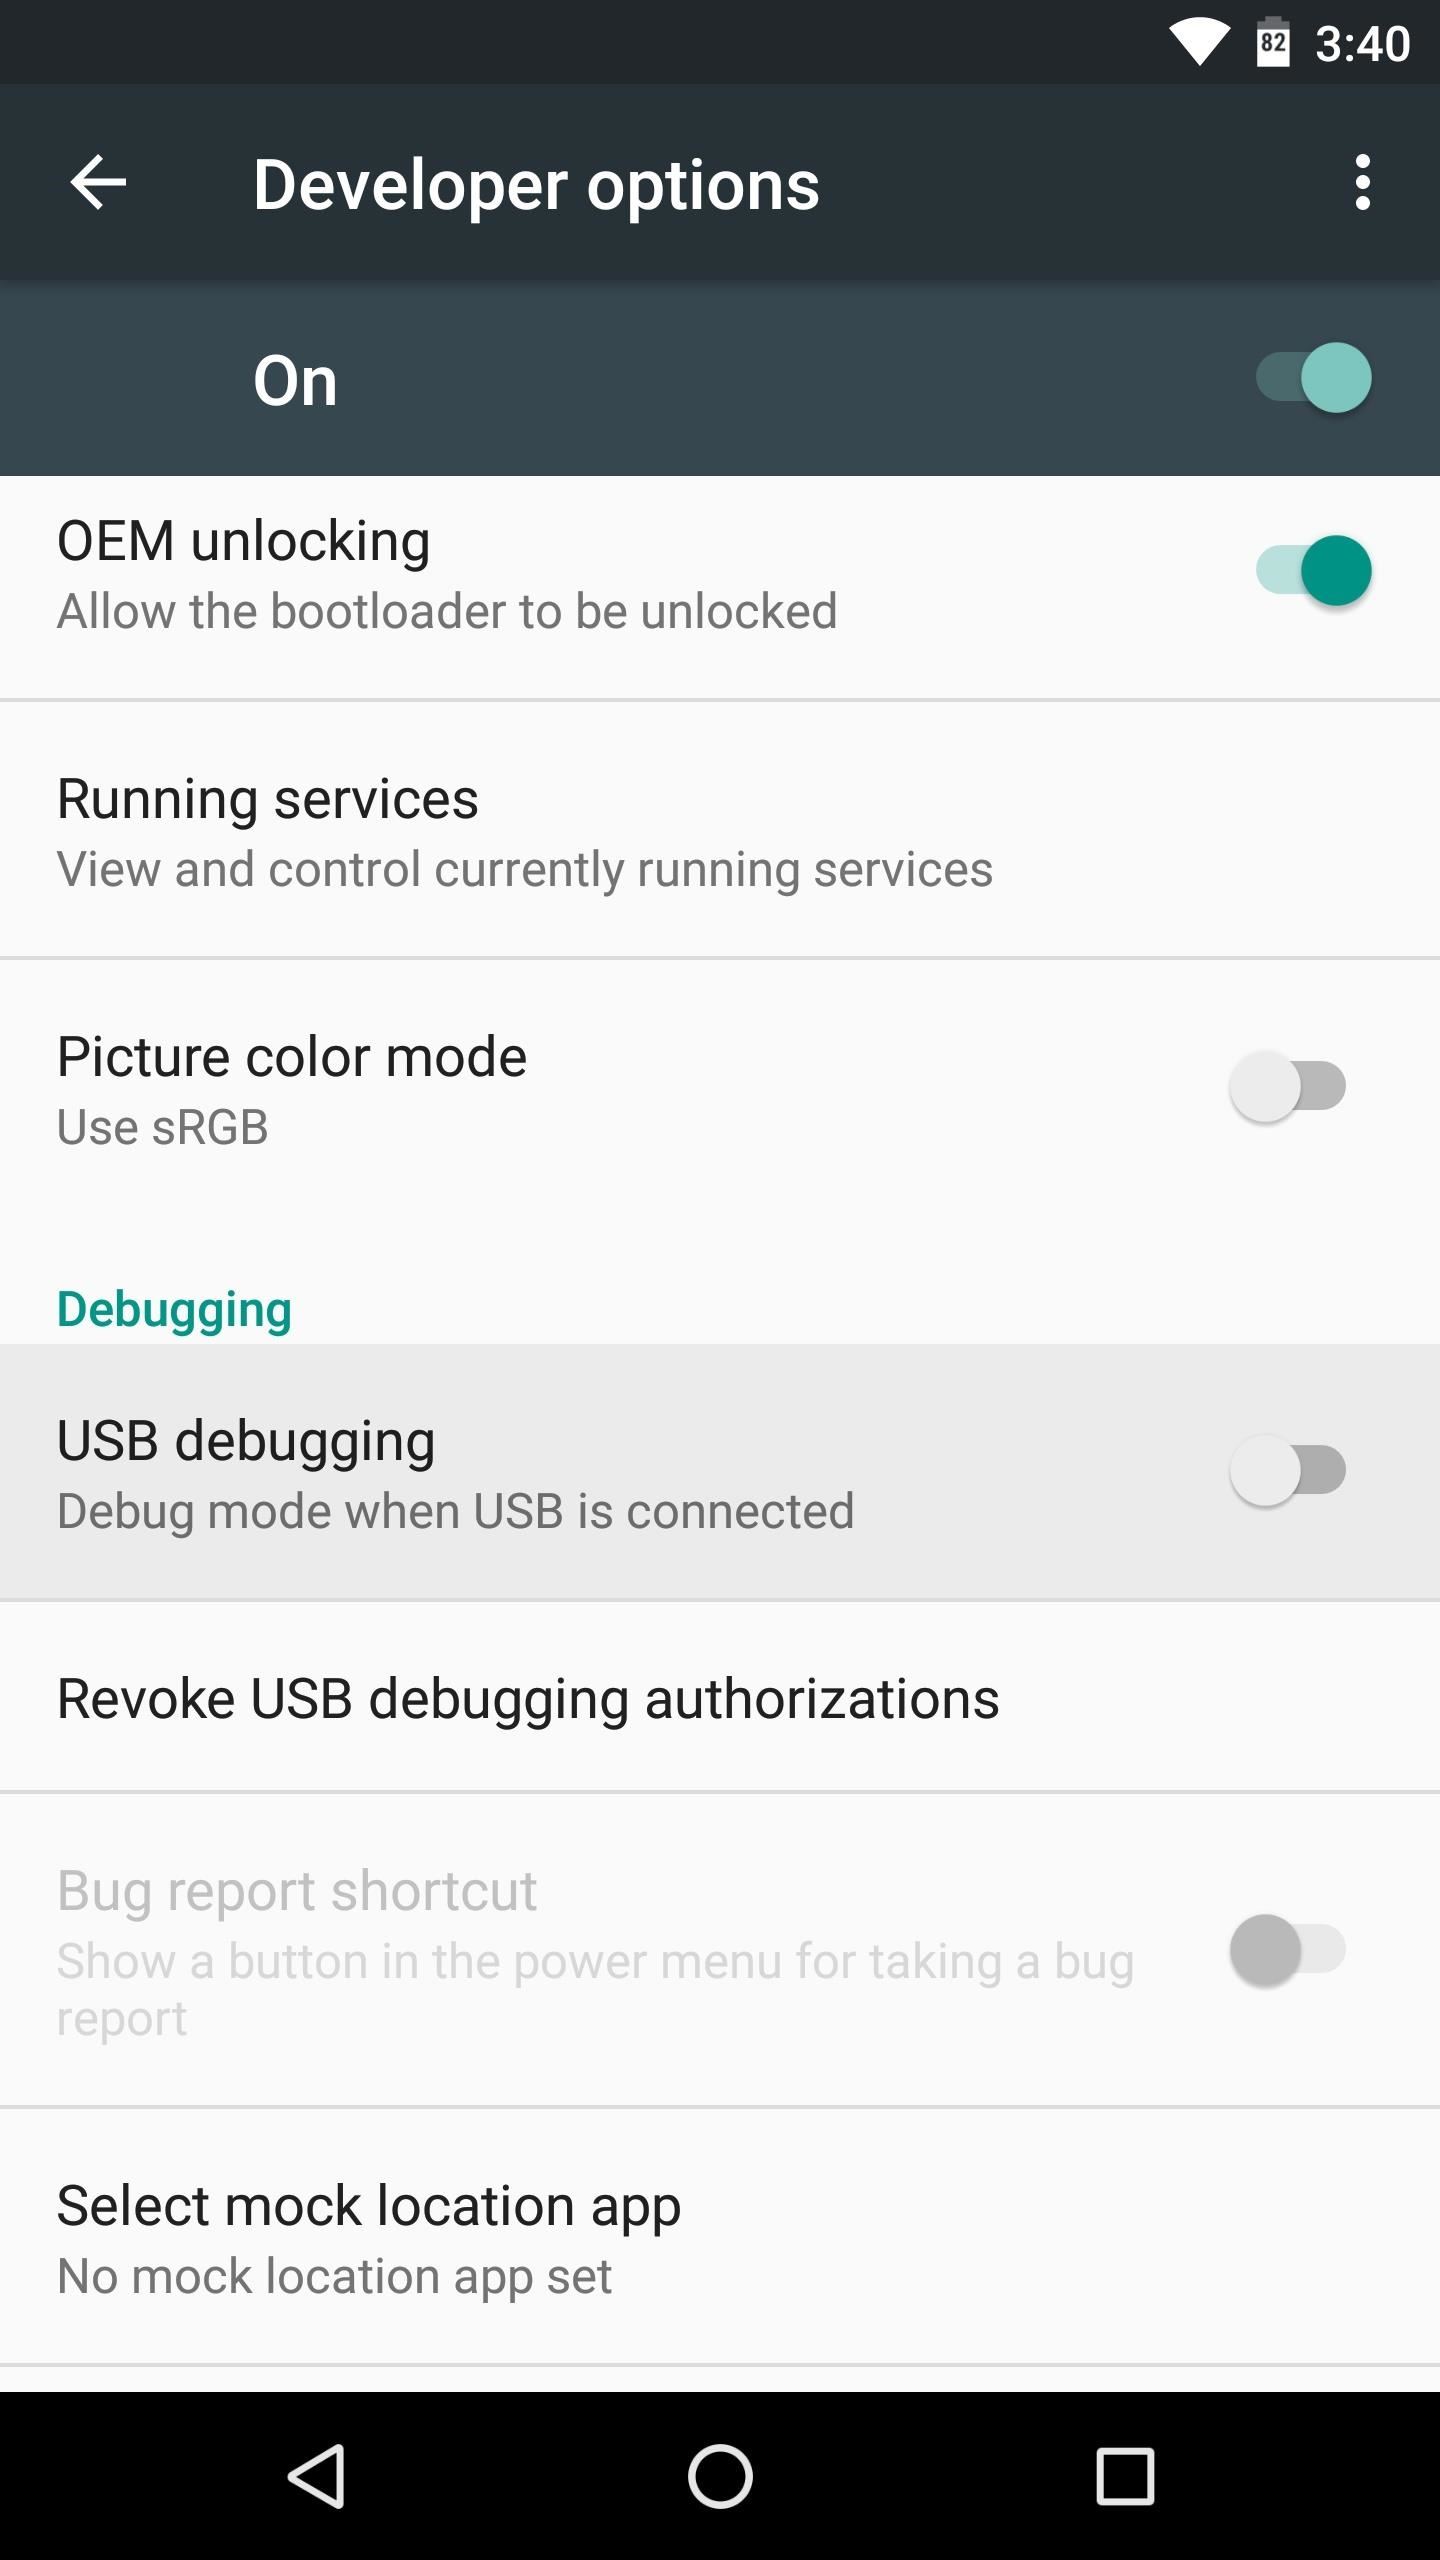
For some strange reason, a fairly common cause of SafetyNet issues with Magisk is the “USB Debugging” setting in Developer options. So if you have this option enabled, head to your Settings menu to disable it, then reboot and see if that solved your SafetyNet issues.
Step 5: Custom ROM? Try a Custom Kernel
As I mentioned earlier, CTS stands for “Compatibility Test Suite.” This is the process Google uses to verify that a device and its firmware meet certification standards, and to put it simply, a custom ROM will never officially pass this test.
However, some custom kernels can help with this issue. The most popular kernel that’s been known to help with custom ROM incompatibility is Franco Kernel. It’s available for all Nexus, Pixel, and OnePlus devices, as well as the Redmi Note3, and the easiest way to install it would be to purchase the FKU app, then tap the “Download” button on the main page. Otherwise, you can search your device’s XDA forum to find a free flashable ZIP.

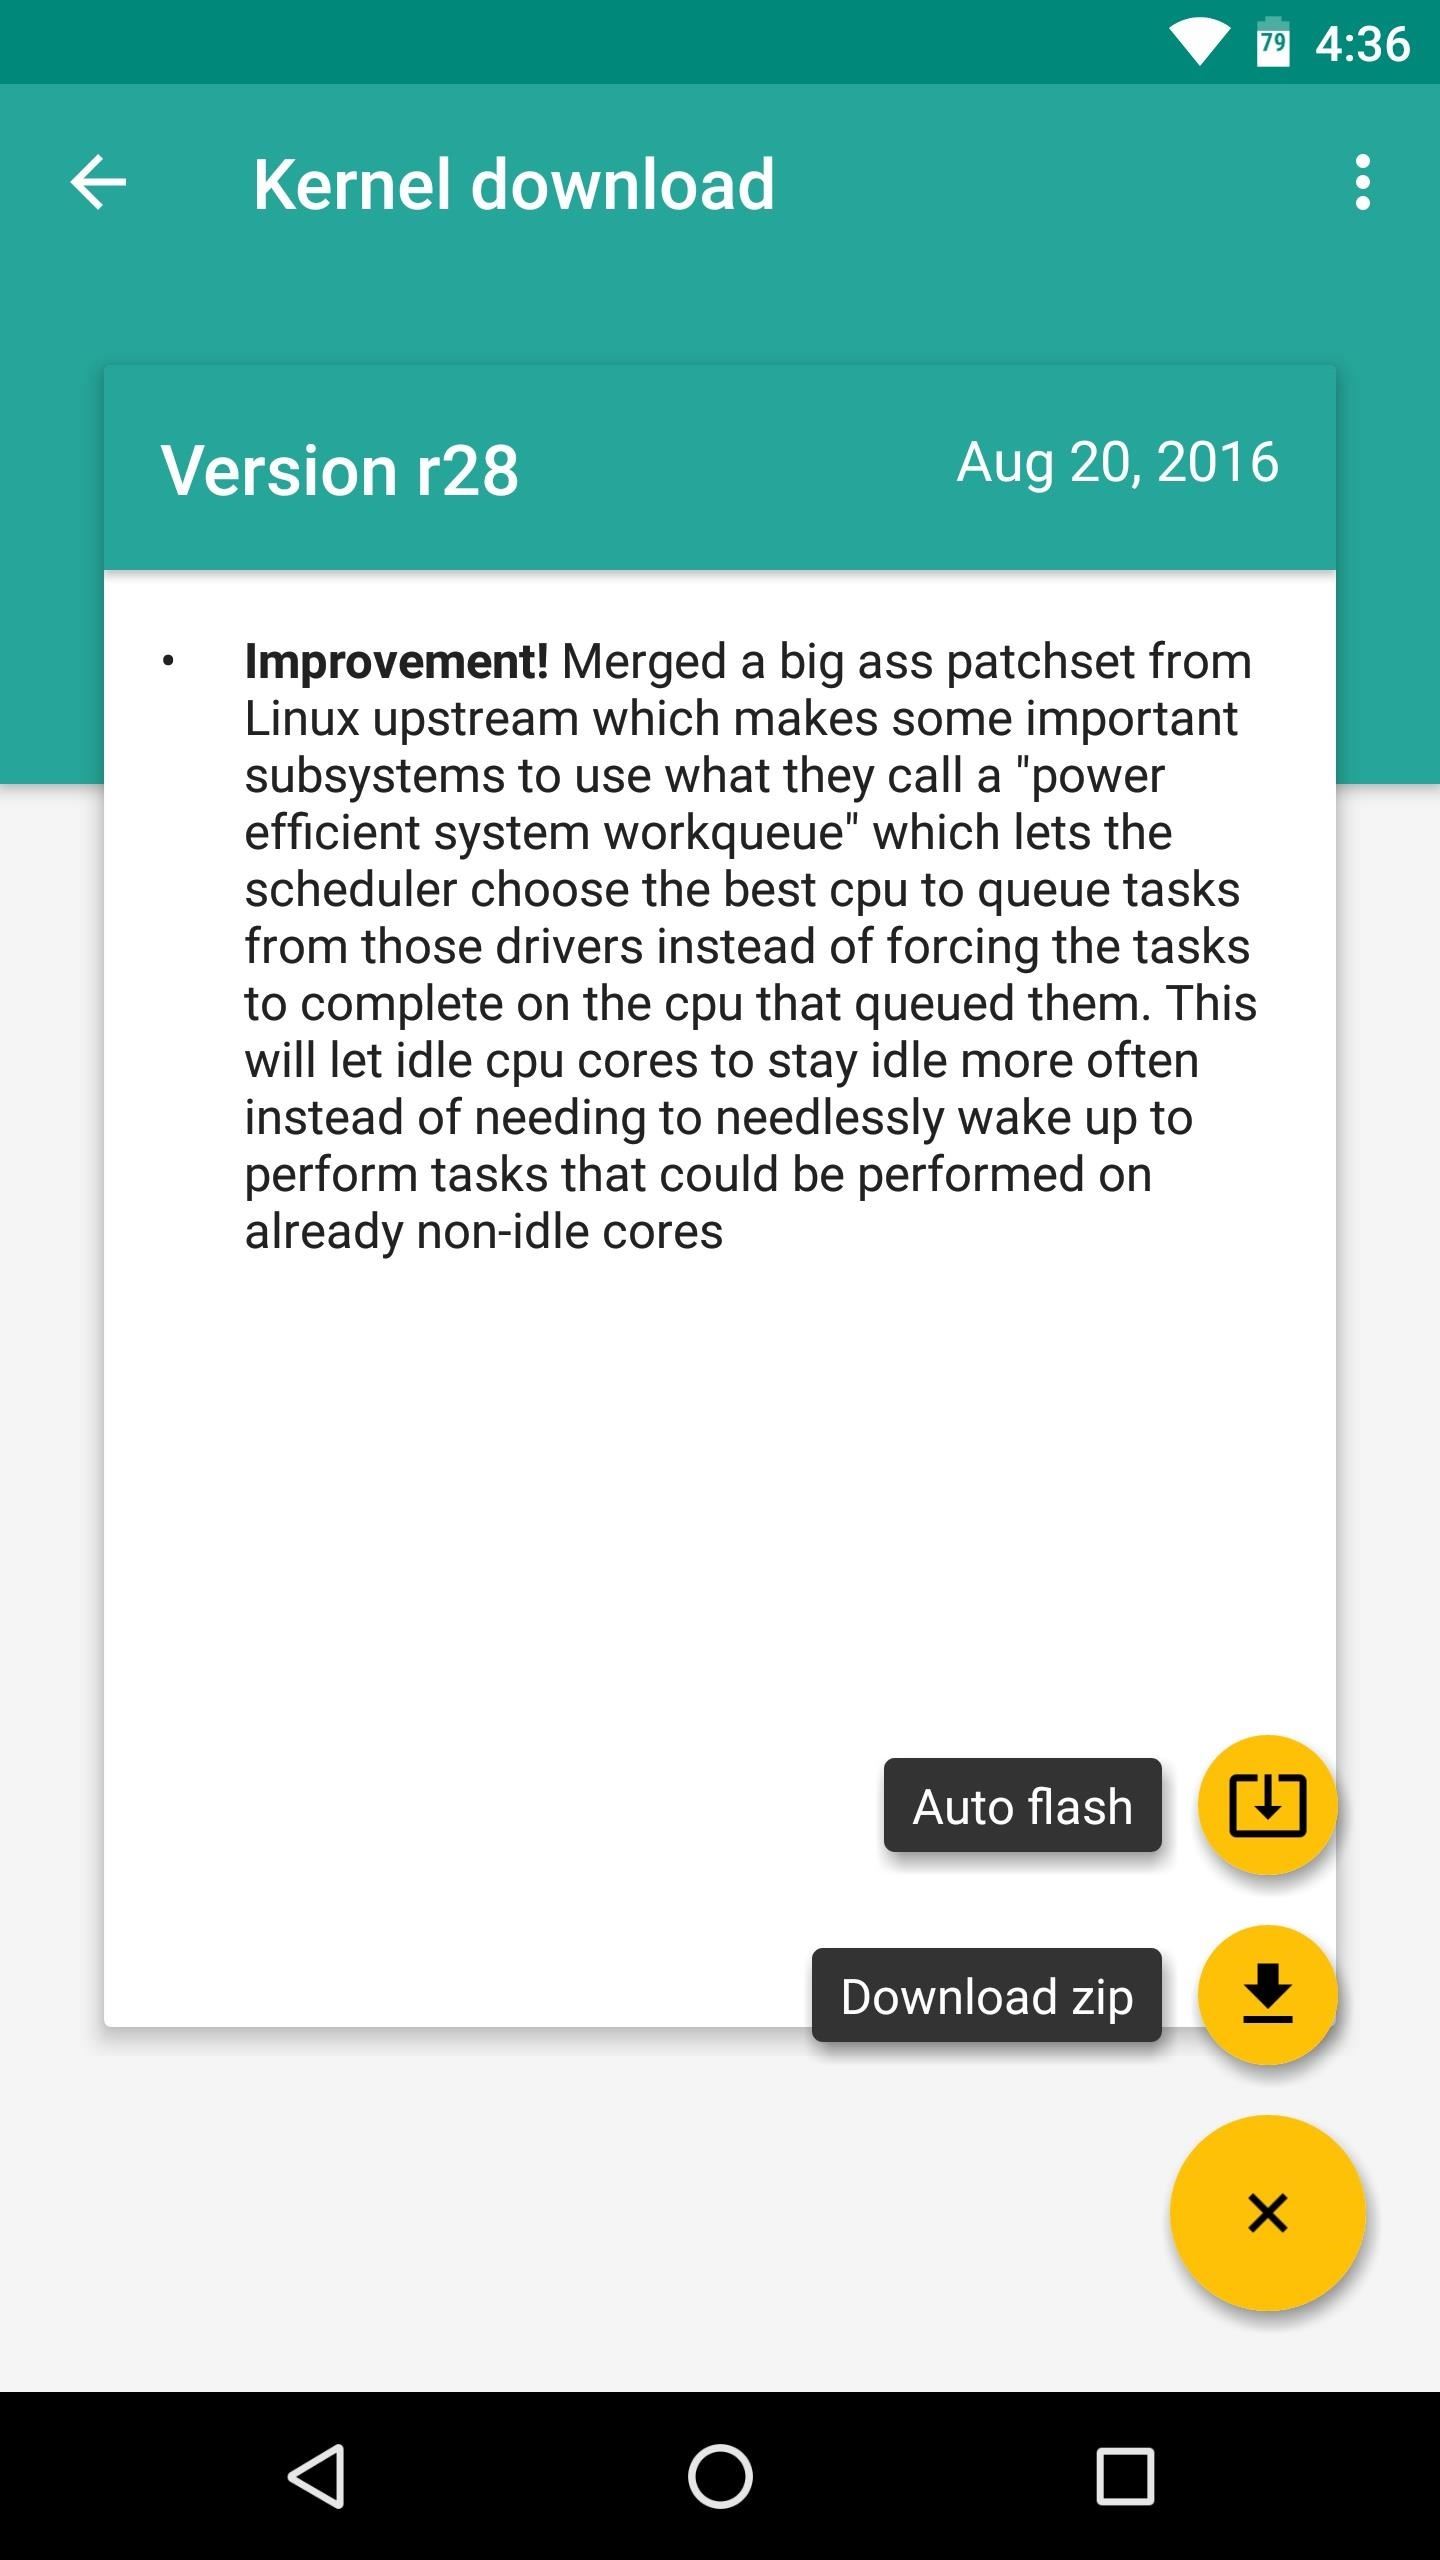
For some custom ROMs (particularly Lineage OS), this option may not fully solve the problem. However, many apps that use SafetyNet only check one CTS-related aspect called “Basic Integrity,” and flashing Franco kernel will usually fix that aspect. So while Magisk Manager may still report a CTS mismatch, you may very well be able to use all of your apps now.
Finally, for Xiaomi users that are running a custom ROM, there’s another option. This Magisk module by developer Deic will reportedly make your phone pass the CTS test, so try installing it, then rebooting.
Step 6: Address Other Potential Problems
Before you take the nuclear approach outlined in Step 8 below, there are a few less-common issues that might cause SafetyNet to fail based on a CTS profile mismatch, so they’re worth a shot.
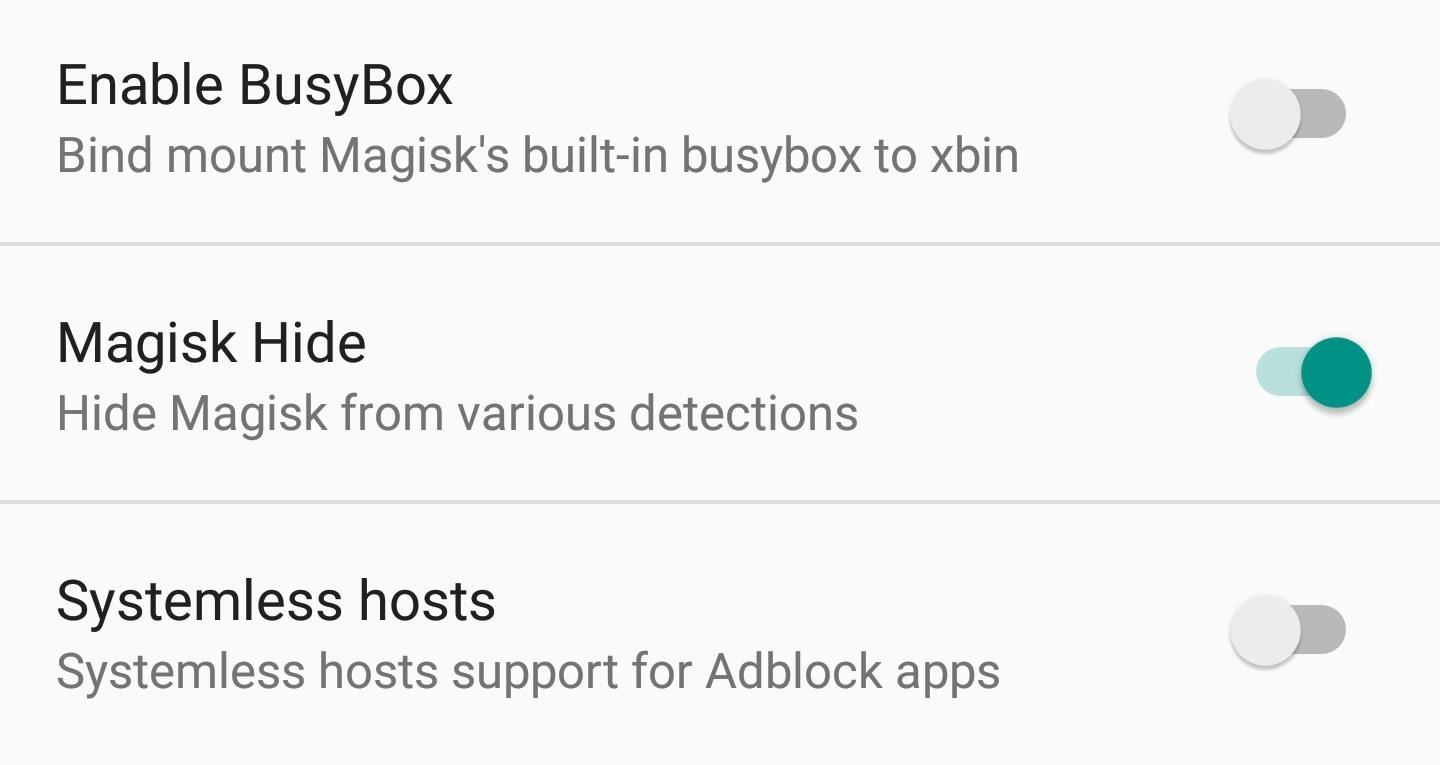
First, it’s possible that the Magisk Hide daemon isn’t starting properly on your phone. To fix that, try heading to the settings menu in your Magisk Manager app, then toggling the “Magisk Hide” option off and back on. Failing that, disable Magisk Hide, reboot, then re-enable the option.
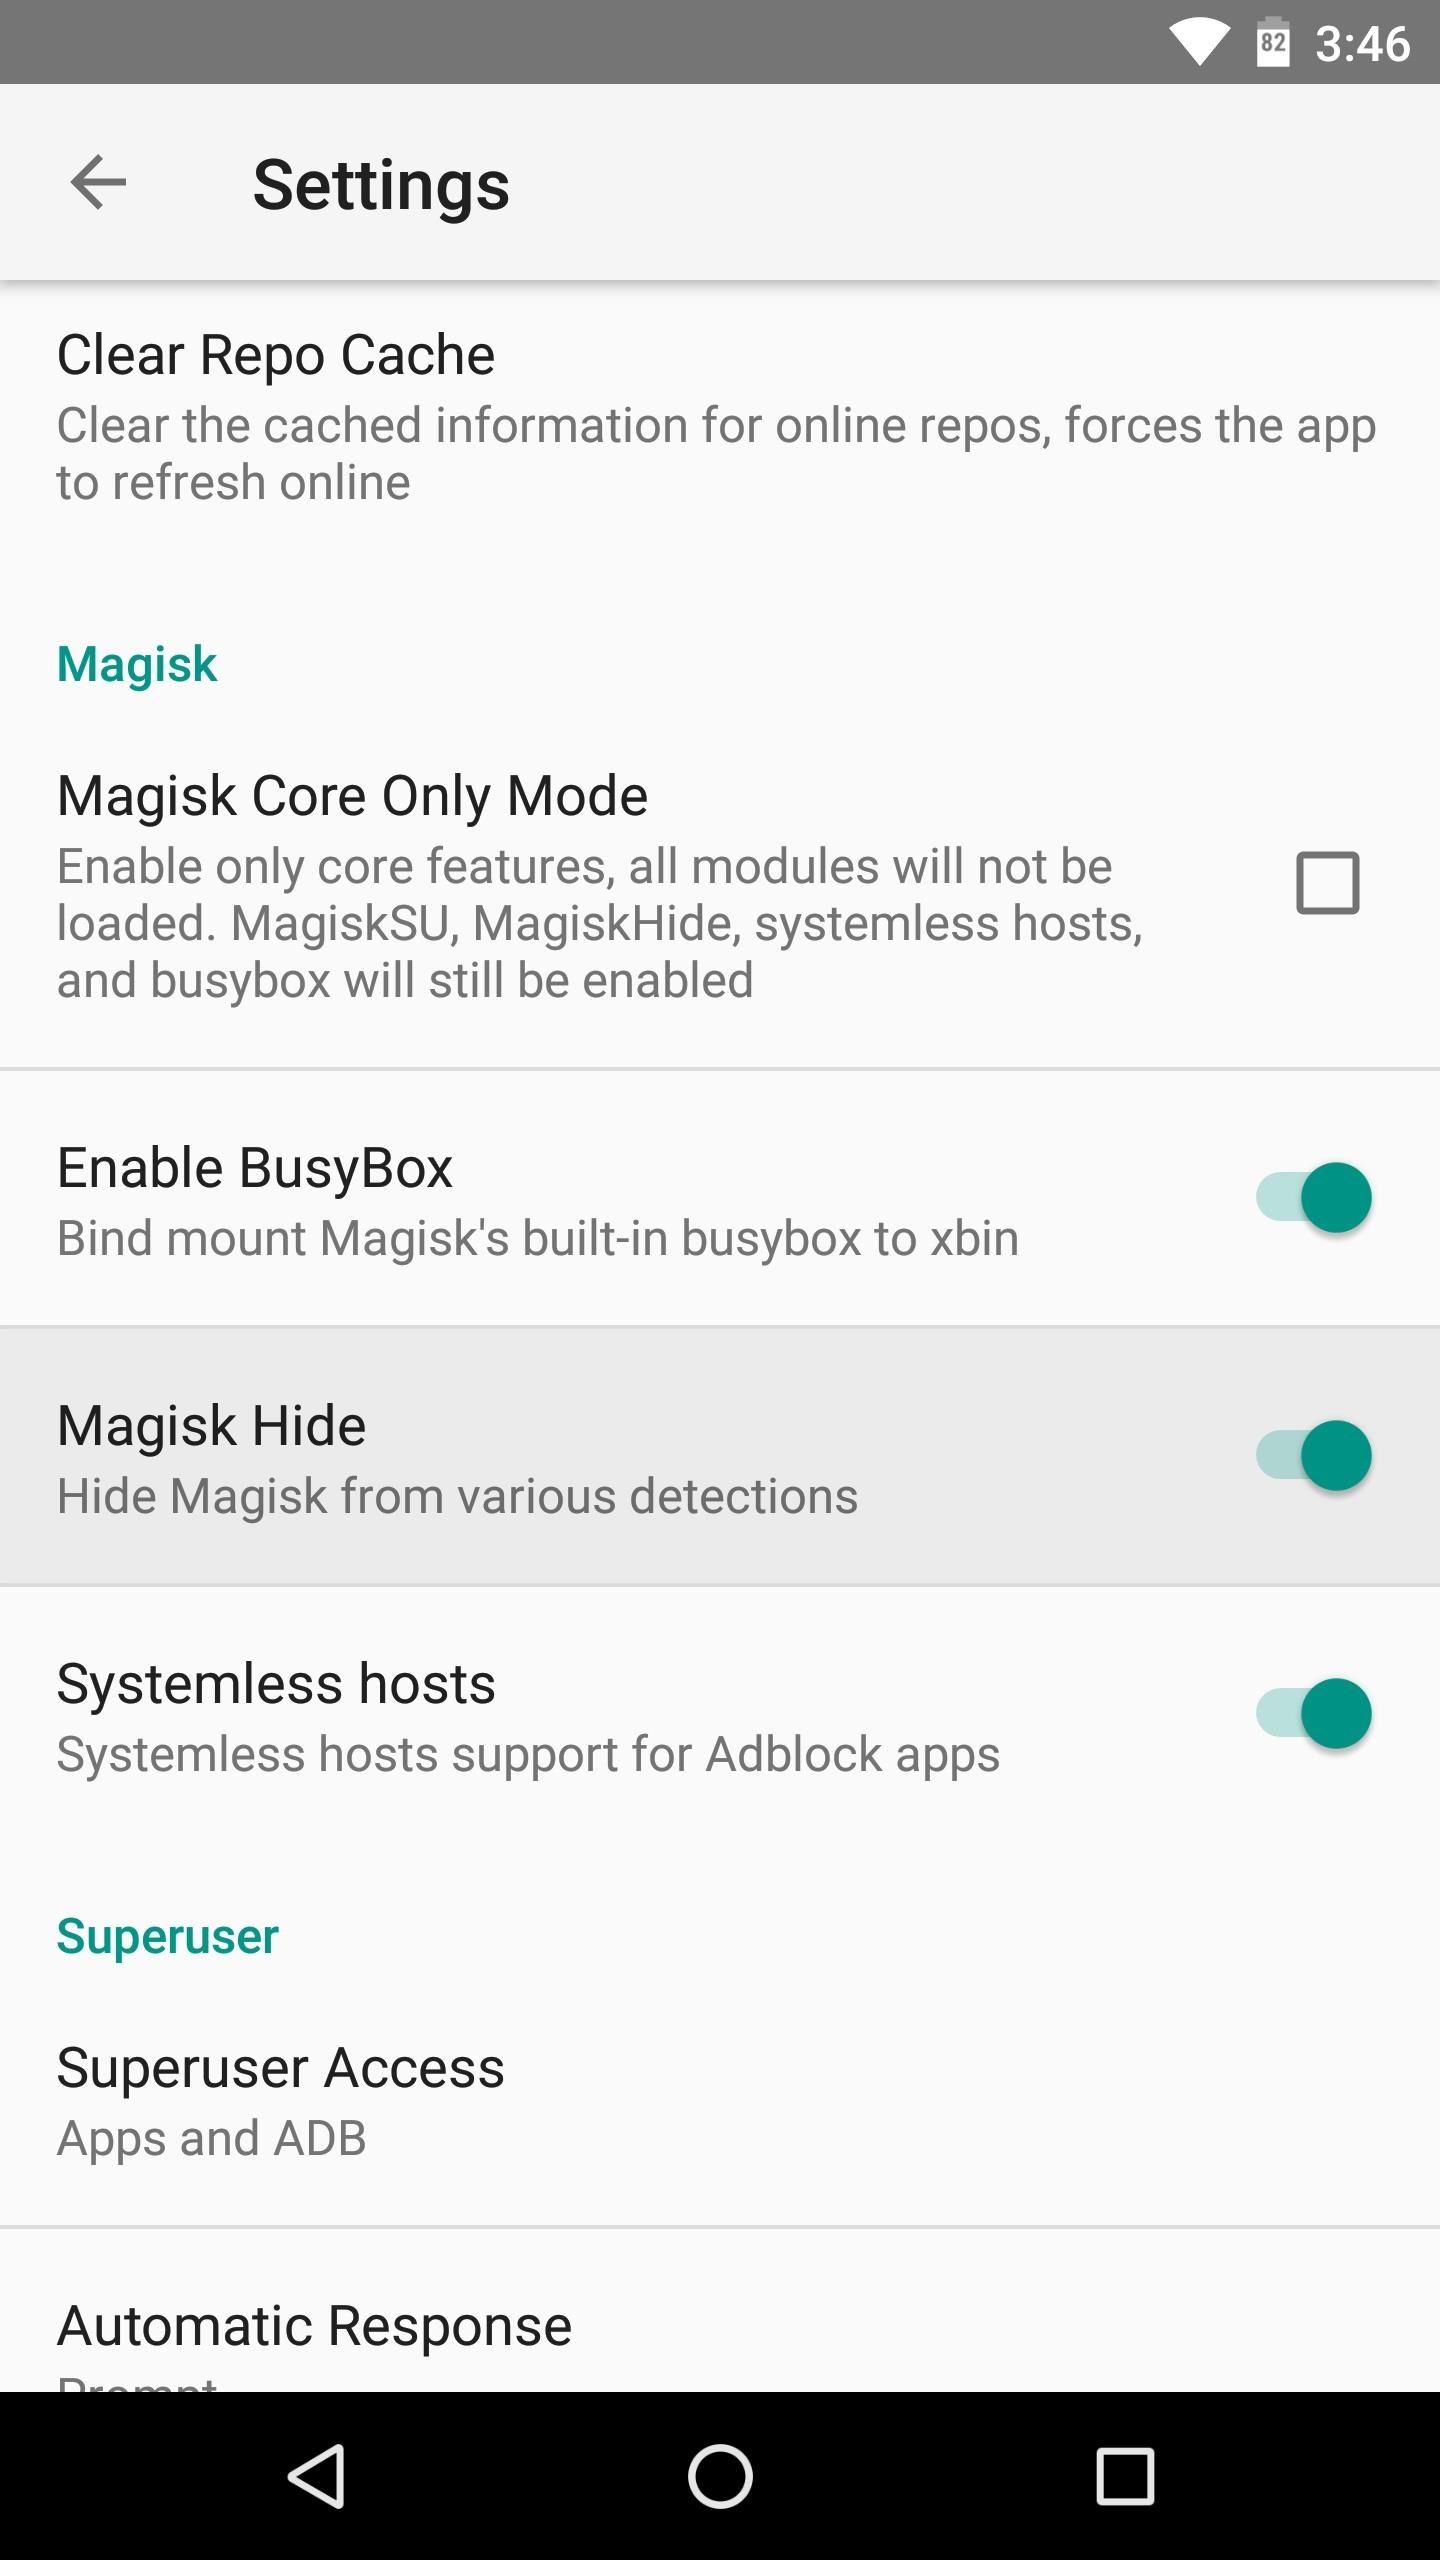
Some users have also reported that Magisk’s “Systemless hosts” and “BusyBox” options caused them to experience issues with SafetyNet. As such, you may want to disable these two options in the Magisk Manager app’s settings menu, though note that disabling systemless hosts may cause issues with ad blockers like AdAway.
Step 7: Enable Core Only Mode
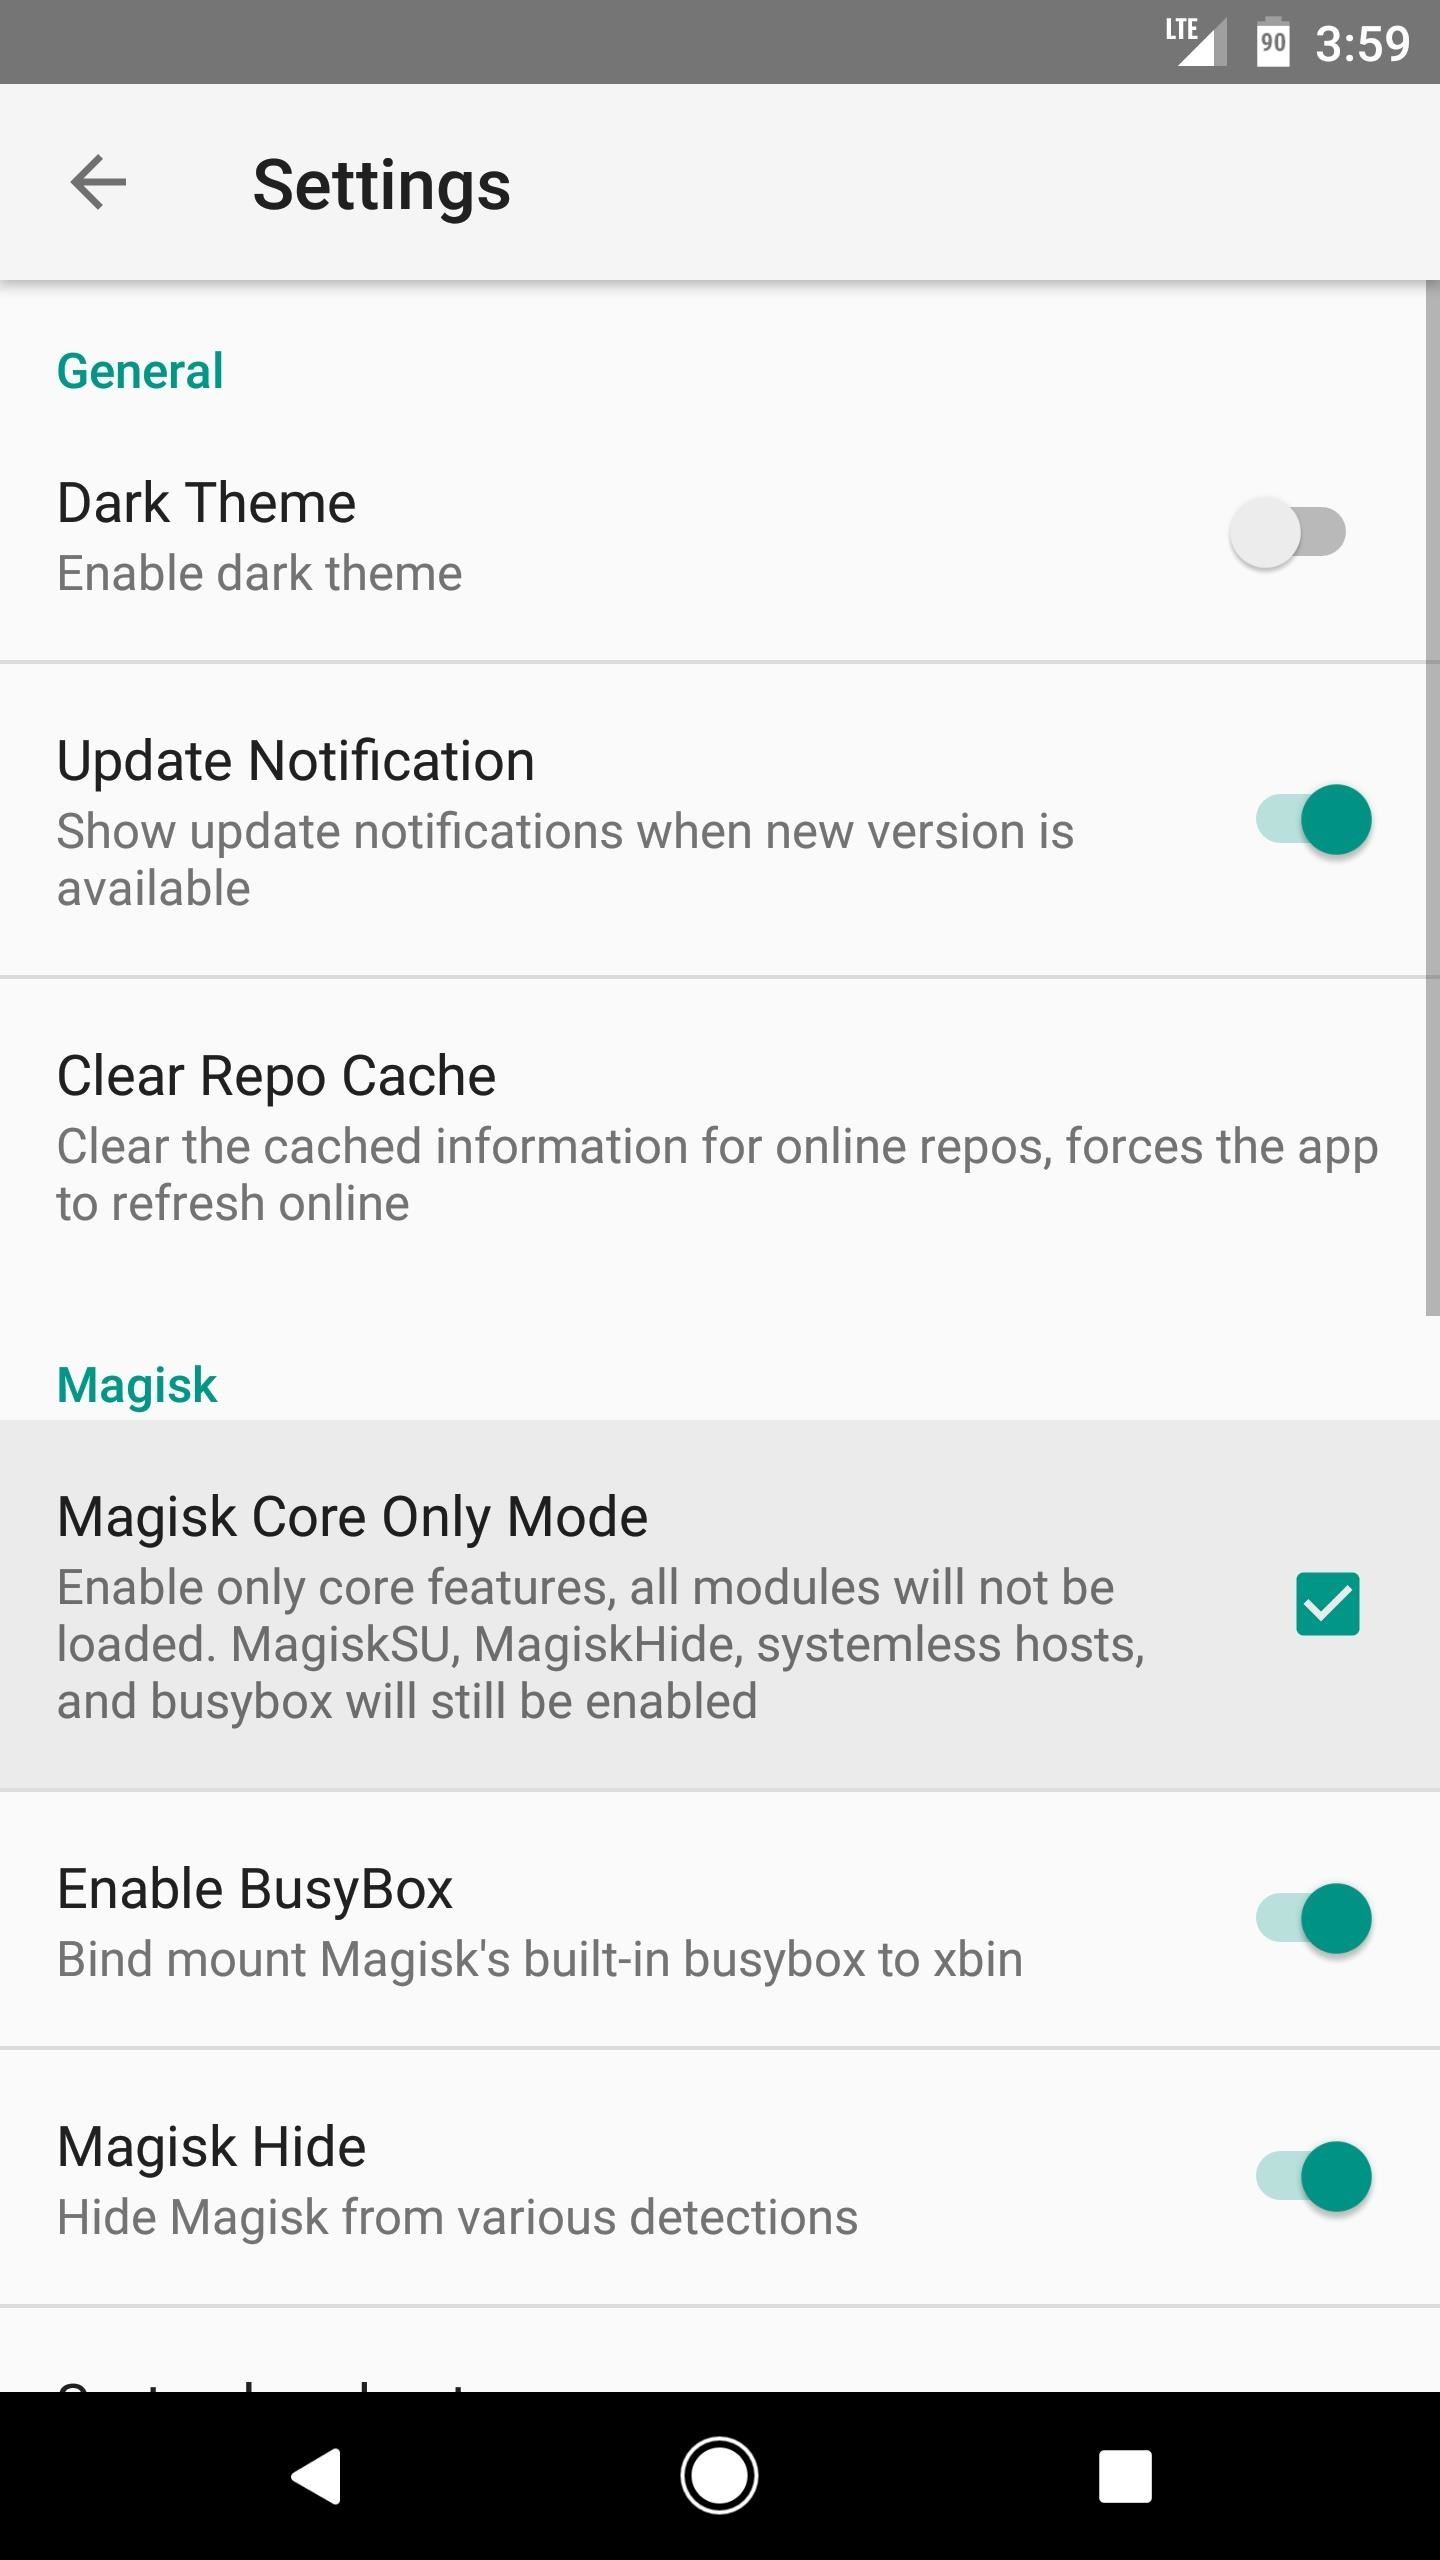
As a last-ditch effort, you can try enabling the “Core only mode” option in Magisk Manager’s settings. This will disable any Magisk modules you’ve installed which could be causing conflicts with SafetyNet, leaving you only with Magisk SU and root.
It may not be the ideal solution, but after Google updated SafetyNet to detect Magisk, enabling “Core only mode” seems to be the only fix that helps most users pass the CTS test. To try it out, head to the settings menu in Magisk Manager and tick the box next to “Core only mode,” then reboot and run the SafetyNet check again.

Step 8: If All Else Fails, Start from Scratch
We’ve saved this step for last because it’s a catchall solution, but it’s a painful pill to swallow. If all else fails, simply restore your device’s stock firmware, reinstall custom recovery, then flash the Magisk ZIP that you can download in the Magisk Manager app. This will work in almost all cases.
The process of restoring your stock firmware will vary depending on the device, but if your phone has a bootloader menu that supports Fastboot commands, we’ve covered the process at this guide. Failing that, your best bet would be to do a Google search for “restore stock firmware <phone name>.” When you’re done there, you can reference this guide for re-installing TWRP.
So have you finally solved your CTS profile mismatch issues? Do you have any other tips that will help get people past that dreaded SafetyNet check? If so, drop us a line in the comment section below.
Hot Deal: Set up a secure second phone number and keep your real contact details hidden with a yearly subscription to Hushed Private Phone Line for Android/iOS, 83%–91% off. It’s a perfect second-line solution for making calls and sending texts related to work, dating, Craigslist sales, and other scenarios where you wouldn’t want to give out your primary phone number.
“Hey there, just a heads-up: We’re part of the Amazon affiliate program, so when you buy through links on our site, we may earn a small commission. But don’t worry, it doesn’t cost you anything extra and helps us keep the lights on. Thanks for your support!”


