With Safestrap bringing custom recovery functionality to the AT&T and Verizon Wireless variants of the Samsung Galaxy S5, it’s high time we covered this process for all other versions of the GS5.
If you’re not familiar with the term “custom recovery”, it’s a piece of software that serves as a replacement to the stock recovery on your device. While the stock recovery lets you do things like factory reset your phone, a custom recovery allows users to do much more. From backing up your device to installing custom firmware like CyanogenMod, a custom recovery is the single most powerful tool available to Android users.
The process outlined below requires a Windows PC and a USB Cable, but it’s the safest method of installing a custom recovery on your Galaxy S5.
Supported Devices
This tutorial only applies to the following variants of the Galaxy S5:
- G900F
- G900T
- G900W8
- G900I
- G900P
- G900M
Do not proceed unless your device’s model number is listed above. If you’re unsure of your Galaxy S5’s model number, you can find that information in Settings under About Device.
As with any device, installing a custom recovery on your GS5 will void your warranty, so consider that fact before proceeding.
Step 1: Download Necessary Files
Before you begin, you’ll need to be sure that you have the Samsung USB drivers installed on your Windows PC. You can find the installer file for these drivers at this link. Once downloaded, just open the file and follow the prompts to install the drivers.
Next, there are two pieces of software that you’ll need to download—Odin & Philz Touch Recovery. Odin is a software suite for installing files on Samsung devices by way of a Windows PC. Philz Touch is the recovery we’ll be installing today, as it is the most feature-rich custom recovery that functions on all of the above-listed devices.
To begin, you’ll need to download these files to your Windows PC. First up is Odin, which you can download here. Once downloaded, extract the two ODIN files to your desktop.
Next is the Philz Touch Recovery file. To download that, head to this link. From that page, find the most recent entry with a filename that ends in tar.md5 and download the file.

To make it easier to keep track of everything, move the philz_touch_6.x.x-klte.tar.md5 file to your desktop as well.
Step 2: Put Your Phone into Download Mode
Odin operates by sending files and commands to your Galaxy device while it’s in Download Mode. To enter Download Mode, power your Galaxy S5 completely off. When the screen goes black, press and hold the Home Button, Volume Down, and Power buttons simultaneously.
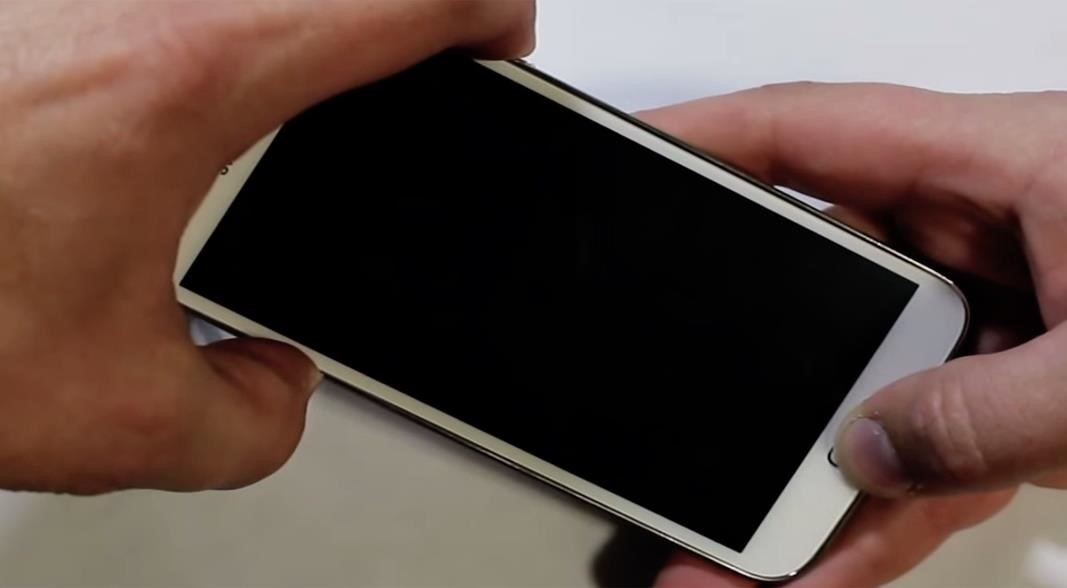
After a few seconds, you will see a warning message. Press the Volume Up key to continue into Download Mode.
Step 3: Install Philz Touch Recovery on Your S5
From your Windows PC, right-click the Odin3 v3.09.exe file that is on your desktop and select Run as Administrator. This will take you right into Odin’s main screen.
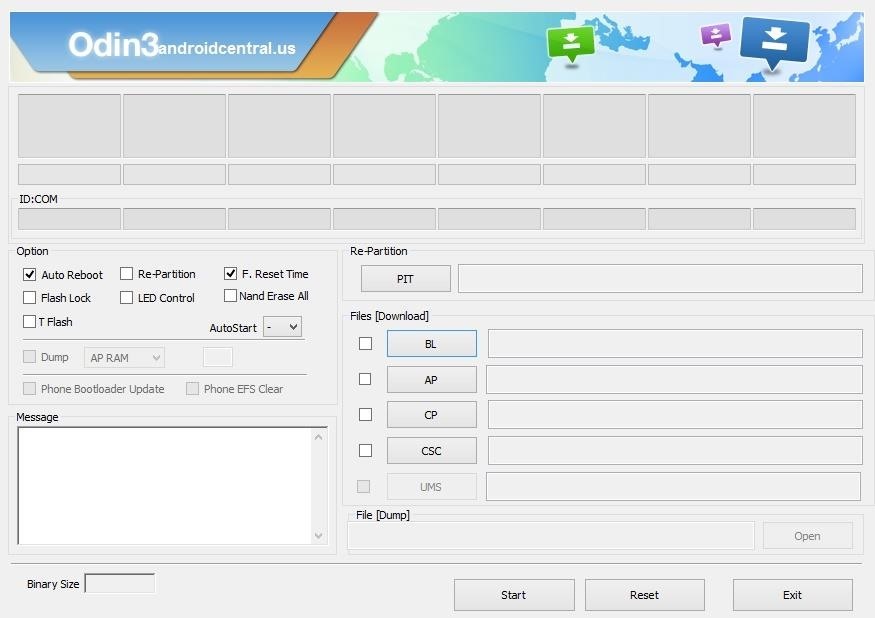
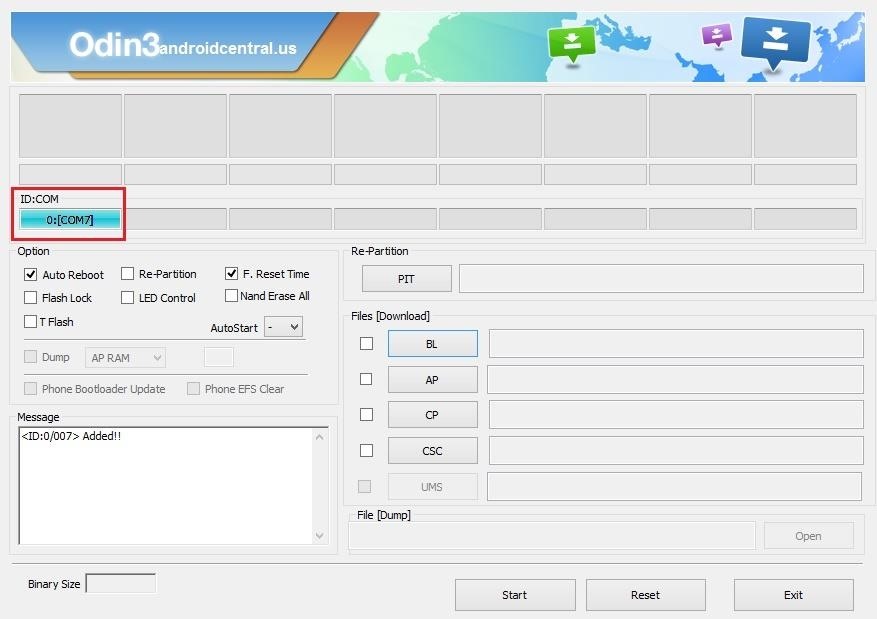
Next, use a USB cable to connect your phone to your PC. After a few seconds, Odin will recognize your phone and a blue box will appear under the ID:COM field.
From here, click the AP button under the Files Download section, then browse and select the philz_touch_6.x.x-klte.tar.md5 file that you saved to your desktop.

After a few seconds, the Message field in the lower-left corner of Odin will display a message stating Checking MD5 finished successfully. At this point, ensure that your USB cable is properly connected and only the Auto Reboot and F. Reset Time options are ticked, then press the Start button at the bottom of the screen to install Philz Touch.
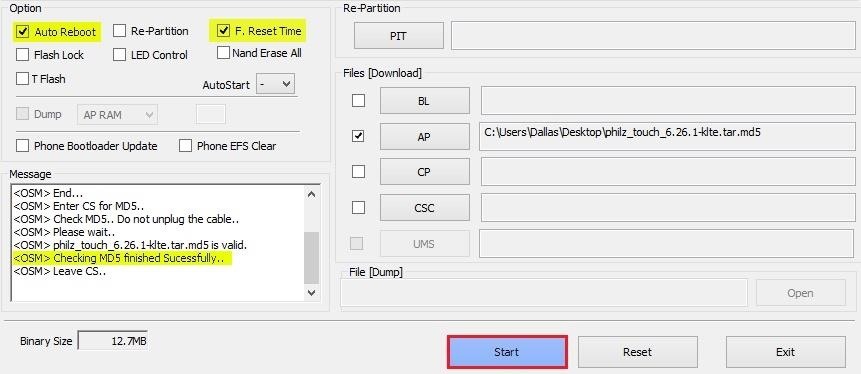
The process may take a few minutes, and when it has completed, a green box with the word Pass will appear at the top-left of the screen.

At this point, Philz Touch will have been installed, and your phone will automatically reboot into Android. When that happens, it is safe to unplug your phone from your PC.
Step 4: Create a Backup
Before you use your new custom recovery to do anything else, make a backup of your existing setup.
To boot into Philz Touch, power your Galaxy S5 completely off. Next, hold the Volume Up, Power, and Home keys simultaneously, and after a few seconds, the recovery interface should appear.
Philz Touch Recovery responds to touches, obviously, but a set of software keys at the bottom of the screen let you navigate the interface as well. From the main screen, select Backup and Restore to begin the backup process. Next, choose Backup to /sdcard, and the backup process will begin immediately.
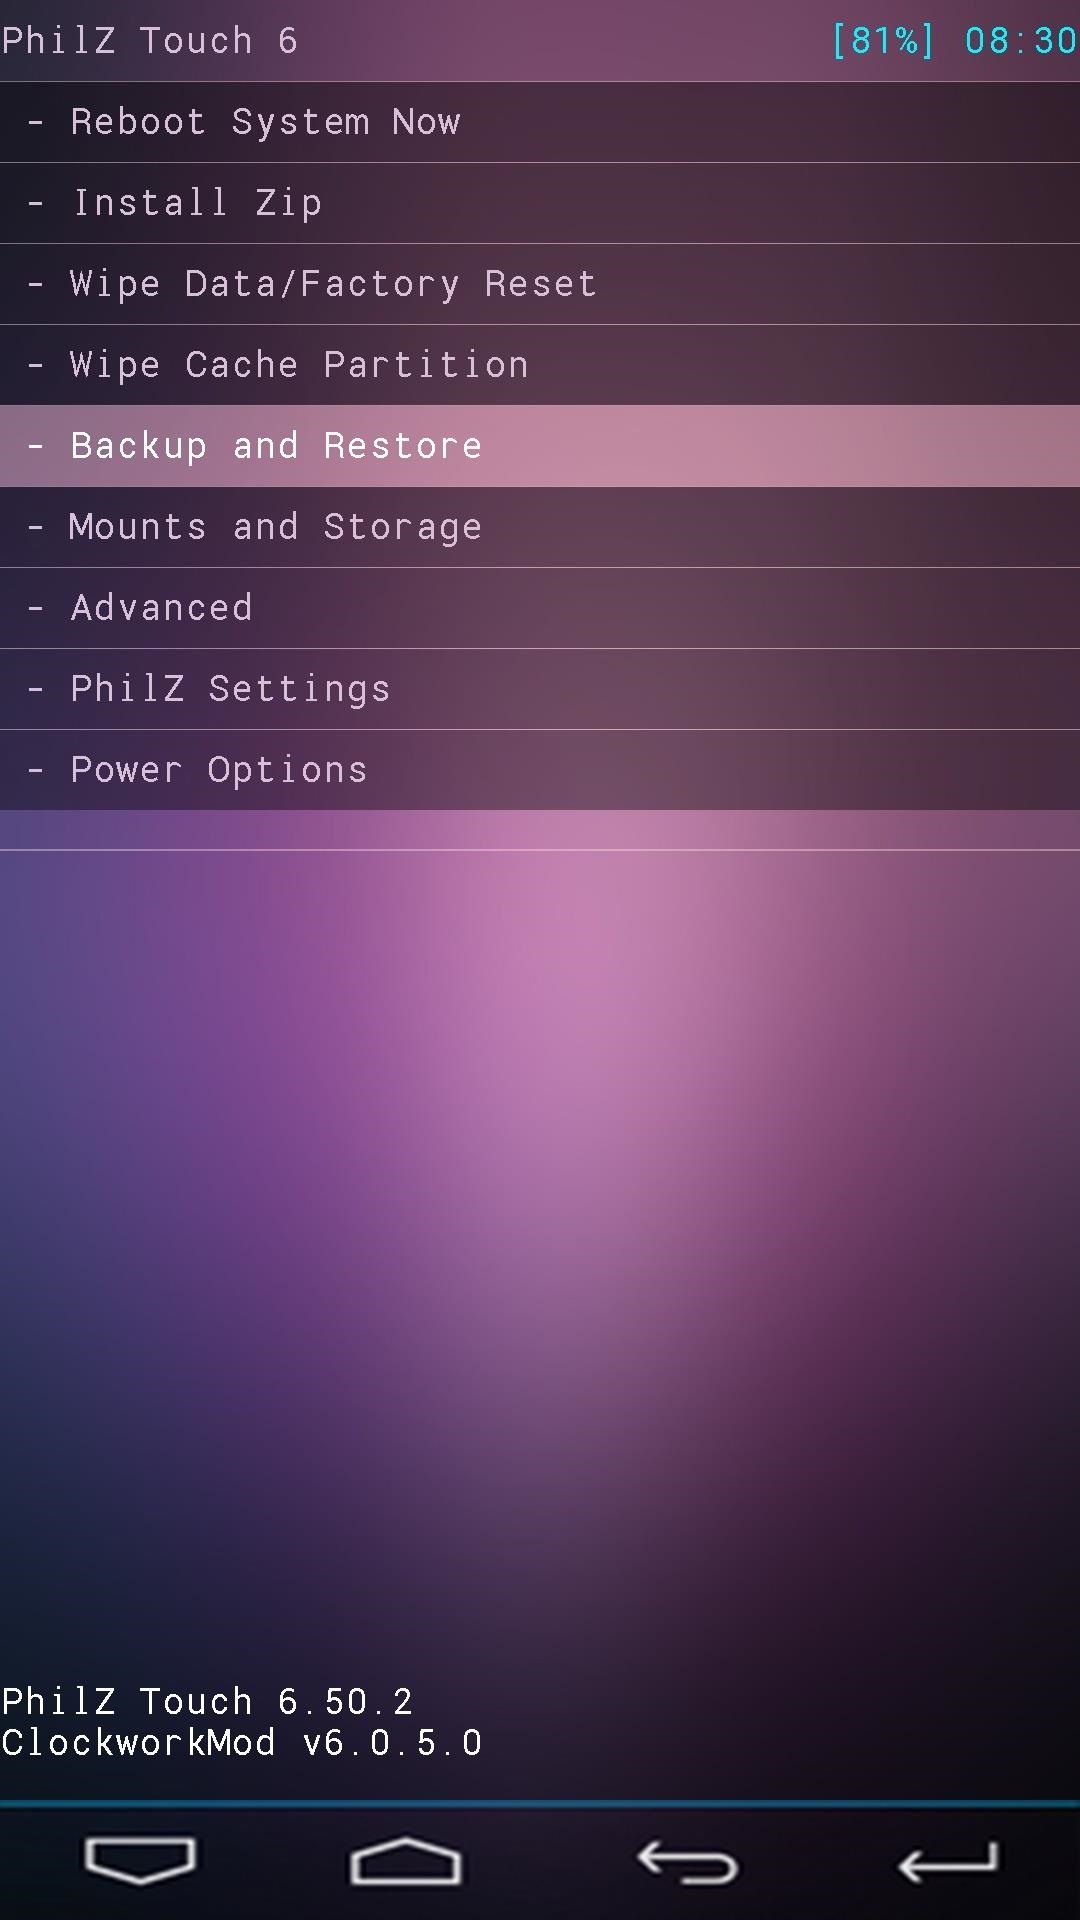
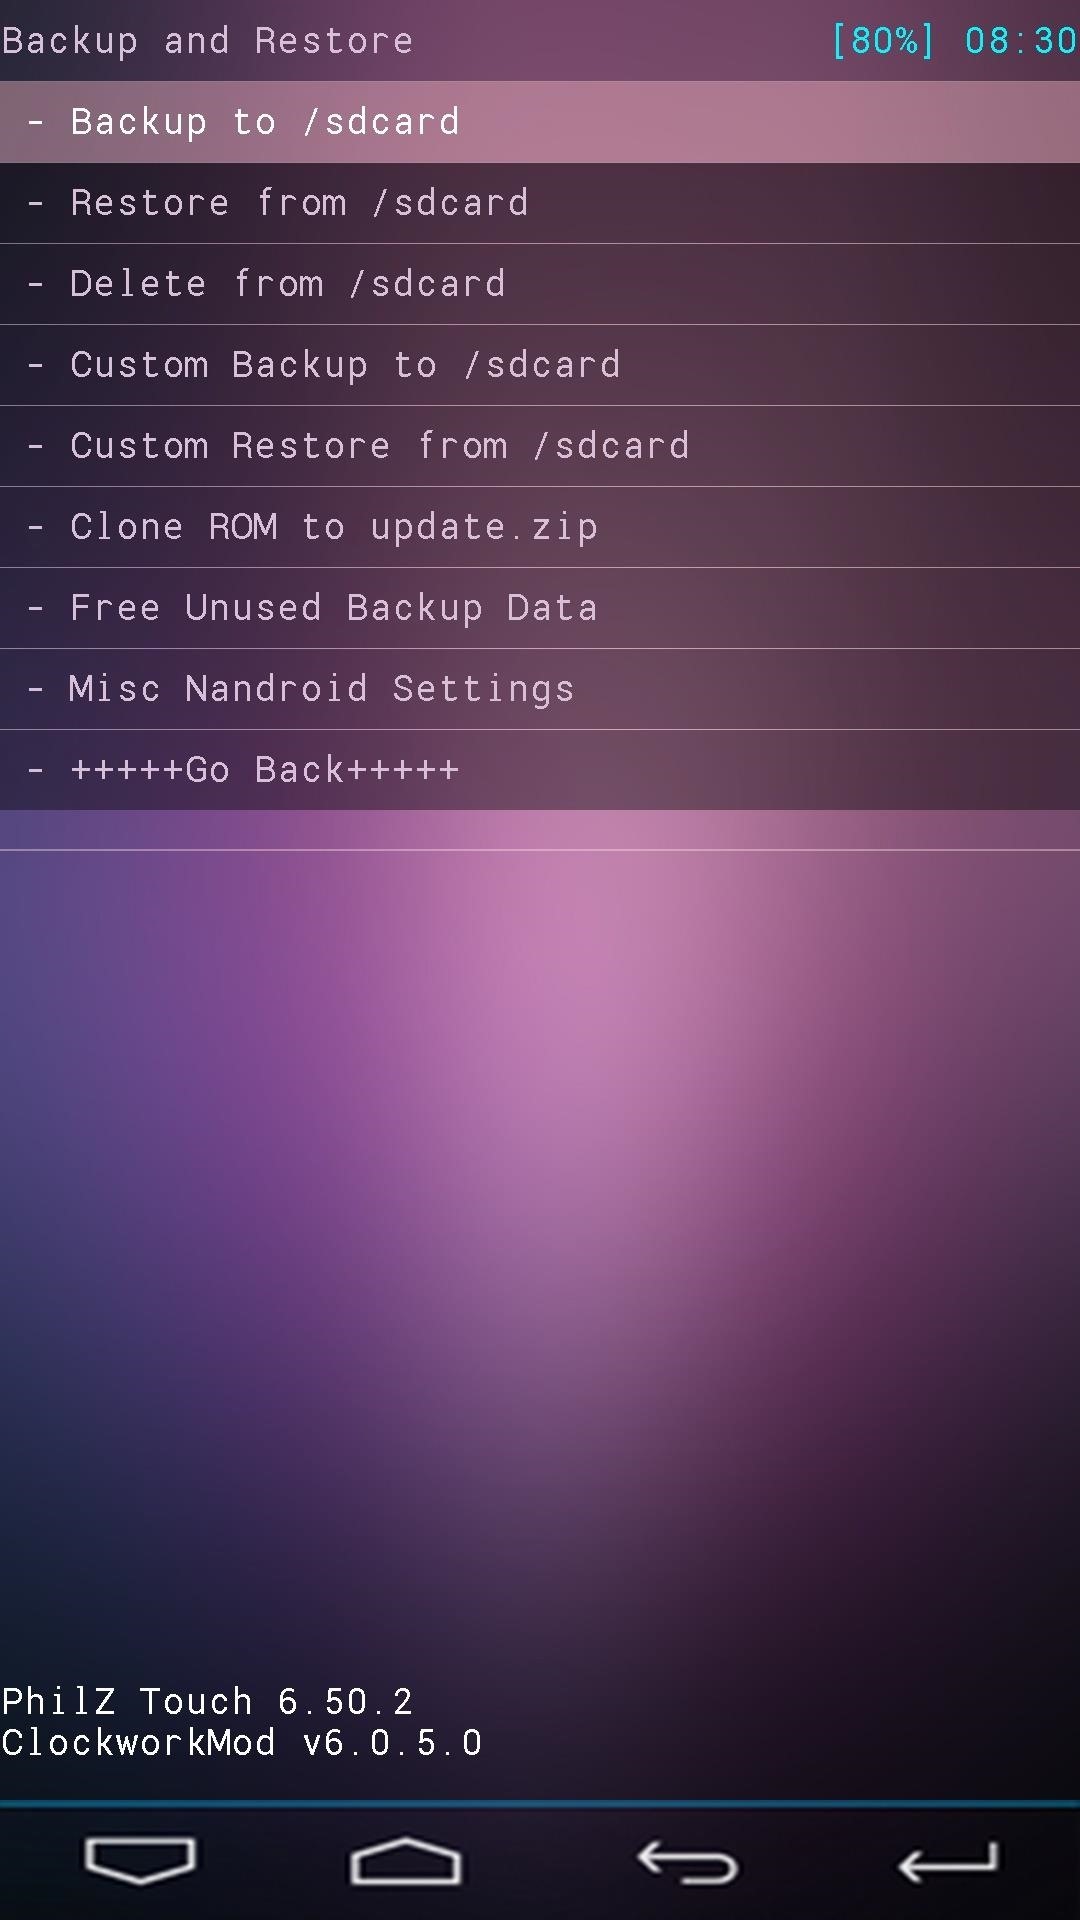
The backup process may take as long as 10 minutes to complete, but when it’s finished, you’ll have an exact snapshot of your system to serve as a restore point in case anything ever goes wrong.
How to Flash ZIP Files
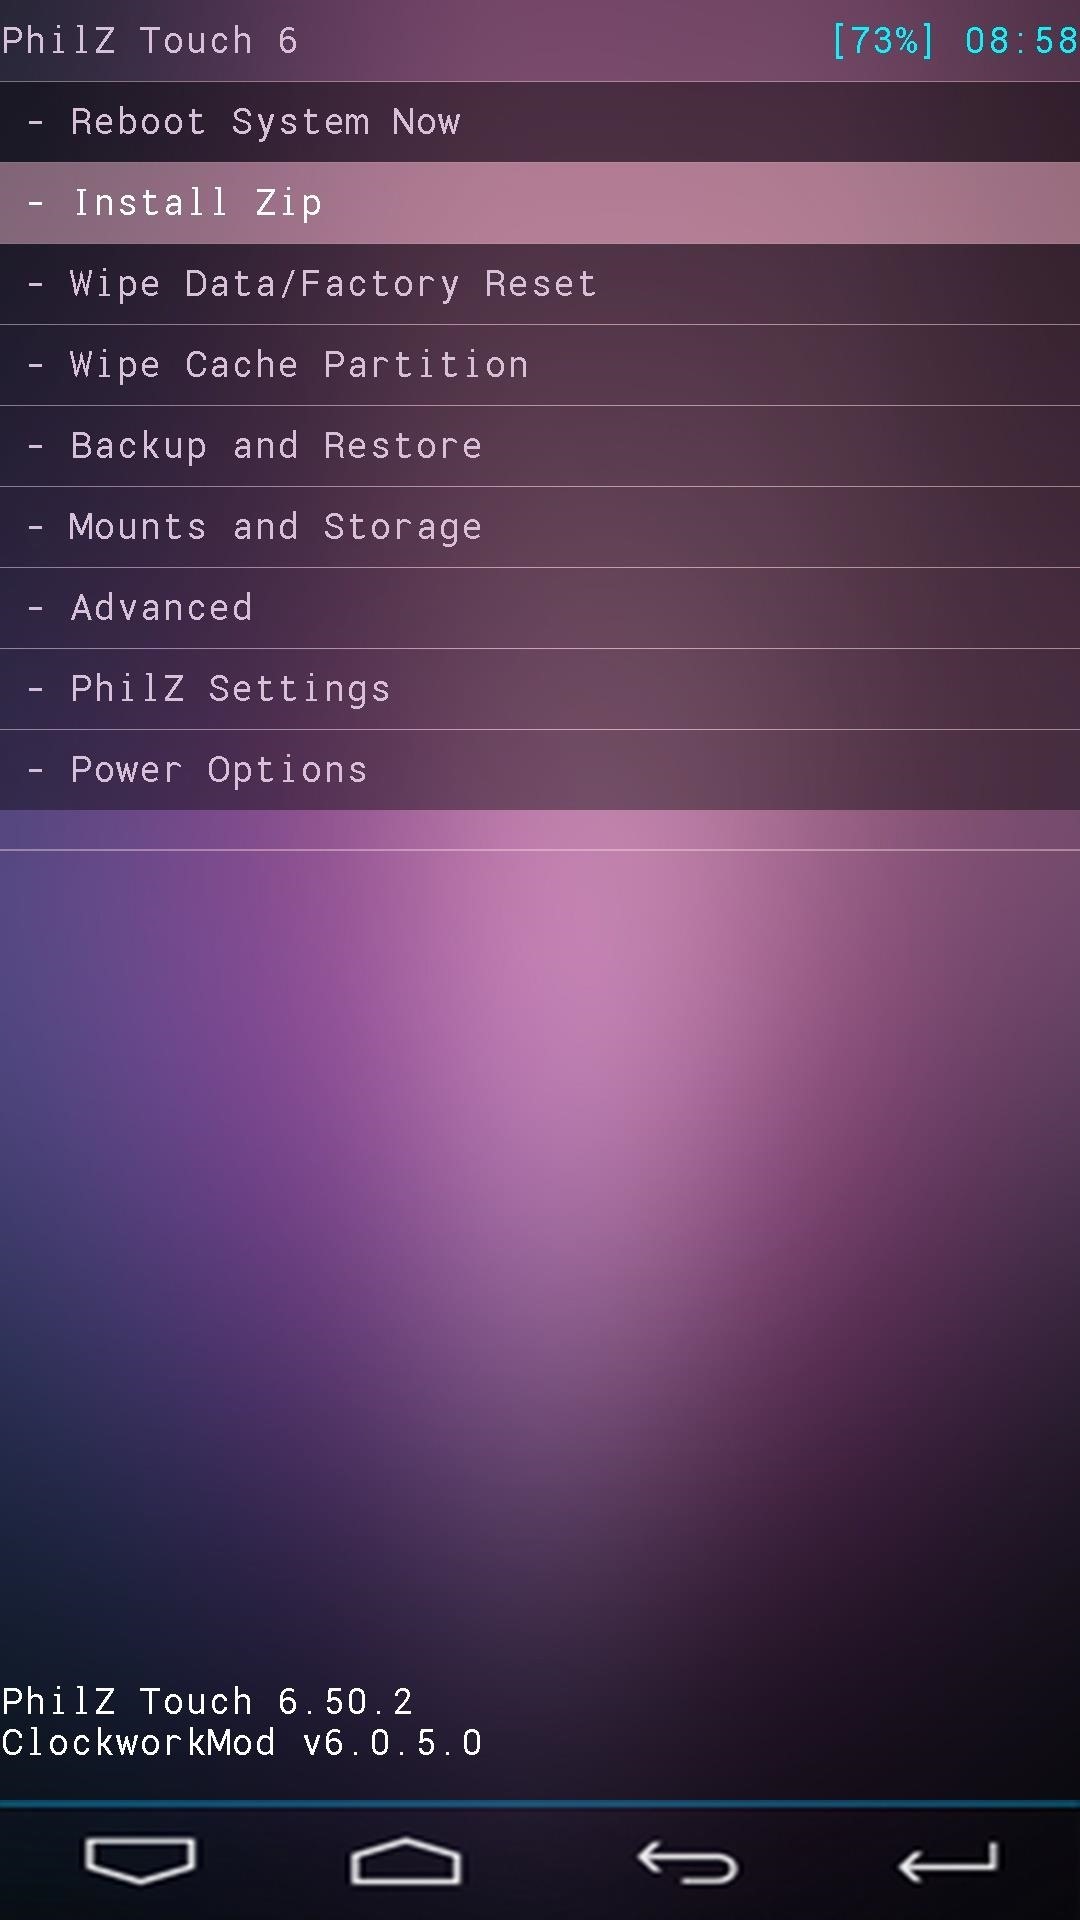
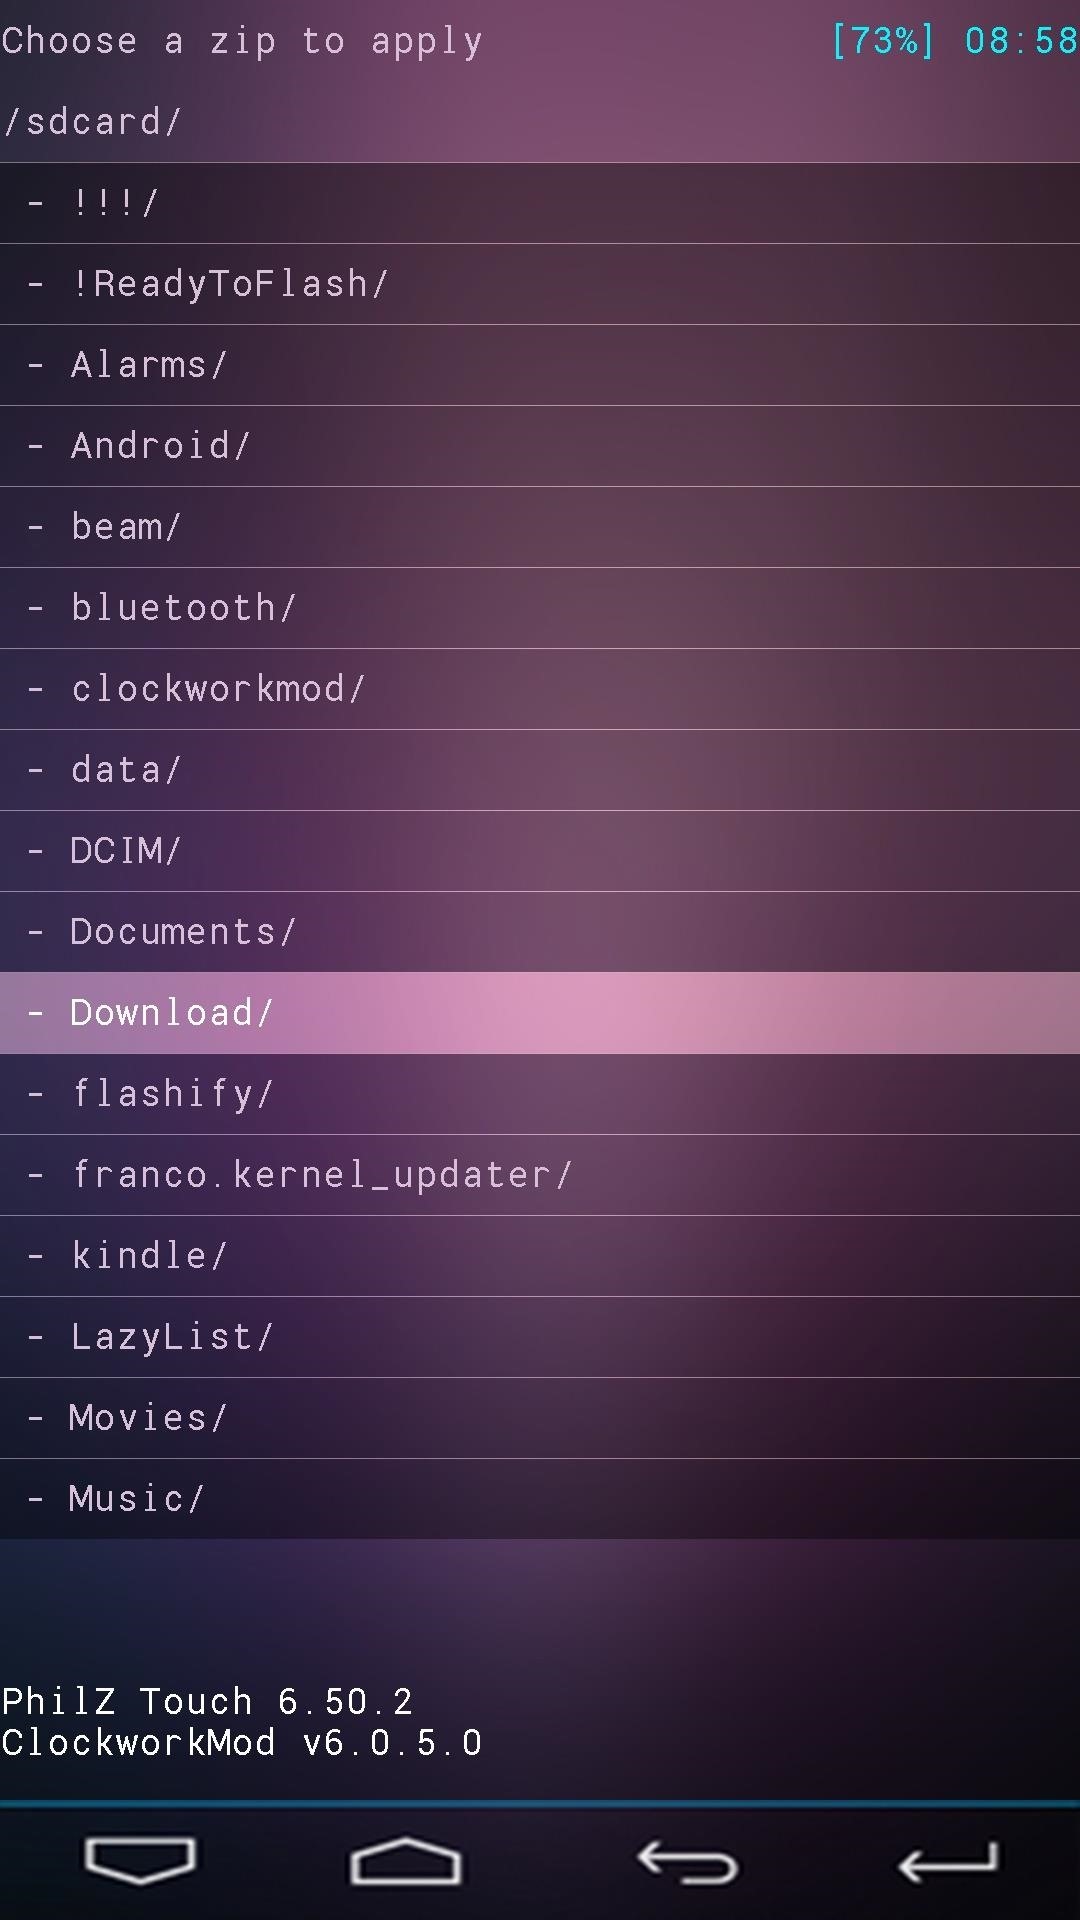
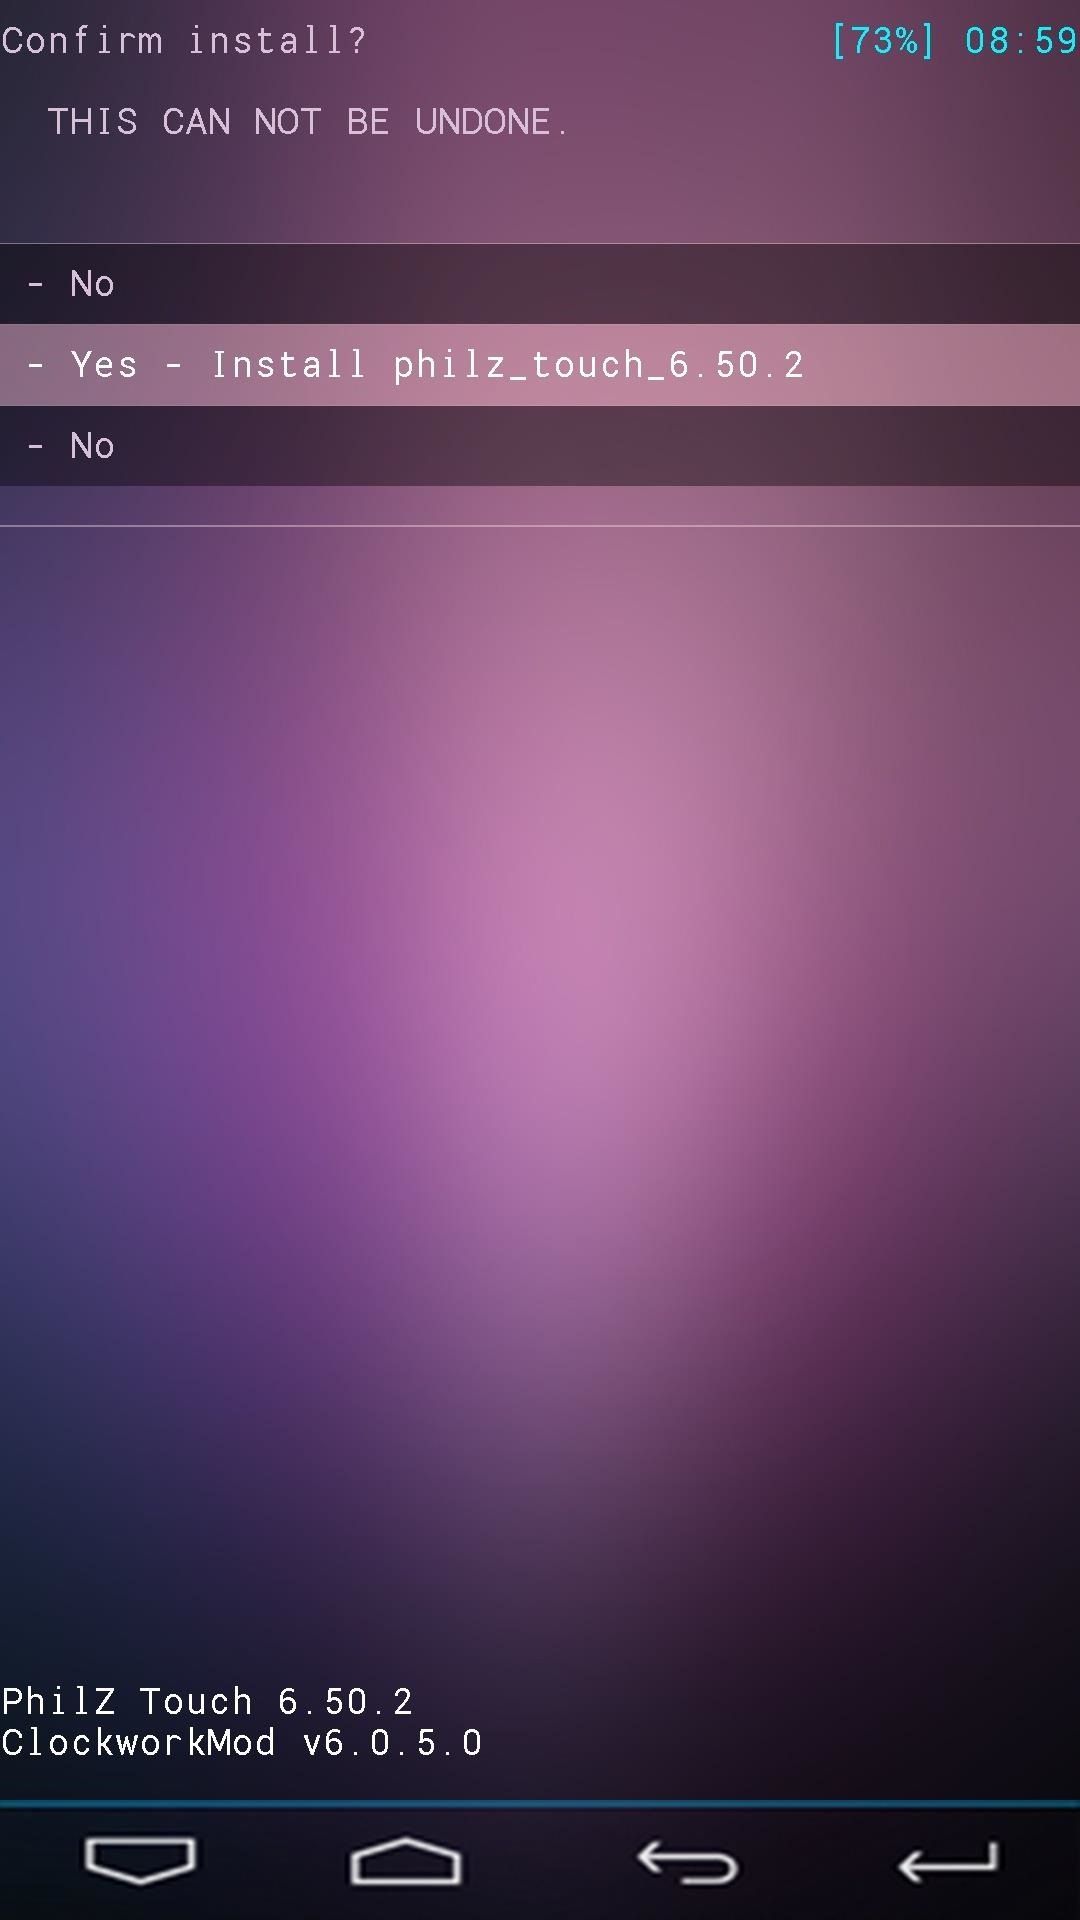
When you’re ready to try out some of the cool hacks that come in the form of a flashable ZIP file, the process is pretty straightforward. Just boot into recovery, then select Install Zip from the main menu, then Choose zip from /sdcard.

Next, browse and select the ZIP file that you’d like to install, then select Yes from the menu to confirm installation.
If this is your first time installing a custom recovery on an Android device, get ready for some fun. You’ve just unlocked an entire world of Gadget Hacks that can now be applied to your Galaxy S5. And the peace of mind that comes with having a backup handy is a great added bonus!
What was the first ZIP you flashed with your new Philz Touch recovery? Let us know in the comments section below.
Just updated your iPhone? You’ll find new emoji, enhanced security, podcast transcripts, Apple Cash virtual numbers, and other useful features. There are even new additions hidden within Safari. Find out what’s new and changed on your iPhone with the iOS 17.4 update.
“Hey there, just a heads-up: We’re part of the Amazon affiliate program, so when you buy through links on our site, we may earn a small commission. But don’t worry, it doesn’t cost you anything extra and helps us keep the lights on. Thanks for your support!”


