Mobile phones are not only essential for work and communication, they’re quickly becoming an integral asset to our health. Your iPhone can store valuable data about fitness, nutrition, heart health, and so much more. And since iOS 11.3, your iPhone can even import a list of allergies, medications, immunizations, hospital visits, and other health information from your doctor or hospital.
If you’re someone who has health records with multiple hospitals and clinics, or someone who needs to have quick access to your important health data, you should definitely give this feature a try. As long as your iPhone is running iOS 11.3 or higher, you can follow the instructions below to import any and all health records you may have, assuming your healthcare provider is one of the participating organizations.
- Don’t Miss: What that High Heart Rate Warning on Your Apple Watch Means
Step 1: Open Up ‘Health Records’ in Health
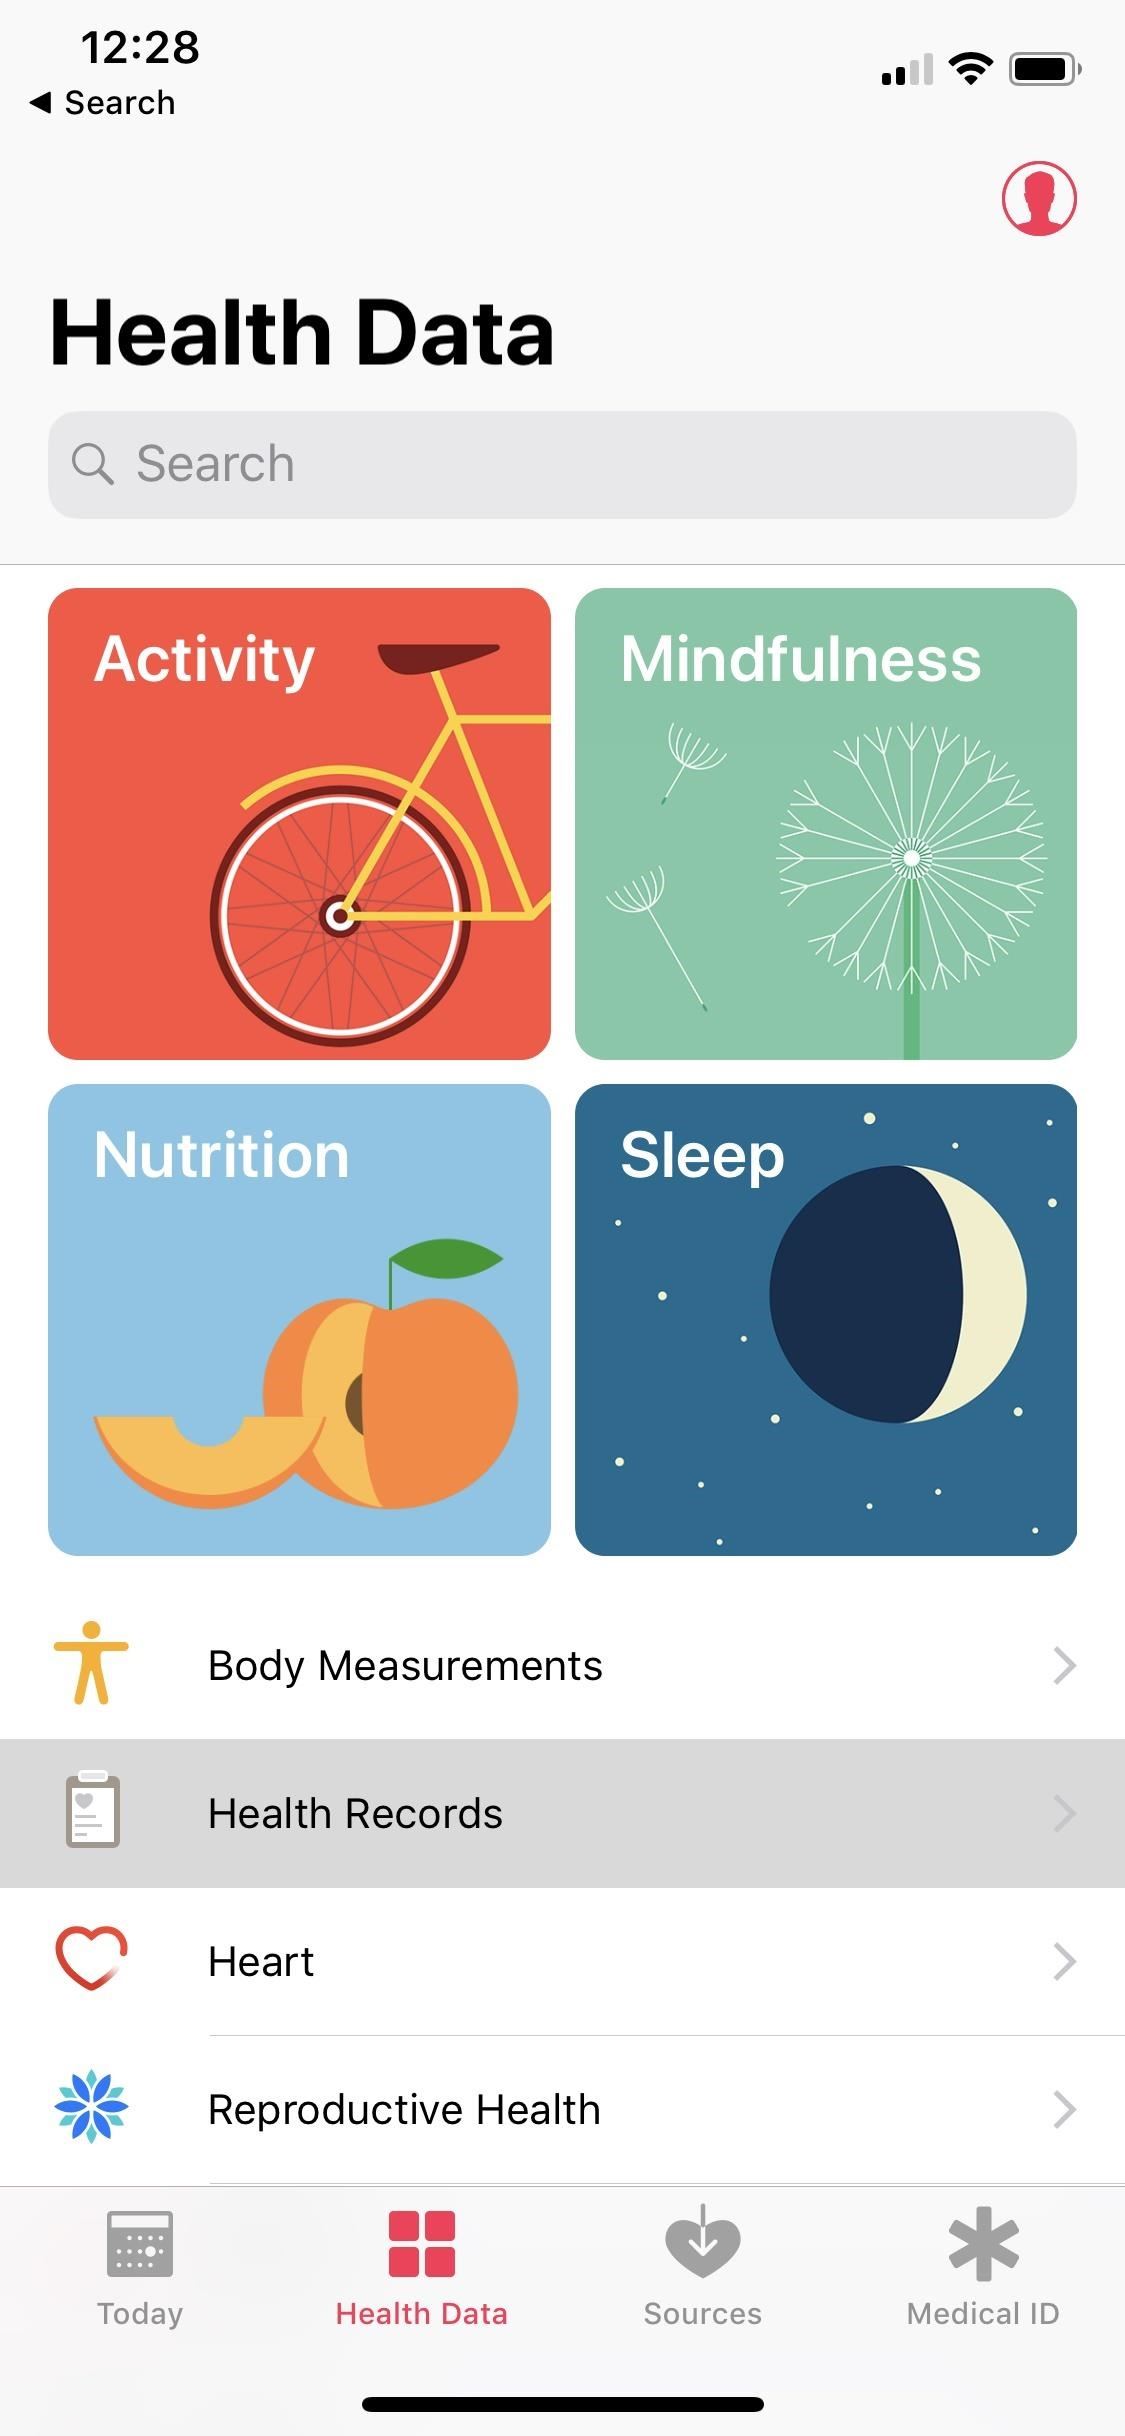
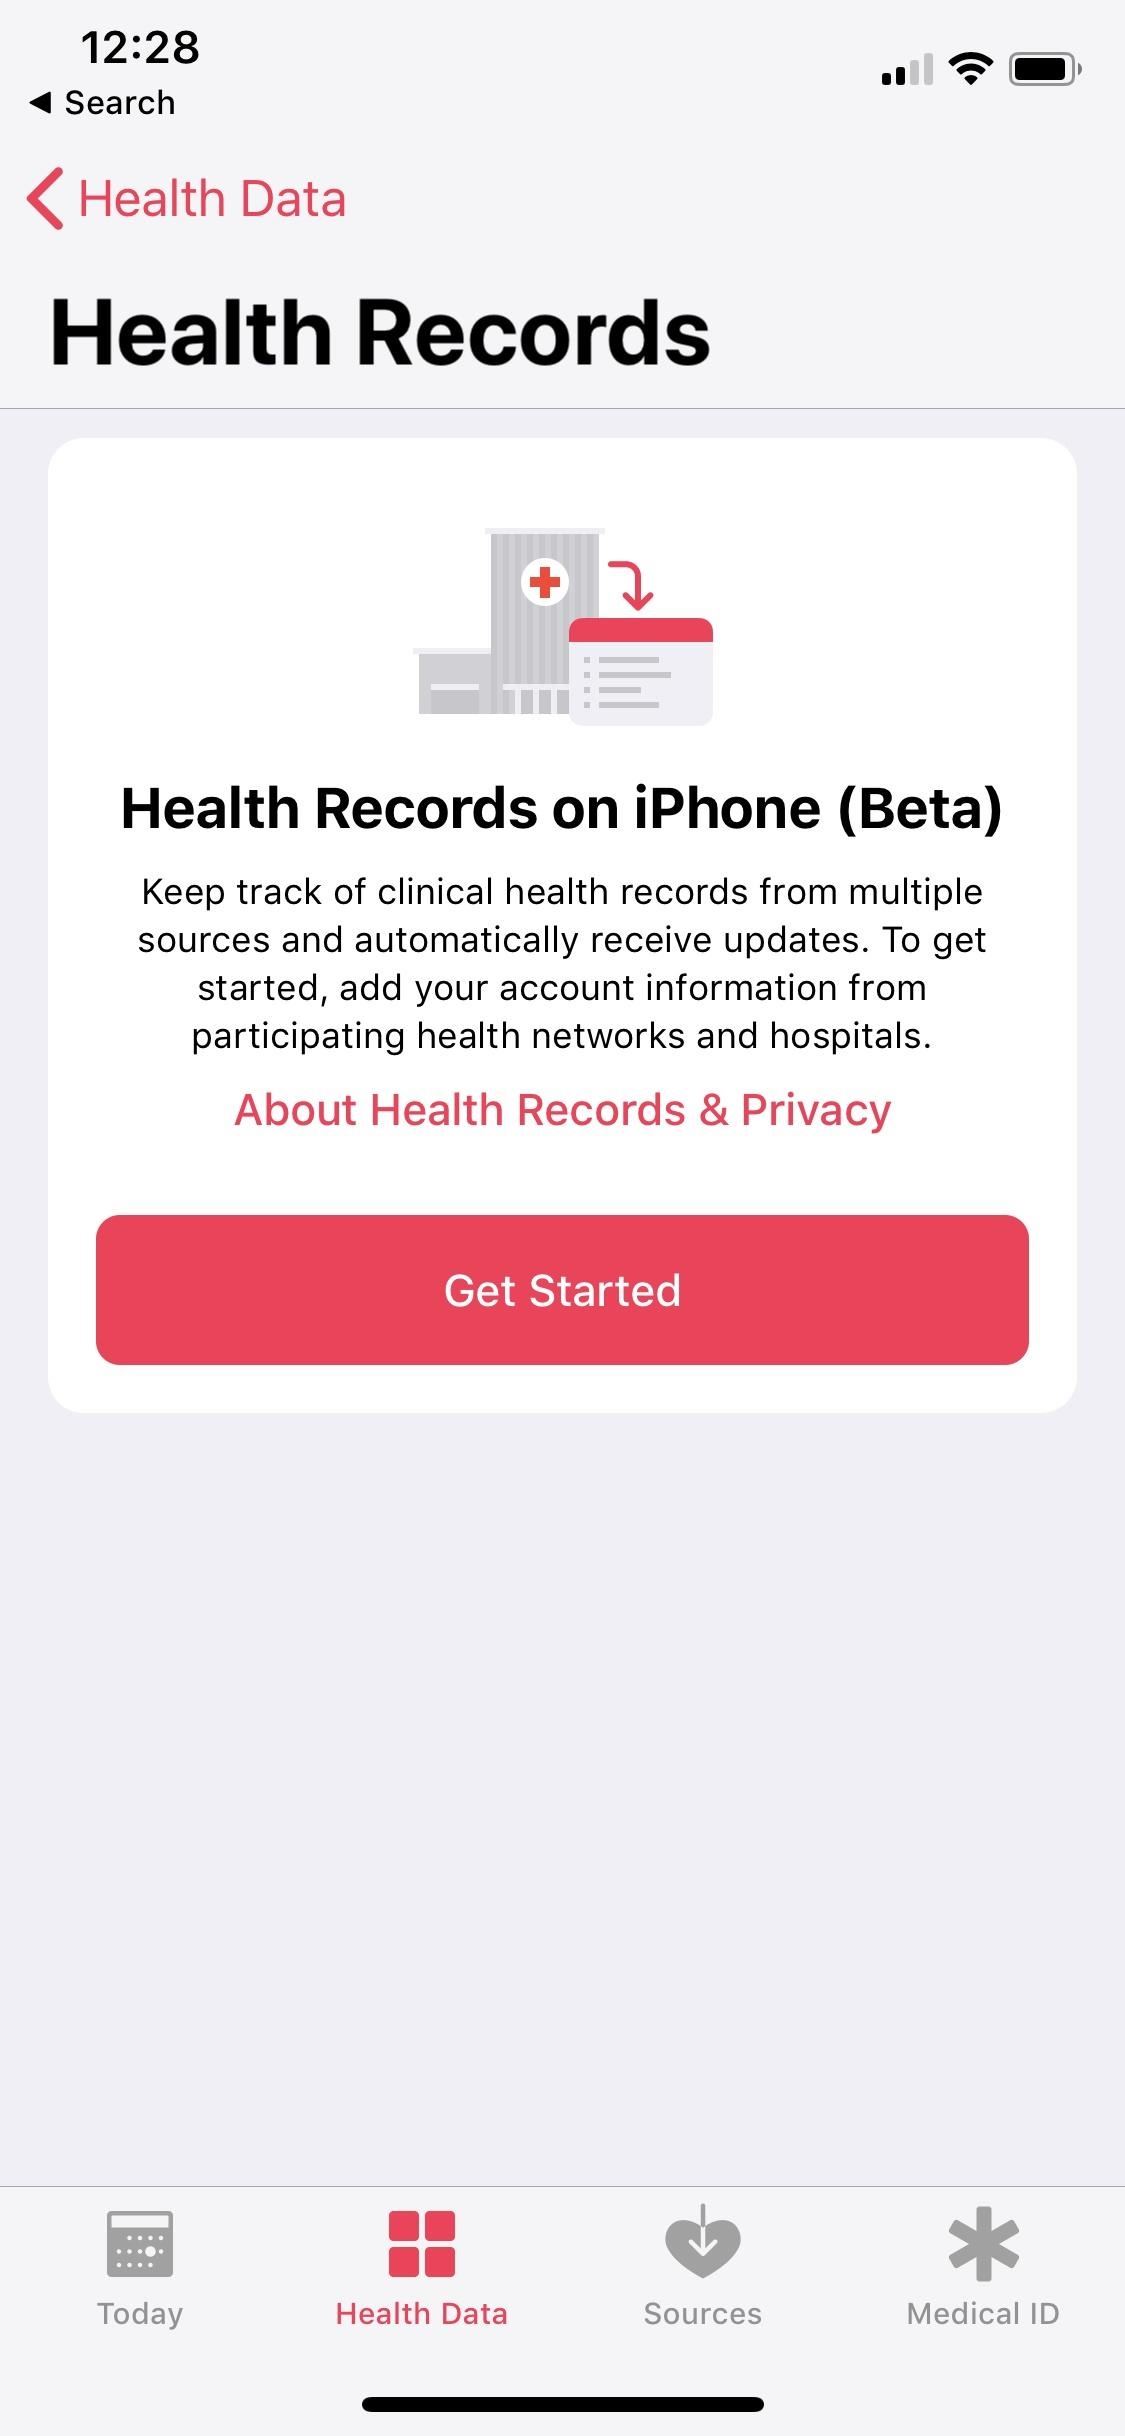
To begin, open up the Health app on your iPhone. If you open up to “Today,” tap the “Health Data” tab at the bottom of the display. Next, tap on “Health Records” from the list, then tap “Get Started” to do just that.
Step 2: Choose Your Healthcare Provider(s)
The next page allows you to locate your hospitals and clinics. Some of these you may have digital access to using the MyChart portal, Cerner Health, or another login option, while others may not have any patient-facing database for personal health records aside from support for the Health app.
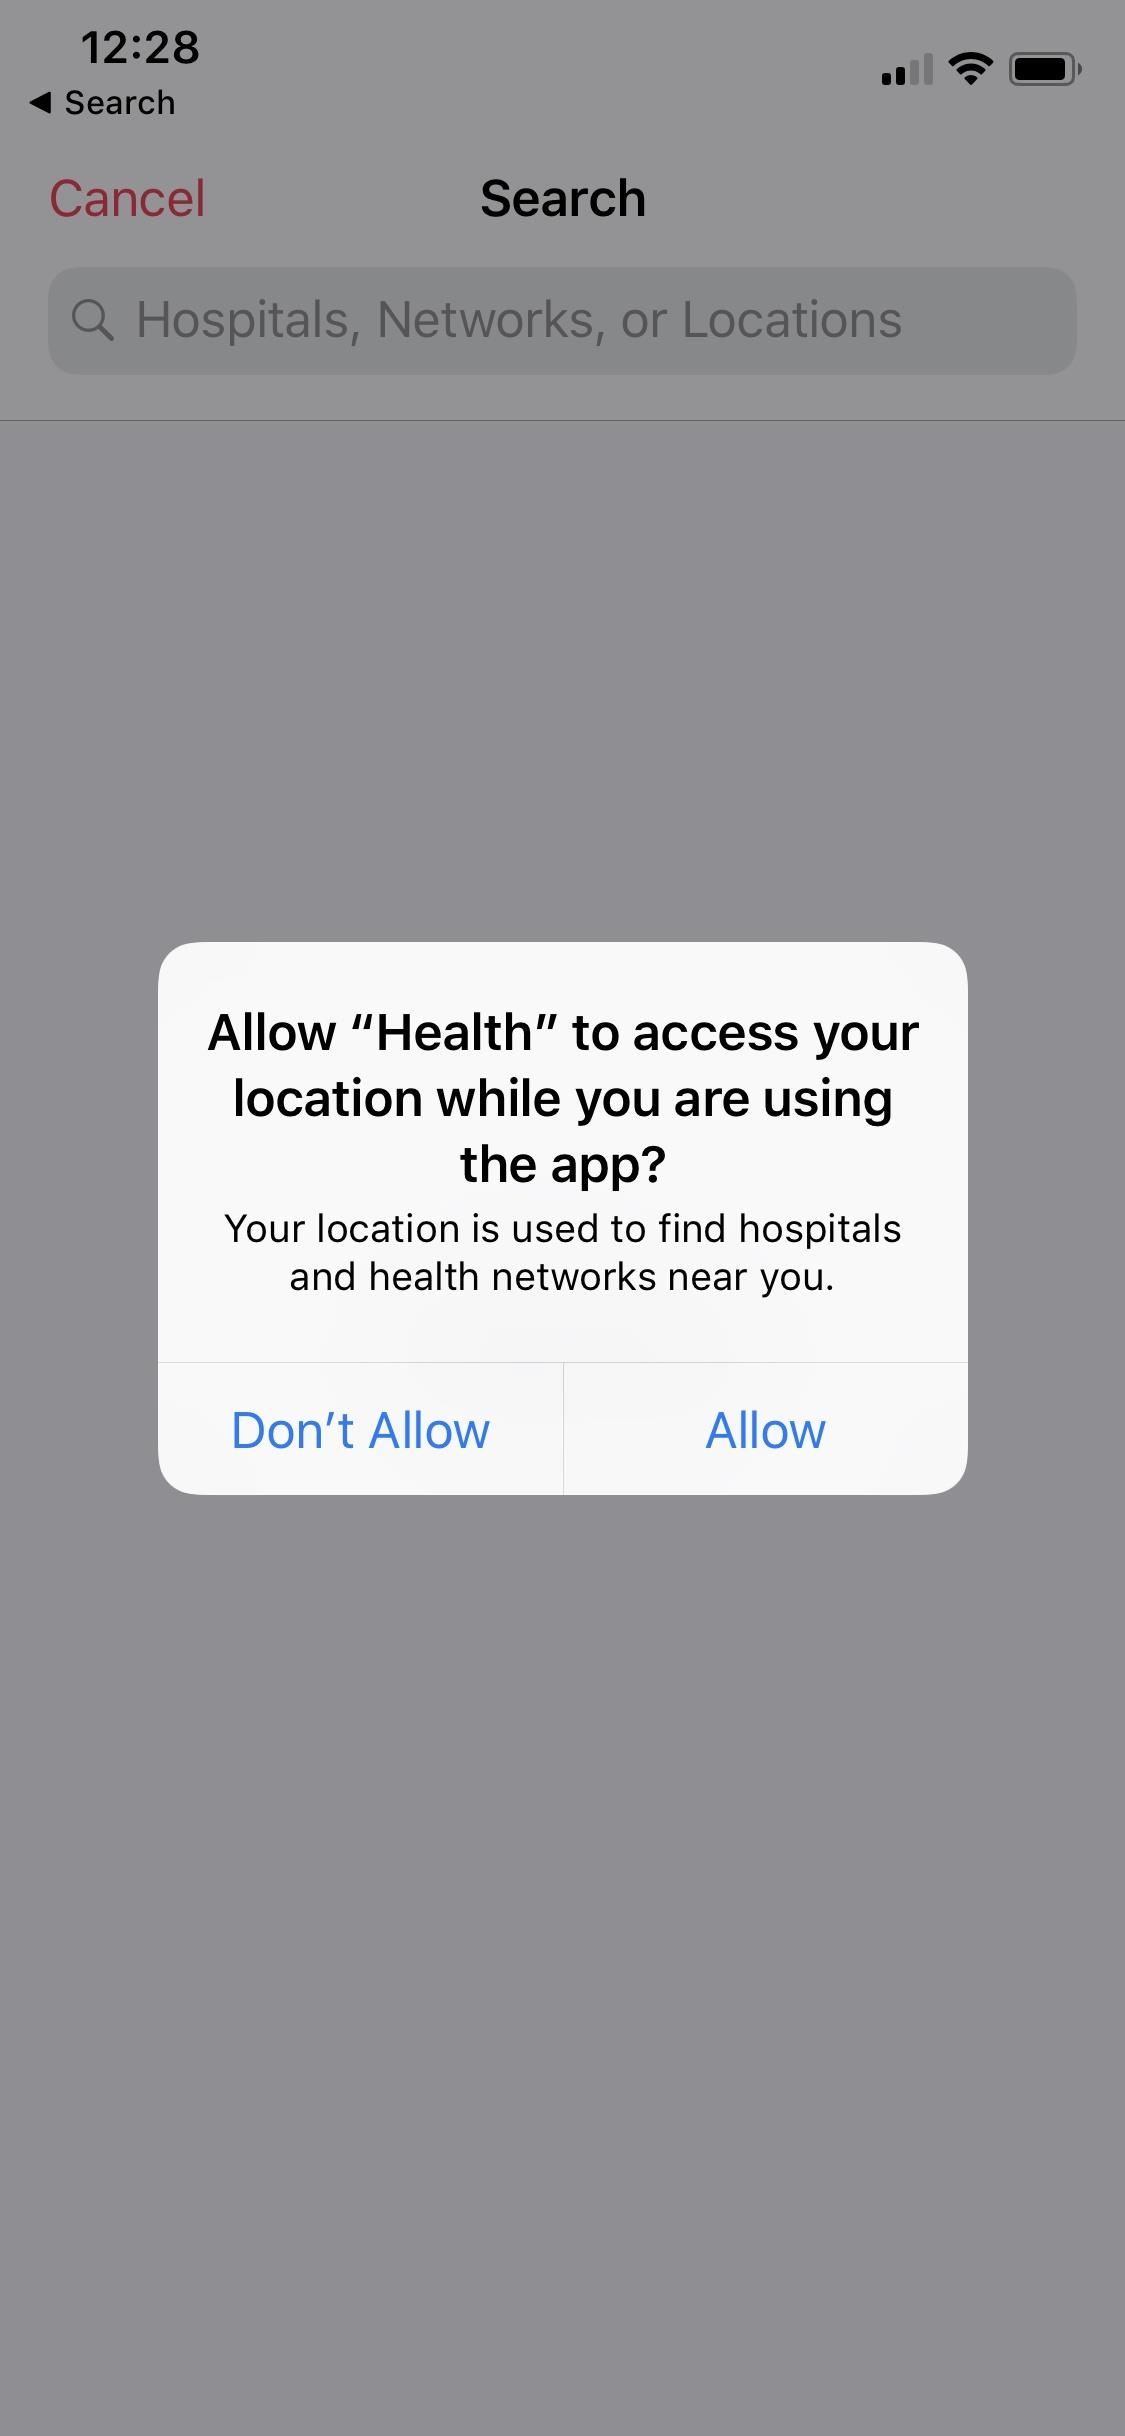
When prompted, you can approve or deny Health using your current location. If you tap “Allow,” the app will show you providers in your area. Feel free to tap “Don’t Allow” if you don’t want to share your location, as you can always search for other establishments manually by name, network, or location.

At its inception, only a small pool of medical centers was participating, but since iOS 12 has come out, the list has grown to over 75 locations. These are the places available right now:
- Adult Internal Medicine (North Carolina)
- Adventist Health System (Colorado, Florida, Georgia, Illinois, Texas, and others)
- AtlantiCare (New Jersey)
- Austin Regional Clinic (Texas)
- Dan Bangart, DPM (Arizona)
- Baptist Health (Kentucky, Indiana, and Illinois)
- BayCare (Florida)
- Better Me Healthcare (Florida)
- Black River Memorial Hospital (Wisconsin)
- Bon Secours Health System (Kentucky, Maryland, South Carolina, Virginia, and Florida)
- Boone County Health Center (Nebraska)
- Dr. Albert Boyd, MD (Texas)
- Buffalo Medical Group (New York)
- Carroll County Memorial Hospital (Missouri)
- Carson Valley Medical Center (Nevada)
- Cedars-Sinai (California)
- Center for Manual Medicine (Kansas)
- Central Valley Medical Center (Utah)
- Centura Health (Colorado and Kansas)
- Cerner Healthe Clinic (Kansas, Missouri)
- Chase County Community Hospital (Nebraska)
- Christiana Care Health System (Delaware, Pennsylvania, Maryland, and New Jersey)
- Circle Health (Massachusetts)
- Cleveland Clinic (Ohio, Nevada, and Florida)
- Cogdell Memorial Hospital (Texas)
- Cone Health (North Carolina)
- Confluence Health (Washington)
- Coquille Valley Hospital (Oregon)
- CoxHealth (Missouri)
- David J. MacGregor MD (California)
- Deaconess Health System (Indiana)
- Dignity Health (Arizona, California, and Nevada)
- Duke Health (North Carolina)
- Eisenhower Health (California)
- Family Foot and Ankle Clinic, P.A. (Minnesota)
- Family Footcare Specialist (New Jersey)
- Fisher-Titus Health (Ohio)
- Fitzgibbon Hospital (Missouri)
- Fort Healthcare (Wisconsin)
- Franciscan Missionaries of Our Lady Health System (Louisiana)
- Geisinger (Pennsylvania)
- Genesis Healthcare System (Ohio)
- Grace Cottage Hospital (Vermont)
- Greater Hudson Valley Health System (New York)
- Greenville Health System (South Carolina)
- Group Health Cooperative of South Central Wisconsin (Wisconsin)
- Henry Community Health (Indiana)
- Henry Ford Health System (Michigan)
- Highlands Health System (Kentucky)
- Hospital for Special Surgery (New Jersey, New York)
- Hospital Sisters Health System (Illinois, Wisconsin)
- Houston Methodist (Texas)
- Indianapolis Gastroenterology and Hepatology (Indiana)
- Innovative Express Care SC (Illinois)
- Intermountain Healthcare (Utah)
- Jefferson Health (Delaware, New Jersey, and Pennsylvania)
- John Muir Health (California)
- Johns Hopkins (Maryland)
- Kaiser Permanente (Oregon, Washington, and Colorado)
- Kishwar Shareef MD (New Jersey)
- Klamath Orthopedic Clinic (Oregon)
- Kreptowski Family Practice (Ohio)
- LabCorp (nationwide)
- Lake Health (Ohio)
- Lavaca Medical Center (Texas)
- LMH Health (Kansas)
- Legacy Health (Oregon and Washington)
- Lehigh Valley Health Network (Pennsylvania)
- LifeBridge Health (Maryland)
- Madison Memorial Health Partners (Idaho)
- Madison Primary Care (Alabama)
- Mammoth Hospital (California)
- MedStar Health (Maryland and Washington D.C.)
- Memorial Community Health, Inc. (Nebraska)
- Mercy Medical Center (Iowa)
- Methodist Health System (Nebraska)
- Methodist Le Bonheur Healthcare (Tennessee)
- Middlebrook Family Physicians, PA (New Jersey)
- Midwest Surgical Hospital (Nebraska)
- Mission Health (North Carolina)
- MIT Medical (Massachusetts)
- Moffitt Cancer Center (Florida)
- Monroe County Hospital & Clinics (Iowa)
- Monroe Foot Clinic (Wisconsin)
- Mosaic Life Care (Missouri)
- Mount Sinai (New York)
- MU Health Care (Missouri)
- Munson Healthcare Charlevoix Hospital (Michigan)
- Nebraska Medicine (Nebraska)
- Nevada Regional Medical Center (Missouri)
- North Canyon Medical Center (Idaho)
- Norton Healthcare (Indiana, Kentucky)
- NYU Langone Health (New York)
- Ochsner (Louisiana)
- OhioHealth (Ohio)
- Omni Dermatology (Arizona)
- OrthoVirginia (Virginia)
- Overlake Hospital Medical Center (Washington)
- Pagosa Springs Medical Center (Colorado)
- Partners HealthCare (including Massachusetts General Hospital and Brigham and Women’s Hospital)
- PeaceHealth (Alaska, Oregon, Washington)
- Penn Medicine (Pennsylvania)
- Premier Health (Ohio)
- Providence Health & Services (Alaska, California, Montana, Oregon, and Washington)
- Providence Medical Center (Nebraska)
- Quest Diagnostics (nationwide)
- Randolph Community Clinic (Wisconsin)
- Renown Health (Nevada)
- Rush University Medical Center (Illinois)
- San Antonio Regional Hospital (California)
- San Francisco Gynecology, INC. (California)
- Sansum Clinic (California)
- Scripps Health (California)
- Sicher Foot Center (Texas)
- Singing River Health System (Mississippi)
- Southeast Colorado Hospital District (Colorado)
- Southern Iowa Orthopedics (Iowa)
- Southwest General (Ohio)
- St. Luke’s Health System (Idaho and Eastern Oregon)
- St. Luke’s University Health Network (Pennsylvania and New Jersey)
- Stanford Health Care (California)
- Summit Medical Group (New Jersey)
- Sunset ID Care PA (Texas)
- Sutter Health (California)
- Syringa Hospital & Clinics (Idaho)
- Tampa General Hospital (Florida)
- Texas Health Resources (Texas)
- Thayer County Health Services (Nebraska and Kansas)
- The San Antonio Orthopaedic Group (Texas)
- The University of Kansas Health System (Kansas)
- Torrance Memorial Medical Center (California)
- Tower Health (Pennsylvania)
- Truman Medical Centers (Missouri)
- UC Davis Health (California)
- UC Irvine Health (California)
- UC San Diego Health (California)
- UCLA Health (California)
- UCSF Health (California)
- UNC Medical Center (North Carolina)
- University of Arkansas for Medical Sciences (Arkansas)
- University of Chicago Medicine (Illinois)
- University of Rochester Medical Center (New York)
- University of Utah Health (Utah)
- University of Virginia Health System (Virginia)
- Upstate Medical University (New York)
- Valley Medical Group (Massachusetts)
- Vanderbilt University Medical Center (Tennessee)
- Dr. Catherine F. Vanderloos (Louisiana)
- Vascular Surgery Associates (Florida)
- VCU Health (Virginia)
- Verdugo Dermatology (California)
- Vibrant Health Family Clinics (Wisconsin)
- Weill Cornell Medicine (New York)
- Winona Health (Minnesota)
- WVU Medicine (West Virginia)
- Yale New Haven Health (Connecticut)
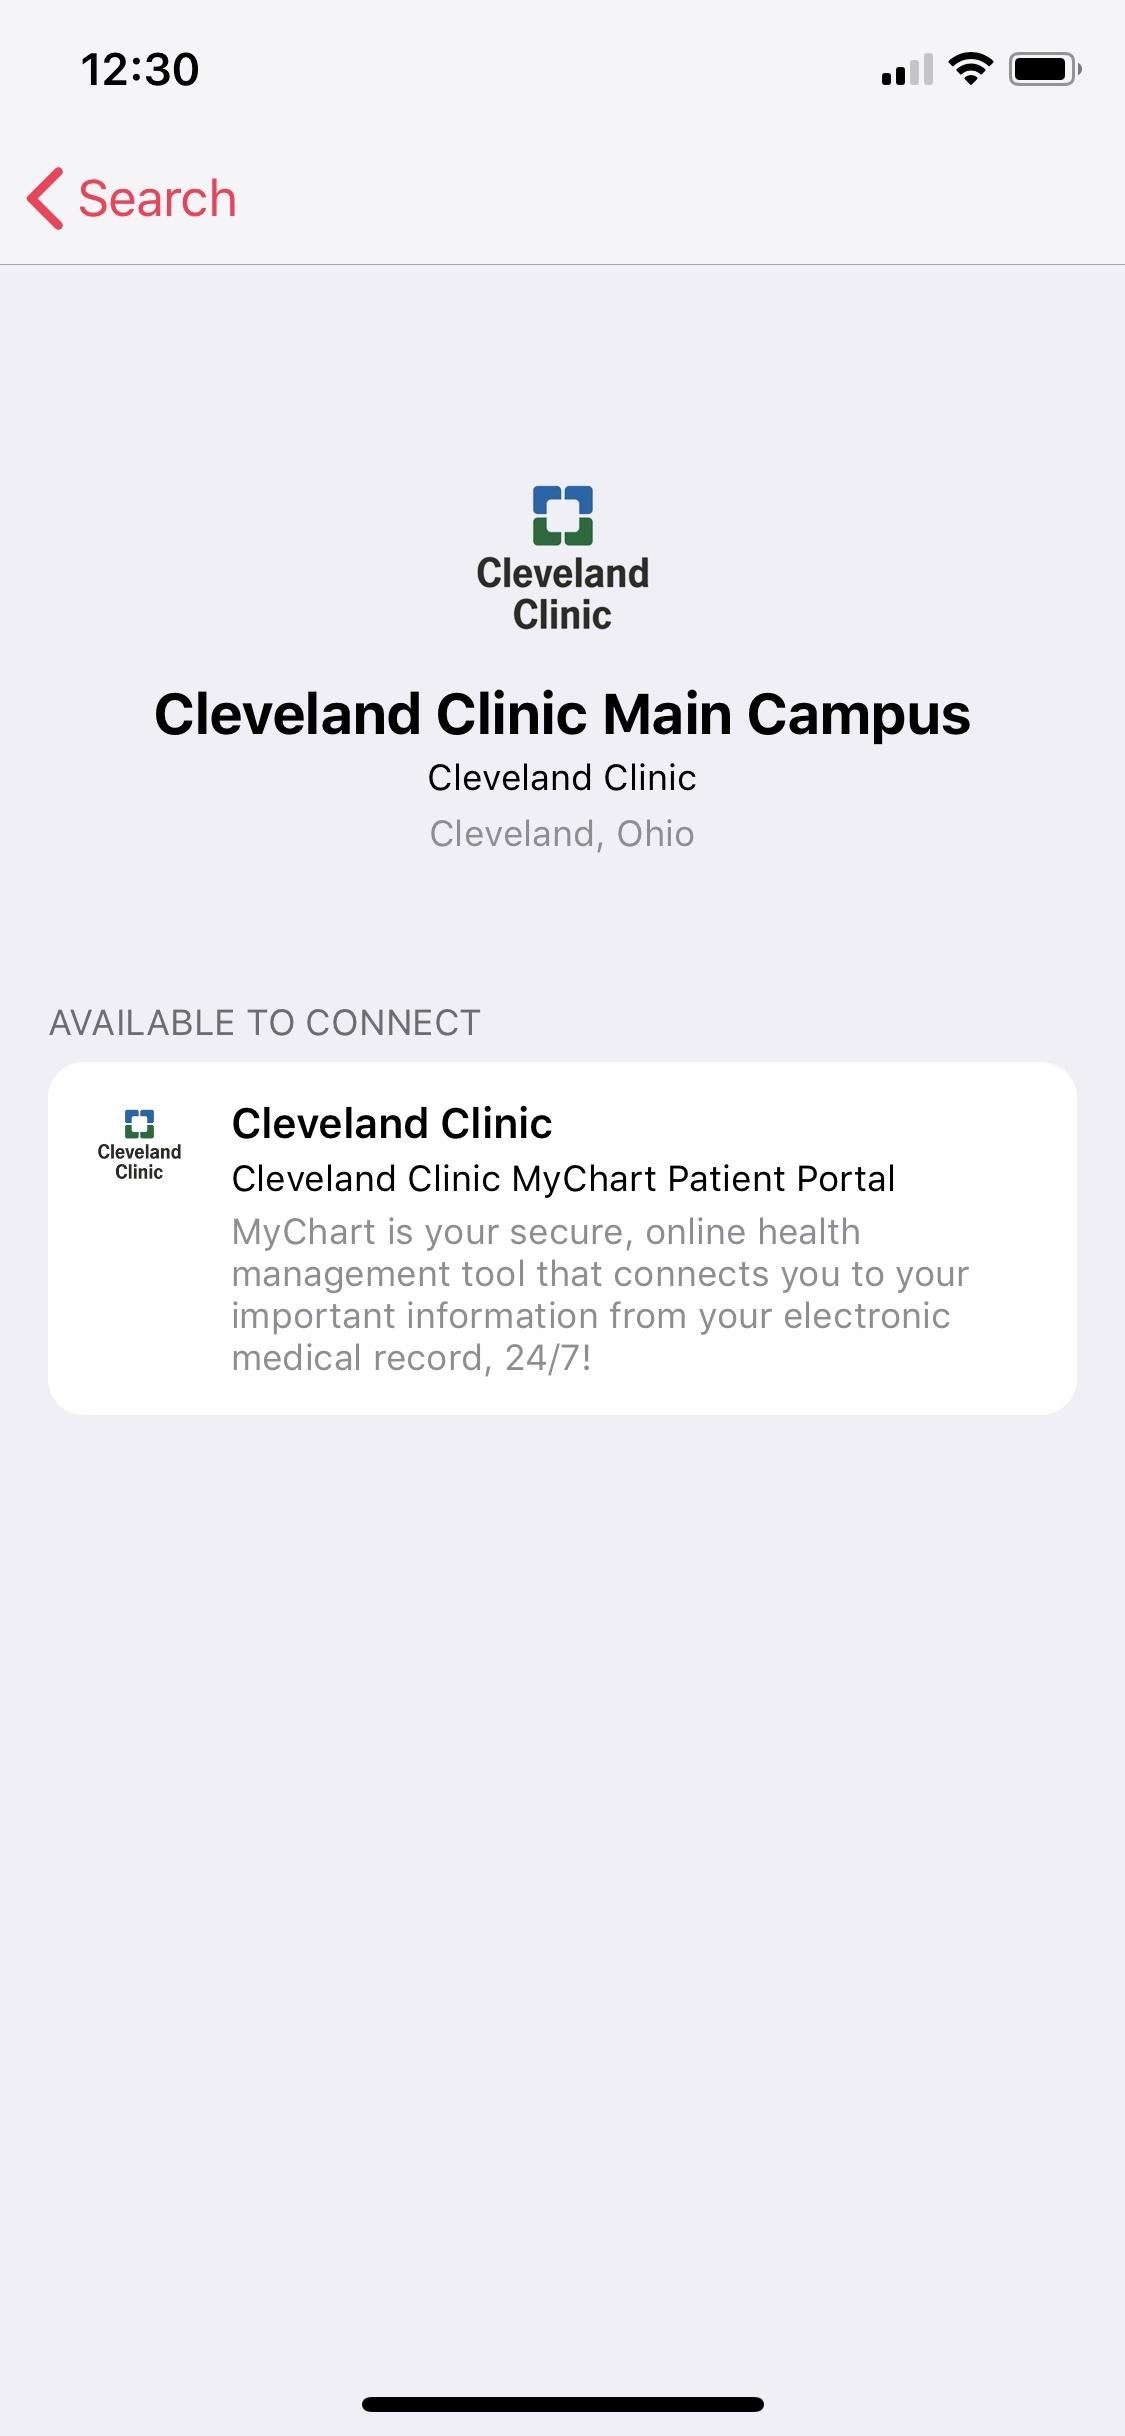
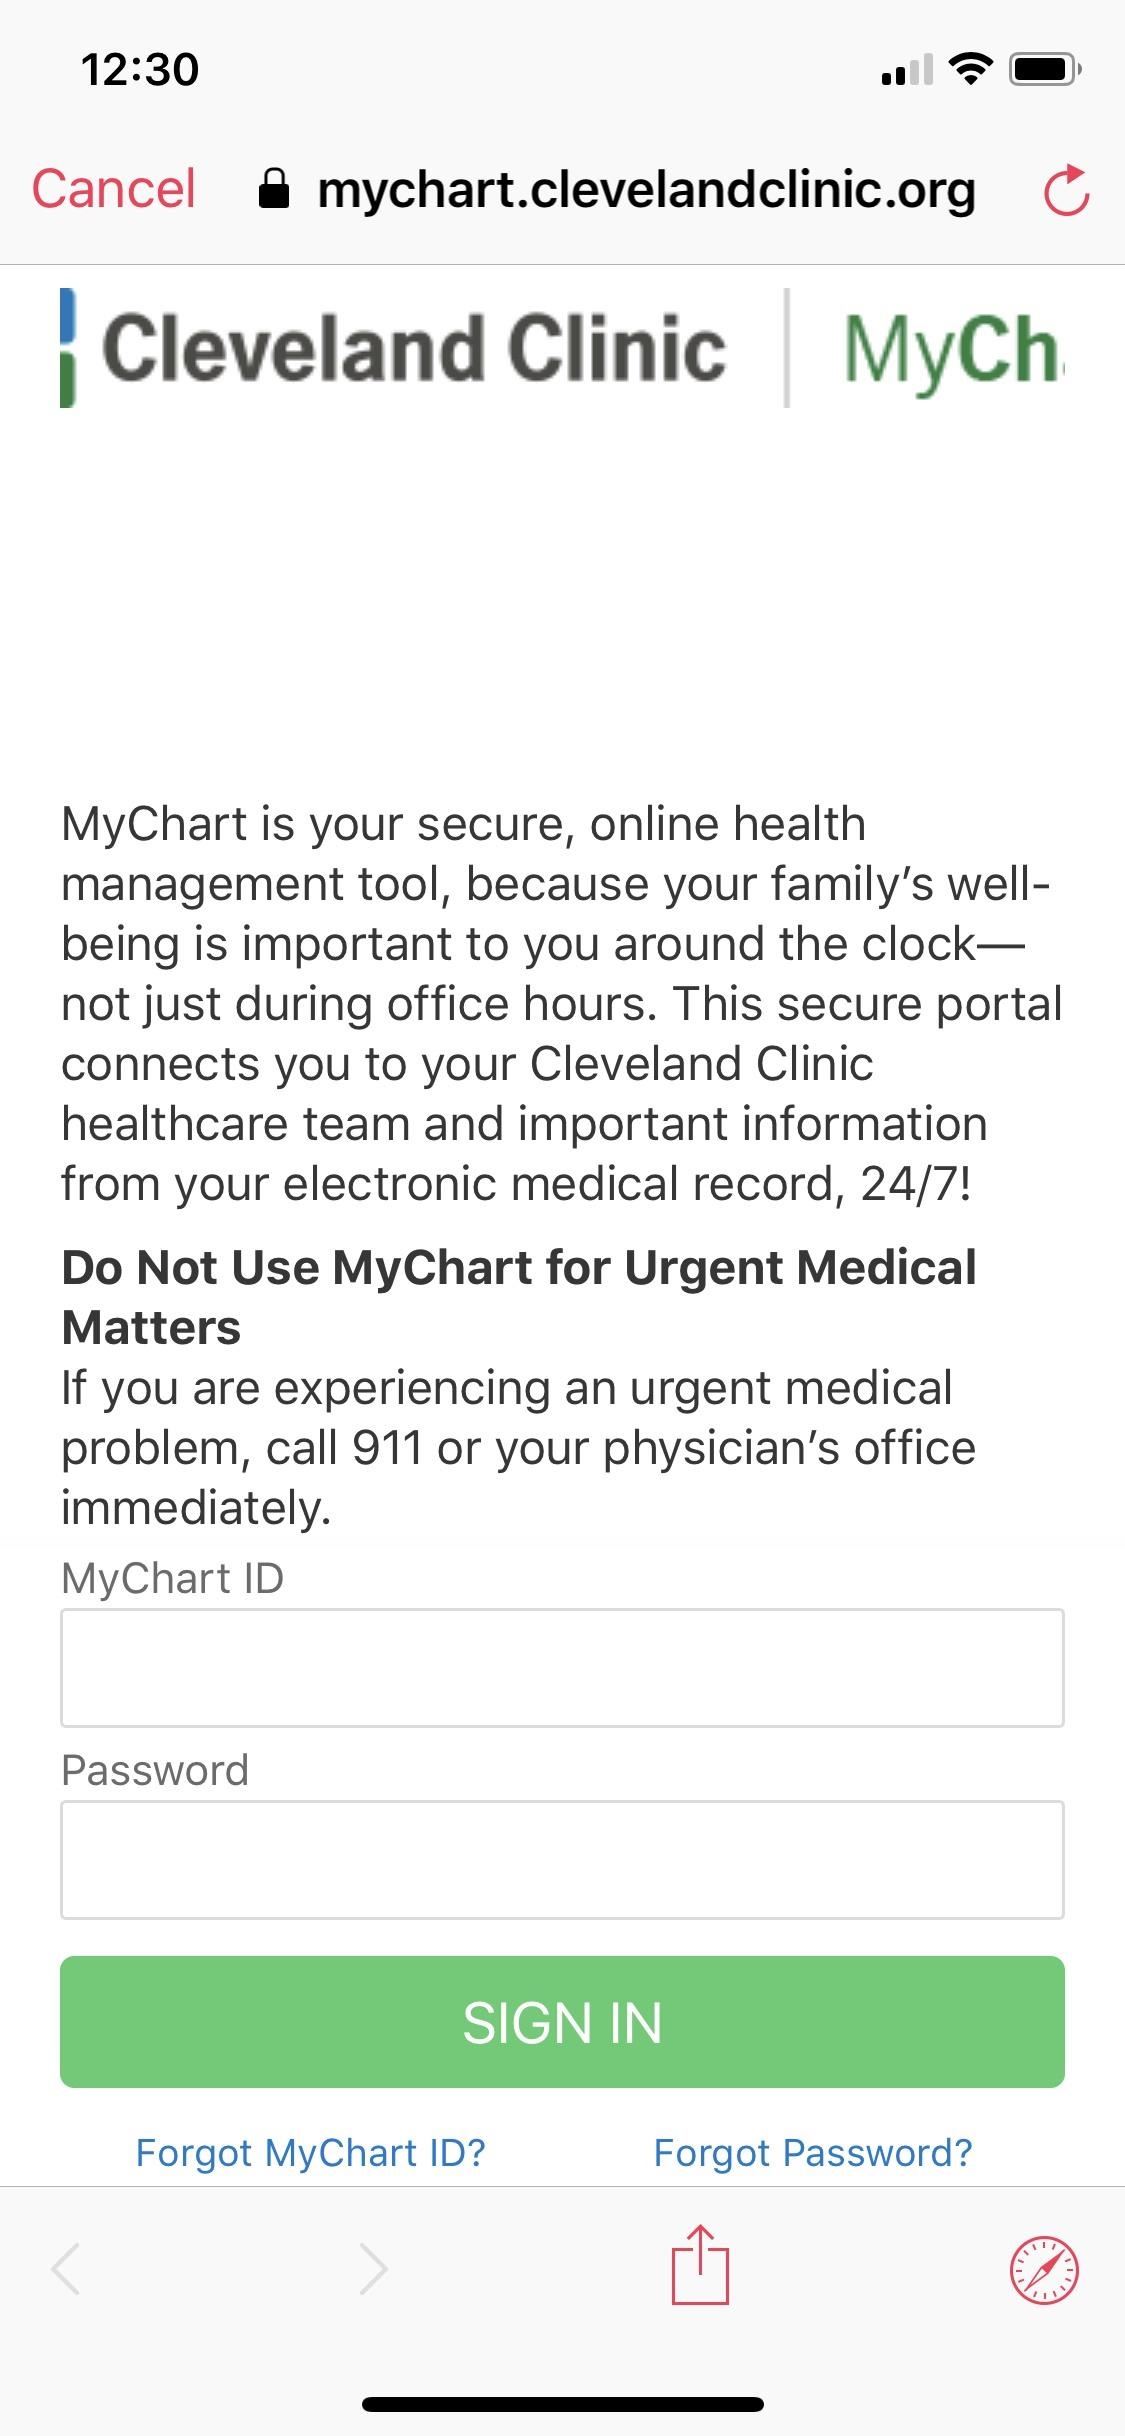
Use the search to locate your healthcare provider or select yours from the list provided. Doing so will give you a link to your healthcare provider’s website, where you can sign in as you typically would to the patient portal. If you don’t have any login credentials for the healthcare portal, contact the hospital or clinic to see about getting online access to your health records for Apple Health use.
And if you’re worried about security, Apple specifically states:
This connection is directly between your iOS device and the healthcare provider’s systems (including other connected systems that the healthcare provider may use; e.g. electronic medical records services). Any health information you receive in connection with this feature will remain encrypted while stored on your device.
Step 3: View Your Medical Records
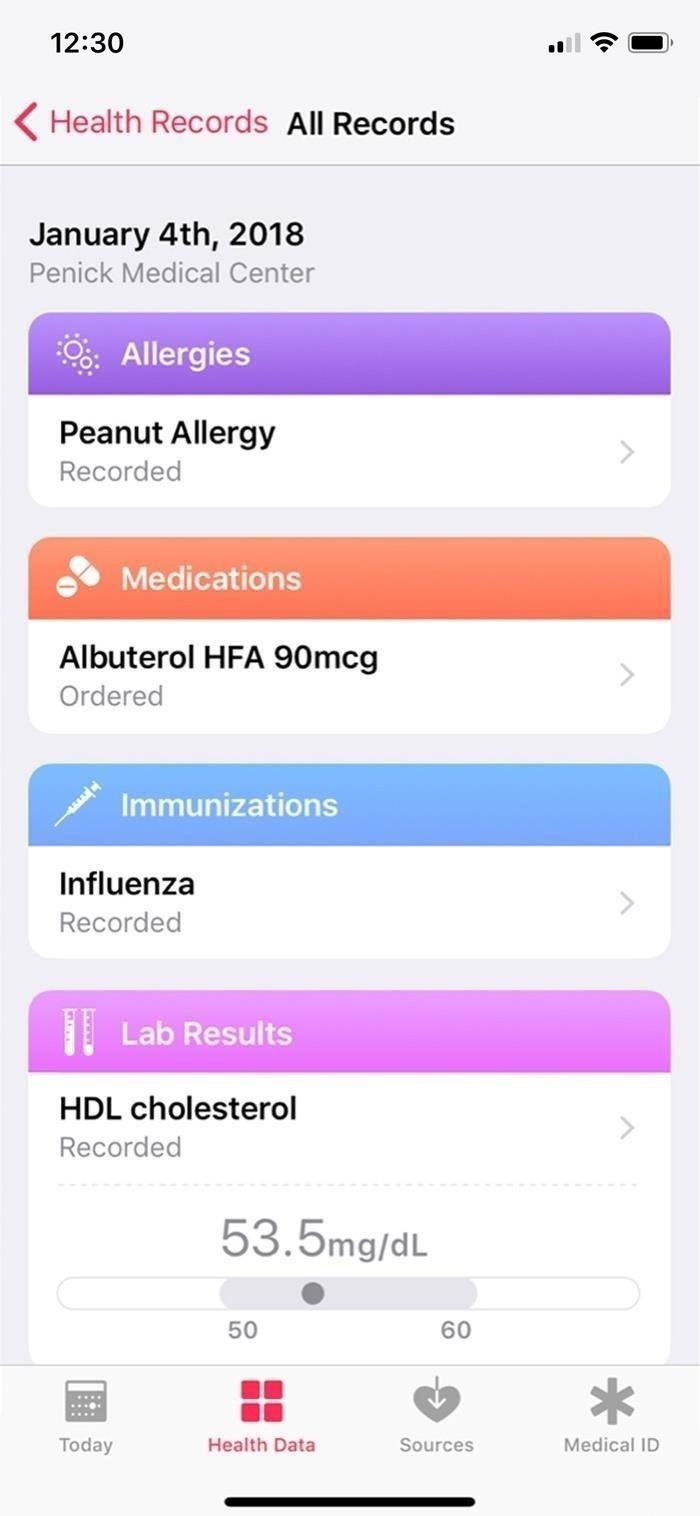
Once you sign in, your health information will transfer to the Health app in an organized, easy-to-view manner. You can select specific queries like allergies, immunizations, and medications from this Health Records list, or you can view all of your records at once. In typical Apple fashion, the records are neatly color-coded and labeled, which makes it easy to find the stats you’re looking for. Tap each to access more information.
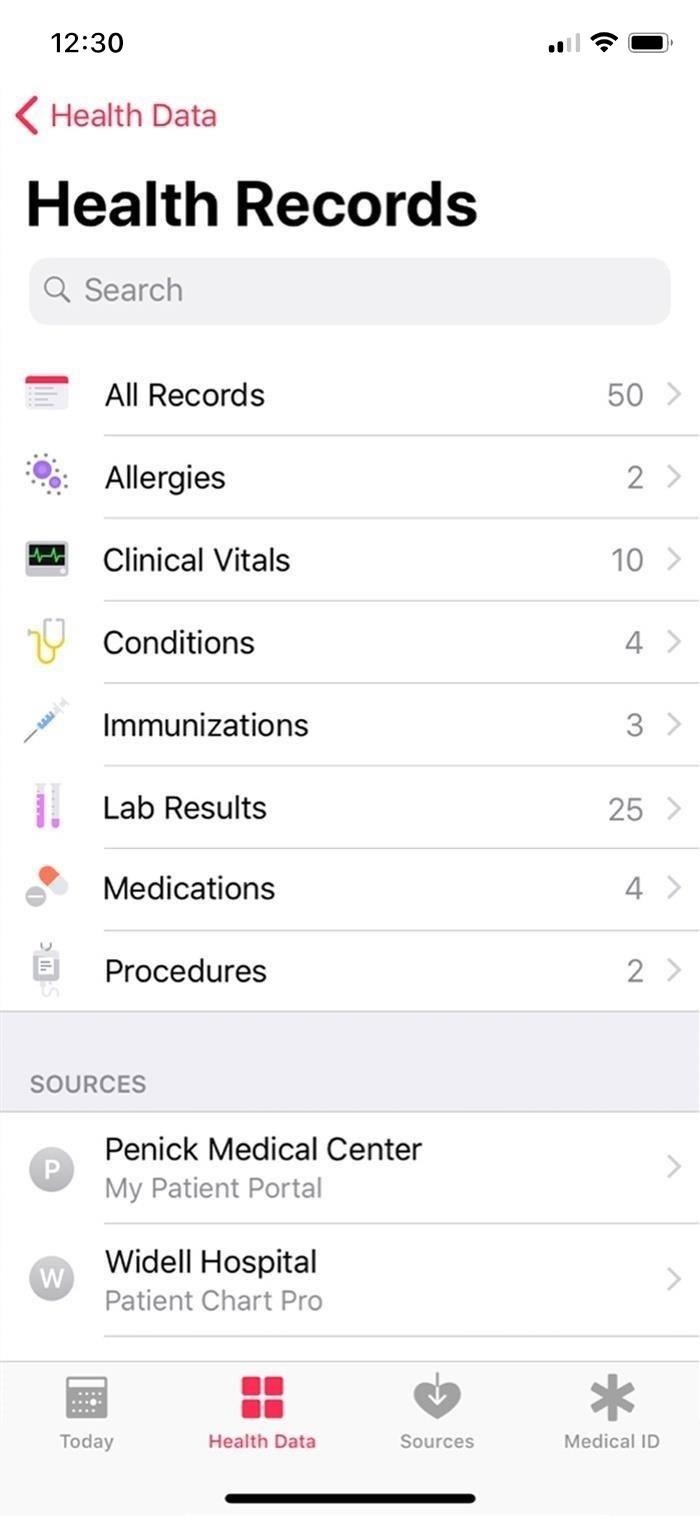
Of course, you can add more than one provider’s information at a time. Just repeat the process for all hospitals and clinics you have health records with, as long as they are participating in the program. All of your connected providers will appear at the bottom of the “Health Records” page under Sources.
This article was produced during Gadget Hacks’ annual Health & Fitness special coverage. Read all of the Health & Fitness series.
- Follow Gadget Hacks on Pinterest, Reddit, Twitter, YouTube, and Flipboard
- Sign up for Gadget Hacks’ daily newsletter or weekly Android and iOS updates
- Follow WonderHowTo on Facebook, Twitter, Pinterest, and Flipboard
Just updated your iPhone? You’ll find new emoji, enhanced security, podcast transcripts, Apple Cash virtual numbers, and other useful features. There are even new additions hidden within Safari. Find out what’s new and changed on your iPhone with the iOS 17.4 update.
“Hey there, just a heads-up: We’re part of the Amazon affiliate program, so when you buy through links on our site, we may earn a small commission. But don’t worry, it doesn’t cost you anything extra and helps us keep the lights on. Thanks for your support!”


