Android phones finally have a true AirDrop alternative called “Nearby Share.” The new feature was added through an update to the Google Play Services app that comes pre-installed on all Android devices in the US, so you don’t even have to wait on a firmware upgrade — it’s just there.
Nearby Share finally gives Android a universal file transferring system. It works for large files and links just the same, and it makes it super easy to share things with someone who’s physically nearby. The beautiful part is that it’s not an OEM skin feature, so every phone running Android 6.0 and up can use it. You can even send files to desktop computers running Windows, macOS, Linux, and ChromeOS.
Google is doing a slow rollout for this feature, so you may not see on your smartphone just yet. According to Google, it will appear first on select Google Pixel and Samsung smartphone before reaching other manufacturers’devices in the near future. In my testing, I was able to access it on my OnePlus 5T but not my ASUS Zenfone 6, so it just depends.
Step 1: Add the Quick Settings Tile
You could share a file or link right now, but before you do, there are a few things you should familiarize yourself with. Both the sender and recipient need to take action to complete a Nearby Share, so you may need to show some of this to the friend you’re sharing with.
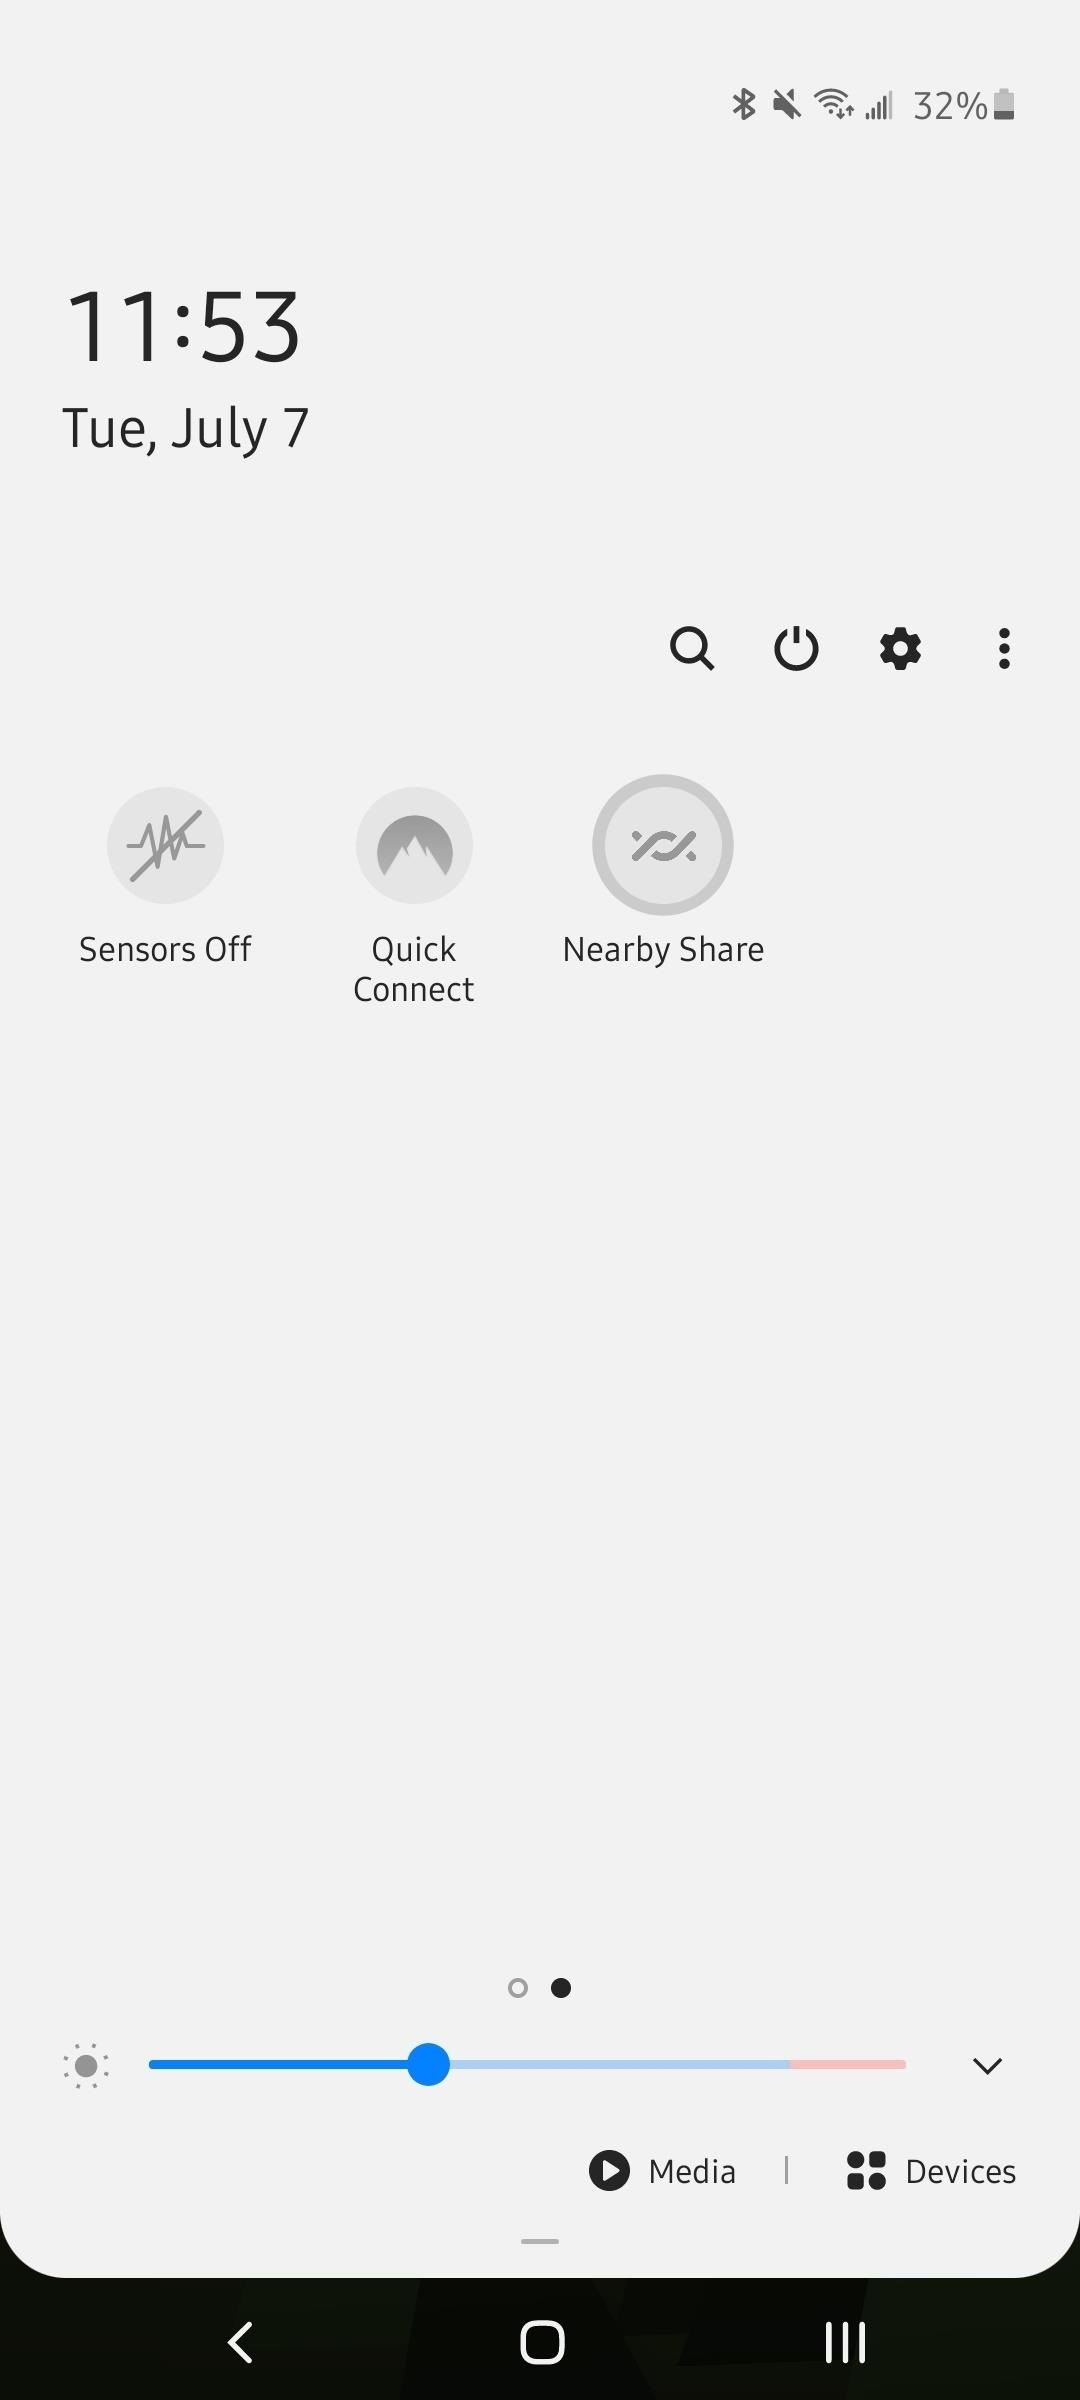
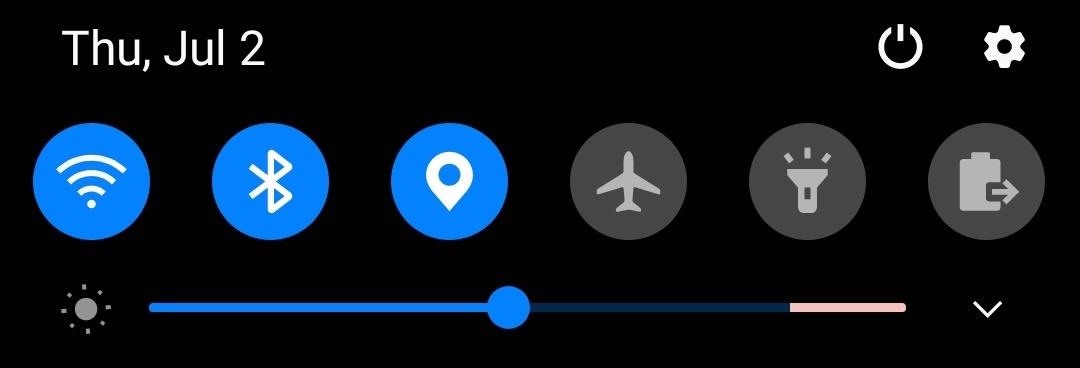
First, if you plan on using this feature more than once, you’ll want to add the Quick Settings tile. Swipe down twice from the top of your screen to fully expand the Quick Settings menu, then either tap the pencil-shaped edit button (most phones), or hit the three-dot menu button and choose “Button order” (Samsung phones).
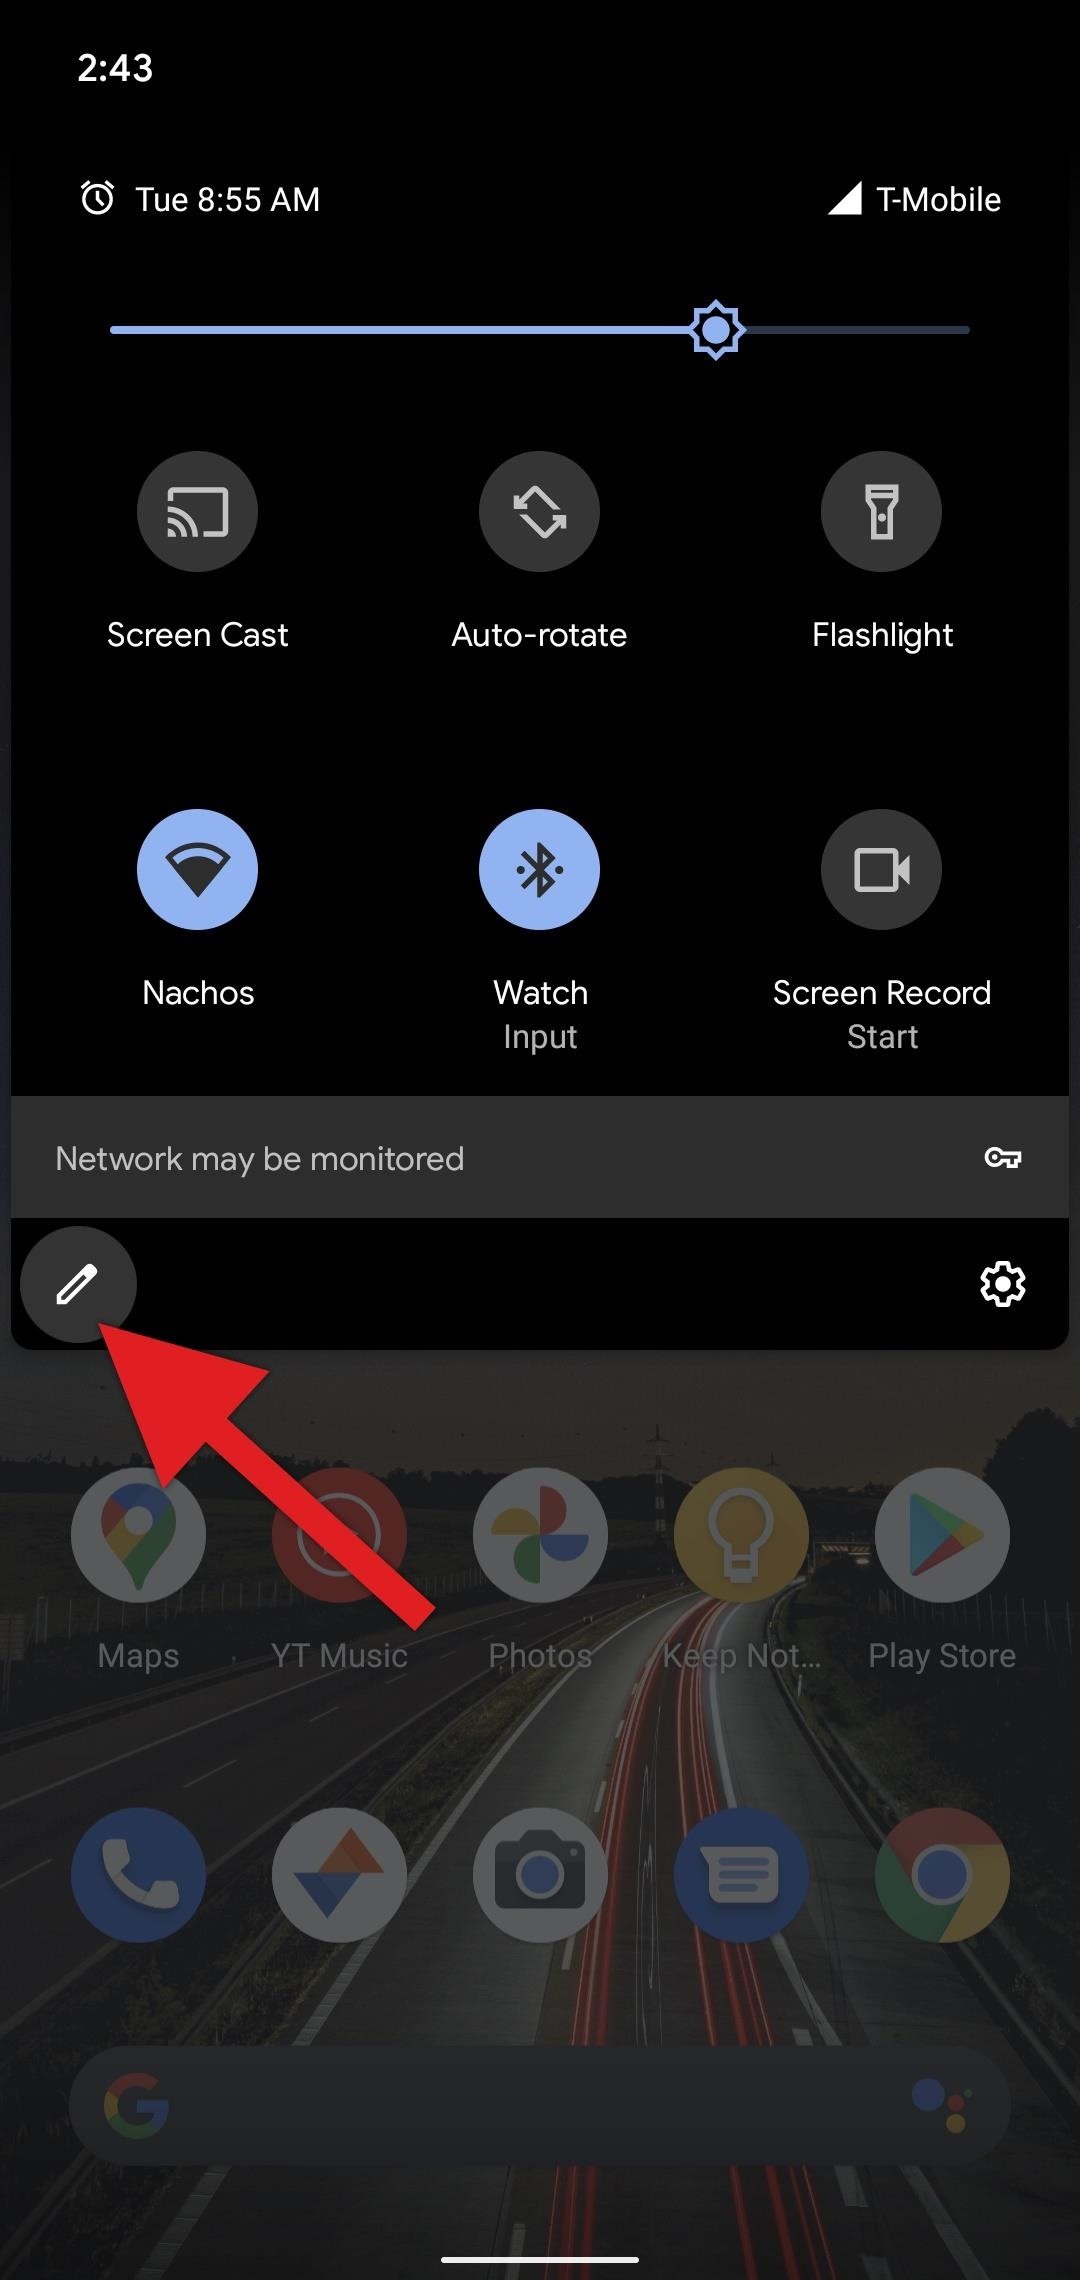
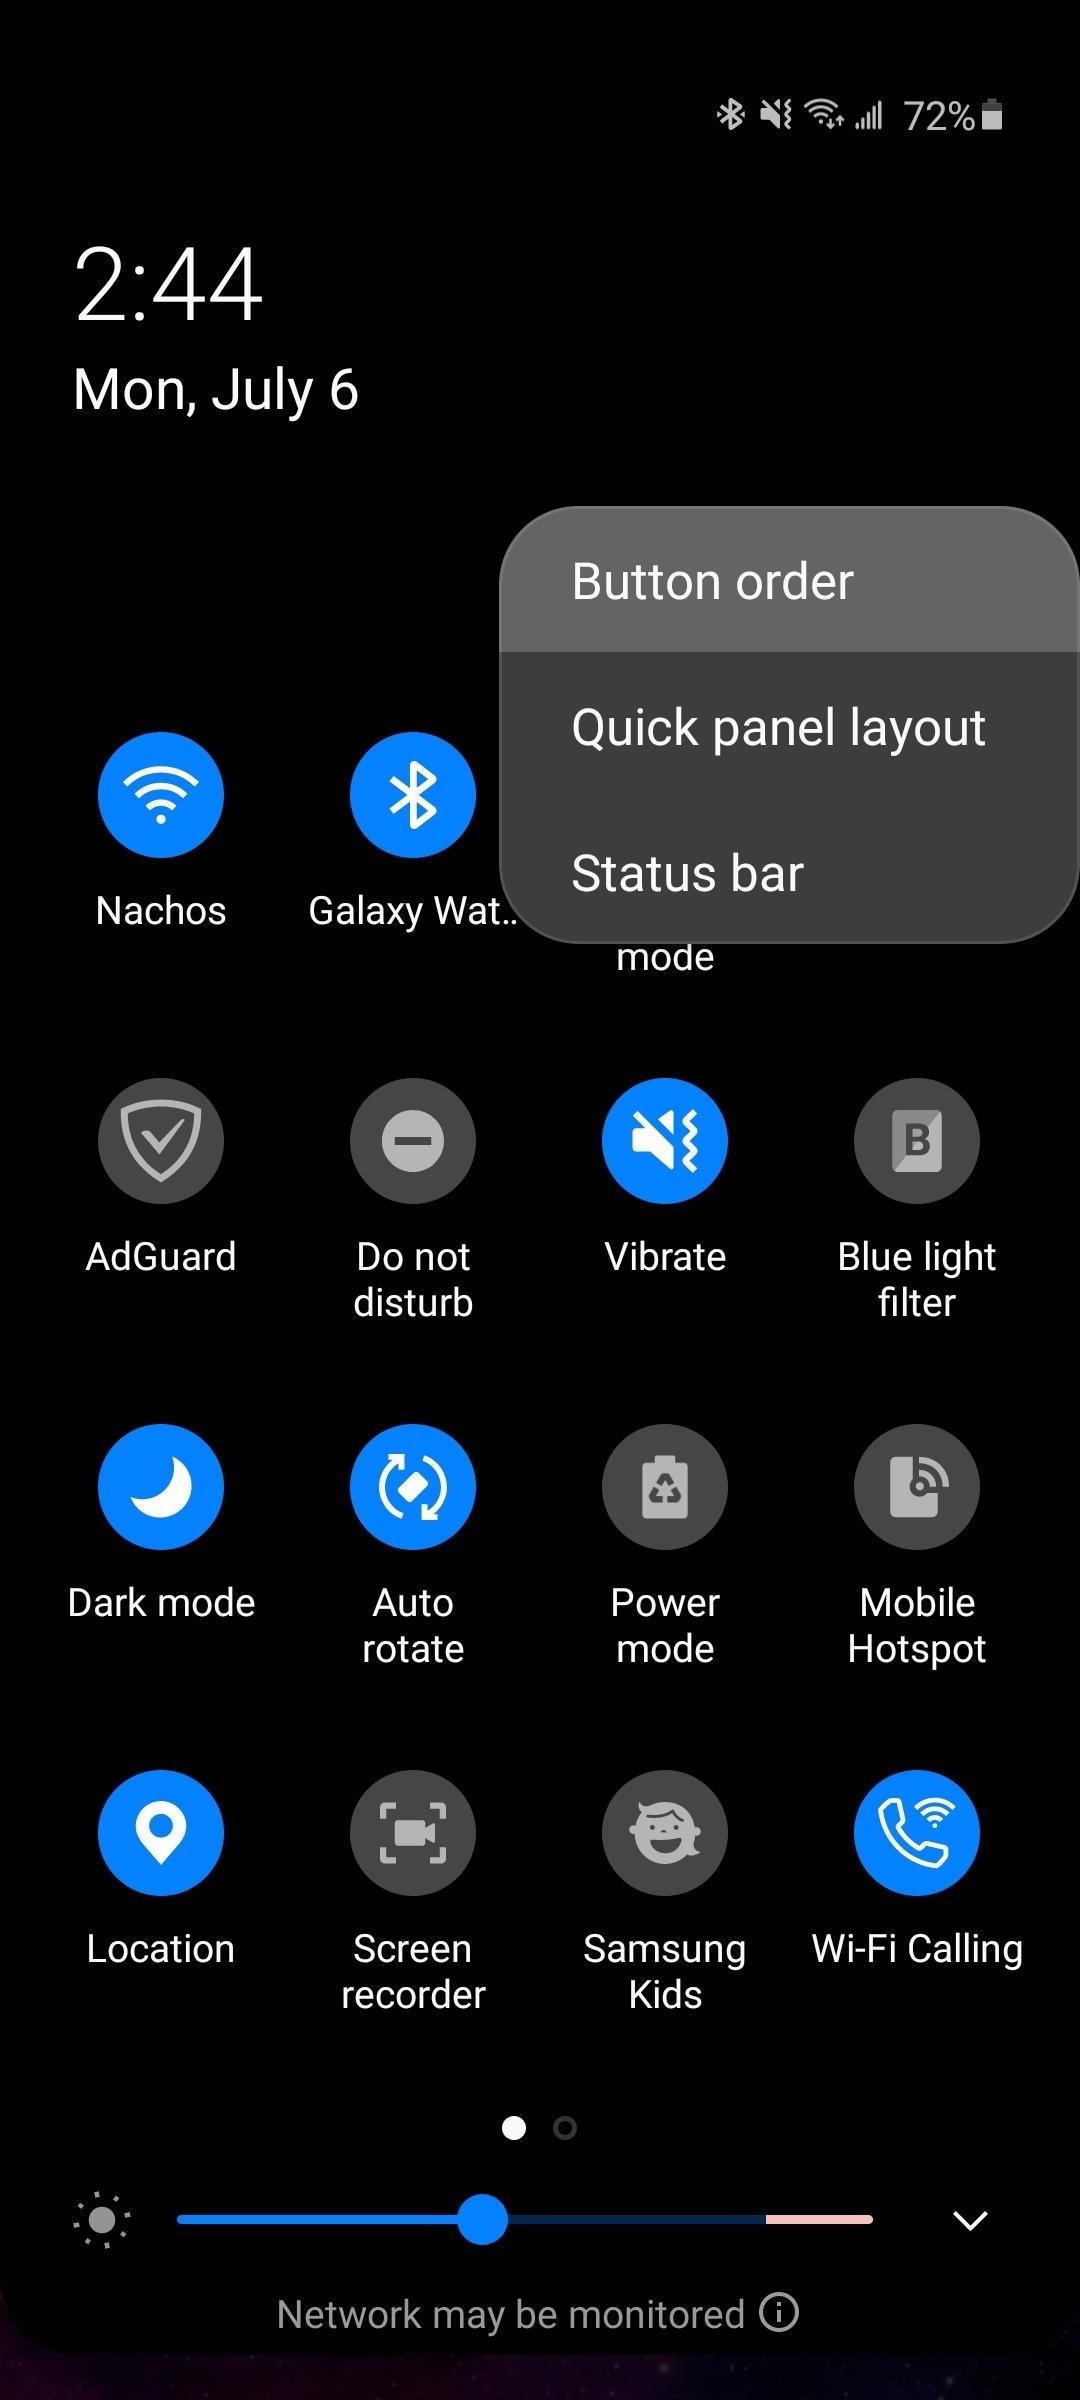
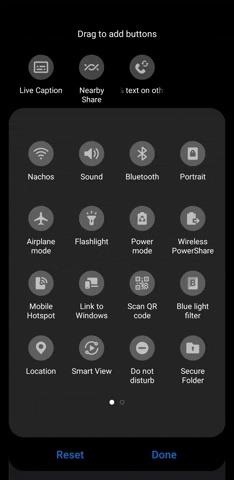
From here, find the “Nearby Share” toggle among the list of inactive tiles. On Samsung, inactive tiles are in a small strip at the top that scrolls left to right. On stock Android, they’re in the lighter gray section at the bottom that scrolls vertically.
If you don’t see this toggle, you’ll have to wait on a server-side update to use Nearby Share. In other words, Google will silently activate the feature on your phone at some point in the near future, so keep checking back.
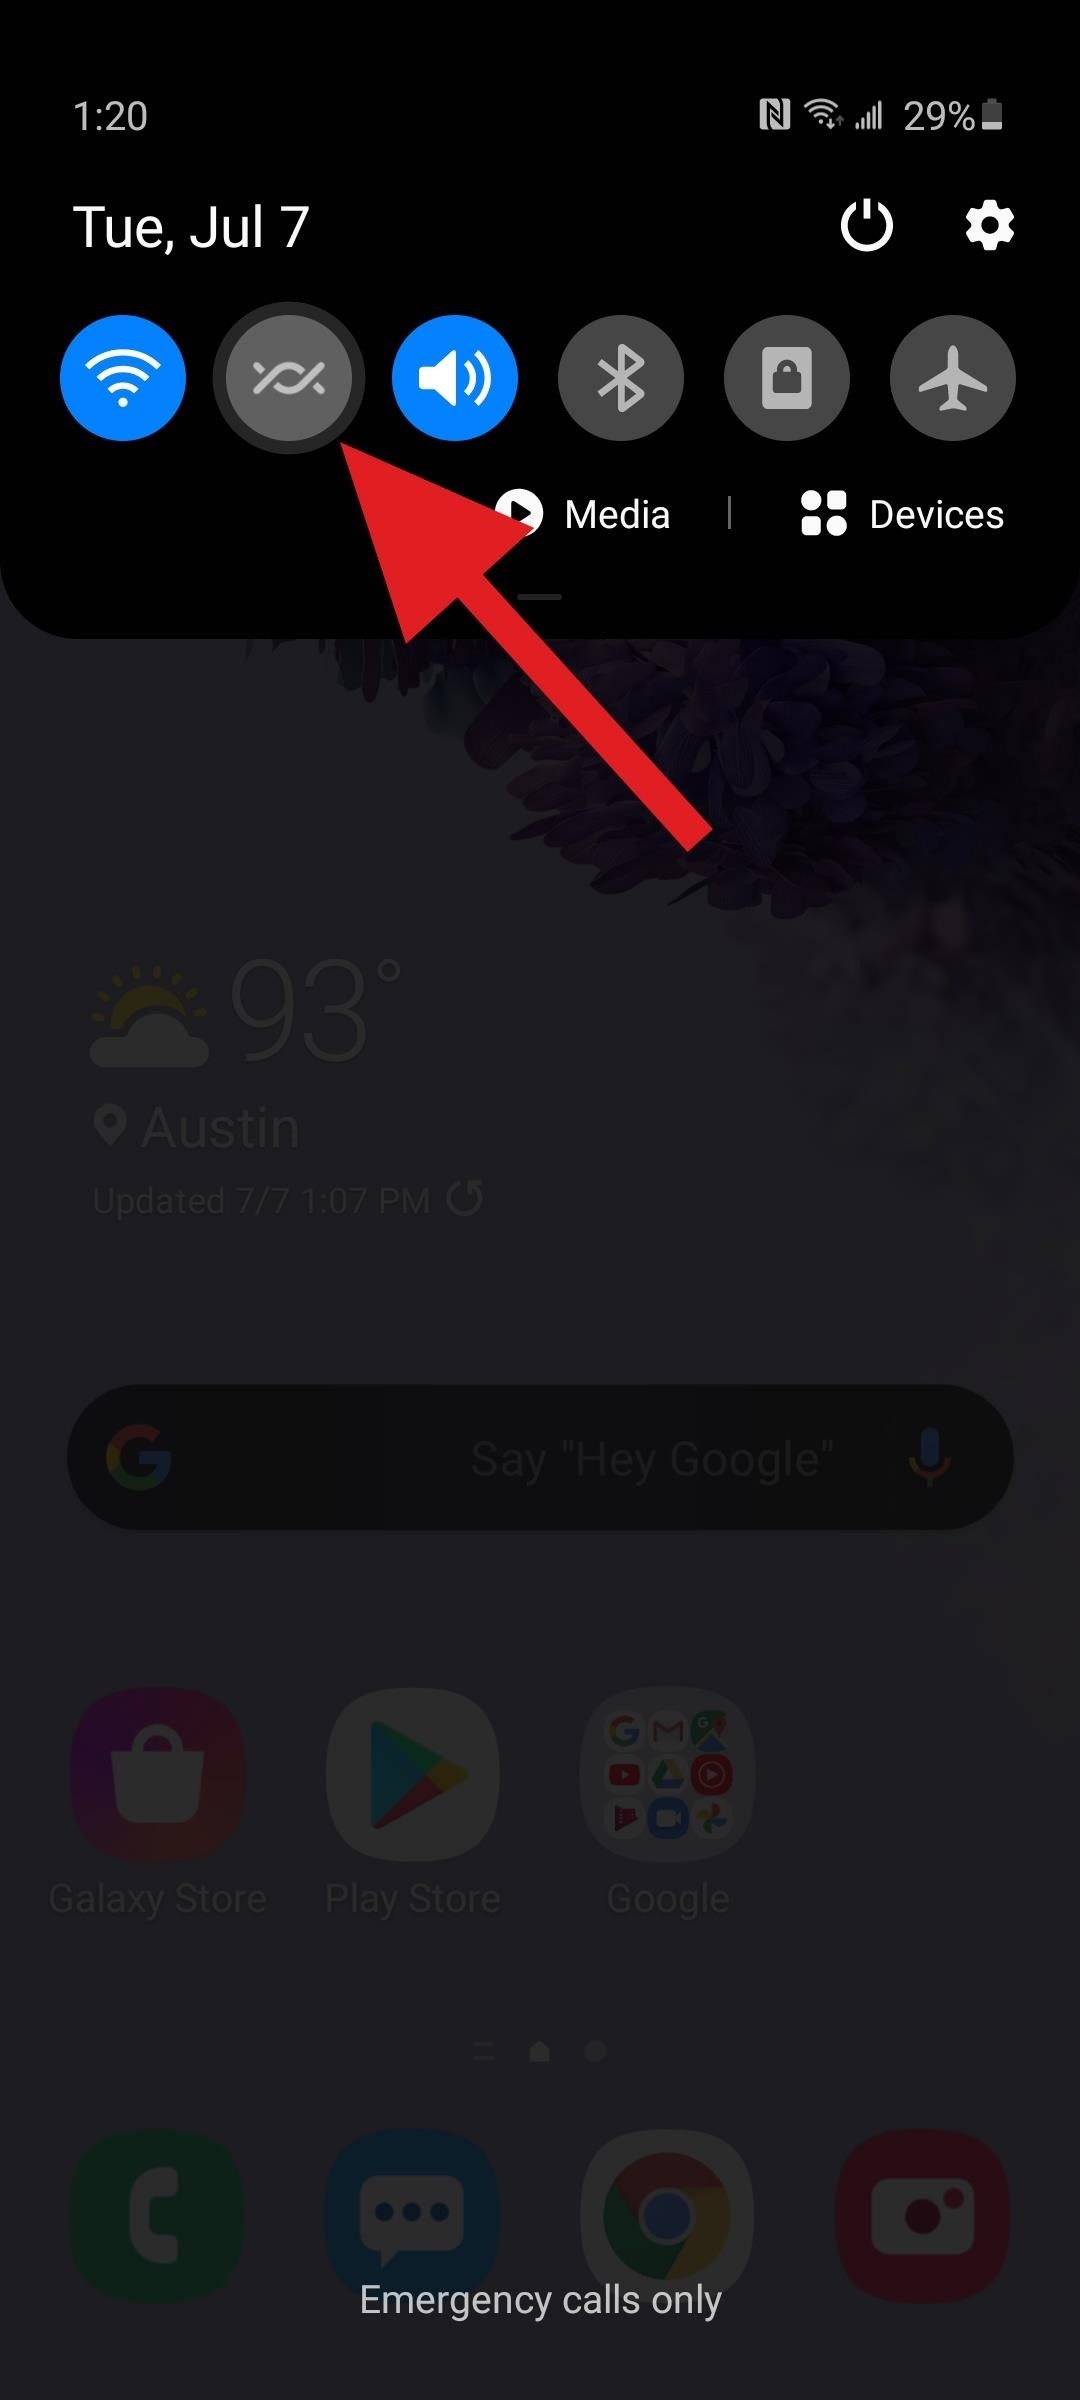
Once you find the toggle, drag it from the inactive area and drop it in place among your active tiles. If it’s already in your active tiles, great! But you should know that only the first six toggles show up in the mini-Quick Settings view when you swipe down one time. After that, and you’ll have to swipe down twice to expand the menu in the future, then possibly swipe to the left to see it among the additional tiles.
Step 2: Choose Who Can See Your Phone
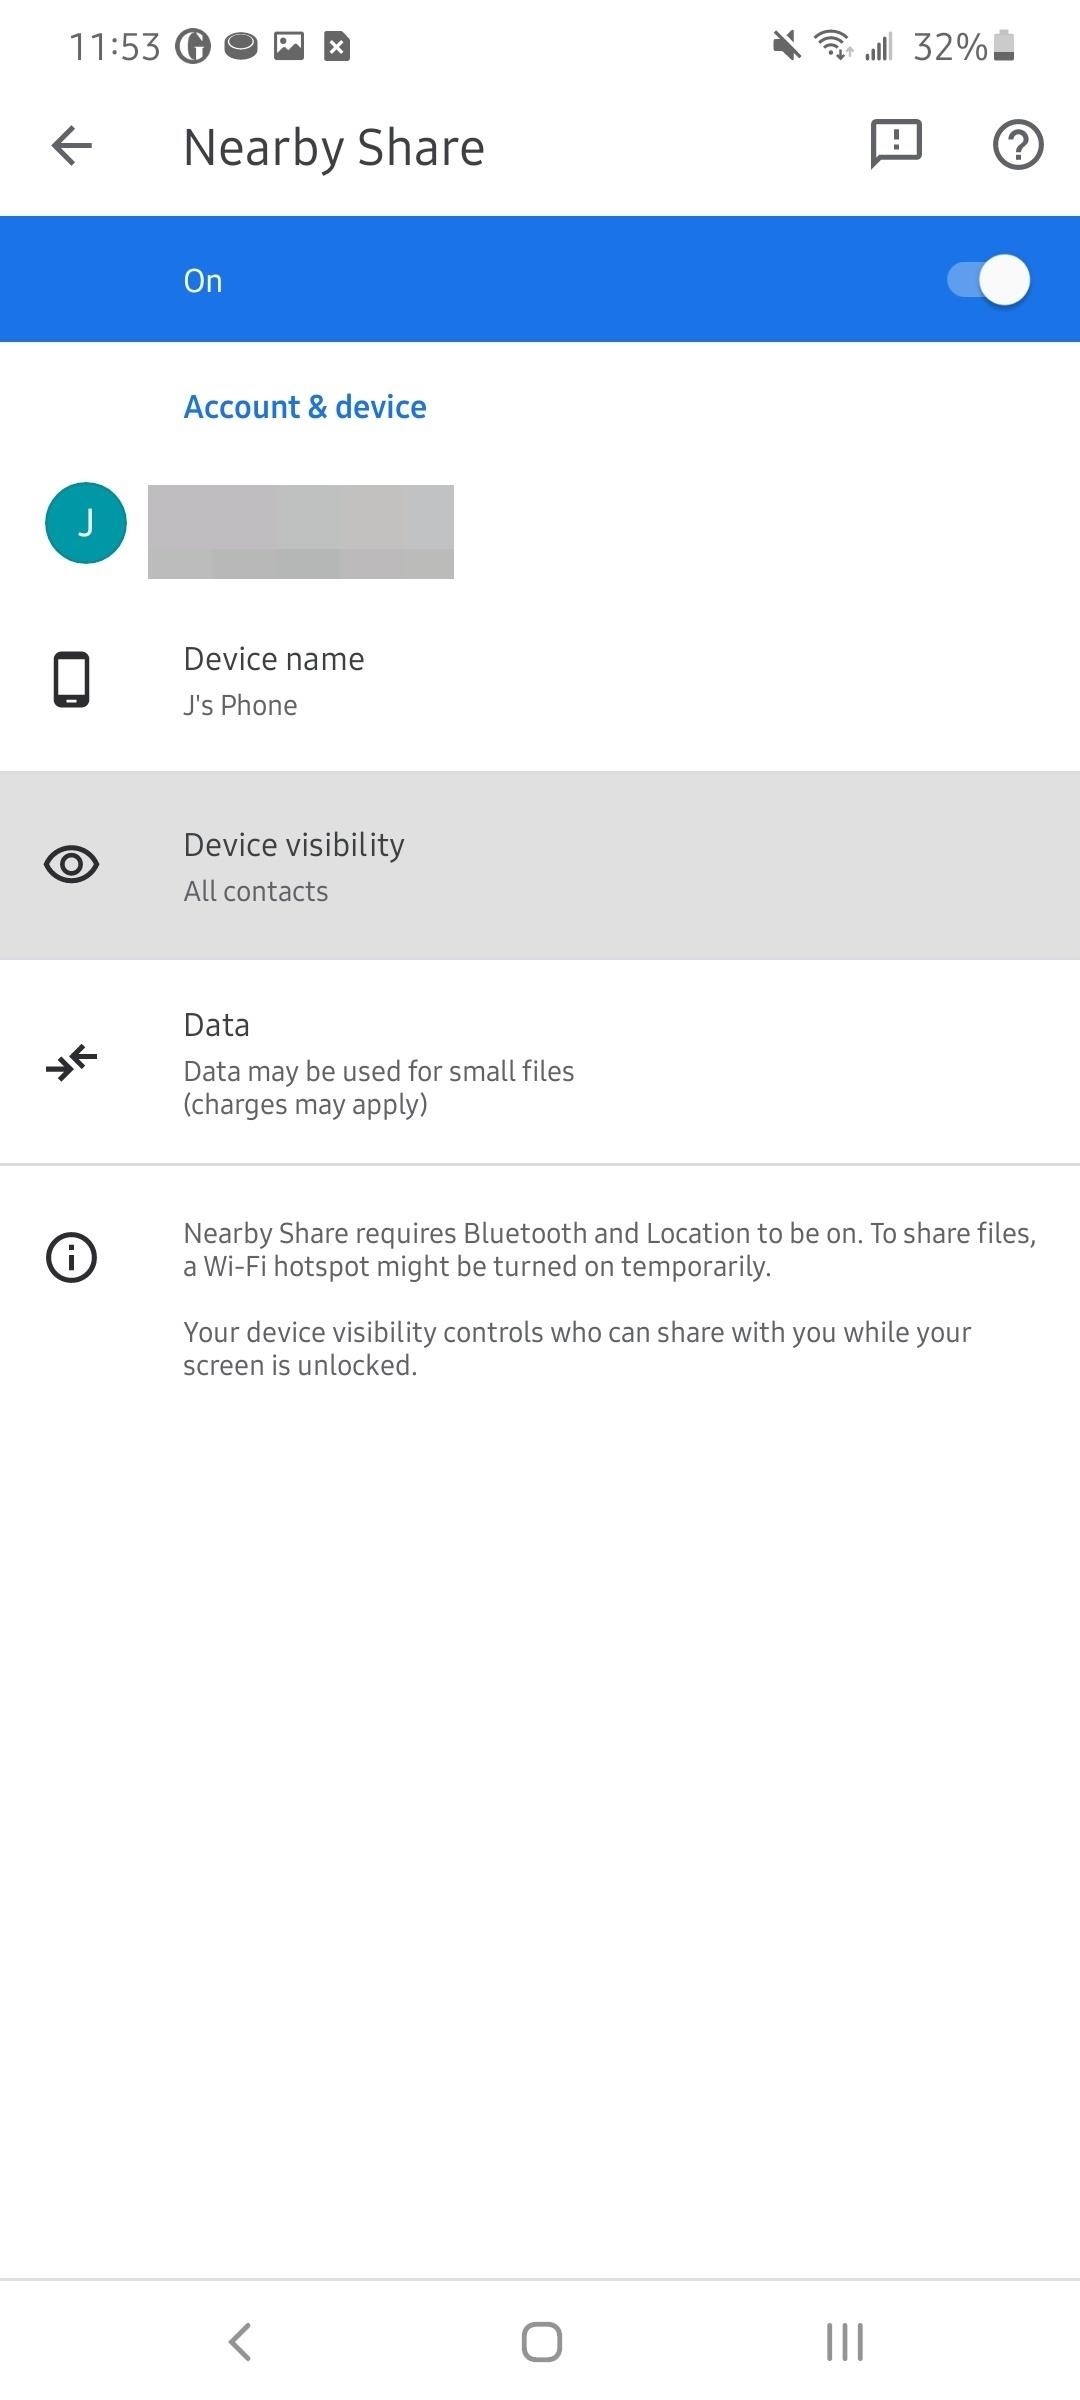
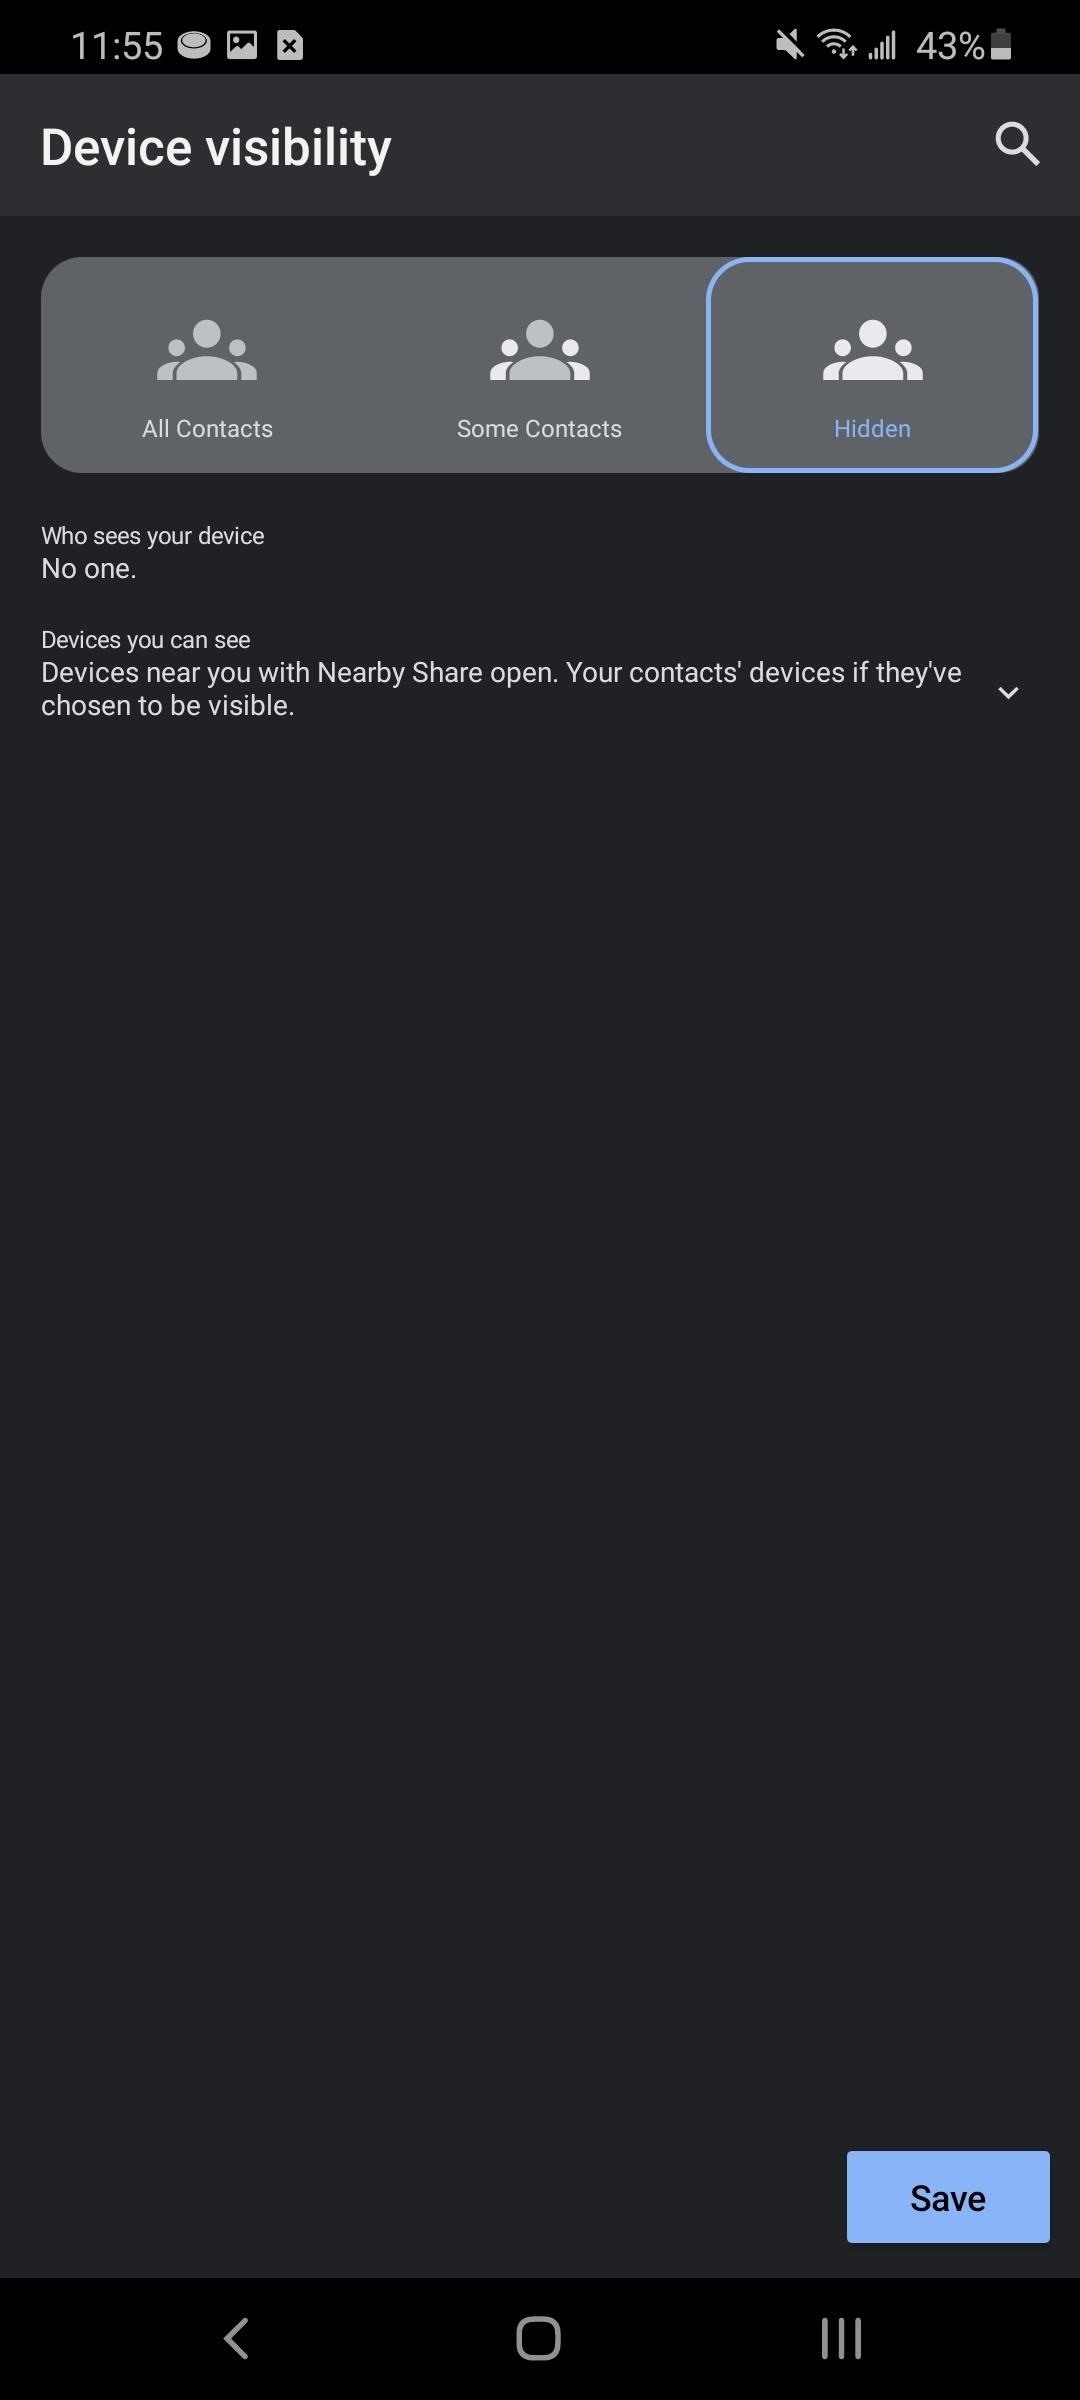
Since AirDropping nudes to complete strangers is a thing, Google has implemented a few security measures to protect users from unintended transfers. So first, access your Nearby Share settings by long-pressing the Quick Settings toggle you added in Step 2. Here, select “Device visibility” to configure who can send you items.
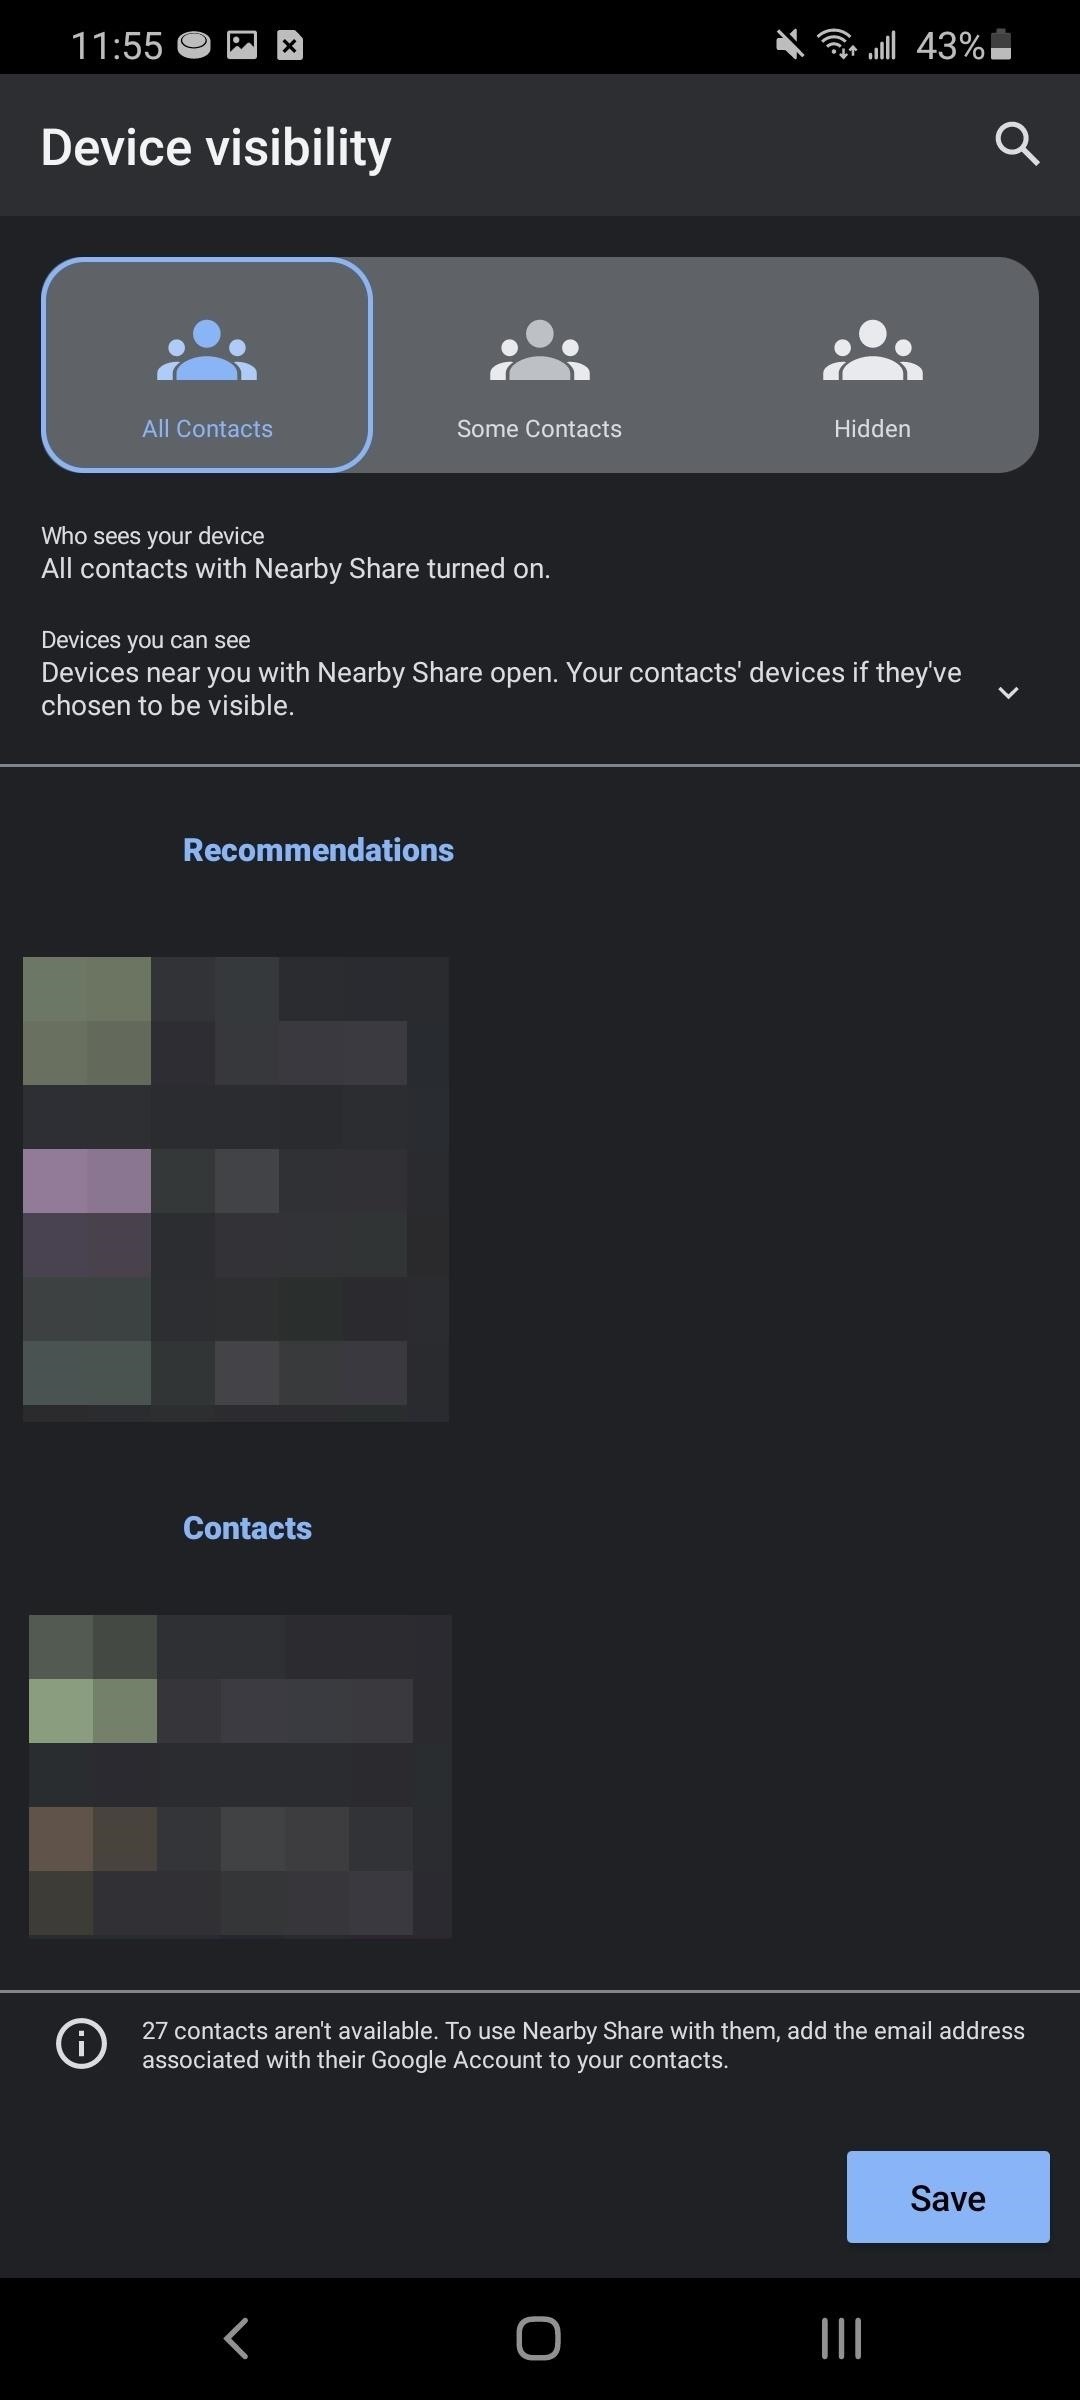
Setting this to “All Contacts” will allow anyone nearby to see your device and send files to it (you’ll still have to tap “Accept” before the file will transfer). On your end, you will also see all nearby devices with Nearby Share once you initiate a share, including your contacts if they choose to be visible.
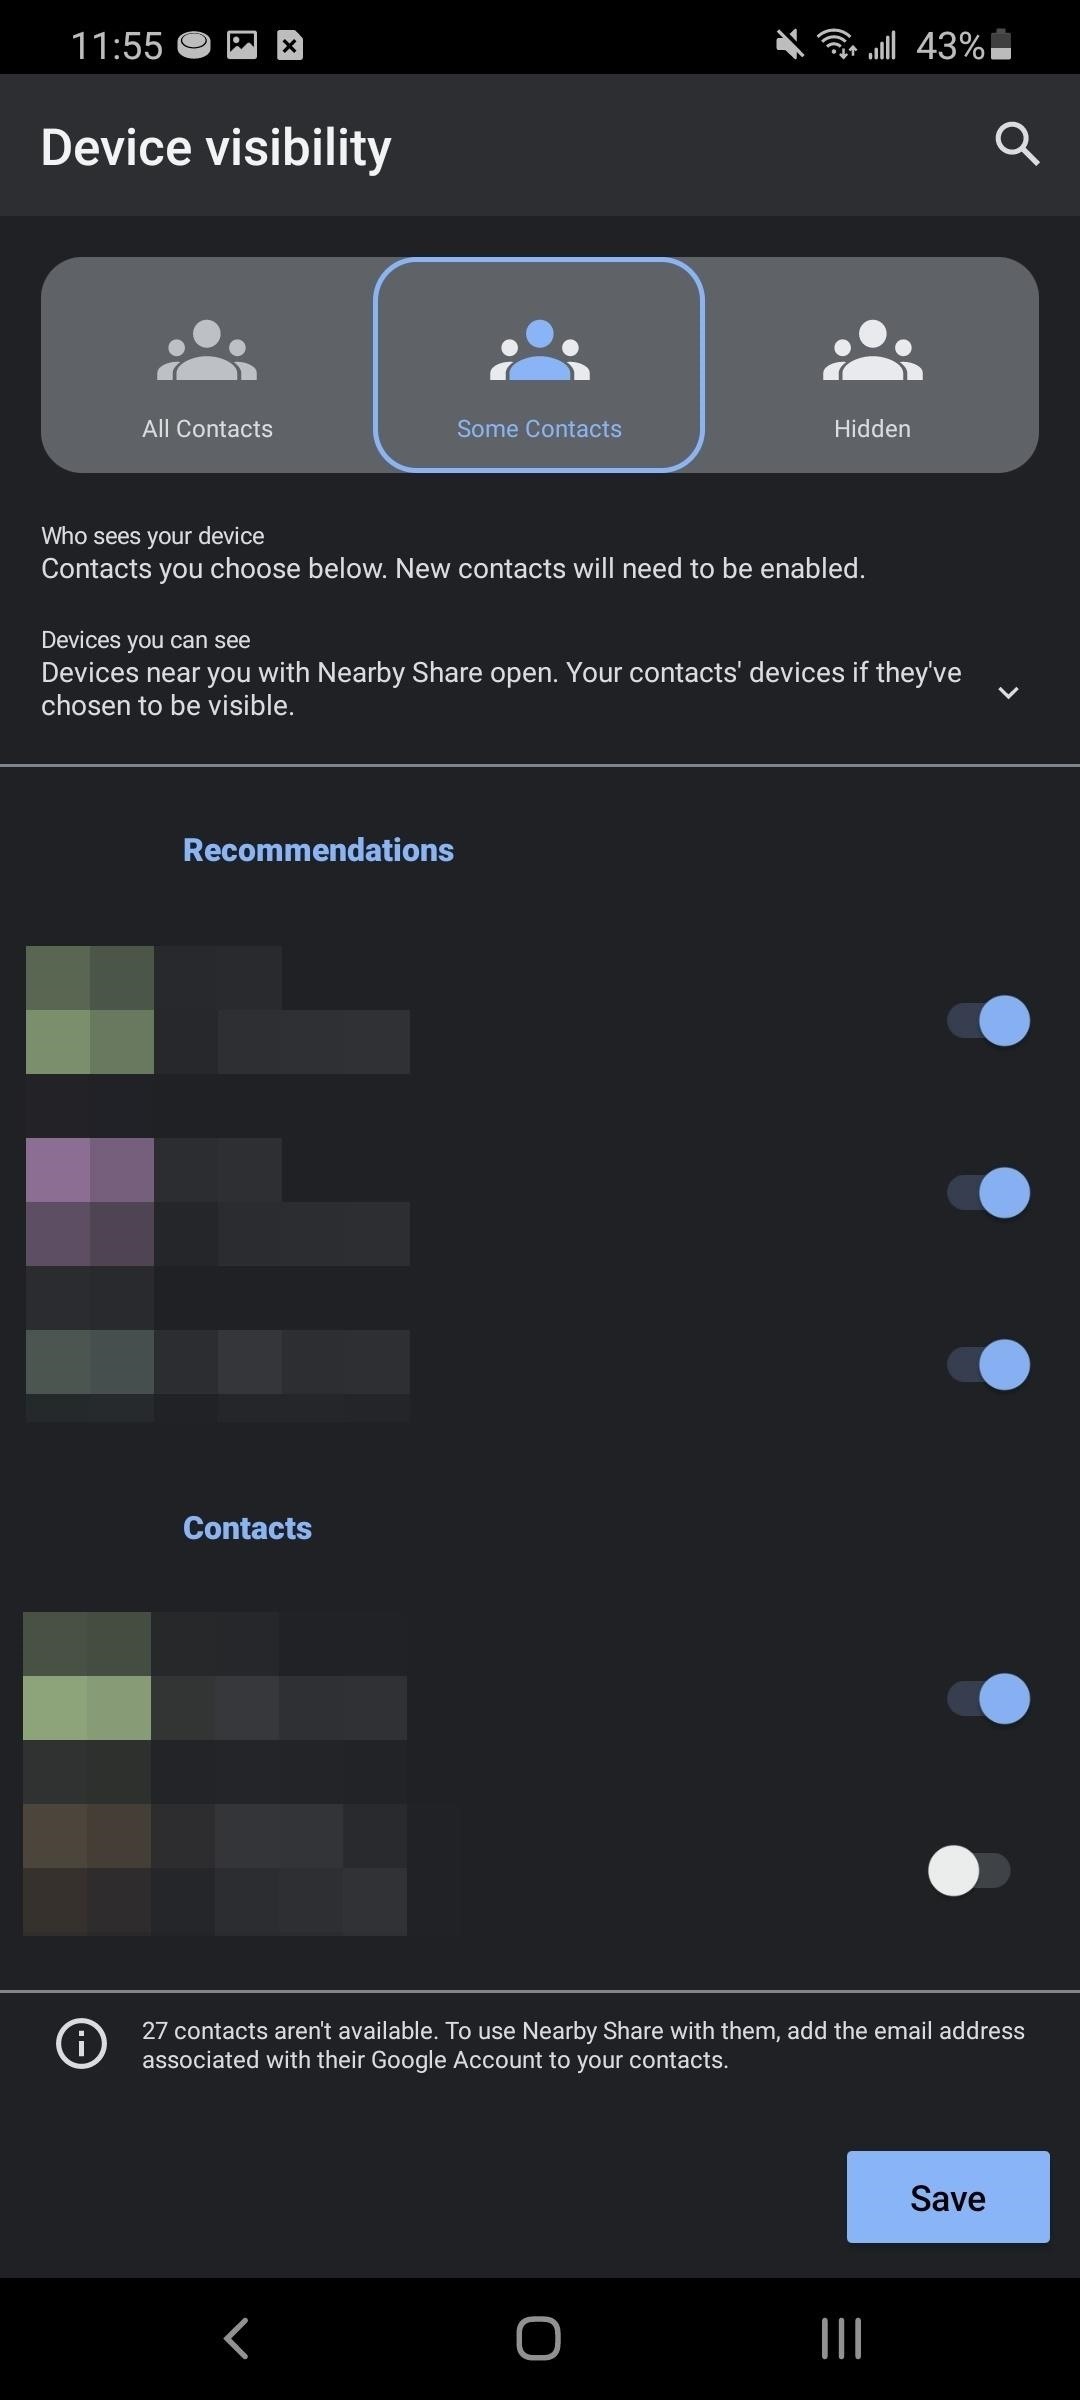
Choosing “Some Contacts” will limit your visibility only to specific people. Google will even recommend your starred contacts to be added and place them on the top of the list. In this mode, your device can see anyone who has Nearby Share open, has chosen to be visible, and is in your contacts.
Finally, there is “Hidden,” which blocks anyone from seeing you. You’ll still see closeby devices with Nearby Share enabled as well as contacts who have chosen to be visible. If you’re in an area where you know you don’t want to share (such as airplanes and subways), use this option to protect yourself from potential spam.
Step 3: Decide on Data Usage
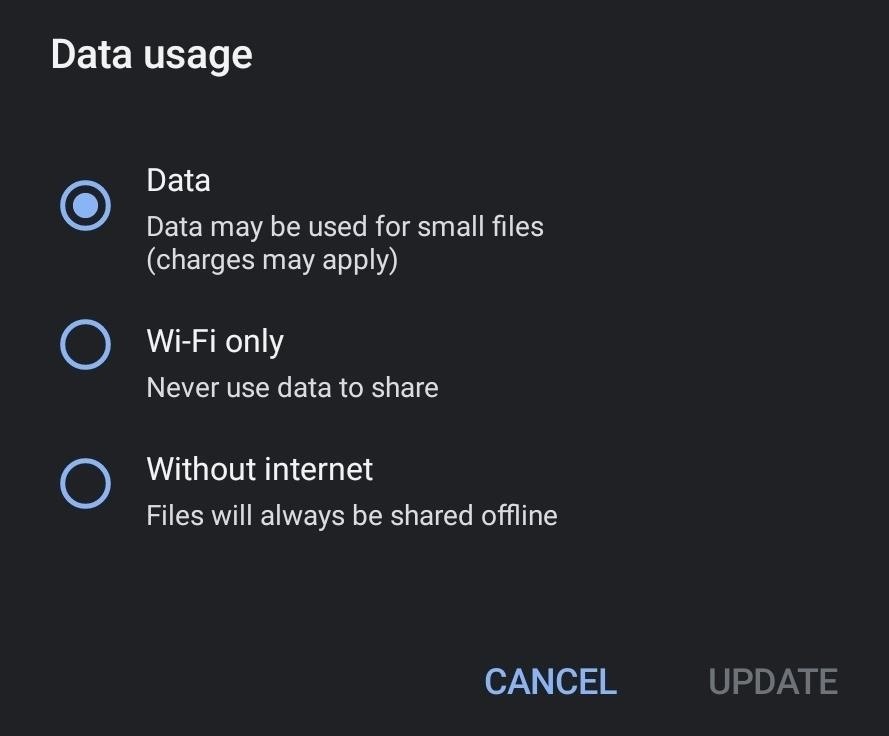
Nearby Share can use one of four protocols to share files: Bluetooth, Bluetooth Low Energy, WebRTC, or Wi-Fi Direct. It can also use cellular data, which you can limit using “Data usage,” found by long-pressing the Quick Settings toggle, then choosing “Data usage.”
If you select “Data,” cellular data will be used to transport smaller files. “Wi-Fi” will always only use Wi-Fi to transfer files, no matter their size. “Without internet” will disable any method that uses the internet, instead relying on Wi-Fi Direct to complete the transfer.
Step 4: Send a File or Link to Someone Nearby
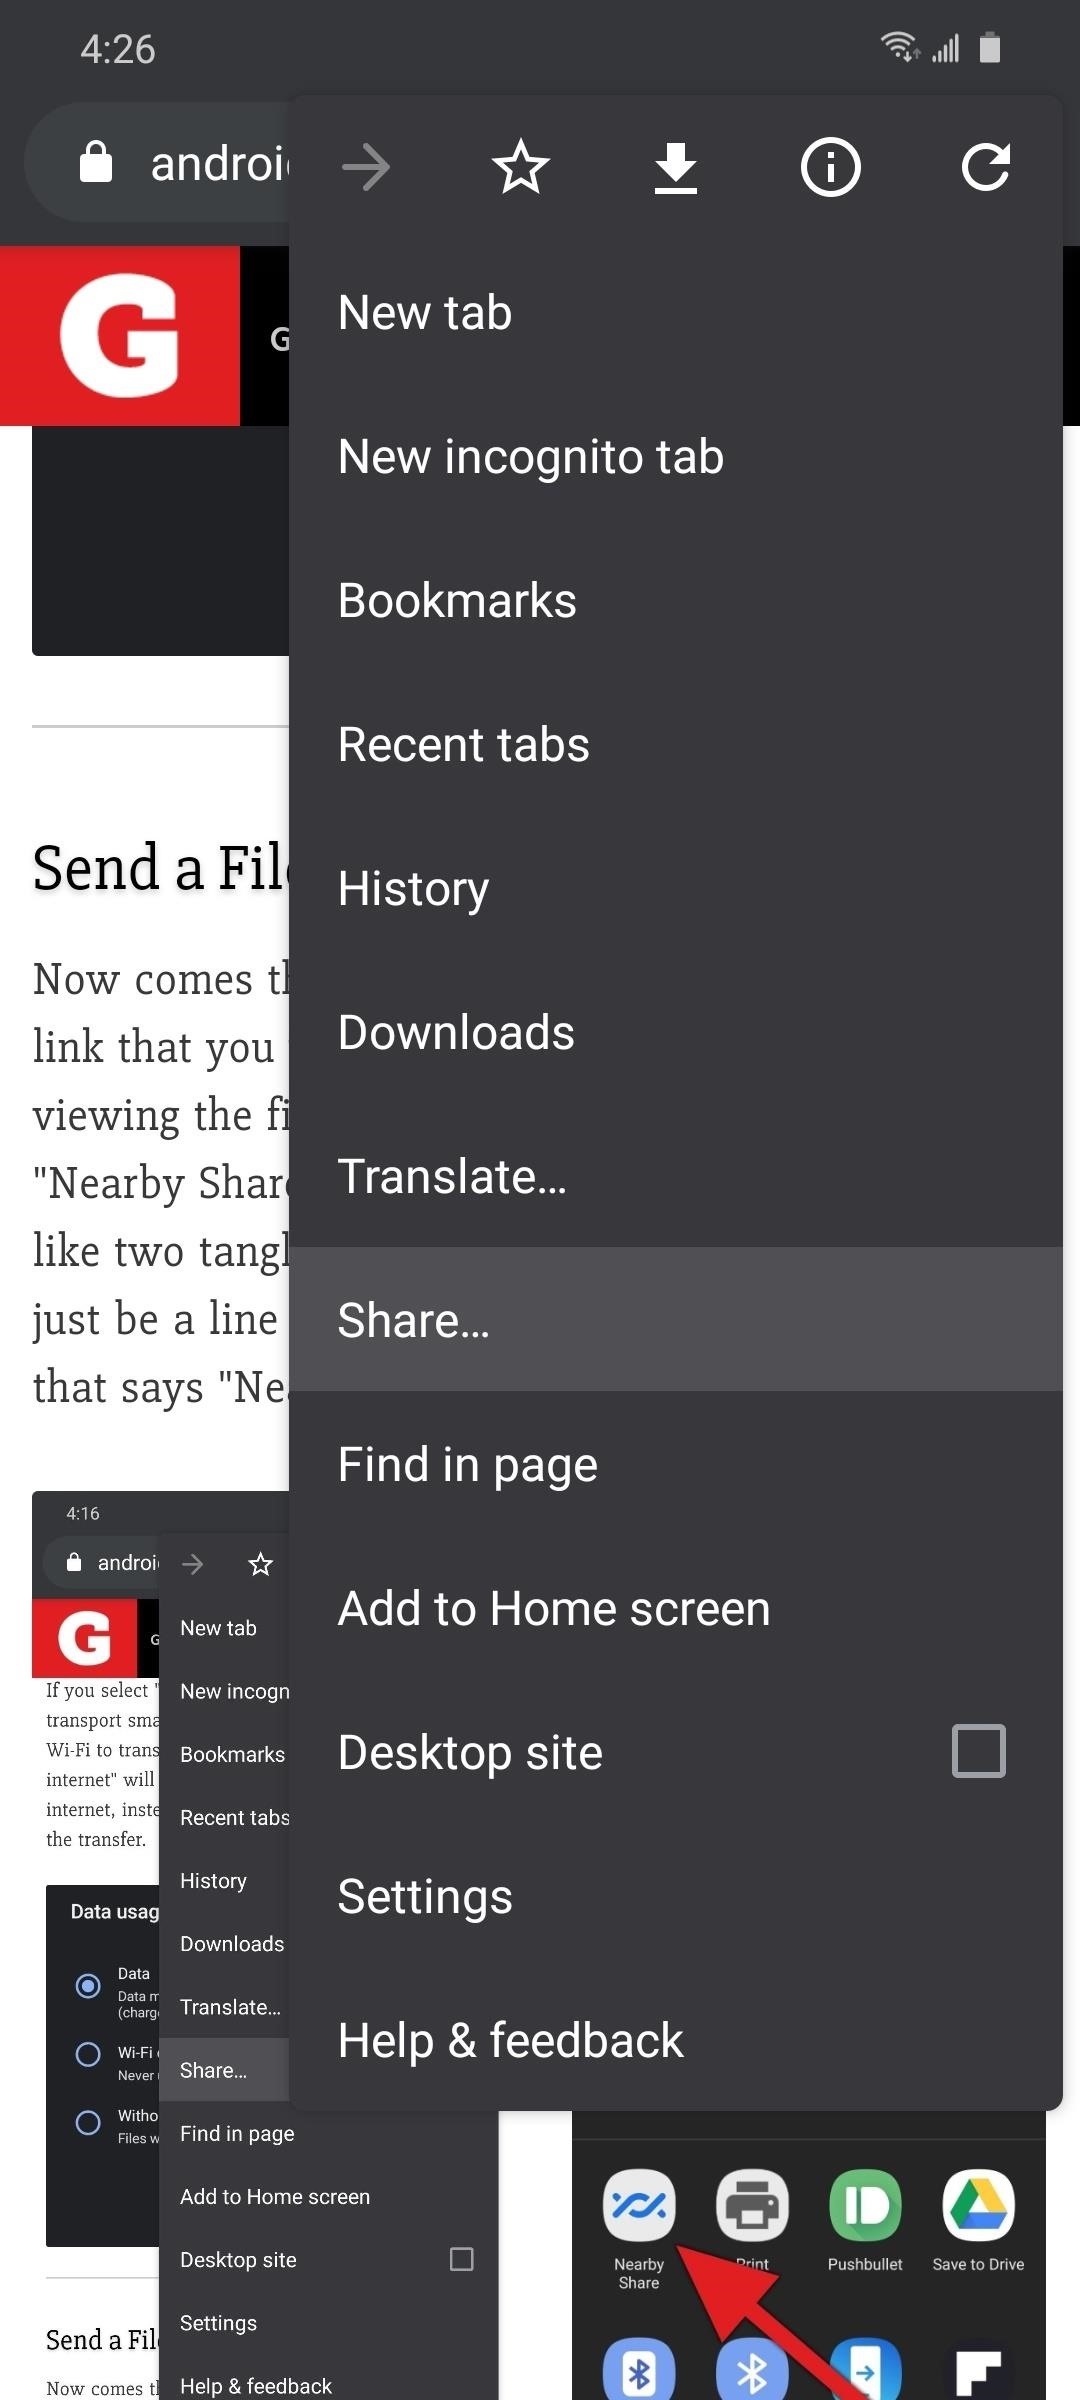
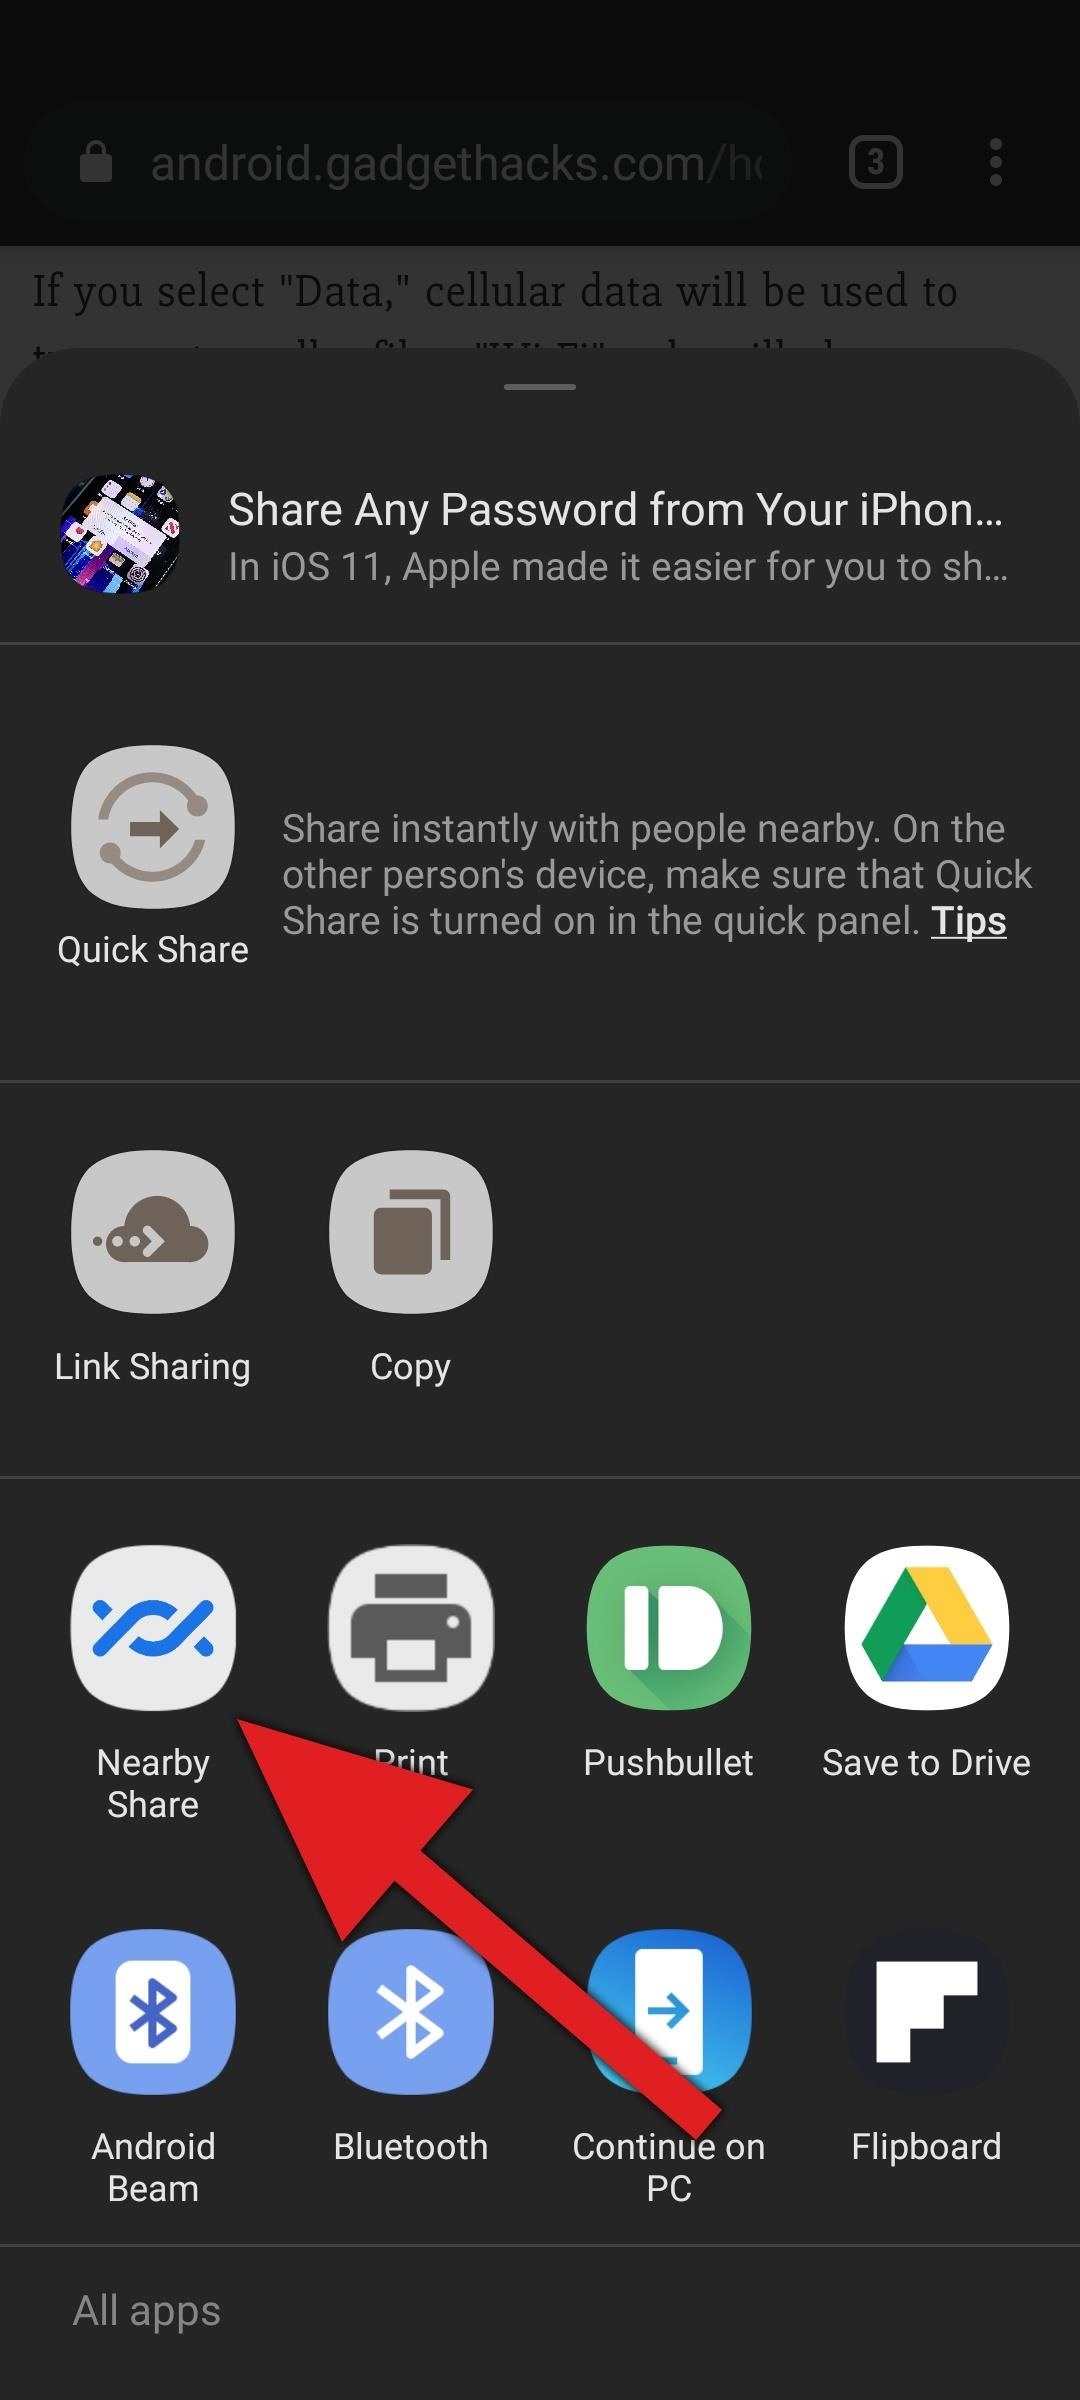
Now comes the fun part! In any app, find a file or link that you want to share with a friend. While viewing the file, tap the share button and you’ll see “Nearby Share” as one of the options. Its icon looks like two tangled lines, but on some phones, it may just be a line of text at the top of the share menu that says “Nearby Share.”
Once you select Nearby Share, you will be asked to turn on three sensors: Wi-Fi, Bluetooth, and Location. Select “Turn on” to enable these sensors, or manually enable them using their corresponding Quick Settings tiles.
A prompt will appear displaying nearby eligible devices. If they haven’t already, have your friend set up the Quick Settings tile and long-press it, then head to head to “Device visibility” and make sure it’s set to something other than “Hidden.”
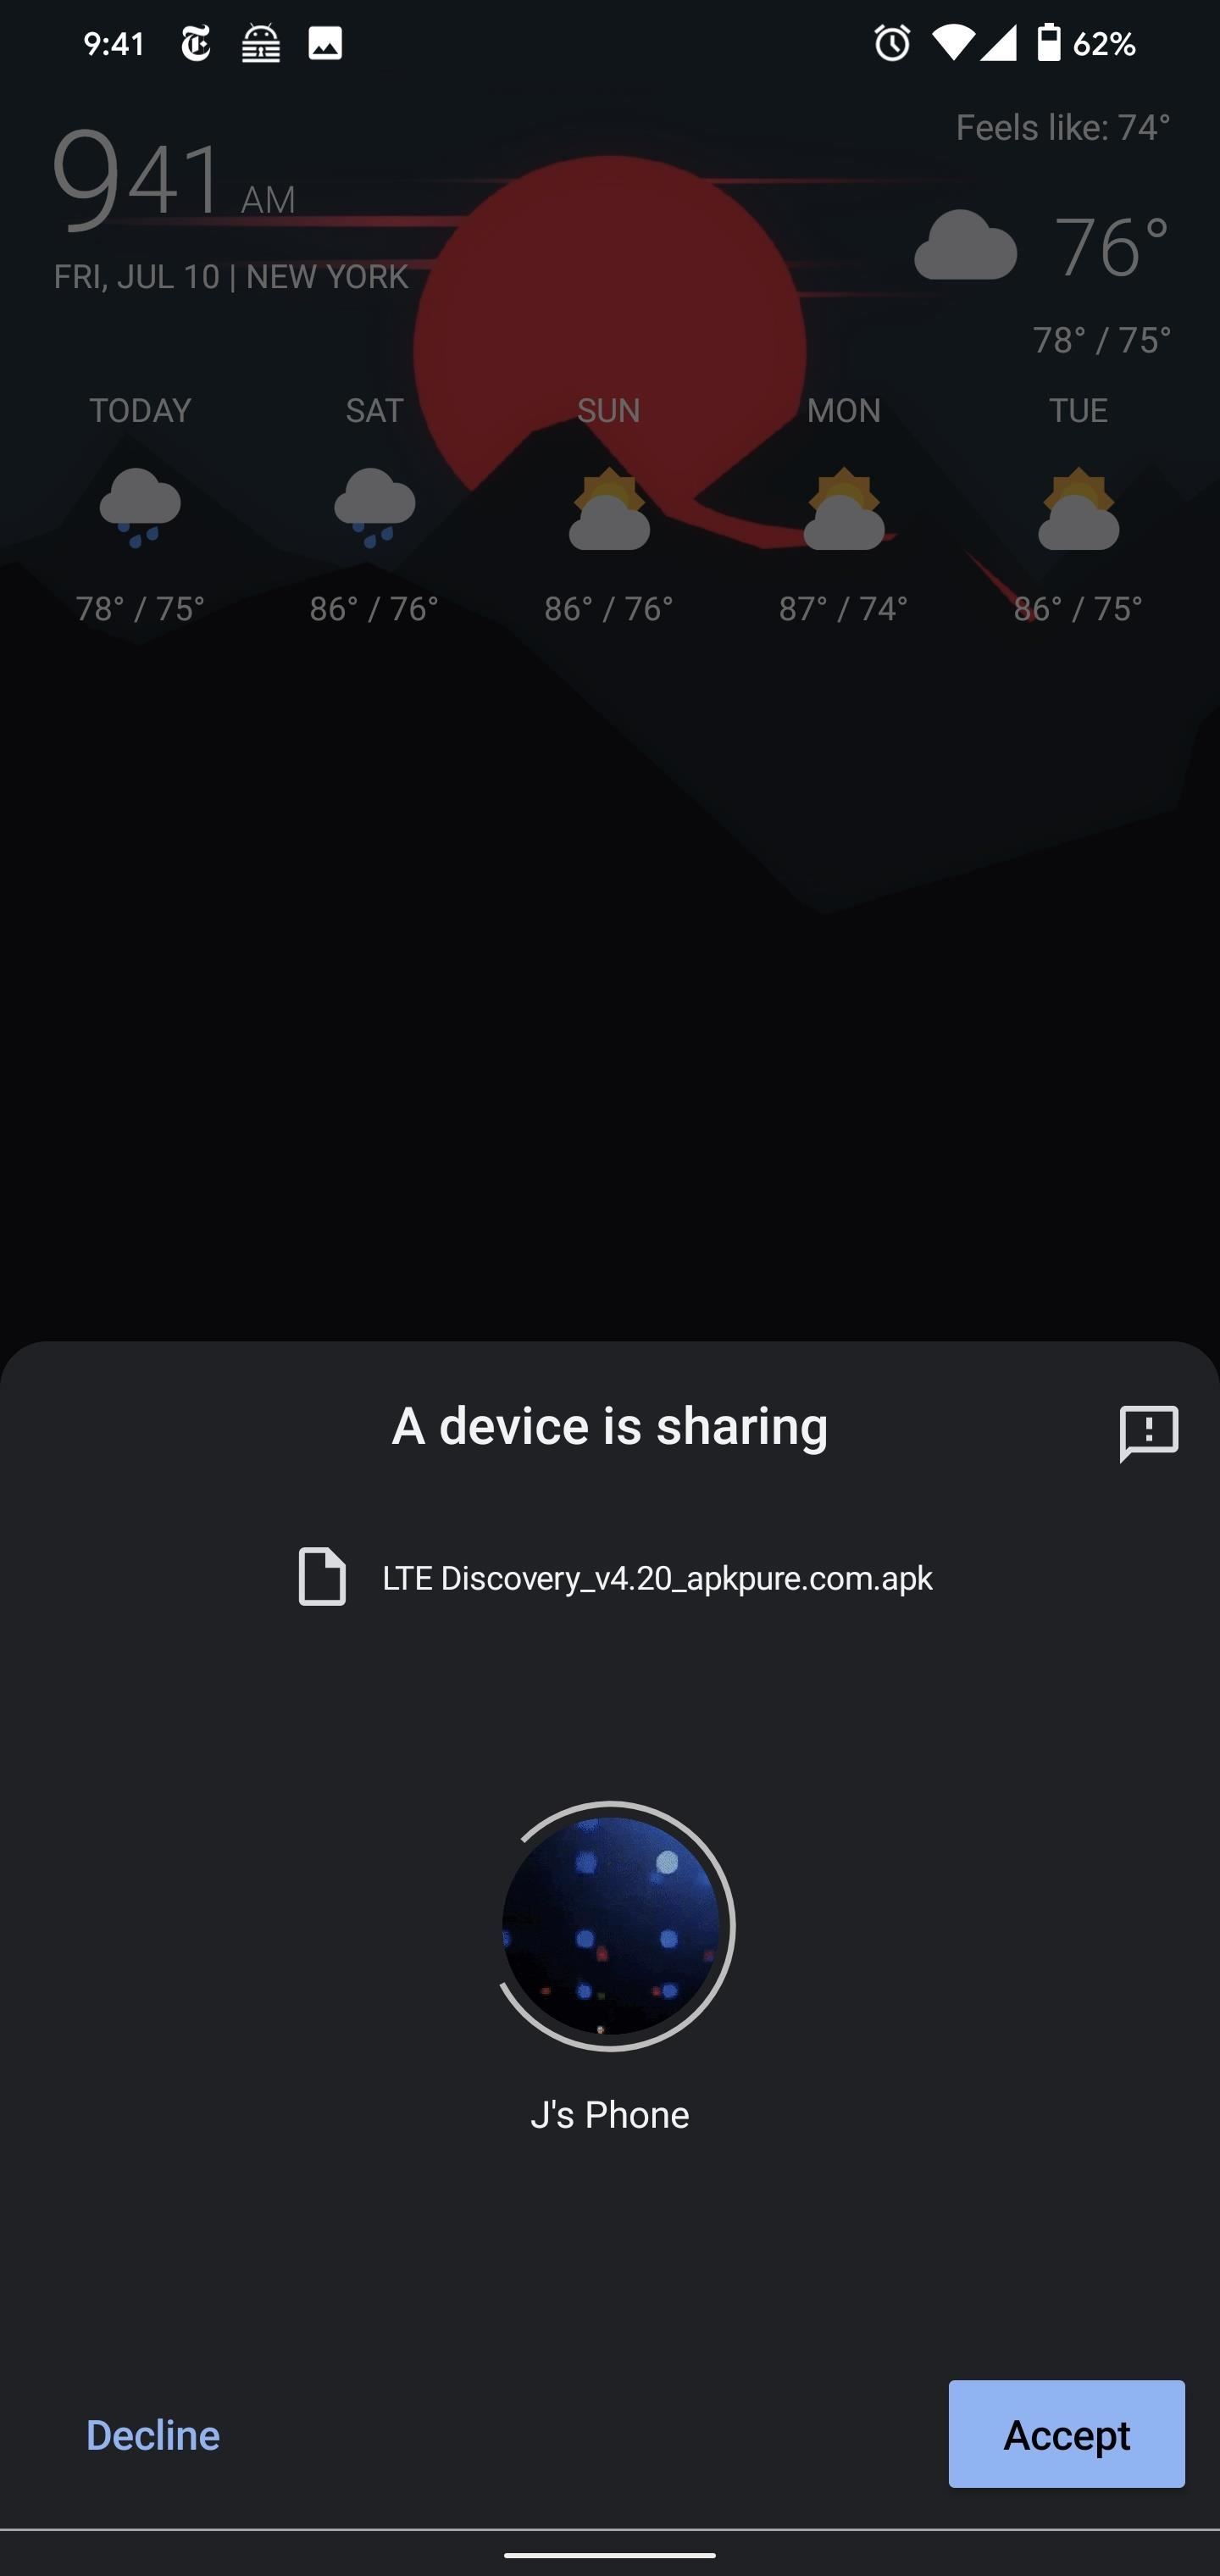
You’ll now see all eligible devices within range, even if Nearby Sharing isn’t currently open. Select your friend’s phone, and a notification will appear on their end asking if they wish to open Nearby Share (they can also just tap the Quick Settings tile to make their phone visible). Accept this, and a prompt will appear asking if they wish to accept or decline the file being shared.
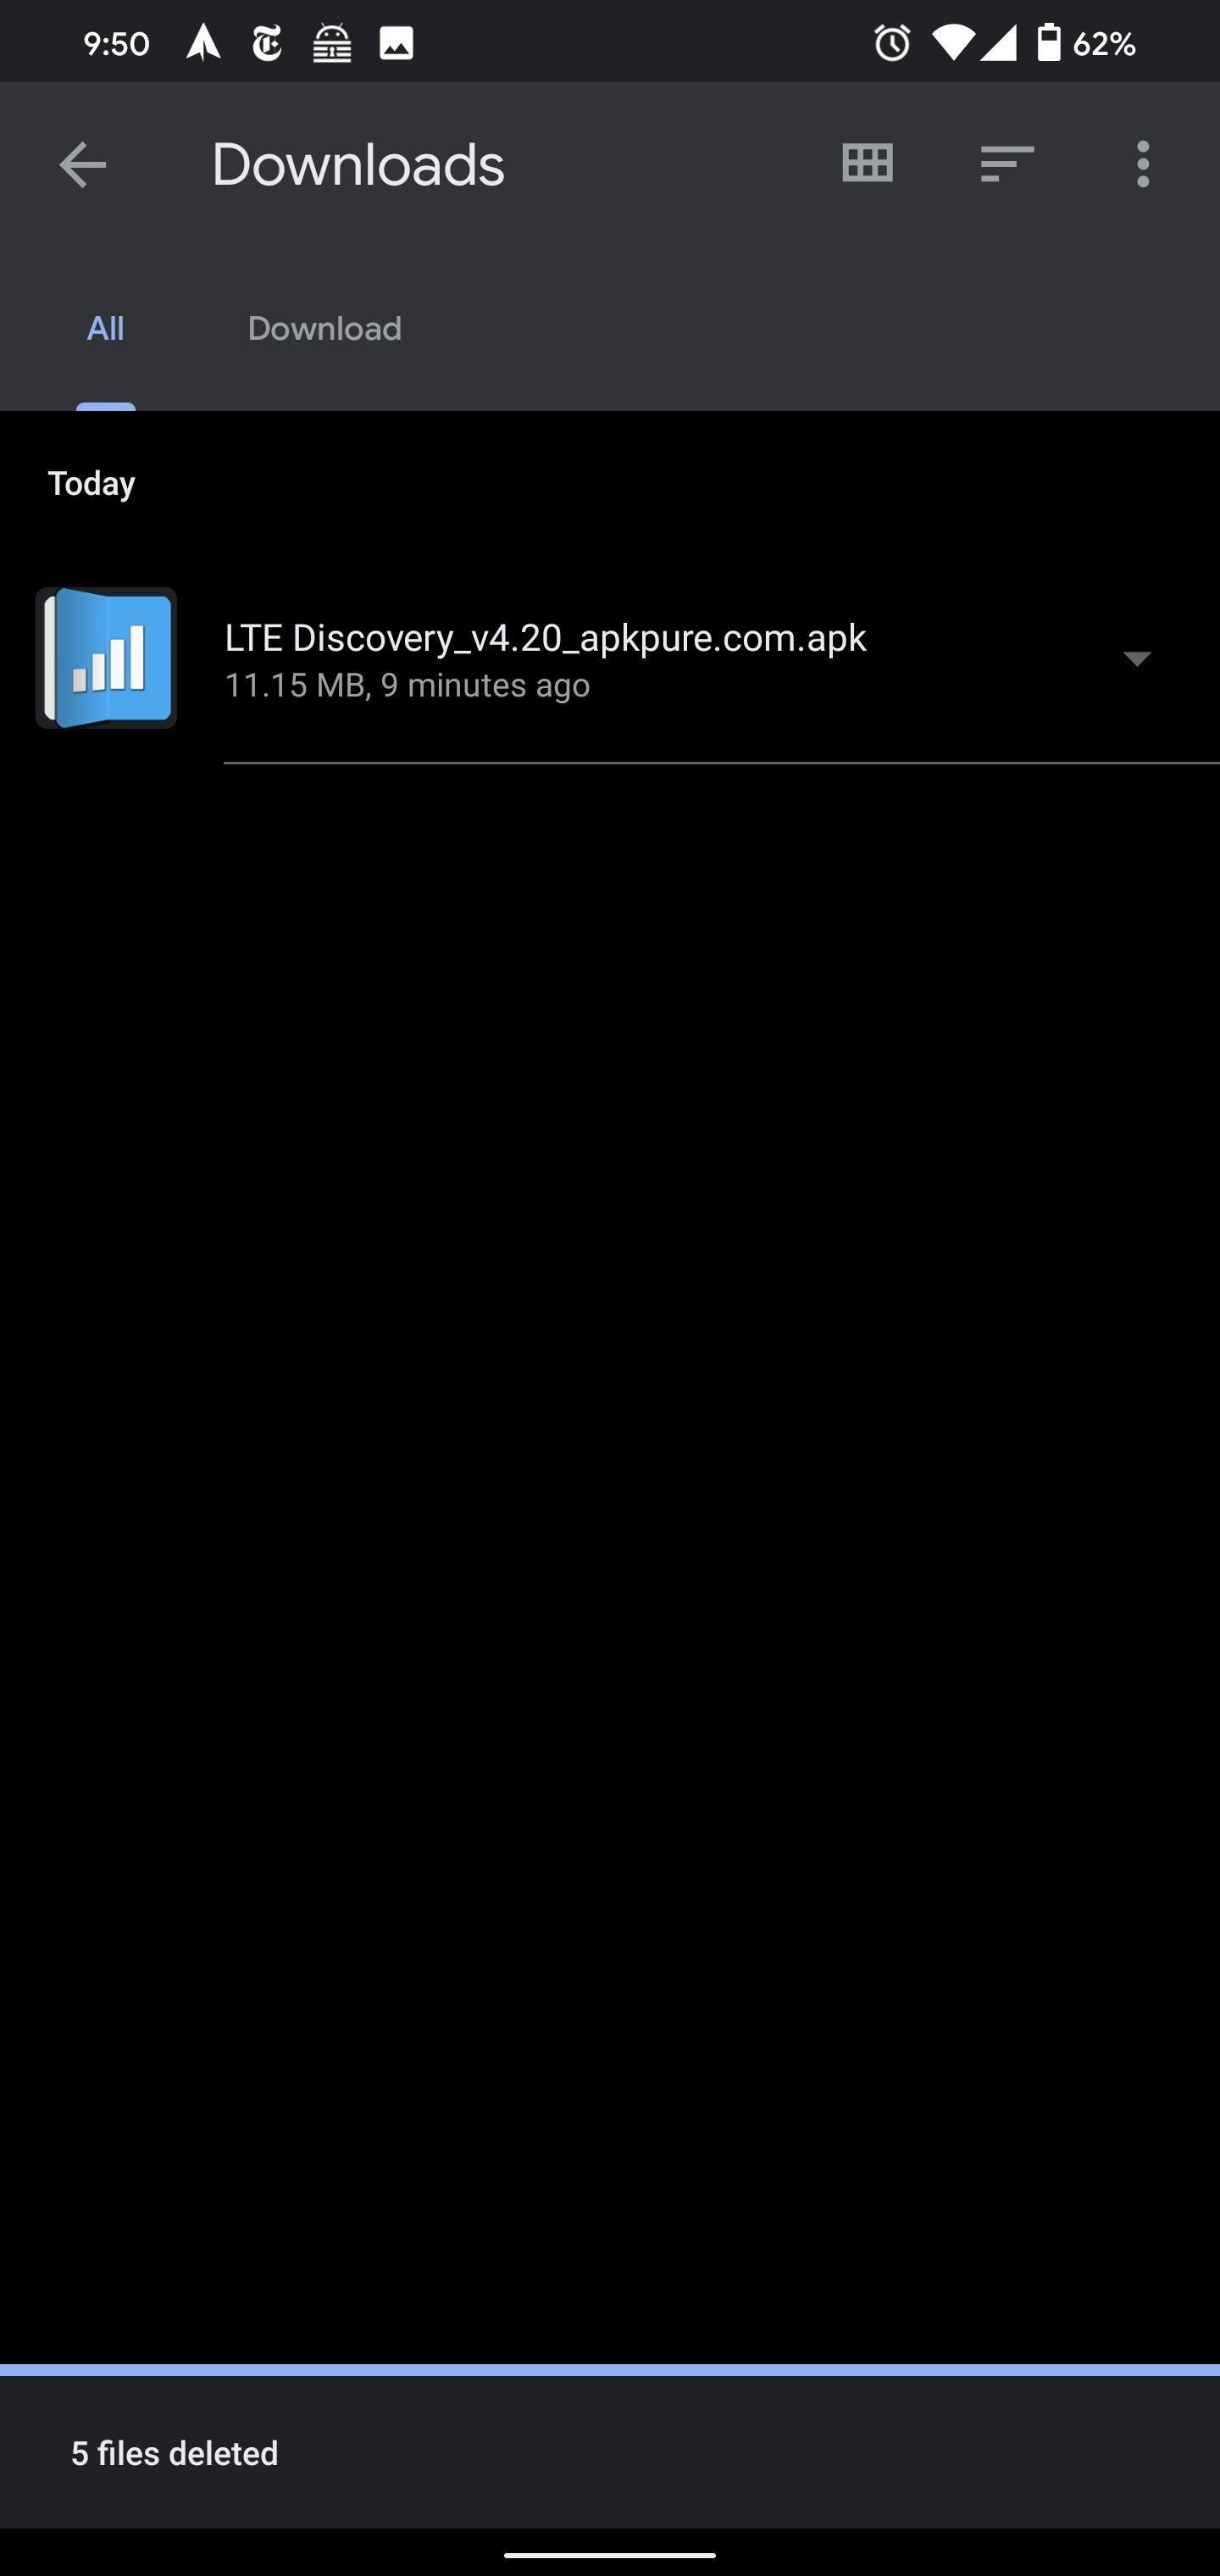
Once they choose “Accept,” a progress bar will appear around their picture (or first initial) in the menu on your phone. Once completed, the file will be stored in their Download folder. For shareable items that aren’t files, the corresponding app will open (for example, URLs will open the browser, while Tweets will open the Twitter app).
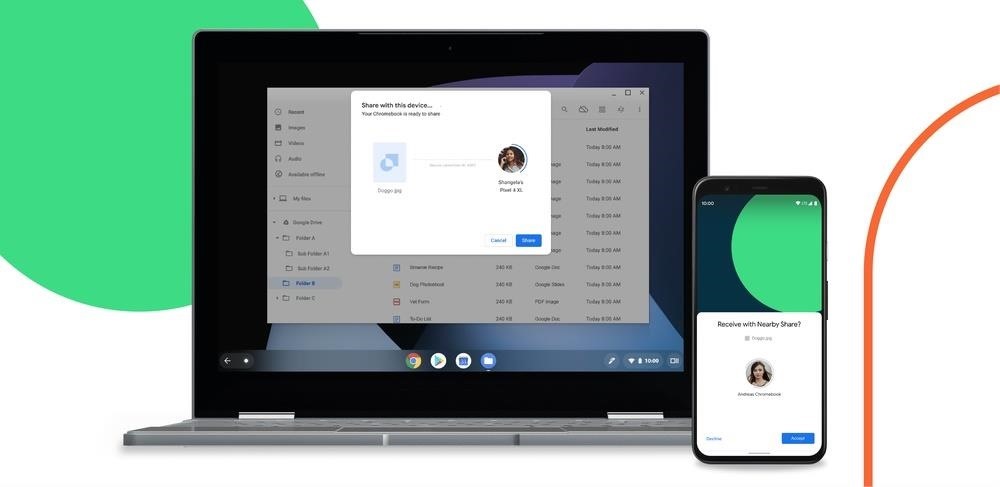
At the time of writing, it is only available to select Android devices. According to Google, in the coming months, it will work with Chrome OS devices. So stay tuned!
Hot Deal: Set up a secure second phone number and keep your real contact details hidden with a yearly subscription to Hushed Private Phone Line for Android/iOS, 83%–91% off. It’s a perfect second-line solution for making calls and sending texts related to work, dating, Craigslist sales, and other scenarios where you wouldn’t want to give out your primary phone number.
“Hey there, just a heads-up: We’re part of the Amazon affiliate program, so when you buy through links on our site, we may earn a small commission. But don’t worry, it doesn’t cost you anything extra and helps us keep the lights on. Thanks for your support!”


