The autocorrect feature in Apple’s default iOS keyboard is anything but perfect. Sometimes it can’t autocorrect things on your iPhone to want you want, while other times there’s a software bug that just flat out gets it wrong. These autocorrect issues can get even worse thanks to Apple’s predictive text feature, QuickType, and the inability to edit your custom dictionary.
Apple’s stock keyboard can get tripped up easily with obscure words, a different language, uncommon names, and curse words, but when it comes to software glitches like the infamous “i” to “A ?” failure, or less common iOS autocorrect bugs such as “it” to “I.T.” and “is” to “I.S,” it can seem like there’s nothing to be done. But there is. There are a few things, actually, that you can try out.
If autocorrect is driving you a little nuts, we’re going to give you a few tips on how to make it play nicer on any iPhone running iOS 11.0 or higher. A lot of these tips can also apply to older iOS versions, all the way back when QuickType was first released on iOS 8, and even further back to iOS 7. So, if you have an older iPhone that doesn’t support iOS 11, you can still find help here.
Tip 1: Add a Unique Name to Your Contacts
Autocorrection has a difficult time correctly spelling names that are uncommon, usually ones that are foreign to your native language or the strange names you give to your pets. As you can see below, the Irish names Cathal and Niamhe show up as “Cathay” and “Miami” in the QuickType predictive bar, then autocorrect to those after hitting the space bar.
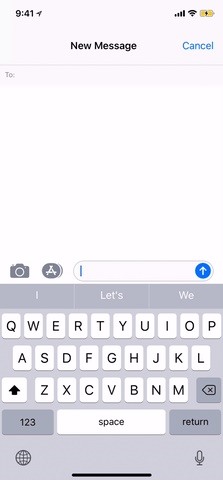
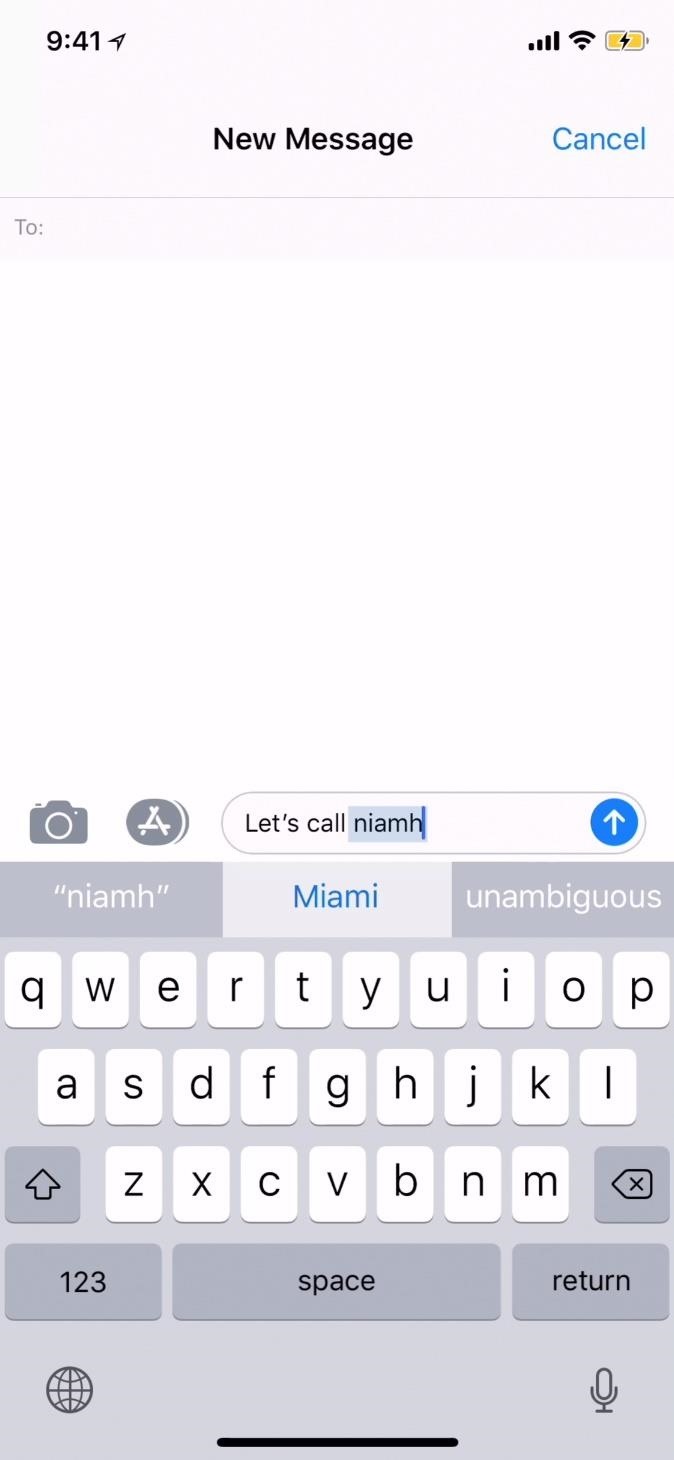
An easy way to teach autocorrect how to learn uncommon names properly is by adding the name to your list of contacts. Open up the Contacts app, or select “Contacts” from the Phone app, then tap the plus (+) sign to add a new contact. Enter the correct spelling of the name, then hit “Done.”
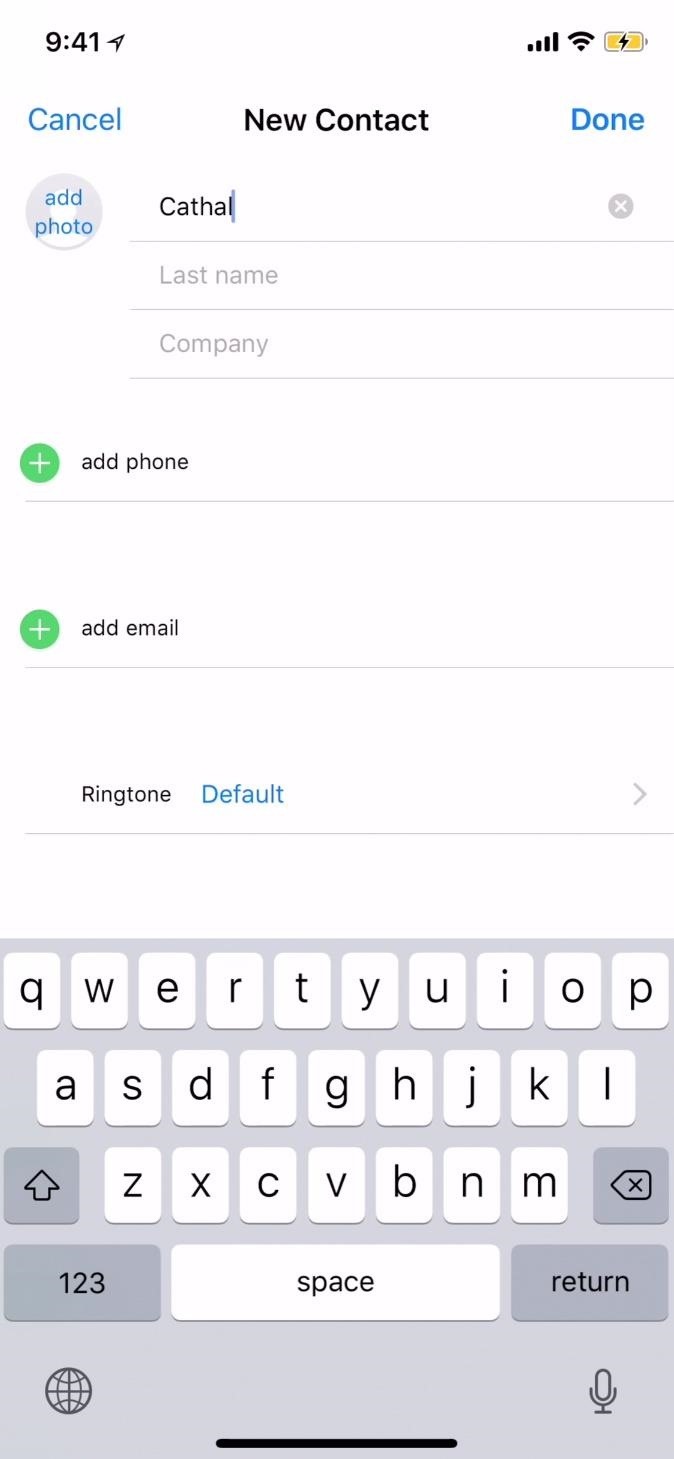
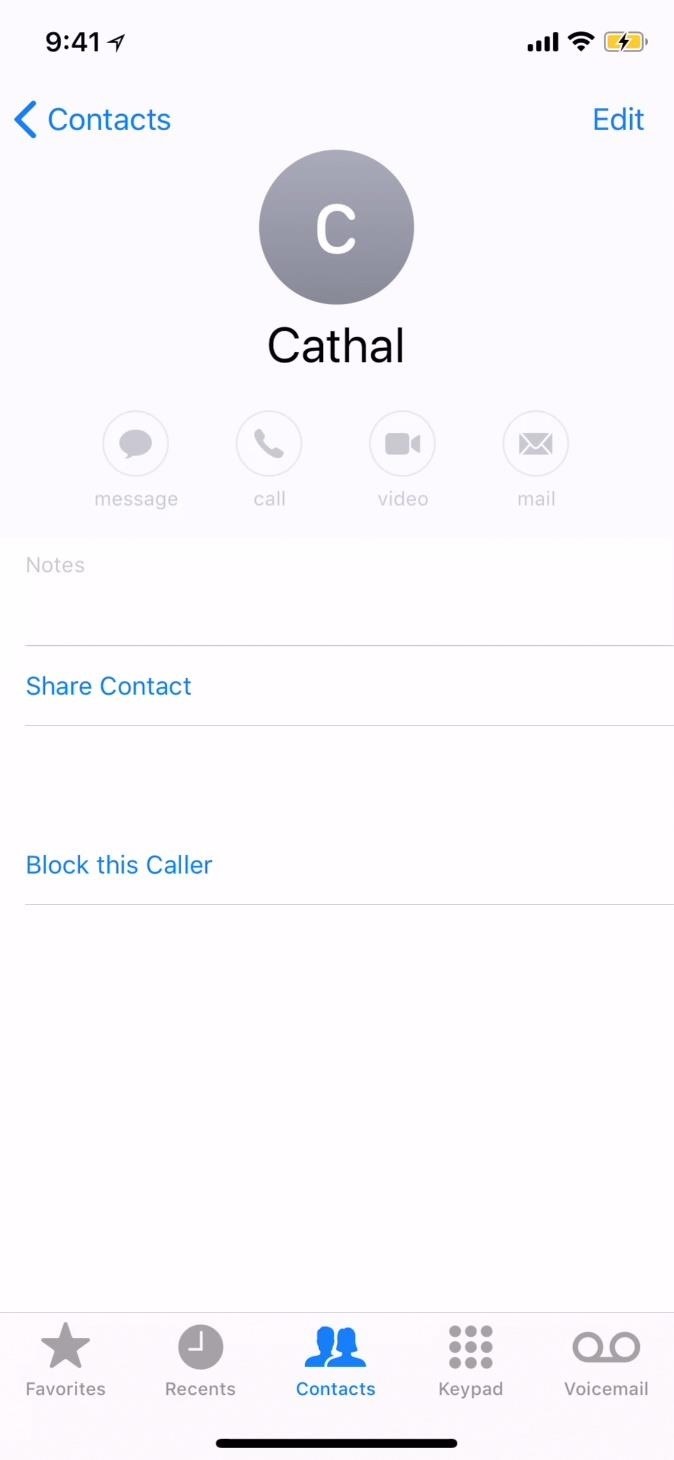
After doing so, typing the name out on the keyboard will not autocorrect to something else. And spelling it incorrectly will mostly autocorrect to the version you actually want. As you can see below, Cathal is not being autocorrected to “Cathay” anymore, and misspelling it as “Catal” gets autocorrect to change it to “Cathal” right away.
Examples of other names that could use this treatment include Caoimhe, Kohen, Arlo, Haiden, and Anoushirvan. If you’re using the name enough, it might be a good idea to place it in your contacts list, even if you don’t have a phone number or email address for that person.
You can even place made-up words that you use in any of the three contact lines (first name, last name, company) and your keyboard will recognize all of them.
Tip 2: Accept & Reject Auto-Correct Suggestions Wisely
Whether you choose to accept or reject one of autocorrect’s suggestions, that single incident is enough to teach your keyboard which word you prefer to show up in the future. In order to ensure that your correct word is chosen, we’ll go through three scenarios that may arise where you can choose which word you want saved to your keyboard’s dictionary.
Tap ‘X’ in the Autocorrect Bubble to Reject It
Without the QuickType feature on (i.e., “Predictive” text), if the autocorrect bubble that appears above your word is incorrect, tap on the “X” next to it to dismiss it. The word you typed will be saved in your dictionary after one occurrence, even though it may still appear underlined in red.
Auto-Correct It Again
If you’re in a hurry and accidentally auto-correct to the wrong word, press the delete key on your keyboard. This will not only re-highlight the wrong word that auto-correct gave you, it will also give you the option to replace it with the word you intended to use as a bubble — tap the bubble.

Erase the Entire Word
Piggy-backing off of the second tip in this section, you can also completely delete the word that auto-correct gave you and re-enter the word you intended. This will override the auto-corrected word.

While this should work for the most part, it isn’t foolproof. Occasionally, some words will be re-autocorrected by the keyboard, so you’ll have to re-correct them from time to time.
If there are any annoying words that won’t stay corrected, check out the next tip.
Tip 3: Add a New Shortcut
As someone who was a sailor in a past life, I tend to curse quite often in my text messages. Unfortunately, auto-correct won’t guess one of my favorite curse words correctly, even if I only slightly misspell it. One of auto-corrects biggest blunders has spurred a slew of memes, centered around that one particular curse word.

Instead of dealing with auto-correct’s ineptitude with properly conveying your mother-ducking frustration through curse words, you can always create a keyboard shortcut to override auto-correct.
Open up your Settings app and tap on “General” followed by “Keyboard.” Next, tap on “Text Replacement” (which used to be called “Shortcuts” in earlier iOS versions), then tap on the plus (+) sign at the top right in order to define a new keyboard shortcut. In the Phrase box, type in the word you want, and in Shortcut, type in the misspellings that you usually make when trying to type in that word. Add as many entries as you need to.
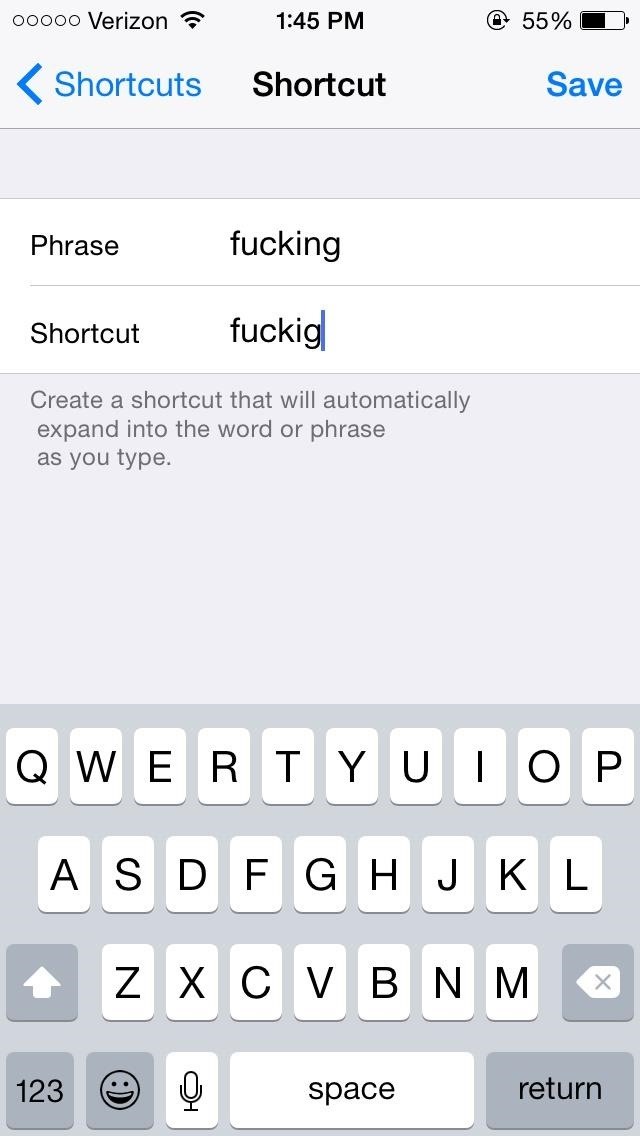
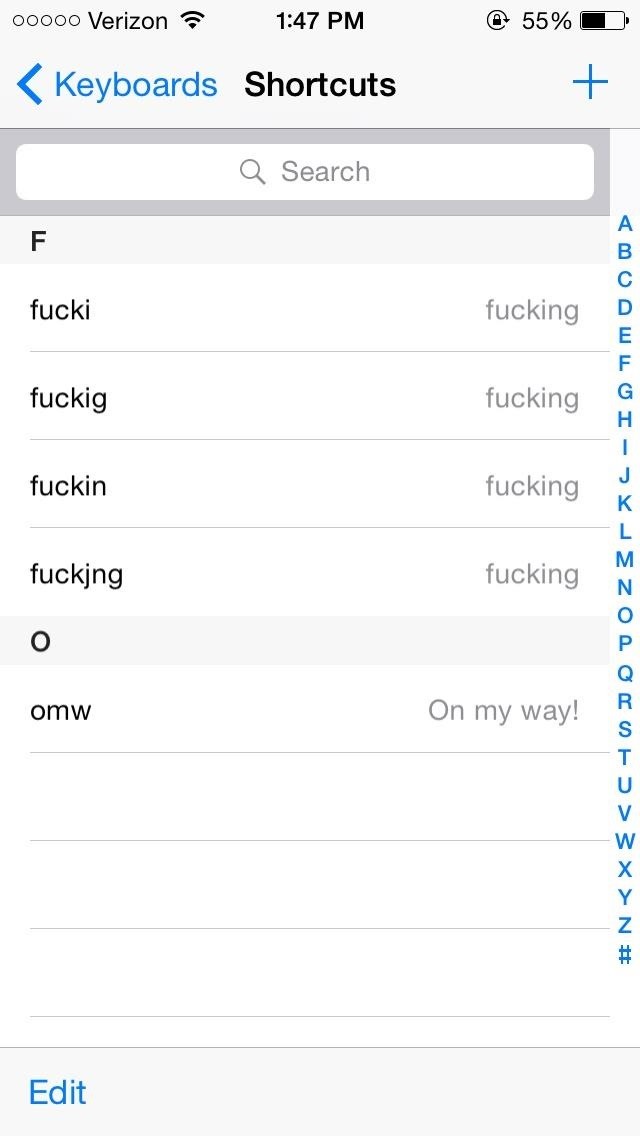
Once you’re done, you can get back to cursing in your text messages (or using other words that aren’t curse words that auto-correct also can’t figure out). Below you can see auto-correct before and after creating my shortcuts.
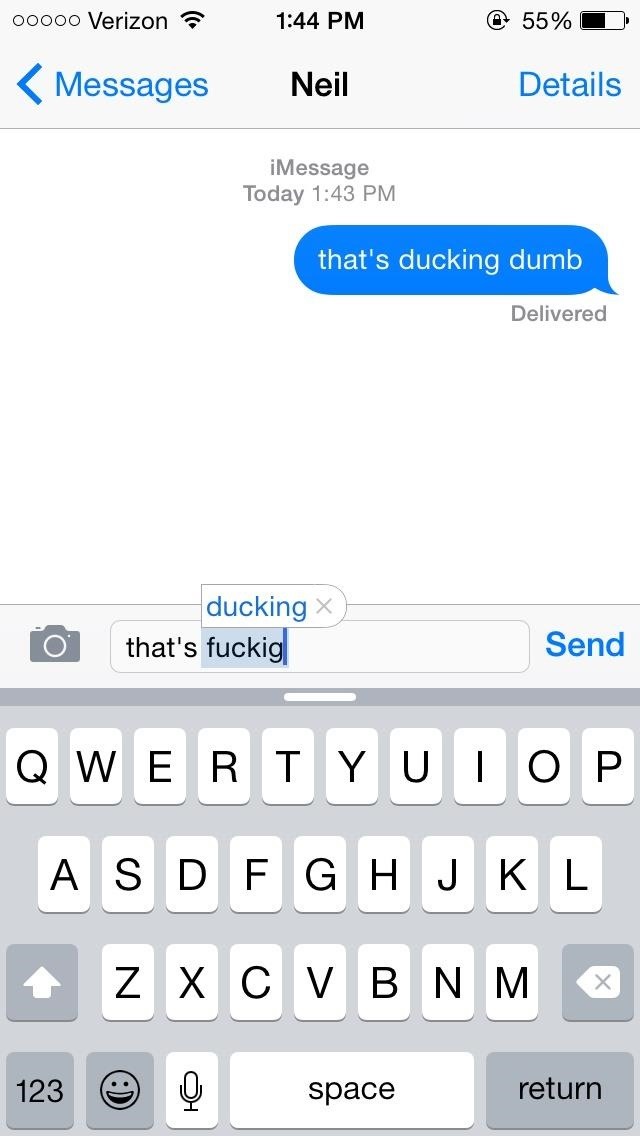
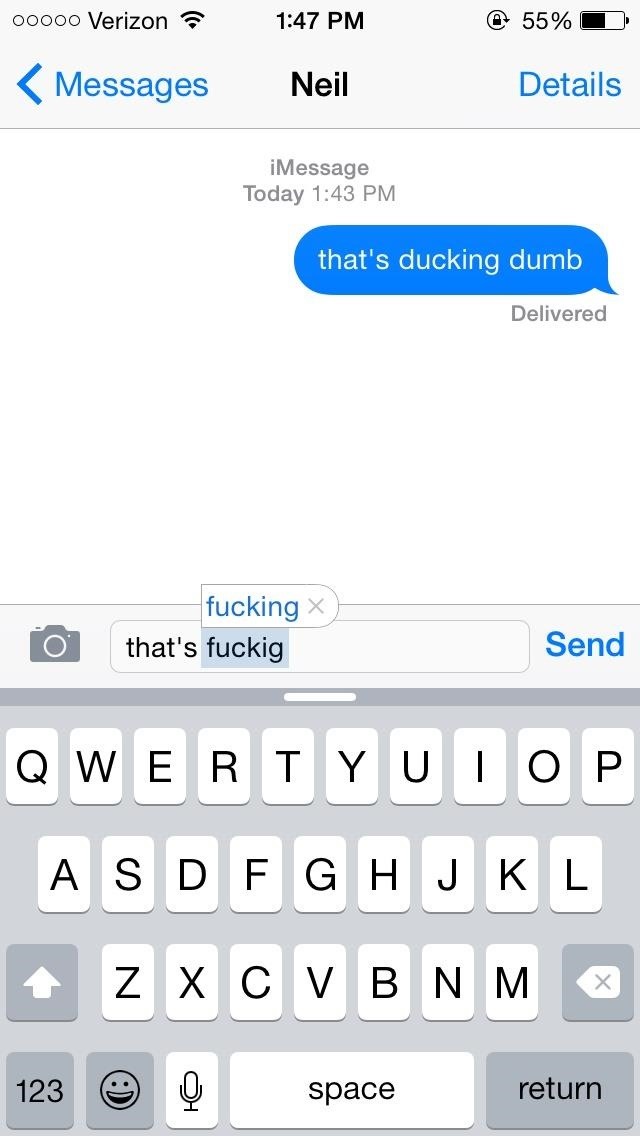
It definitely makes a fucking difference.
Tip 4: Reset Your Keyboard
Rejecting your iPhone’s keyboard suggestions by mistake can lead to an incorrect word popping up in the future, taking the place of the word you actually want.
While you can add words and phrases to the iOS dictionary, there’s no way to manage or edit the words that are already in it. So if you’re dealing with a word that you want to get rid of, there’s only one way to fix that issue — reset your keyboard.
Back in the Settings app, head to “General,” then “Reset.” Tap on “Reset Keyboard Dictionary” in order to delete all of the custom words that your keyboard has learned. If you have a passcode, you will need to enter it now. A warning will then ask you if you’re sure you want to do this — tap “Reset Dictionary” to proceed.
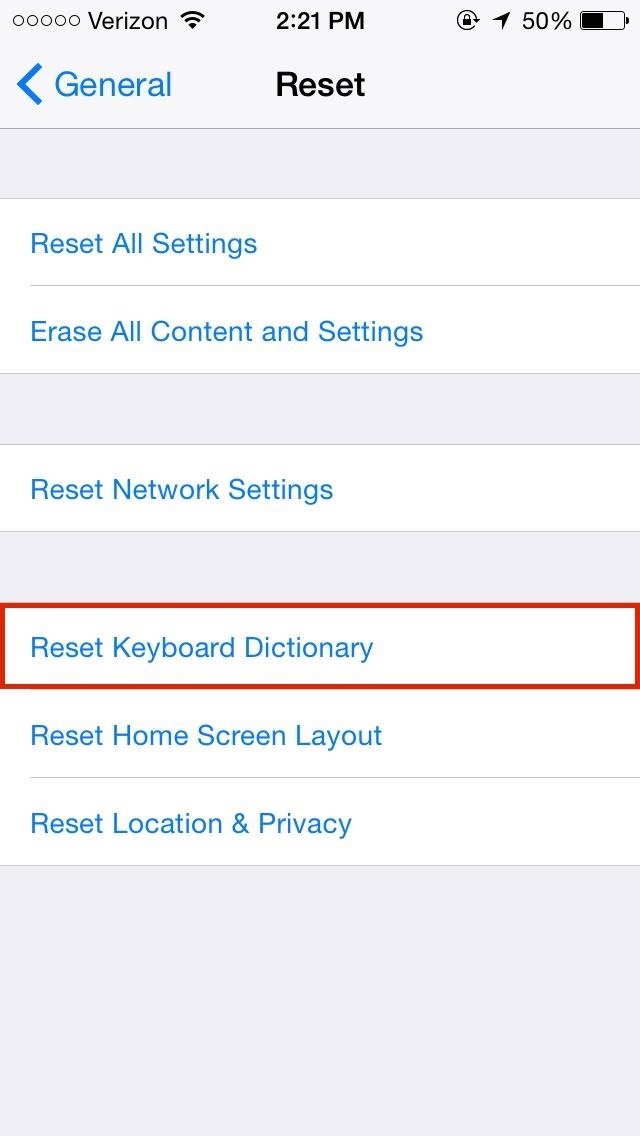
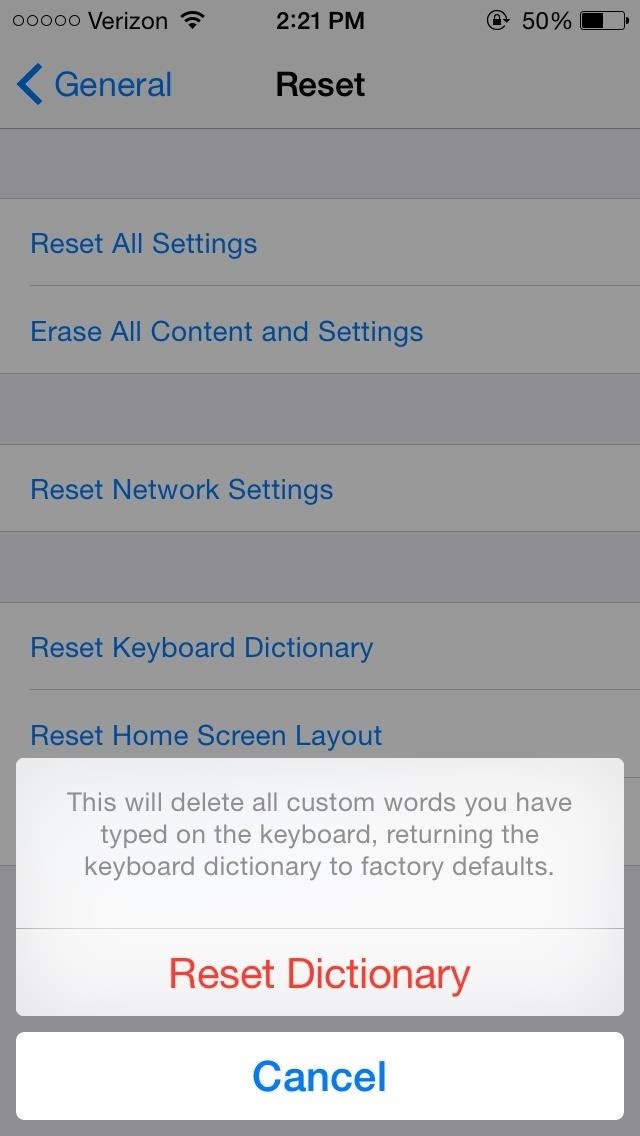
All of your auto-correct options will start anew, so be careful not to accidentally reject the suggestions you want or accept the suggestions you’re disinterested in.
Desperation Tip: Disable Auto-Correction
If you’re unable to tame the beast that is auto-correct, your best course is to just disable the damn thing. Within the “Keyboard” settings in “General,” toggle off “Auto-Correction” to get rid of auto-correct.
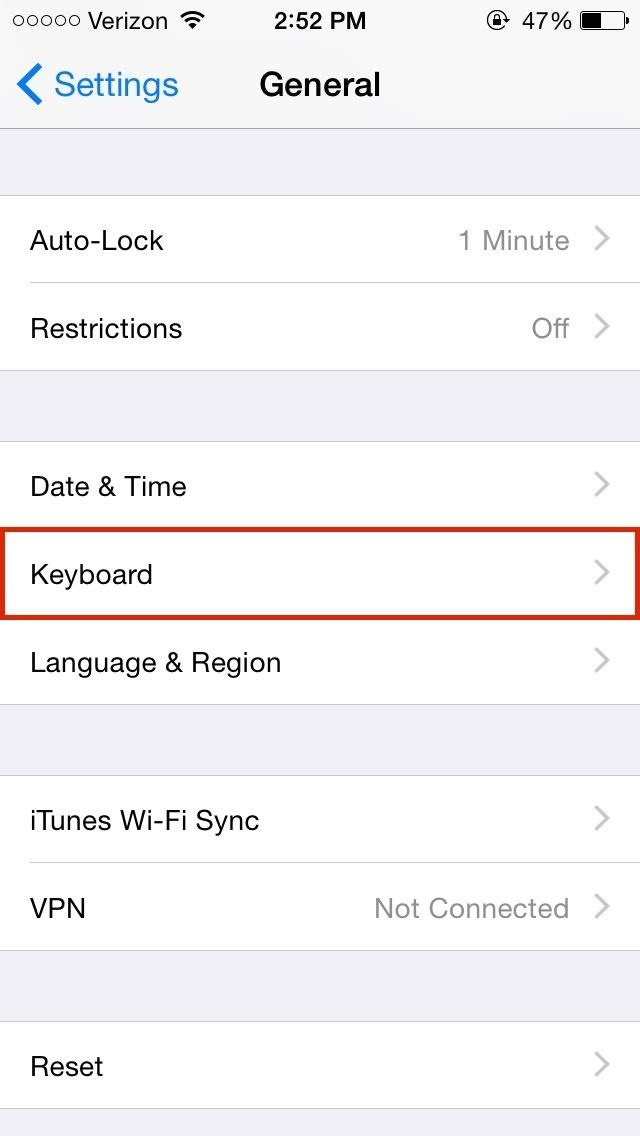
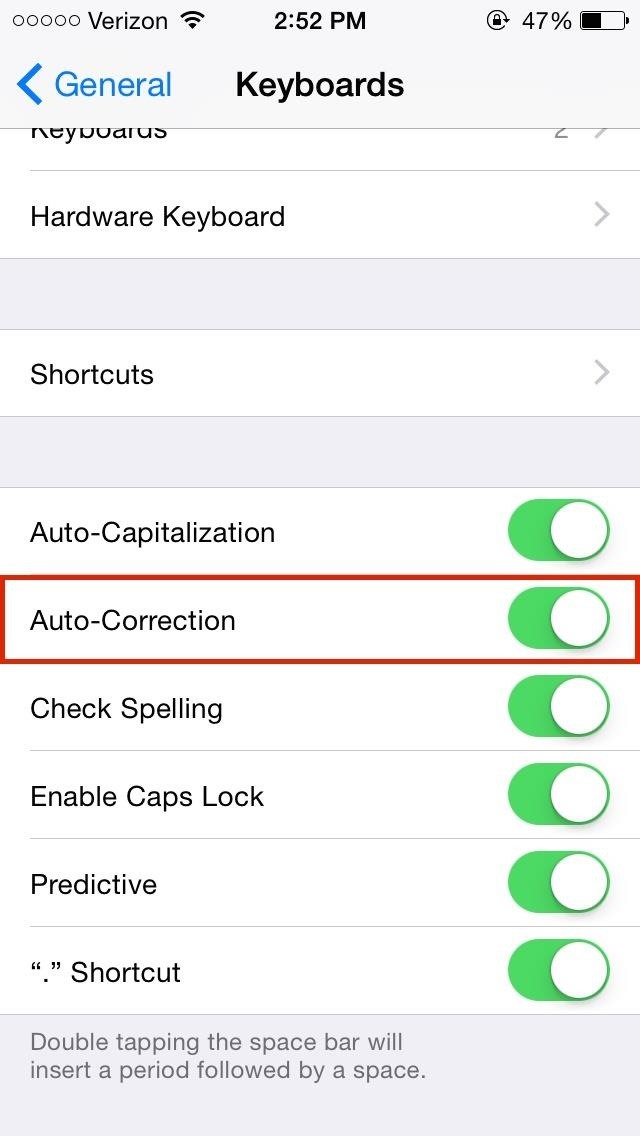
While it hopefully won’t have to come this, it’s a last resort sort of measurement in the case that auto-correct just proves too frustrating for you.
With any luck, these tips should help you with your auto-correct woes. Even now that we’re up to iOS 11, auto-correct has not gotten any better — even with the QuickType keyboard. In fact, there was even a bug shortly after iOS 11’s release that was auto-correcting the letter “i” to some gibberish.
Auto-correct isn’t perfect, and it probably never will be, as language and words progress and become much more complicated. The only thing we can do is to try and tame it to the best of our ability, but like as with a lion, there’s always that off-chance of getting bit.
Just updated your iPhone? You’ll find new emoji, enhanced security, podcast transcripts, Apple Cash virtual numbers, and other useful features. There are even new additions hidden within Safari. Find out what’s new and changed on your iPhone with the iOS 17.4 update.
“Hey there, just a heads-up: We’re part of the Amazon affiliate program, so when you buy through links on our site, we may earn a small commission. But don’t worry, it doesn’t cost you anything extra and helps us keep the lights on. Thanks for your support!”


