How to Set Up a Kodi Media Center on Linux
Kodi
Key Takeaways
- Install Kodi on Linux using your package manager, but you typically need to add the official Kodi repository first.
- Launch Kodi and begin setup by adding folders containing your media so you can import it and download metadata.
- Use Kodi’s settings for personalization, including interface, playback, audio, add-ons, parental controls, and streaming to other devices in your home.
Transform your Linux machine into a powerful media center and elevate your entertainment experience to the next level with Kodi. Effortlessly organize your media, enjoy smooth playback across all formats, and stream content to other devices in your home.
While Kodi may not be as popular as Plex, it does have compelling reasons to choose it. For one, it’s open source, highly customizable, and its add-ons make it flexible and extensible. Furthermore, Kodi tends to be the preferred choice for those who just need local media playback with better offline support. Best of all, Kodi is completely free with no premium tiers or subscriptions.
Update and Prepare Your Linux System
We’ll detail steps to install Kodi on the three most popular Linux distriibutions—Ubuntu, Fedora, and Arch Linux—using the terminal. Kodi is also available via Flatpak if you prefer not to use the command line.
Install Kodi on Ubuntu
To begin, open a terminal and update your system.
sudo apt updatesudo apt upgrade -y
Install the required dependencies.
sudo apt install software-properties-common
Add the official Kodi personal package archive (PPA).
sudo add-apt-repository ppa:team-xbmc/ppasudo apt update
Install Kodi.
sudo apt install kodi -y
Install Kodi on Fedora
Using the terminal, first update the system.
sudo dnf update -y
Enable the RPM Fusion repository.
sudo dnf install https://download1.rpmfusion.org/free/fedora/rpmfusion-free-release-$(rpm -E %fedora).noarch.rpm
Install Kodi.
sudo dnf install kodi -y
Install Kodi on Arch Linux
Similar to Ubuntu and Fedora, you need to first open the terminal and update your system.
sudo pacman -Syu
Install Kodi.
sudo pacman -S kodi
You can also install optional dependencies for additional functionality.
sudo pacman -S kodi-audioencoder-* kodi-pvr-*
Launch Kodi and Add Media Sources
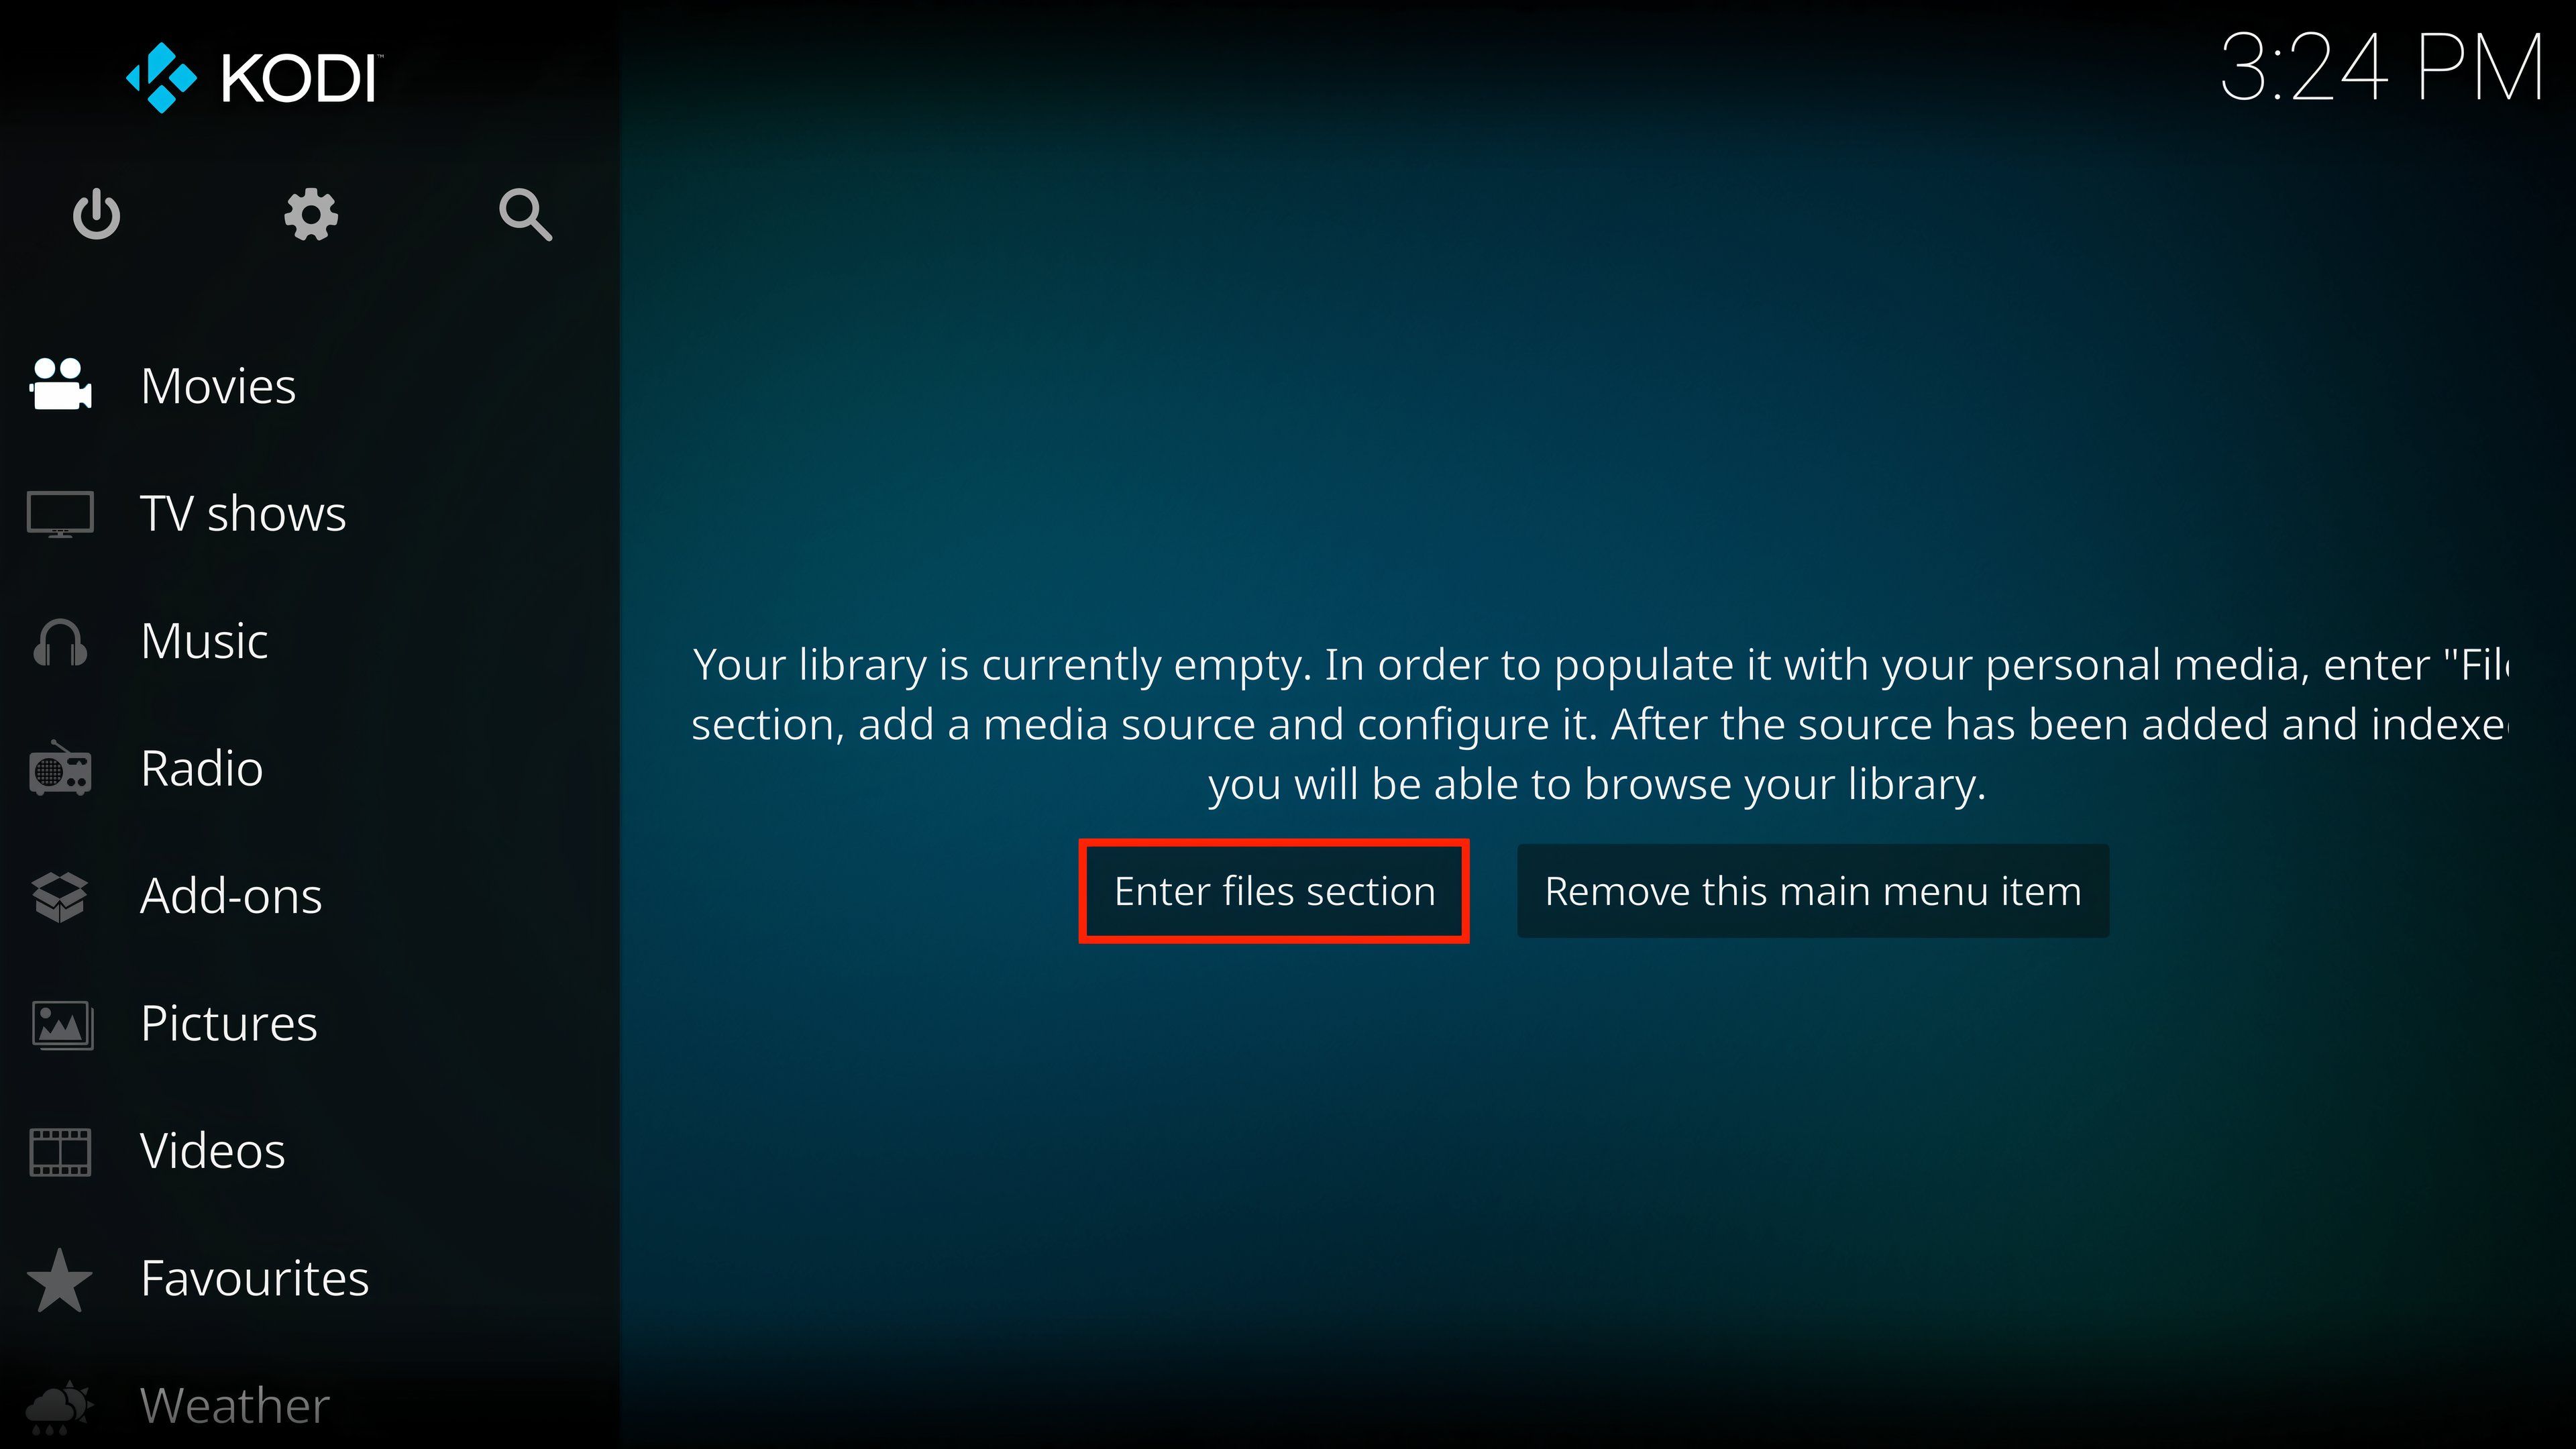
You can launch Kodi by typing kodi on the command line, or launch it from your Linux desktop’s application menu. Next, you’ll need to add your media sources. Select the media to add, such as “Movies,” then select “Enter Files Section.”
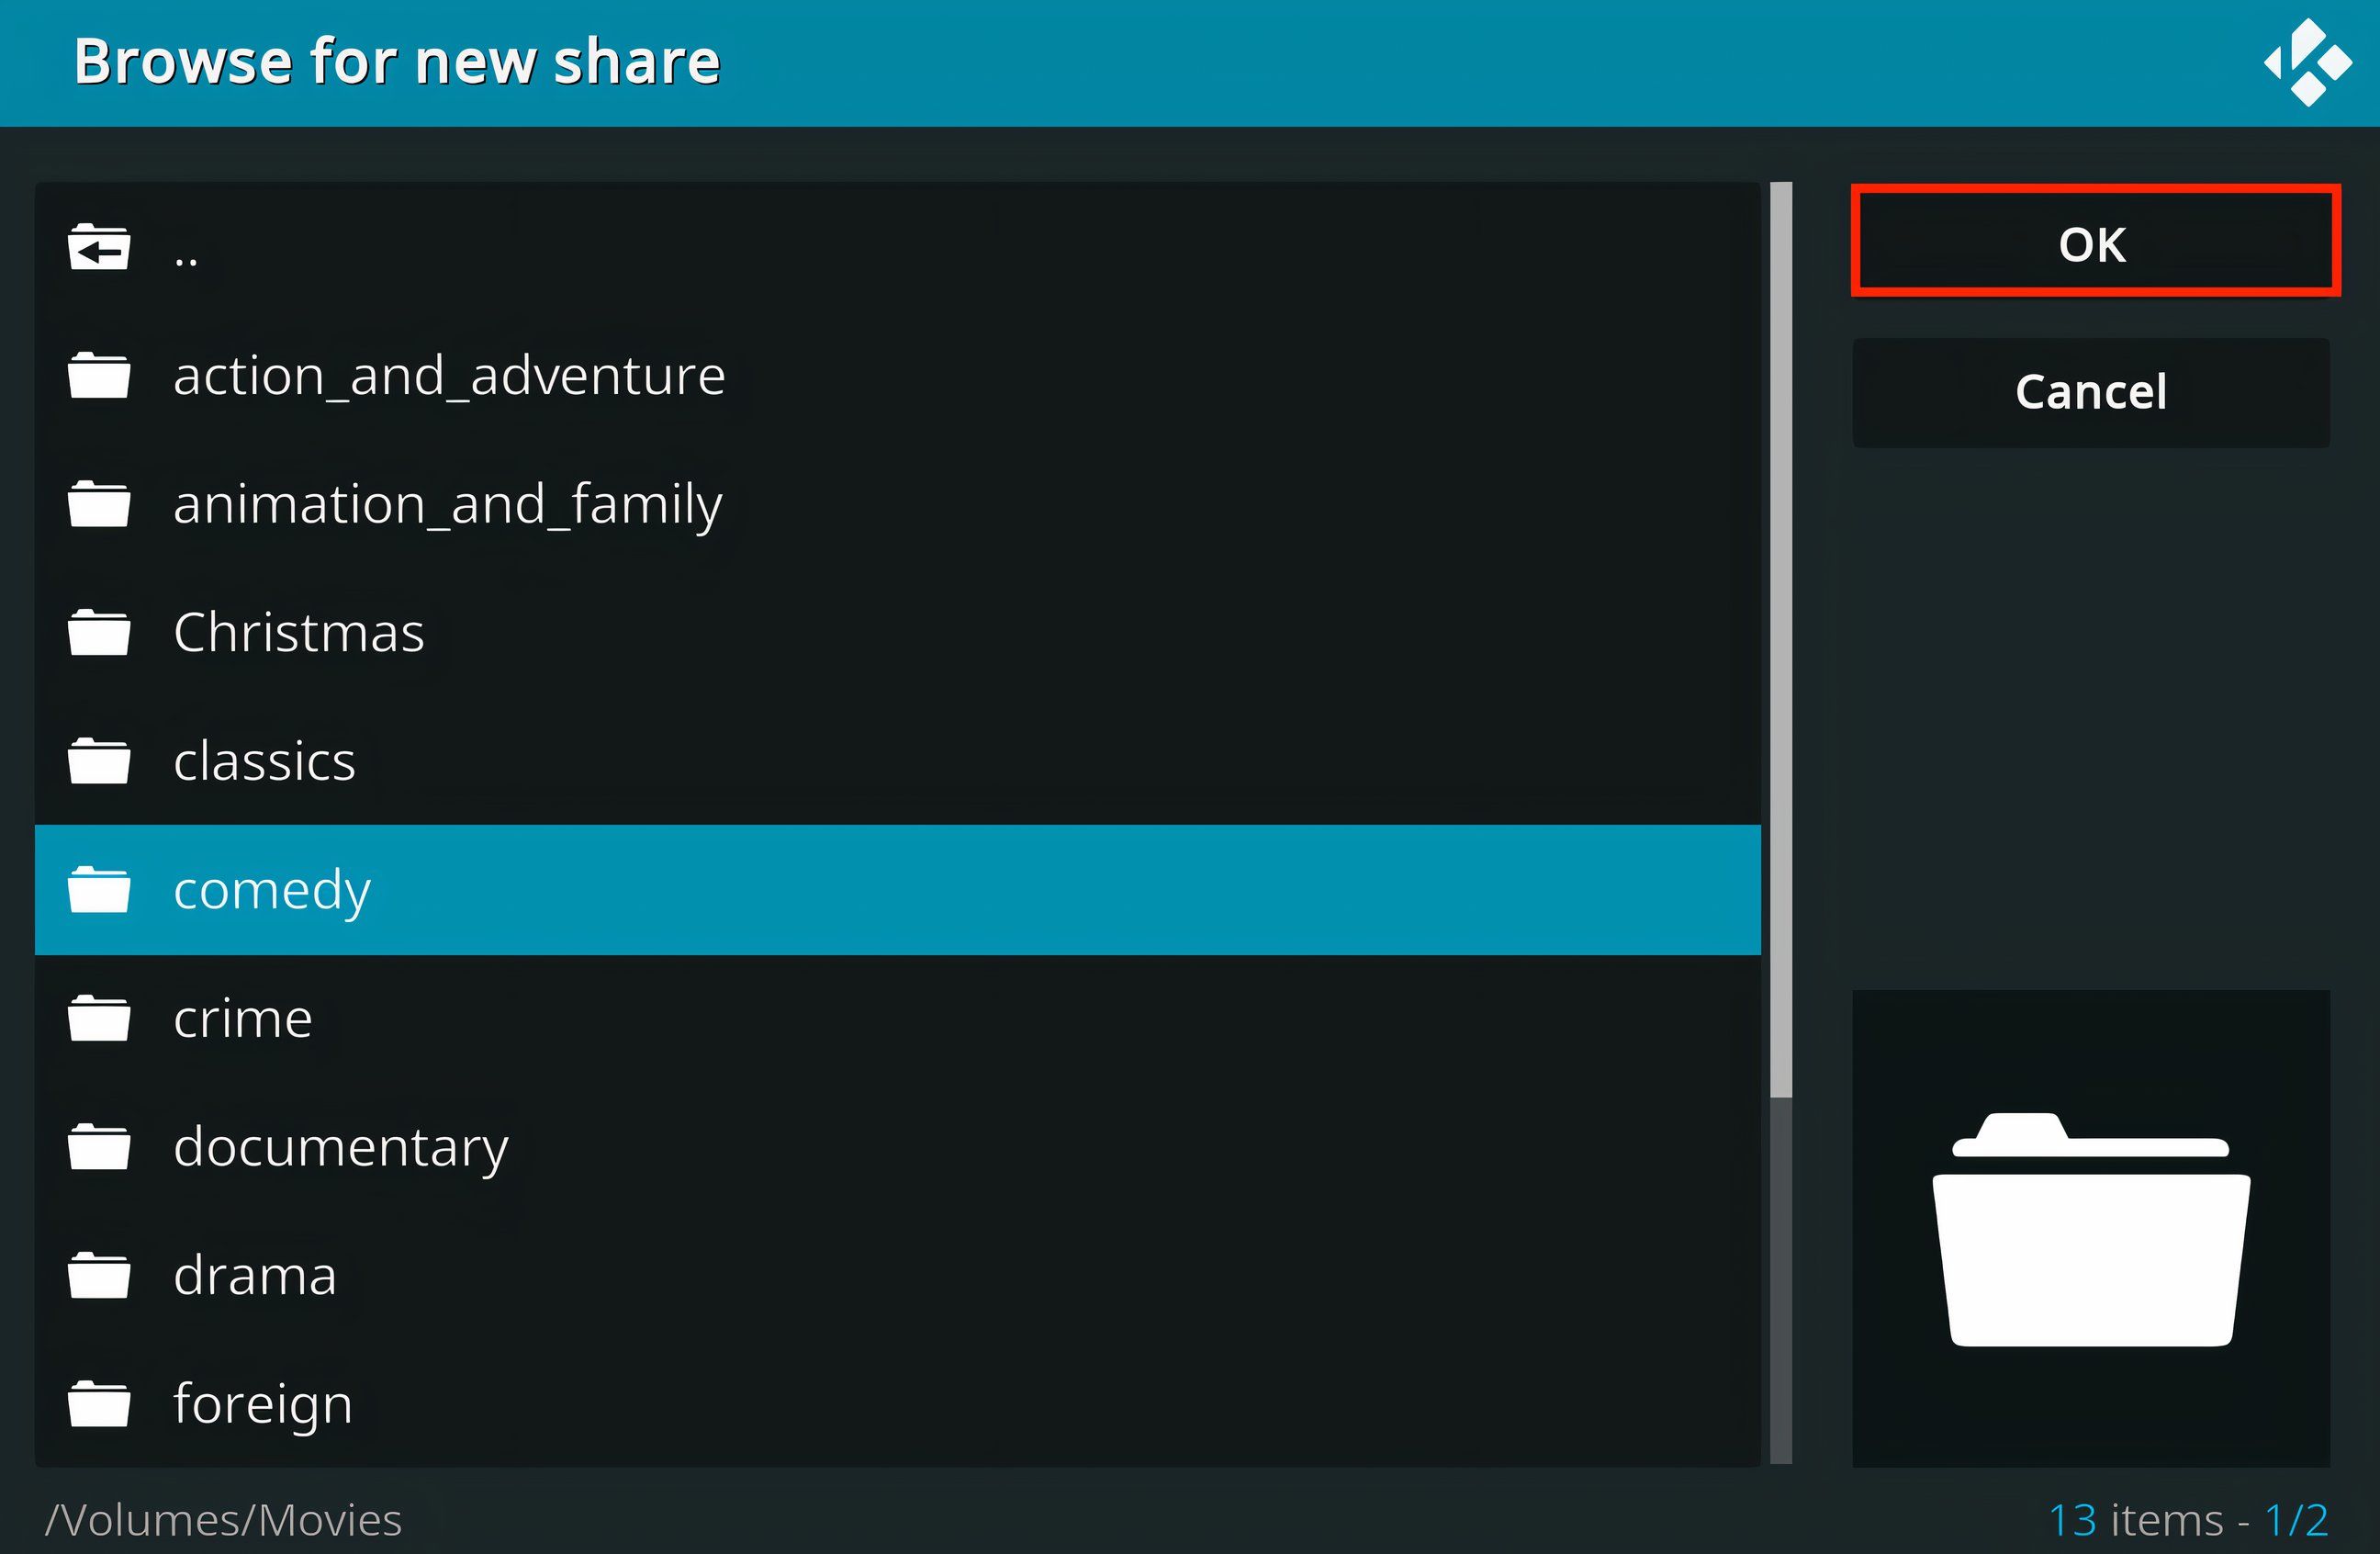
Enter the location or browse to it, and select “Ok.”
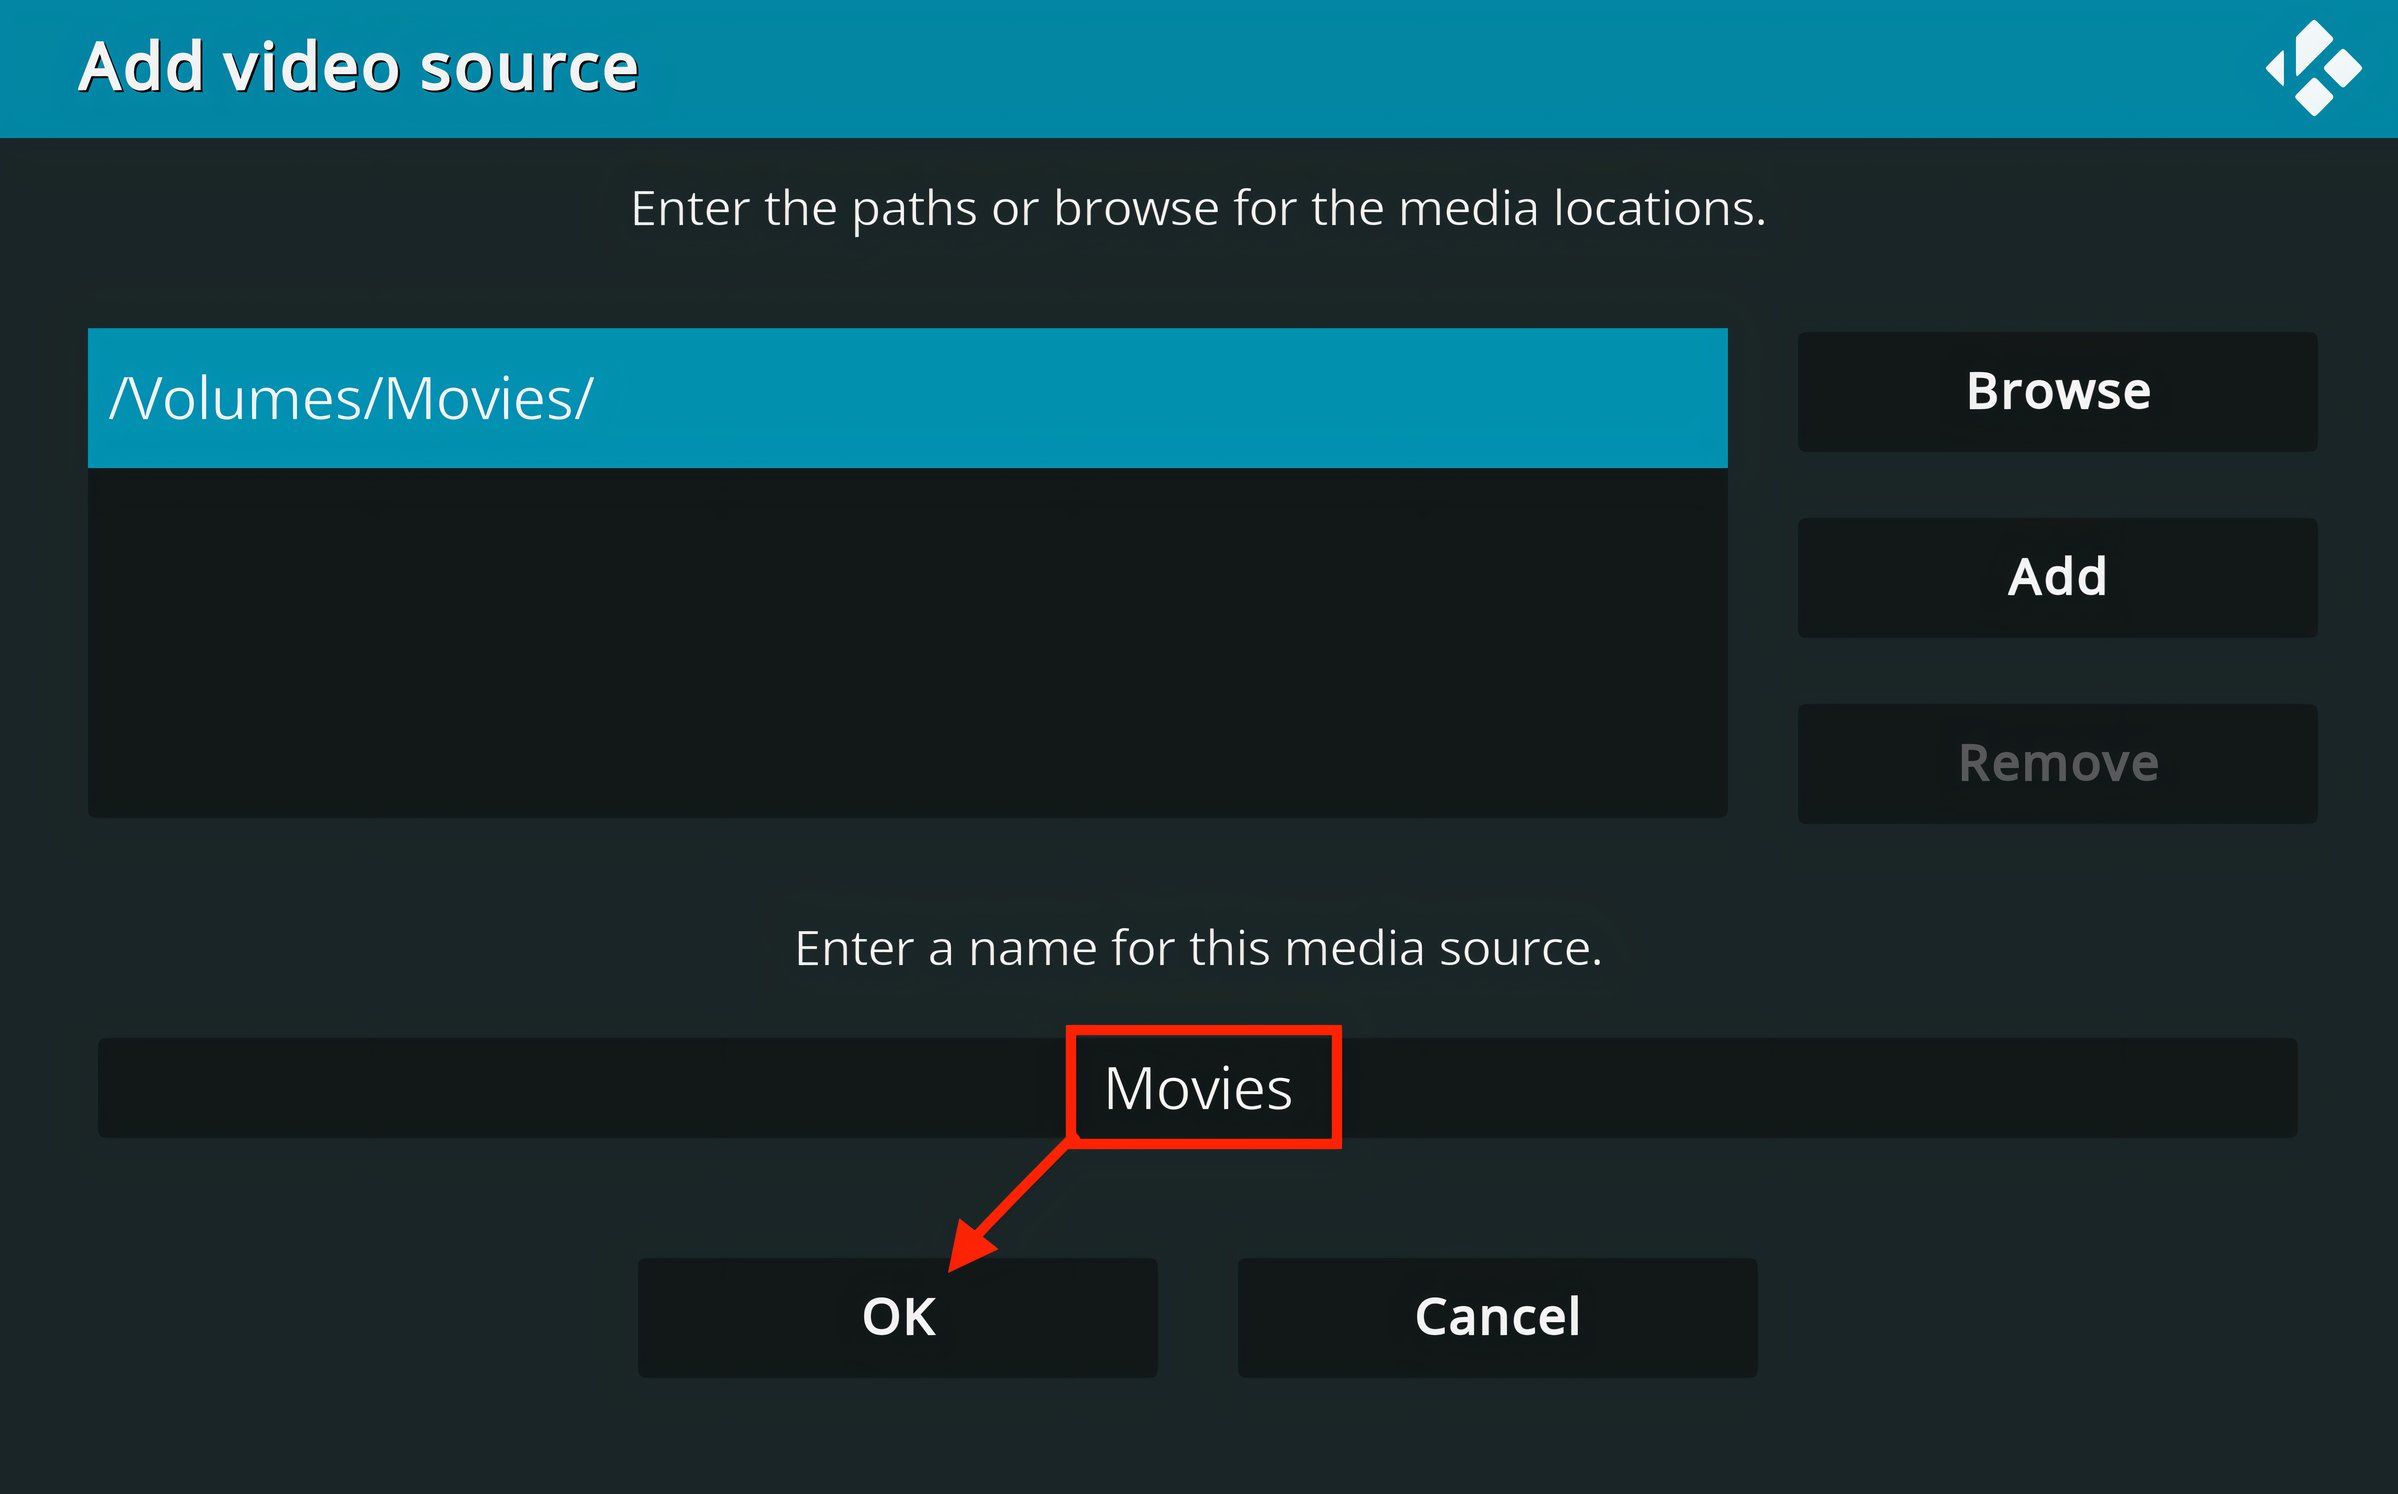
Once you select your source, specify a name for it, and select “Ok.”
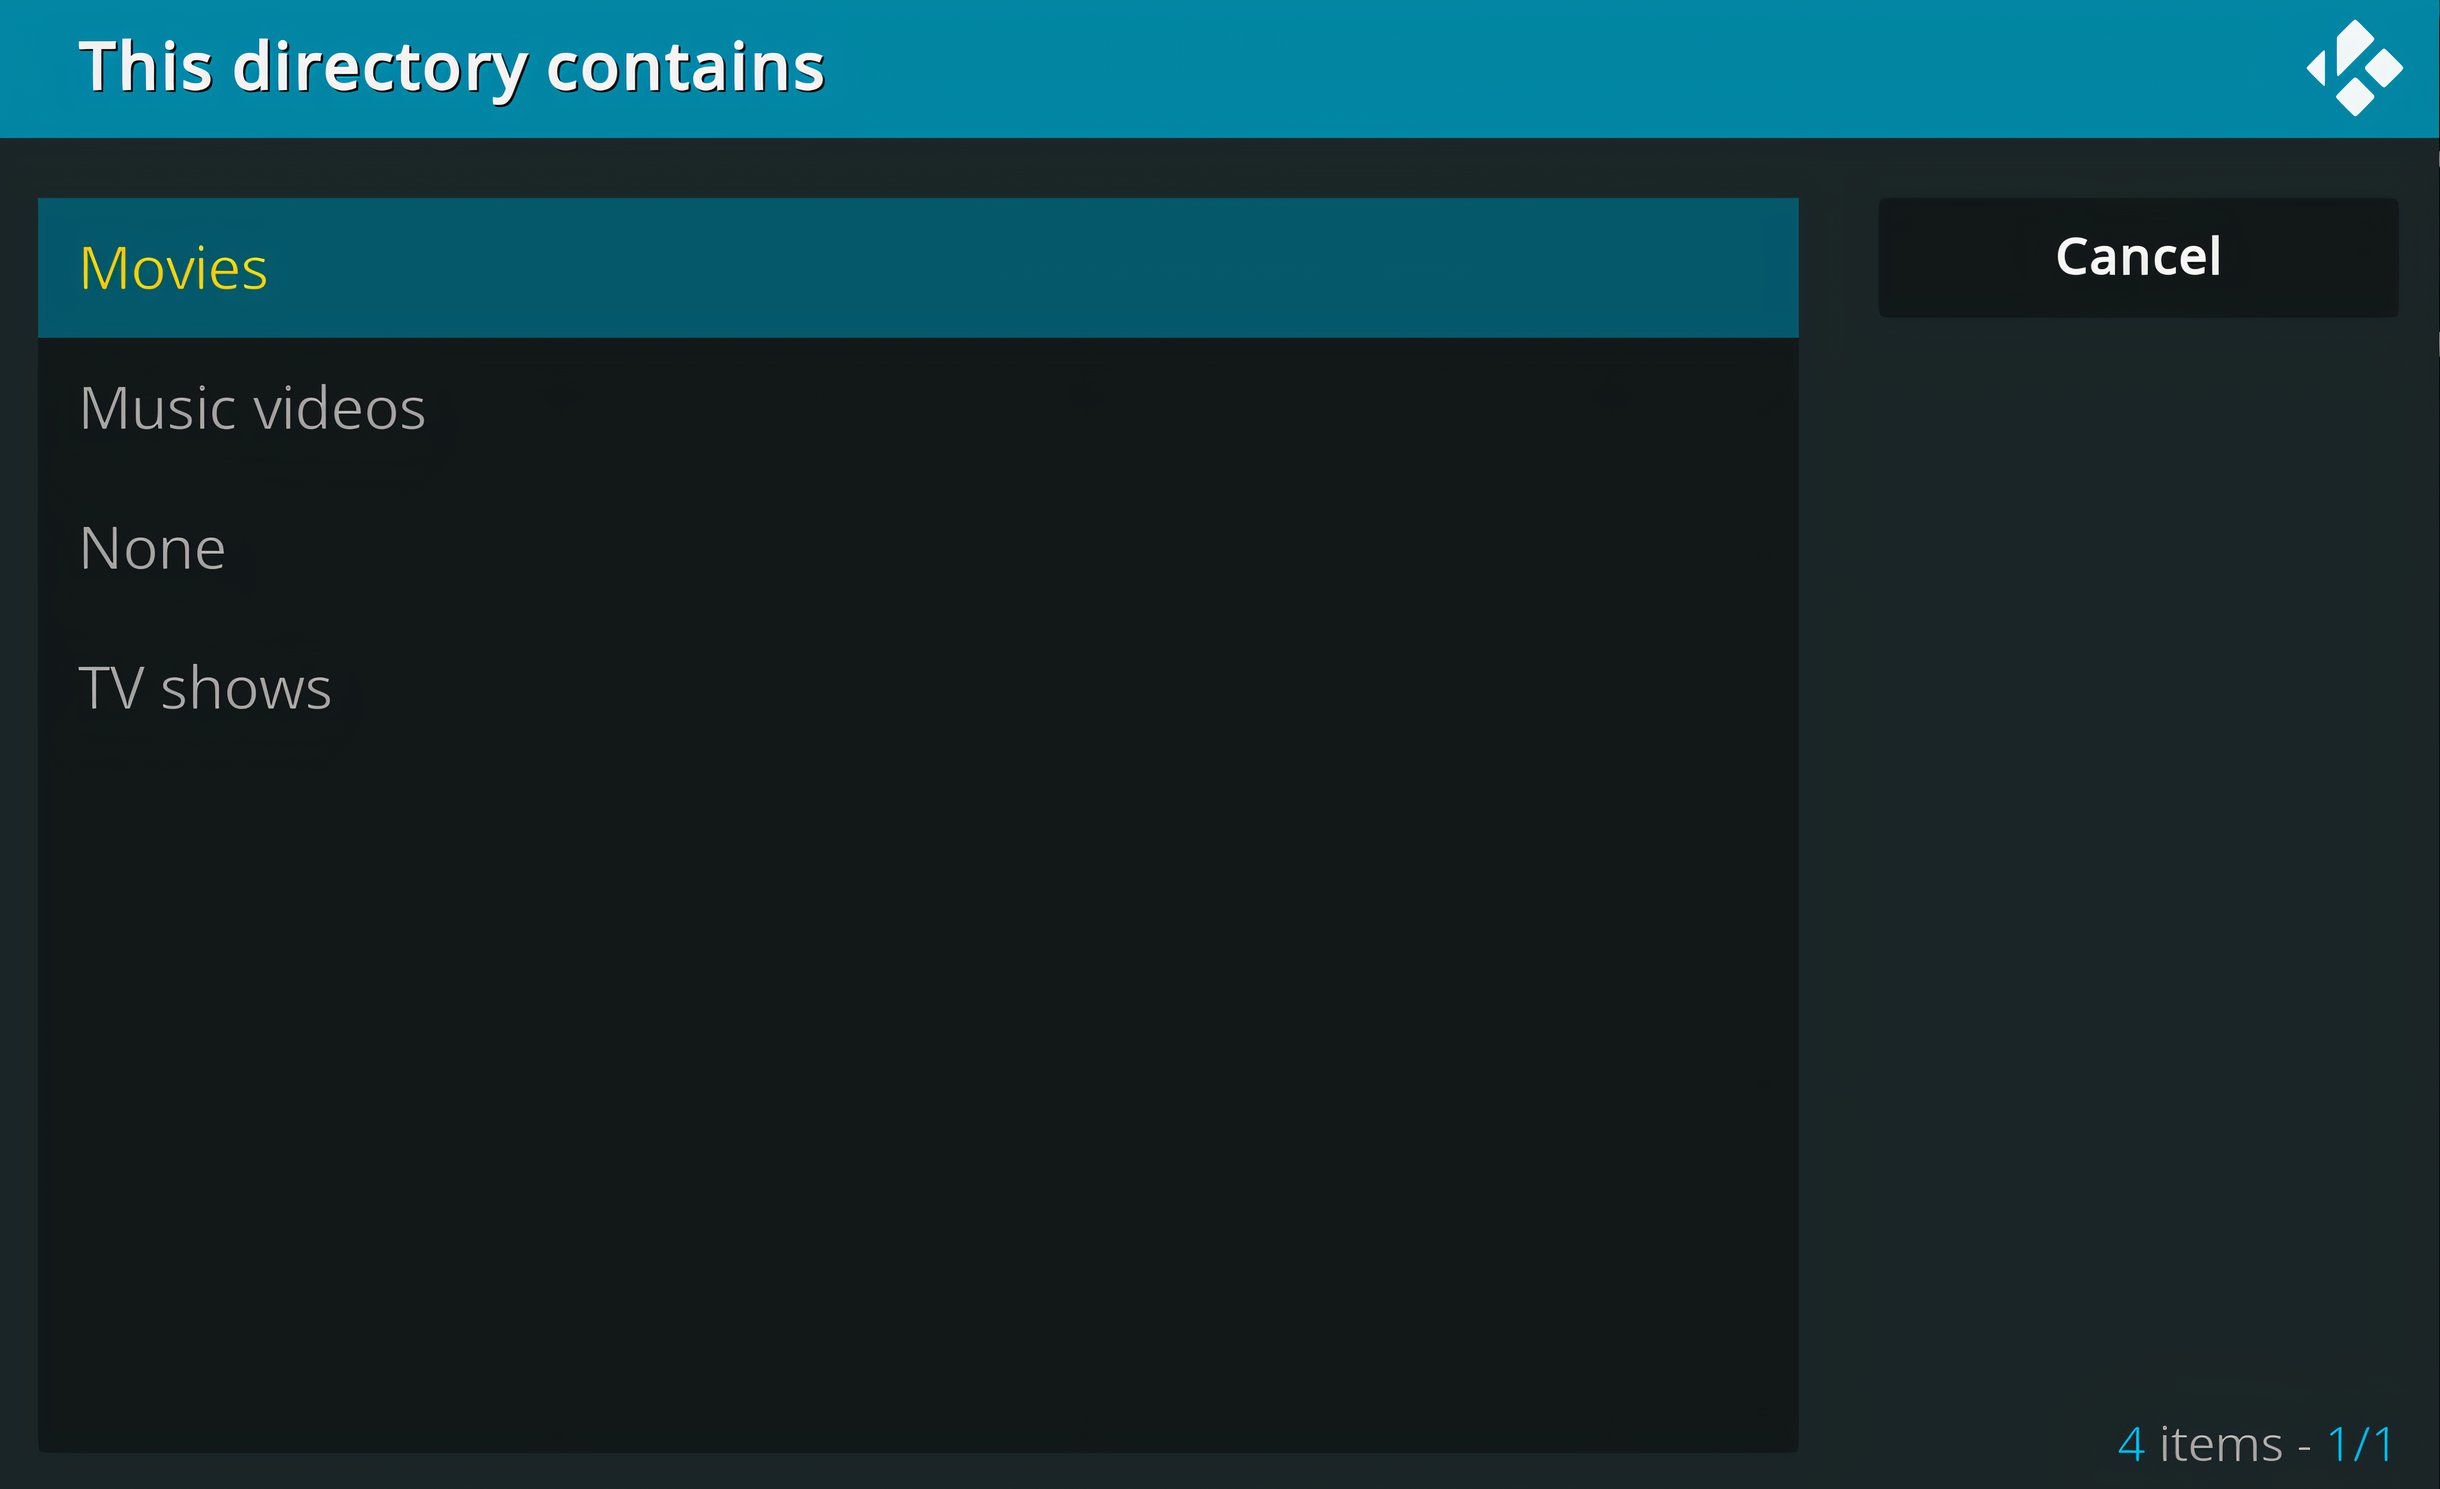
Select the type of media the directory contains.
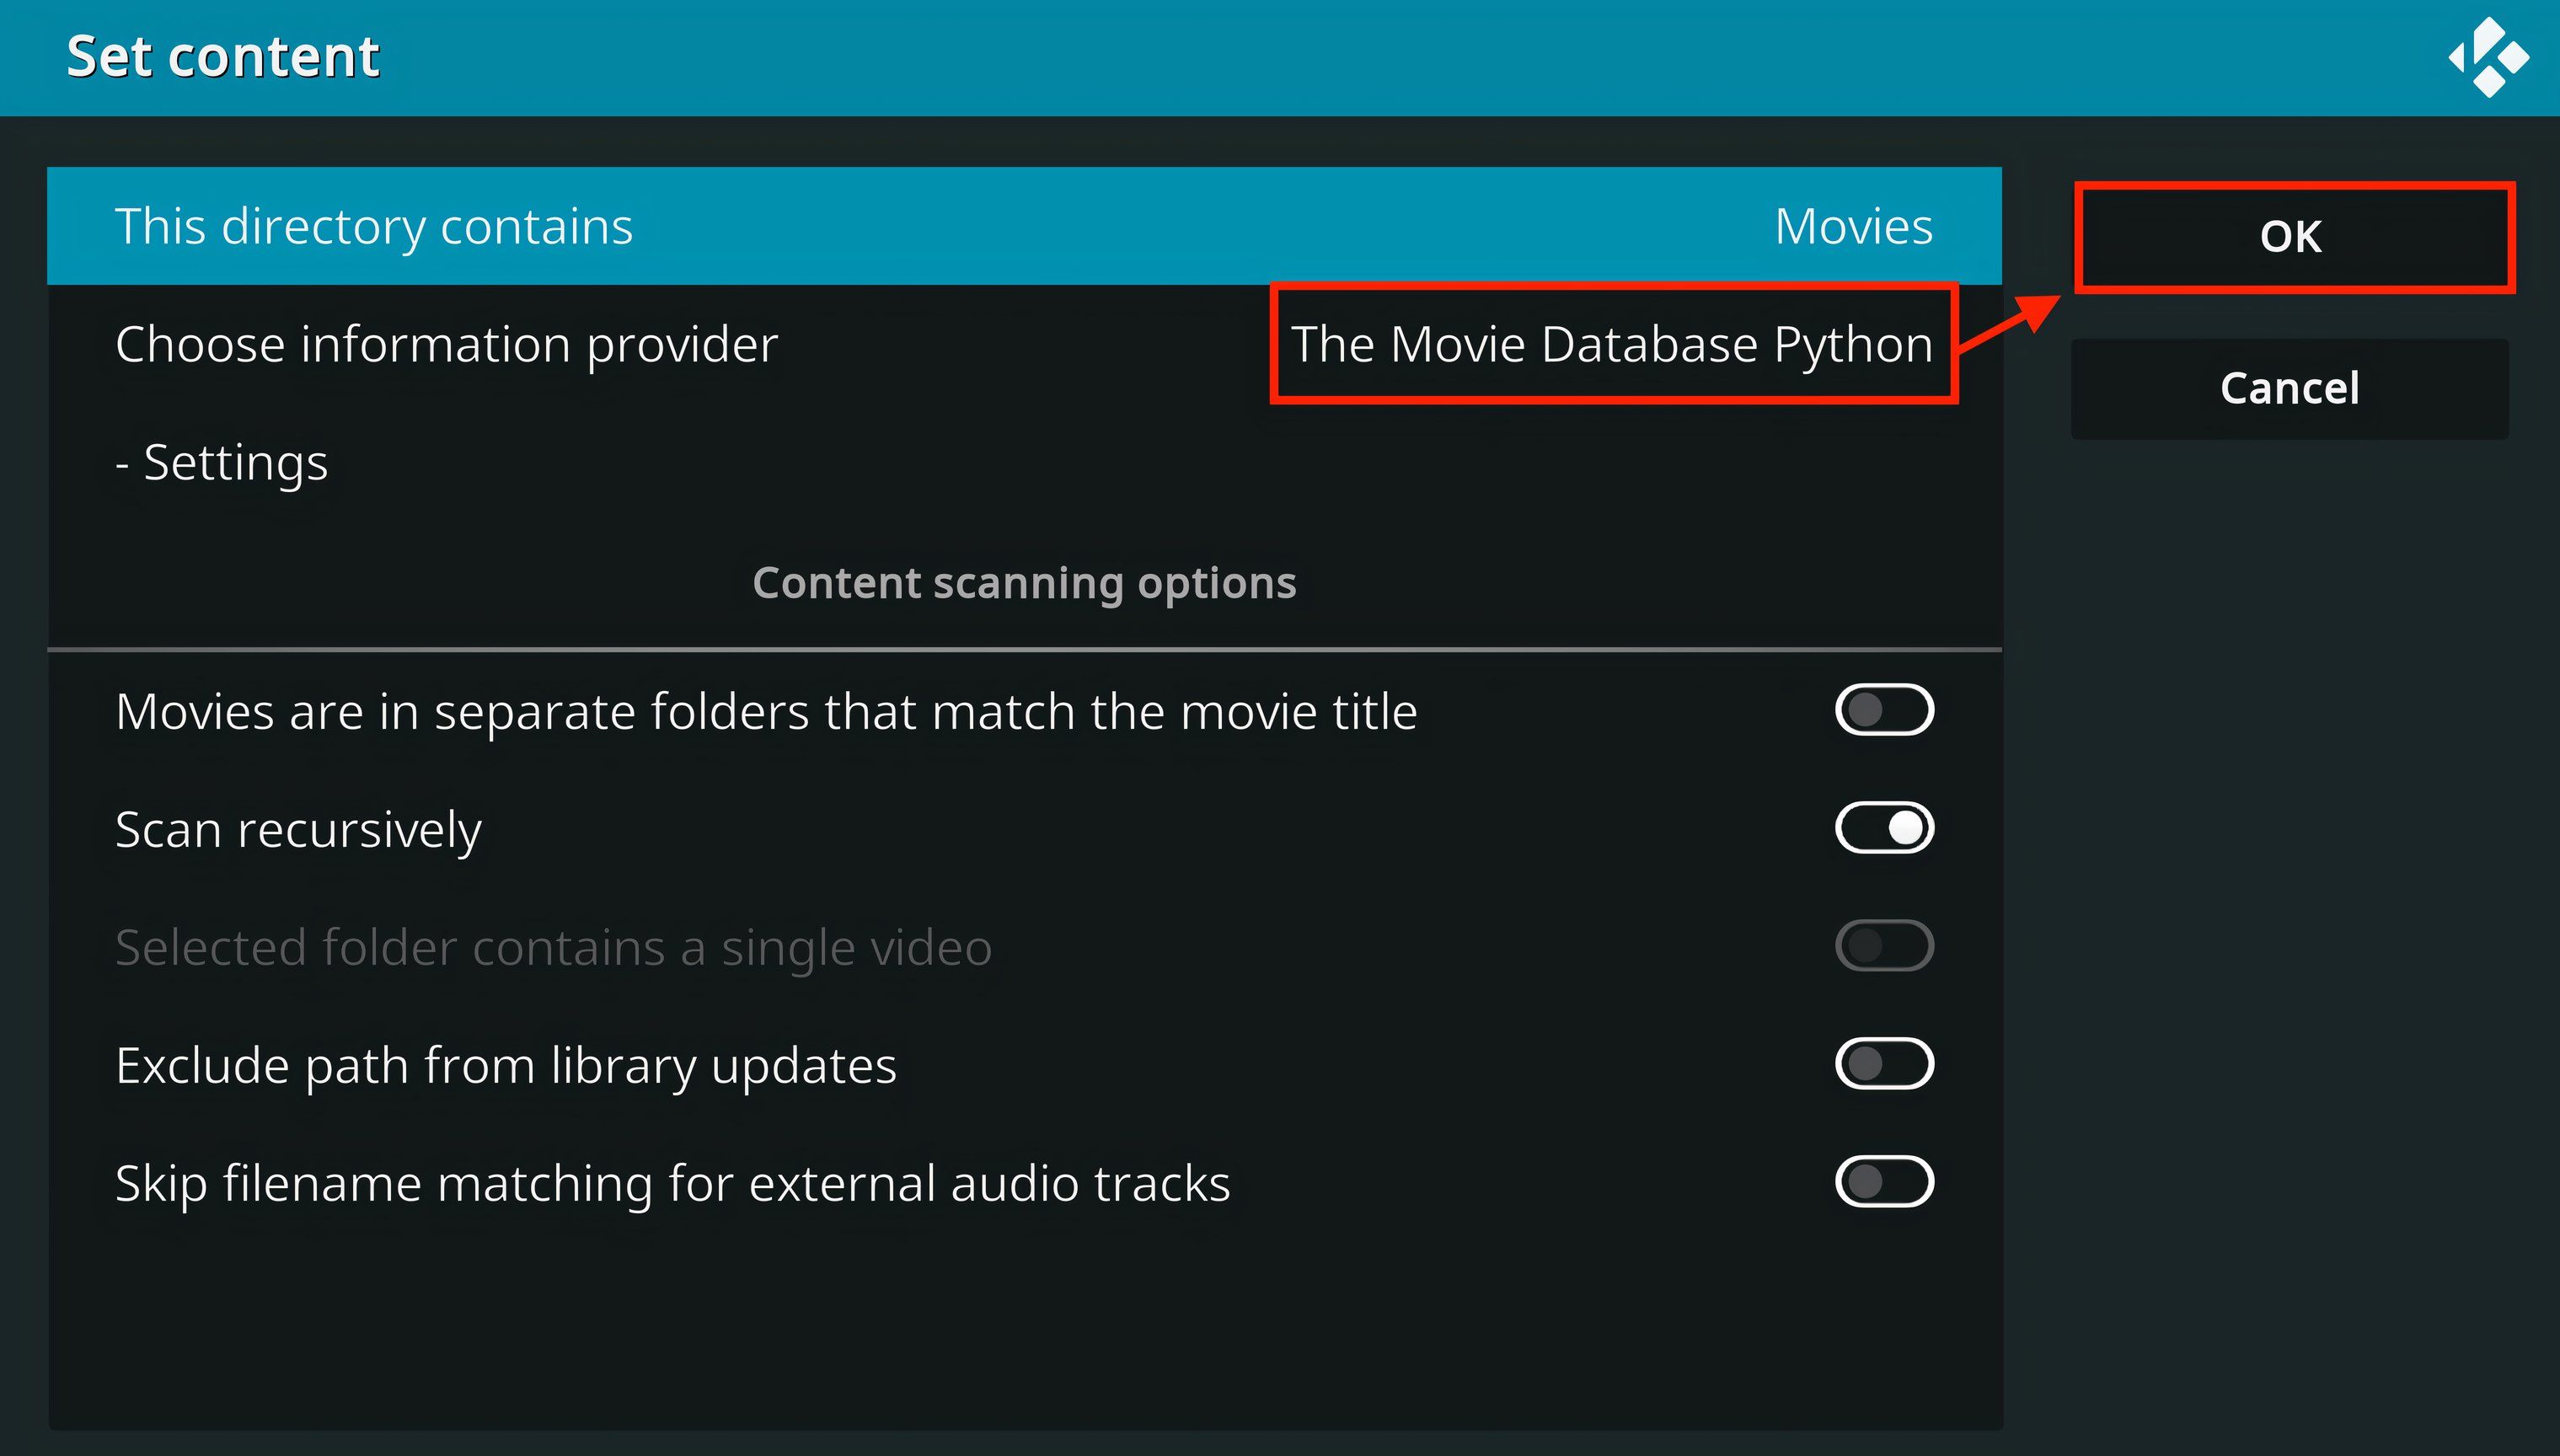
Choose an information provider, then select “Ok.” This allows the system to properly tag your media files with the correct metadata. Otherwise, it is generally okay to leave everything else as default.
Kodi will scan your media files. Depending on how much media you have, this can take several minutes or more. You can start enjoying your stuff as soon as it shows up.
Use Settings to Fine Tune Kodi
Kodi has a lot of settings and features that you might want to know about. You can access the settings by selecting the gear icon in the upper-left corner. Let’s briefly discuss some of the most relevant settings you might want to know about.
Interface and Appearance
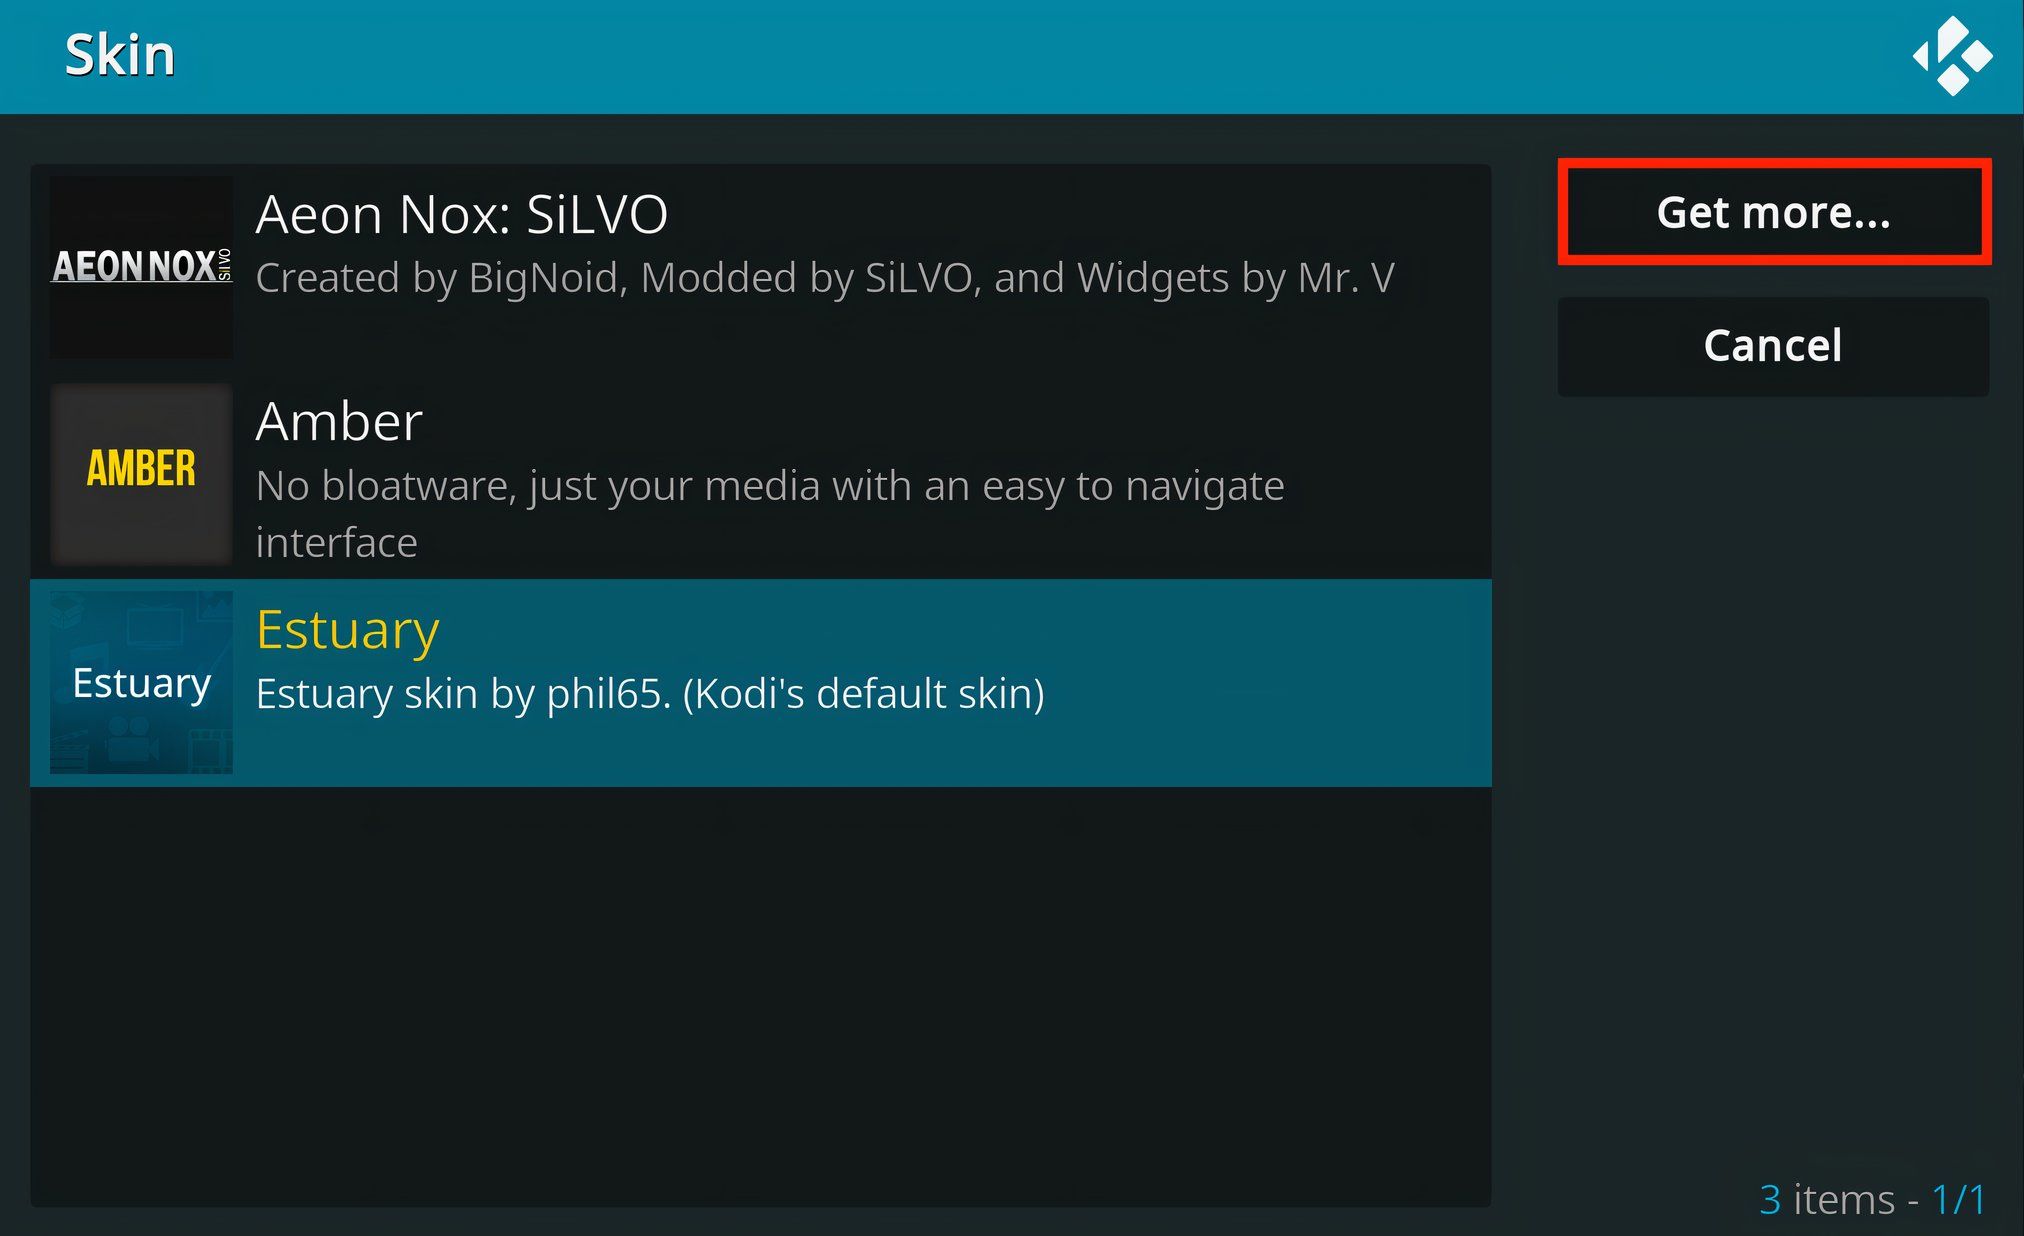
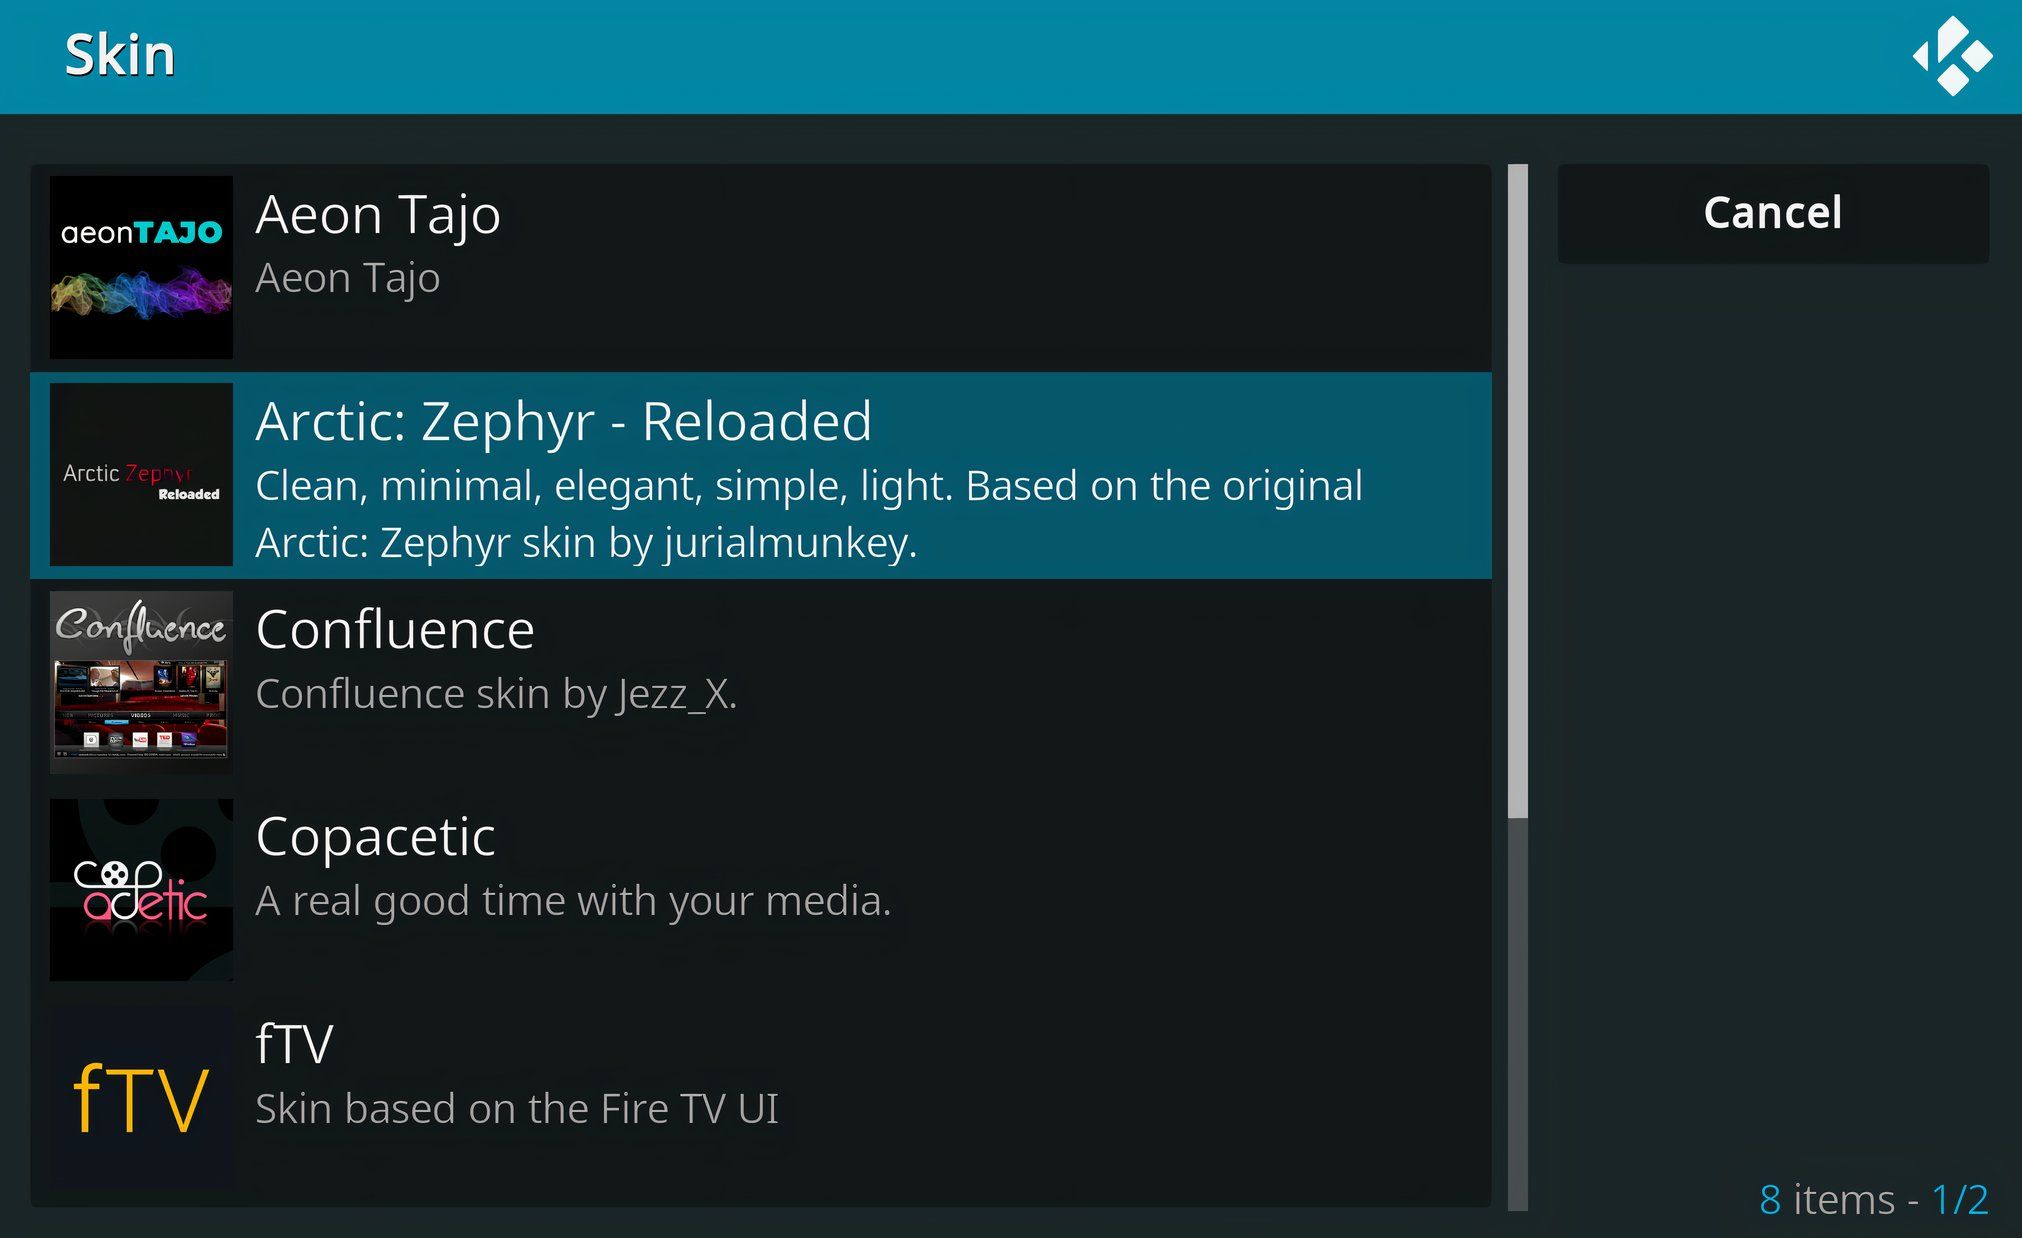
The default skin is Estuary but you can select different skins to personalize your experience. Go to Settings > Interface > Skins, and select “Get More.”
On the resulting page, select a new skin to change Kodi’s appearance.
Add More Media Sources
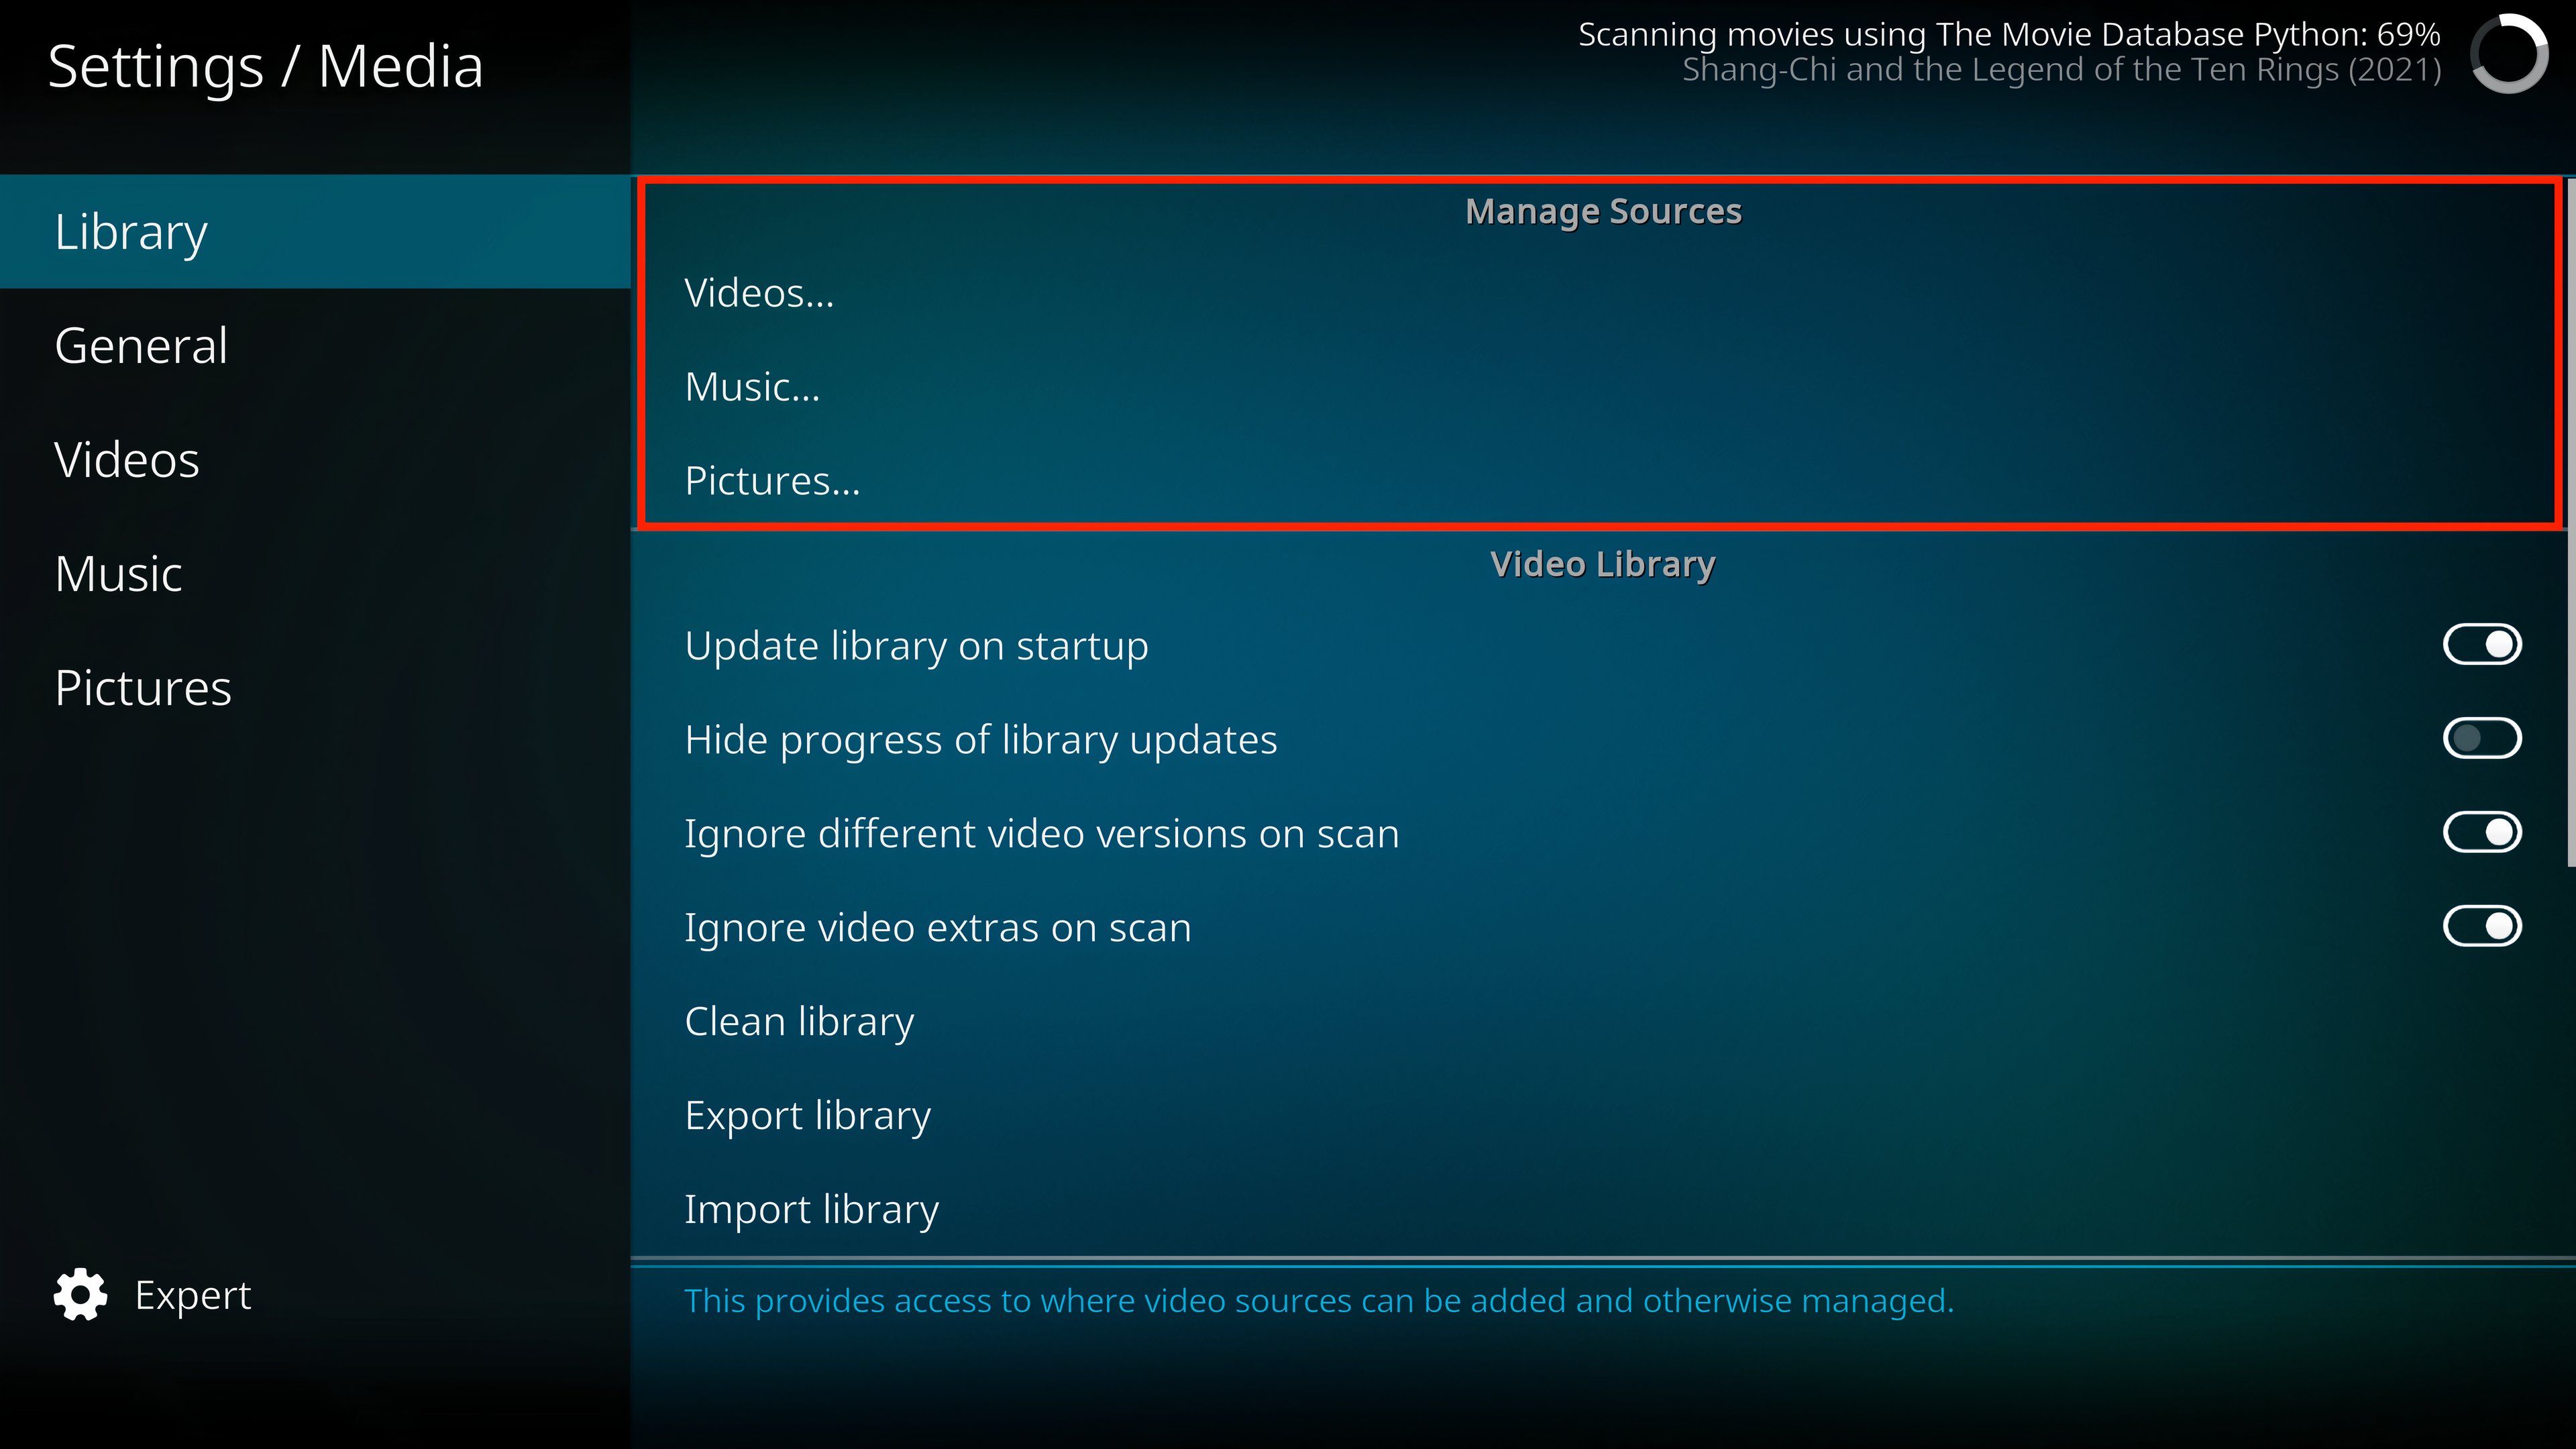
If ever you need to add more media sources, you can go to Settings > Media > Library to add other locations where you have movies, TV shows, music, and other media types stored.
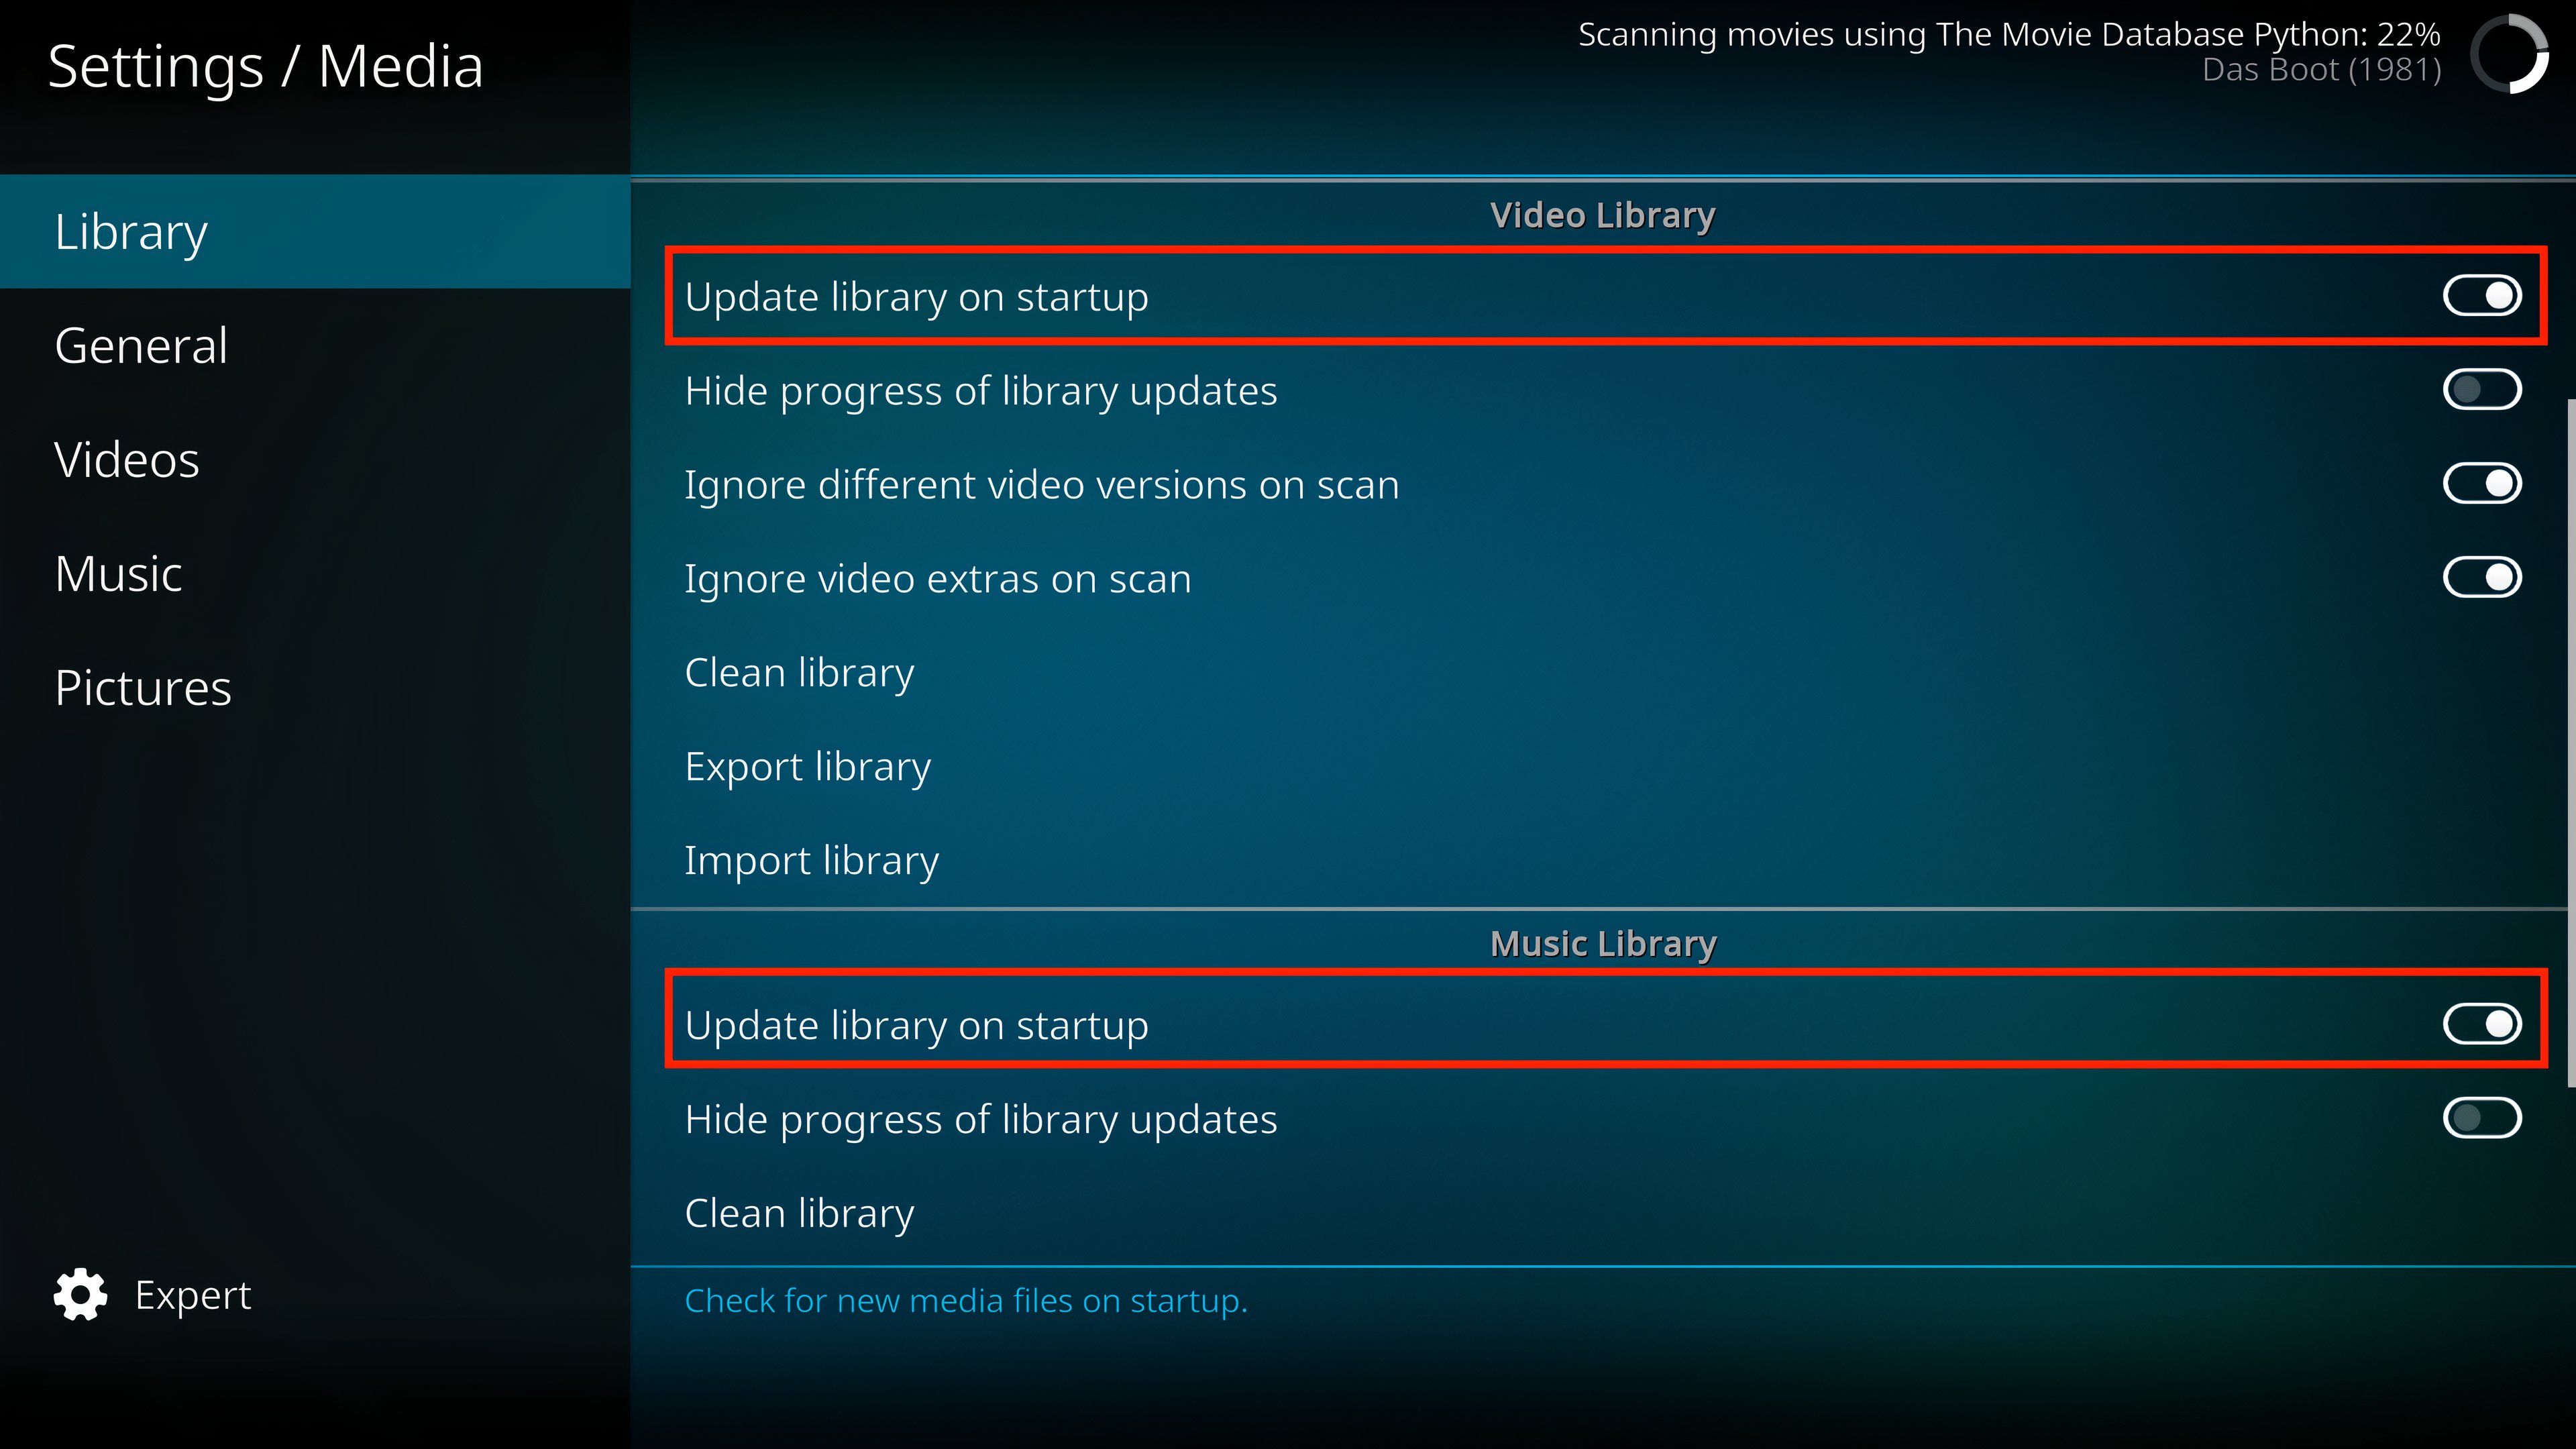
While you’re at it, you can set up your Kodi library’s to automatically update when you add or remove media.
Subtitle Settings
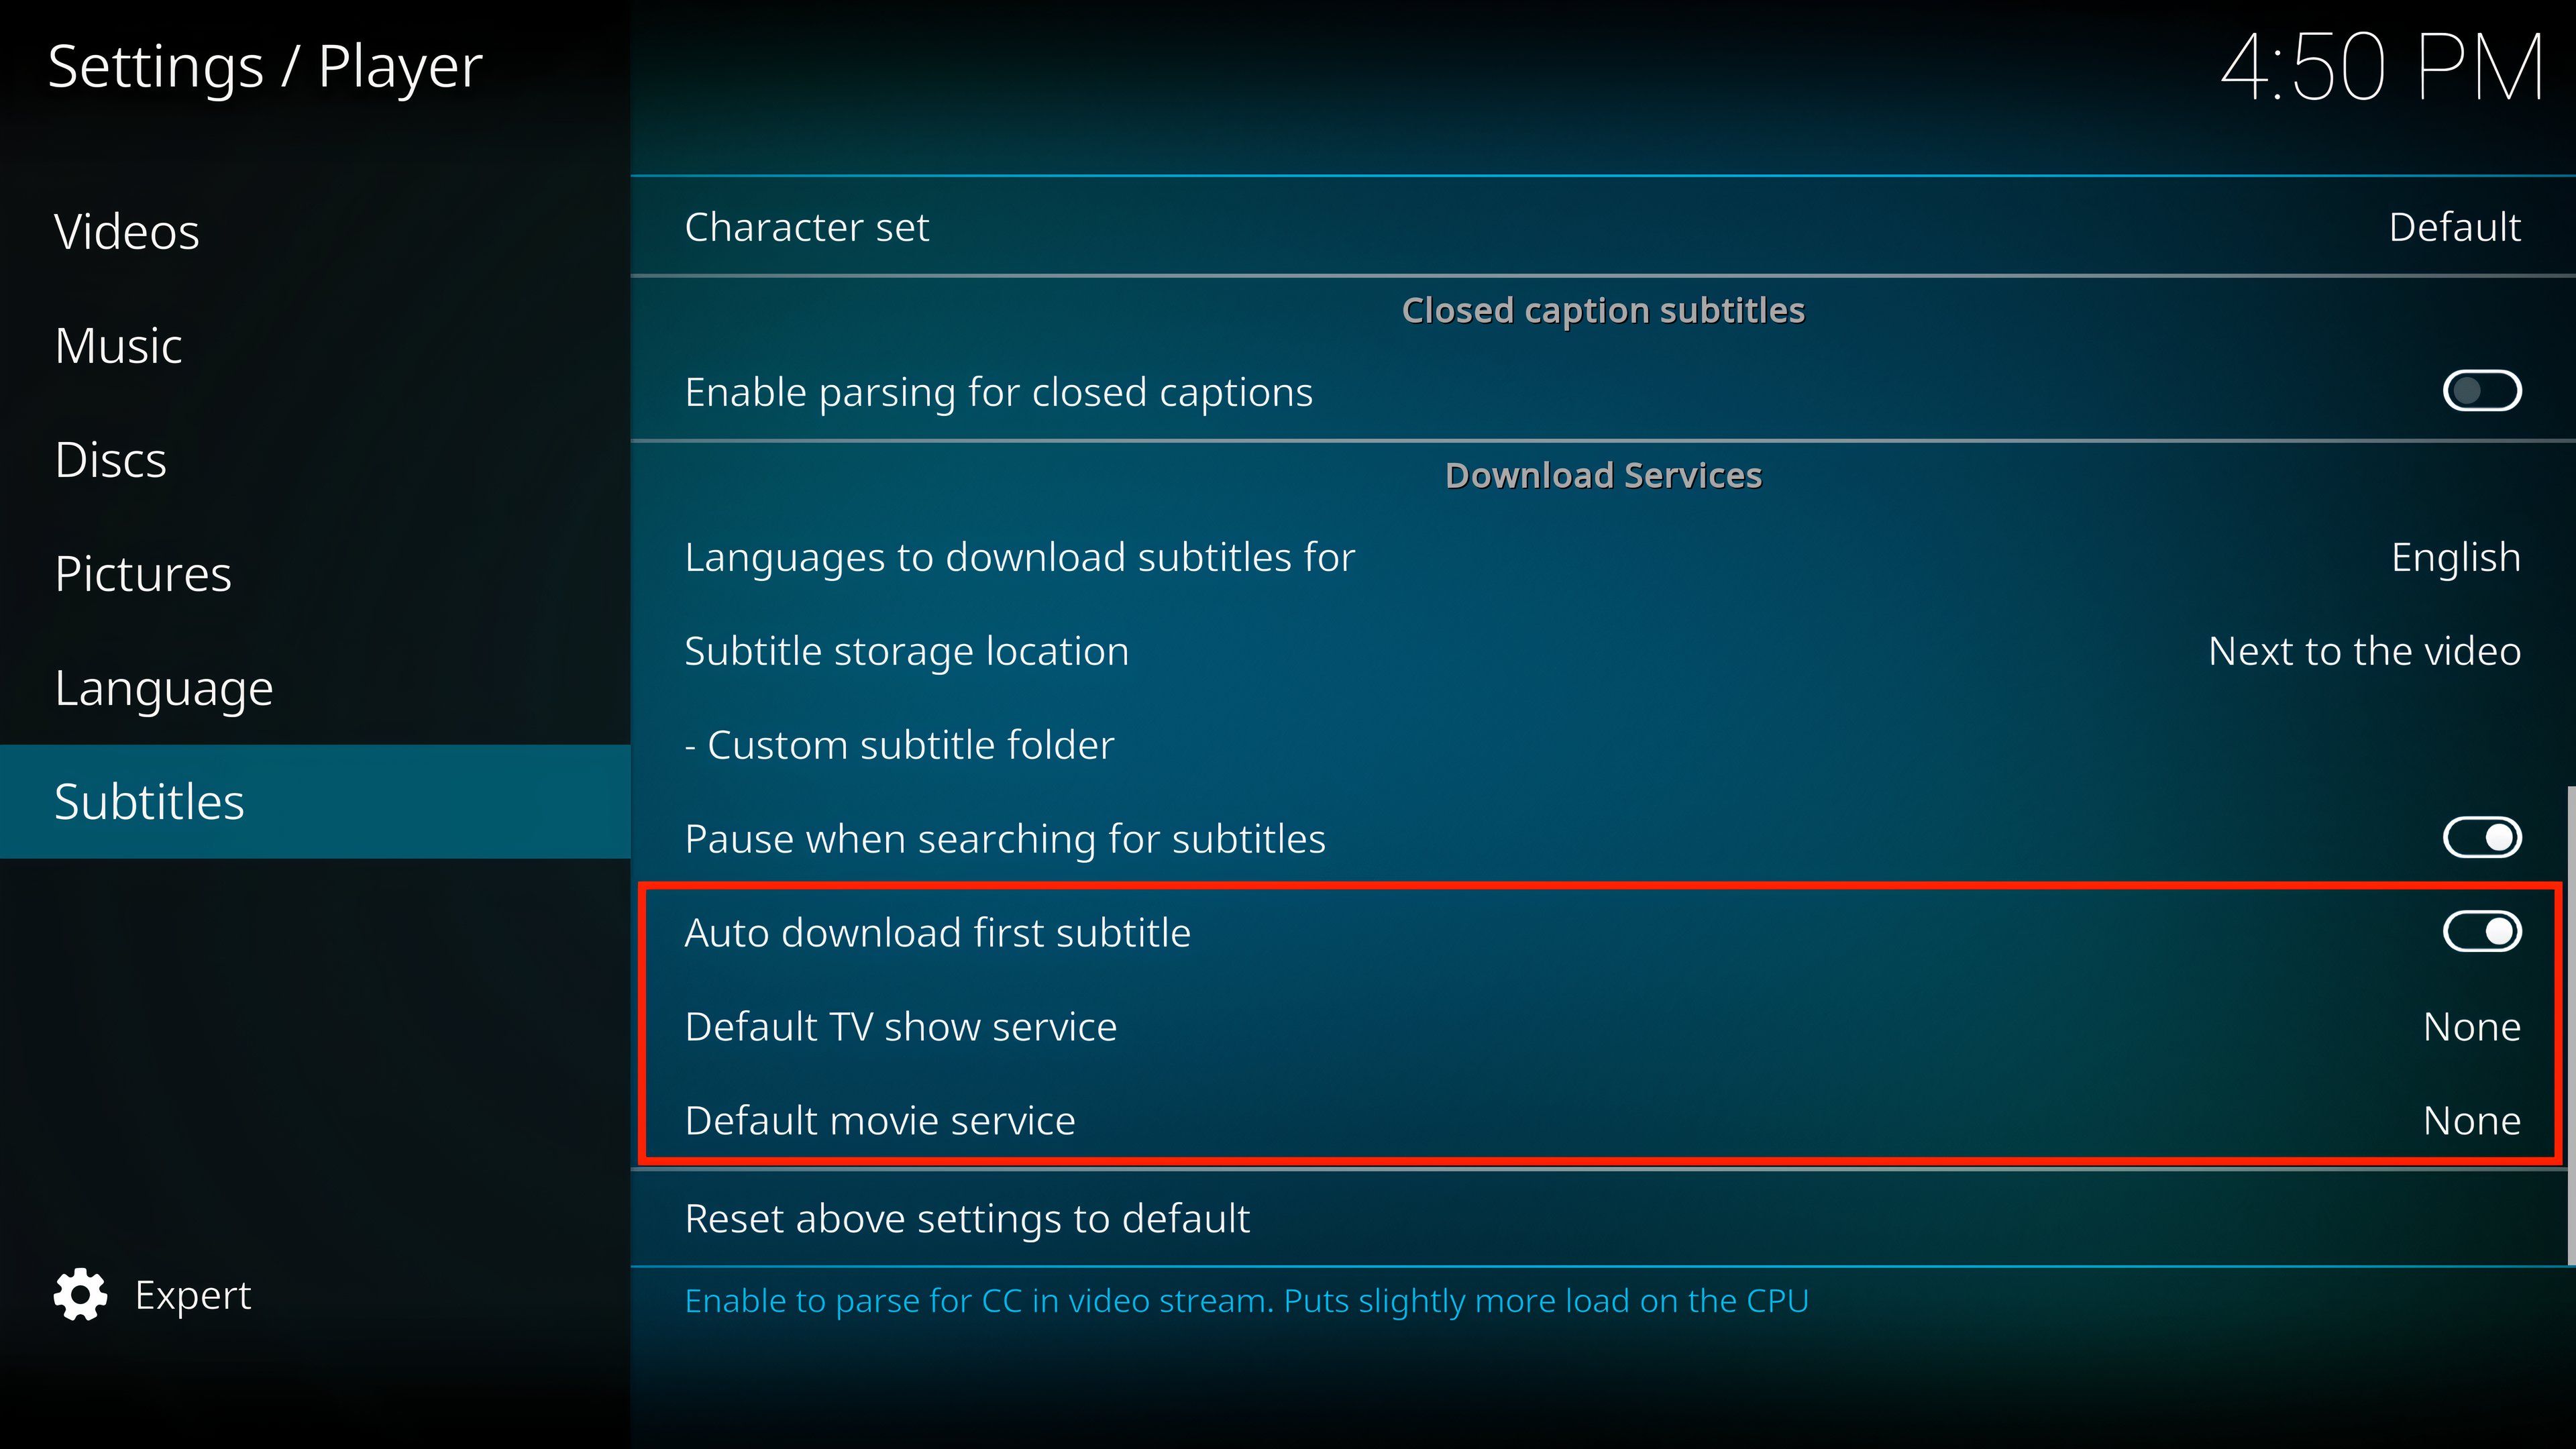
A lot of movies and TV shows can be hard to follow without subtitles, but you can configure Kodi to automatically download subtitles for all your visual media. Simply go to Settings > Player > Subtitles, then select “Auto Download First Subtitle,” then select a “Default TV Show Service” and a “Default Movie Service.”
Playback Settings
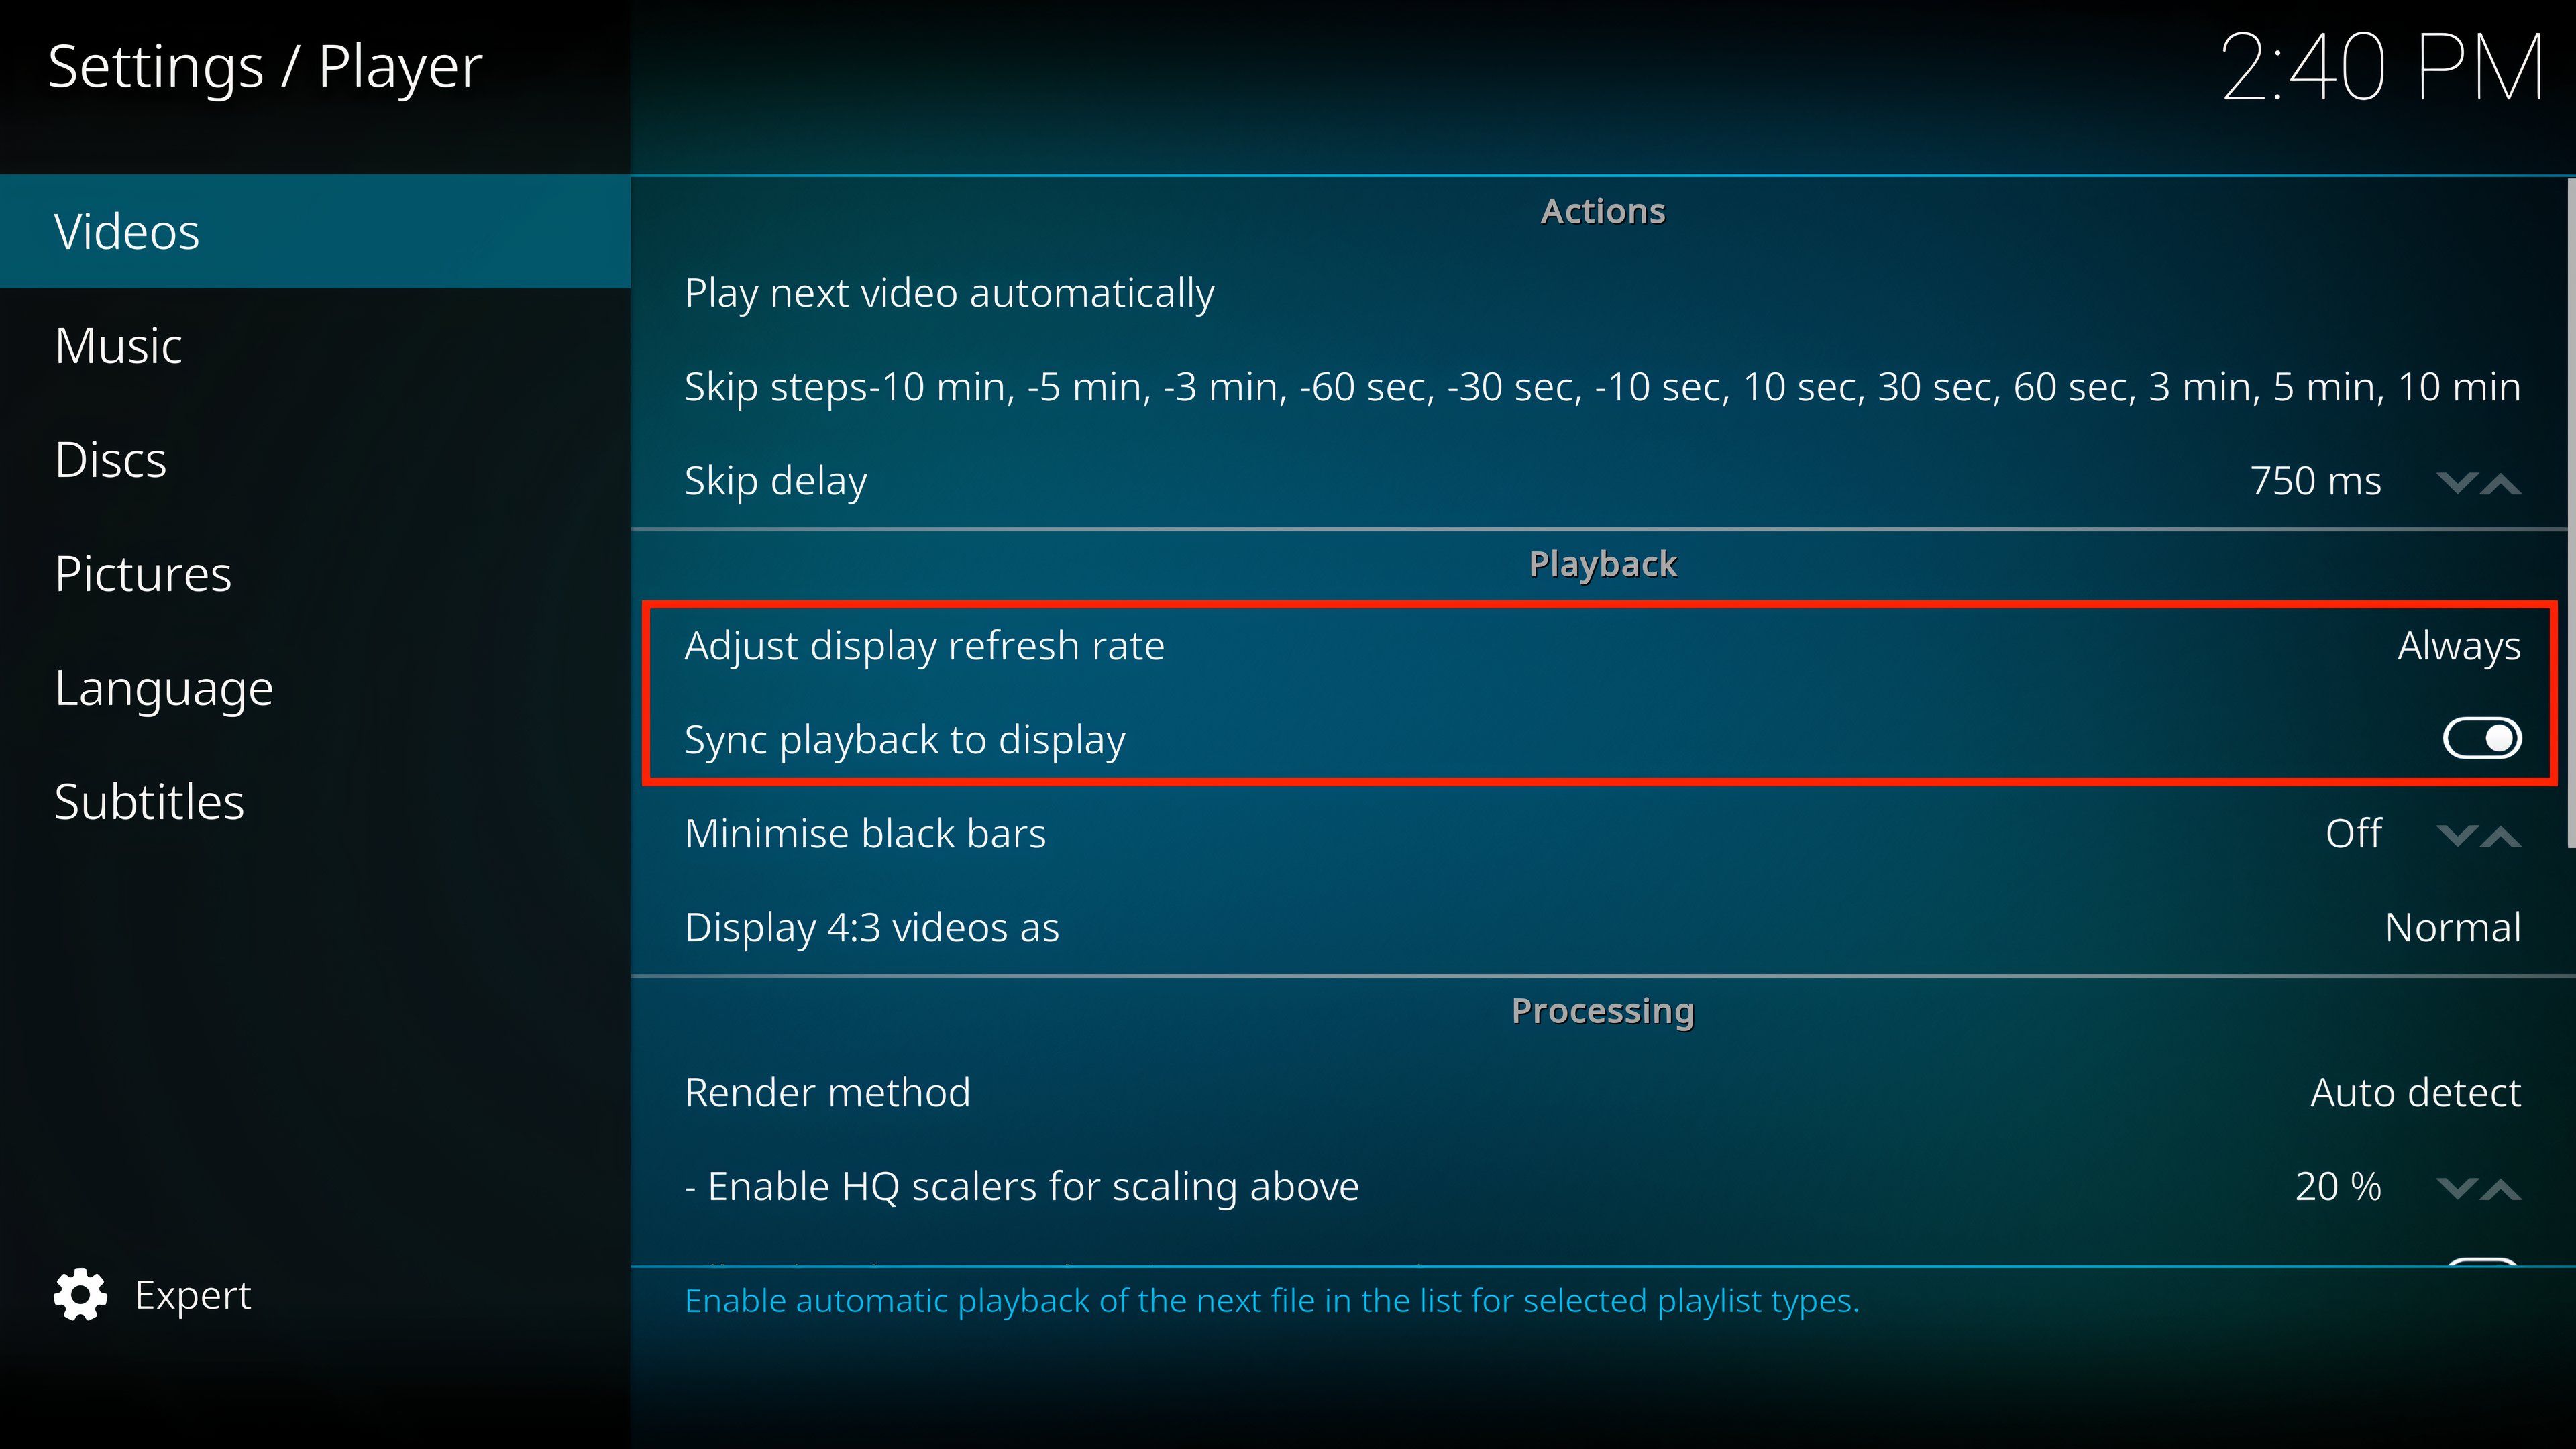
You can adjust your playback experience by adjusting settings like hardware acceleration and syncing playback to the display. Go to Settings > Player > Videos to make sure “Adjust Display Refresh Rate” and “Sync Playback to Display.” This ensures you will experience a smoother playback.
Audio Output
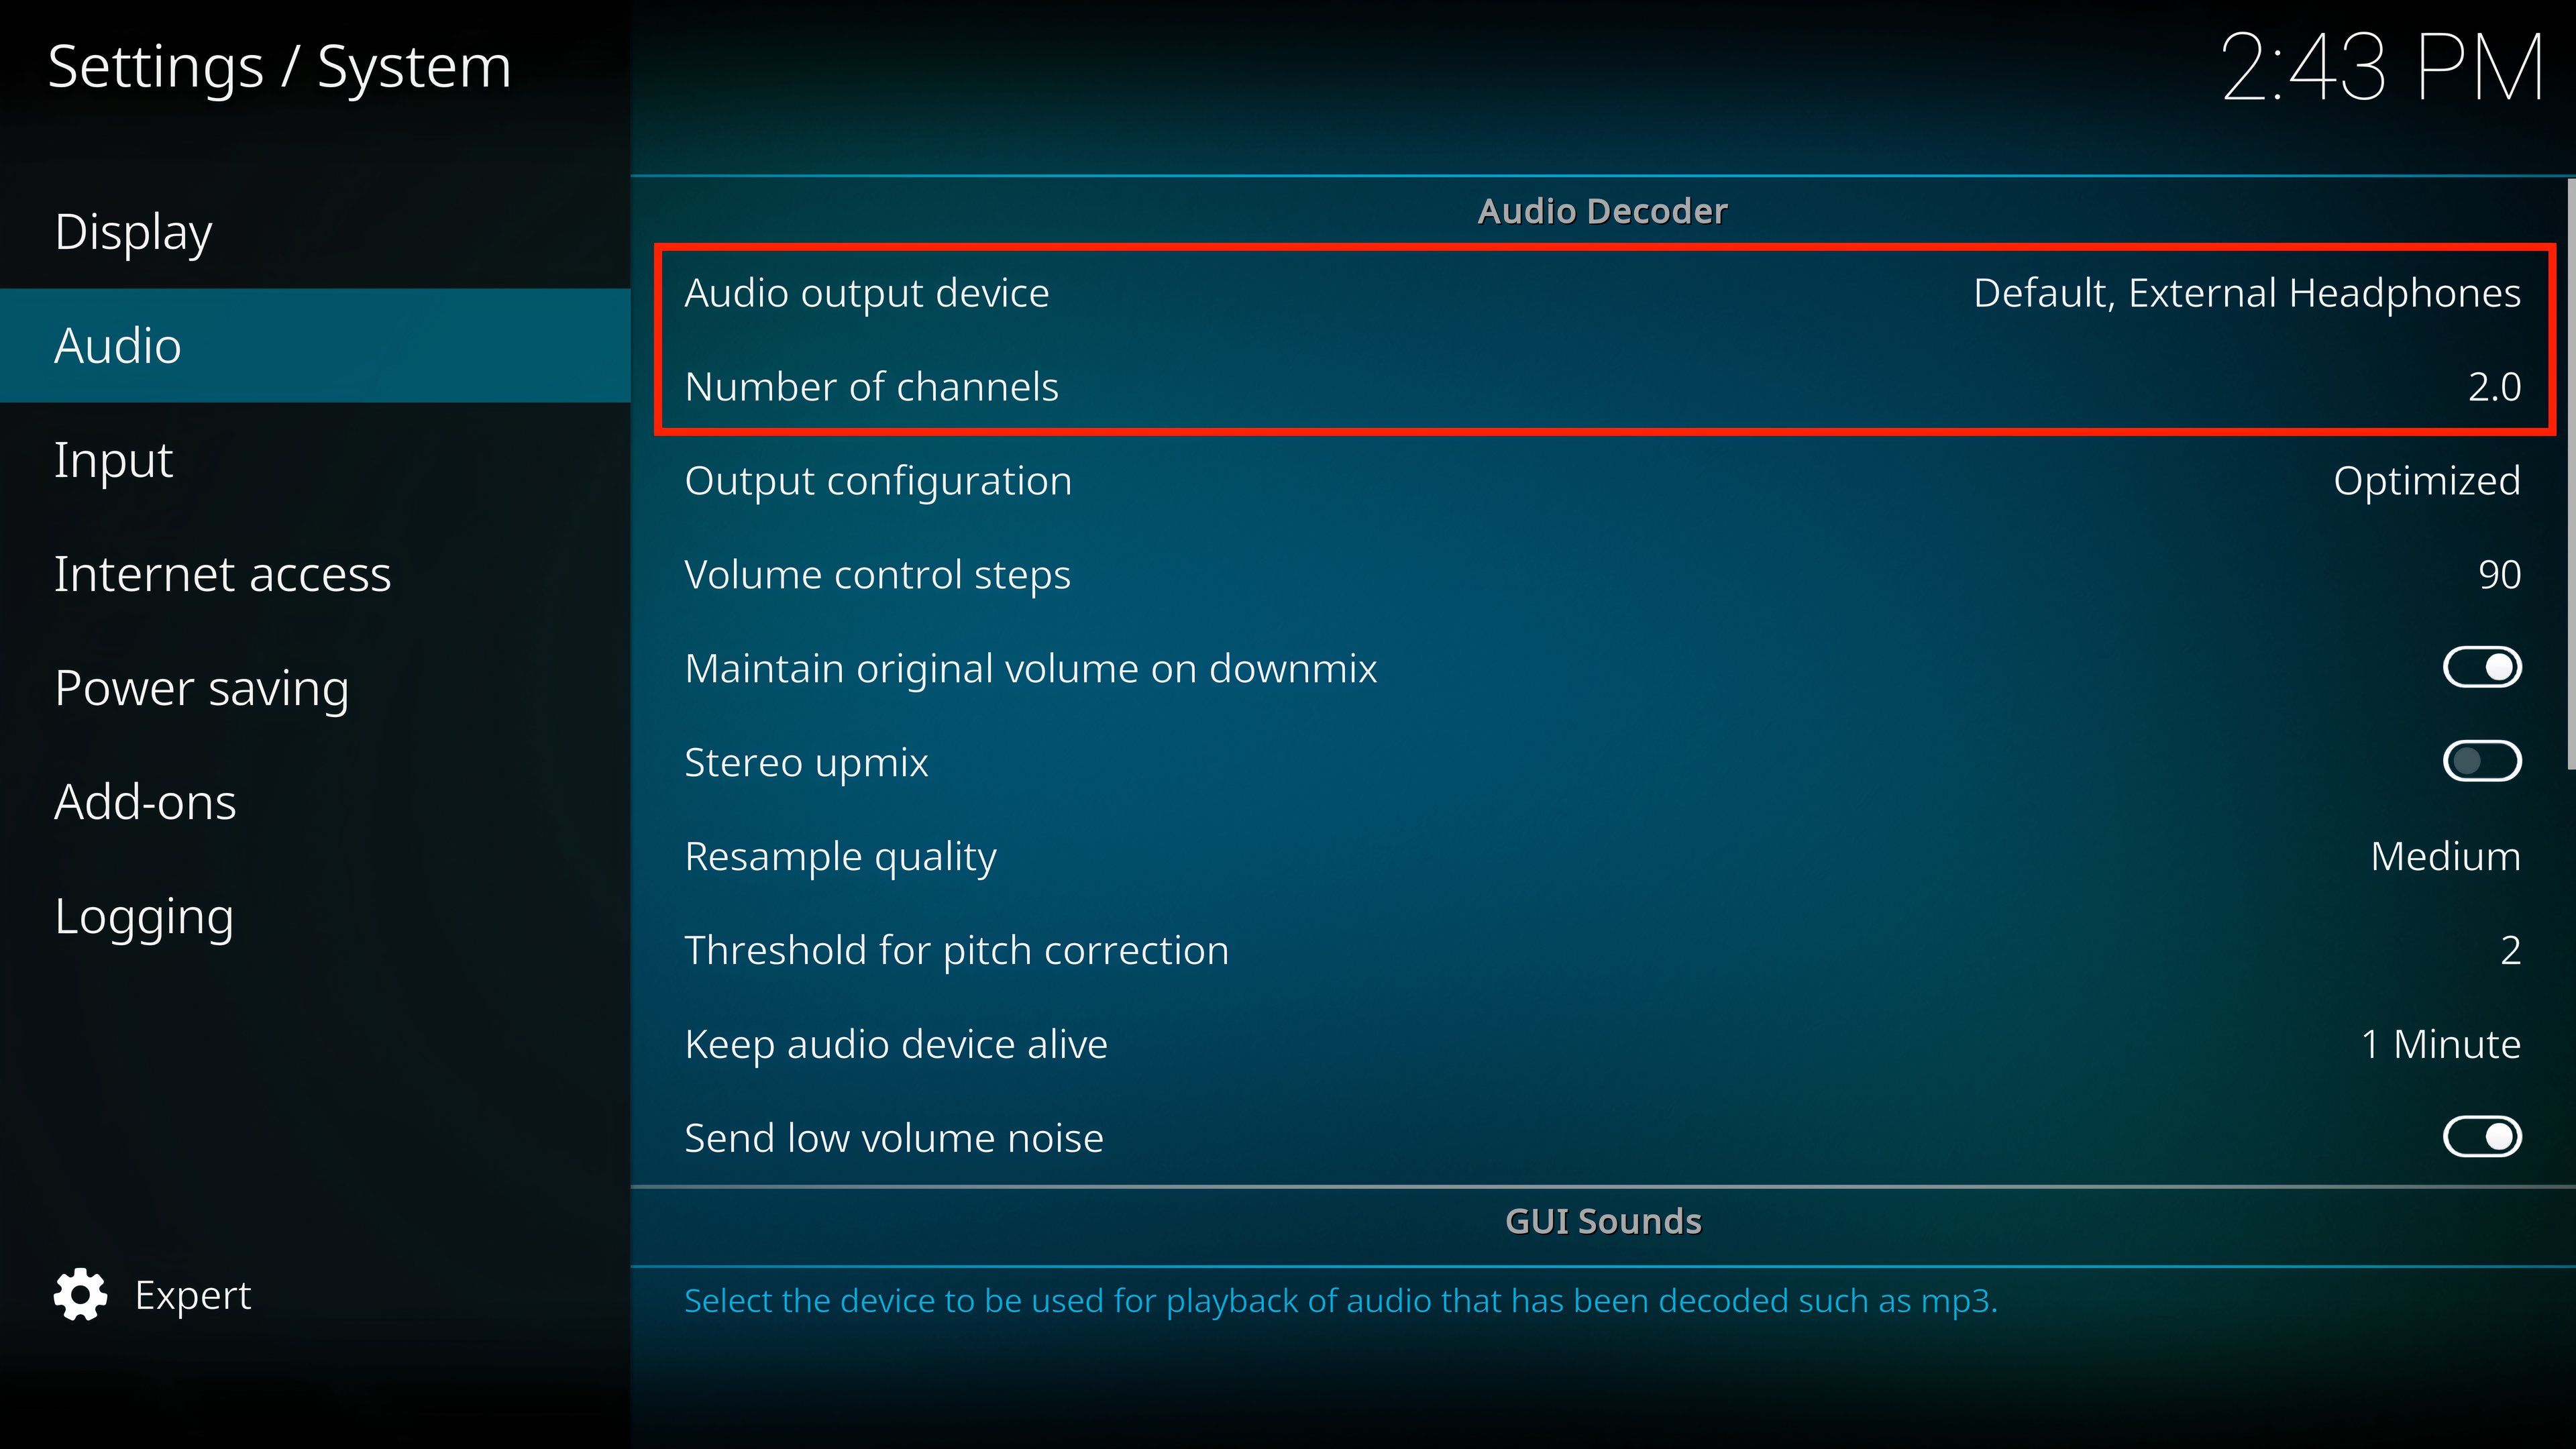
If you’re going to be watching your media on a TV or outputting audio to an external speaker system, you should make sure the correct audio output device is selected. Go to Settings > System > Audio to select the output device and number of channels.
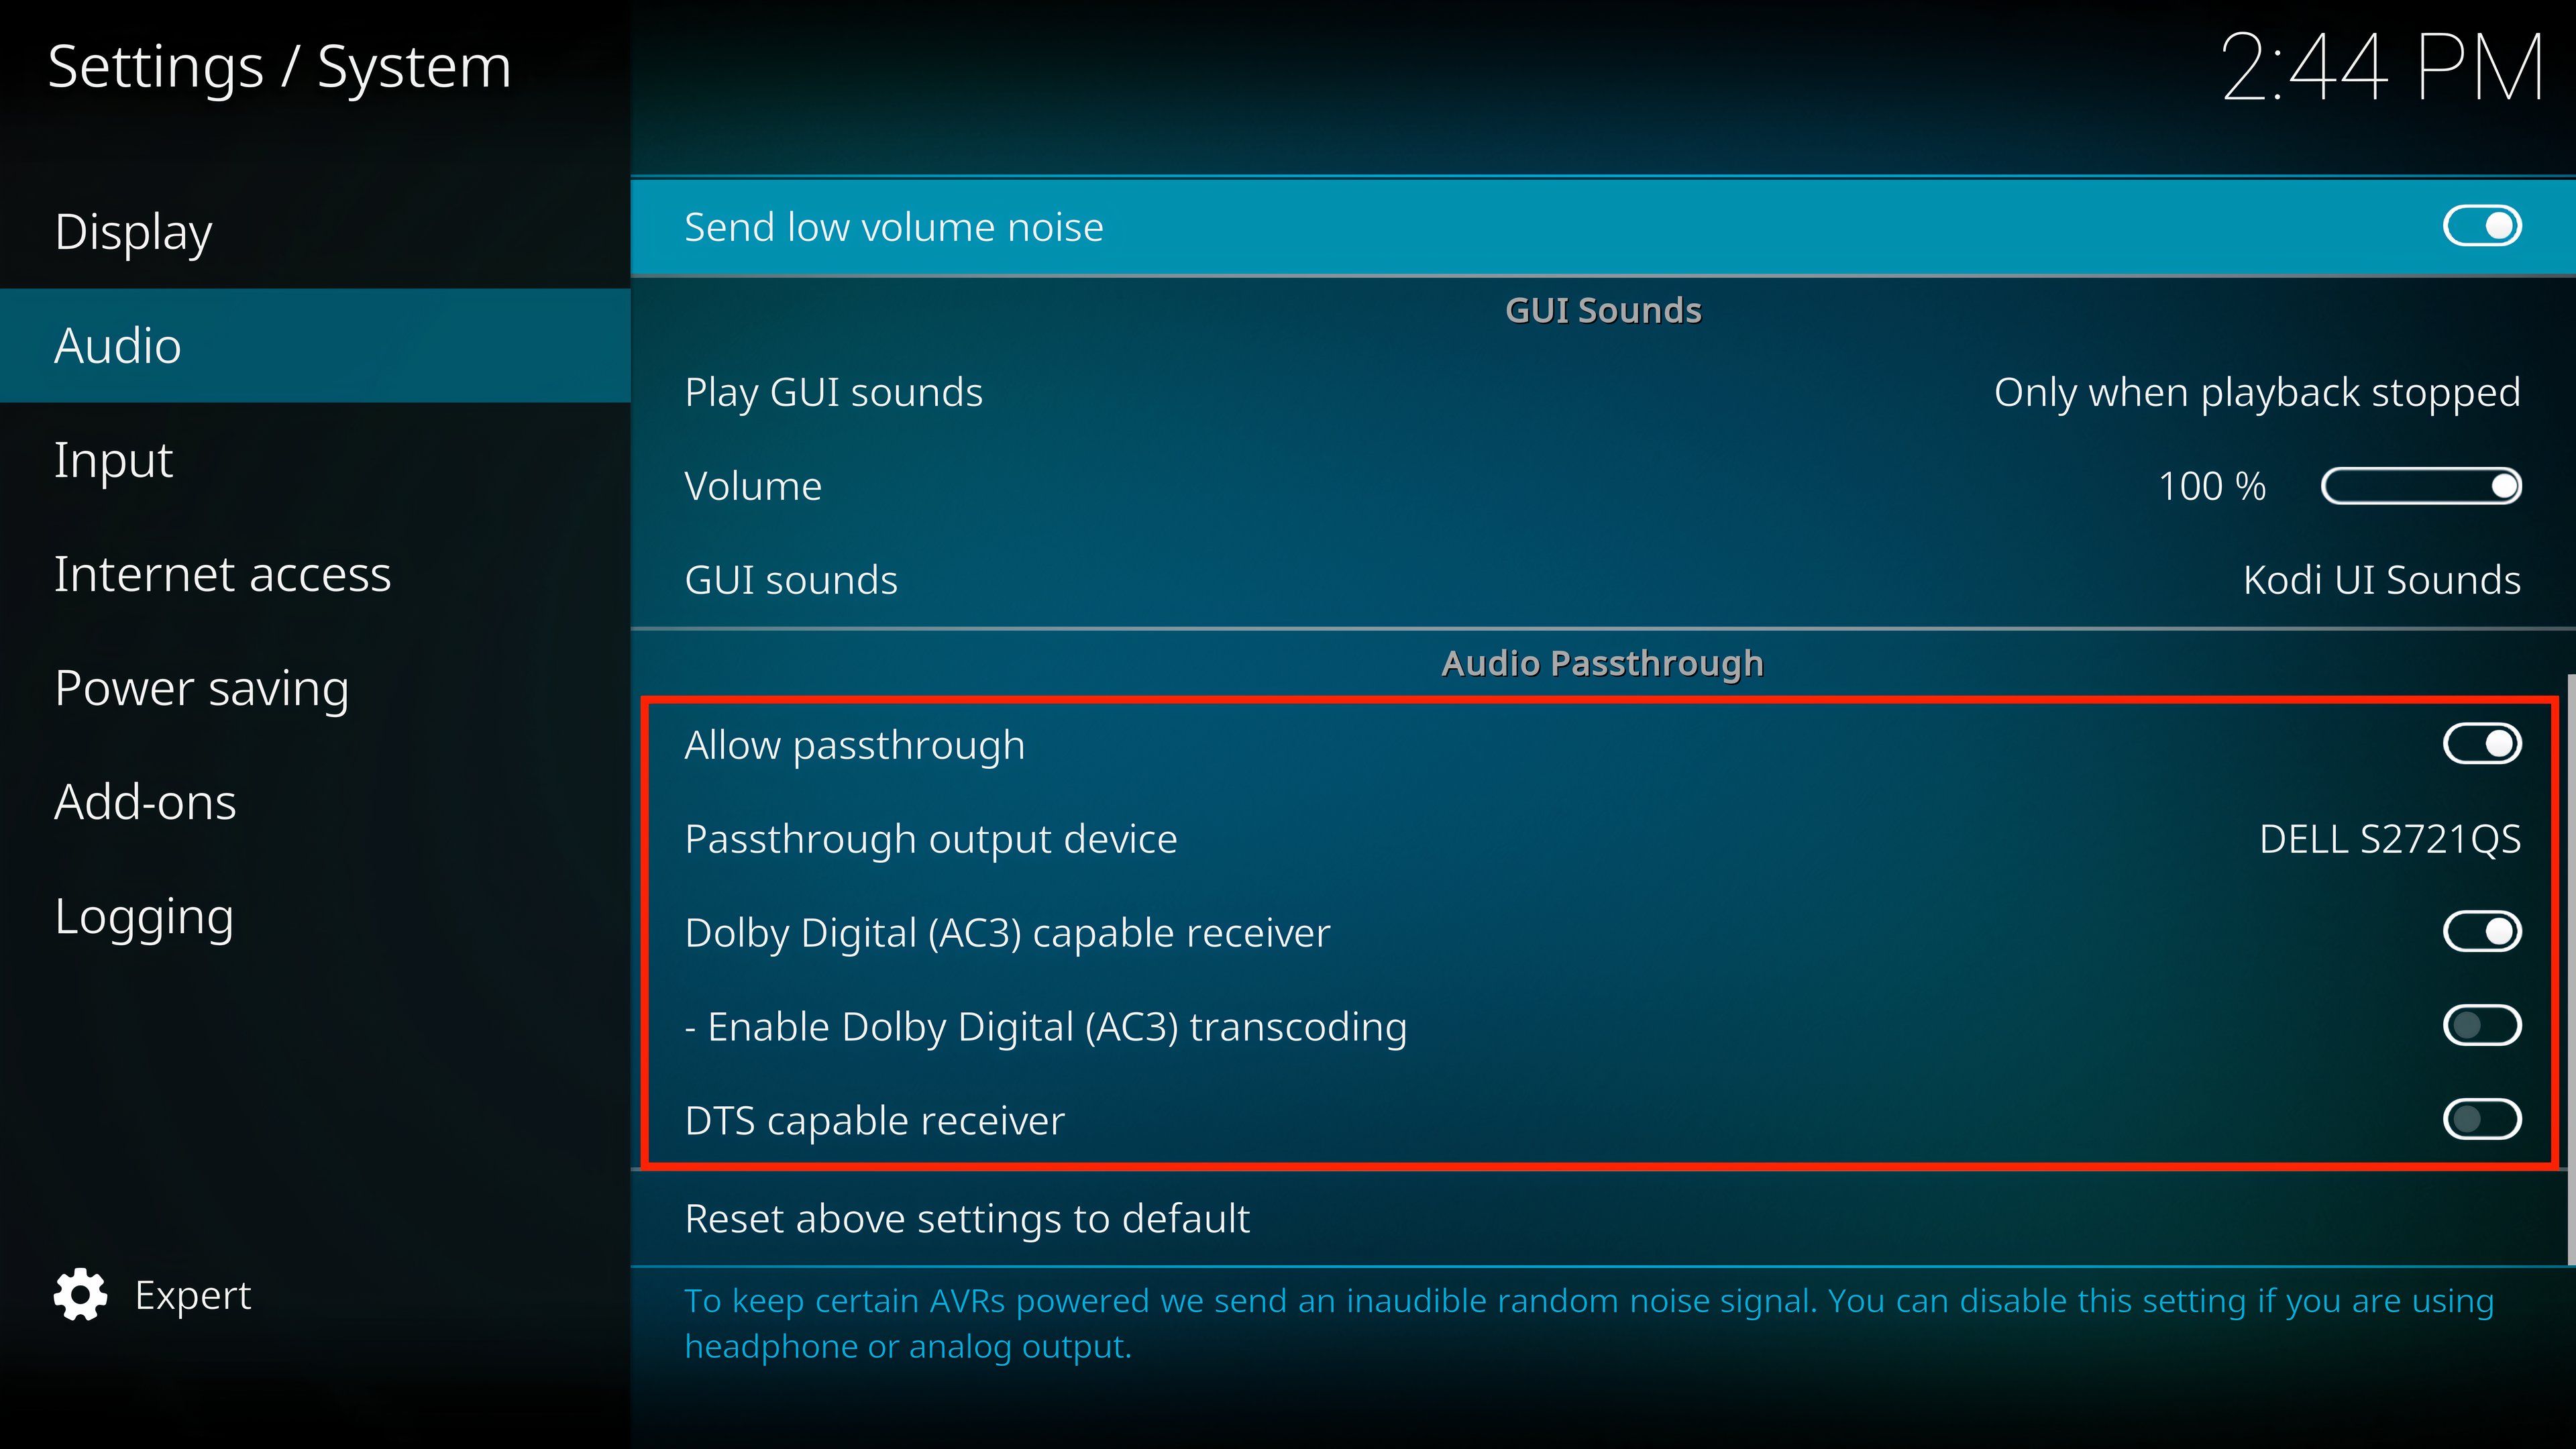
If your audio output device supports it, you can also enable passthrough Dolby or DTS.
Add-ons and Updates
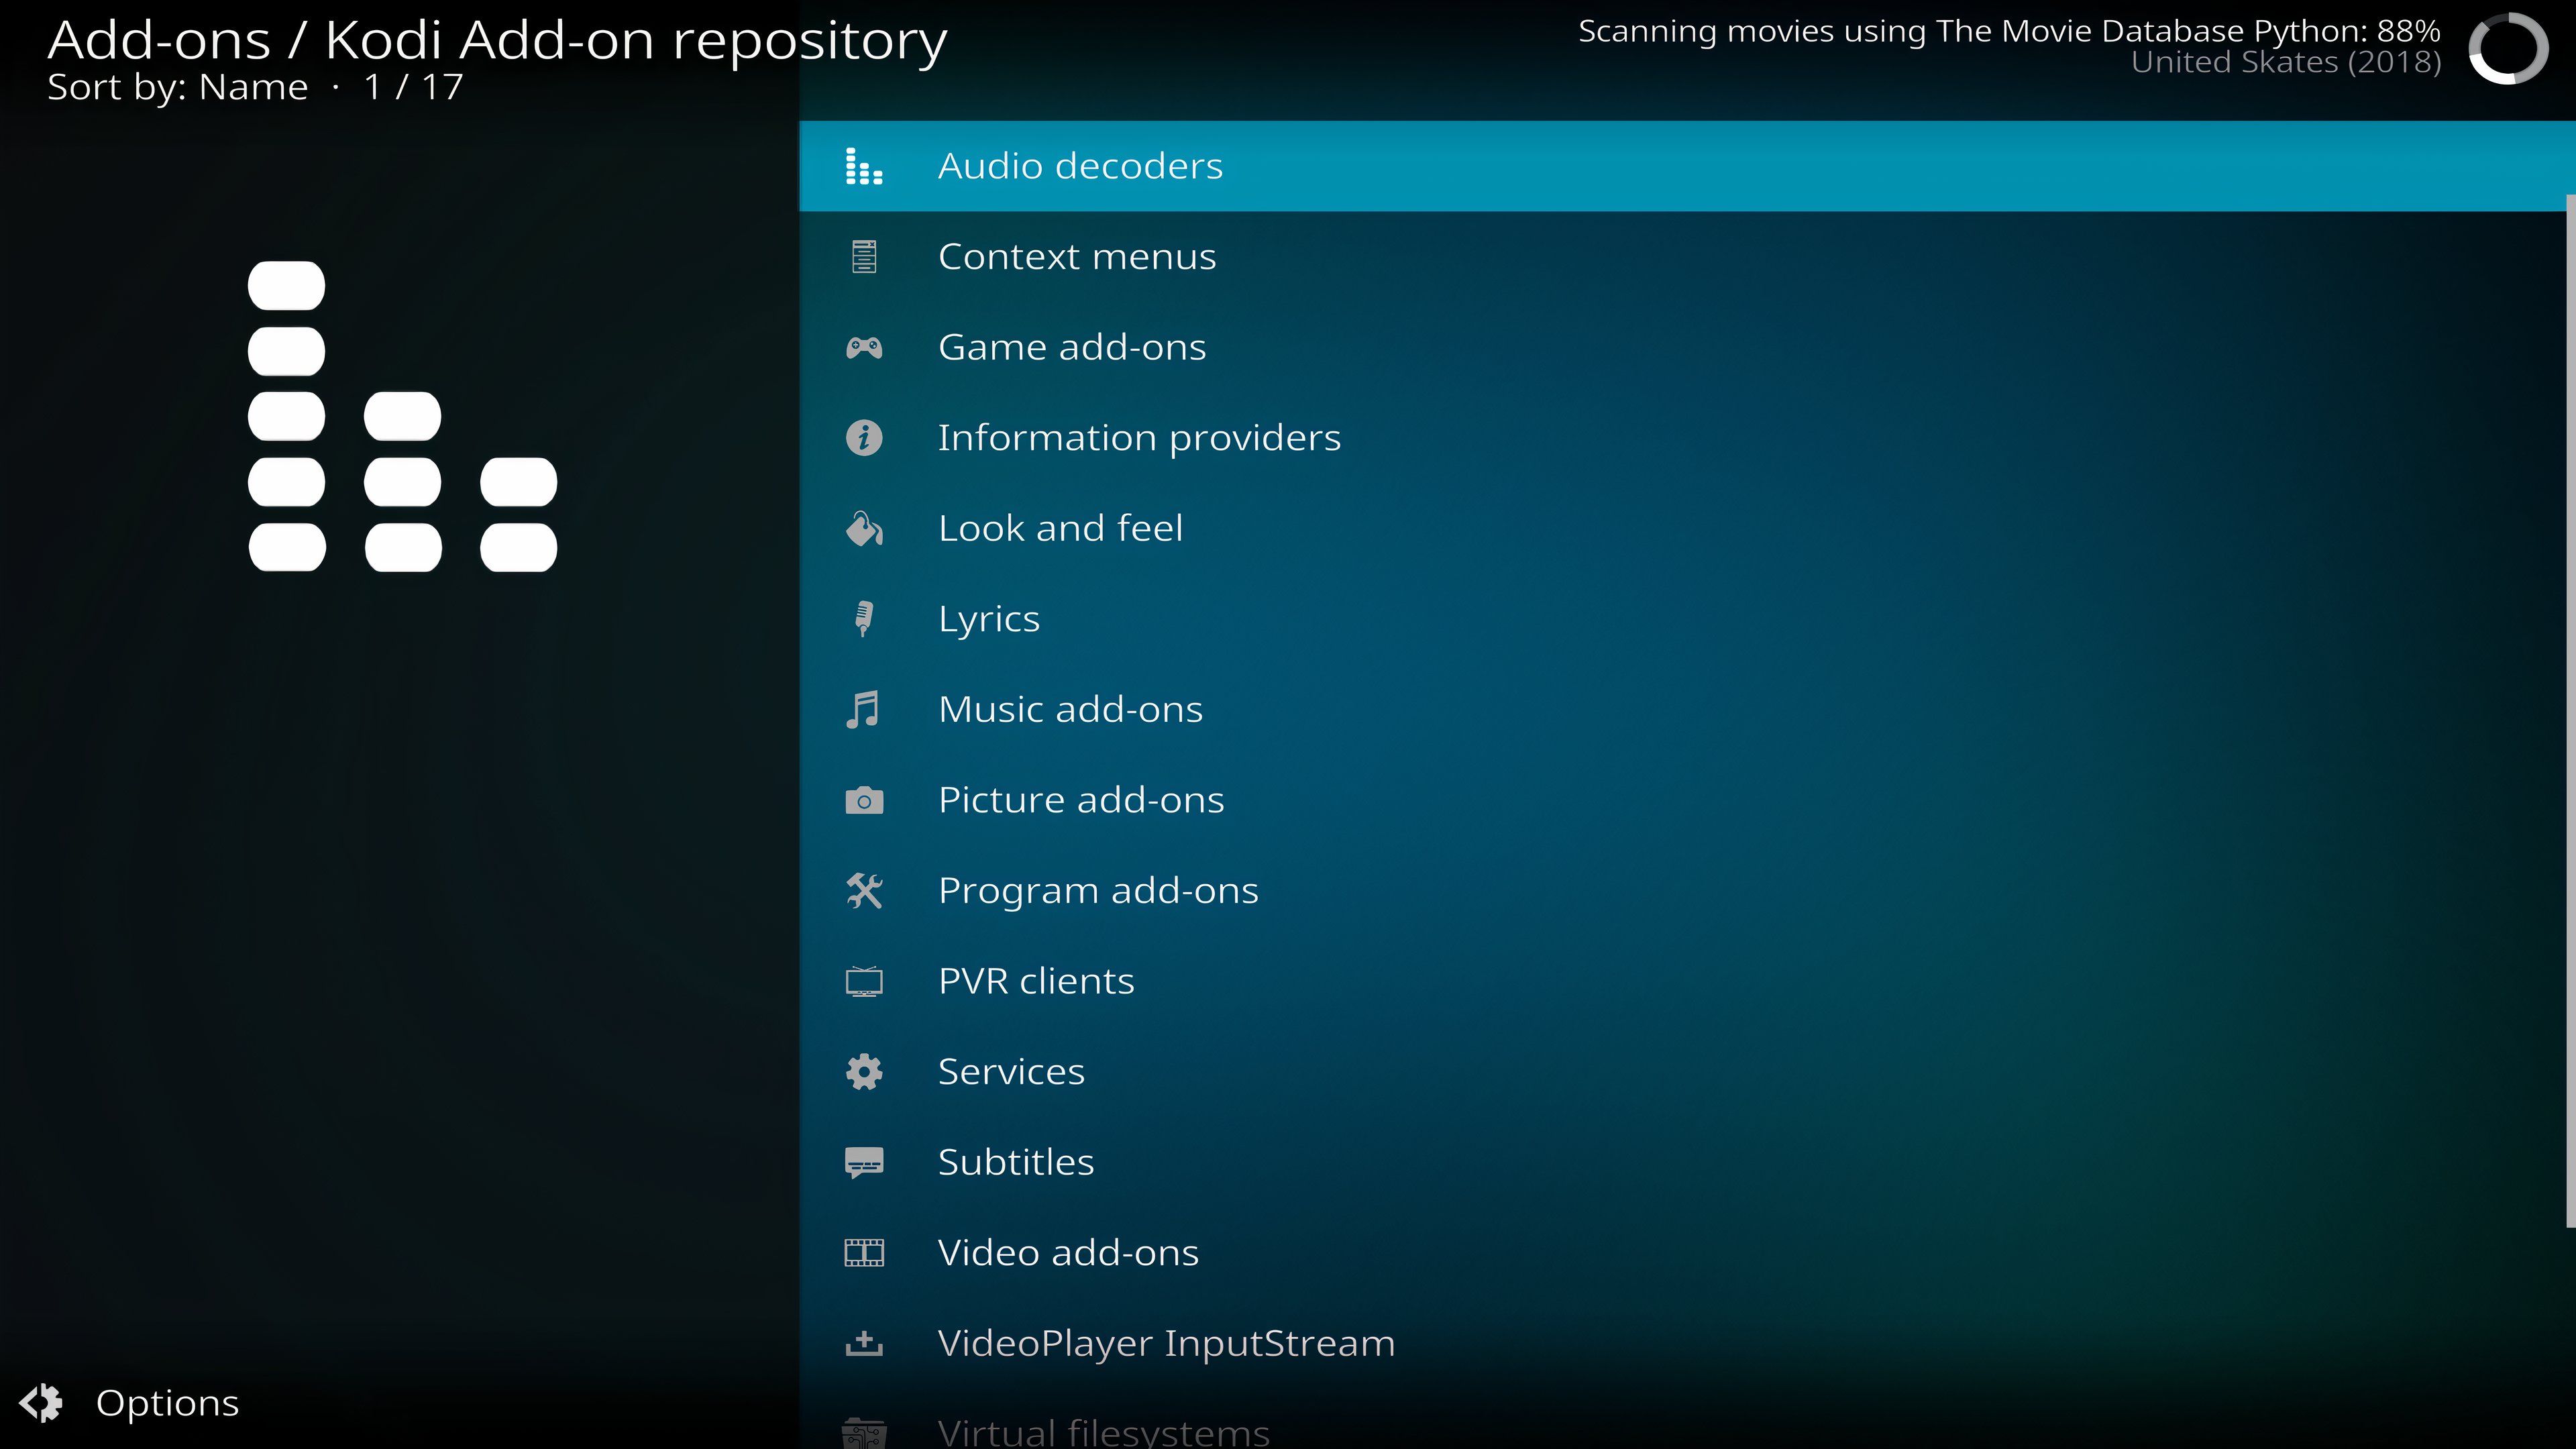
One of Kodi’s biggest selling points are its add-ons, which allow you to extend its functionality with streaming services or additional content. Go to Settings > Add-ons > Install from Repository.
Then, browse and install add-ons from Kodi’s official repository.
While you’re at it, make sure Kodi and its add-ons are always up-to-date by enabling automatic updates. Go to Settings > System > Add-ons > Updates, then select “Auto Update” to keep Kodi and its add-ons current.
Parental Controls
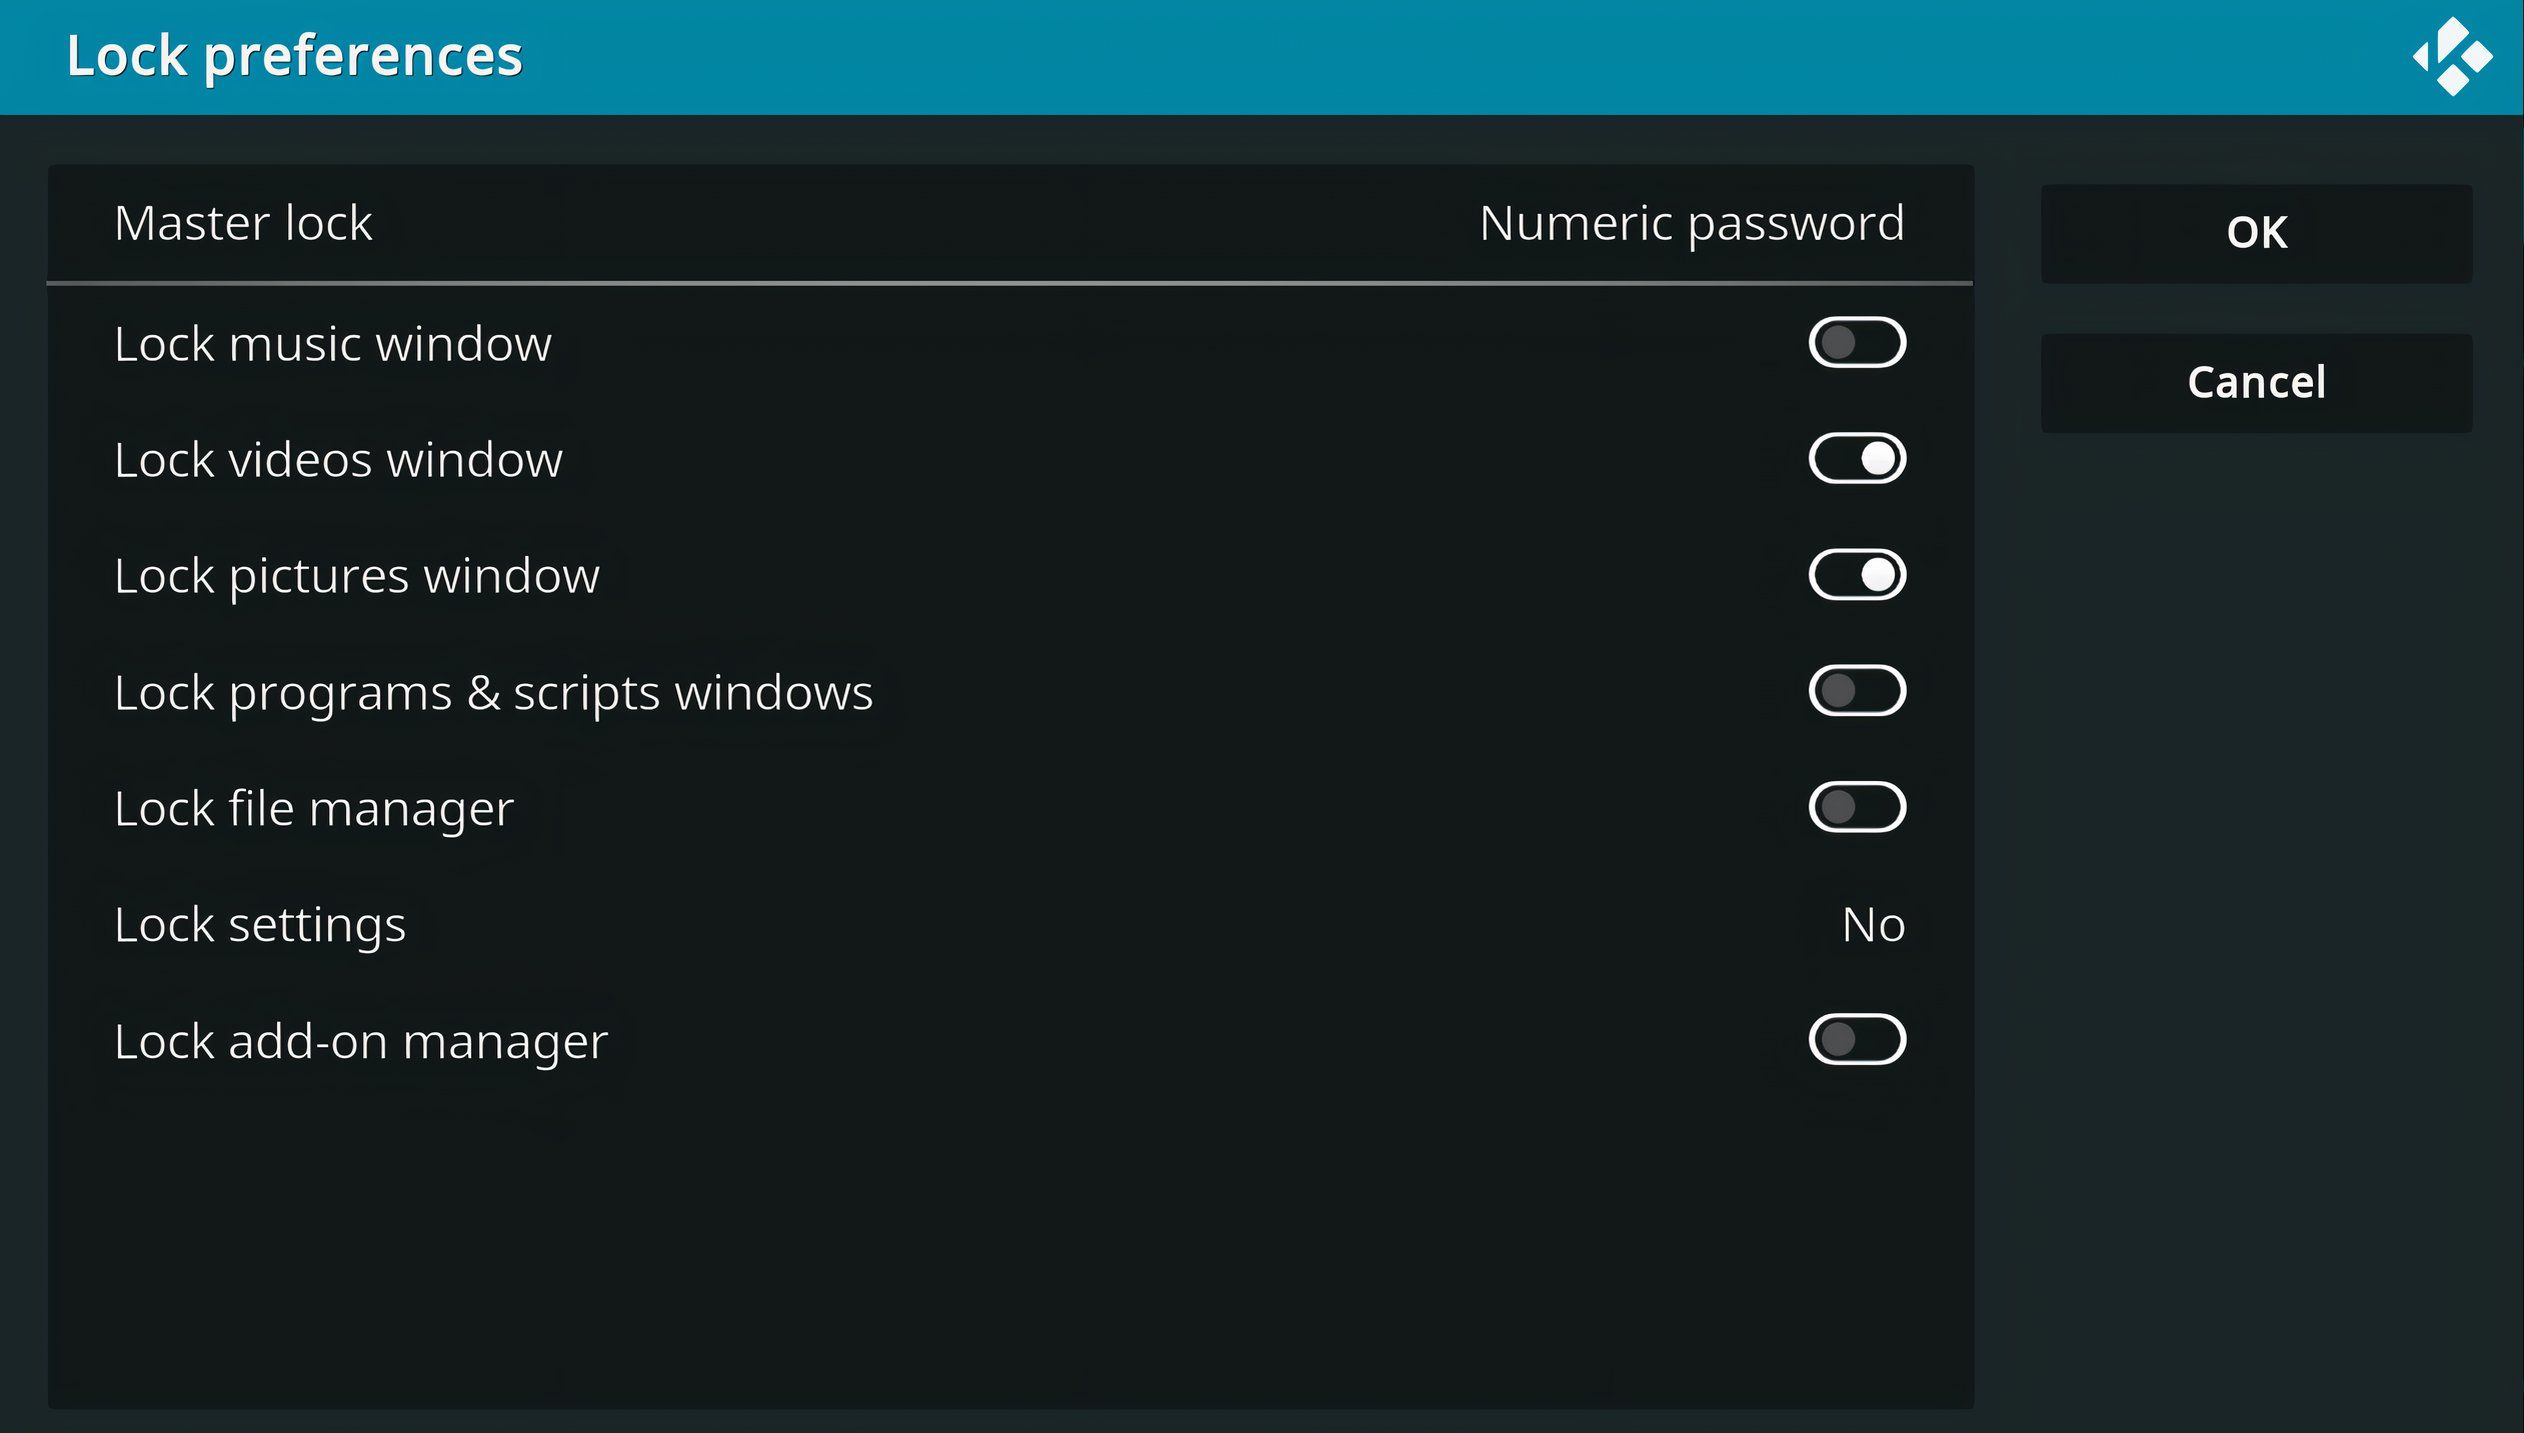
Use Kodi’s parental controls to restrict your children’s access to certain content. Go to Settings > Interface > Master Lock to set a master lock such as numeric code or password.
Then, you can control access to settings and certain media.
Streaming to Household Devices
Part of the fun of having a big media library is being able to watch it on any device in any room.
It’s important to note that only Android TV and Chromecast devices with Google TV have native Kodi app support. If you want to use Kodi on an Amazon Fire TV device, you can sideload the app, which is a fairly straightforward process.
On Apple TV, there isn’t an official Kodi app. While you can technically sideload the app onto newer versions (4th generation and later), it’s really just easier to use a media player like VLC.
Roku devices don’t support Kodi and there’s no official way to install or sideload Kodi.
Enable UPnP/DLNA
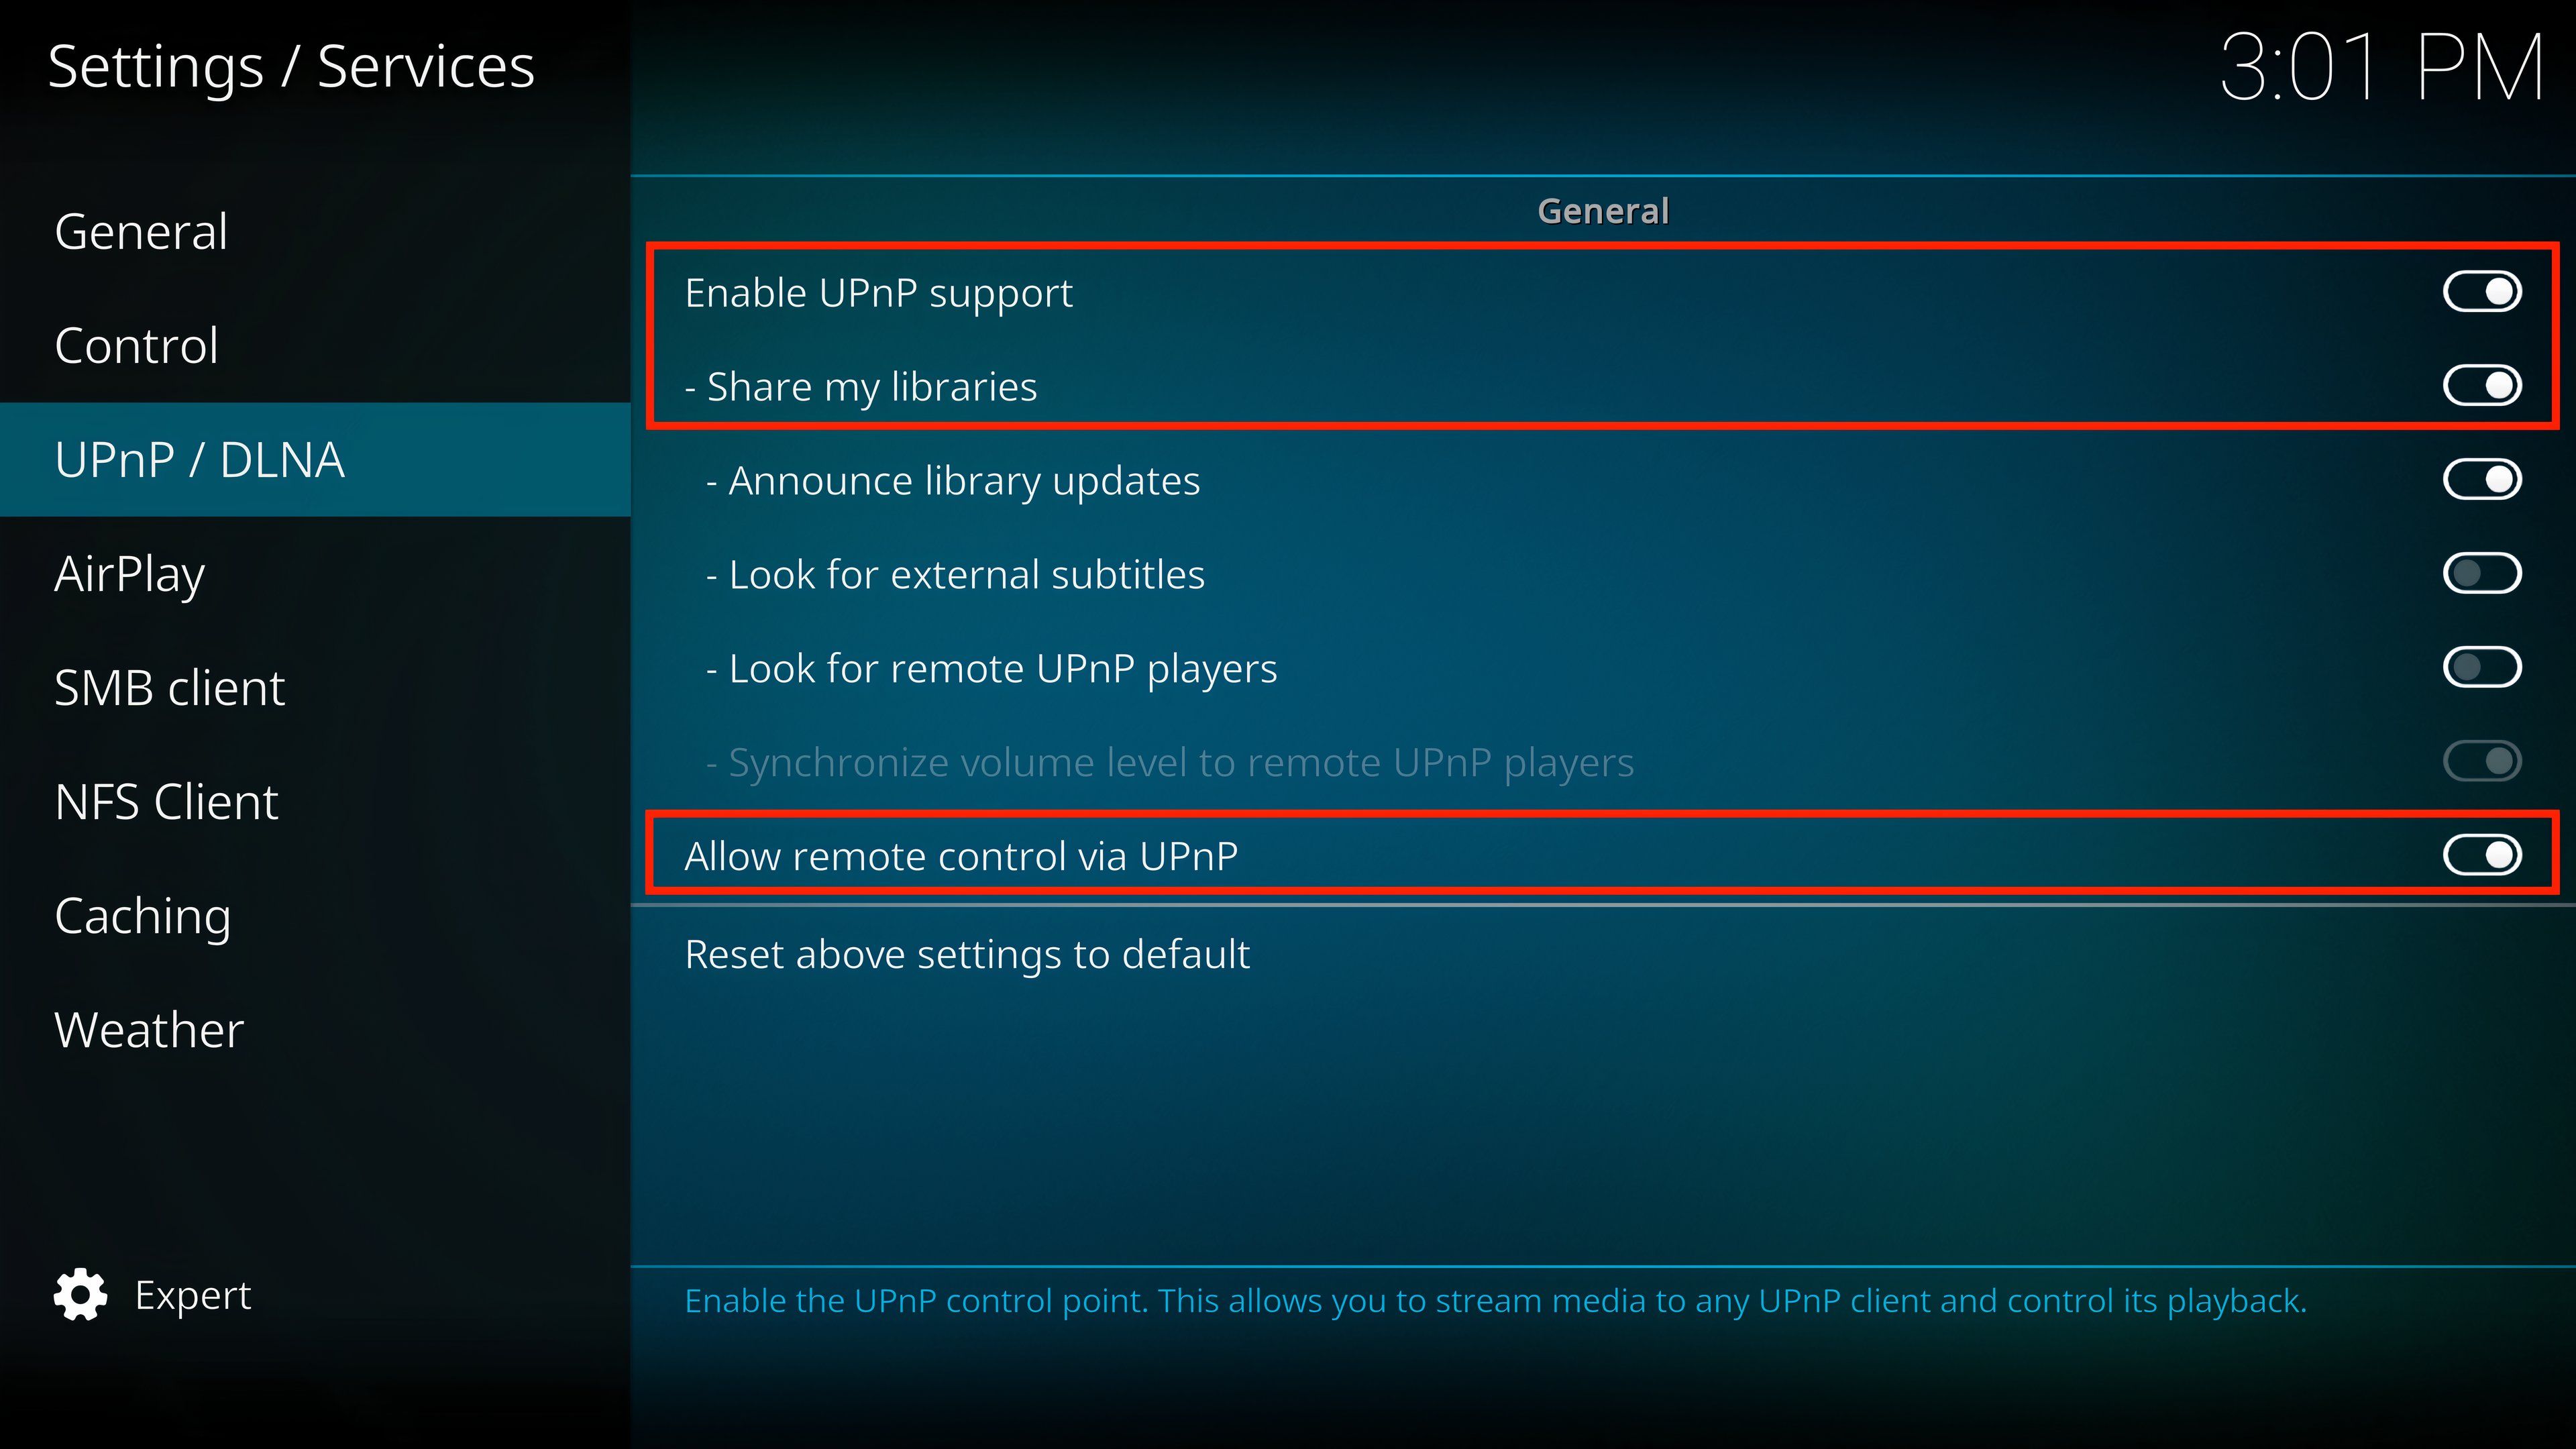
If you want to share your media with other devices, go to Settings > Services > UPnP/DLNA, then enable “Share My Libraries.” This makes your Kodi media library accessible to other devices on the network. While you’re at it, you can also enable “Allow Remote Control via UPnP” to control playback to any UPnP client.
Once you enable UPnP/DLNA on your Linux machine, you’ll also need to do the same on your streaming device where you have the Kodi app installed.
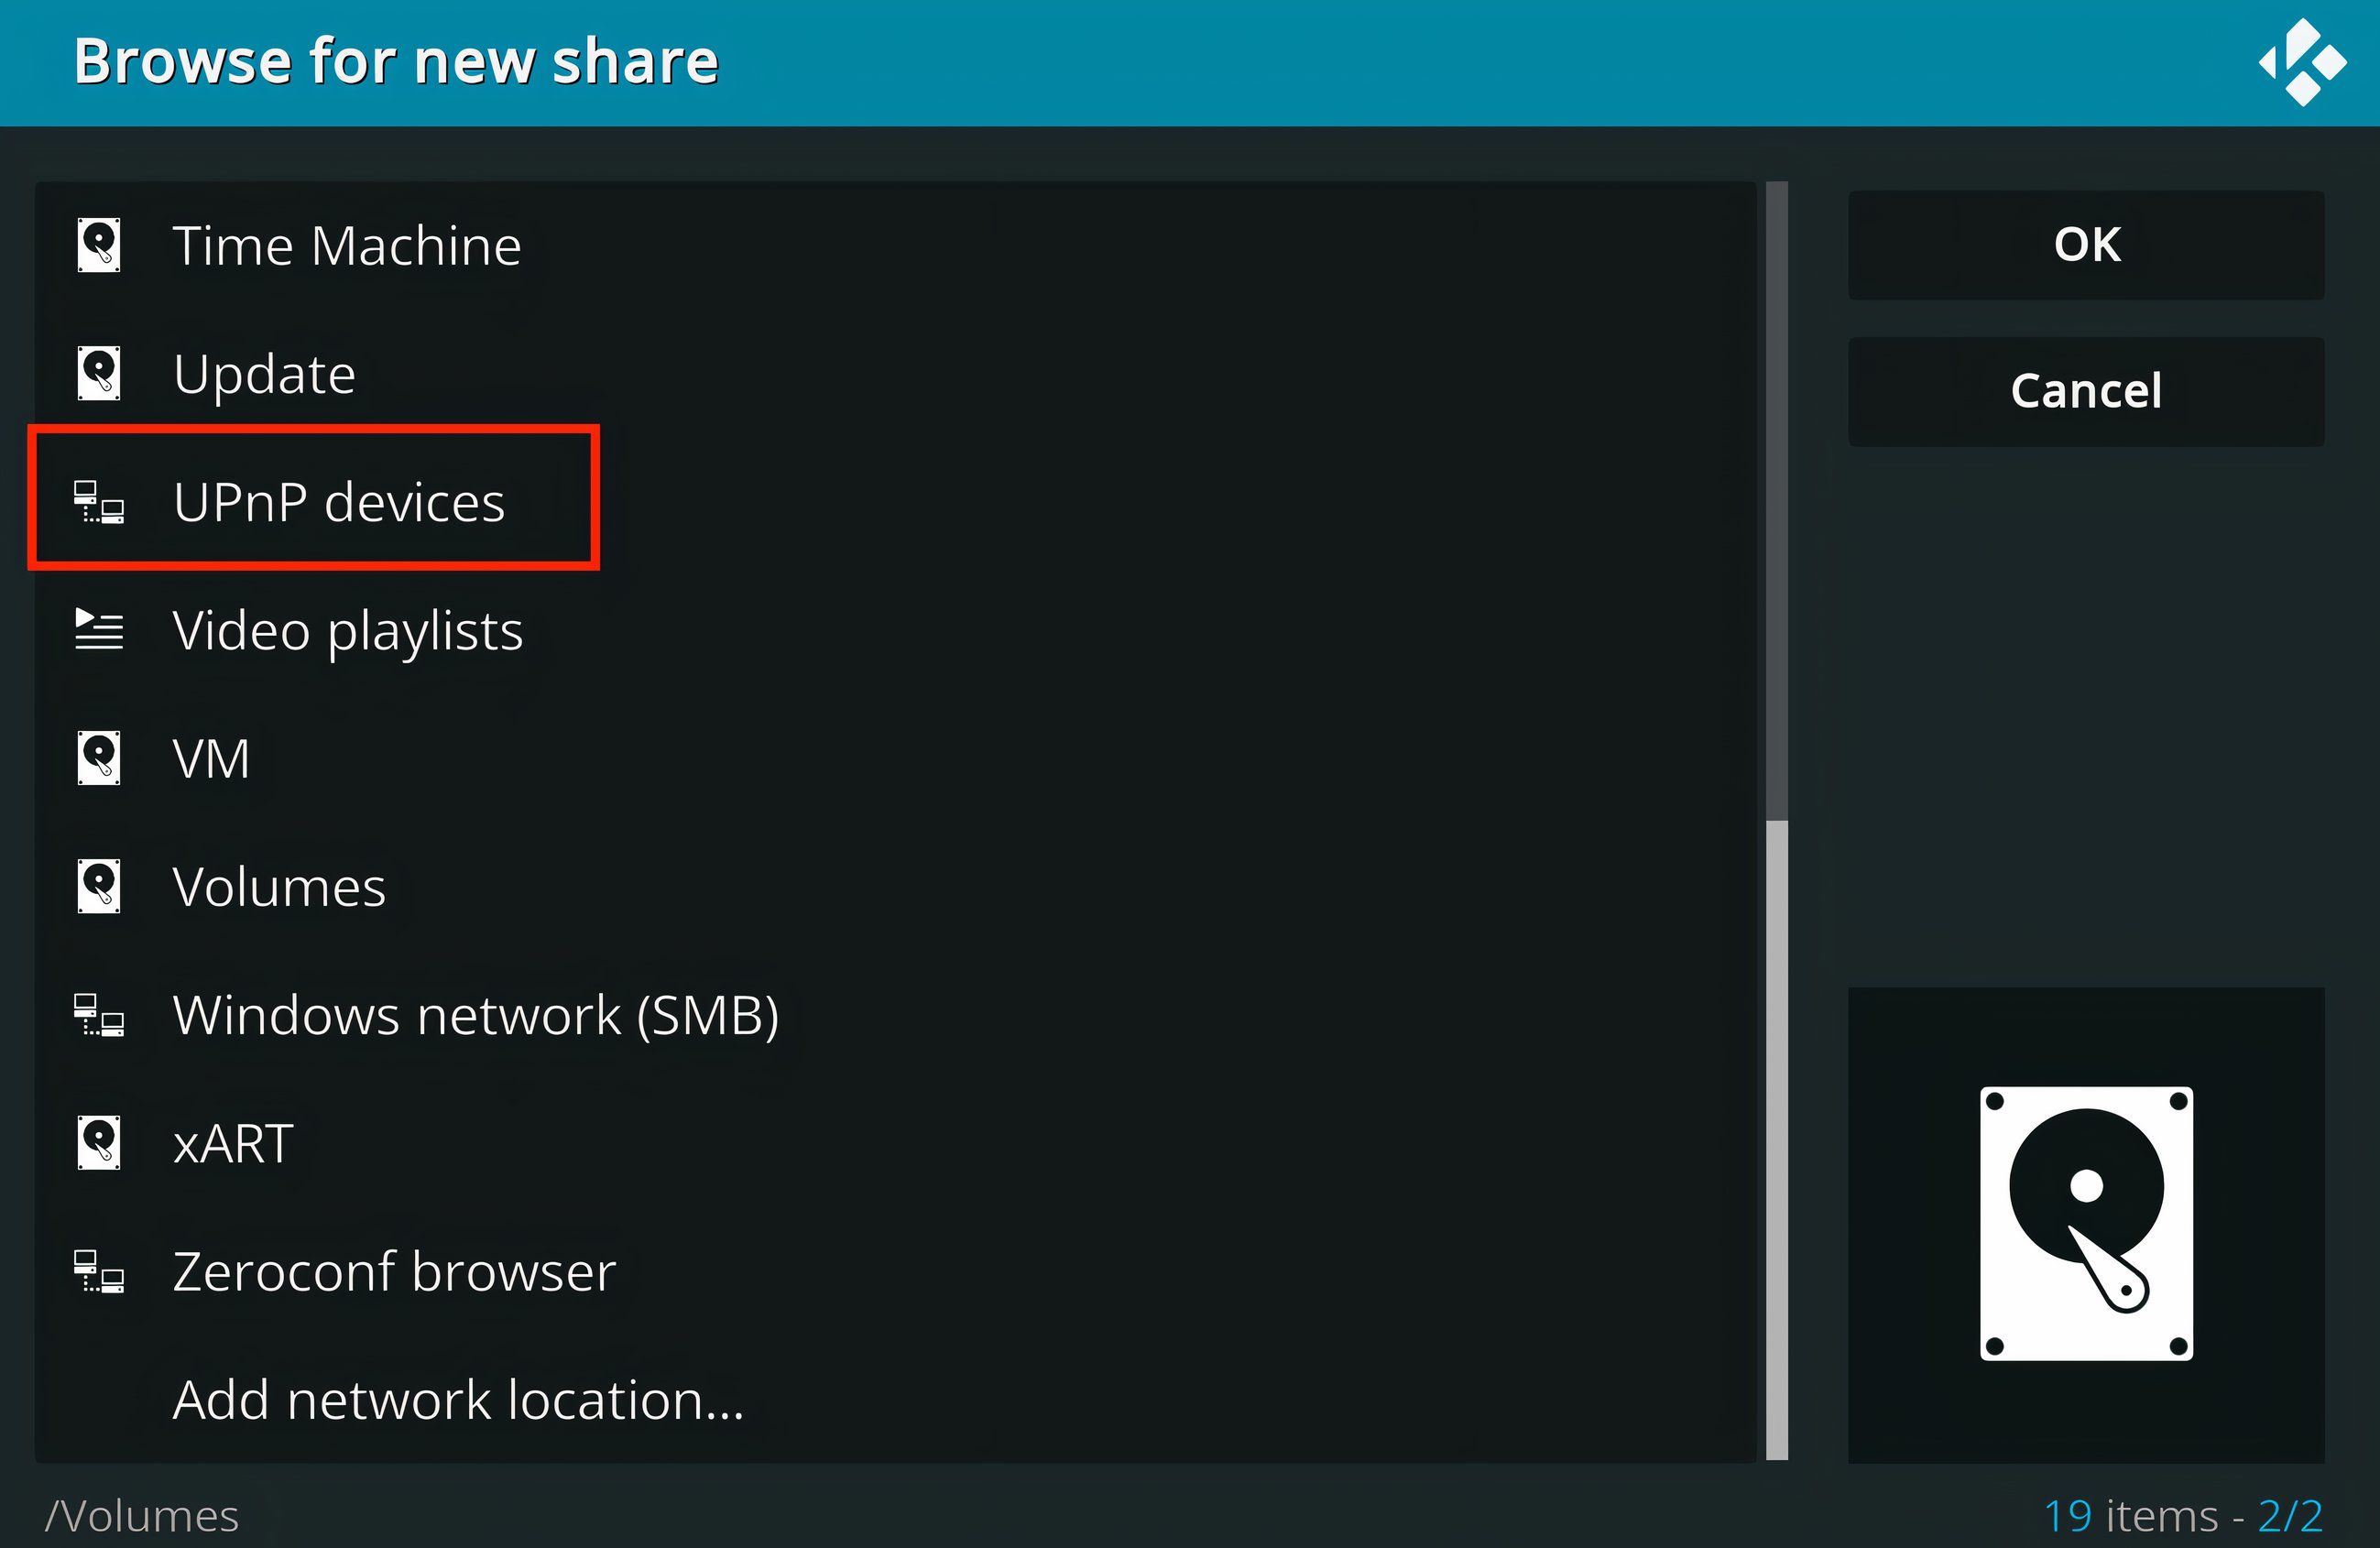
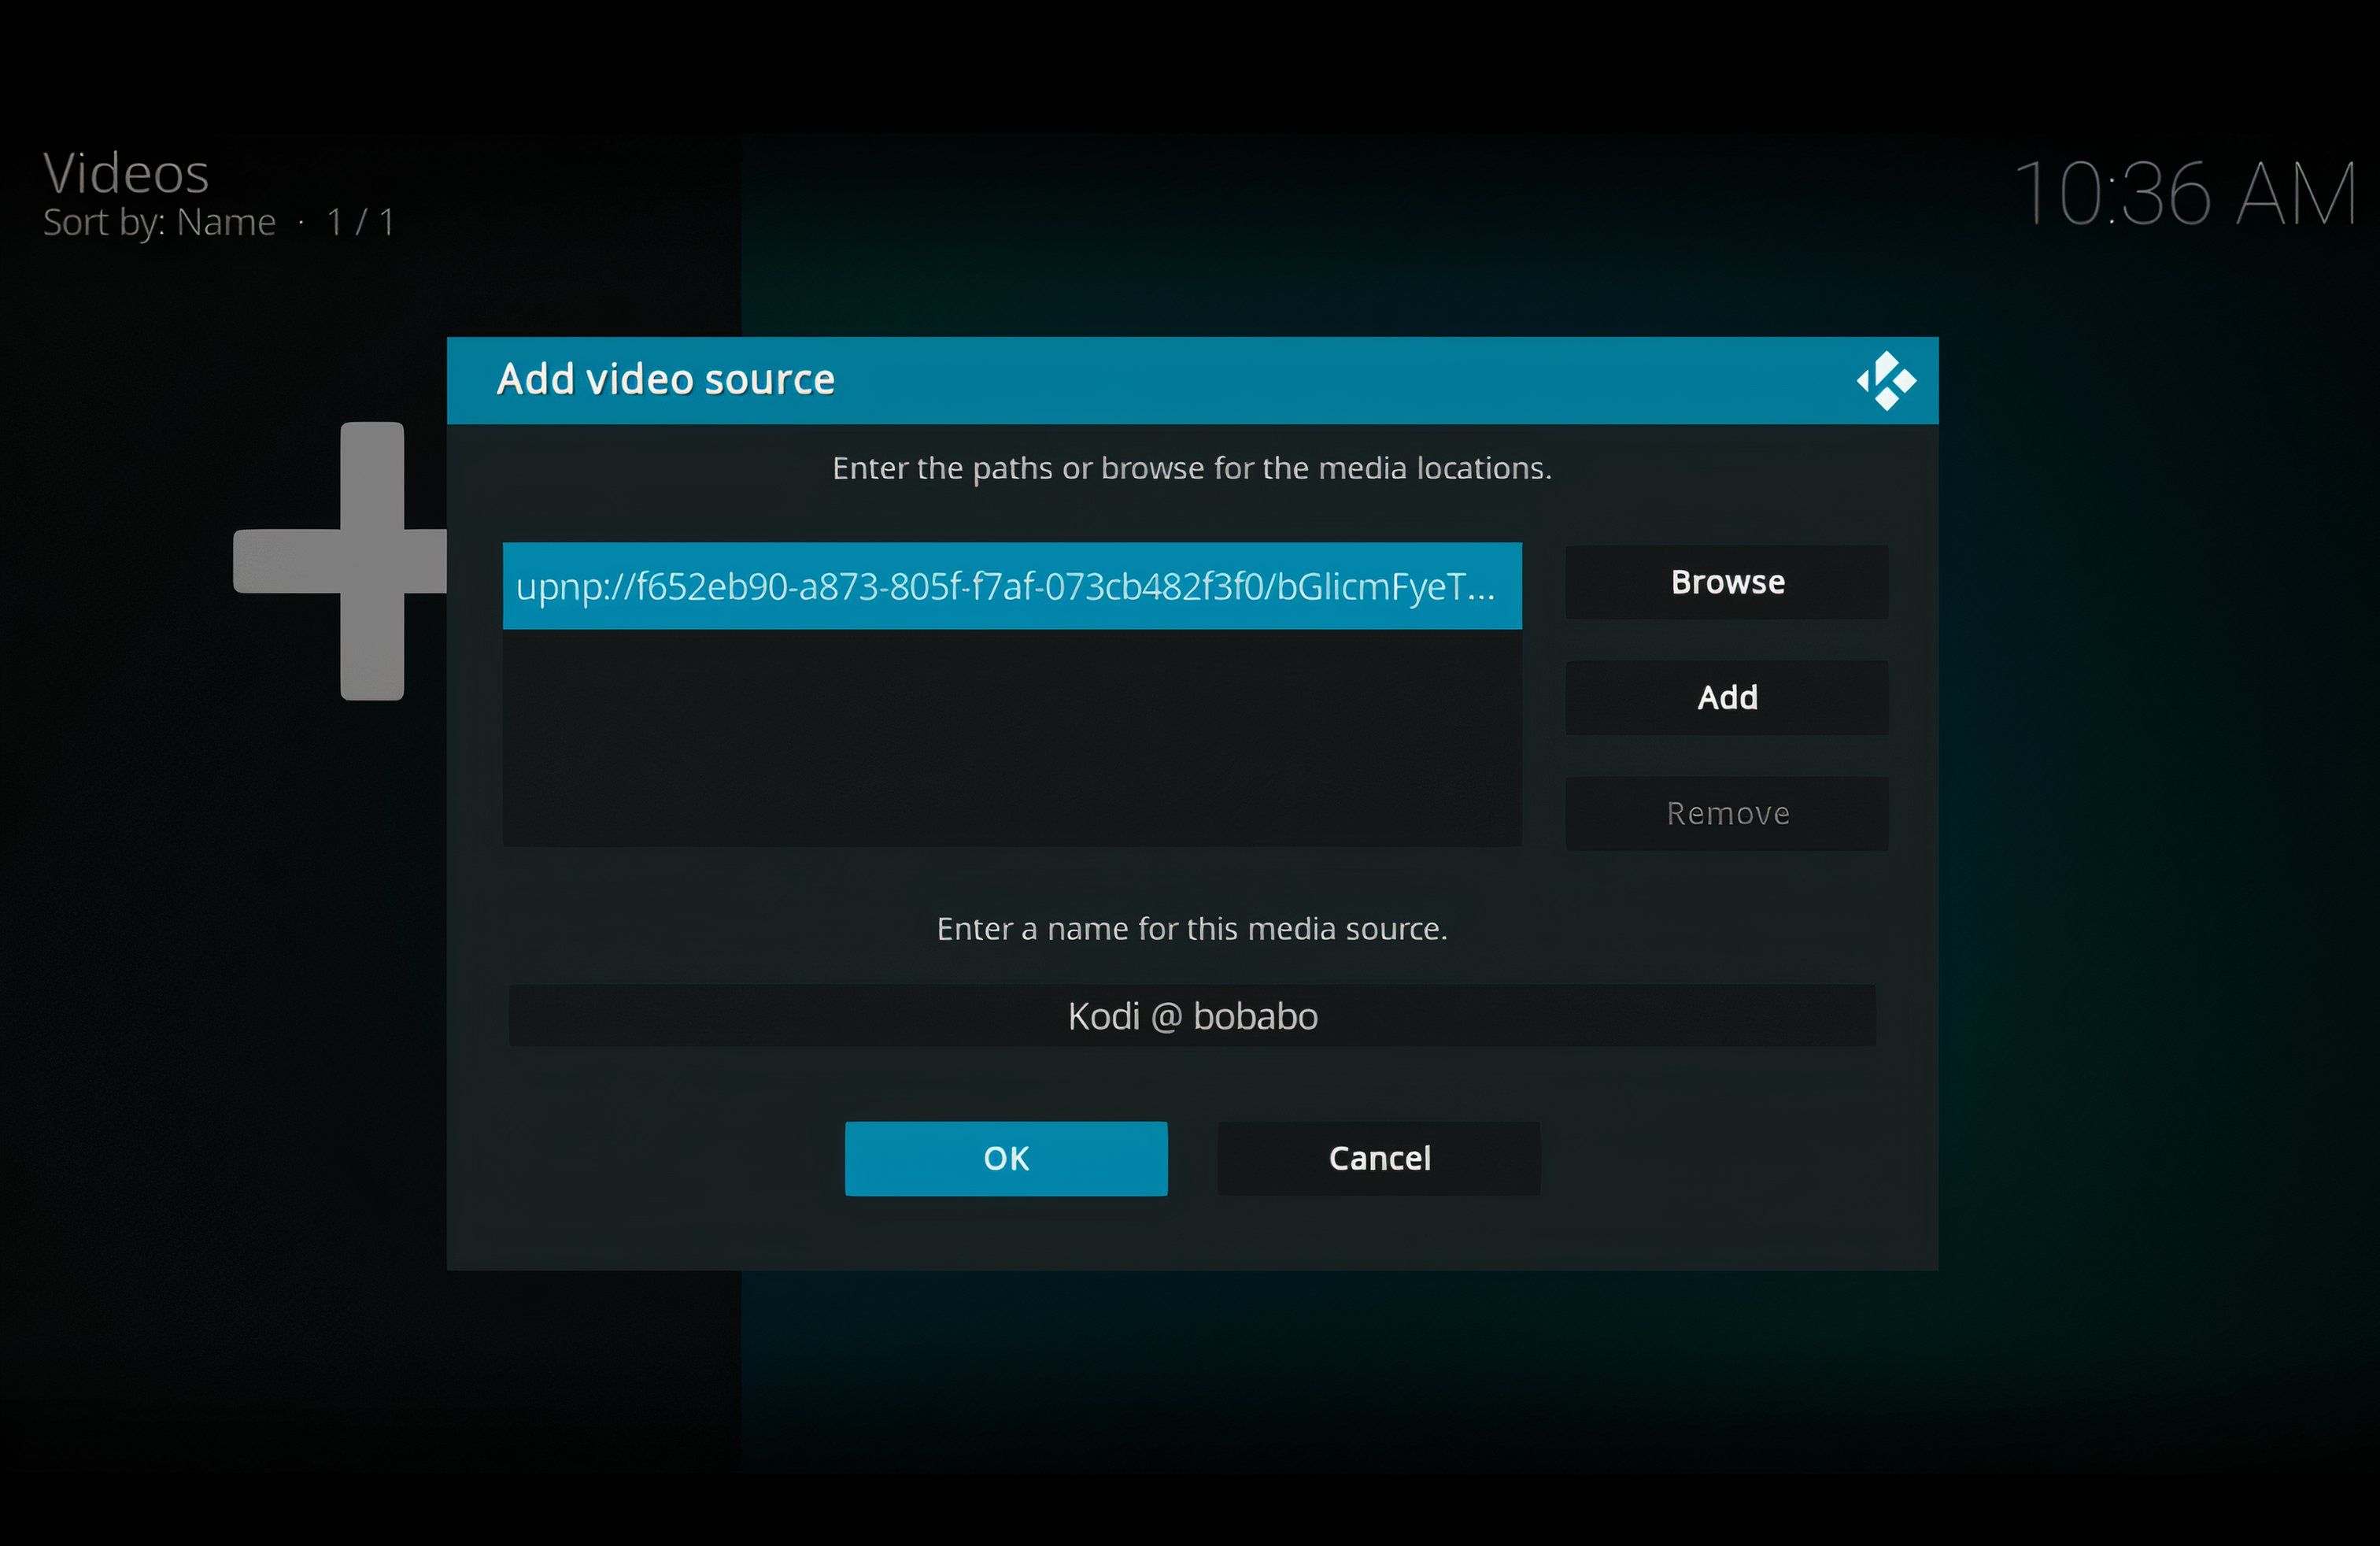
Finally, on the client machine, you need to go to Settings > Media > Videos > Add Videos. Then select “Browse” and “UPnP Devices.”
Then, your Linux machine as a video source.
Use VLC
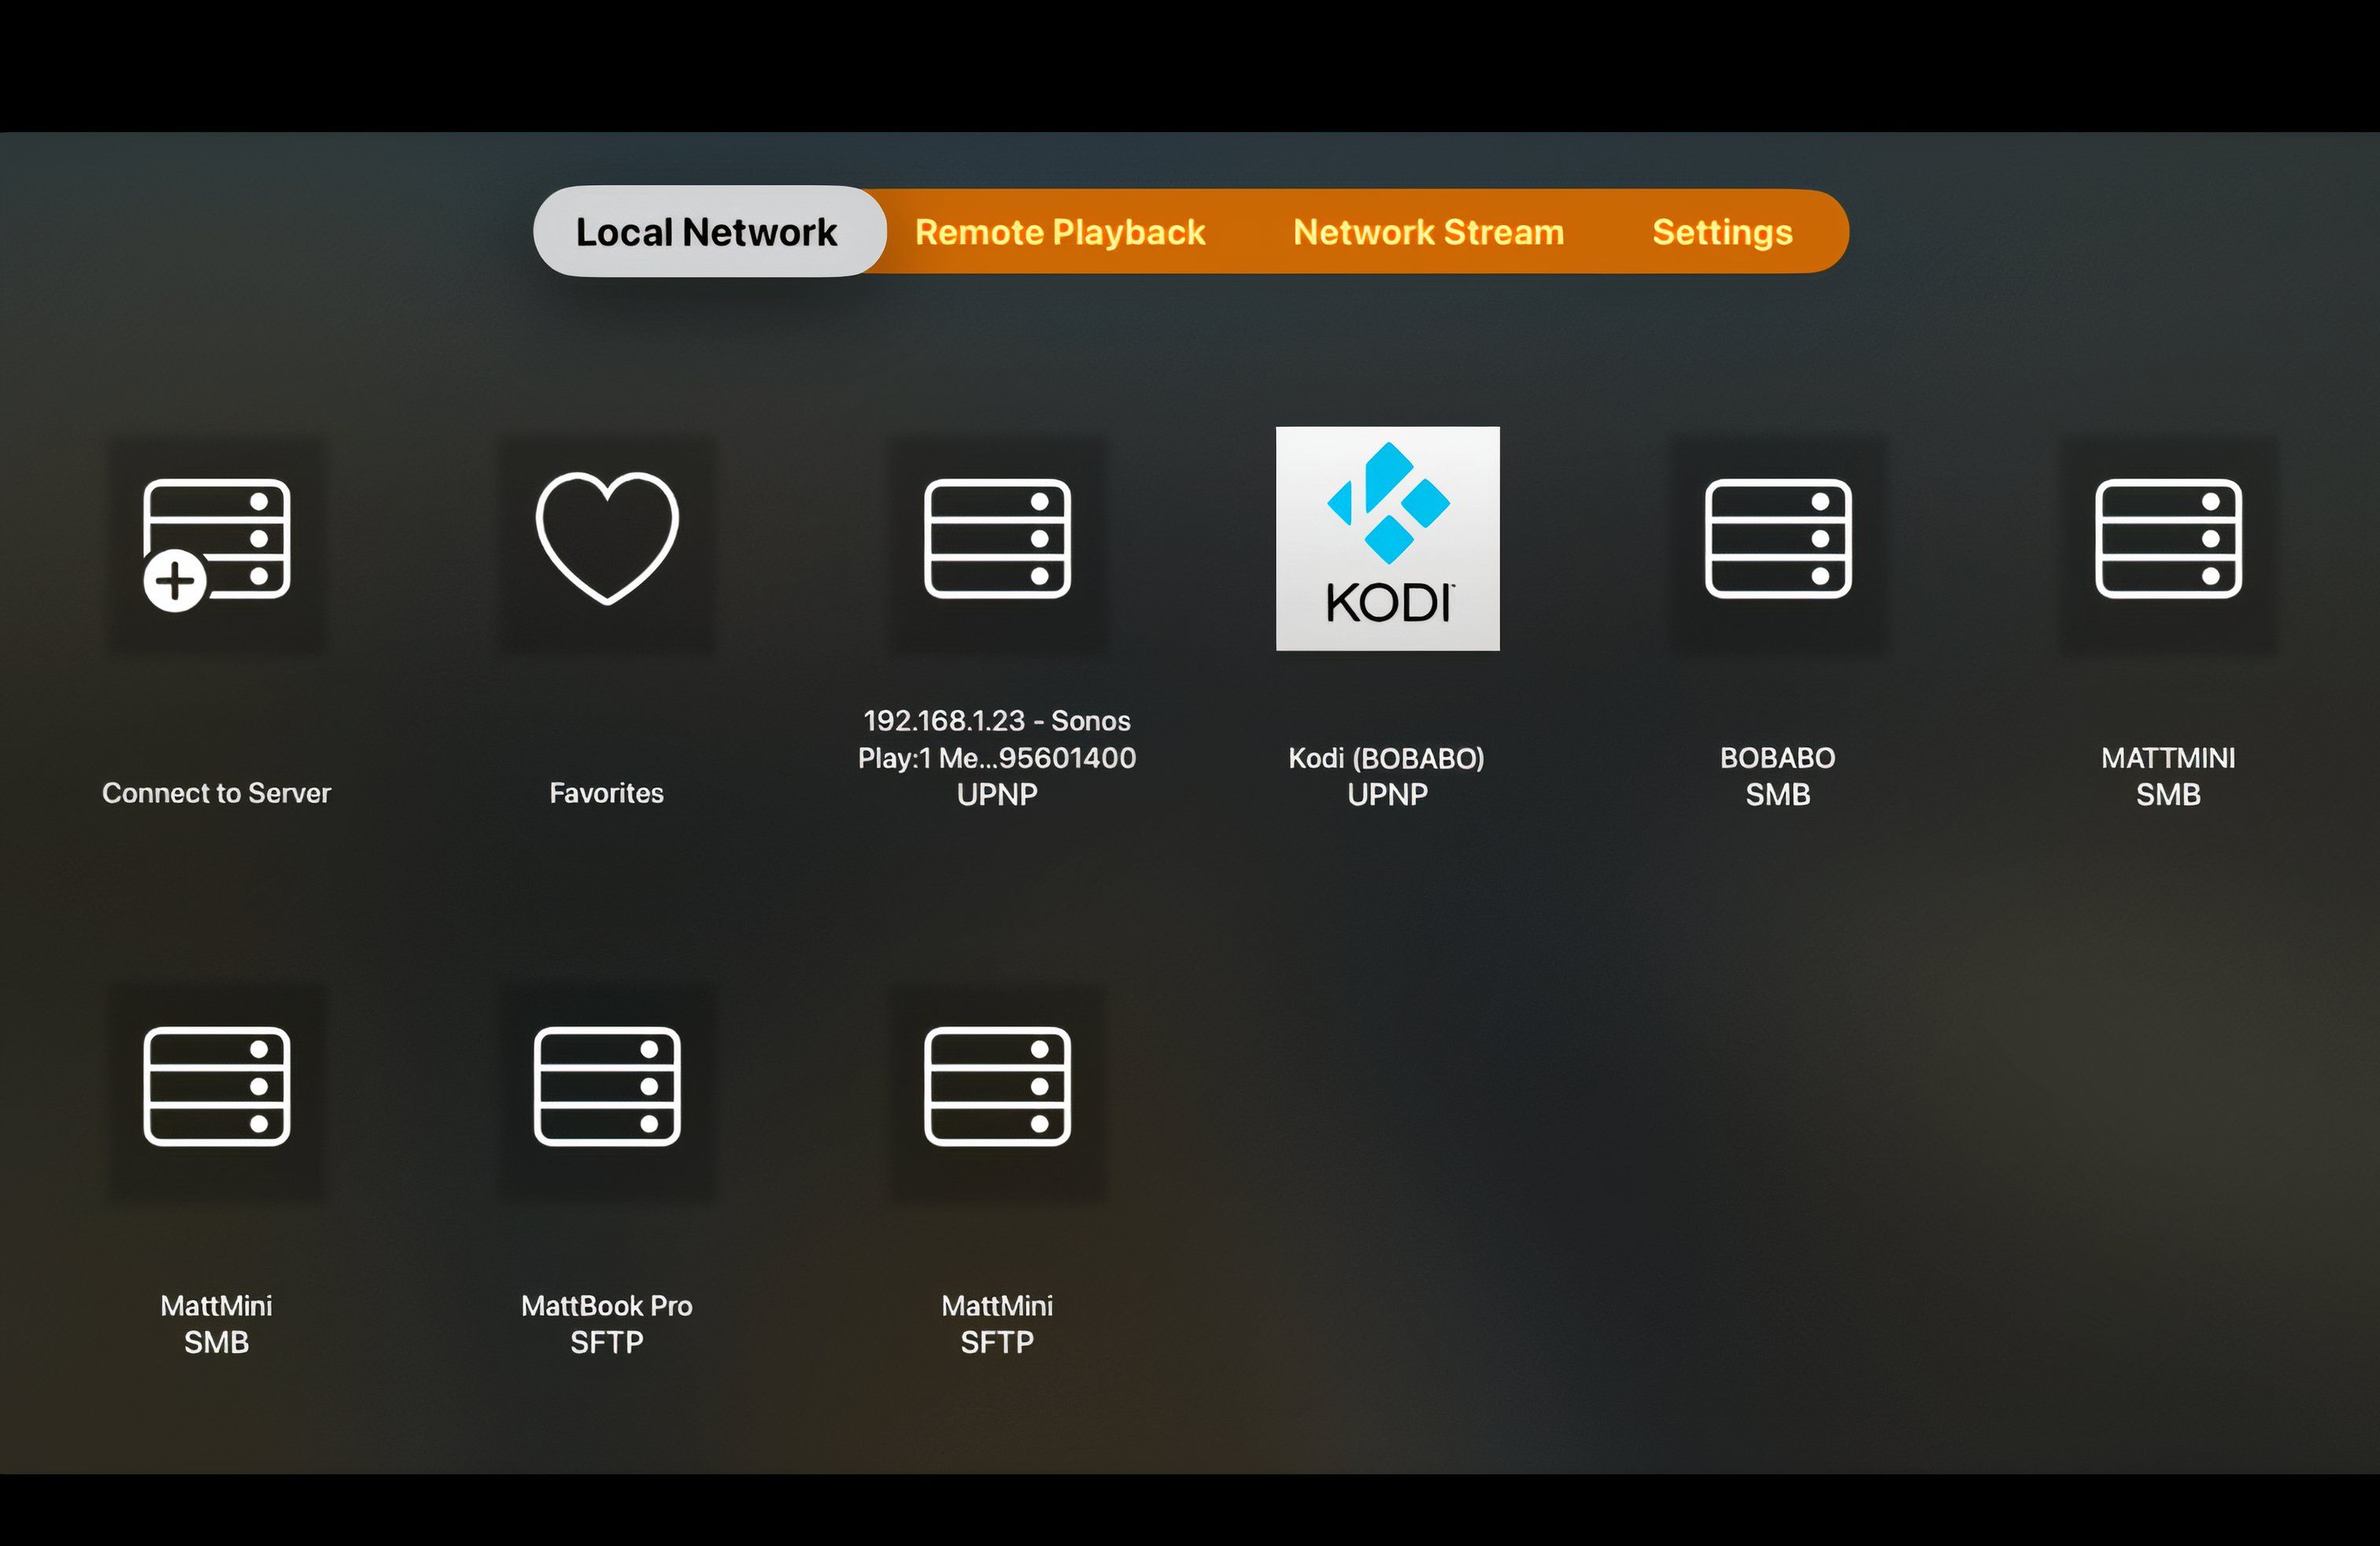
If your device doesn’t have a native Kodi app such as on Apple TV, you can use a different media player such as VLC. You shouldn’t have to perform any special configuration to VLC. When you open the app, your Kodi installation will appear on the main screen.
Controlling Kodi Remotely
Similarly, you can also control Kodi from a smartphone or tablet using Kodi’s official remote control app.
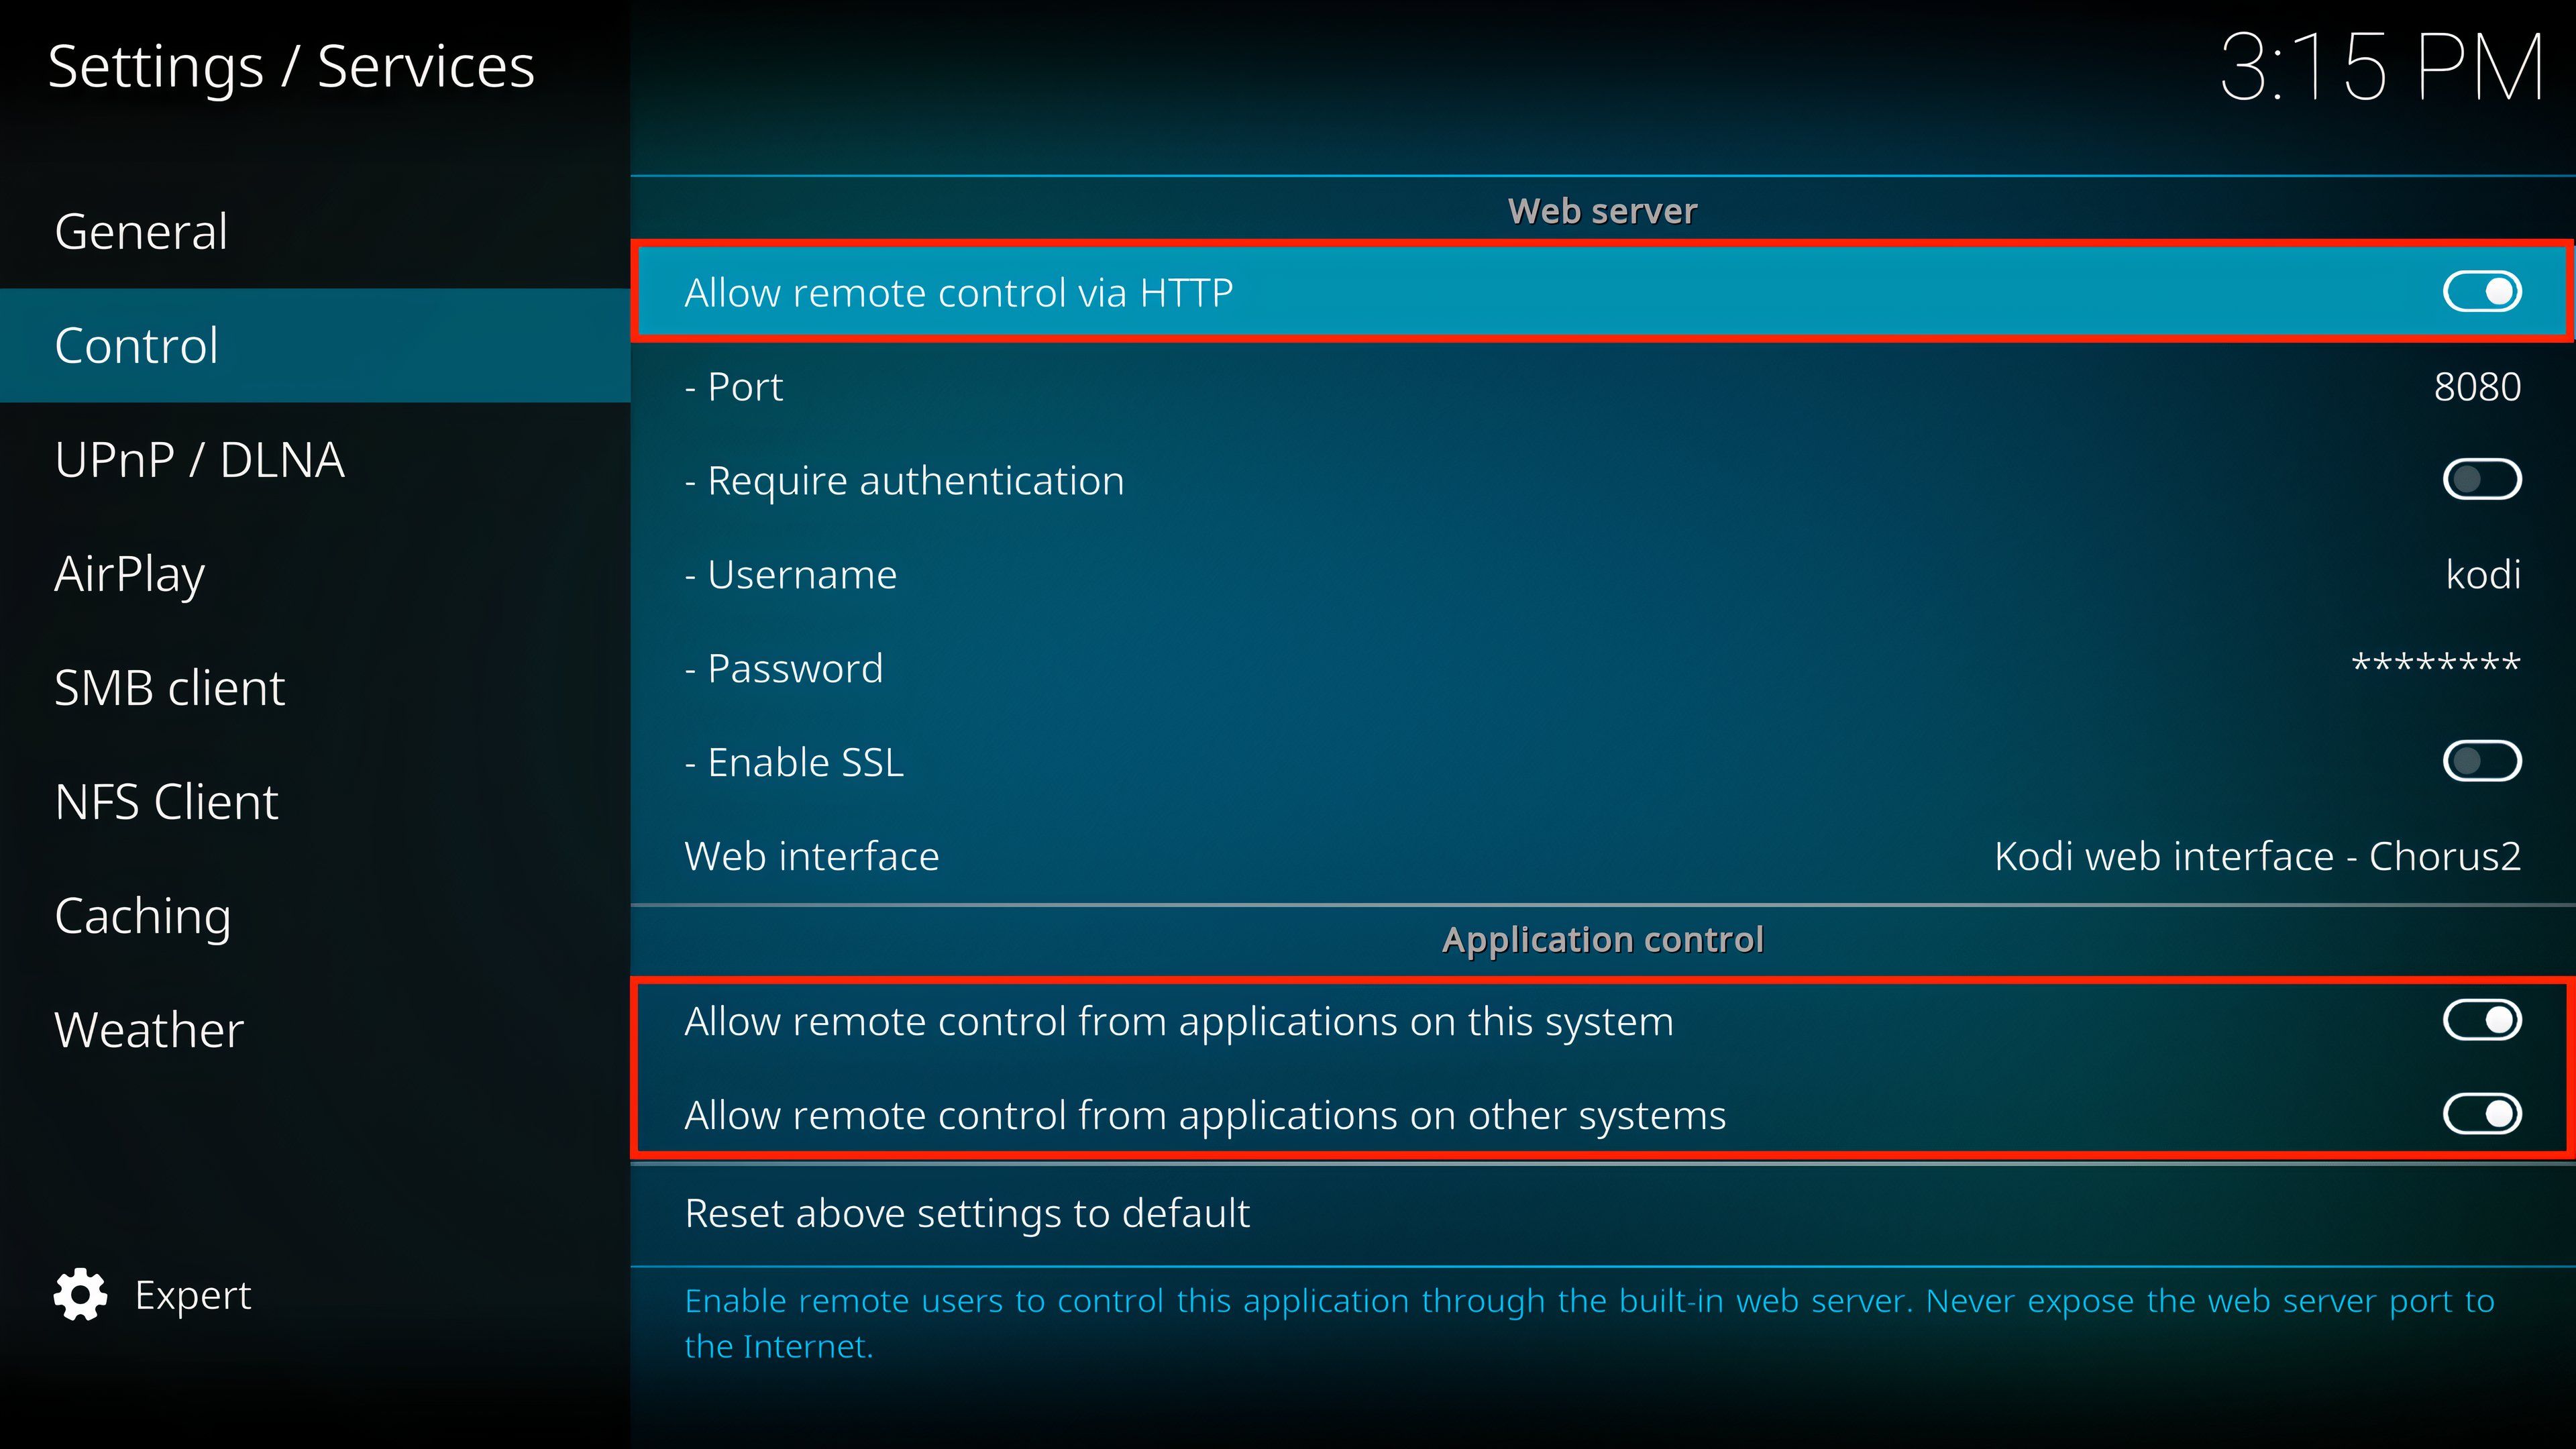
To enable remote control access on Kodi, go to Settings > Services > Control. Enable “Allow Remote Control via HTTP”and “Allow Remote Control from Applications on Other Systems” and “Allows Remote Control from Applications on Other Systems.”
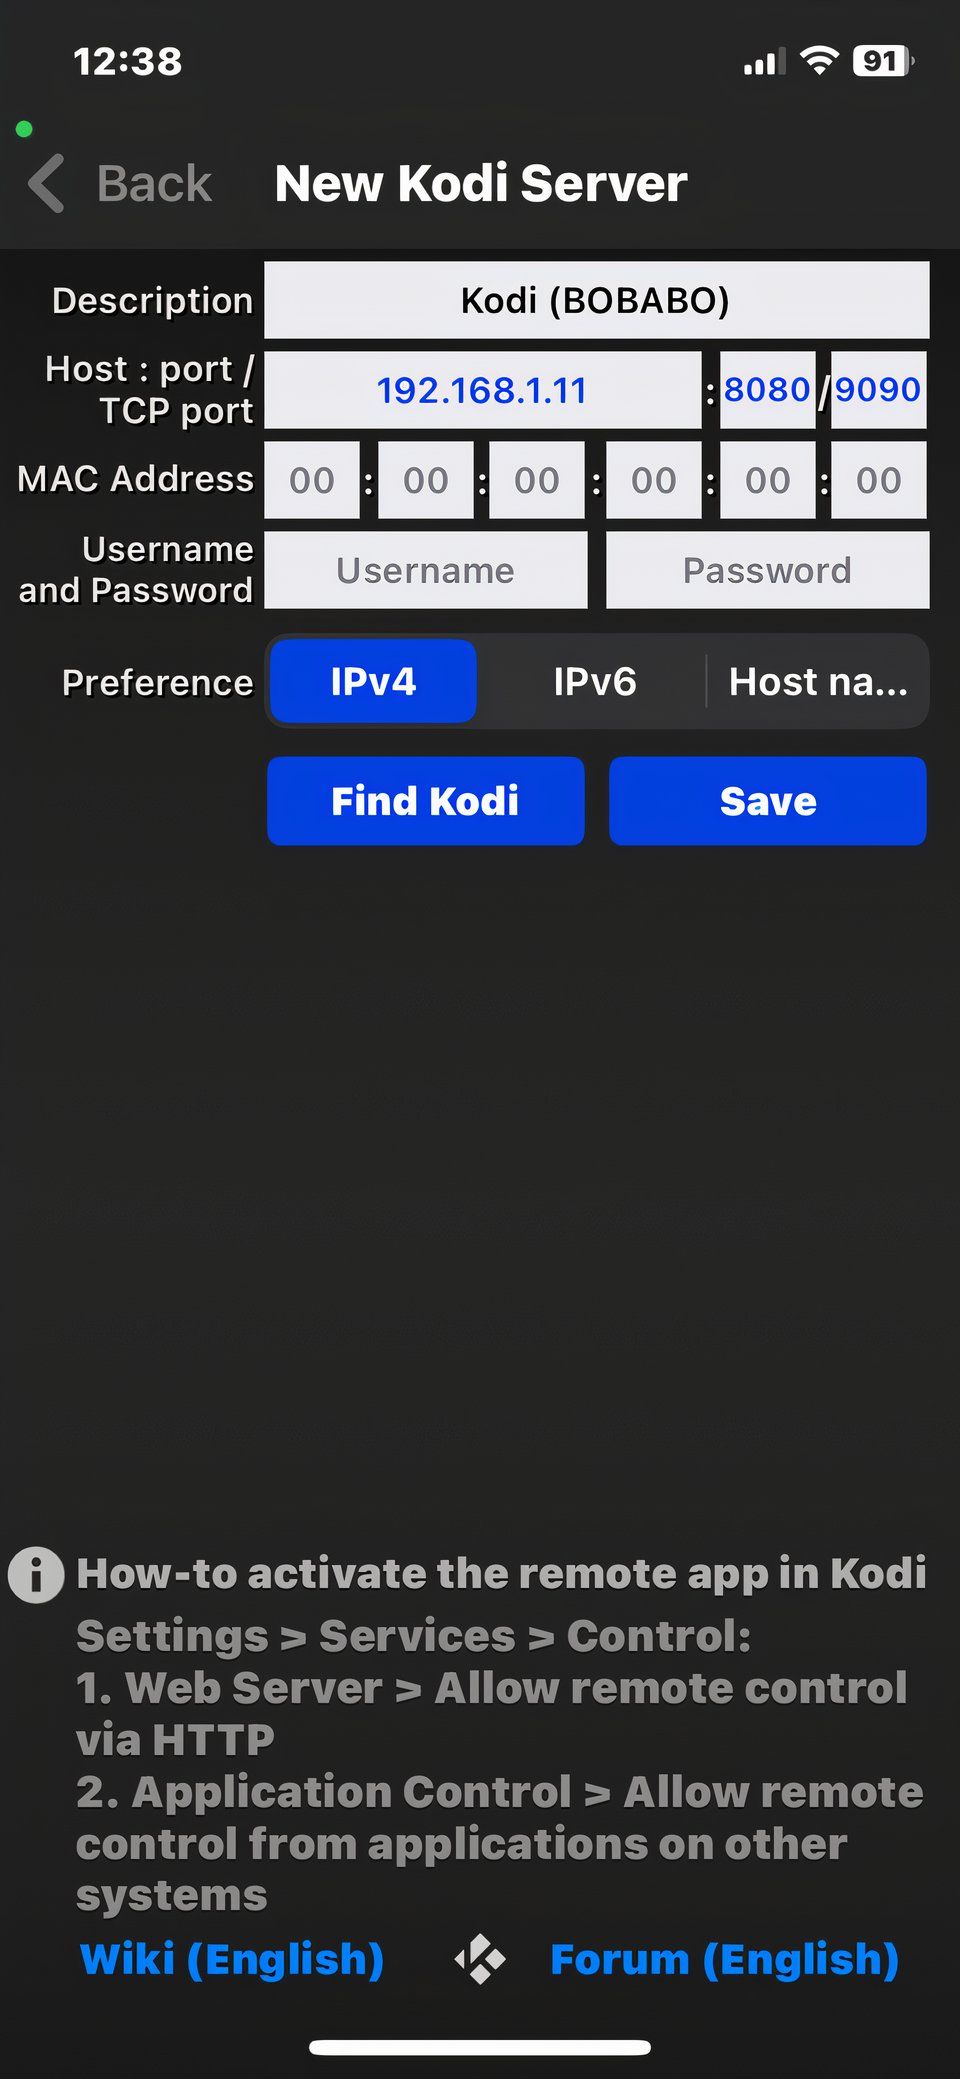
Download the Kodi Remote app on your phone or tablet, open it, then choose Add Host > Find Kodi then “Save.”
With that done, you’ll be able to control your Kodi media center without having to go over to the computer.
Congratulations! You’ve successfully transformed your Linux machine into a powerful and versatile media center with Kodi. Whether you’re streaming to multiple devices or enjoying your media collection offline, you’ve unlocked a world of entertainment possibilities. With Kodi’s flexibility, customization options, and extensive features, you’re all set to elevate your home entertainment experience to new heights.


