Most often or not, Windows users face problems while using their computers. Users may see error messages, driver errors, a Blue screen of death, an endless restart loop, and more. These problems are often linked to corrupted system files; you can easily fix them.
Hence, this detailed guide shares a few simple methods for scanning and fixing corrupt Windows files. Doing this will eliminate all errors and problems caused by corrupted or missing system files. Let’s get started.
Running the SFC tool on Windows
SFC, or System File Checker, is a great utility for finding and fixing corrupted system files. If it finds a corrupted system file, it will automatically replace it. Here’s how to run the tool via the PowerShell utility.
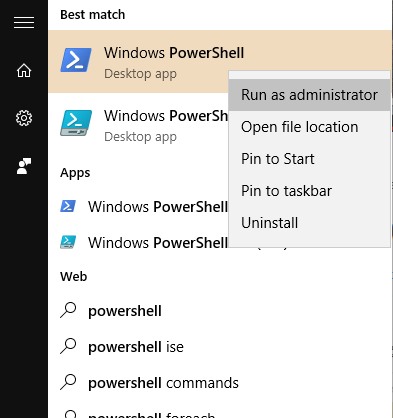
1. Press the Windows button and type Powershell. Right click on PowerShell and select Run as Administrator.


2. Now, in PowerShell, enter the sfc /scannow command to scan all the corrupted files.

3. Now, you need to fix the files; for that, you need to enter the below command in Powershell.
Dism /Online /Cleanup-Image /RestoreHealth

4. Now, Windows will start fixing the files, and you should be patient during this process, as it will take a long time to complete.
5. You need the actual ISO file to recover the file. To do that, you need to download the Windows ISO file for your particular version.
7. Now, return to the PowerShell window and enter the command below.
Dism /Online /Cleanup-Image /RestoreHealth /Source:wim:X:sourcesinstall.wim:1
Note: Replace the letter “X” with the actual drive letter of your Windows installation media.


8. Now execute the below command in PowerShell sfc /scannow


Fix Windows Corrupted files if the SFC command failed to fix
Sometimes, the SFC command fails to fix the corrupt Windows files. It will show you a message like “Windows Resource Protection found corrupt files but could not fix some of them”. So, if the SFC command fails to run or can’t replace the corrupted files, the DISM command sometimes fixes the underlying Windows system.
However, you shouldn’t usually have to run the DSIM command. Use it only if the SFC command fails to fix the underlying problems.
1. First of all, open Command Prompt with administrative rights. Now, you need to enter the following commands.
DISM /Online /Cleanup-Image /RestoreHealth
2. The process can take between 10-15 minutes to complete. The process is stuck at several percent, but there’s nothing to worry about.


After the scan process is complete, the DISM command results will be displayed. Restart your Windows Computer and then rerun the SFC command. This time, the SFC command will run properly and fix corrupted files.
Repairing system files when Windows failed to boot
1. You need the Windows installation DVD; you can borrow one from a friend or use a Recovery drive created on any computer. Insert the Windows Installation DVD and boot it on your computer.
2. Once booted, you will see the Windows installation option. In the first step, you will be asked to select the language and time format. Click on Next to continue.


3. Now, on the next page, you must click Repair Your Computer.


4. You will now be asked how you want to continue repairing your computer. Select Troubleshoot.


5. Now, in the next step, you will be given two options; you need to select Advanced Options.


6. Now, under “Advanced Options,” select Command Prompt.


7. Now, in the command prompt, you must use the ‘dir’ command. The command will help you find your Windows partition’s drive letter. Like in the screenshot below. D: has the actual Windows partition.


8. You must run the ‘SFC’ command to repair the Windows installation. It will fix all the corrupted files. Enter the command
sfc /scannow /offbootdir=D: /offwindir=D:windows


Note: you can replace D: with your actual drive letter in the above command
Wait until the scan completes. Once it has, reboot the system and enjoy. This will fix the Windows corrupted files issue.
Run the CHKDSK Scan to Repair Corrupt Drive Sectors
If you have disk drive problems, you can run the CHKDSK Scan. With the help of the CHKDSK scan, you will be able to replace the corrupted files on your preferred drives. Here’s how to use the Check Disk utility to repair corrupt drive sectors.
1. Open the File Explorer on your Windows 11 PC.
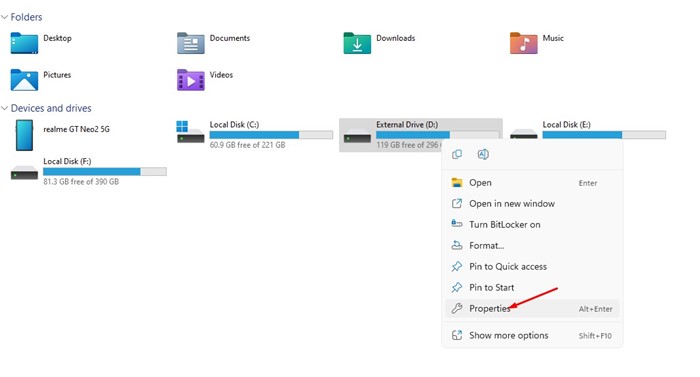
2. When the file explorer opens, right click on the drive you want to scan and select Properties.


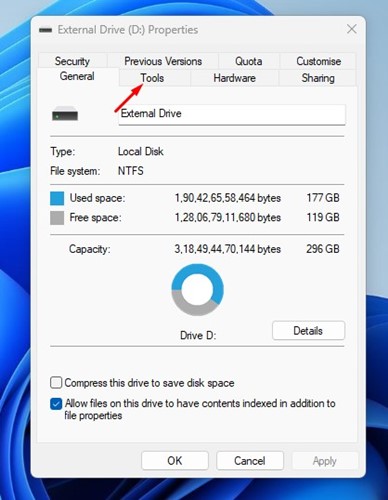
3. Switch to the Tools section on the Drive Properties.


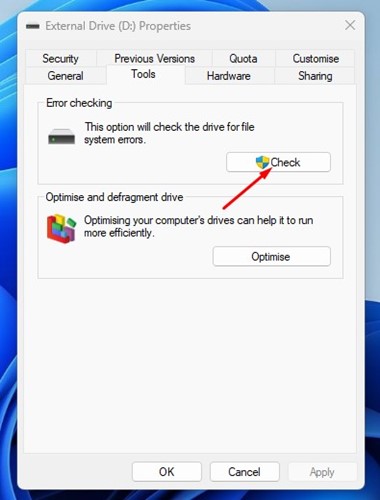
4. Next, click the Check button in the Error Checking section.


System Restore and Reset
If the two methods fail, you must run the system restore tool to fix the issue. The tool restores your operating system files to a previous state when the files were not corrupt.
However, remember the names of the essential apps or back up your files onto an external hard drive or pendrive, as system restore will delete some of the apps installed on your computer.
1. In the Windows search bar, enter “System Restore” and open the Create a Restore Point.


2. You need to click on the Configure button.


3. You need to enable the Turn on system protection, make the Max Usage level 5-10%, and press Apply.


Reset:
You can also fix the corrupted Windows file by completely resetting it. For that, open the search box and then type “System Reset” and under Reset this PC, click on “Get Started”


Now you will see two options “Keep My Files” and “Remove Everything”. Choose the option according to your wish.


The above guide covers scanning and Fixing Corrupted Windows Files. Using Powershell, you can quickly fix any damaged files in your Windows OS. If you are stuck at any step and need help, let us know in the comments below.
“Hey there! Just so you know, we’re an Amazon affiliate. This means if you buy something through our links, we may earn a small commission. It doesn’t cost you extra and helps keep our lights on. Thanks for supporting us!”


