With the growing list of products Apple offers, the number of devices connected to your Apple ID can get quite extensive. Having all those devices connected to your Apple ID helps you keep track of them, but when it comes time to part ways with an Apple TV or Apple Watch, those devices can still be attached to your Apple ID. In some cases, this could affect the overall security of your account.
For convenience’s sake, you can manage your list of Apple devices right from your iPhone. I’d suggest everybody do this every now and then to check which devices are connected to your account, and you’ll see why in a second.
Why You Should Check Your Apple ID Device List
If you no longer have one of the listed devices, whether it was stolen, lost, sold, or given away, there’s no point in them being attached to your Apple ID. You may even find devices you don’t recognize at all. In these cases, it’s best to remove them.
From a security standpoint, if you’re not using the device anymore and have two-factor authentication set up for your Apple ID, it’s even more important to remove the devices as they can be used to receive 2FA verification codes when logging into Apple or iCloud services from a new device.
Items That Show Up in Your Apple ID Device List
Devices you can view and remove in your Apple ID account include almost every major Apple product: iPhone, iPad, iPod touch, Mac, Apple Watch, and Apple TV. AirPods are not included as those don’t connect to your Apple ID, even though they will show up in Find My iPhone so you can track them down if lost.
As far as non-Apple devices go, you can also view Windows 10 machines that you logged into iCloud with, such as a Surface Laptop 2 or Surface Go. Instead of viewing an image of the device, machines using Windows 10 and higher will have an icon with four gray diamonds inside a larger diamond shape.
Removing Items from Your Apple Device List
Deleting devices from your list can be done from iCloud.com, but this post will only focus on doing so from an iPhone as that will be the easiest way for most Apple users to remove devices from their account. This is most useful whenever you sell, give away, or just lose a device.
Don’t confuse this with the process of unlinking devices from your iTunes account, which is very similar, but an entirely different thing. Authorized devices with iTunes are just for iTunes, and you can authorize iTunes use on devices not your own, so removing them in iTunes won’t remove them from your Apple ID account.
Step 1: Open Your Apple ID Settings
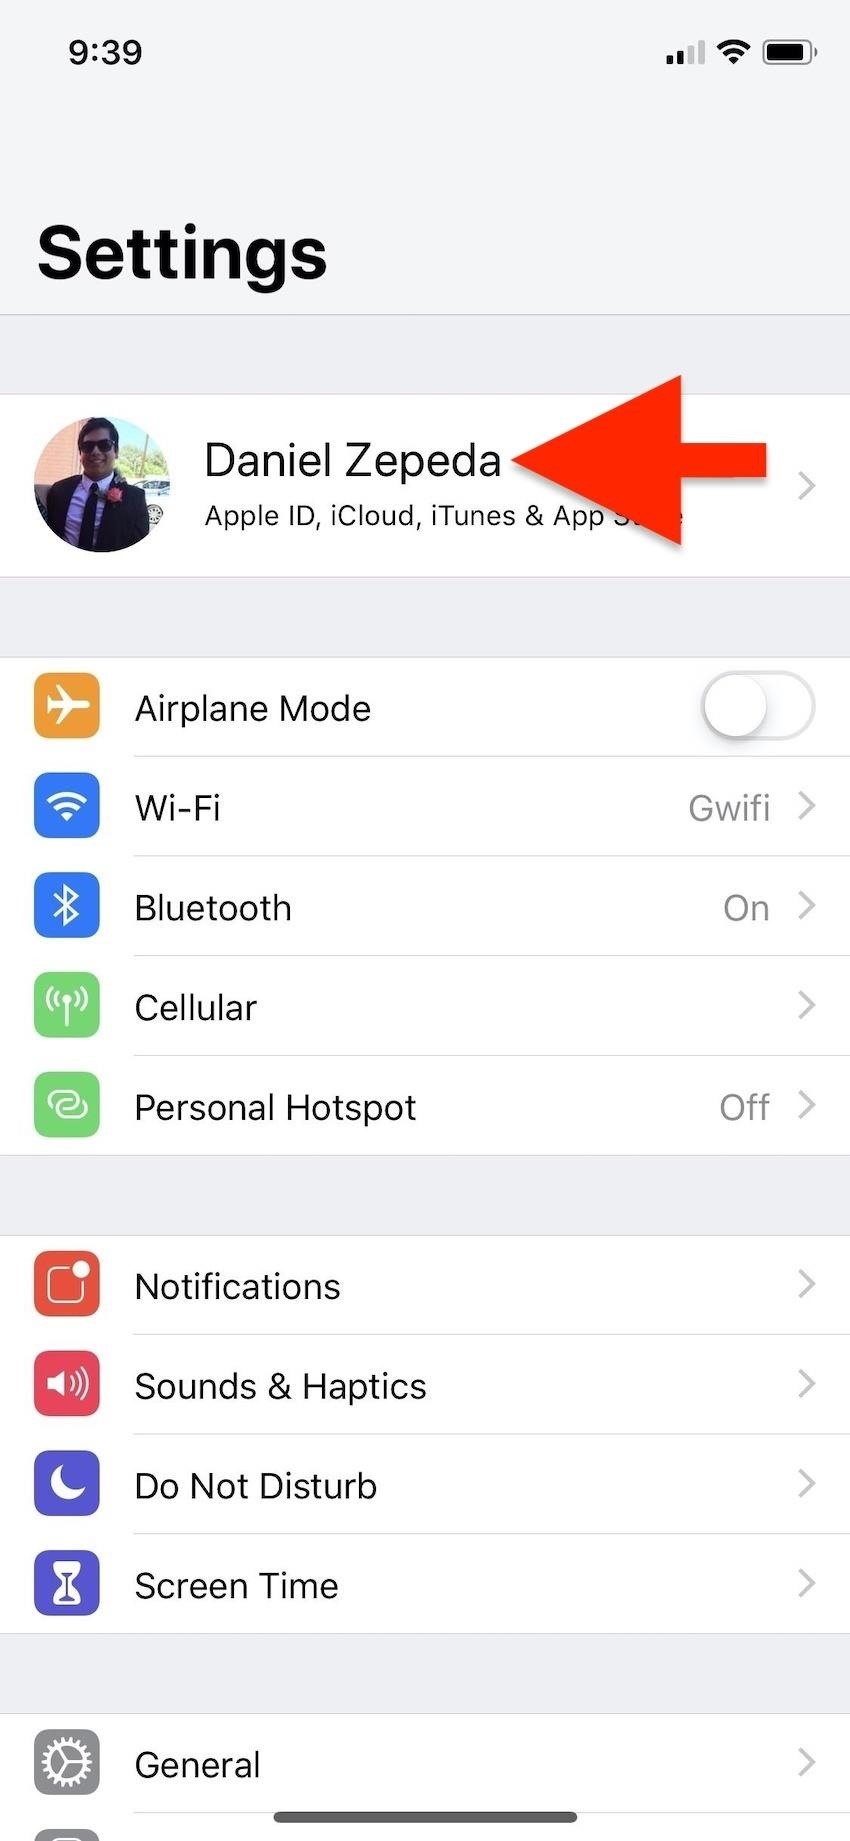
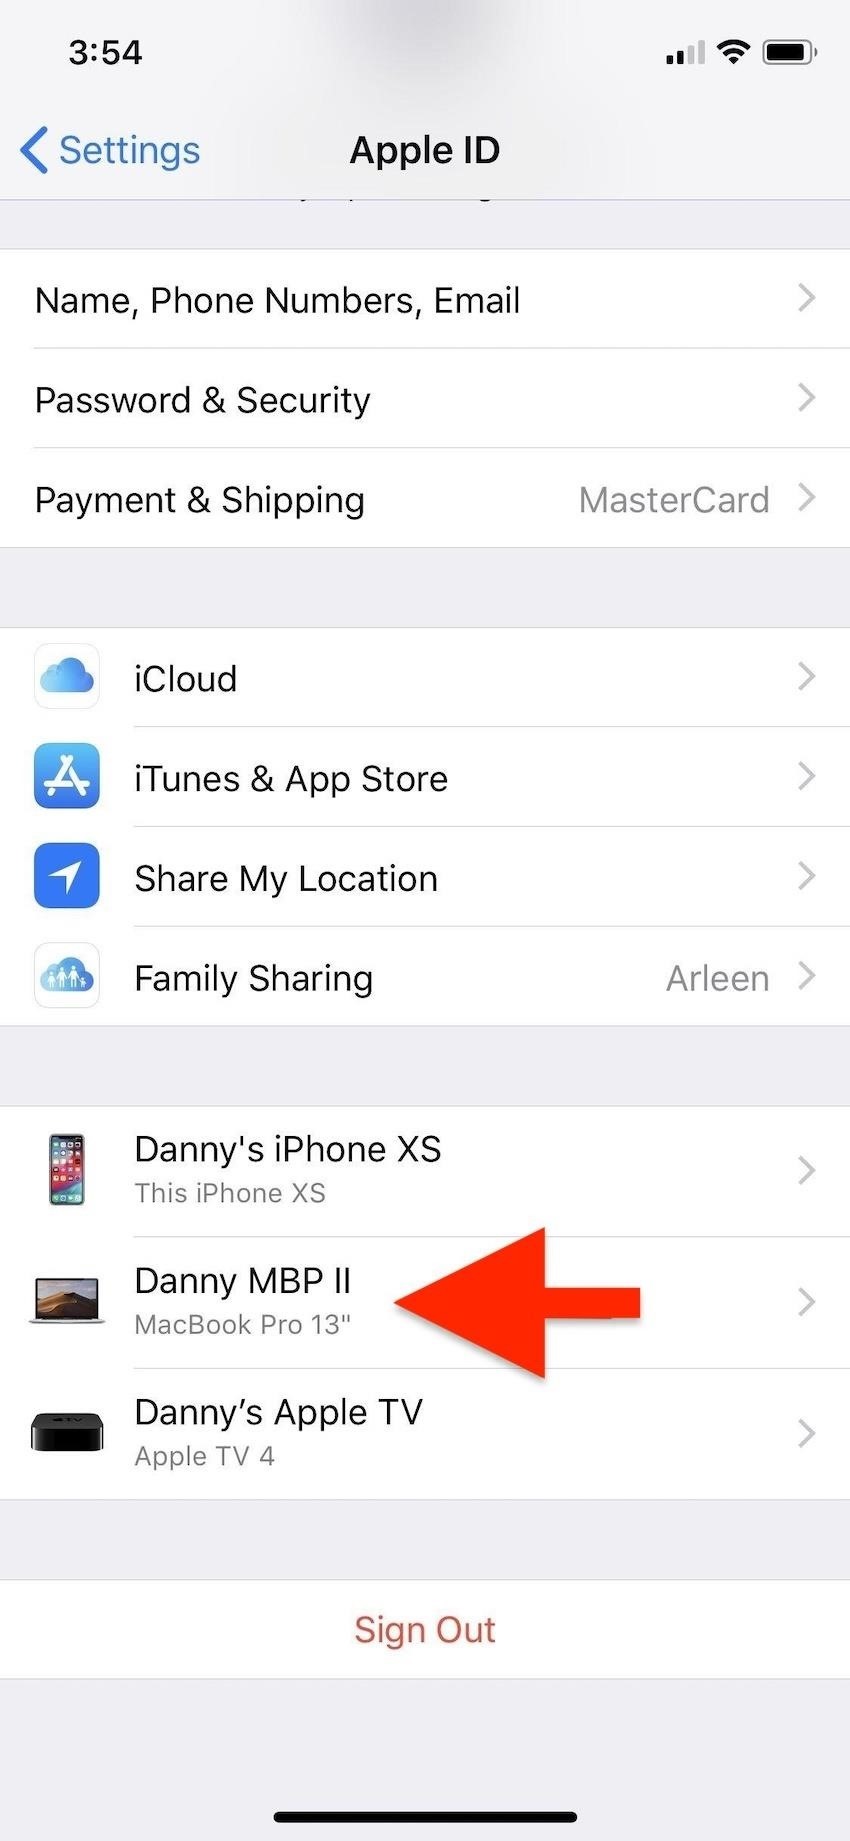
Open up the Settings, then tap on your name, which houses all of your important Apple information, including Apple ID, iCloud, iTunes, and App Store preferences. The devices connected to your account will be listed in order at the very bottom of the menu. The first device listed (example: “This iPhone”) will be the device you are using and the rest will be your other Apple devices.


Step 2: Remove Devices You Don’t Need Anymore
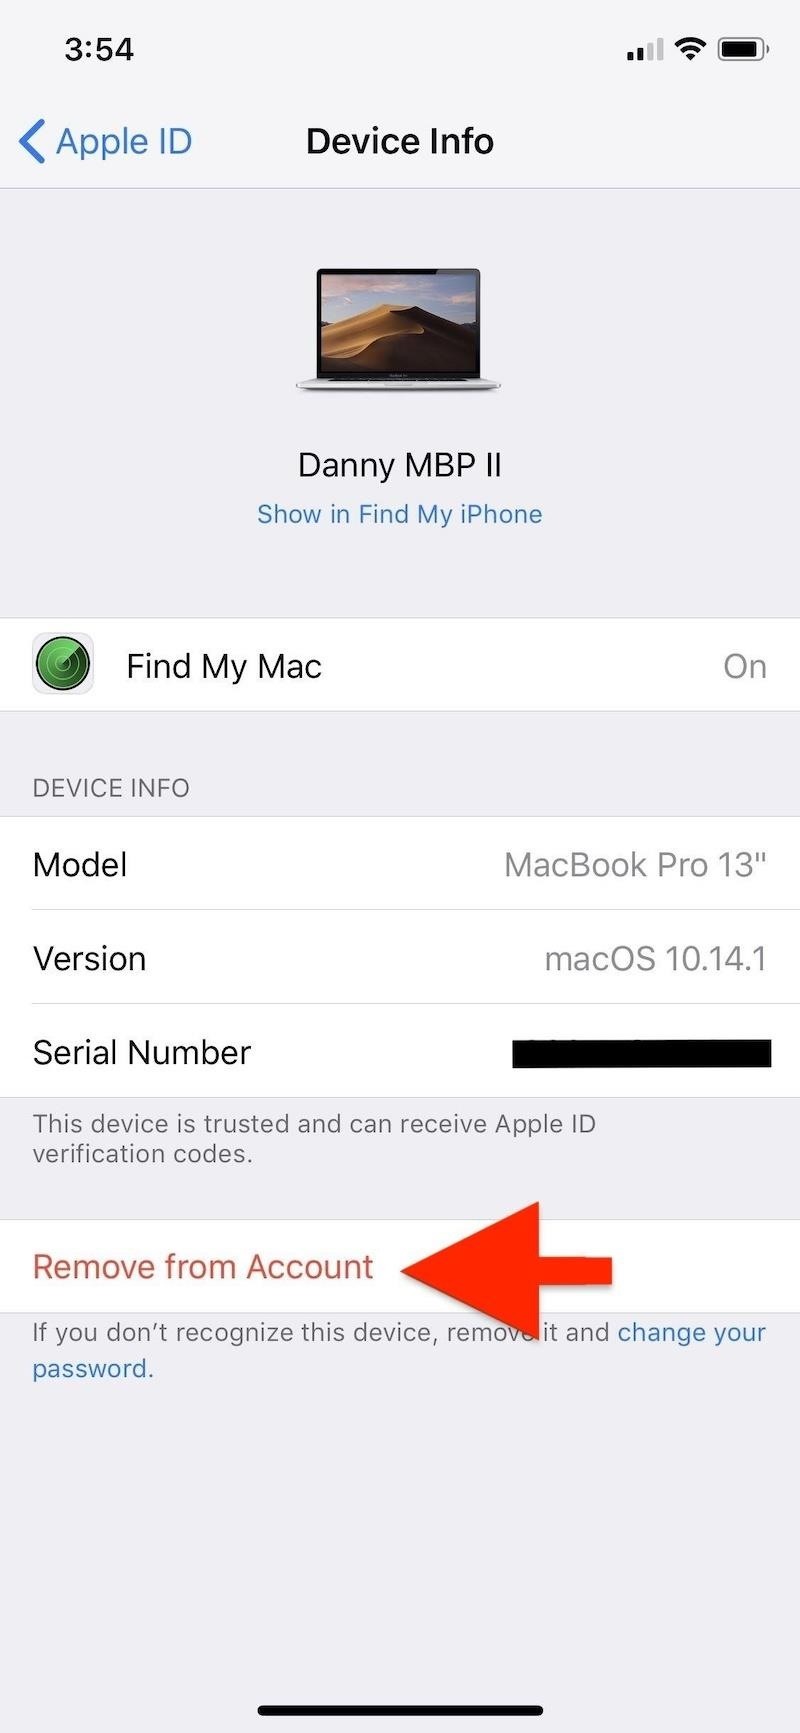
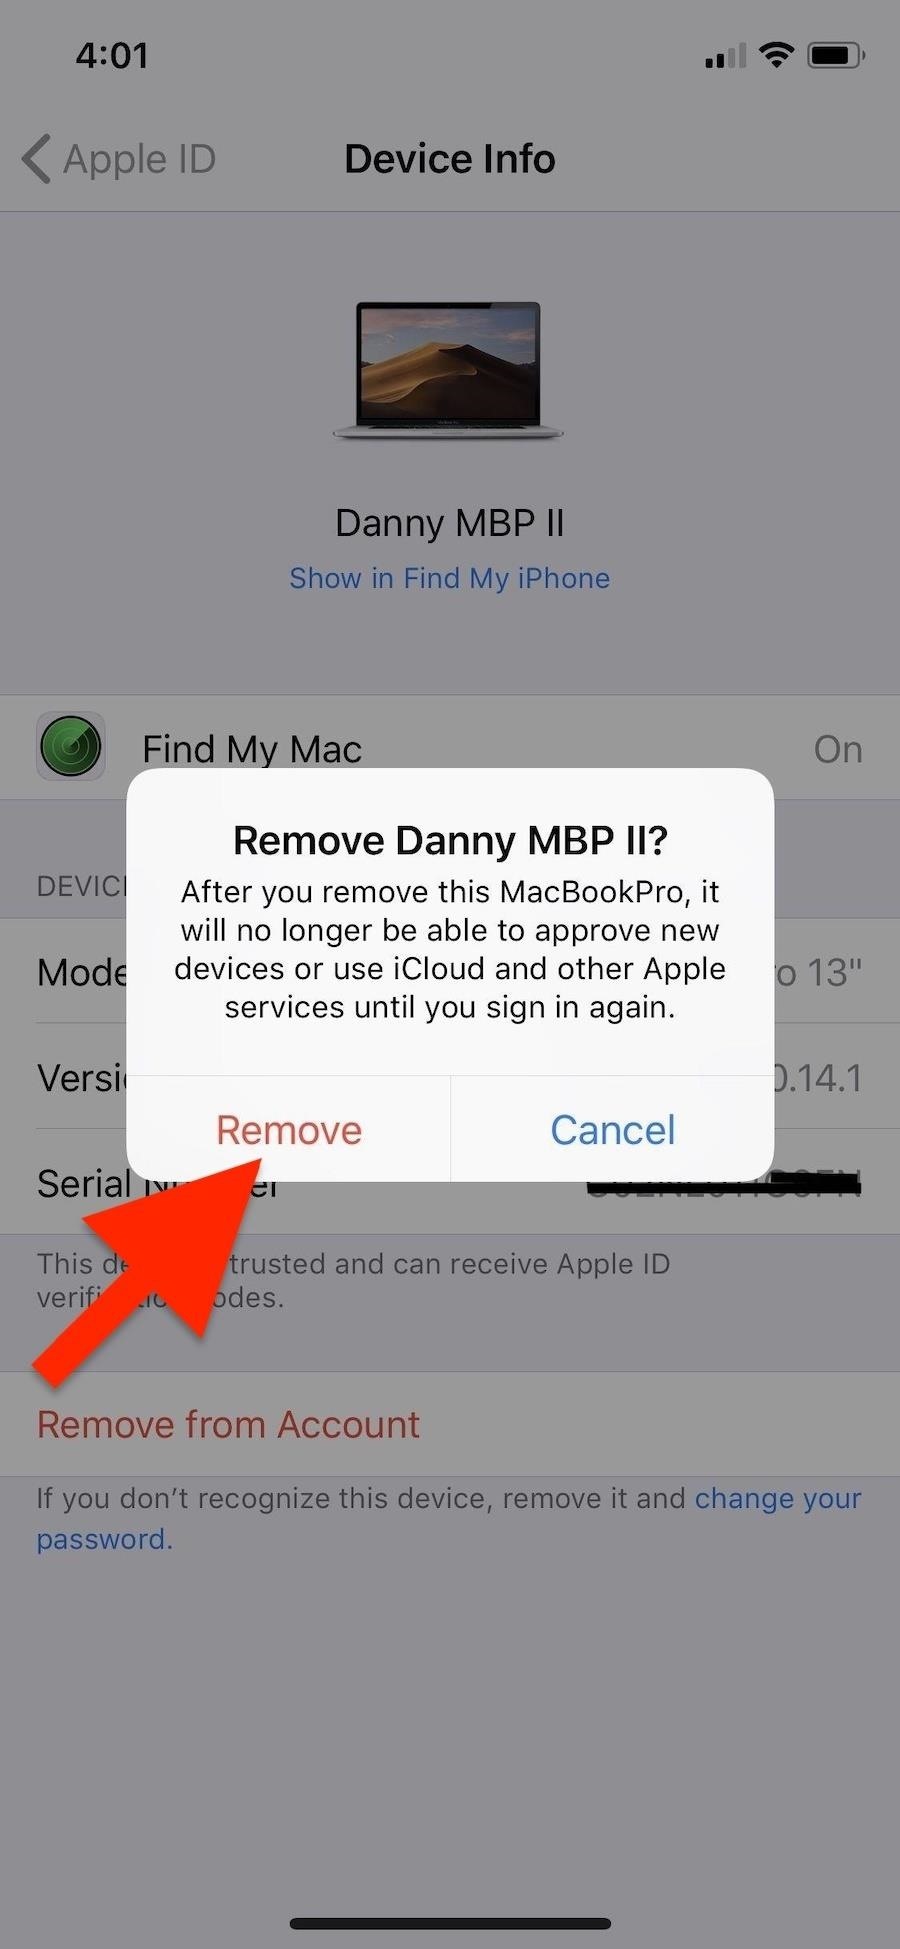
To remove devices you are not using anymore, tap its name. Within the menu for Device Info, go to the very bottom and tap on the “Remove from Account” option. You’ll get a prompt to confirm you want to remove it, so press “Remove” on that.
Once you remove a device, it will never show up in your Apple device list again unless it connects back to the internet with your Apple ID logged in. This may be annoying if you’re trying to eradicate it from the list altogether, so you’ll need to make sure you’re logged out of your Apple ID on the device first.


It’s also worth noting that within this Device Info menu, you’ll also get access to other important information, such as whether Find My iPhone (or iPad, iPod, or Mac) is on or off. If it’s the device you’re using, you’ll also get a toggle for it.
Other data here may include Send Last Location, the model name, software version, serial number, IMEI, phone number, and Apple Pay cards, the latter of which can be turned off per device. This serves as an easy way to keep track of important device information you may need one day.
Important Things to Consider When Removing Devices
If you’re giving the device to a family member, logging out of iCloud, iTunes, iMessage, FaceTime, and Game Center is probably good enough. When selling an Apple device like an iPhone or iPad, it’s good to wipe the device which will remove your Apple ID information and disable Find My iPhone and Activation Lock.
When it’s an Apple device that was lost or stolen, before you remove it from your Apple device list, you’ll want to use Find My iPhone to mark it as lost so that no one else can use it. Then, remote wipe it. That way, Activation Lock will prevent anyone who tries to log in to their own account on the device, a security measure meant to deter thieves and other purveyors of stolen goods. After, you can remove the device as described above or directly in Find My iPhone after remote wiping it.
If you were removing a device that was lost, stolen, or unknown to you, you may want to consider changing your Apple ID password as an extra precaution.
- Follow Gadget Hacks on Pinterest, Reddit, Twitter, YouTube, and Flipboard
- Sign up for Gadget Hacks’ daily newsletter or weekly Android and iOS updates
- Follow WonderHowTo on Facebook, Twitter, Pinterest, and Flipboard
Just updated your iPhone? You’ll find new emoji, enhanced security, podcast transcripts, Apple Cash virtual numbers, and other useful features. There are even new additions hidden within Safari. Find out what’s new and changed on your iPhone with the iOS 17.4 update.
“Hey there, just a heads-up: We’re part of the Amazon affiliate program, so when you buy through links on our site, we may earn a small commission. But don’t worry, it doesn’t cost you anything extra and helps us keep the lights on. Thanks for your support!”


