You can do practically anything with a modern smartphone or tablet, so it stands to reason that the apps you have installed may serve vastly different purposes. Picture a game and a video player sitting right next to each other in your app drawer—odds are, you want the sound turned up while you’re watching videos, but would prefer that the game was muted or a little lower. As a result, we’re constantly tweaking volume levels to get the best experience.
- Don’t Miss: Make Android’s Volume Keys Control Media By Default
But what if each of your apps remembered your preferred volume level and automatically adjusted sound output to suit your tastes? That’s the premise behind an app from SpyCorp, which lets you set volume levels on a per-app basis. As if that weren’t enough to get you interested, the app is incredibly easy to use, doesn’t require root access, and is completely free, so read on below if you’re tired of tweaking volume levels in all of your apps.
Step 1: Install App Volume Control
The app that will automatically adjust volume levels for any app on Android is appropriately called App Volume Control. To get the app installed, search it by name on the Google Play Store, or use the following link to jump straight to the install page:
- Install App Volume Control for free from the Google Play Store

Step 2: Enable the Accessibility Plugin
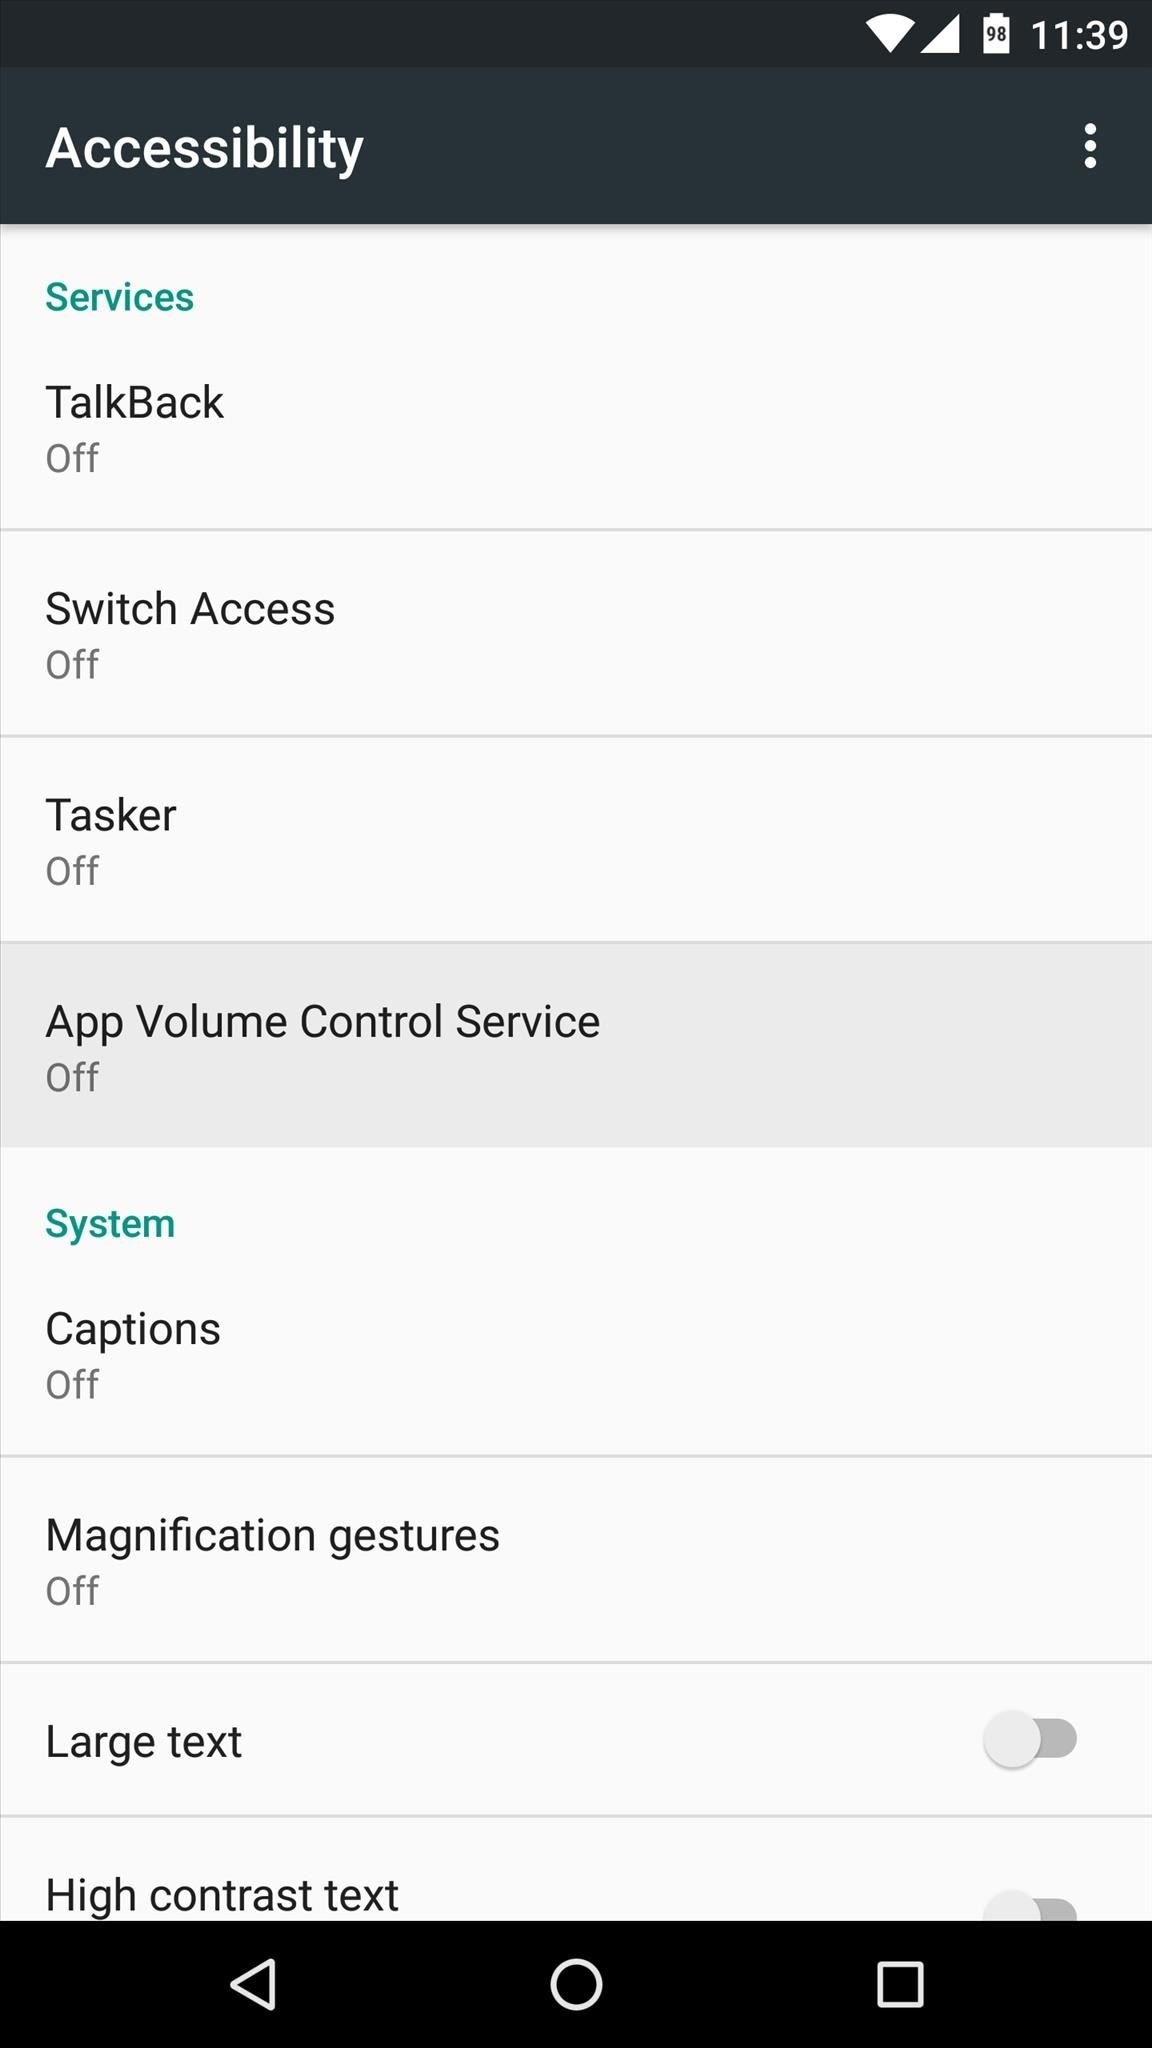
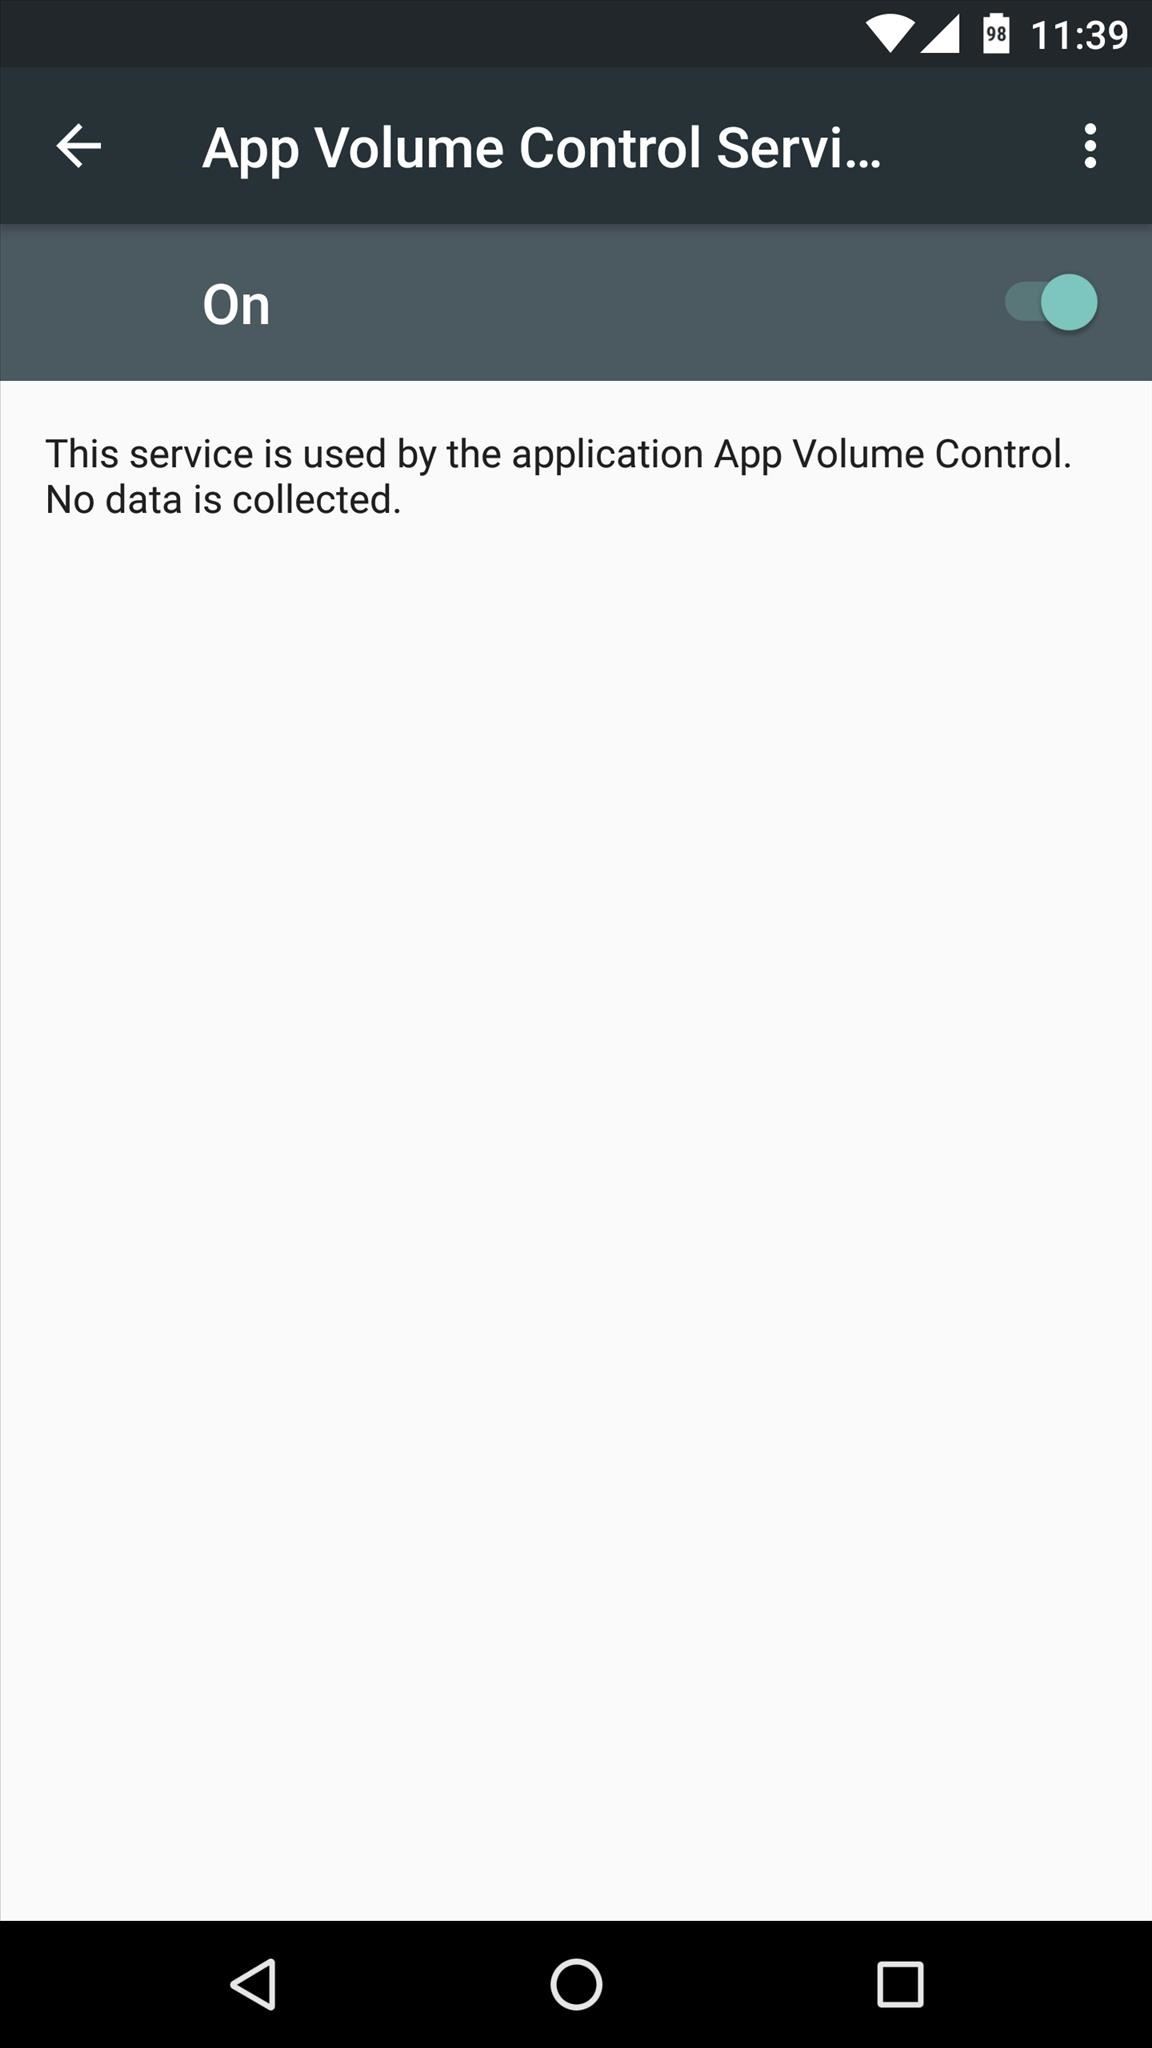
For App Volume Control to be able to work its magic, you’ll need to enable its accessibility plugin first. After launching the app, tap the button in the middle of the screen and you’ll be taken to an Android settings menu. From here, select App Volume Control from the list, then enable the accessibility plugin by toggling the switch at the top of the screen to “On.”

Step 3: Set Volume Levels for Individual Apps
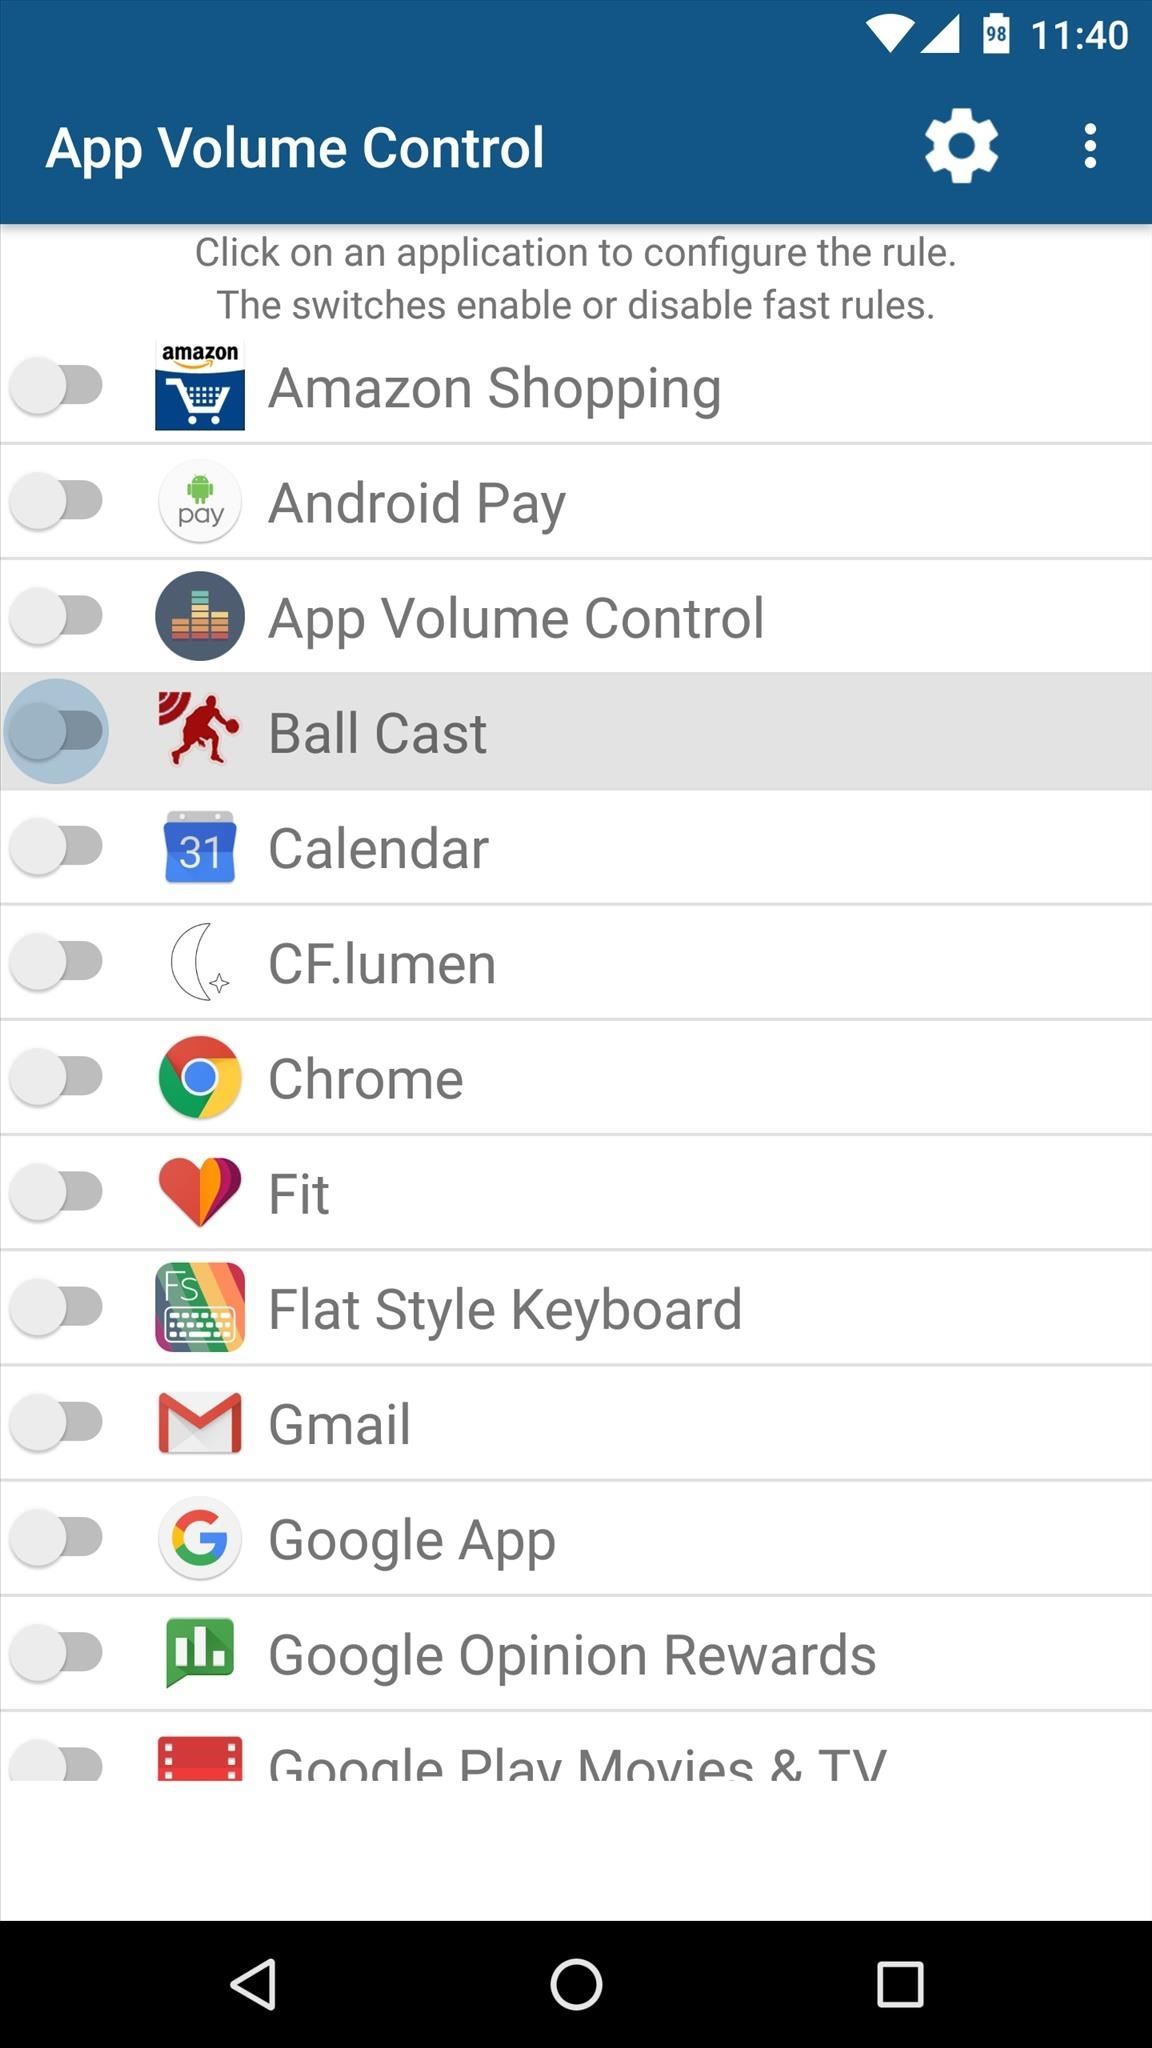
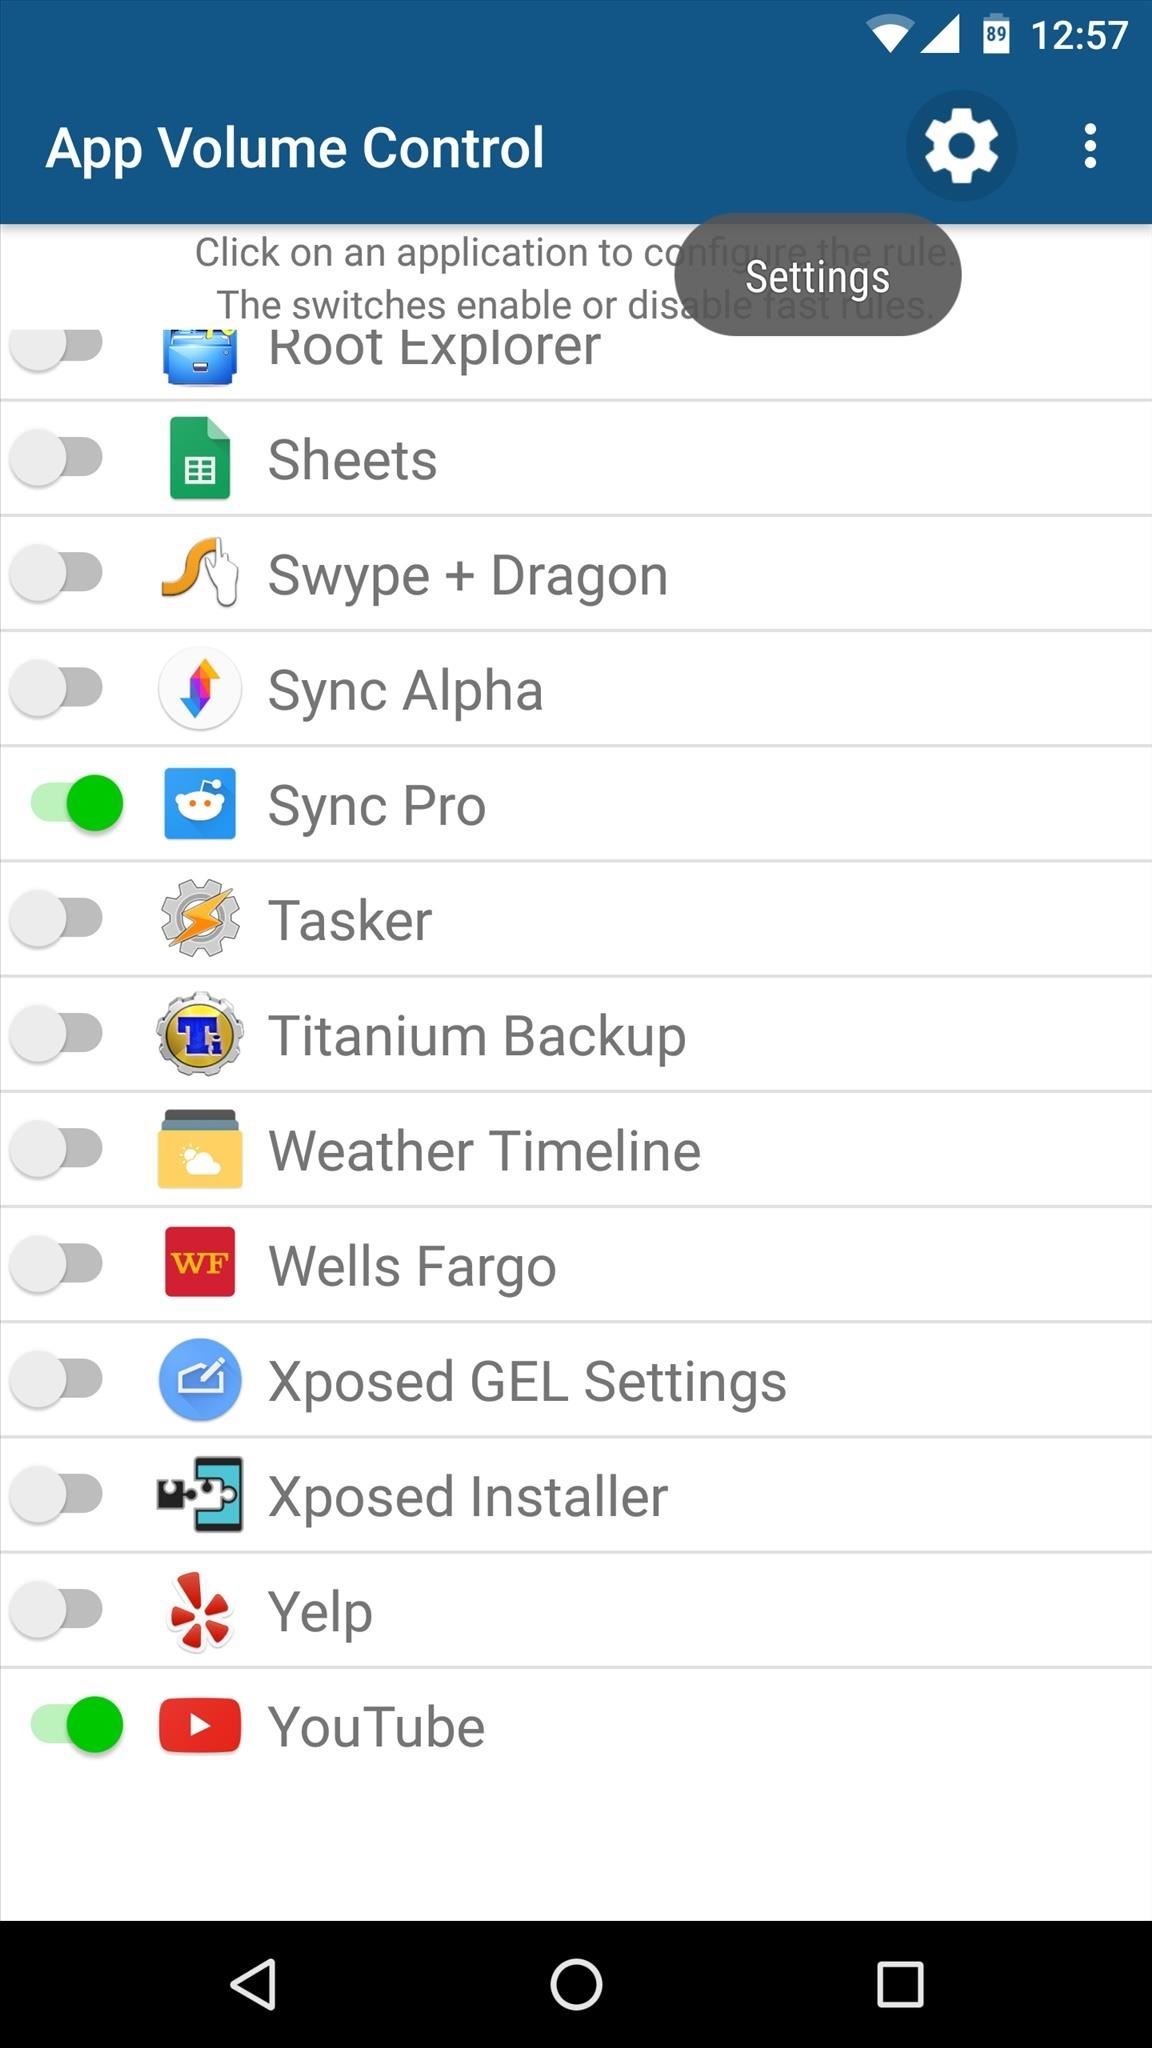
With the accessibility plugin enabled, head back to App Volume Control, and you’ll now see a list of all your installed apps. From here, simply tap any app to adjust its volume levels on an individual basis.
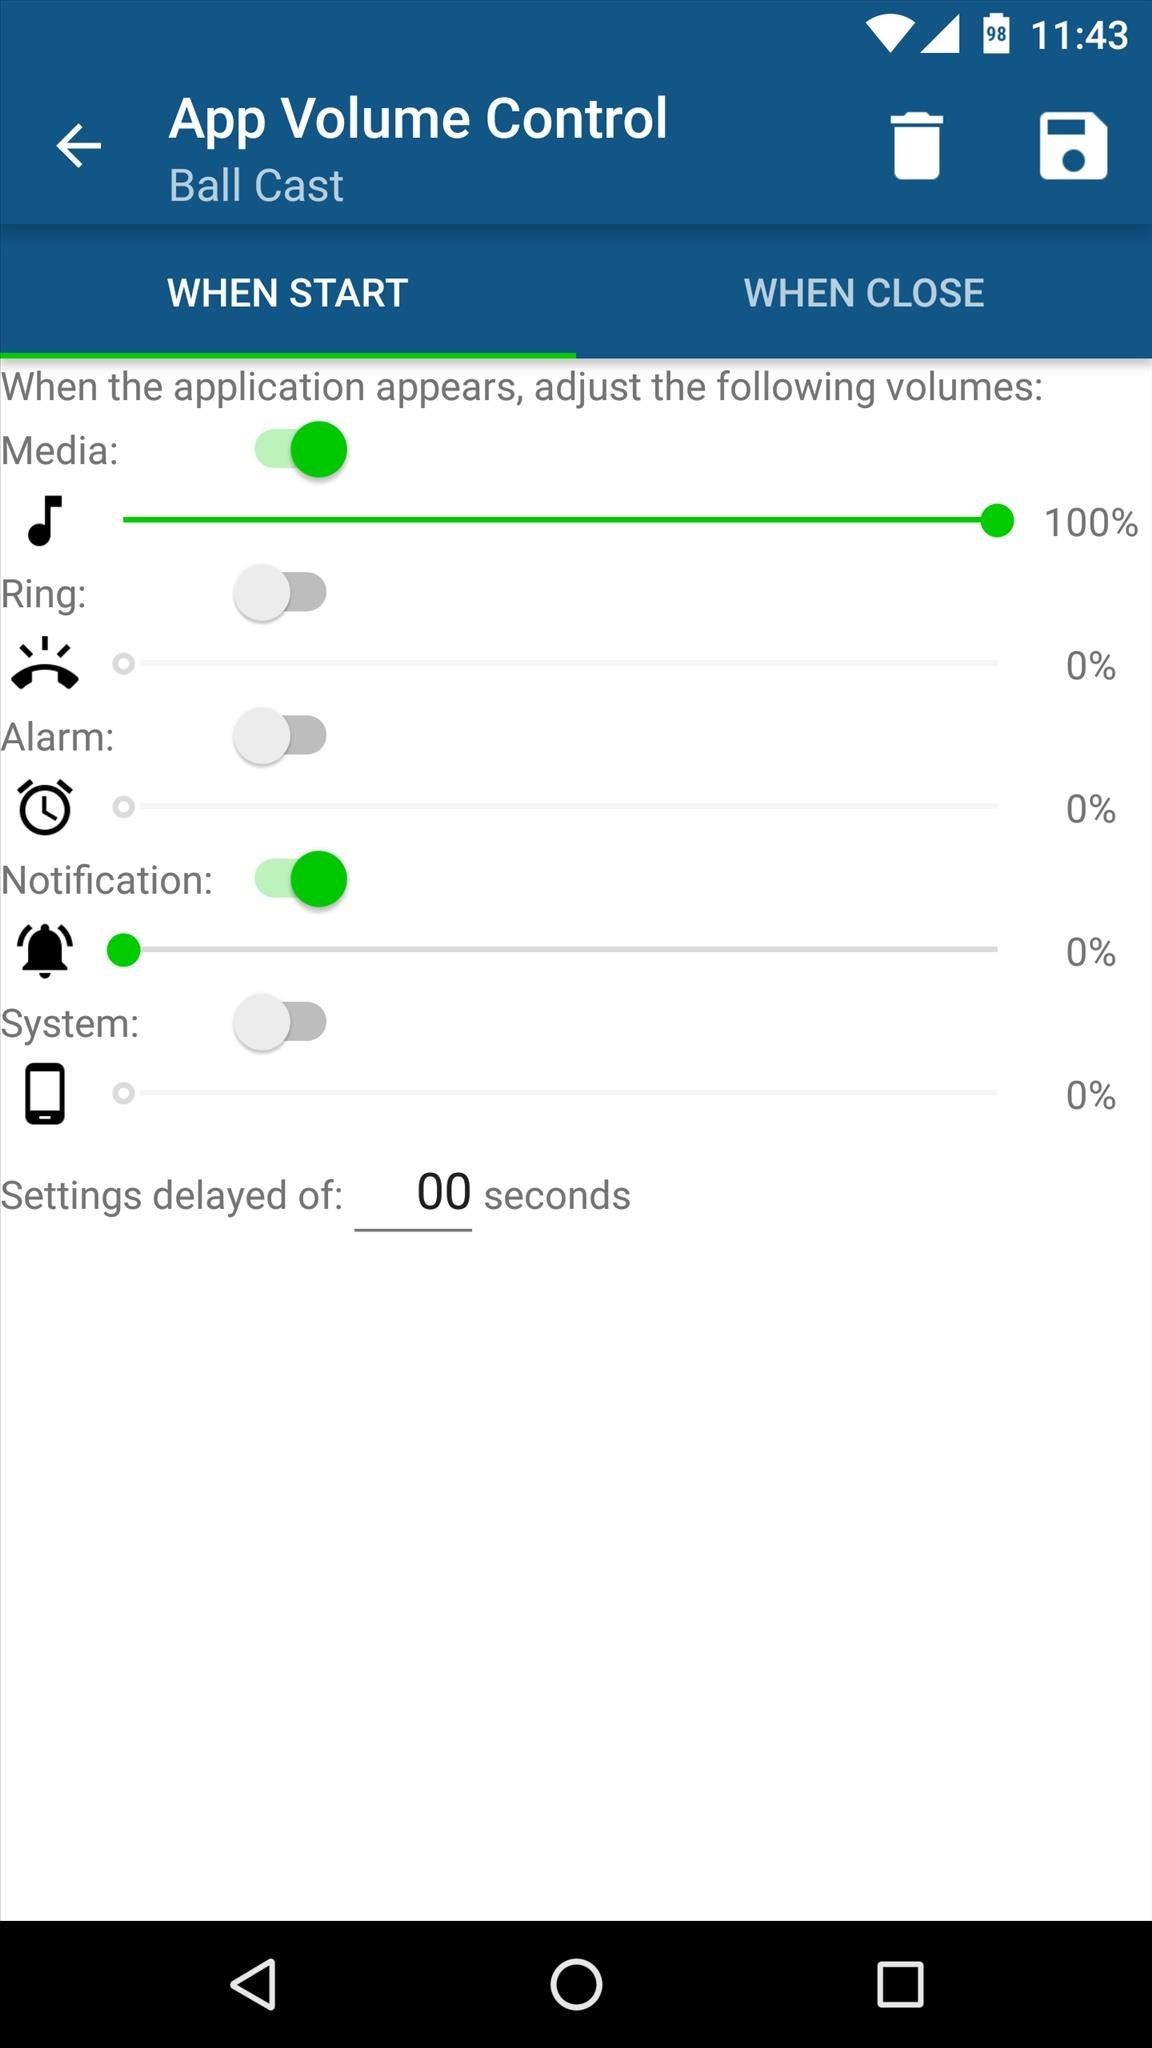
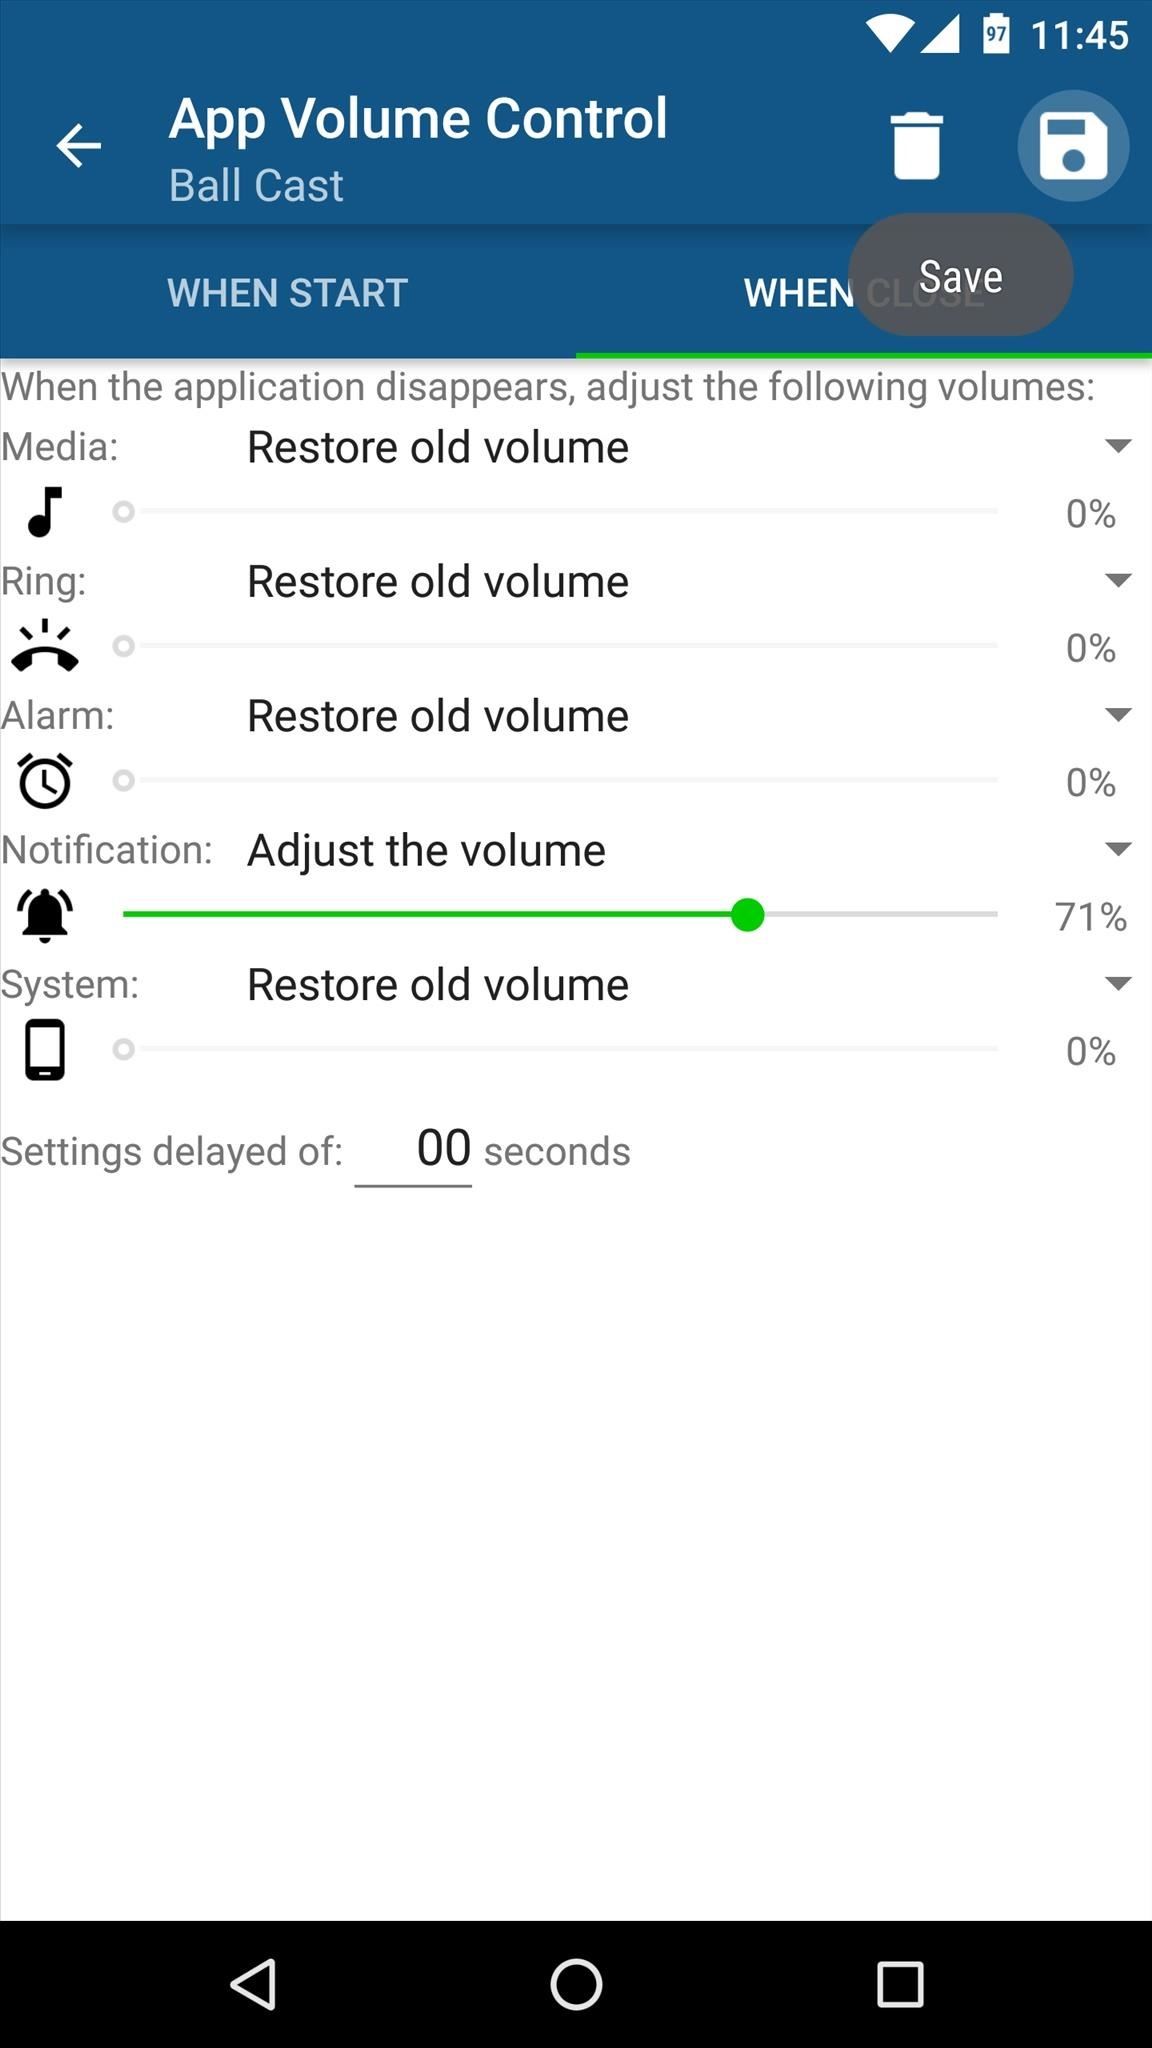
On the next screen, you’ll see 5 different volume categories—simply enable the toggle switch next to any of these entries, then set your preferred volume level using the slider. From here, if you’d like to have the volume levels change again when you exit the app, head to the “When close” tab. By default, these are set to restore your previous volume levels when you leave the app in question, but you can change that to a specific level if you’d like—just make sure to hit the “Save” button when you’re done.
Step 4: Disable Notifications (Optional)
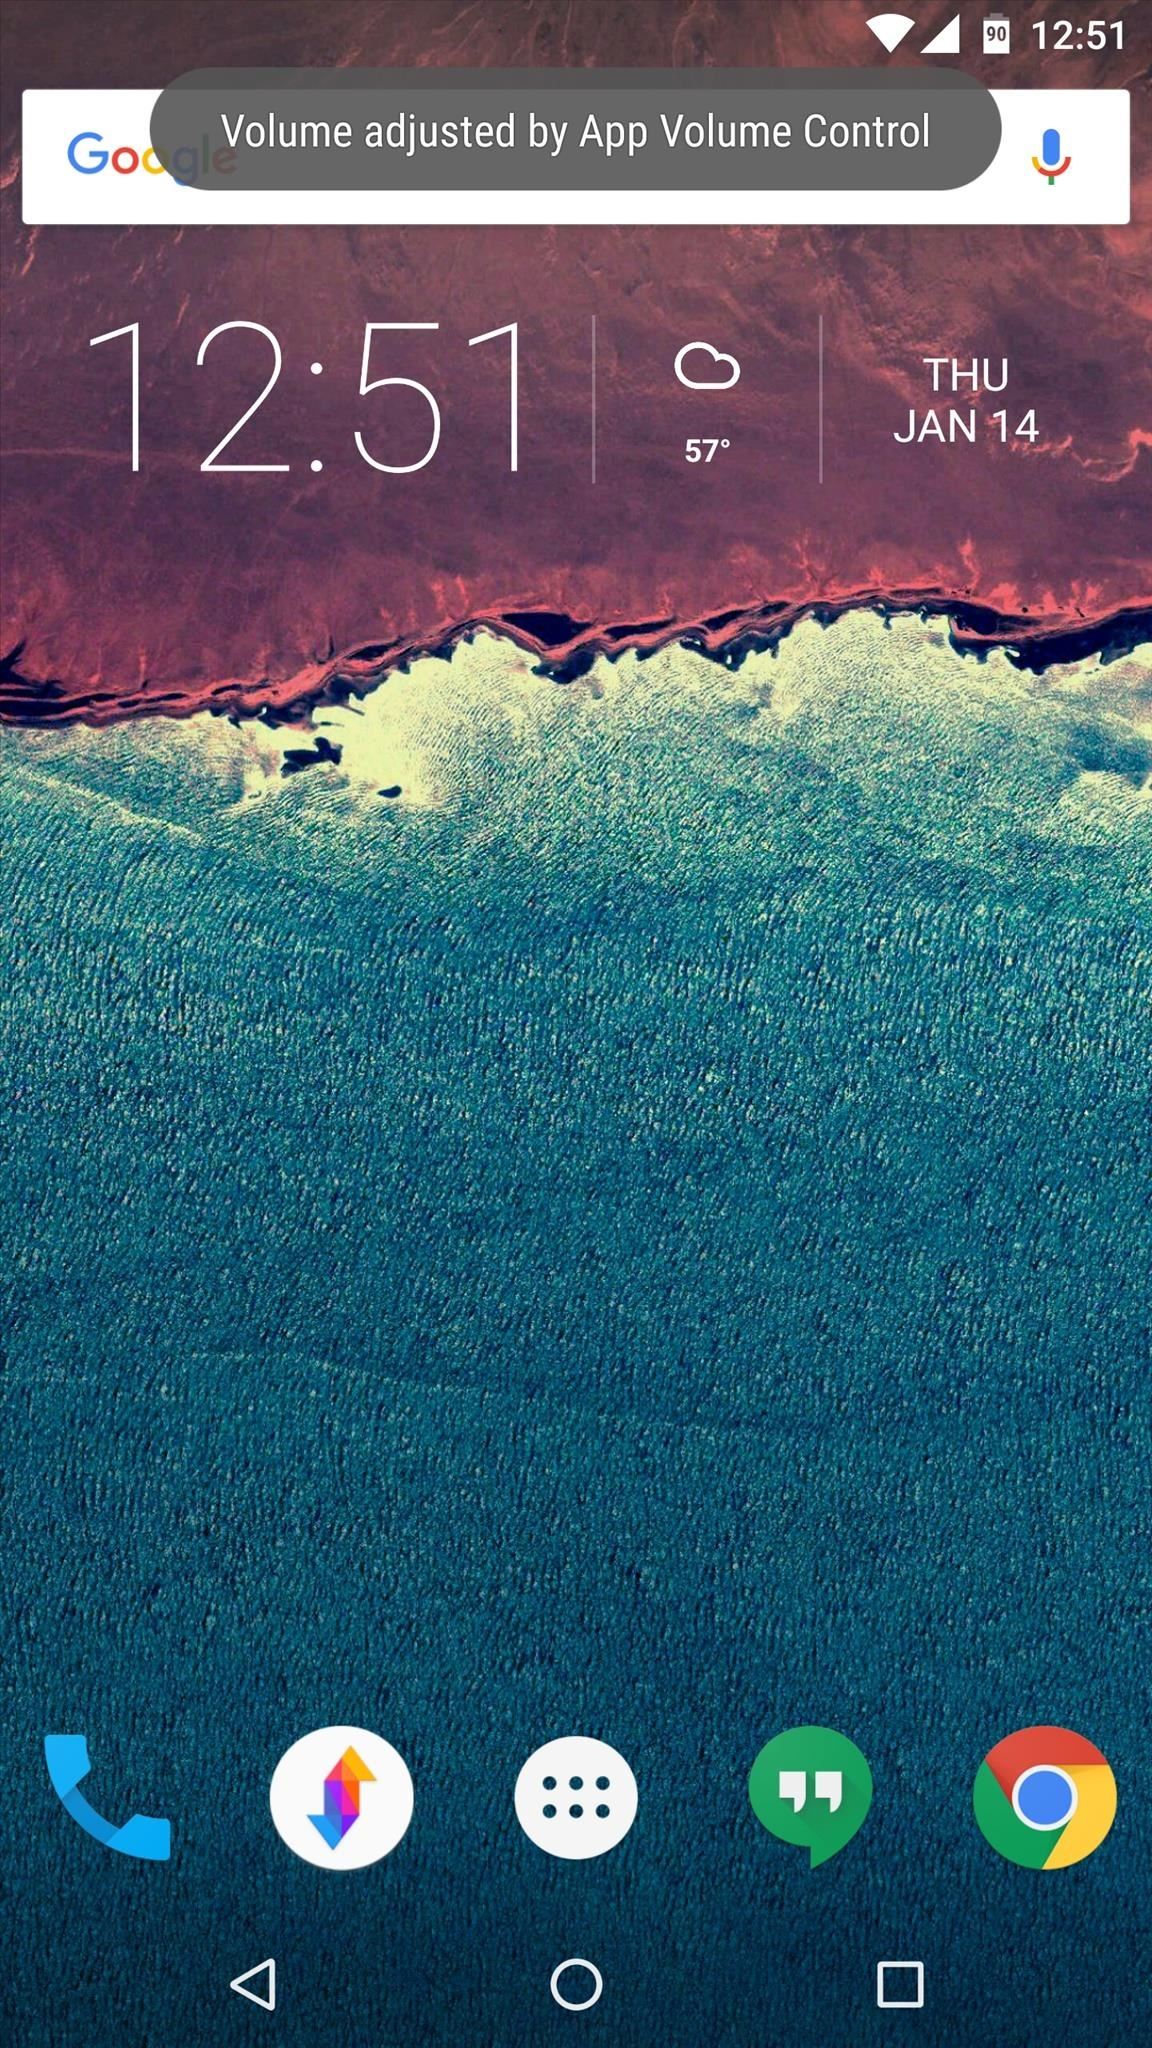
From now on, the volume will automatically be set to your preferred level any time you open one of the apps you’ve configured. One thing that bothered me, though, is that a toast message appears any time this happens—but that’s easy enough to fix.
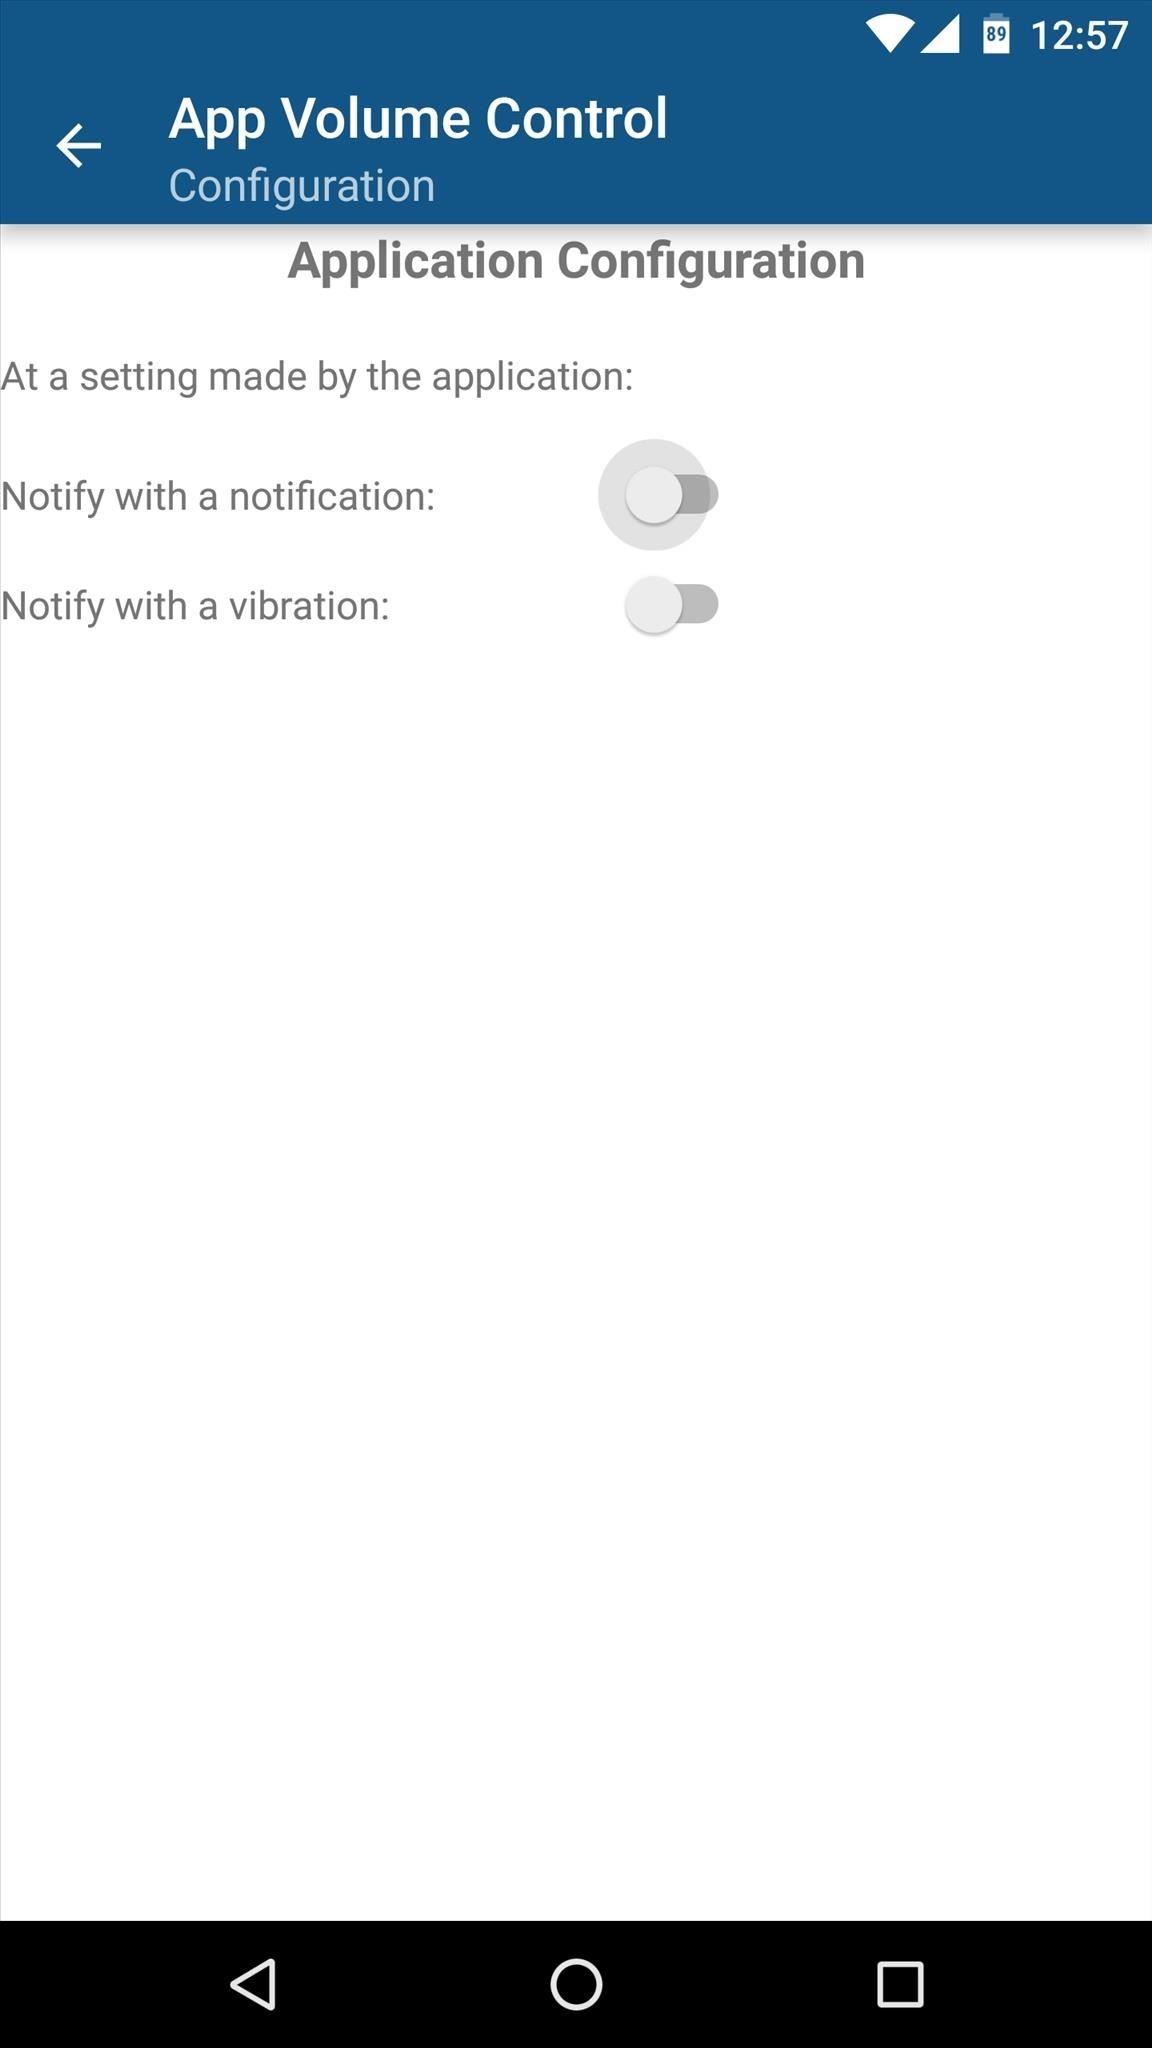
So if you’d like to get rid of this toast message, open App Volume Control and tap the settings icon at the top of the screen. From here, simply disable the “Notify with a notification” option, and from now on, your volume levels will change automatically and silently when you open any of the apps you configured.
Which apps are you controlling using App Volume Control? Let us know in the comment section below, or drop us a line on Android Hacks’ Facebook or Twitter, or on Gadget Hacks’ Facebook, Google+, or Twitter.
Hot Deal: Set up a secure second phone number and keep your real contact details hidden with a yearly subscription to Hushed Private Phone Line for Android/iOS, 83%–91% off. It’s a perfect second-line solution for making calls and sending texts related to work, dating, Craigslist sales, and other scenarios where you wouldn’t want to give out your primary phone number.
“Hey there, just a heads-up: We’re part of the Amazon affiliate program, so when you buy through links on our site, we may earn a small commission. But don’t worry, it doesn’t cost you anything extra and helps us keep the lights on. Thanks for your support!”


