Apple is finally adding profiles to Safari, so you can now keep your personal, work, and other topical browsing totally separate in their own instances, with their own history, cookies, website data, and active extensions.
Creating profiles for different parts of your life has been noticeably absent on iOS and iPadOS for most (if not all) of the big mobile web browsers. While the Google Chrome desktop browser has allowed multiple profiles for at least 10 years, there is no such capability for iPhone or iPad. You may think that Microsoft Edge does it, but it requires you to use two separate Microsoft accounts instead of just one.
- Don’t Miss: Use Your iPhone’s New ‘Check In’ Feature to Let Contacts Know When You Arrive Safely at Your Destination
On iPhone and iPad, you’ll need to use Safari on iOS 17 or iPadOS 17 to have multiple profiles in your browser without needing separate accounts. You can set one up for any topic you choose — work, school, hobbies, games, shopping, and so on — and there’s seemingly no limit on how many you can have.
Also, if you share a device with family members or friends in your household, each person can have their own profile to separate browsing activity. Unfortunately, there are no locks on profiles, and they can’t be assigned to different Apple IDs, so there are no protections to prevent someone with access to the device from opening your profiles and vice versa.
The stable iOS 17/iPadOS 17 releases aren’t expected until the fall, but you can try out Safari profiles on the iOS 17 Beta or iPadOS 17 Beta.
Quick Facts
- Safari profiles work starting in iOS 17, iPadOS 17, and macOS Sonoma.
- They also sync across iOS, iPadOS, and macOS if you have iCloud sync enabled and are logged in using the same Apple ID on all your devices.
- All your current tabs will be added to an automatically created “Personal” profile after creating at least one new profile.
- If you’re using older software on any of your devices, you will only be able to see your default “Personal” profile on those devices.
- Each profile will have its own isolated history, cookies, and website data.
- That includes Web Push subscriptions, so you can subscribe to notifications for a website in one profile but not another if you want.
- And browser extensions can be enabled or disabled per profile.
- You can create a folder to house profile-specific bookmarks, but you can access all your Safari bookmarks from any profile.
- Each profile has the same Private Browsing mode, so they share the “Private” option; they do not get their own.
- There’s seemingly no limit to the number of profiles you can have. At least, I was able to create 27 profiles before giving up trying to find the limit.
1. Create a New Safari Profile
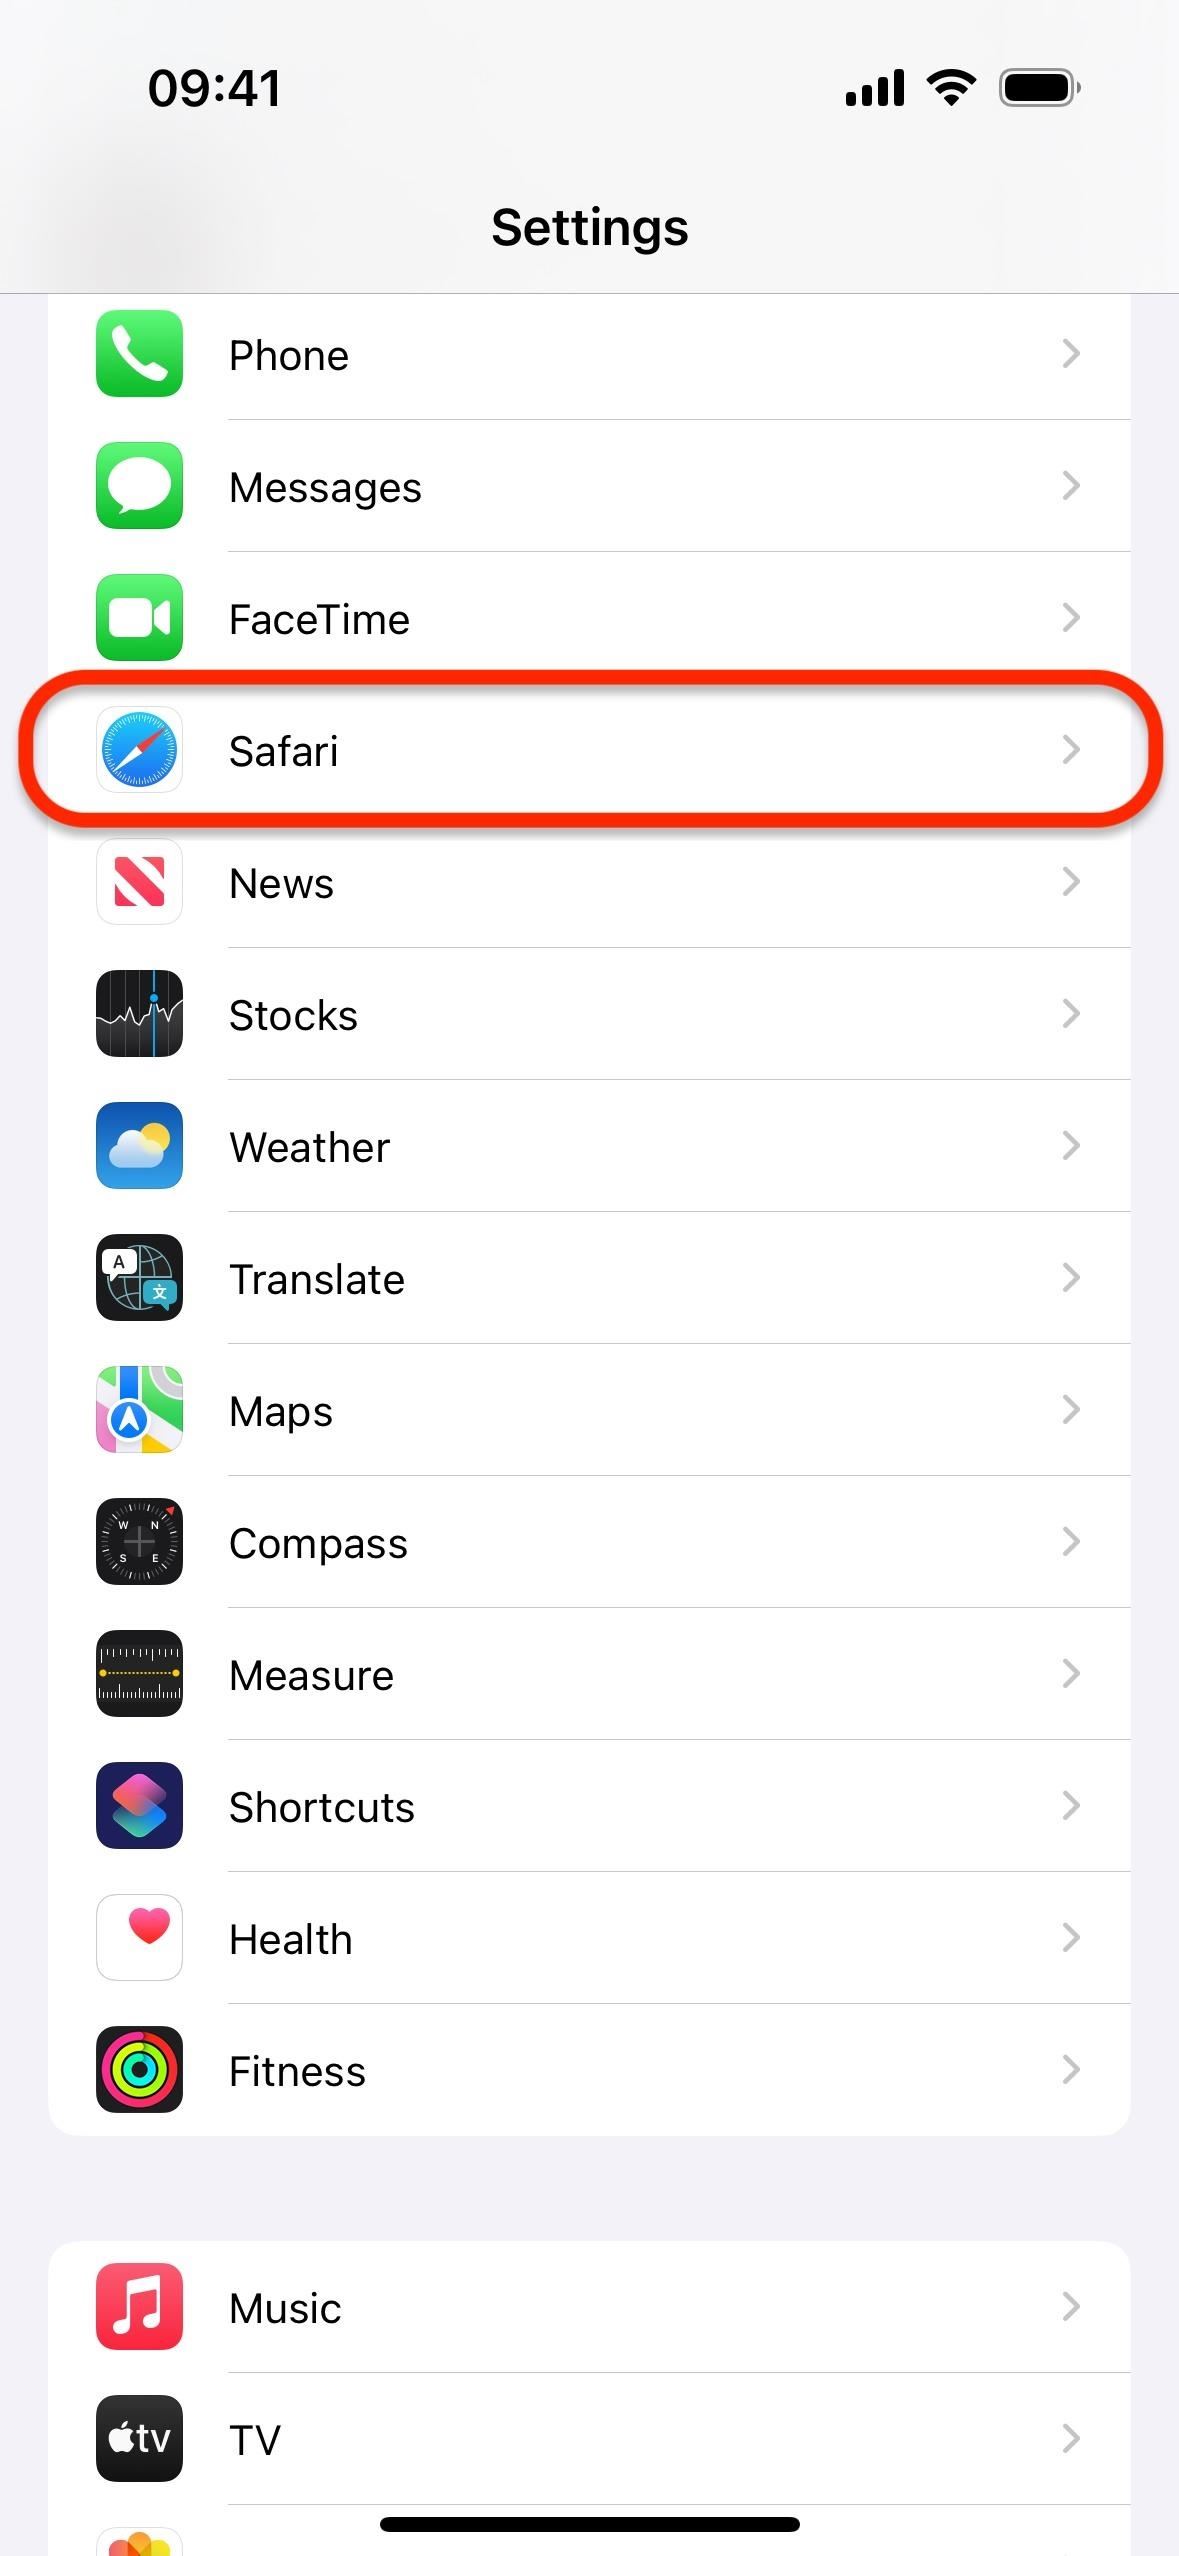
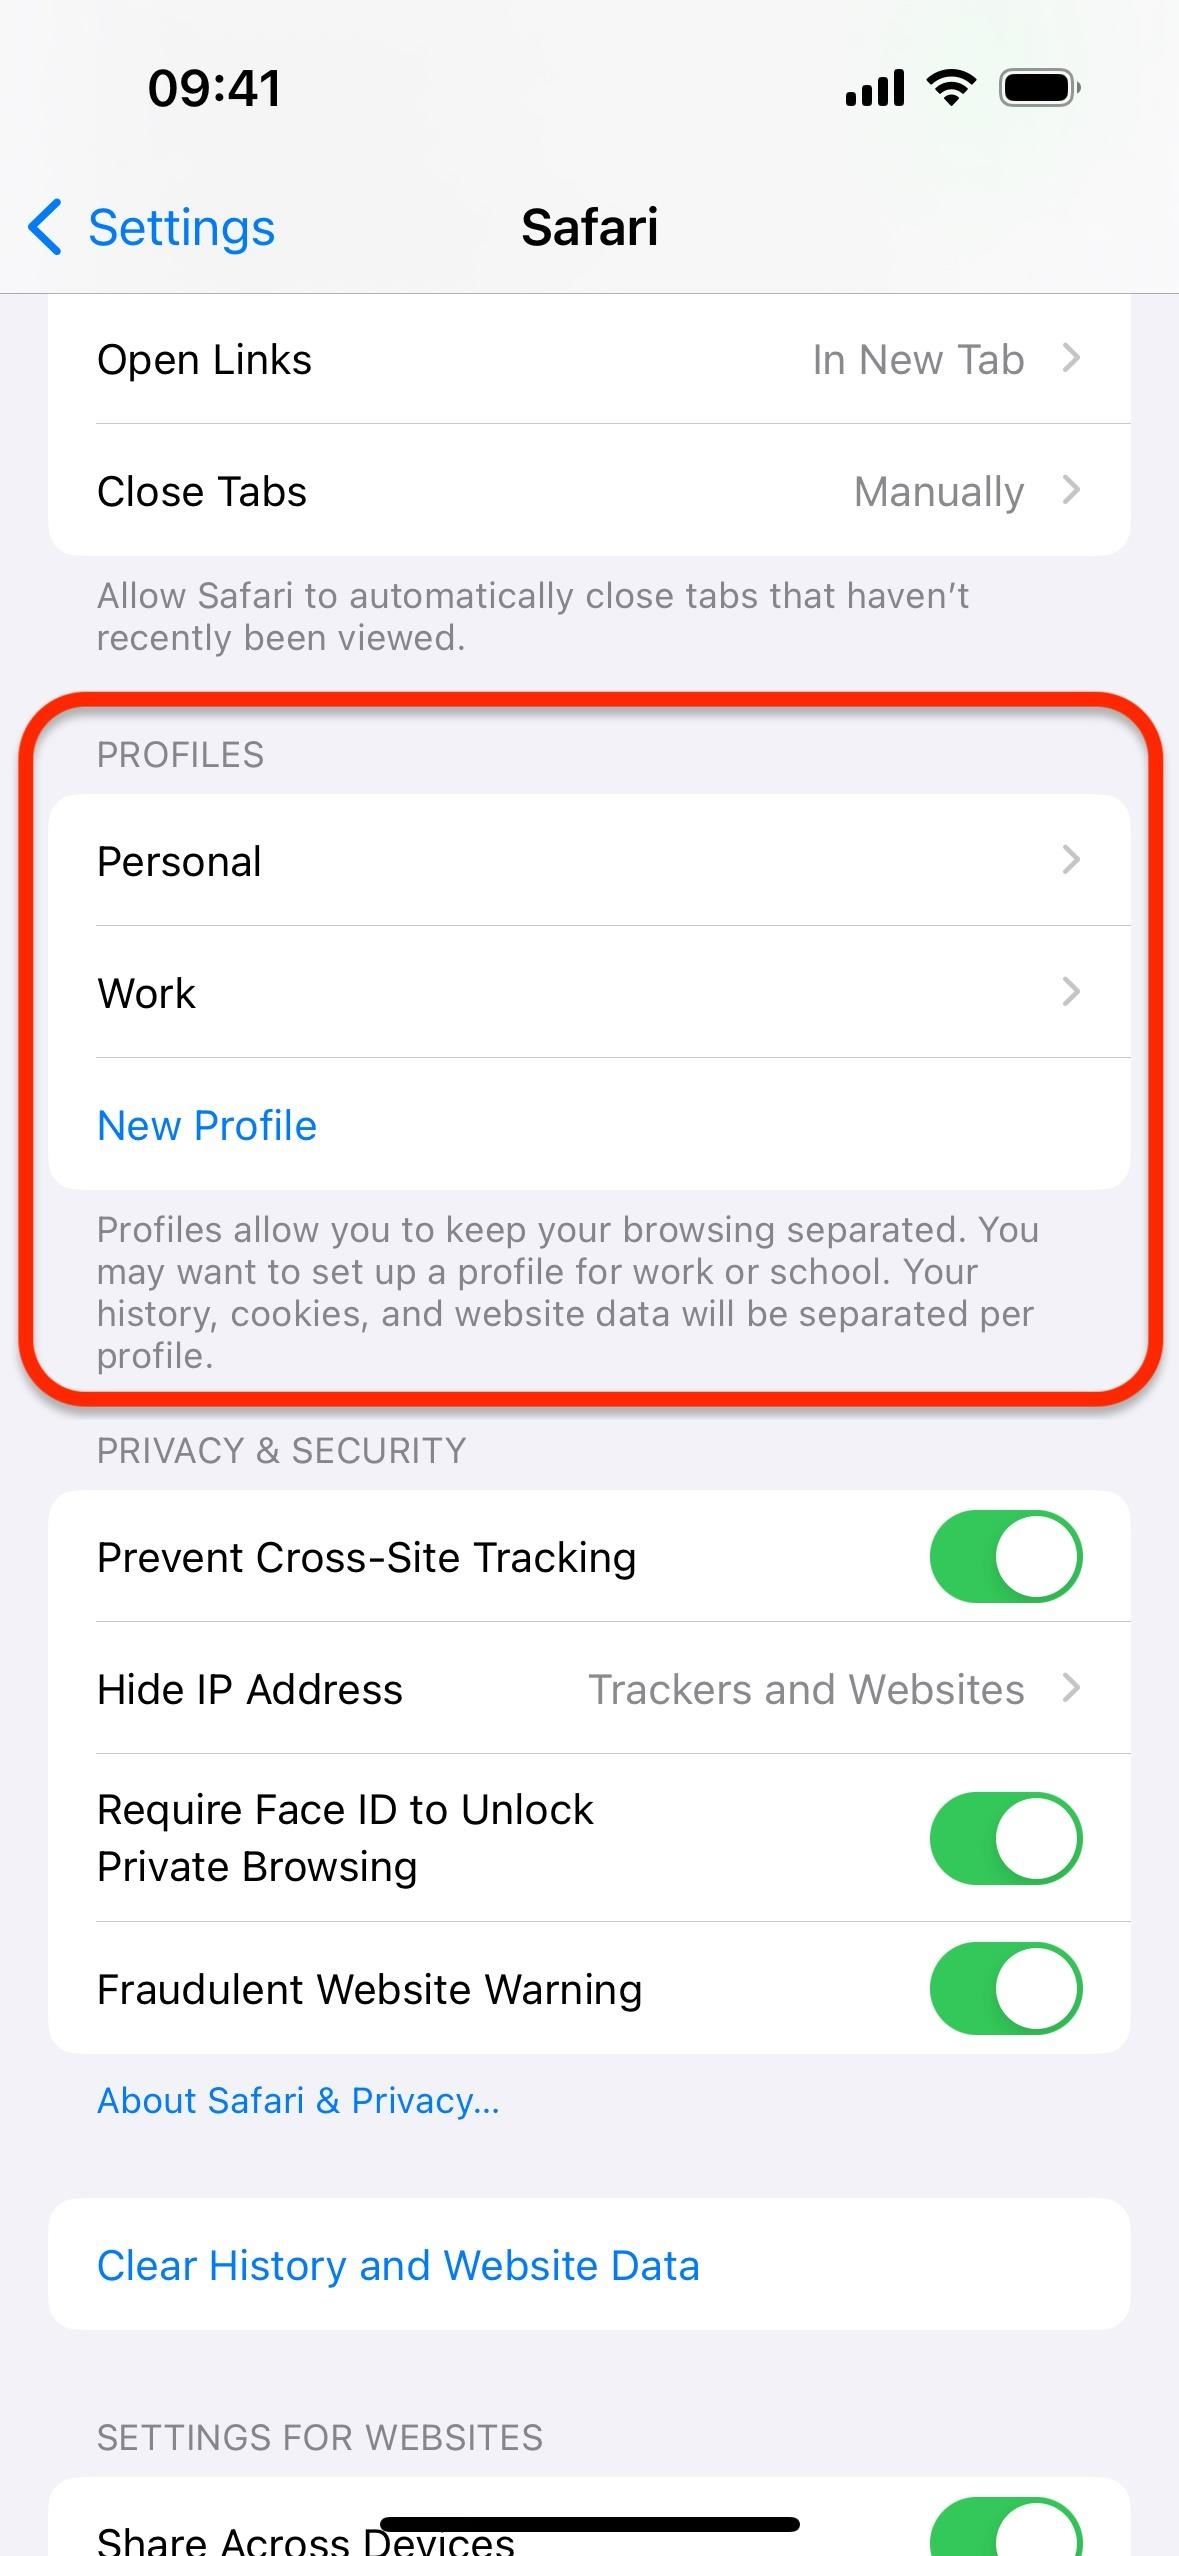
To create a new Safari profile, open the “Safari” menu in the Settings app, then choose “New Profile” in the Profiles section.

You don’t need to create a “Personal” profile since all your current tabs will be added to an automatically created “Personal” profile after creating at least one new profile. So your first profile should be for a different topic, such as work, school, hobbies, etc.
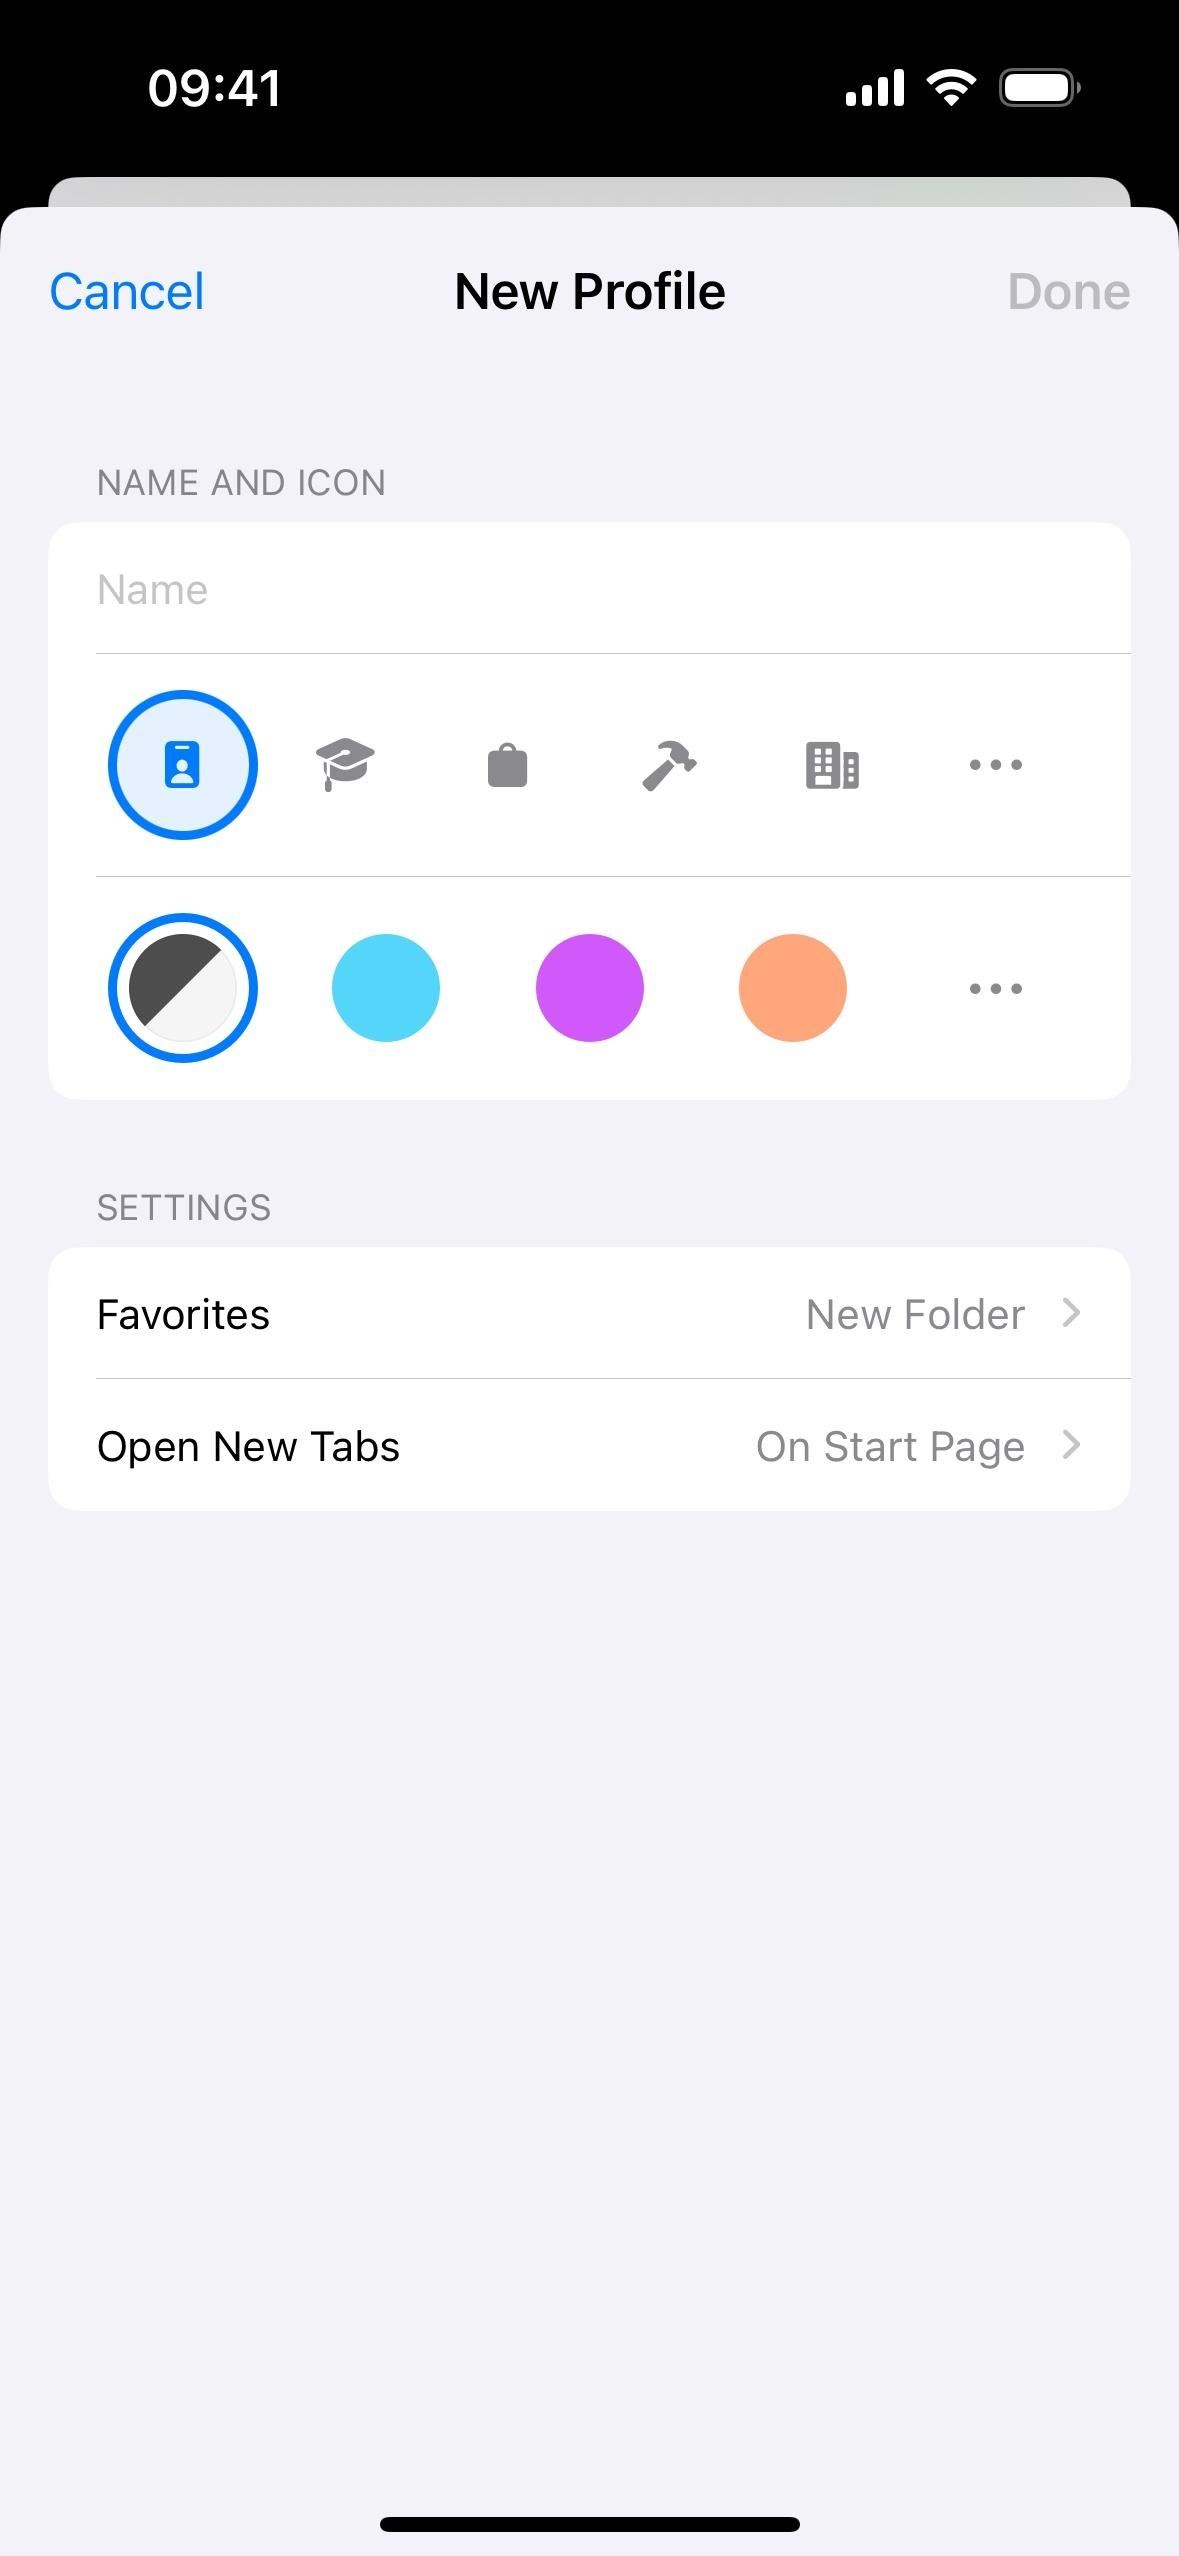
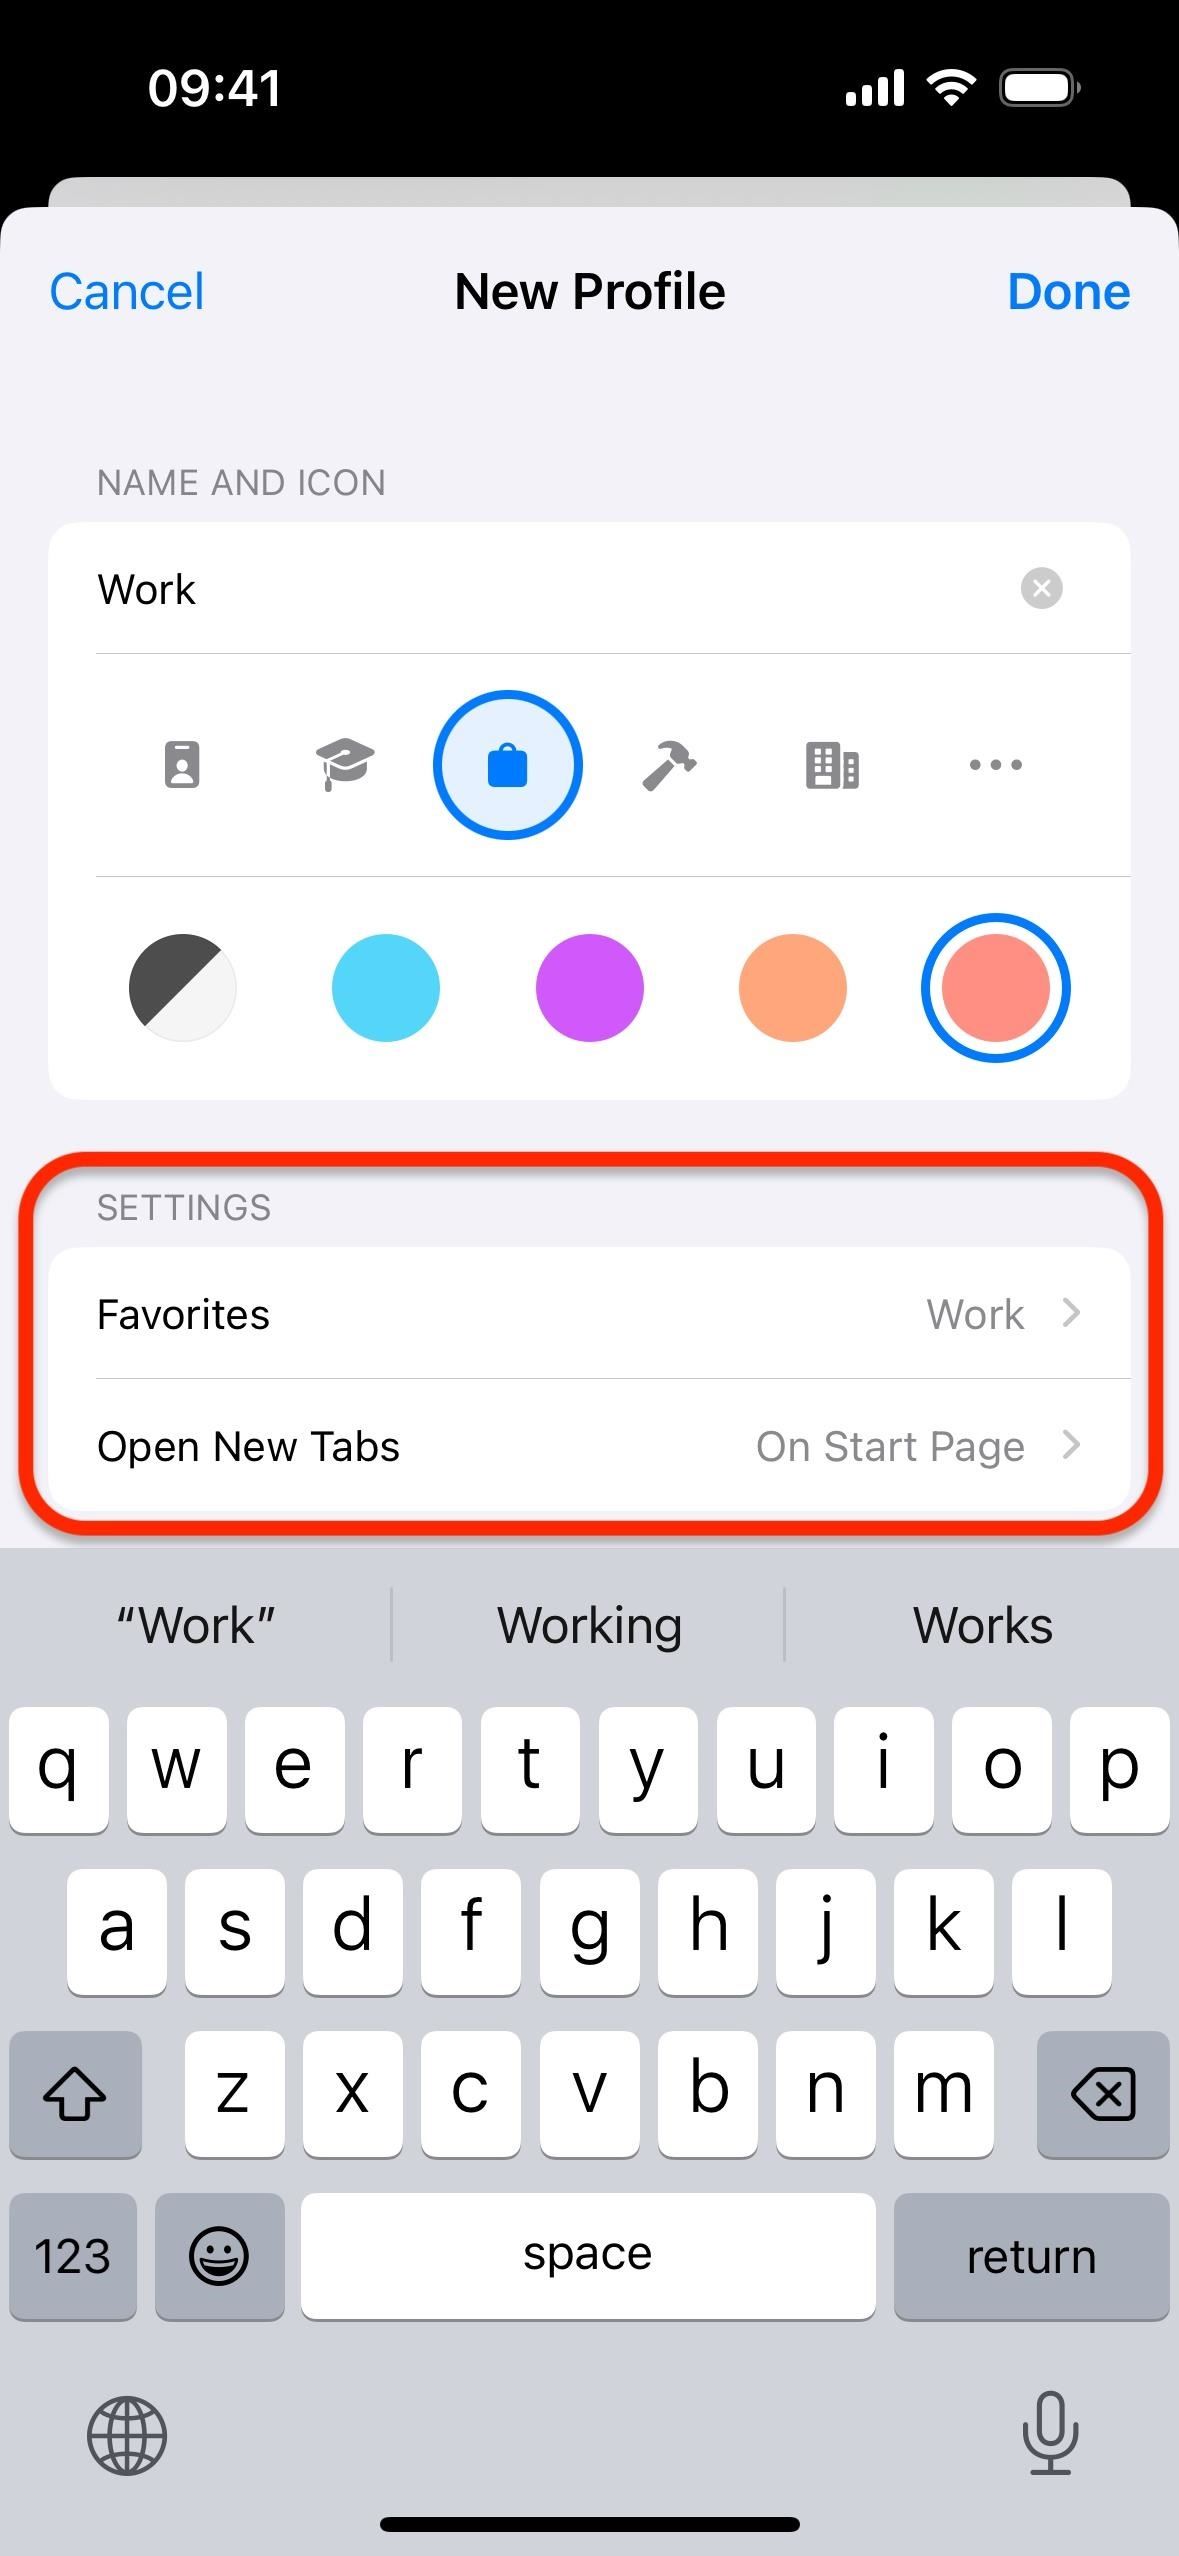
Pick a Name, Icon, and Color
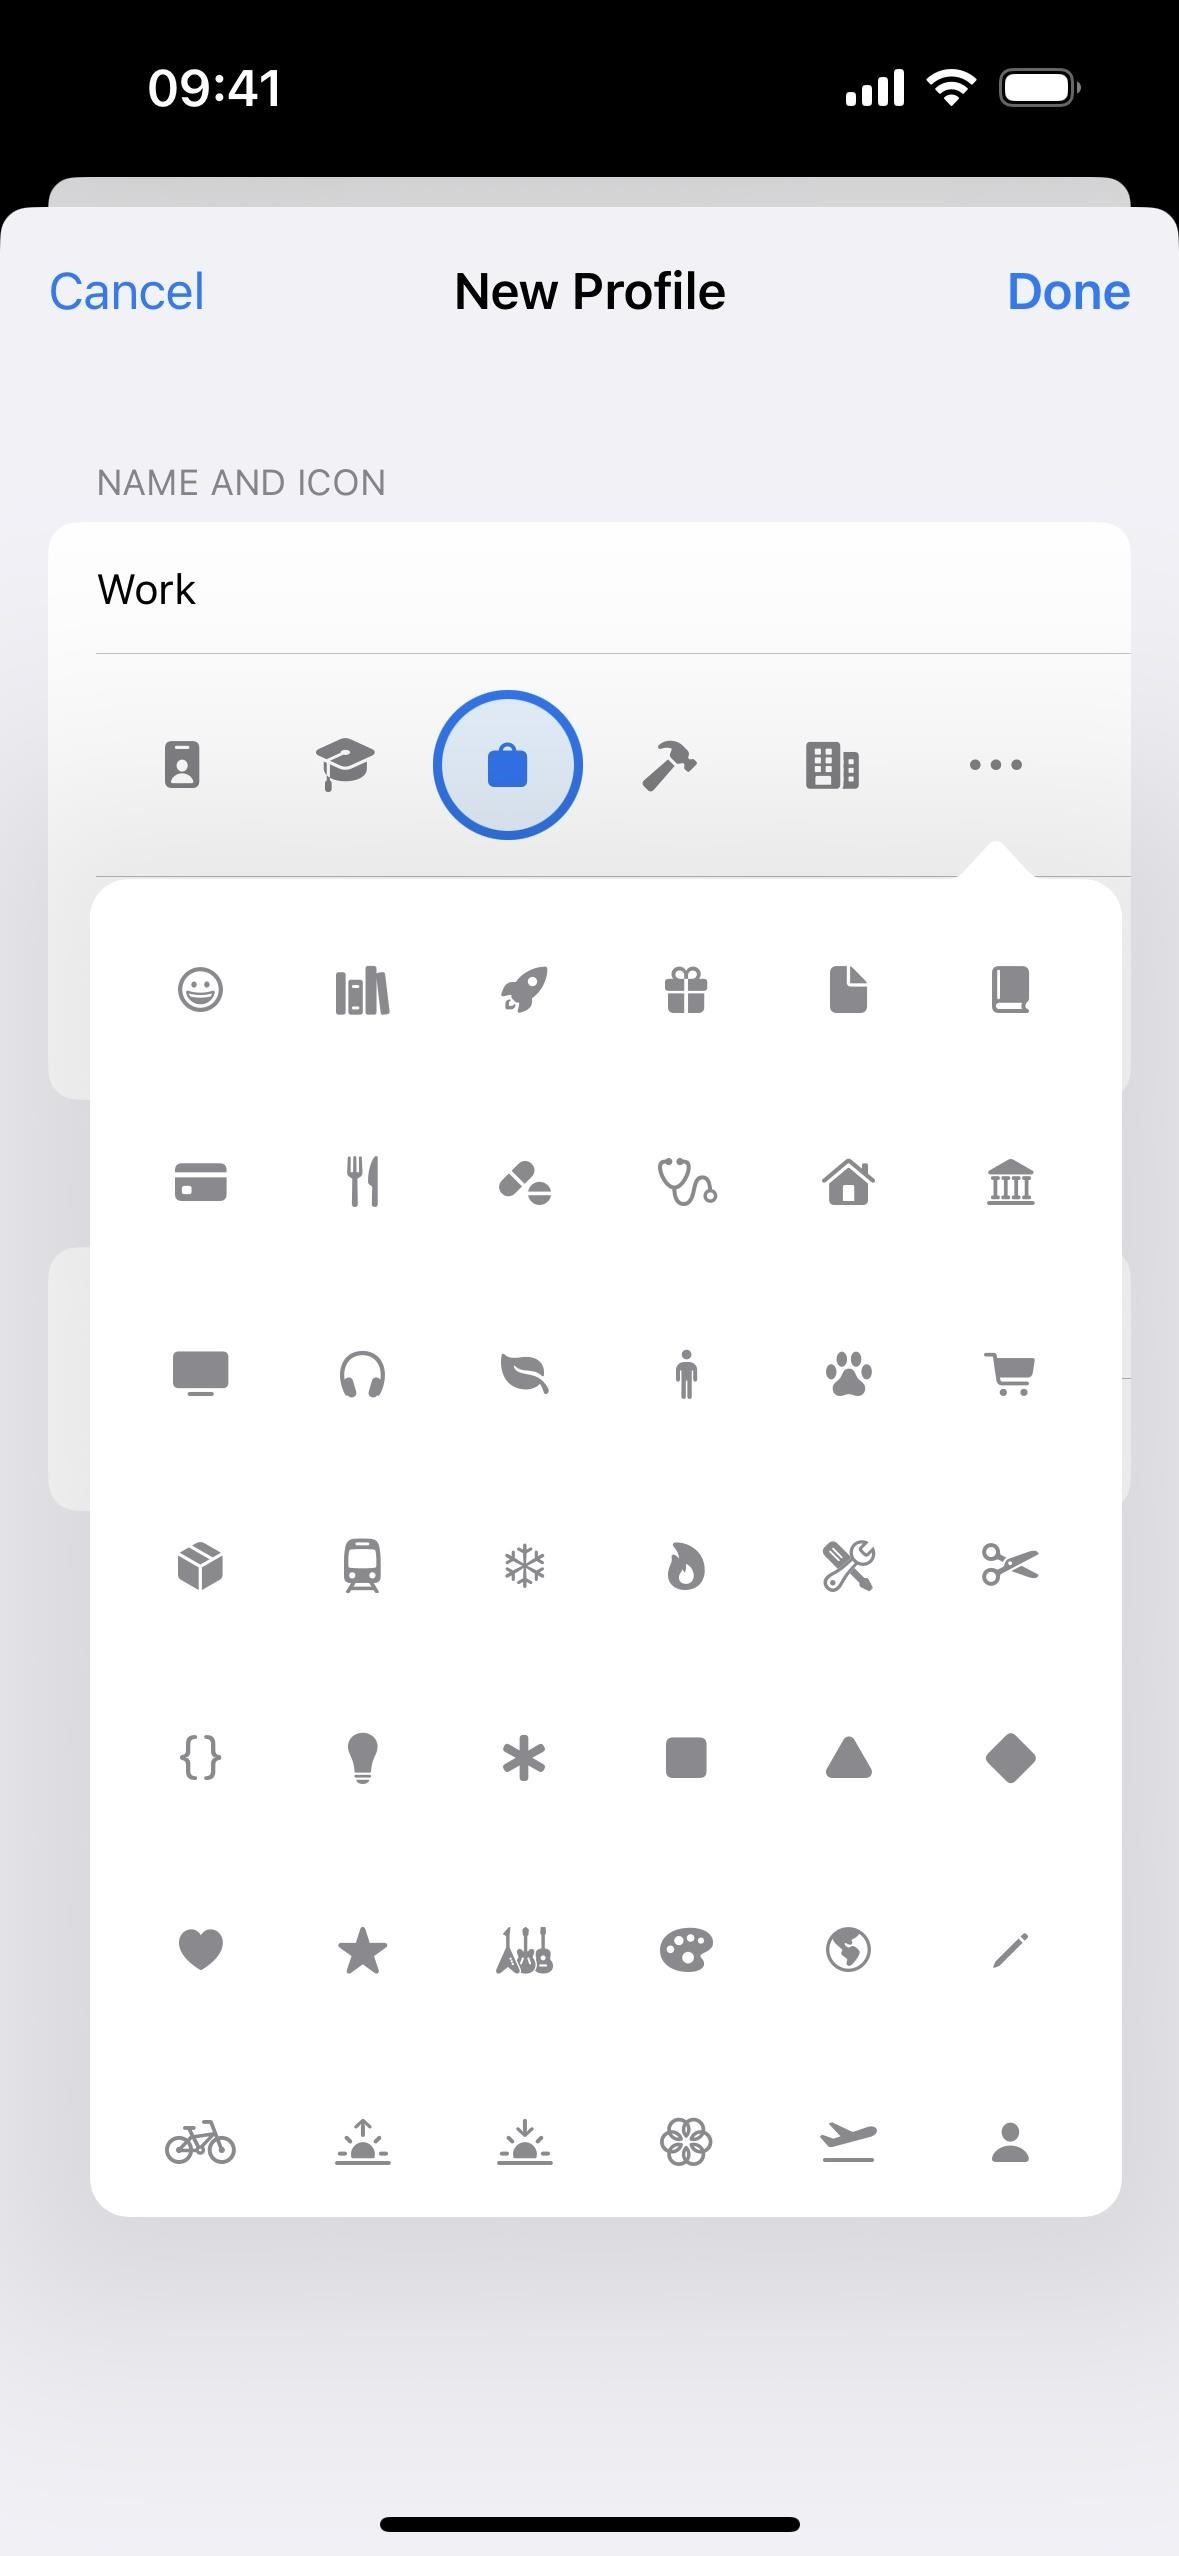
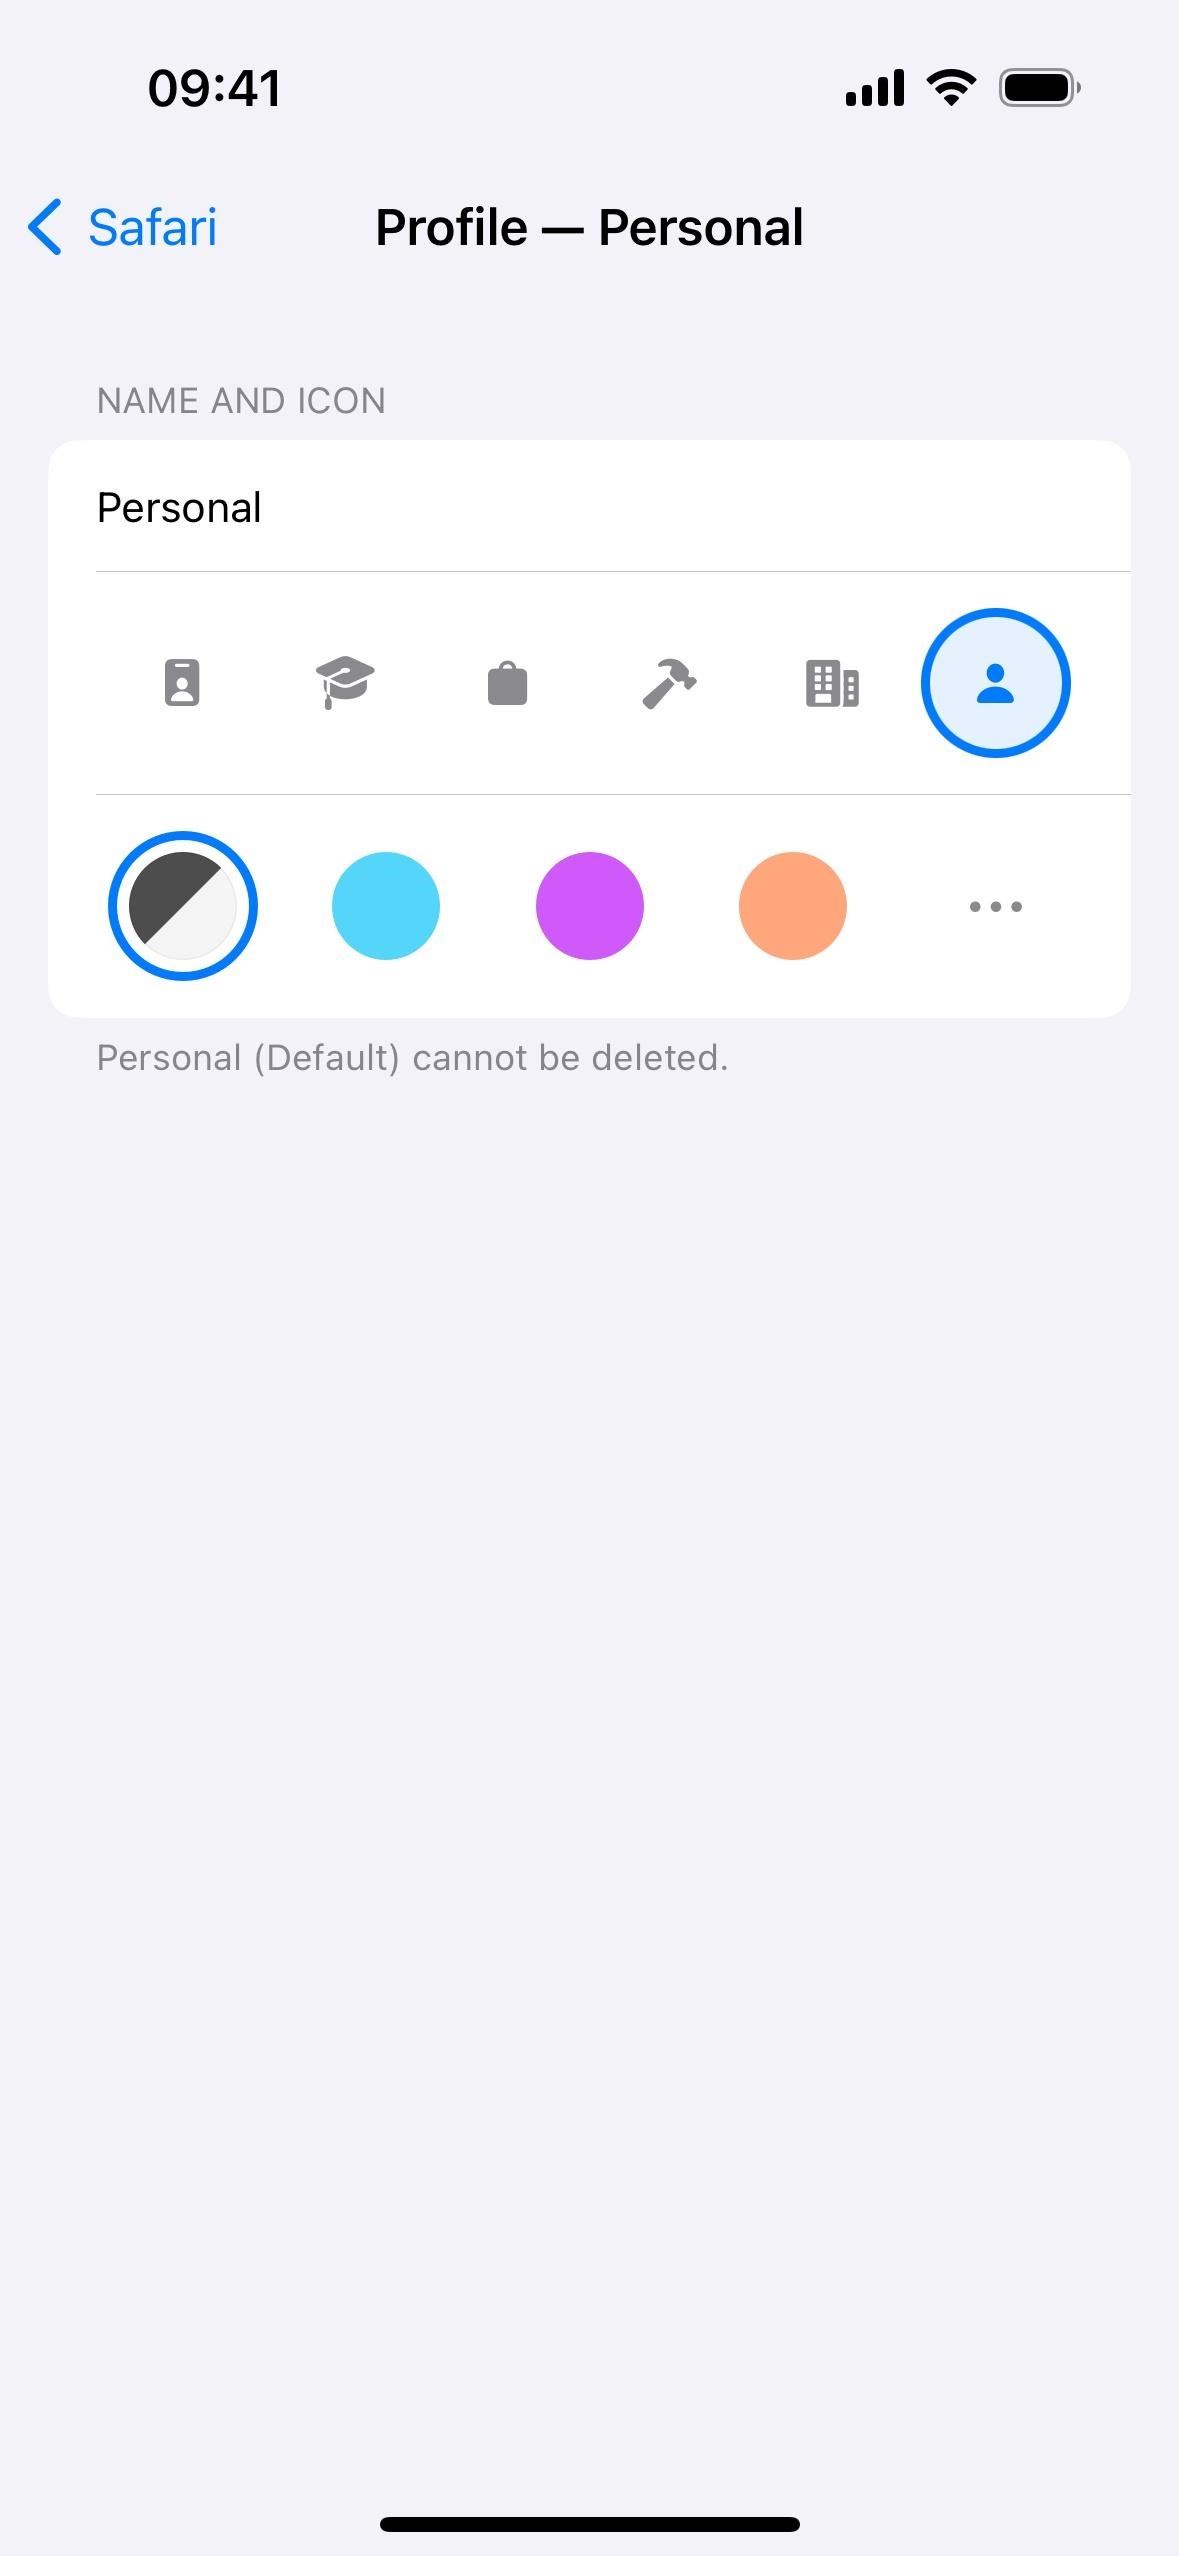
After entering a name for the profile, choose an icon that best represents it. Tap the “More Icons” (•••) button to see more glyphs. There’s a small selection of glyphs right now, but there may be more symbols in the future.
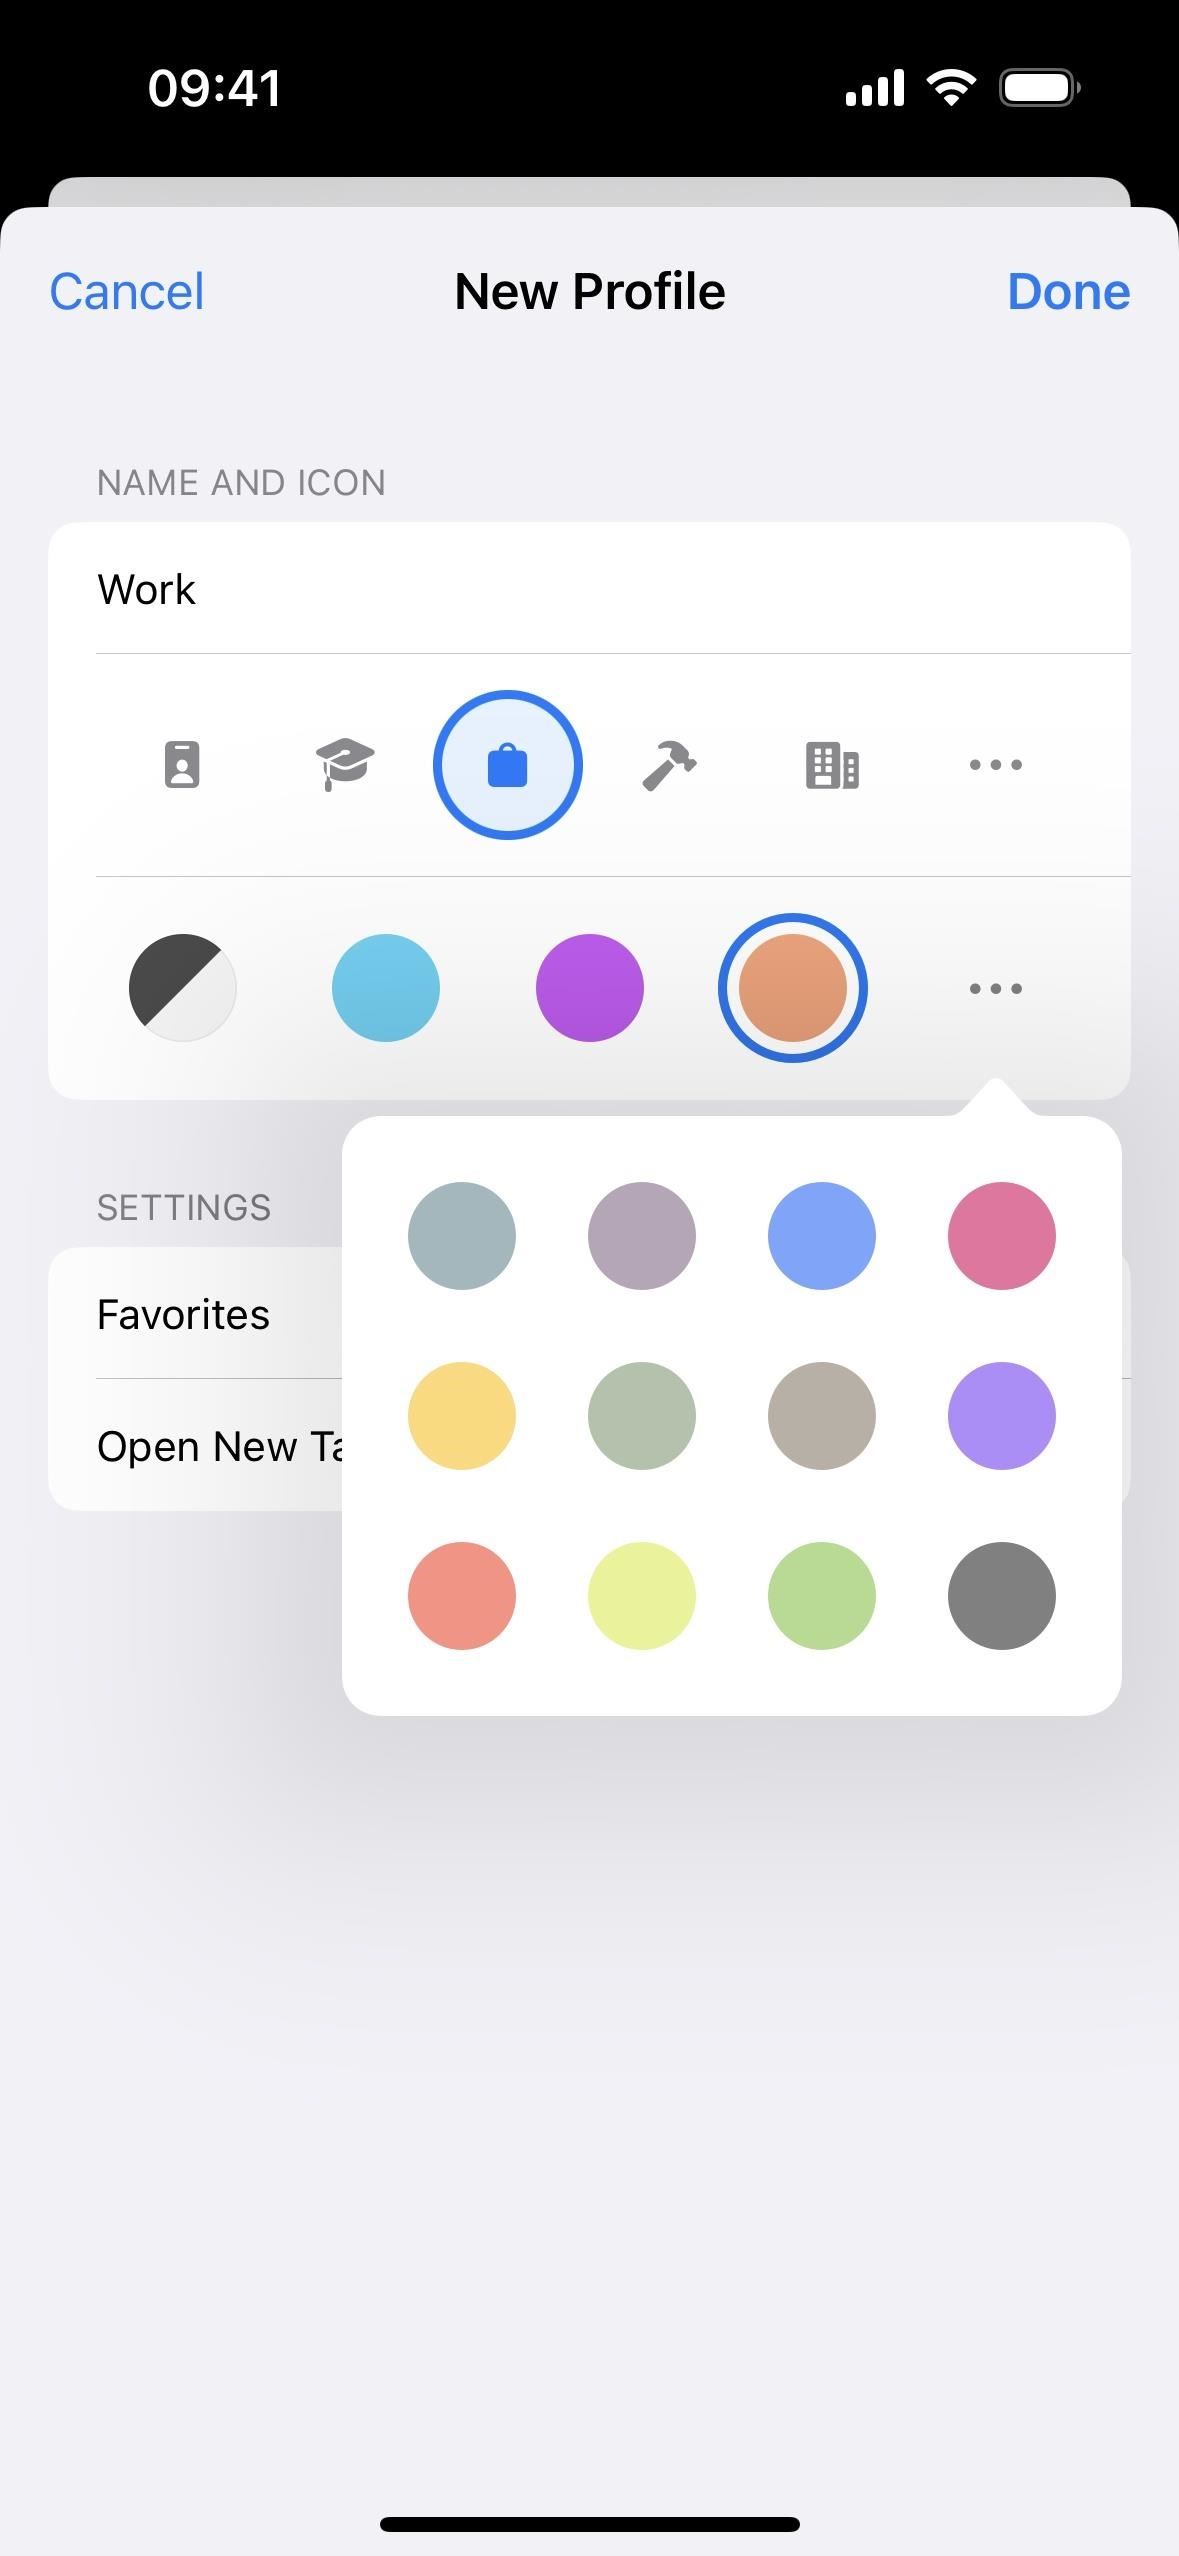
You can also choose an associated color for the profile. Apple automatically assigns a color based on the selected icon, but you’re not stuck with it. The black/white color is the transparent option, and you can view more colors via the “More Colors” (•••) button.
The profile’s icon and color will appear as the background image on the start page when you open a new tab for it. You can always change the wallpaper per profile by tapping “Edit” at the bottom of the start page.
Pick the Favorites Location and New Tabs Start Page
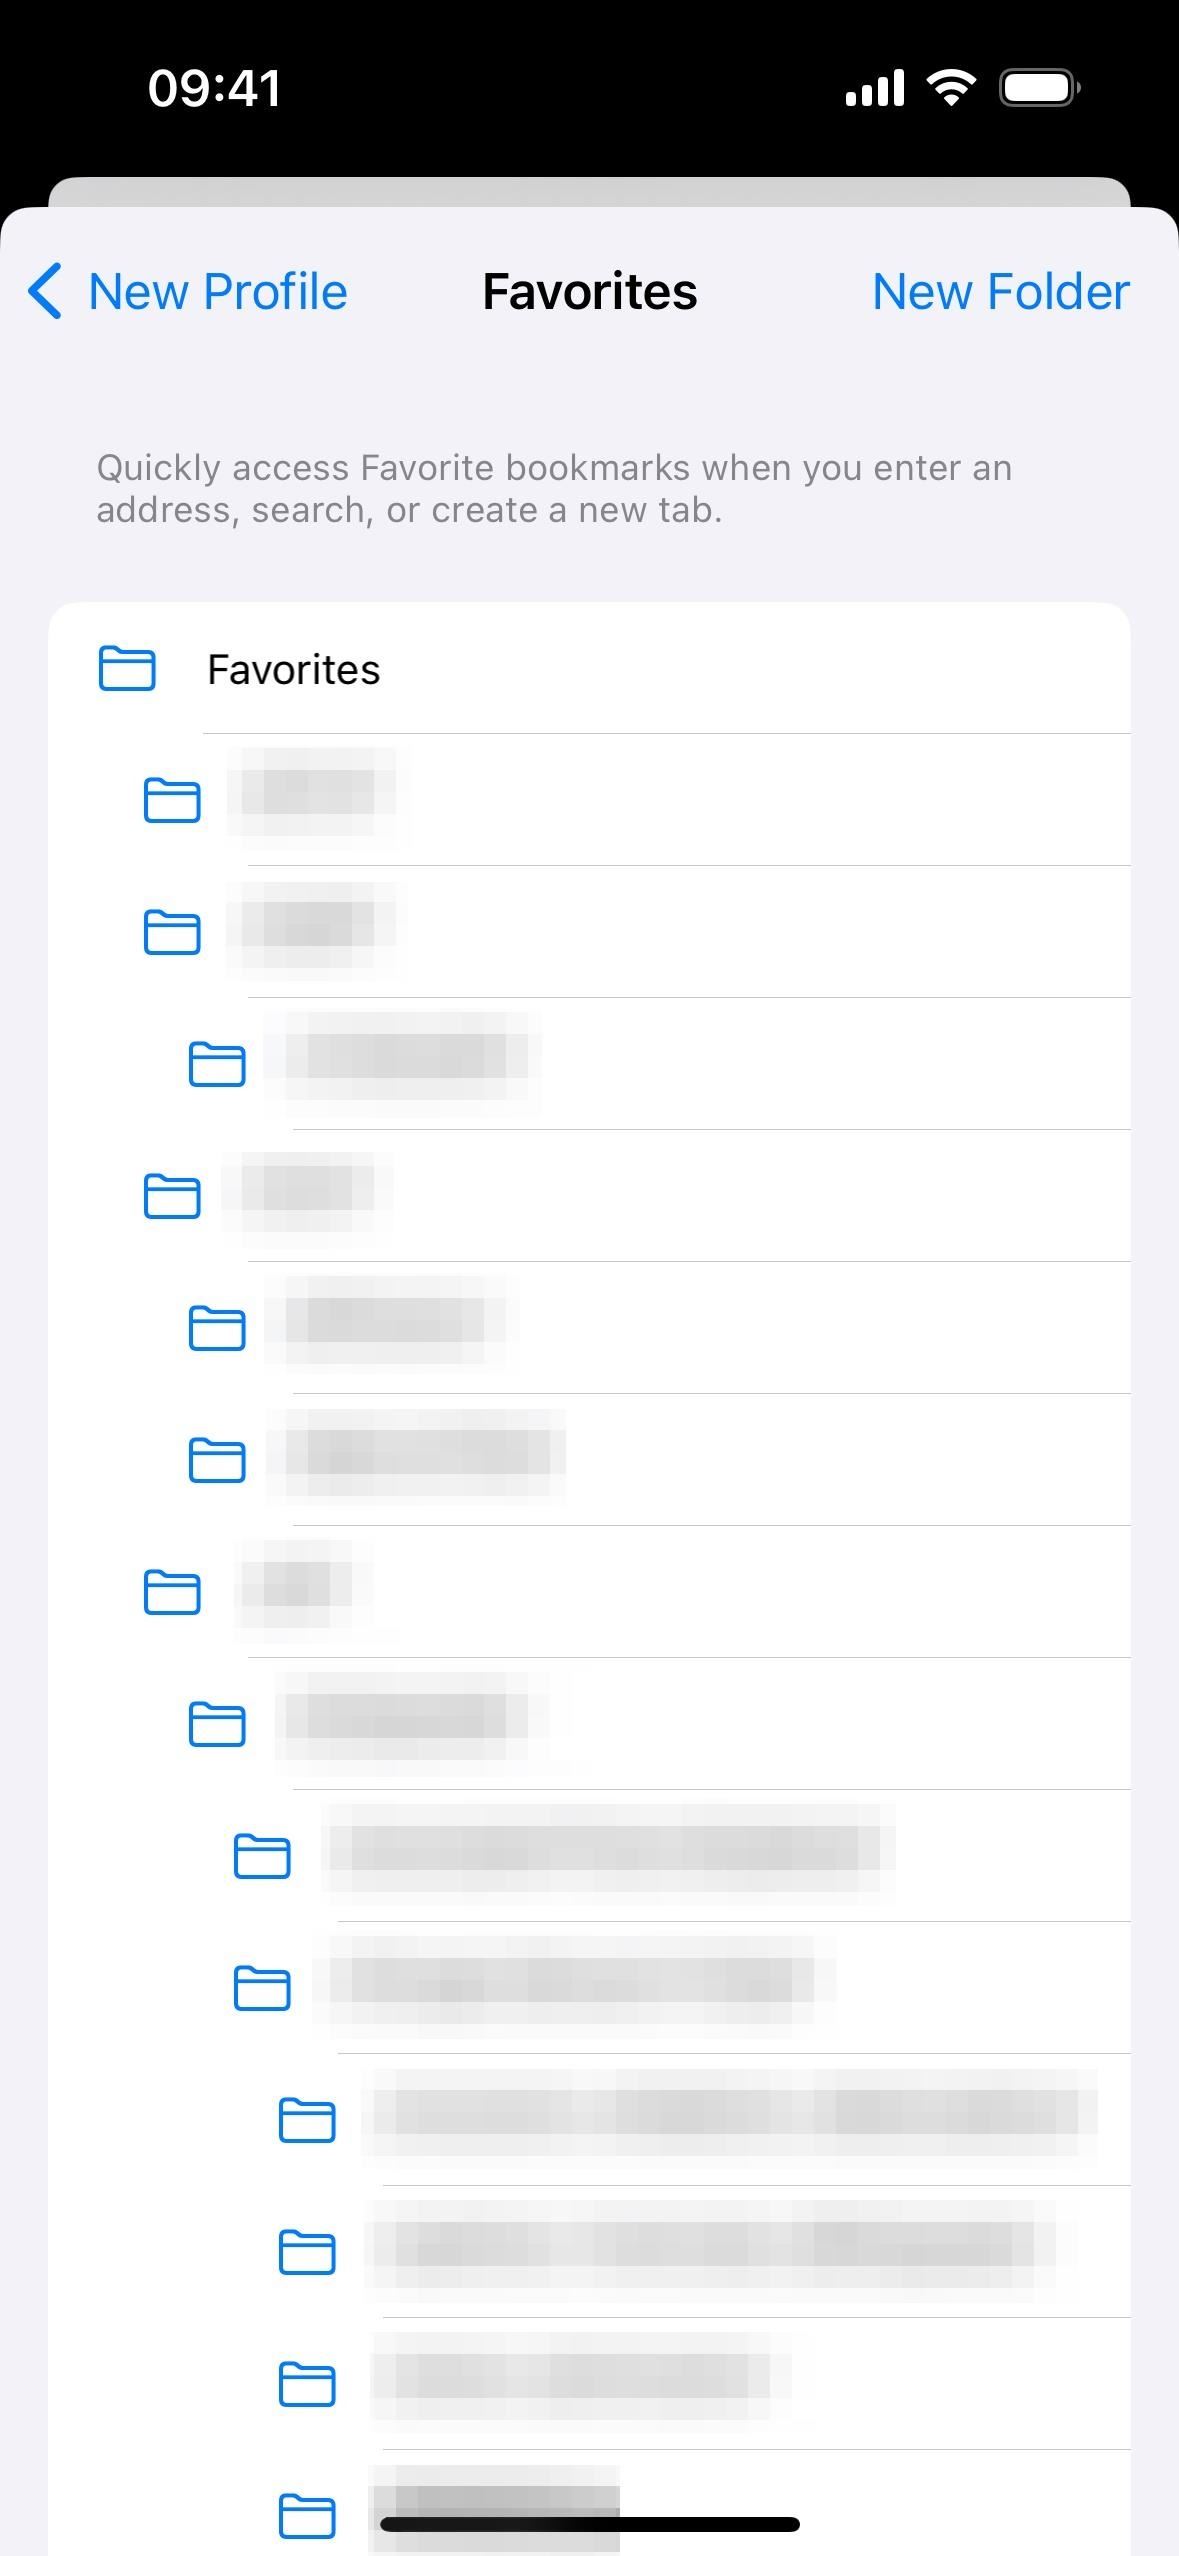
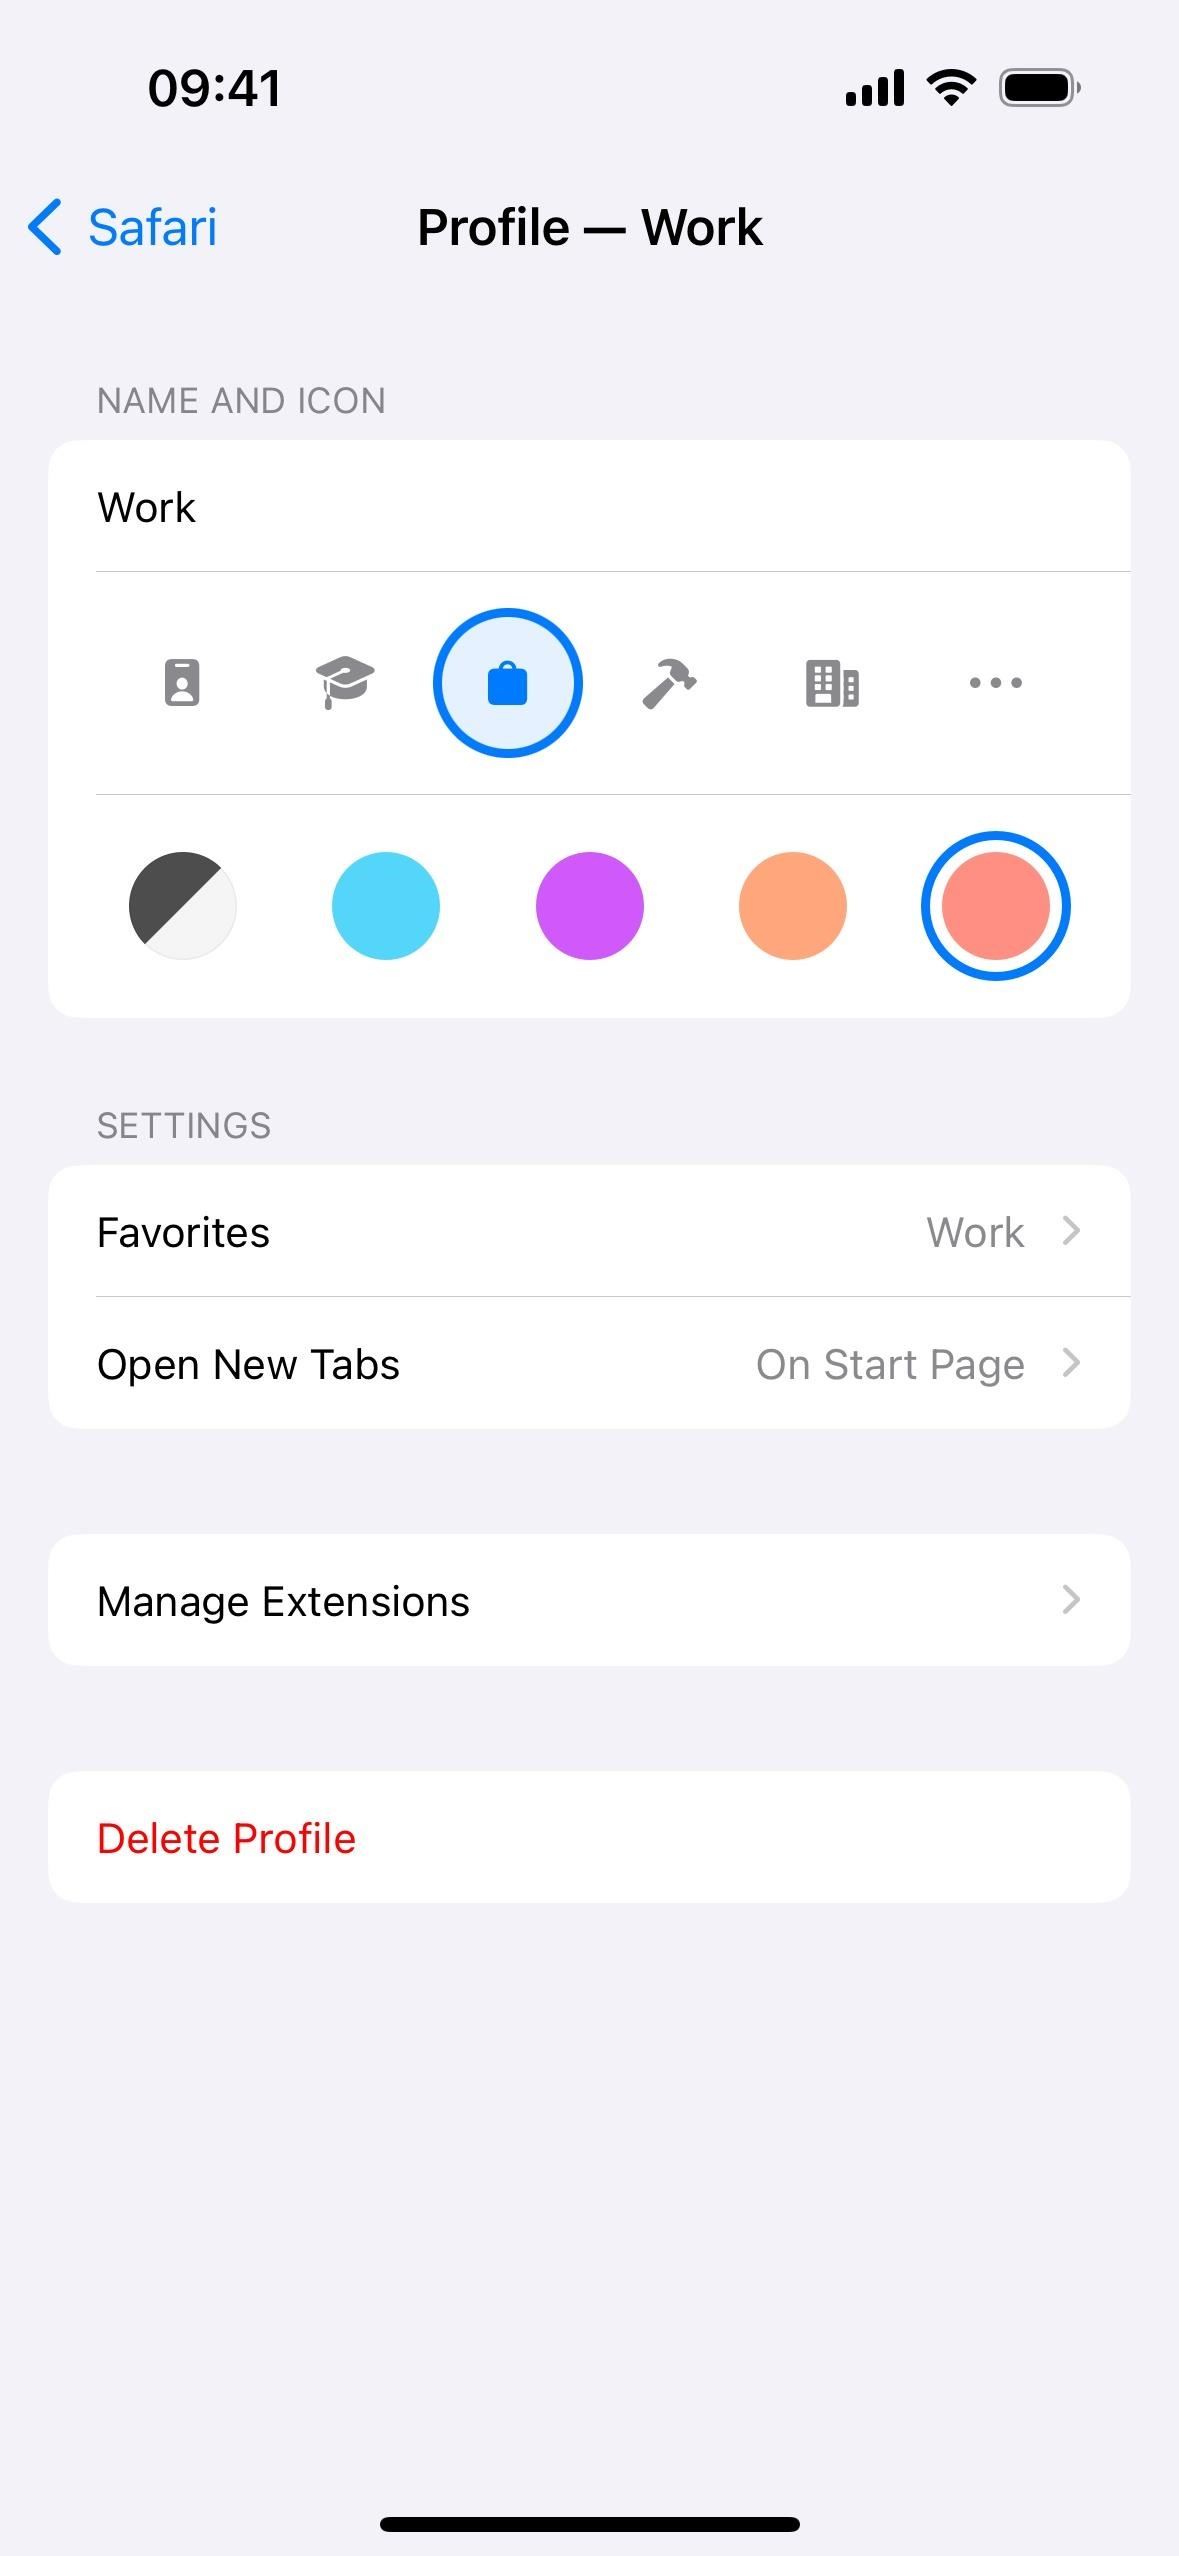
Next, you can customize where all your bookmarks are saved for the profile. When you name the profile, it will automatically create a new bookmarks folder with that name, but you can select a different folder or create a custom one.
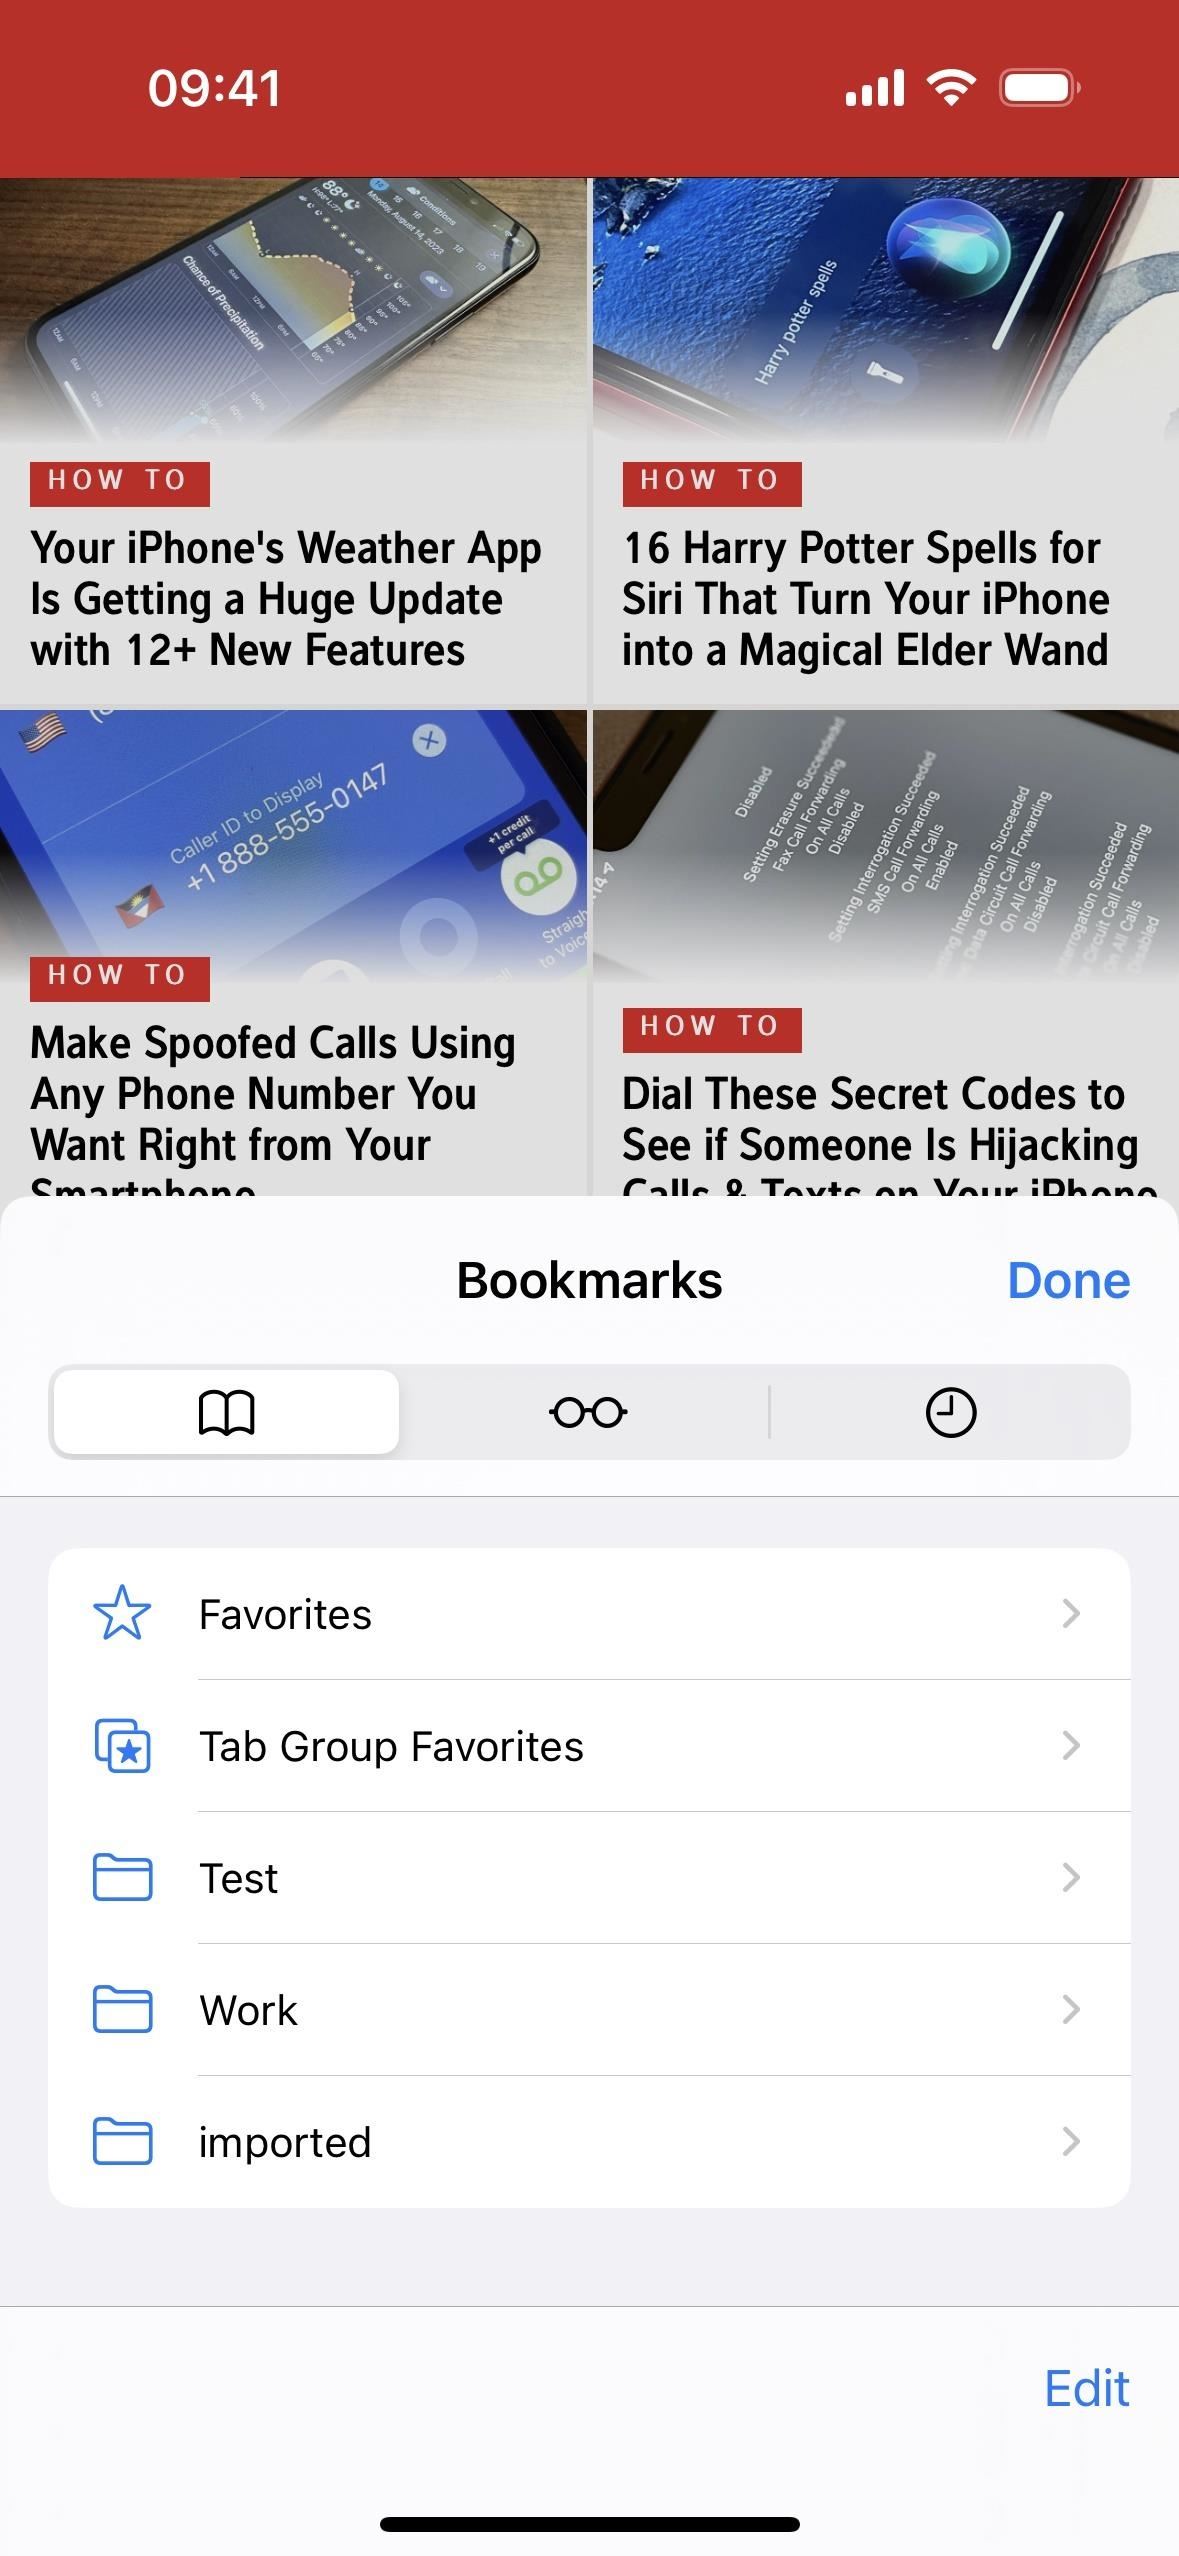
Whatever you choose will be your “favorites” on the profile’s start page. If you go with the auto-created one, it will act as a main directory, and you can find it manually via the “Show Bookmarks” button. If you choose a custom folder, it will be in whatever directory that custom folder is in, whether the root directory or any subdirectory, such as Favorites.
There’s also an option to choose what appears when you “Open New Tabs,” but the only option available is “On Start Page.” However, that may change since the menu item hints at the possibility.
2. Switch Between Your Safari Profiles
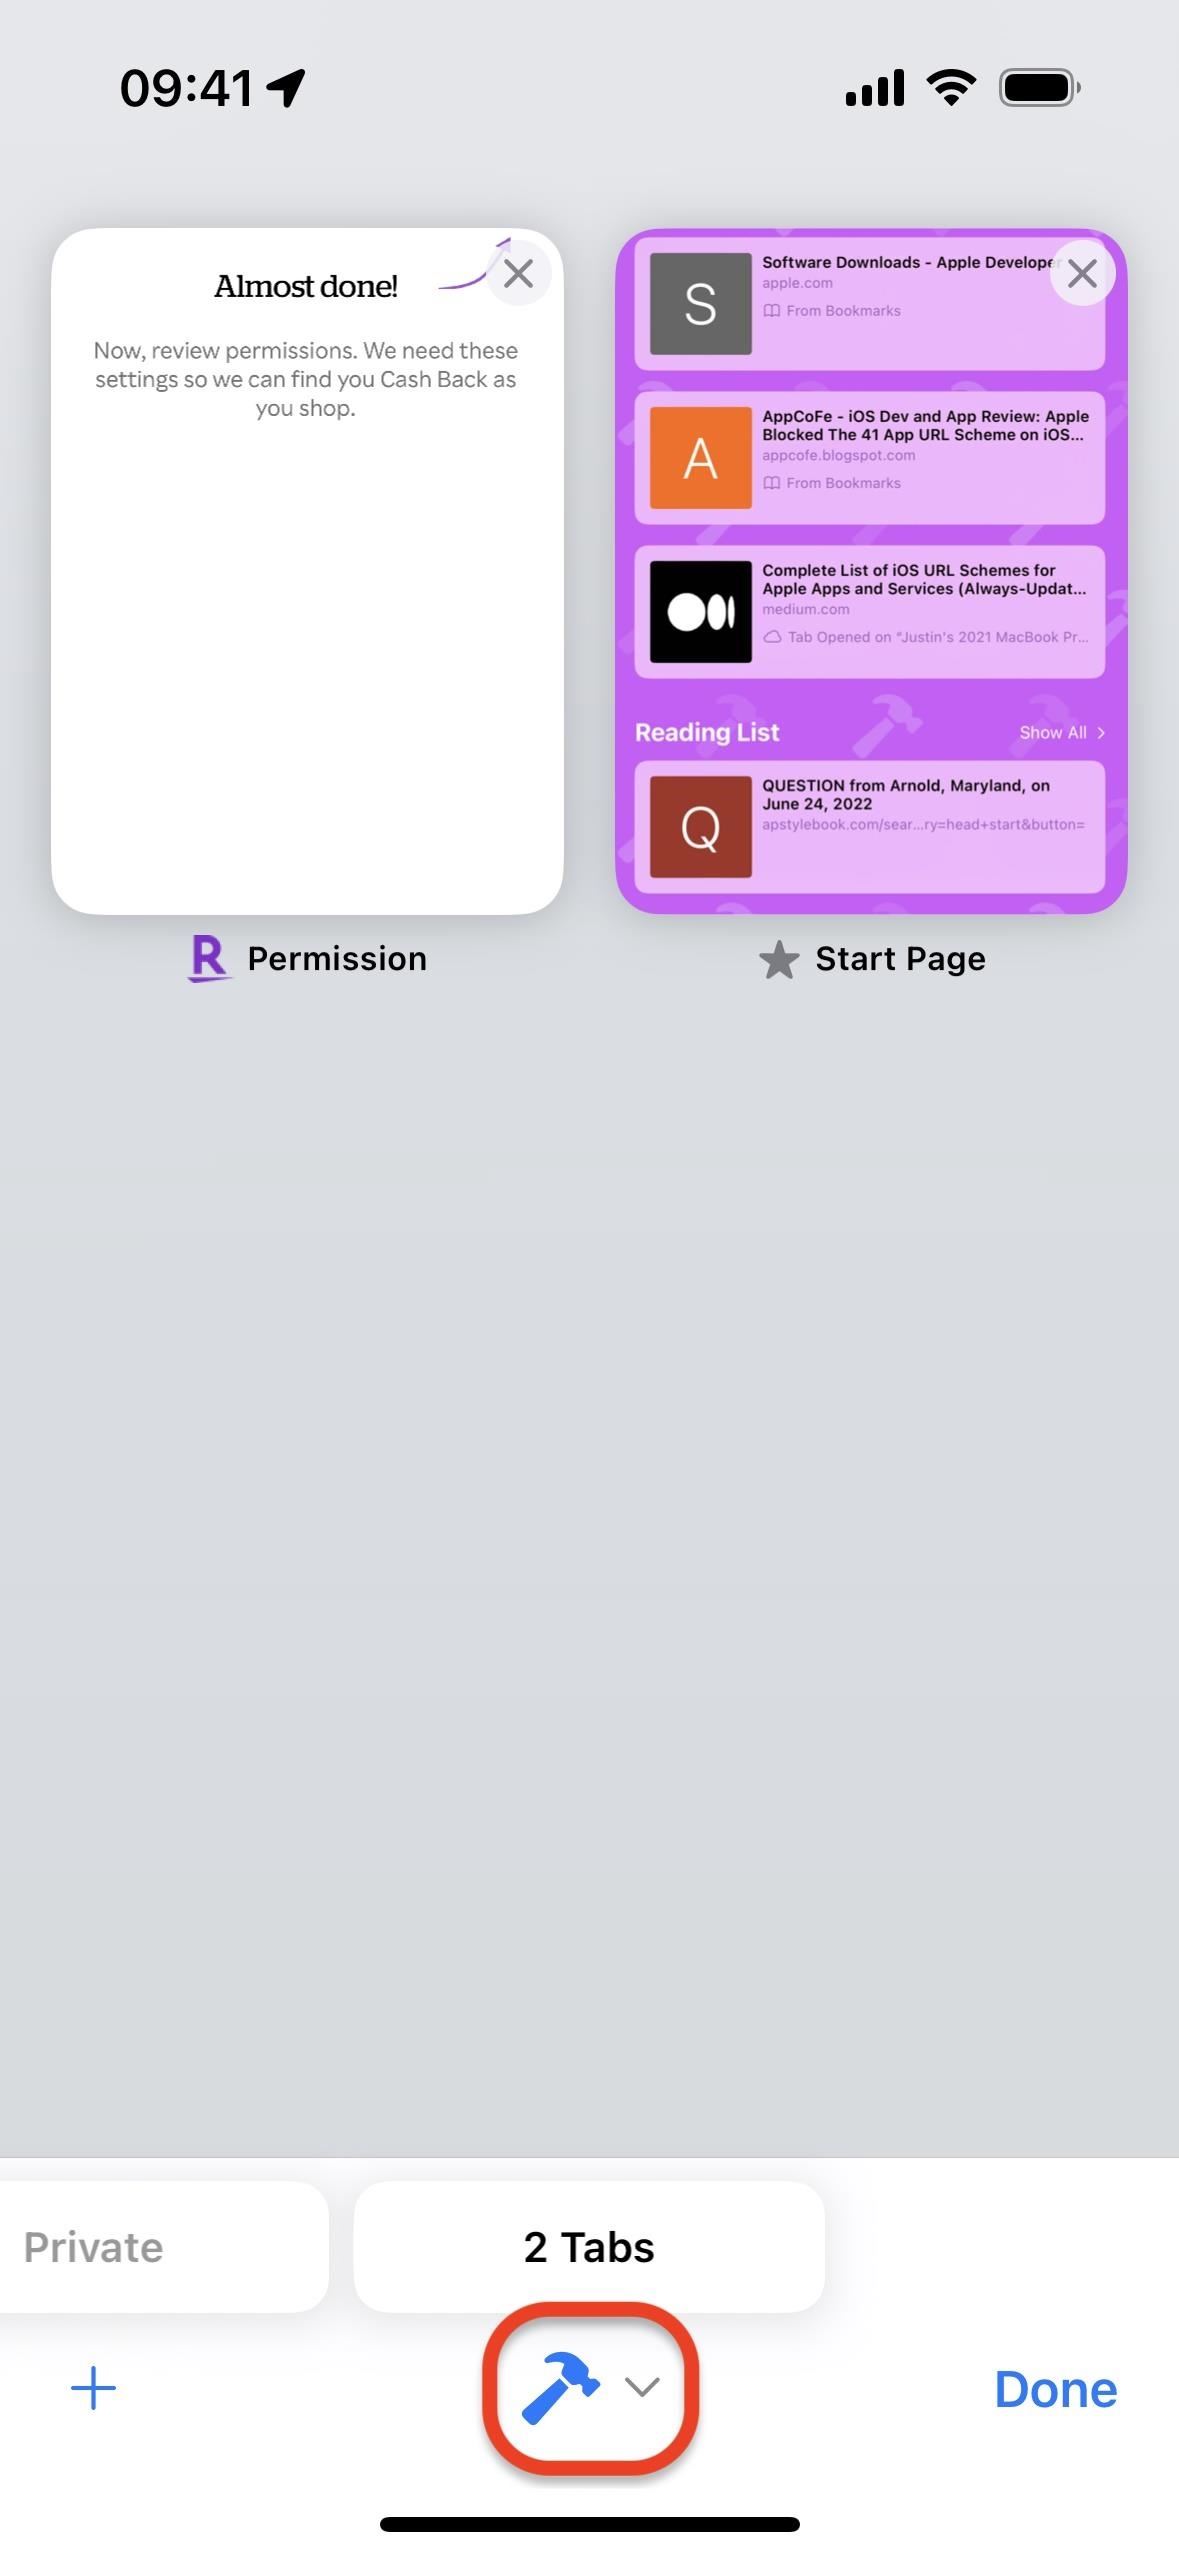
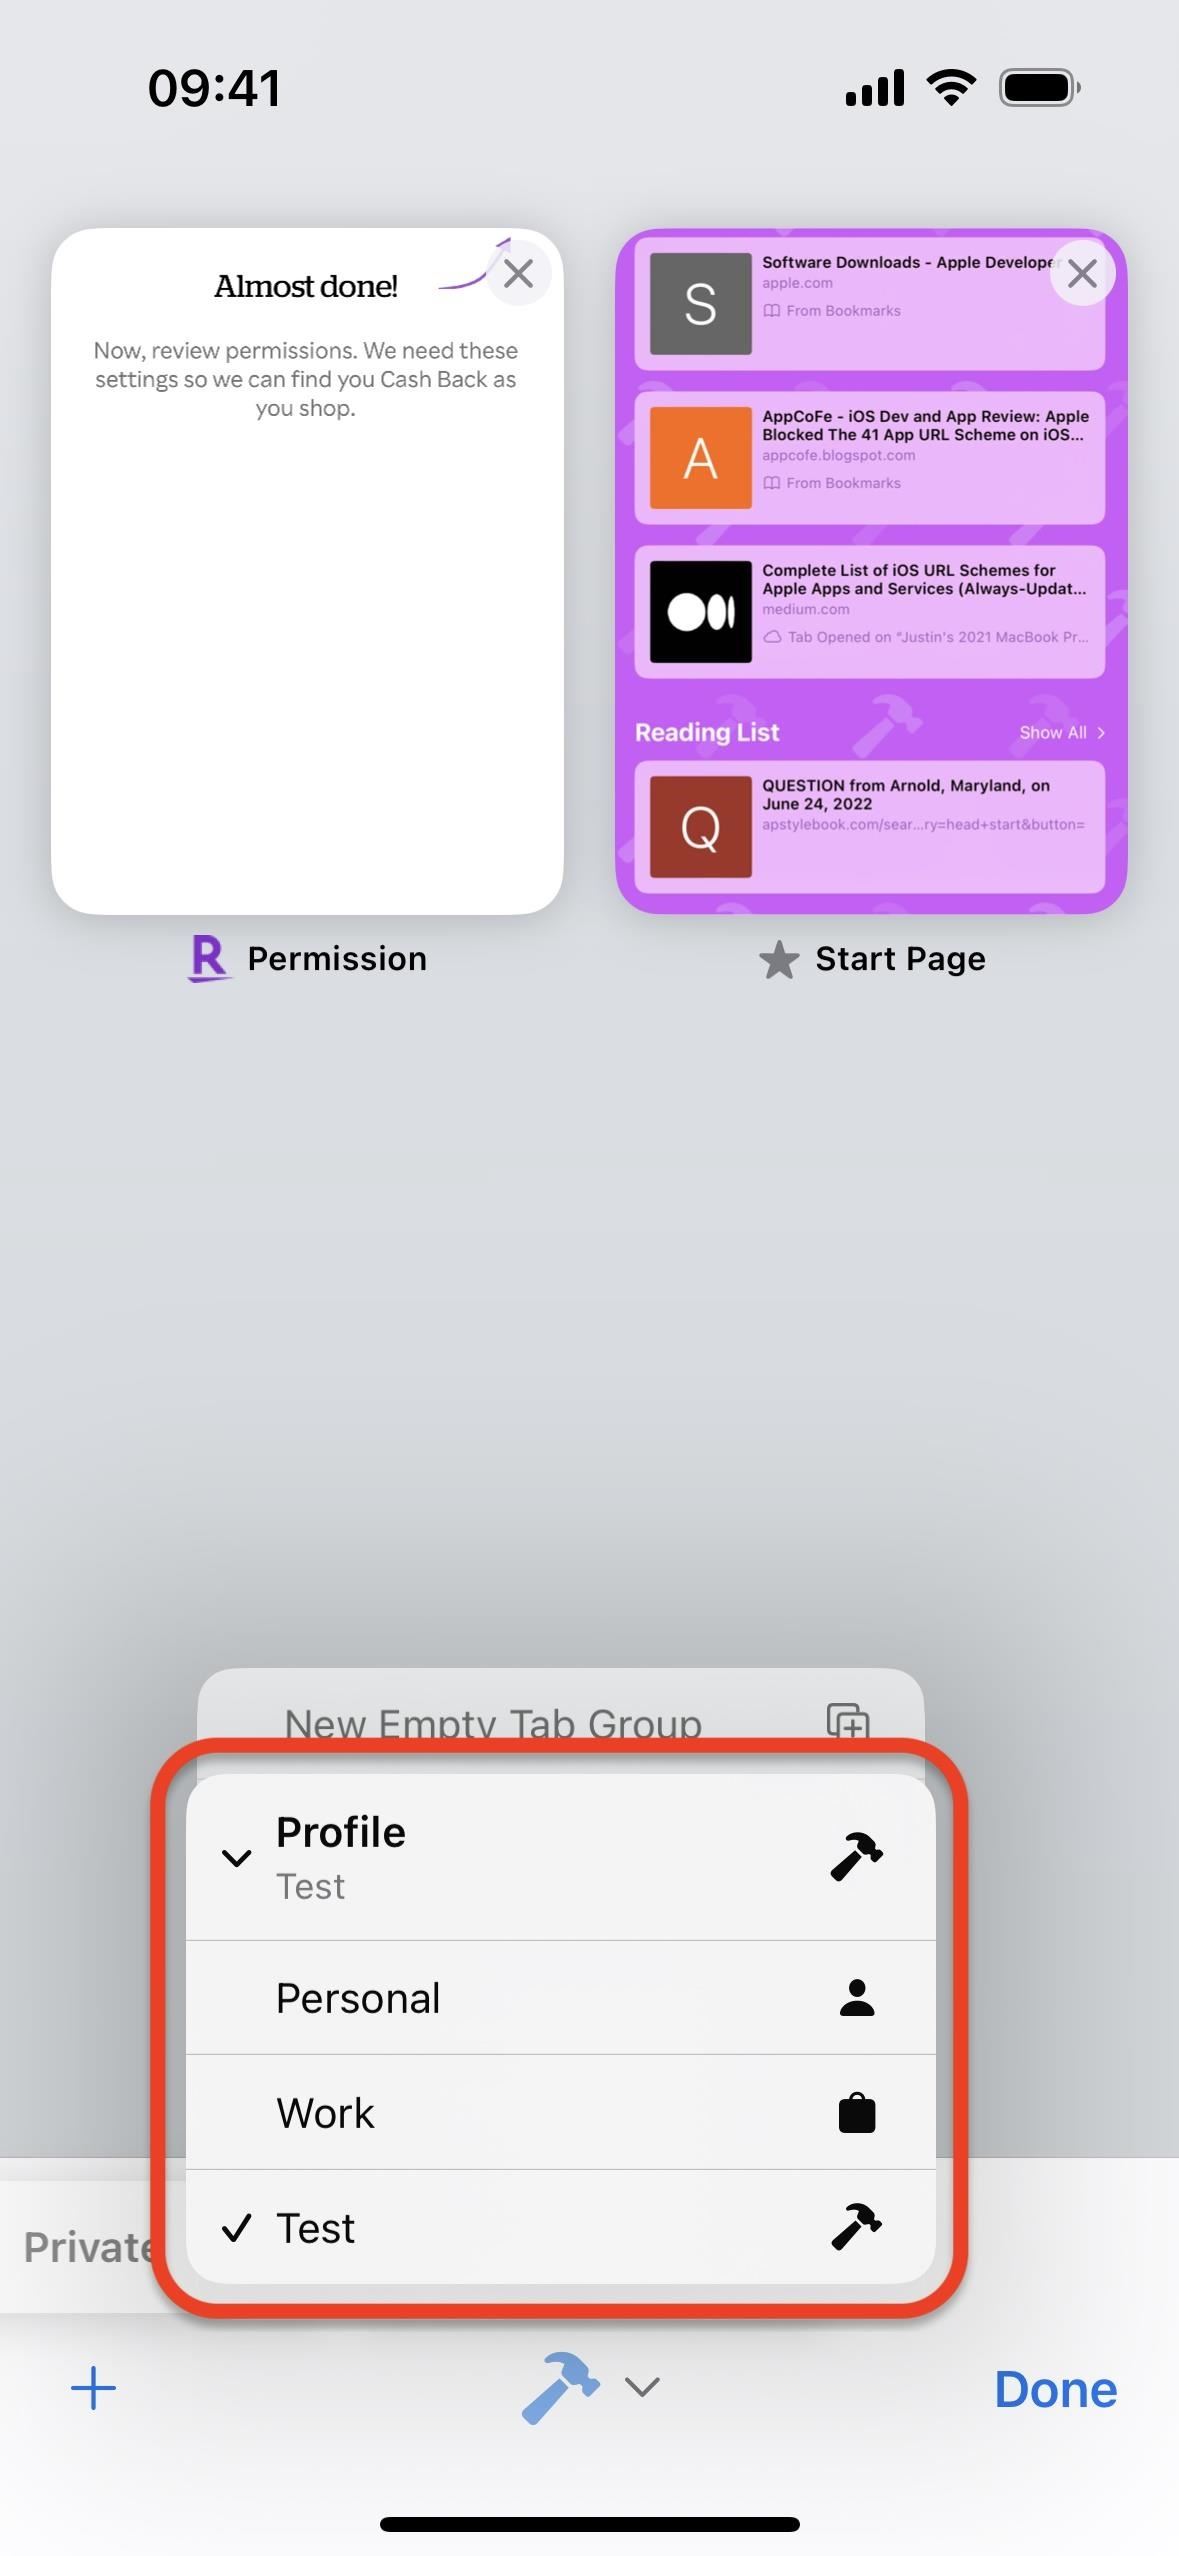
To switch between your profiles, open Safari, tap the “Tabs” button in the toolbar, and hit the icon at the bottom for the current profile.

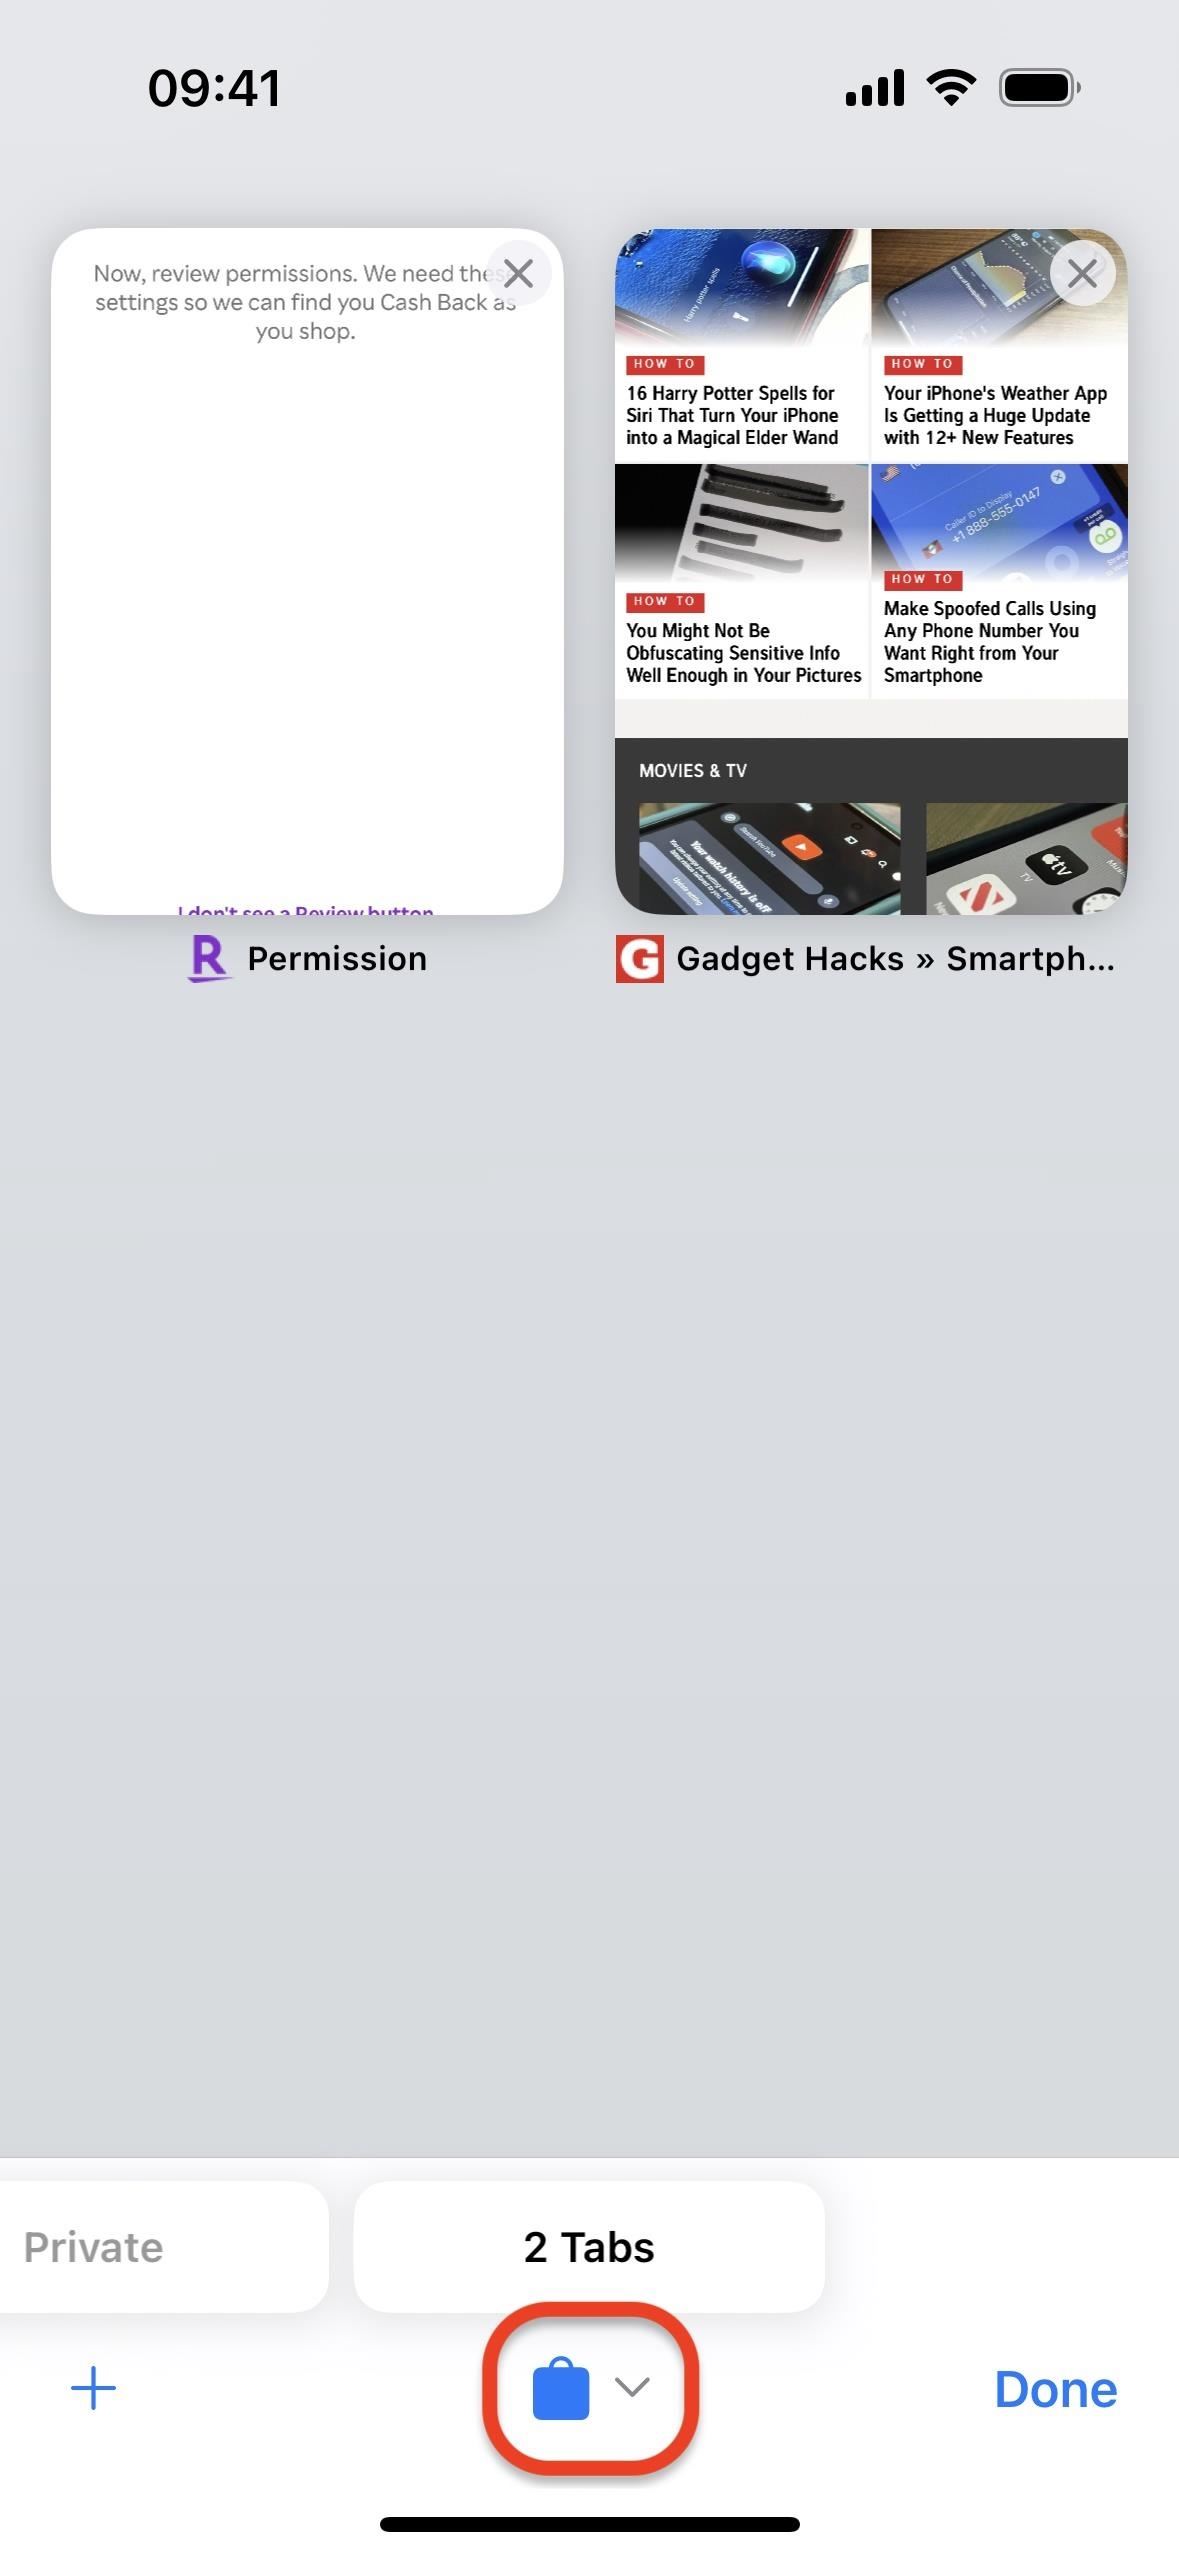
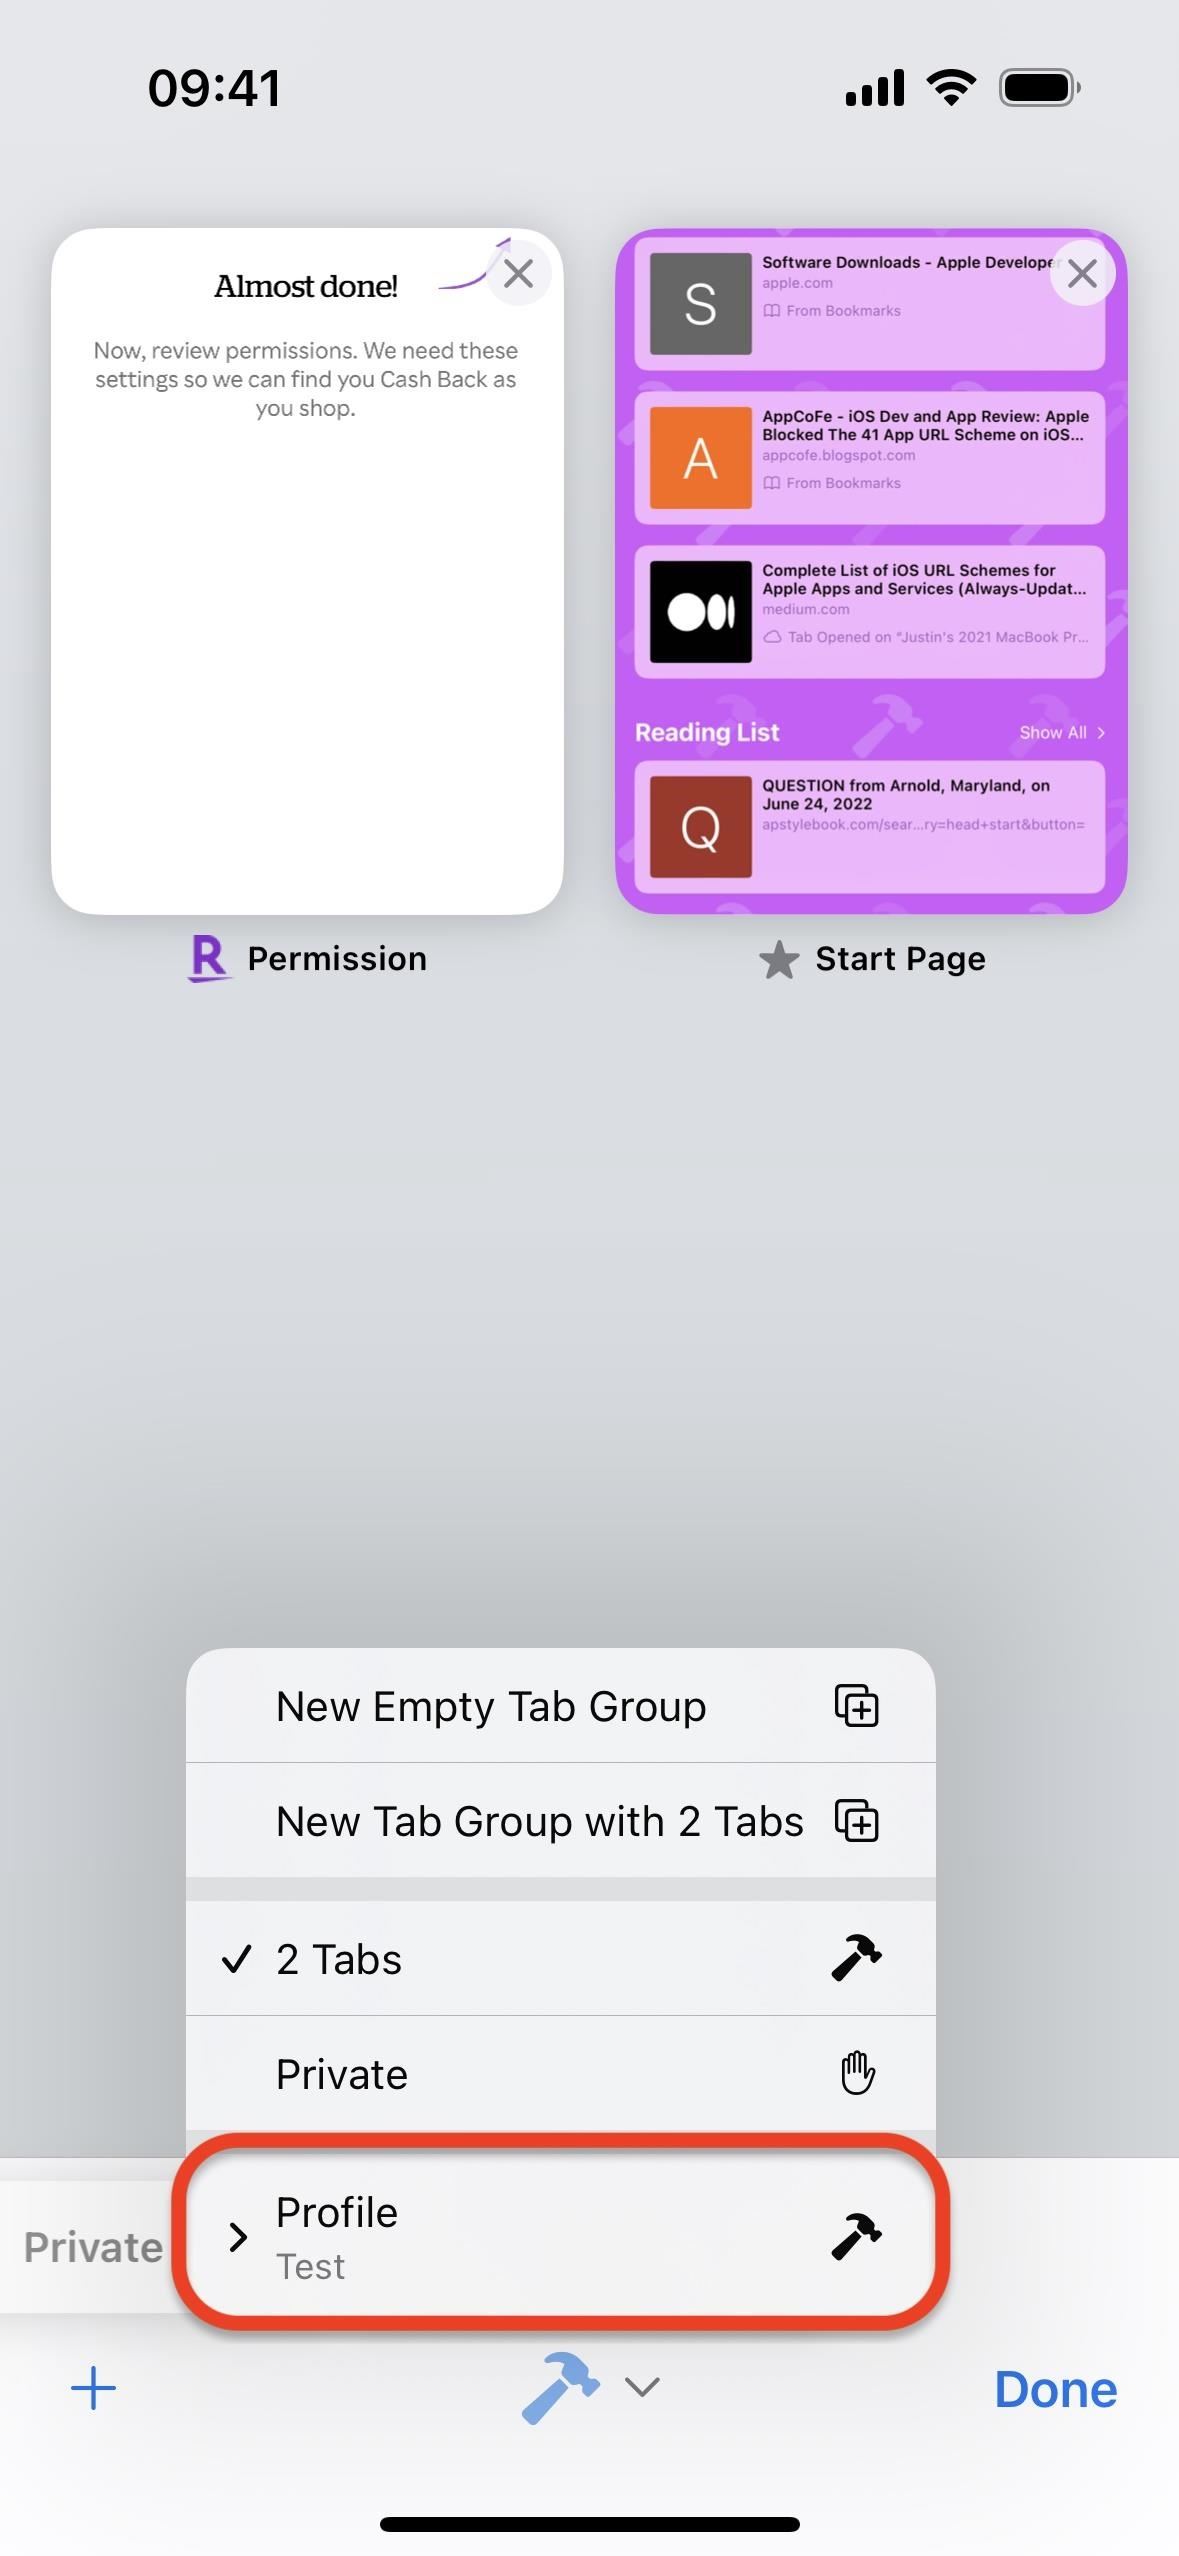
Next, select “Profile,” then choose the profile you want to switch to. It’s that easy.
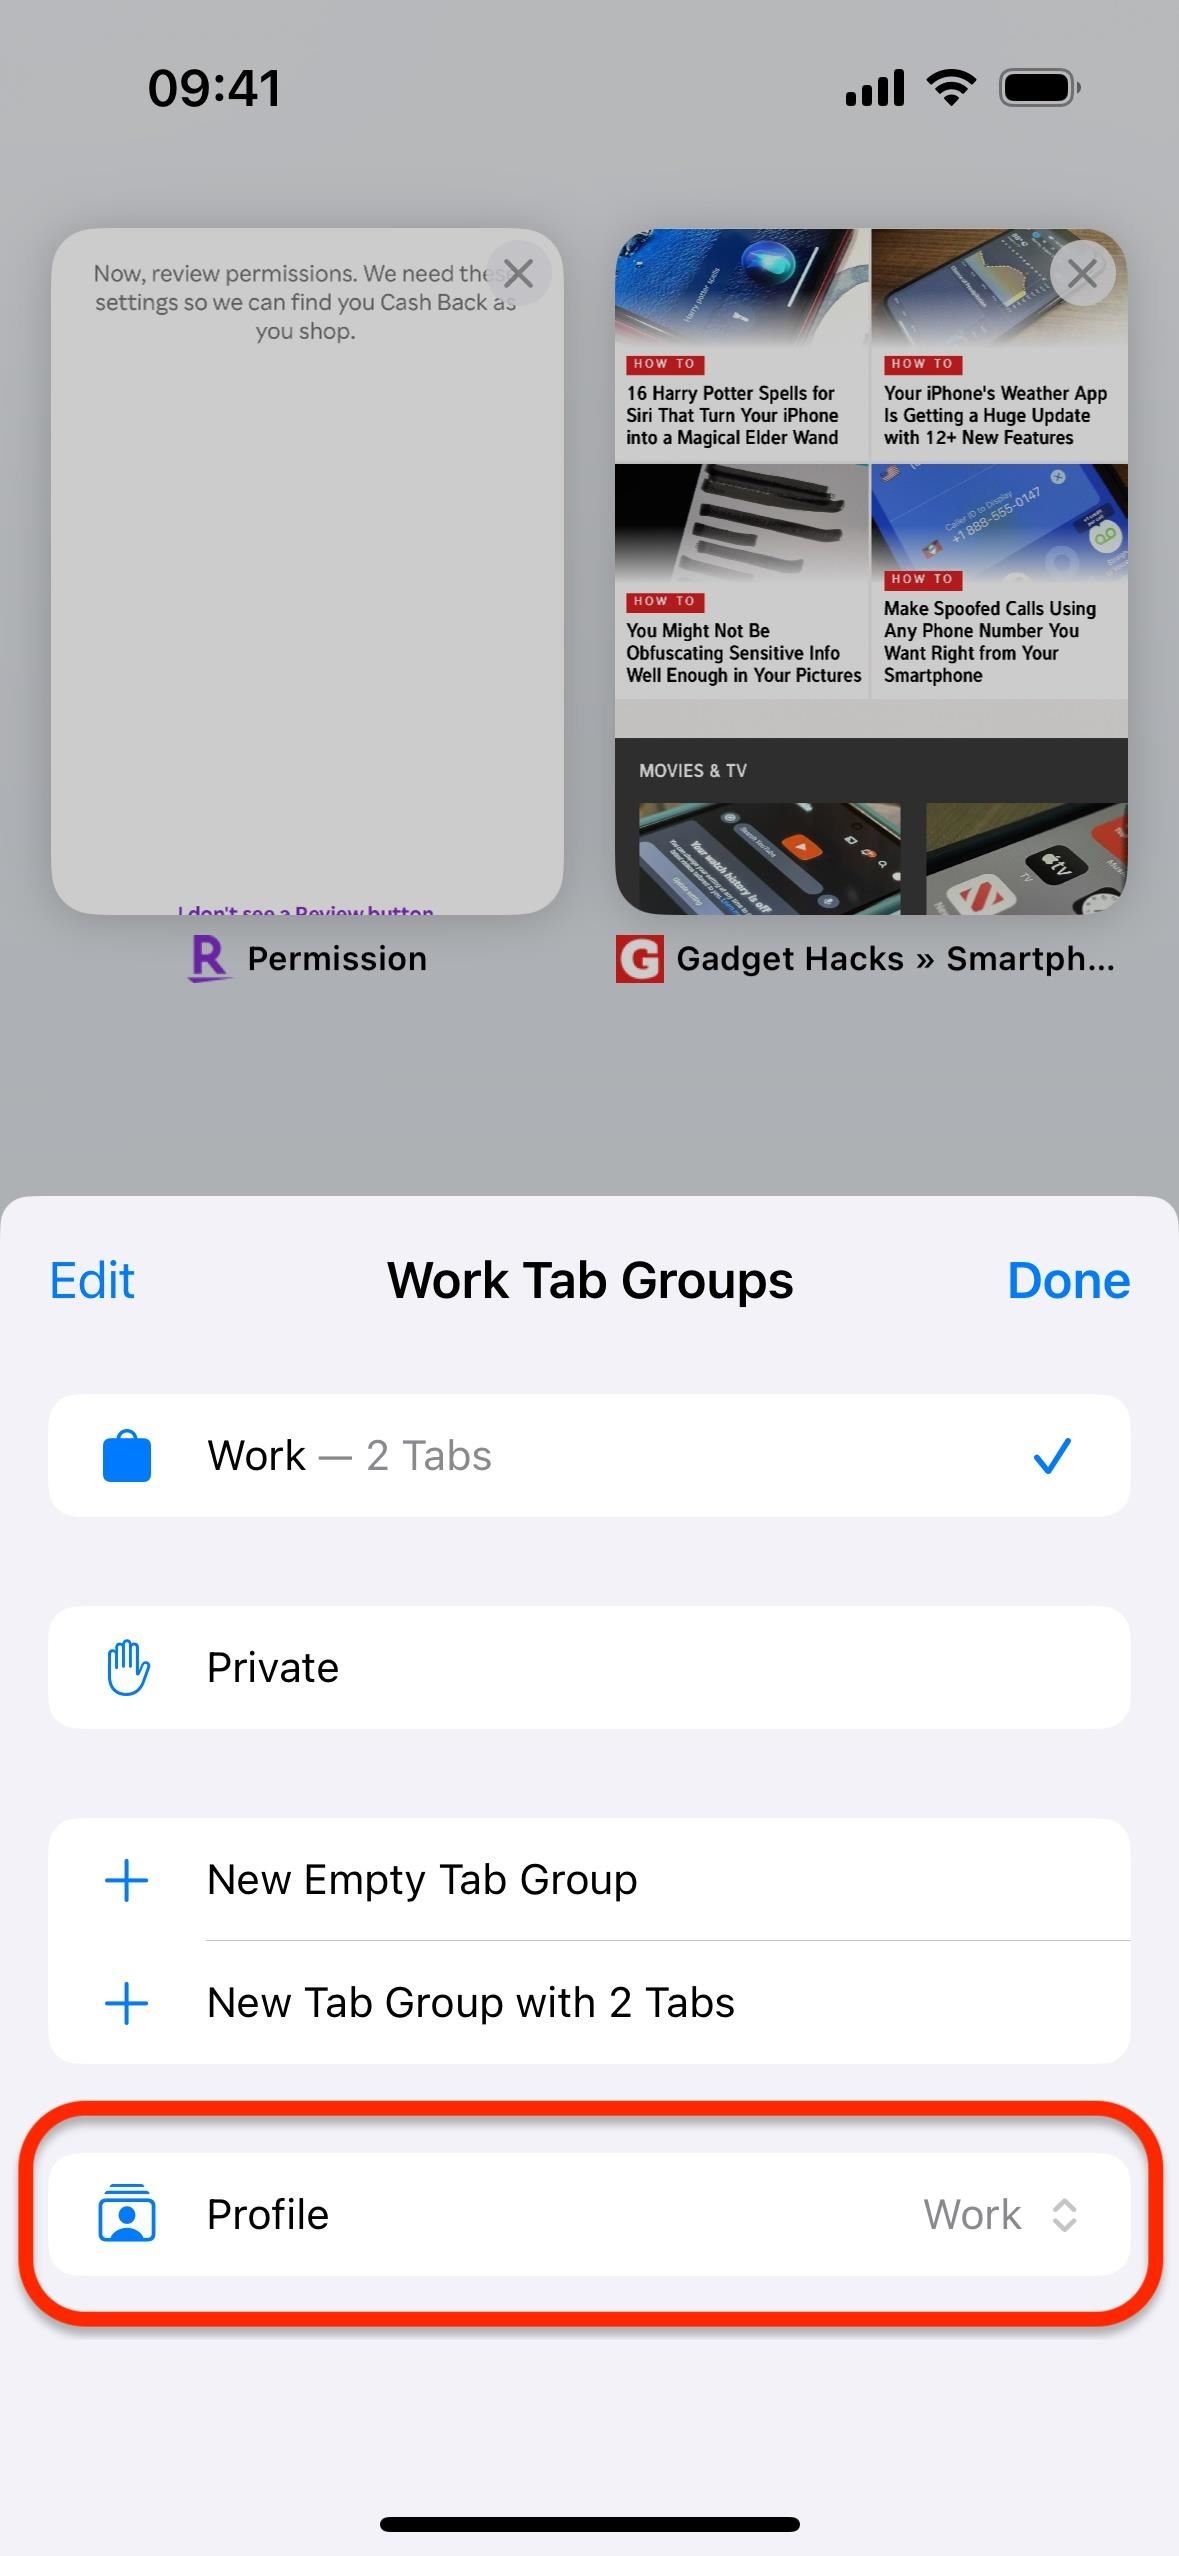
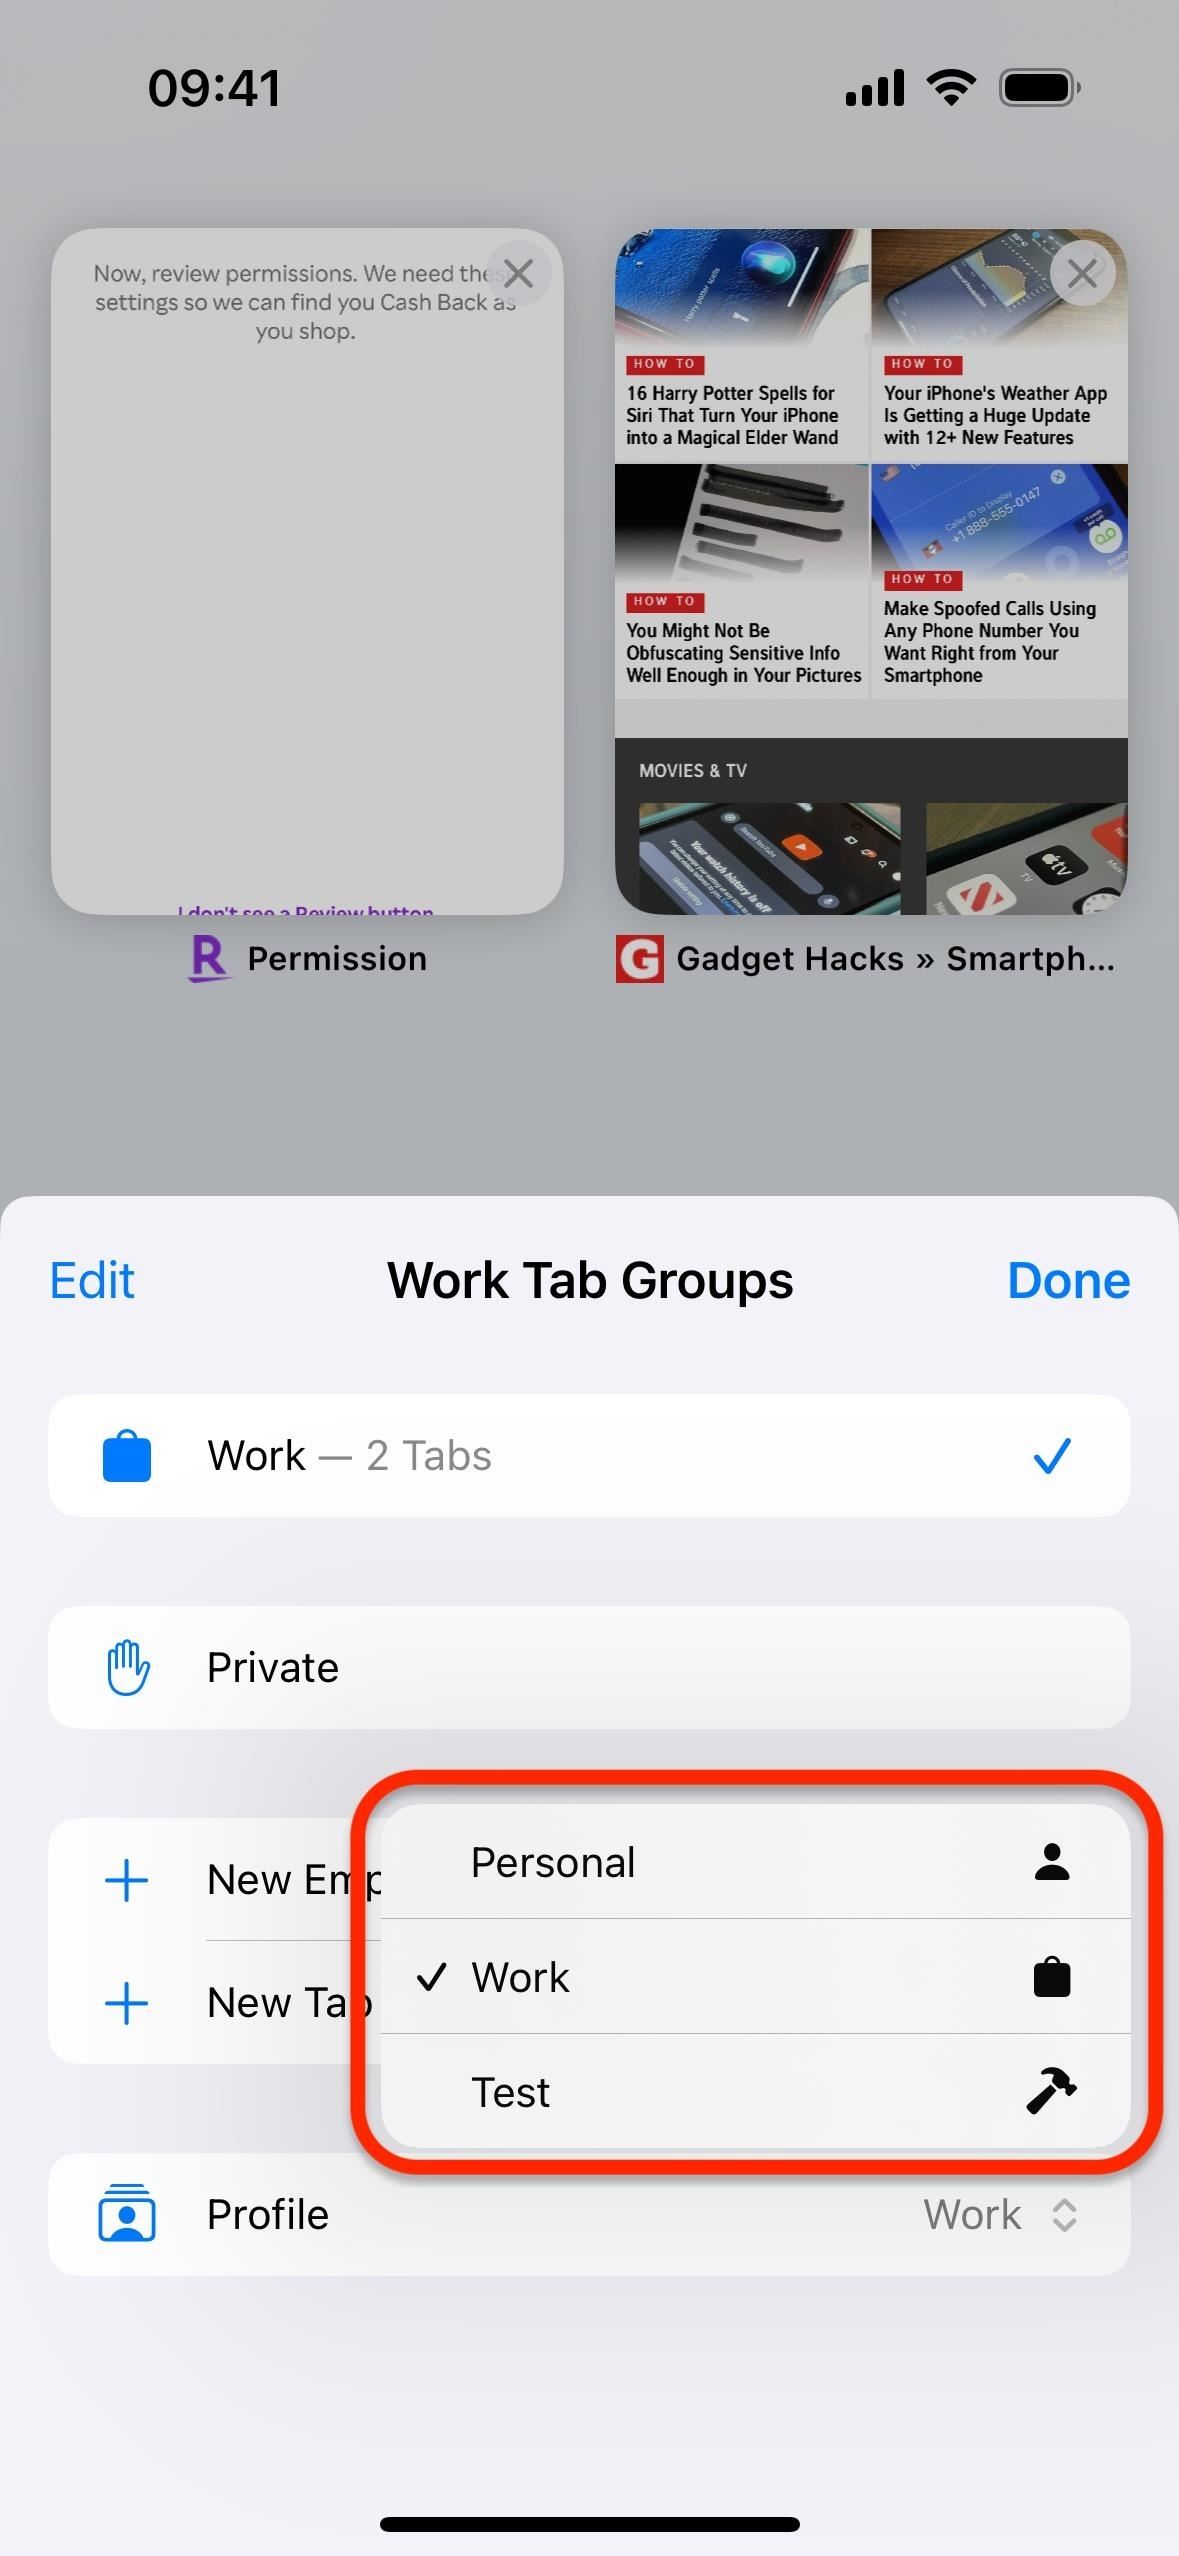
Alternatively, you can open your tabs, then tap and hold the icon at the bottom for the current profile instead of simply tapping it. Then, select “Profile” and choose the profile you want to switch to.
3. Edit or Delete Your Safari Profiles
You can go back to Safari’s settings to create more profiles or make changes to existing ones. For the default “Personal” profile, you can only update the name, icon, and color; it can’t be deleted.
There are more options for other profiles. Select one, and you can change the location of the bookmarks folder assigned to your favorites on new tabs. And you can choose which installed extensions are enabled or disabled for the profile.
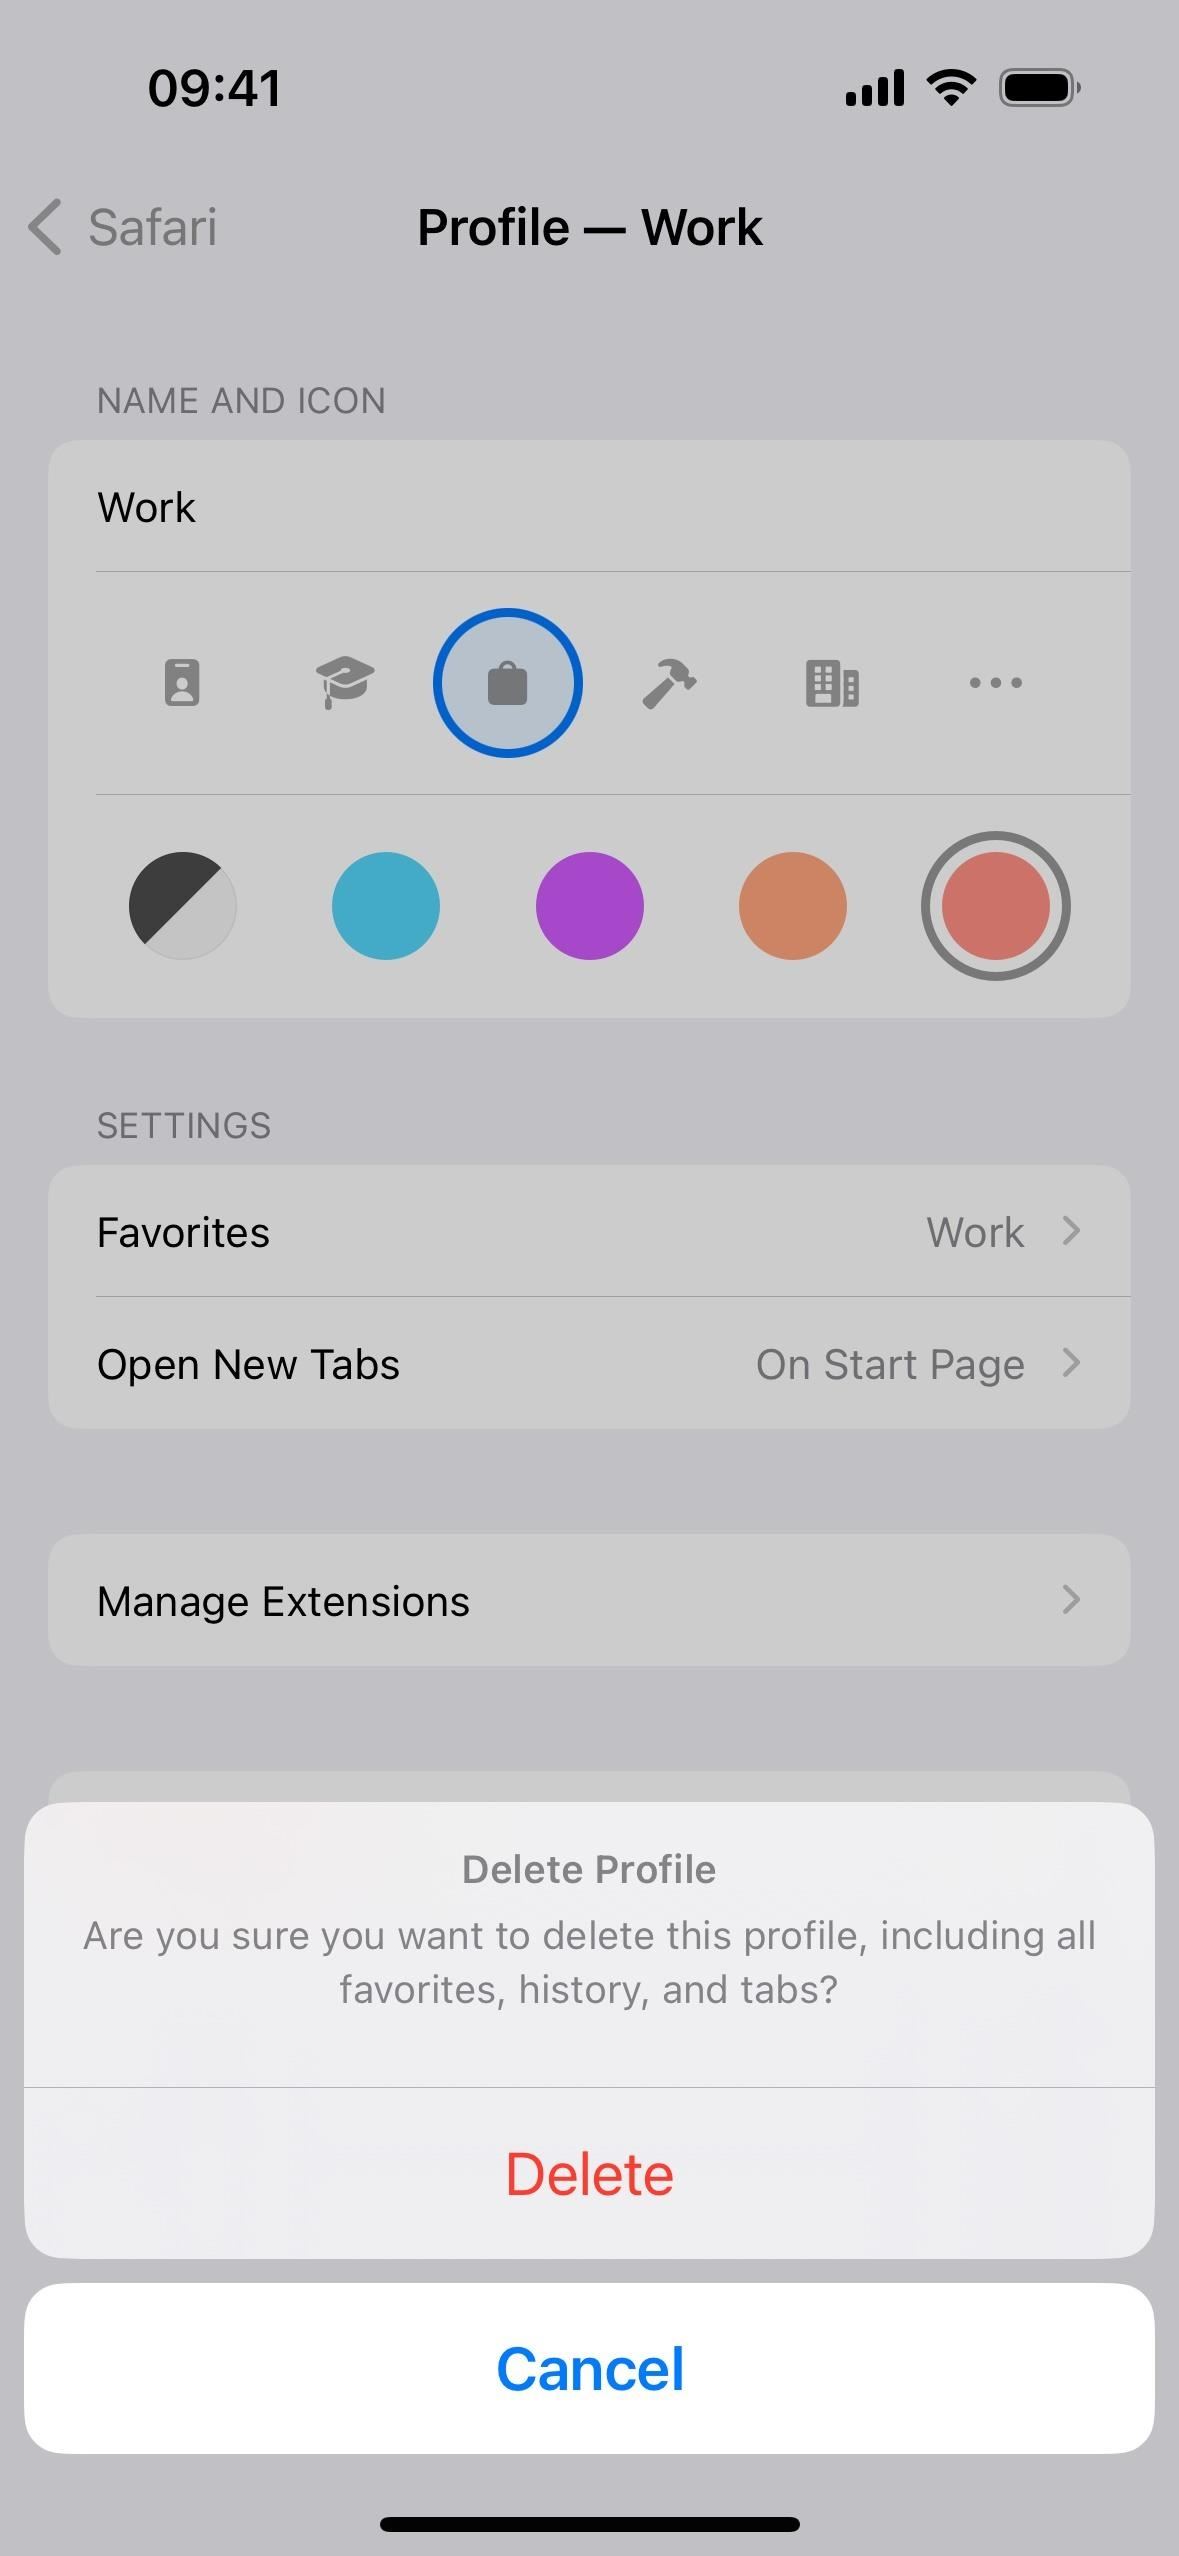
You can also tap “Delete Profile,” which will warn you that deleting the profile will not only delete the profile but also all its associated favorites, history, and tabs. So you may need to move things around beforehand if you want to save anything.
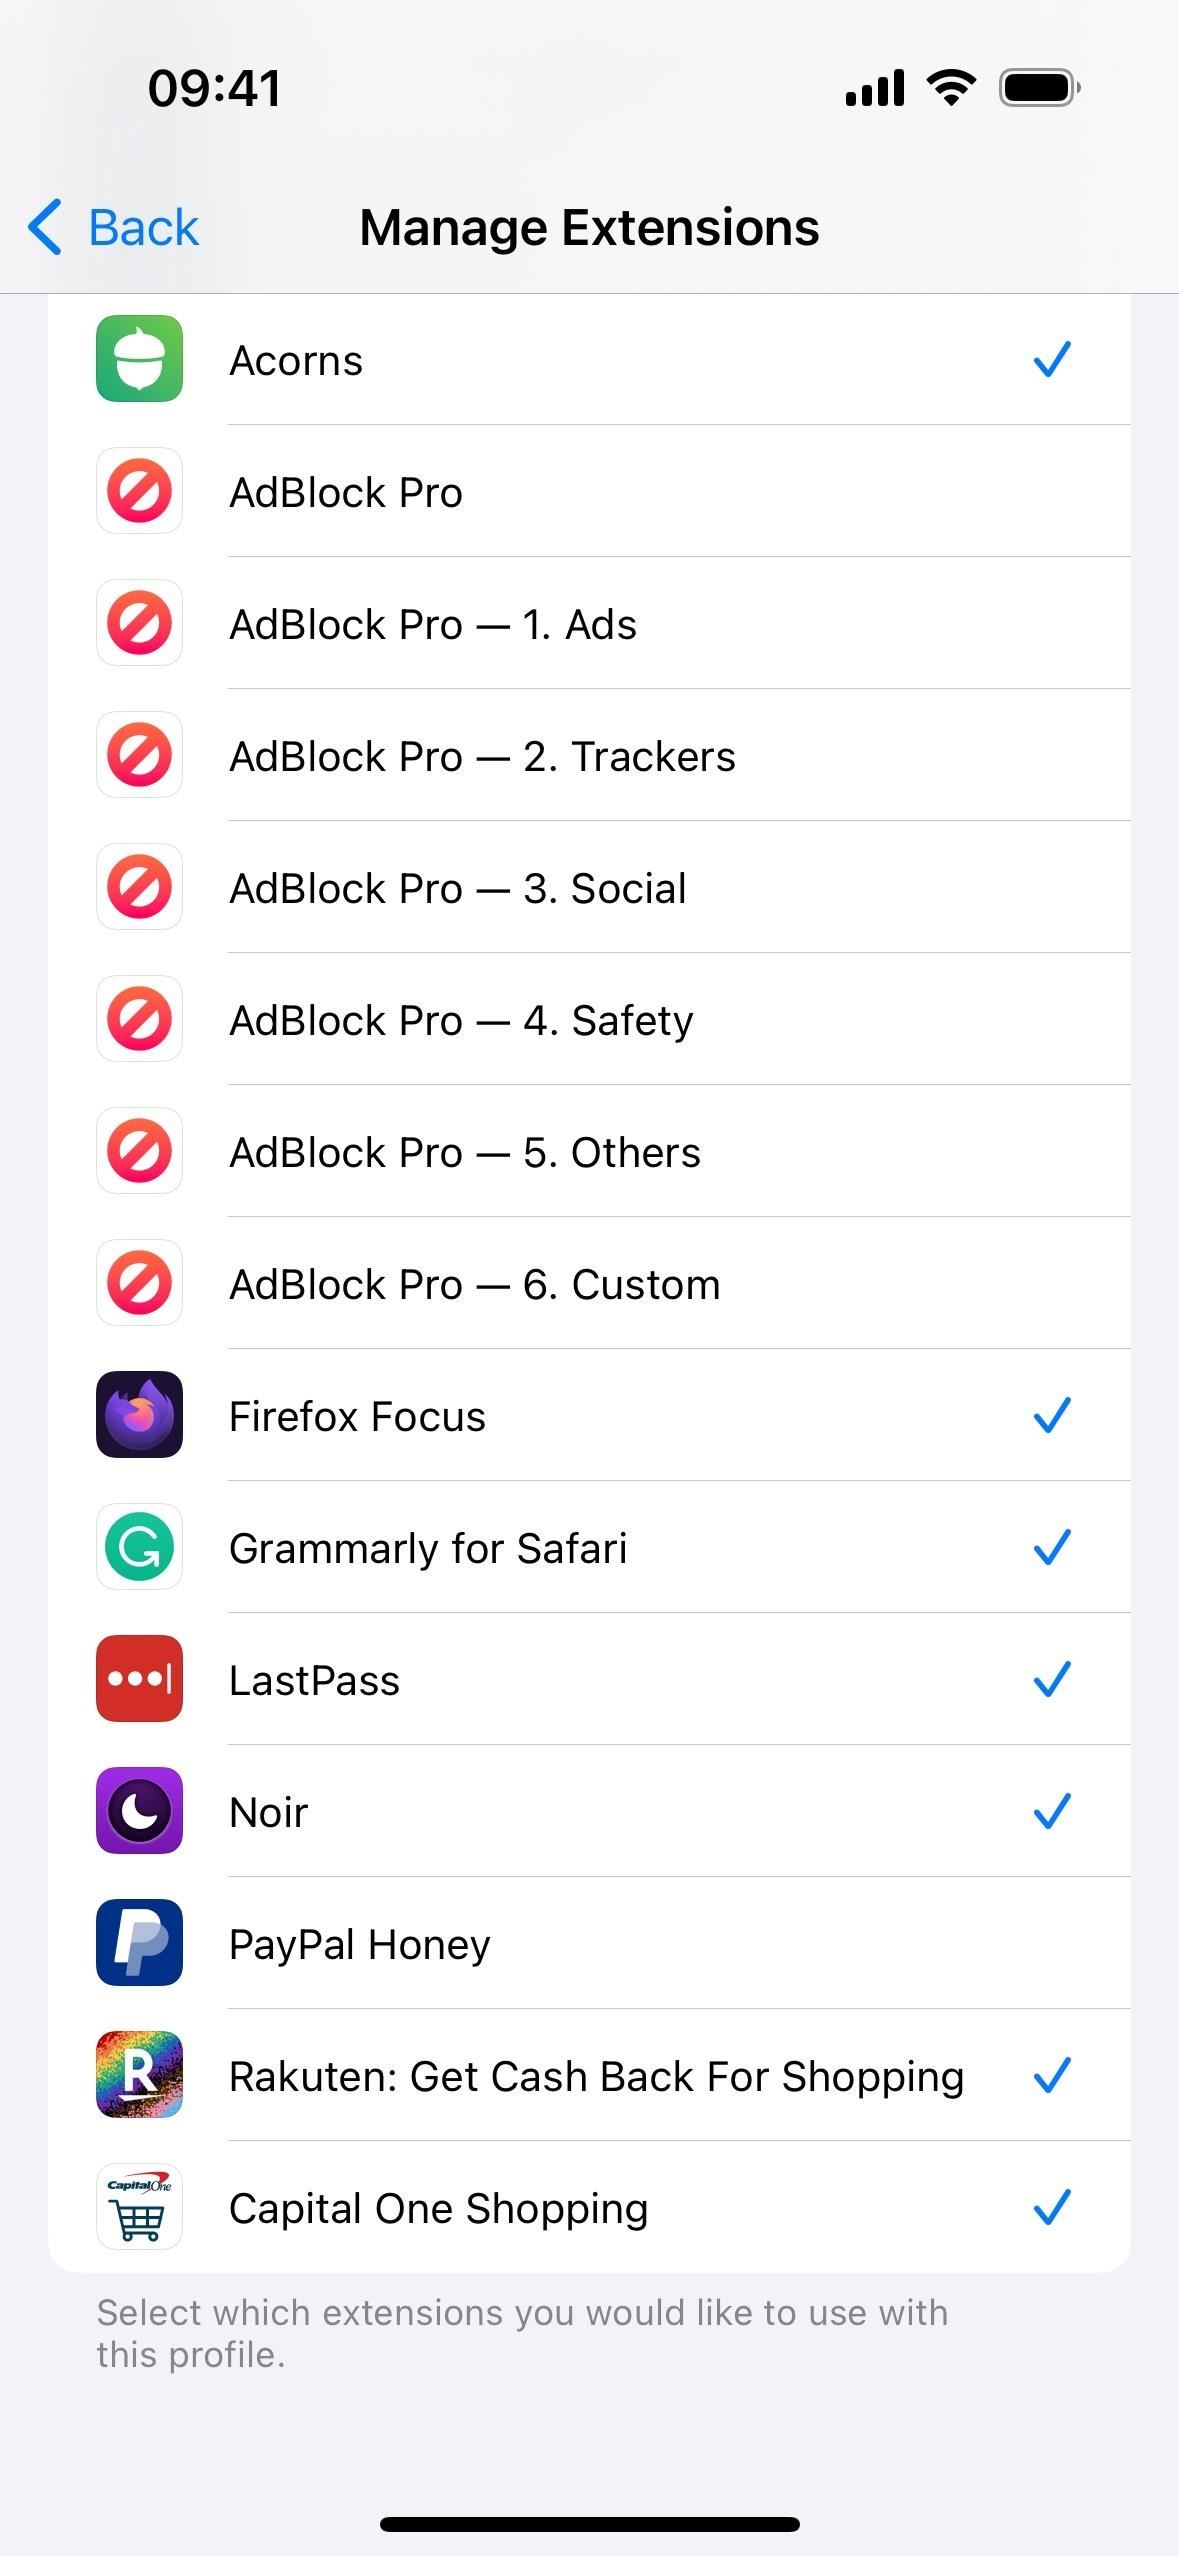
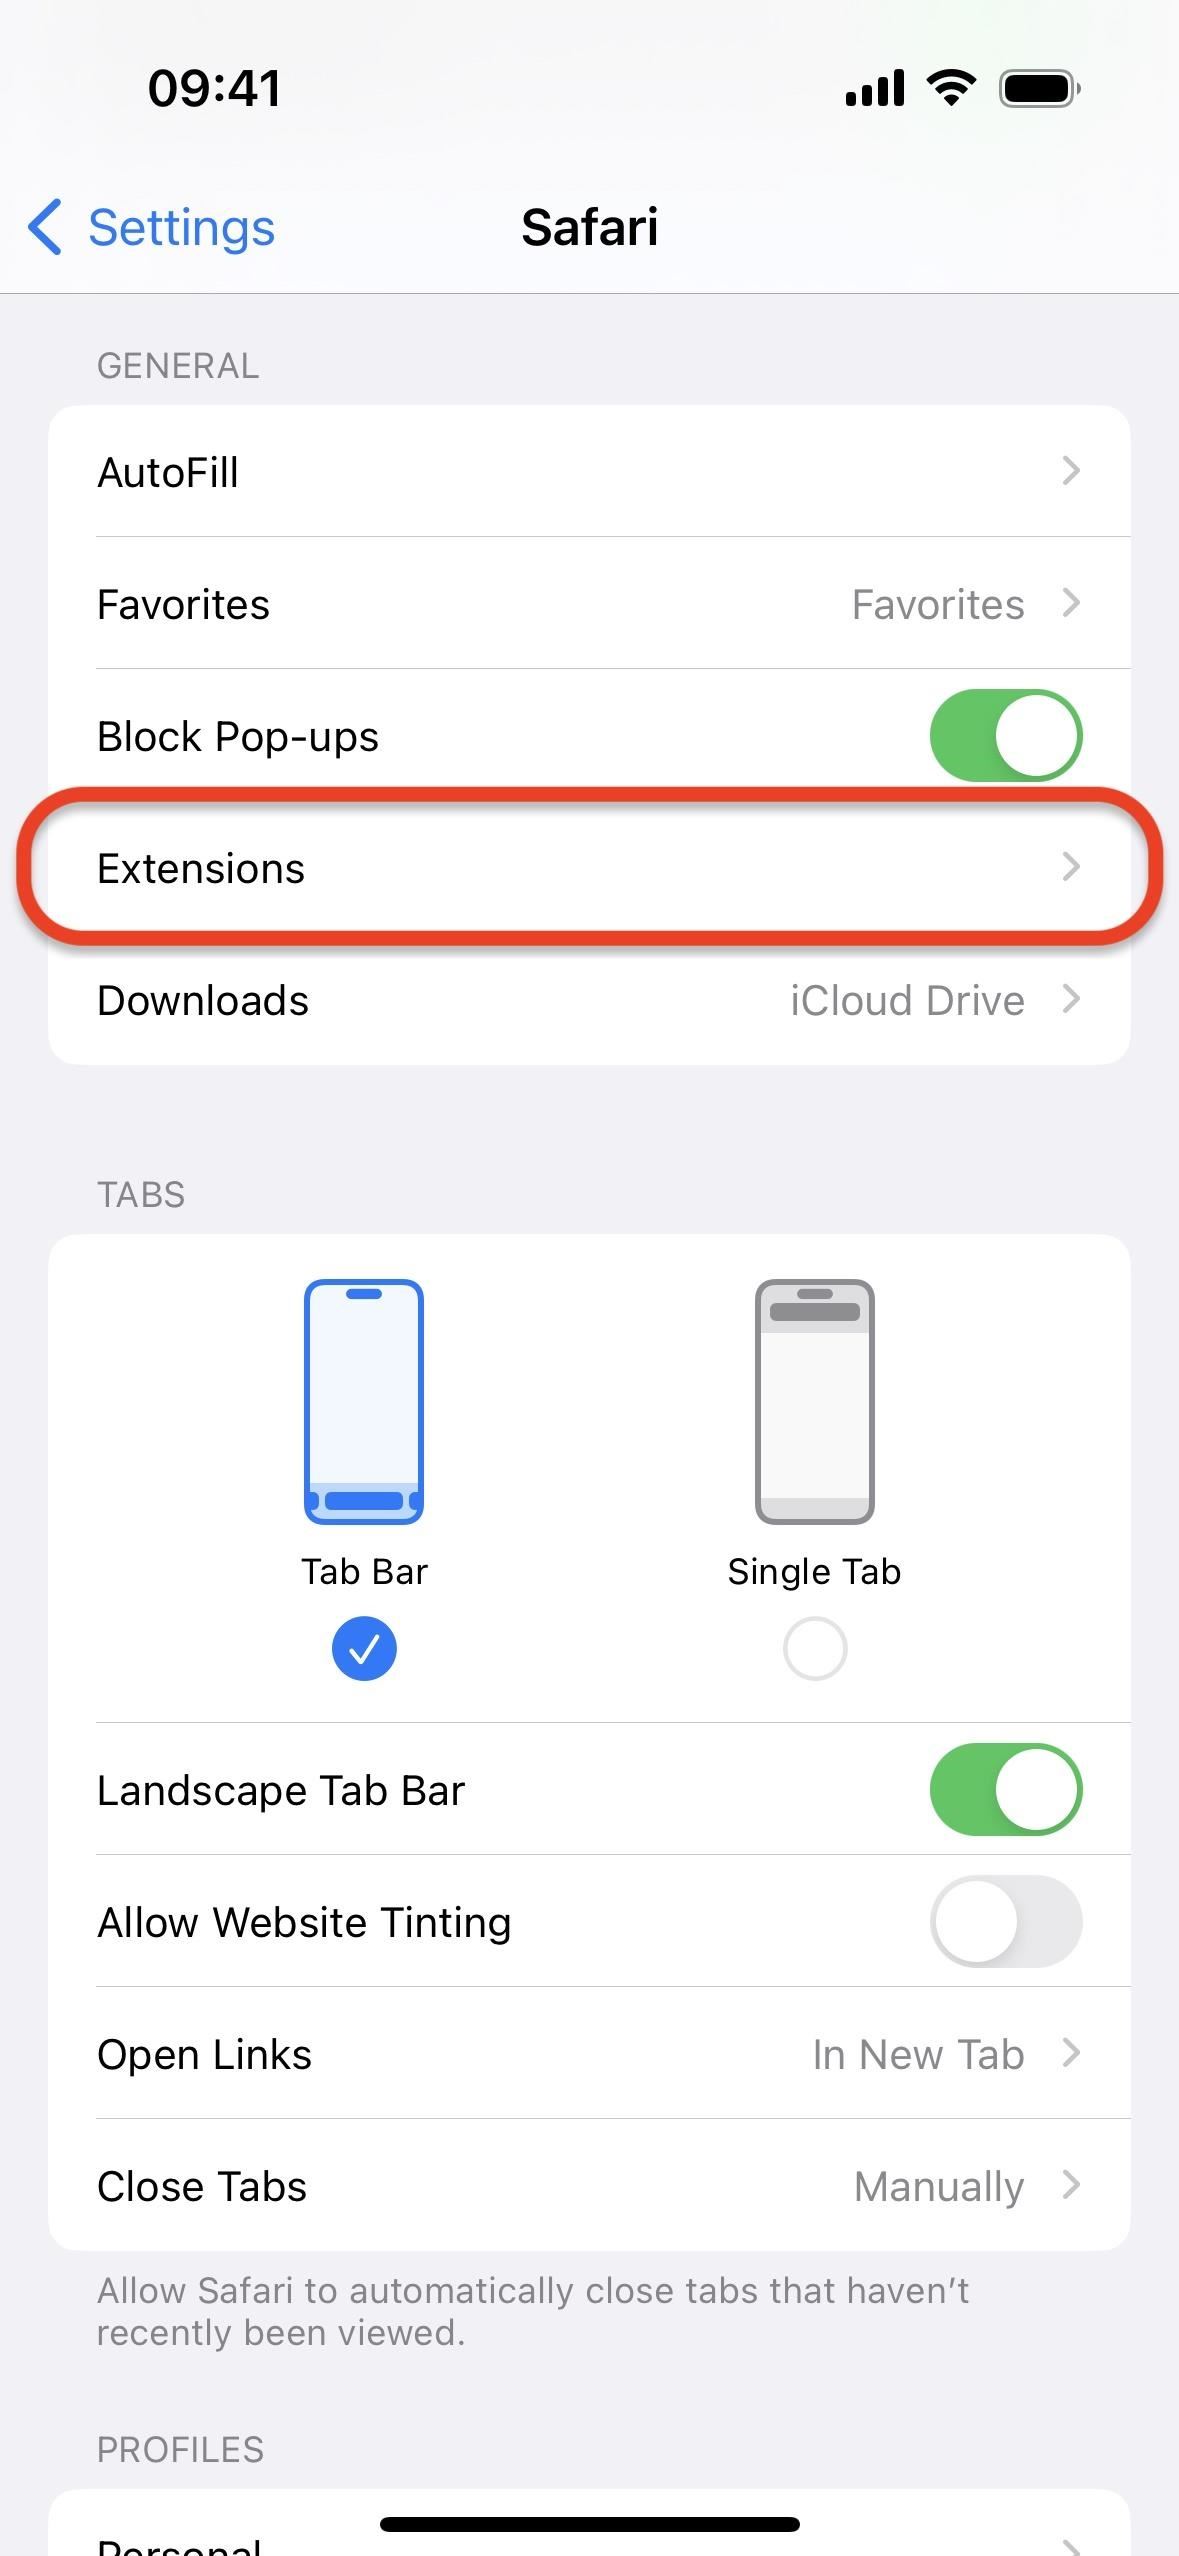
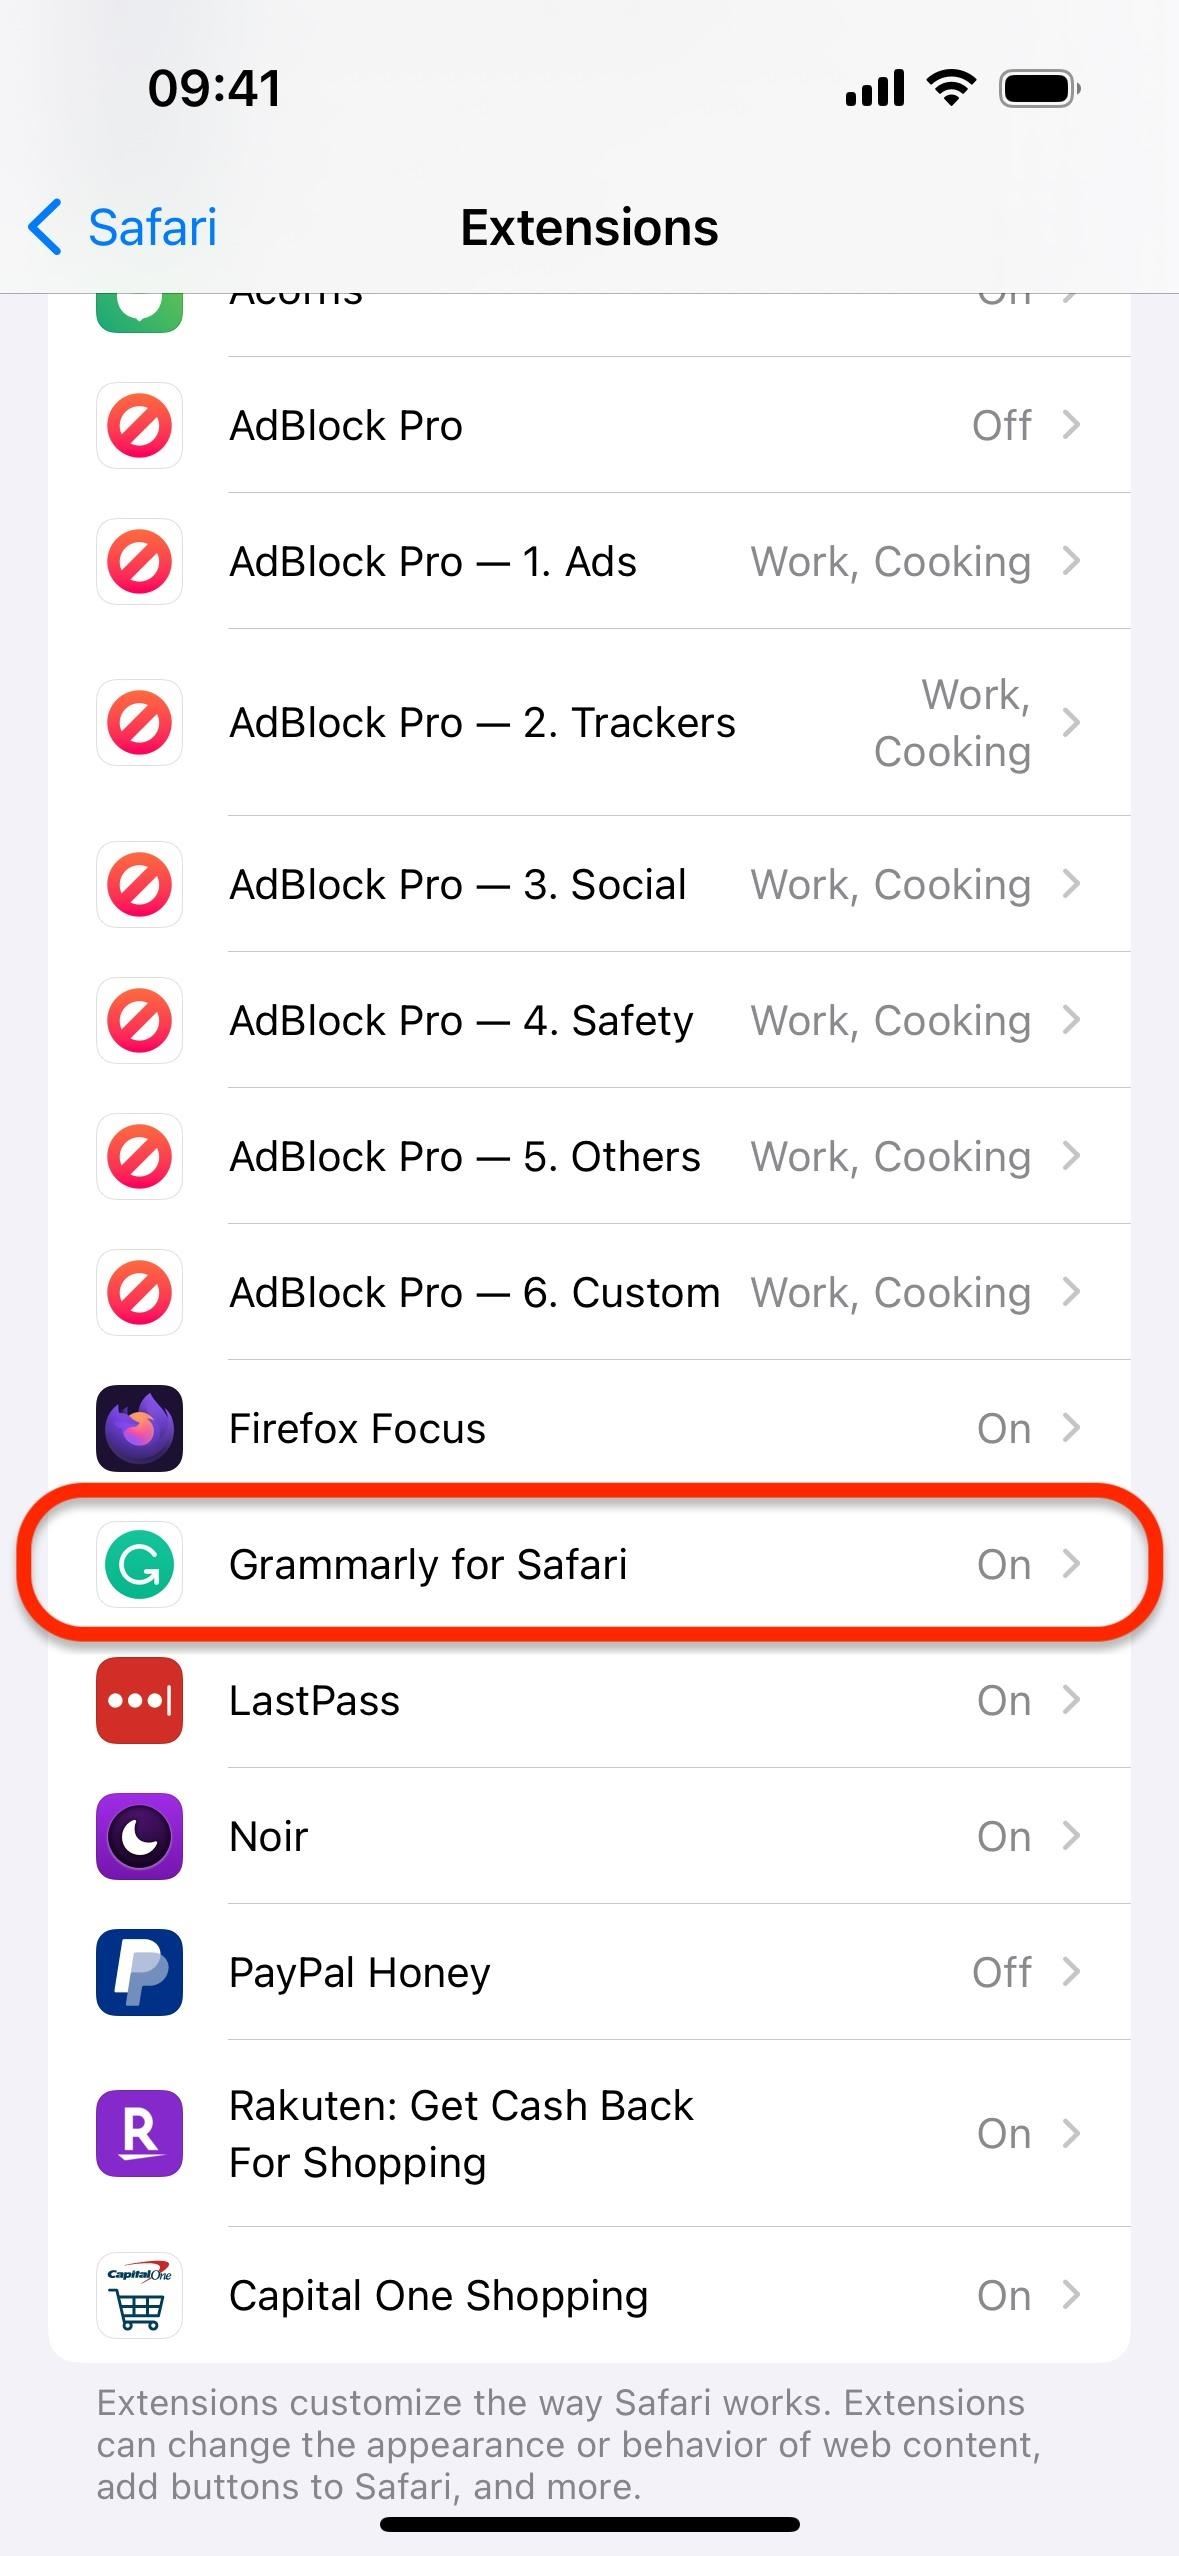
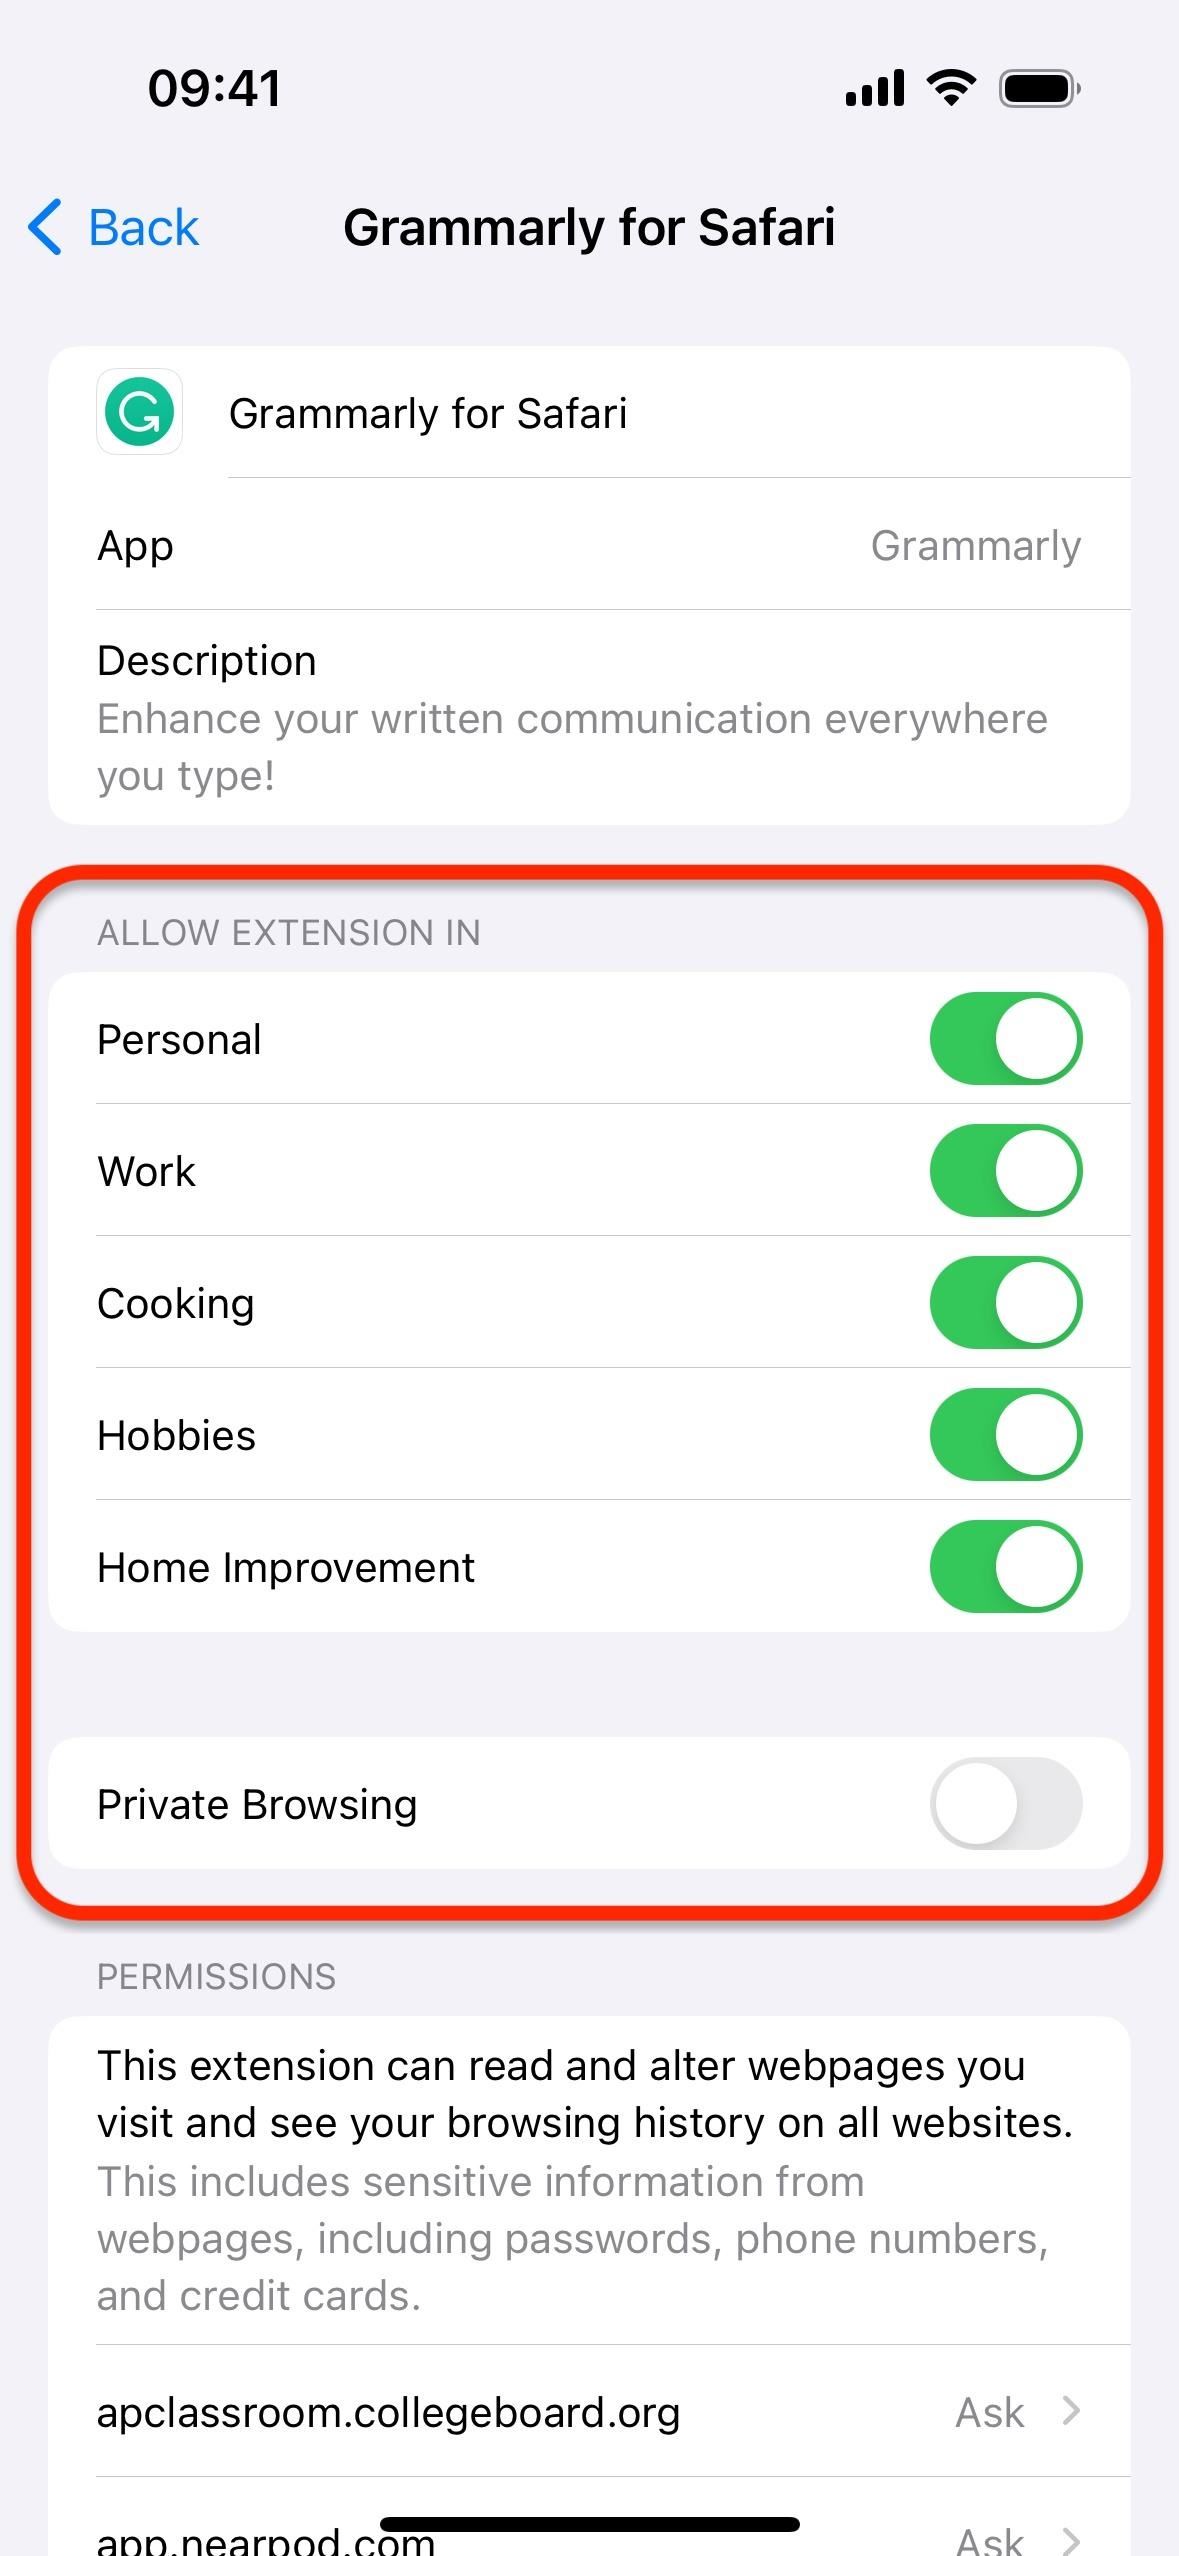
You can also manage extensions per profile via Settings –> Safari –> Extensions. Select an extension, then toggle the switch on or off next to the profile in the Allow Extension In section. If the “Personal” profile is on, “Private Browsing” mode can also be selected.
4. Use Safari Profiles on macOS
If you have a Mac, you can create and manage profiles from Safari –> Settings –> Profiles. To switch between profiles, right-click the Safari icon in your dock, hover over “New Window,” and choose the profile. The active profile’s name, icon, and color scheme will be visible at the top of the window next to the Show/Hide Sidebar button. You could then left-click that to open another window with a different profile.
Just updated your iPhone? You’ll find new emoji, enhanced security, podcast transcripts, Apple Cash virtual numbers, and other useful features. There are even new additions hidden within Safari. Find out what’s new and changed on your iPhone with the iOS 17.4 update.
“Hey there, just a heads-up: We’re part of the Amazon affiliate program, so when you buy through links on our site, we may earn a small commission. But don’t worry, it doesn’t cost you anything extra and helps us keep the lights on. Thanks for your support!”


