There’s a powerful tool on your iPhone that can fine-tune your iOS experience based on what you’re doing and when, and it’s completely customizable. With it, you can control what notifications appear or are silenced, who can call you, which Home Screen pages you want to view, the Lock Screens you can pick from, and more. And you can automate it based on a variety of triggers.
The feature in question is Focus, which helps you concentrate on the one thing that’s important at any particular moment. It minimizes distractions so you can pay attention to whatever it is you’re doing, from playing a game to working or exercising. Its name couldn’t be any more apt.
Focus includes Do Not Disturb mode as one of the options, and you can create and switch between up to nine other Focus choices, such as Fitness or a custom-named Focus. You can set the feature to turn on and off automatically based on triggers such as a scheduled time or when you’re in a specific location, but you can also toggle each Focus manually.
The Focus feature has been available since iOS 15 and iPadOS 15 and works even better now on iOS 17 and iPadOS 17. It functions similarly on iPadOS, macOS, and watchOS and can sync between most of your iCloud-connected devices. And it works nicely with other Apple features, such as Siri, which can enable or disable a Focus mode by request.
Jump to a Section:
- Using Focus from Control Center
- –> Find the Focus Control
- –> See When a Focus Is Active
- –> Change the Focus Type
- –> Add a New Focus
- Viewing Your Focus Settings
- Creating a New Focus
- Customizing a New or Old Focus
- –> Update the Name and Appearance
- –> Allow or Silence Notifications from Specific People
- –> Allow or Silence Notifications from Specific Apps
- –> Further Customize Notifications
- –> Show or Hide Screens and Pages
- –> Set a Schedule
- –> Add Focus Filters
- –> Delete a Focus
- Adjusting Other Focus Options
- –> Share Across Devices
- –> Focus Status
- Using Focus Profiles in Shortcuts
Using Focus from Control Center
The easiest way to use Focus is from the Control Center, which you can open by swiping down from the top right of your iPhone (on Face ID models) or iPad or up from the bottom of the screen (on Touch ID iPhone models).
Find the Focus Control
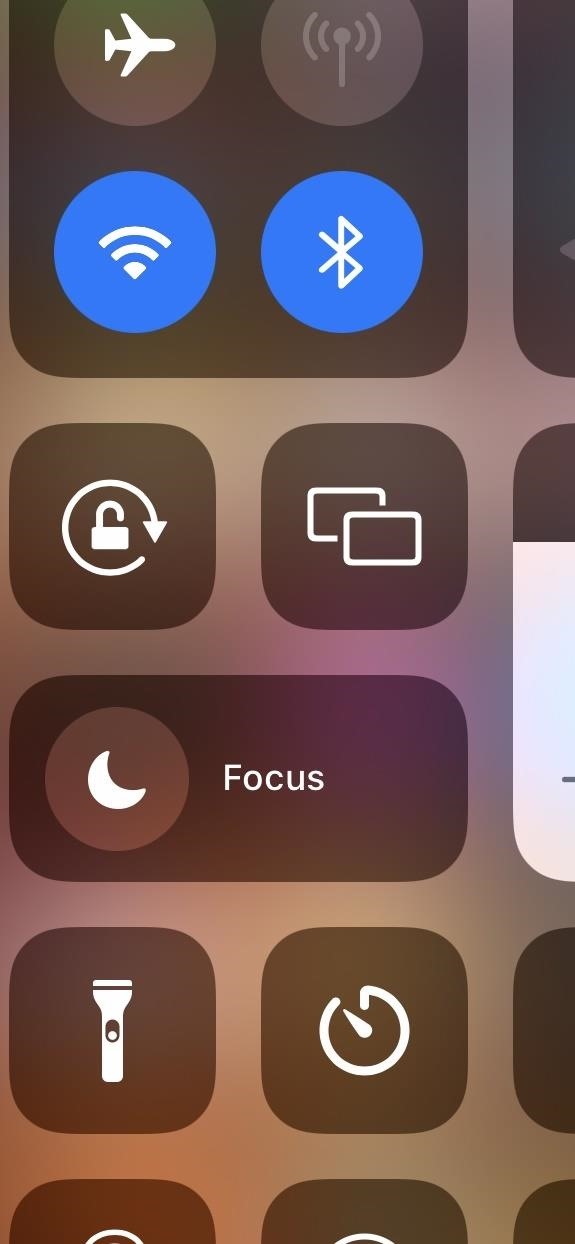
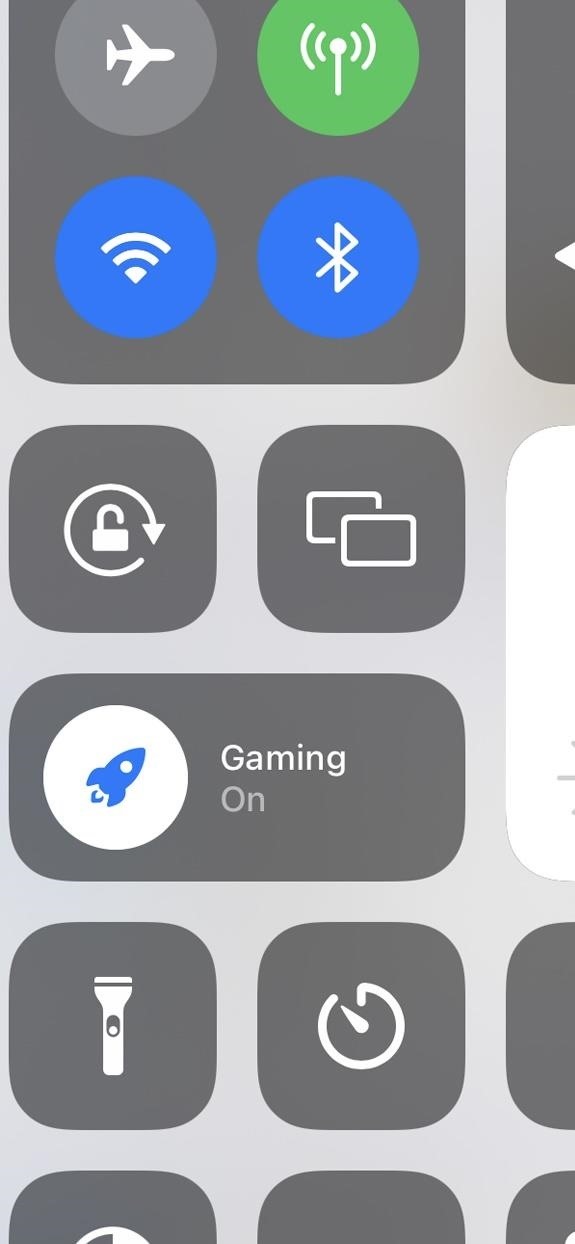
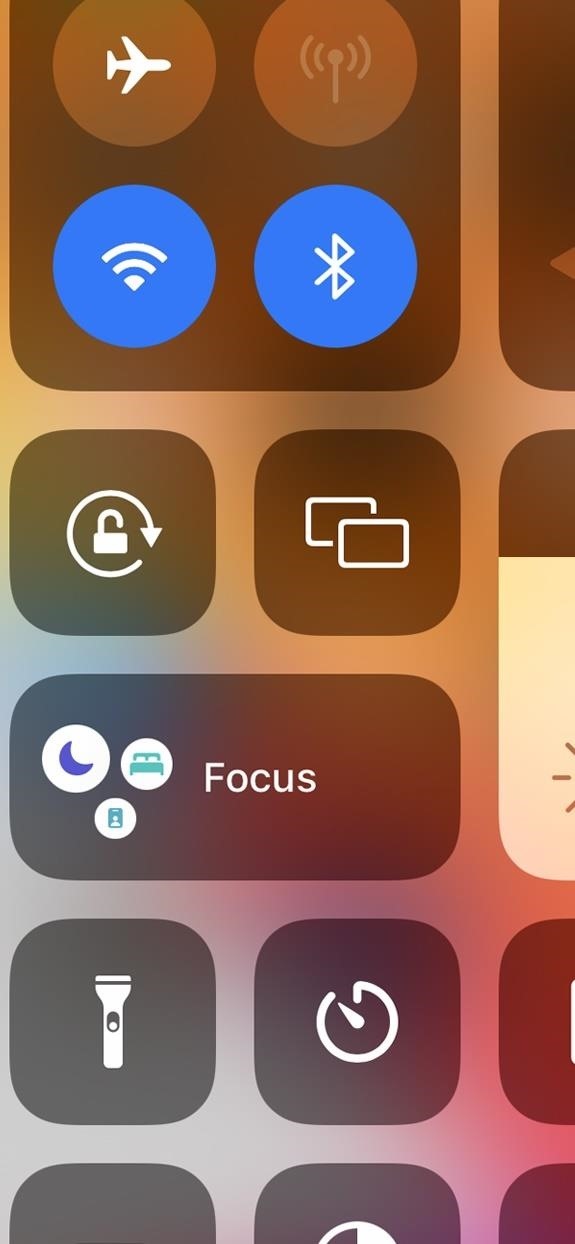
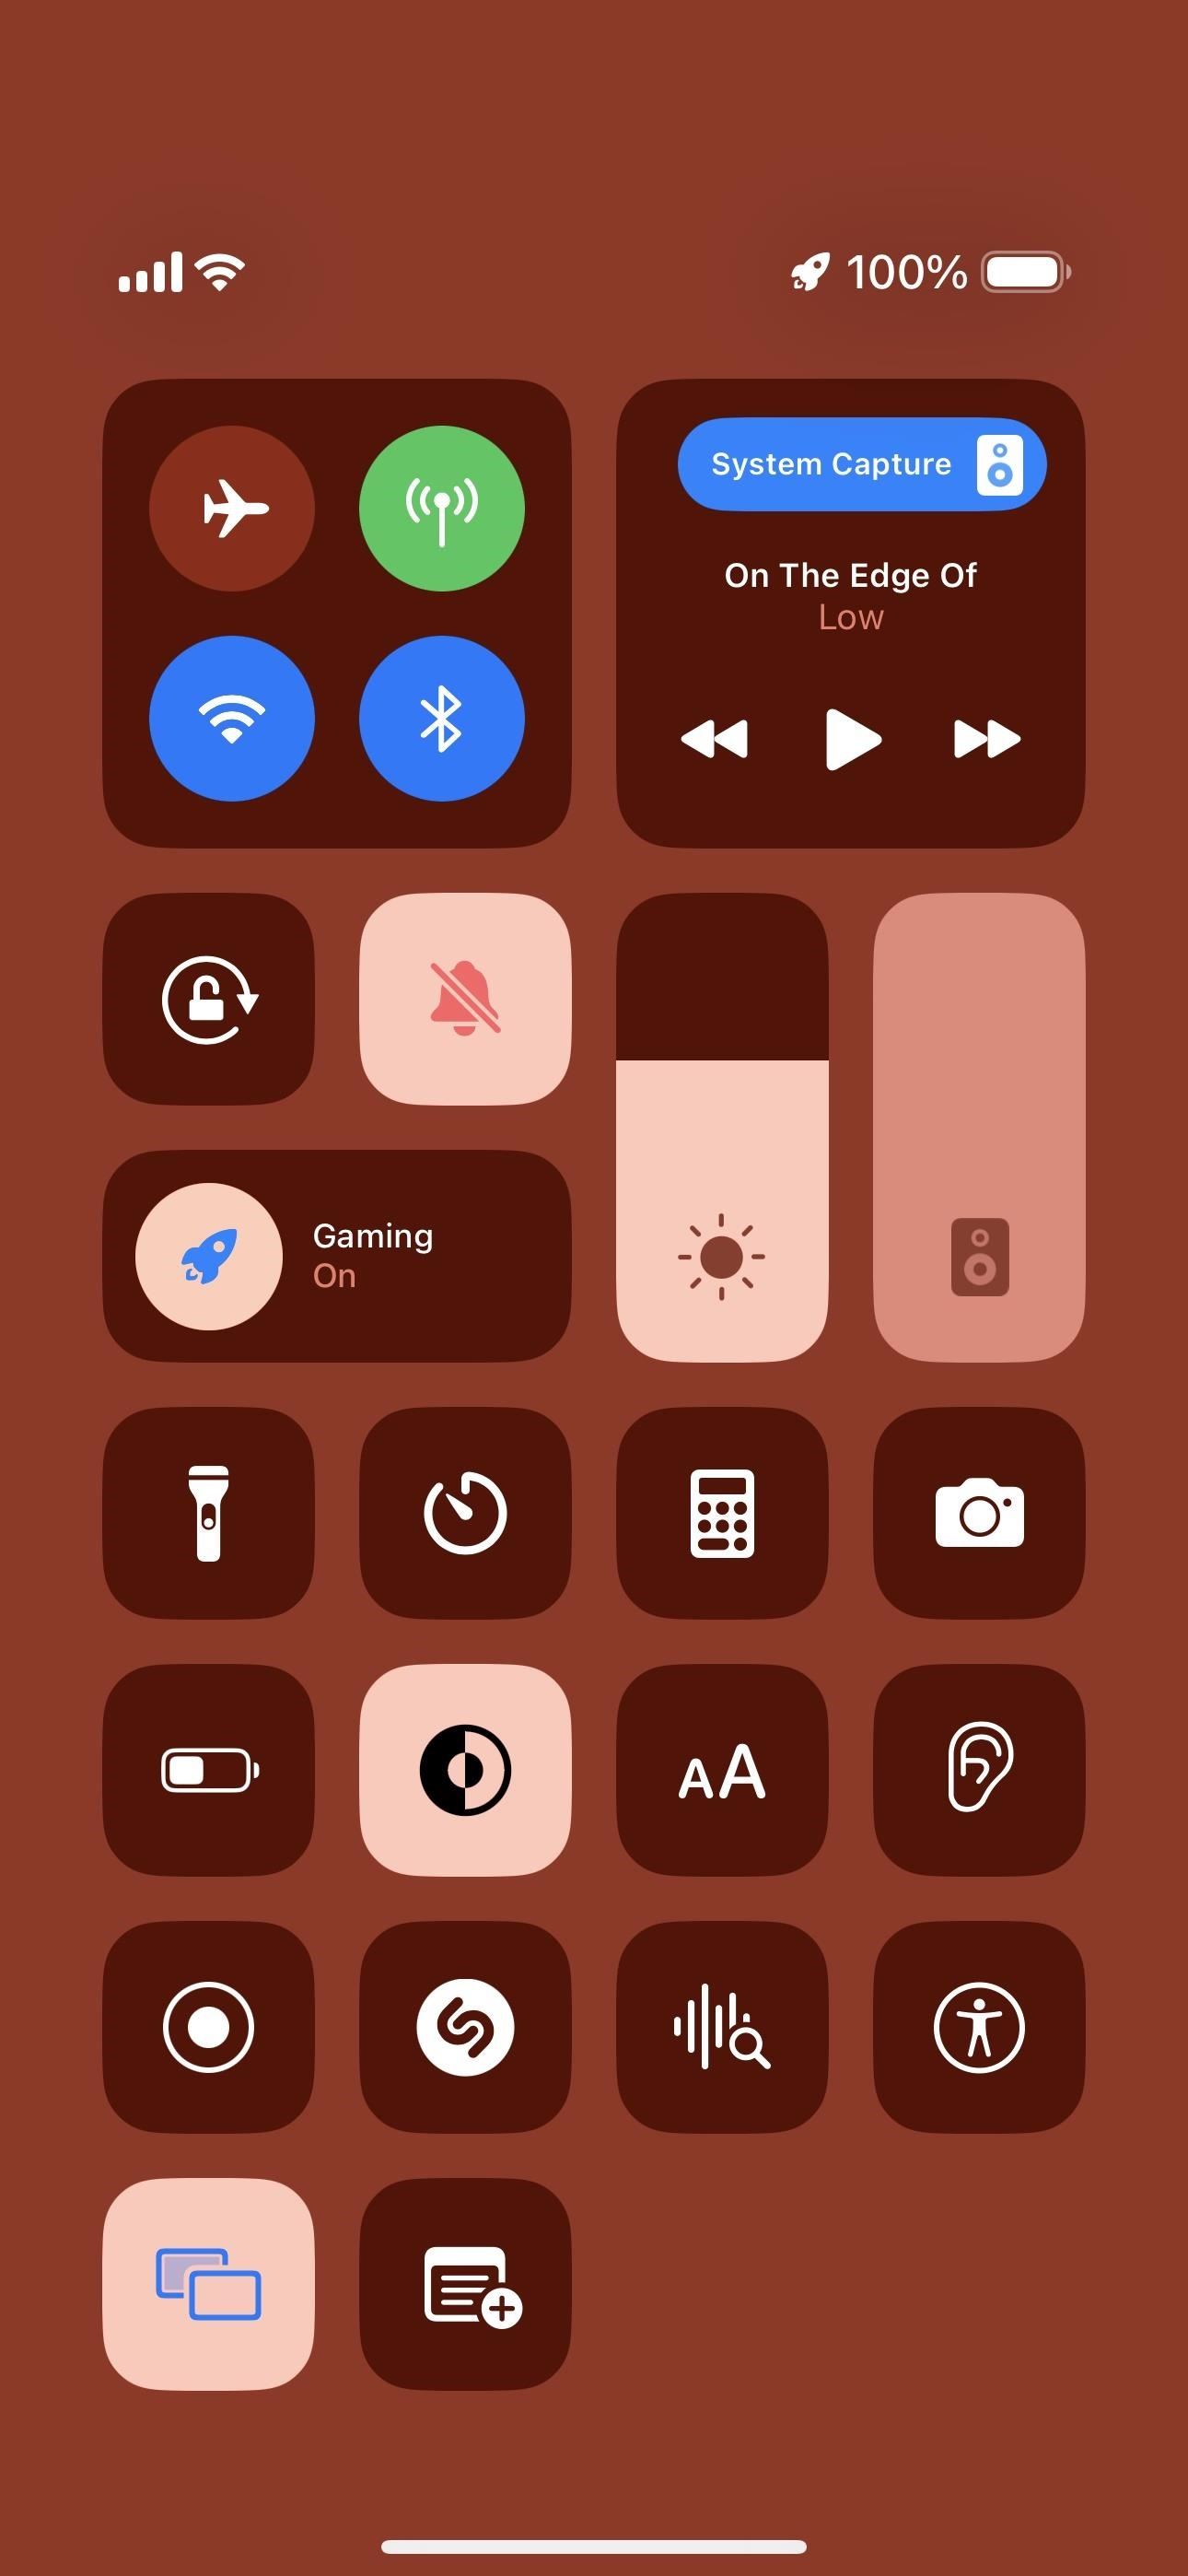
The Focus control in your Control Center will look different depending on its current state. When inactive, it will simply say “Focus.” Otherwise, the label will be that of the current focus state.
The icon shows the symbol for the currently active Focus. When off, it may show a previously used state, a scheduled state coming up, or the default Do Not Disturb moon. Tapping the icon toggles Focus on and off. If you’ve never used Focus, the control may have multiple symbols.
See When a Focus Is Active
Your iPhone will tell you in various parts of iOS when a Focus is active. For example:
- Control Center: The Focus is highlighted with “On” next to it on the Focus control, and the Focus icon appears next to the battery levels in the status bar.
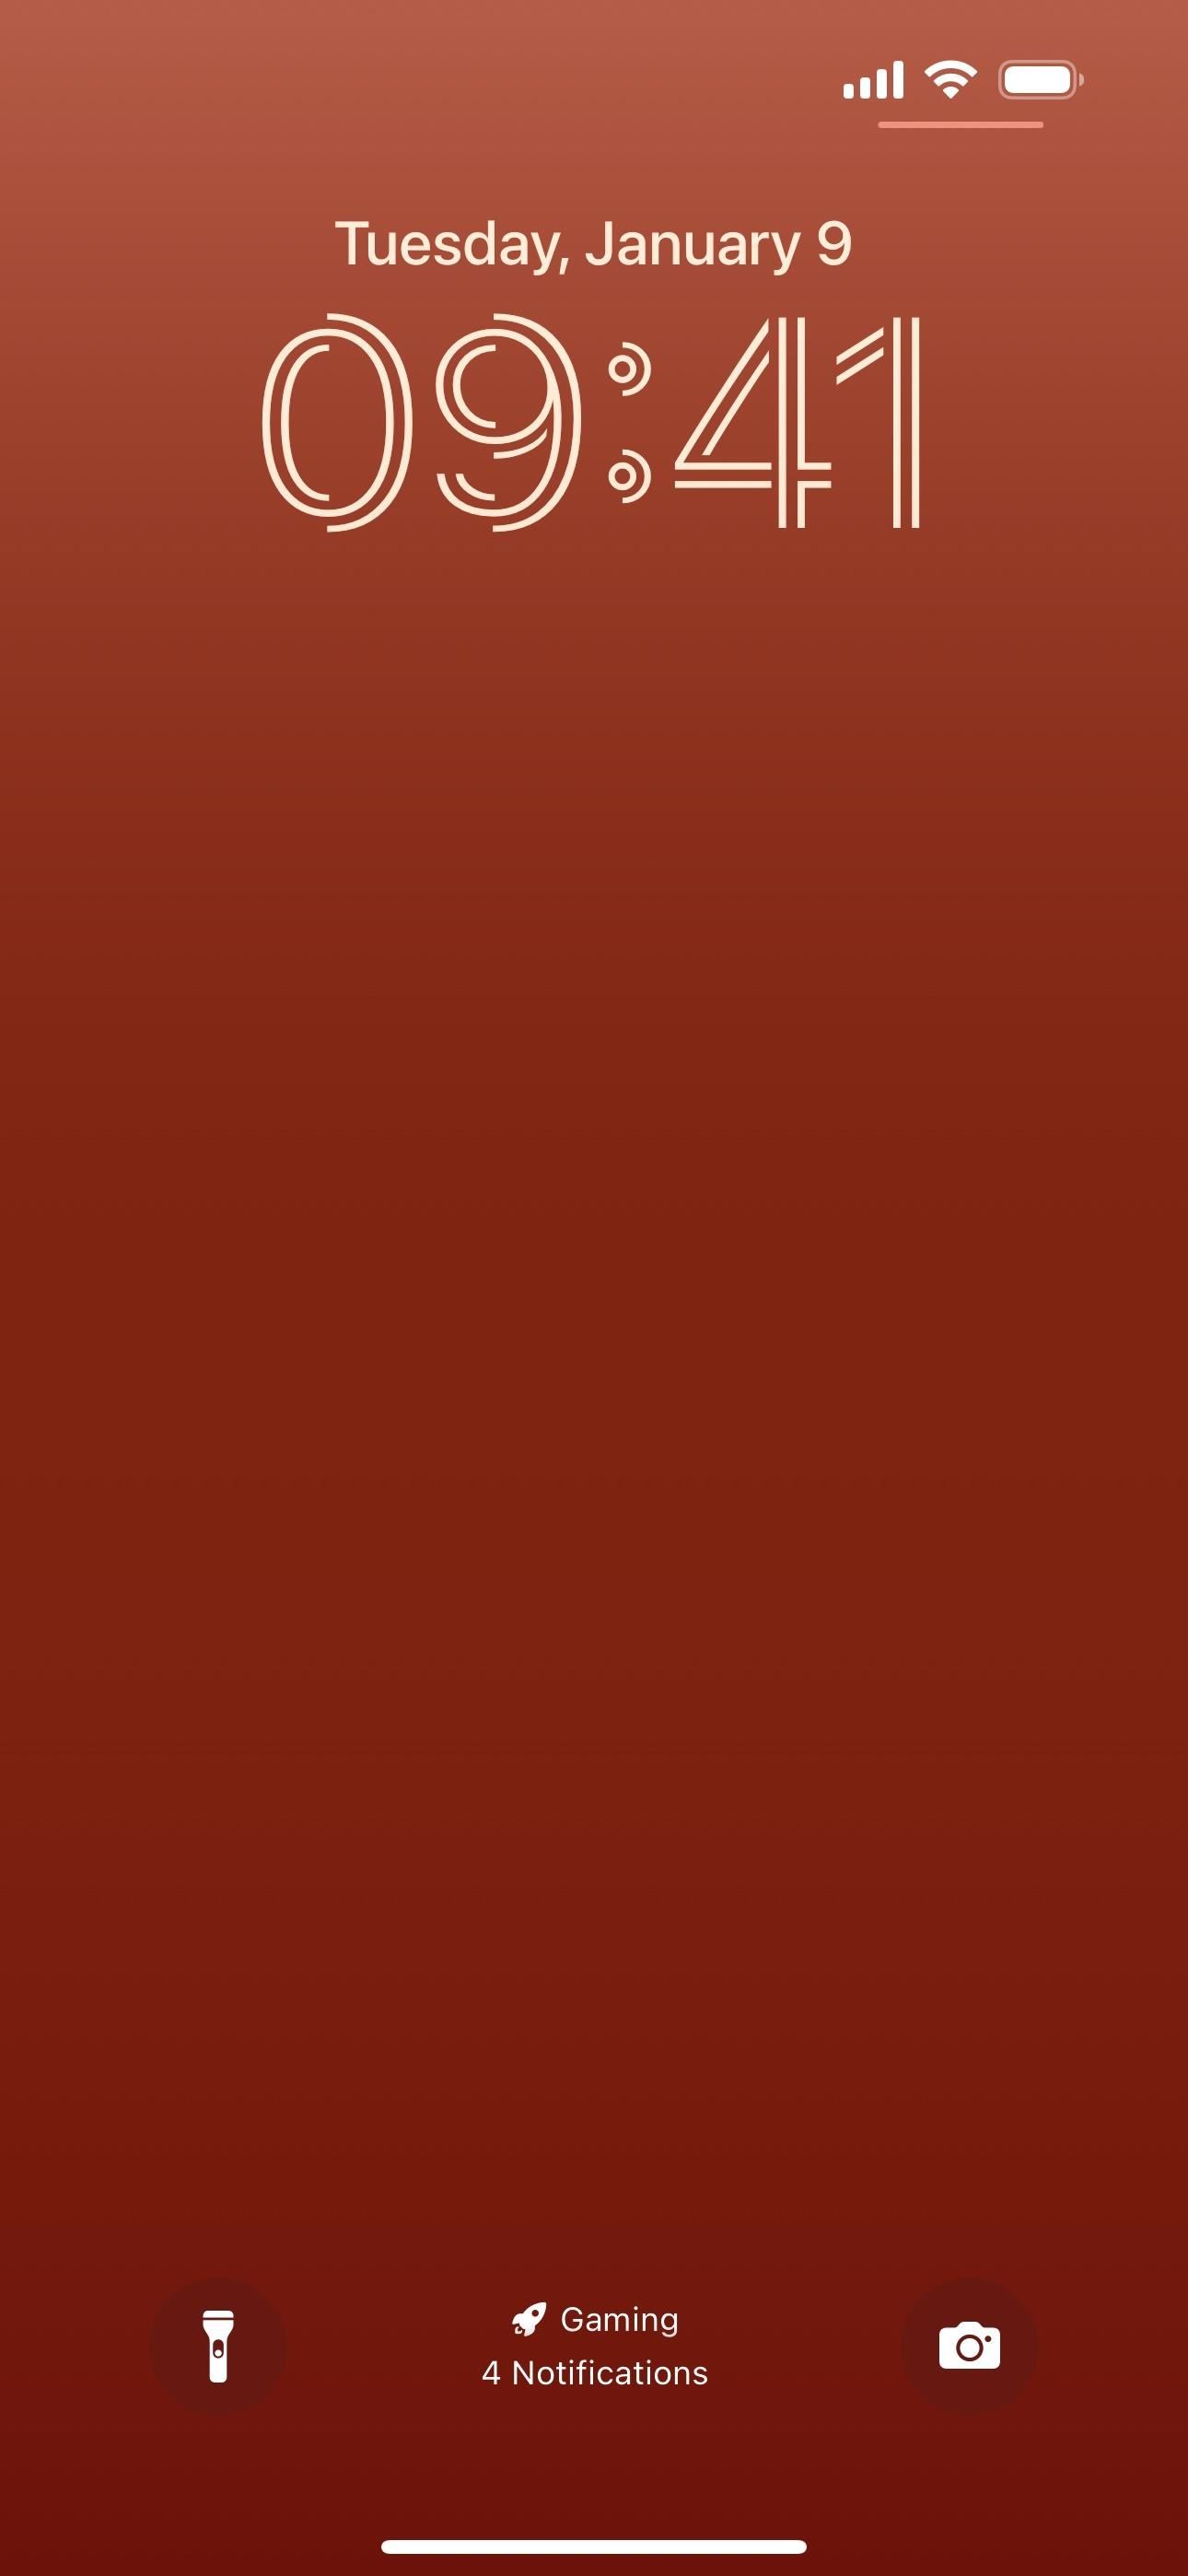
- Lock Screen: The Focus name and icon appear at the bottom of the screen.
- Notification Center: The Focus name and icon appear at the bottom of the screen.
- Home Screen: The icon appears next to the time in the status bar except in Control Center or when another status bar icon temporarily takes its place.

Change the Focus Type
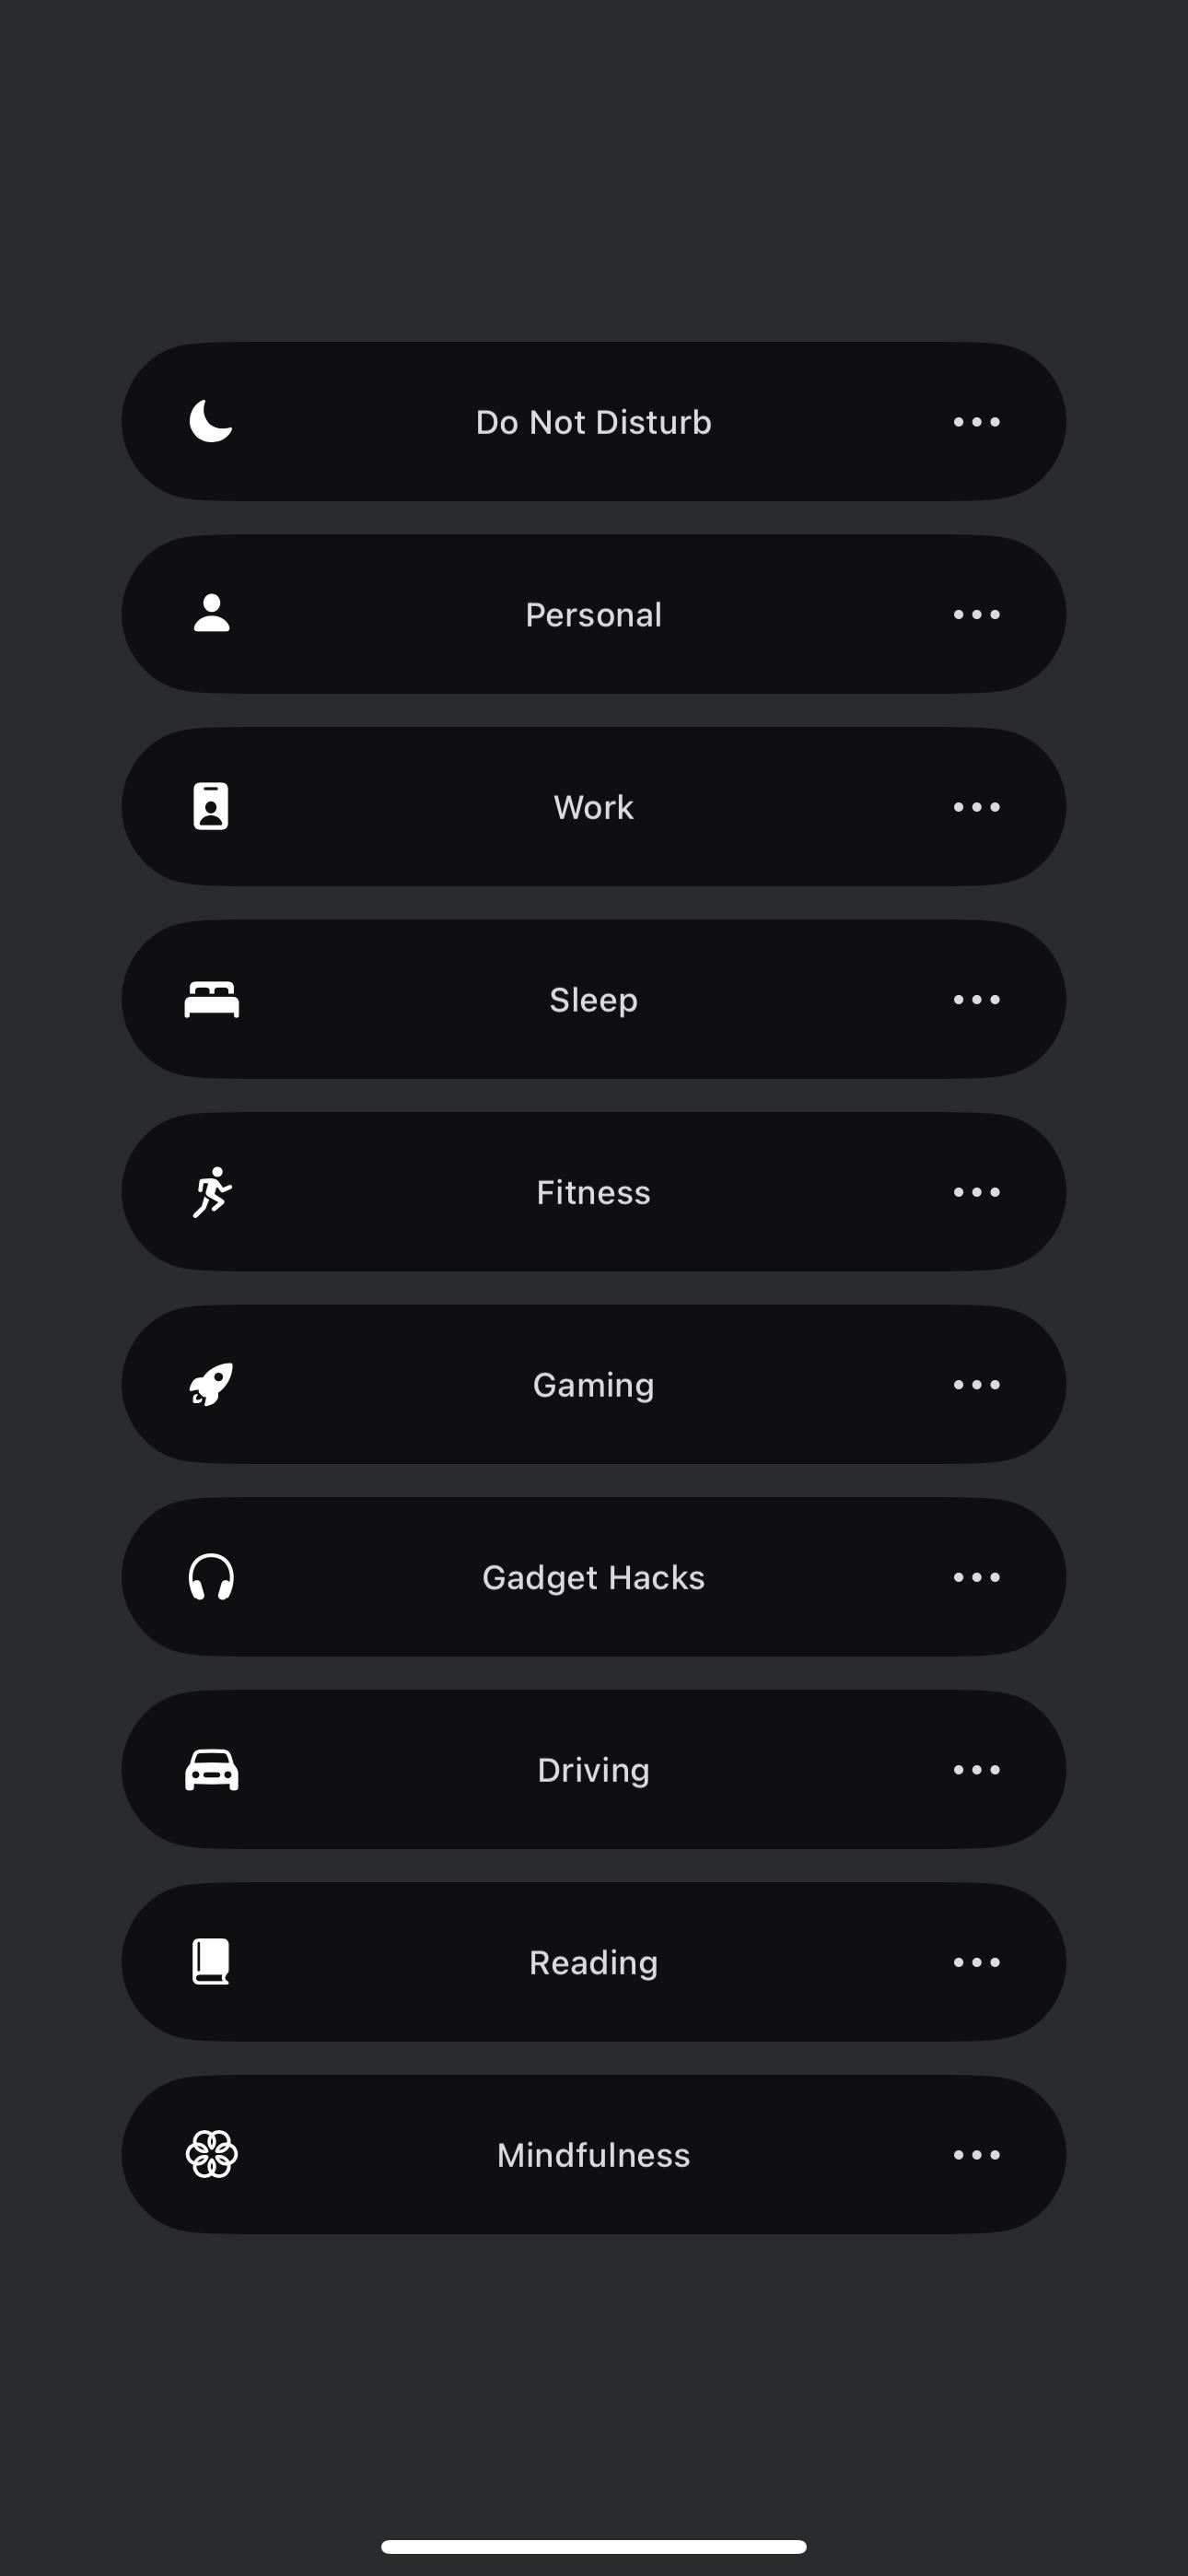
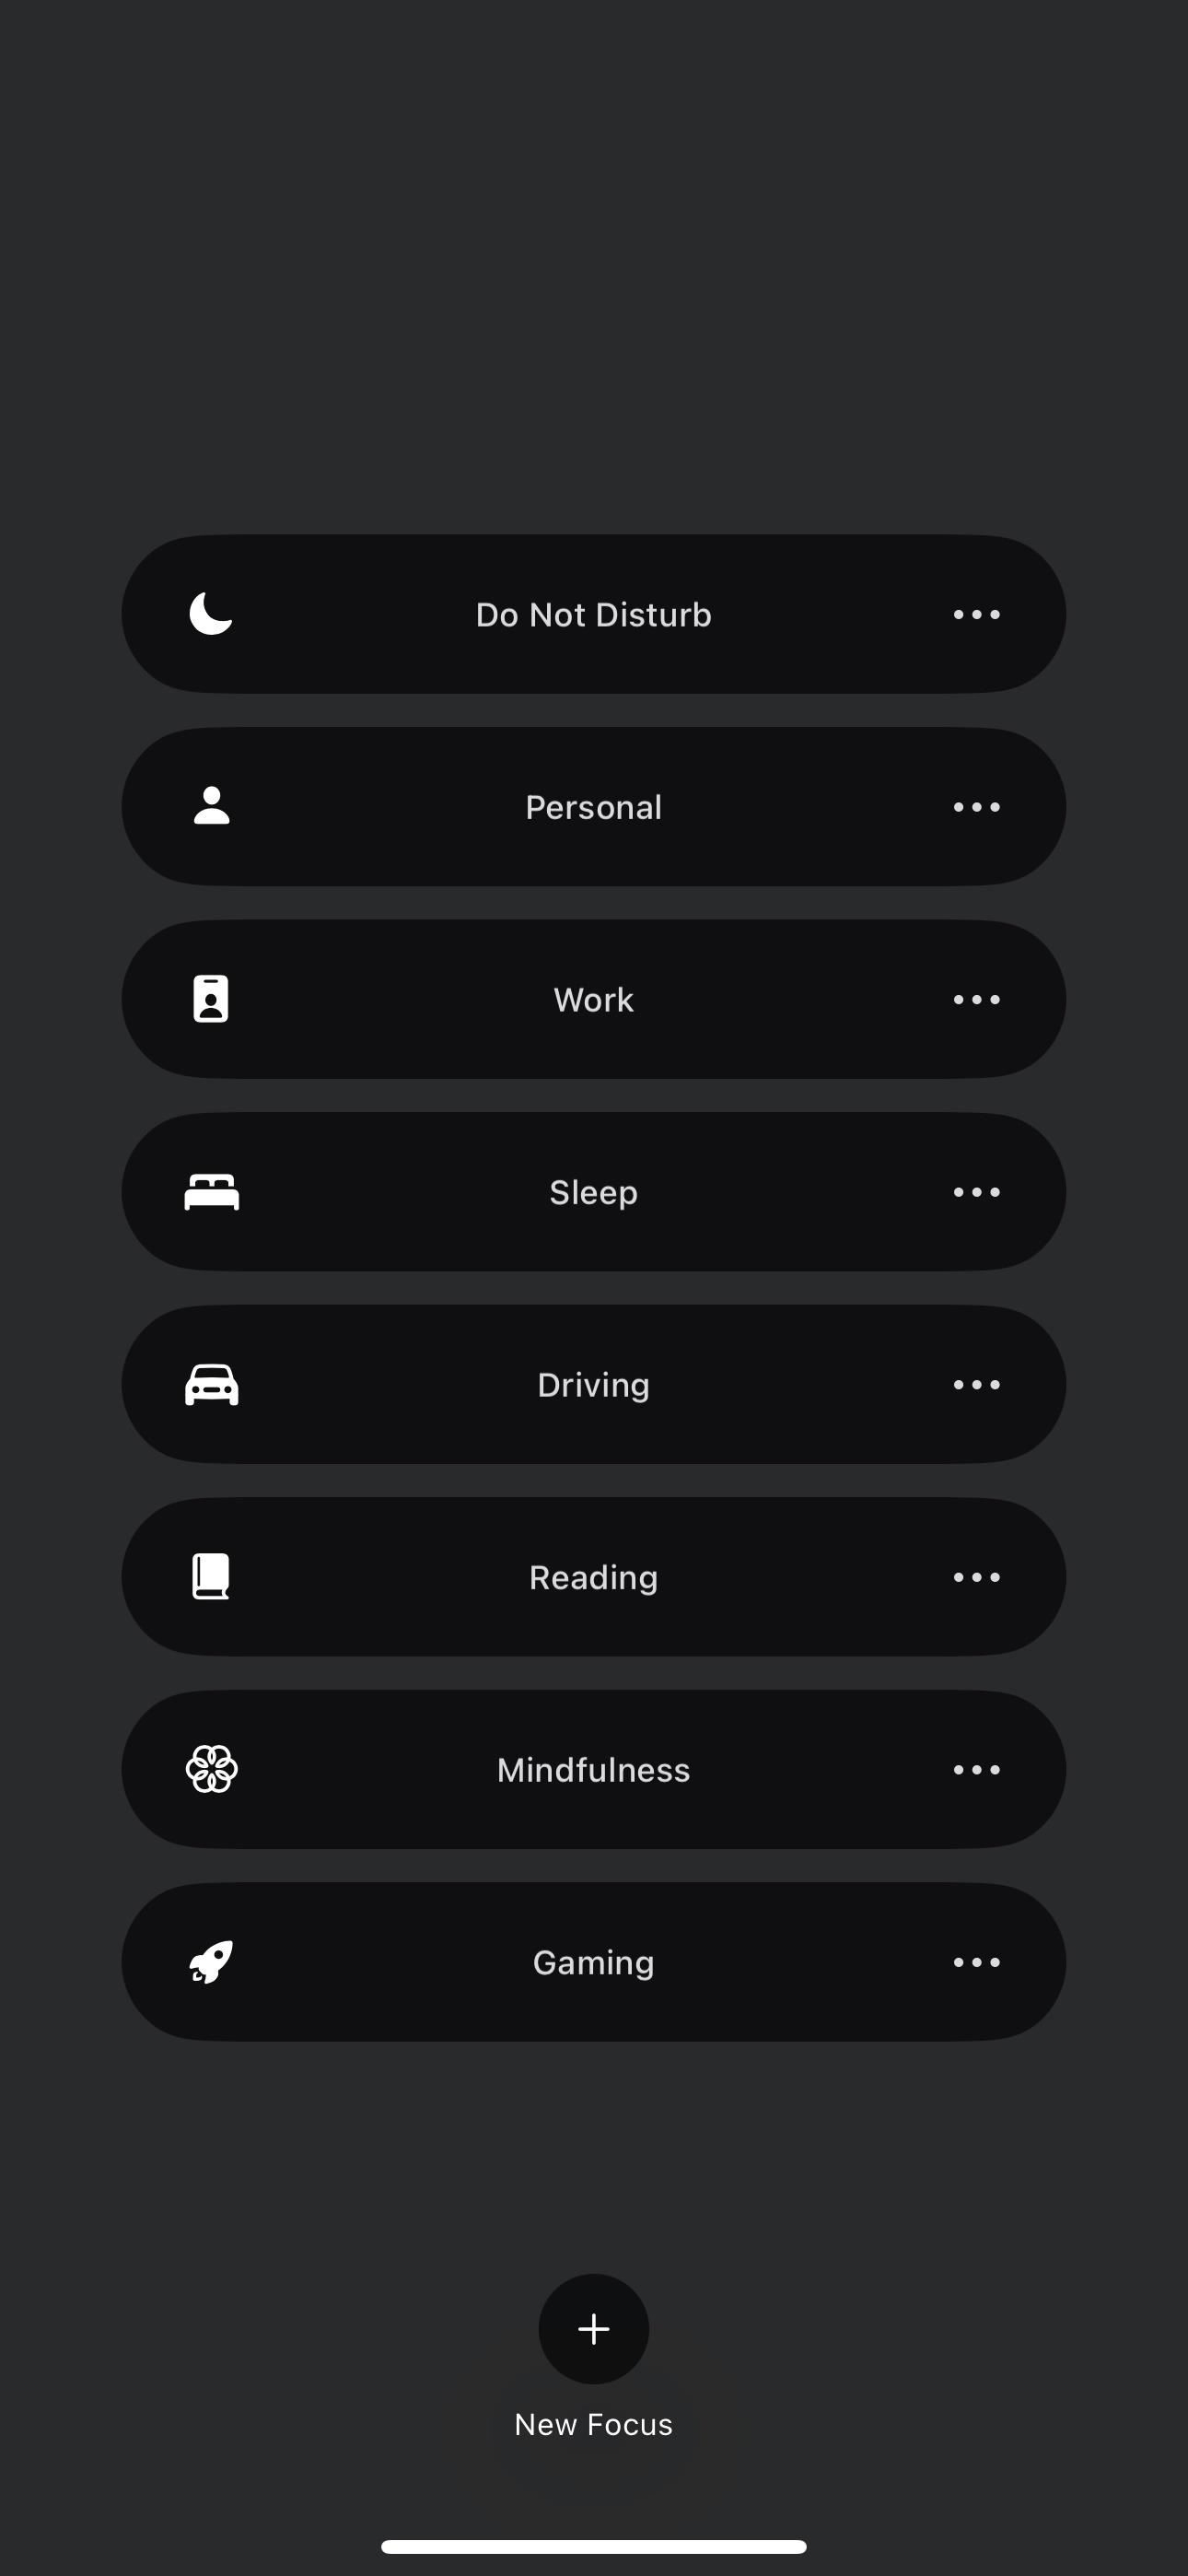
Tap anywhere on the Focus control outside the icon to show the list of available Focus states. You can also press and hold anywhere on the Focus control.
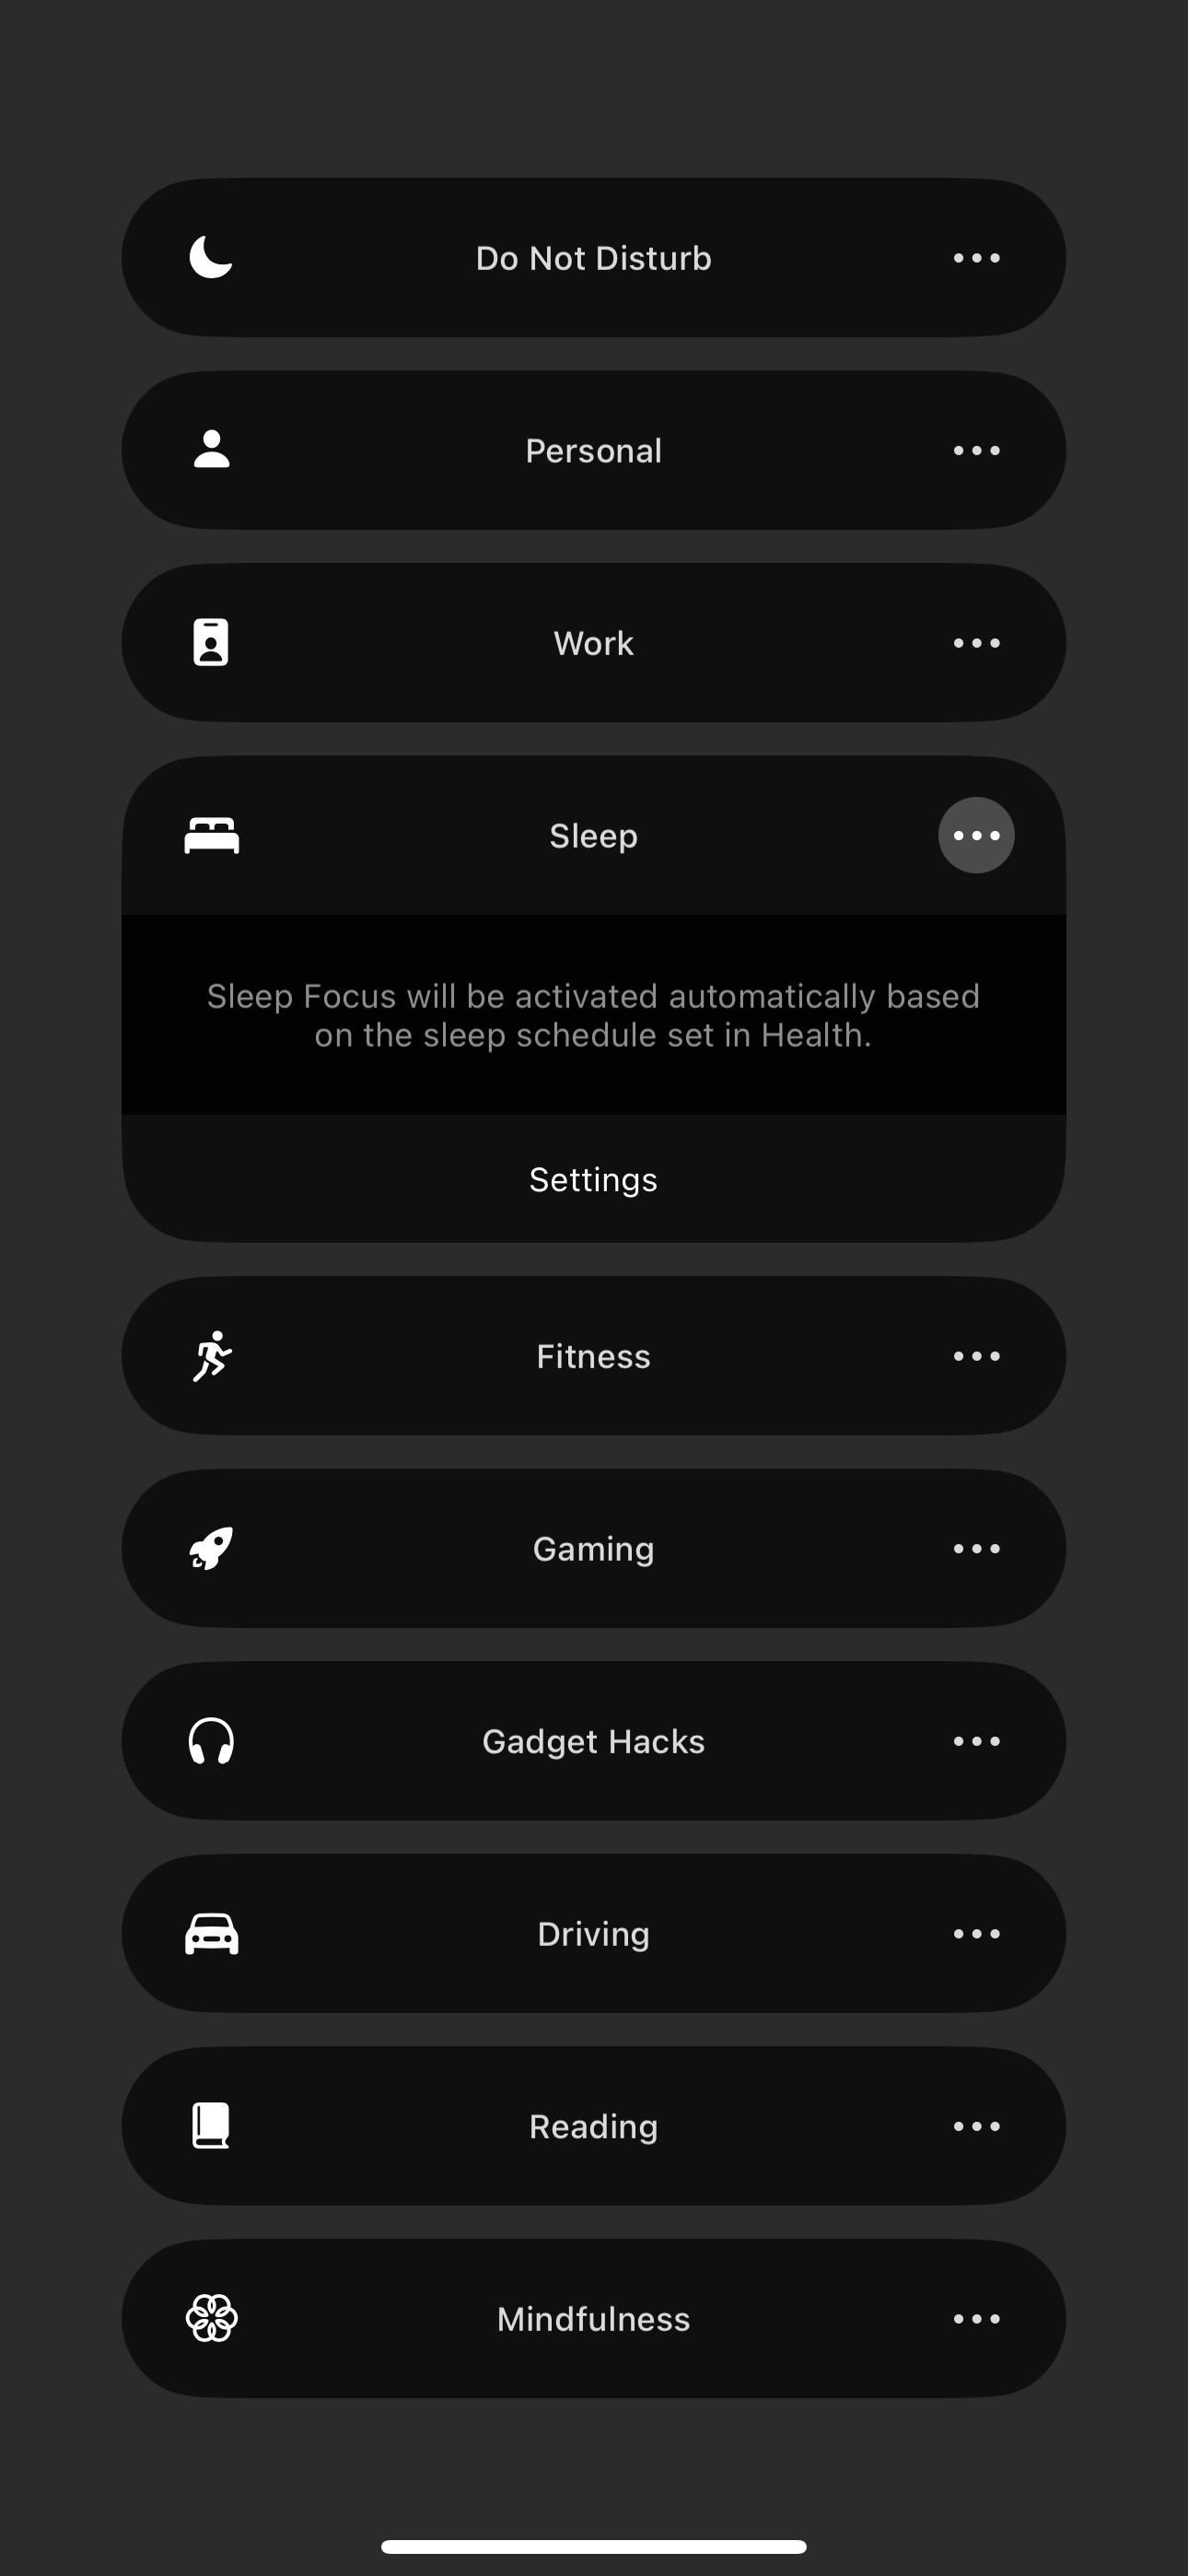
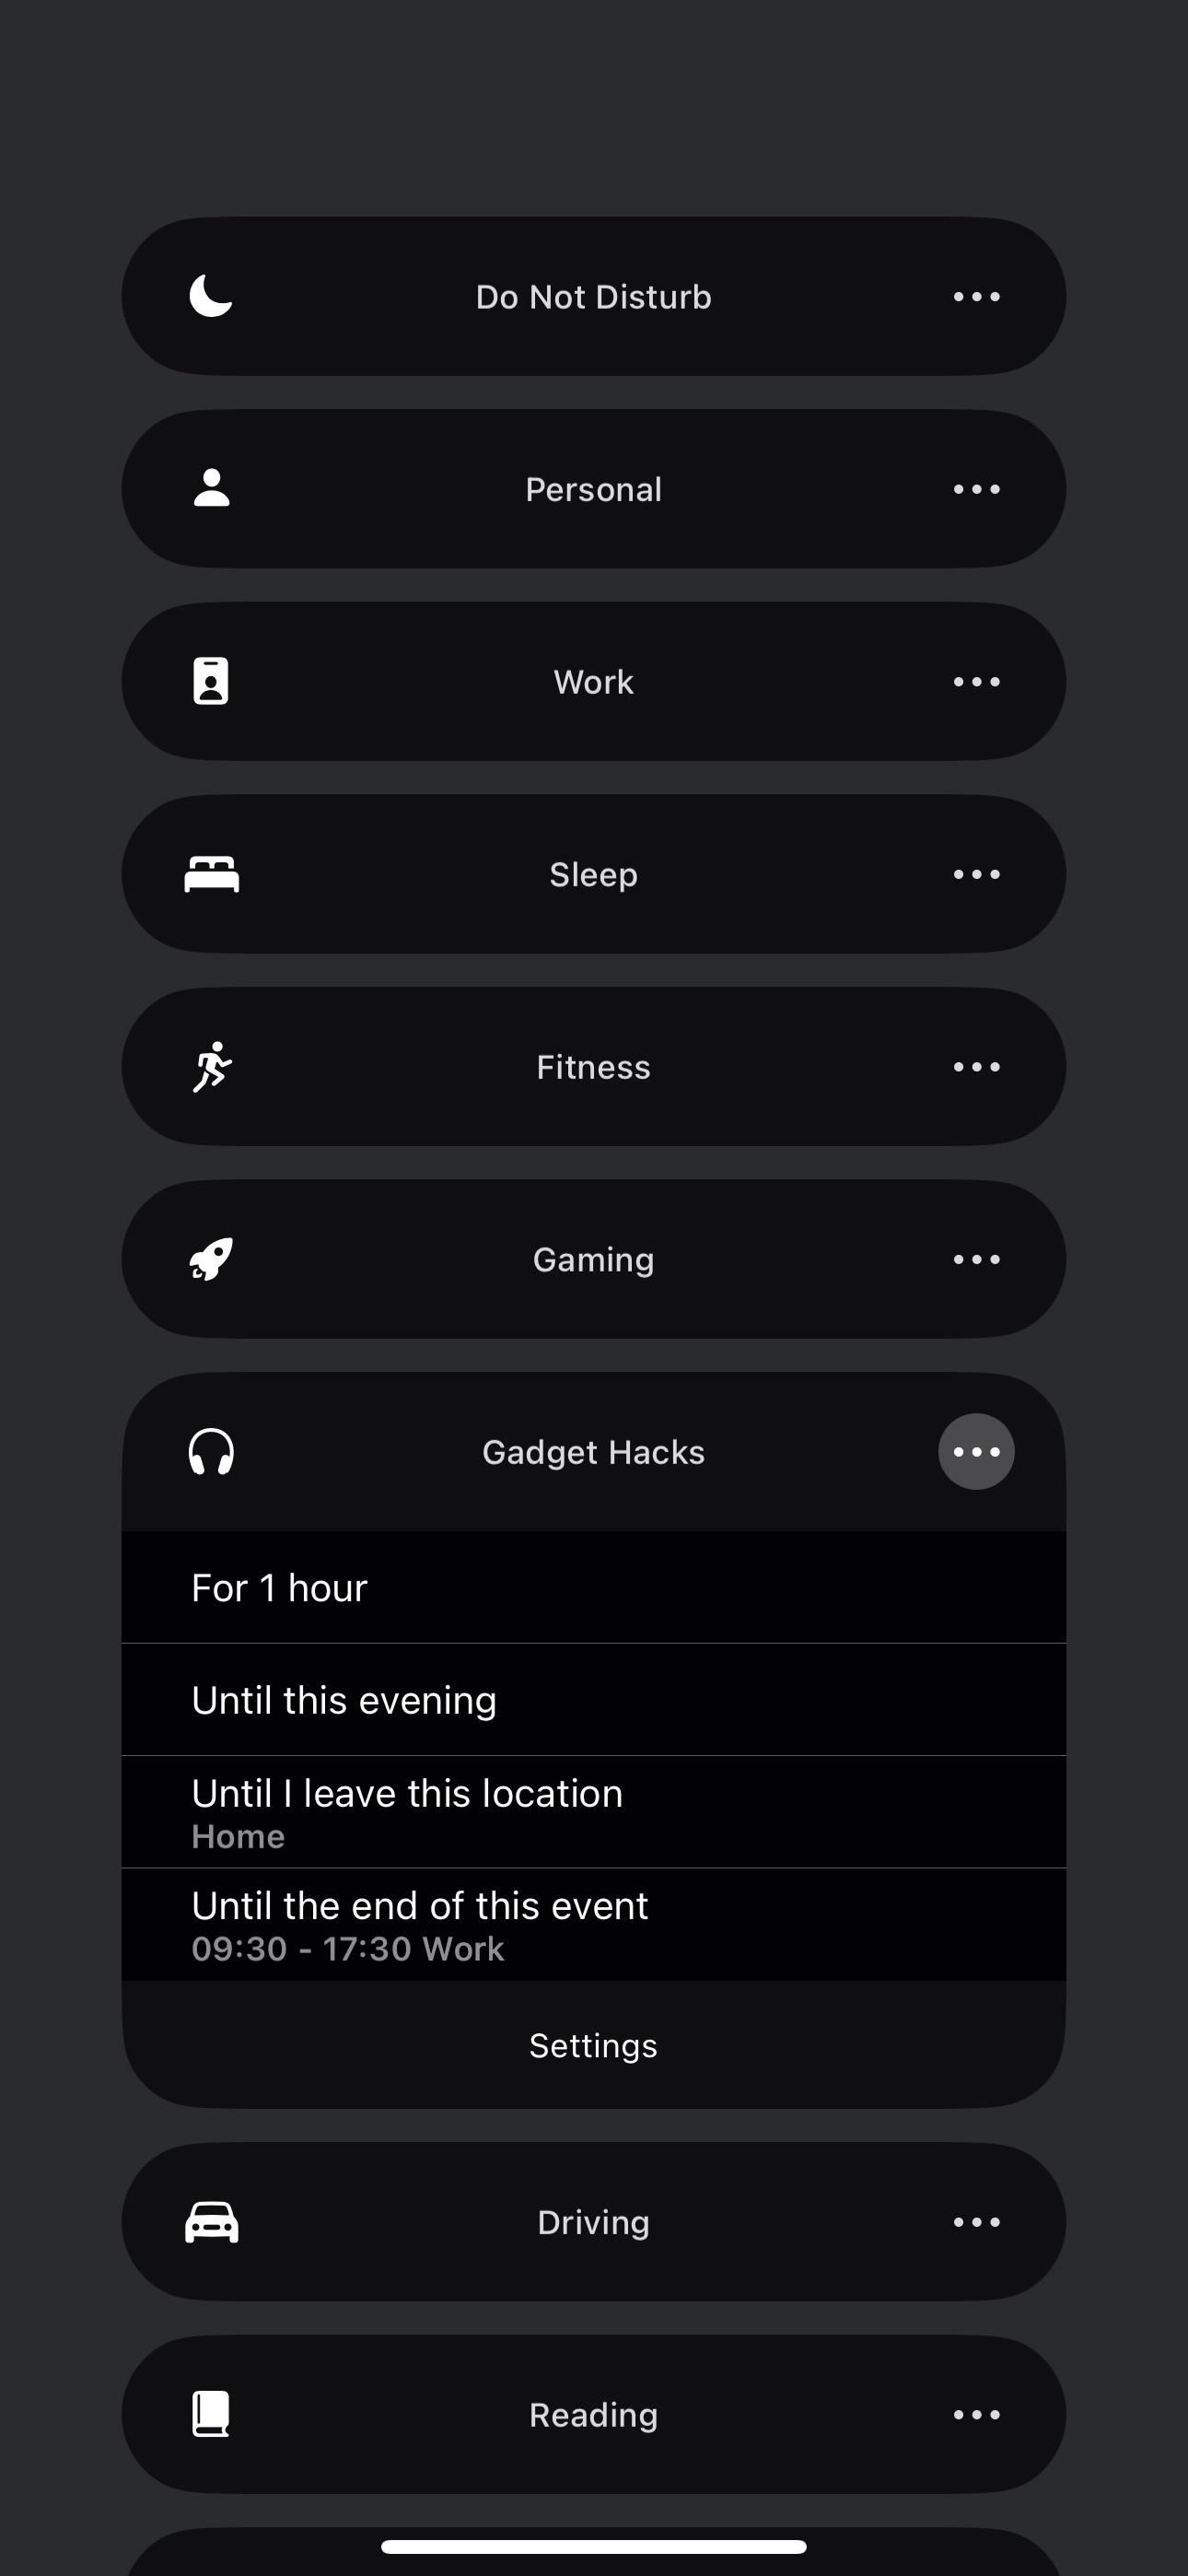
From the list, you can tap a Focus to turn it on and off, and you can hit the ellipsis (•••) next to each one to see more options. Most Focus states will let you toggle them on for one hour, until evening, or until you leave your current location, as well as after any scheduled event in your Calendar app. Sleep does not since it uses your sleep schedule, nor does Driving, which automatically turns on based on movement or when your iPhone connects to your vehicle’s Bluetooth or CarPlay.
Each Focus has a shortcut to its “Settings” from the three-dot menu.
Add a New Focus
Below the list, you can tap the plus (+) sign to add a new state. If you don’t see a plus button, it’s either because the Focus explanation card is still at the top of the list (close it) or because you’ve maxed out the number of slots available for Focus (you can only have up to 10).
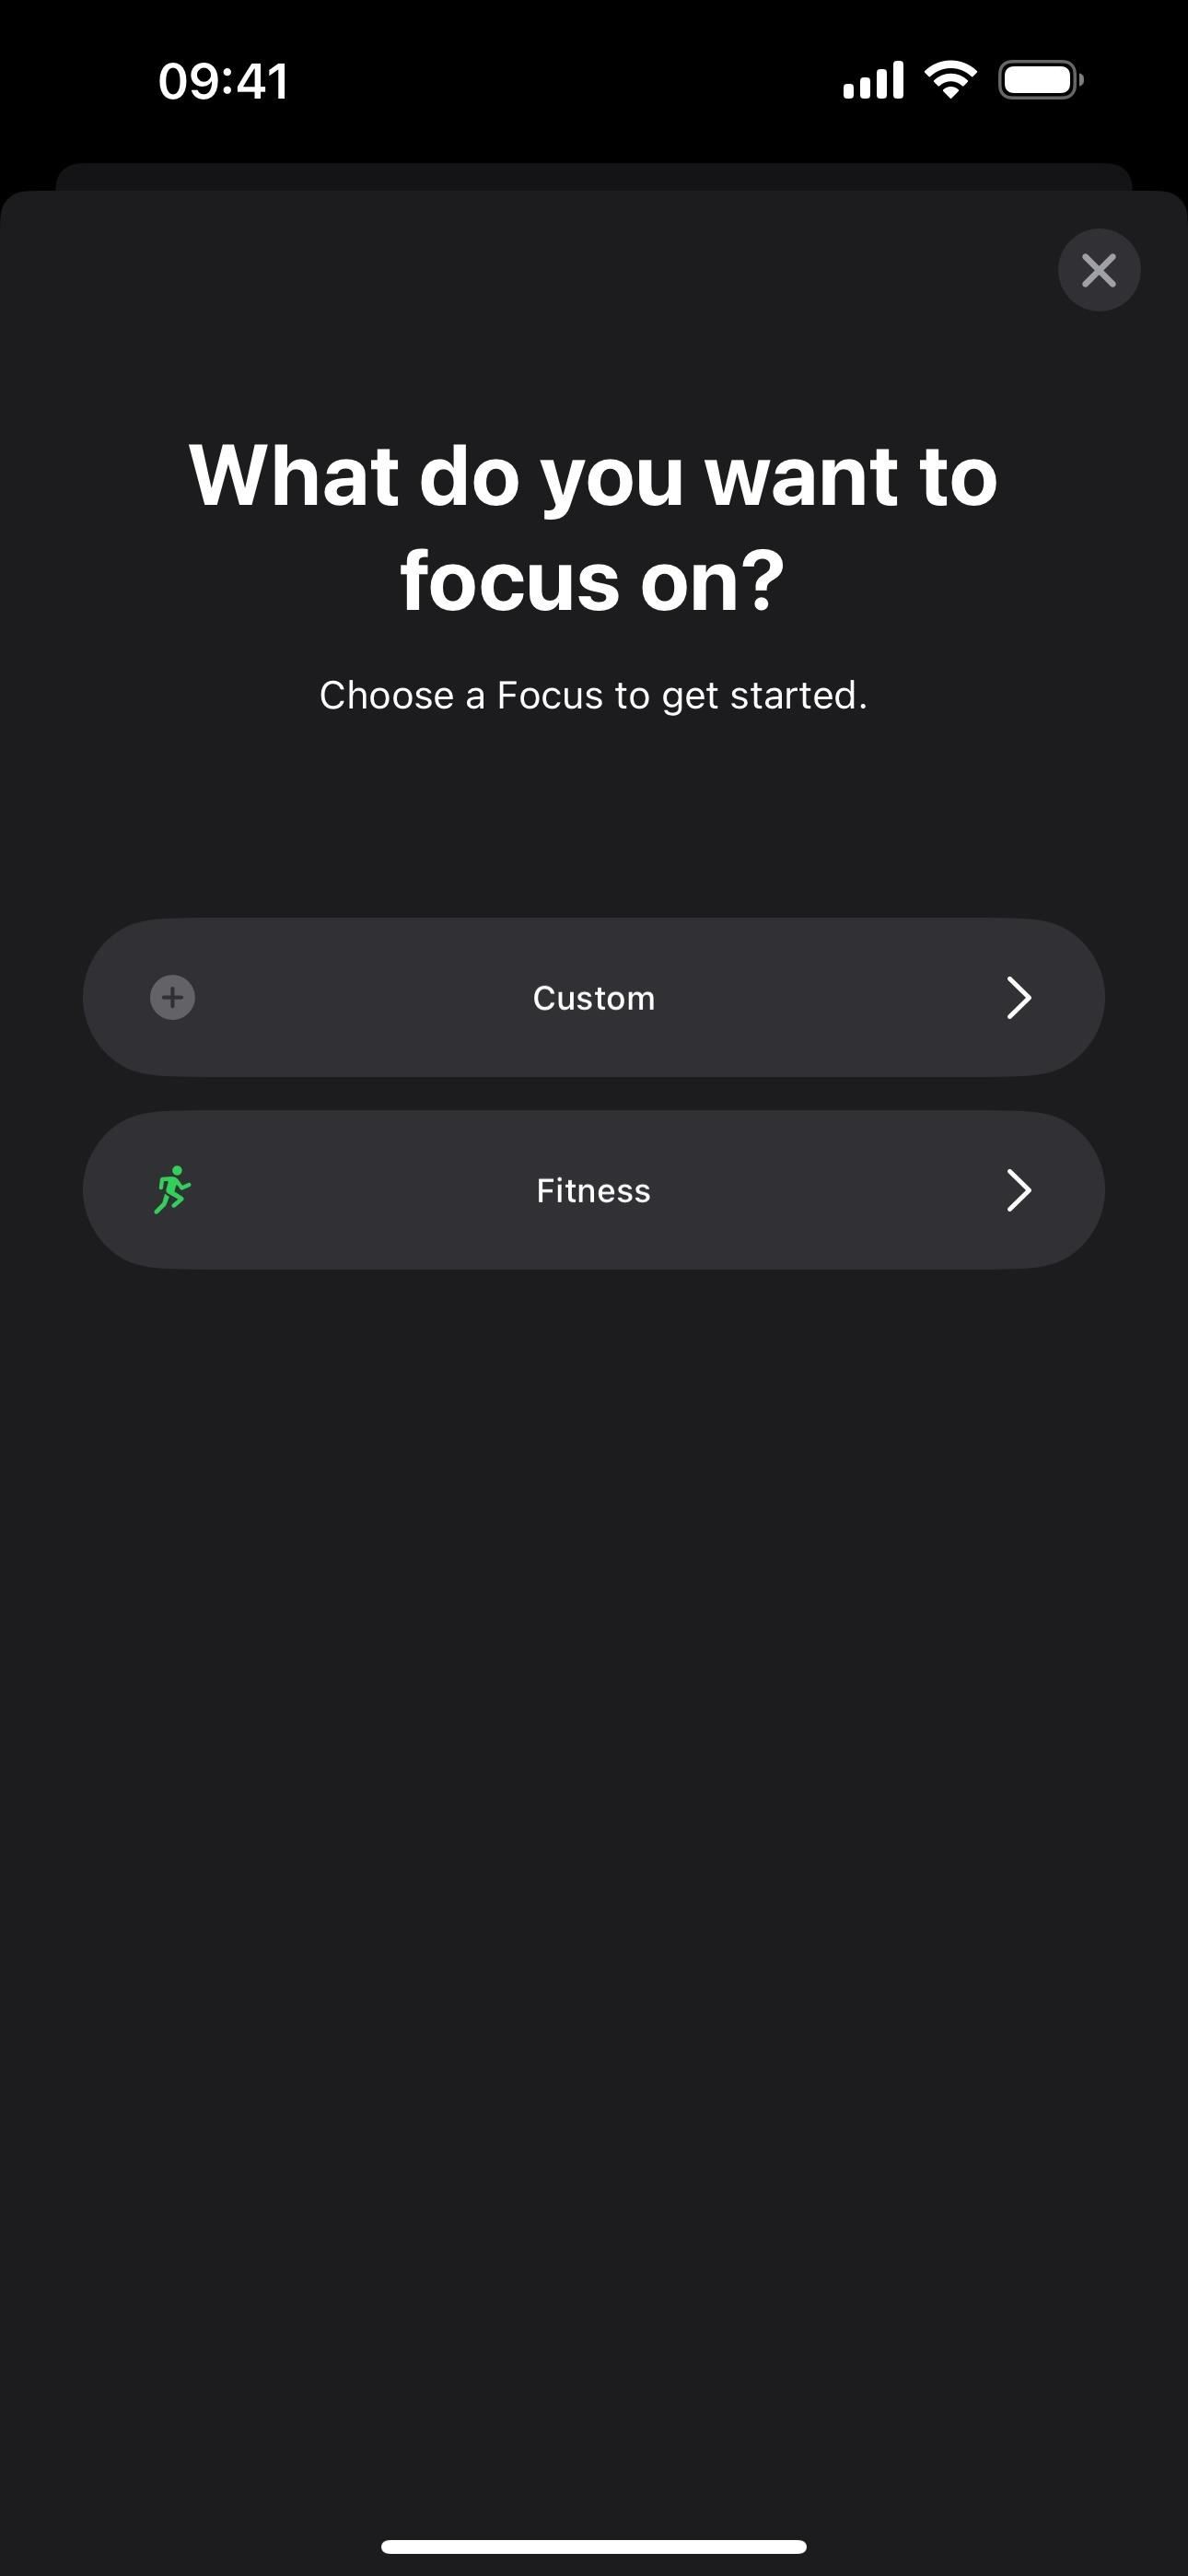
After hitting the plus icon, you will be redirected to the Focus preferences in Settings, where you can immediately choose a Focus to start building. See “Customizing a New or Old Focus” below for more info on building focuses.
Viewing Your Focus Settings
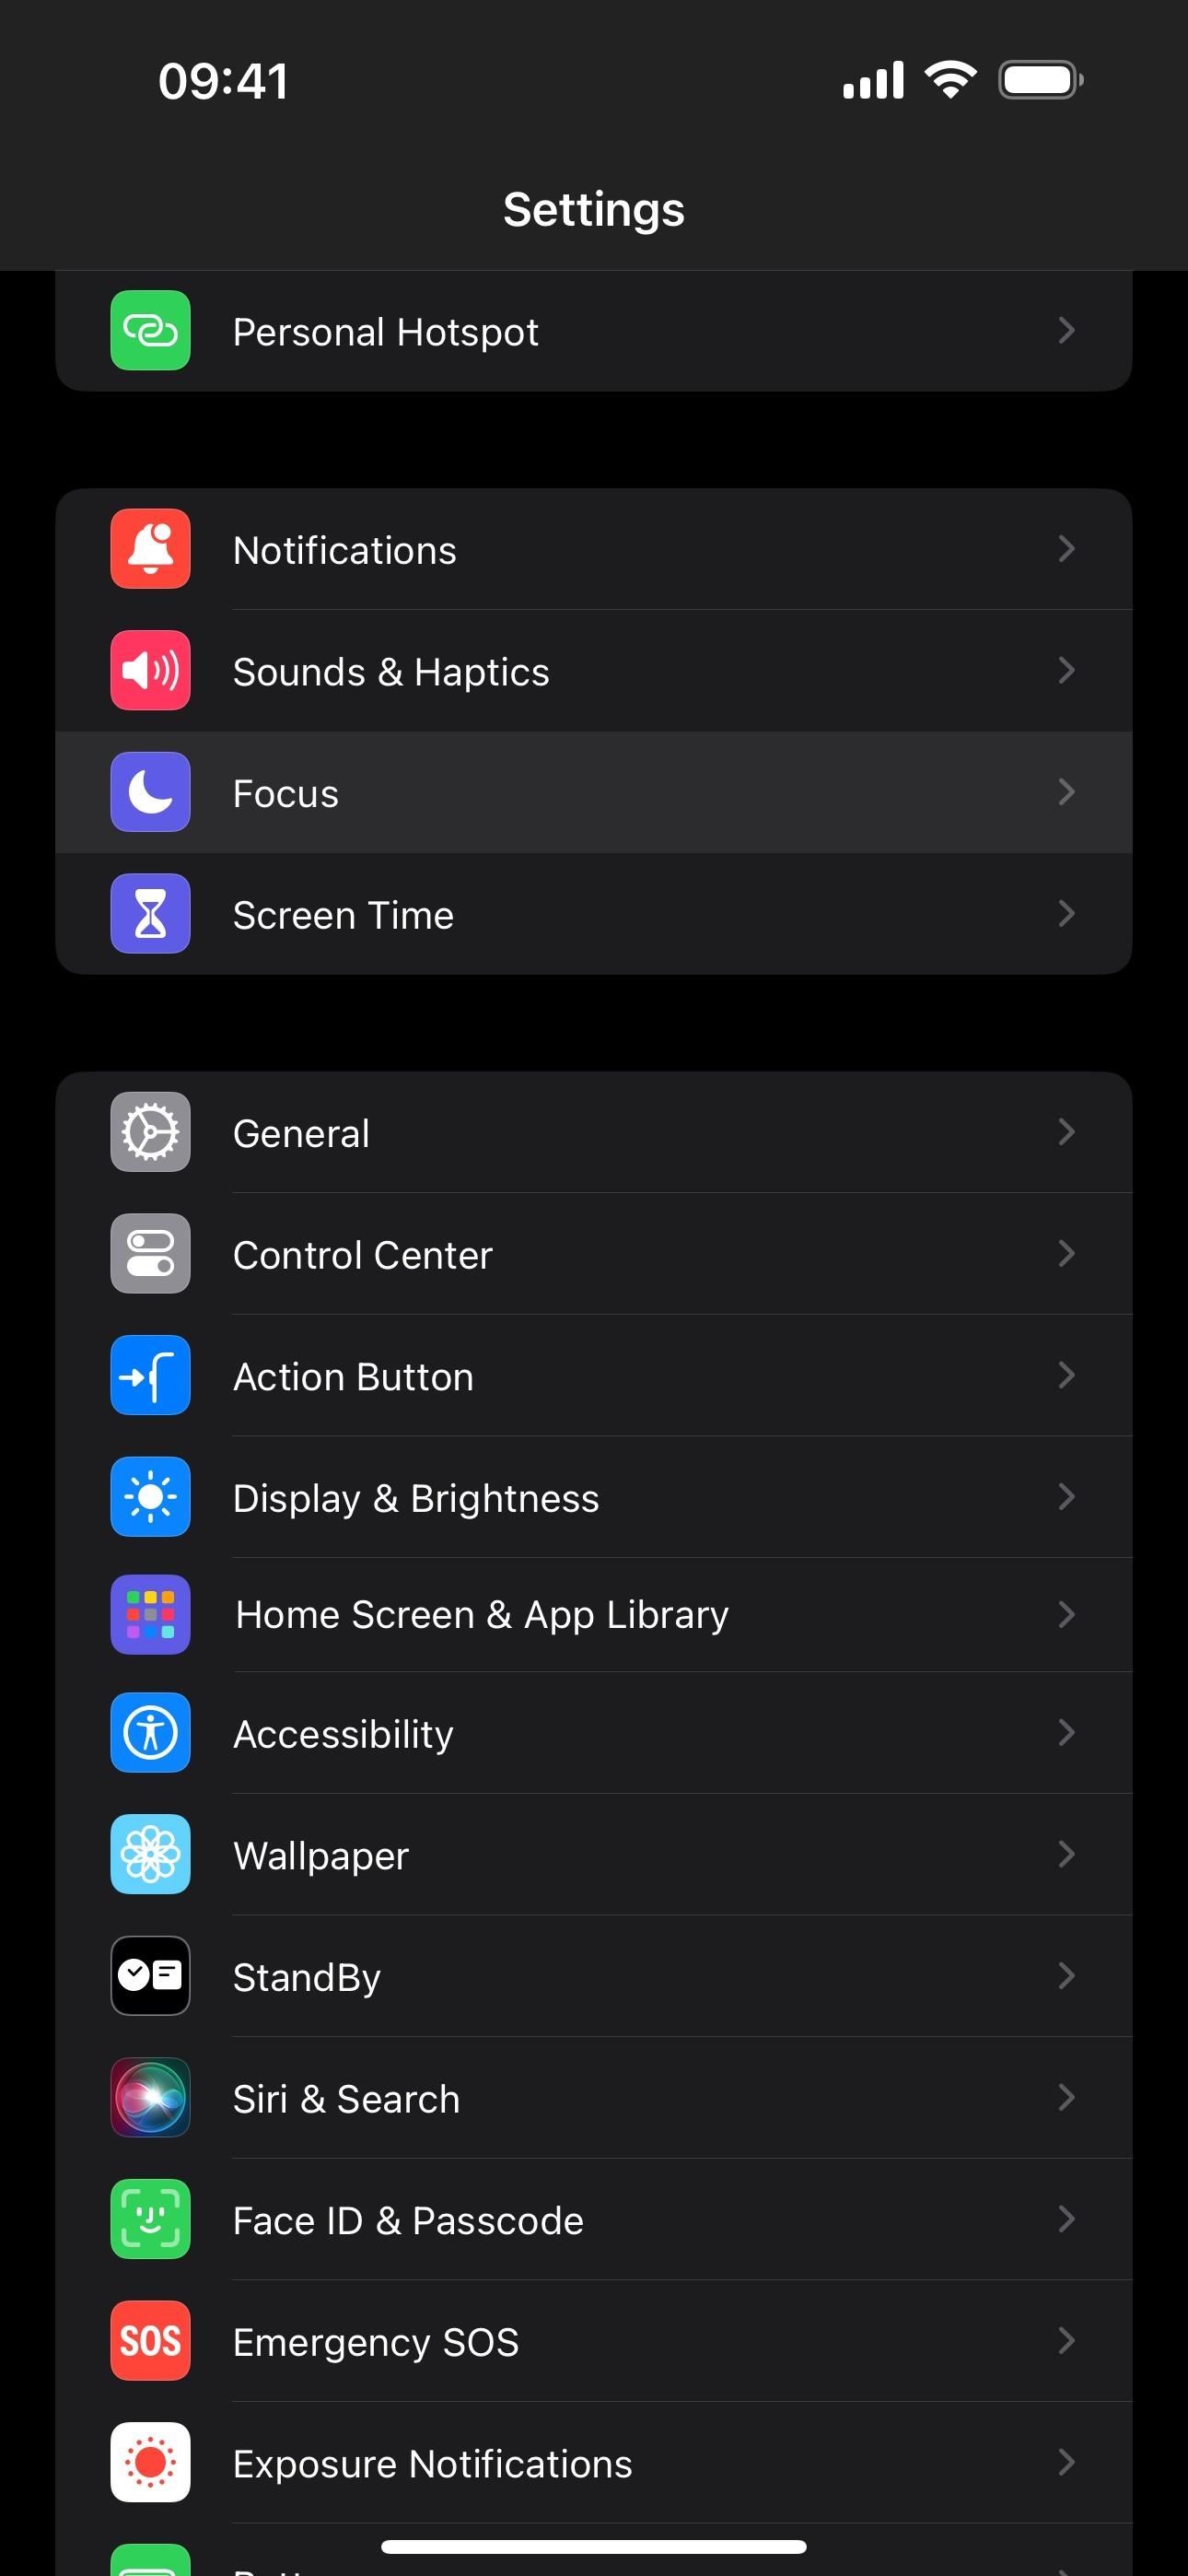
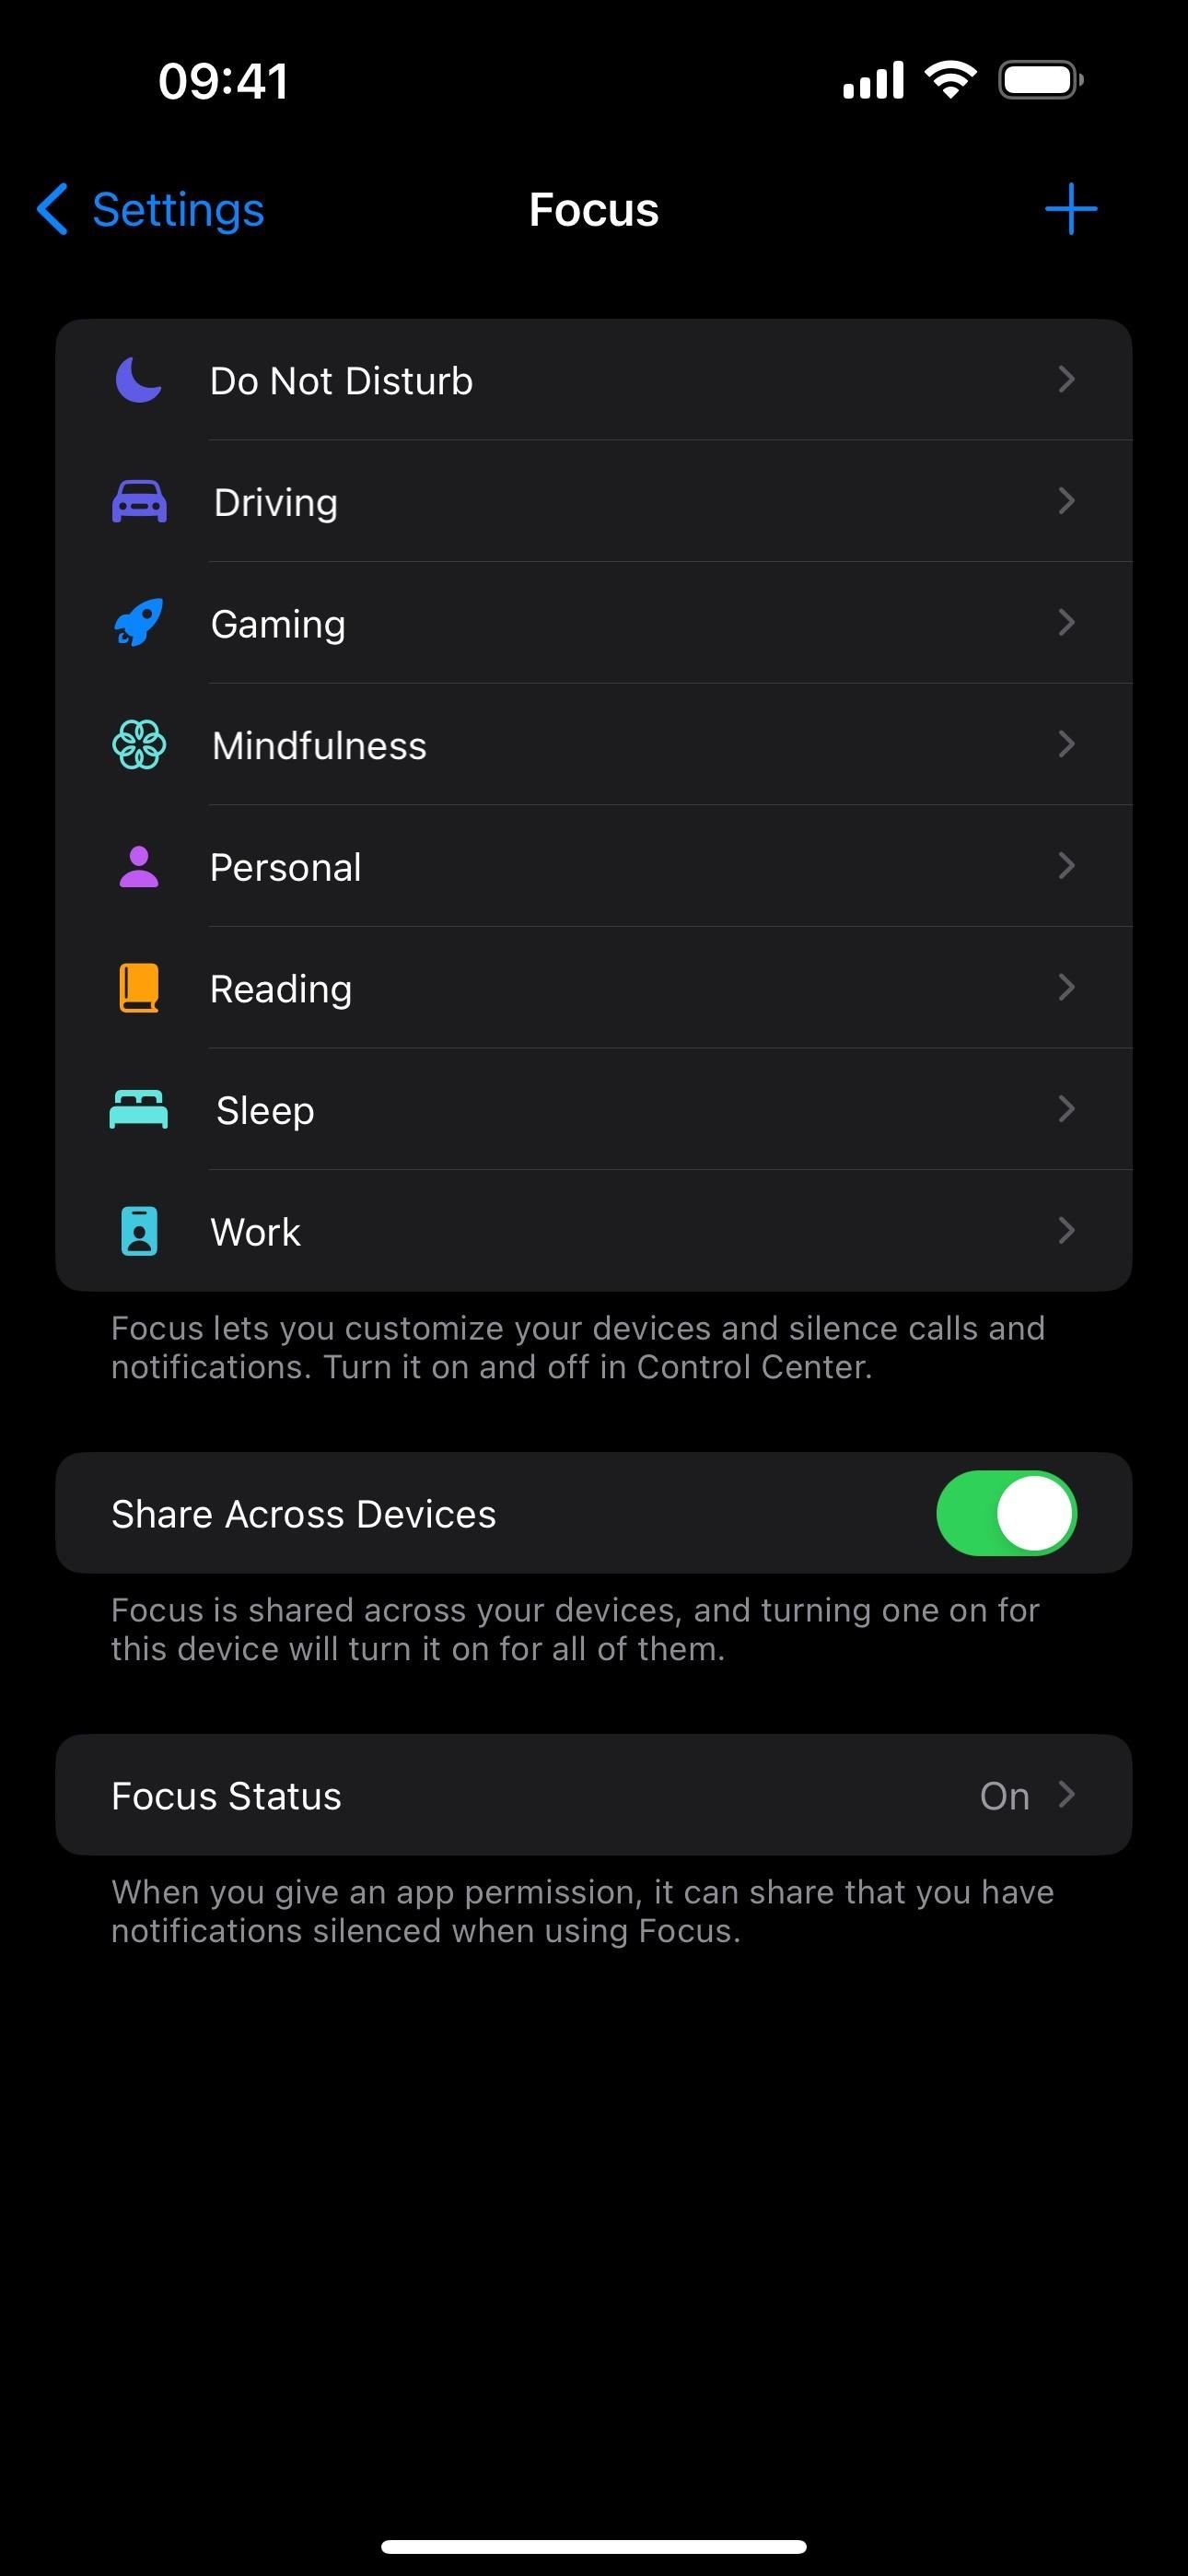
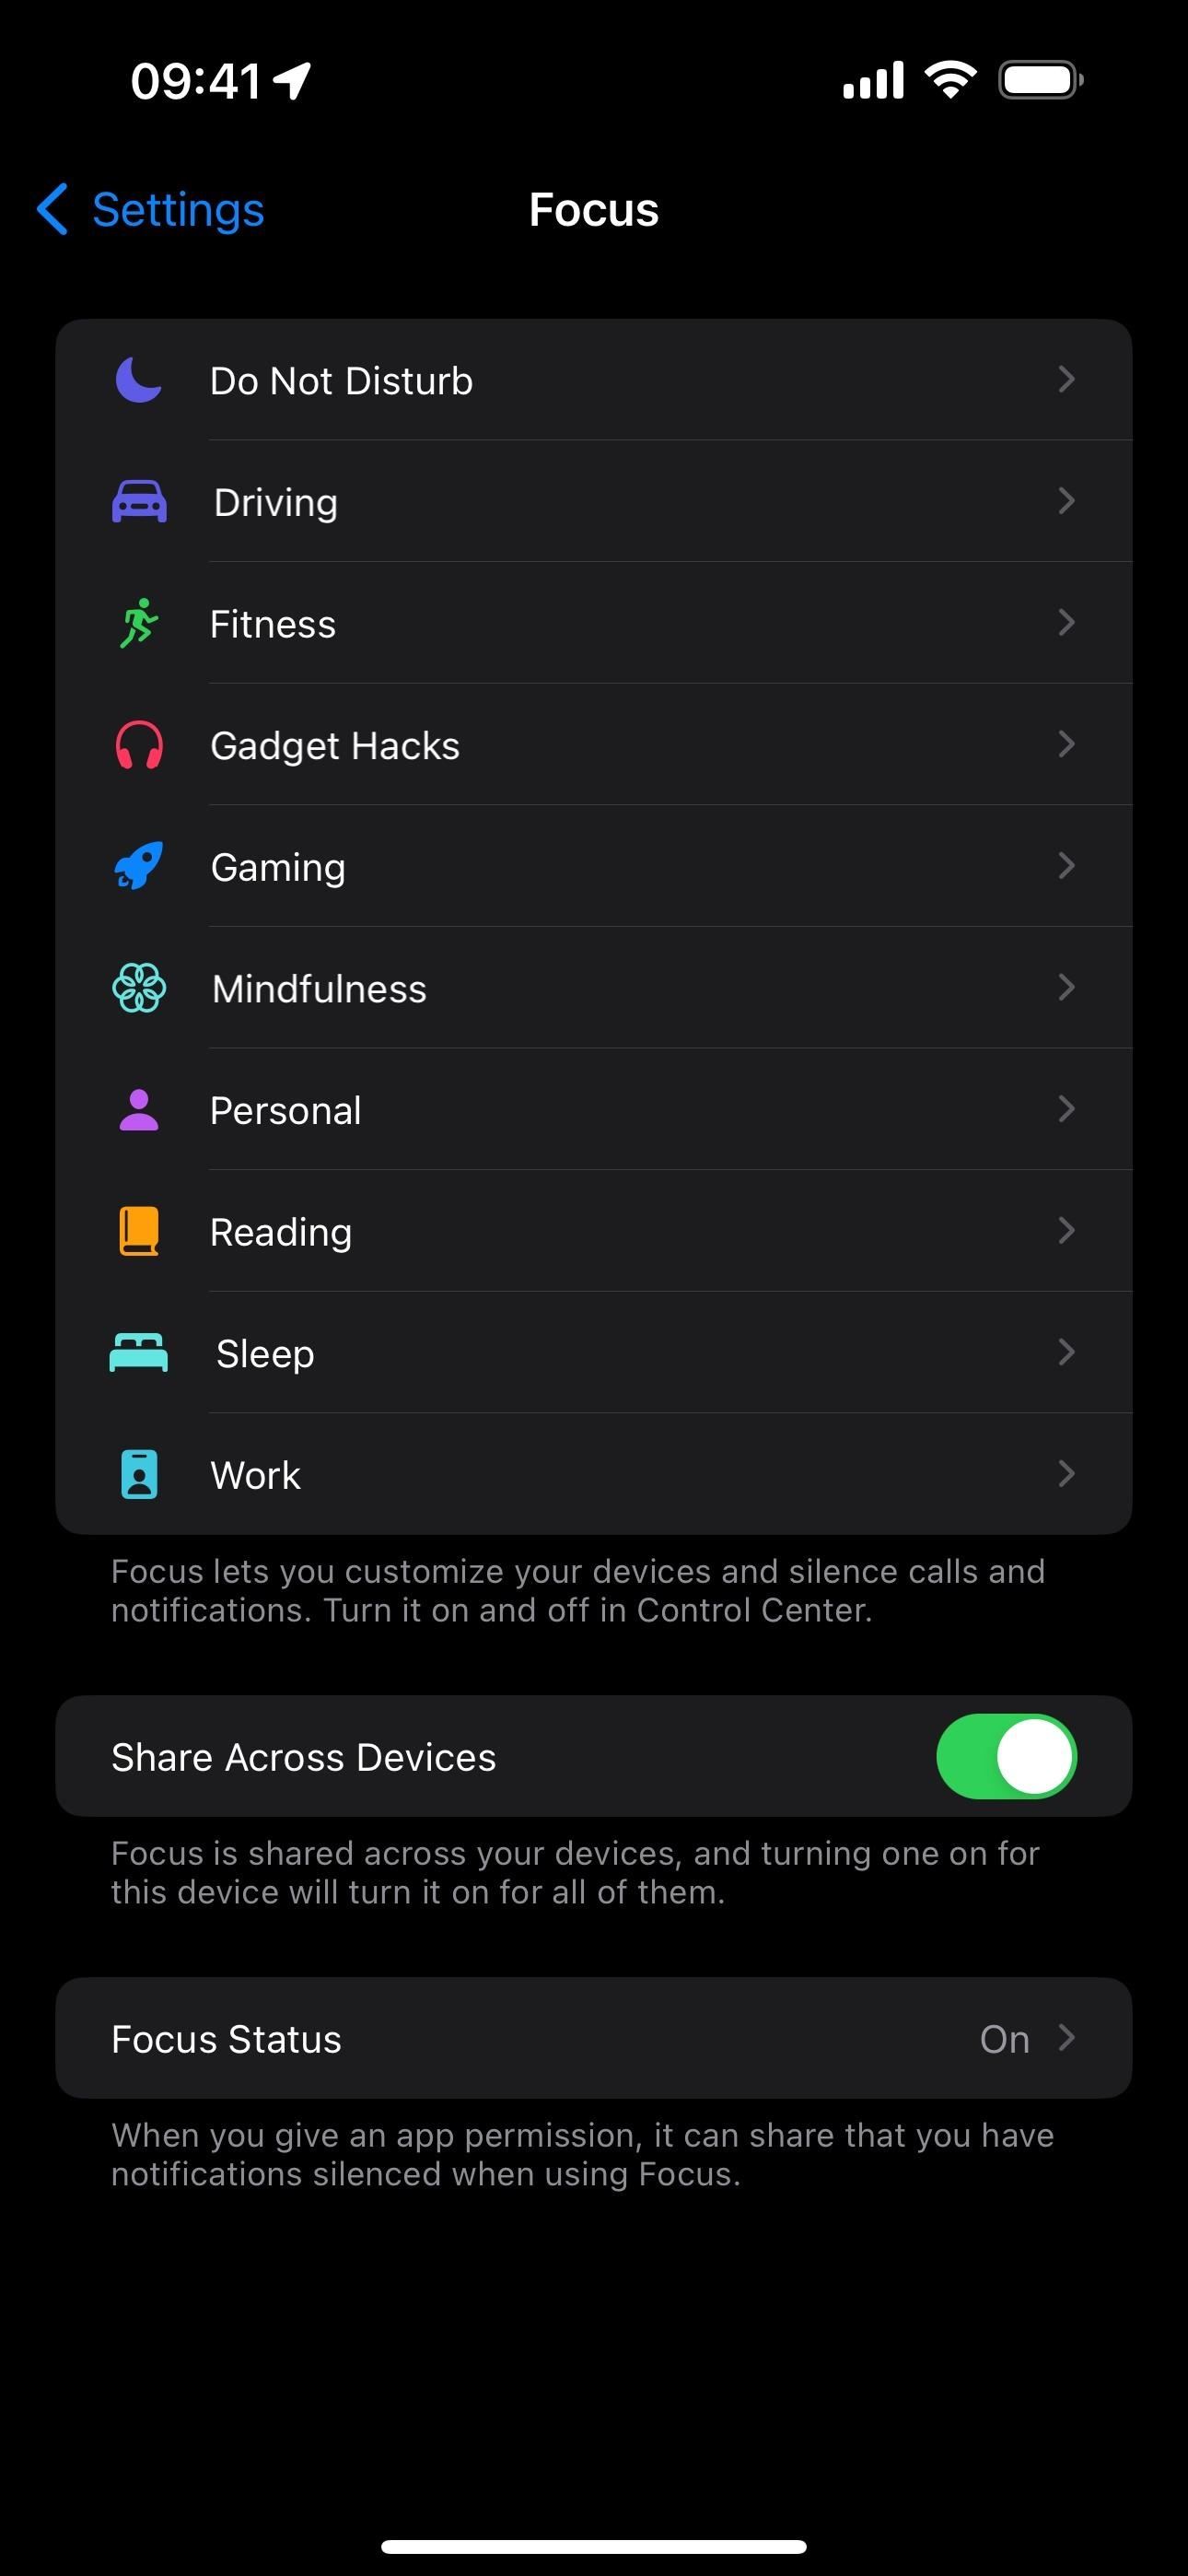
The Focus menu in the Settings app lets you manage Focus options, create new ones, toggle them on/off, and more. To access it, navigate to Settings –> Focus.
On the Focus settings, you may see one or more Focus options available, which can include:
- Do Not Disturb
- Sleep
- Work
- Personal
- Driving
- Fitness
- Gaming
- Mindfulness
- Reading
- Custom options
All of these can be customized to your liking. Just tap the one you want to edit the preferences. You can delete any Focus except for Do Not Disturb, and you can have up to 10 Focus options, which can include the above topic names or any number of custom-built Focus modes.
Creating a New Focus
You can create a new Focus from scratch or use one of Apple’s templates. The process is relatively the same no matter which you choose.
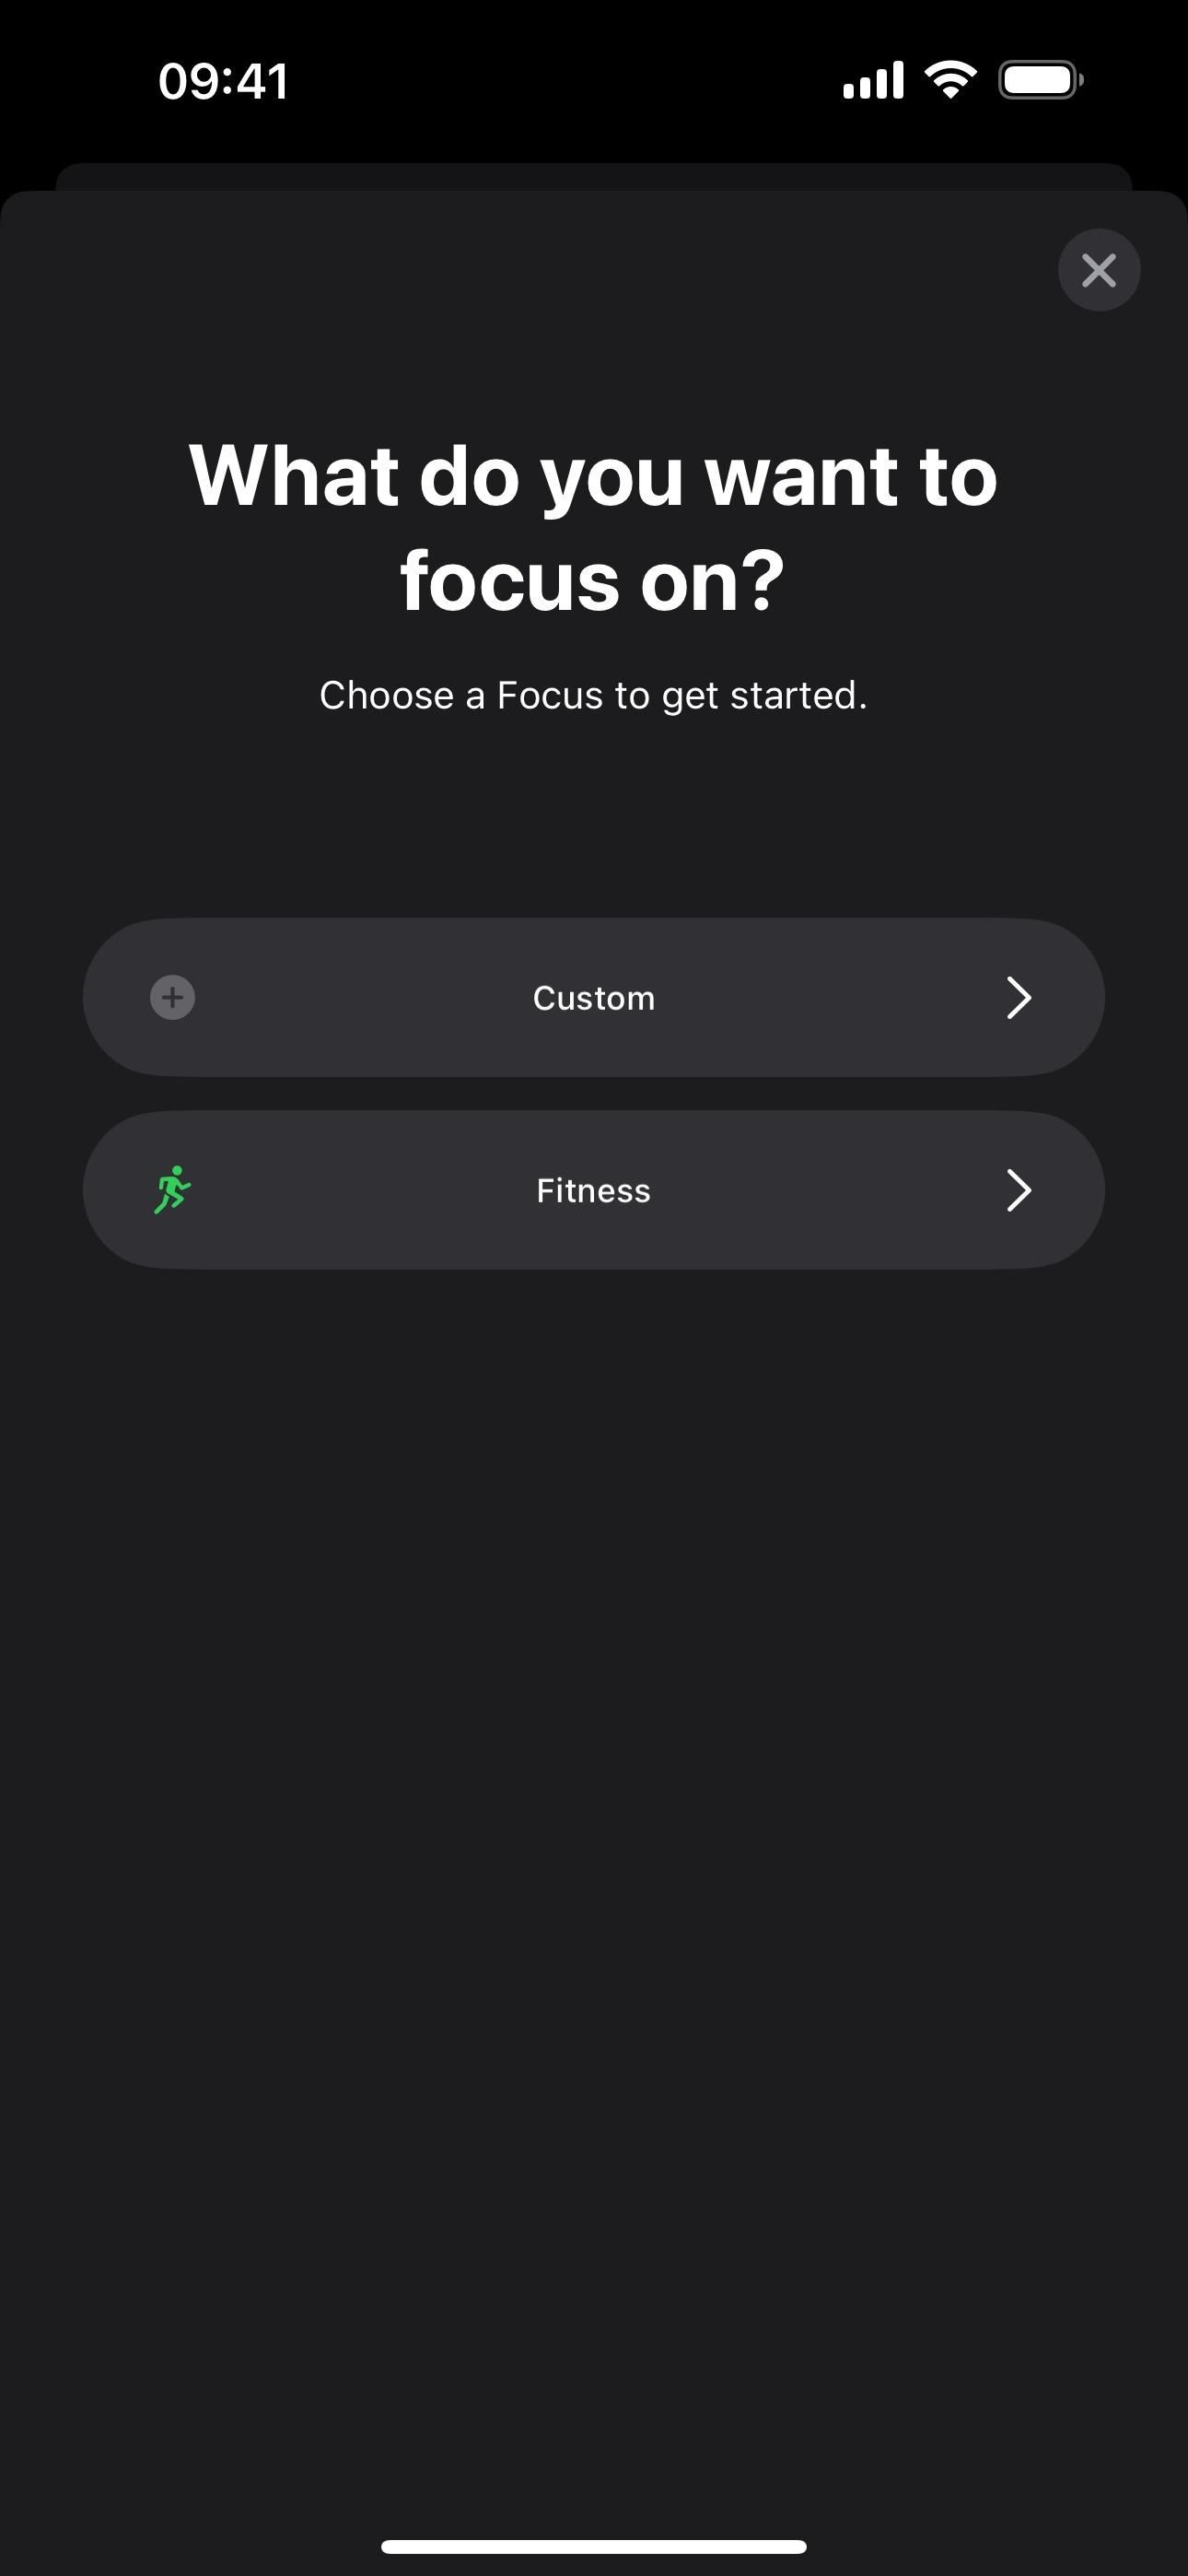
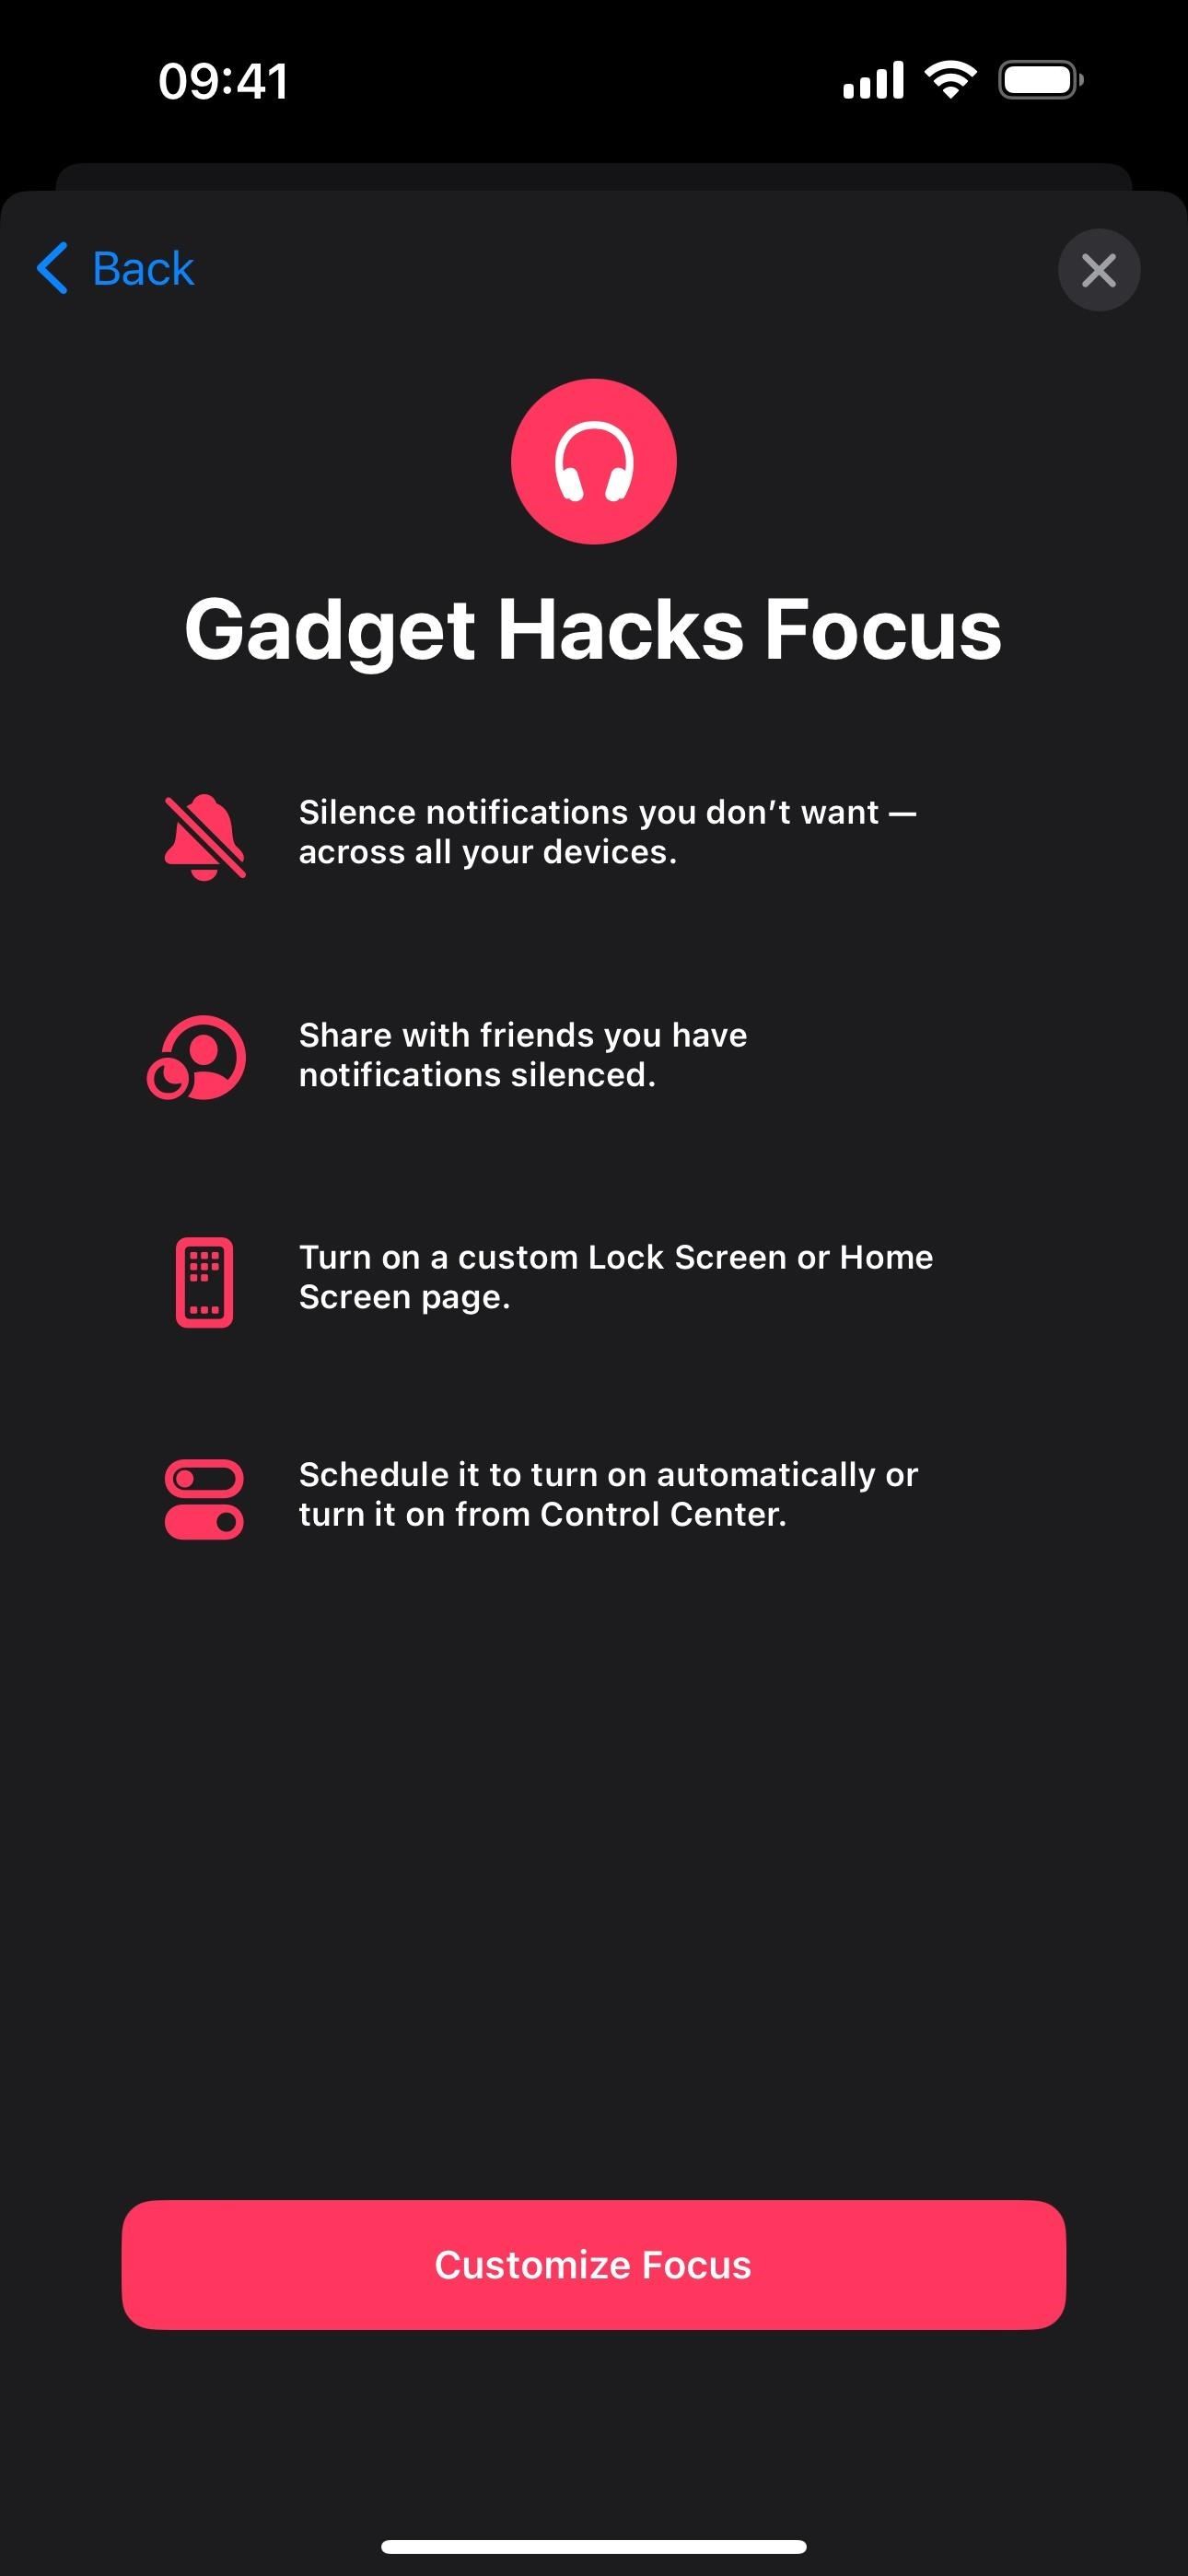
Tap on the plus (+) sign on the Focus settings page or from the expanded Focus control in Control Center, then choose one of Apple’s templates, such as Fitness or Gaming, or “Custom” to build one from scratch. If you select a template, tap “Customize Focus” on the description window to continue.
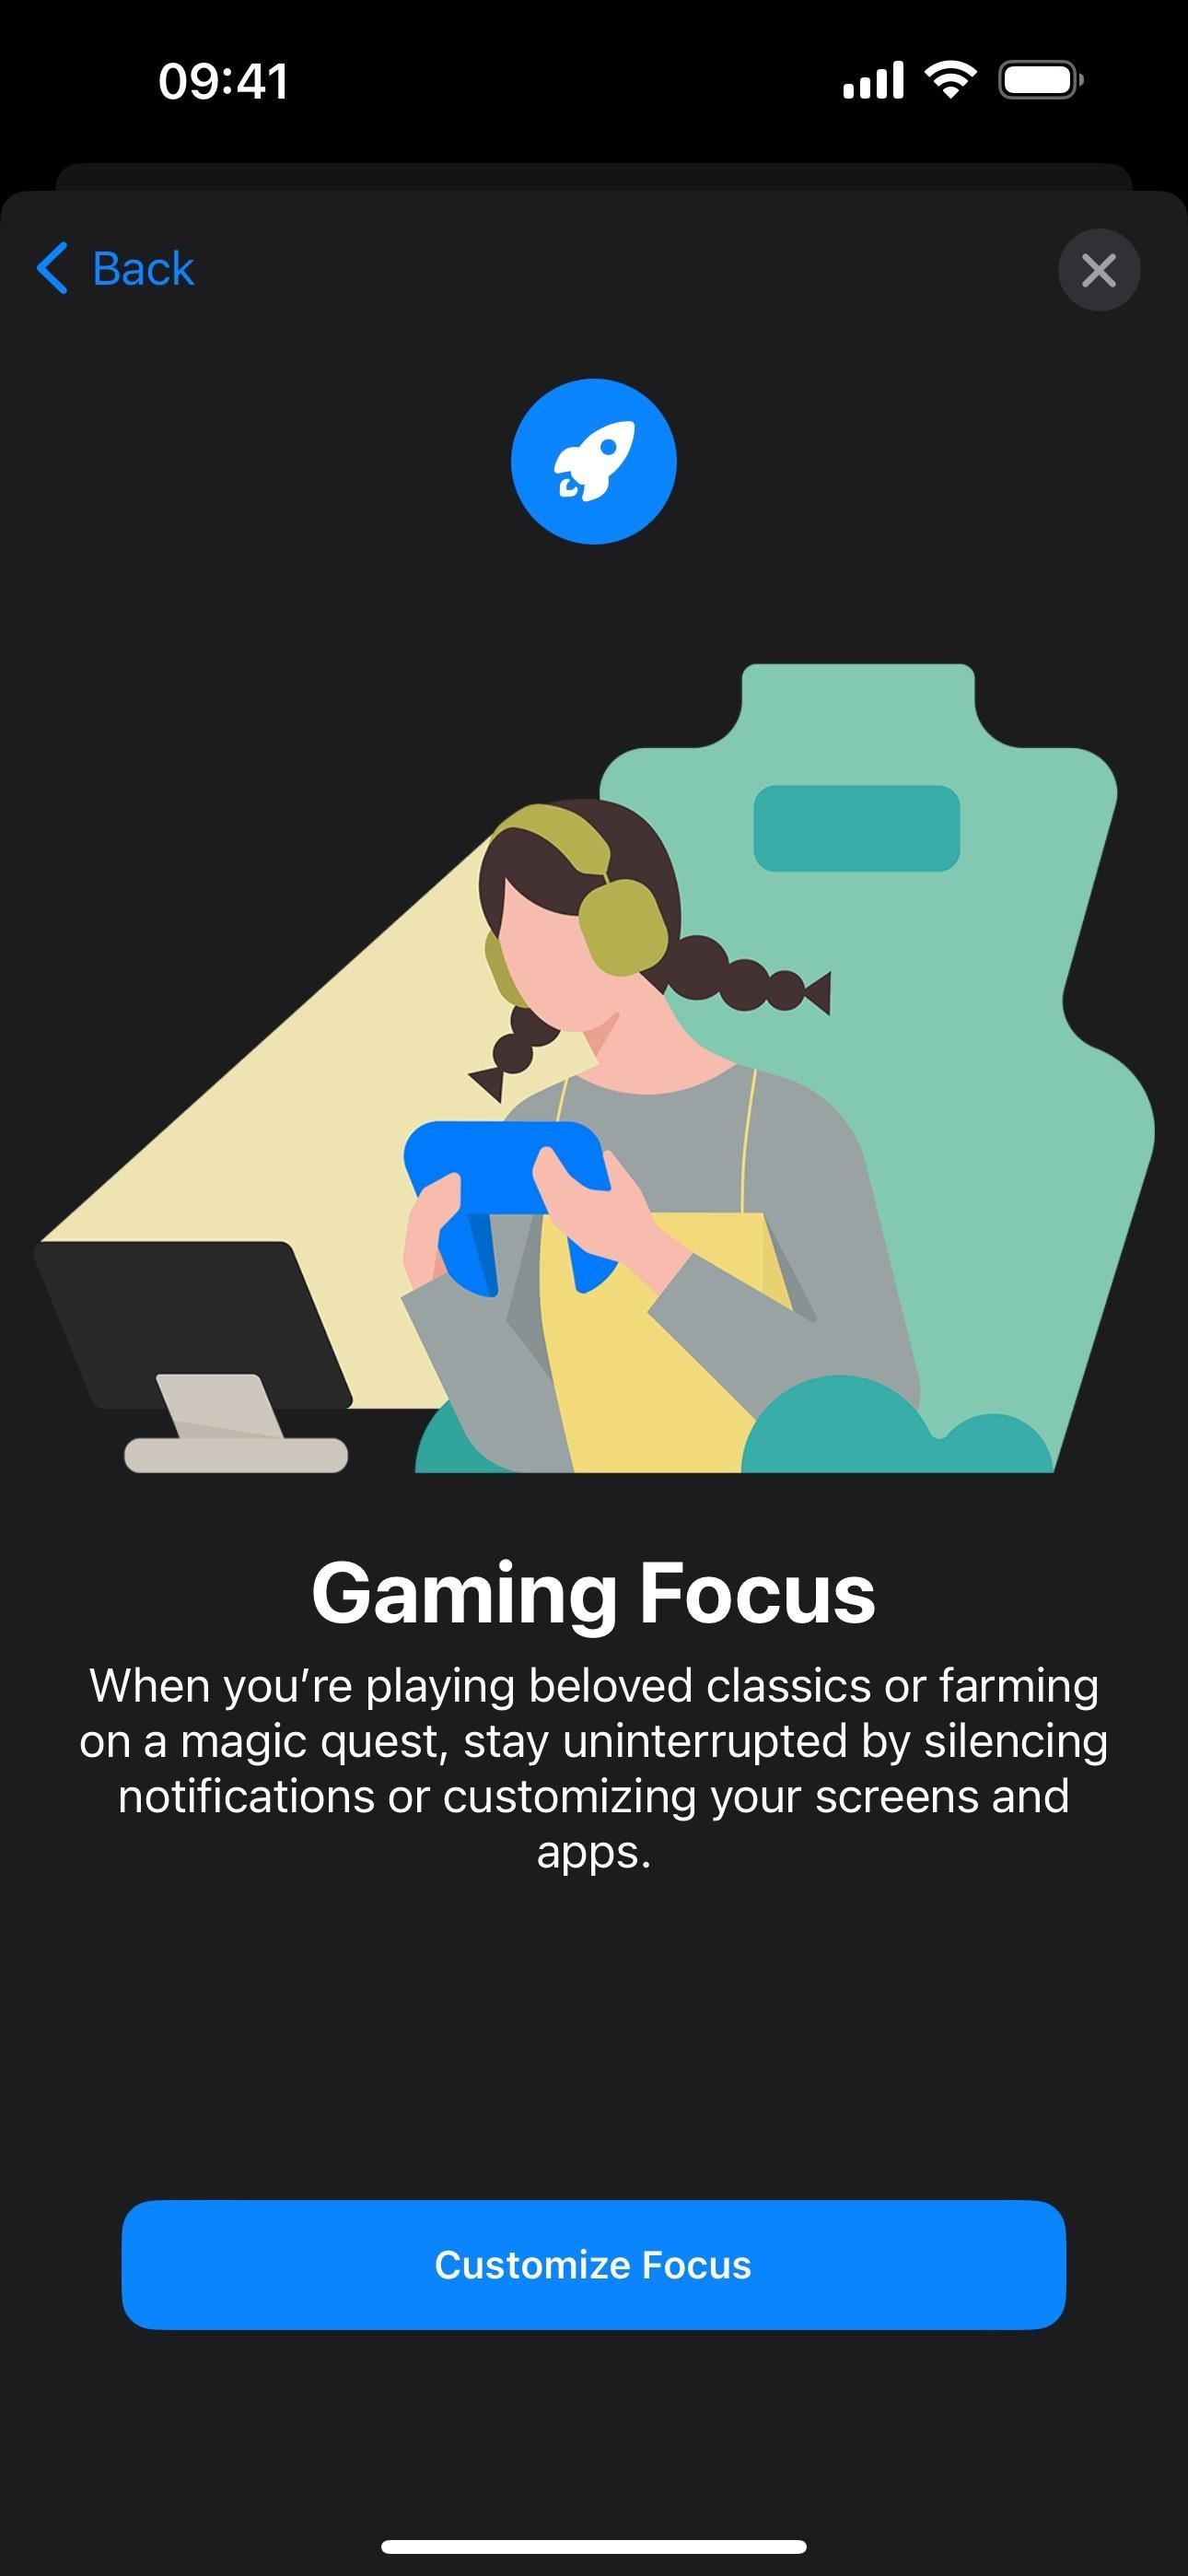
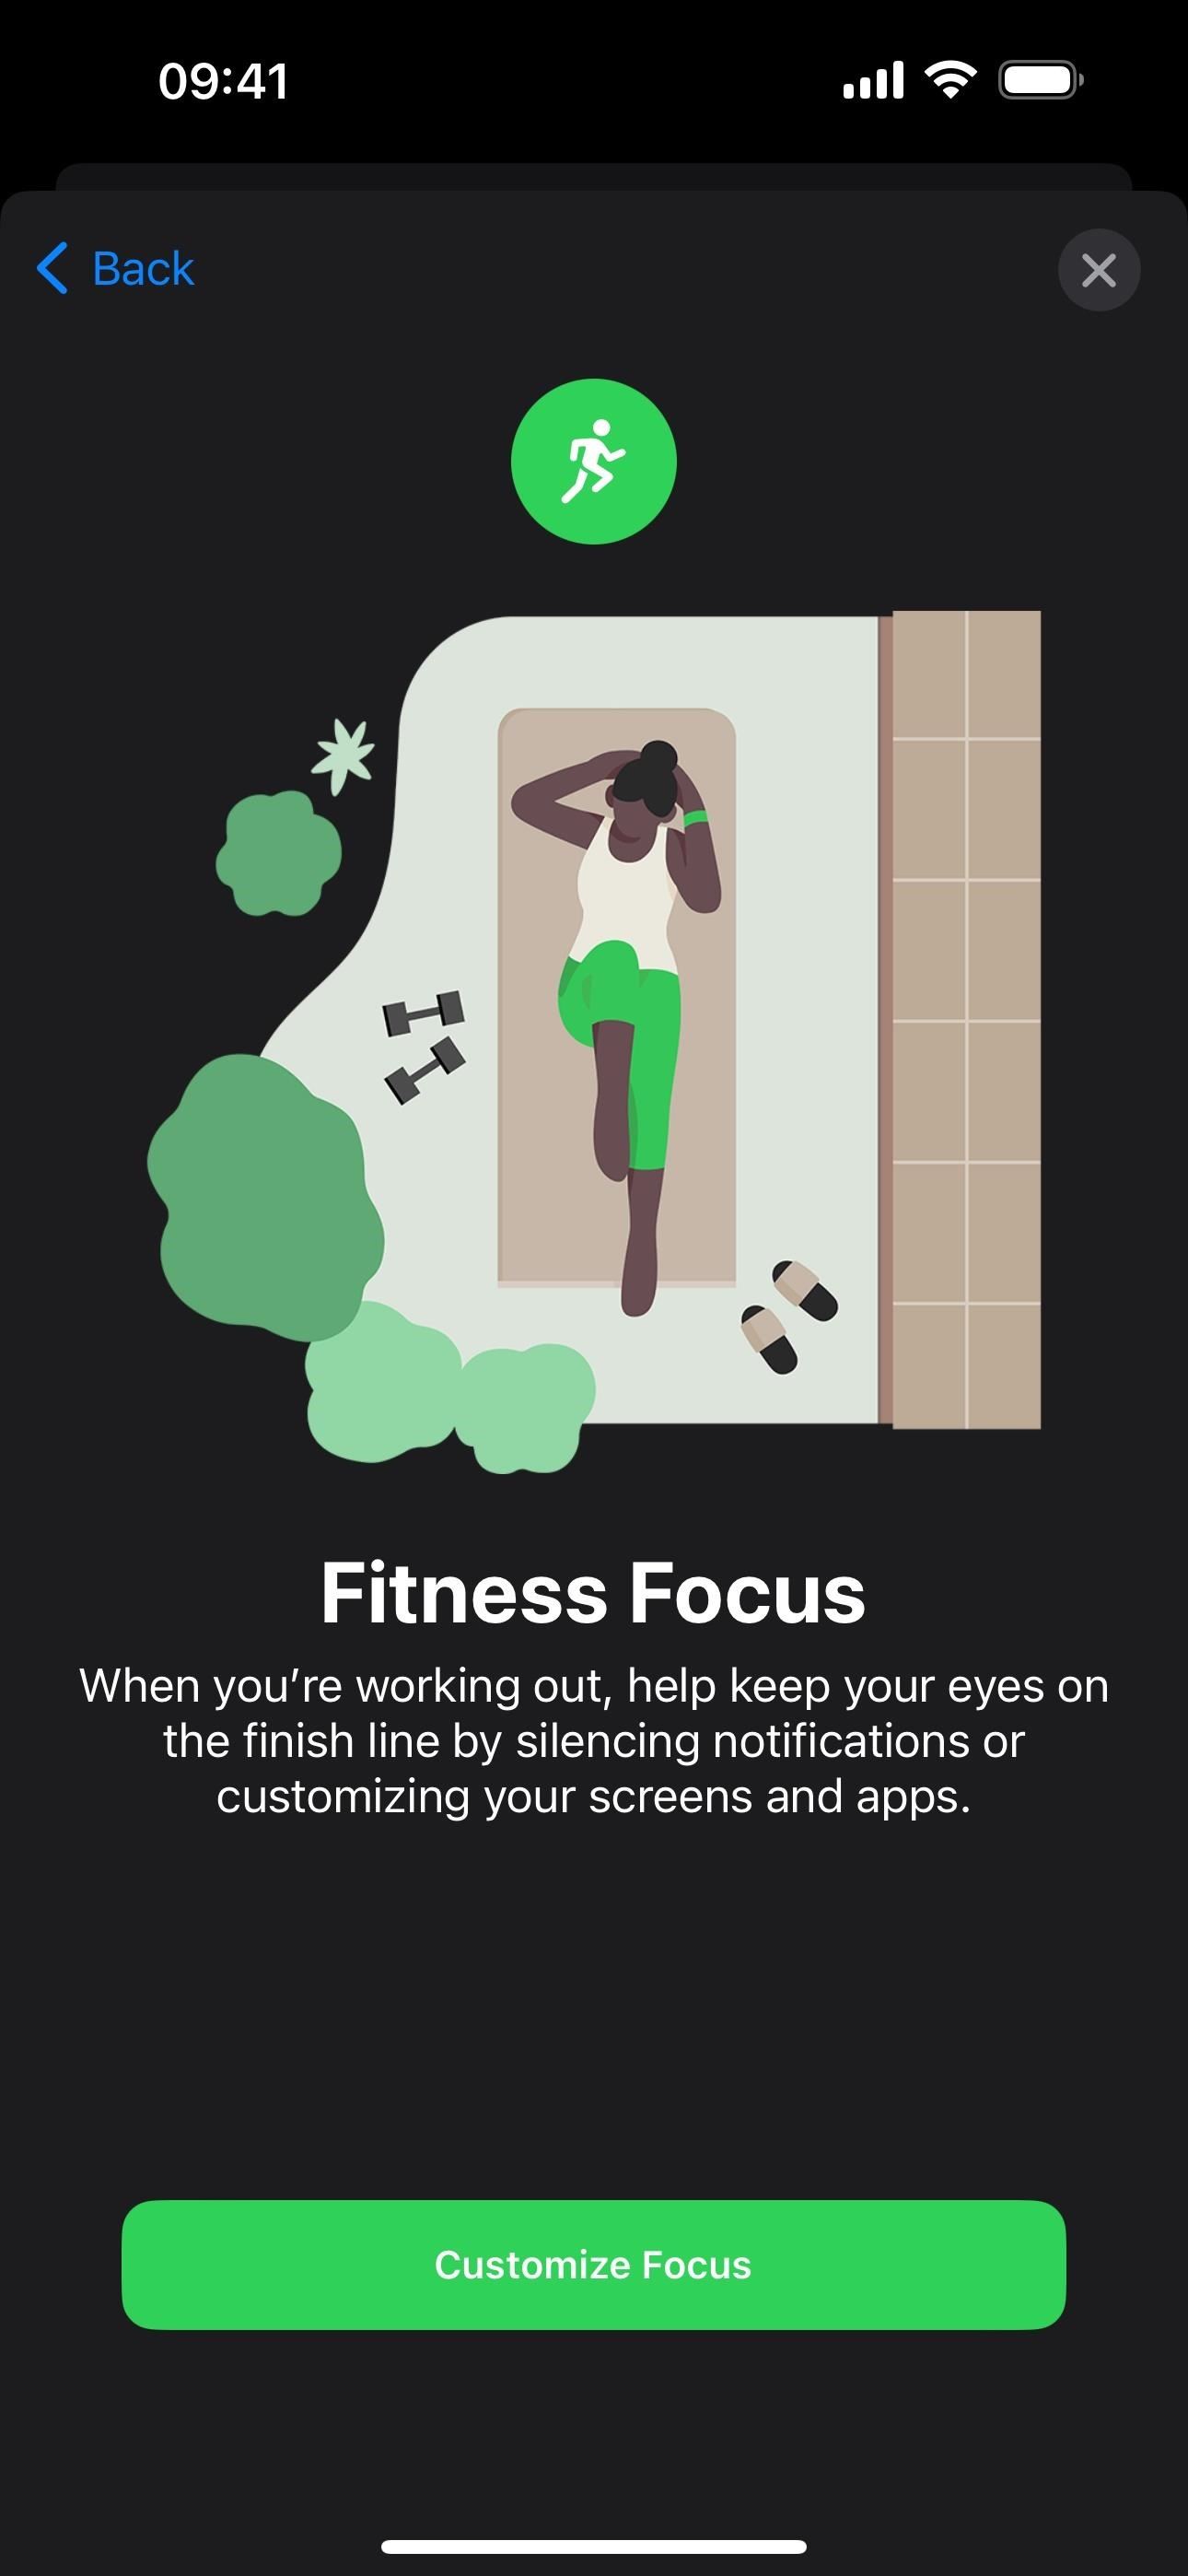
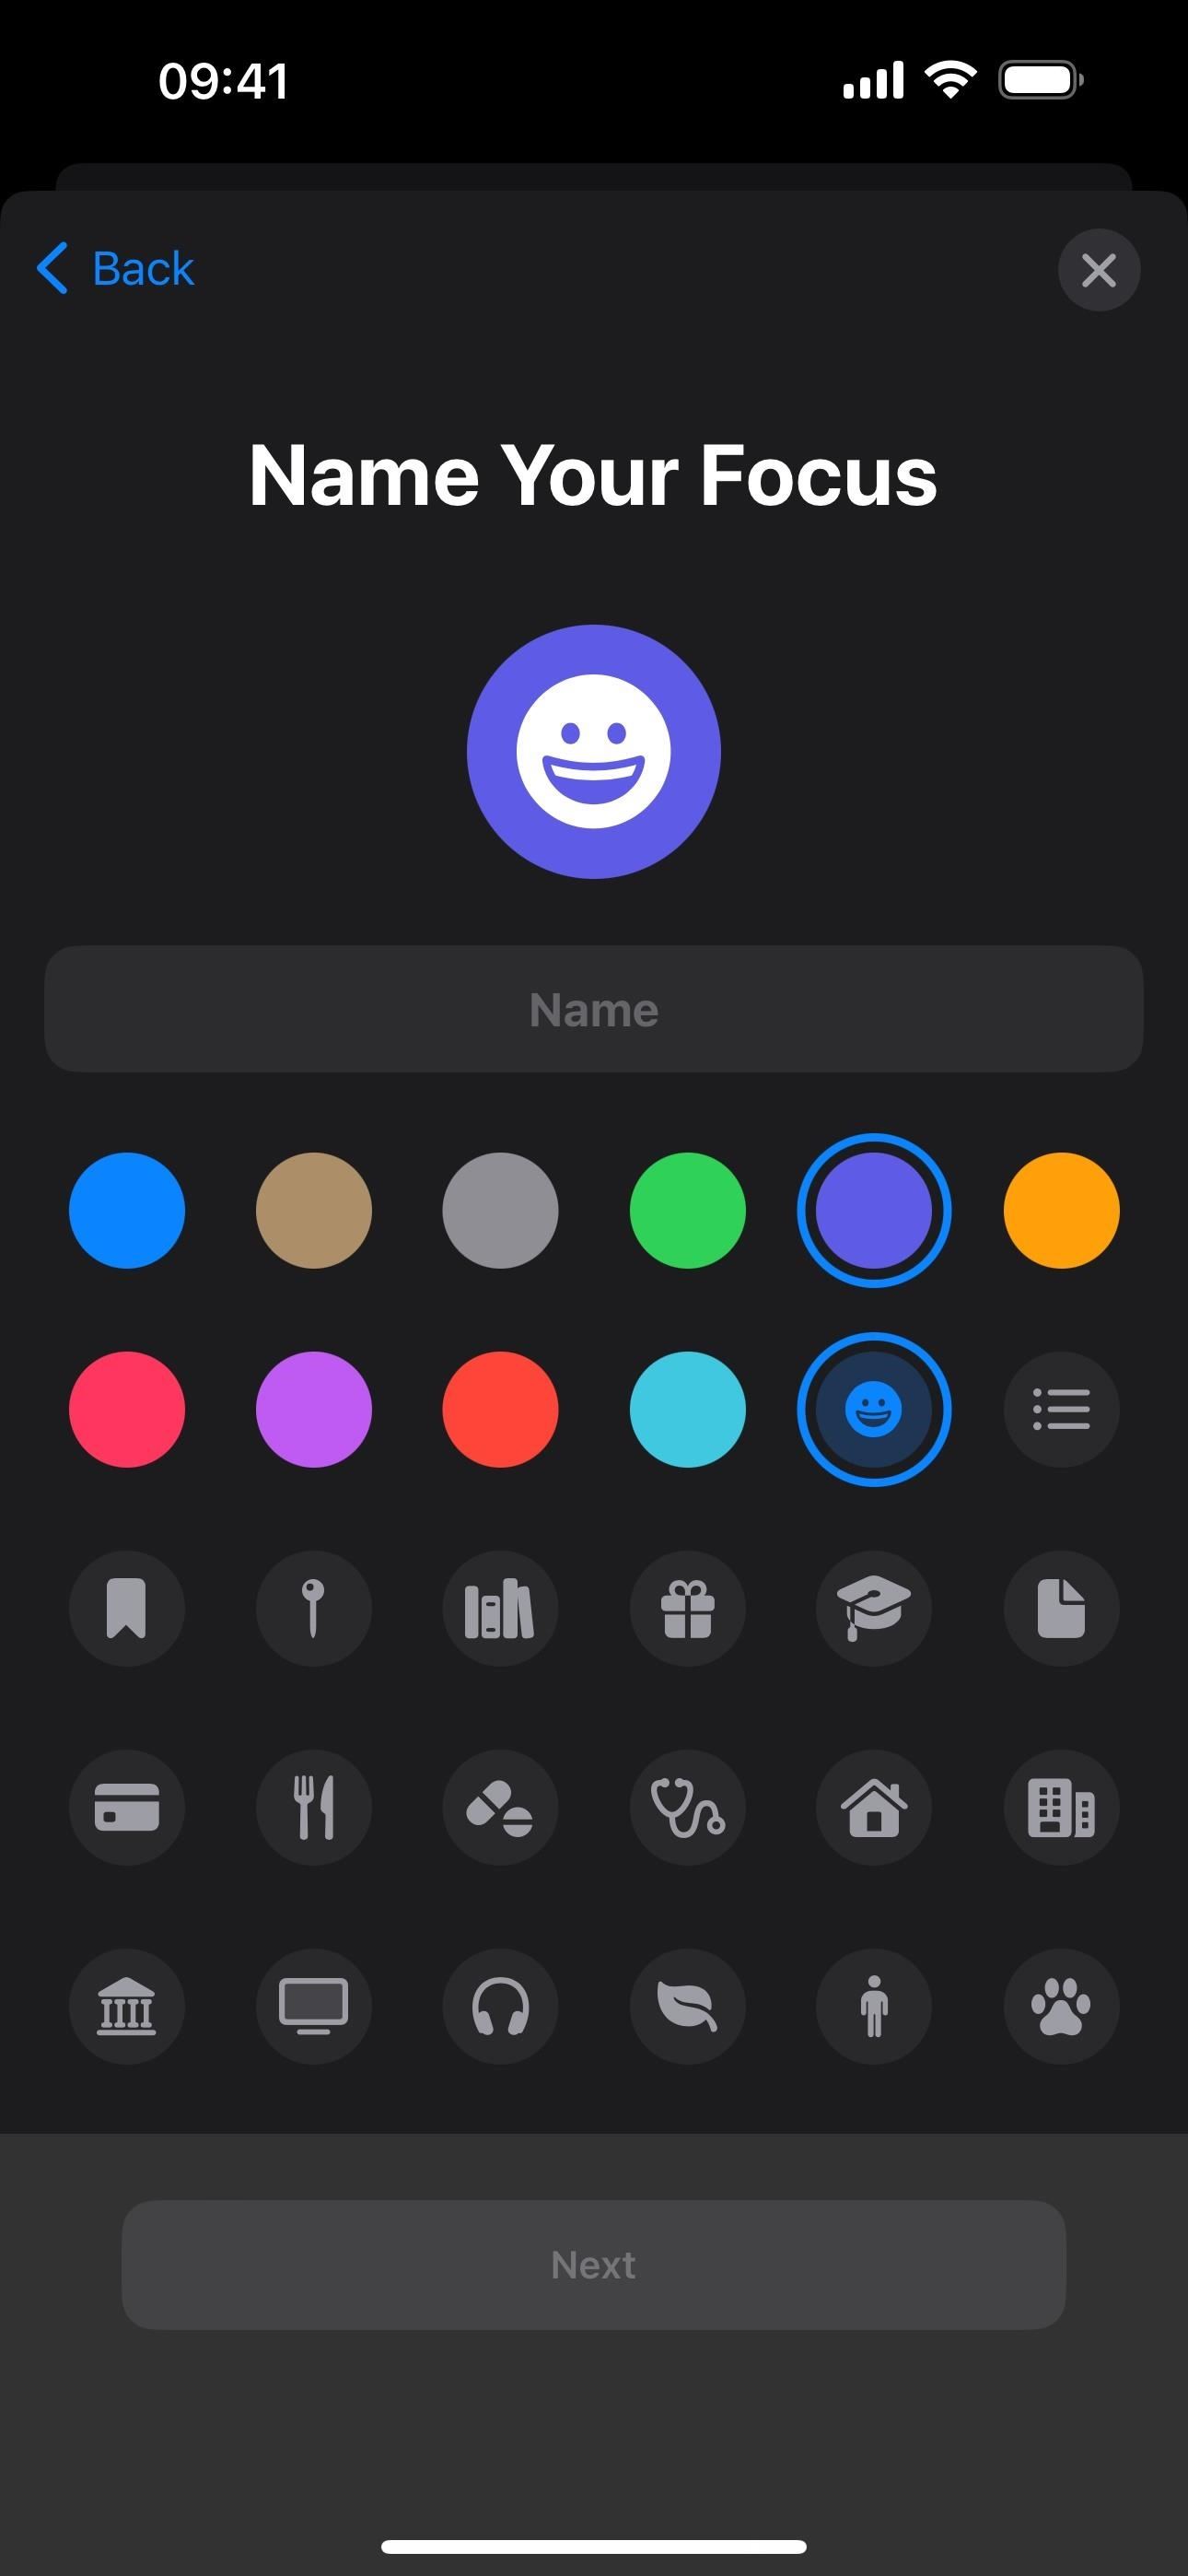
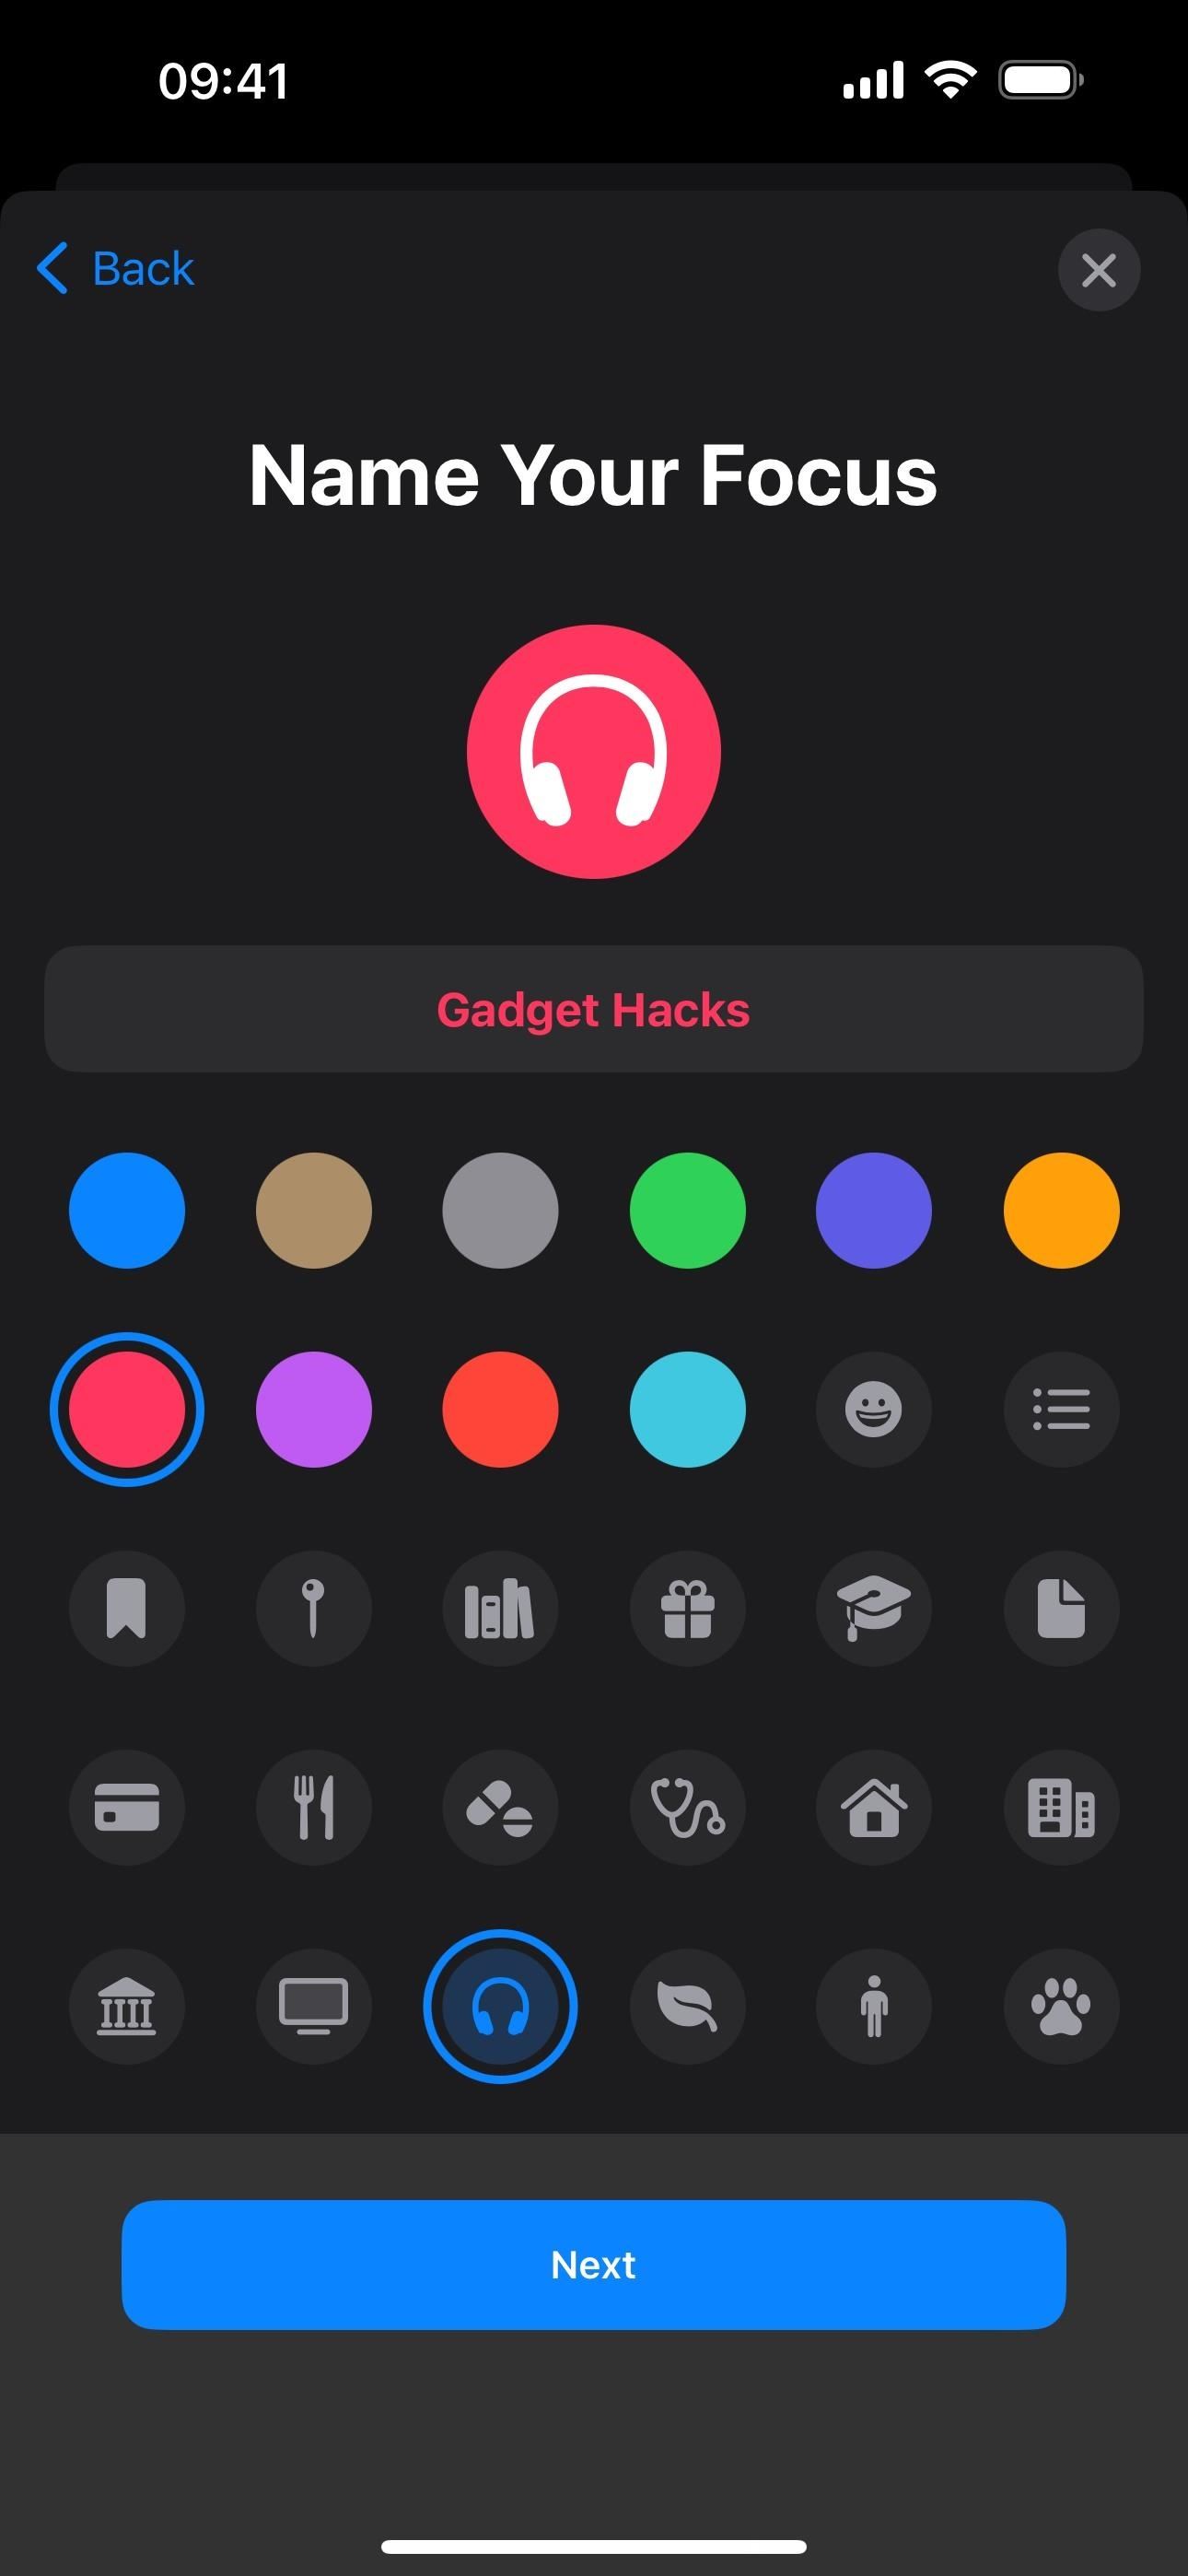
If you select “Custom,” you’ll get to name it and choose its icon and color. Tap “Next” to continue, then “Customize Focus.”
Customizing a New or Old Focus
Whether you’re creating a new Focus or editing one you already have, there are many options you can customize. Let’s go over them all now.
Option 1: Update the Name and Appearance
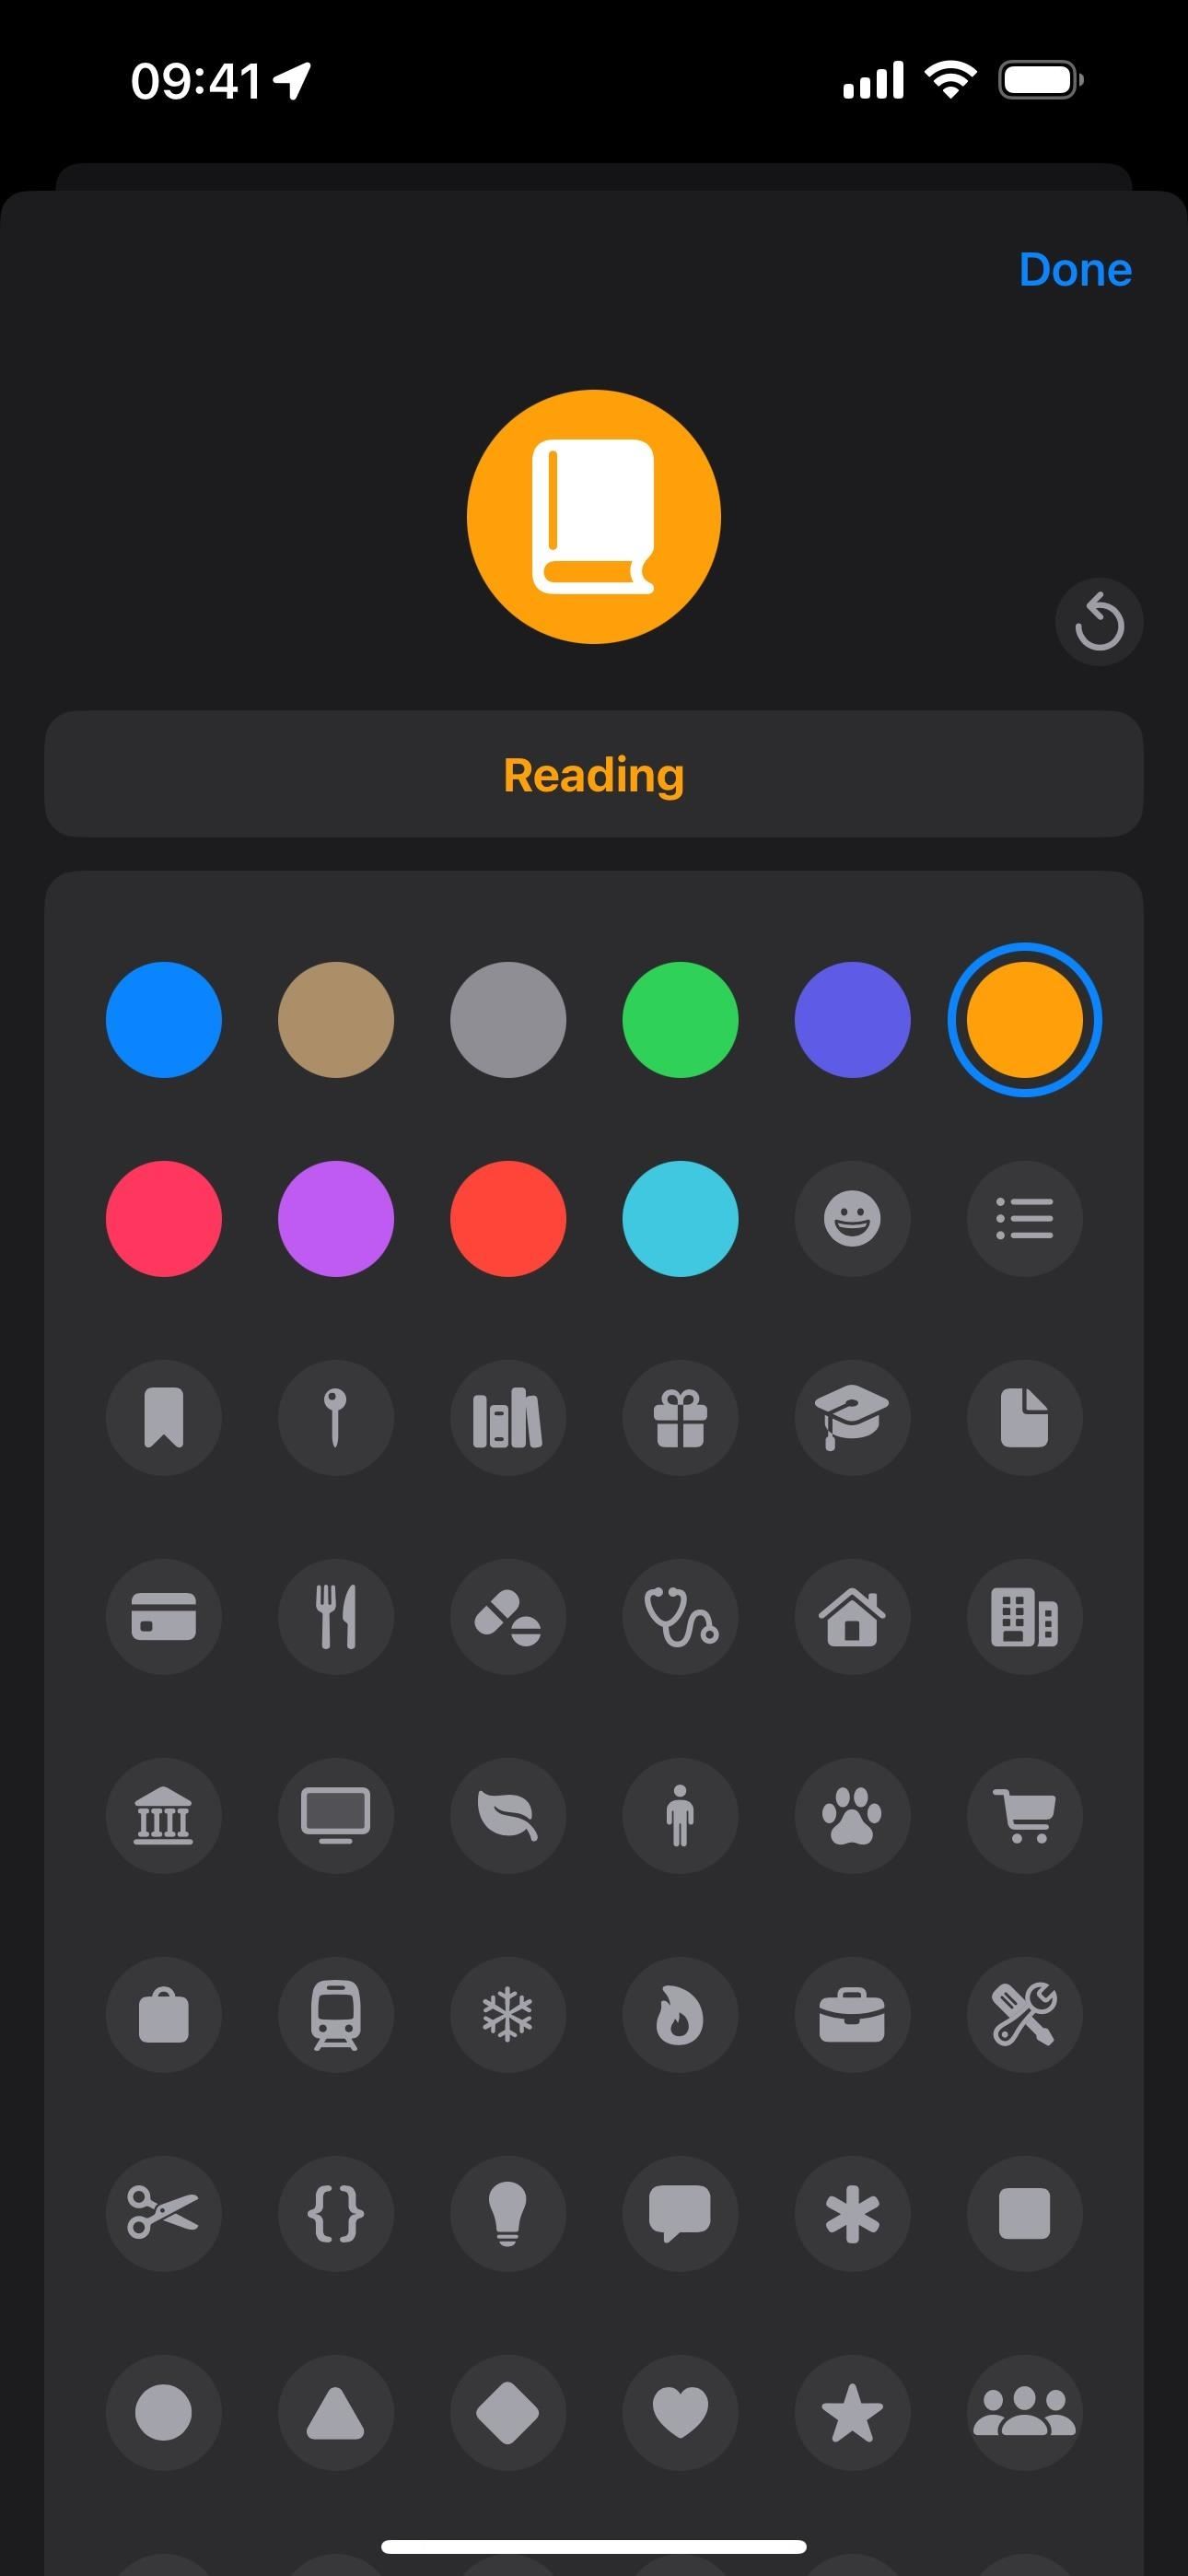
The first thing you can customize is the name of the Focus and its icon’s color and symbol. Simply tap “Edit” under the Focus name, replace the name, pick a new color, and/or select a different icon, and hit “Done.”
You can change all three things on a custom Focus, but for template options like Reading and Mindfulness, you can only change the icon and color or hit the counterclockwise arrow to return to the default look. The only Focus you can’t change the name and appearance for is Do Not Disturb.

Option 2: Allow or Silence Notifications from Specific People
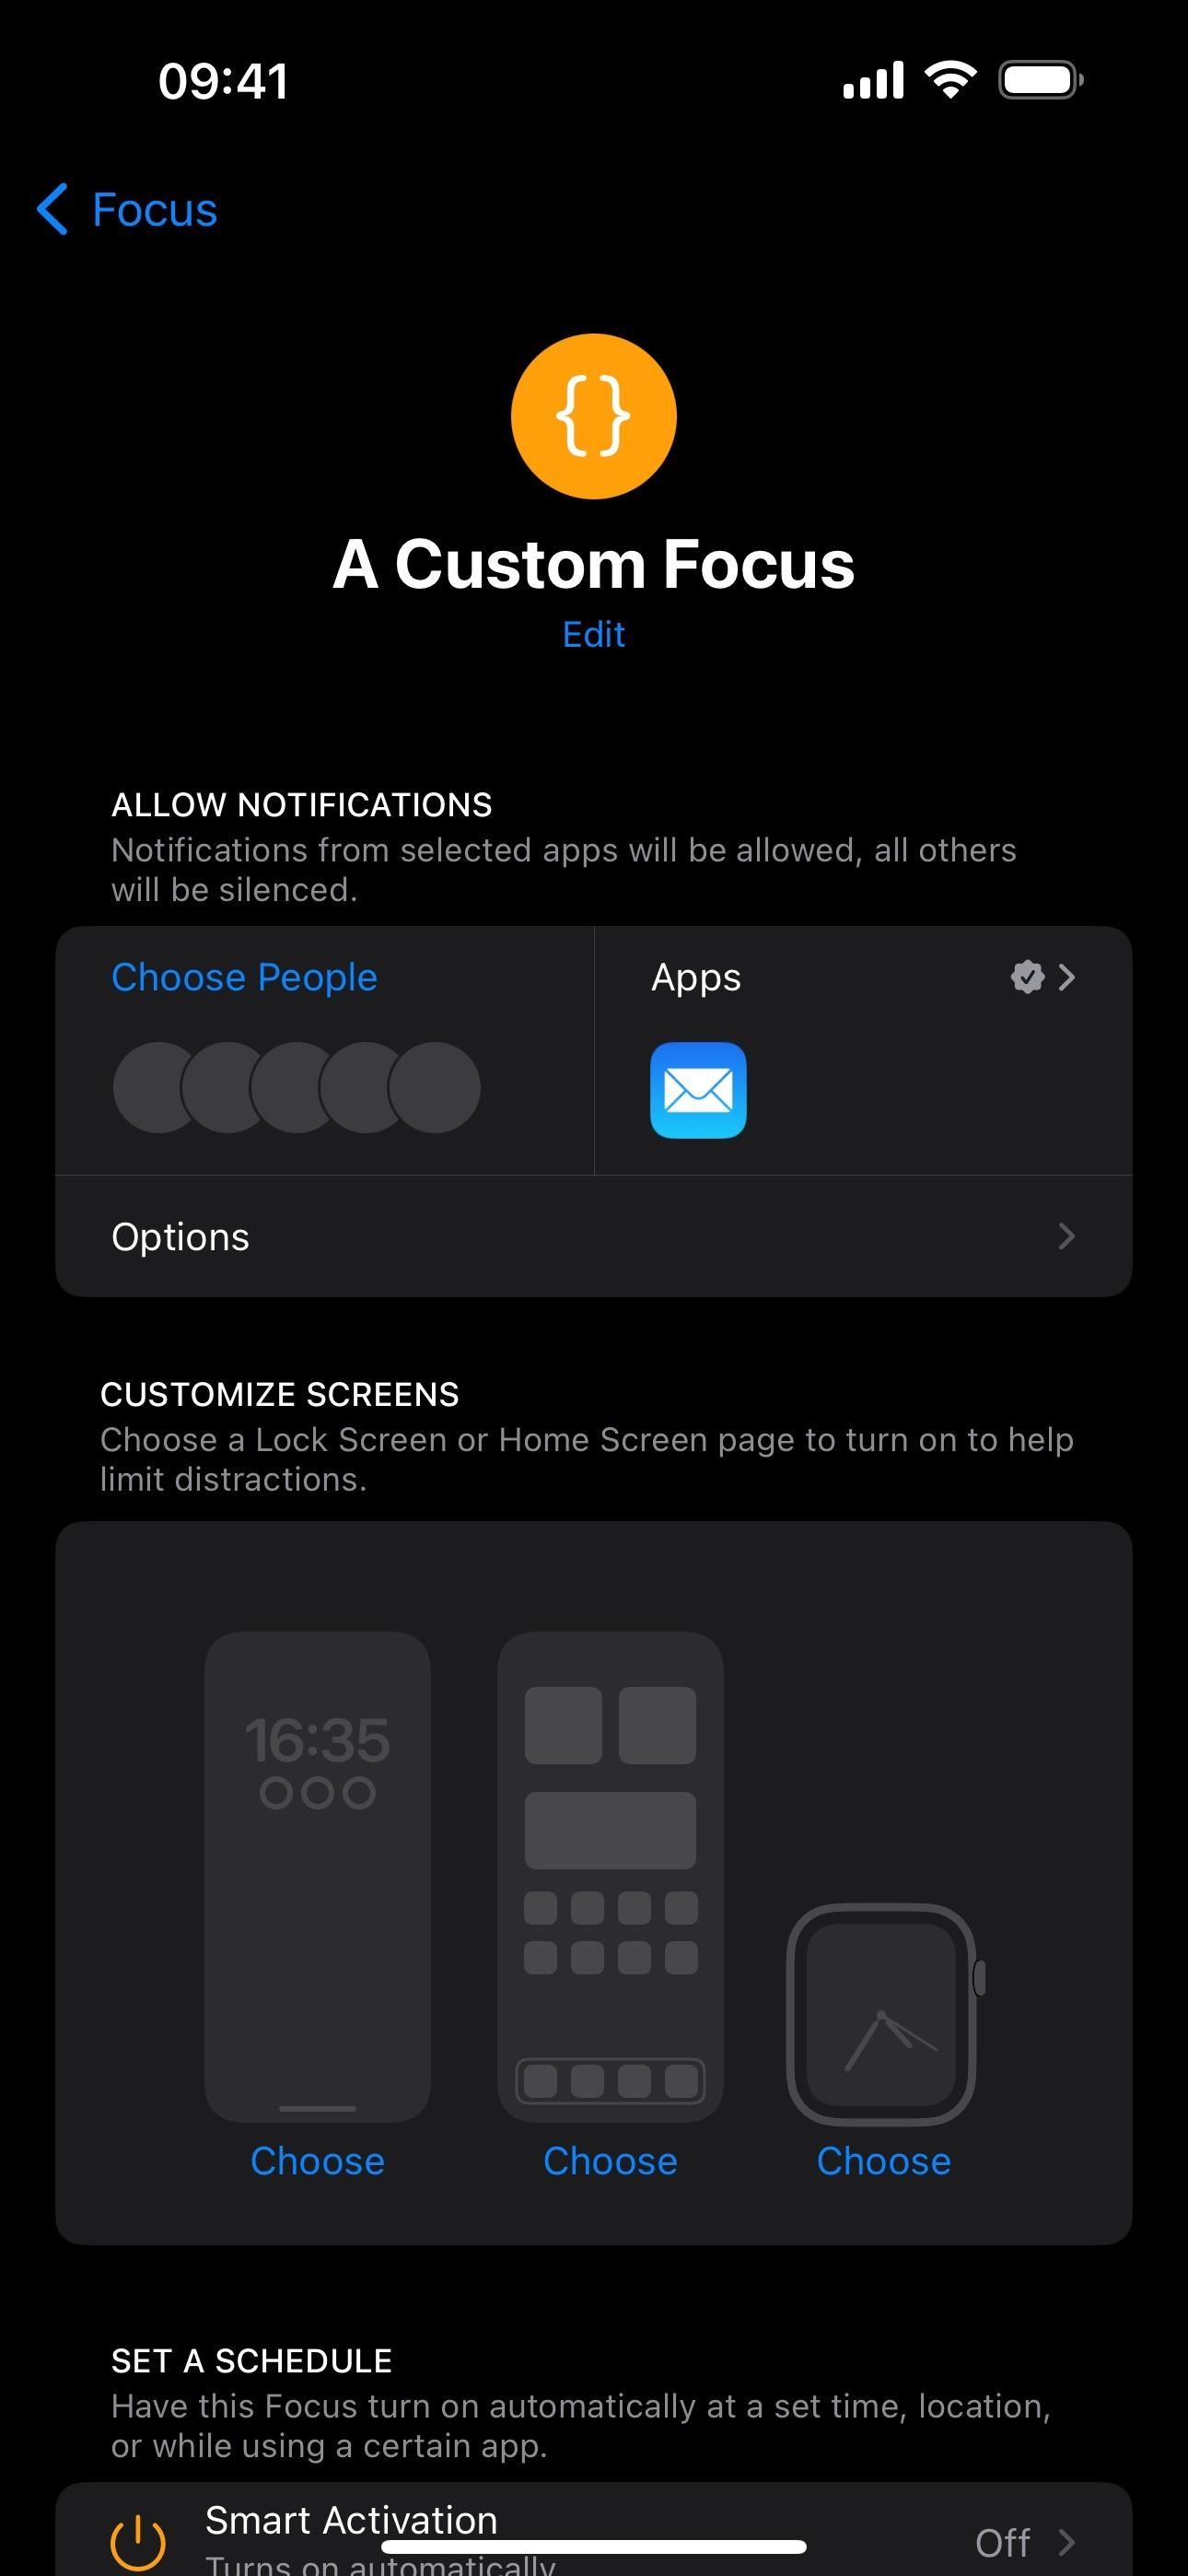
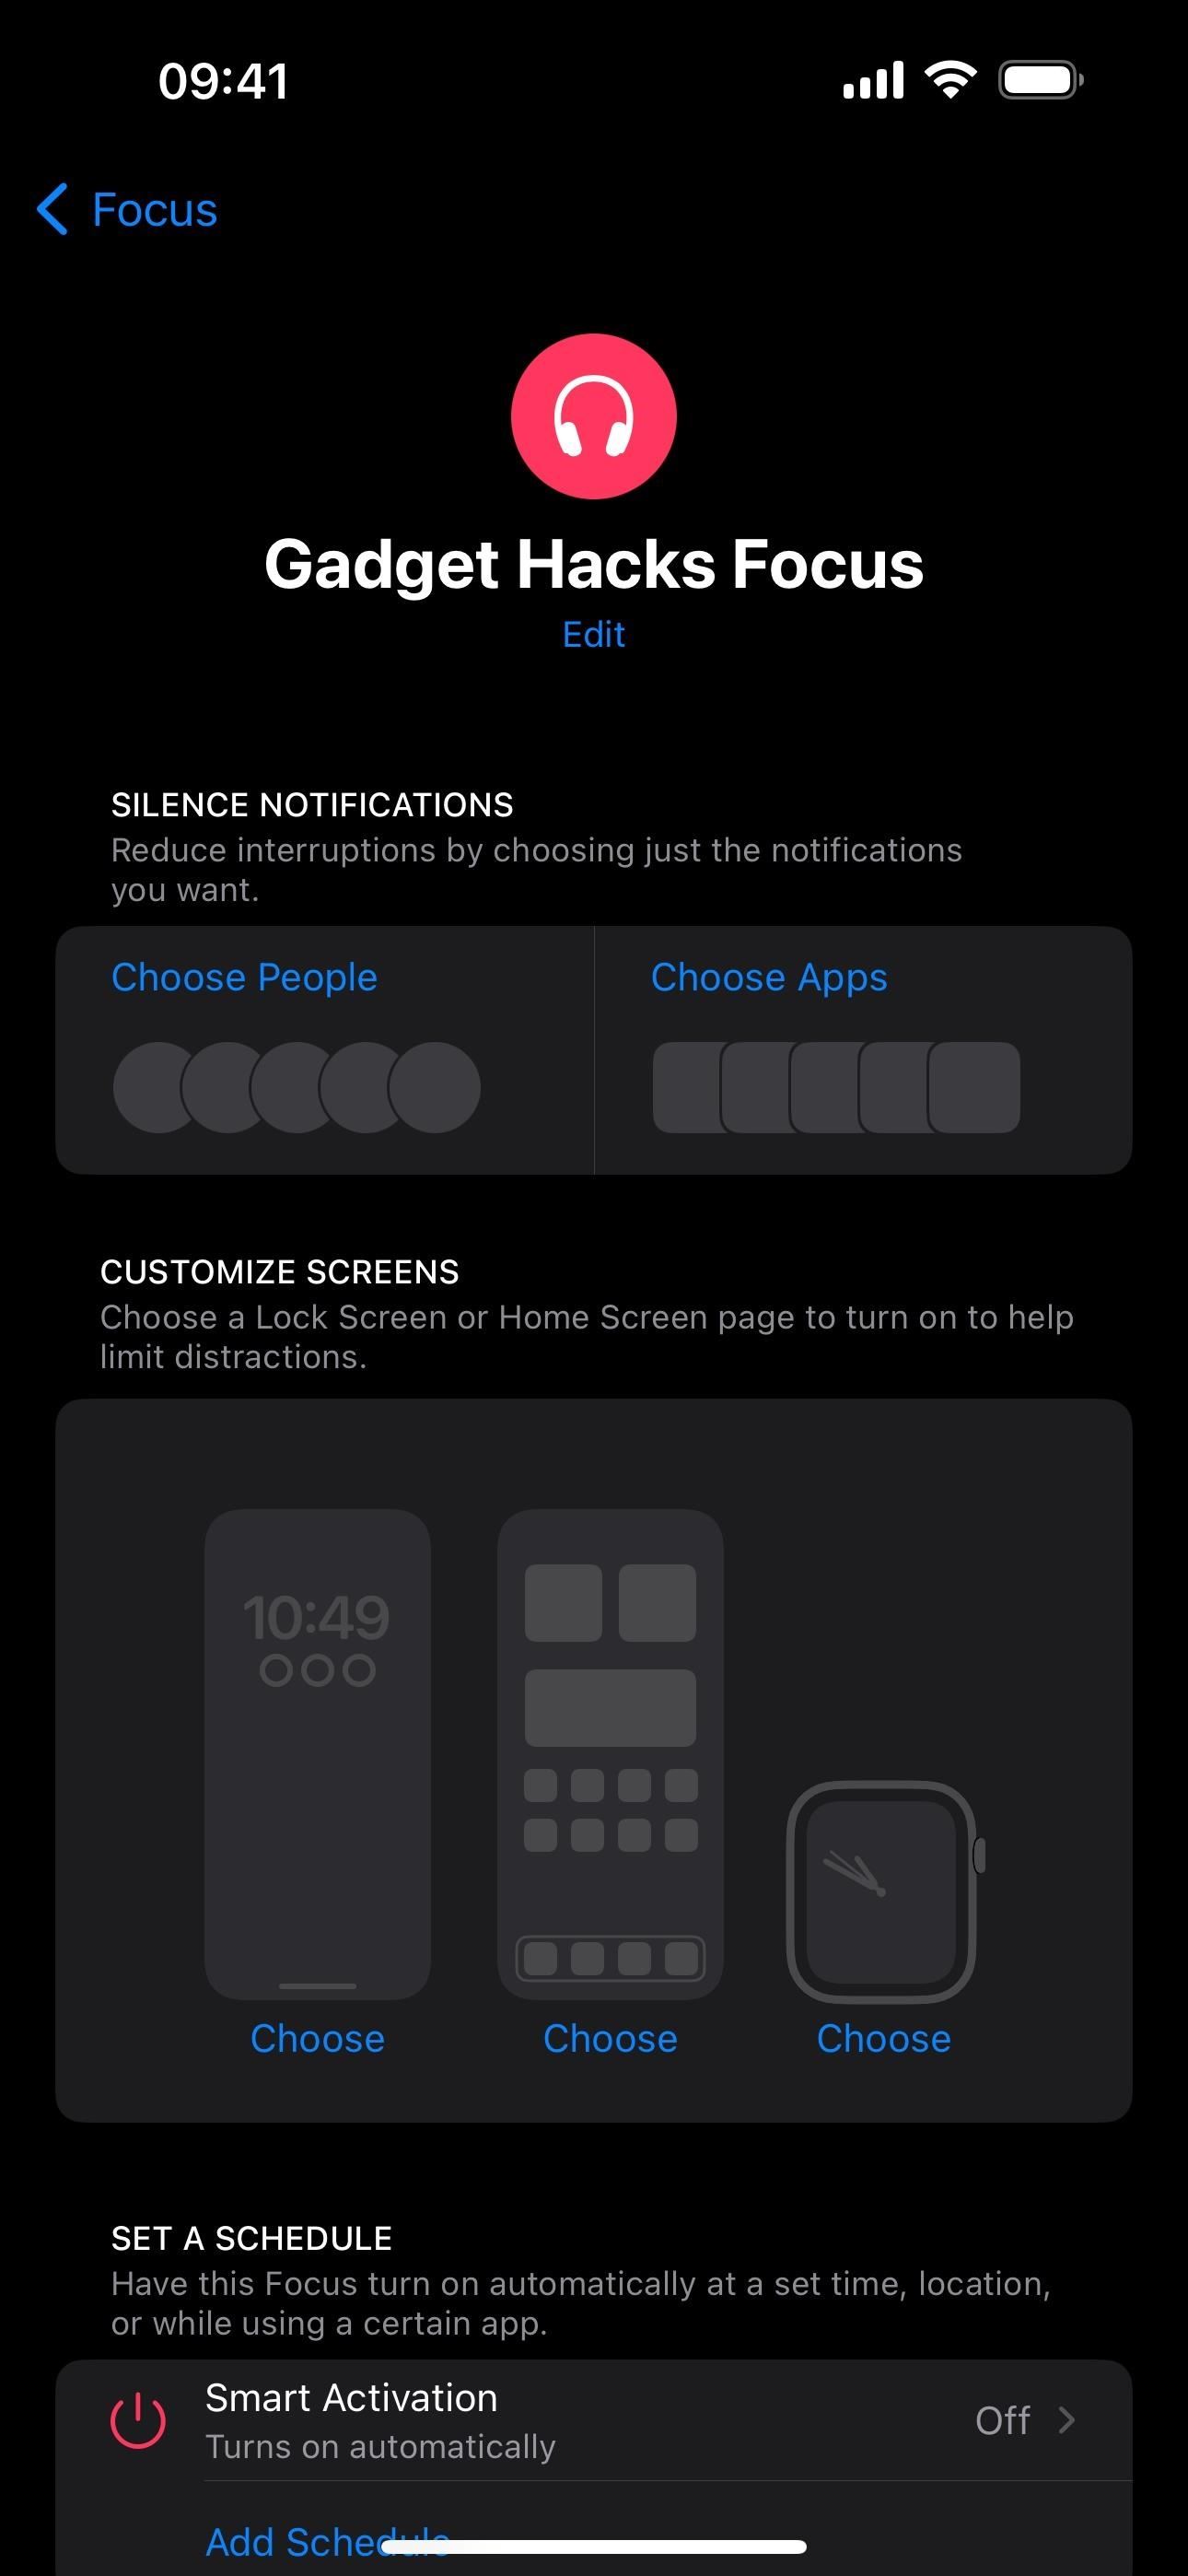
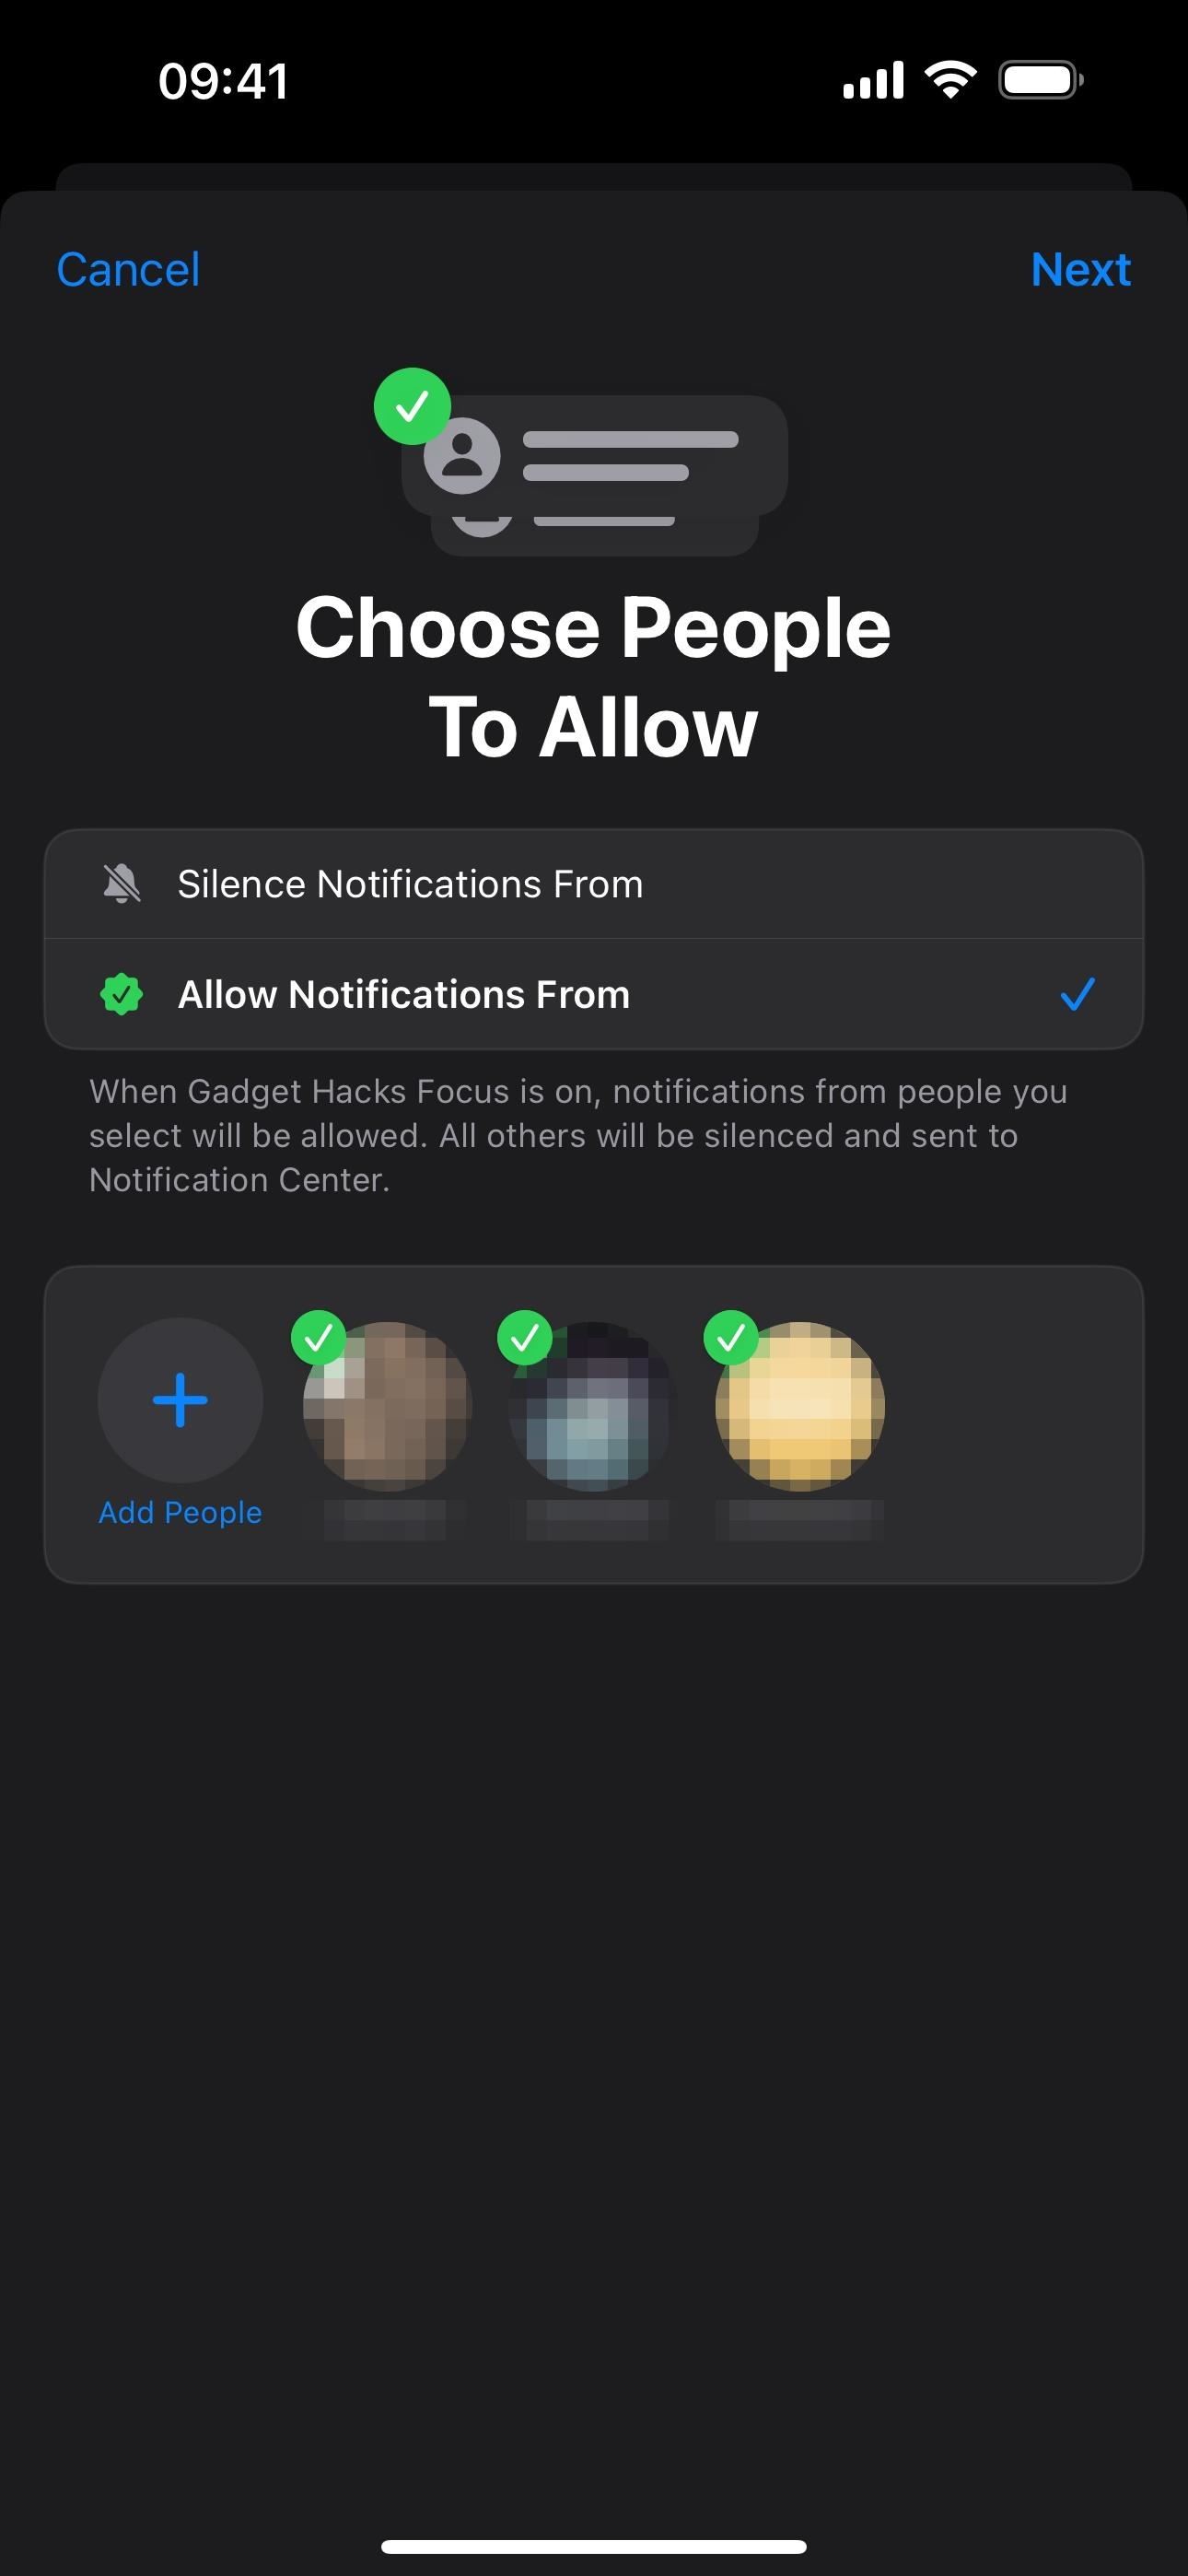
The second thing you can customize with the new or old Focus is notifications from contacts. Under the Silence Notifications heading, tap “Choose People” or “People.” You can then either “Allow Notifications From” or “Silence Notifications From.”
Allow Notifications From:
When the Focus is active, you will only get regular notifications from the people you select. Everything else will go straight to the Notification Center, where you can look at them later. To select contacts, tap “Add People,” choose the contacts, and hit “Done.” You can remove contacts via the minus sign (–) on their contact picture.
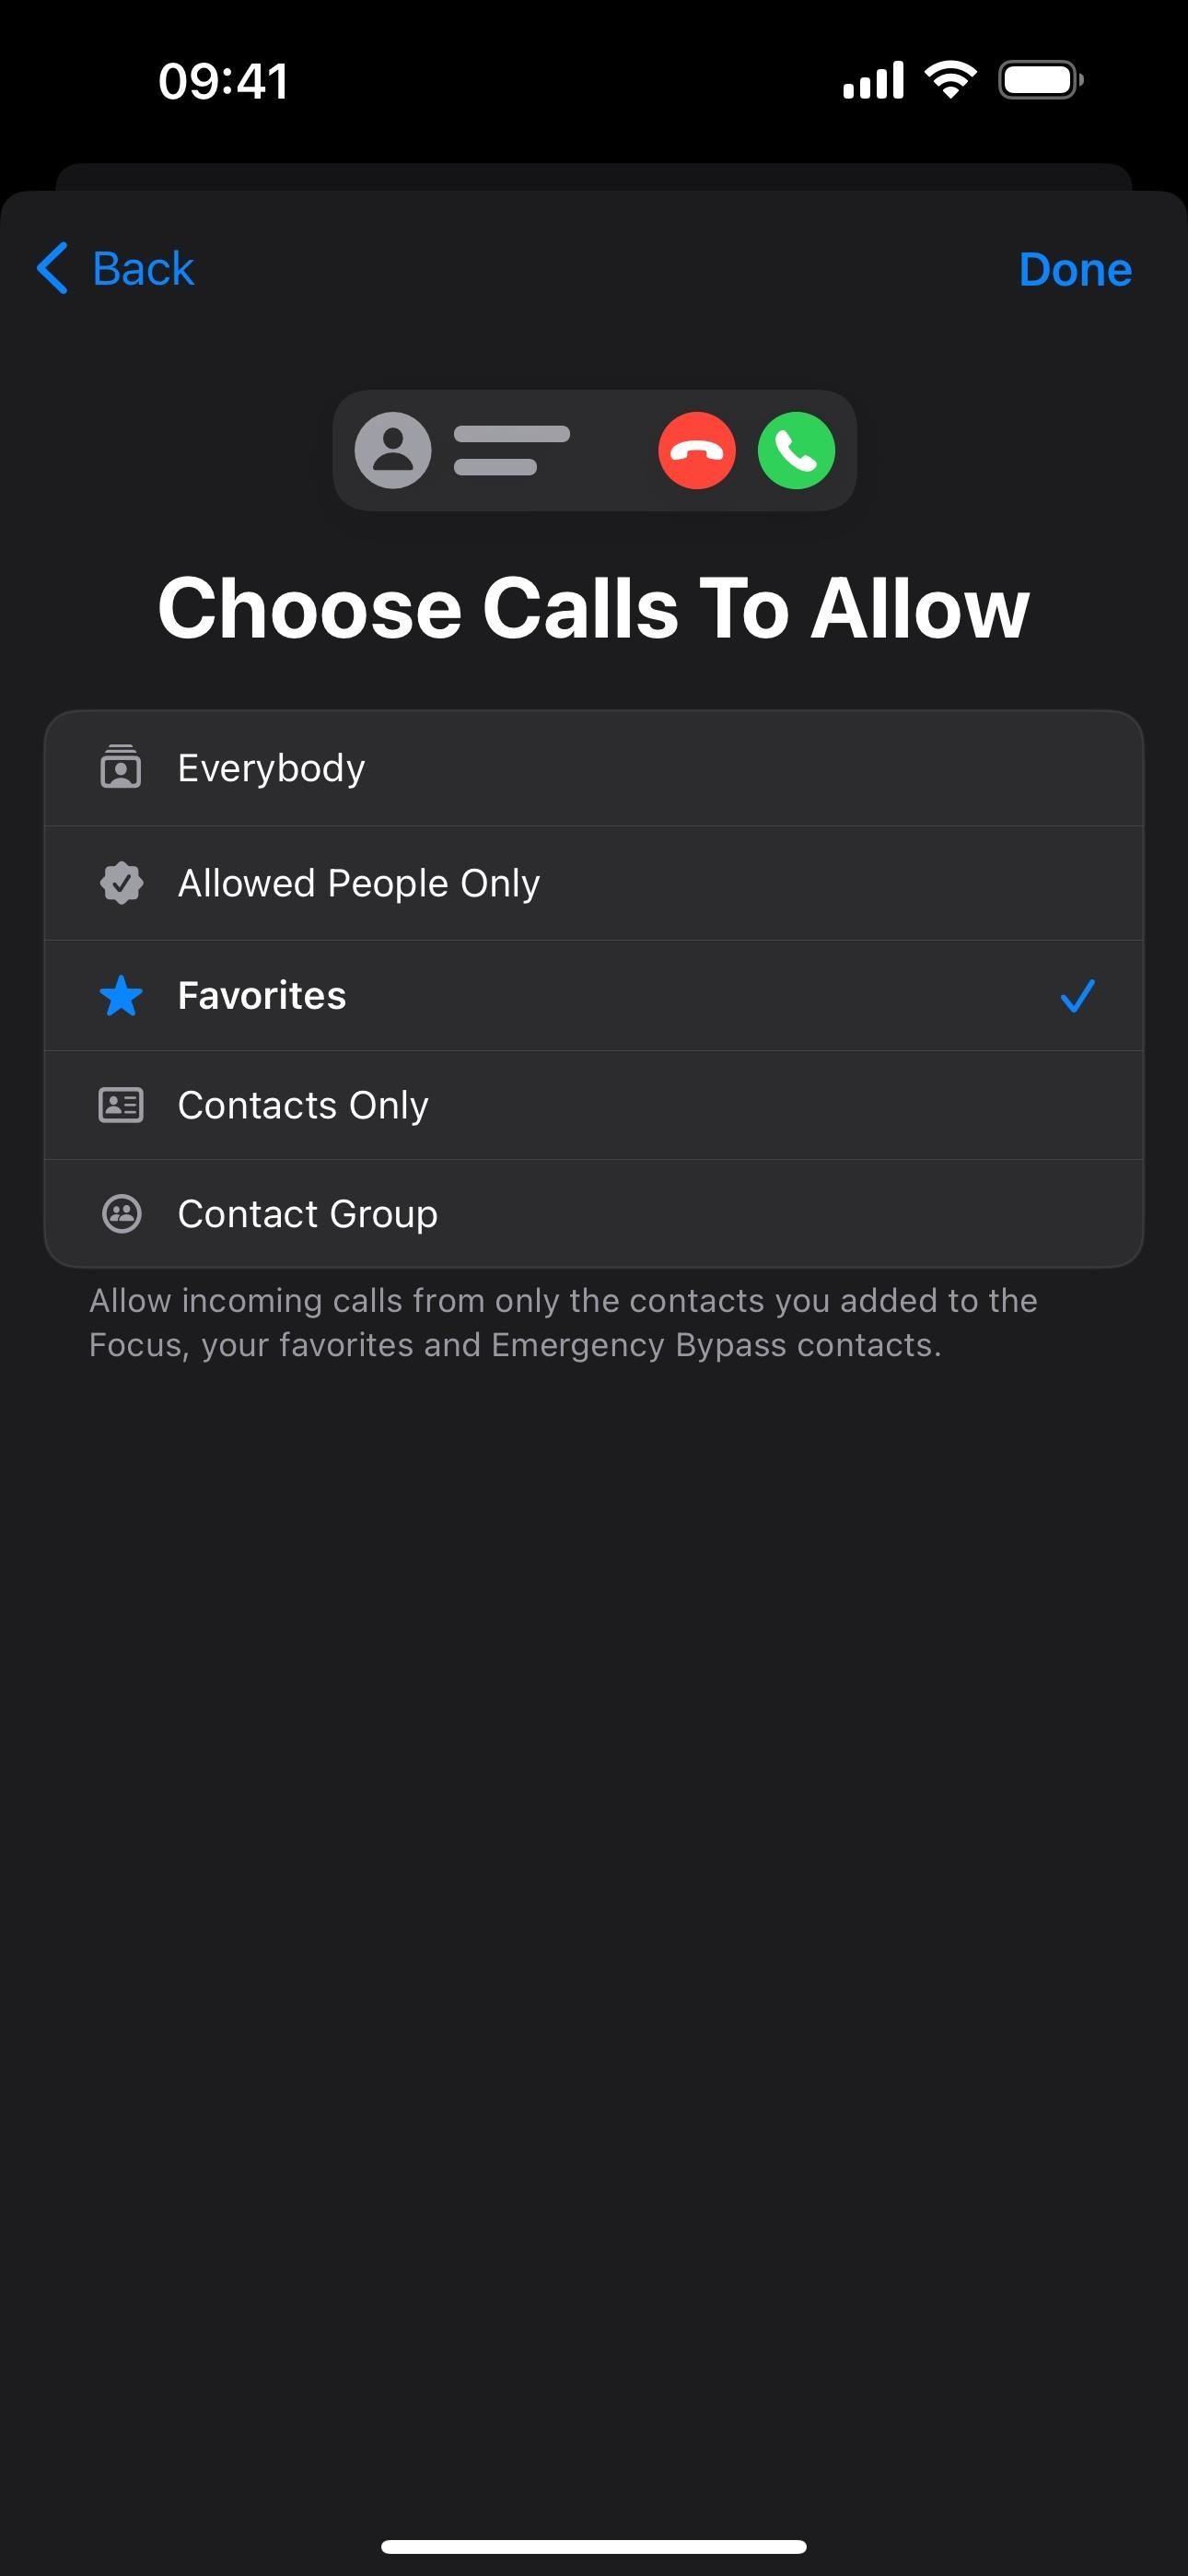
Tap “Next” to customize alerts for incoming phone calls. On the Choose Calls To Allow page, choose between “Everybody,” “Allowed People Only,” “Favorites,” “Contacts Only,” or any of your custom contact groups. These options control who can call you and get through aside from people you’ve added to the Focus and Emergency Bypass contacts. Tap “Done” to finish.
Silence Notifications From:
This is the better option if you want to silence only a few contacts or none at all. To select contacts, tap “Add People,” pick them, and hit “Done.”
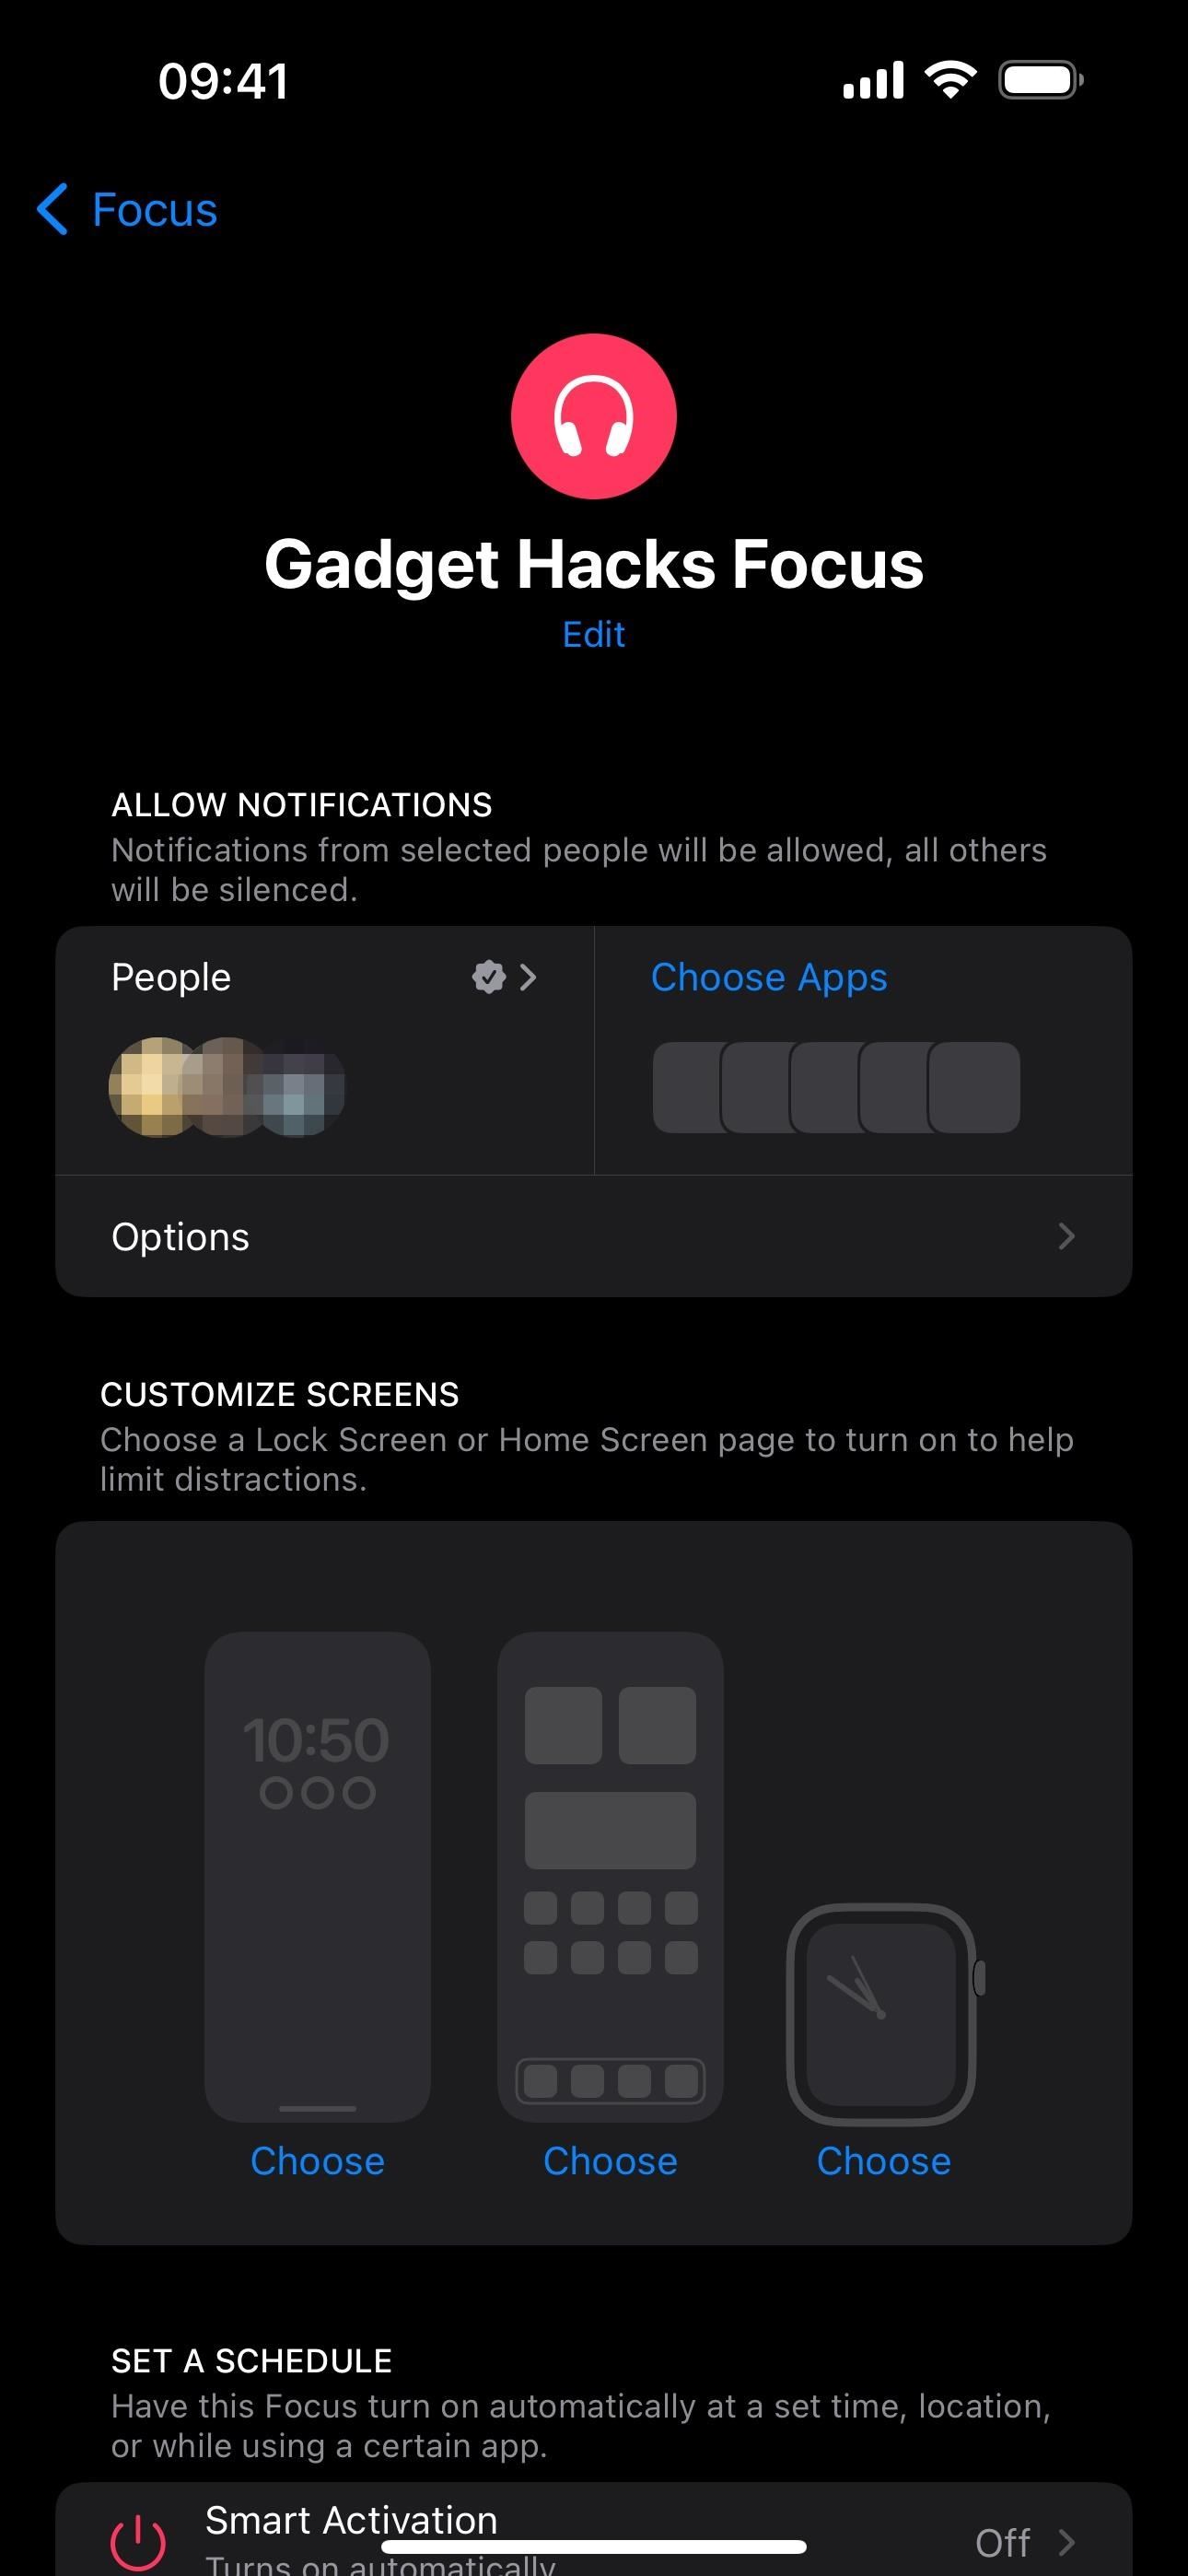
Whichever option you choose, you’ll end up back on the settings page for the Focus. You can then go back into “People” to change who you selected and other preferences, such as “Allow Repeated Calls,” which lets a silenced person call twice in a row within a three-minute period to become unsilenced, and “Allow Calls from Silenced People,” which unmutes silenced contacts.
Option 3: Allow or Silence Notifications from Specific Apps
Next, you can customize app notifications. Under the Silence Notifications heading, tap “Choose Apps” or “Apps.” You can then either “Allow Notifications From” or “Silence Notifications From.”
Allow Notifications From:
When the Focus is active, you will only get regular notifications from the apps you select. Everything else will go straight to the Notification Center, where you can look at them later. To select apps, tap “Add Apps,” choose the apps, and hit “Done.” You can remove apps by unchecking their icons. Tap “Done” to finish.
Silence Notifications From:
This works better when you only want to silence a few apps or none at all. To select apps, tap “Add Apps,” pick them, and hit “Done.” You can remove apps by tapping the silenced button on their icons. Tap “Done” to finish.
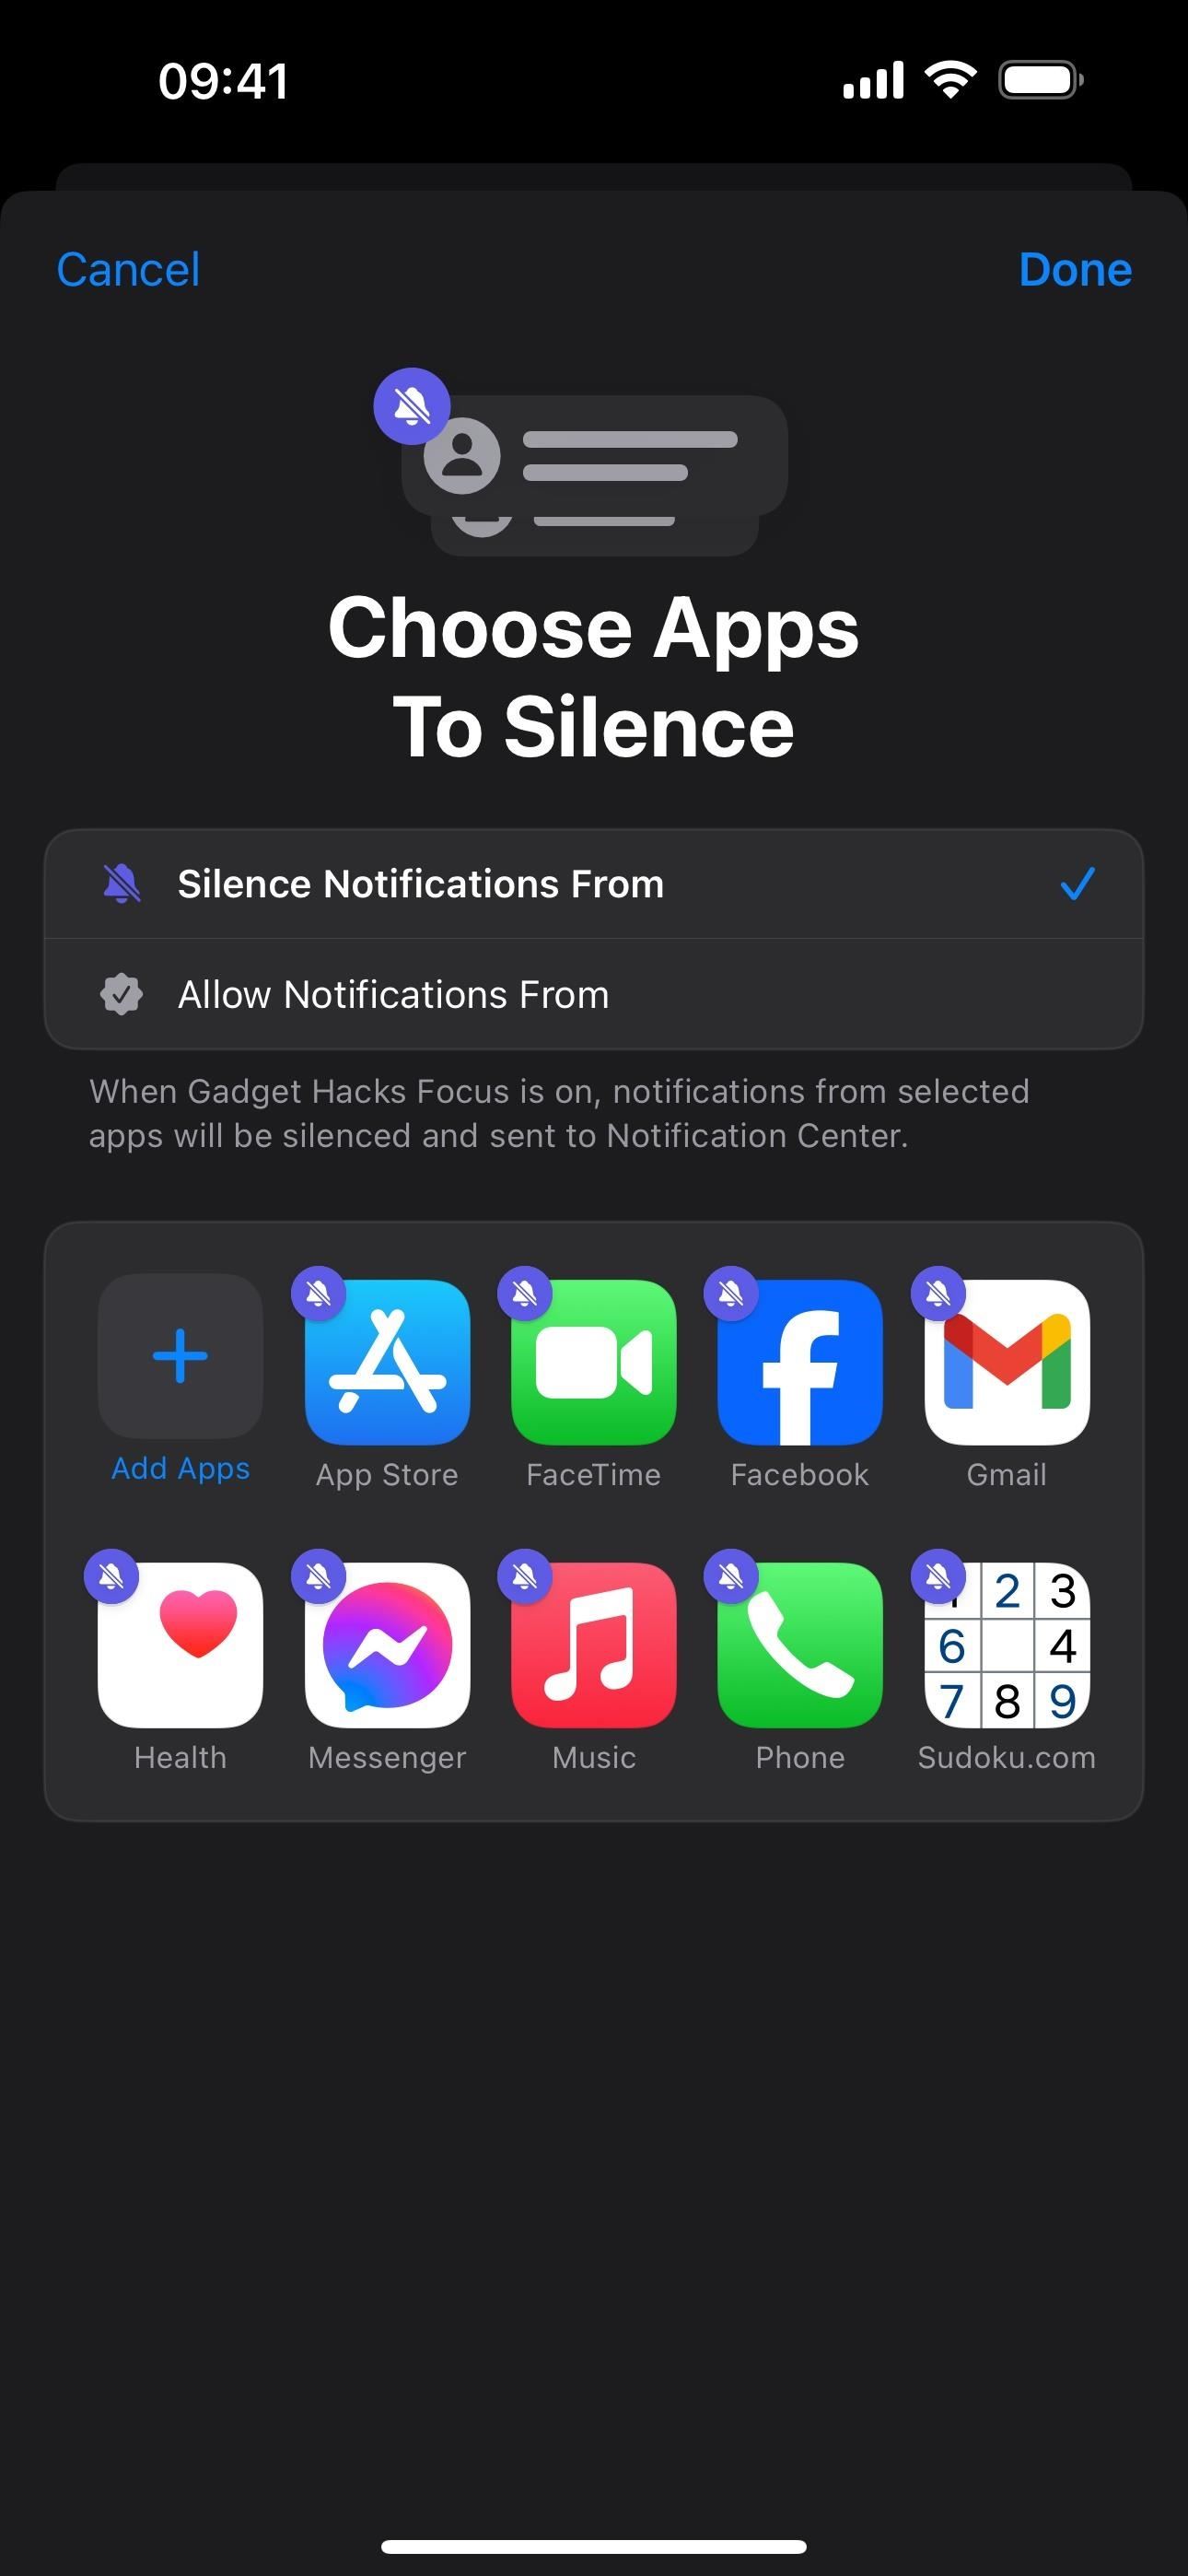
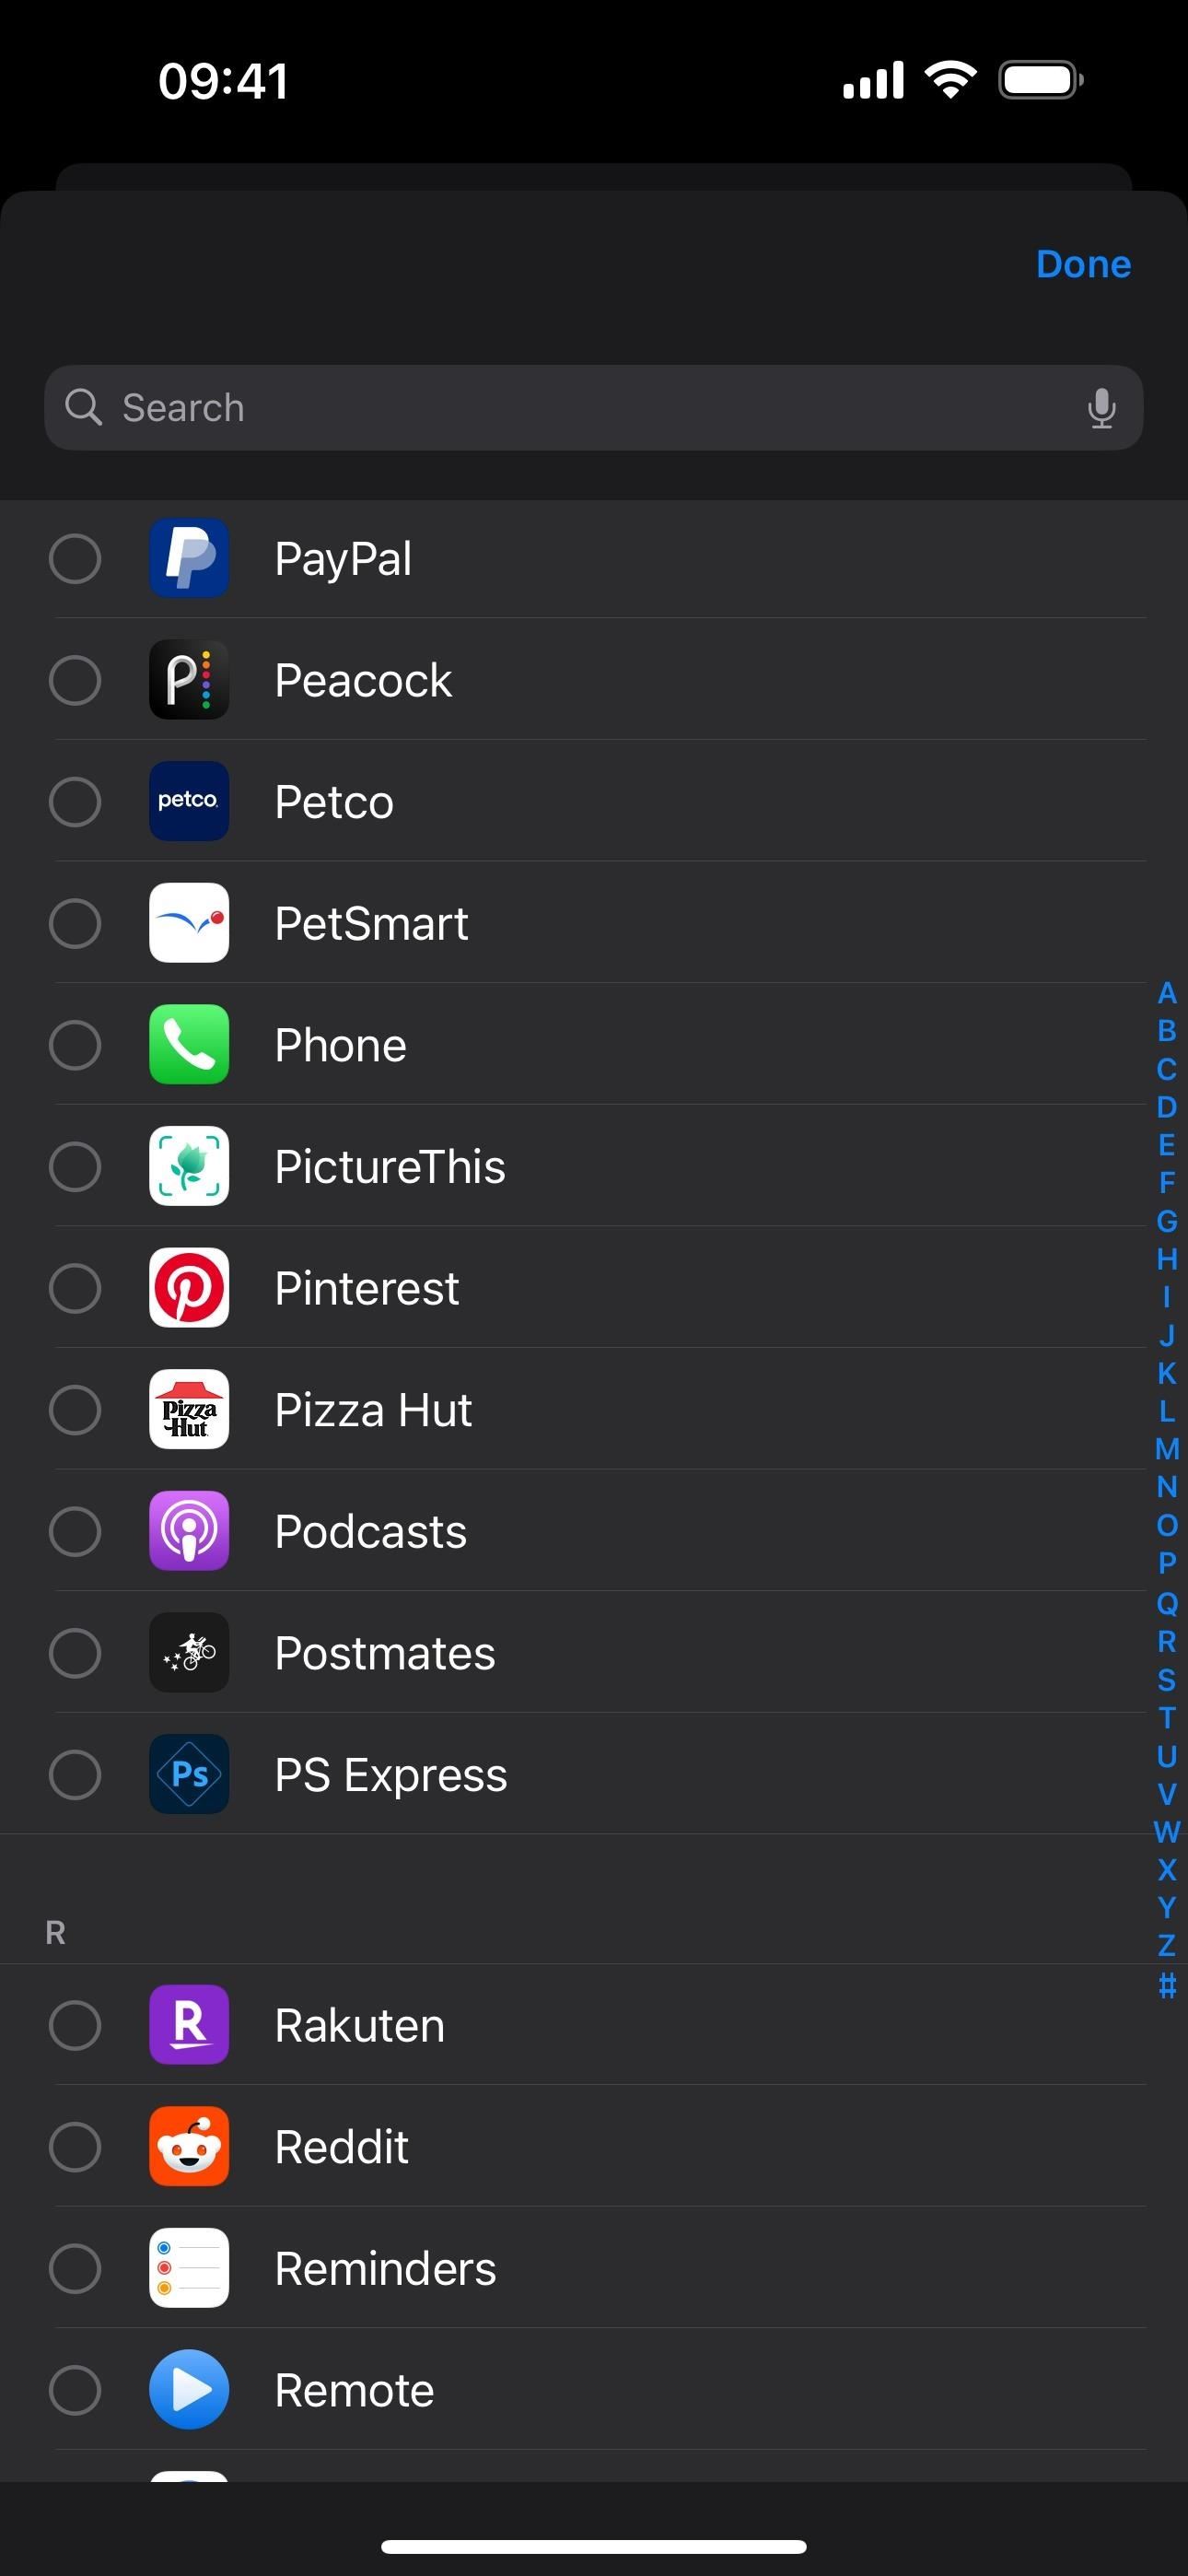
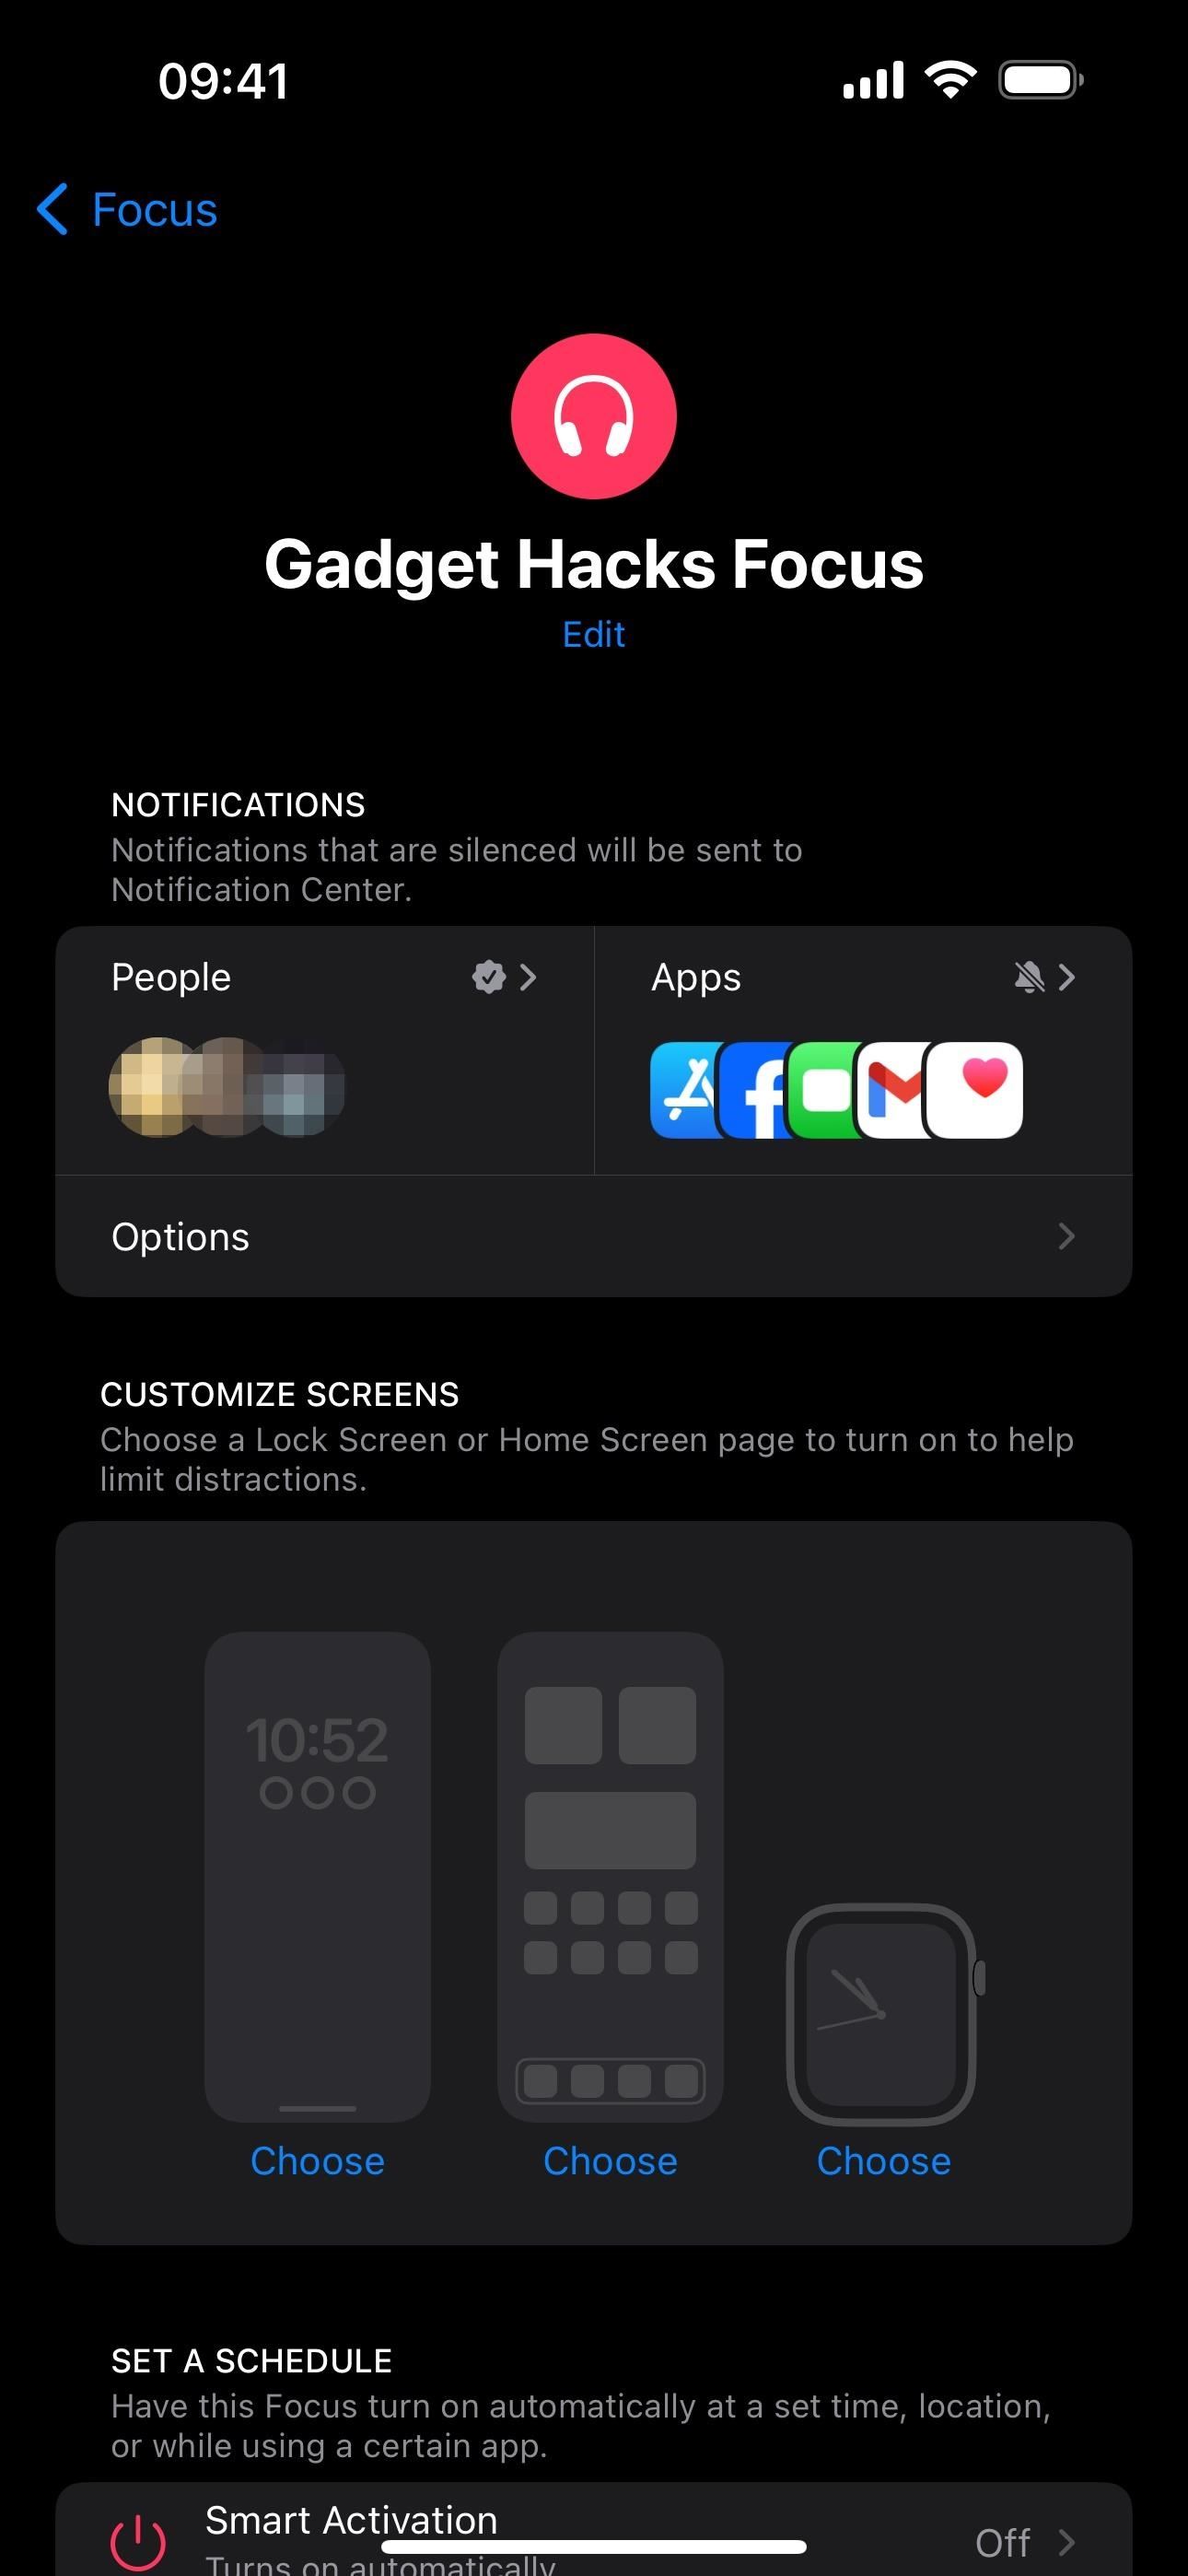
Whichever option you choose, you’ll end up back on the settings page for the Focus. You can then go back into “Apps” to change what apps you selected and other preferences, such as “Time Sensitive Notifications,” which lets a silenced app’s alert go through as usual if it’s time-sensitive.
Option 4: Further Customize Notifications
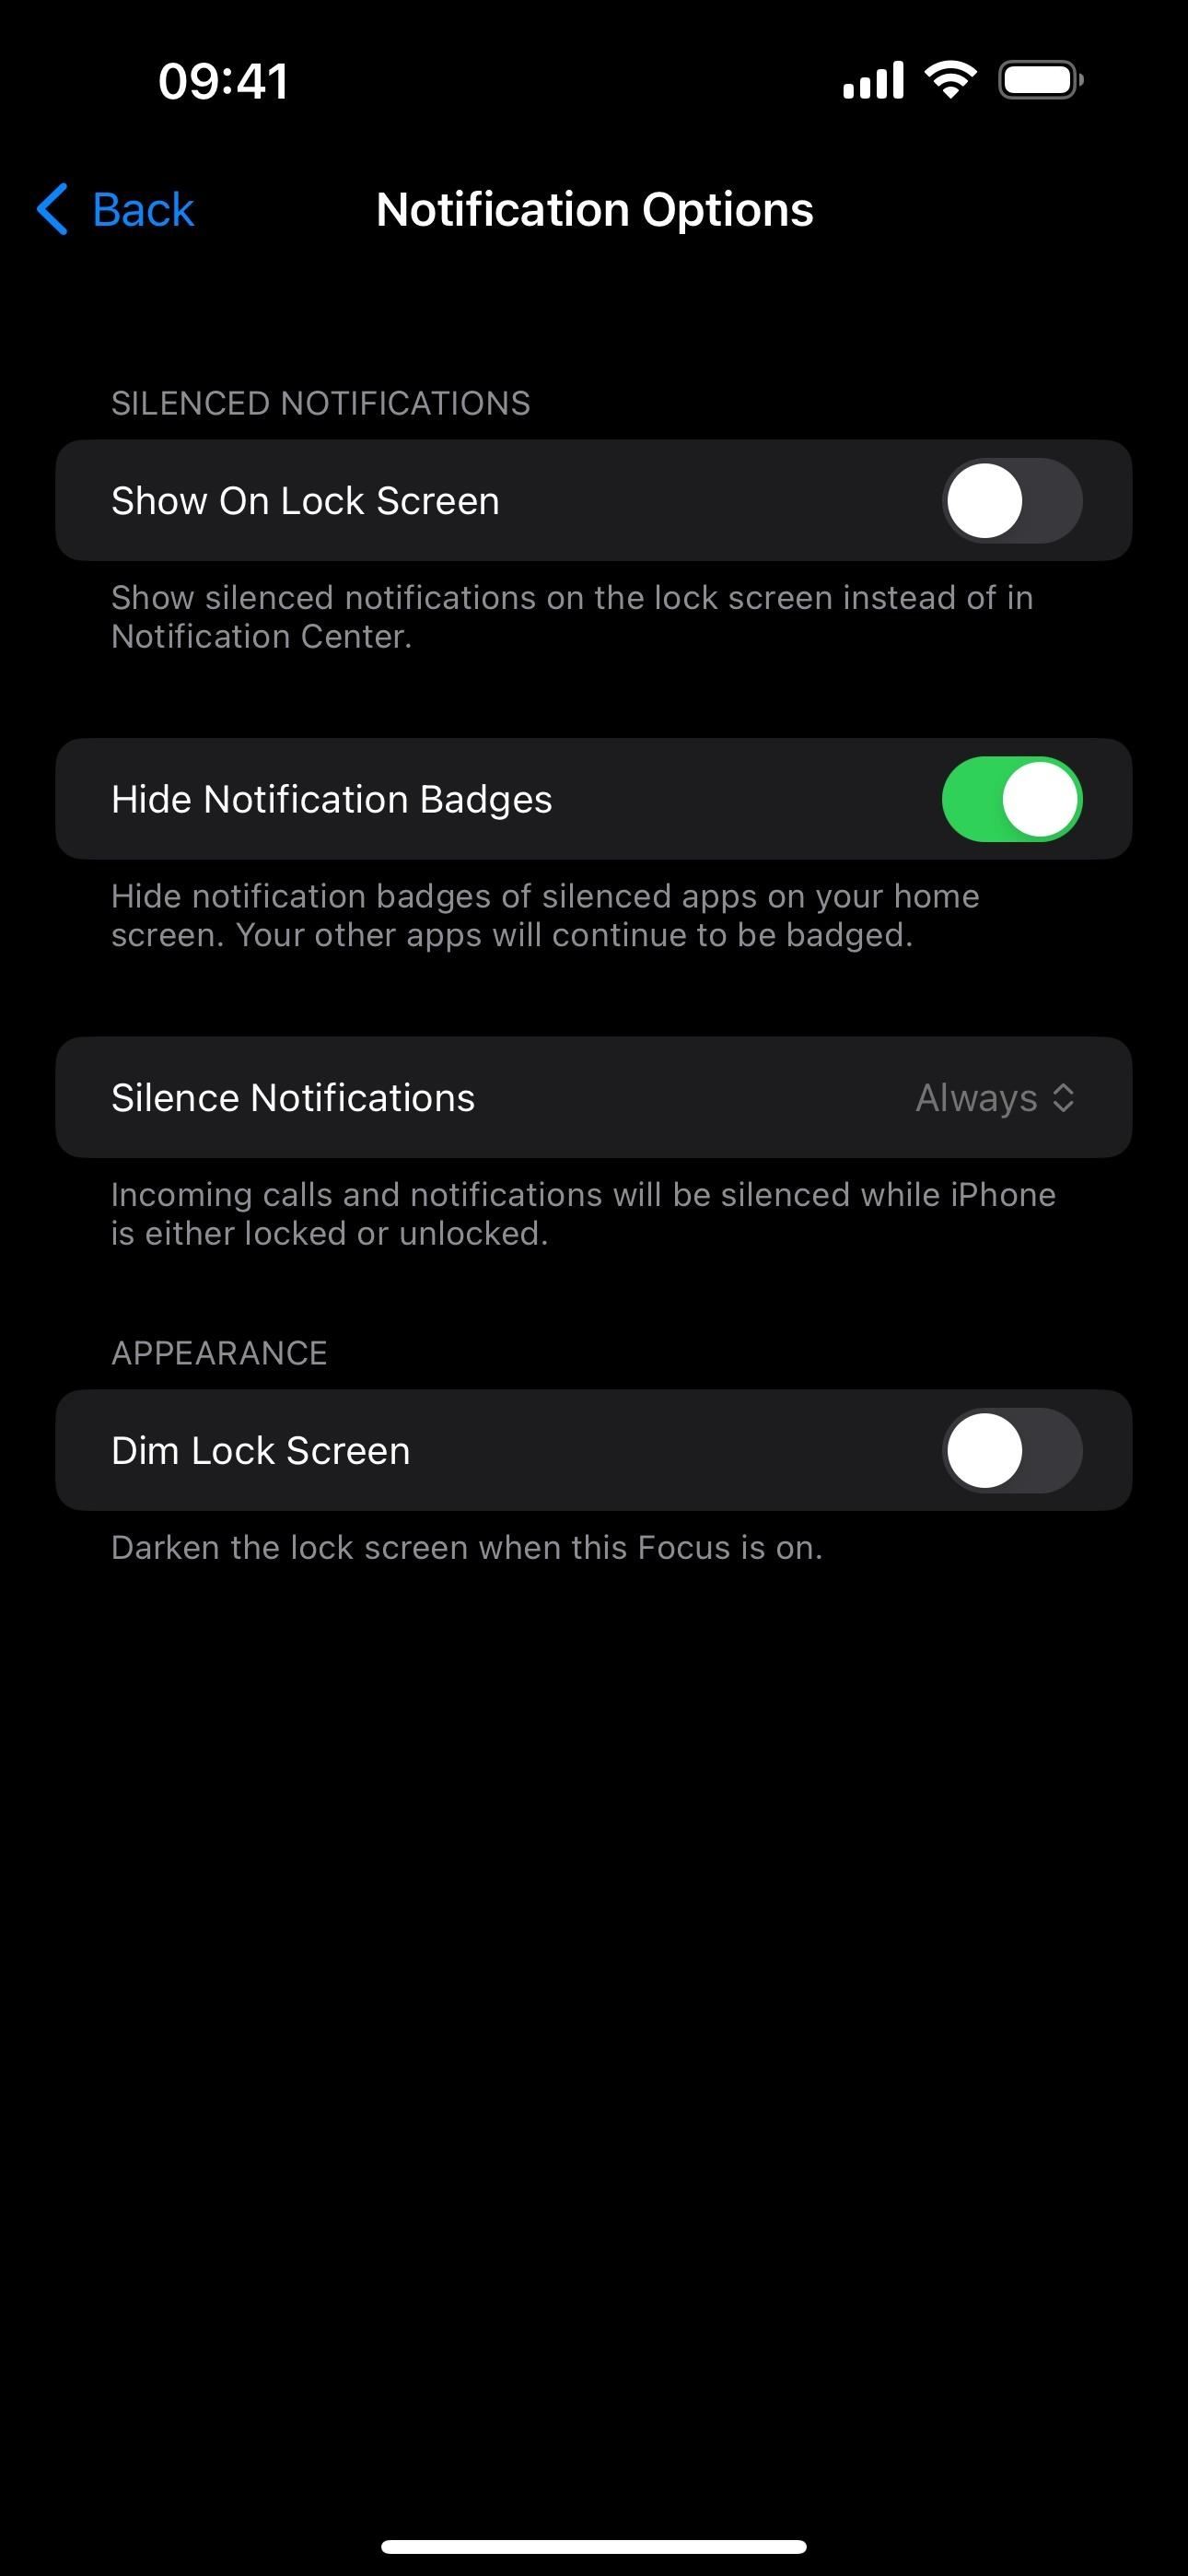
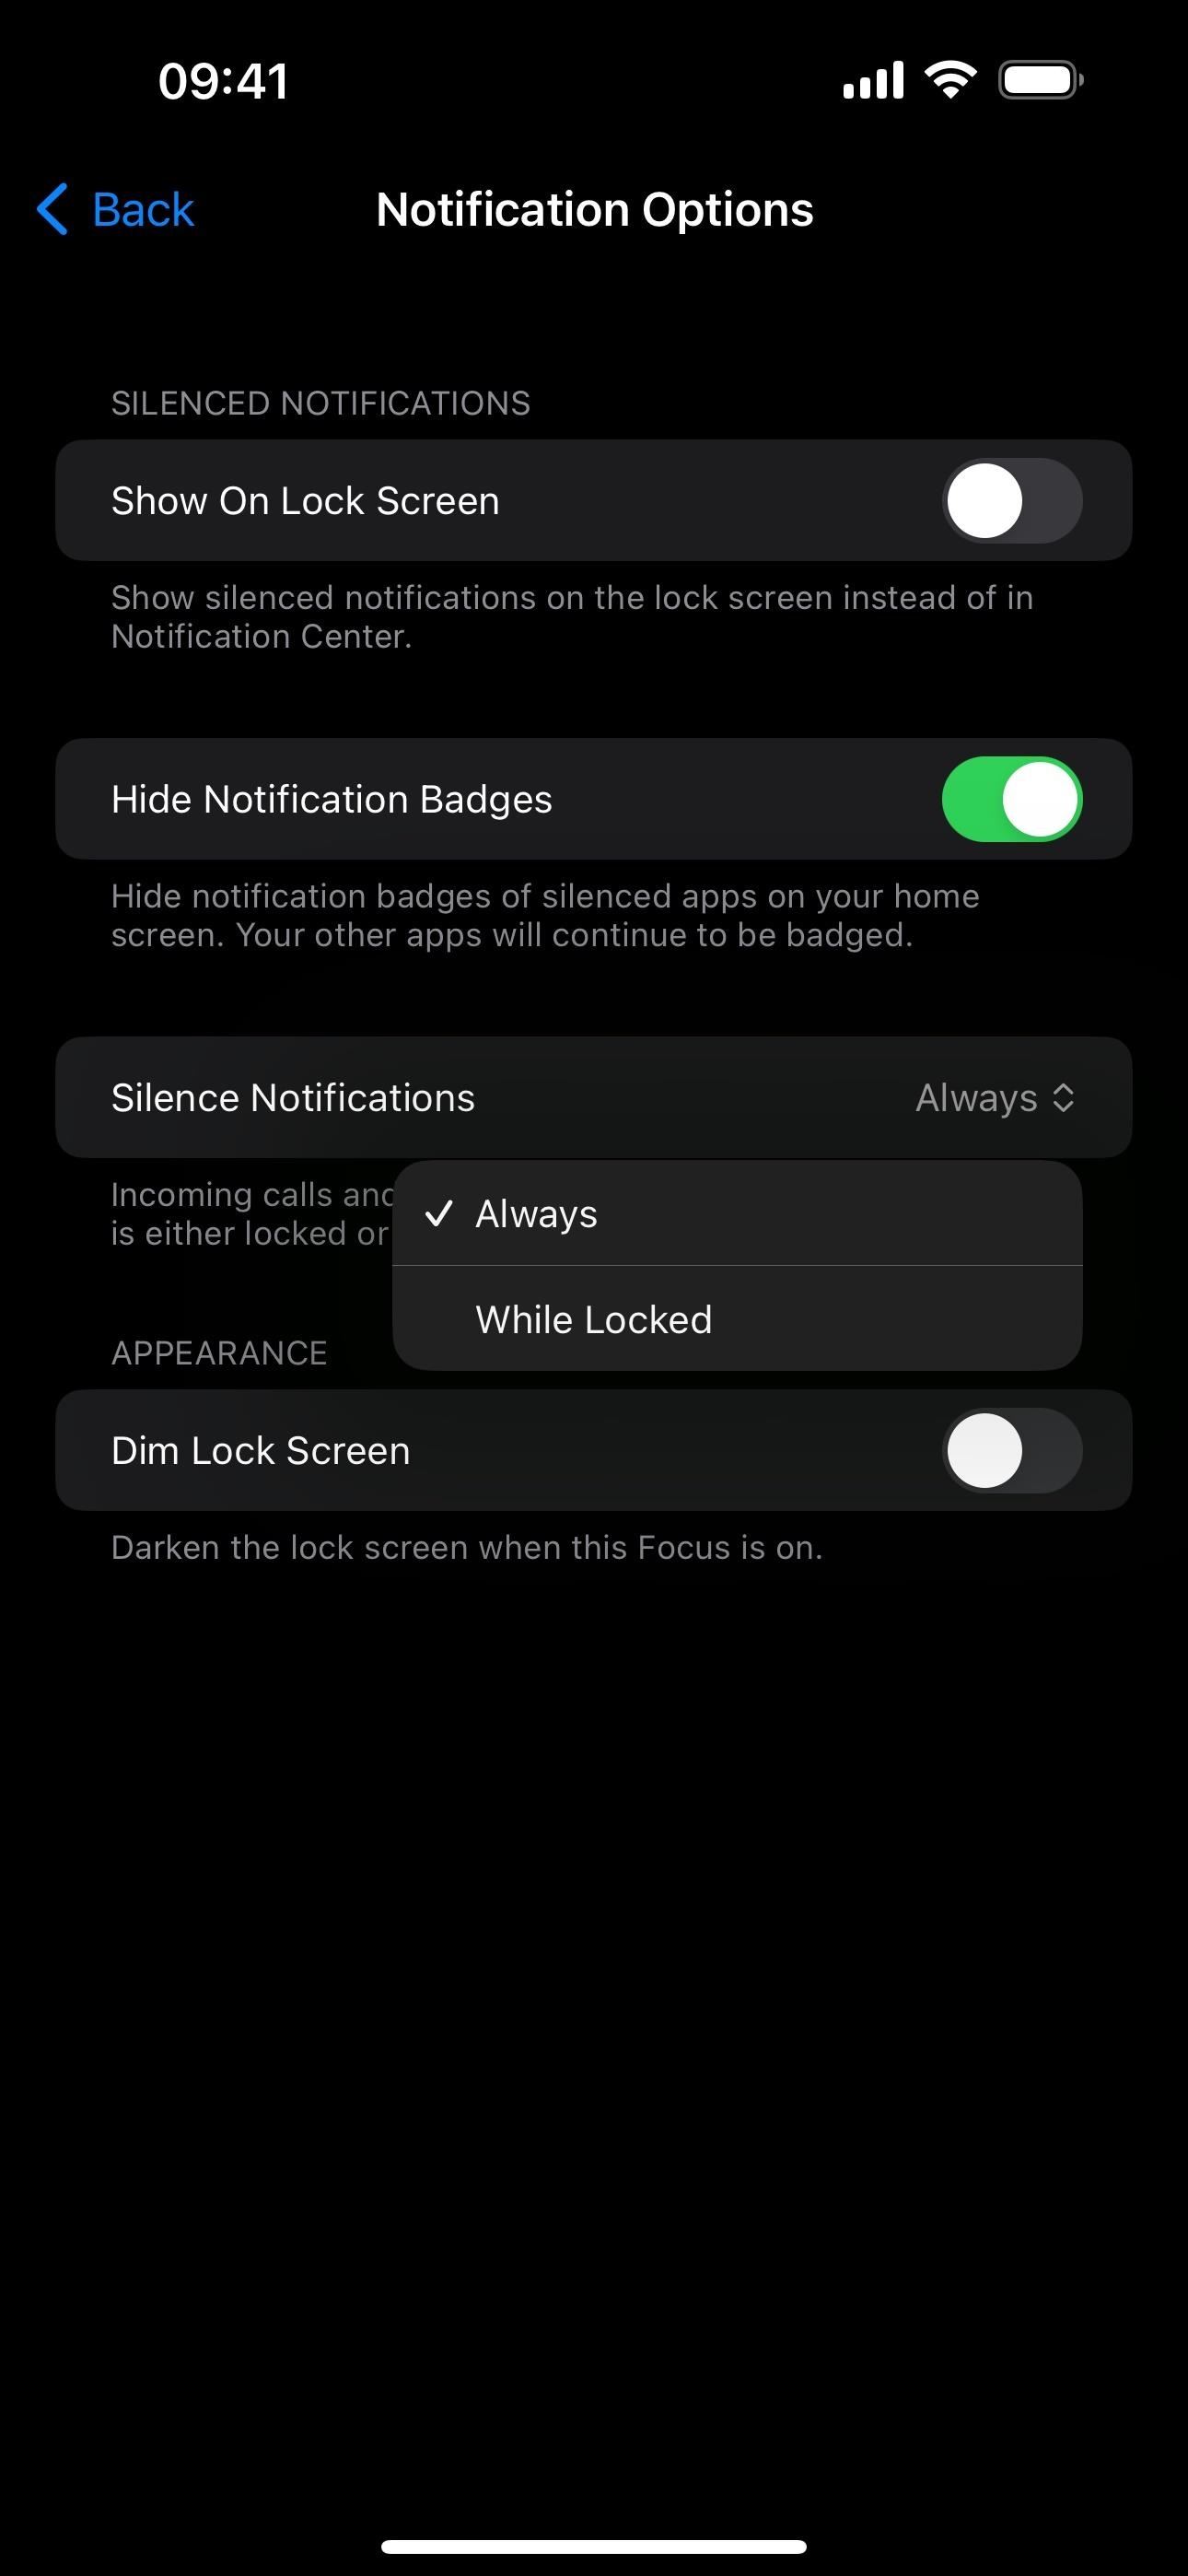
You can further adjust notifications for the Focus via the “Options” menu. Here, you’ll find preferences such as:
- Show On Lock Screen: This will show or hide silenced notifications on the Lock Screen instead of in your Notification Center.
- Hide Notification Badges: This will show or hide notification badges on the silenced apps on your Home Screen while leaving badges on for non-silenced apps.
- Silence Notifications: This will silence incoming calls and notifications while your iPhone is either locked or unlocked (“Always”) or only when locked (“When Locked”).
- Dim Lock Screen: This will darken the Lock Screen on your iPhone when the Focus is active.
For the Driving Focus only, it’s called “Auto-Reply” instead of “Options.” You can choose to send automated replies to “No One,” “Recents,” “Favorites,” or “All Contacts.” And you can customize the automated message to say whatever you want.
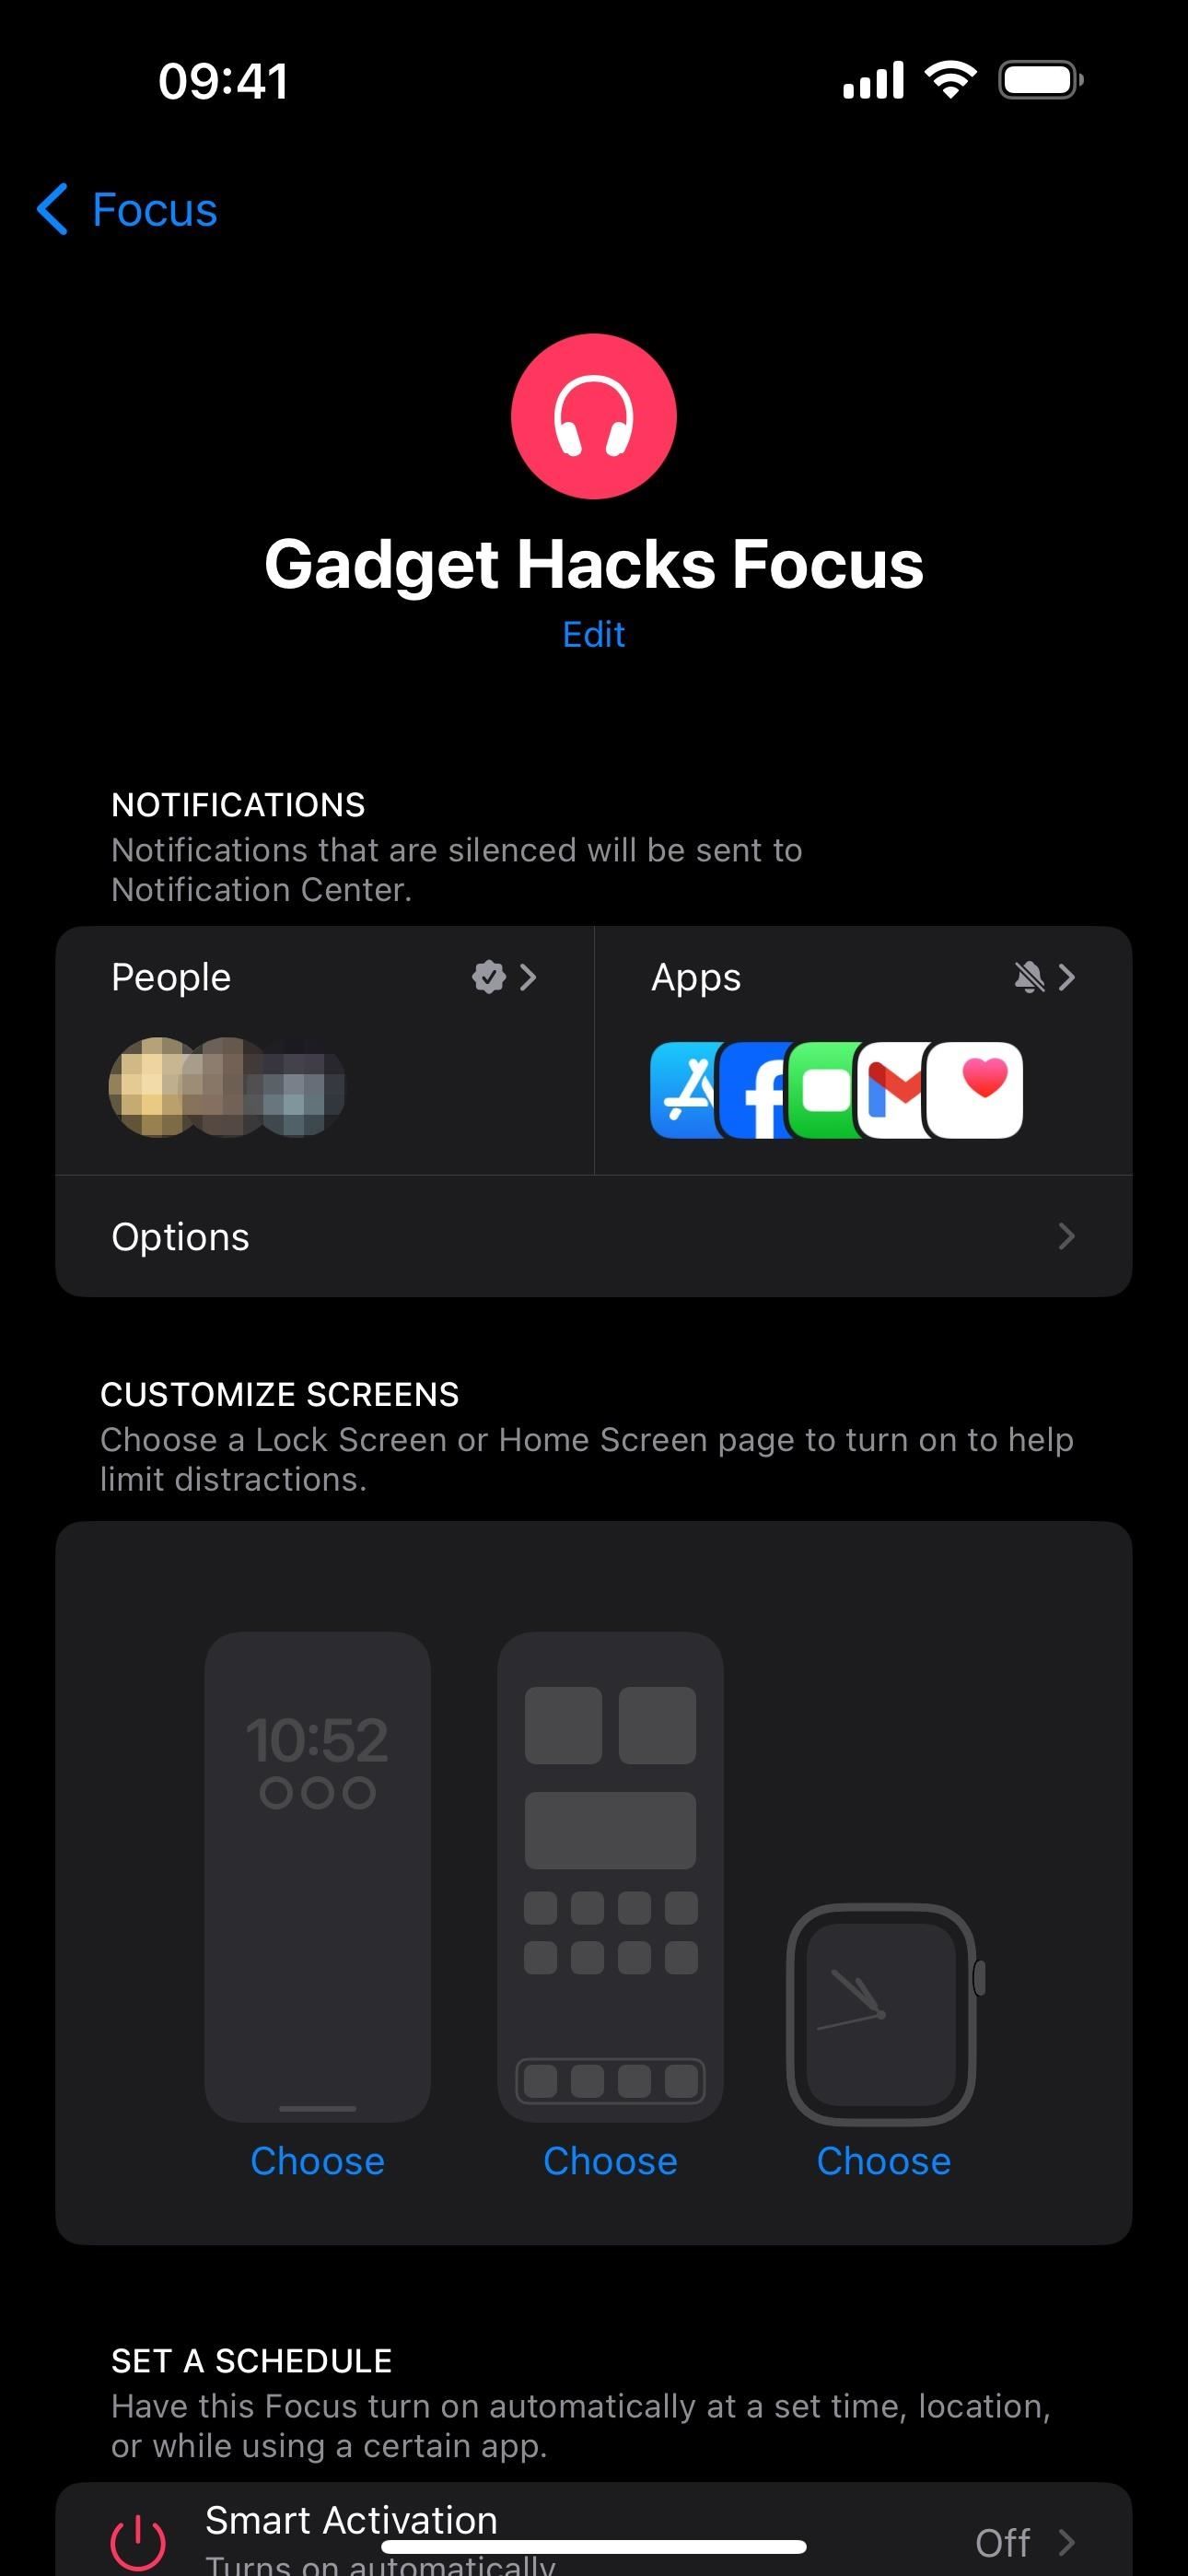
Option 5: Show or Hide Screens and Pages
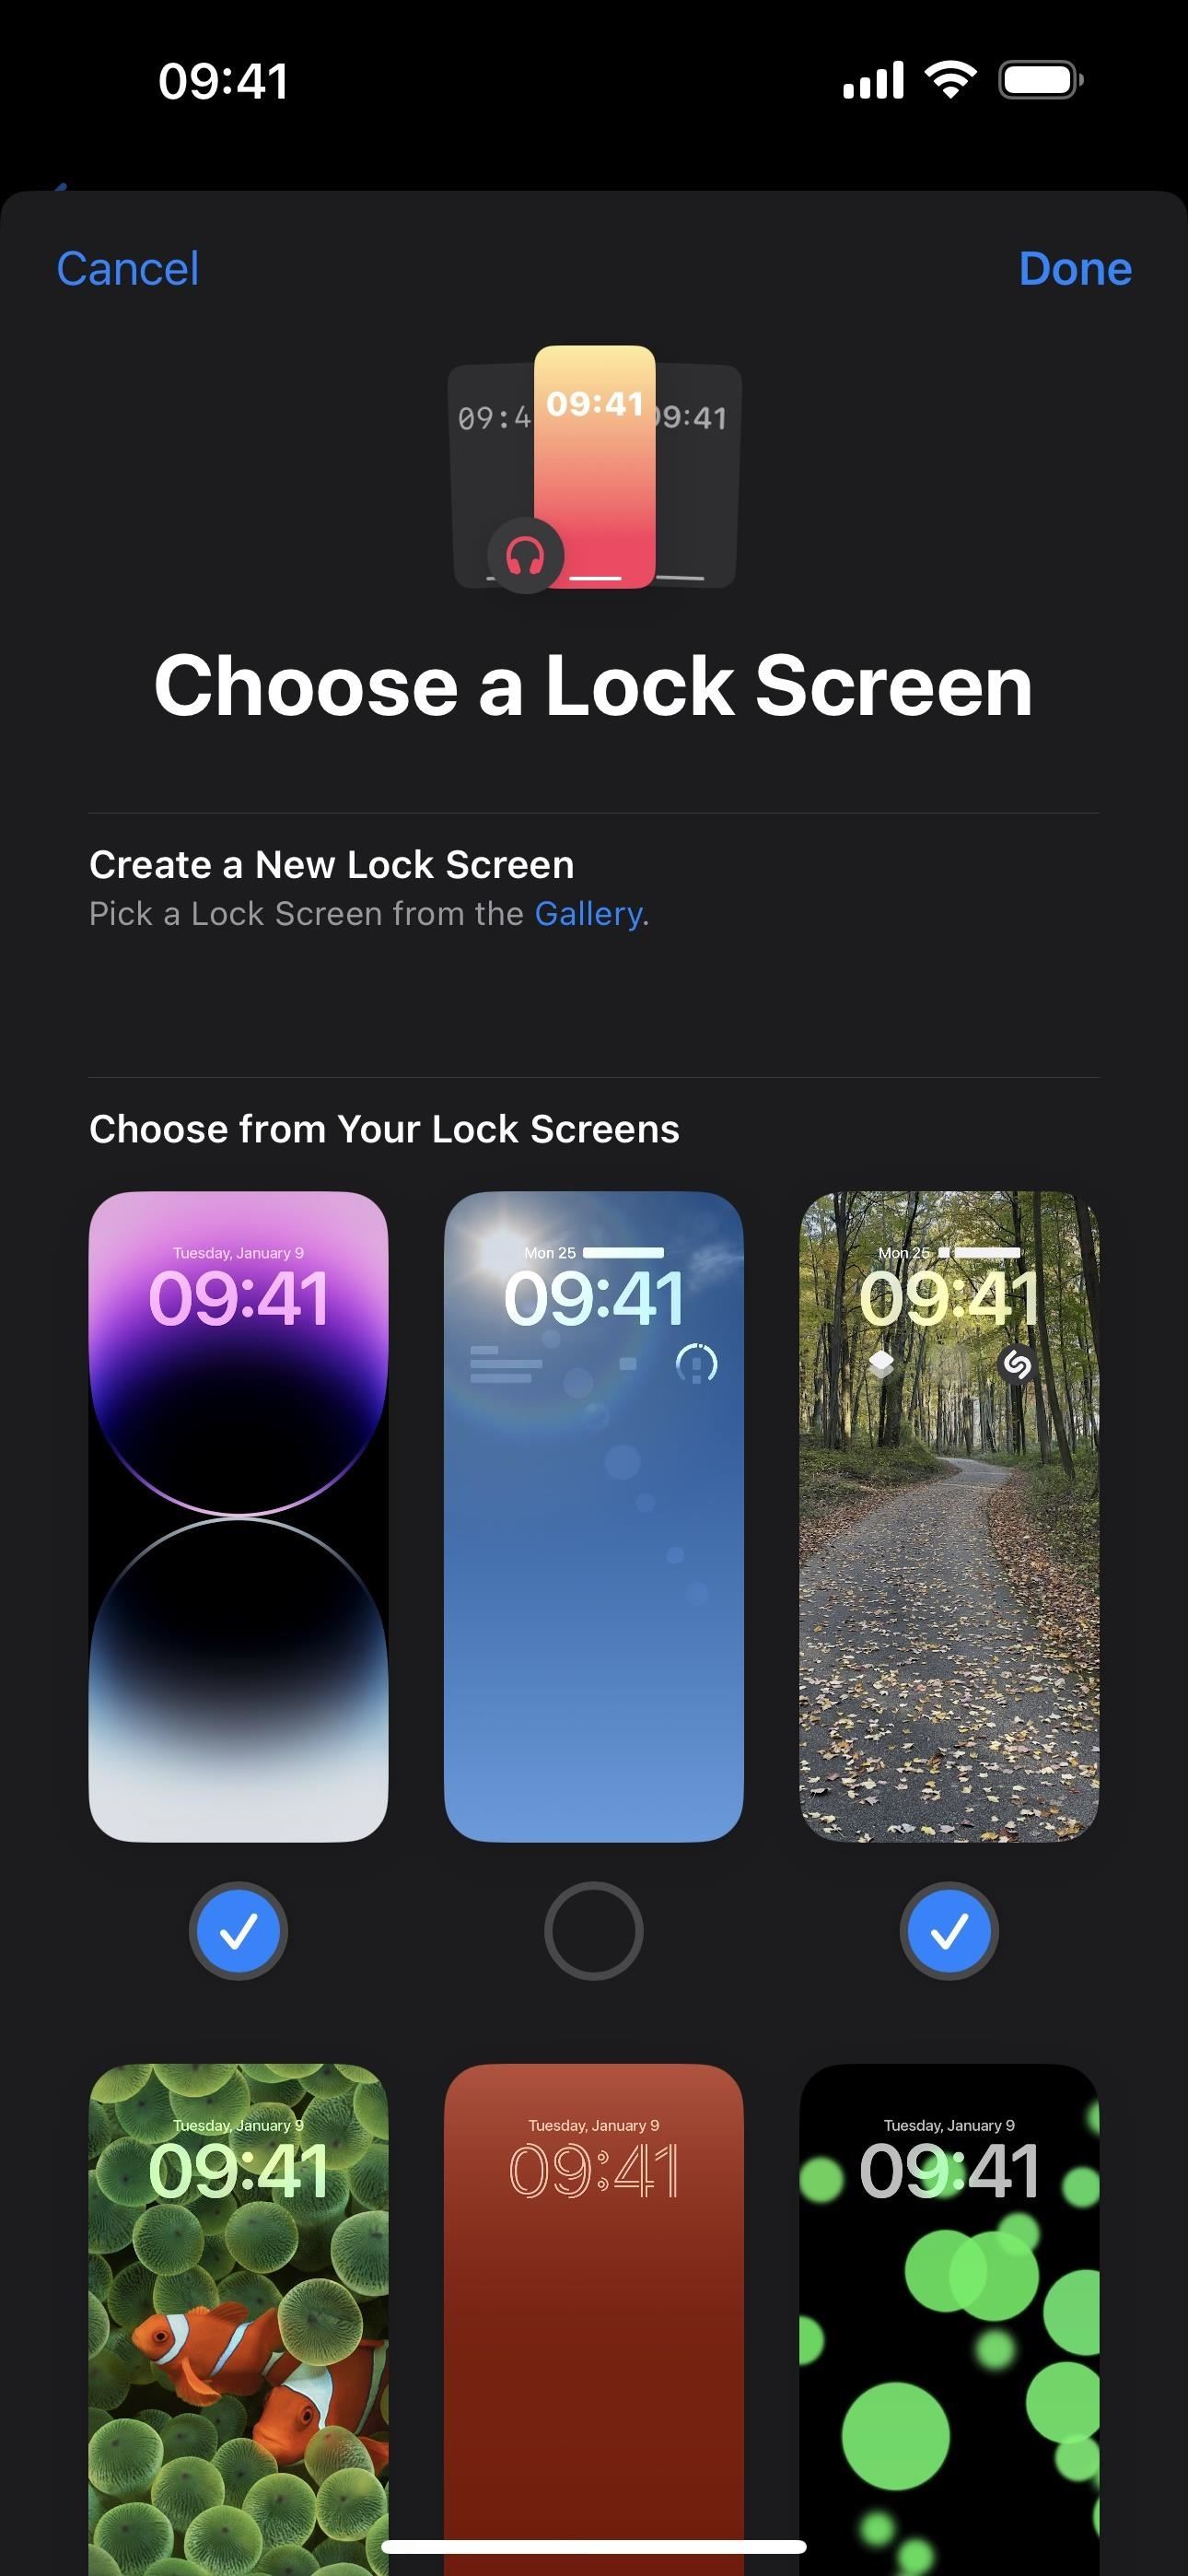
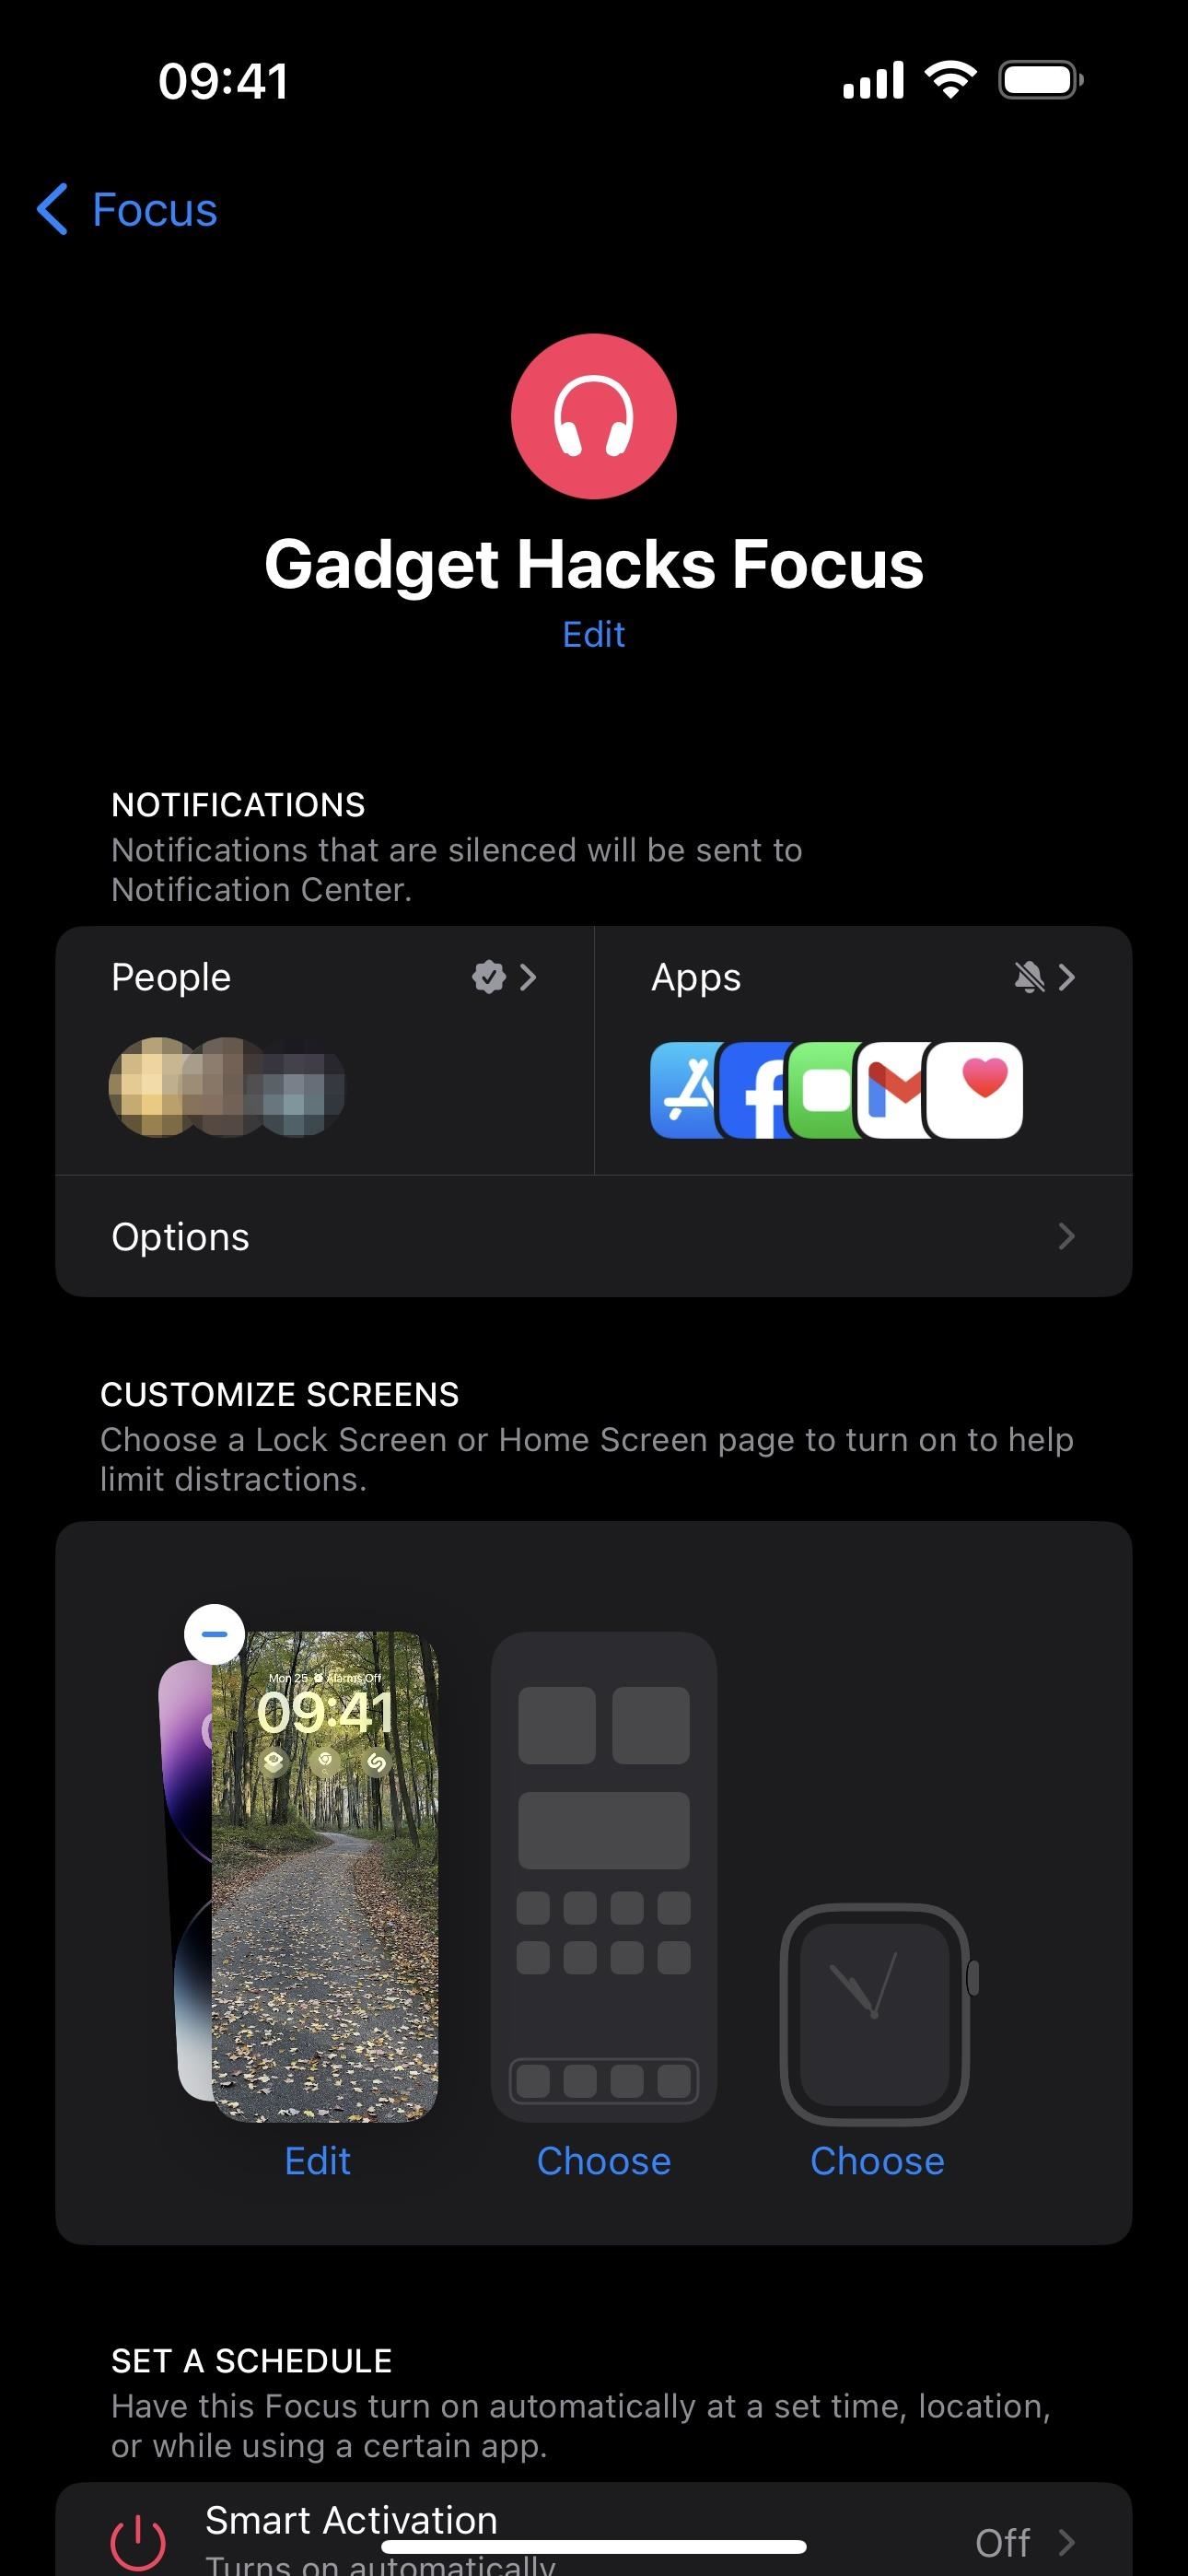
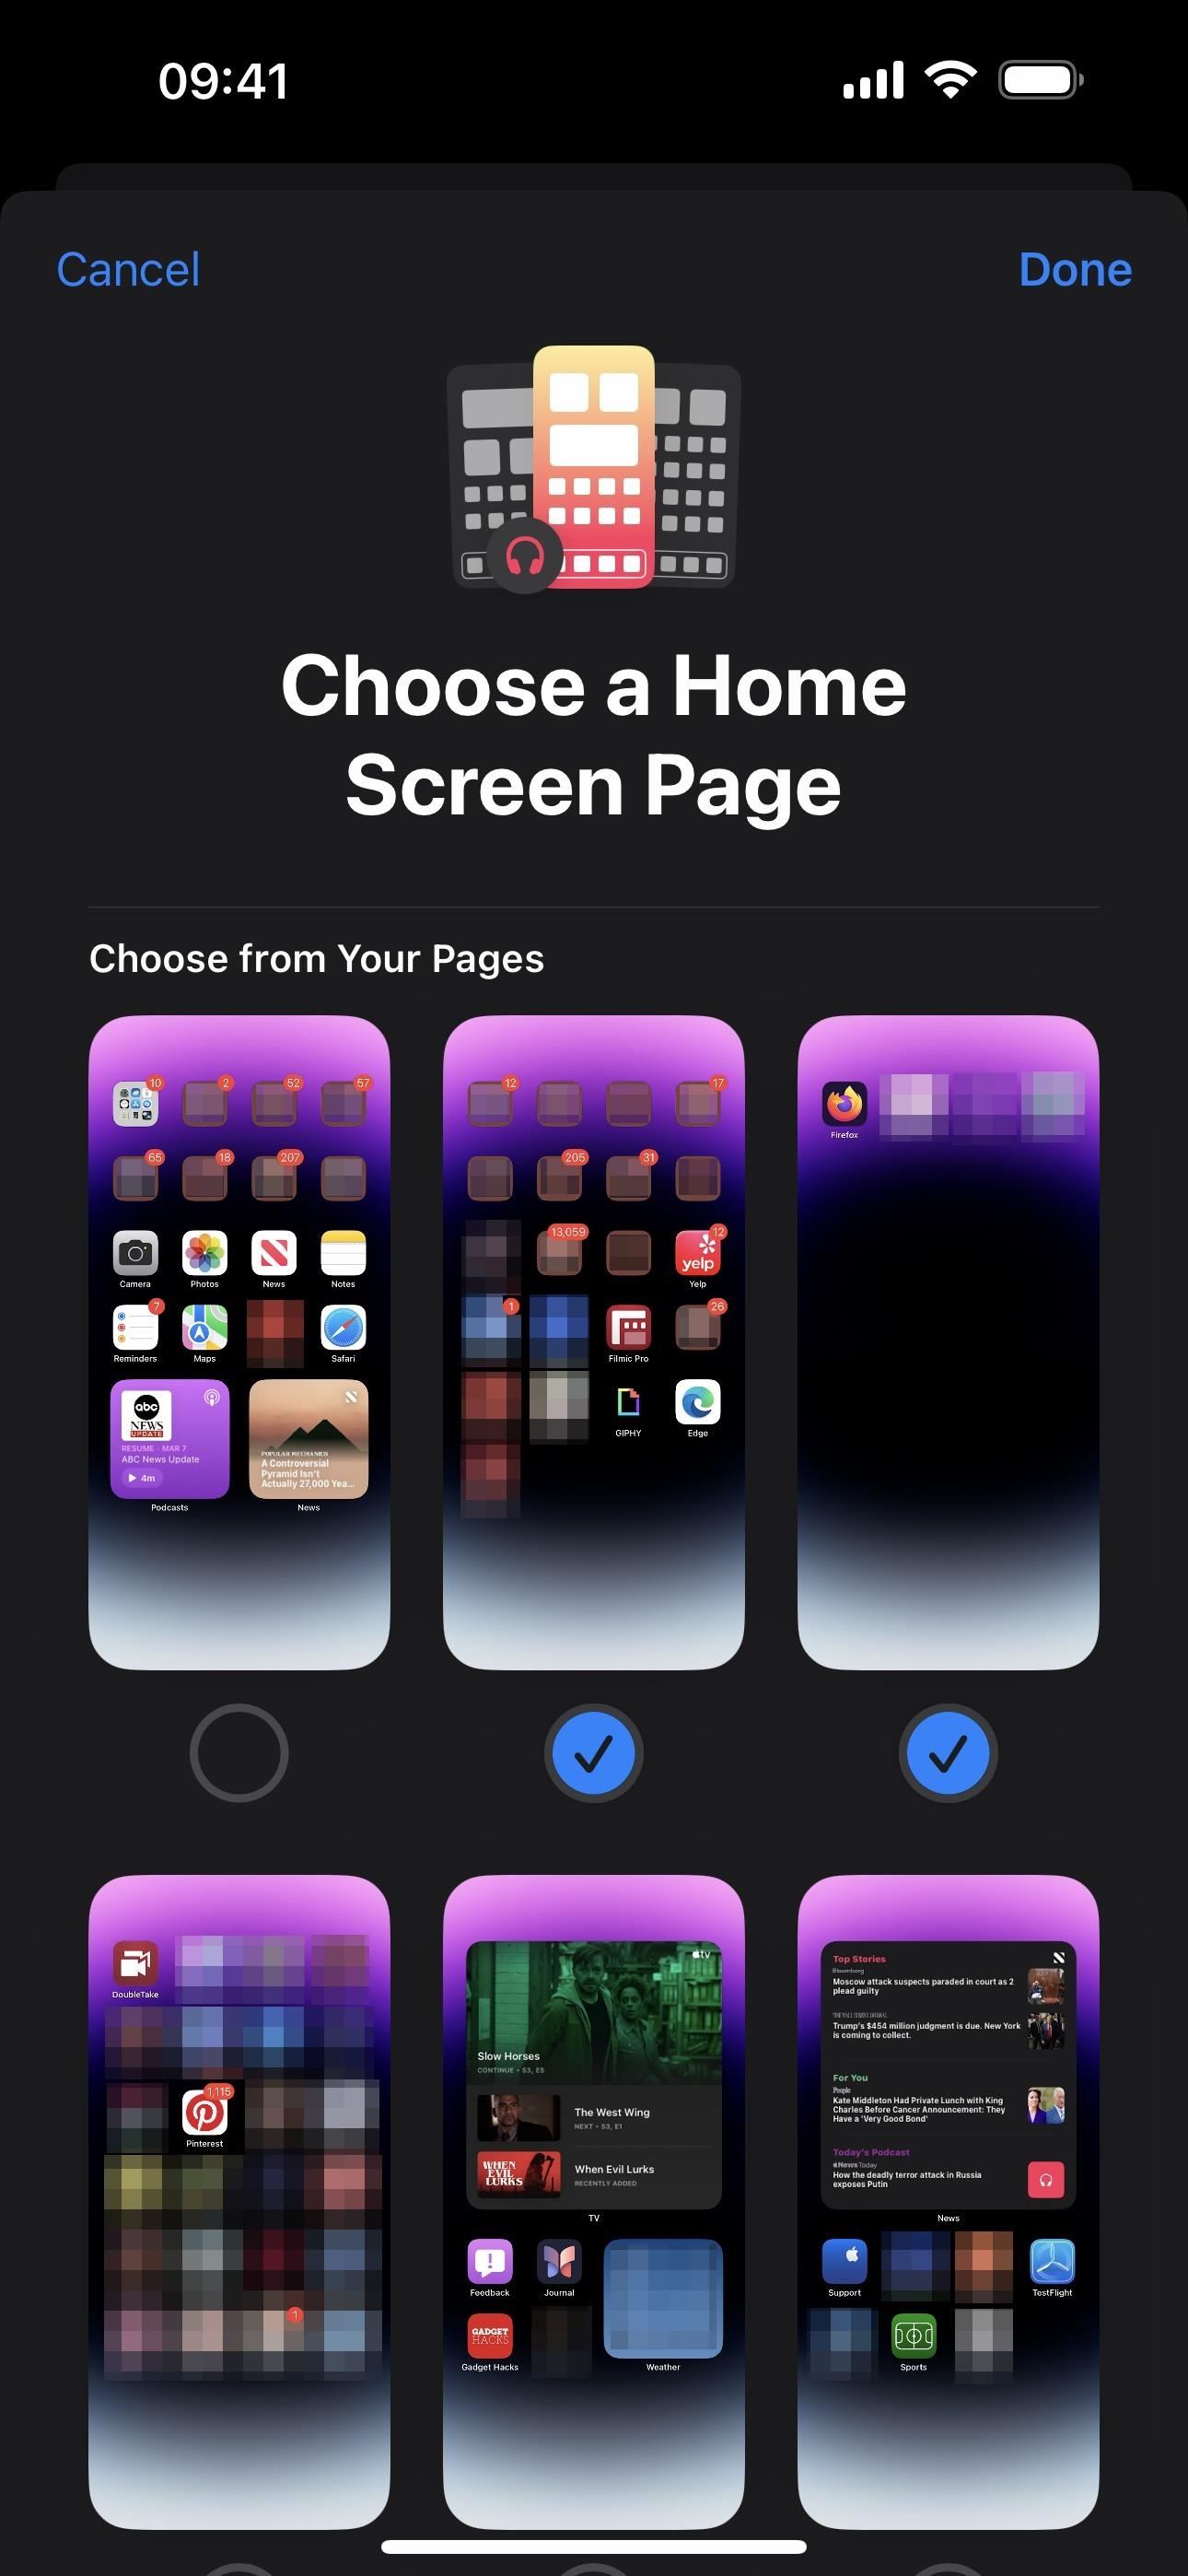
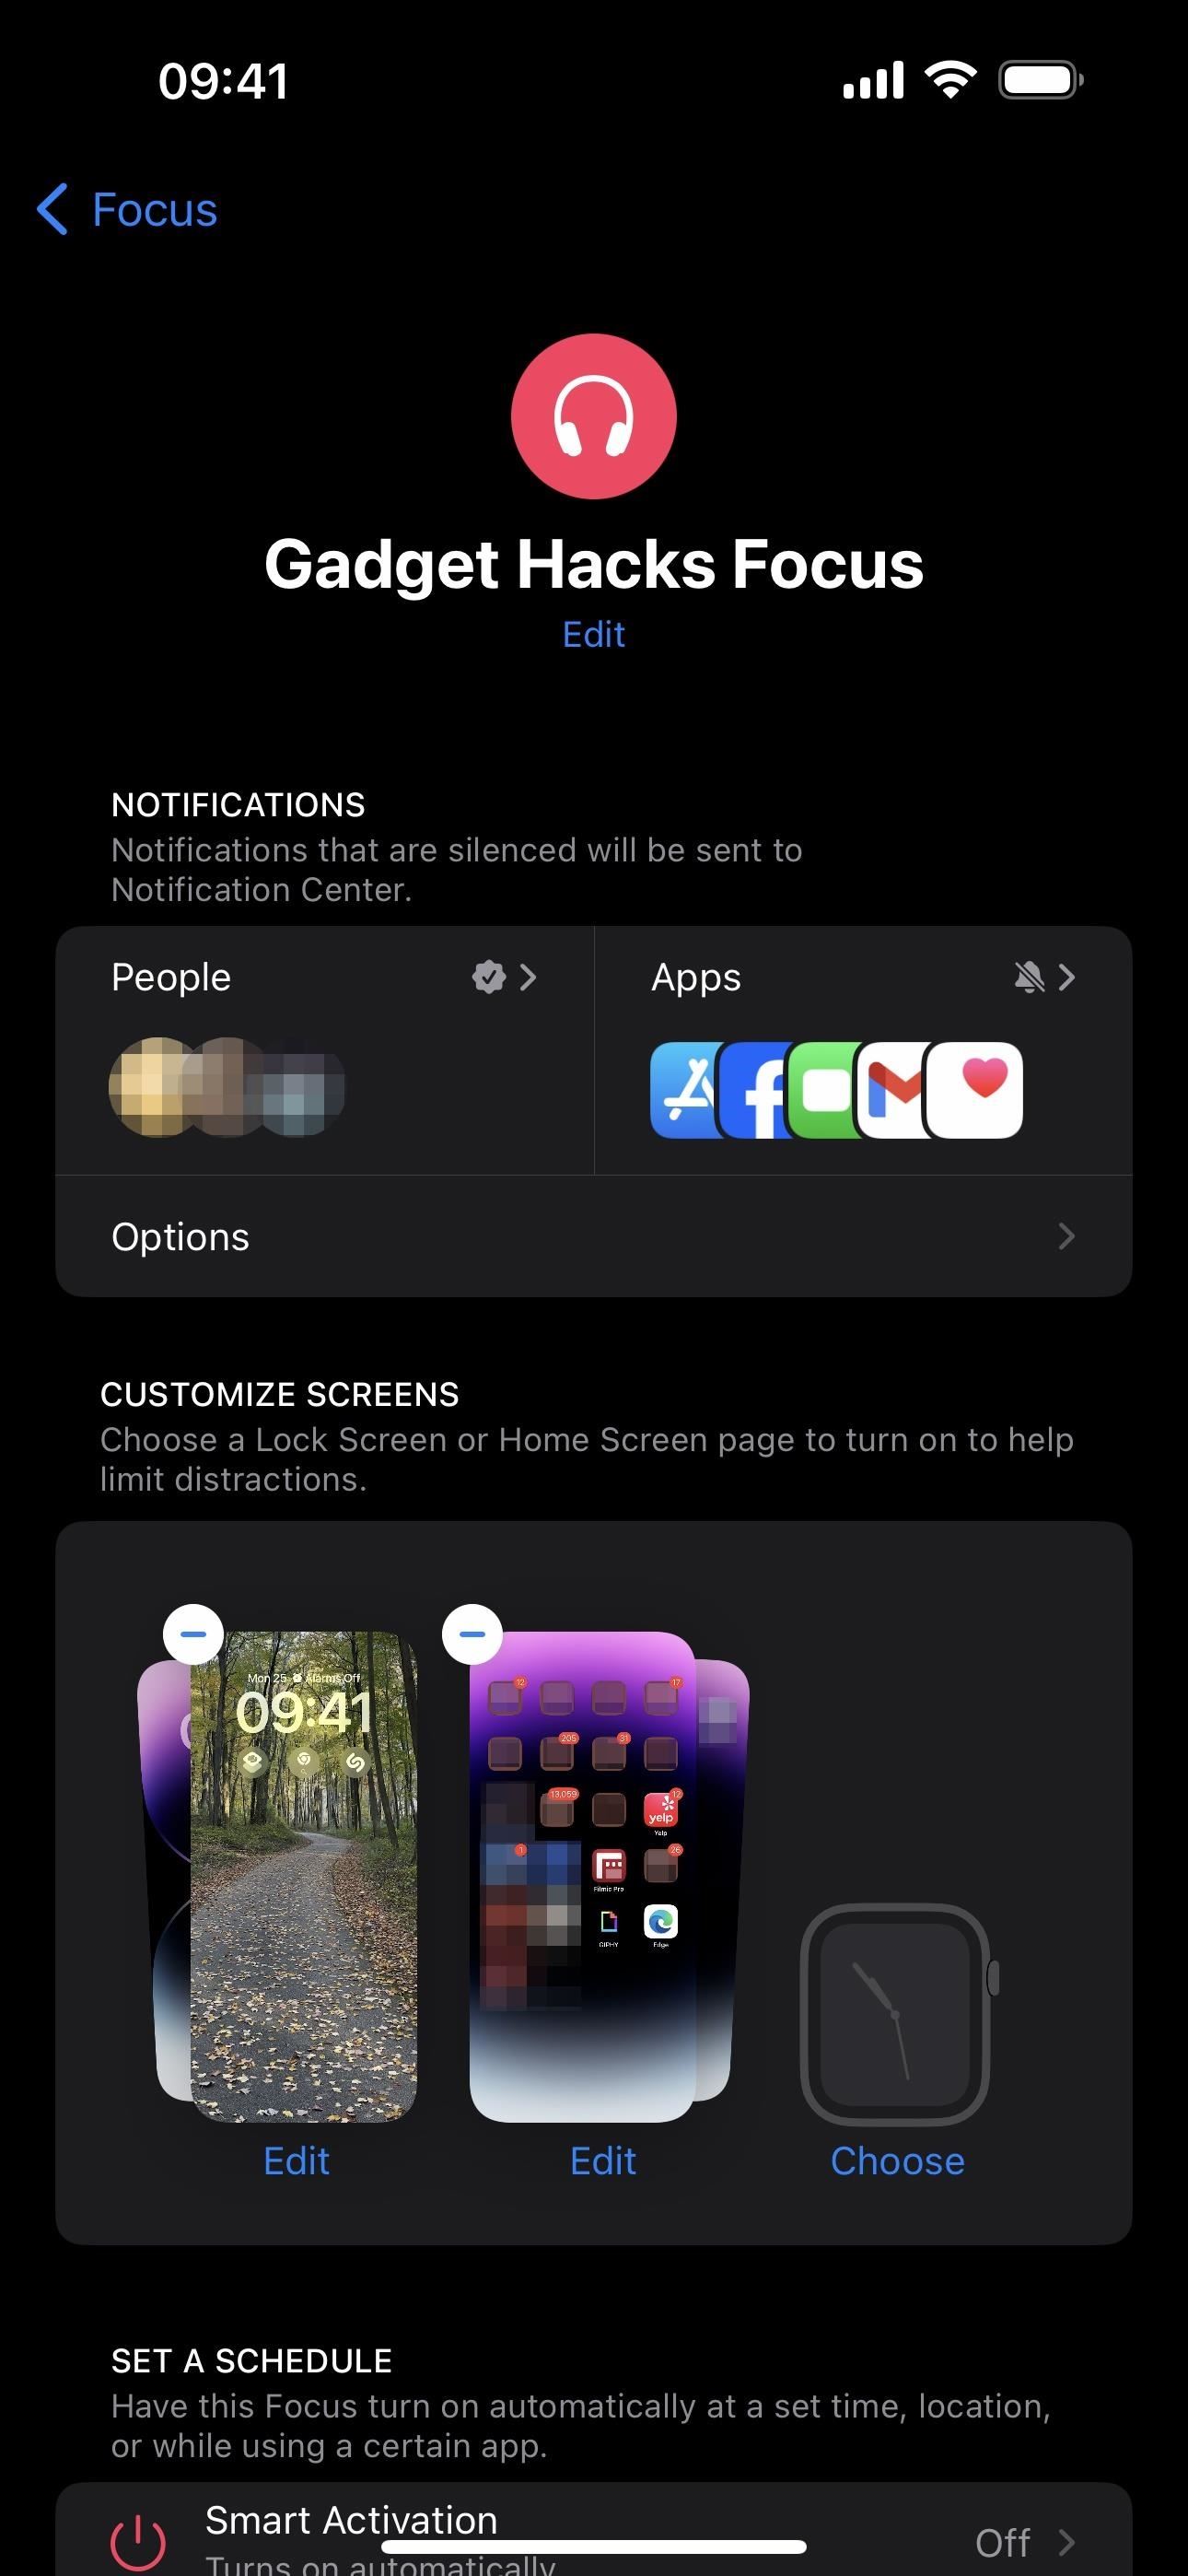
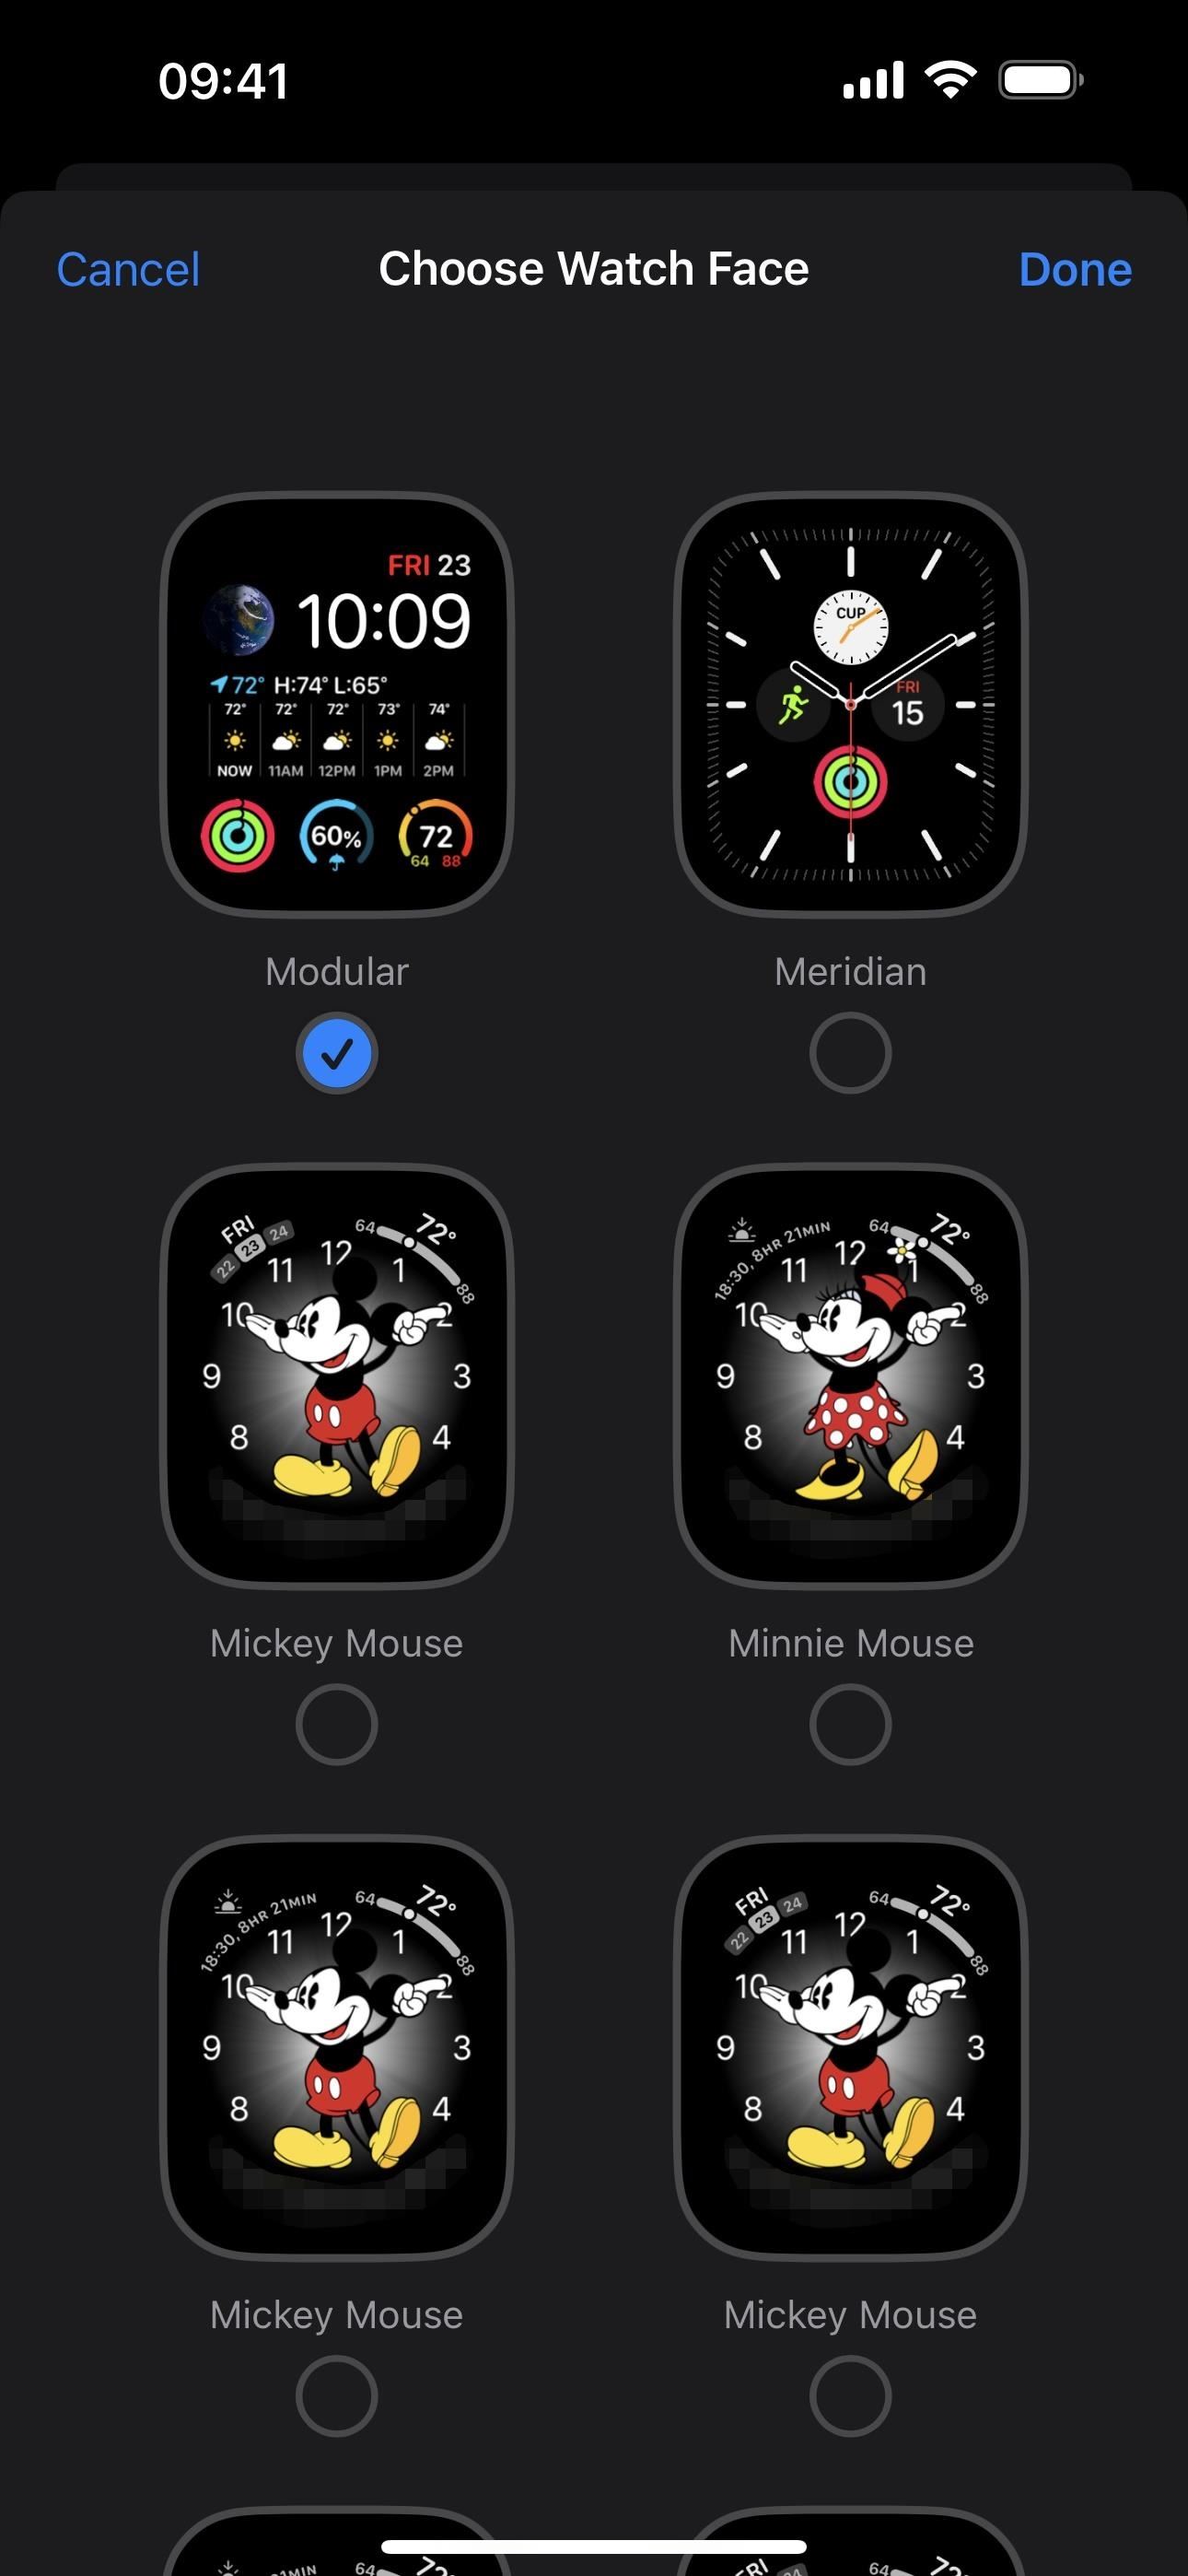
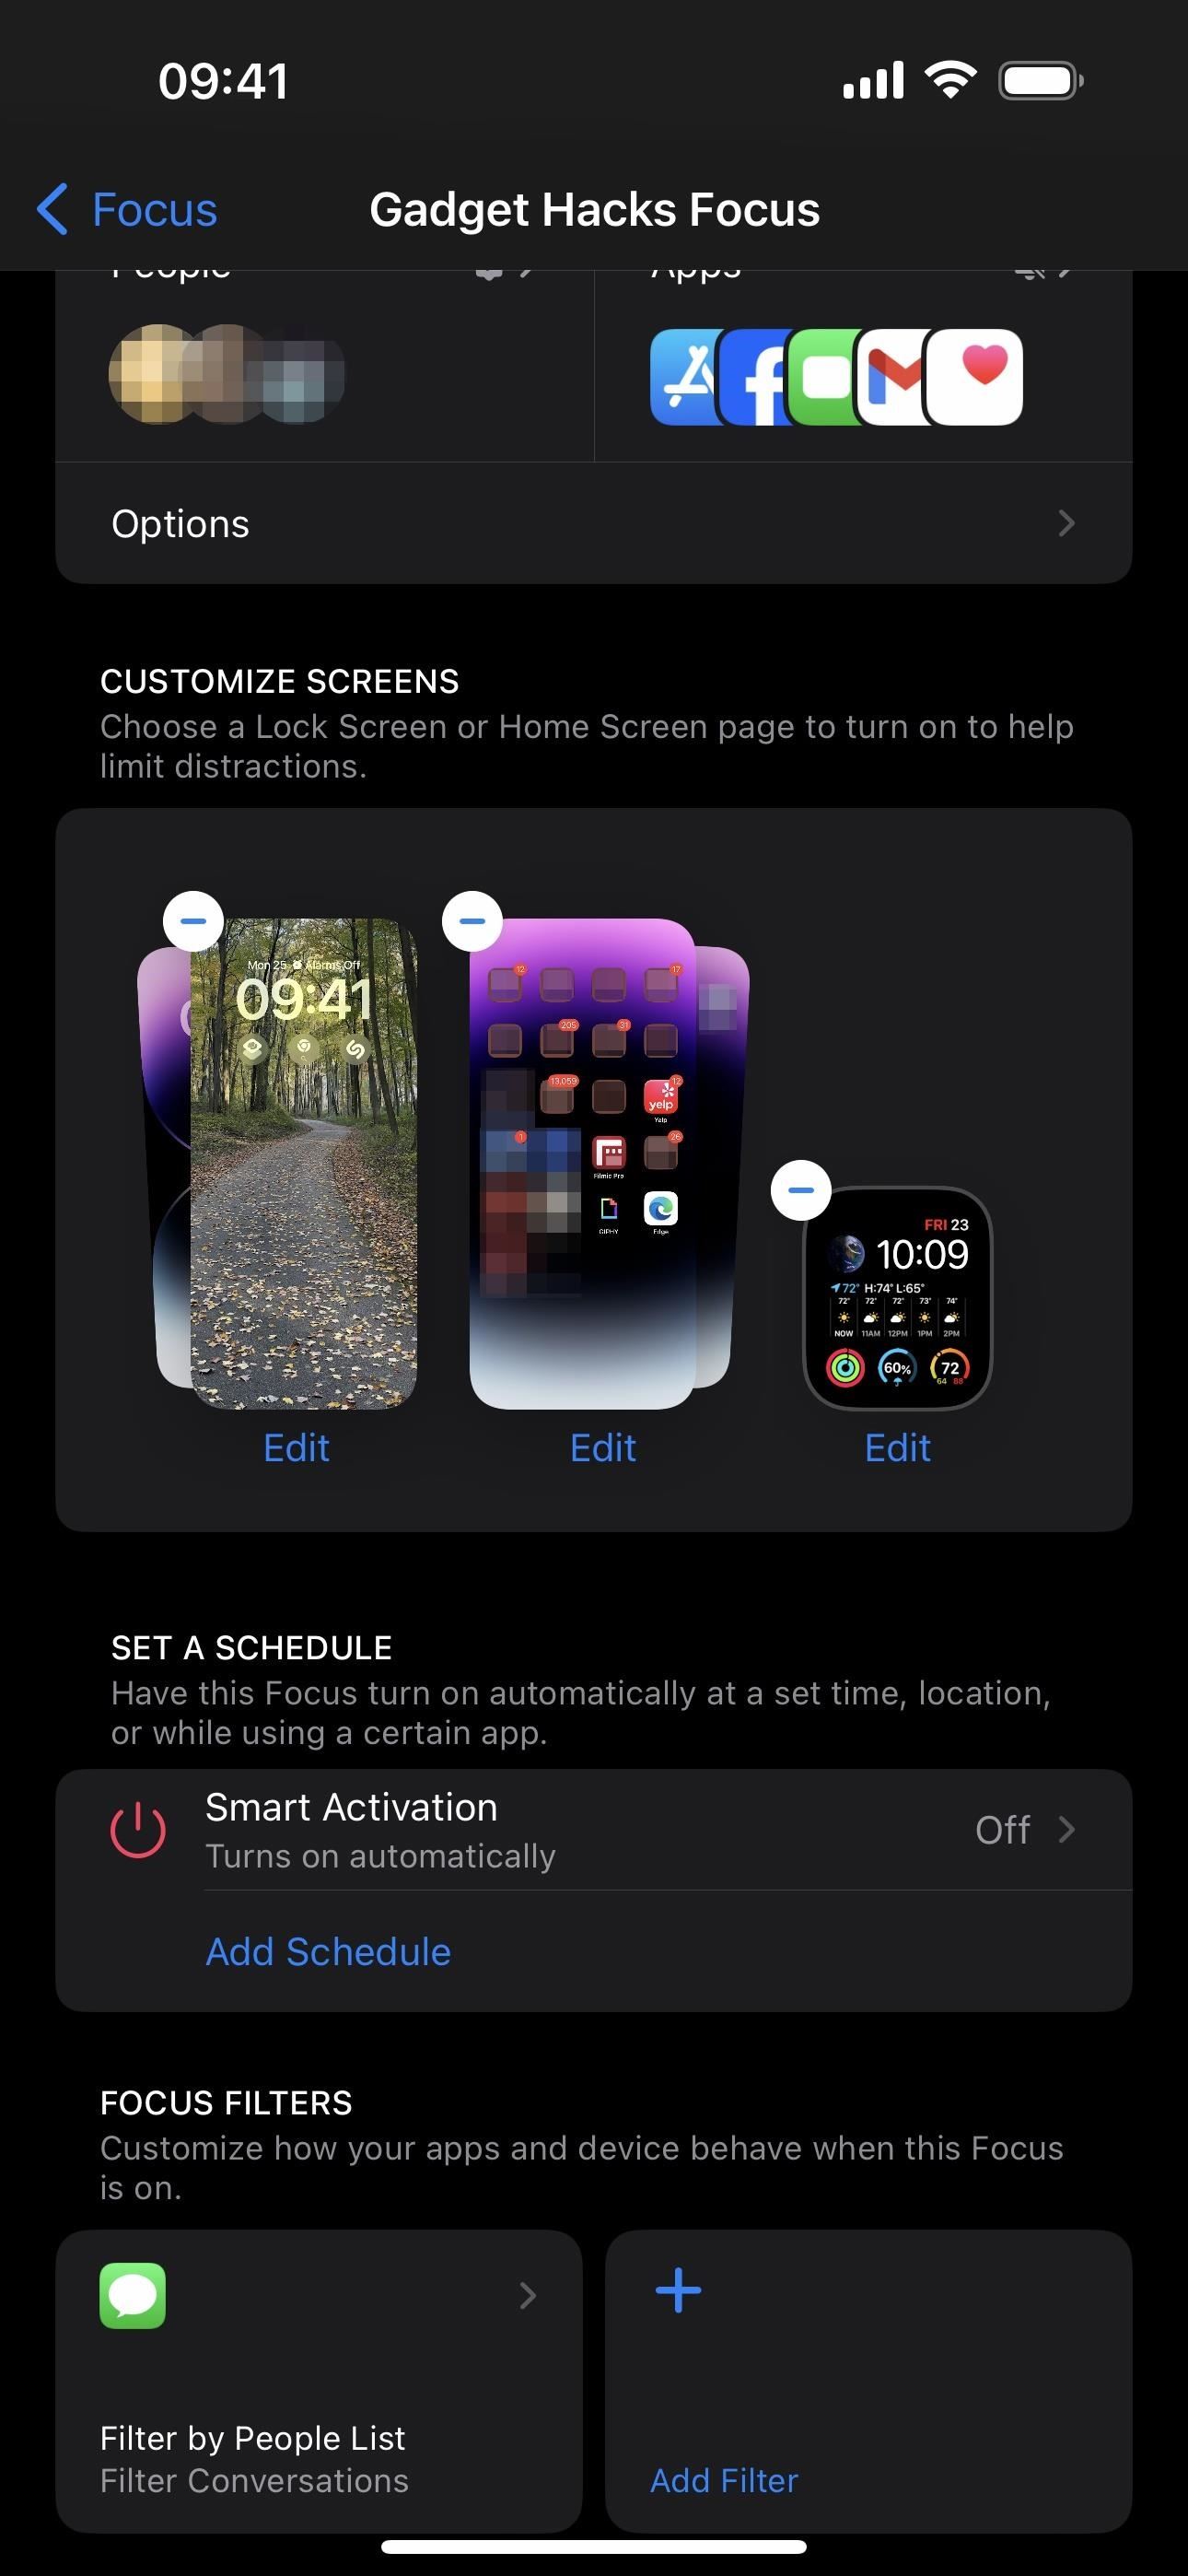
In the Customize Screens section of the settings for your Focus, you can choose which Lock Screen and Home Screen pages will be available when the Focus is active, as well as Apple Watch faces if you have an Apple Watch. Tap “Choose” under one of the options to select pages or watch faces.
For the Lock Screen, check the pages you’d like to be available to choose from when the Focus is active. You can also create a new one from the Lock Screen gallery. Unchecked pages will be hidden from the Lock Screen picker.
For the Home Screen, check the pages you’d like to see when the Focus is active. Unchecked pages will be hidden from the Home Screen.
- Don’t Miss: Hide Entire Home Screen Pages on Your iPhone for a Simpler Layout
For the watch face, check the watch faces you’d like to be available to choose from when the Focus is active. Unchecked watch faces will be hidden from the watch face selector on your Apple Watch.
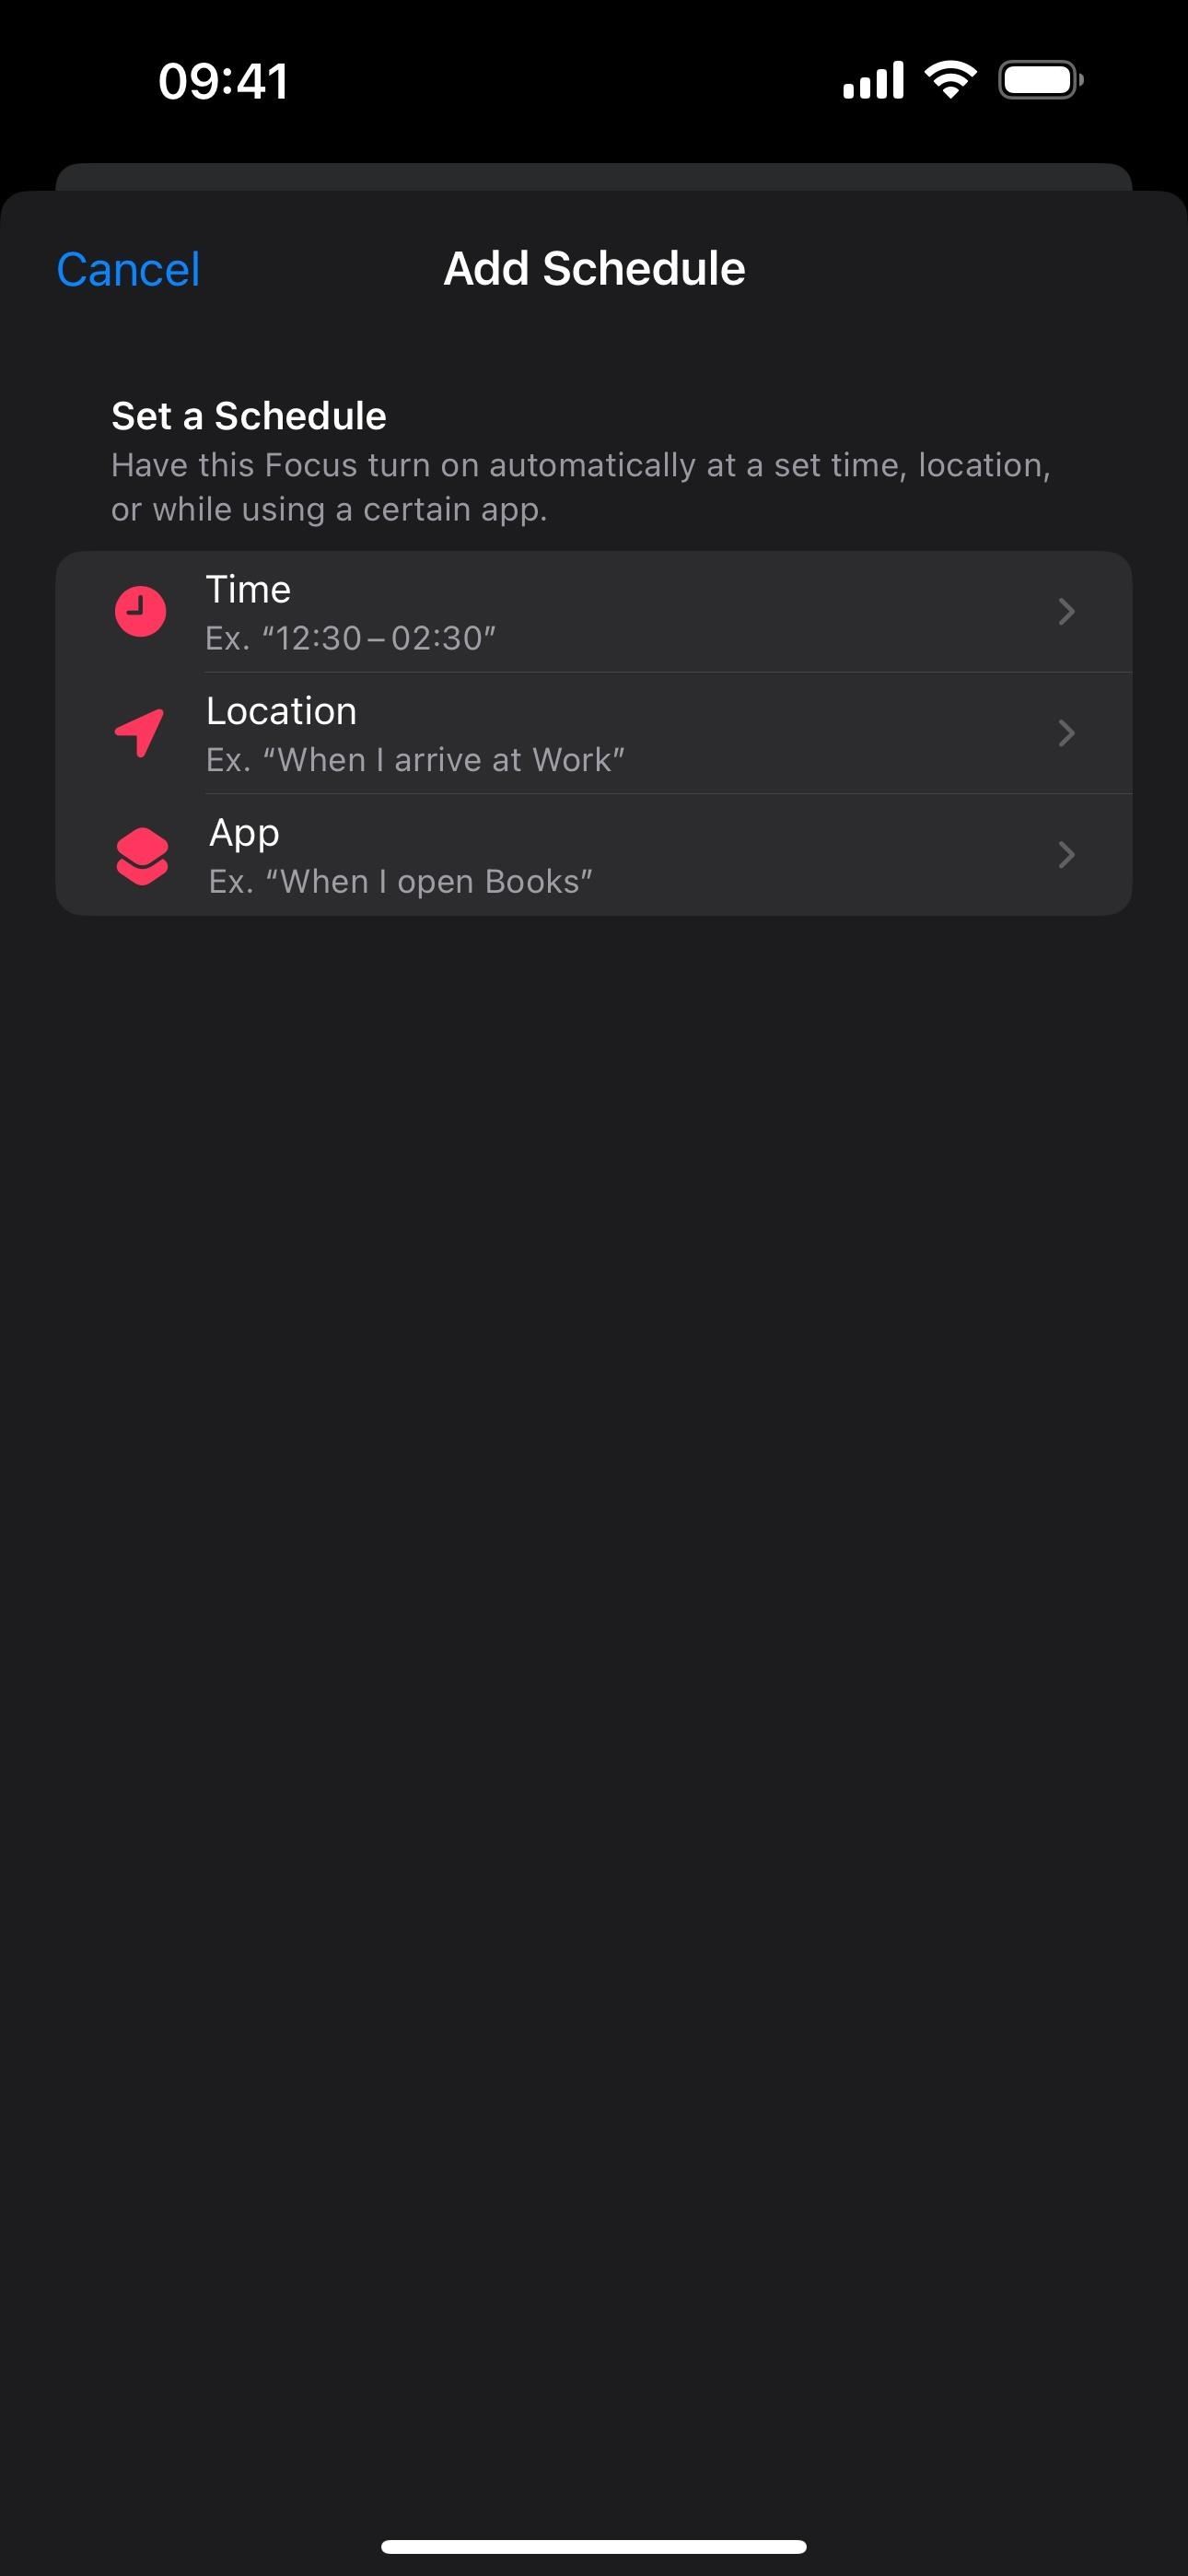
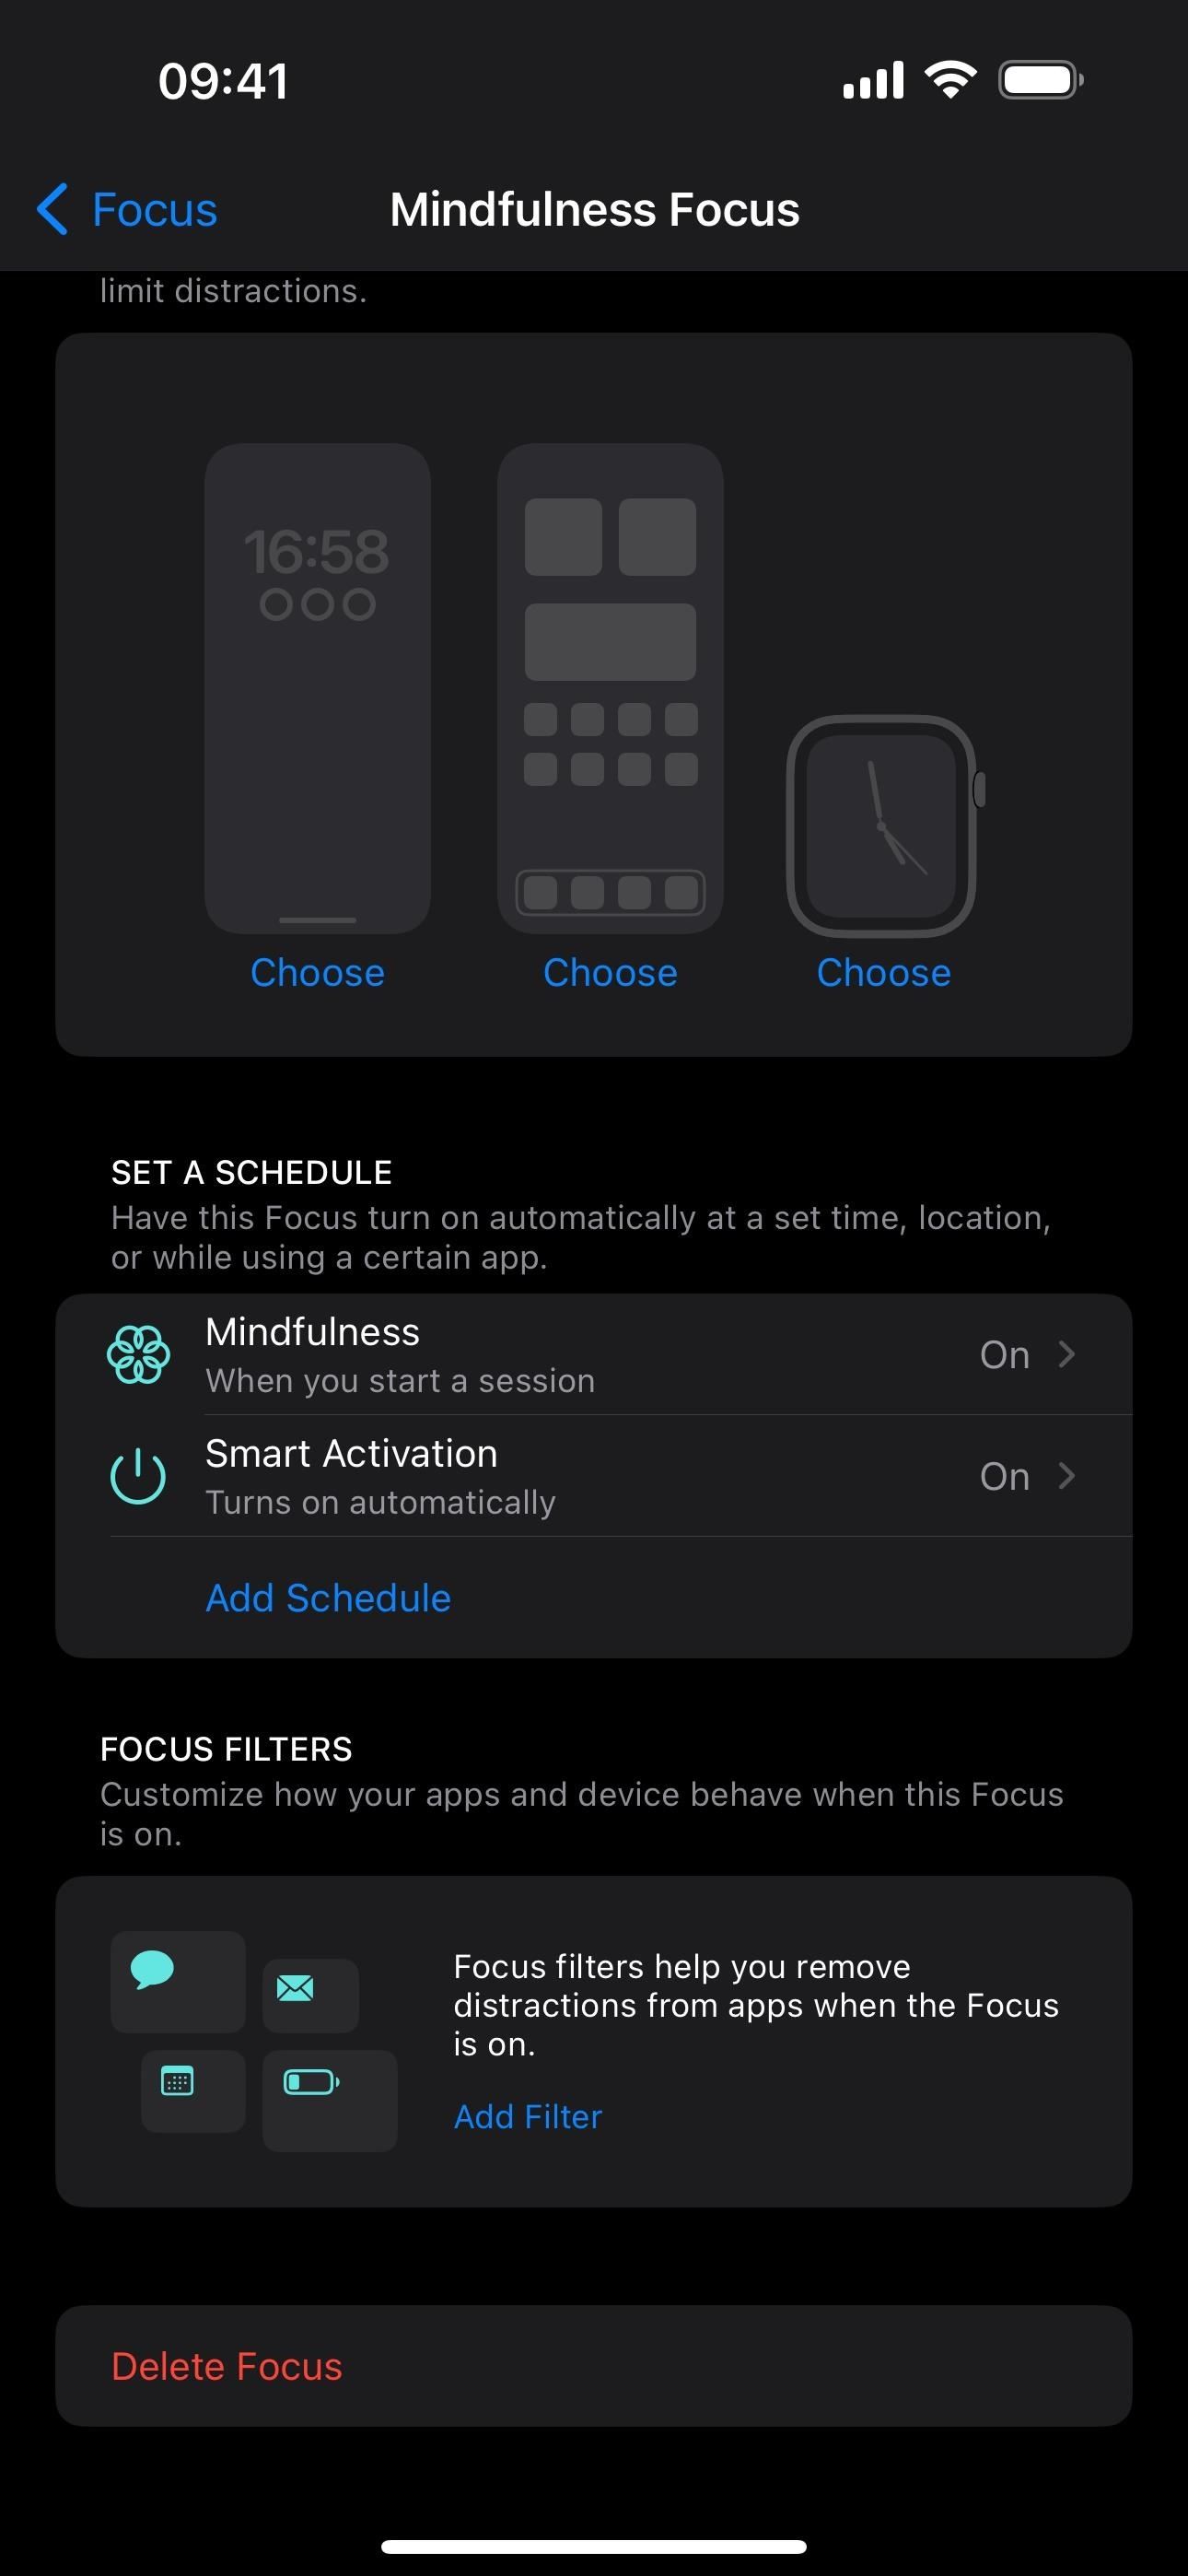
Option 6: Set a Schedule
Under the Set a Schedule section, or Turn On Automatically for the Driving Focus only, you can choose between different ways to automate the turning on and off of your Focus. Here are things things you may see:
- Mindfulness: This only shows in the Mindfulness Focus. Turning it on will start your Focus automatically every time you start a session in the Mindfulness app.
- Next Schedule: This only shows in the Sleep Focus if you have a Sleep schedule in the Health app. Turning it on will start your Focus automatically at your scheduled bedtime.
- While Driving: This only shows in the Driving Focus. You can choose to activate the Focus “Automatically,” “When Connected to Car Bluetooth,” or “Manually,” and you can also toggle on “Activate With CarPlay” if you have CarPlay in your vehicle.
- Wireless Controller: This only shows in the Gaming Focus. Turning it on will start your Focus automatically every time your iPhone connects to a wireless controller.
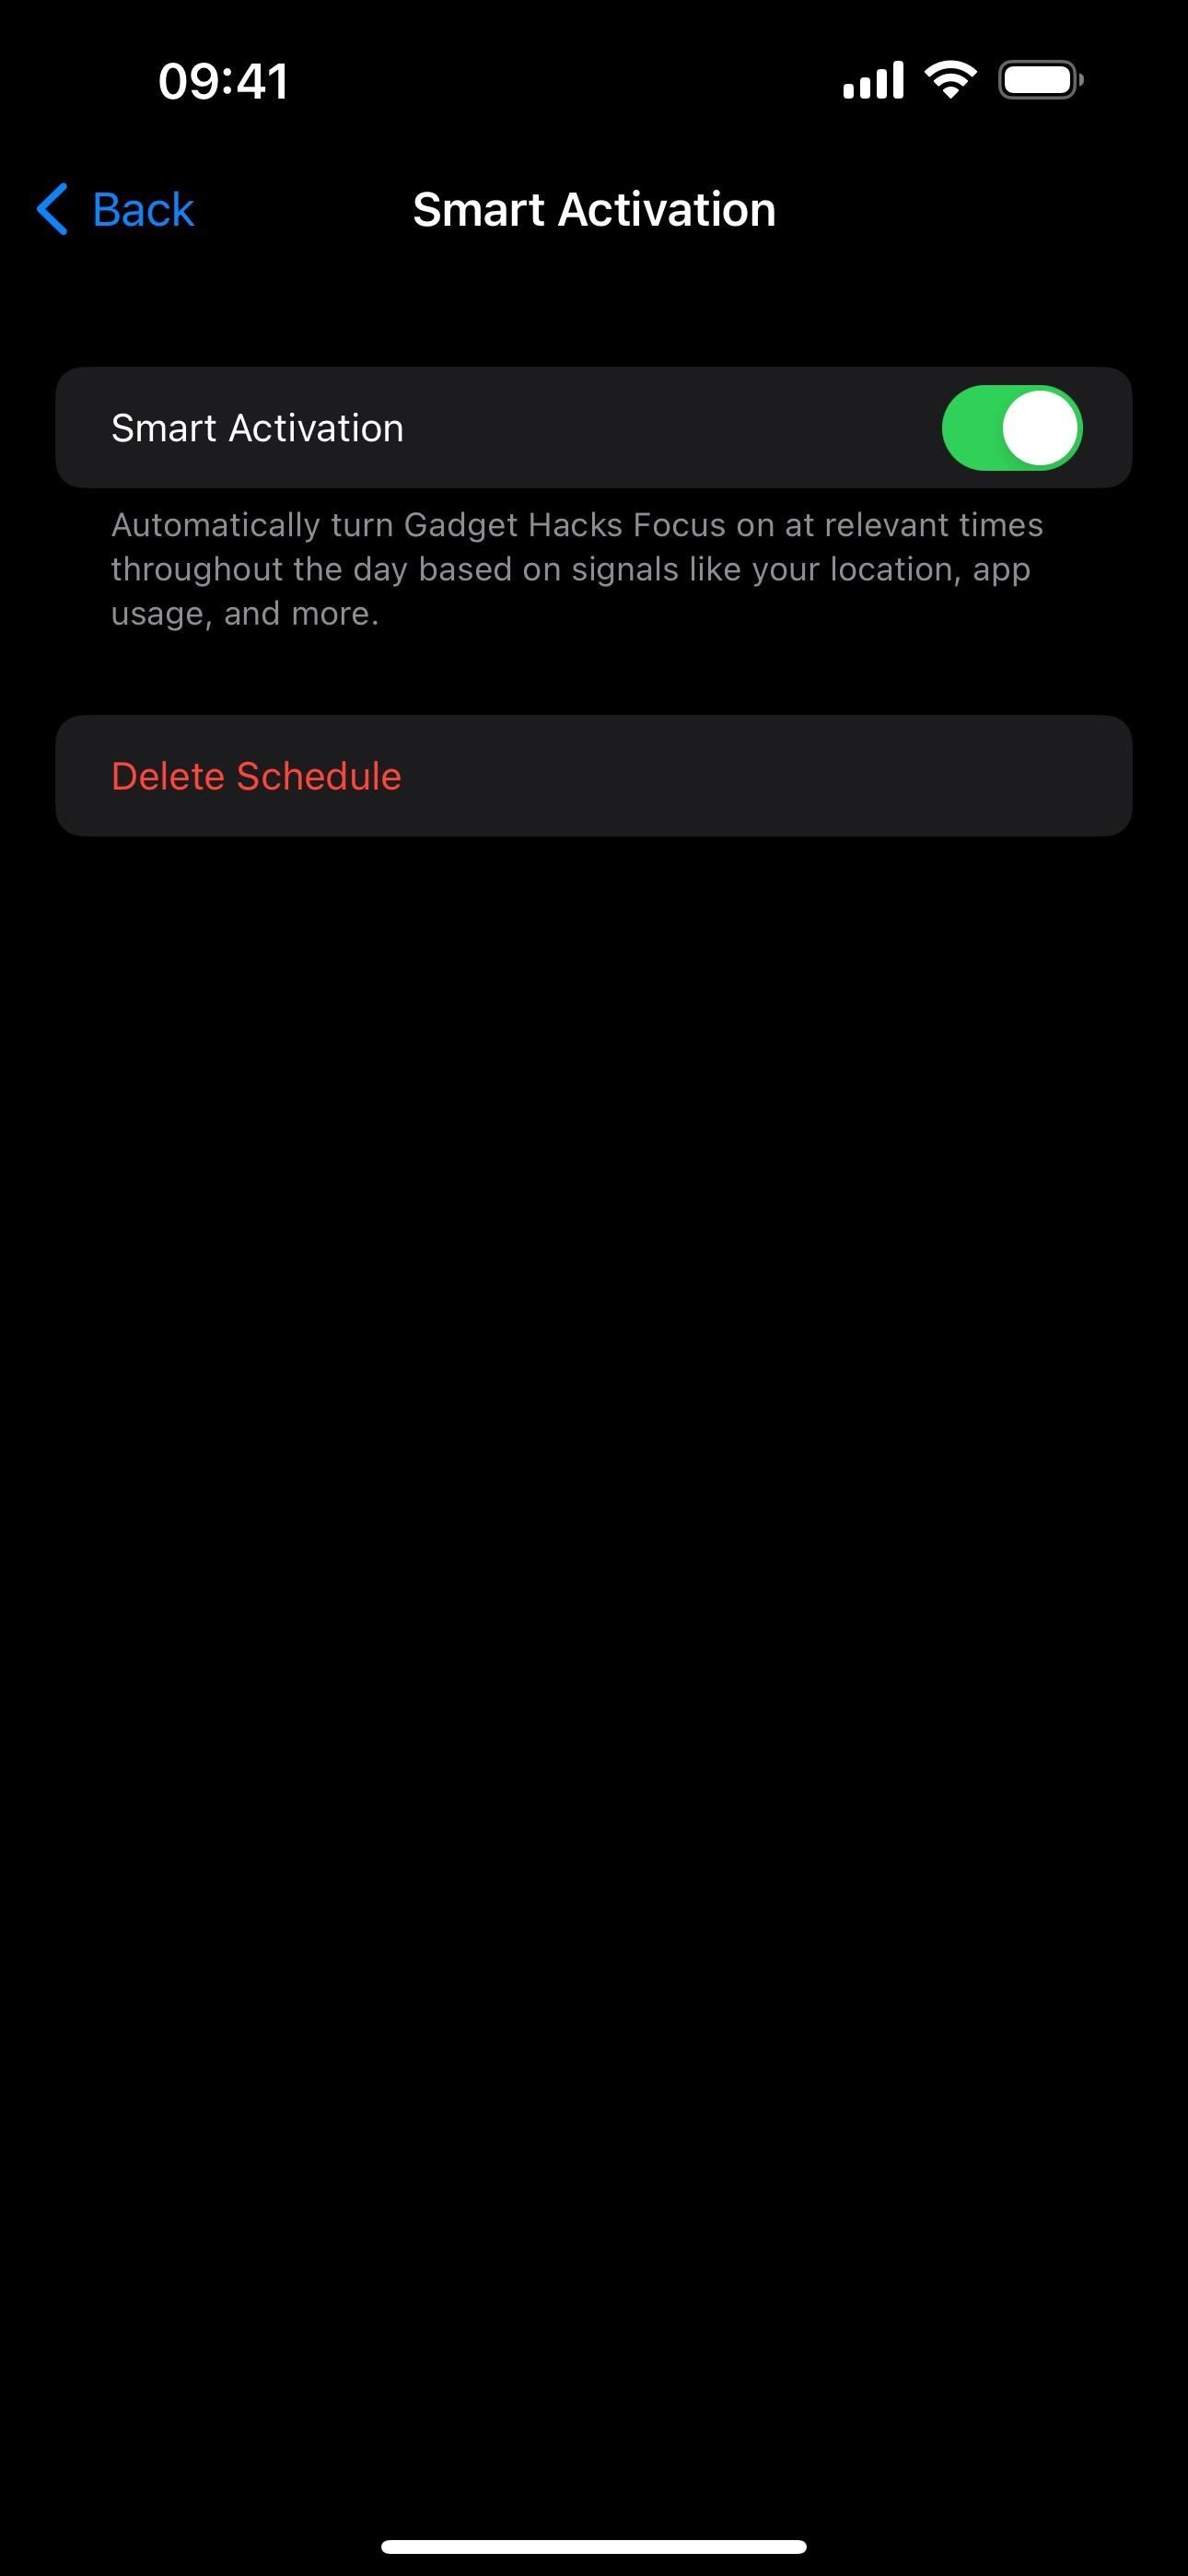
- Add a Schedule: This lets you set a custom schedule to turn the Focus on at a set time, in a specific location, or while using a particular app. You can also enable “Smart Activation,” except on the Driving and Fitness Focus options, which will turn the Focus on at relevant times automatically throughout the day based on data points such as location and app usage.
You can create multiple schedules for any custom Focus and most templates.
Option 7: Add Focus Filters
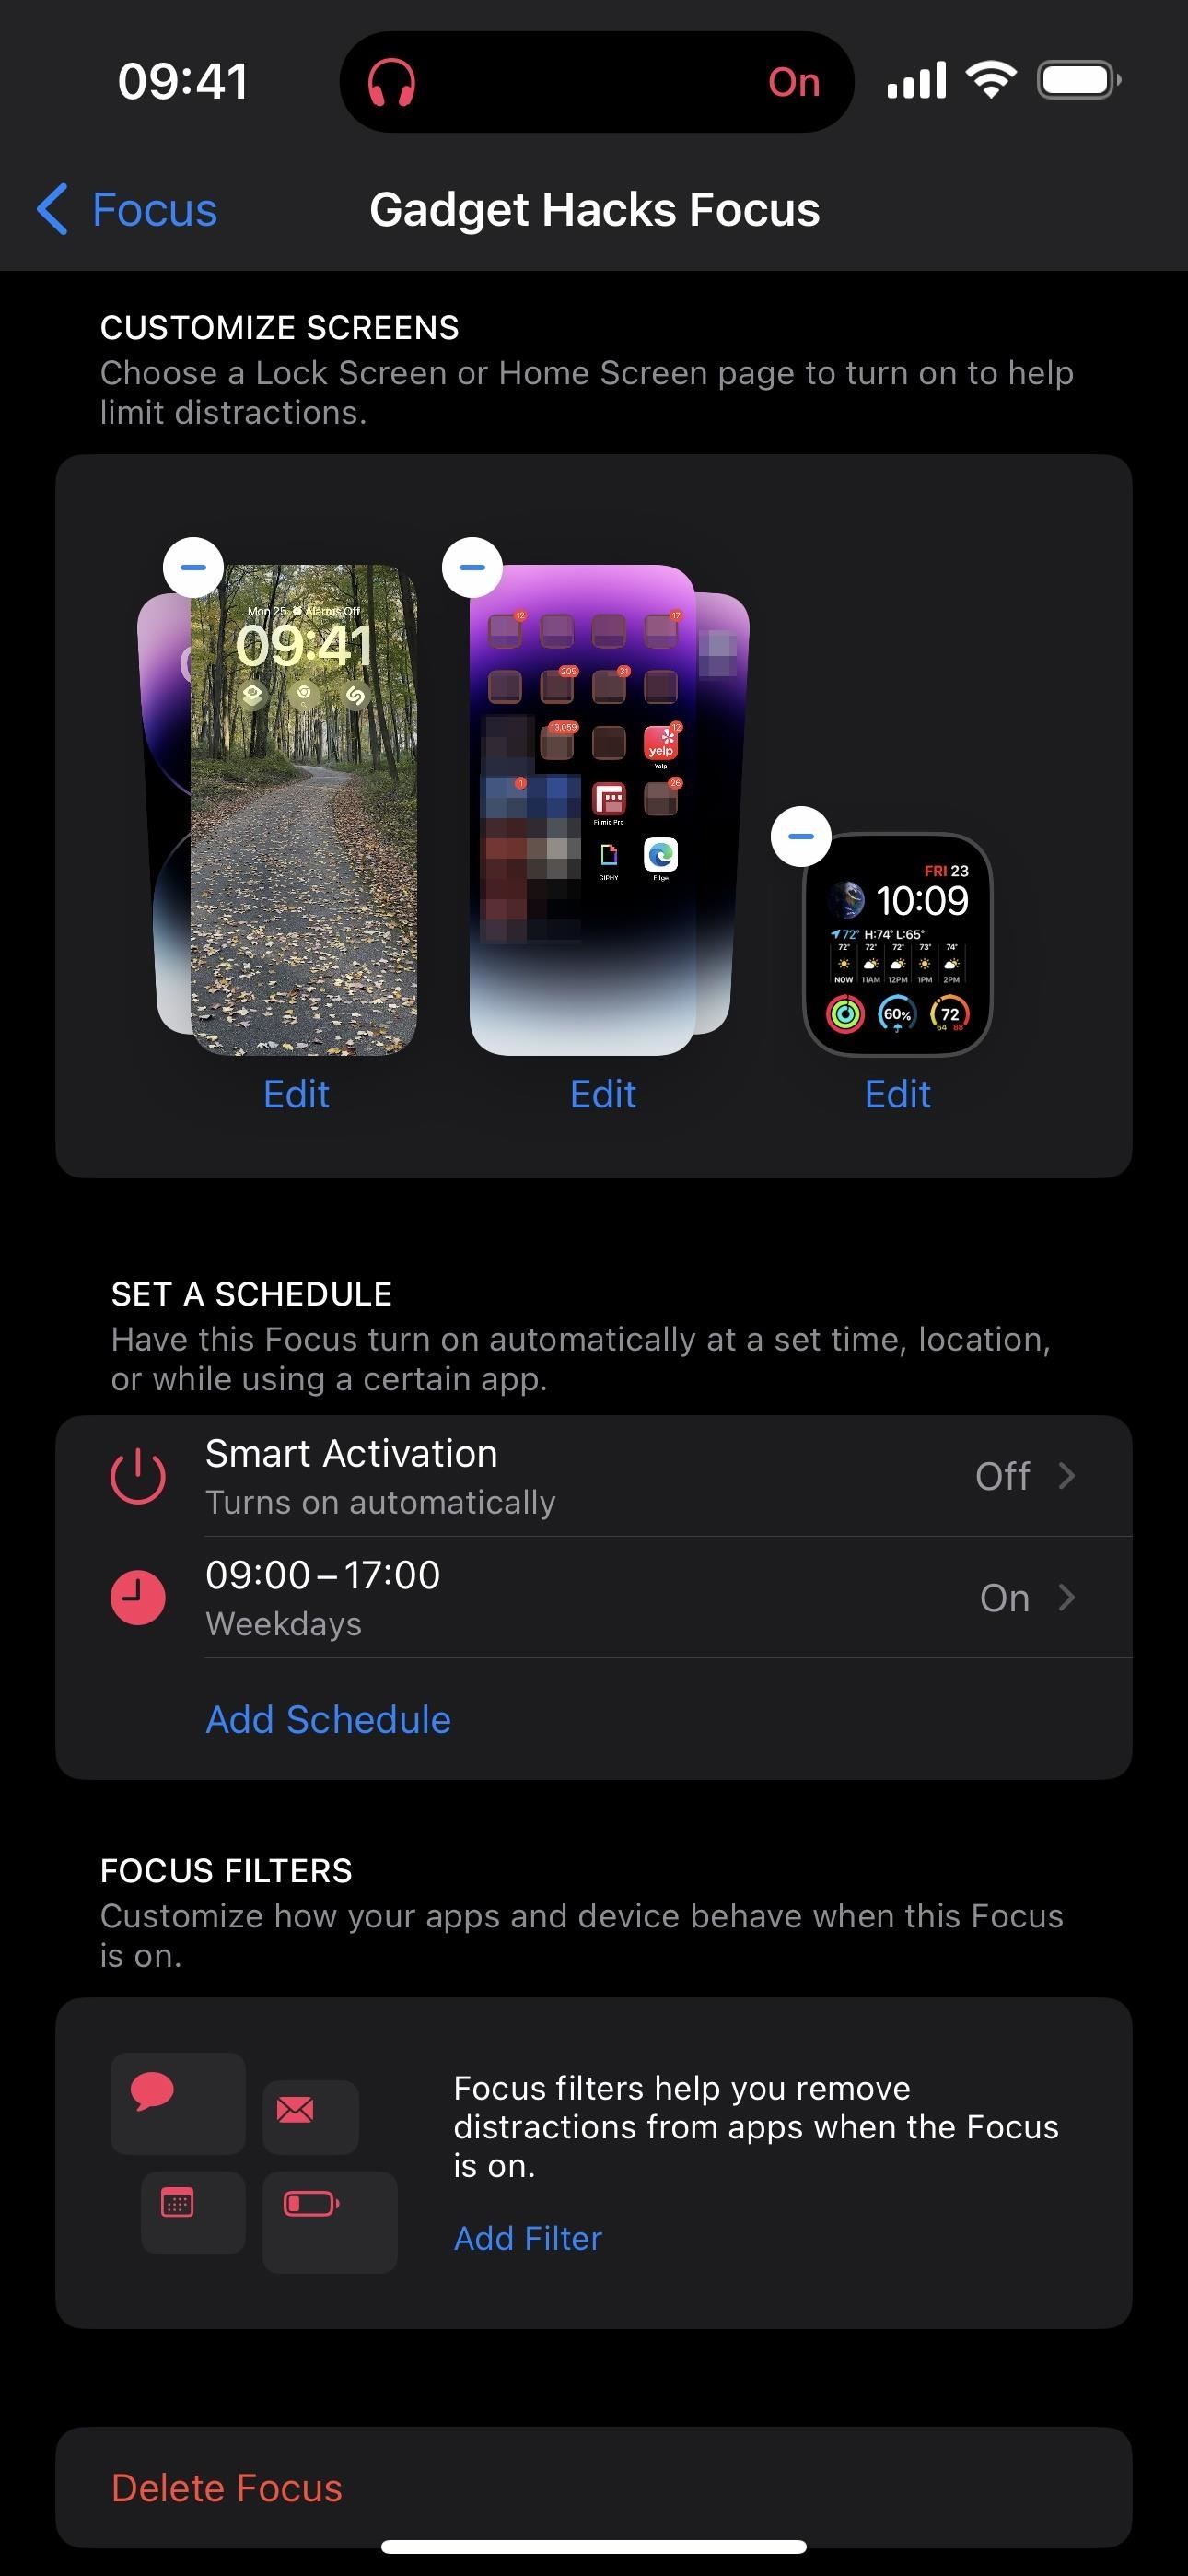
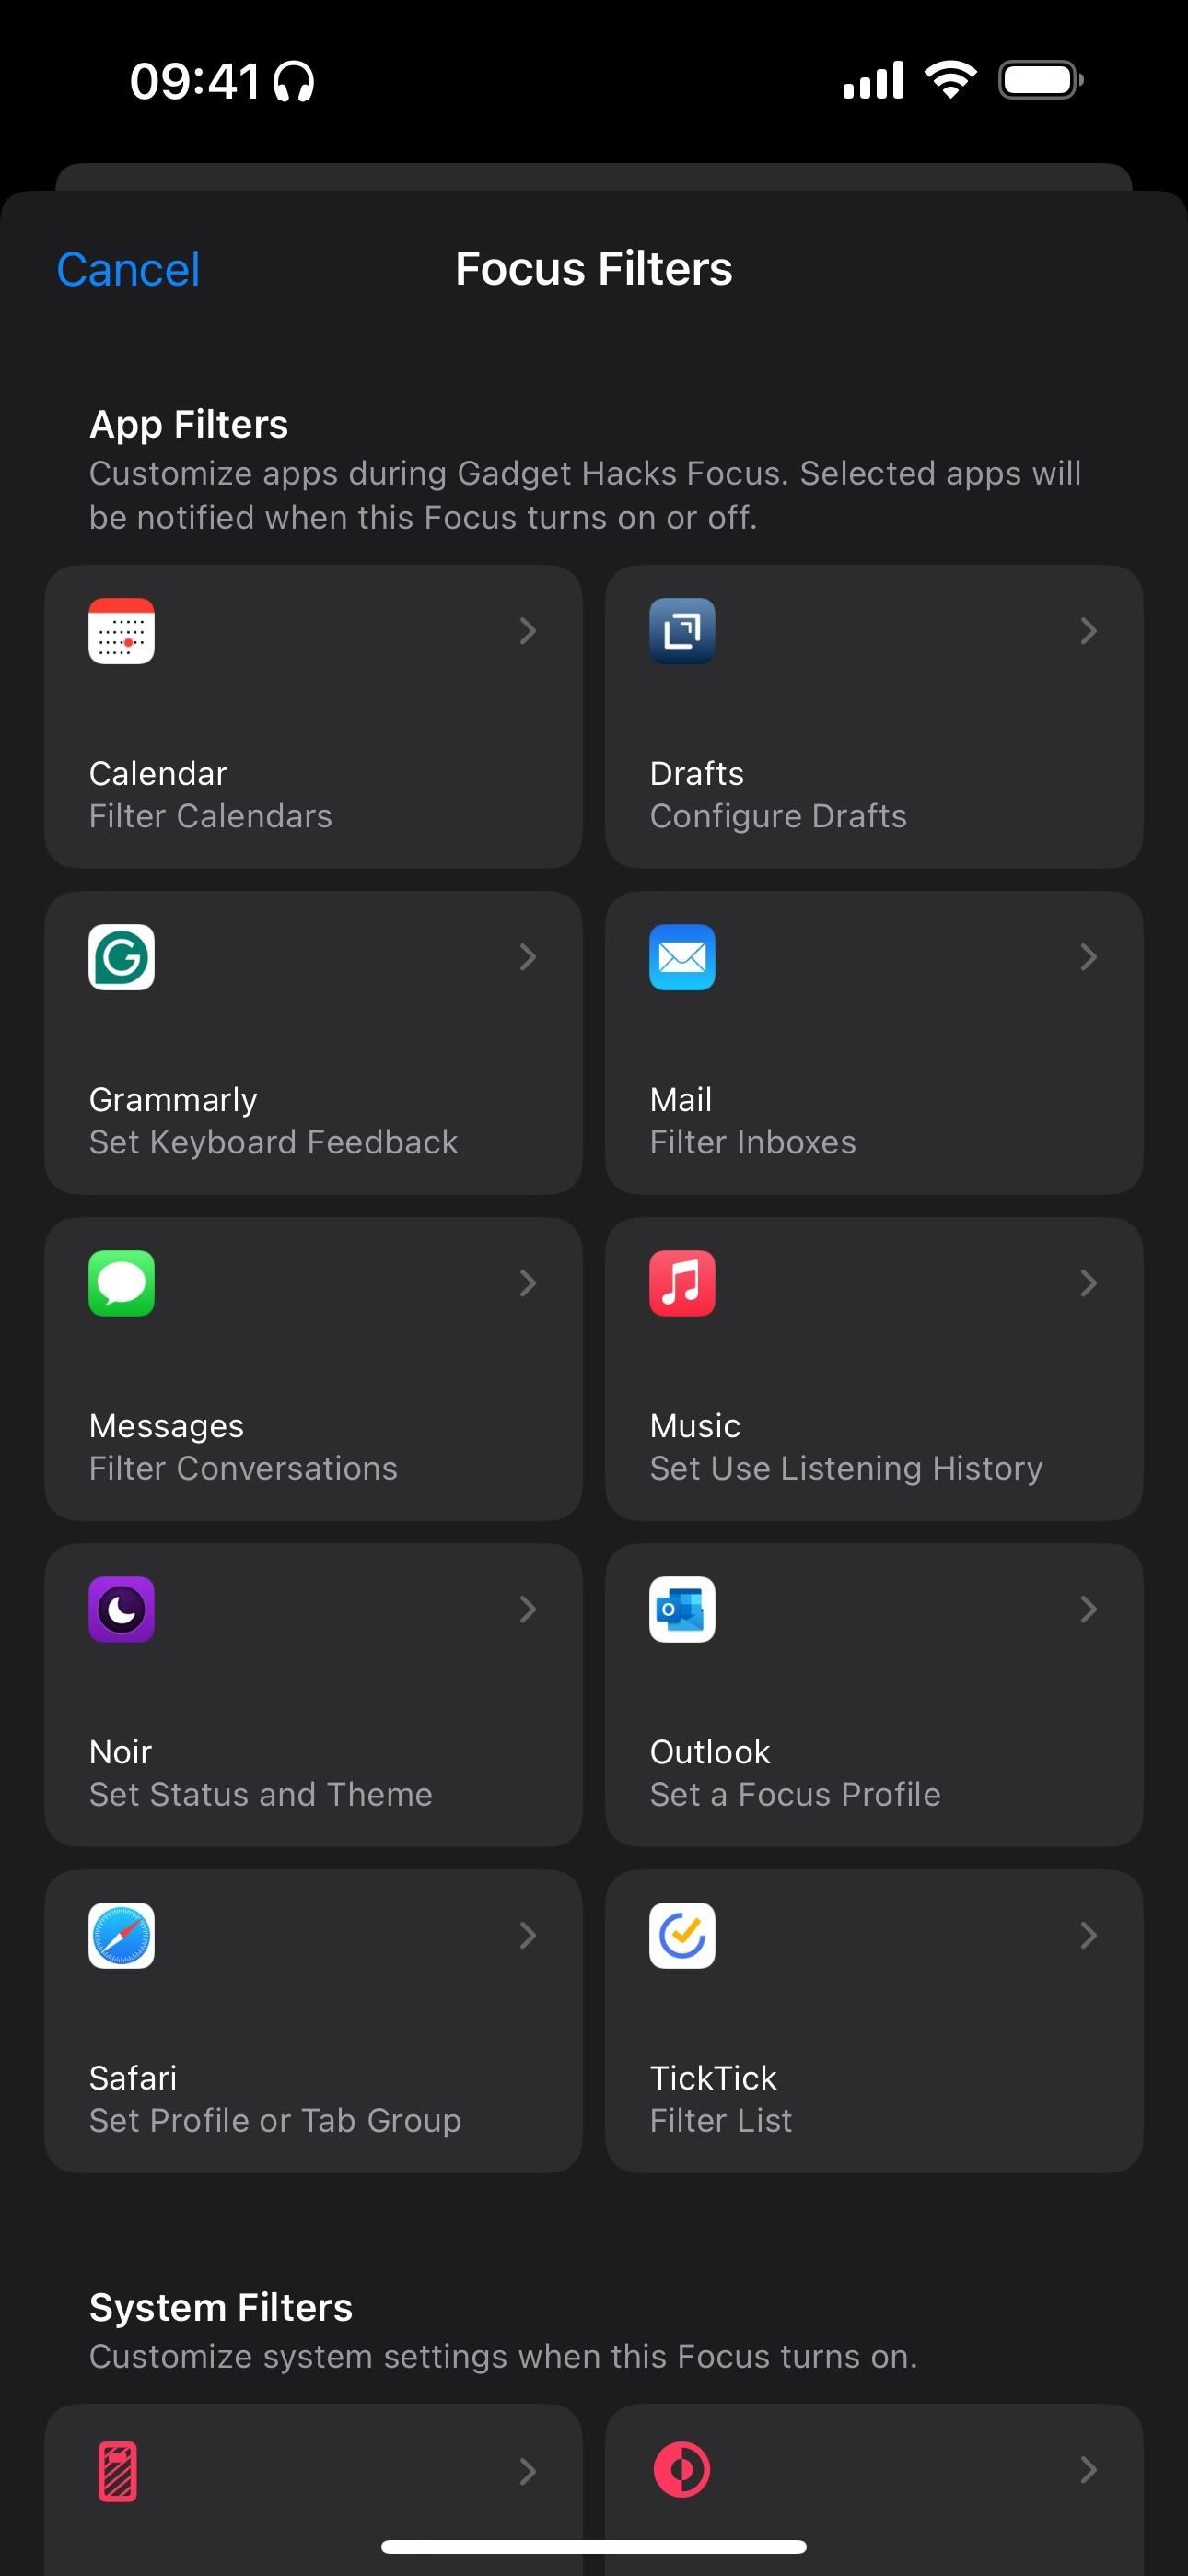
Focus Filters is next, available since iOS 16 and iPadOS 16. You can choose one or more app filters or system filters for your Focus, and the options will vary based on your iPhone or iPad model and installed apps. Tap “Add Filter” to get started.
If you choose an app filter, your Focus will automatically communicate with the app in question when the Focus activates, and then the app will perform its associated filter task. Here are some filters you may see:
- Calendar: Choose the calendar/s showing when the Focus turns on.
- Mail: Choose the email account/s accessible when the Focus turns on.
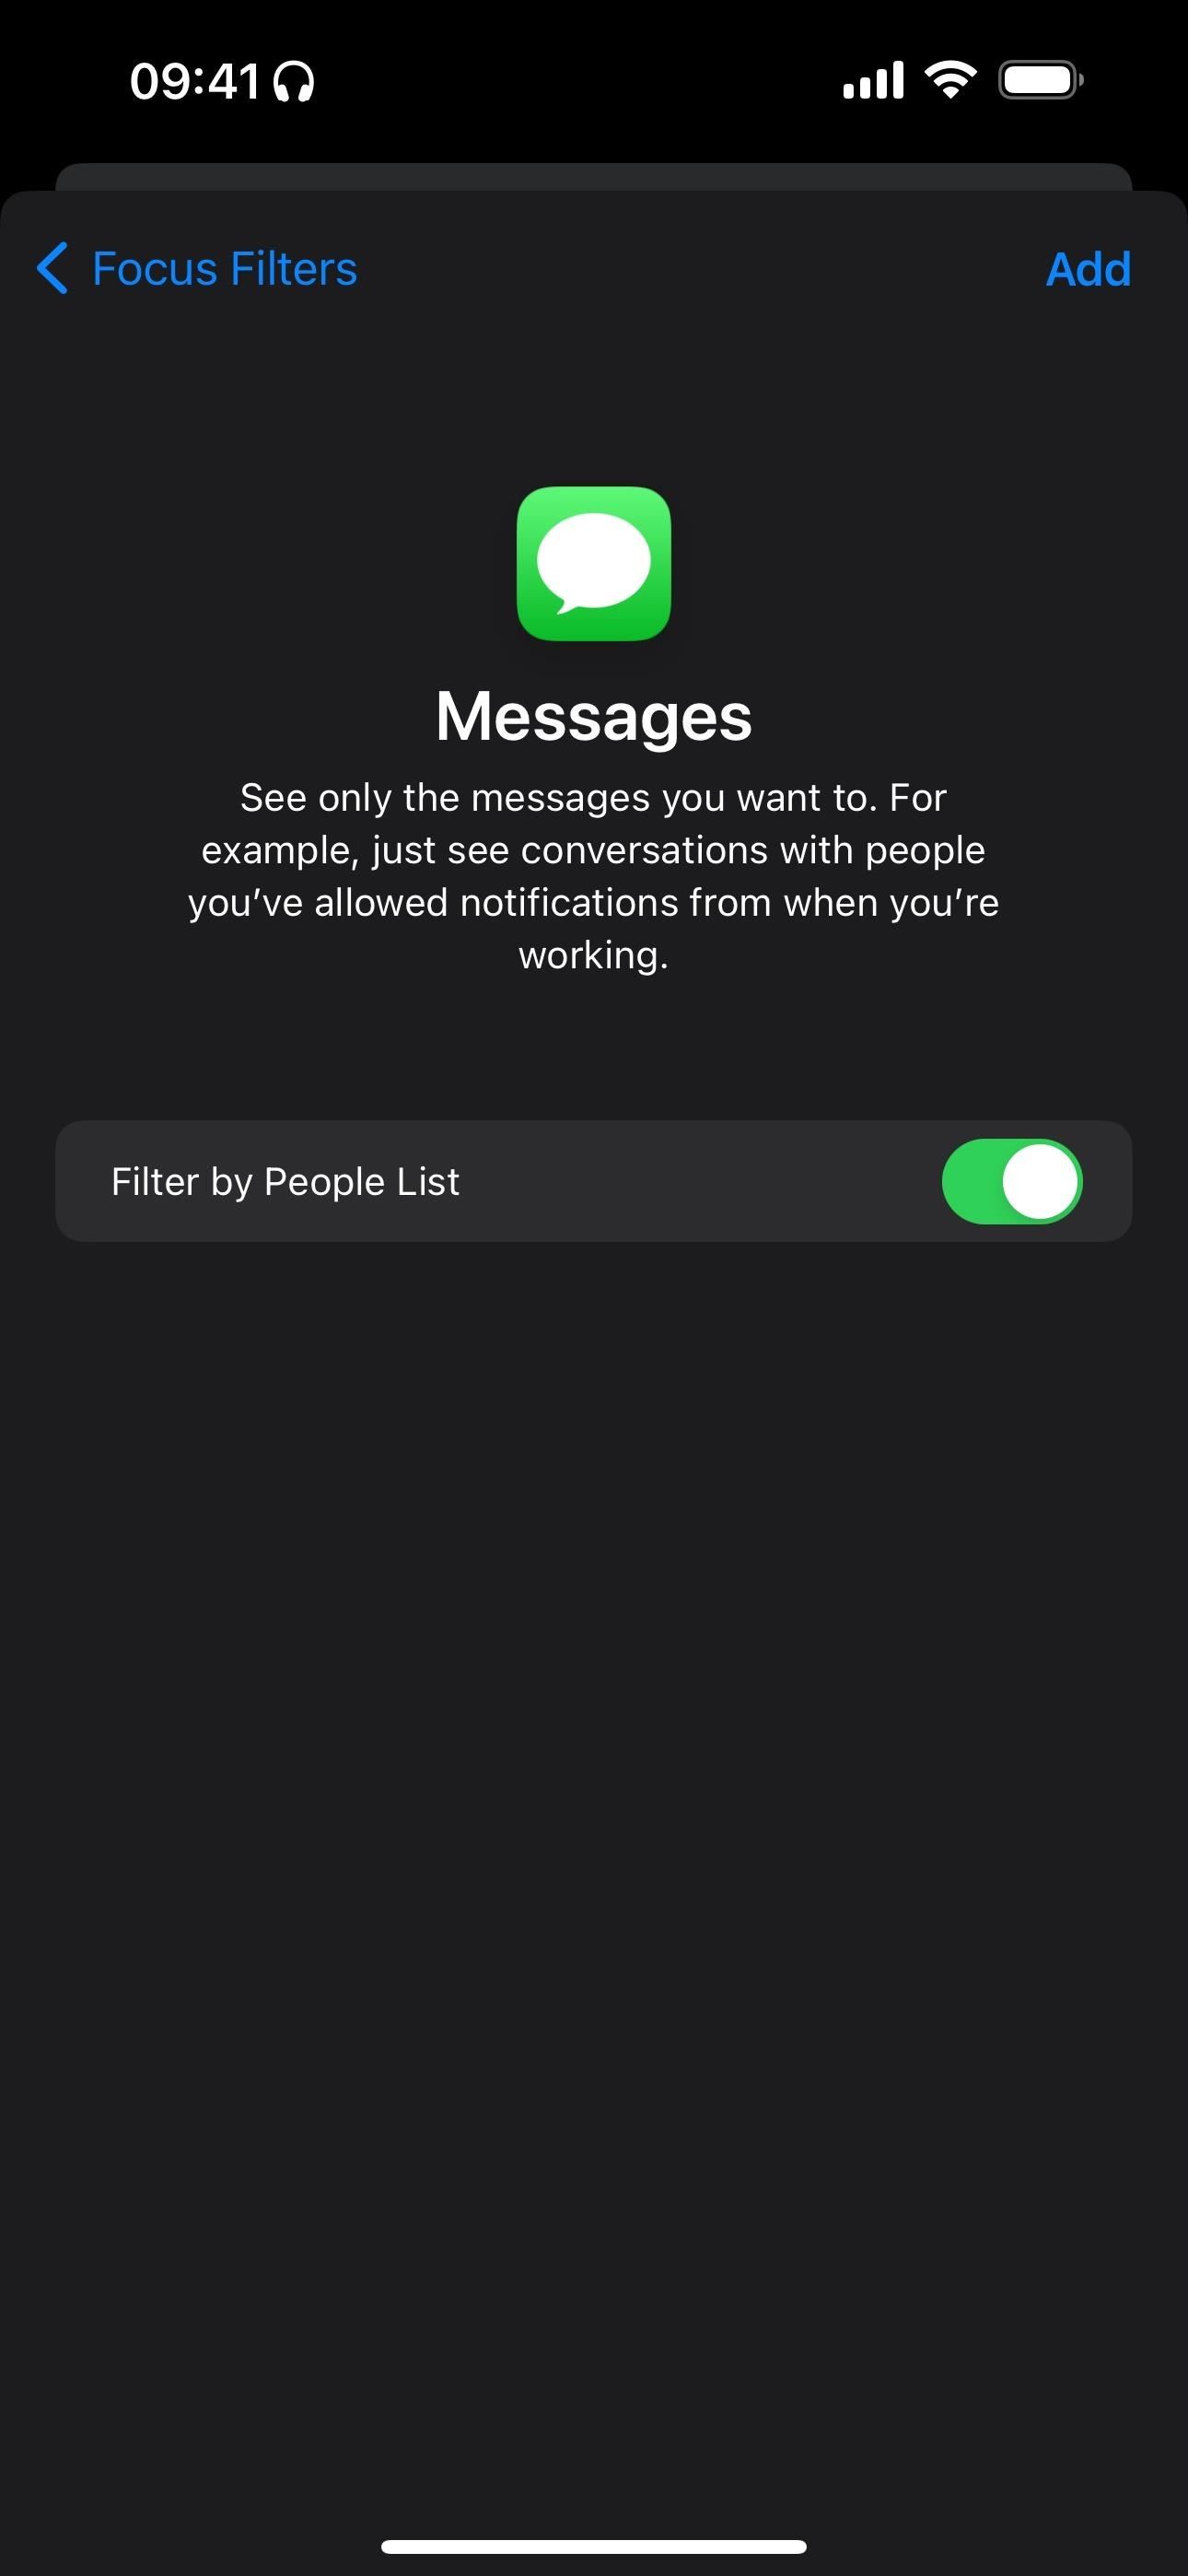
- Messages: Choose the conversations you can access when the Focus turns on and/or filter by People List.
- Music: Choose whether or not any music played while the Focus is on will influence recommendations and mixes, appear in Recently Played, or be visible to your Apple Music friends.
- Safari: Choose the profile or tab group/s that will be accessible when the Focus turns on.
As for system filters:
- Always On Display: Choose whether to enable or disable Always On Display when the Focus turns on.
- Dark Mode: Choose whether to use Dark or Light mode when the Focus turns on.
- Low Power Mode: Choose whether to enable or disable Low Power Mode when the Focus turns on.
- Silent Mode: Choose whether to enable or disable Silent Mode when the Focus turns on.
Option 8: Delete a Focus
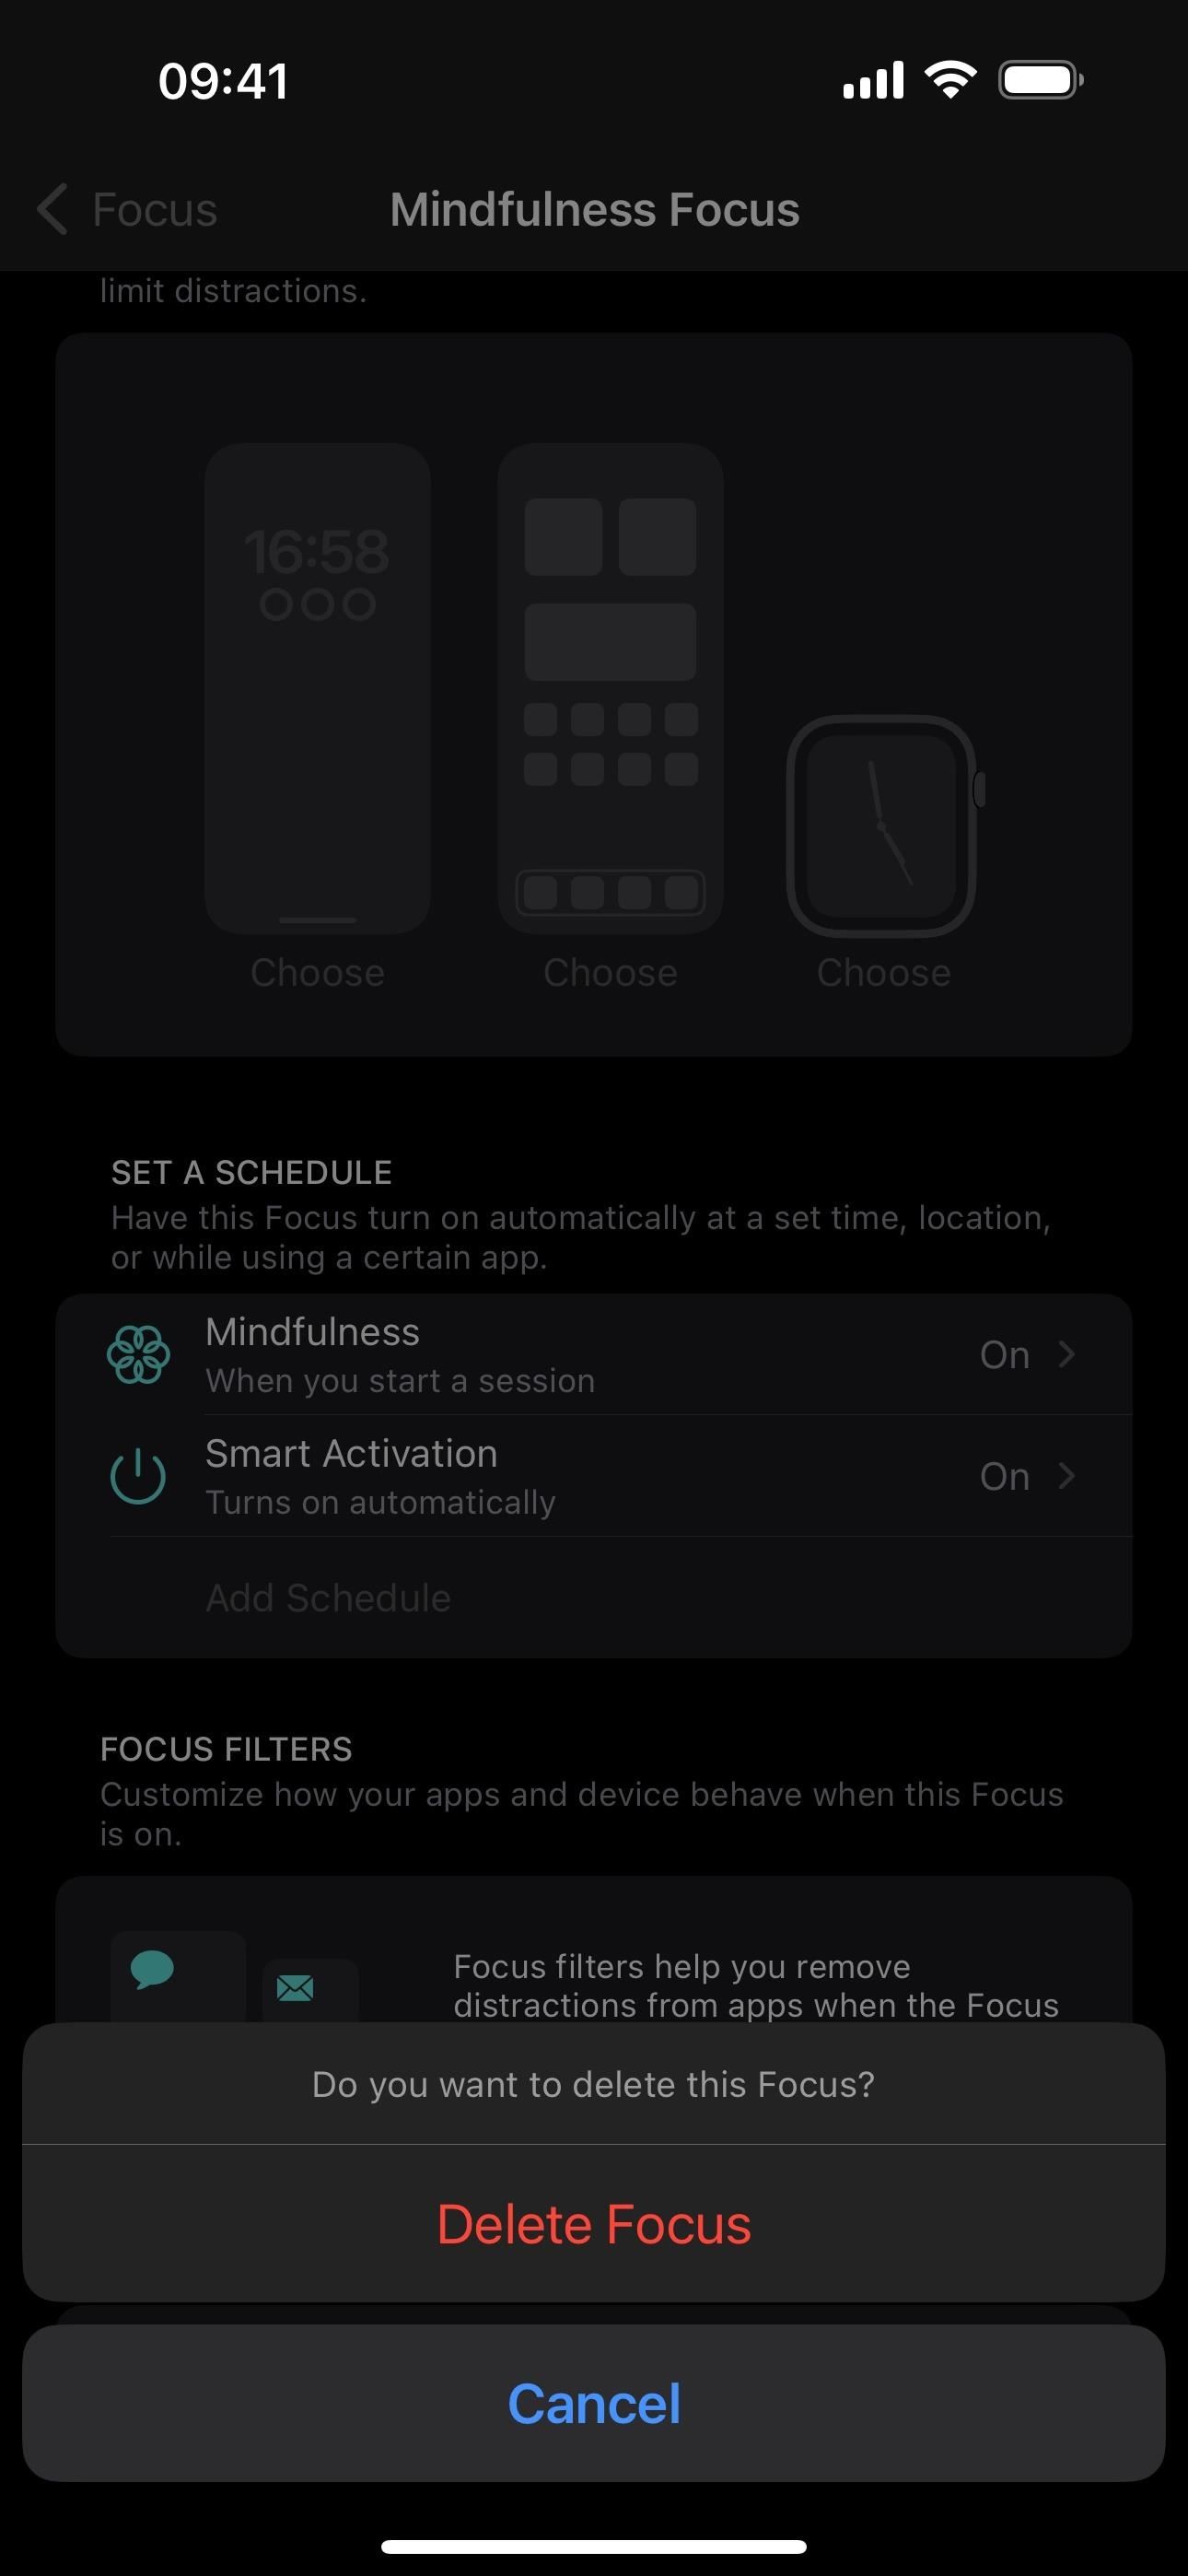
If you no longer need a Focus or want to make room for a new one, you can delete any Focus except Do Not Disturb. Just tap “Delete Focus” at the bottom of the Focus’s settings, then confirm with “Delete Focus.” Deleting any template Focus will make it appear as an option again when creating a new Focus, but all of its prior customizations will be lost.
Adjusting Other Focus Options
Aside from per-Focus customizations, there are a few things you can adjust for Focus as a whole. You can find these options from the main list in Settings –> Focus.
Share Across Devices
Toggling on “Share Across Devices” syncs your Focus with all of your other iCloud-connected devices, such as your iPad or Mac. When the Focus activates on one device, it will be enabled on all your devices where you signed in using the same Apple ID account.

Focus Status
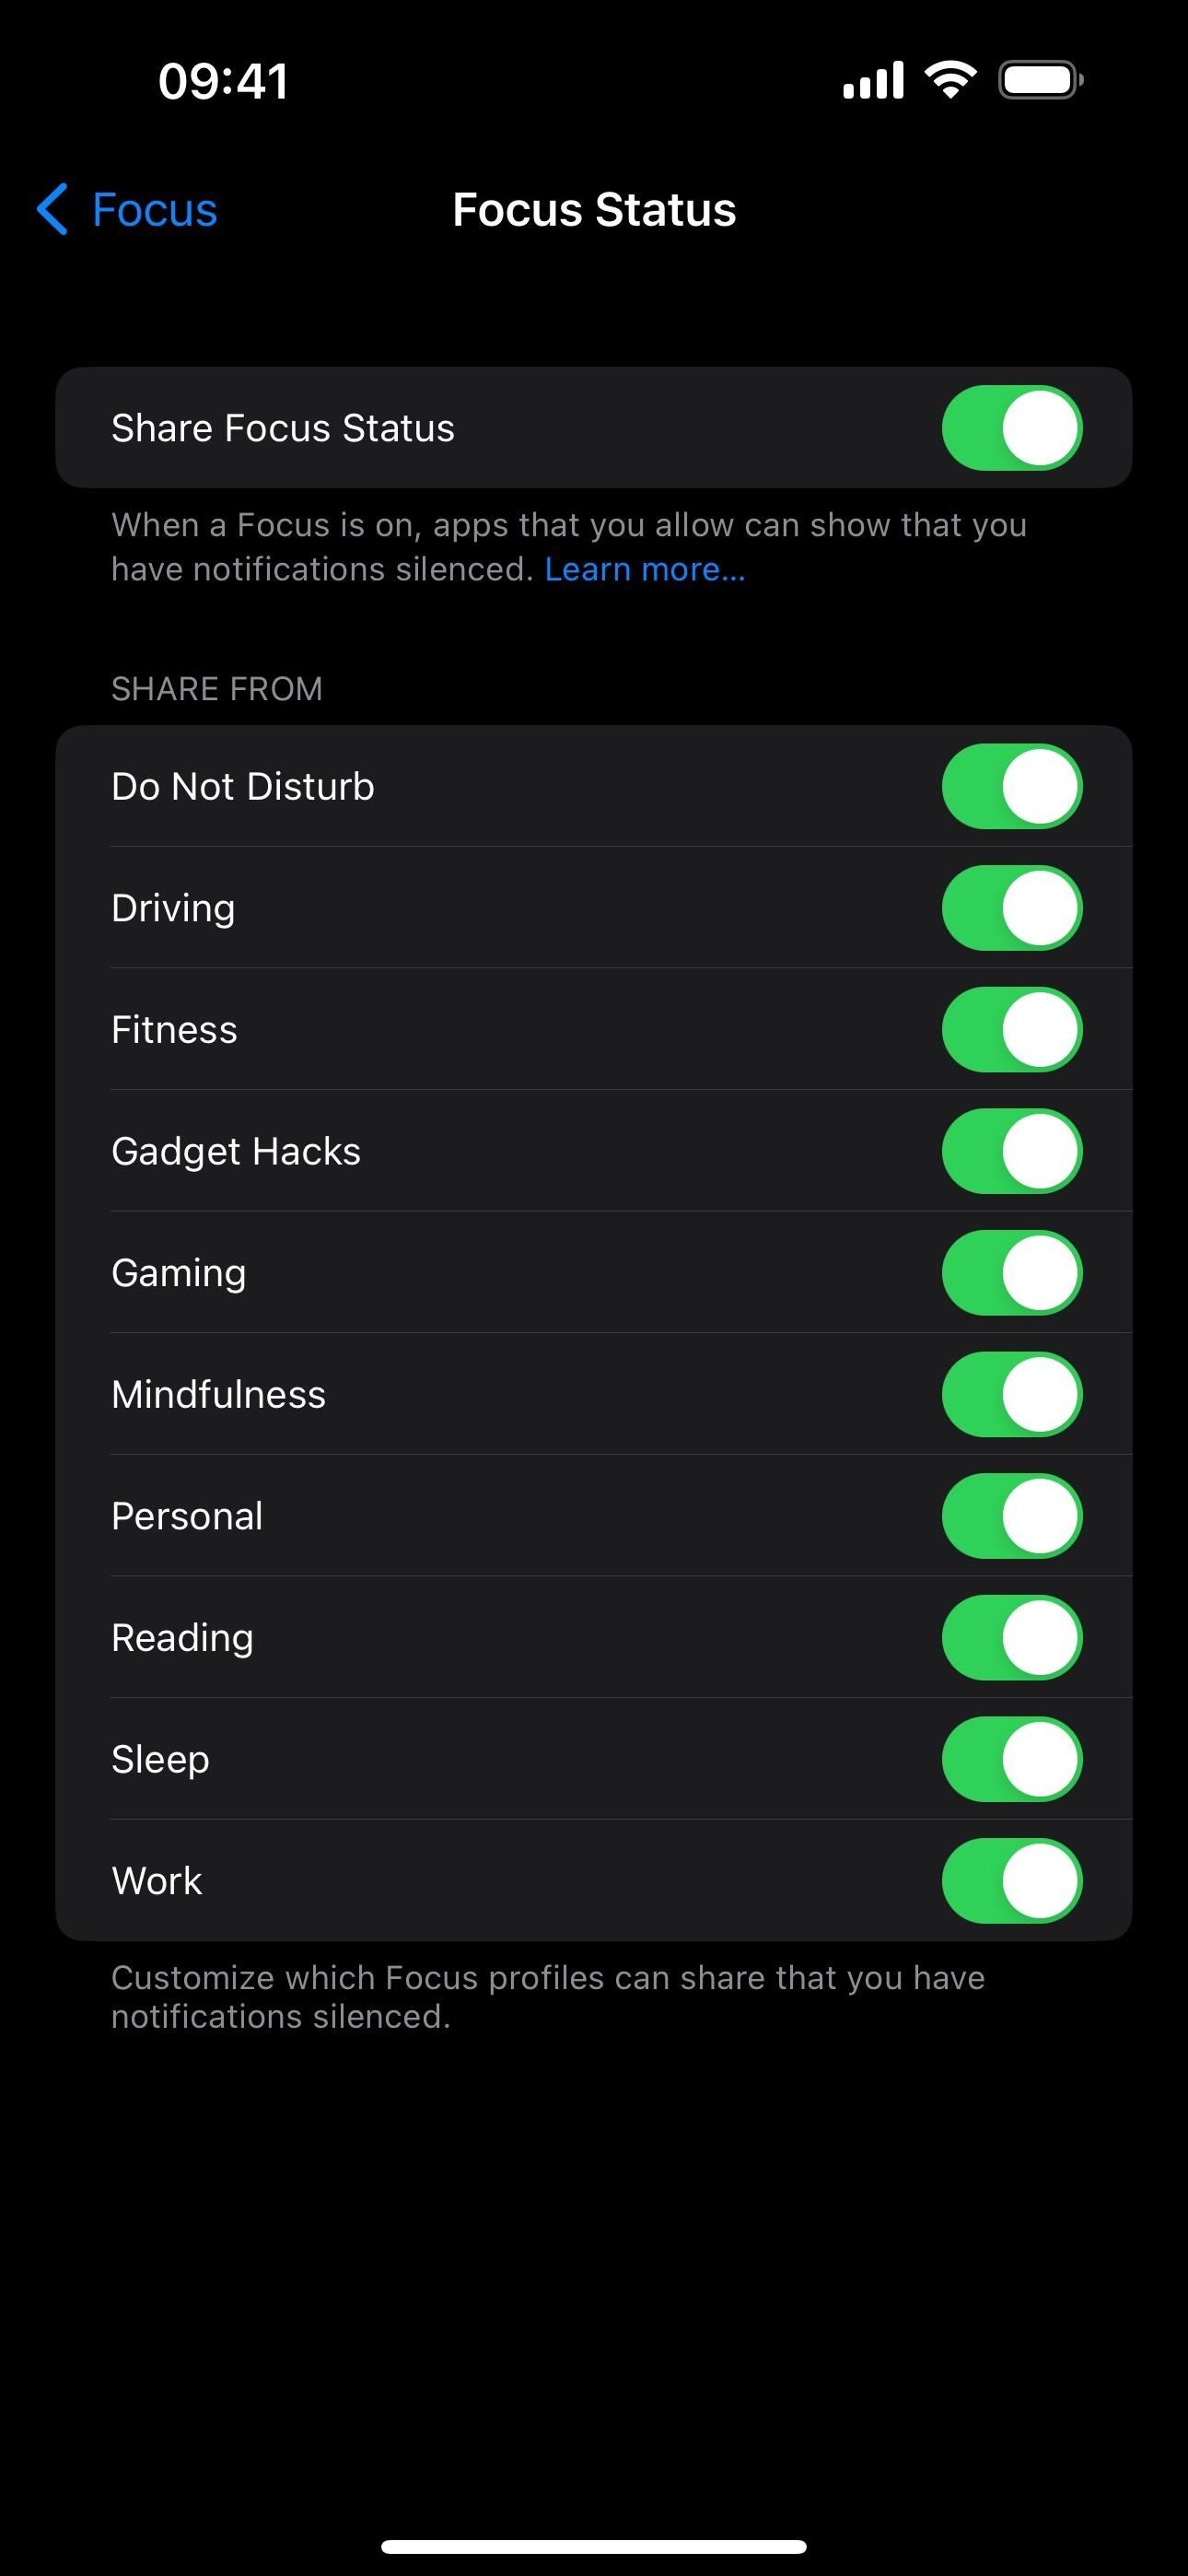
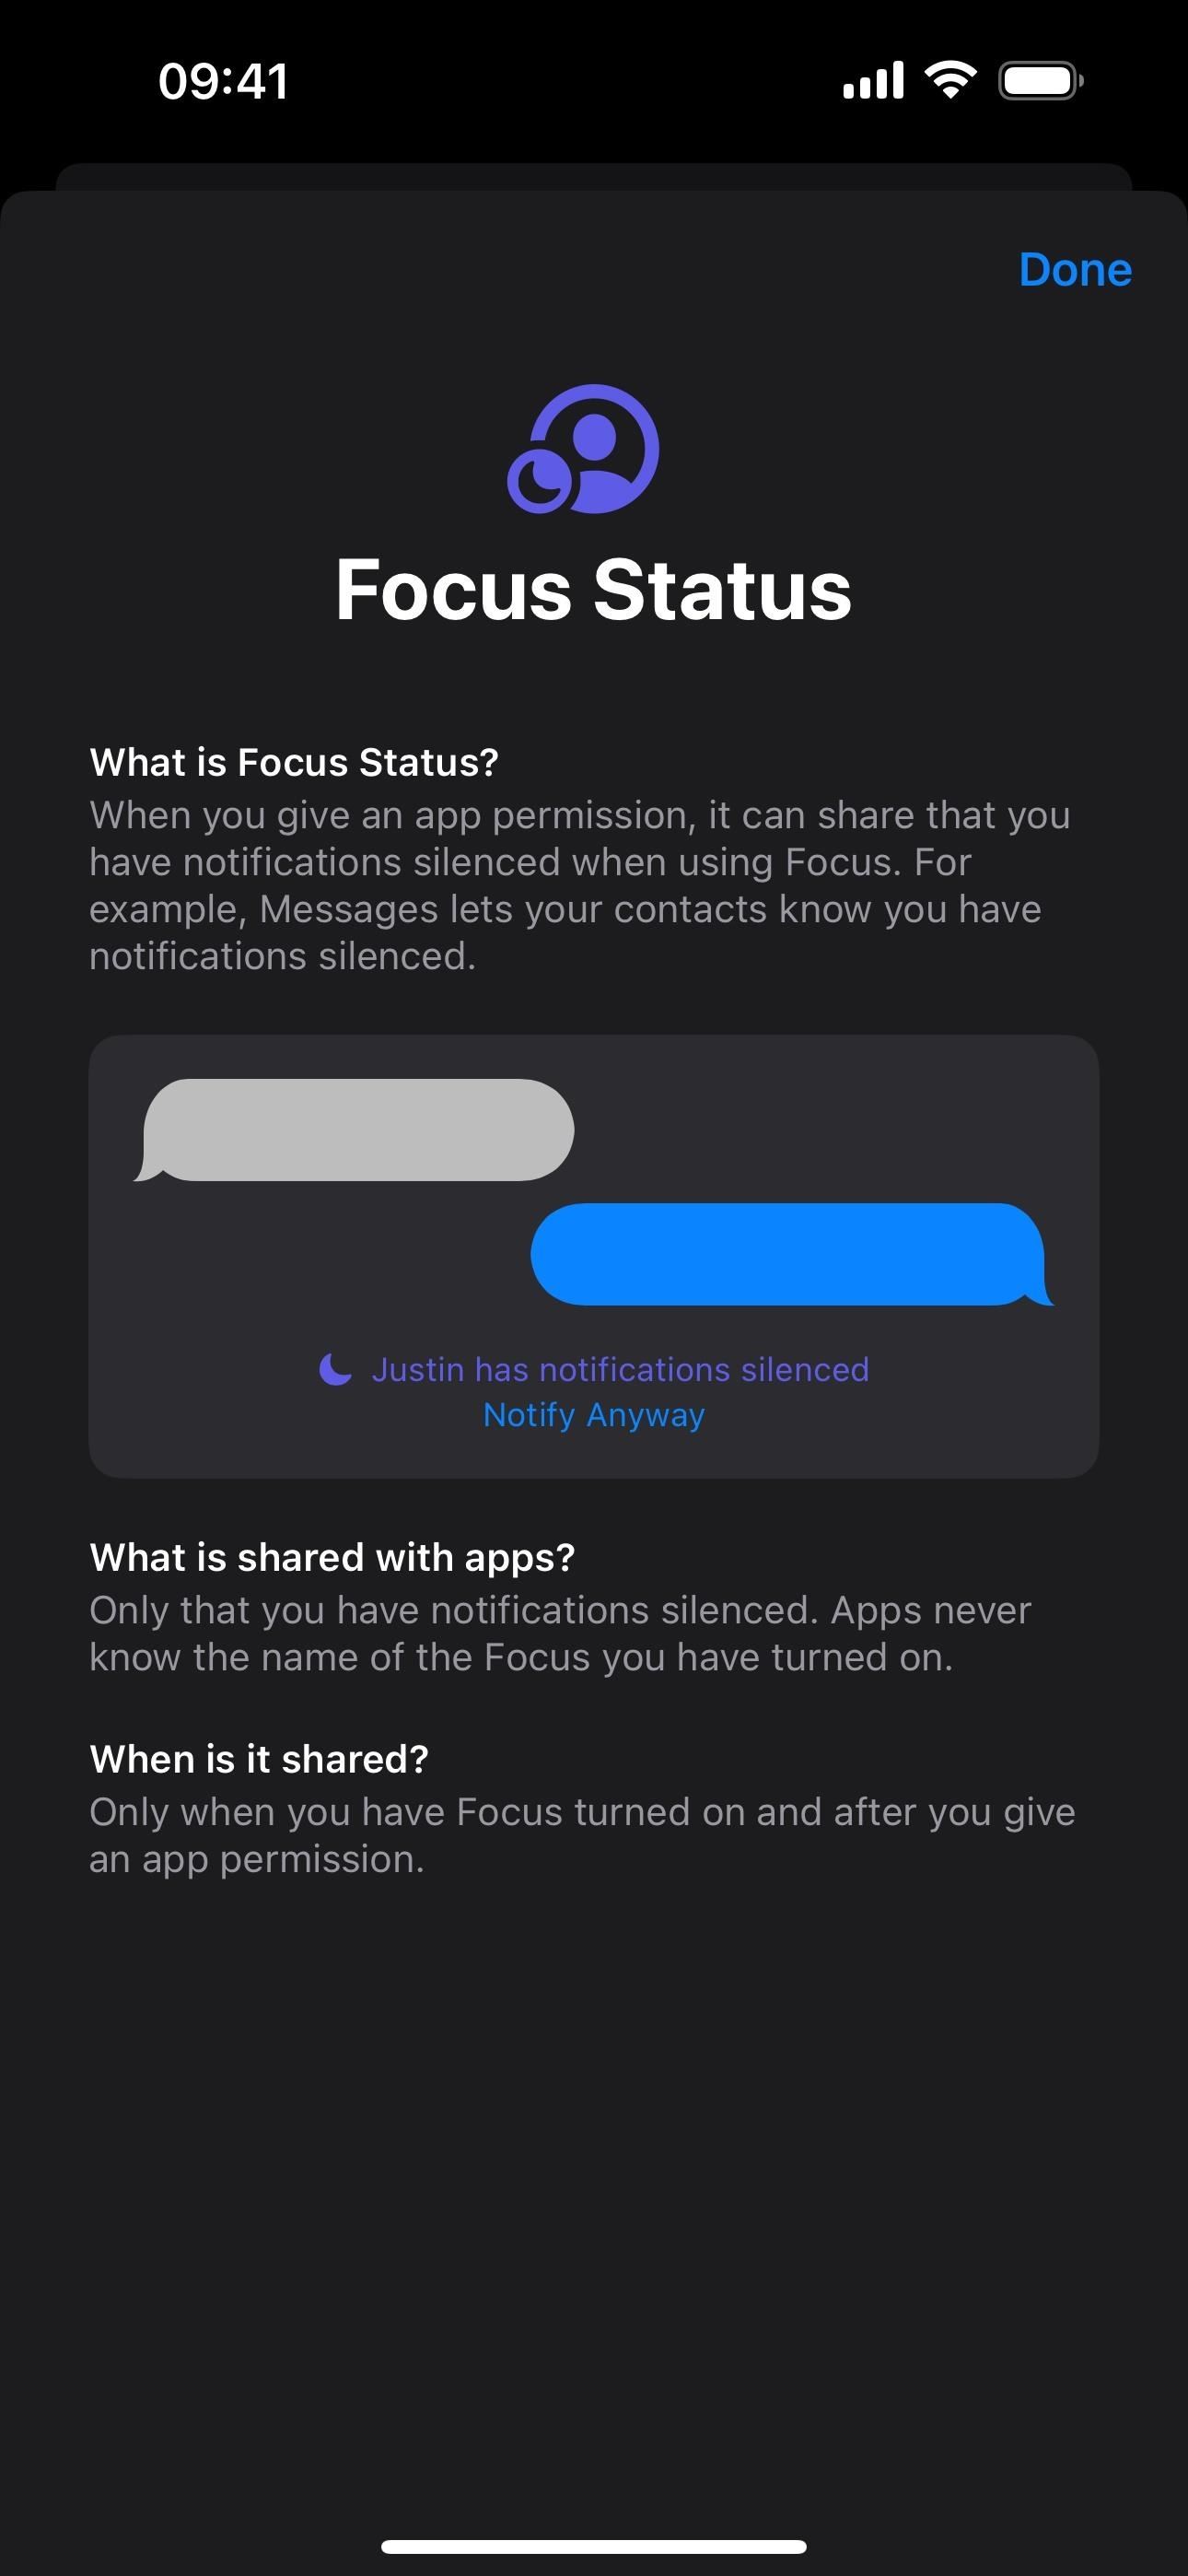
Tapping “Focus Status” gives you access to the Focus-wide “Share Focus Status” switch. However, you can toggle on or off any Focus in the list below if you don’t want to share the status when using those. With the option on for a Focus, apps you’ve allowed for the Focus can show other users that you have silenced notifications. This is most obvious in the Messages app.
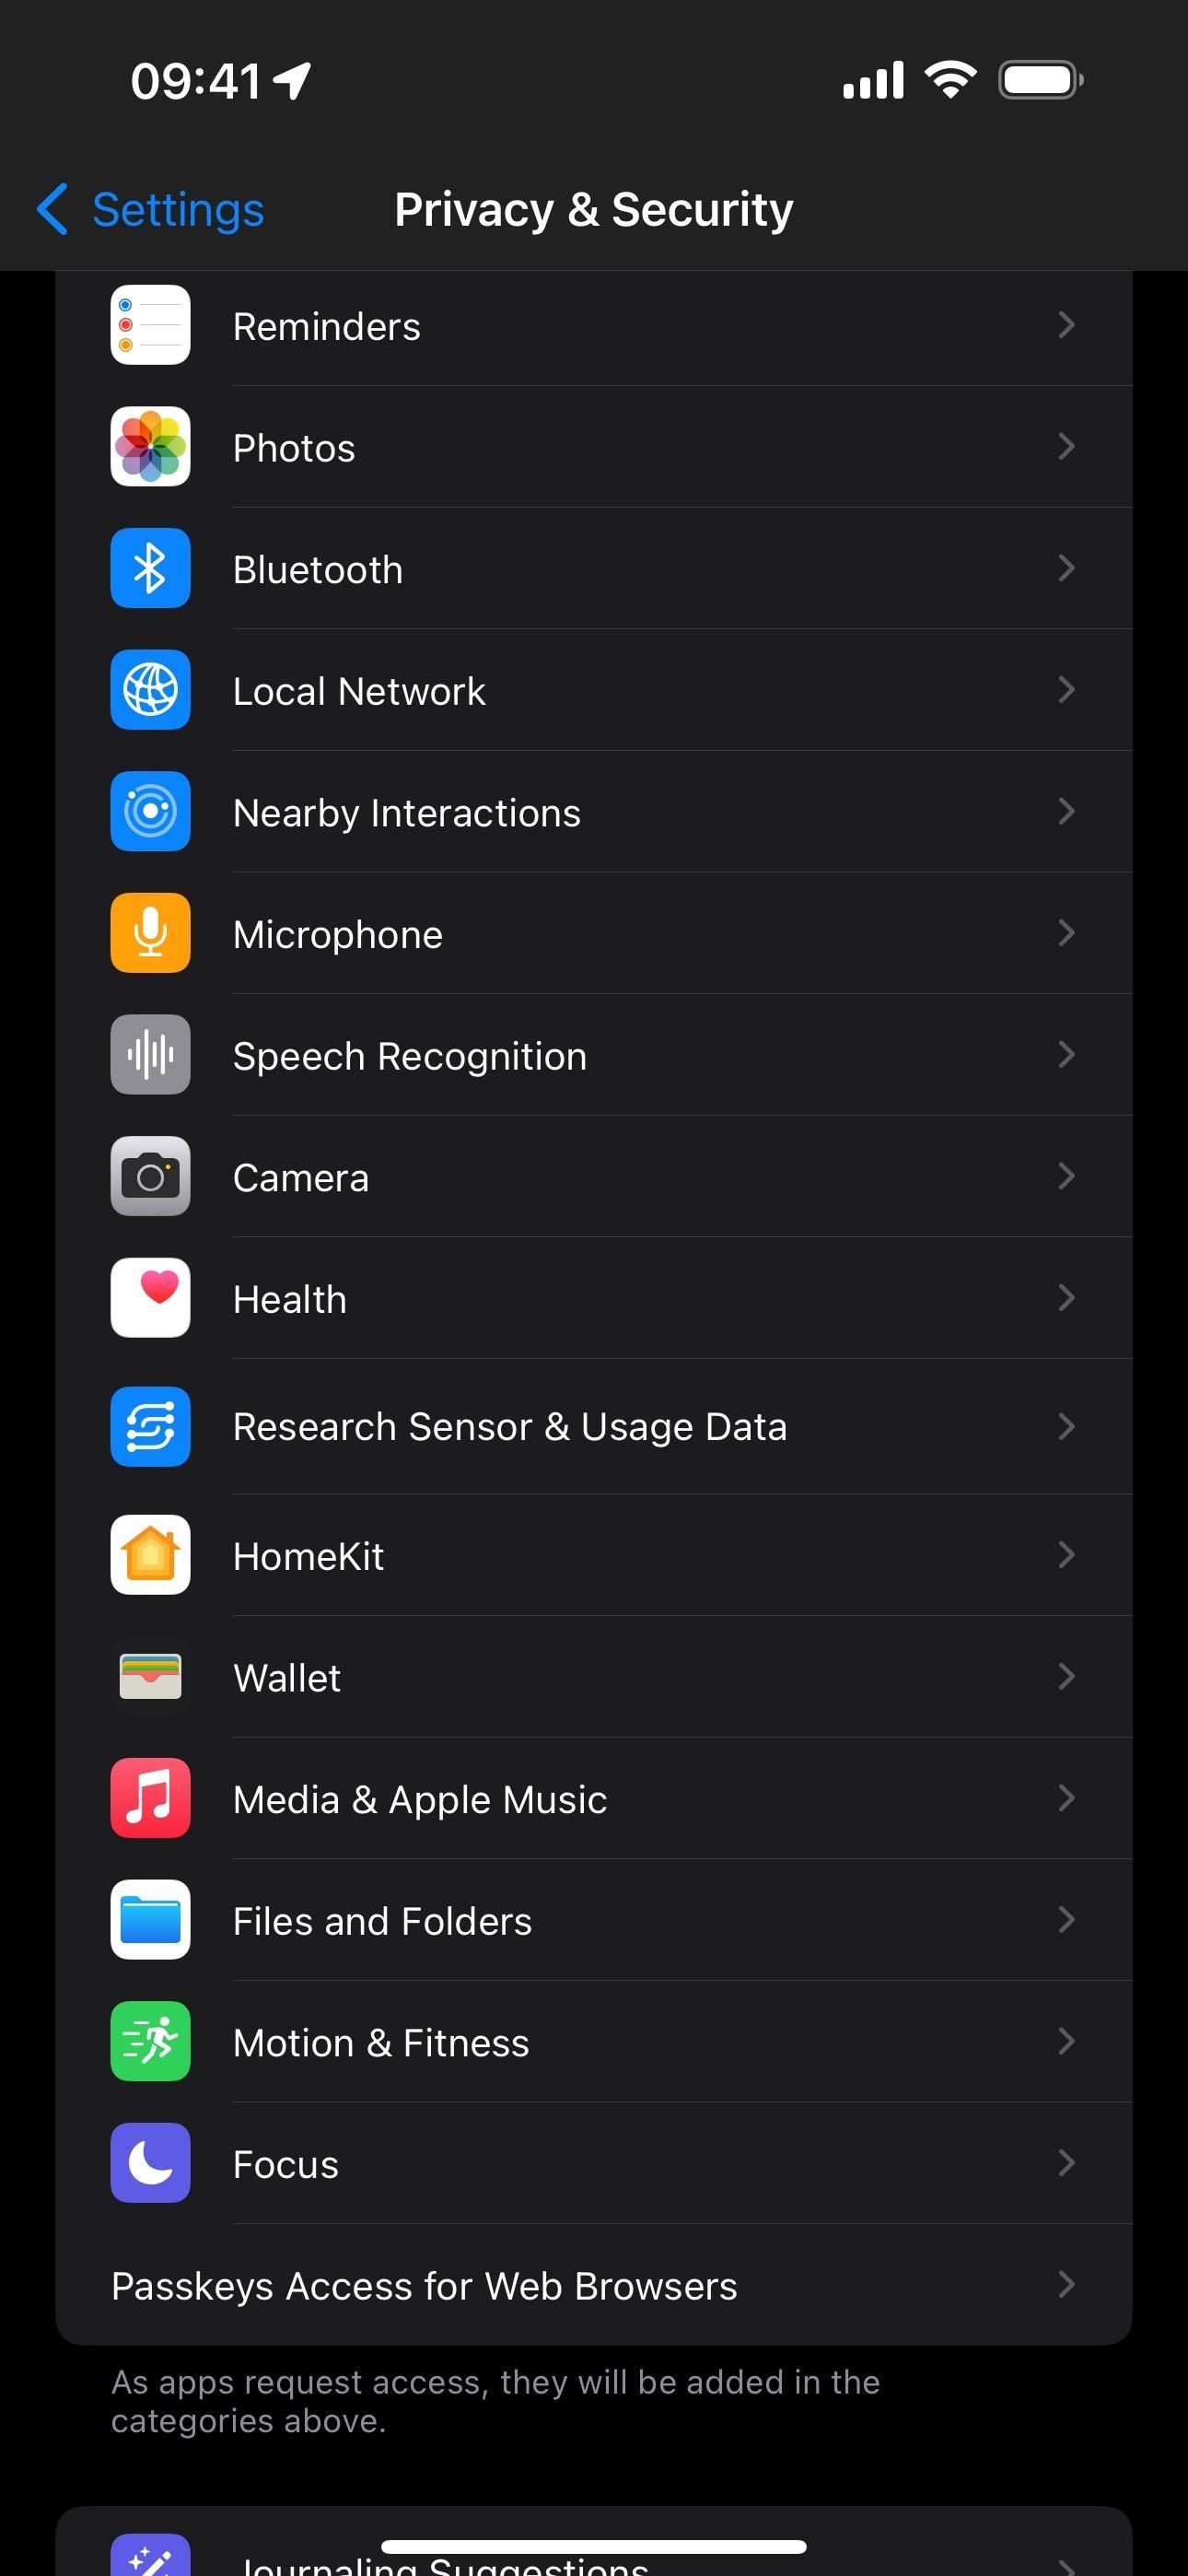
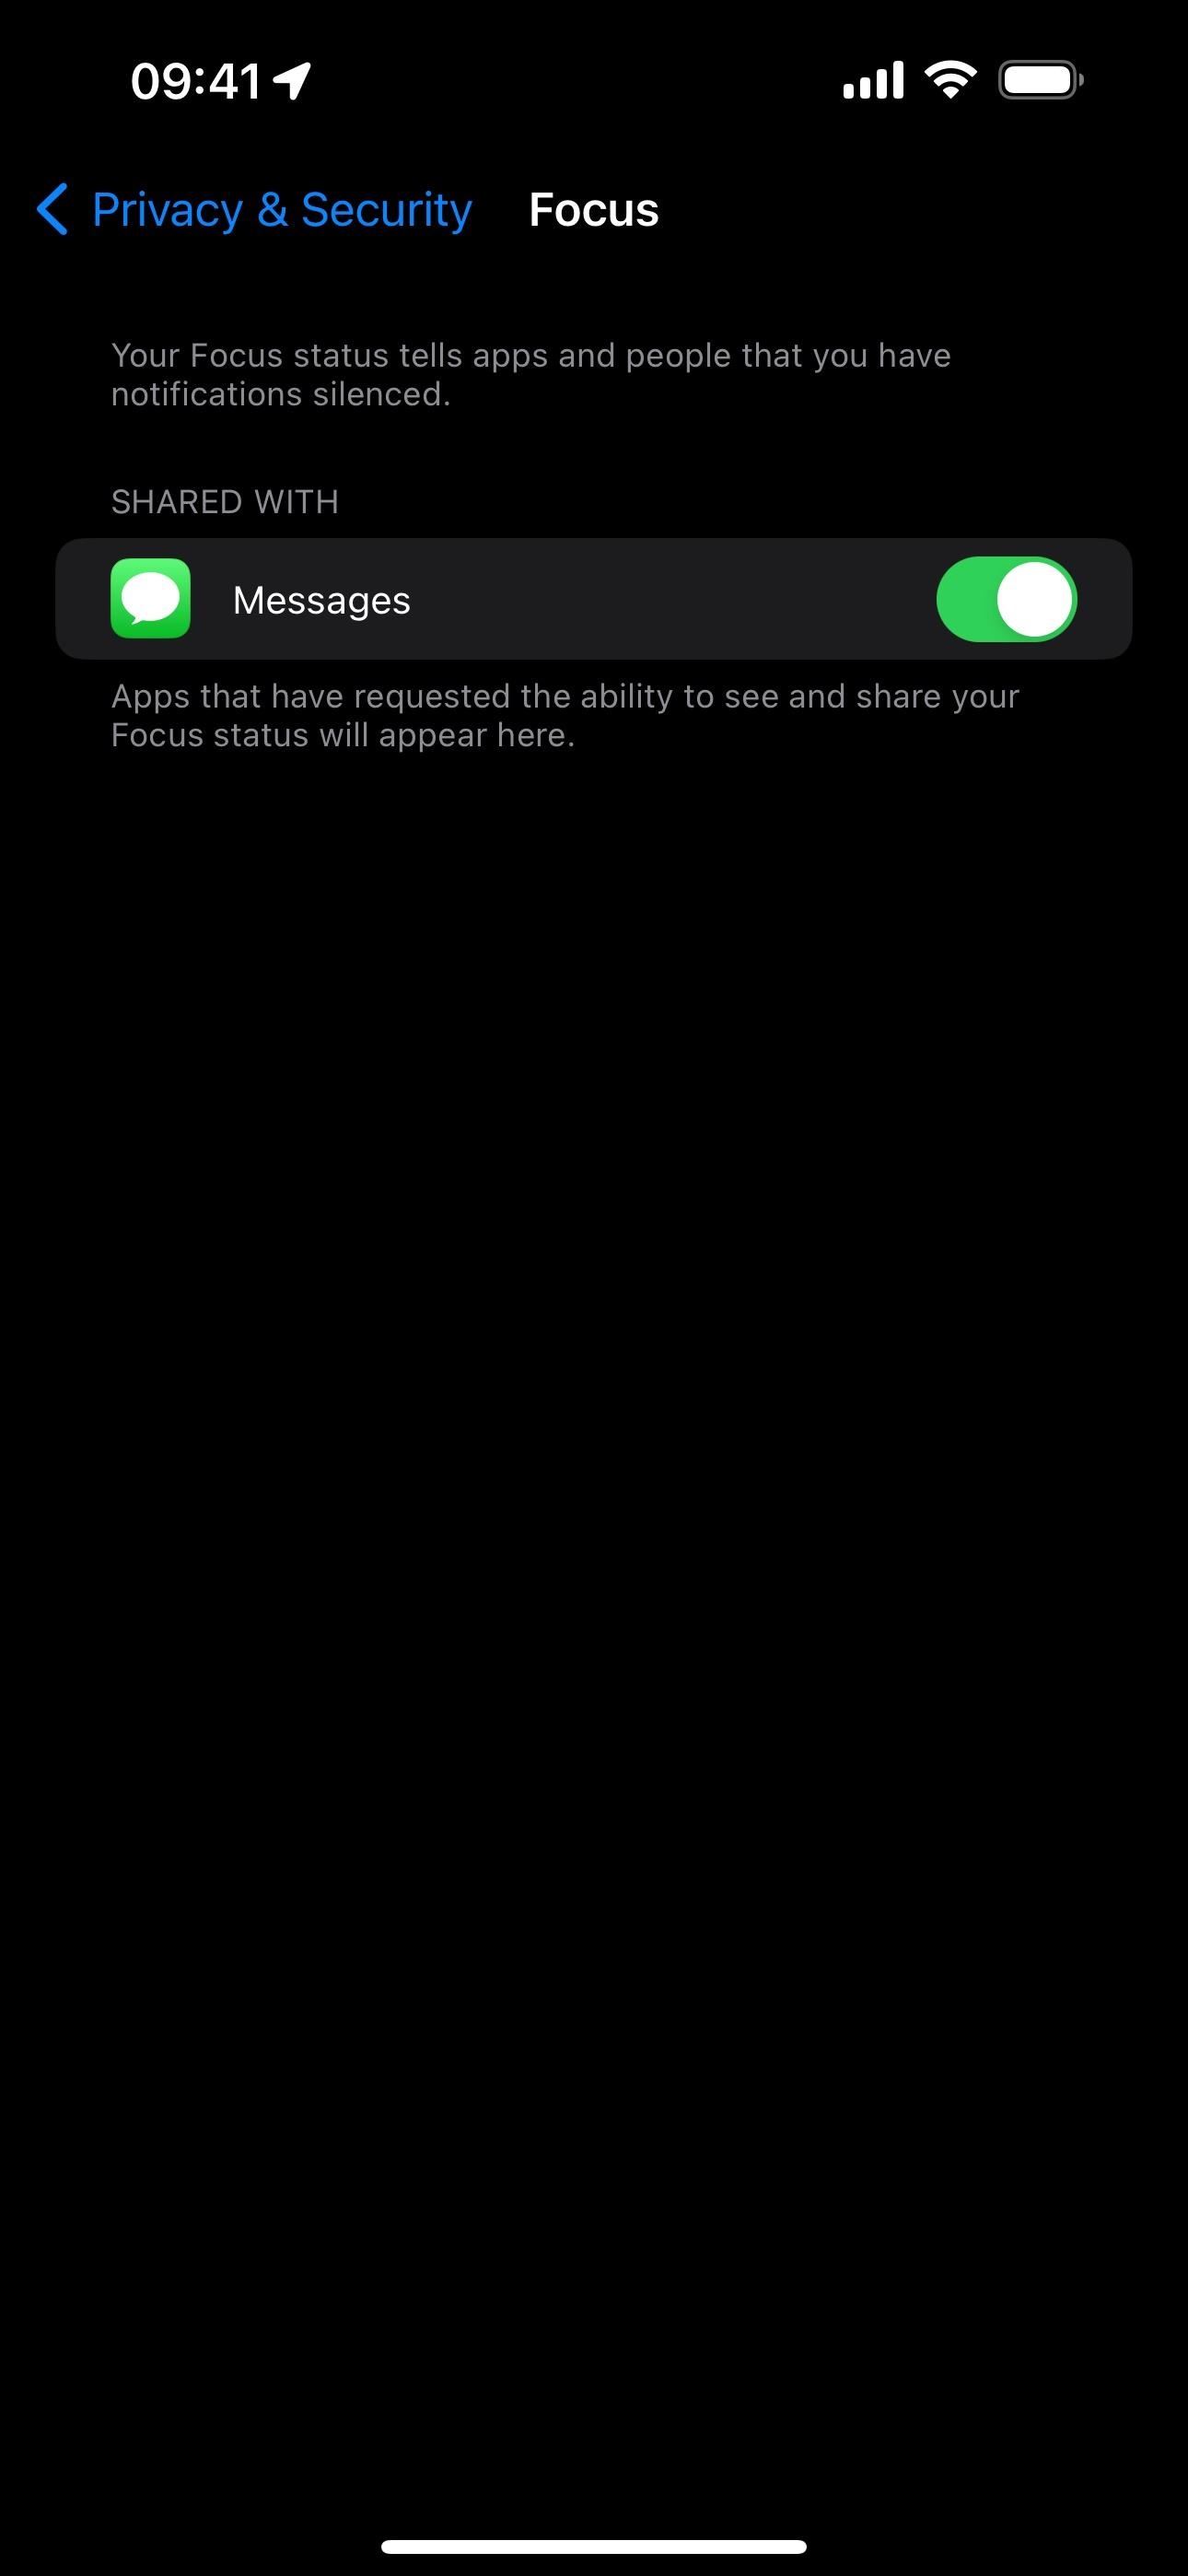
You can turn on or off Focus Status access to individual apps via Settings –> Privacy & Security –> Focus.
Using Focus Profiles in Shortcuts
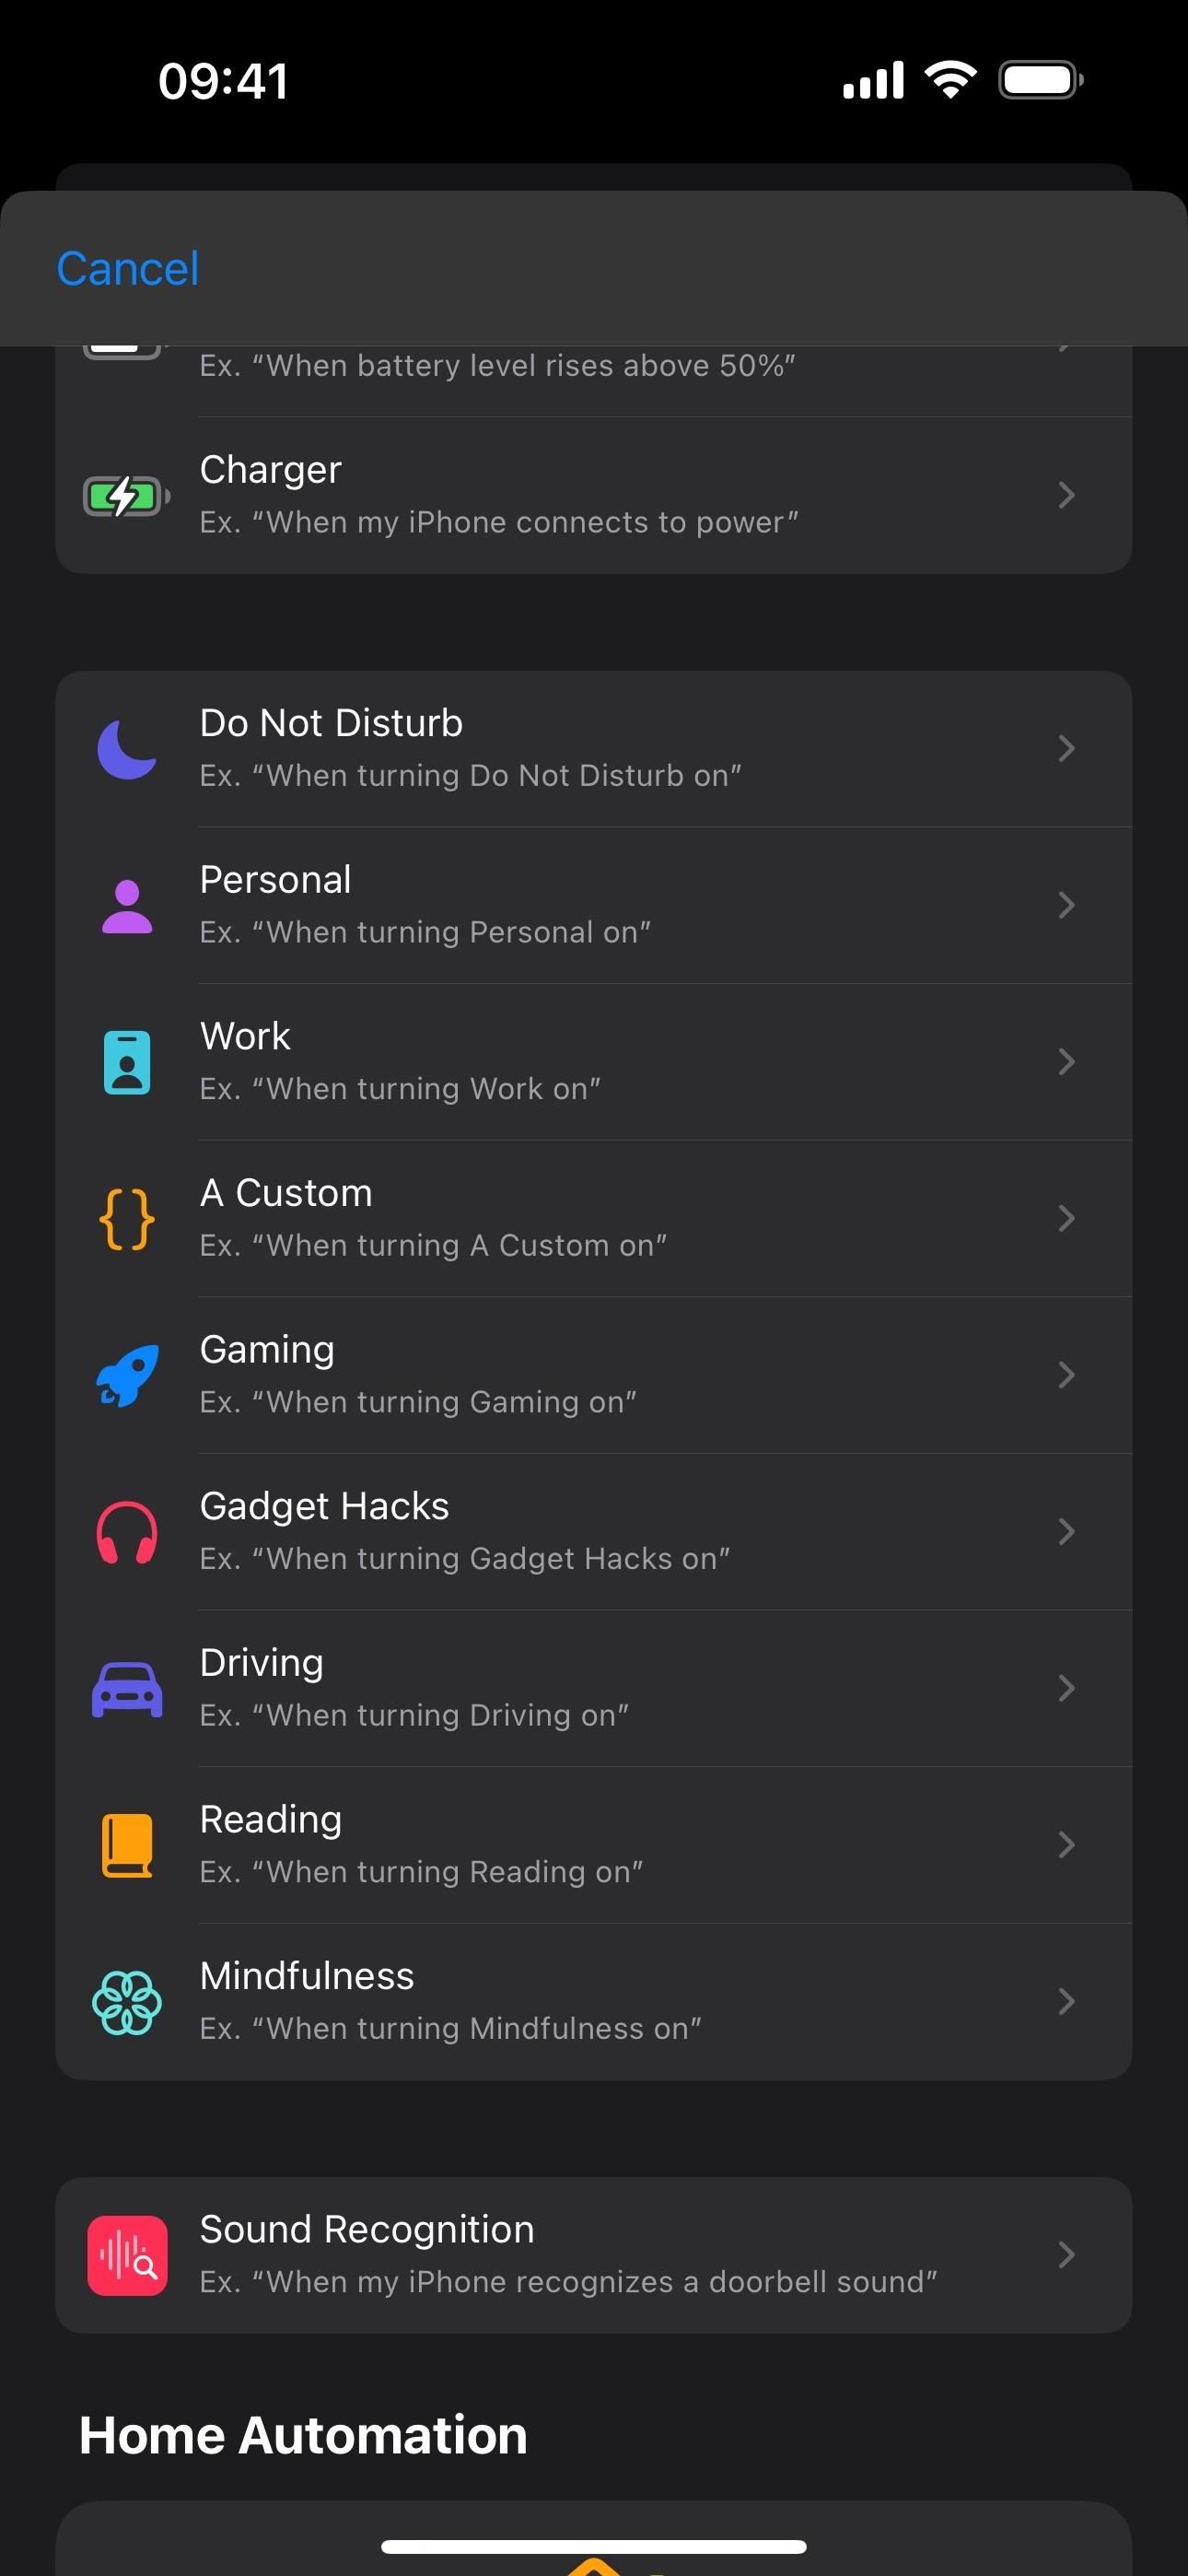
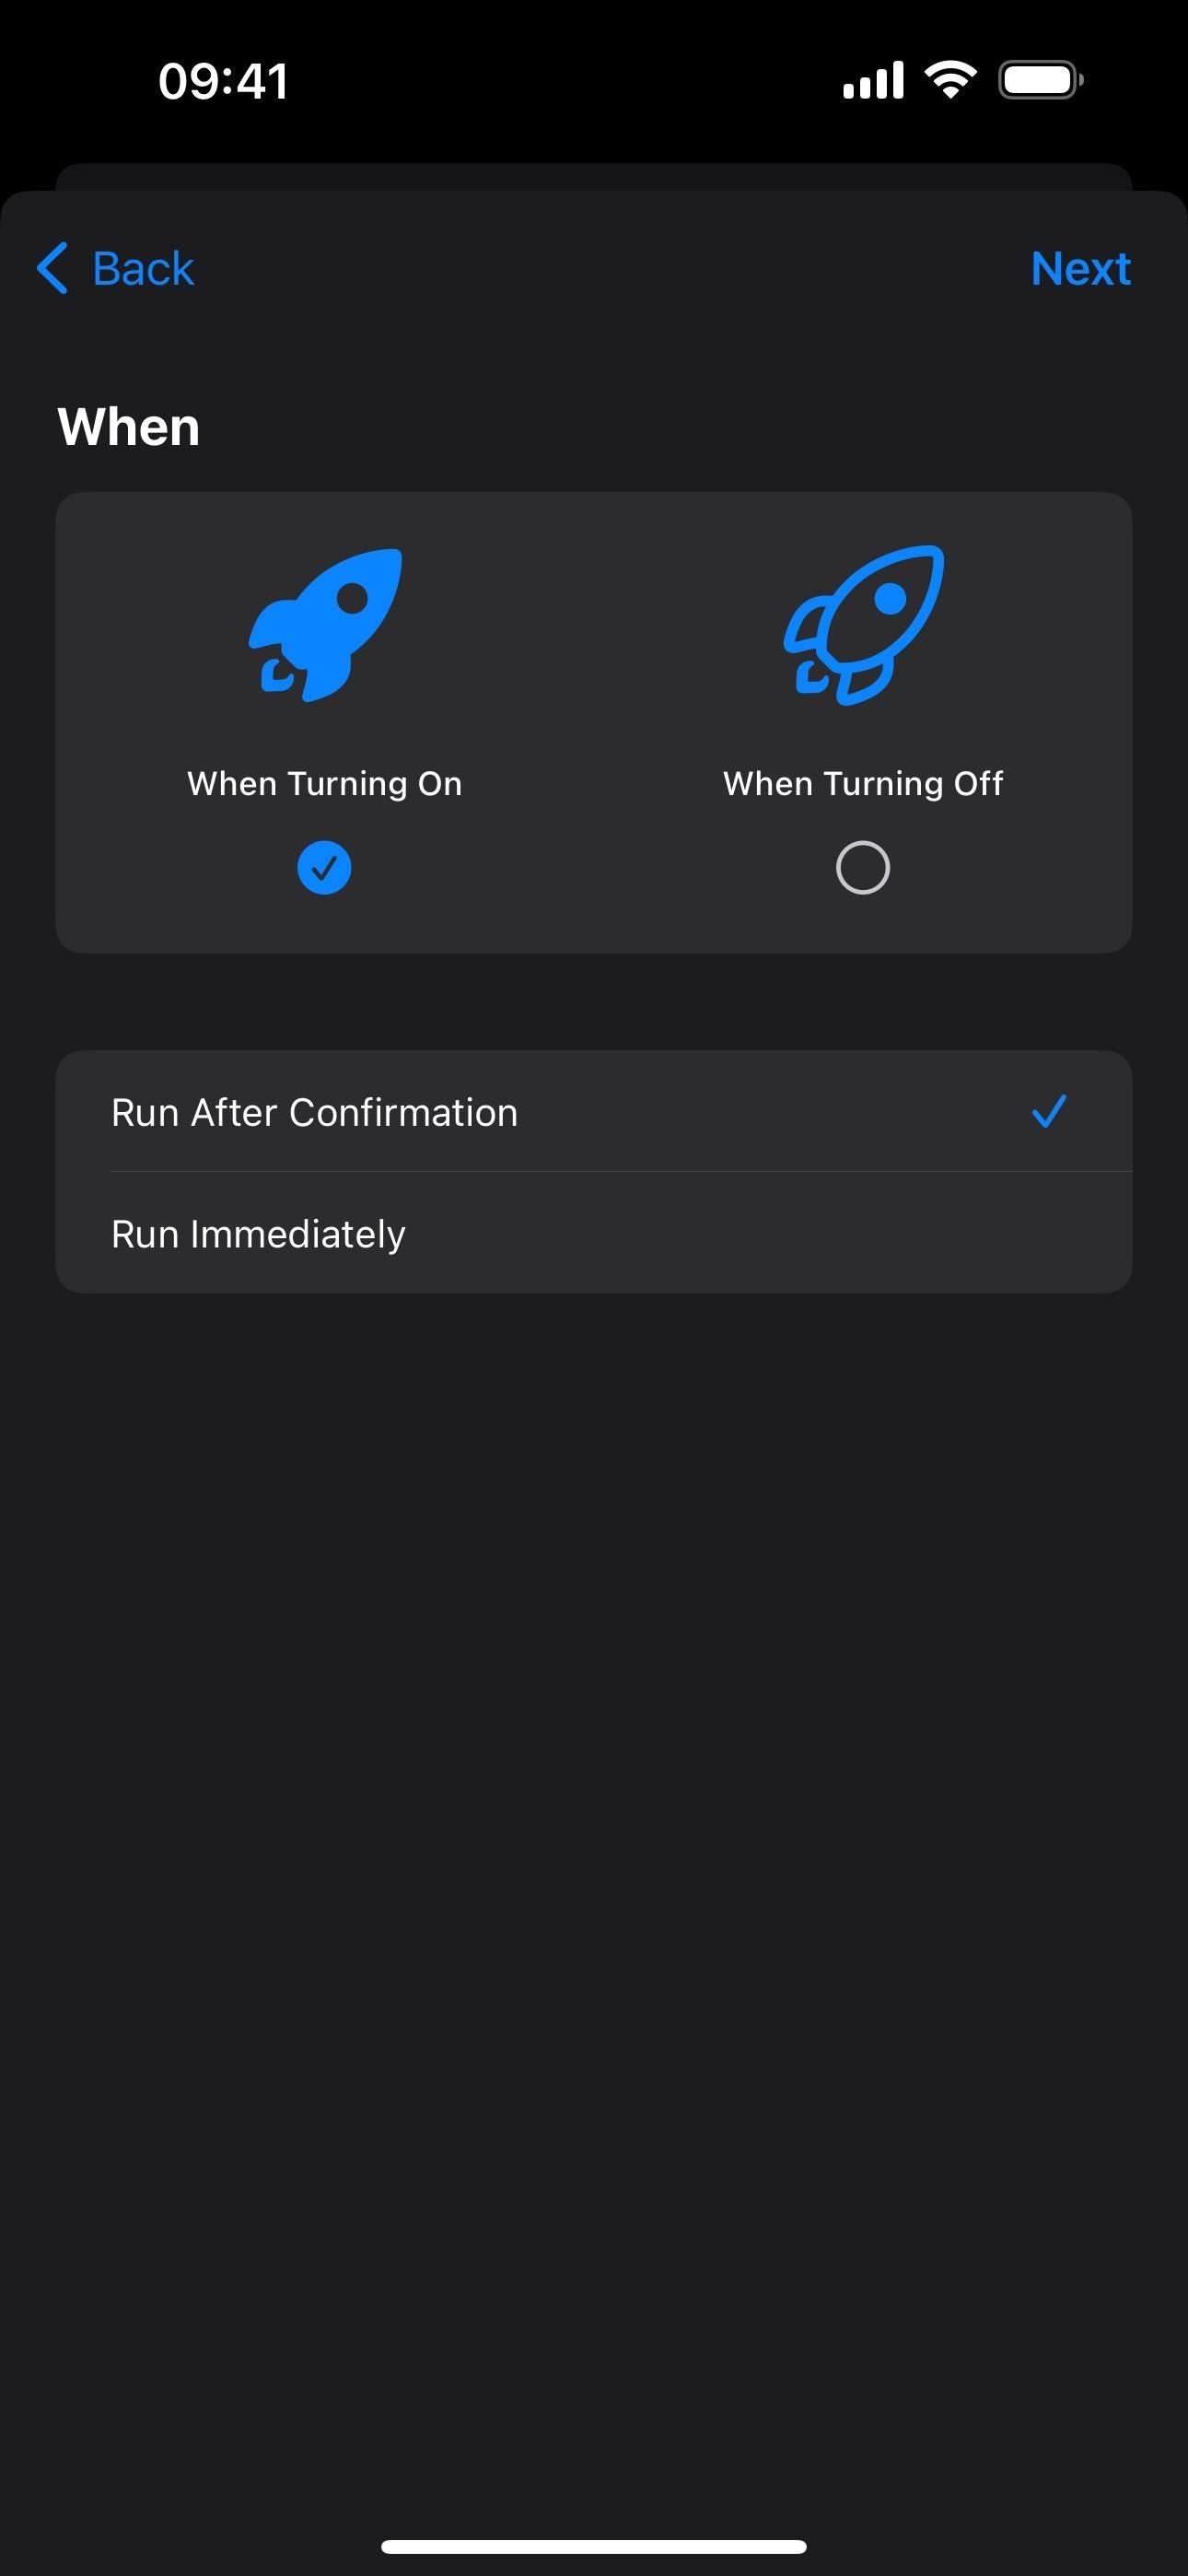
While Apple’s Focus feature is flexible enough to meet most people’s needs, it can be even more elaborate using the Shortcuts app. For example, you can use any Focus as a trigger for an automation or incorporate Focus-related actions into regular shortcuts.
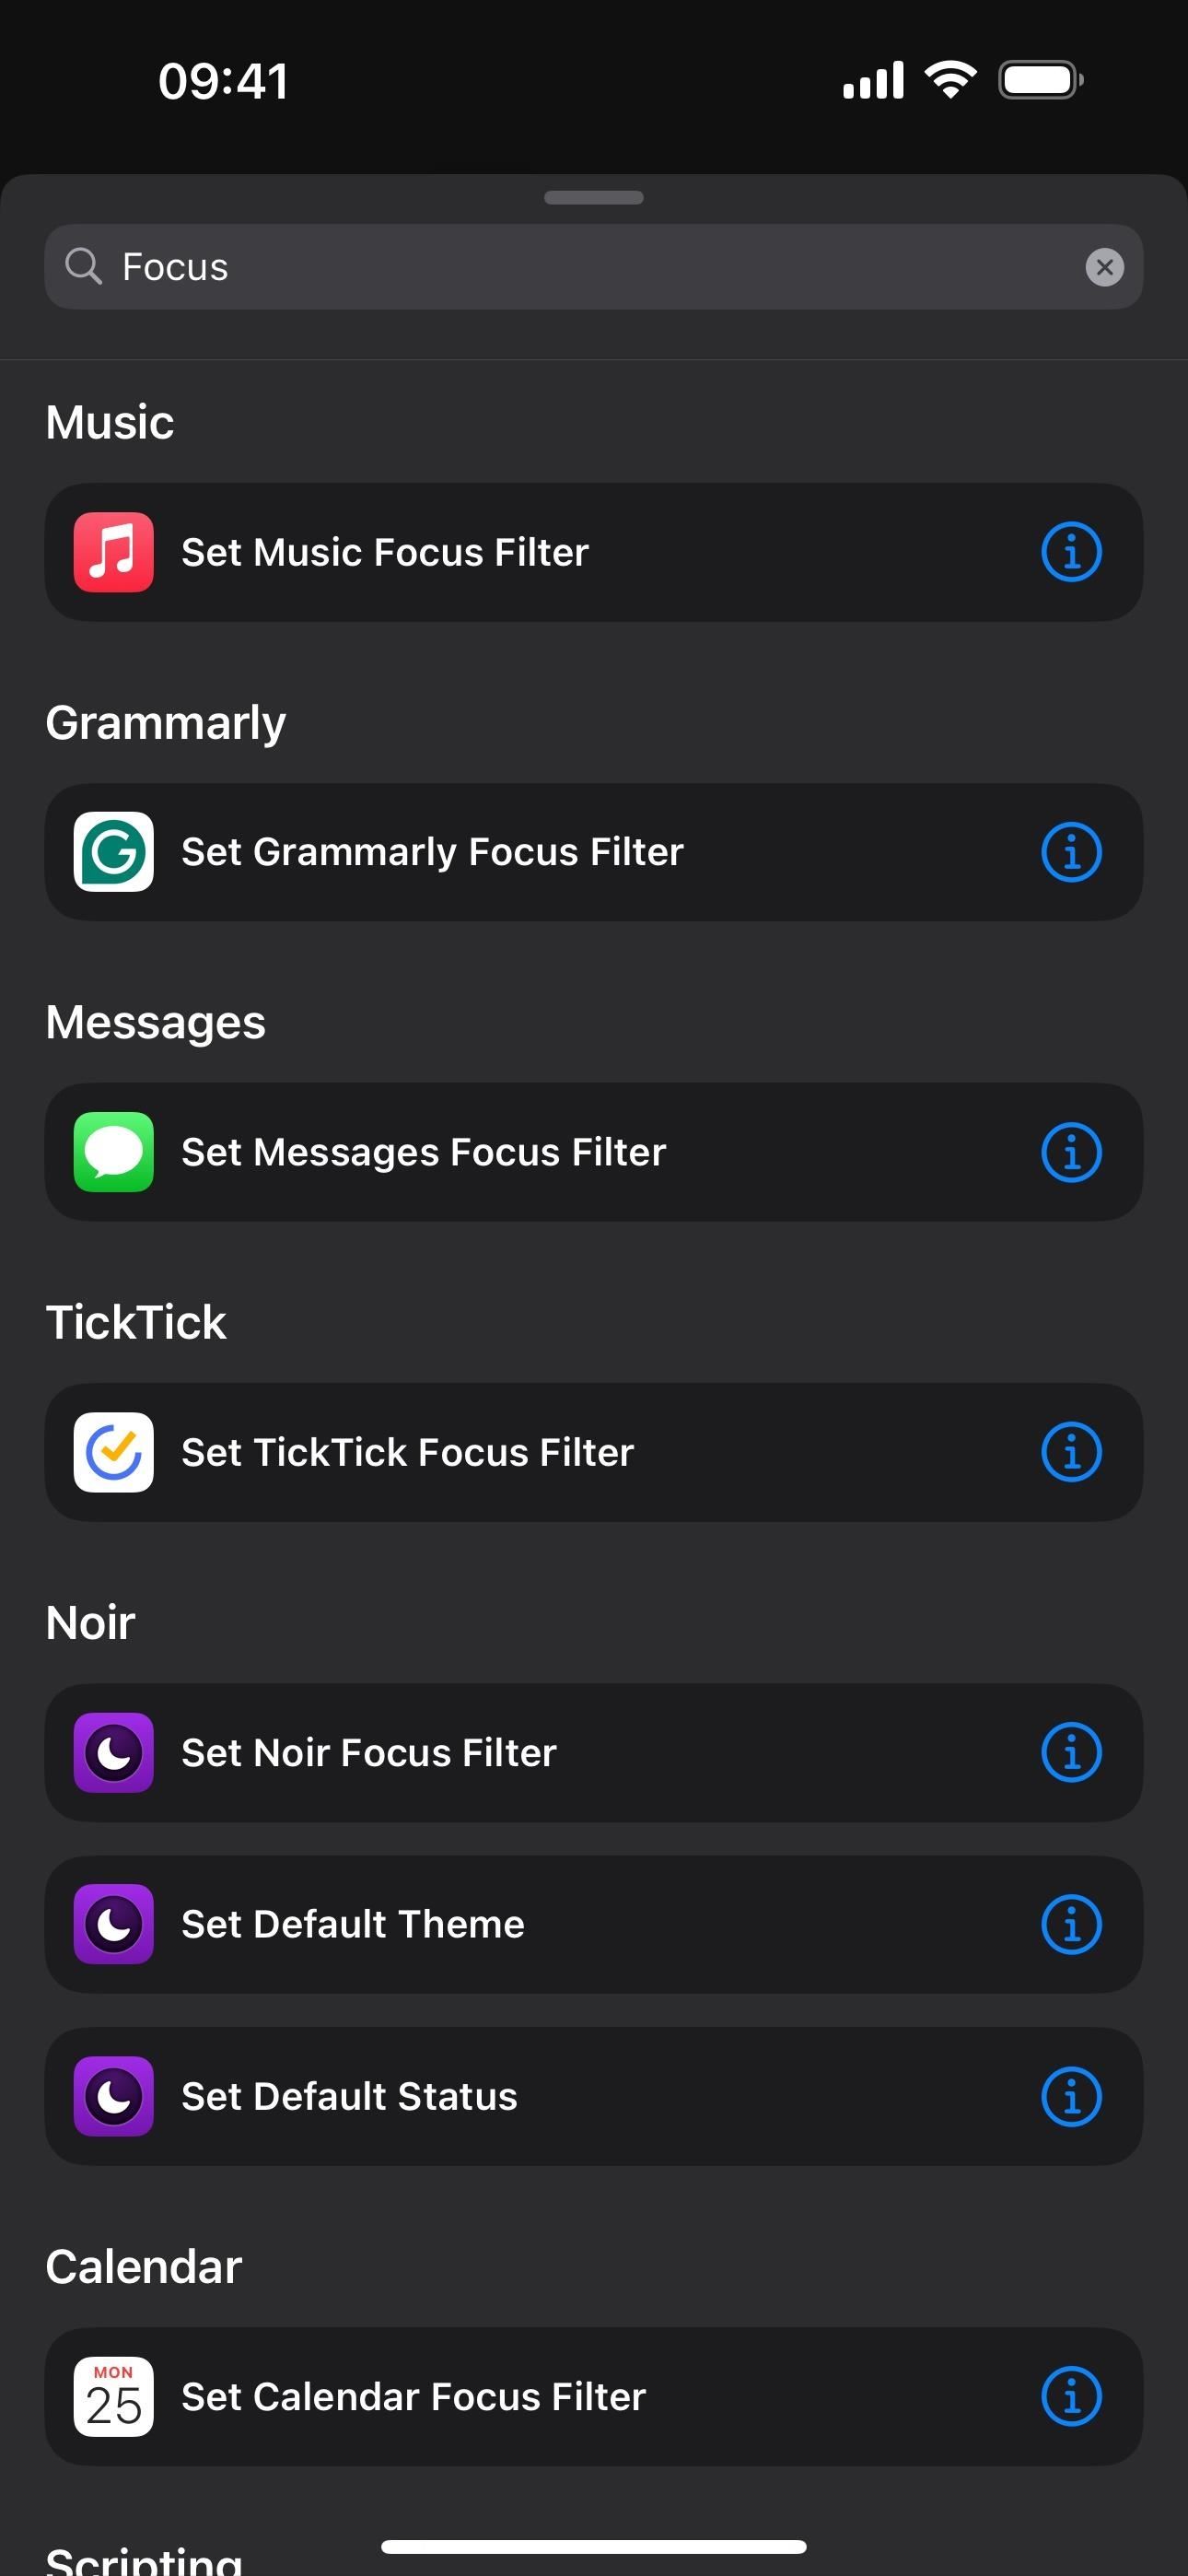
I won’t get into specifics here, but Focus profiles work best as automation triggers. Still, you’ll find Focus-geared actions like the following in the actions selector.
- Set Focus
- Get Current Focus
- Set Calendar Focus Filter
- Set Mail Focus Filter
- Set Messages Focus Filter
- Set Music Focus Filter
- Set Safari Focus Filter
Just updated your iPhone? You’ll find new emoji, enhanced security, podcast transcripts, Apple Cash virtual numbers, and other useful features. There are even new additions hidden within Safari. Find out what’s new and changed on your iPhone with the iOS 17.4 update.
“Hey there, just a heads-up: We’re part of the Amazon affiliate program, so when you buy through links on our site, we may earn a small commission. But don’t worry, it doesn’t cost you anything extra and helps us keep the lights on. Thanks for your support!”


