Samsung’s latest flagship devices, the Galaxy S7 and S7 Edge, as well as the Note7, have a useful feature called “Always On Display.” With this one enabled, the clock and some other information will continue to be shown on the screen, even when you lock your phone or turn your screen off.
We covered an app called Glance Plus that gives users a decent chunk of this functionality. But that app didn’t offer a true “Always On” display, because it would eventually turn off after a while for the sake of battery life.
So we kept on the lookout for an app that emulates this functionality perfectly, and we finally found one from developer Tomer Rosenfeld. Unlike Glance Plus, this one will stay on indefinitely (without killing your battery), plus it offers plenty of customization options, and it lets you continue using your fingerprint scanner as you normally would.
Note About AMOLED Displays
This app is not recommended for use on devices with traditional LCD screens. These types of displays require that their entire backlight be lit up at all times while displaying any content, so an always-on display would be a huge battery drain on a device with an LCD screen.
Therefore, we can only recommend this app if your device uses an AMOLED display, which is a newer technology where each pixel on the screen emits its own light. With this type of screen, only the white portions of the always-on display will use any power, so the battery drain is significantly lowered.
Step 1: Install Always On AMOLED
The app that brings a true “Always On” feature to devices with AMOLED displays is fittingly called Always On AMOLED. To begin, head to the Google Play Store and get it installed.

Step 2: Grant Permissions
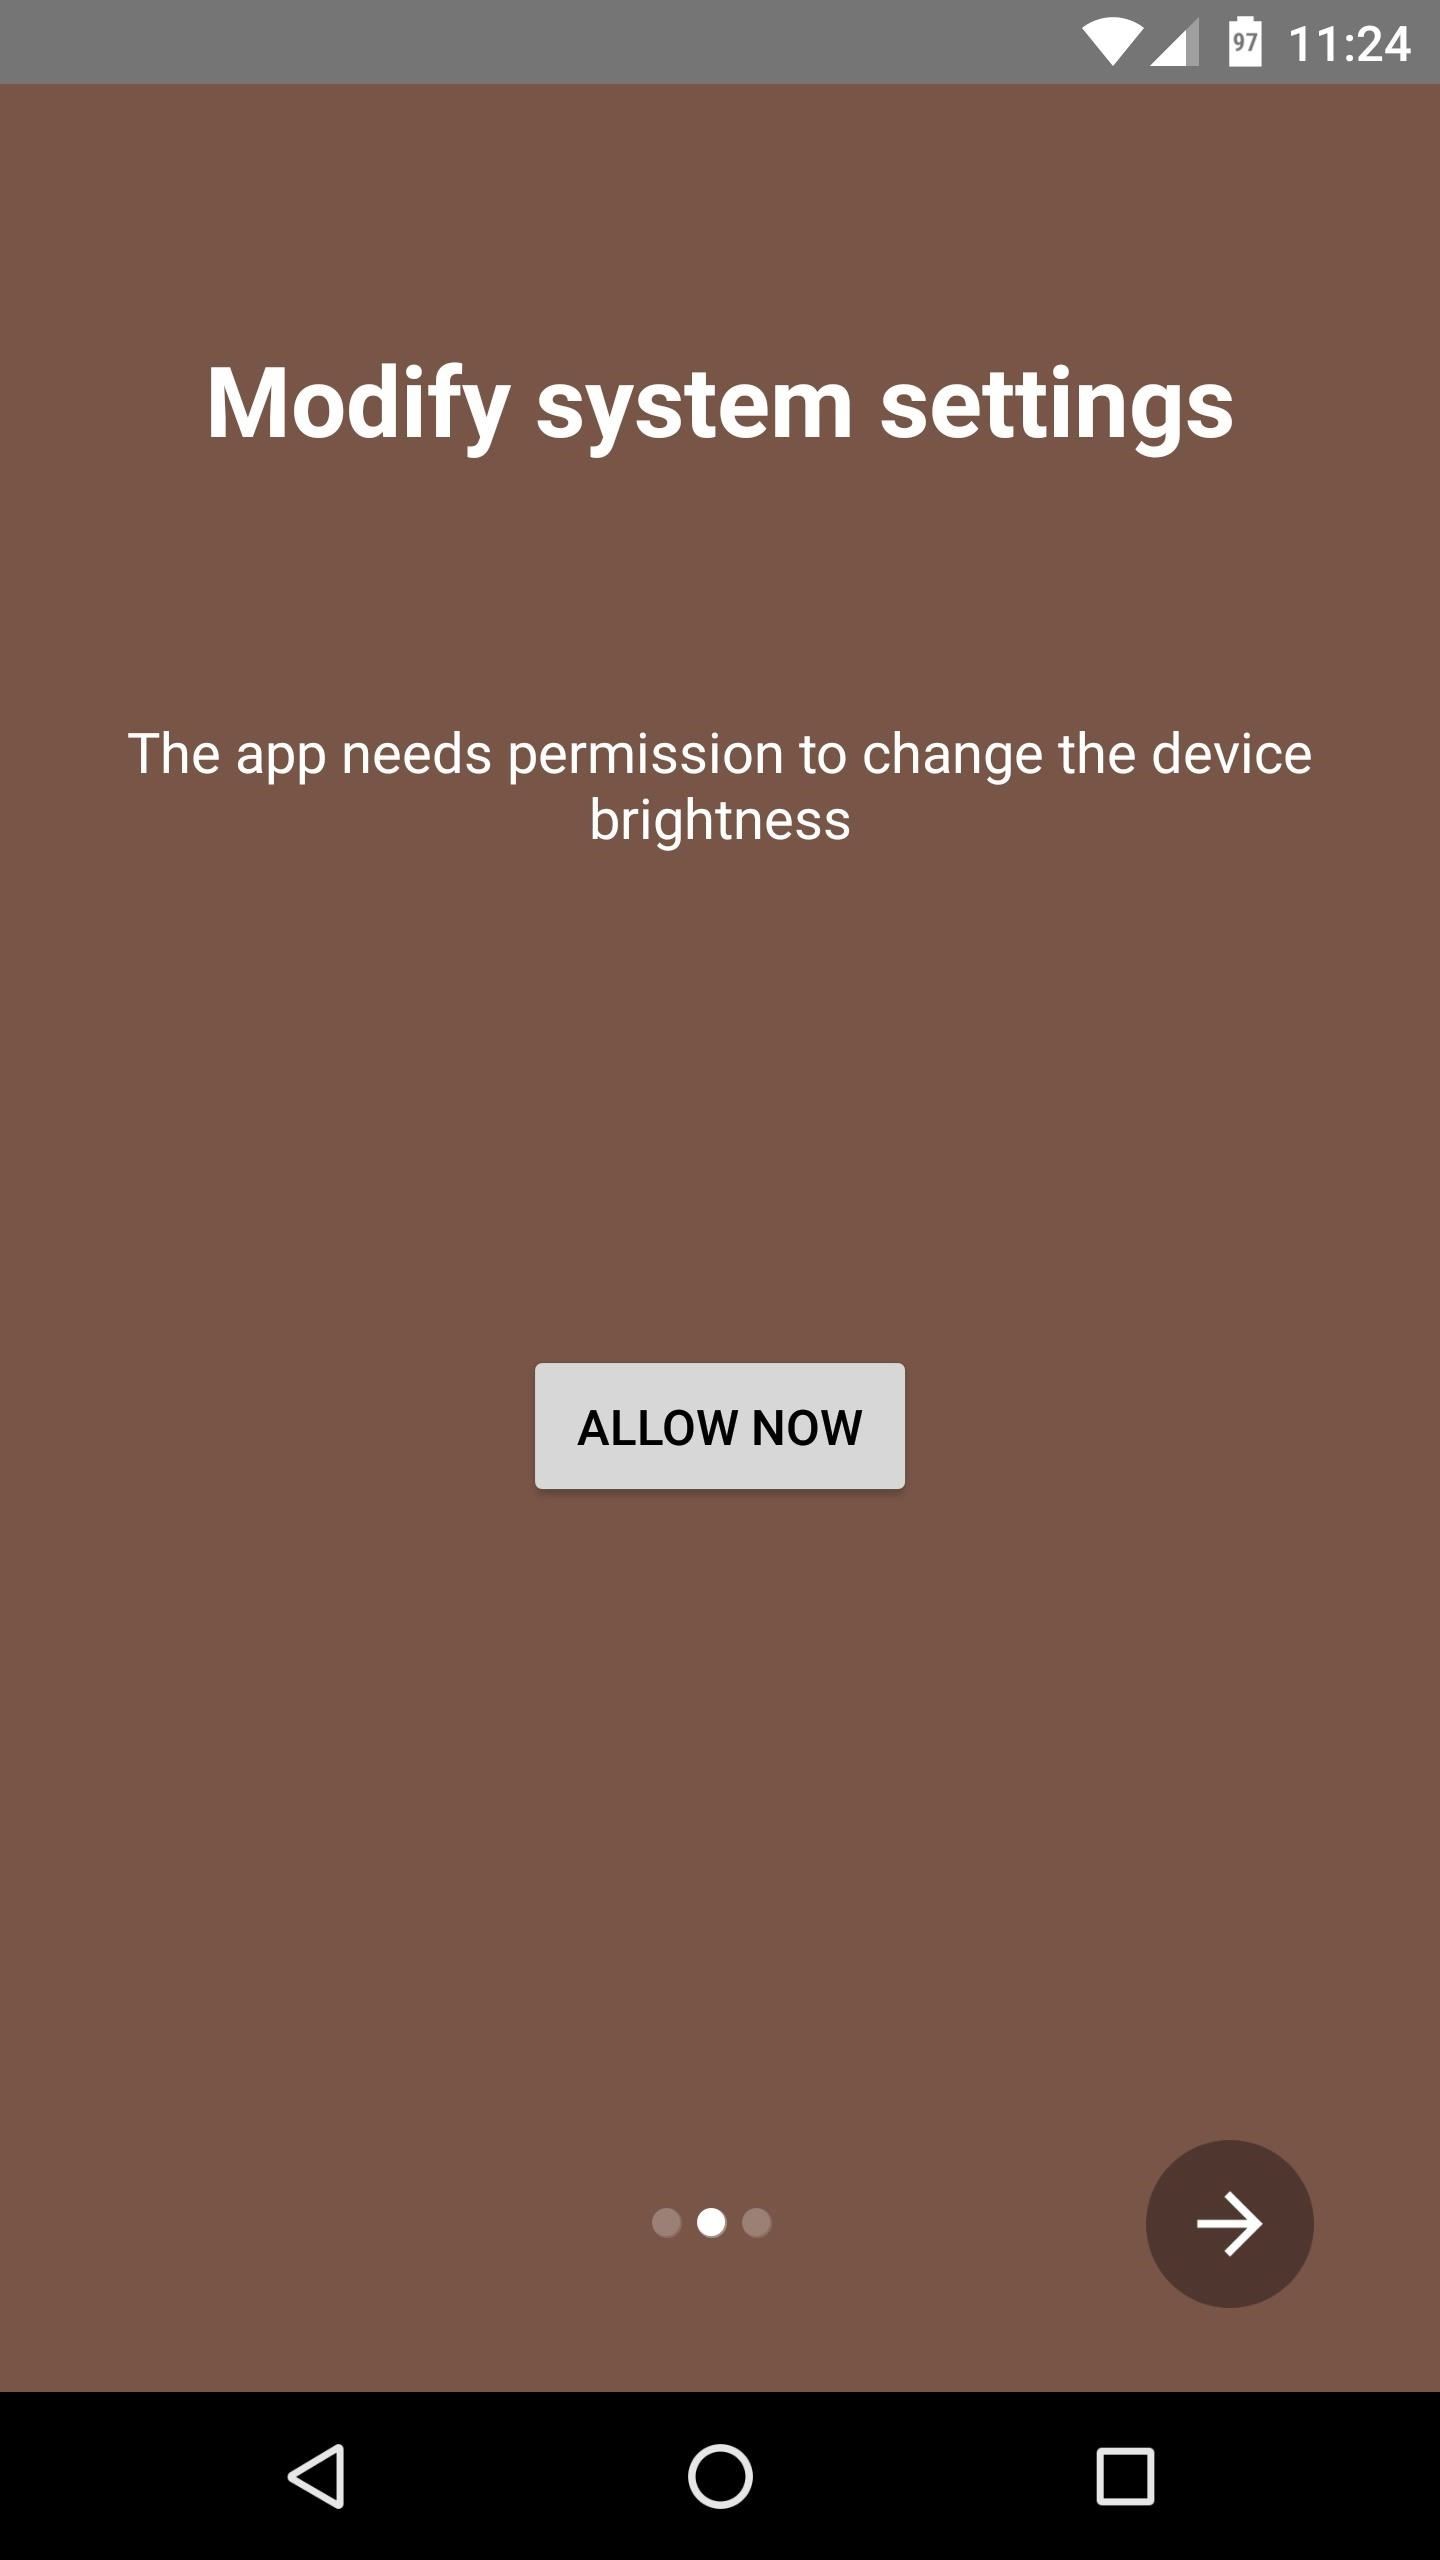
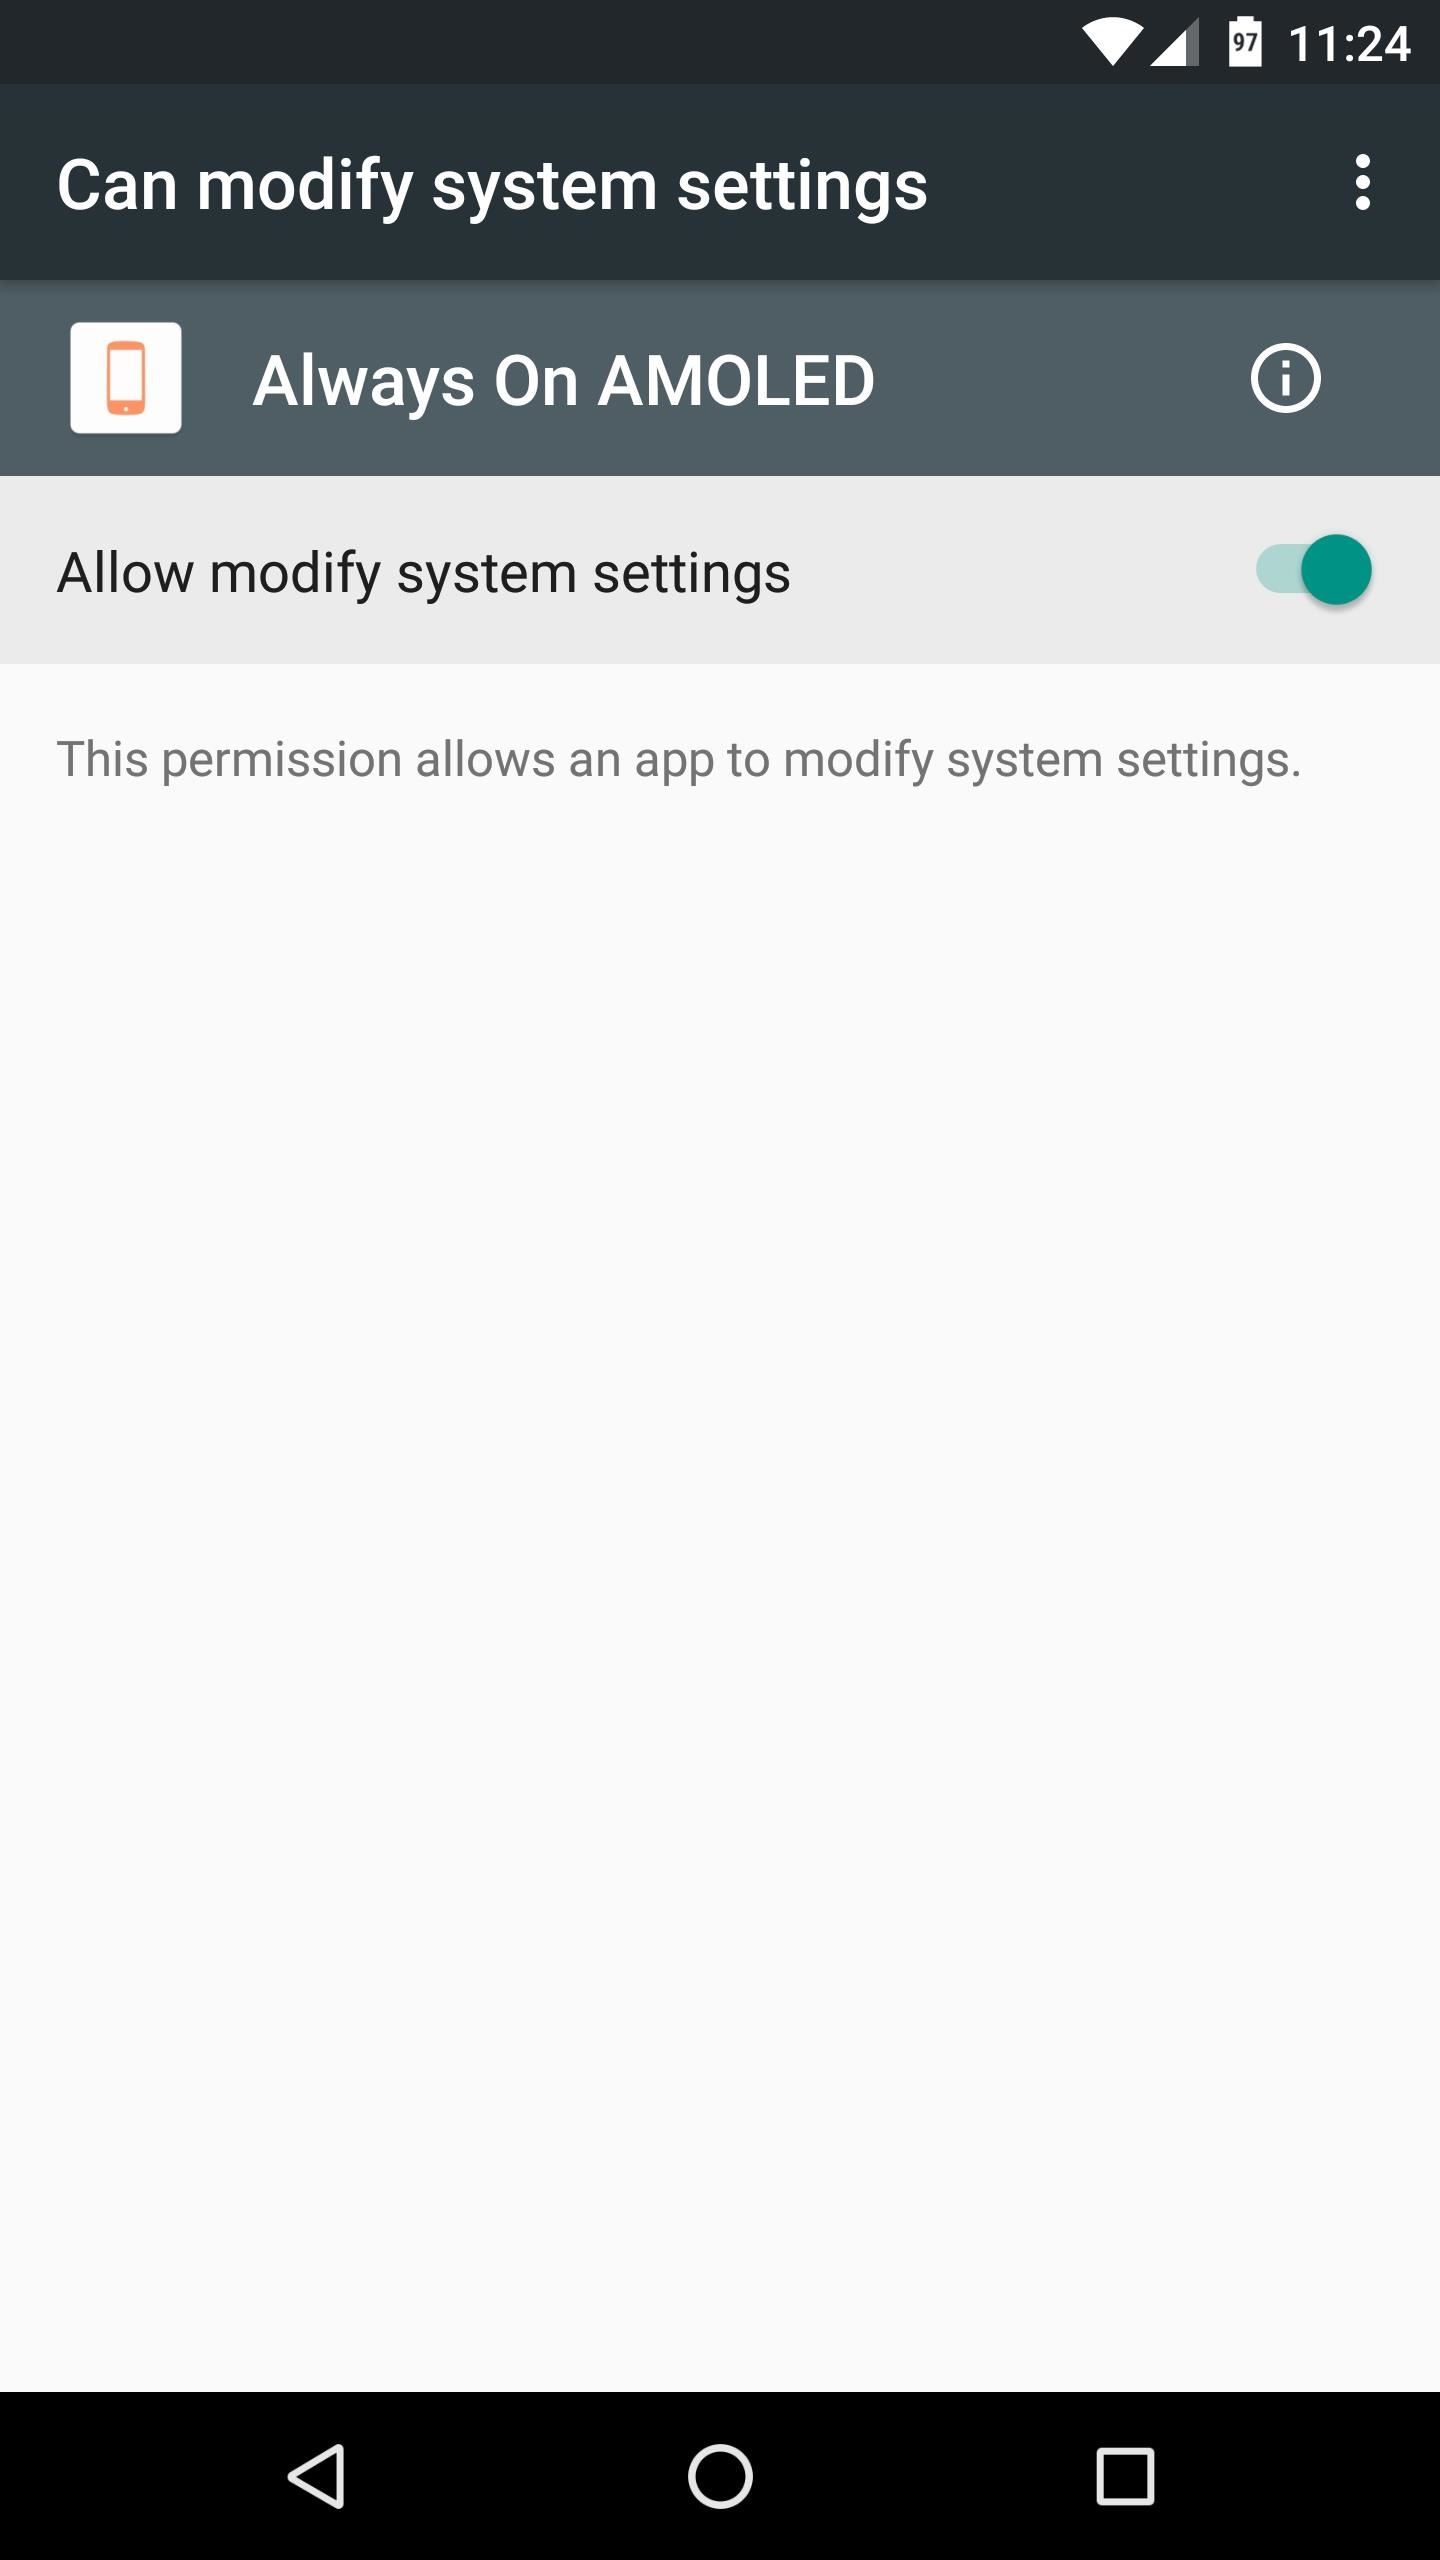
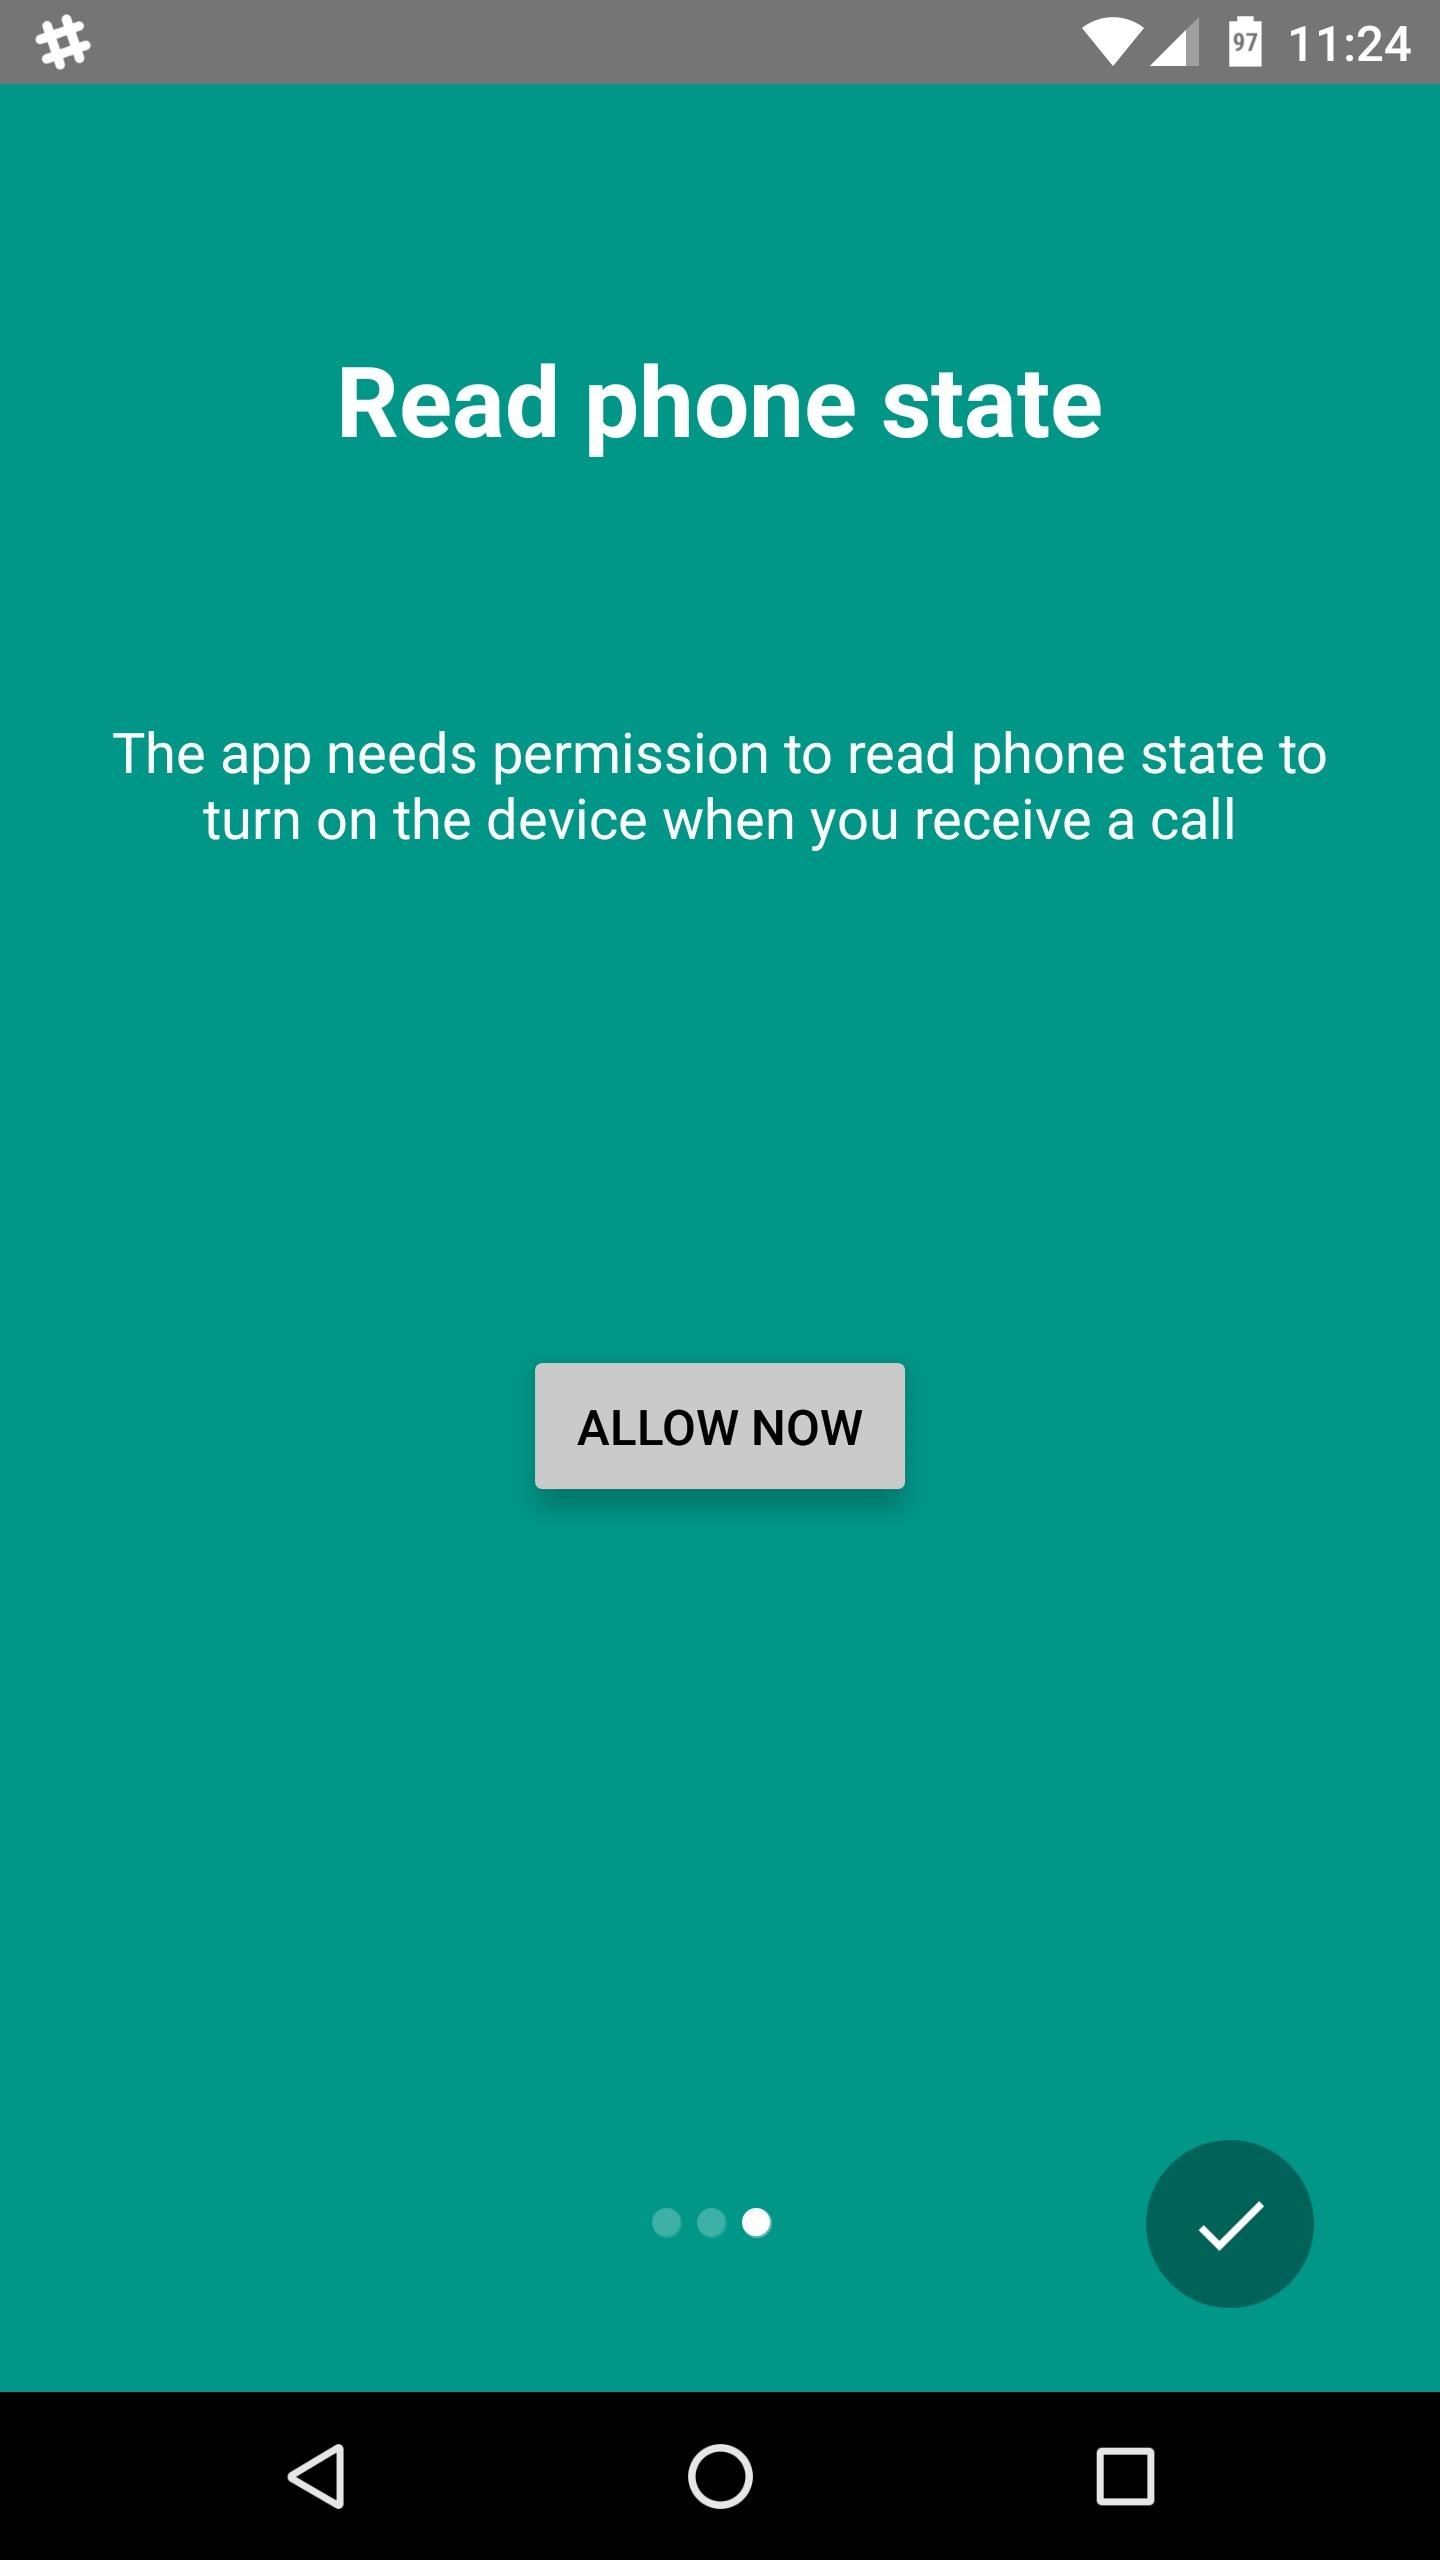
When you first launch the app, you’ll be greeted by a set-up guide. These screens will prompt you to enable a pair of additional permissions, so tap the “Allow Now” button, then enable the switch on the following screen. When you’re done with the first one, head back to the app, then repeat this same process for the second permission.


Step 3: Adjust Options
With the permissions enabled, Always On AMOLED will be ready to go, though you may want to adjust a few of its options before you try it out.
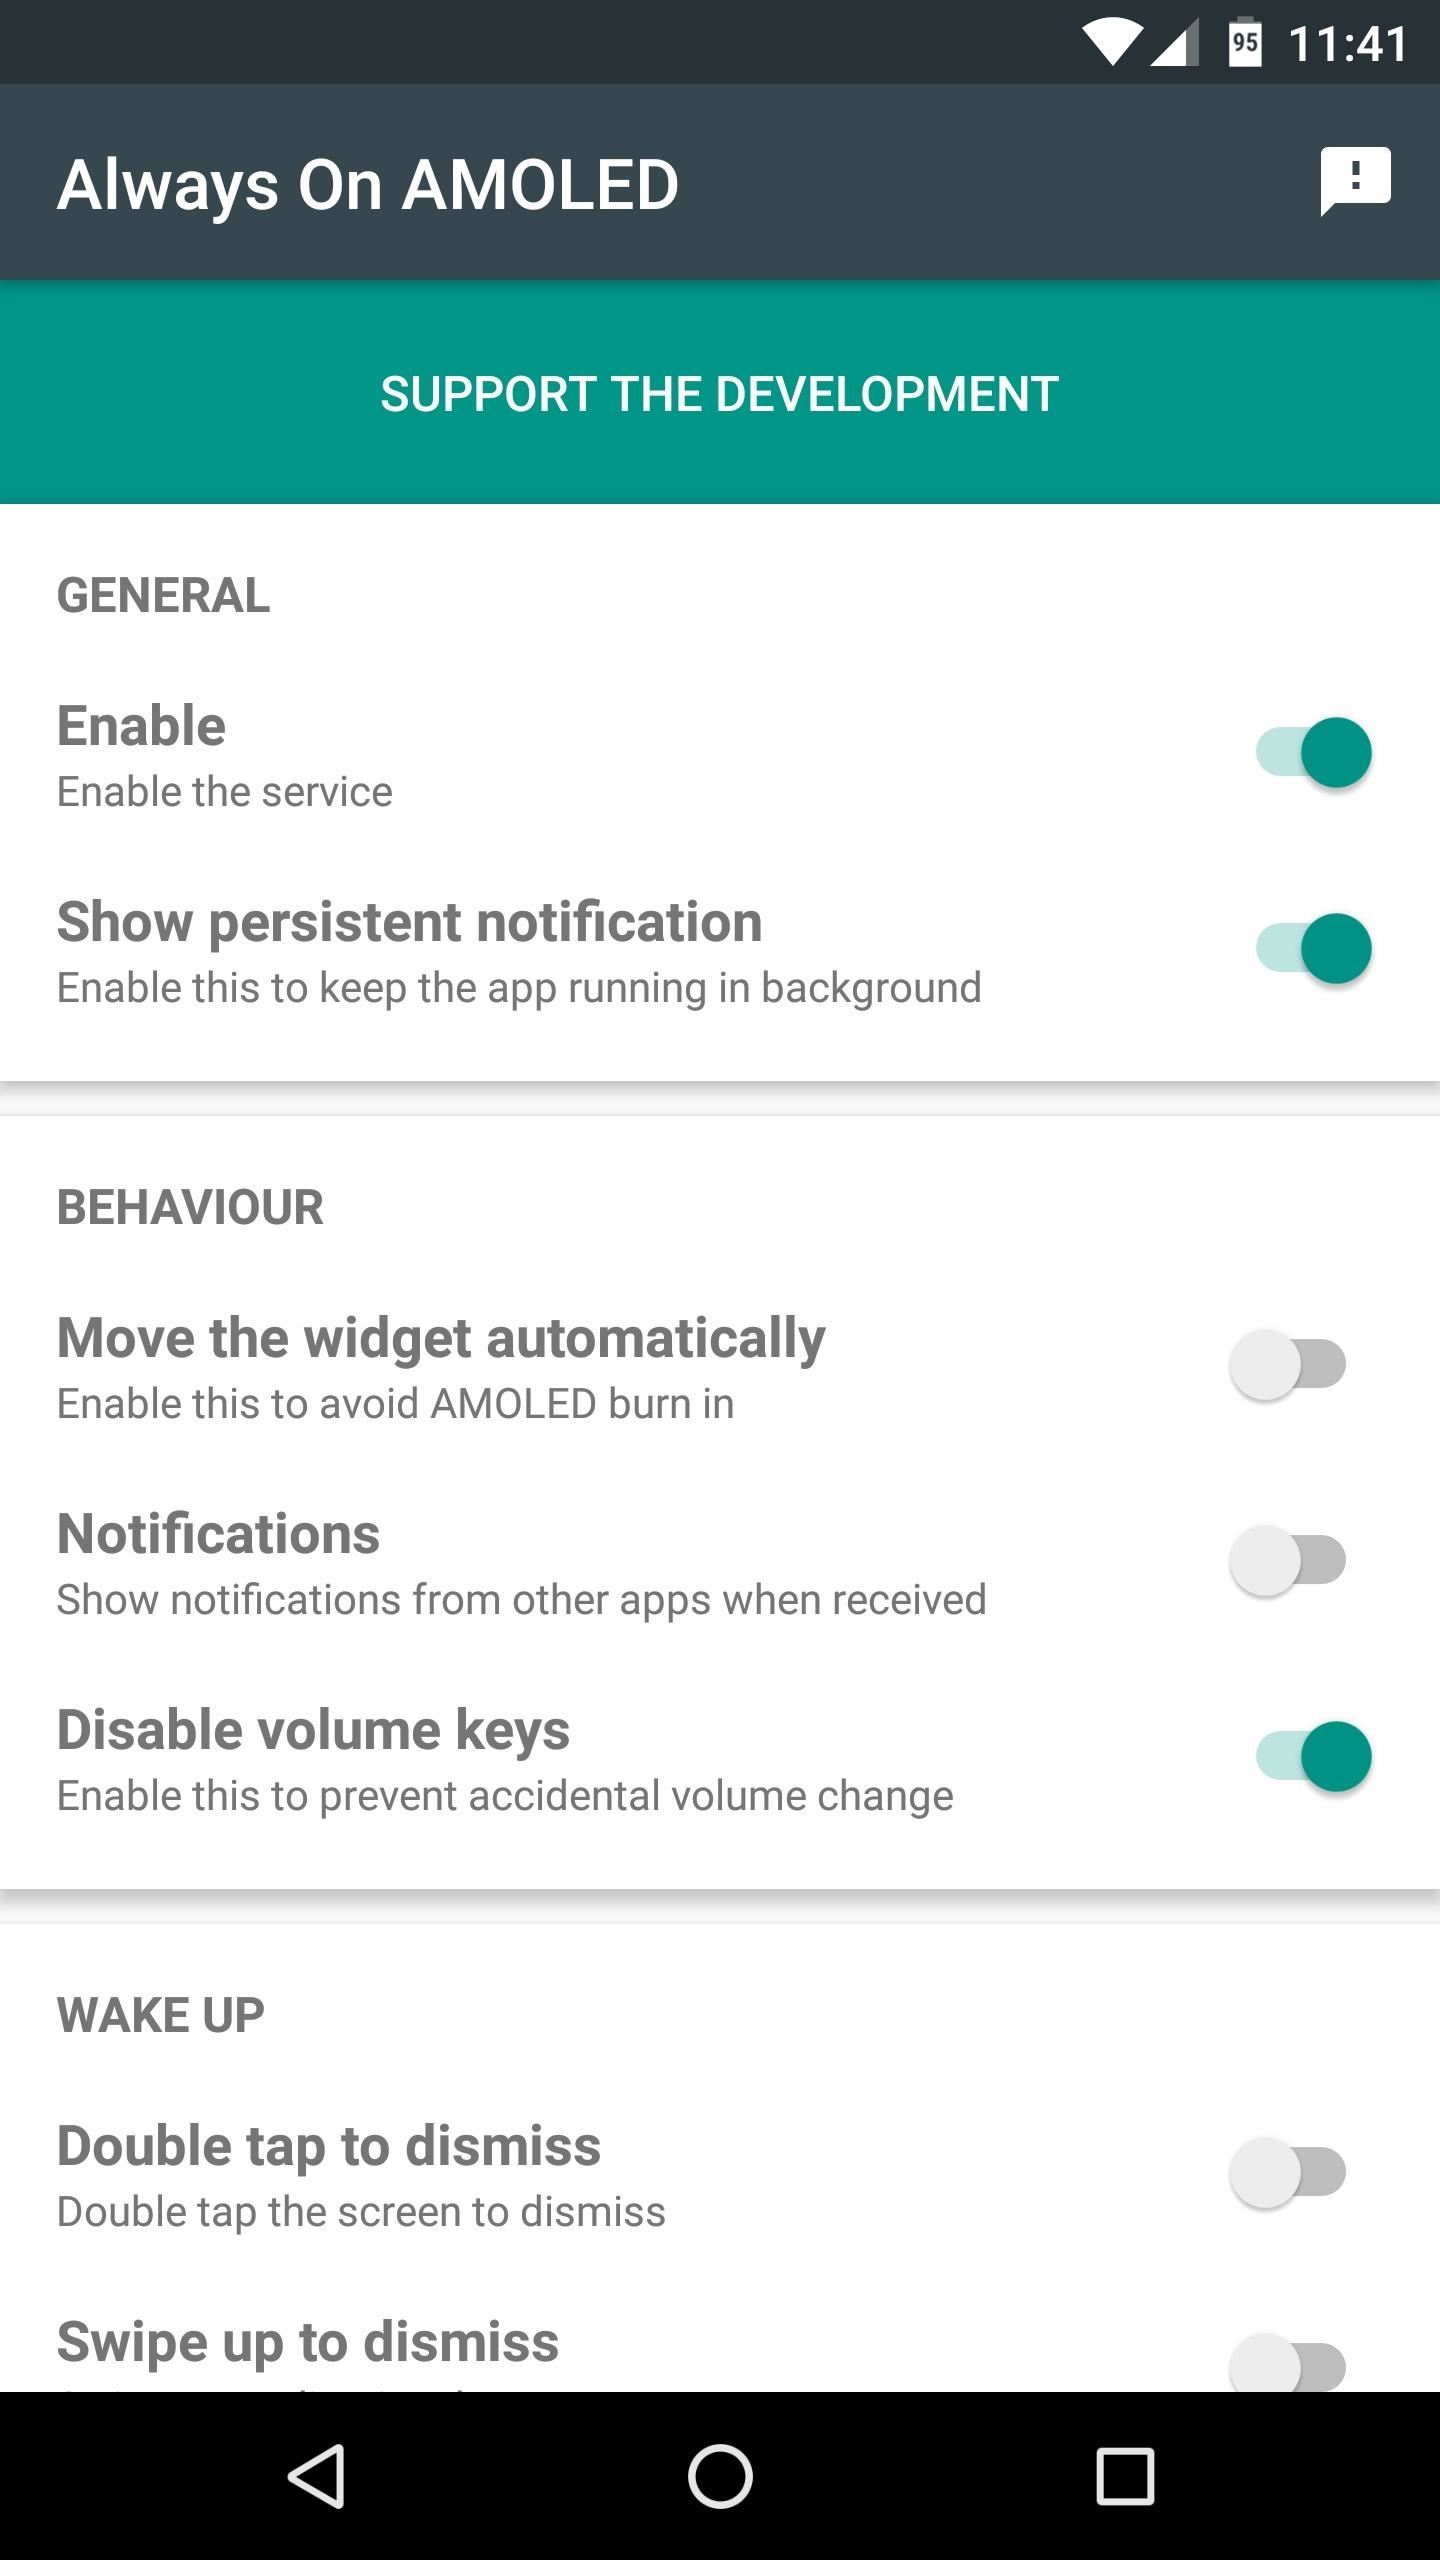
To make sure the feature is on and not being cleared from memory, keep the two options in the General section enabled. Aside from that, you should enable “Move the widget automatically” to avoid any screen burn-in. Then, if you’d like, you can have the always-on display show notification icons by enabling the “Notifications” option.
Scrolling down further, you can enable “Double tap to dismiss,” “Swipe up to dismiss,” or “Volume keys to dismiss,” which offer additional ways to dismiss the always-on display and return to your lock screen, though the power button can do this by default. Then, finally, you can adjust the brightness of the always-on clock with the slider towards the bottom of this menu.


Step 4: Try Your New Always-On Display
With everything set up to your liking, you’re good to go. The next time you turn your screen off, the always-on display feature will show up a second or two later. The interface is mostly black with a white clock, which is very AMOLED-friendly. Then, if you enabled the “Notifications” option, you’ll even see icons beneath the clock when you receive a new message.


Hot Deal: Set up a secure second phone number and keep your real contact details hidden with a yearly subscription to Hushed Private Phone Line for Android/iOS, 83%–91% off. It’s a perfect second-line solution for making calls and sending texts related to work, dating, Craigslist sales, and other scenarios where you wouldn’t want to give out your primary phone number.
“Hey there, just a heads-up: We’re part of the Amazon affiliate program, so when you buy through links on our site, we may earn a small commission. But don’t worry, it doesn’t cost you anything extra and helps us keep the lights on. Thanks for your support!”


