With protests springing up across America, there’s a chance you may have your first interaction with law enforcement. Many demonstrators will have their phones in-hand to film the action, which, sadly, could prompt an officer to demand the device and any self-incriminating data it may contain. Before this happens, you should know there are tools at your disposal to protect your data in such situations.
These tips mostly involve tightening up settings within Android, but there’s also a third-party app that can help. Once you’ve implemented these tips, you can derail law enforcement’s effort by keeping your phone locked even while it’s in their possession. But we’re not lawyers, so use these tips at your own discretion, as each circumstance is different.
Tip 1: Disable Biometrics in a Few Seconds
While biometrics do provide a great balance of security and convenience, they can be used against you when dealing with law enforcement. While a recent ruling in the District Court for the Northern District of California deemed that police forcing you to unlock your phone with your fingerprint was a violation of the Fourth and Fifth Amendments, whether it stands in future court hearing remains to be seen.
However, the refusal to give up your passcode has been upheld in both a Pennsylvania and a Colorado ruling. While a Florida judge has challenged its Fifth Amendment protection, it is still the safer option.
In Android 9 Pie, Google introduced a feature known as Lockdown Mode. It isn’t enabled by default, so you will need to turn it on first. Once activated, you can quickly lock your phone and disable biometrics with one button, leaving your PIN, pattern, or password as the only way to unlock your phone. Best of all, it only disables your fingerprint scanner (or secure facial recognition) once, so you don’t have to remember to turn off the feature after your encounter.

If your phone is running an older Android version, there’s another workaround: Just restart it. When you reboot the phone, it will require that your password, PIN, or pattern is entered on the next unlock. In other words, biometrics will be temporarily disabled.
Tip 2: Use a Strong Password
Piggybacking off Tip 1, the safest authentication method offered by your phone is the alphanumeric password. With a secure password (which can be up to 16 characters long), you can rest assured your phone won’t be unlocked without your consent, as there are simply too many possible combinations for law enforcement to guess.
An 8-character password with no consecutive letters (or the use of common words or names) would take a computer over five months to crack. Increase this to 16 characters and it would take several millennia. Until Google implements the ability to require both the password and biometrics to unlock, this is the safest option to keep anyone (including law enforcement) out of your phone. And with Lockdown Mode, you will hardly ever have to use it.
Tip 3: Disable Smart Lock
If you’re using Android’s Smart Lock feature to make it easier to unlock your device, know that it’s a double-edged sword: It also makes it easier for law enforcement to get into your phone.
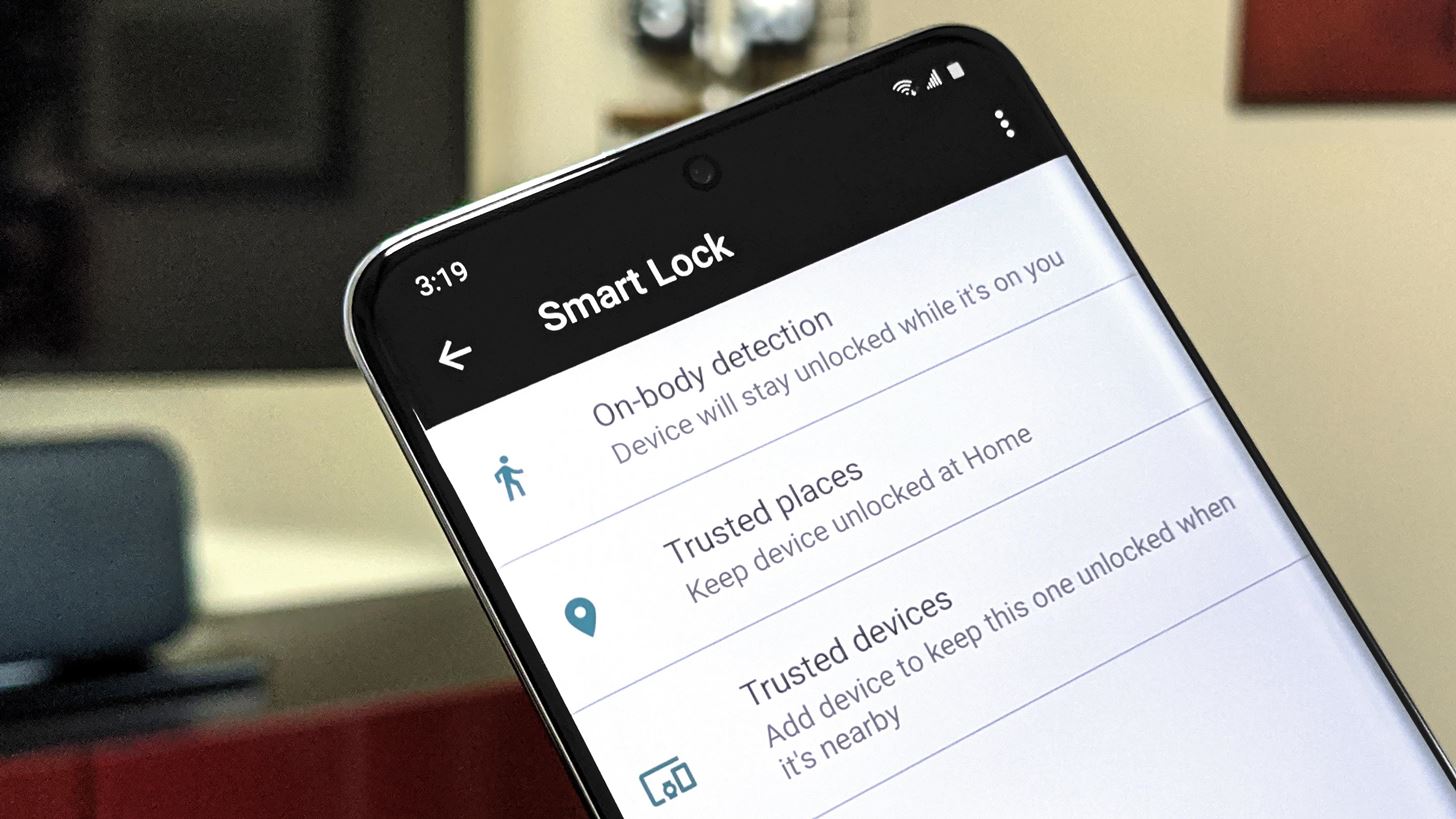
Particularly the “On-Body Detection” setting, which keeps your phone unlocked when its motion sensors detect that it has been continuously moving (in a manner consistent with a person walking) since the last time it was unlocked with a PIN, pattern, or password. Thing is, if you get stopped while the phone’s in this unlocked state, the officer could take possession of your phone and keep the on-body detection active by placing it on his or her person. They would then be able to unlock your phone with a simple swipe.

There’s also a slight risk with Smart Lock’s “Trusted Places” setting. This keeps your phone unlocked in specific locations such as your home. If you’re detained at one of these locations, officers could unlock your phone without your PIN, pattern, or password.
To disable all Smart Lock options, go to Settings –> Security –> Smart Lock, then choose each item individually and disable the toggle switch on the subsequent screen. With Trusted Places, tap any locations, then choose “Delete.”
Tip 4: Hide Notifications
While the lock screen does prevent law enforcement agents from accessing the contents of your phone, it can potentially be a source of information even without access to the rest of the phone. That is because, by default, our notifications (particularly messages) can be read — sometimes in their entirety — on the lock screen.
To change this behavior, open Settings and select “Security & location” (this may be labeled differently on your phone; if so, look for an option with “Security” in the name). Choose “Lock screen preferences” and “On lock screen.” From the pop-up, choose either “Hide sensitive content” or “Don’t show notifications at all.”
If your phone comes equipped with a notification LED, we would recommend choosing the latter, as it offers the best protection. You’ll know about new notifications thanks to the blinking LED, but they will never appear on your lock screen. But without a notification LED, if your phone is on silent, you wouldn’t know you got a new message until the next time you unlocked it. In this case, we recommend choosing “Hide sensitive content.”
Alternatively, if your phone is on Android 9 or higher, you can use the Lockdown Mode option as a way of temporarily disabling all lock screen notifications in the event you get pulled over or detained by law enforcement. Once Lockdown Mode is triggered, notifications won’t appear on your lock screen until the next time you unlock the device with your pattern, PIN, or password.
Tip 5: Keep Your Bootloader Locked
Android has a system of checks and balances to ensure that when it boots up, every piece of the operating system is still secured. But it’s also an open operating system, and Google has gone to great lengths to preserve this aspect.
To keep the door open for users who want to root while simultaneously hardening boot-up security, Google came up with a system that locks the boot chain by default, but lets you use a two-part setting to unlock it if you want. One of these settings is inside the Android OS, the other resides outside of it in a pre-boot menu called the bootloader.
The setting inside Android is called OEM Unlocking. The thinking here is you can only enable this option if you’ve entered your pattern, PIN, or password to get into the Android OS. Therefore, if it’s been enabled, it was enabled by you.
Once that setting is turned on from within Android, you can then boot into bootloader mode and send Fastboot commands to unlock the bootloader. This will allow you to install unofficial software on the device, such as custom recovery or a custom ROM. In turn, these can help you gain root access to the phone.
To make things even safer, the actual act of unlocking your bootloader automatically wipes all data on the device.
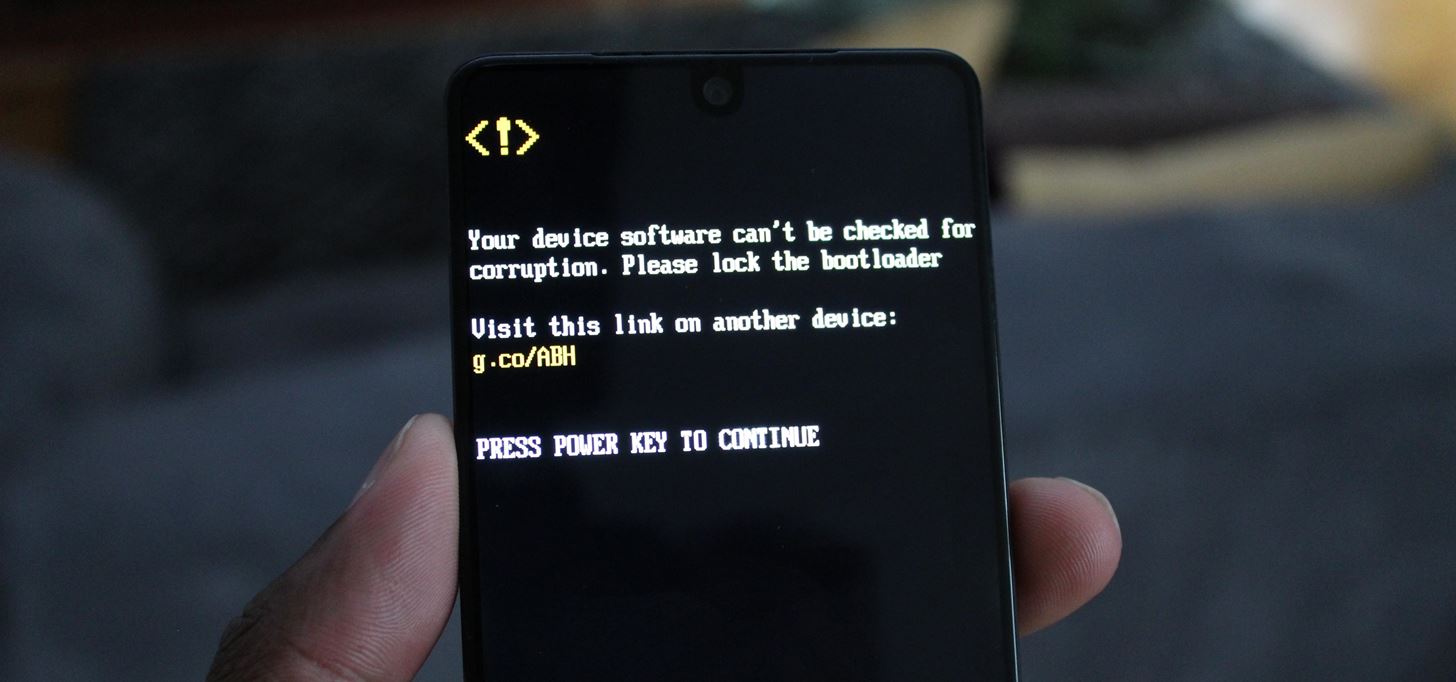
But here’s the thing: If your bootloader is currently unlocked, law enforcement can easily install unofficial firmware on the device to bypass your lock screen and access your data.

The OEM Unlocking setting isn’t really worth worrying about since that only allows the bootloader to be unlocked. If officers did unlock your bootloader, any data stored on your device would be deleted automatically.
But if you unlocked your bootloader after enabling OEM Unlocking — for instance, if you rooted your phone with Magisk — it’s a good practice to go back and re-lock the bootloader once you’re done. Additionally, if you installed a custom recovery like TWRP, you should make sure to password-protect the recovery menu.
Tip 6: Use Cerberus
Cerberus is a third-party app that offers all the features of Google’s Find My Device and much more. While it does have a monthly subscription, it is a much more complete security software than Find My Device. Because of Google’s policy change, Cerberus decided to leave the Play Store instead of disabling one of its key features. Therefore, you will need to download the APK from Cerberus’s website and sideload it to your device.
In the case the police take your phone, Cerberus lets you send SMS messages or use a browser to send commands to your phone. One command enables you to lock your phone with a code of your choosing that is separate from your lock screen code.
And if you are worried law enforcement will be able to bypass your lock screen, you can remote wipe your phone using SMS commands (or through a browser) if you don’t expect to get your phone back. This way, even if they circumvent the other methods, there will be nothing on the phone for them to retrieve.
And if you are that worry about your lock screen passcode or gesture, delete your backups. For Android 9 Pie or later devices, the encryption is based on this lock screen authentication which means if they can crack your phone, they can access your backups. For older versions of Android, the backups are unencrypted so they can restore your device without any trouble. So it both cases, it makes more sense to remove the data.
Hot Deal: Set up a secure second phone number and keep your real contact details hidden with a yearly subscription to Hushed Private Phone Line for Android/iOS, 83%–91% off. It’s a perfect second-line solution for making calls and sending texts related to work, dating, Craigslist sales, and other scenarios where you wouldn’t want to give out your primary phone number.
“Hey there, just a heads-up: We’re part of the Amazon affiliate program, so when you buy through links on our site, we may earn a small commission. But don’t worry, it doesn’t cost you anything extra and helps us keep the lights on. Thanks for your support!”


