Making the jump from an older iPhone, or even an Android phone, to the iPhone 12, 12 mini, 12 Pro, or 12 Pro Max can be a big one. It’s not just the change of a new smartphone — it may have had a huge impact on your wallet too. So whenever the device goes berserk, is unresponsive, or won’t turn on, it’s understandable to be worried. But DFU mode can help whenever you’re in a dire situation.
If you’re not familiar with DFU mode, which stands for Device Firmware Upgrade mode, it’s probably a good thing. It’s the last resort for attempting to fix an iPhone that’s bricked, completely unresponsive, won’t turn on or shut down correctly, and other severe issues — right after trying a hard reset or entering recovery mode.
- Don’t Miss: Shut Down & Restart the iPhone 12, 12 Mini, 12 Pro, or 12 Pro Max
Entering your iPhone into DFU mode isn’t something you should do lightly, but if your iPhone 12 is not responding to anything and you’ve run out of options, it might be your only hope. Fortunately, entering DFU mode has been the same process since the iPhone 8, so you may already be familiar with it. However, if you’re coming from any other smartphone, you’ll need to learn the somewhat-complex button combinations to enter DFU mode on your new iPhone 12 model.
Requirements
- Mac or Windows computer
- Lightning to USB or Lightning to USB-C cable
- Finder (on macOS Catalina or higher) or
- iTunes (on macOS Mojave and lower or Windows)
Warning — You’re About to Lose Everything
As we mentioned above, entering DFU mode is a desperation move. If all else has failed and you’re forced to enter DFU mode, you’ll completely wipe out everything on your iPhone, which might be a problem if you haven’t backed up your photos, texts, and other important data to your iCloud or your computer. Unfortunately, most people who enter DFU mode can’t use their iPhone, so it might be difficult to back it up if you’re already at this step, but if you’re worried about that, use it as a last resort only.
Step 1: Plug Your iPhone into Your Mac or PC
To start, connect your iPhone 12, 12 mini, 12 Pro, or 12 Pro Max to your computer with either a Lightning to USB or Lightning to USB-C cable, depending on your computer model.
Step 2: Unlock Your iPhone
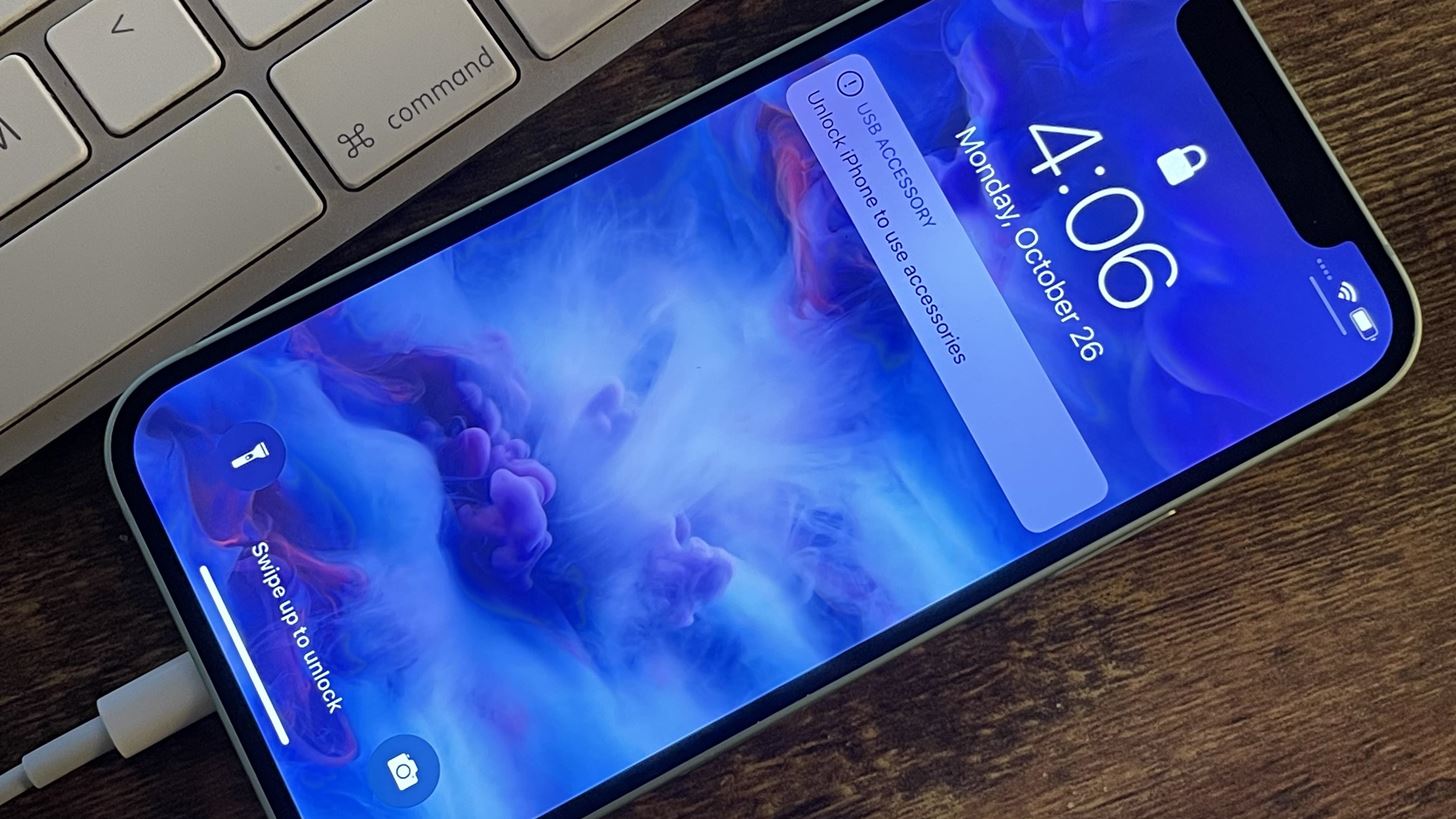
When connected, unlock your iPhone 12, 12 mini, 12 Pro, or 12 Pro Max using your passcode or Face ID, if it’s not already unlocked. You won’t be able to proceed with DFU mode if you don’t unlock your iPhone, especially if you see the “Unlock iPhone to Use Accessories” notification. If you don’t have a passcode, skip this step.
Step 3: Open Finder or iTunes
On a computer running macOS Catalina (10.15 or later) or macOS Big Sur (11.0 or later), open up a “Finder” window, then click on “iPhone” (or whatever your iPhone’s name is) under Locations in the sidebar.
If you’re using a Windows PC or macOS Mojave (10.14) or earlier, open up iTunes. (Apple’s iTunes should be installed by default on a Mac, but you’ll have to install it on a Windows PC if you haven’t already.) If iTunes is already open on your computer, exit the app, then reopen it. Once iTunes is up and running, click on your iPhone’s icon near the top of the window or your iPhone’s name under Devices in the sidebar.
Step 4: Trust Your Computer
If this is your first time connecting your iPhone 12, 12 mini, 12 Pro, or 12 Pro Max to your computer, or if you’ve recently reset your location and privacy settings or your network settings on the iPhone, you will to “trust” your computer. If the computer is already trusted, skip to Step 5.
To do so in Finder, click “Trust.” For iTunes, click “Continue” instead.
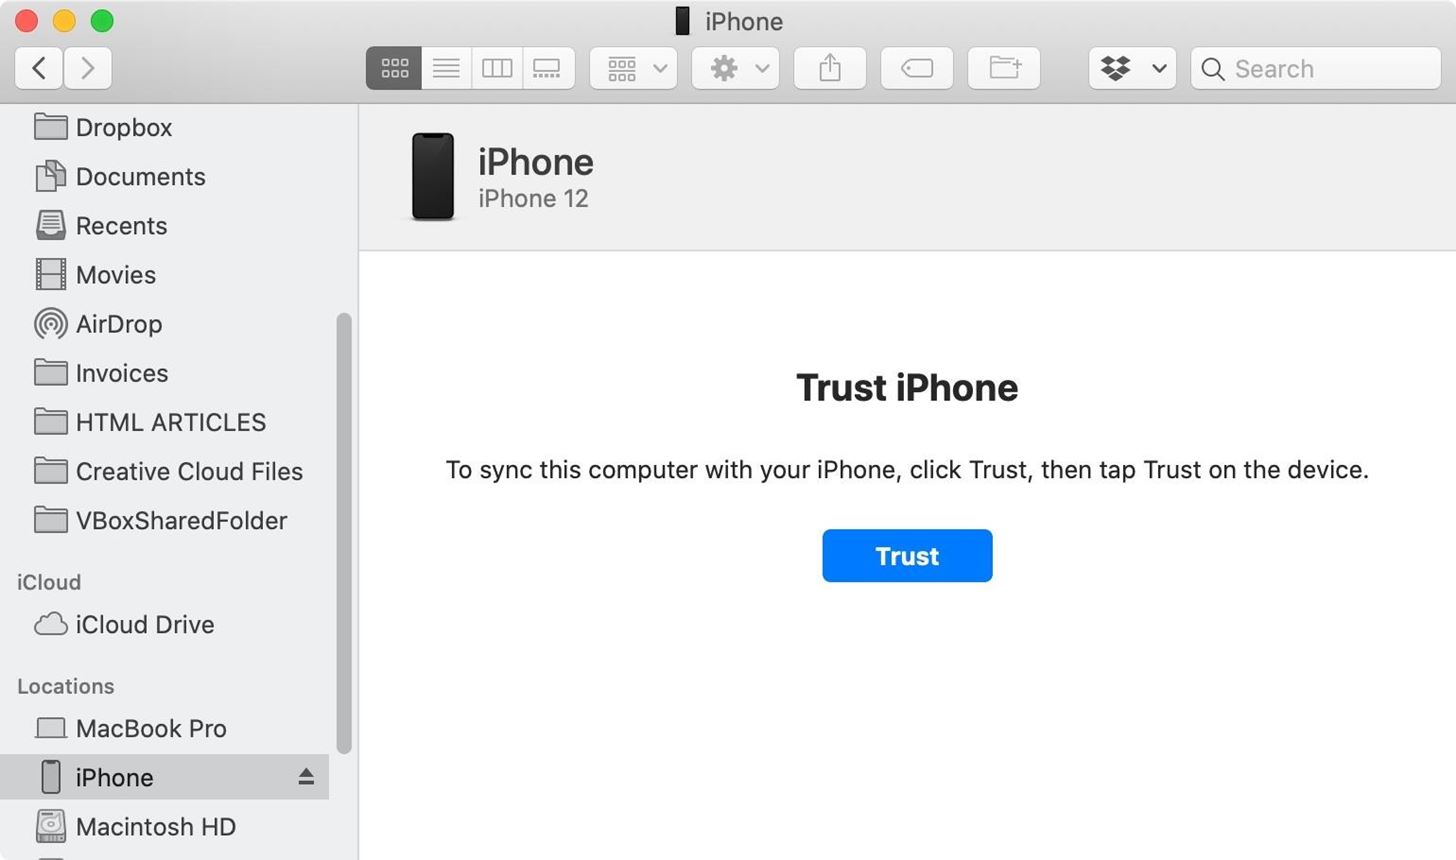
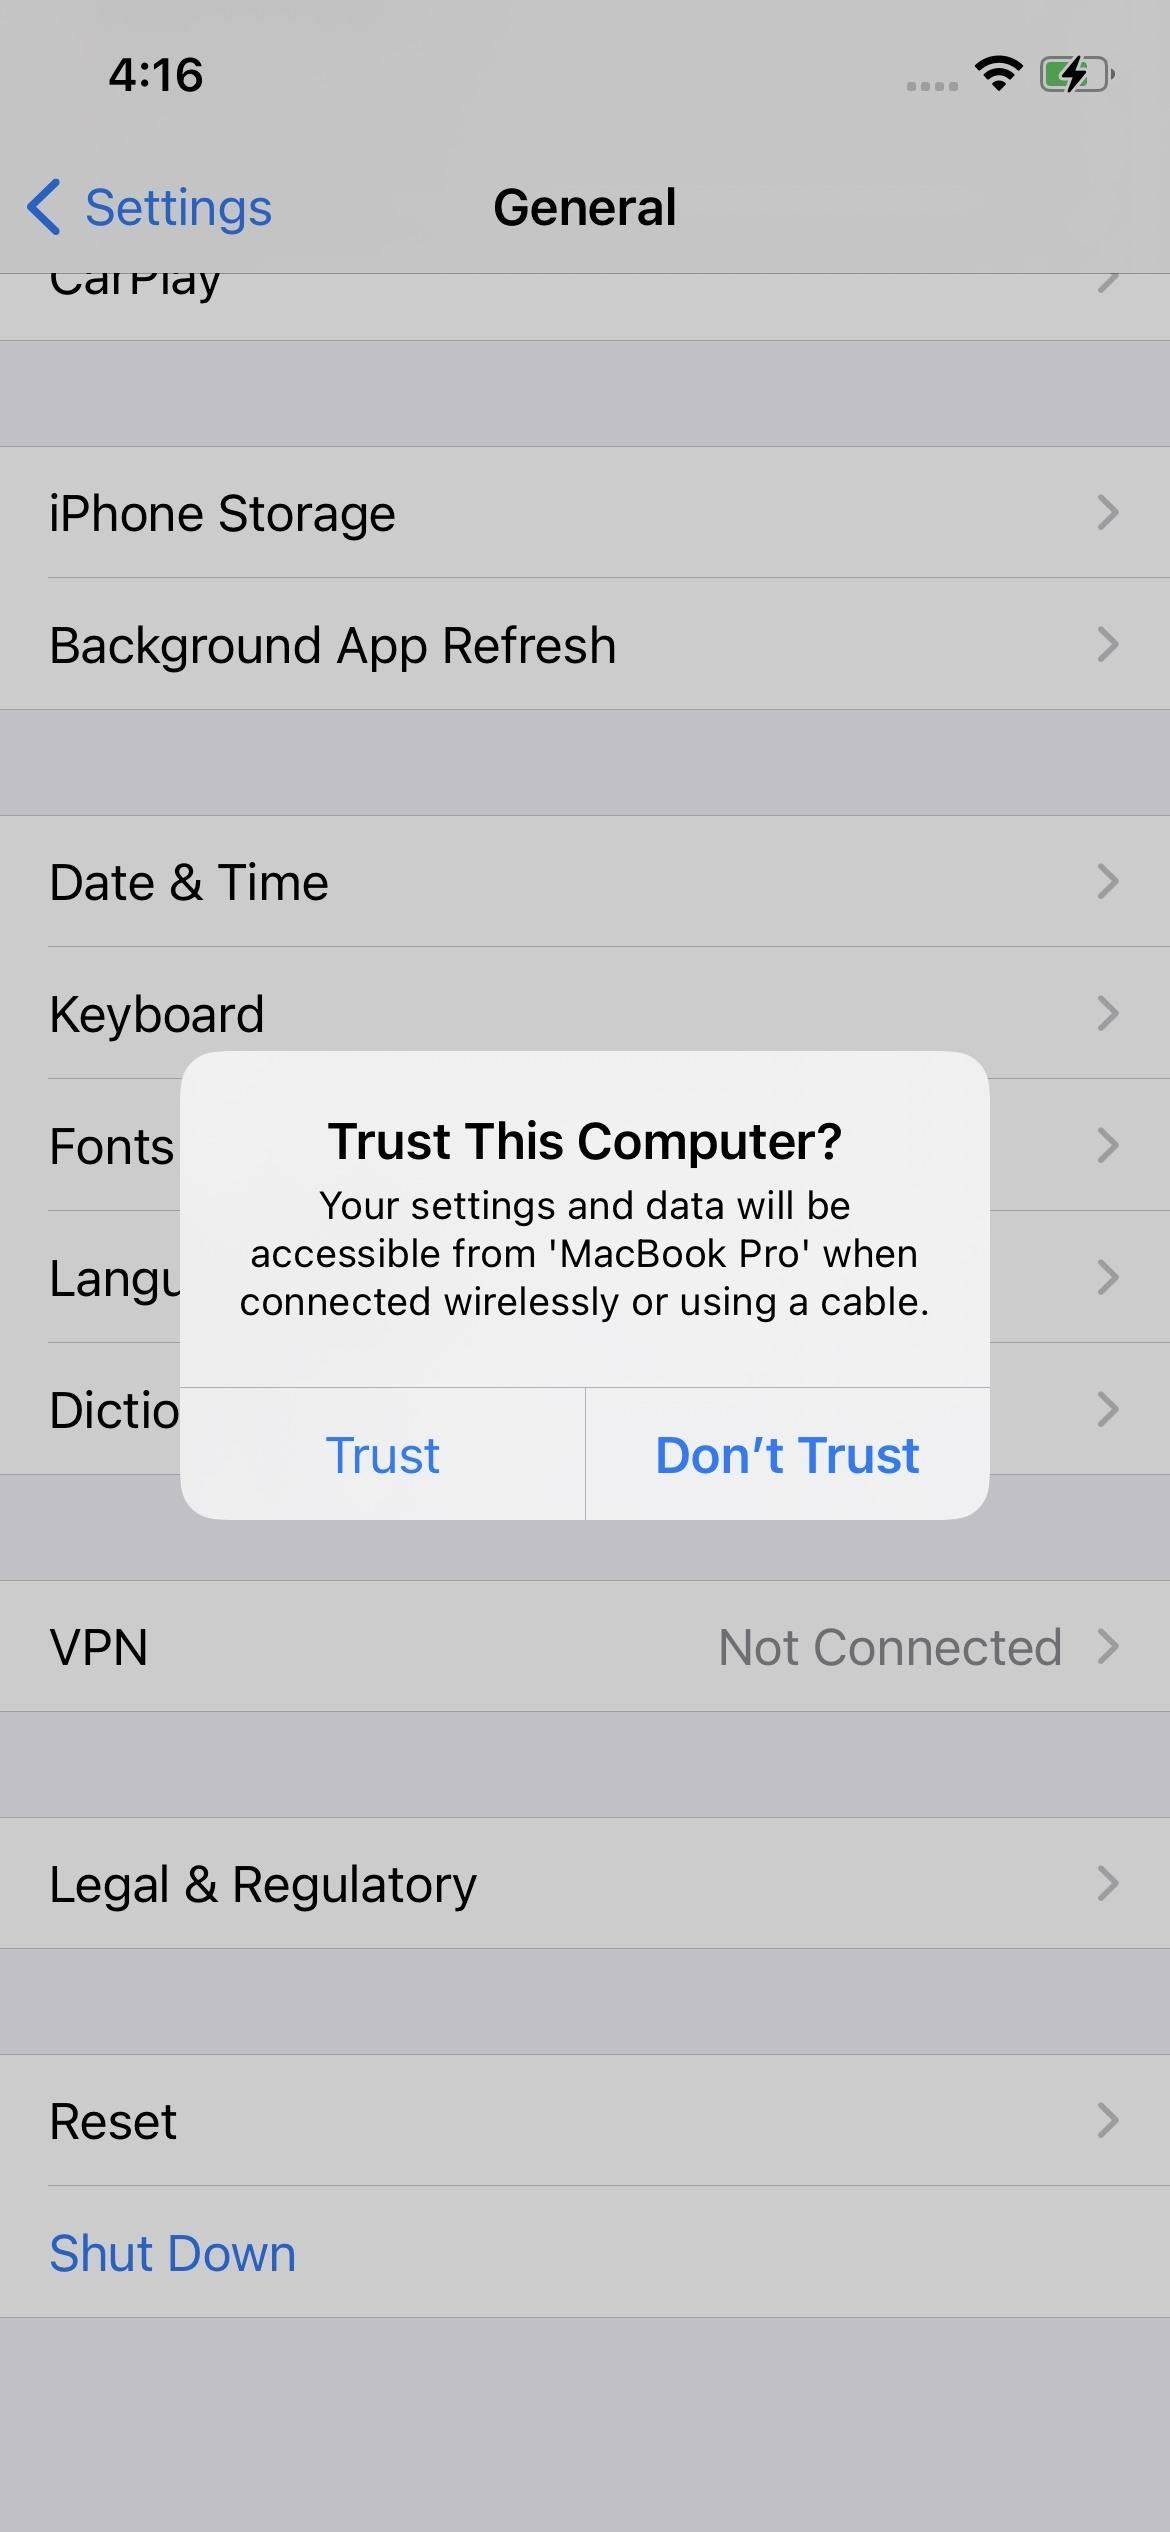
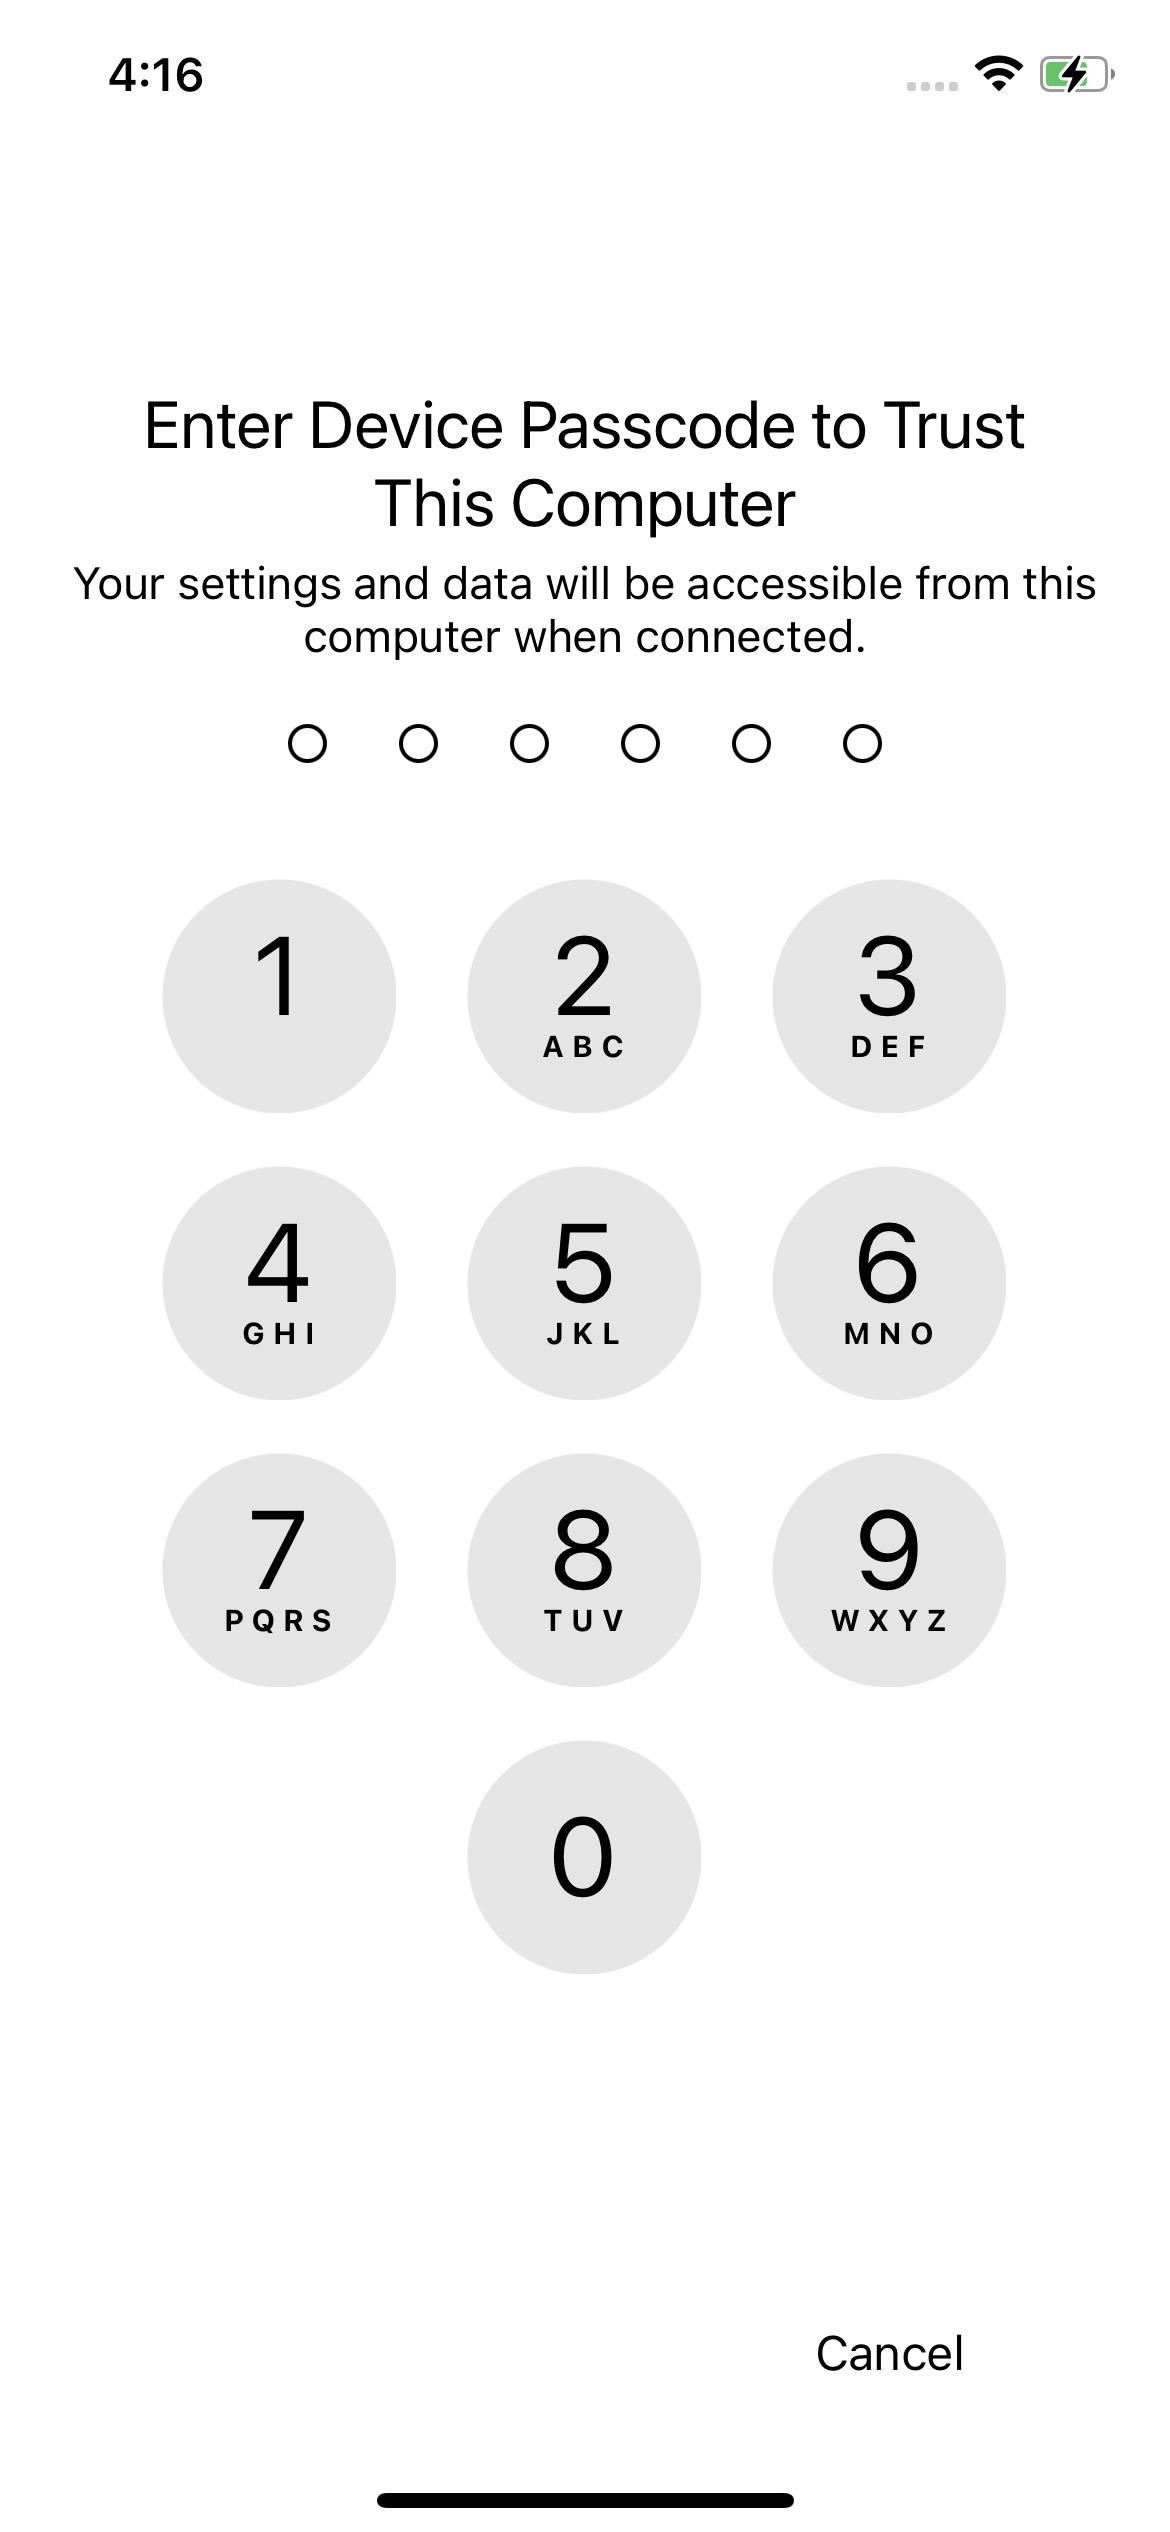
Then, on your iPhone, a prompt will appear on the screen as long as you’re not on the lock screen. On that prompt, tap “Trust,” then enter your iPhone’s passcode to give your computer rights to access your iPhone’s data.
If you’re using a computer that isn’t yours and don’t feel comfortable with it having access to the data on your iPhone 12, you can untrust the computer once you’re done.
Step 5: Boot Your iPhone into DFU Mode
Now comes the fun part. While your iPhone 12, 12 mini, 12 Pro, or 12 Pro Max is connected to your computer with Finder or iTunes open, perform the following button presses on your iPhone.
- Click the Volume Up button.
- Then, quickly click the Volume Down button.
- Then, quickly press-and-hold the Side button.
- When the iPhone’s screen turns black, also press-and-hold the Volume Down button without letting go of the Side button.
- After about 5 seconds, release the Side button but keep holding the Volume Down button.
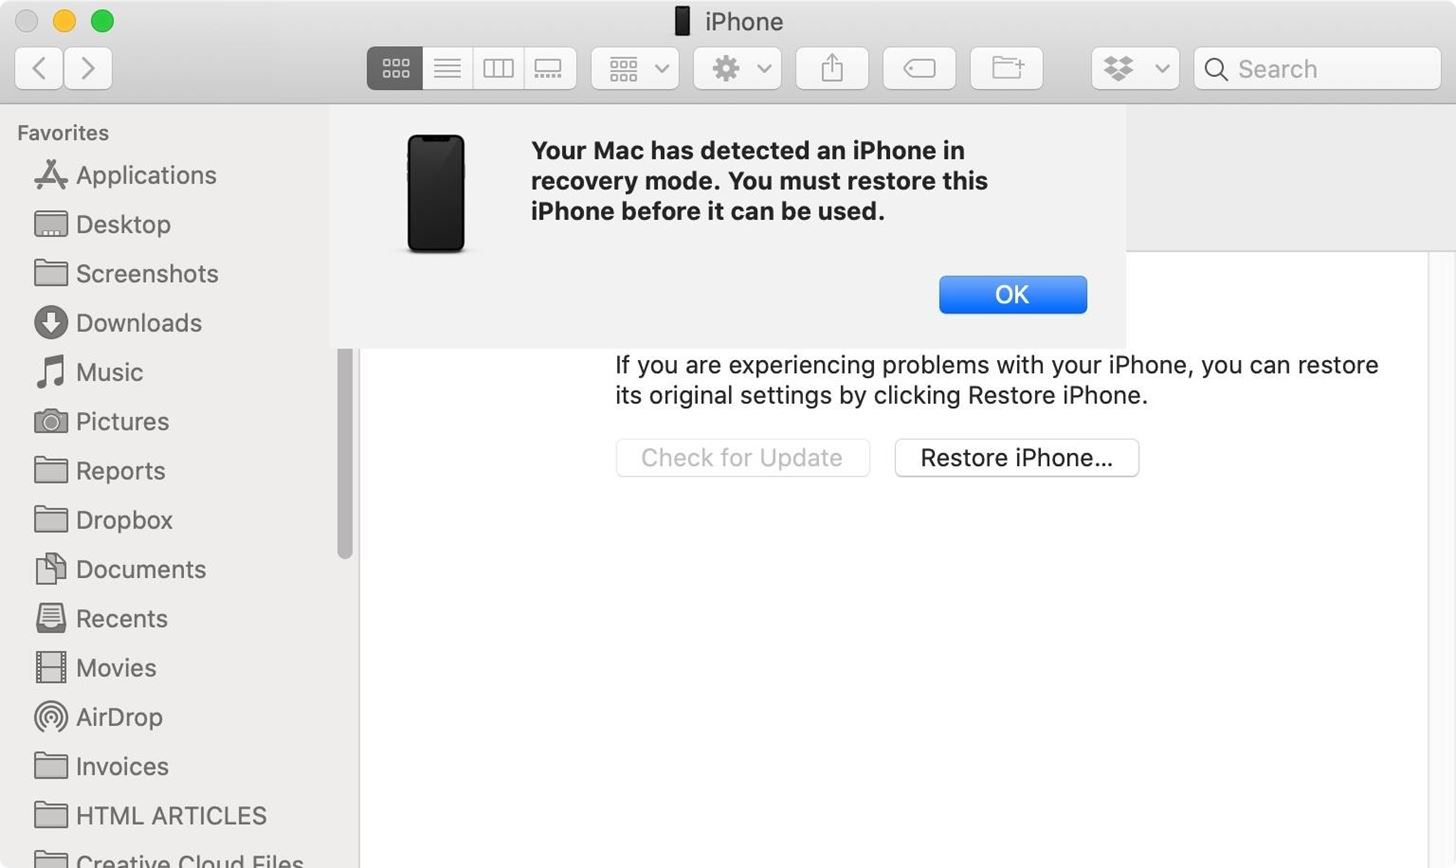
- Let go of Volume Down once you see the “recovery mode” prompt in Finder or iTunes on your computer. Your iPhone’s screen will remain black.
If you perform 1–3 above only, the recovery mode prompt will still open in Finder or iTunes on your computer; only it’s strictly for recovery mode, not DFU mode. Recovery mode communicates with your iPhone’s bootloader (iBoot), while DFU mode talks directly with the bootrom (SecureROM). So whenever recovery mode fails to address your issue, DFU mode can save the day since it’s starting from the hardware side instead of the software side.
Your Mac [or iTunes] has detected an iPhone in recovery mode. You must restore this iPhone before it can be used.
If you see the Apple logo appear on your iPhone’s screen at any time, wait for it to load up iOS 14 on the iPhone, then unlock the device, put your passcode back in, wait for Finder or iTunes to recognize it, then try Step 5 again.
Exiting DFU Mode if You Change Your Mind
For any reason, whenever you want to exit DFU mode without causing any damage to your iPhone 12, 12 mini, 12 Pro, or 12 Pro Max, you can. To get out of DFU mode, perform the following actions on your iPhone.
- Click the Volume Up button.
- Then, quickly click the Volume Down button.
- Then, quickly press-and-hold the Side button for 5 to 10 seconds.
- Release the Side button when you see the Apple logo on the iPhone’s screen.
After a few seconds, you should see your iPhone boot back up to iOS 14, and you’ll need to then enter your passcode just like you would whenever a restart happens.
Step 6: Erase & Restore Your iPhone
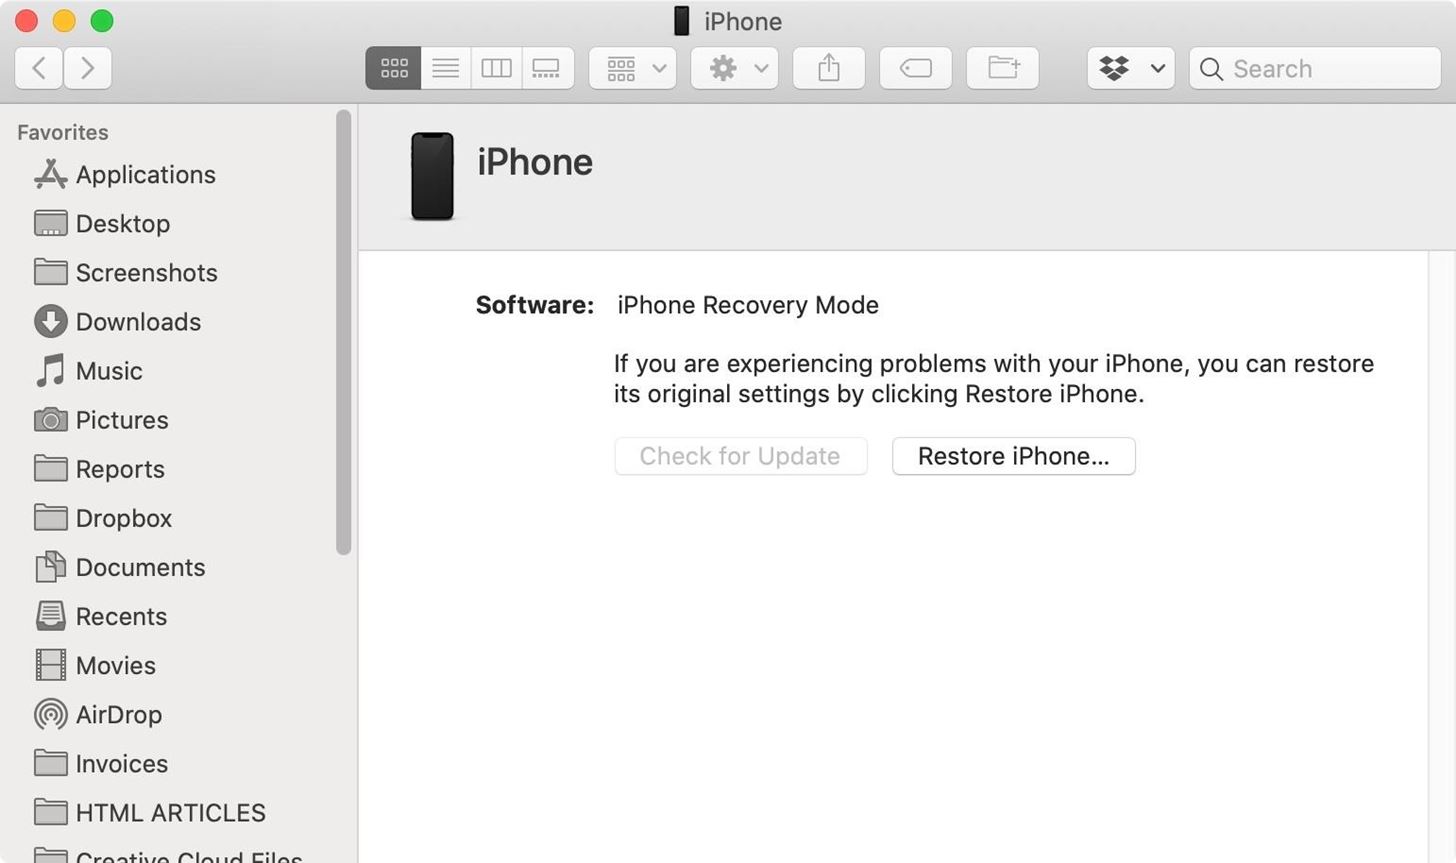
To restore your iPhone 12, 12 mini, 12 Pro, or 12 Pro Max while it’s in DFU mode, click on “Restore iPhone” under iPhone Recovery Mode, which will install the latest iOS 14 software version on the iPhone. It may take several minutes, but your iPhone 12, 12 mini, 12 Pro, or 12 Pro Max should reboot and be ready to go once it’s successfully restored.
Just updated your iPhone? You’ll find new emoji, enhanced security, podcast transcripts, Apple Cash virtual numbers, and other useful features. There are even new additions hidden within Safari. Find out what’s new and changed on your iPhone with the iOS 17.4 update.
“Hey there, just a heads-up: We’re part of the Amazon affiliate program, so when you buy through links on our site, we may earn a small commission. But don’t worry, it doesn’t cost you anything extra and helps us keep the lights on. Thanks for your support!”


