Due to the way Android works, you normally need to be rooted to uninstall the pre-loaded system apps, aka bloatware, that came with your device. This is because the underlying files for these apps are stored on your system partition, which can only be modified with root-level access.
Many system apps, however, can be disabled. For all intents and purposes, this is the same as uninstalling, except the files are left behind in an inert state. But the only trouble here is that manufacturers and carriers like to prevent you from disabling a handful of apps, and up until now, there was nothing you could do about it without being rooted.
But a program for Mac and Windows by developer Gatesjunior will finally allow non-rooted users to disable any app on their Android phone or tablet. It utilizes ADB, so there’s a bit of setup you’ll have to do, but I’ll get into that in more detail below.
Step 1: Knock Out the Prerequisites
For this one to work, you’ll need to enable USB debugging on your Android device, and you’ll also have to install the ADB drivers on your Windows PC (Mac users can skip that part).
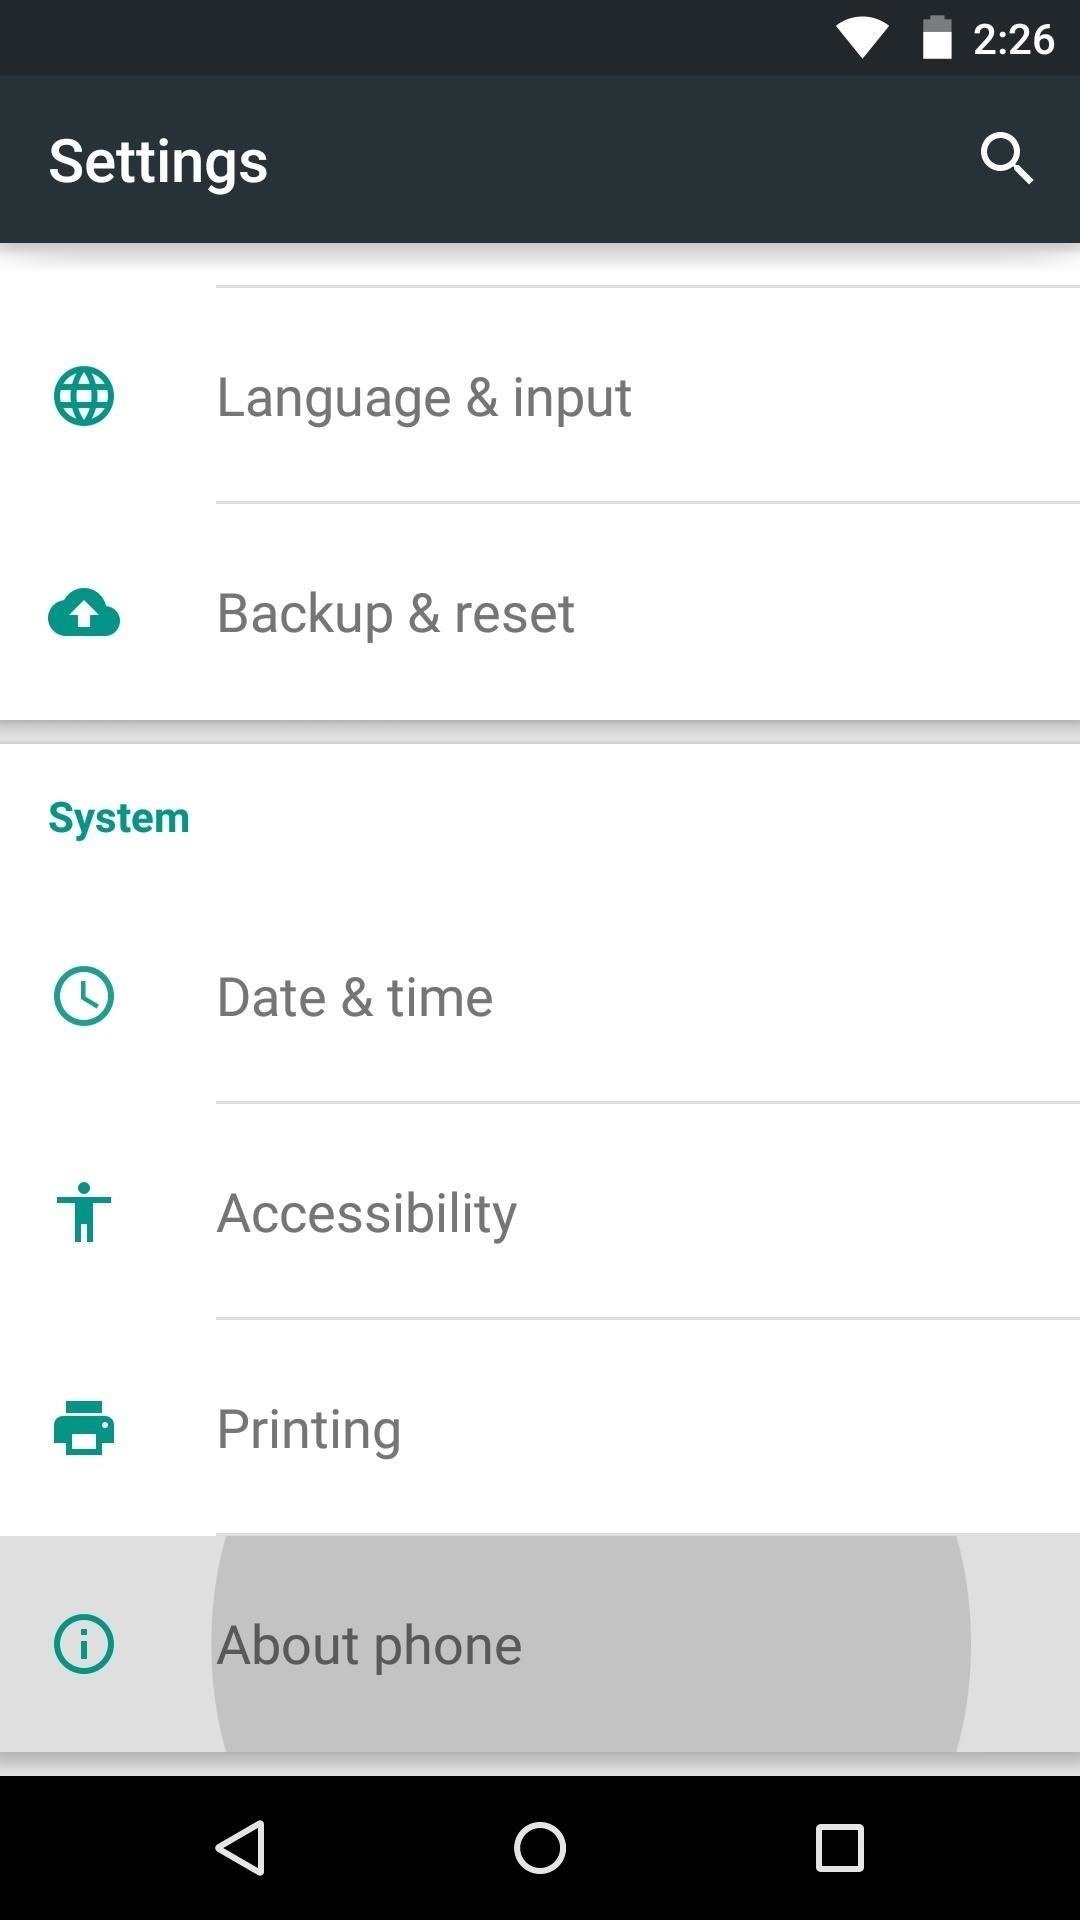
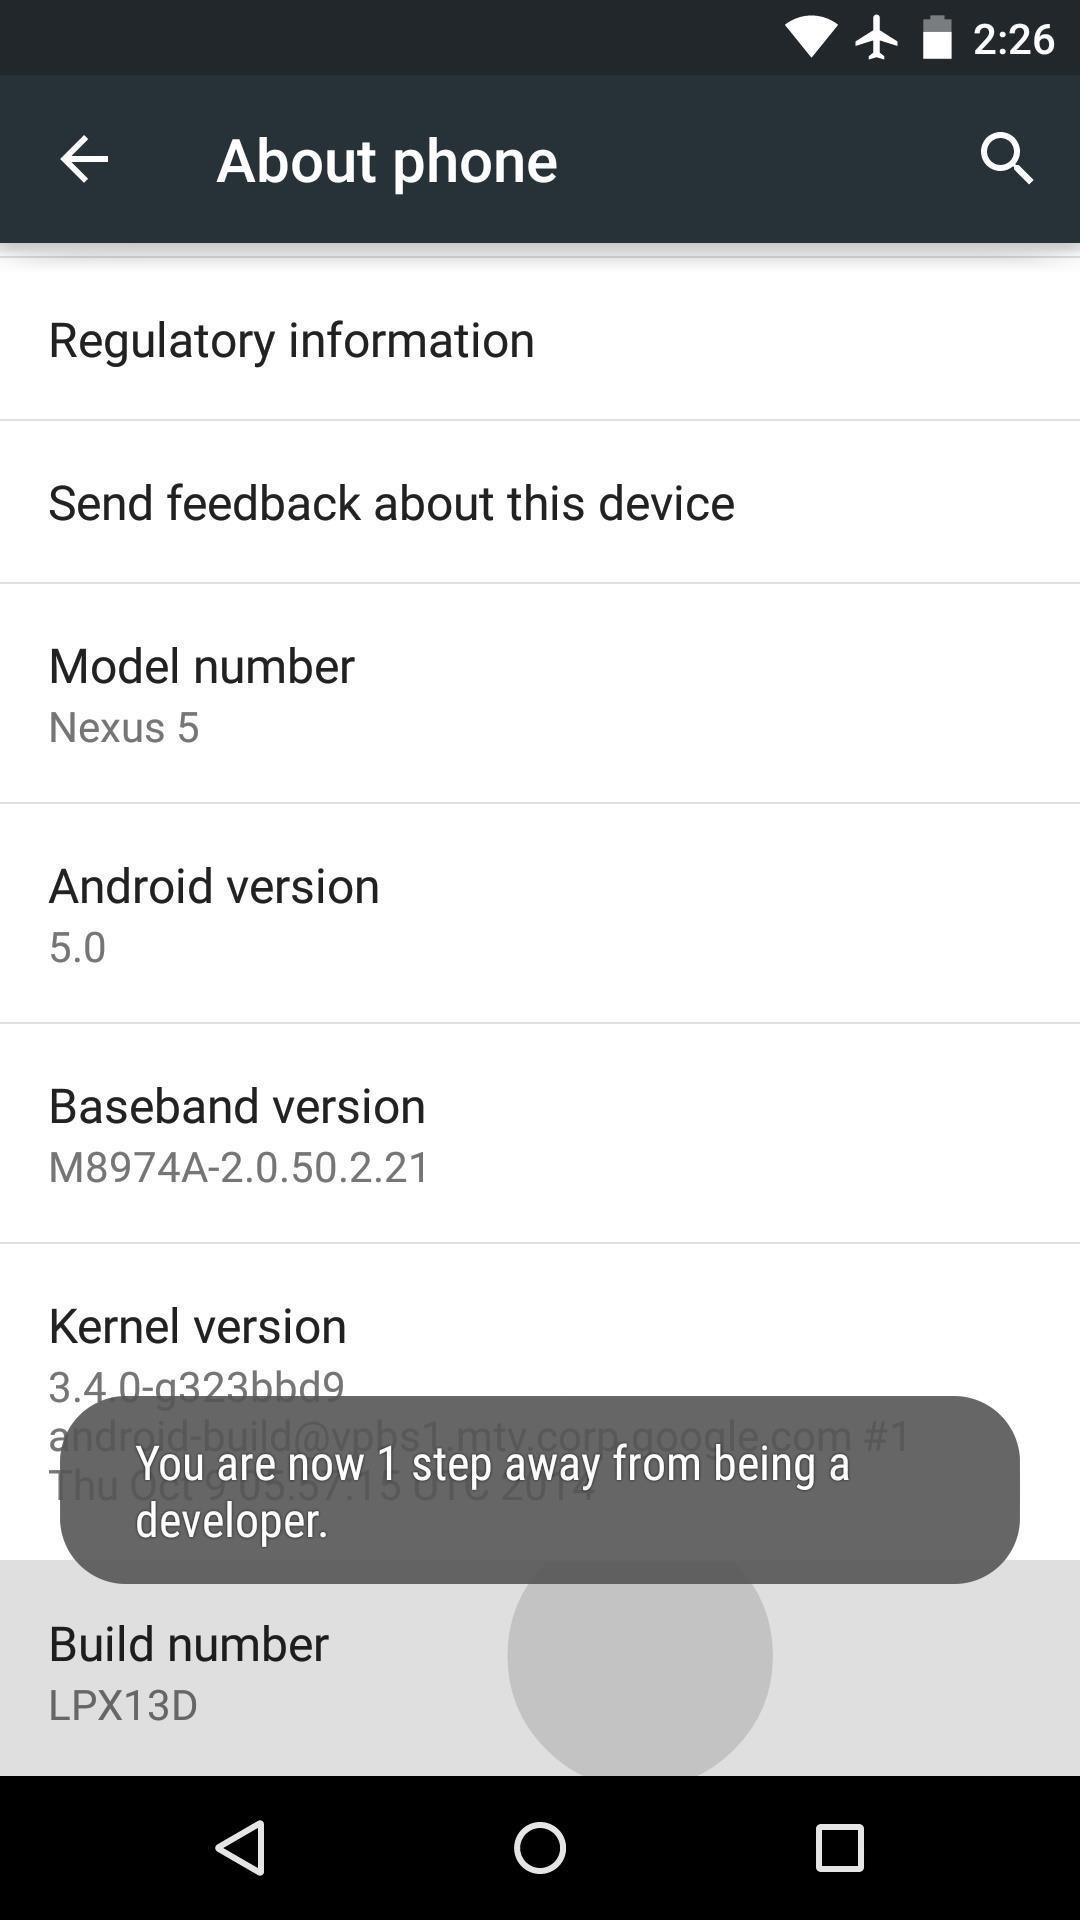
To begin, head to your phone or tablet’s Settings menu, then scroll down and select “About phone.” From here, tap the “Build number” entry 7 times in rapid succession to enable the hidden Developer Options menu.
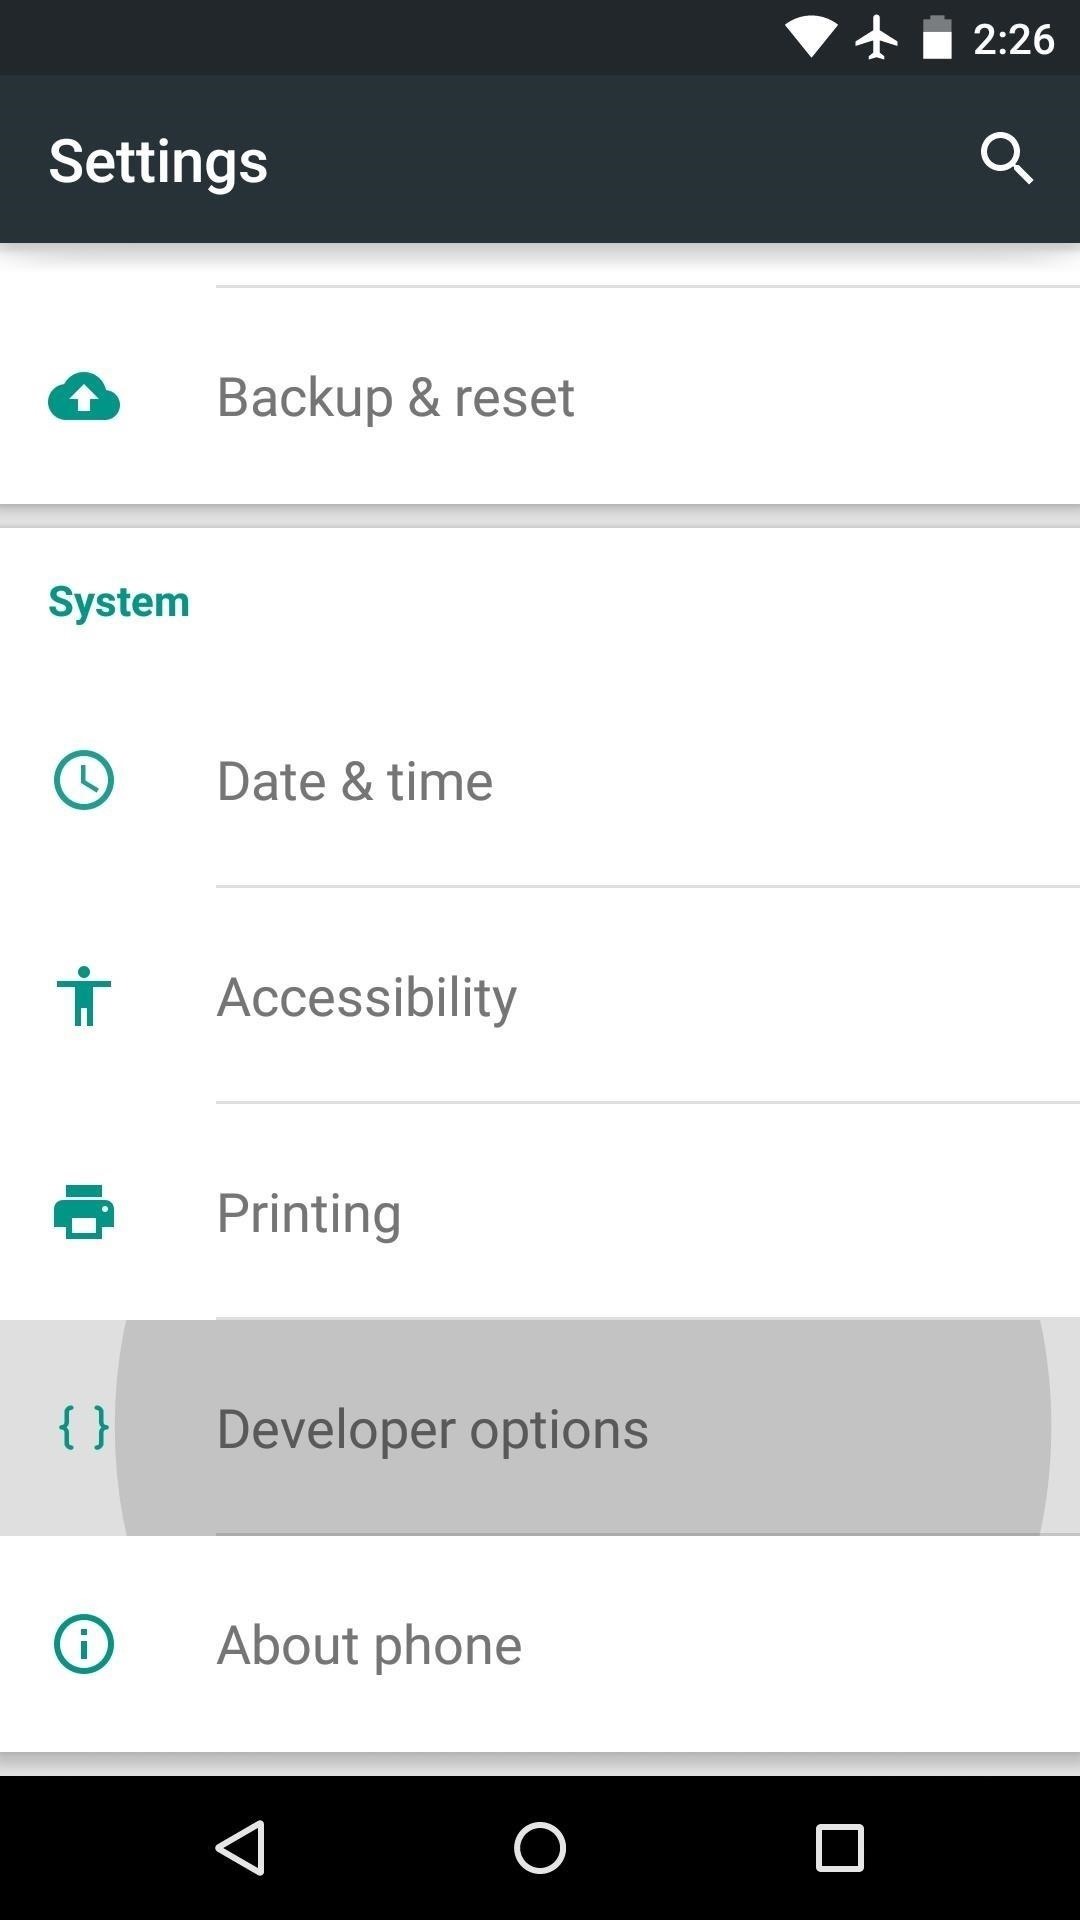
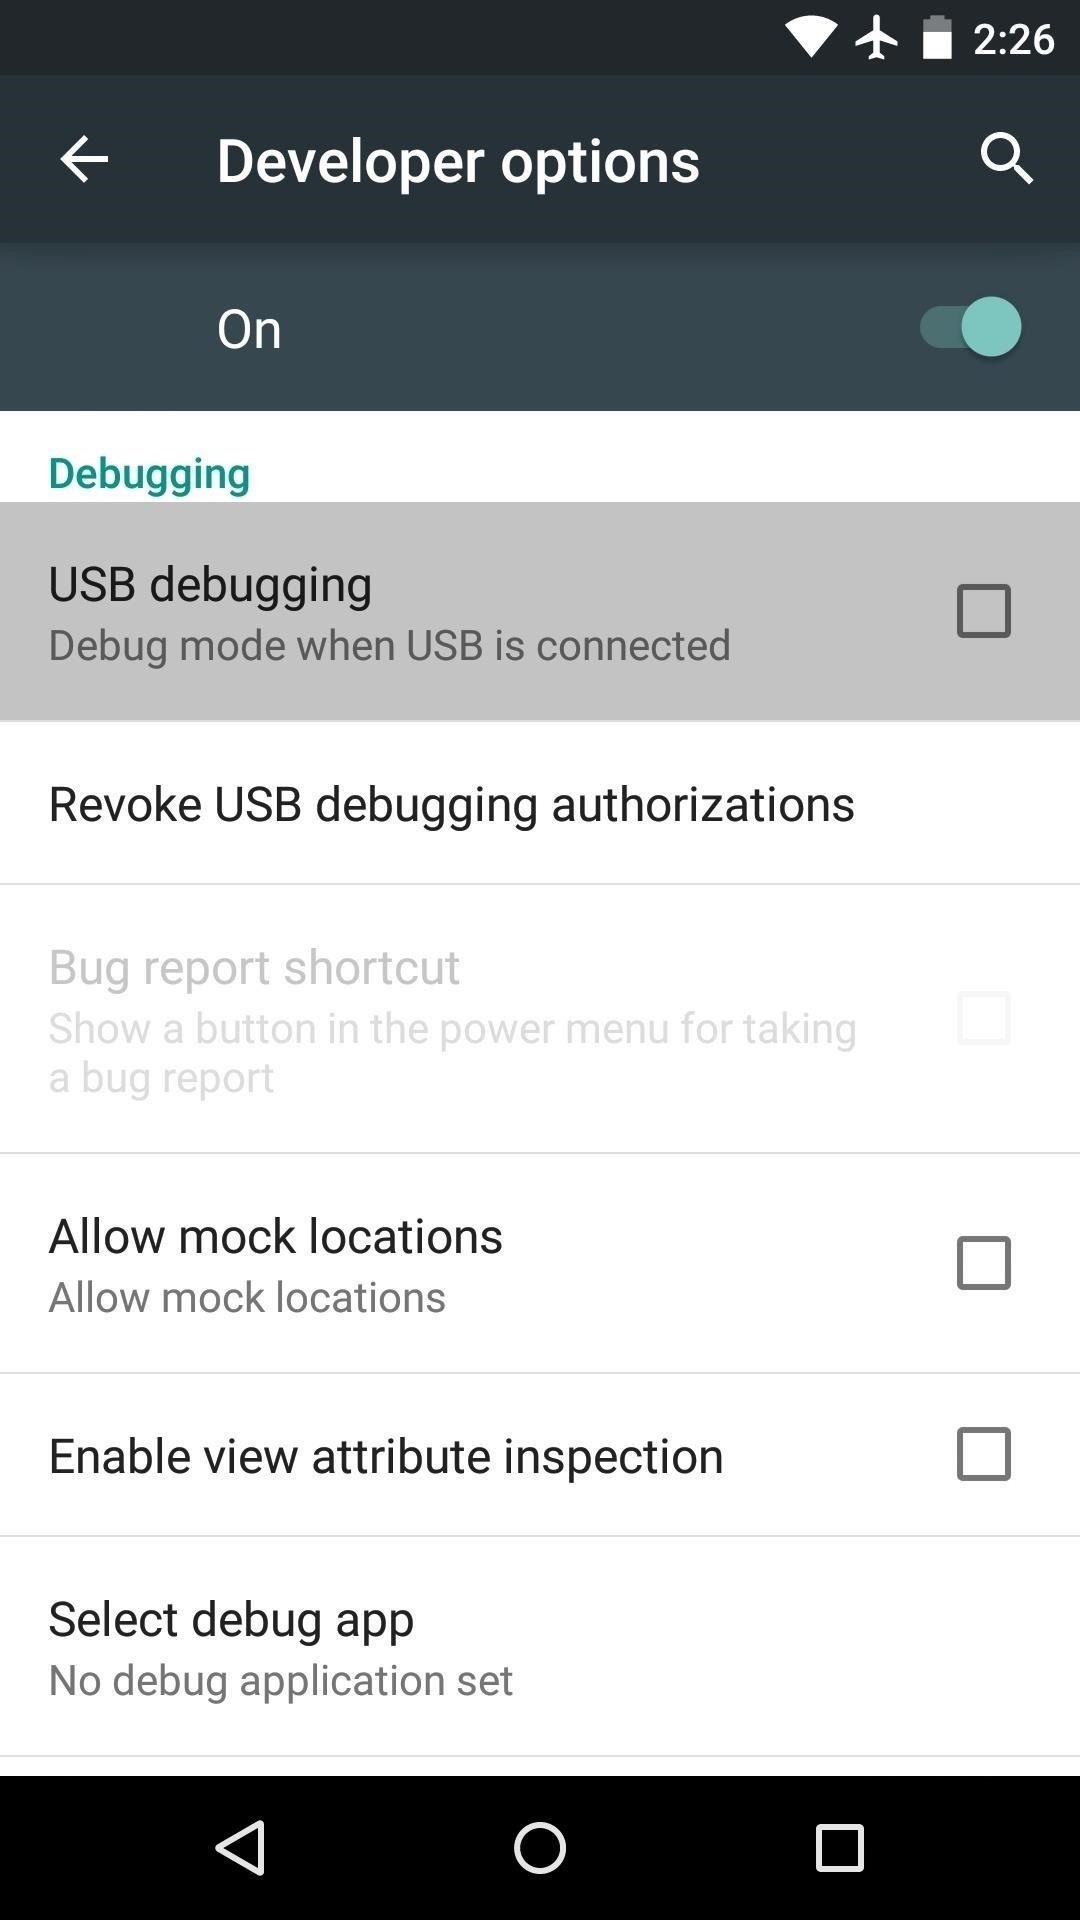
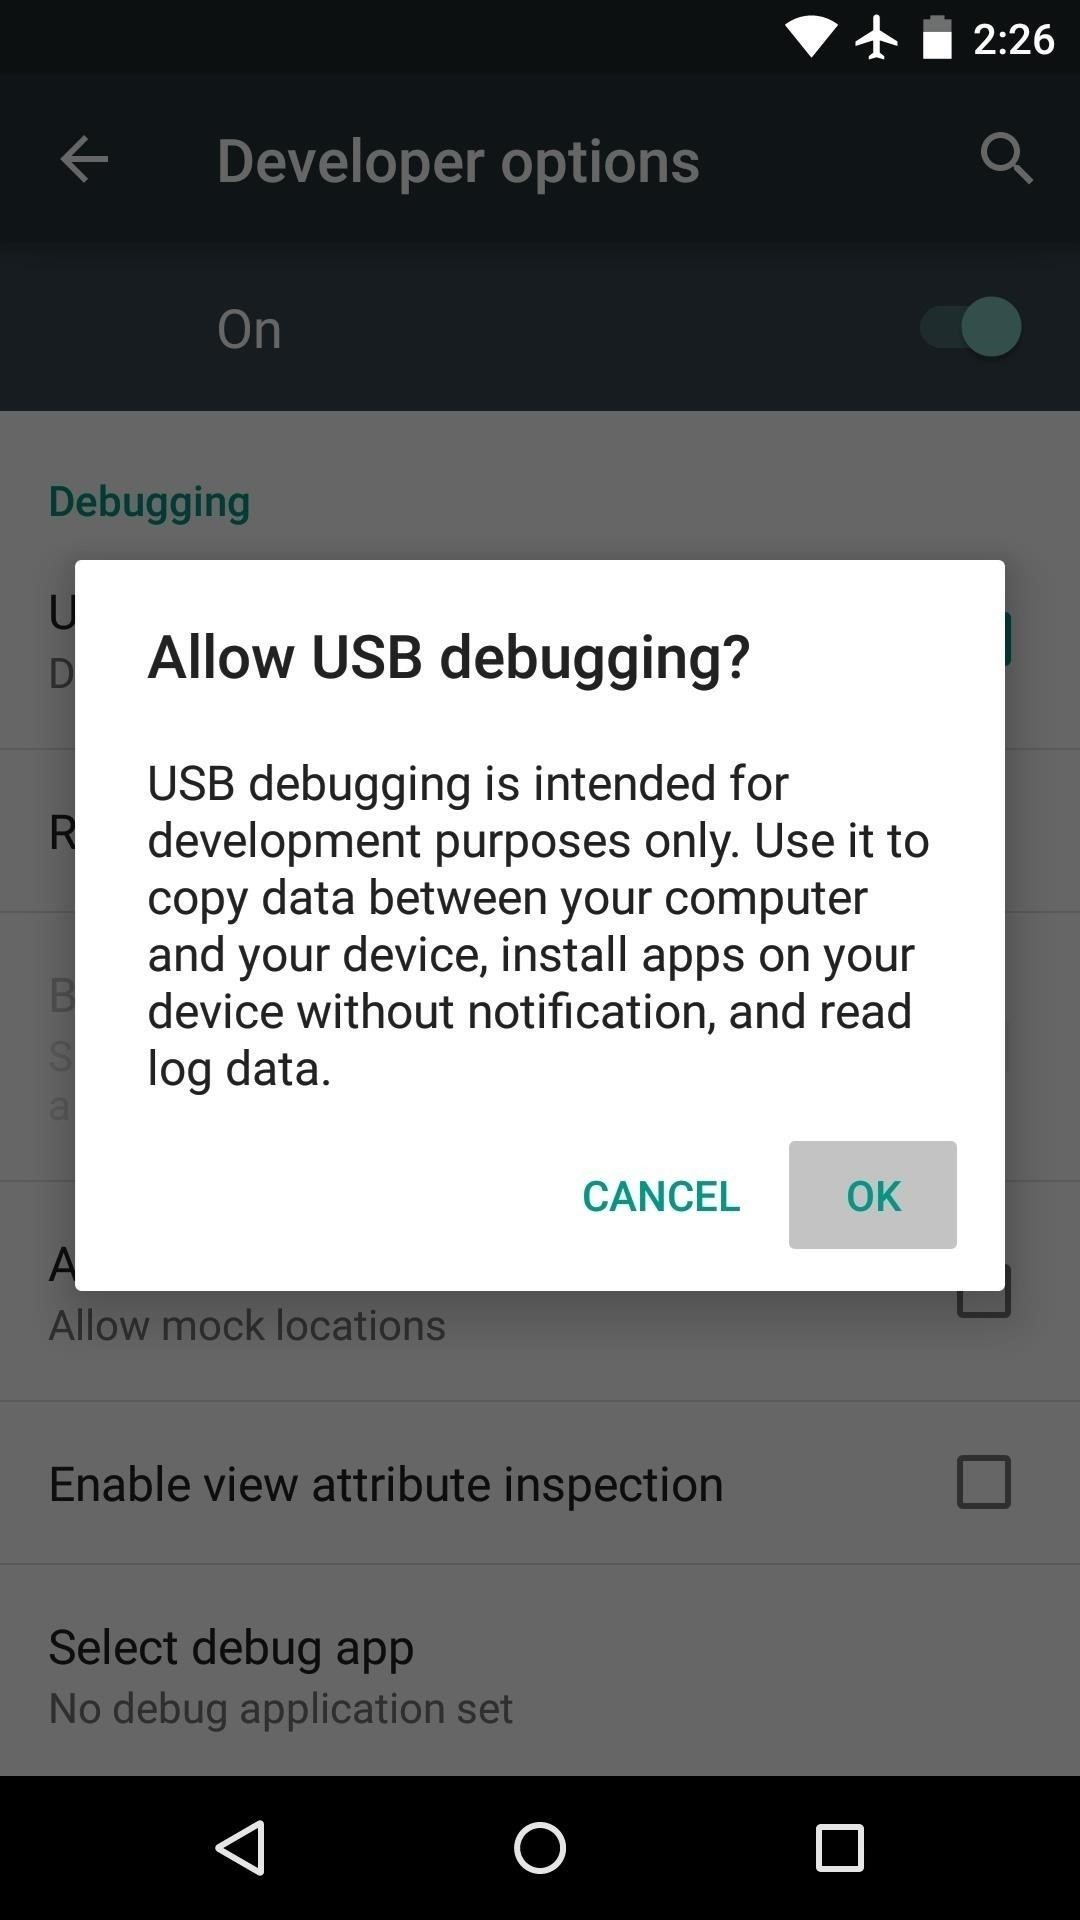
Next, back out one level, then head to the newly-unlocked Developer Options menu. From here, toggle the switch next to the “USB debugging” option, then press “OK” on the popup.
Next up, if you’re using a Windows PC, click this link to grab a copy of Koush’s Universal ADB Drivers. After that, simply launch the file and follow the prompts to get the drivers installed on your system.
Step 2: Install Debloater
With the prerequisites out of the way, download Gatesjunior’s Debloater program for your particular operating system:
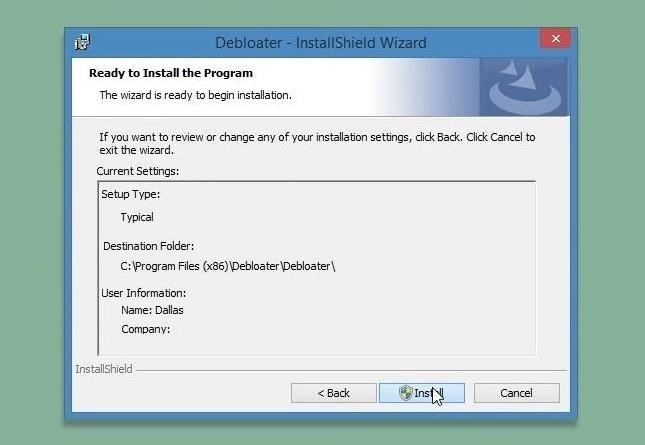
Once you’ve done that, just launch the installer file, then follow the prompts to get Debloater installed on your computer.
Step 3: Disable Any App on Your Android Device
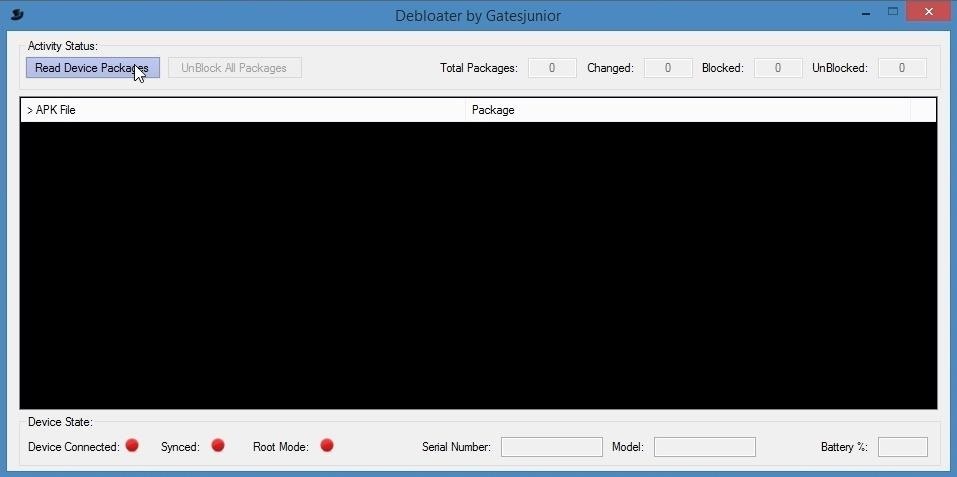
With Debloater installed on your PC, go ahead launch the program, then connect your Android device to your computer with a USB data cable. From here, click the “Read Device Packages” button in the top-left corner to begin.
Note that you may need to allow your computer to access your phone if this is the first time you’ve allowed USB debugging—this is done through a pop-up prompt on your phone.
At this point, Debloater will issue a disclaimer which lets you know that disabling certain apps can cause issues with your Android device. As this varies from device to device, there’s no set list of which apps you can and can’t disable, so you’ll have to use a little discretion. As a general rule of thumb, I’d say if an app is not in your app drawer, it would be best to leave it alone.
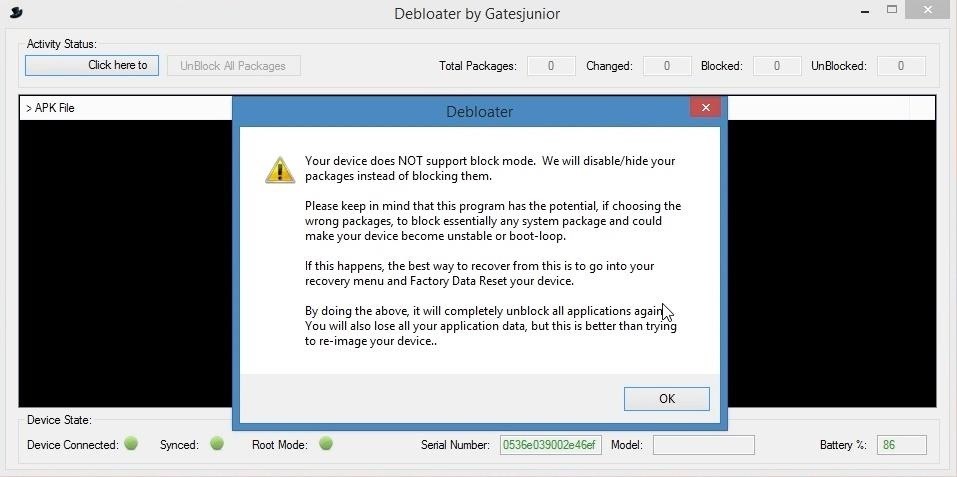
After clicking “OK” on the disclaimer, go ahead and click the “Read Device Packages” button in the top-left corner again.
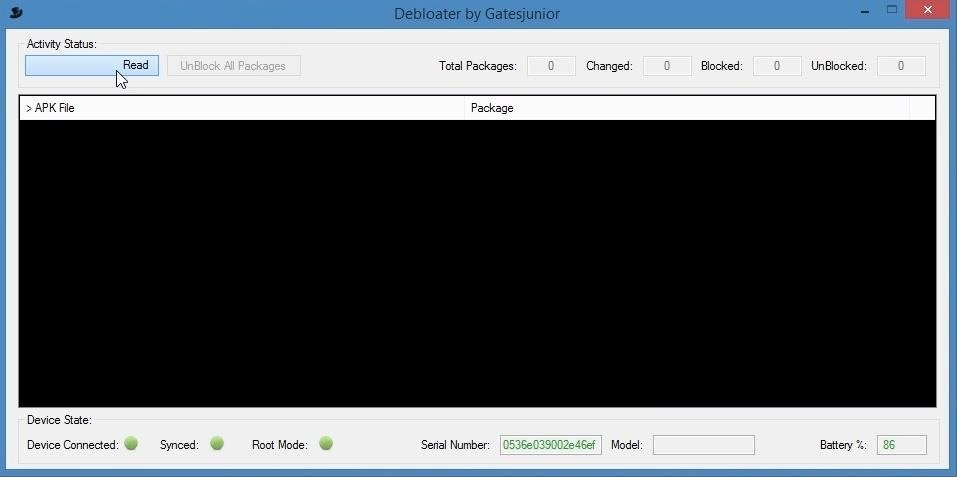
This will populate a list of all the apps that are installed on your phone or tablet. Note that some of these apps don’t have a common name, but you can generally tell which apps are which by reading the package name in the right column.
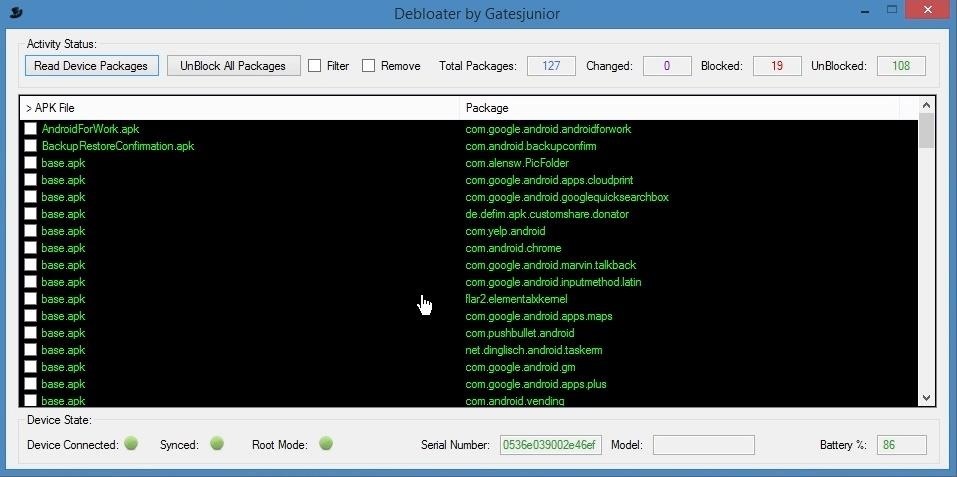
To disable an app, simply check the box next to its entry. You can select multiple apps here, so choose any that you would like to disable, then click the “Apply” button in the top-left corner.
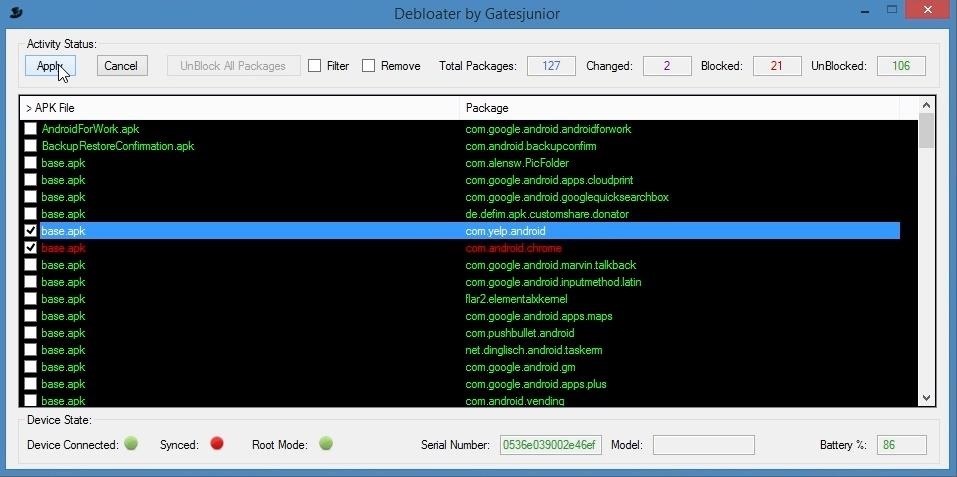
At this point, Debloater will work its magic, and the apps you selected will be disabled. If you look at your phone now, you’ll notice that all traces of the apps are gone.
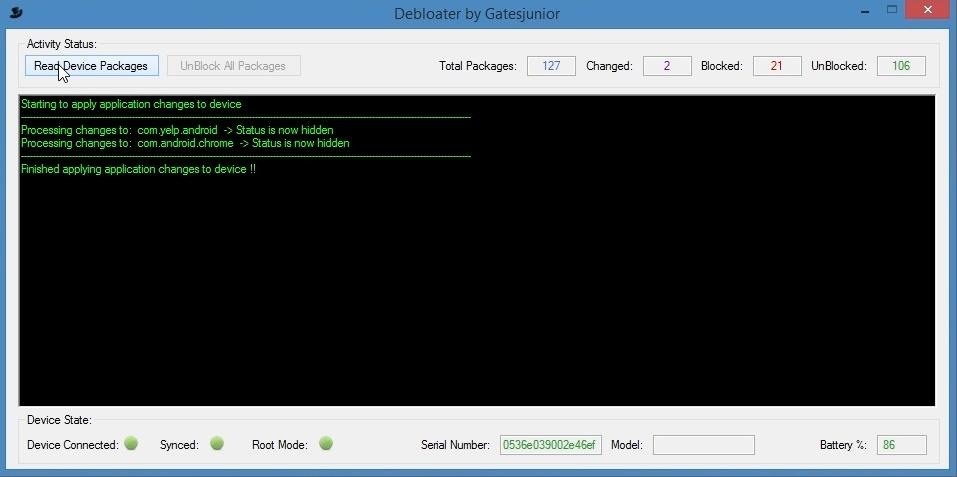
Step 4: Re-Enable Apps That You’ve Disabled (Optional)
Should you decide that you’d like to re-enable an app that you’ve disabled using Debloater, it’s a really simple process. Just hook your phone back up to your PC, then click the “Read Device Packages” button again.
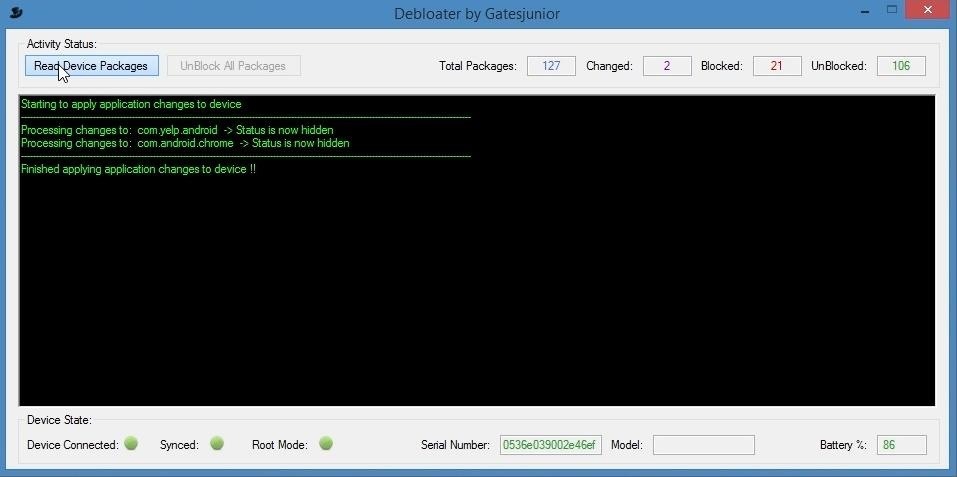
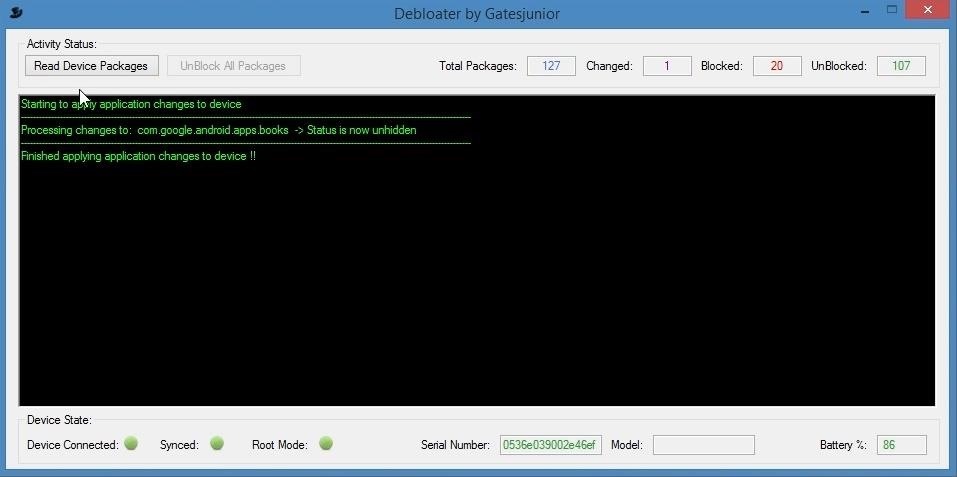
From here, simply uncheck the box next to any disabled app that you’d like to re-enable, then click the “Apply” button at the top of the screen.

Debloater will execute the commands, and you’ll immediately be able to use the selected apps again.
Which apps have you disabled using Debloater? Let us know in the comment section below.
Hot Deal: Set up a secure second phone number and keep your real contact details hidden with a yearly subscription to Hushed Private Phone Line for Android/iOS, 83%–91% off. It’s a perfect second-line solution for making calls and sending texts related to work, dating, Craigslist sales, and other scenarios where you wouldn’t want to give out your primary phone number.
“Hey there, just a heads-up: We’re part of the Amazon affiliate program, so when you buy through links on our site, we may earn a small commission. But don’t worry, it doesn’t cost you anything extra and helps us keep the lights on. Thanks for your support!”


