Google Docs is made for teamwork and collaboration, but Apple’s iWork suite also comes with the same functionality. If you’re working on a Pages document on your iPhone, and you want input from other members of your team, you can easily invite them to view, comment, edit, and more right alongside you.
In typical Apple fashion, it isn’t difficult to start inviting other Pages users to join your document. In fact, it doesn’t matter which Apple device or platform your colleagues or friends happen to be using. Whether they’re working from an iPhone, iPad, or Mac, you all can work, share, and collaborate freely.
- Don’t Miss: How to Open & Edit Word Documents in Pages on Your iPhone
Step 1: Open the Collaborate Menu
After opening Pages, there are a few different ways to start the process of inviting other Pages users to collaborate on your report, letter, book, flyer, poster, card, envelope, business card, certificate, or another word document. Plus, all of the options work if opening or accessing the file from the Files app instead. (Note: we are only discussing the iOS side of things here, though macOS may be very similar.)
Option 1: From the Pages Document
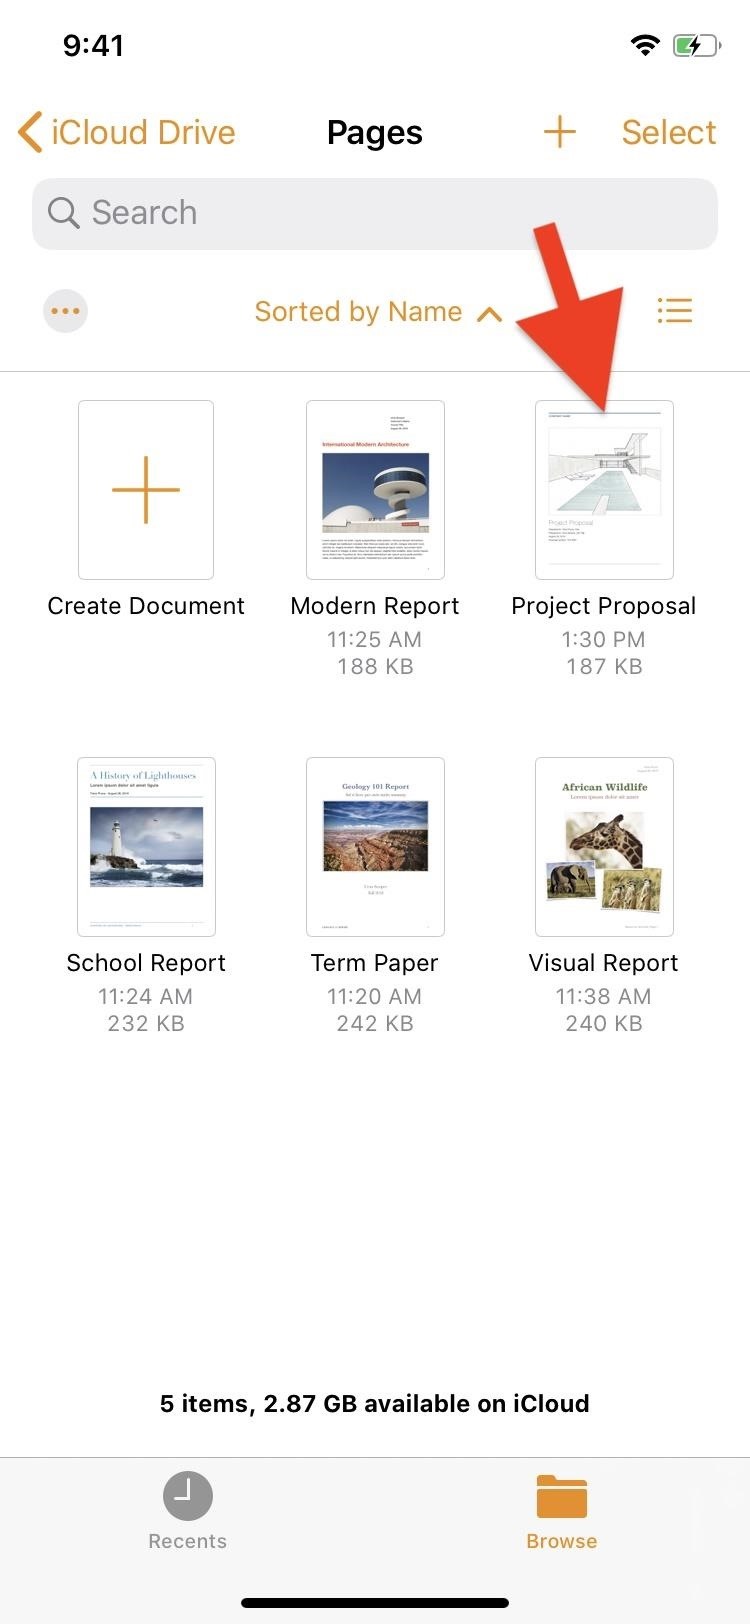
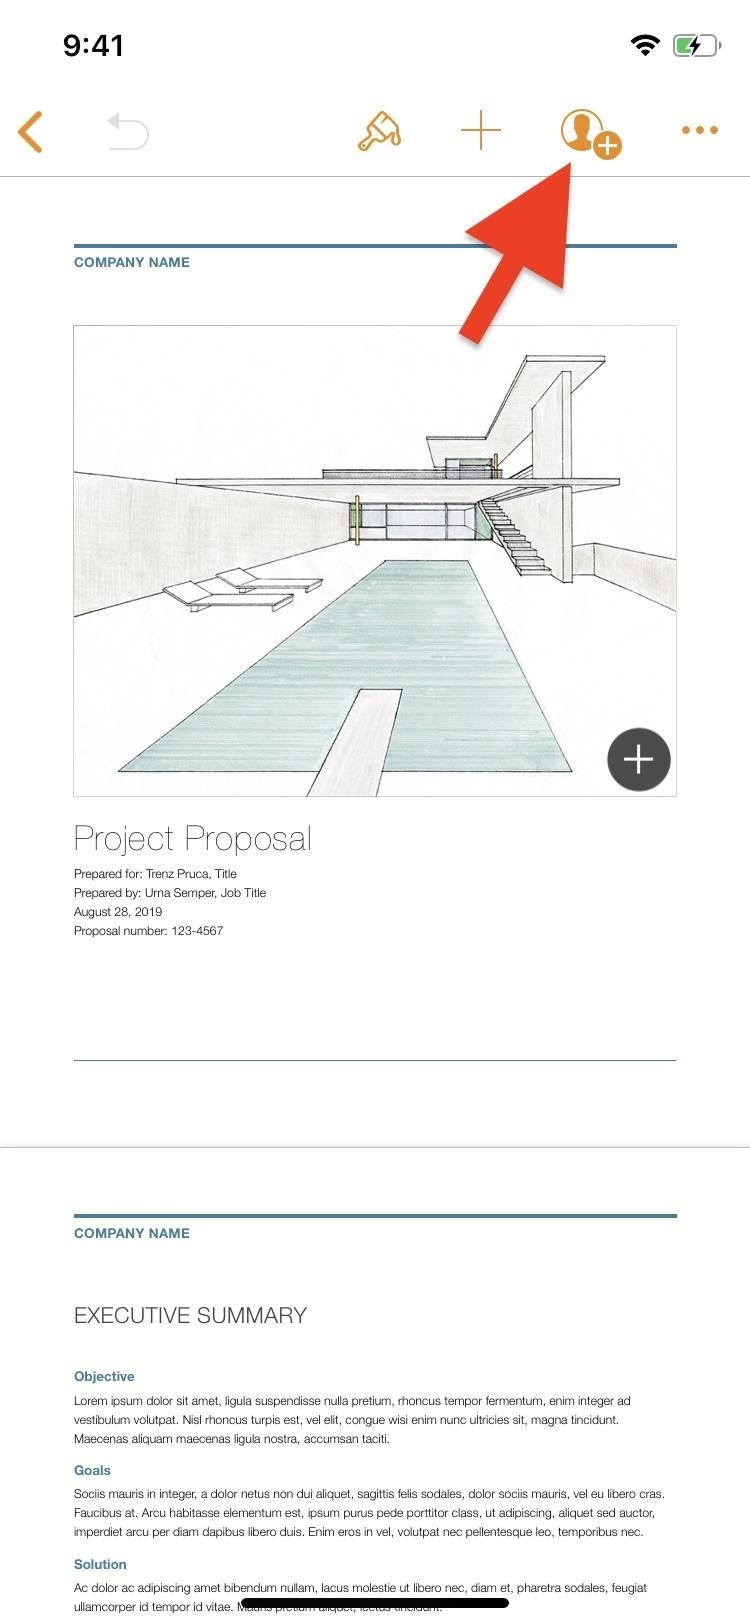
Find and open your document from the Recents or Browse tabs. Next, up top, tap the collaborate icon (a profile icon with a plus (+) sign).
Option 2: From the Recents or Browse Menu
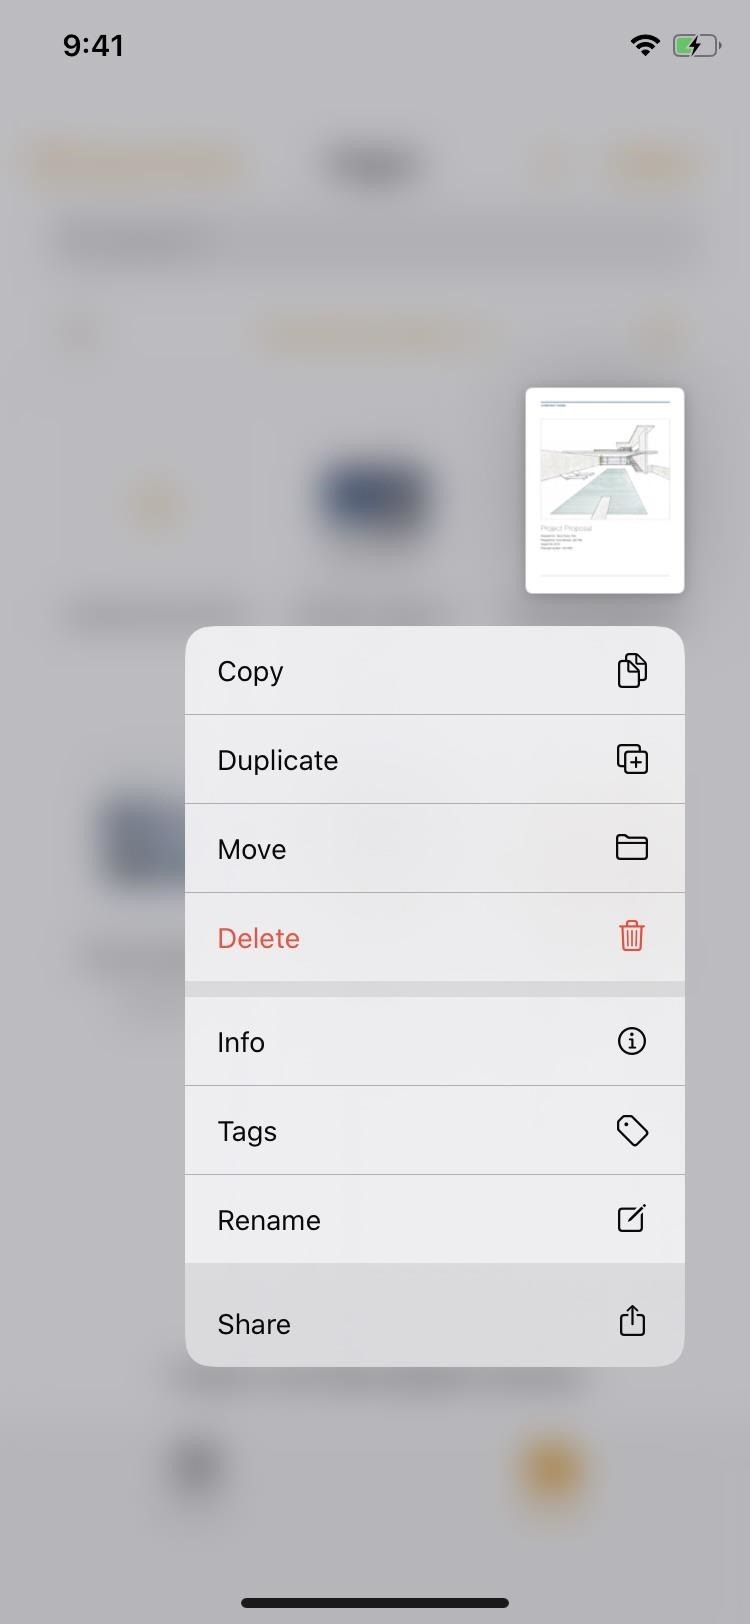
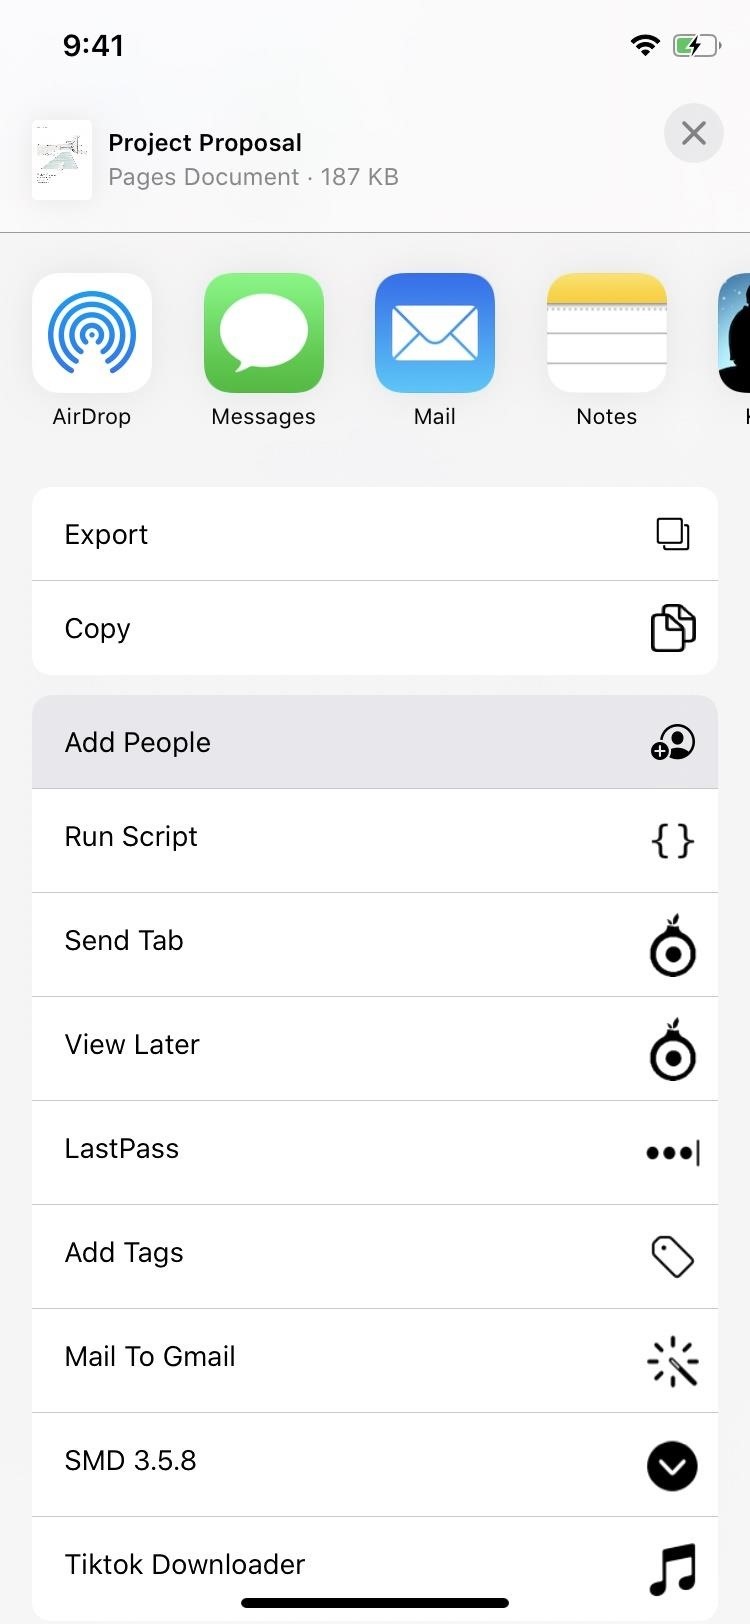
Find your document from the Recents or Browse tabs, then long-press on it to bring up the contextual menu. On iOS 12 and under, the list is black and horizontal, while on iOS 13, it’s more of a platinum or light gray color and vertical. Next, tap “Share,” then hit “Add People” from the options.
Option 3: From the Browse Menu Only
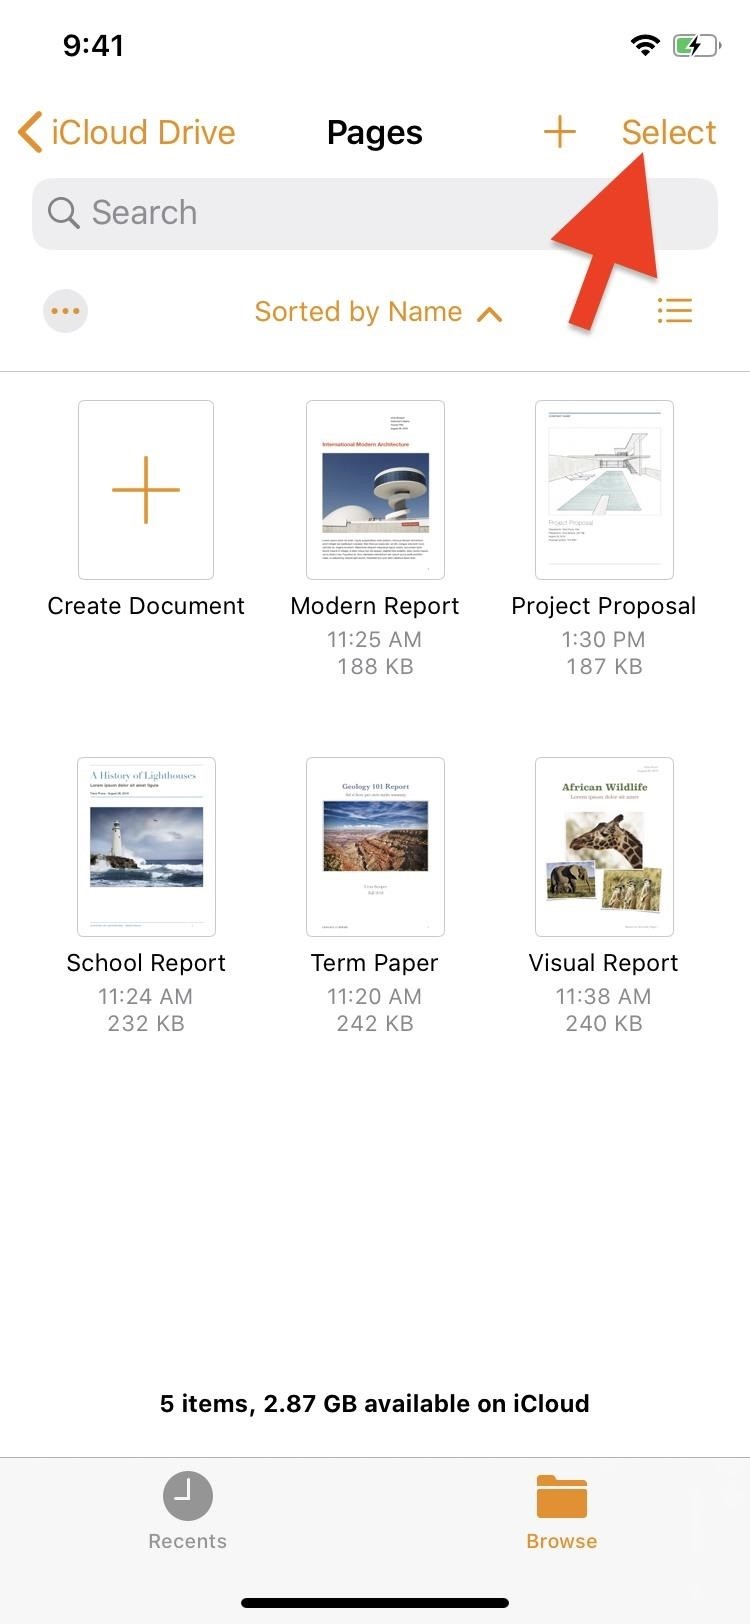
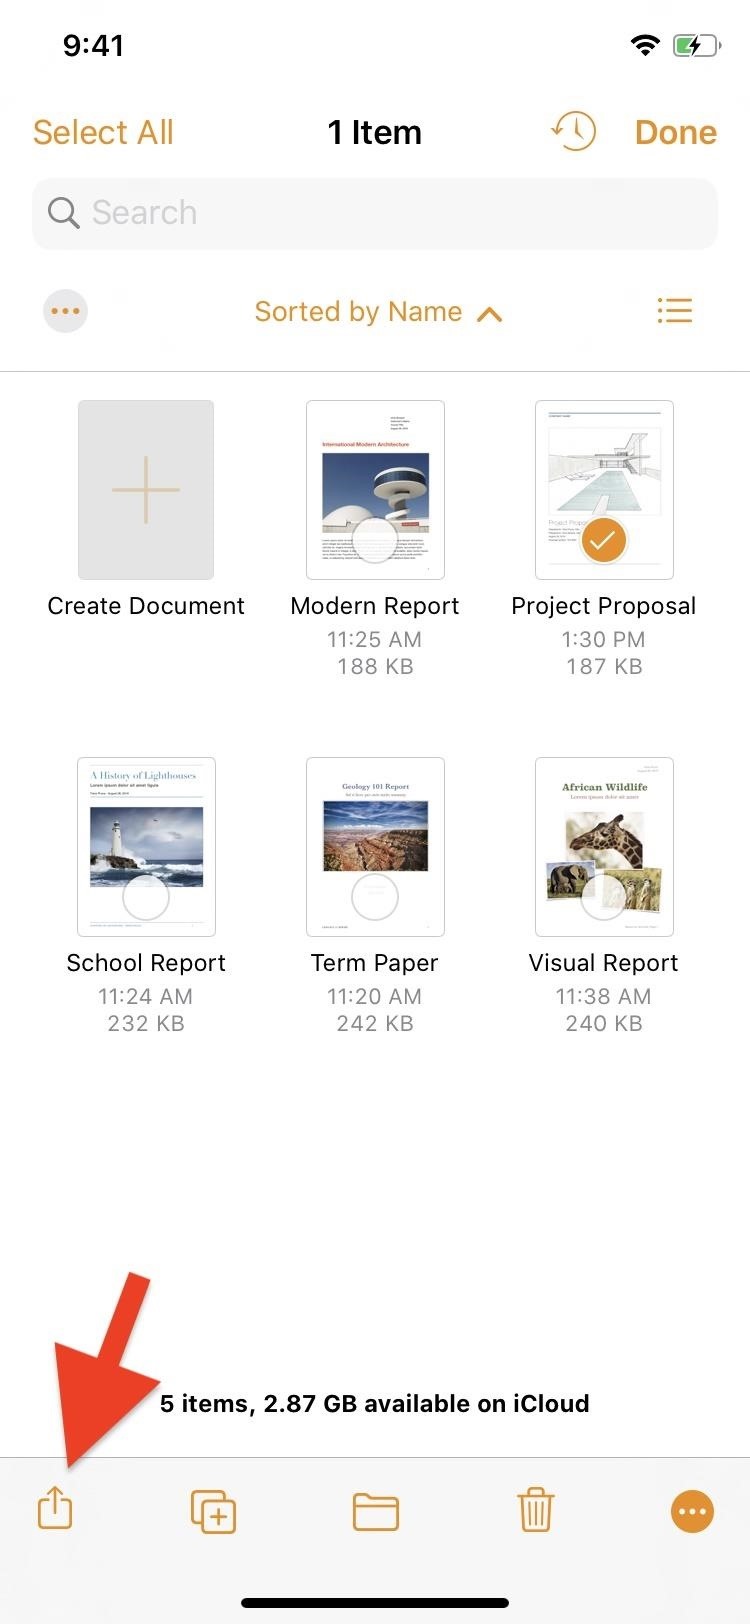
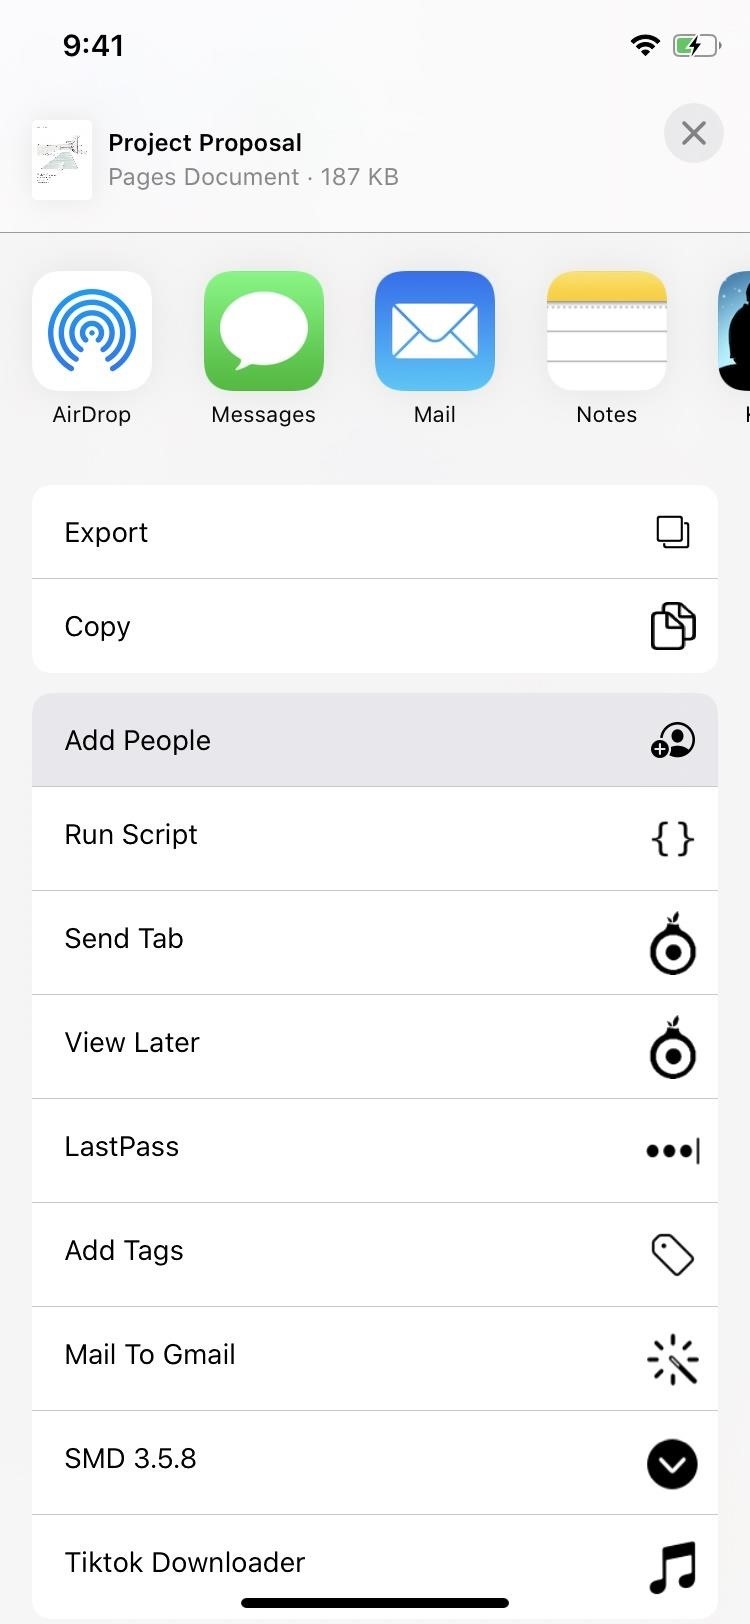
Find your document from the Browse tab, then tap “Select” up top. Next, tap the file you want to share. Then, tap the Share button, followed by the “Add People” action.
Move Your Document to iCloud (If Necessary)
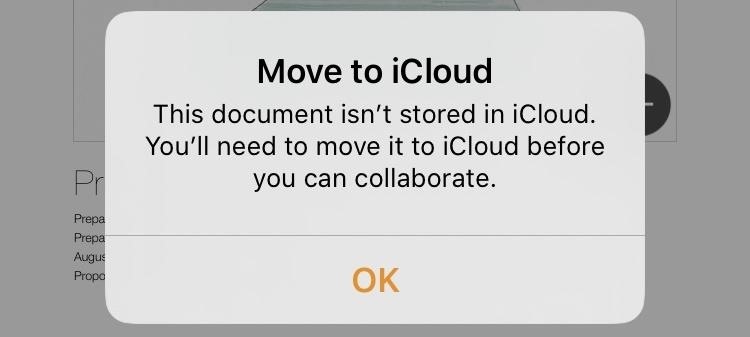
If you don’t see the “Add People” option or you get a “Move to iCloud” warning when tapping the collaborate button inside of the document, your file is located in the “On My iPhone” folder or another location outside of iCloud Drive.
To move a file from the Recents or Browse tabs in the document manager, long-press the file to bring up the contextual menu. Again, on iOS 12 and under, the list is black, and on iOS 13, it’s more of a light gray.
From the menu, tap “Move,” then place it anywhere you want inside iCloud Drive. Inside of the “Pages” folder is a good place if you’d like to keep your Pages docs in one place. Next, tap “Copy,” and Apple will move a copy of the document over to iCloud Drive, ready for collaboration. If you don’t see iCloud Drive as an option, you need to enable it (see below).

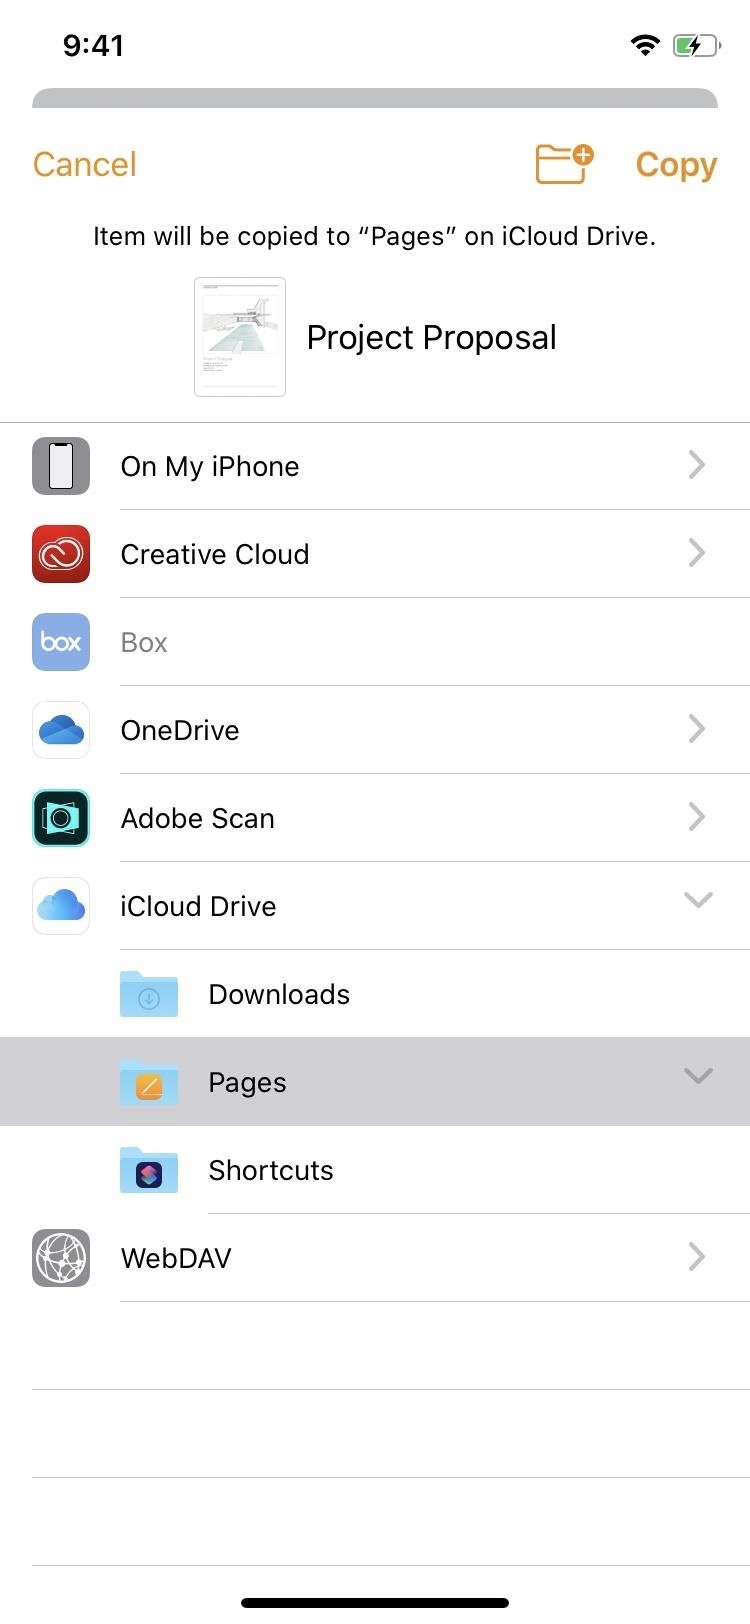
After “moving” the file, the original document is still located outside of iCloud Drive, but you can delete that since you likely won’t need it anymore.
Activate iCloud Drive for Pages (If Necessary)
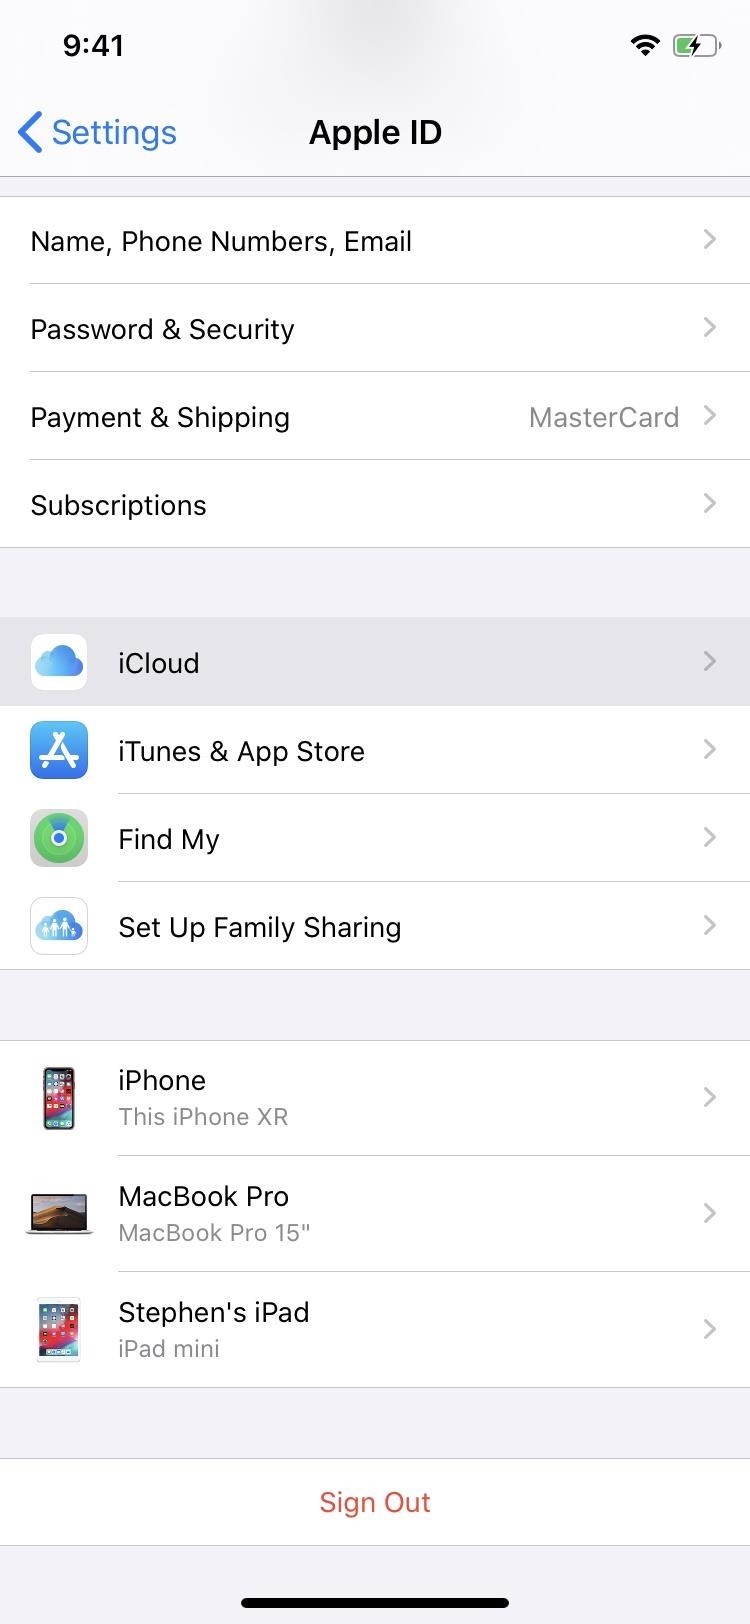
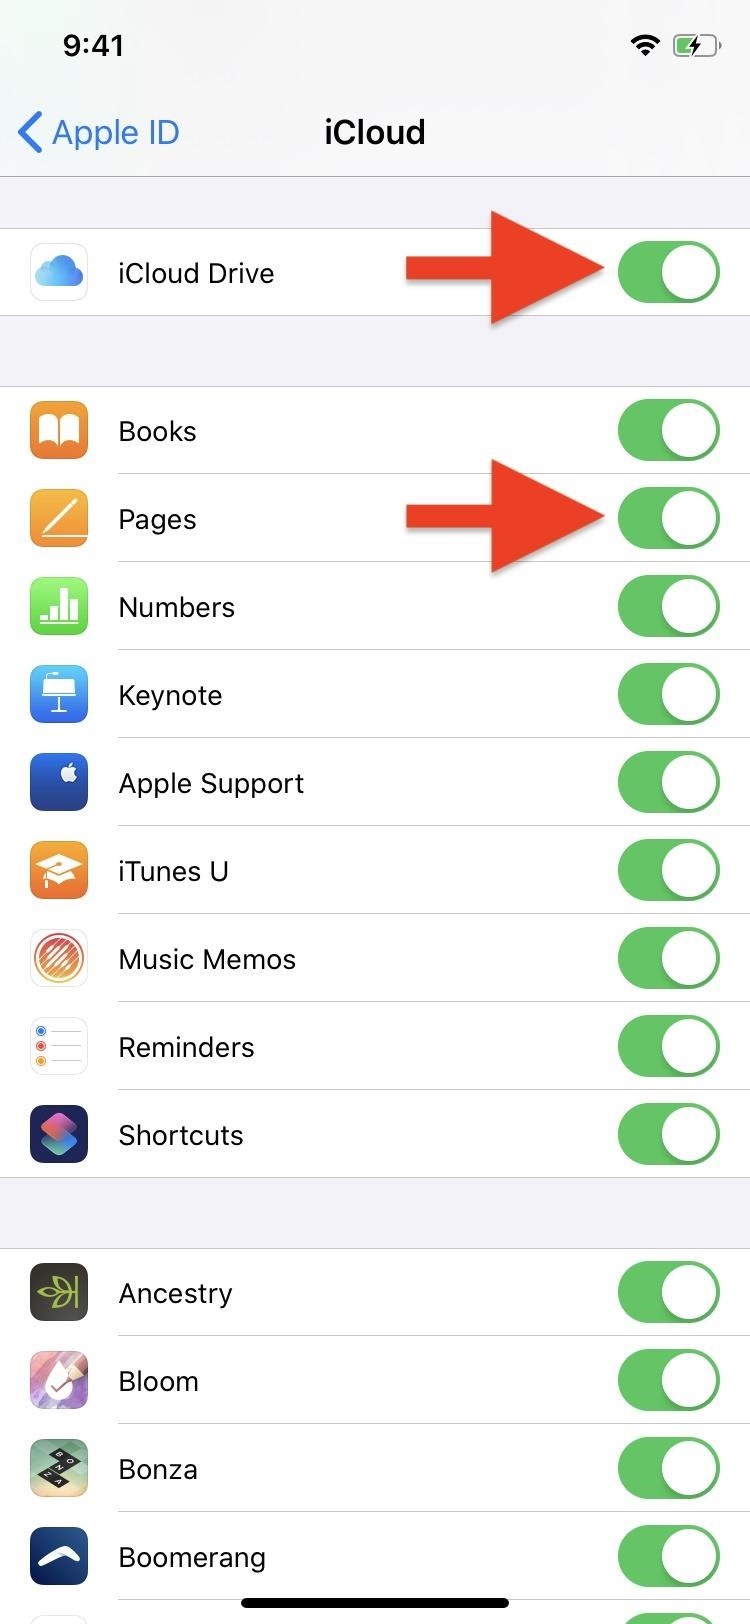
If you didn’t see iCloud Drive as an option in the files manager in Pages, you need to activate it. To do so, open Settings, then tap your name at the top of the page. From here, tap “iCloud,” then turn on “iCloud Drive” if it’s not already. Finally, make sure “Pages” is turned on underneath it.
Step 2: Choose the Share Options
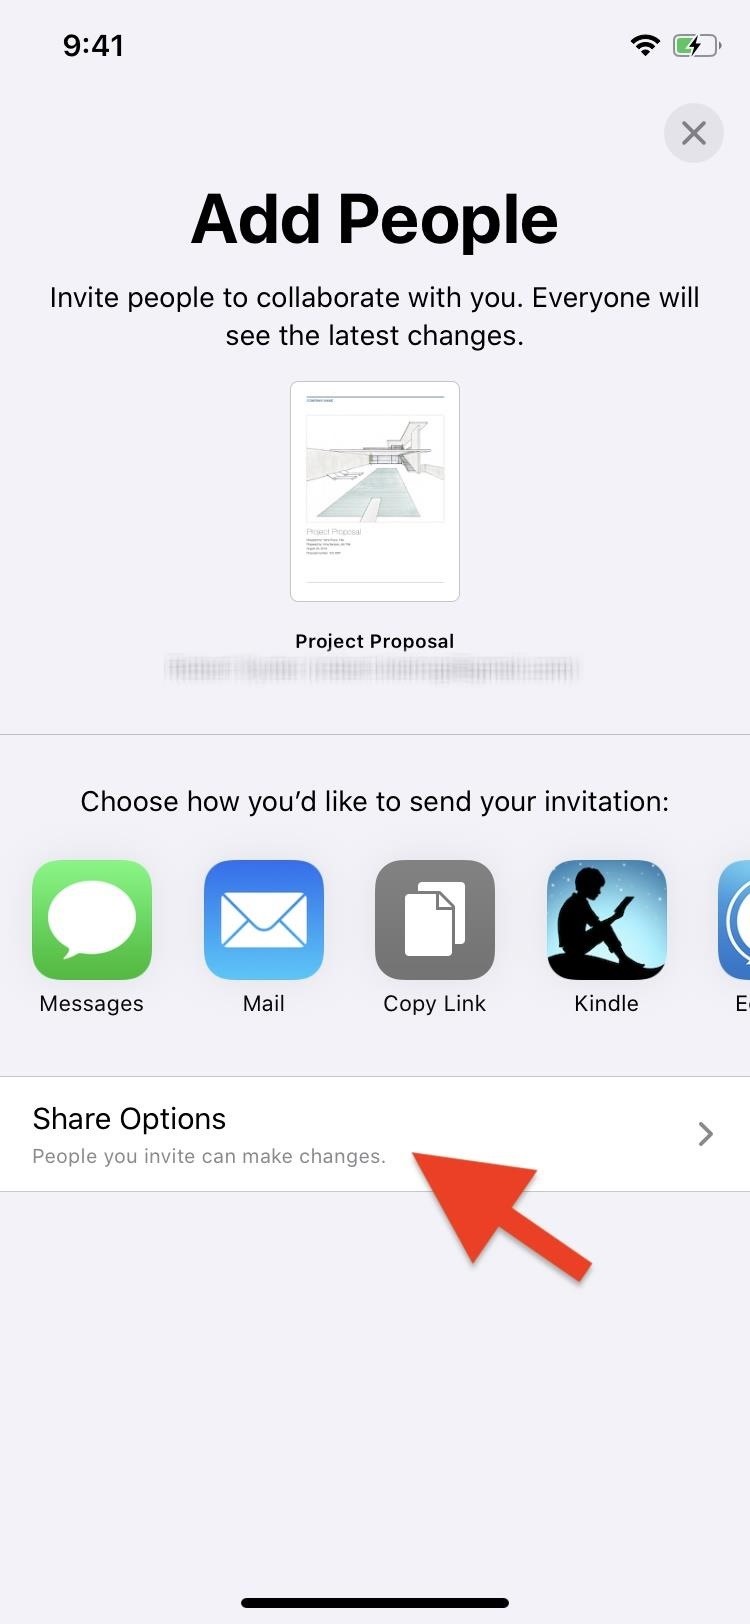
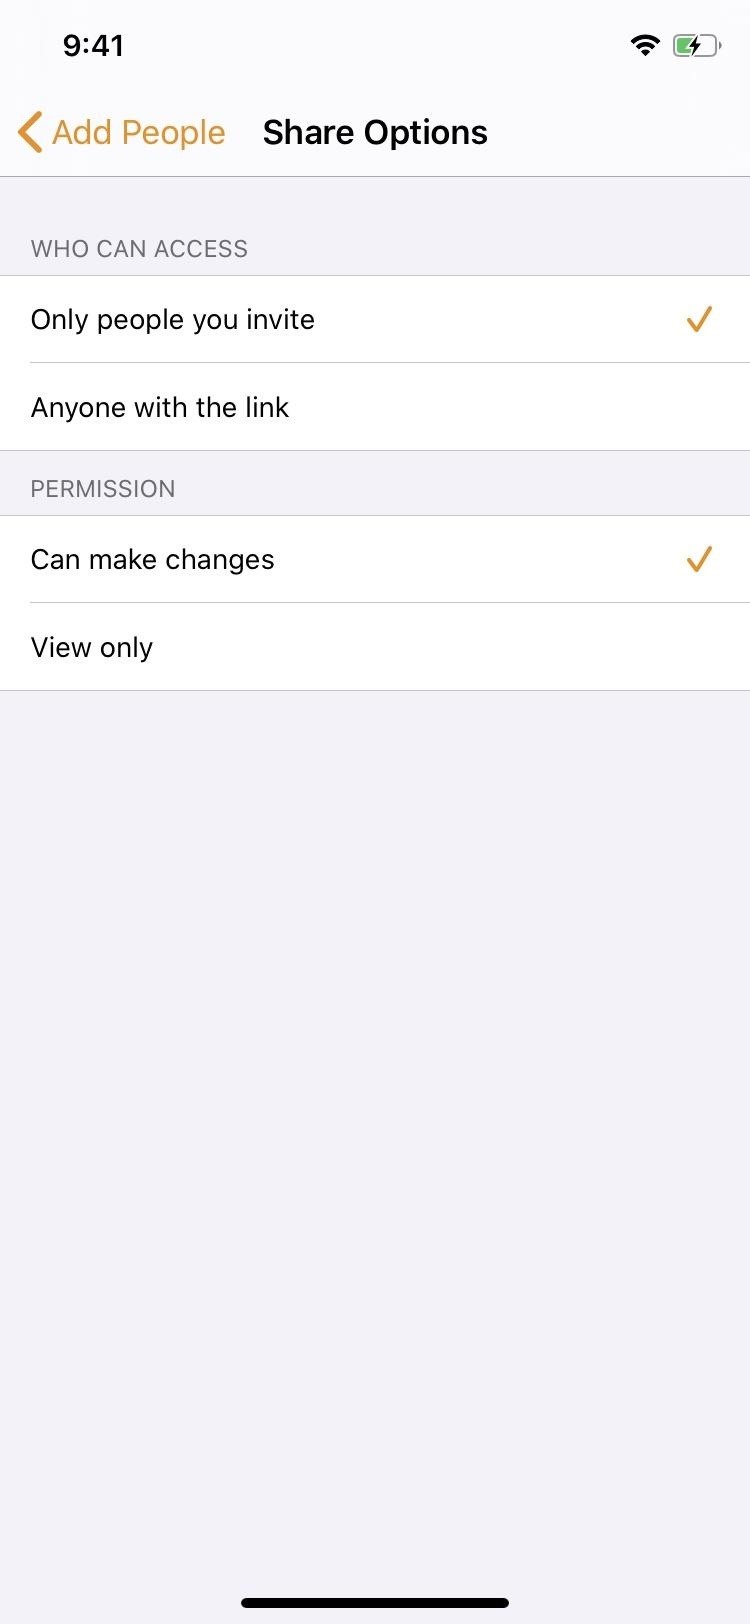
After tapping the collaboration icon or “Add People” link, tap “Share Options” to tweak the document’s sharing rules before sending the invite out.
For who can access the document, you can choose between only people you invite (collaborators can’t share it) or anyone with the link (which can be given by other collaborators). If selecting “Anyone with the link,” you’ll have the option to add a password to the document. As for permissions, you can choose to let the person make changes or only view it without being to interact with it.
Step 3: Send Out the Invite
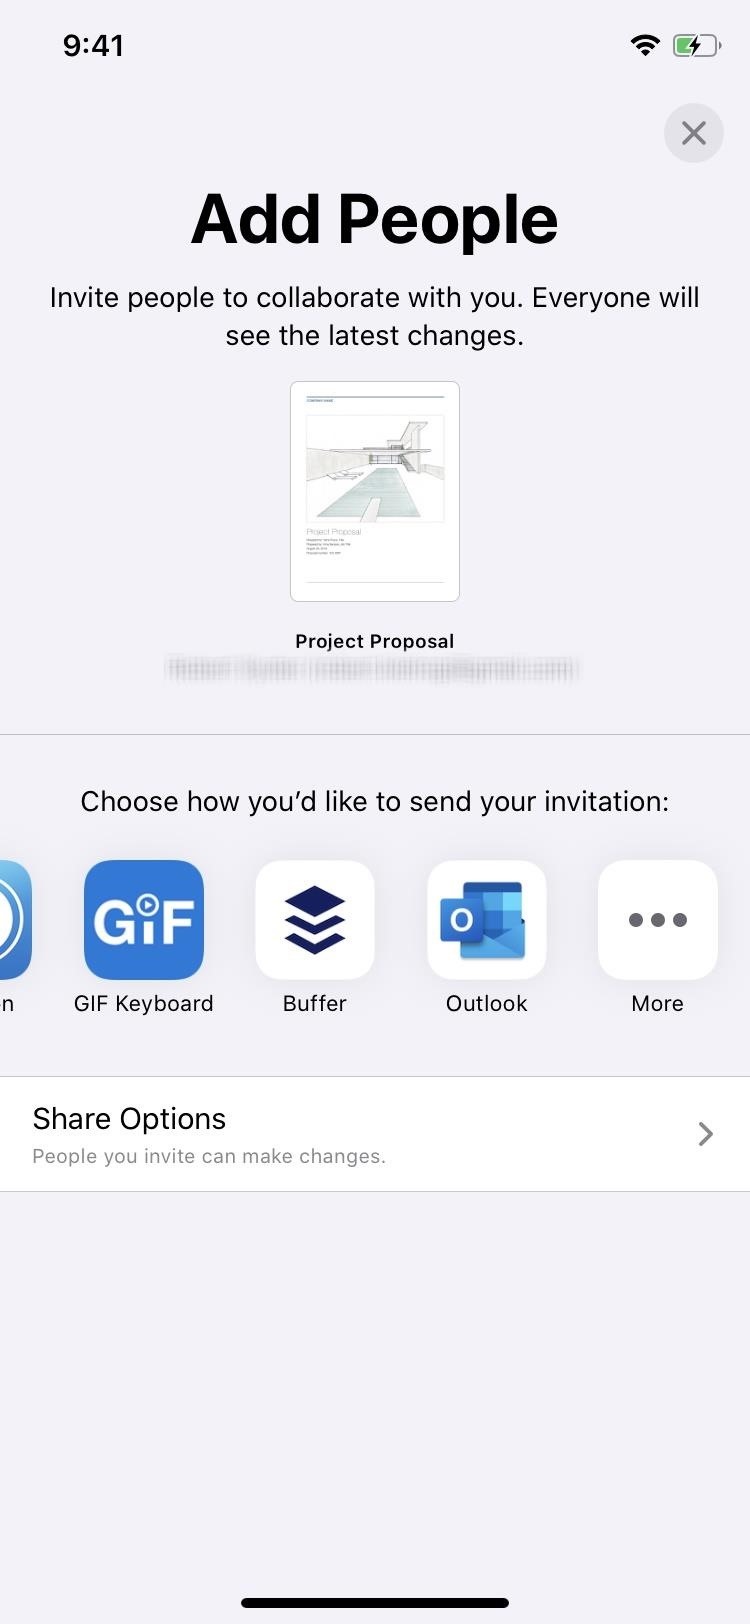
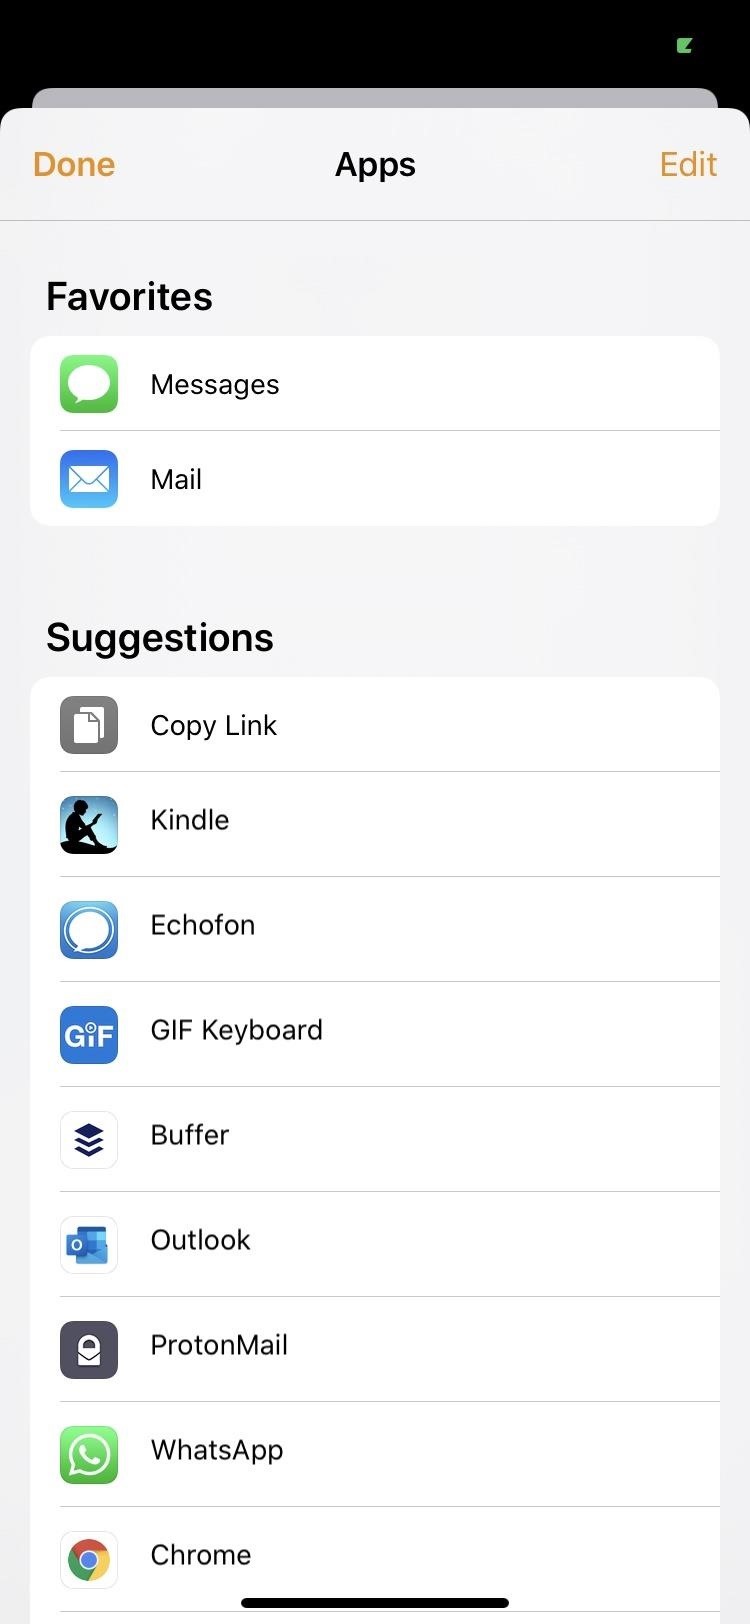
Now, you need to choose how you want to send your invite link. Pages will present a list of suggested apps to share it with. You can scroll to the end of this list and tap “More” for more options. No matter what share options you choose or how you share the invite, once you send out at least one invite for the document, Pages will enable collaboration for it — even if none of your invitees have accepted yet.
Step 4: Collaborate with Others
Now, anyone with the proper permissions can view or edit the document alongside yourself. You can get started right now, but first, here’s a quick run-down on some of the collaboration tools you’ll run into either as the owner or a collaborator:
Commenting
If you want to leave a comment, long-press on the area you’d like to comment on, then tap the arrows until you reach “Comment.” Tap that, then type your comment in the provided field. When finished, tap “Done.”


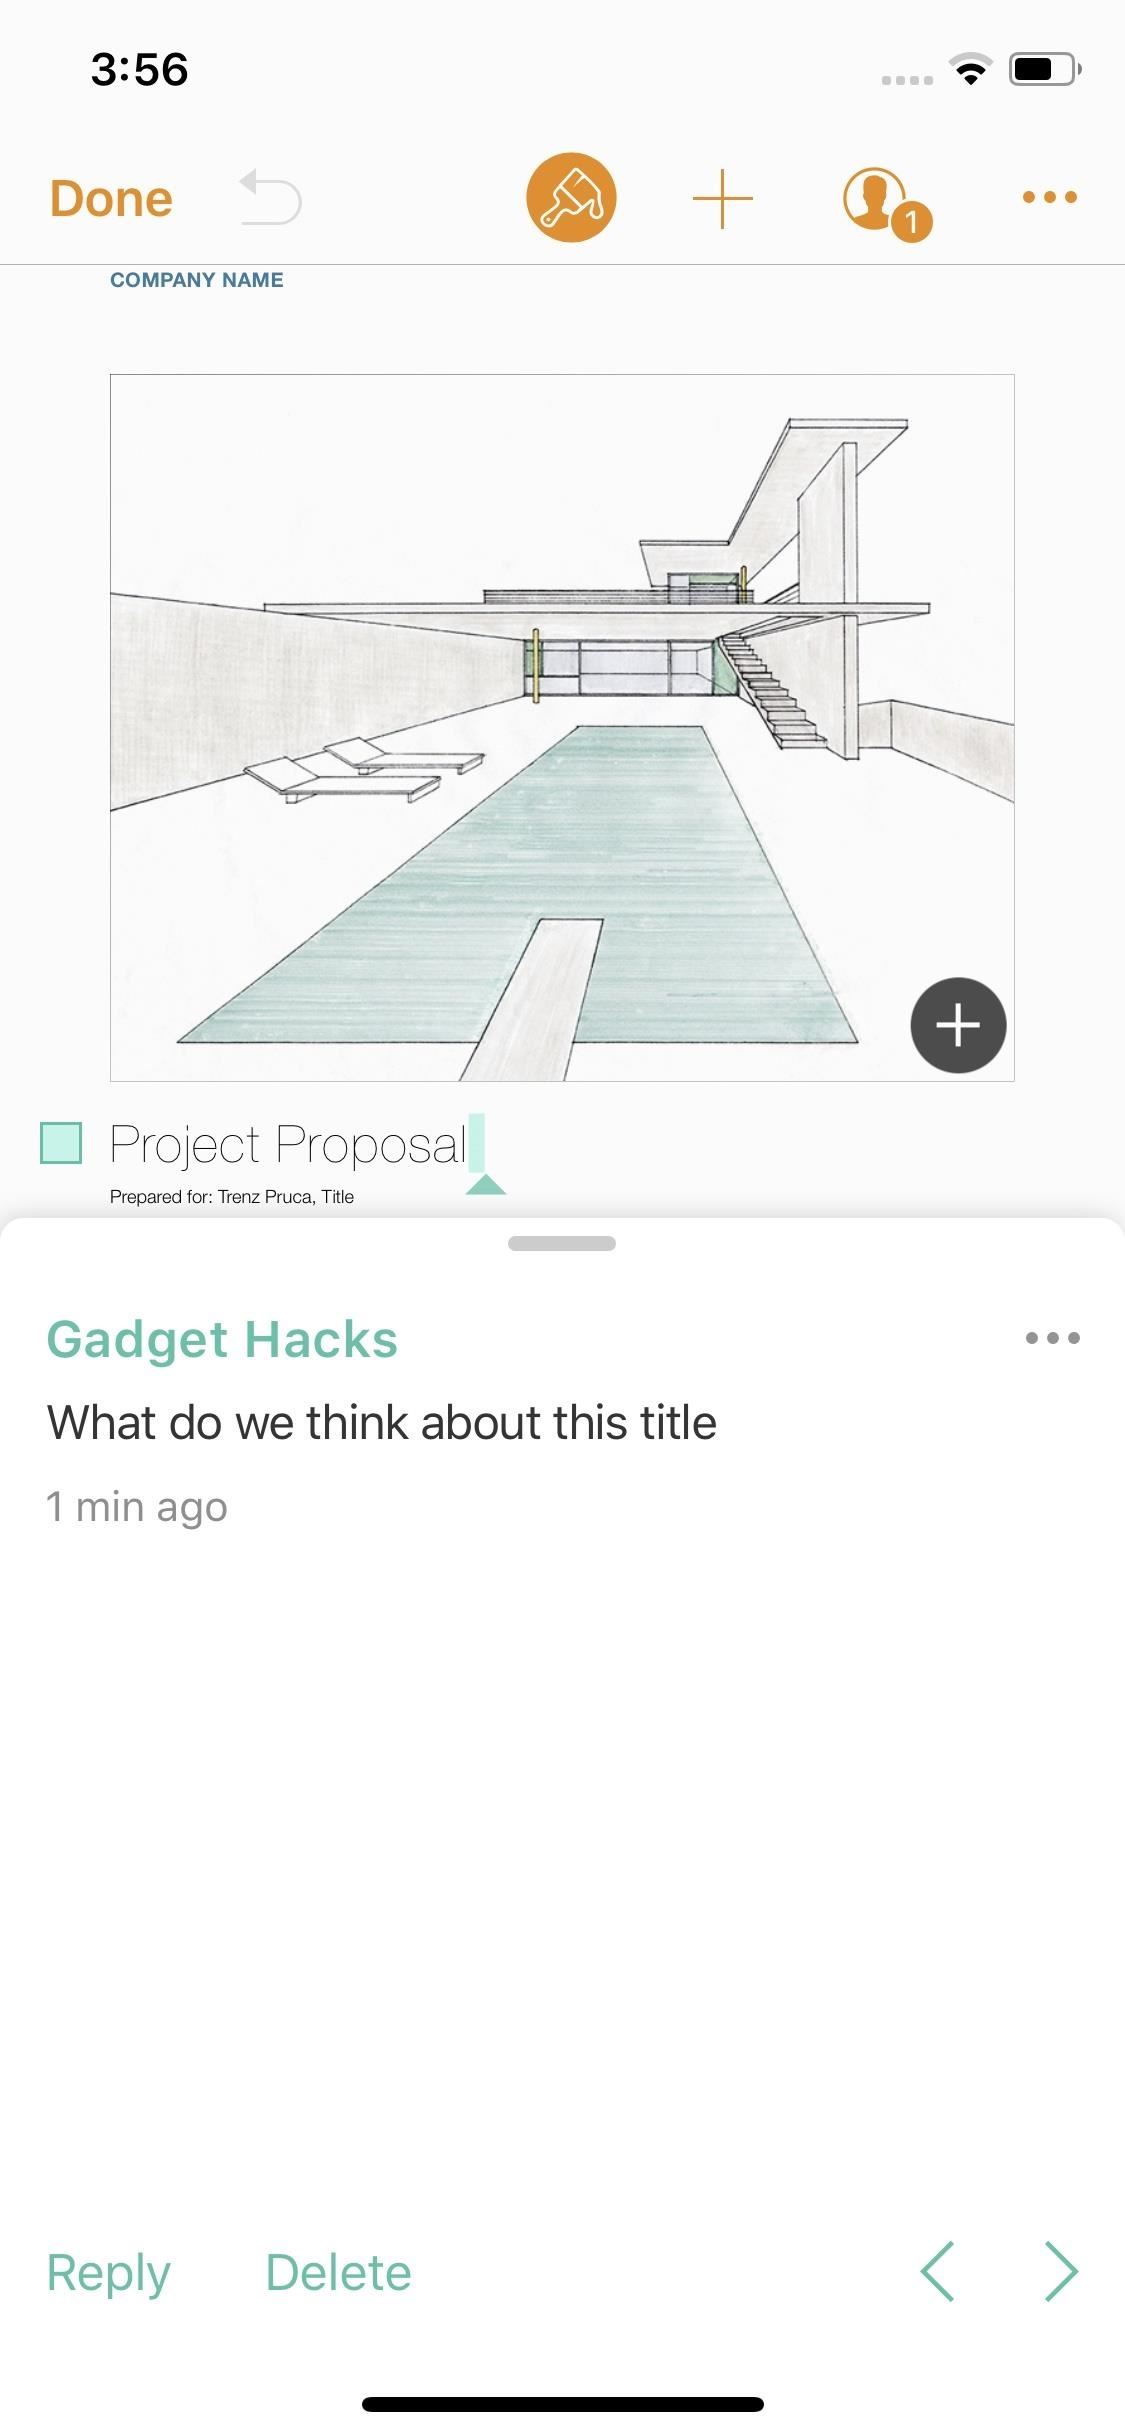
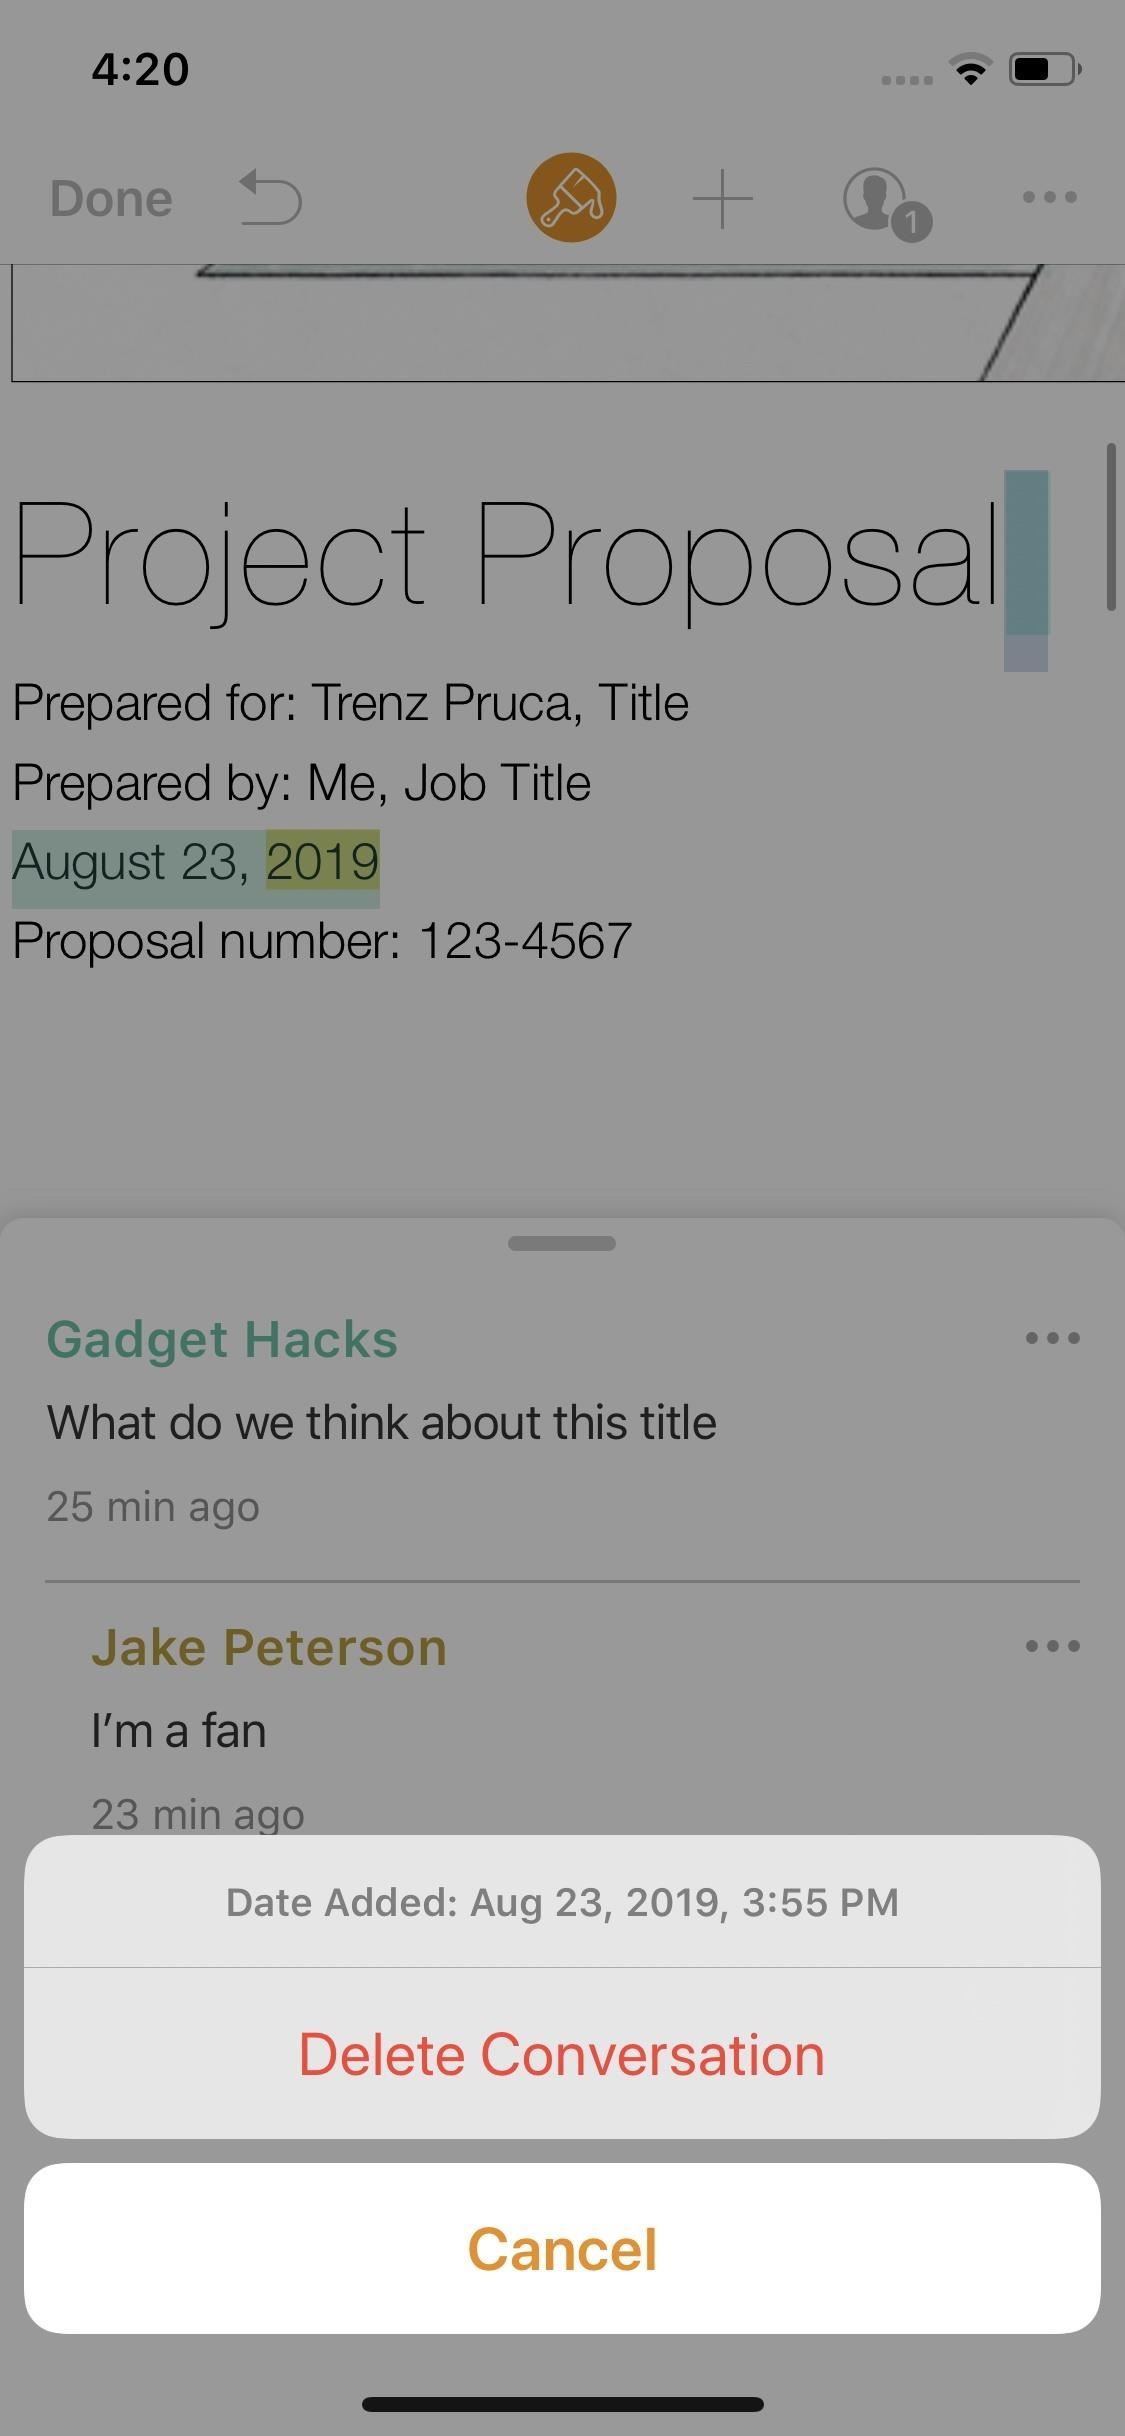
You can deal with comments in as simple a fashion. Comments will appear as a small rectangle in the document. Tap it to open the comment. From there, you can tap “Reply” to add a reply or “Delete” to delete that comment. You can use the arrows in the bottom right to cycle through the comments in the document. You can also tap the ellipsis (•••) to open expanded options.

Managing Edits
You can quickly see who’s active in the document by tapping the collaborate icon, where you can adjust your share settings, invite more users, and cancel sharing. If a user is active, you can hit that user’s dot to be taken to their live edits so you can review. All edits by the user will be this same color, so if you want to review all edits from one user, you can scan the document for that color.

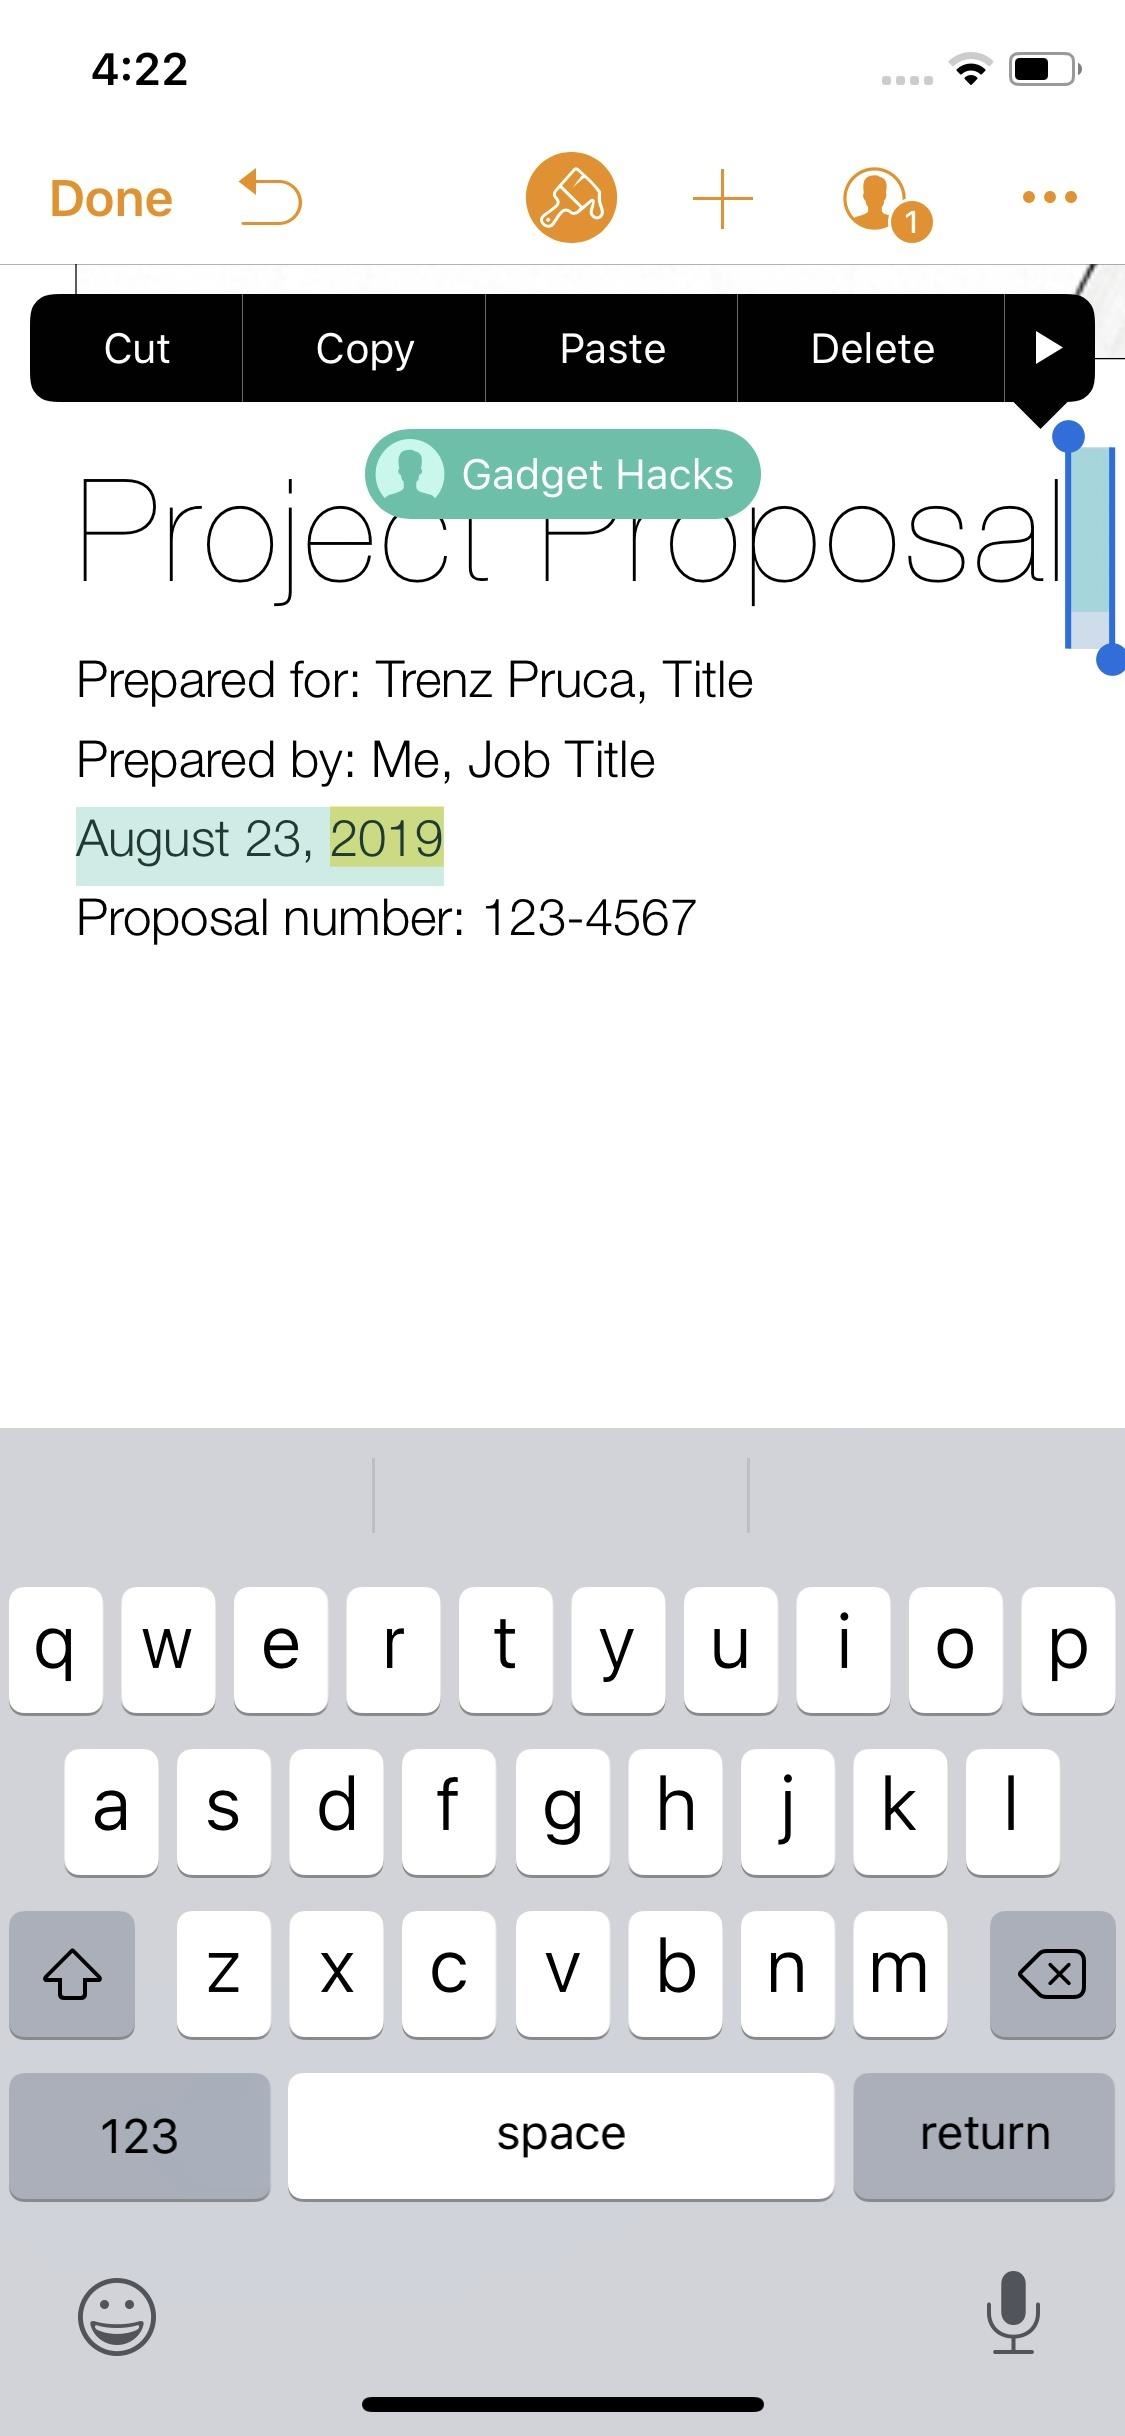
If you want to view the document without these indicators or comments, you can turn them off by tapping the ellipsis (•••), then “Settings,” and ensuring “Collaboration Activity” and “Comments” are disabled.


Stop Sharing
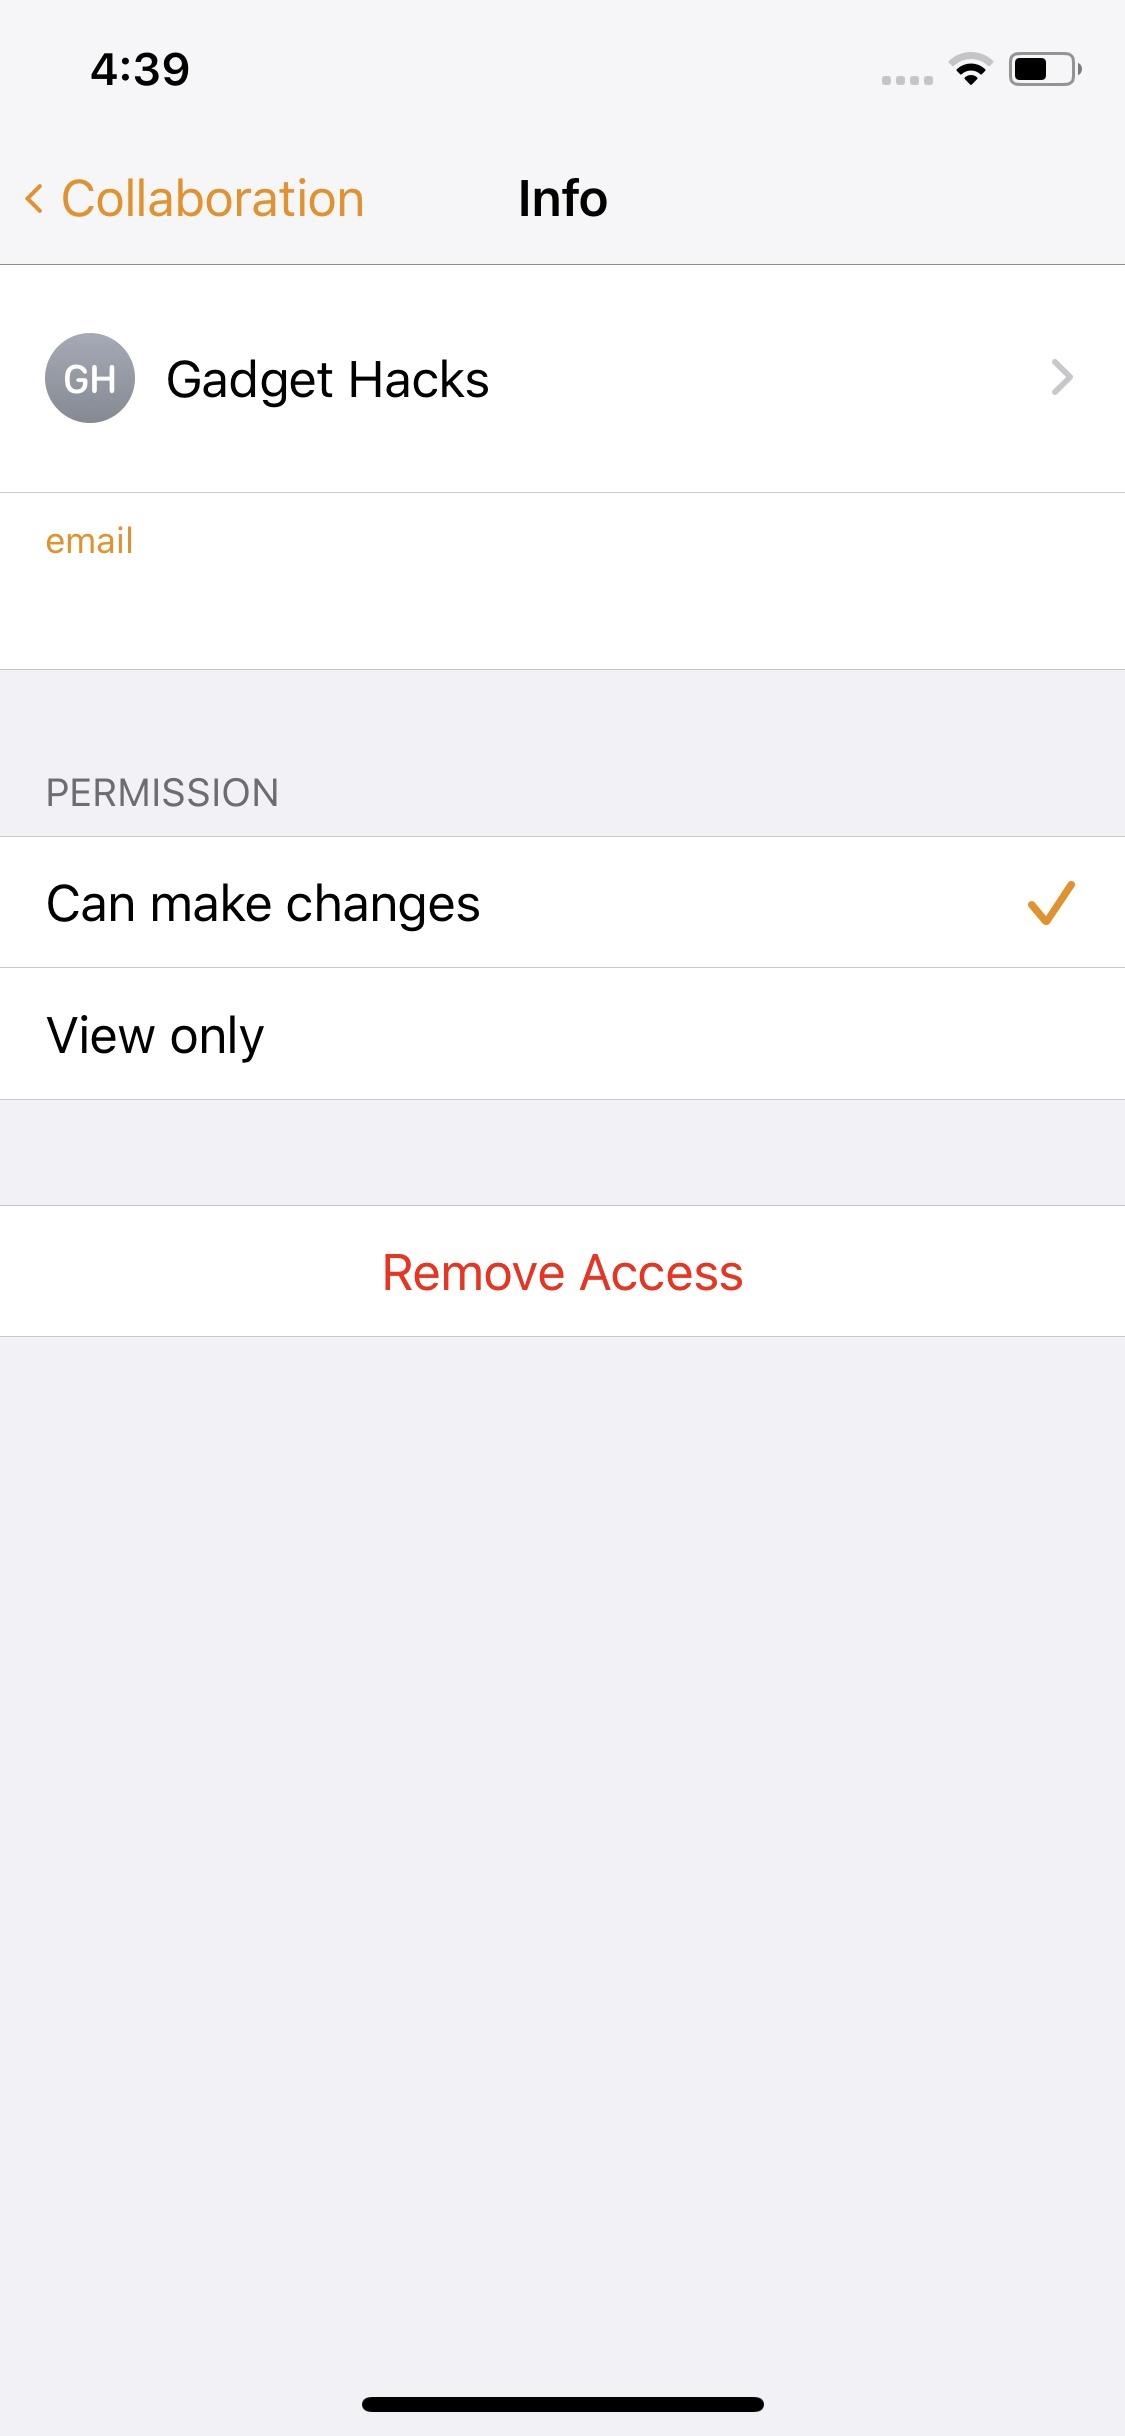
If you’ve had enough collaboration, you have the tools to stop it in its tracks. If you chose to invite people privately, rather than use a public link, you could remove permissions one by one. Tap the collaborate icon, then the user in question. Next, tap “Remove Access.” Tap “Continue” on the pop-up, and that user — not their edits — will be removed from the document.
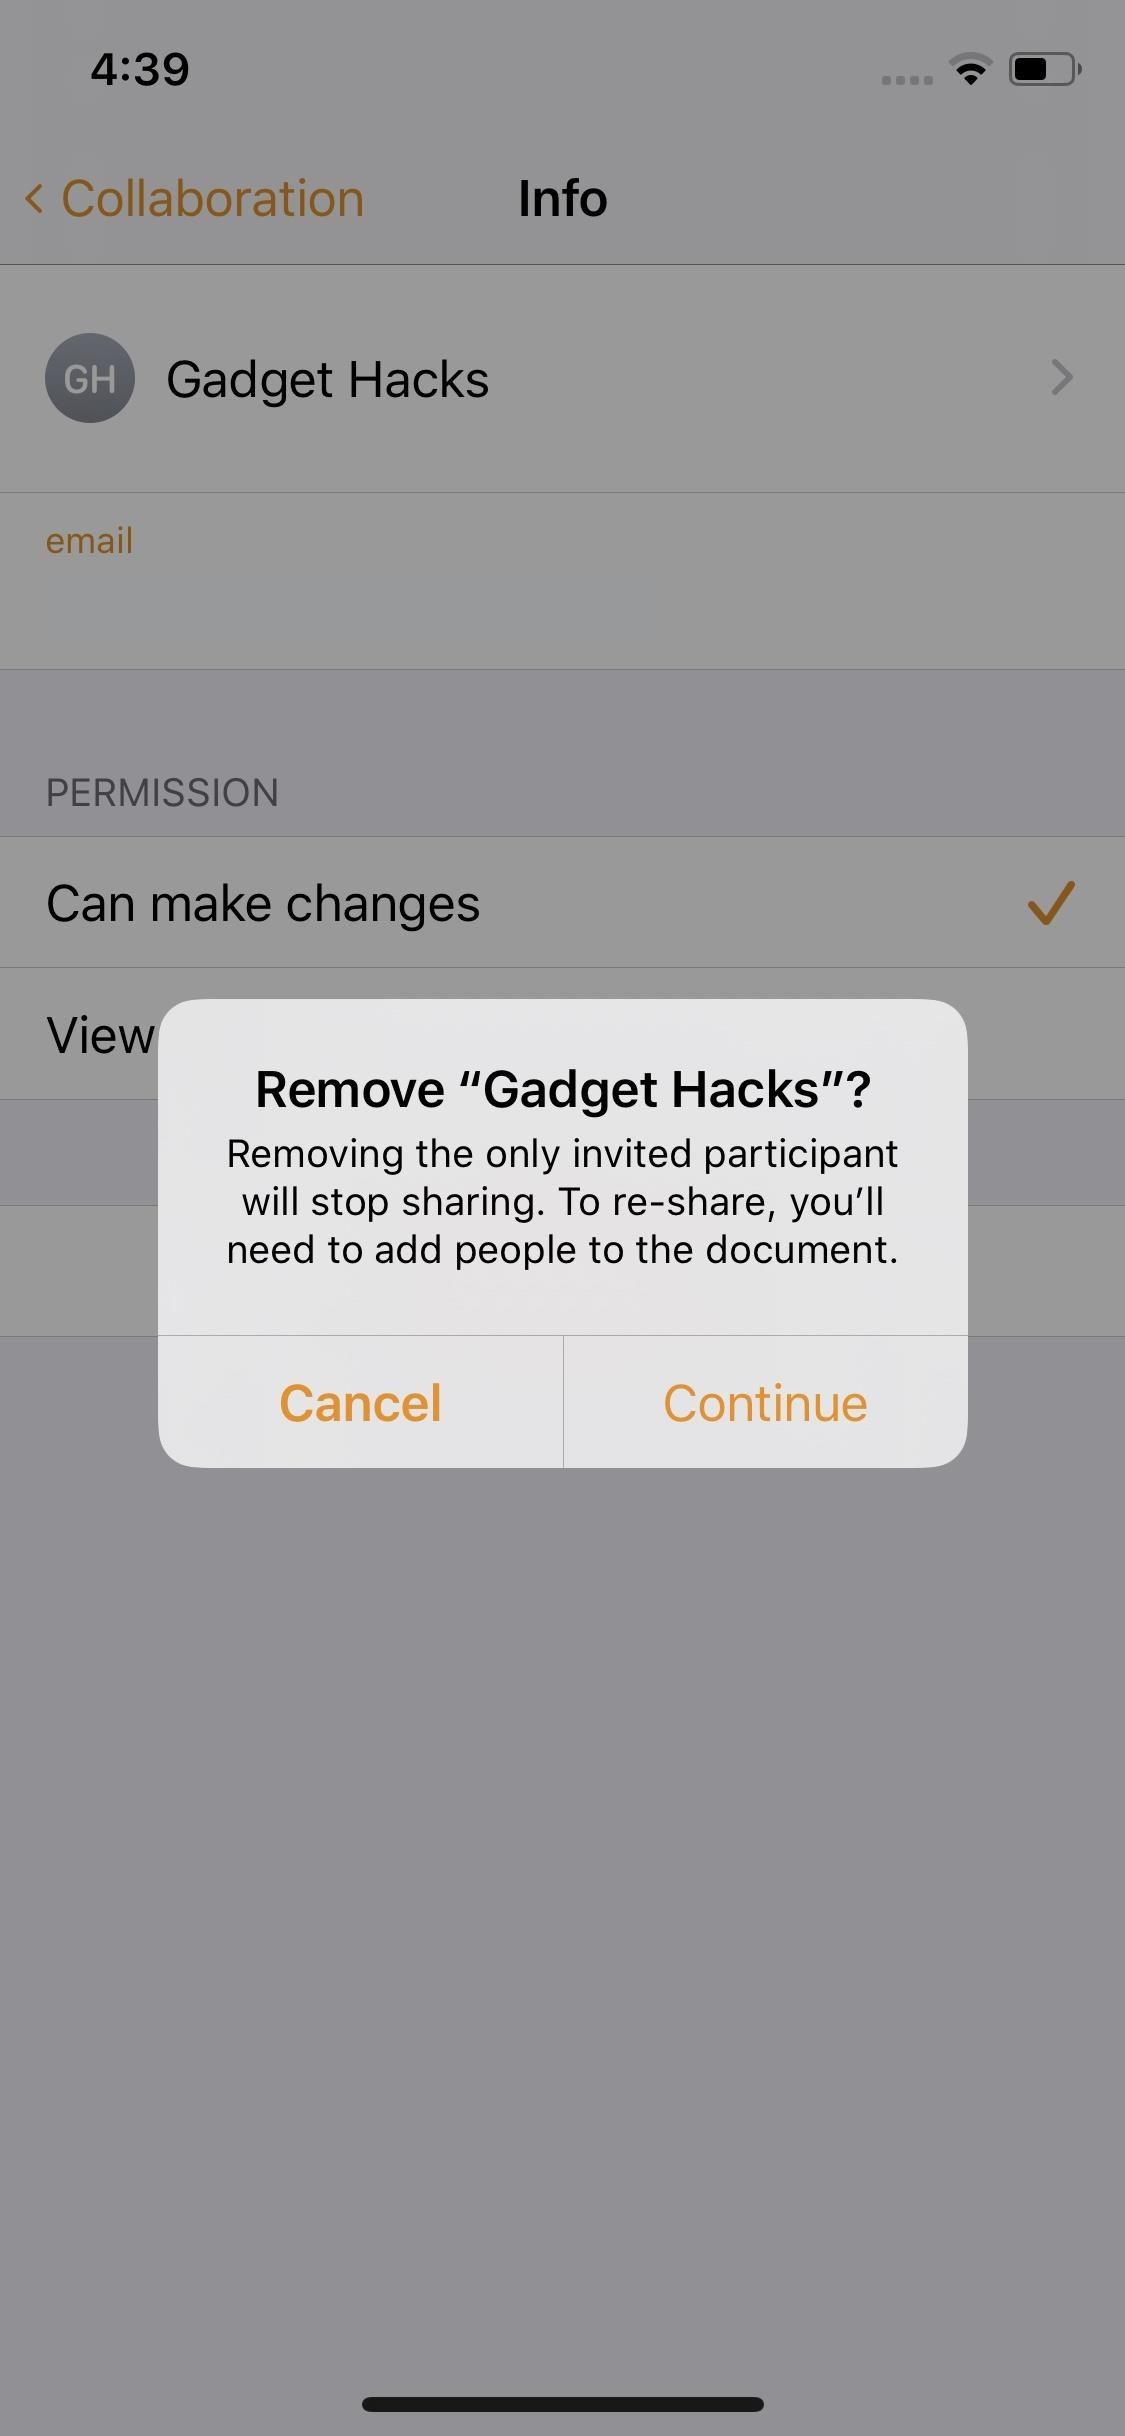
If it’s your last collaborator, the collaboration will end automatically. However, if you still have users floating around, you can end collaboration for the whole team whenever you want. Simply tap the collaborate icon again, then tap “Stop Sharing.” From here, tap “OK” on the pop-up, and all collaborators will be booted off your document.

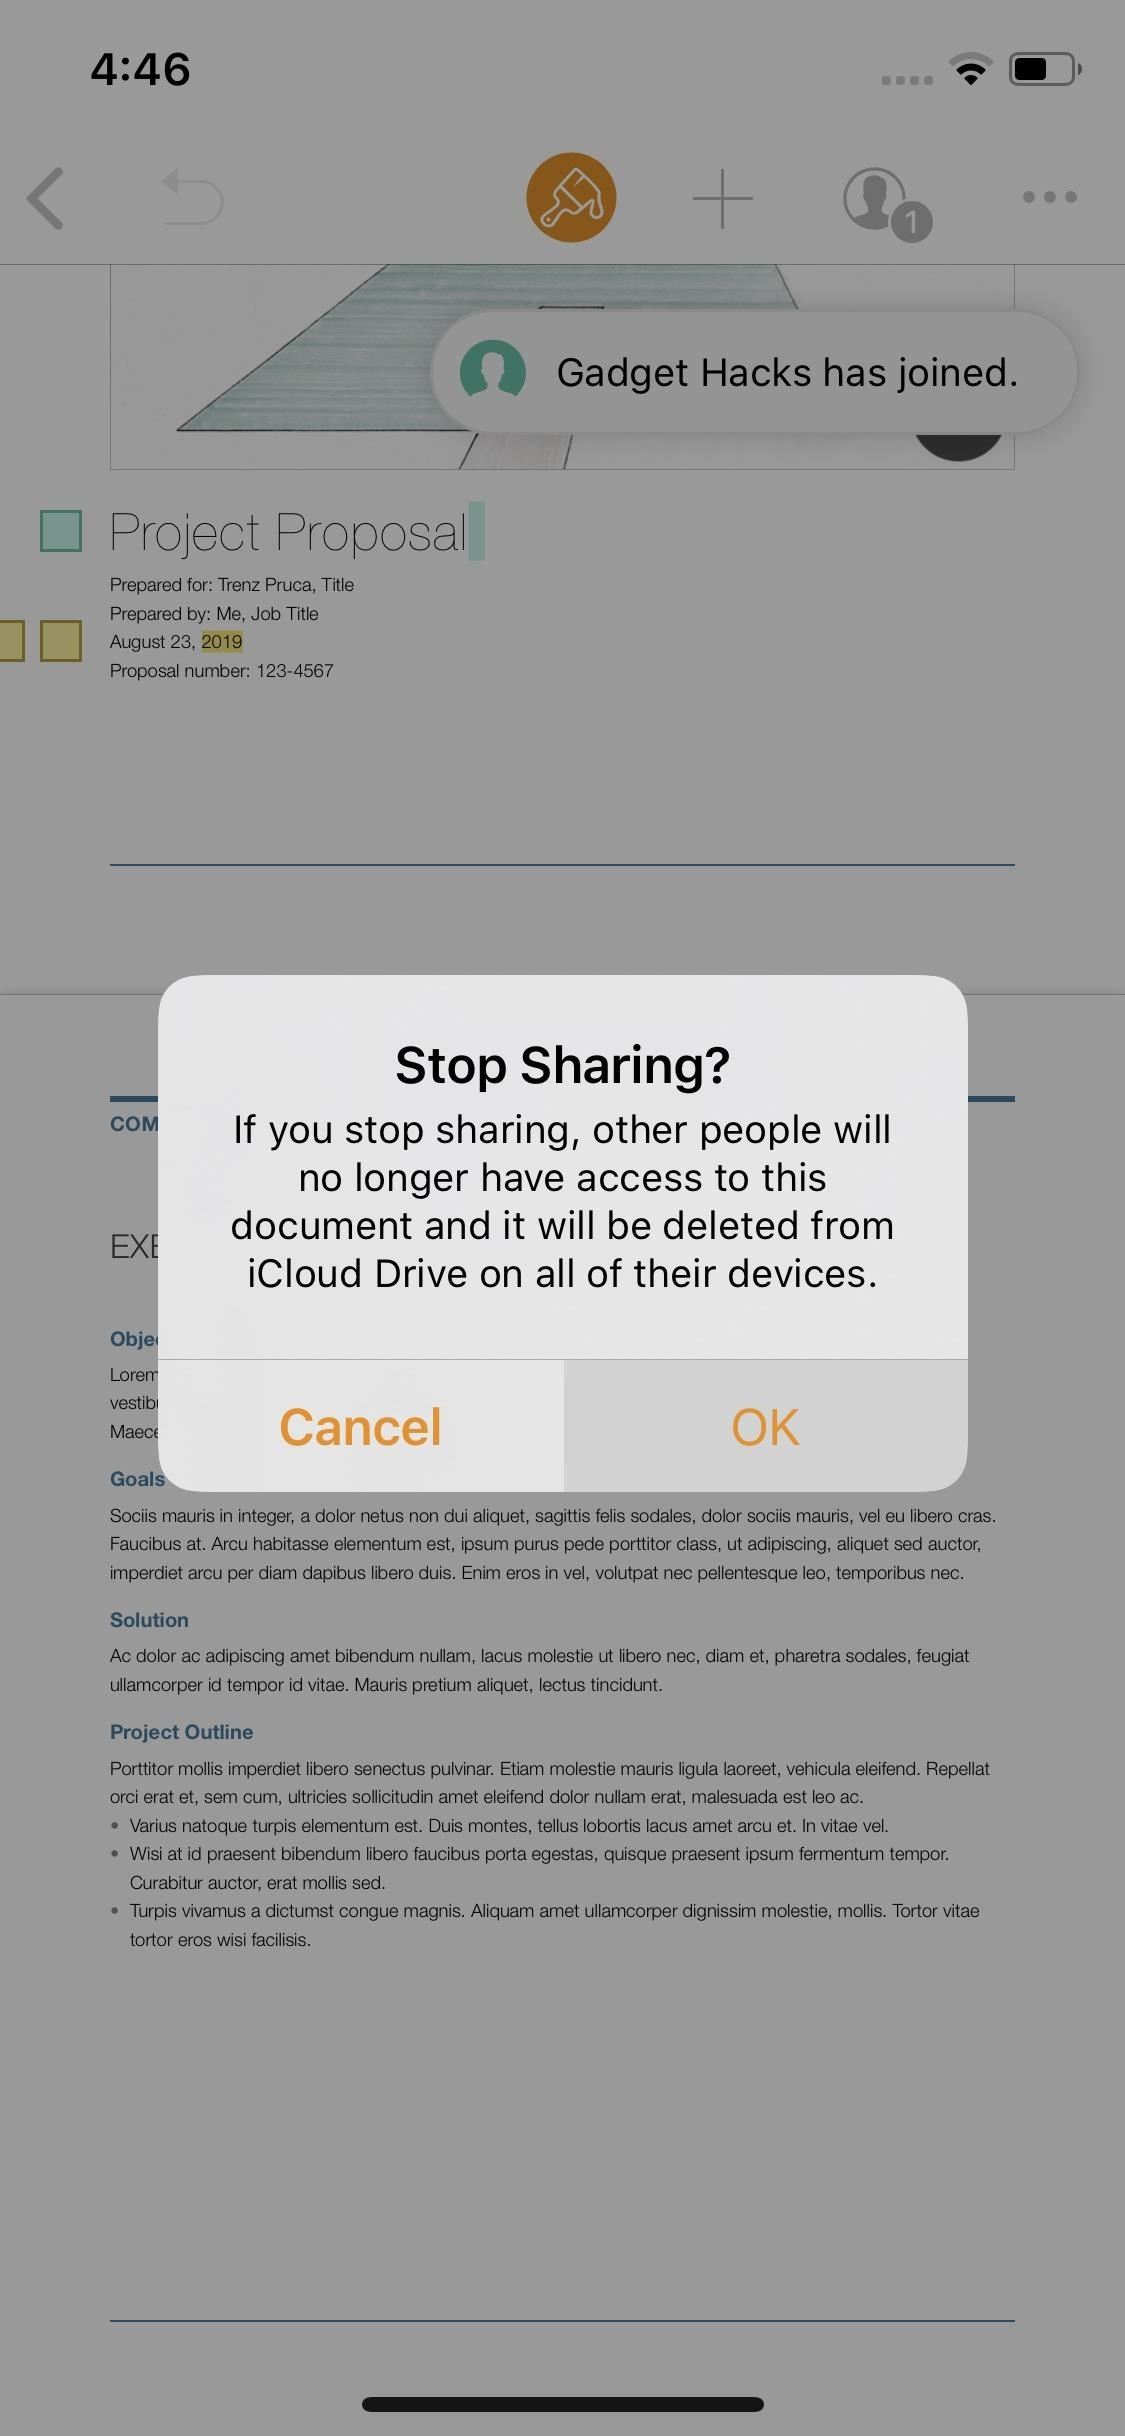
If you choose to open the document again, know that the original invite link will stay the same. That means setting the file to “Anyone with the link” will mean anyone with the original link will be able to hop back on in the future.
Restrictions
According to Apple, there are some restrictions you’ll face when collaborating that you wouldn’t when using Pages alone. Here’s everything you can’t do in Pages when collaborating with friends and colleagues:
- Add or edit media files that are larger than 50 MB.
- Reduce file size (File –> Reduce File Size).
- Drag rows and columns between body and header areas in tables.
- Create, delete, or reorder styles.
- Edit with Ruby in Asian languages.
- Change document locale or use custom region formats.
- Create or edit custom cell formats.
- Adjust footnote settings.
- Insert, cut, copy, paste, delete, duplicate, reorder, or edit sections.
- Adjust EndNote settings.
- Add and edit master objects.
- Insert date and time smart fields.
- Convert Word Processing documents to Page Layout documents and vice versa.
- Edit page number settings.
- Add or edit master pages.
- Reapply master to page.
This article was produced during Gadget Hacks’ special coverage on using your smartphone to boost productivity. Check out the whole Productivity series.
Just updated your iPhone? You’ll find new emoji, enhanced security, podcast transcripts, Apple Cash virtual numbers, and other useful features. There are even new additions hidden within Safari. Find out what’s new and changed on your iPhone with the iOS 17.4 update.
“Hey there, just a heads-up: We’re part of the Amazon affiliate program, so when you buy through links on our site, we may earn a small commission. But don’t worry, it doesn’t cost you anything extra and helps us keep the lights on. Thanks for your support!”


