Free Up Disk Space by Cleaning Up After Deleted Video Games: Here’s How
Keep your disk space tidy by removing those unneeded files out from your game folders.
Key Takeaways
- Delete unused game files to free up space and prevent potential conflicts and performance issues when reinstalling games.
- Locate and remove extra files from Steam games by right-clicking on the game in your library and selecting “Browse Local Files.”
- If you use mods, clean those up too as they can take up even more space and cause compatibility problems, especially when reinstalling games.
If you play games on PC at all, you’ve probably accumulated a lot of extra files in your drive, even for ones you’ve uninstalled, which can hoard more space than you might realize. Fortunately, removing them is simply a matter of deleting a few folders; the hardest part is locating the right ones.
Why You Should Remove Leftover Game Files
Besides the obvious benefits of freeing up space for other games or various files you may need, clearing out the clutter of unused game files can also help prevent file conflicts and other issues if you choose to reinstall the game later. It is rare, but on occasion, a fresh install of a game will come with updated versions of the same files you already have, which can complicate installation and lead to crashes or other performance issues.
Removing the files ahead of time not only circumvents the risk of these conflicts occurring, but it is also just a healthy practice to do a full fresh installation if you choose to reinstall the game again. On top of that, it can also make modding a little less of a hassle down the line, since it is often recommended to only mod games you have freshly installed with no extra files.
How to Remove Files from Uninstalled Steam Games
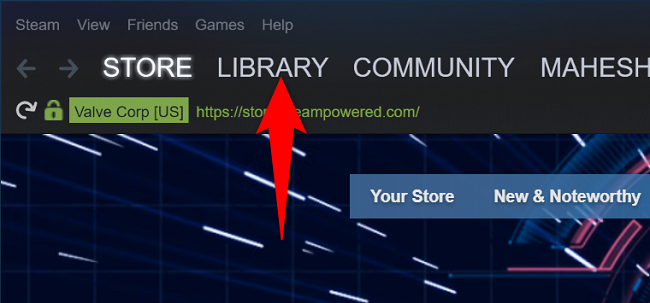
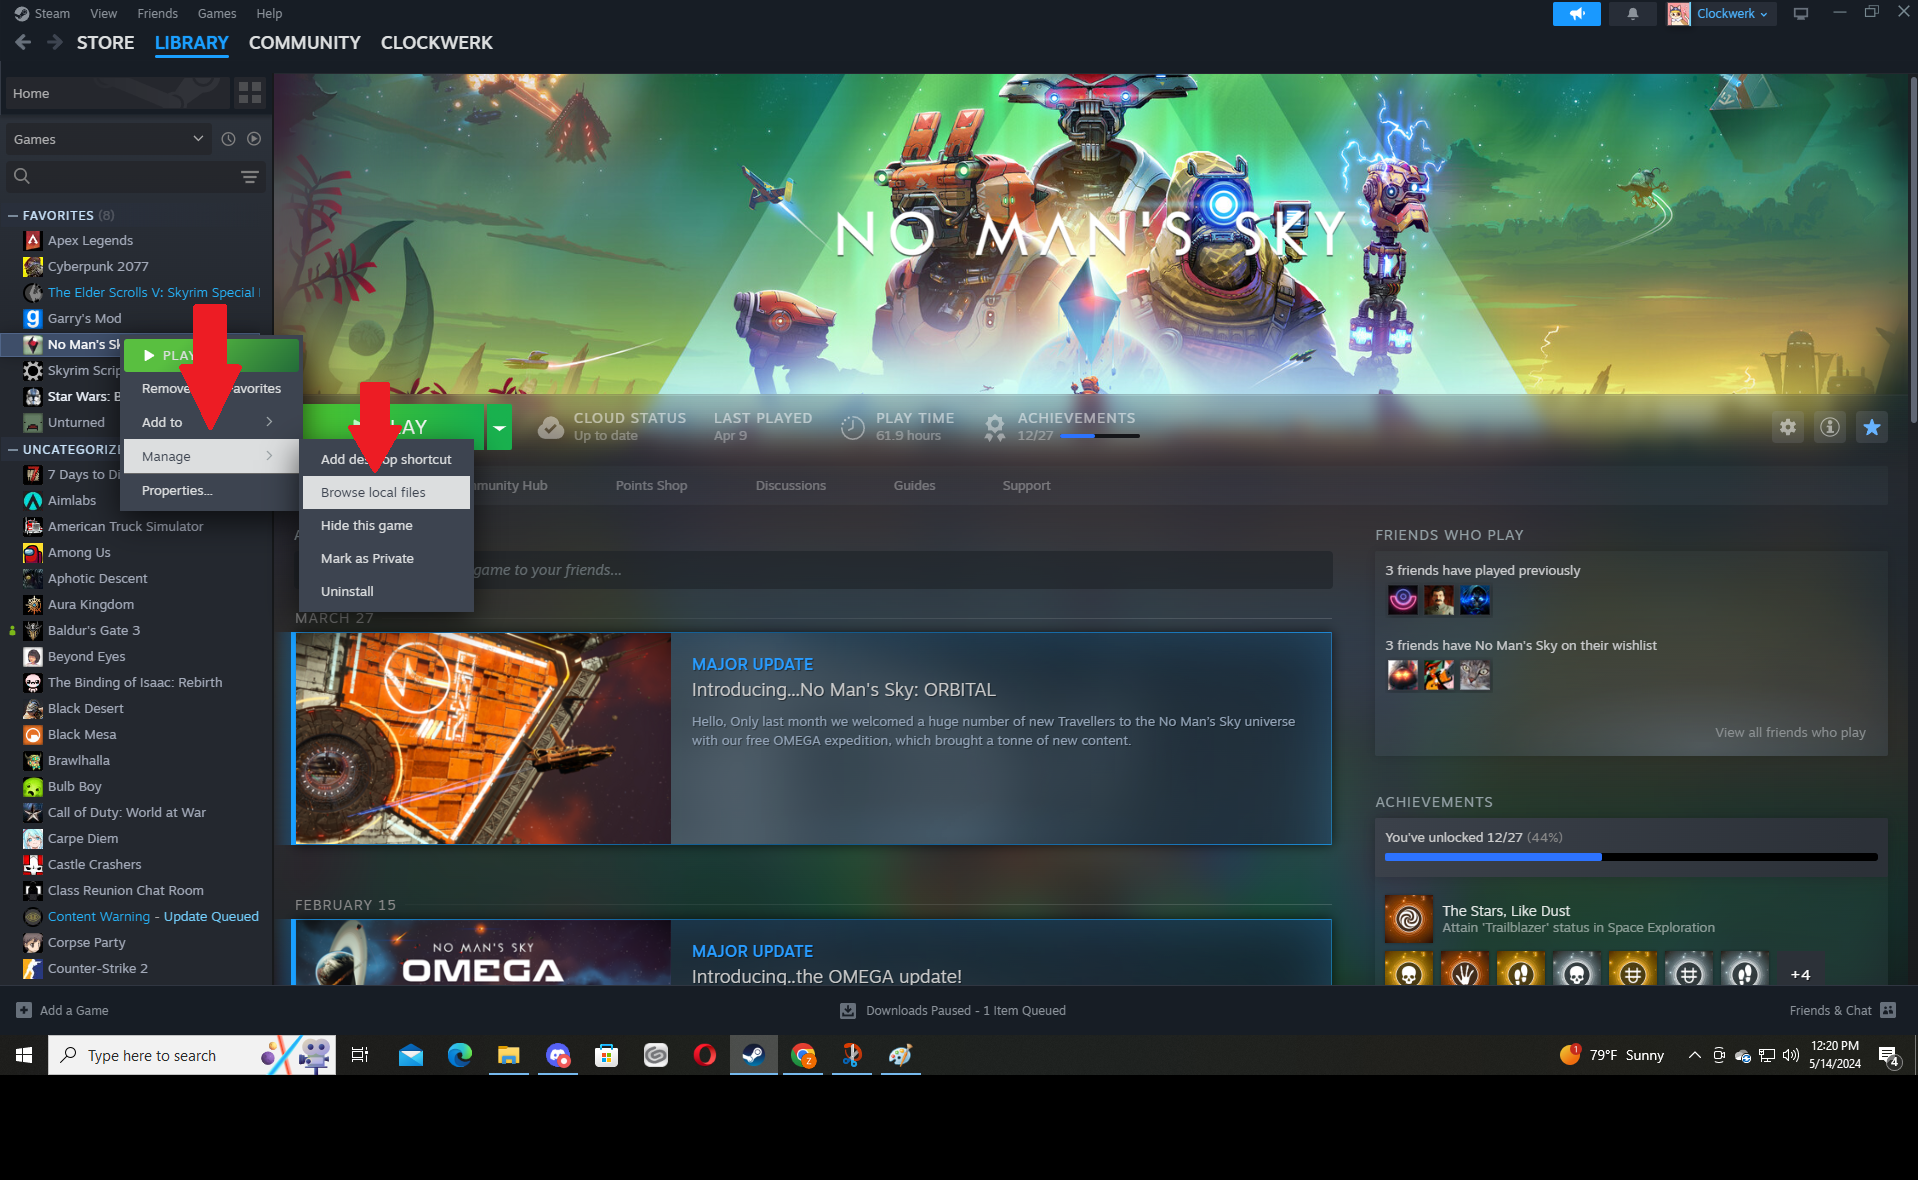
If you’re a Steam user (and if you play on PC there’s a good chance you are), locating your games’ additional files is as simple as finding the game in your Steam library and right-clicking it. On the Steam PC app, navigate to the “Library” tab at the top of the screen and find your desired game from the tab on the left side.
Then, right-click the game’s title, hover your cursor over the “Manage” tab and then click “Browse Local Files,” which will open your PC’s file explorer app to the location of the game’s extra files. From here, you can safely delete them all. Steam stores your save data elsewhere and the game assets would be replaced should you choose to install the game again, so there is no need to worry about losing progress.
If you prefer to do things manually, you can find your local Steam files yourself by going to the file explorer and selecting your main drive under “This PC.” From there, navigate to Program Files (x86) > Steam > Steamapps > Common and find the folder for the game in question.
How to Remove Extra Files from Non-Steam Games
Sometimes you get a game on PC from a storefront other than Steam, like Epic Games, GOG, or the publisher directly, in which case the process is very similar to locating Steam files manually. Simply go to your file explorer and find the main directory of the drive you use to install games like before.
Then, you should either find a folder for the publisher of your respective game or the store from which you bought it, such as Epic Games, where the game’s files will be stored. Similarly to Steam, you can usually safely remove these files as they will be replaced on a fresh install and save data is typically stored elsewhere.
In general, save data is secured either on an external account or outside of the main file directory for games, so you usually don’t need to worry about deleting your progress by accident. However, it may still be a good idea to check the files before deleting them to make sure there is nothing you would want to lose like screenshots, captures, or other data.
Don’t Forget About the Mods
If you’ve installed mods for the game you’re trying to clean up after, it might be a good idea to clean those up too, since they sometimes take up even more space than the game’s base files. The process of doing this will differ depending on how you installed them, though, since mod managers have their own directories in some cases.
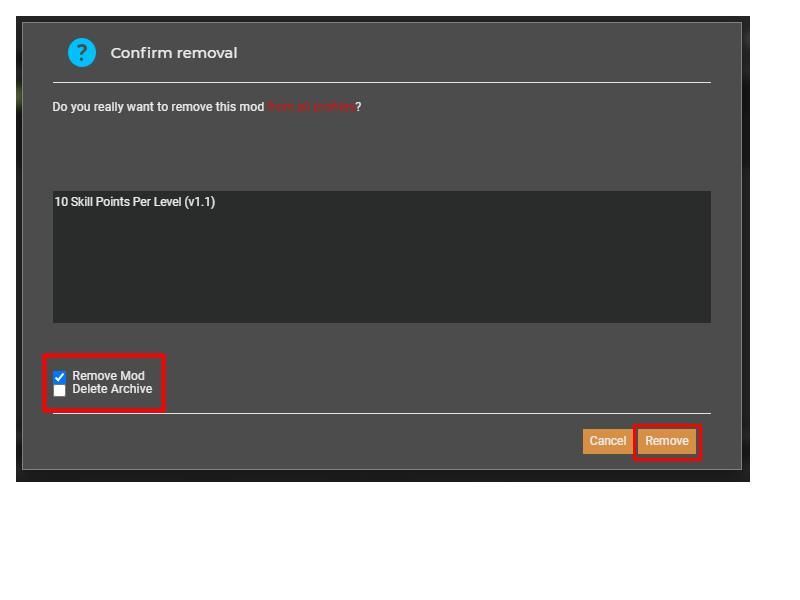
If you use a mod manager, you more than likely already know how to enable and disable mods, and removing them is as simple as selecting them and choosing that option from the manager’s menus. If you want to remove them manually, though, they are often found in the game’s main directory, and you can replace them later if you want to.
This is perhaps even more important than simply removing the game files. Mods are already external add-ons that can cause conflicts even when first installing them, so removing them after uninstalling a game is usually a good idea. That way, if you do plan to play it again at some point in the future and decide to mod it, again you don’t have to worry about your old mods introducing compatibility problems.
Make Sure to Empty the Trash
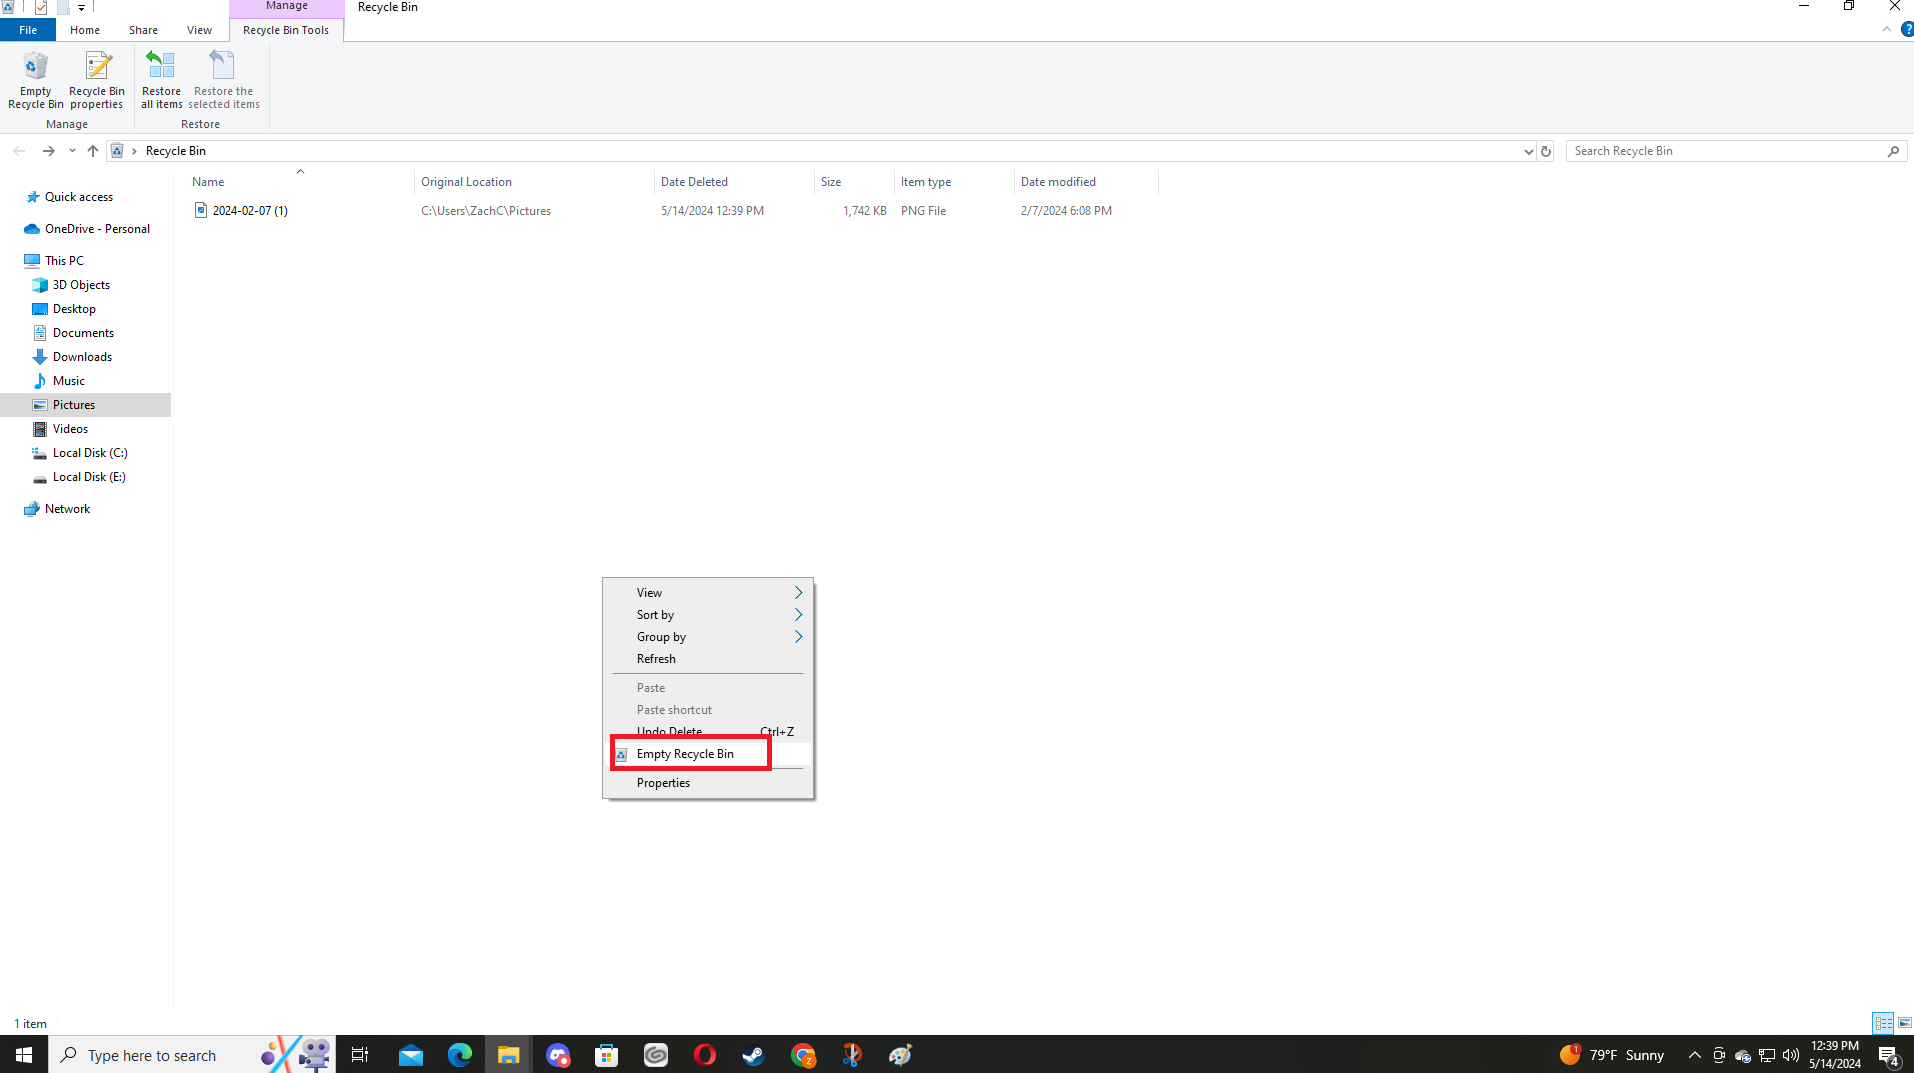
This might seem obvious to most, but you also want to make sure the files are actually removed from your PC and not just the folders from which they came. Sometimes you can delete them outright from within the file explorer, but much of the time you’ll need to open your “Recycle Bin” and manually remove them permanently.
Usually, this can be done with a simple right click from anywhere inside the Recycle Bin by selecting “Empty the Recycle Bin”, which will remove every file inside it automatically. Alternatively, you can delete each file separately as well, which might be a good idea if you have other things in there as well so you can make sure not to remove anything you may have sent there by accident.
If you’re still concerned with your PC’s storage after removing your extra files, see about how you can use your old internal hard drive or consider looking into cloud storage options for your personal files or photos.. If you’re removing files to make way for a fresh install to mod your games, check out how you can improve your game’s graphical fidelity and framerate with mods.


