I always keep my iPhone’s Portrait Orientation Lock on so that my screen doesn’t randomly rotate while I’m lying down. However, there are certain apps that I do turn it off for. It’s kind of a pain since you have to swipe down the Control Center and toggle the orientation lock — but that ends now. Instead of doing it manually, a new iOS update can automate app orientations for you.
This feature is a part of the iOS 14.5, Apple’s latest mobile operating system update. So if you don’t have that yet, make sure to update.
Utilizing the new orientation lock feature isn’t as simple as toggling on switches for each app in Settings, unfortunately, but it can be set from the Shortcuts app. So instead of having to swipe and tap each time you need to toggle the rotation lock, the automation does all of the dirty work for you.
- Don’t Miss: Stop Notification Banners from Popping Up for Custom App Icon Shortcuts on Your Home Screen
Here, we’ll either create one automation or two automations in Shortcuts, depending on your preference. The single automation will simply toggle Portrait Orientation Lock whenever you enter or exit the selected app or apps, but that could become messy if you use the app switcher frequently.
Fort the two-automation route, assuming you keep Portrait Orientation Lock enabled, the first one turns it off when entering the chosen apps, while the second one turns it back on when exiting them. If you always have Portrait Orientation Lock off, you could have the first automation turn it on when opening certain apps, while the second one will turn it back off.
This feature works for more than one app at a time, so if you want to toggle Portrait Orientation Lock for several apps in the same automation, you can easily do so. In my case, I’ll be using Twitter, but you can choose any app or combination of apps installed on your iPhone that you want.
Required
- iOS 14.5: Apple’s latest update for the iPhone.
- Shortcuts app: While this app comes preinstalled in iOS 14, you may have deleted it. If so, you can re-install it for free from the App Store.
Changing the Orientation Lock When Opening an App
As mentioned before, I usually have my Portrait Orientation Lock on. Still, I like the orientation lock to be off when I use Twitter to easily watch videos in landscape mode. If you always have Portrait Orientation Lock off, you may want to turn it on whenever you enter reading apps, such as Apple News.
Here, I’ll create an automation that disables Portrait Orientation Lock whenever I enter Twitter, then separate automation that re-enables it when I exit the Twitter app. You can choose any app you need, and best of all, you can select all the apps you want simultaneously in the same automation, no matter if you’re starting from the orientation lock on or off.
Step 1: Select a Trigger for Your Automation
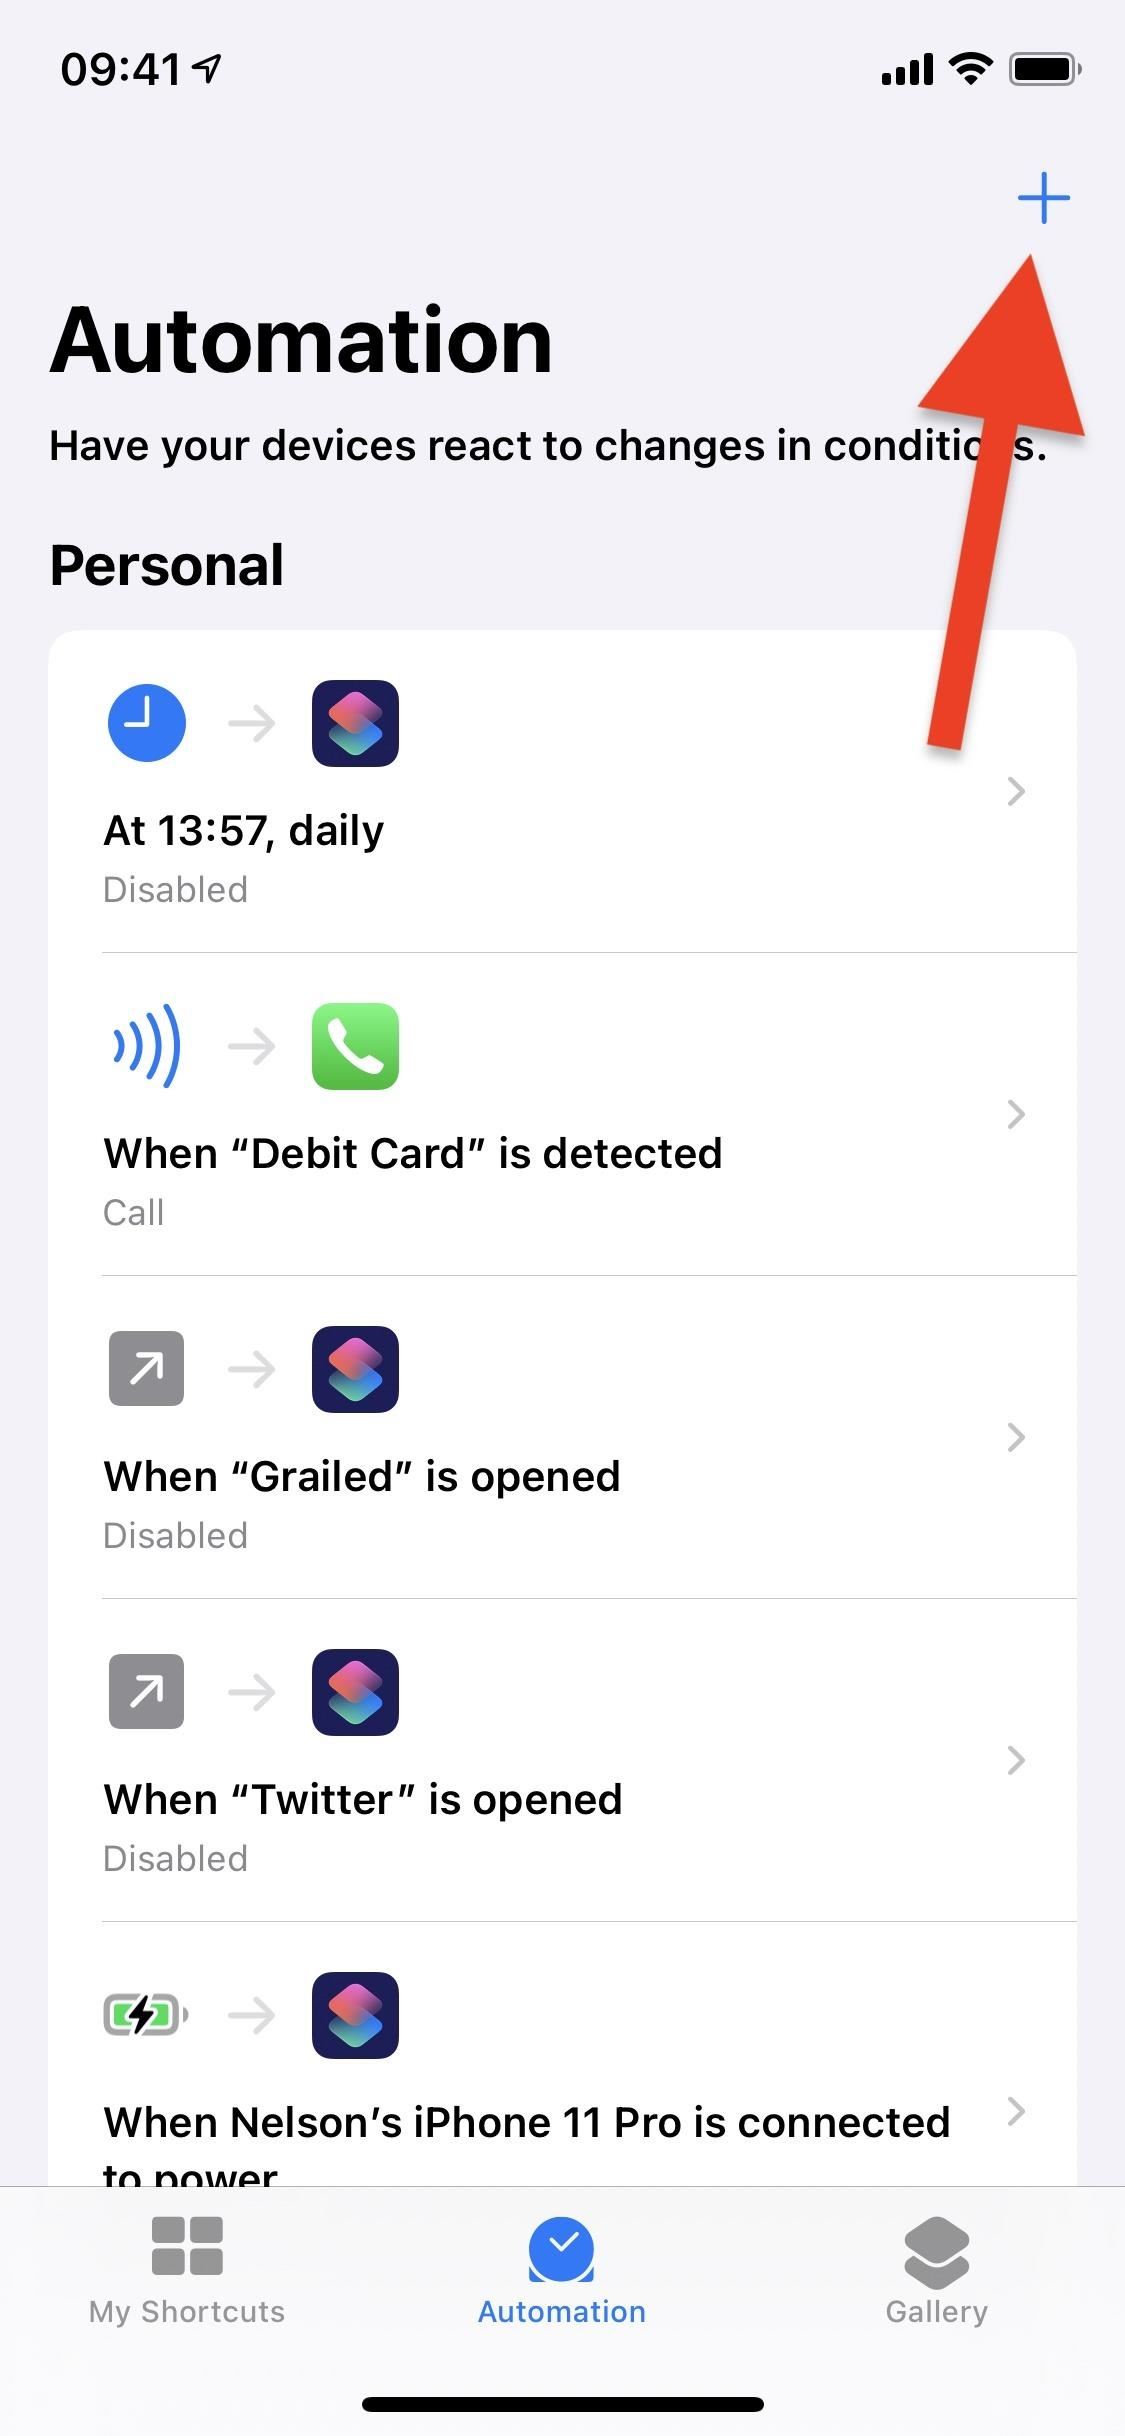
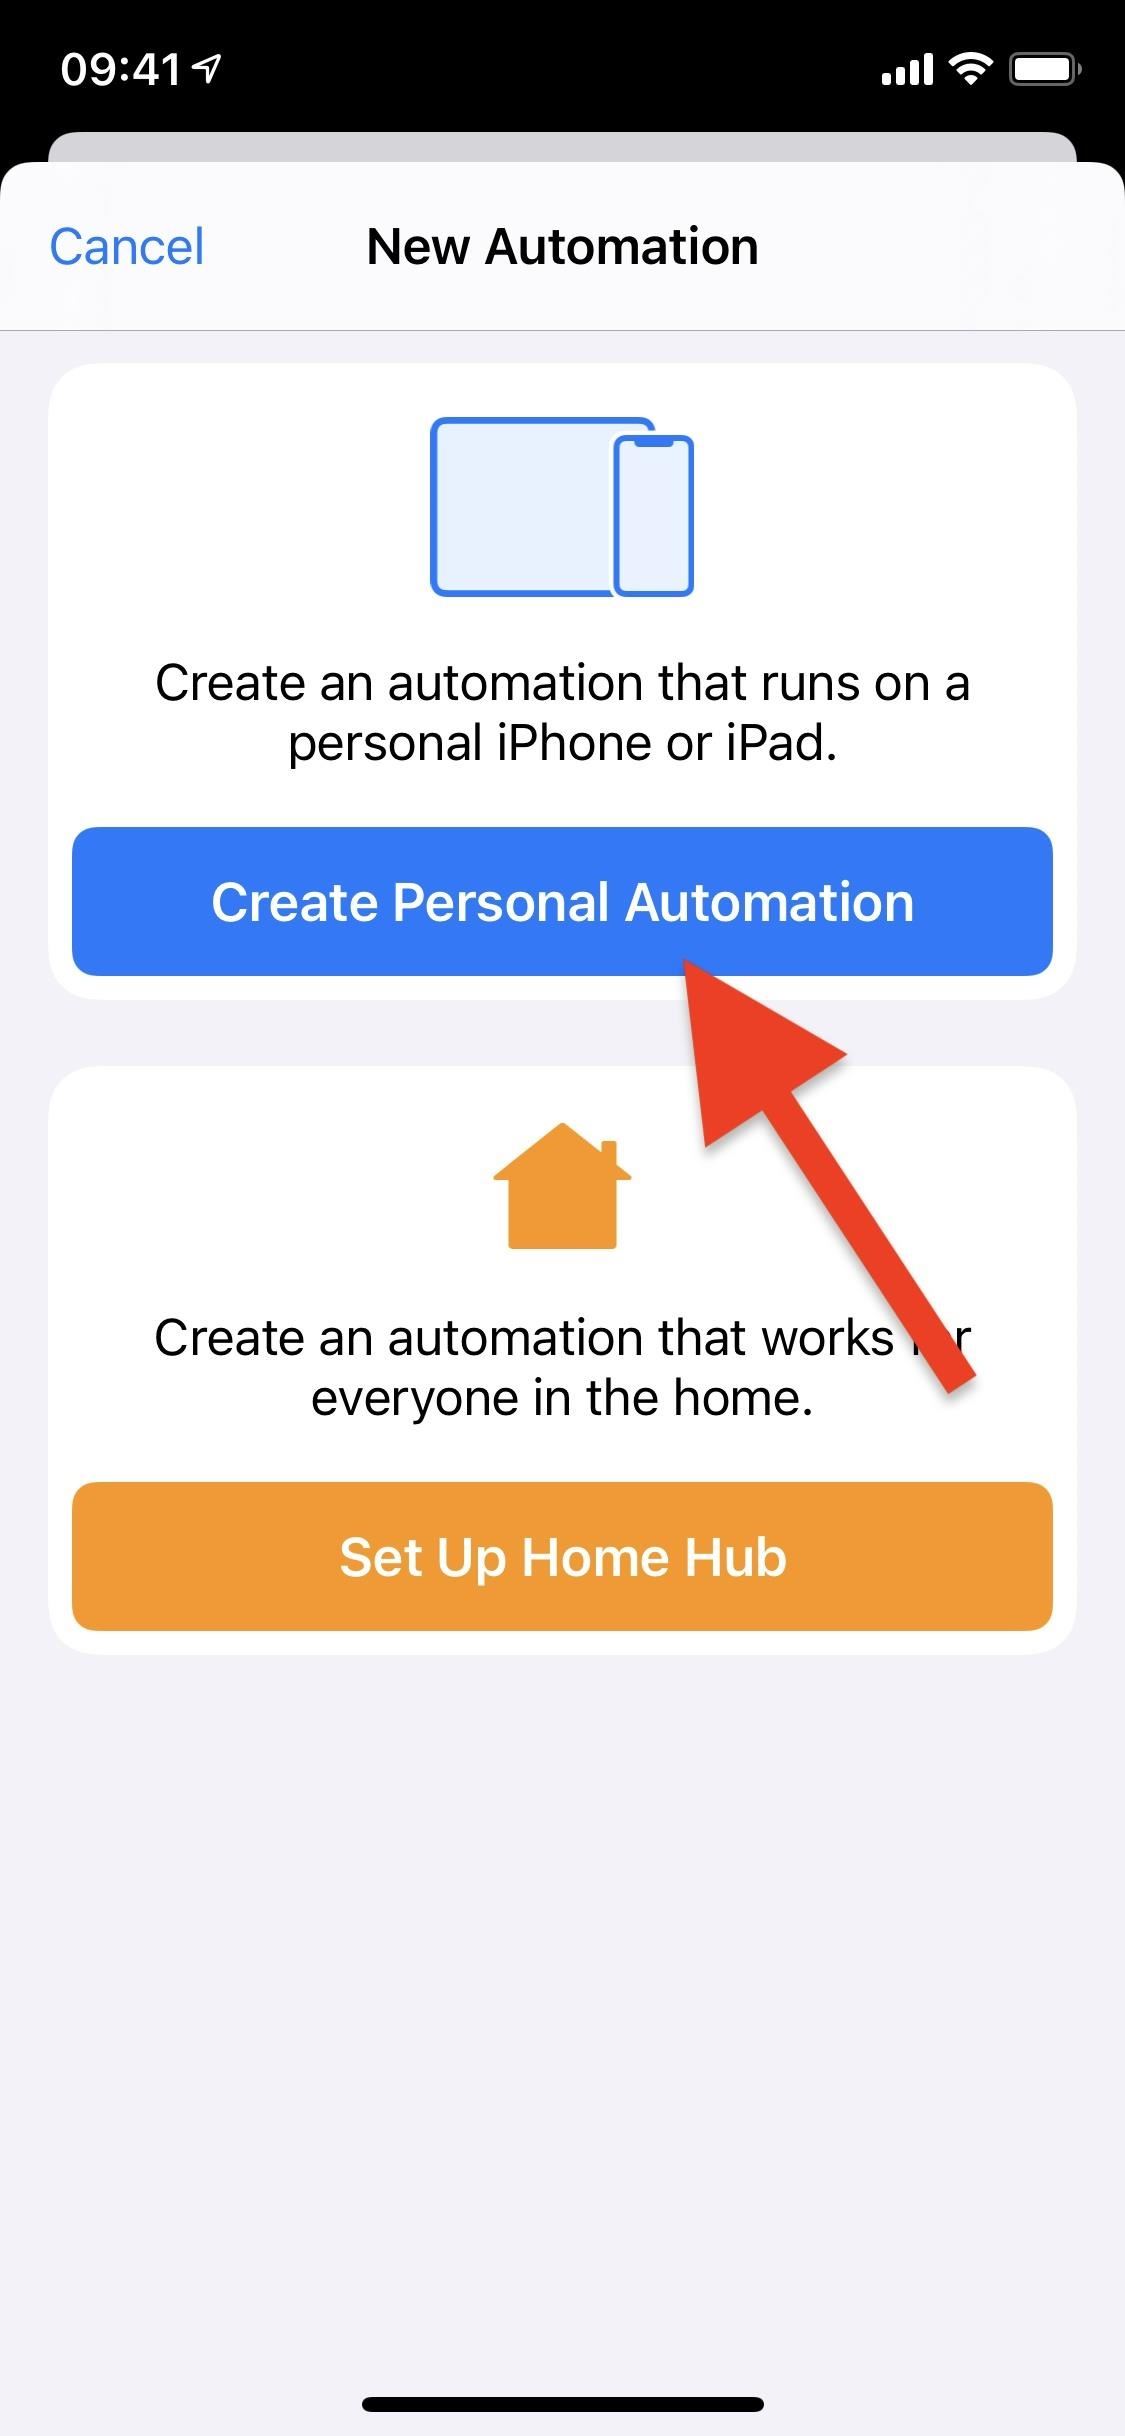
Launch the Shortcuts app and open the “Automation” tab at the bottom. Next, tap “Create Personal Automation.” If you already have one or more automations set up, tap the plus (+) icon instead, then “Create Personal Automation.”
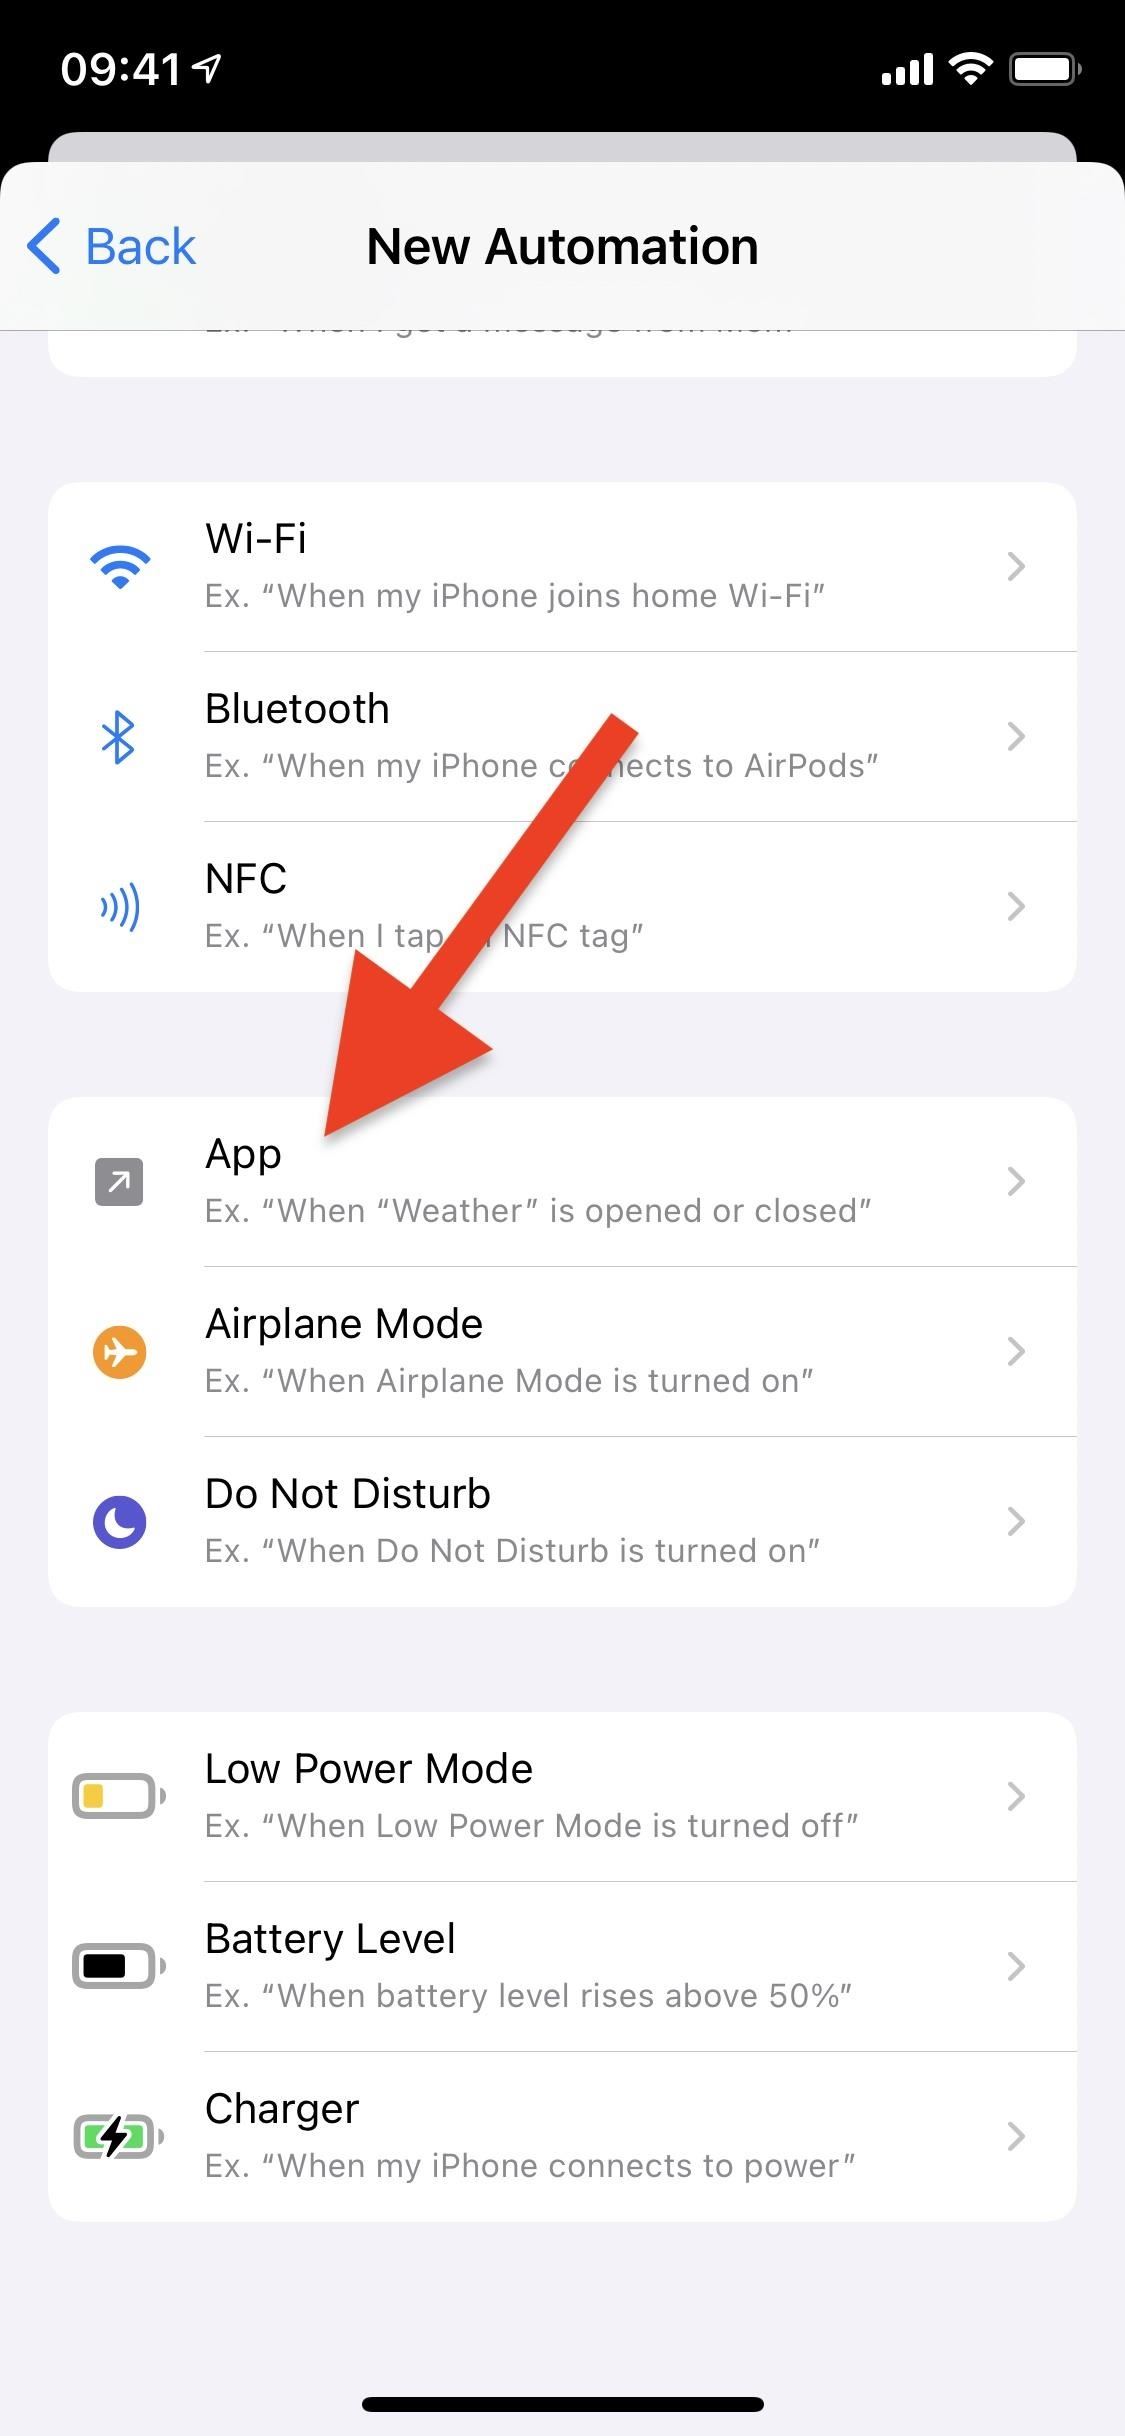
Now, choose the action that will trigger your automation. In this case, you want the Portrait Orientation Lock to change whenever you open a specific app, so choose the “App” option.
Step 2: Choose All the Apps You Want
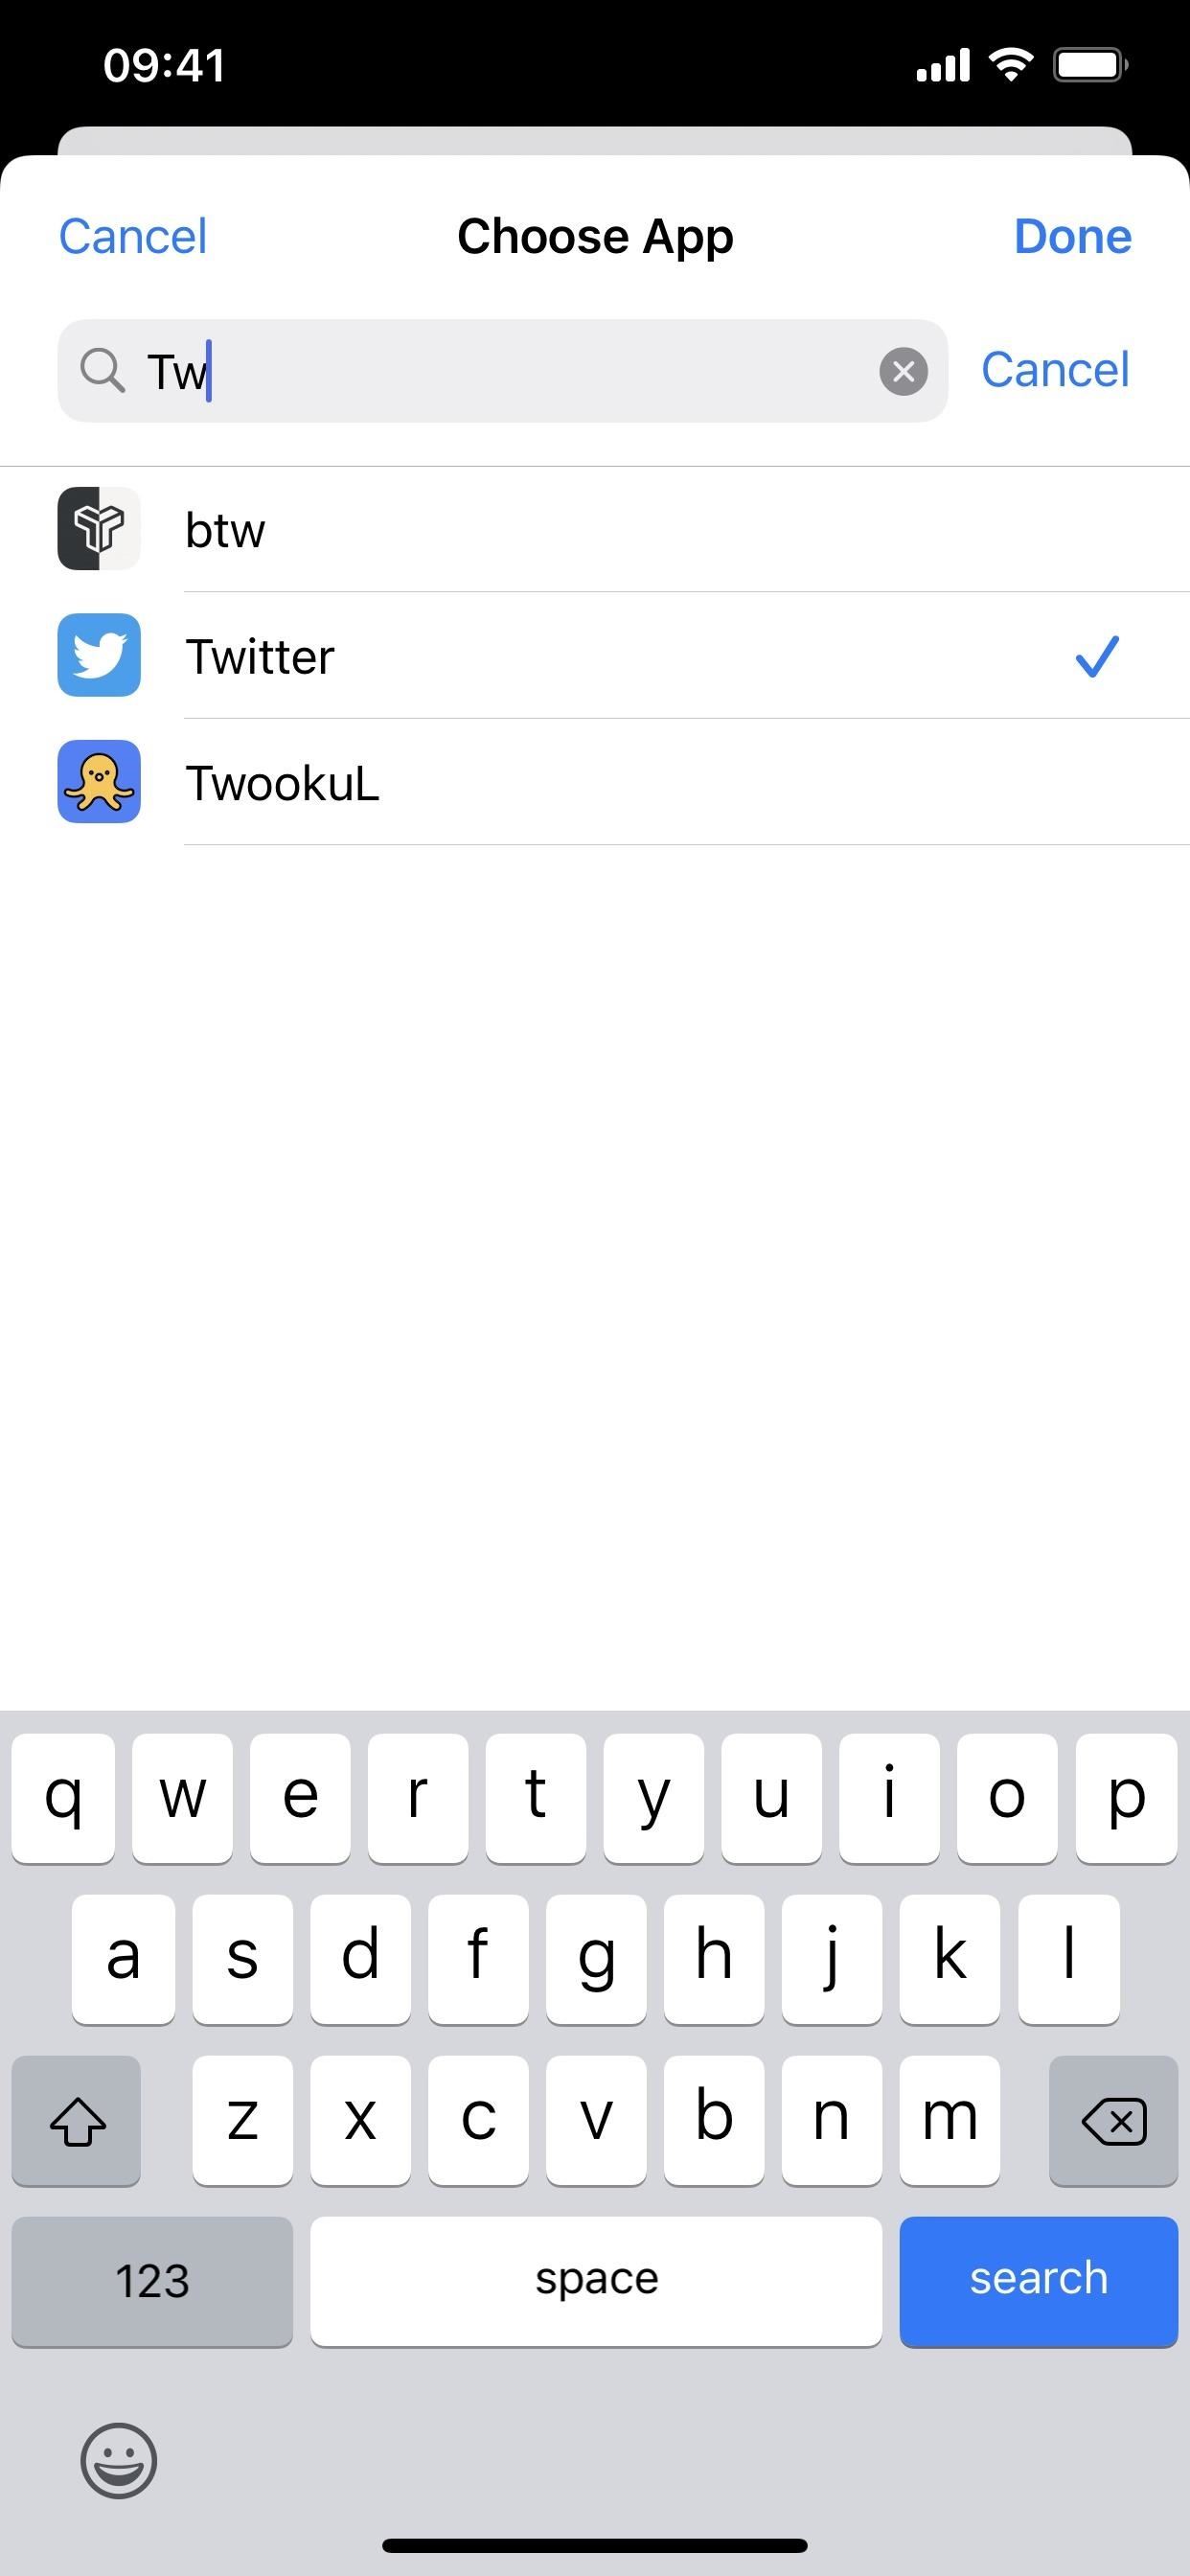
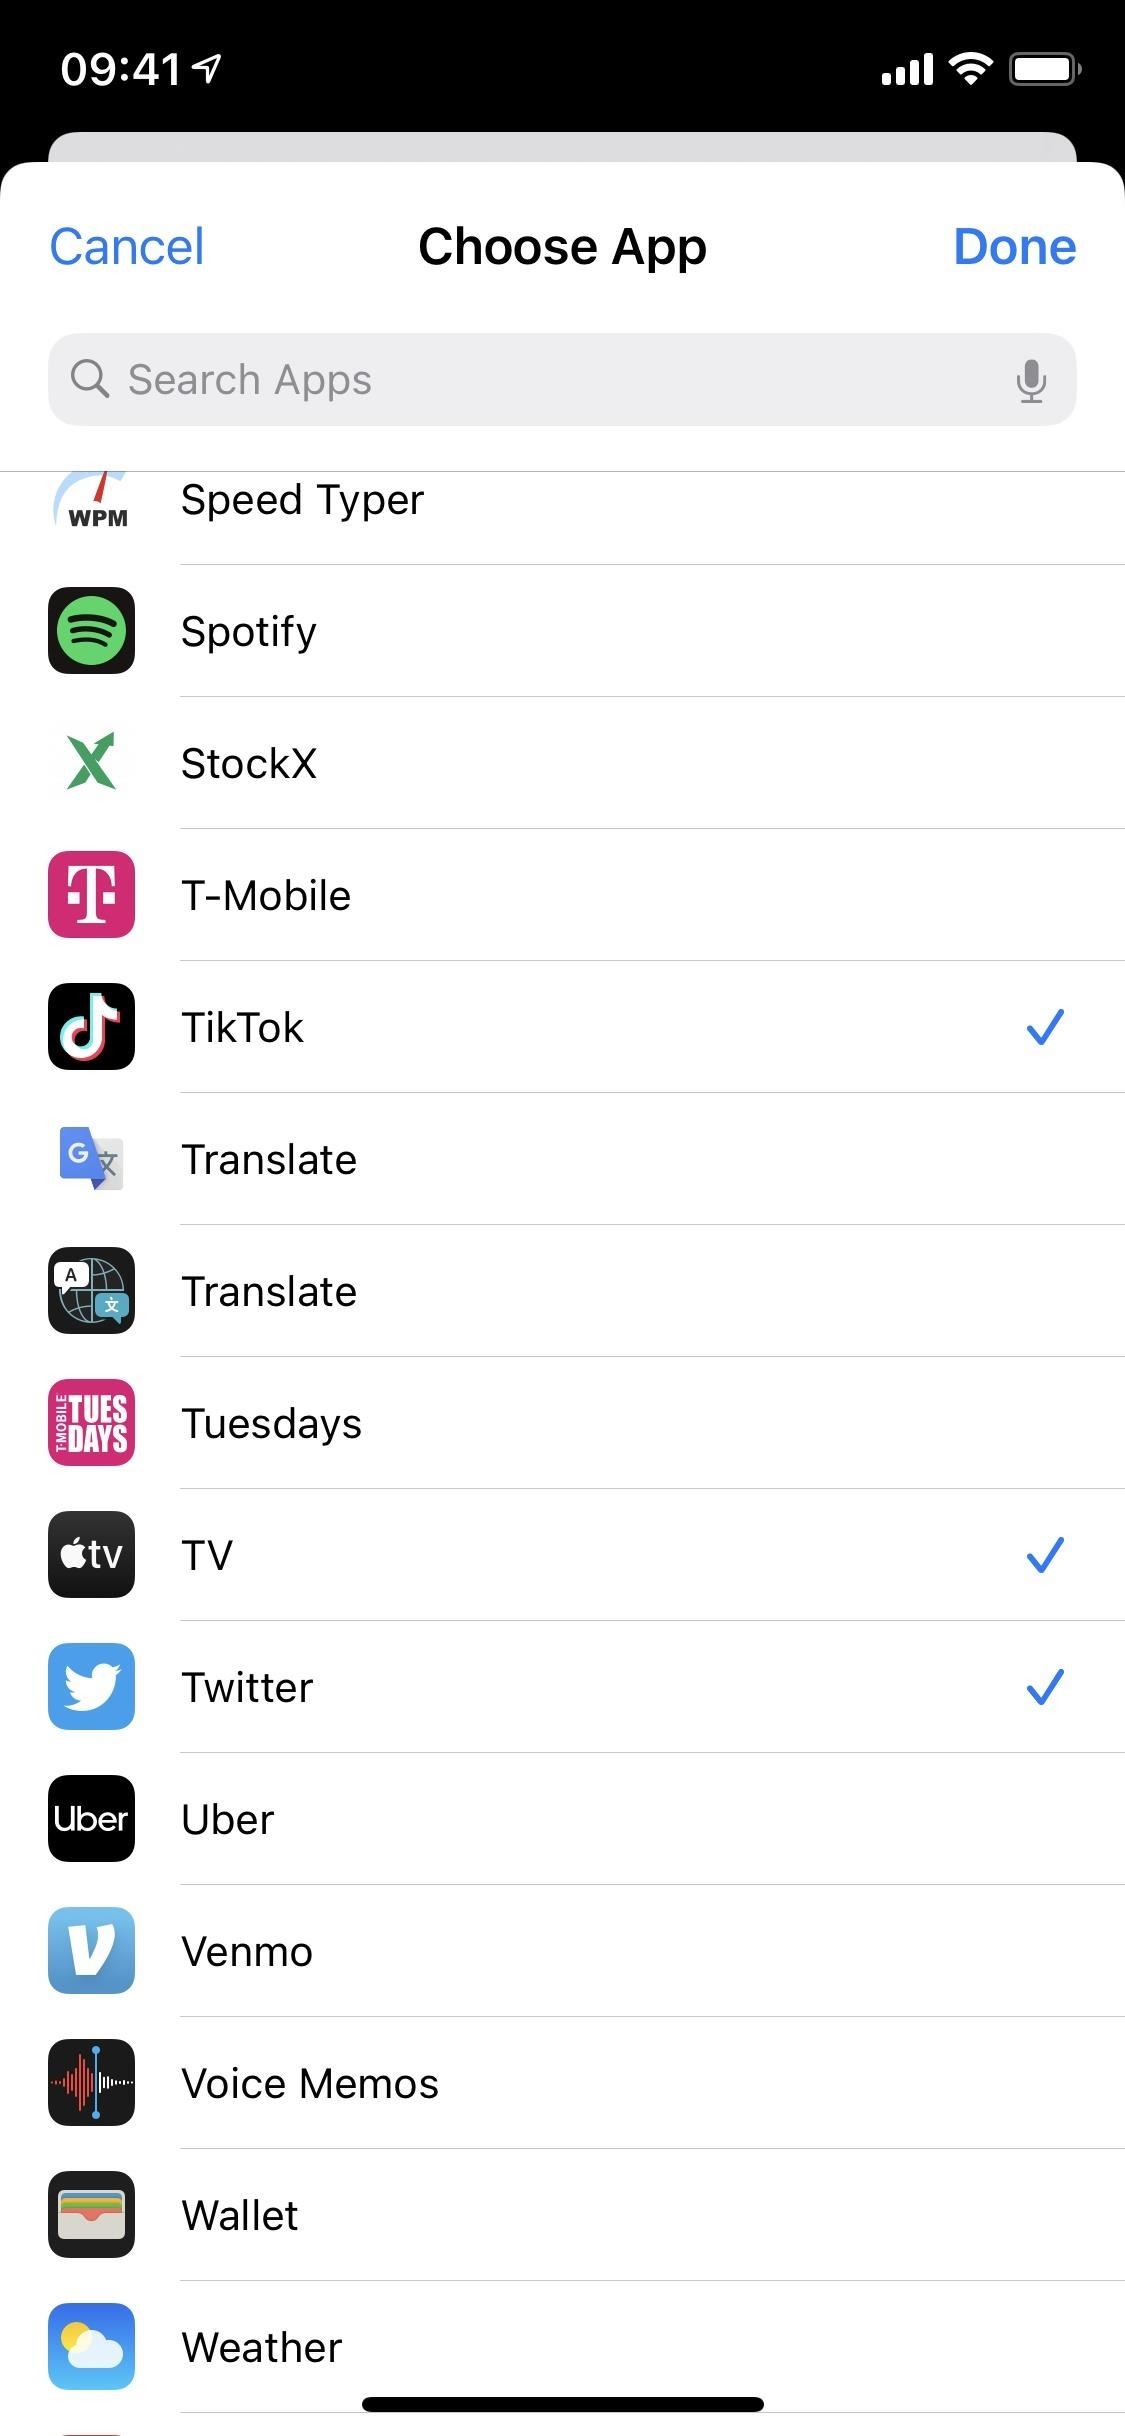
Next, tap on “Choose” and select the app or apps you want from your list of installed ones. If you want to use the automation on more than one app, make sure each is checked in the list, then hit “Done” in the top right. (You can always come back and edit the automation later if you want to add or subtract apps.)
Back on the New Automation page, it’ll say “Any of [#] Apps” if you choose more than one. If not, you’ll see the name of the one app next to App.
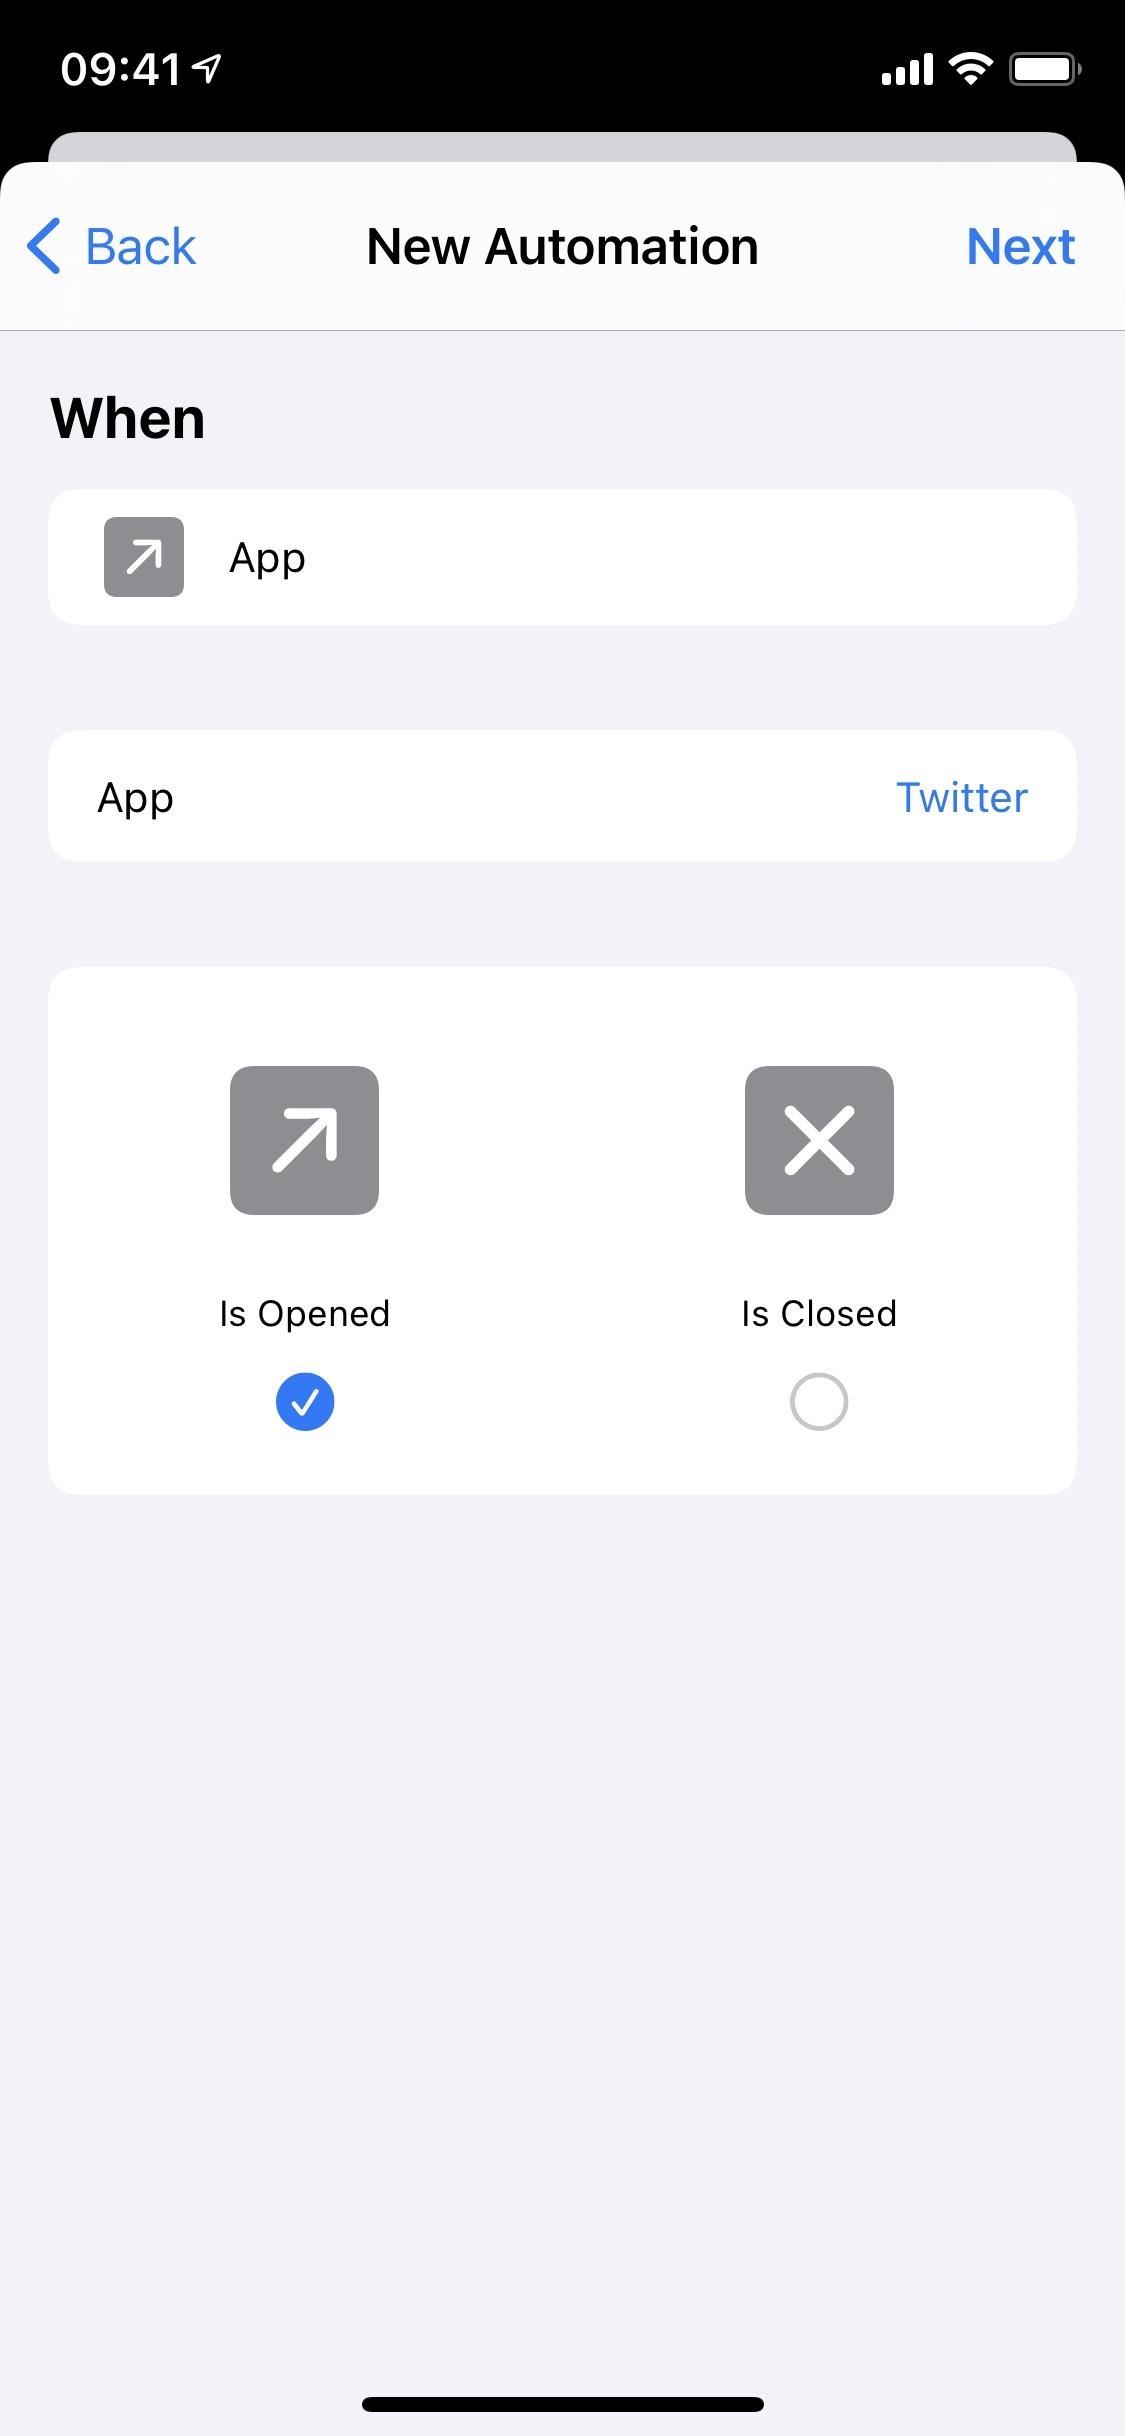
Step 3: Make It Work When Apps Open or Close
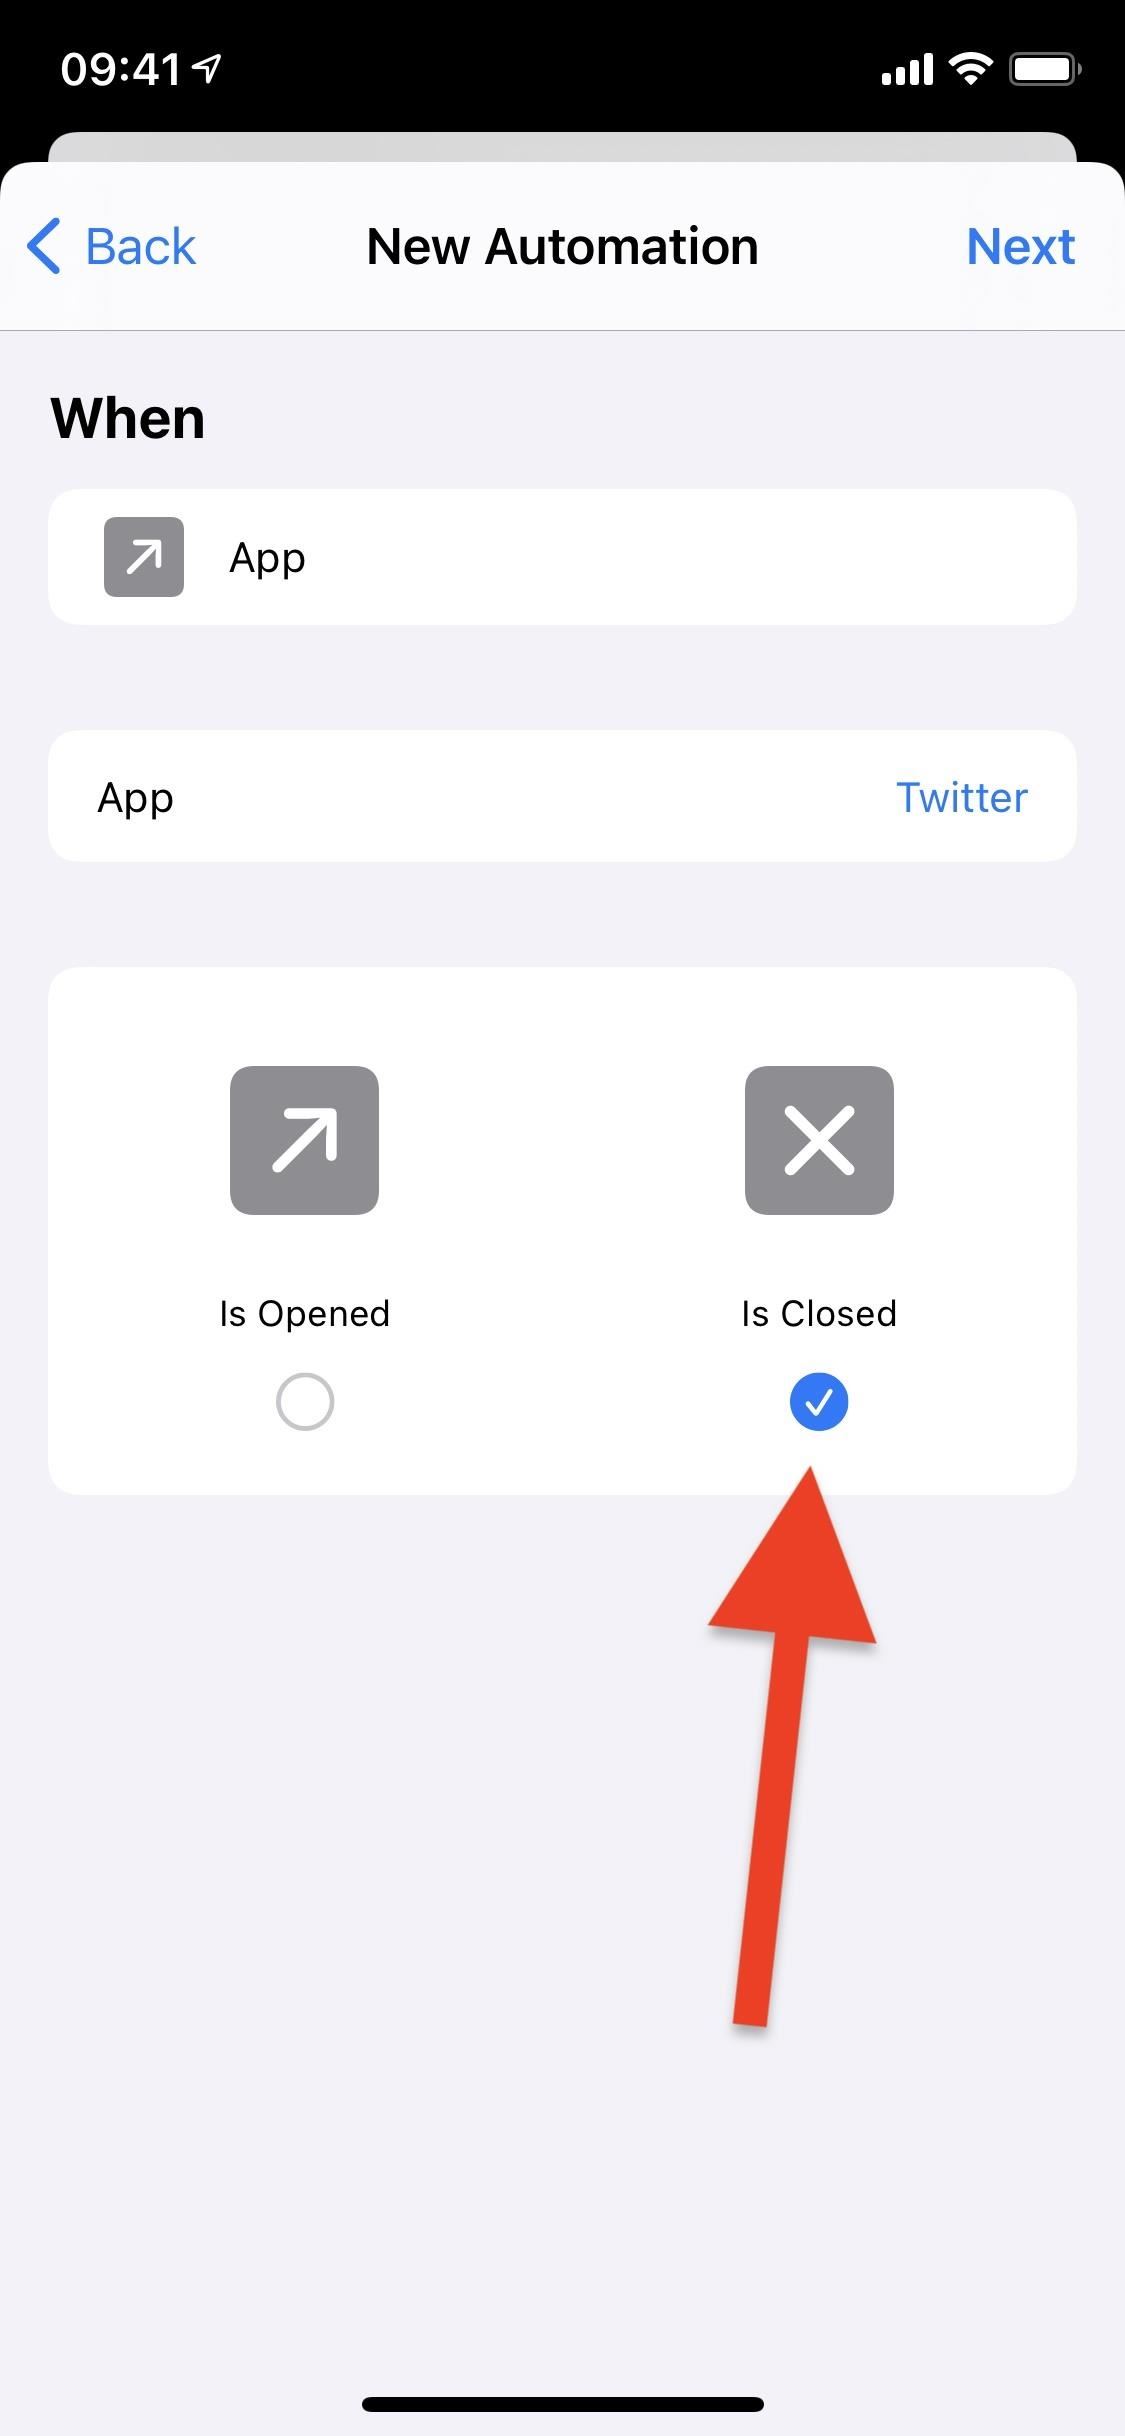
Before proceeding, make sure that “Is Opened” or “Is Closed” is checked. The opened option should be enabled by default. If you’re creating two separate automations, keep it as-is. You’ll come back here later to choose “Is Closed” for the second automation. Hit “Next” to continue.
Step 4: Add the Orientation Lock Action
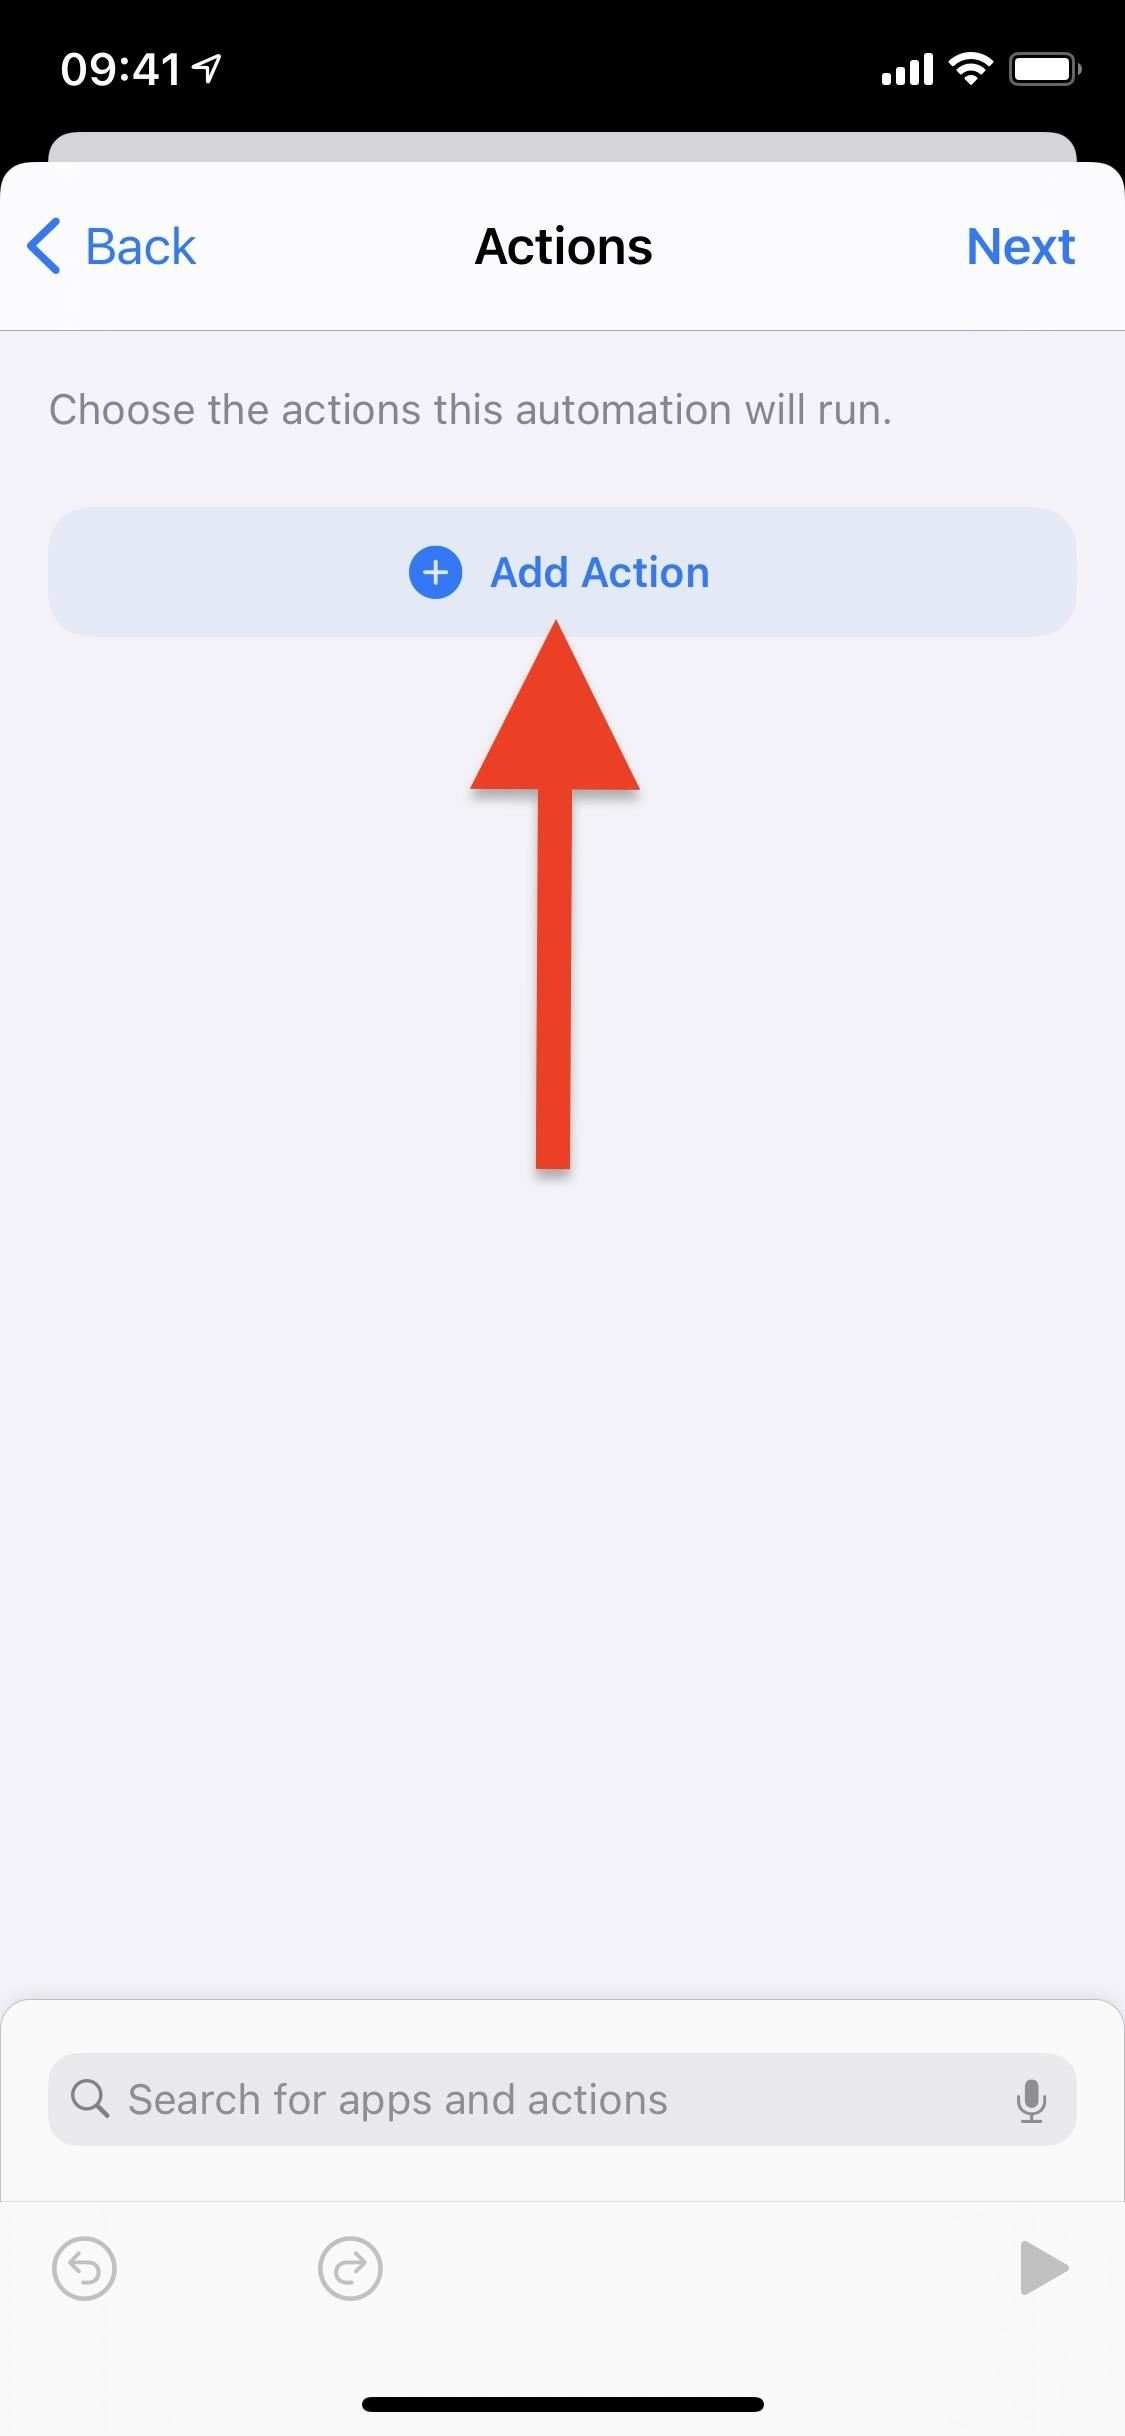
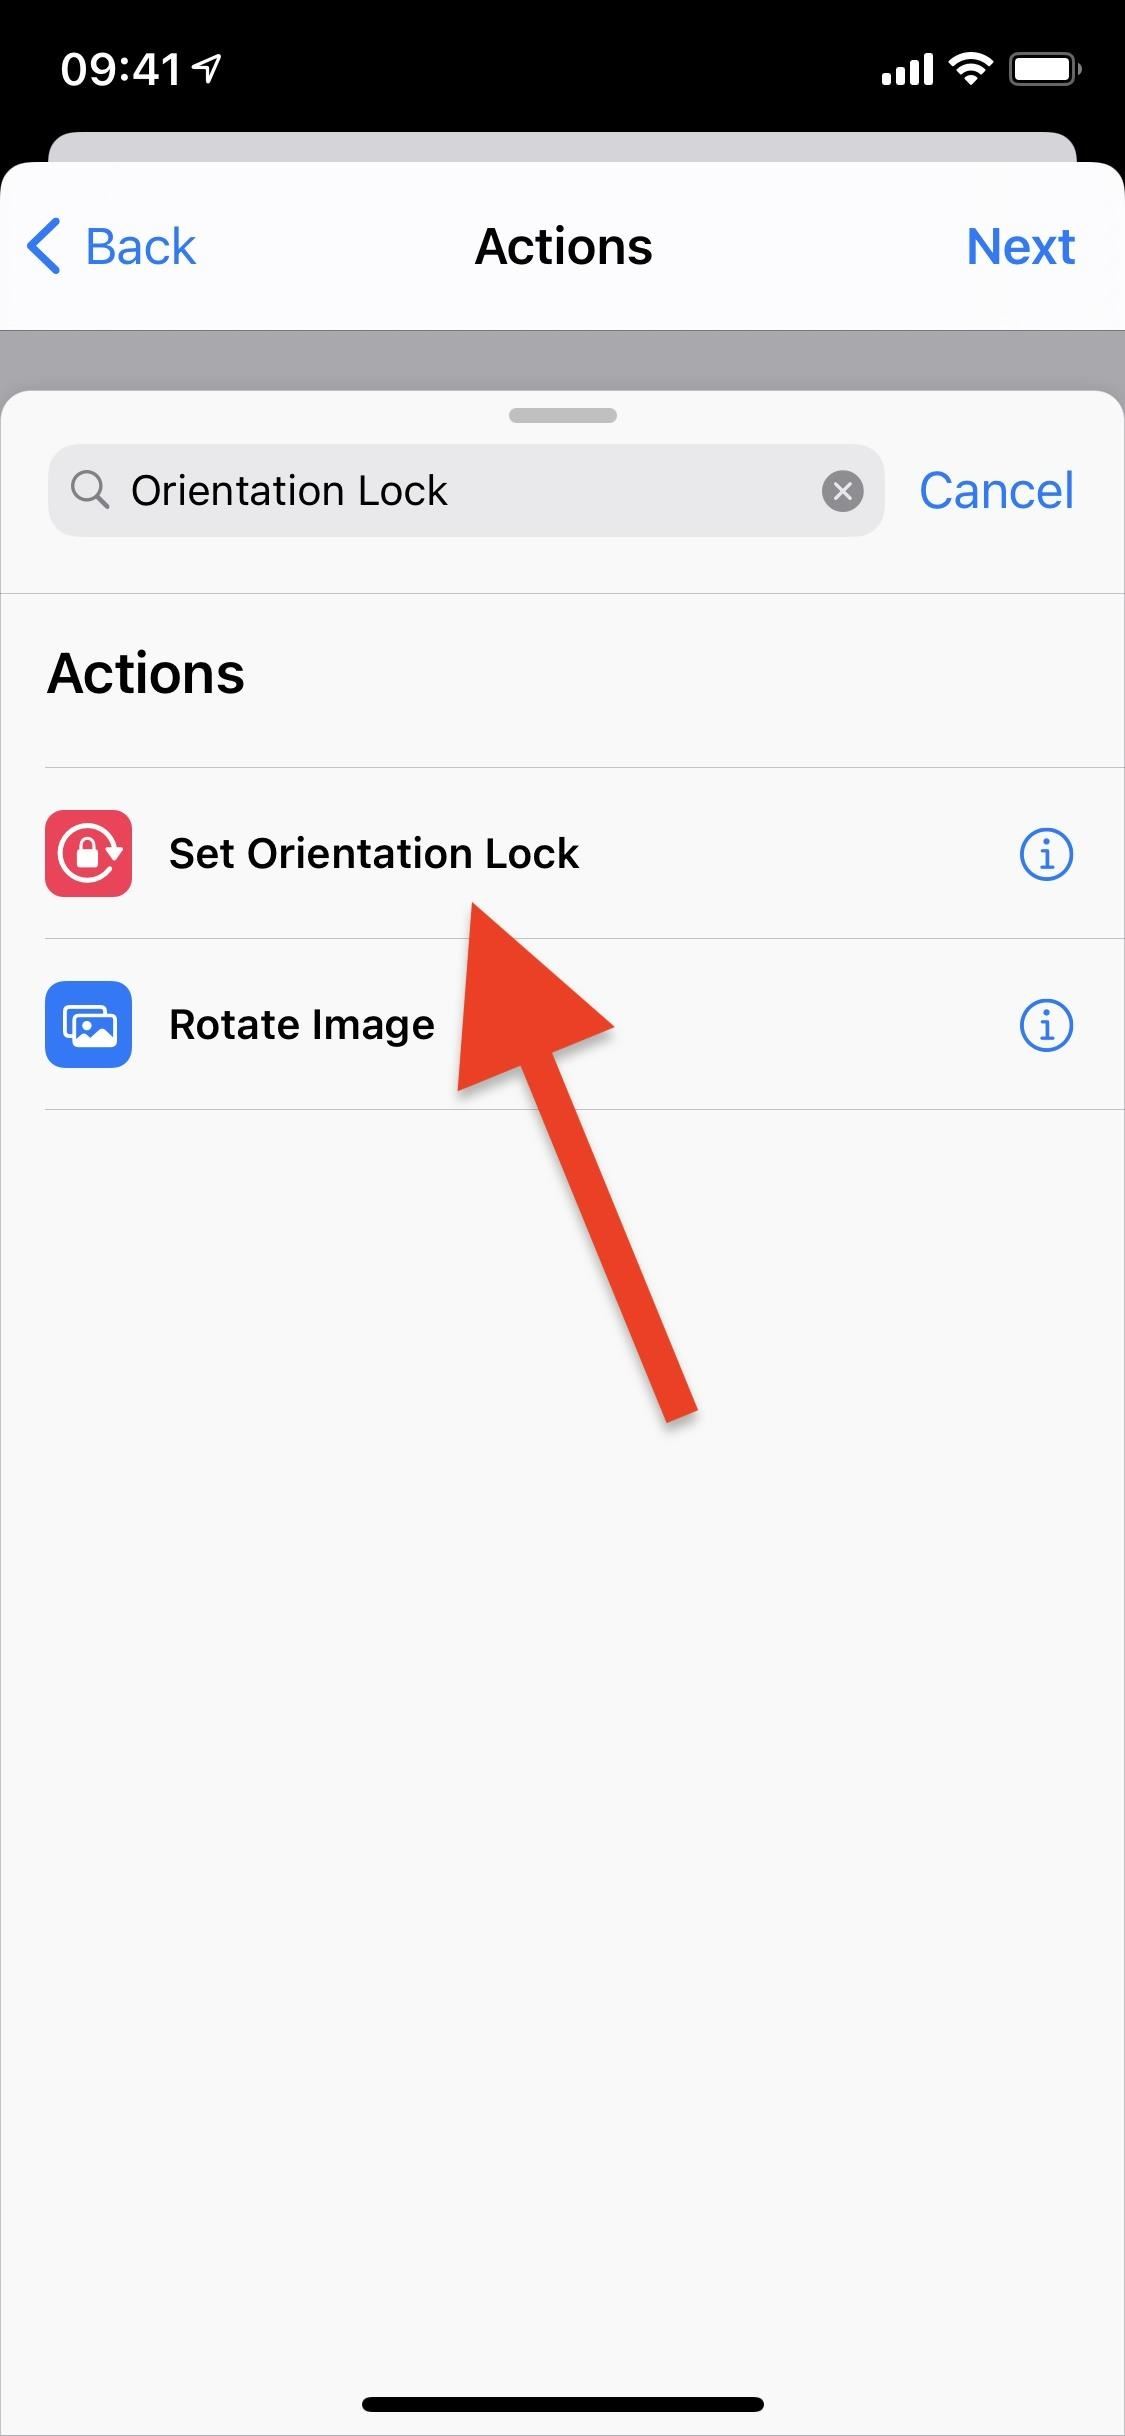
In the automation, tap “Add Action” or the search bar at the bottom, then search for “Set Orientation Lock” and tap the action when it appears in the results.
Step 5: Choose How You Want to Configure It
Now, there are two routes you could go here. The first way is to keep it set to “Toggle” the Portrait Orientation Lock. That means it’ll trigger the action whenever I open my chosen app, Twitter, and it will trigger it again when I leave my chosen app. This is the easiest way to set it up.
However, you could also create two separation automations, one that turns Portrait Orientation Lock on or off when you open your selected app and another that turns Portrait Orientation Lock on or off when you close your selected app. This may be more useful to you if you use the app switcher a lot; if you have more than one app selected using the “Toggle” route, then switch from one of the selected apps to another using the app switcher, things will get pretty confusing real quick.
Option 1: Keep the ‘Toggle’ Configuration
For this option, keep “Toggle” selected in the action box so that it will turn on or off whenever you open or close any of the apps you selected. Again, this could get confusing if you use the app switcher a lot, so keep that in mind. Next, go back and set it to work when the app or apps “Is Opened” and “Is Closed,” i.e., like in Step 3 only with both selected.
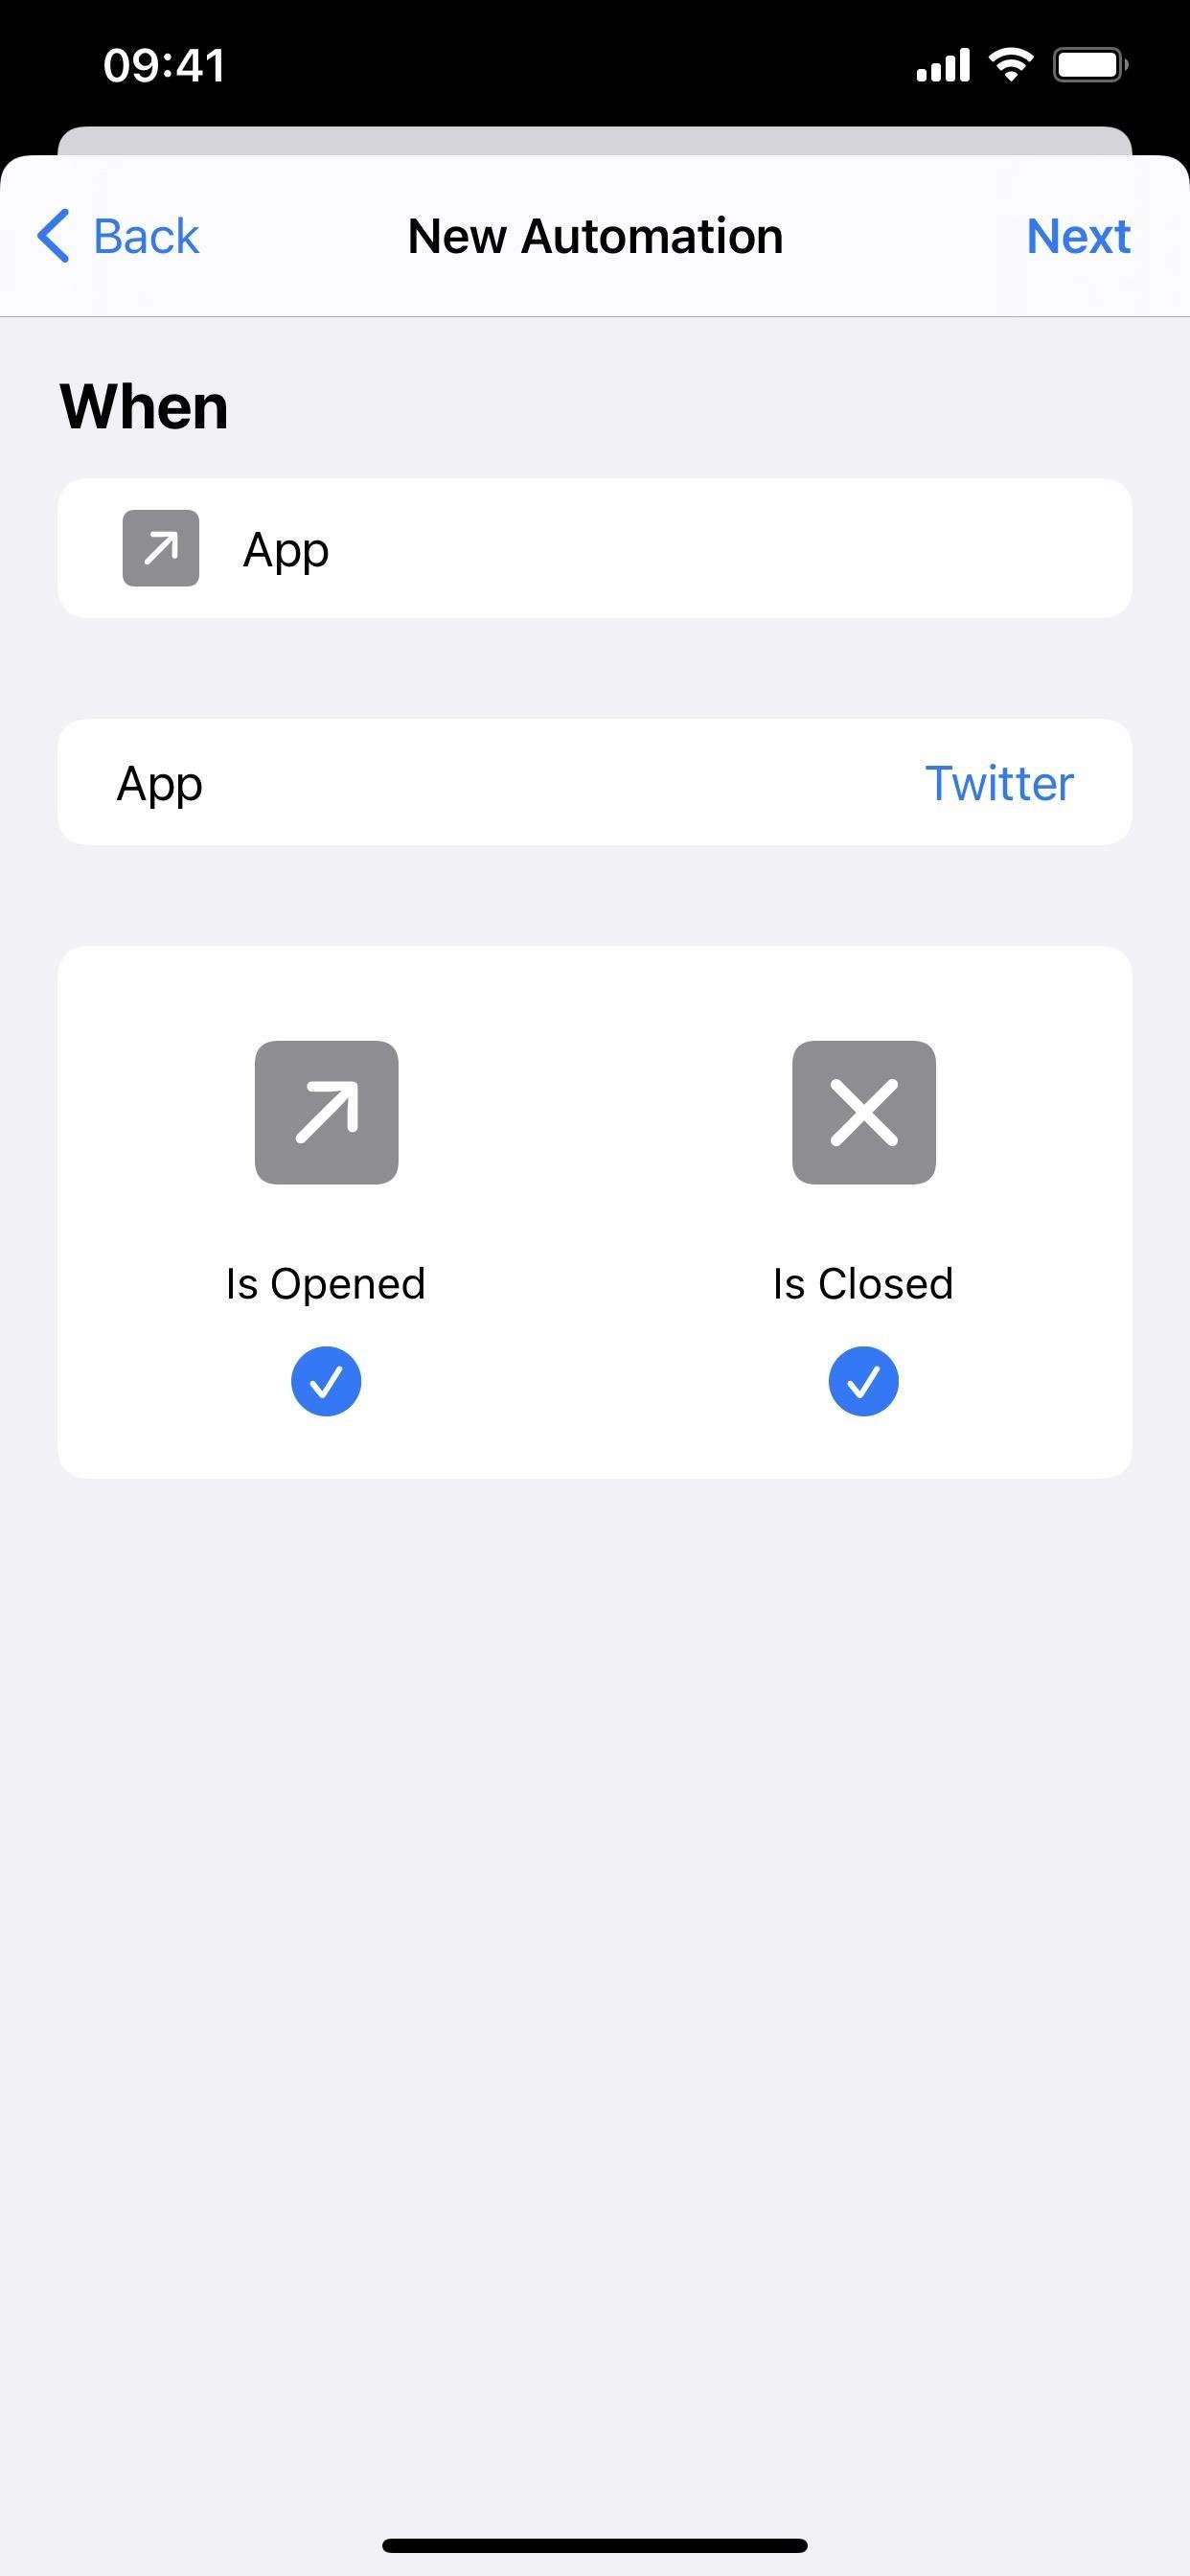
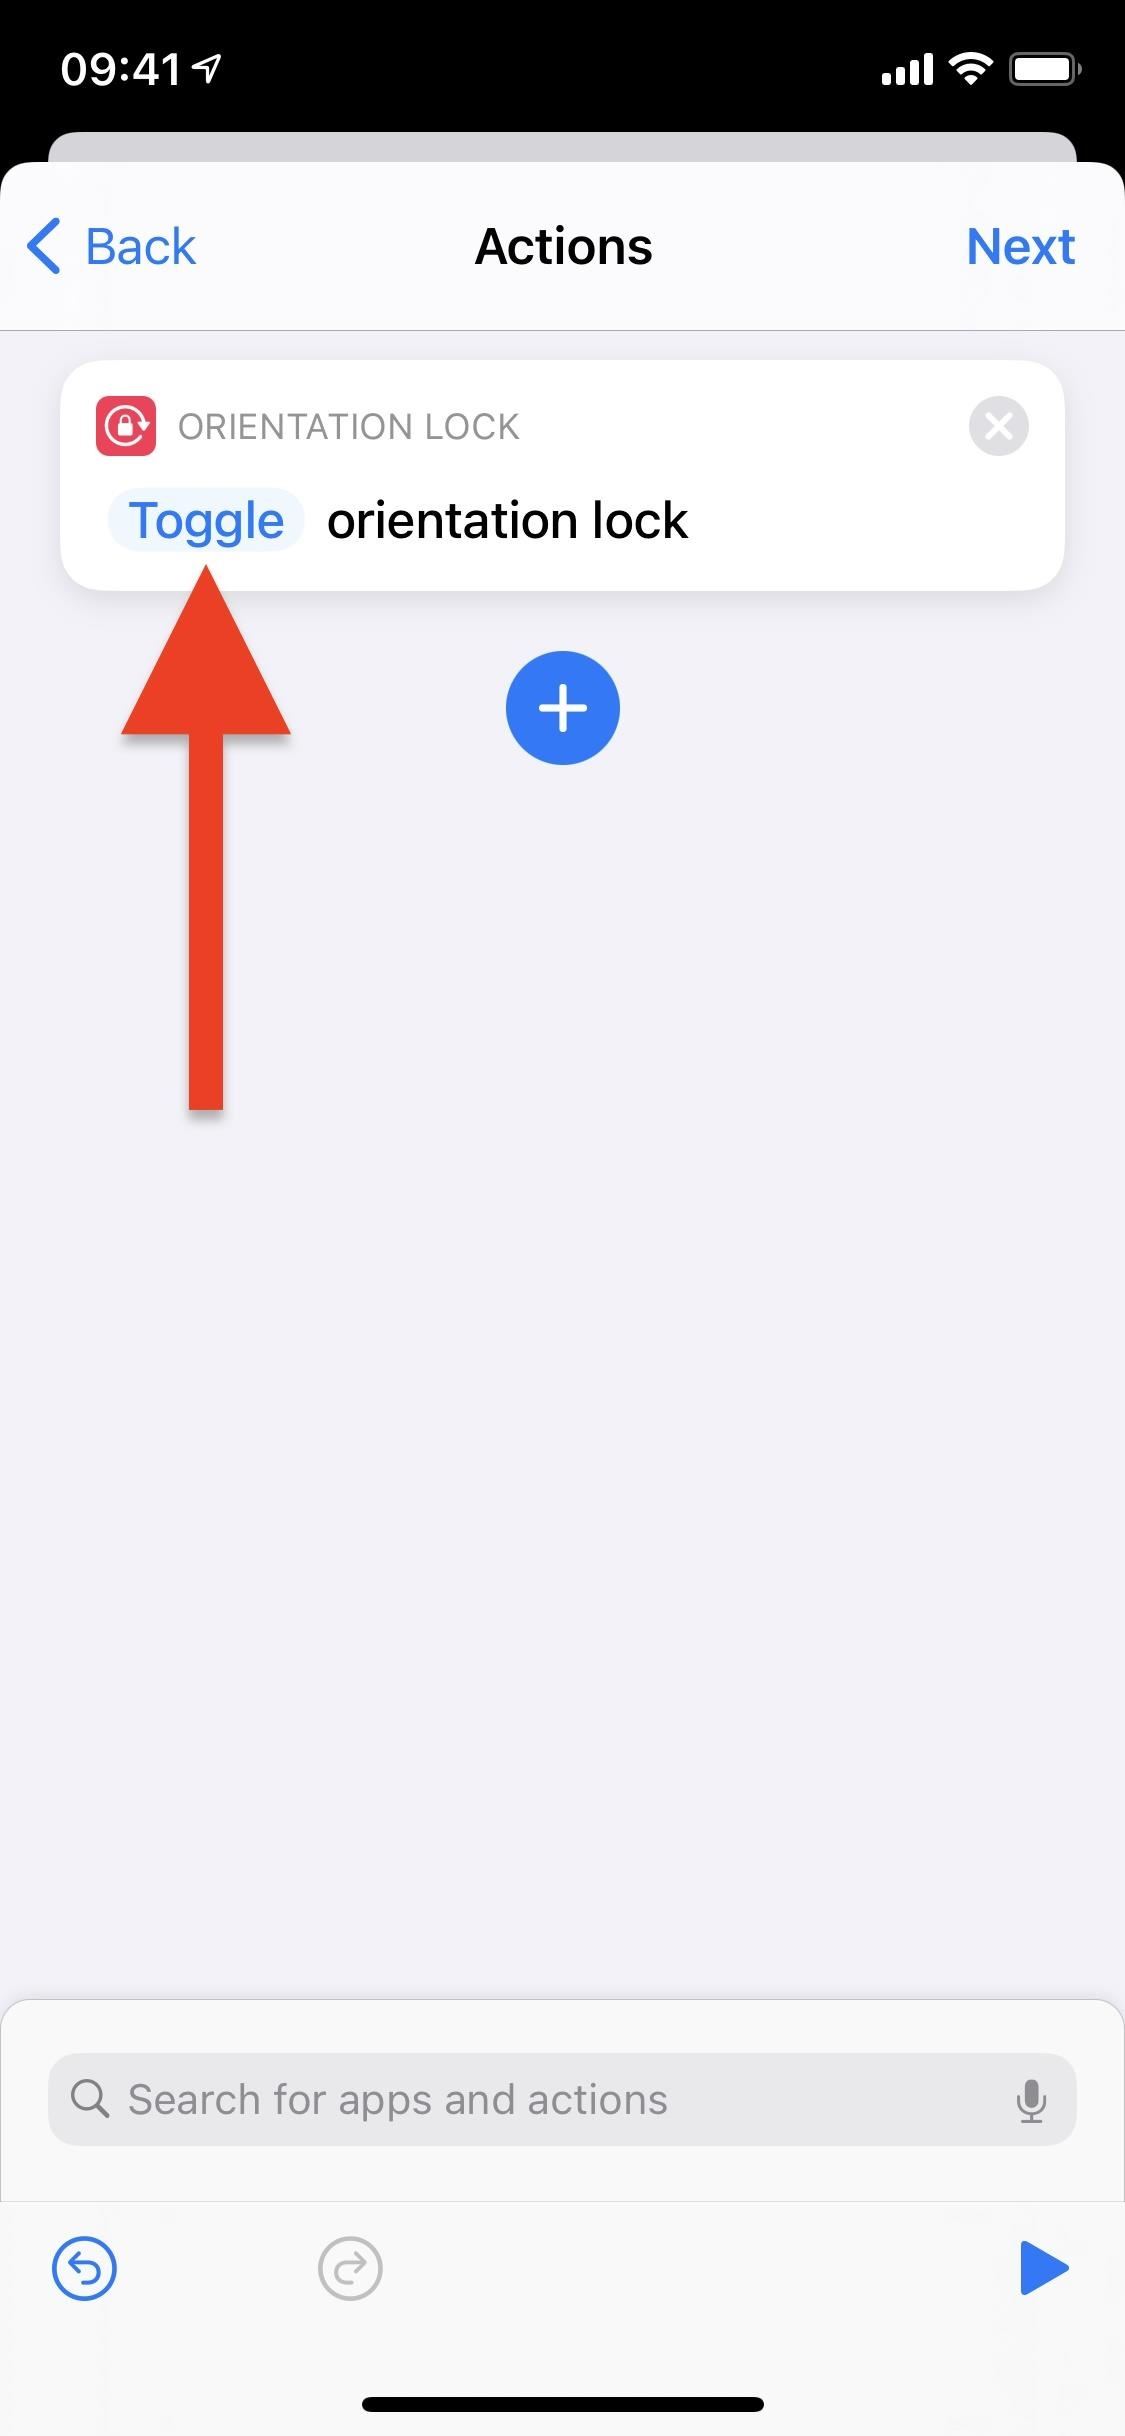
To continue setting it up as “Toggle,” follow the rest of the instructions for the “Turn” option below. If it doesn’t end up working for you, start over again with Option 2 instead.
Option 2: Choose the ‘Turn’ Configuration
For two separate automations, tap “Toggle” in the Orientation Lock action box instead, then choose “Turn” and keep it as “On” or change it to “Off,” as needed.

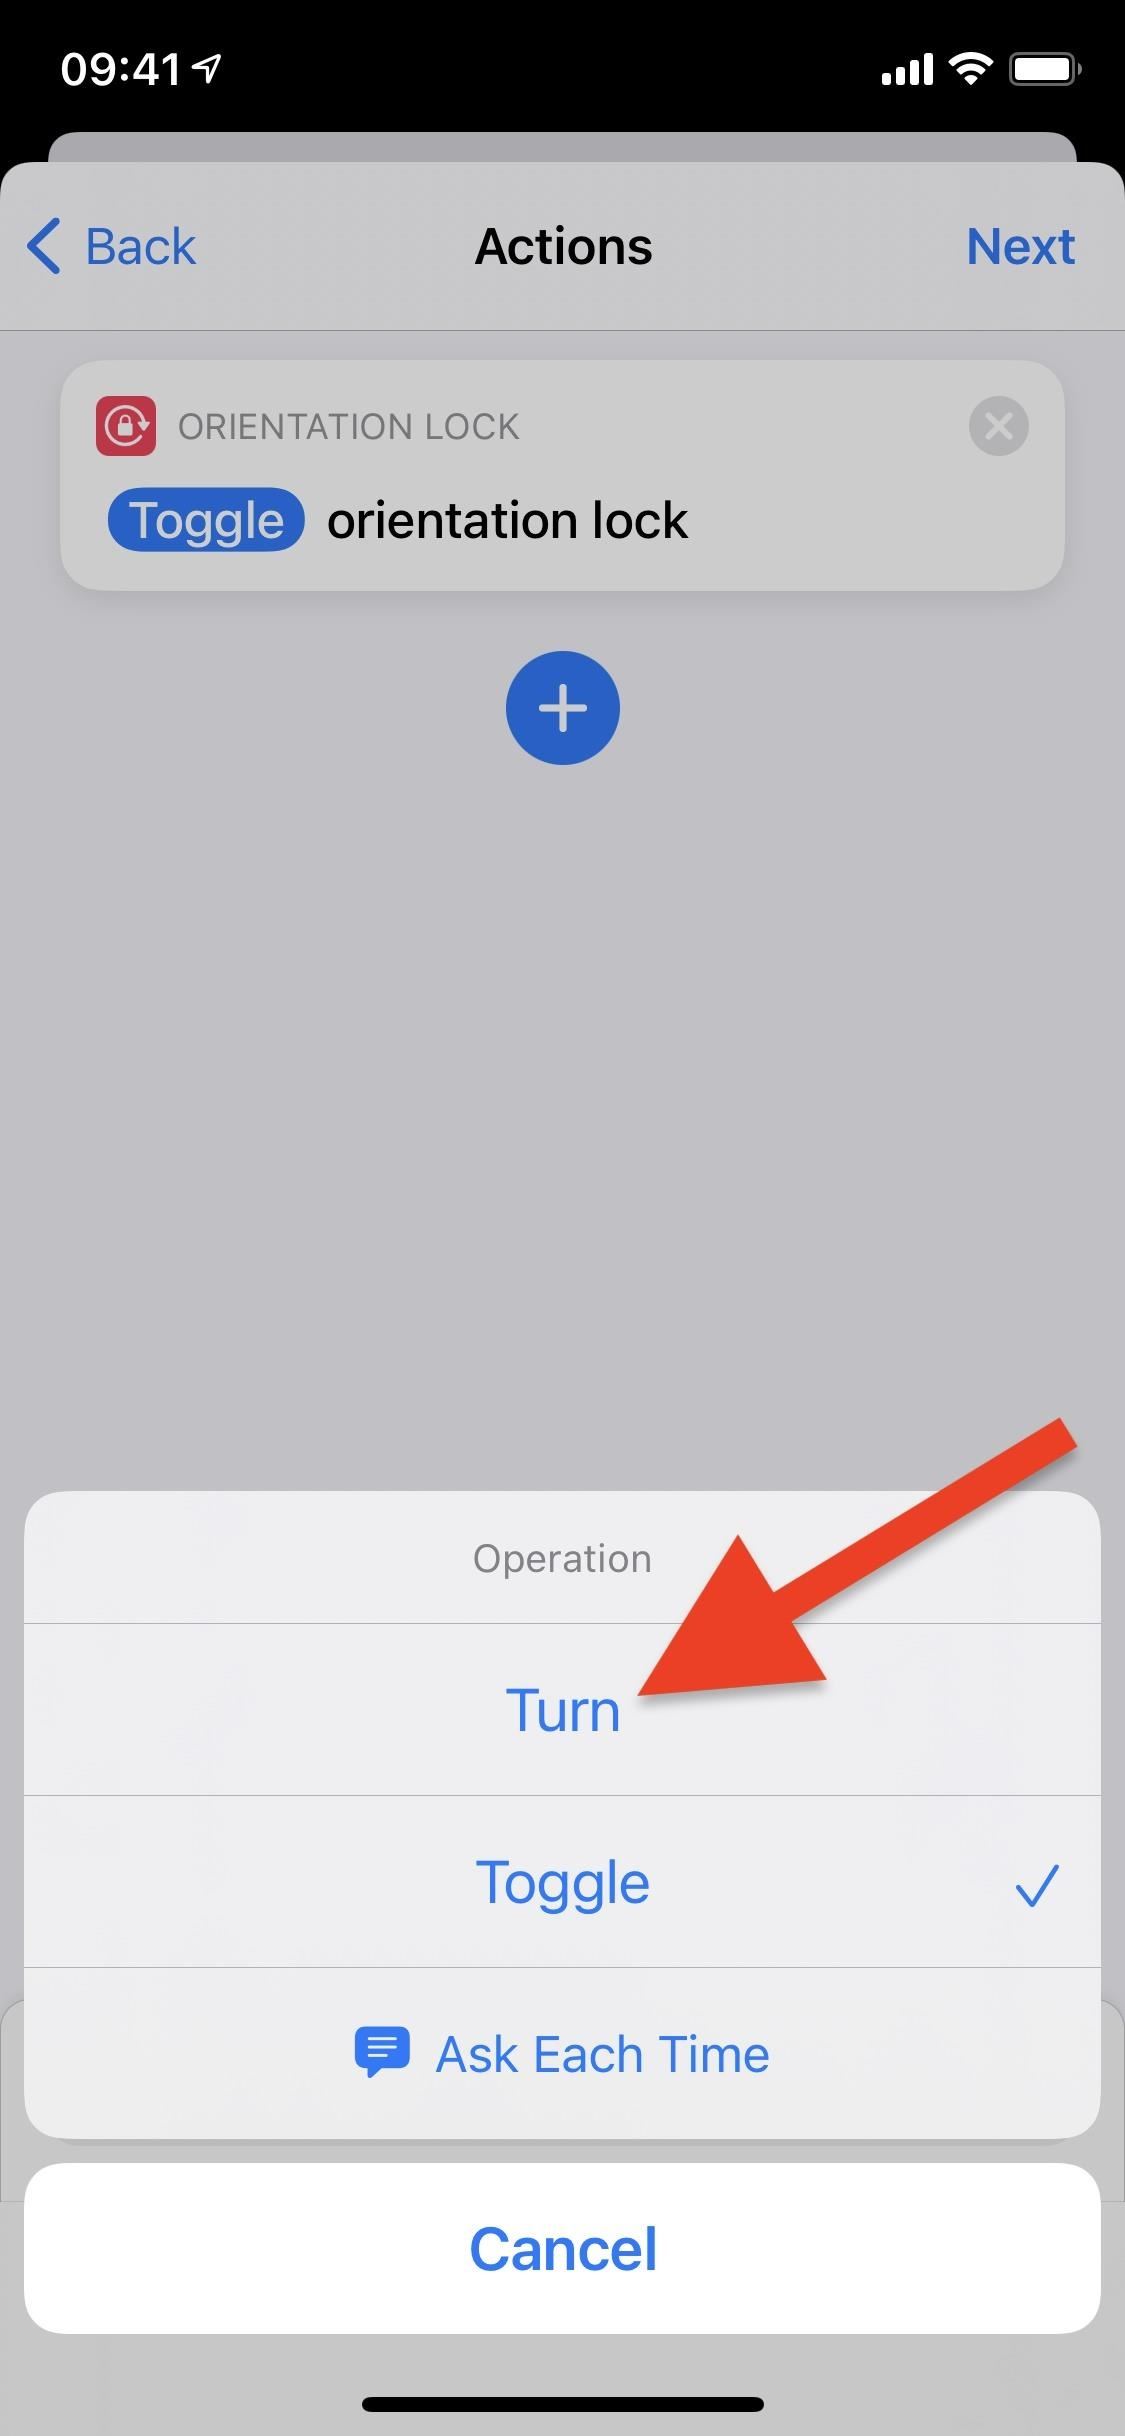
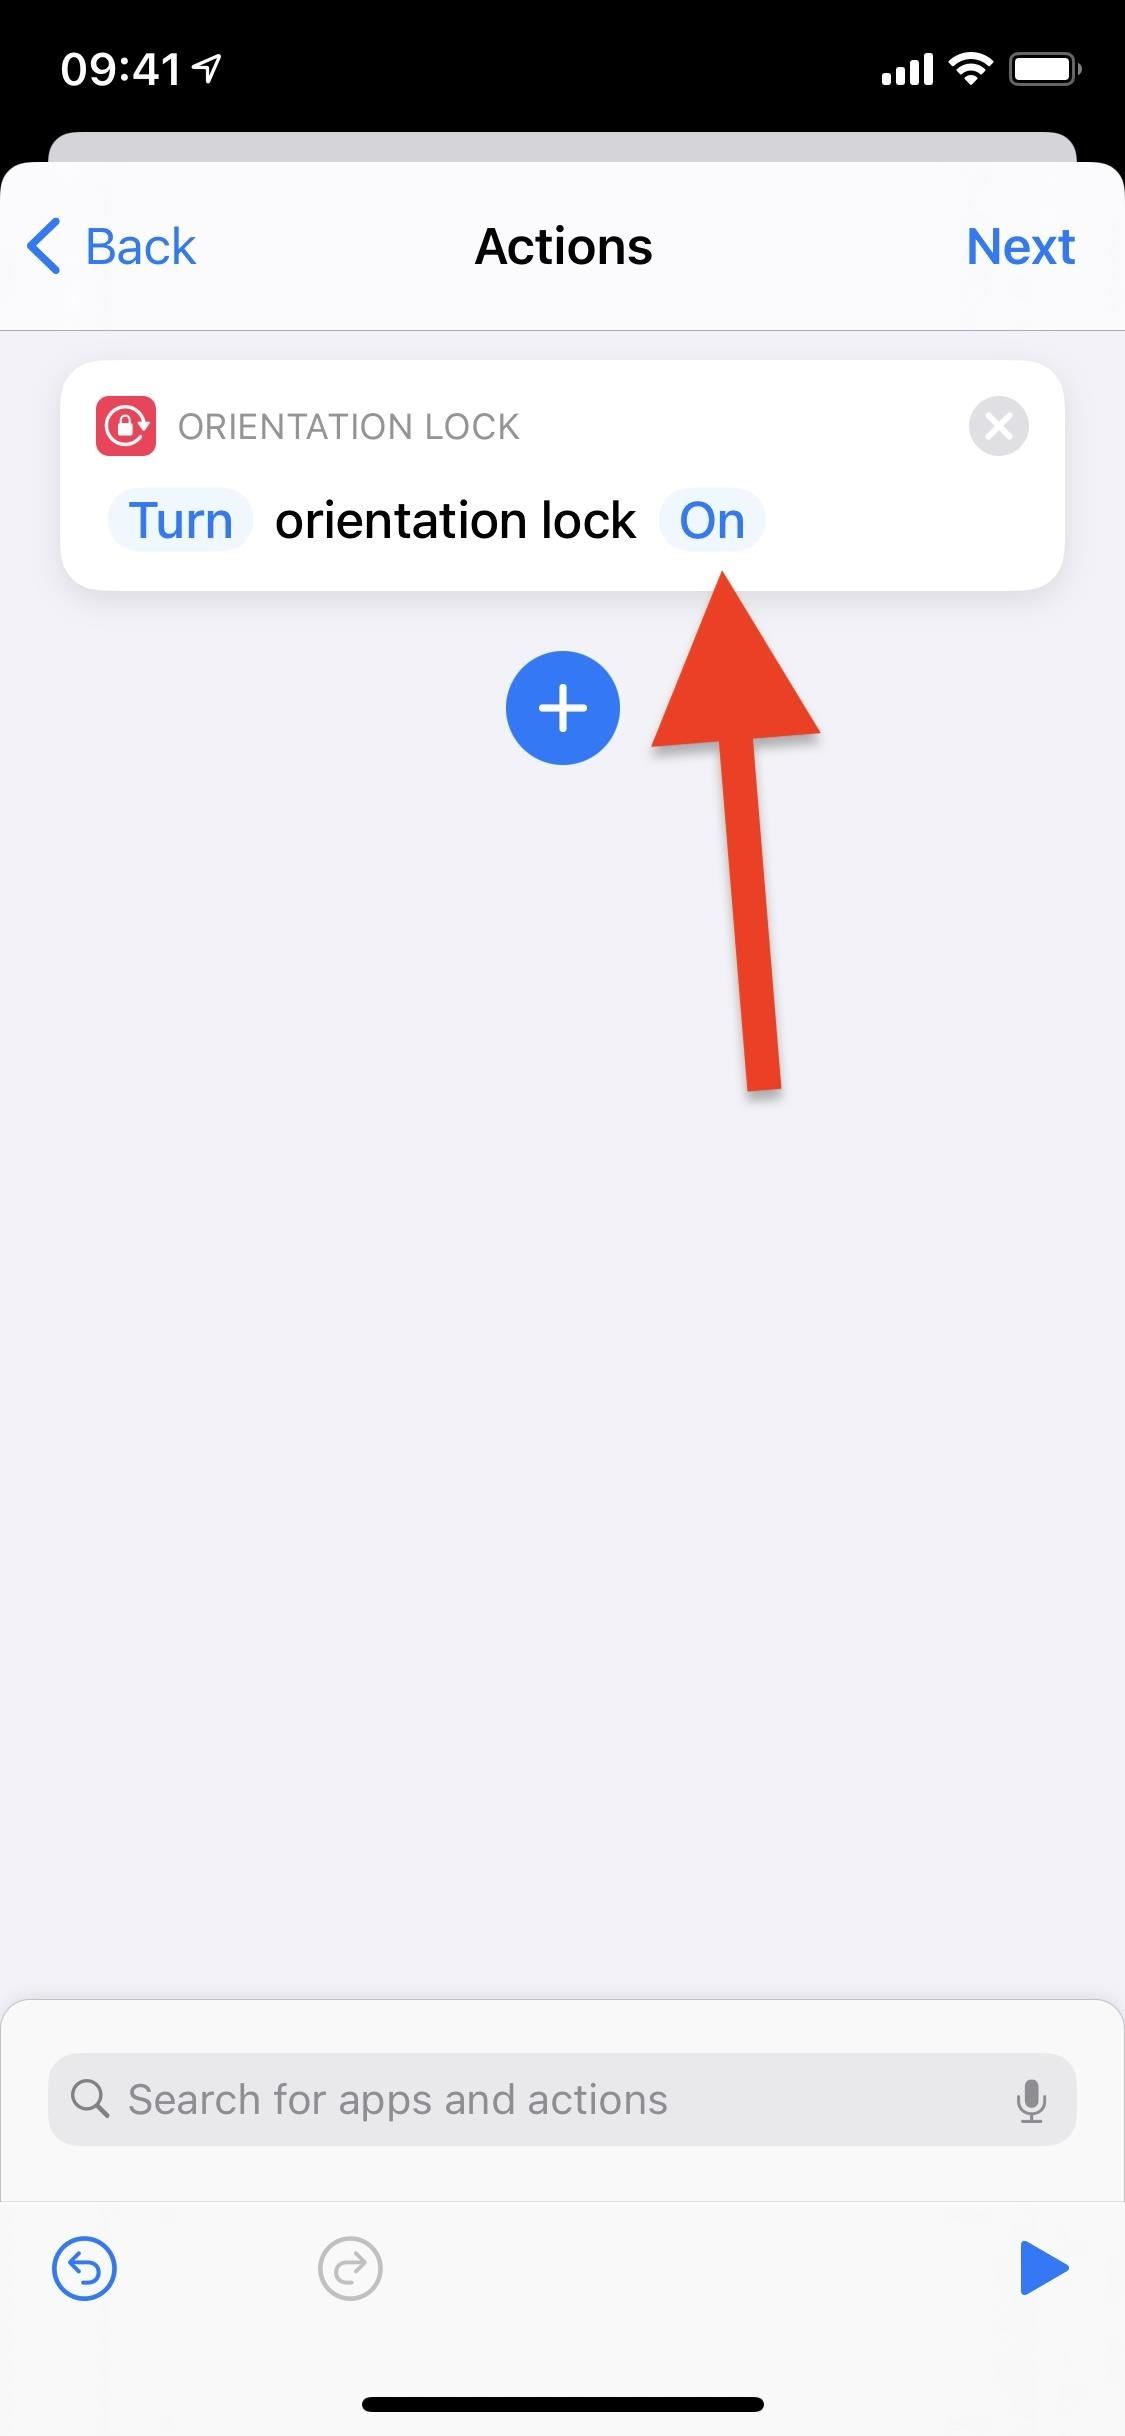
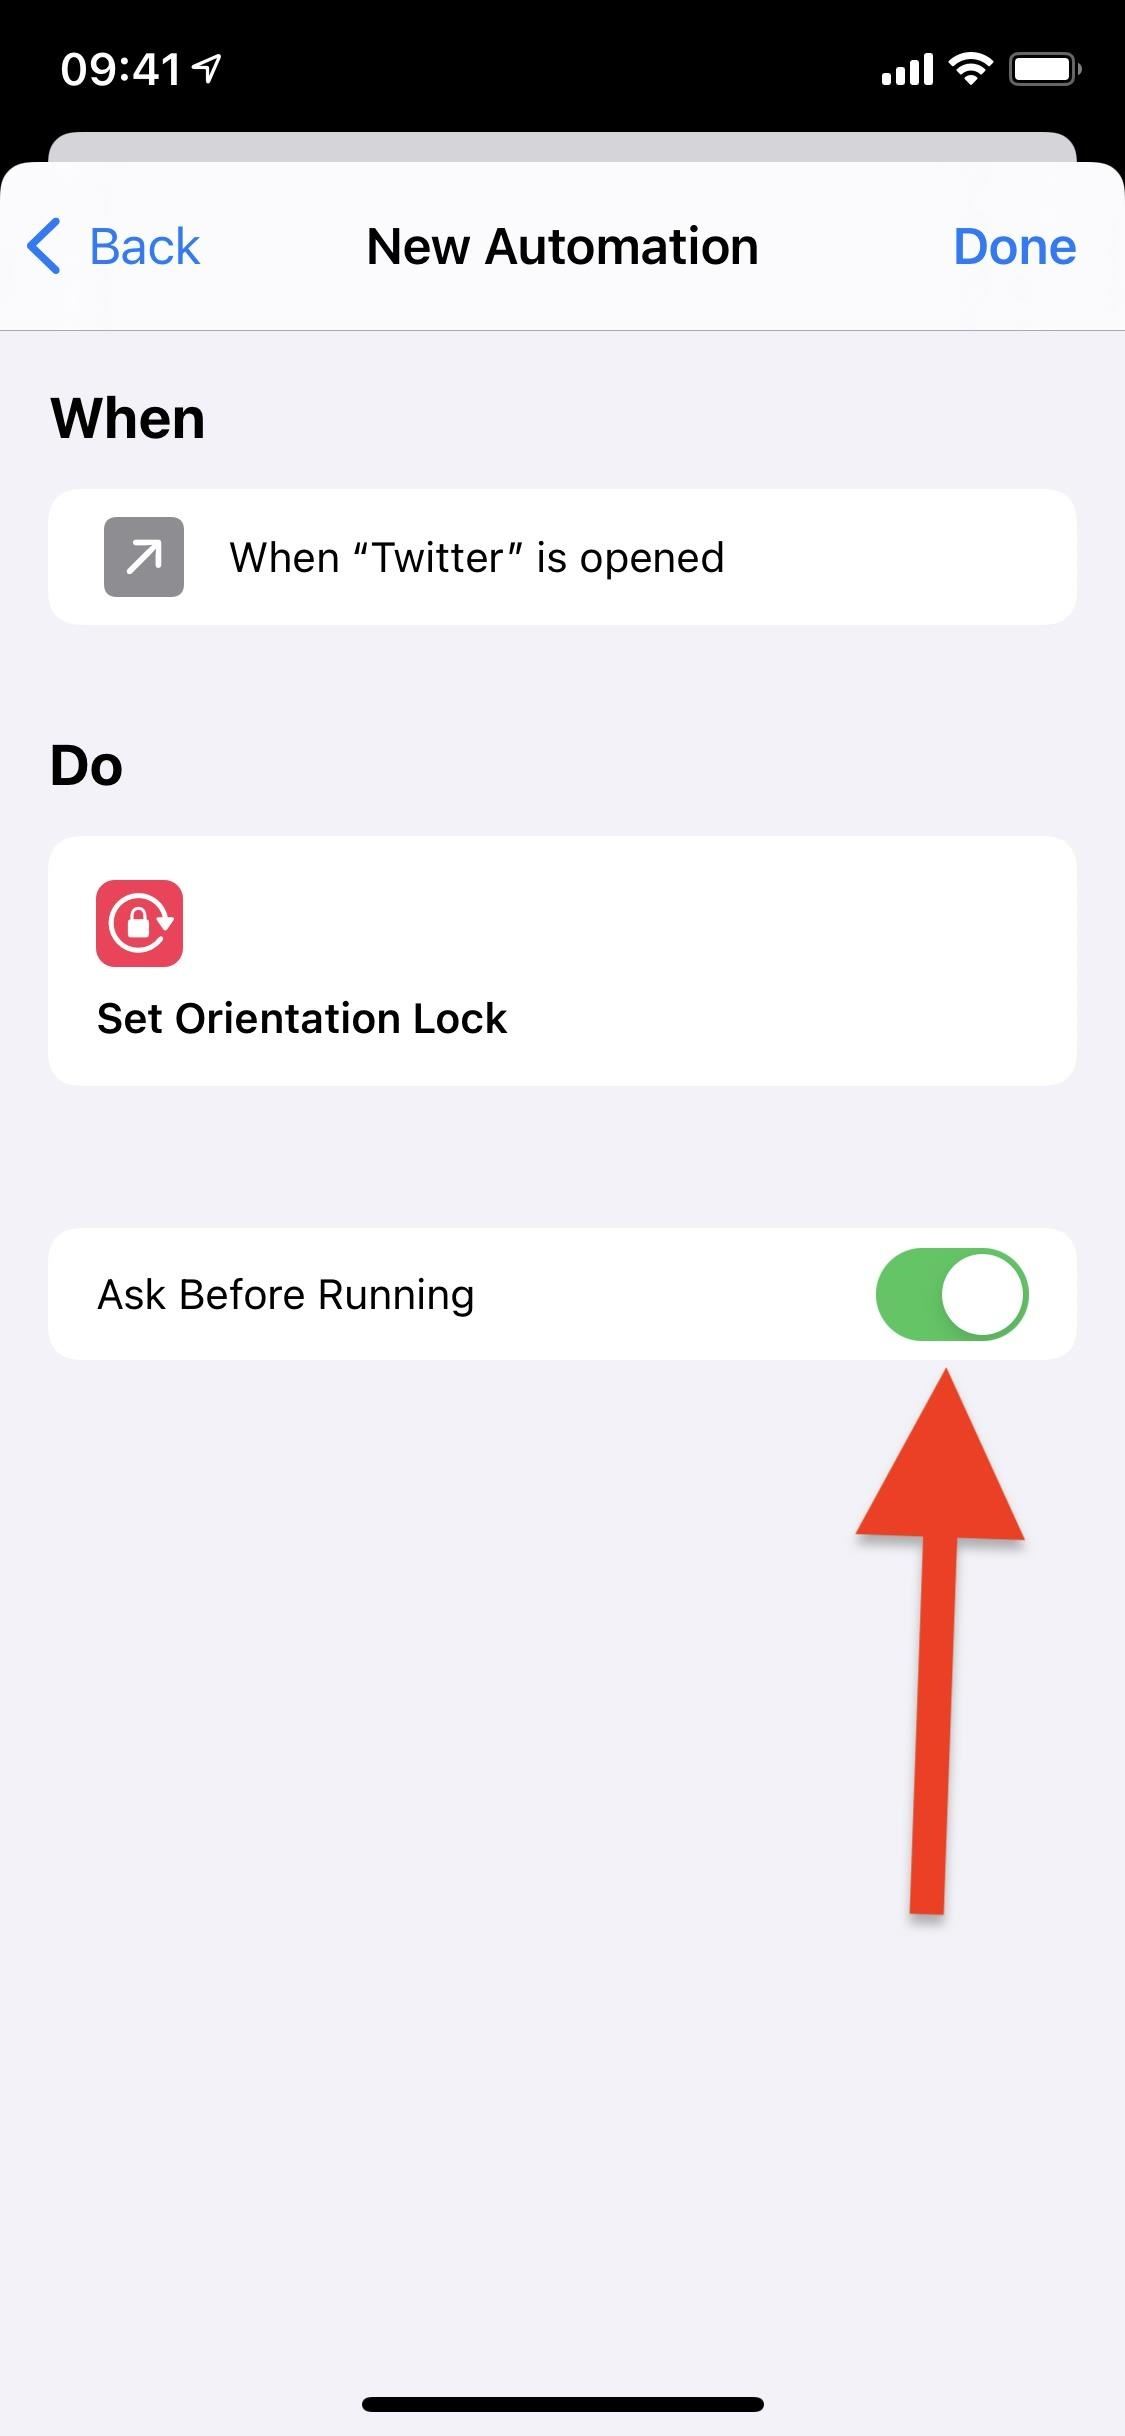
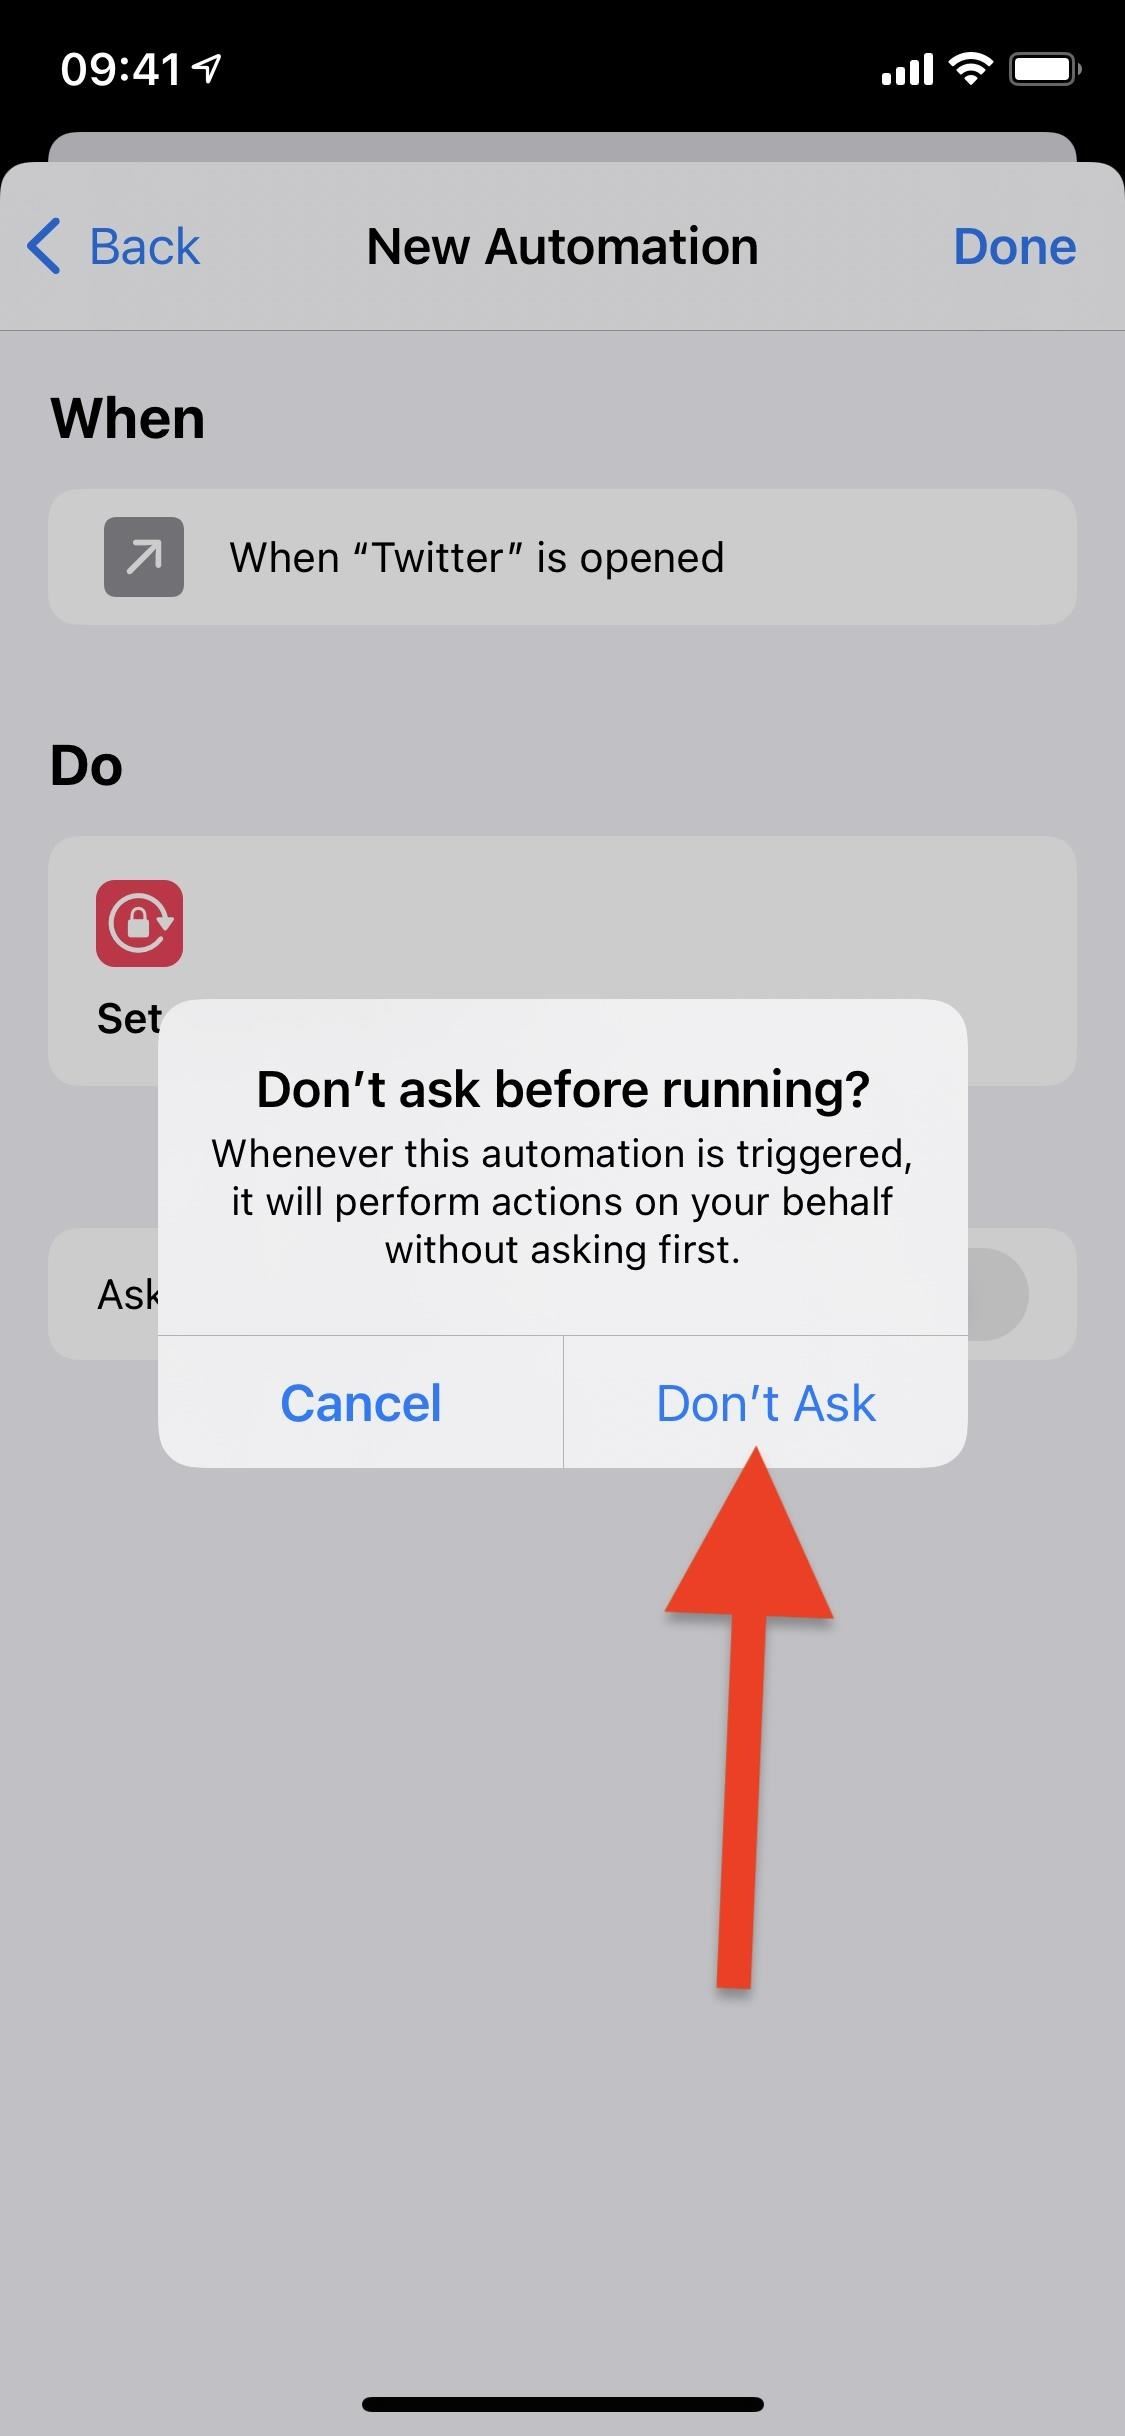
Hit “Next” in the top right to finish creating the automation. You probably don’t want to be asked to run the automation every time it’s triggered, so toggle off “Ask Before Running” and tap on “Don’t Ask” when it appears. Tap “Done” in the top right to wrap everything up.
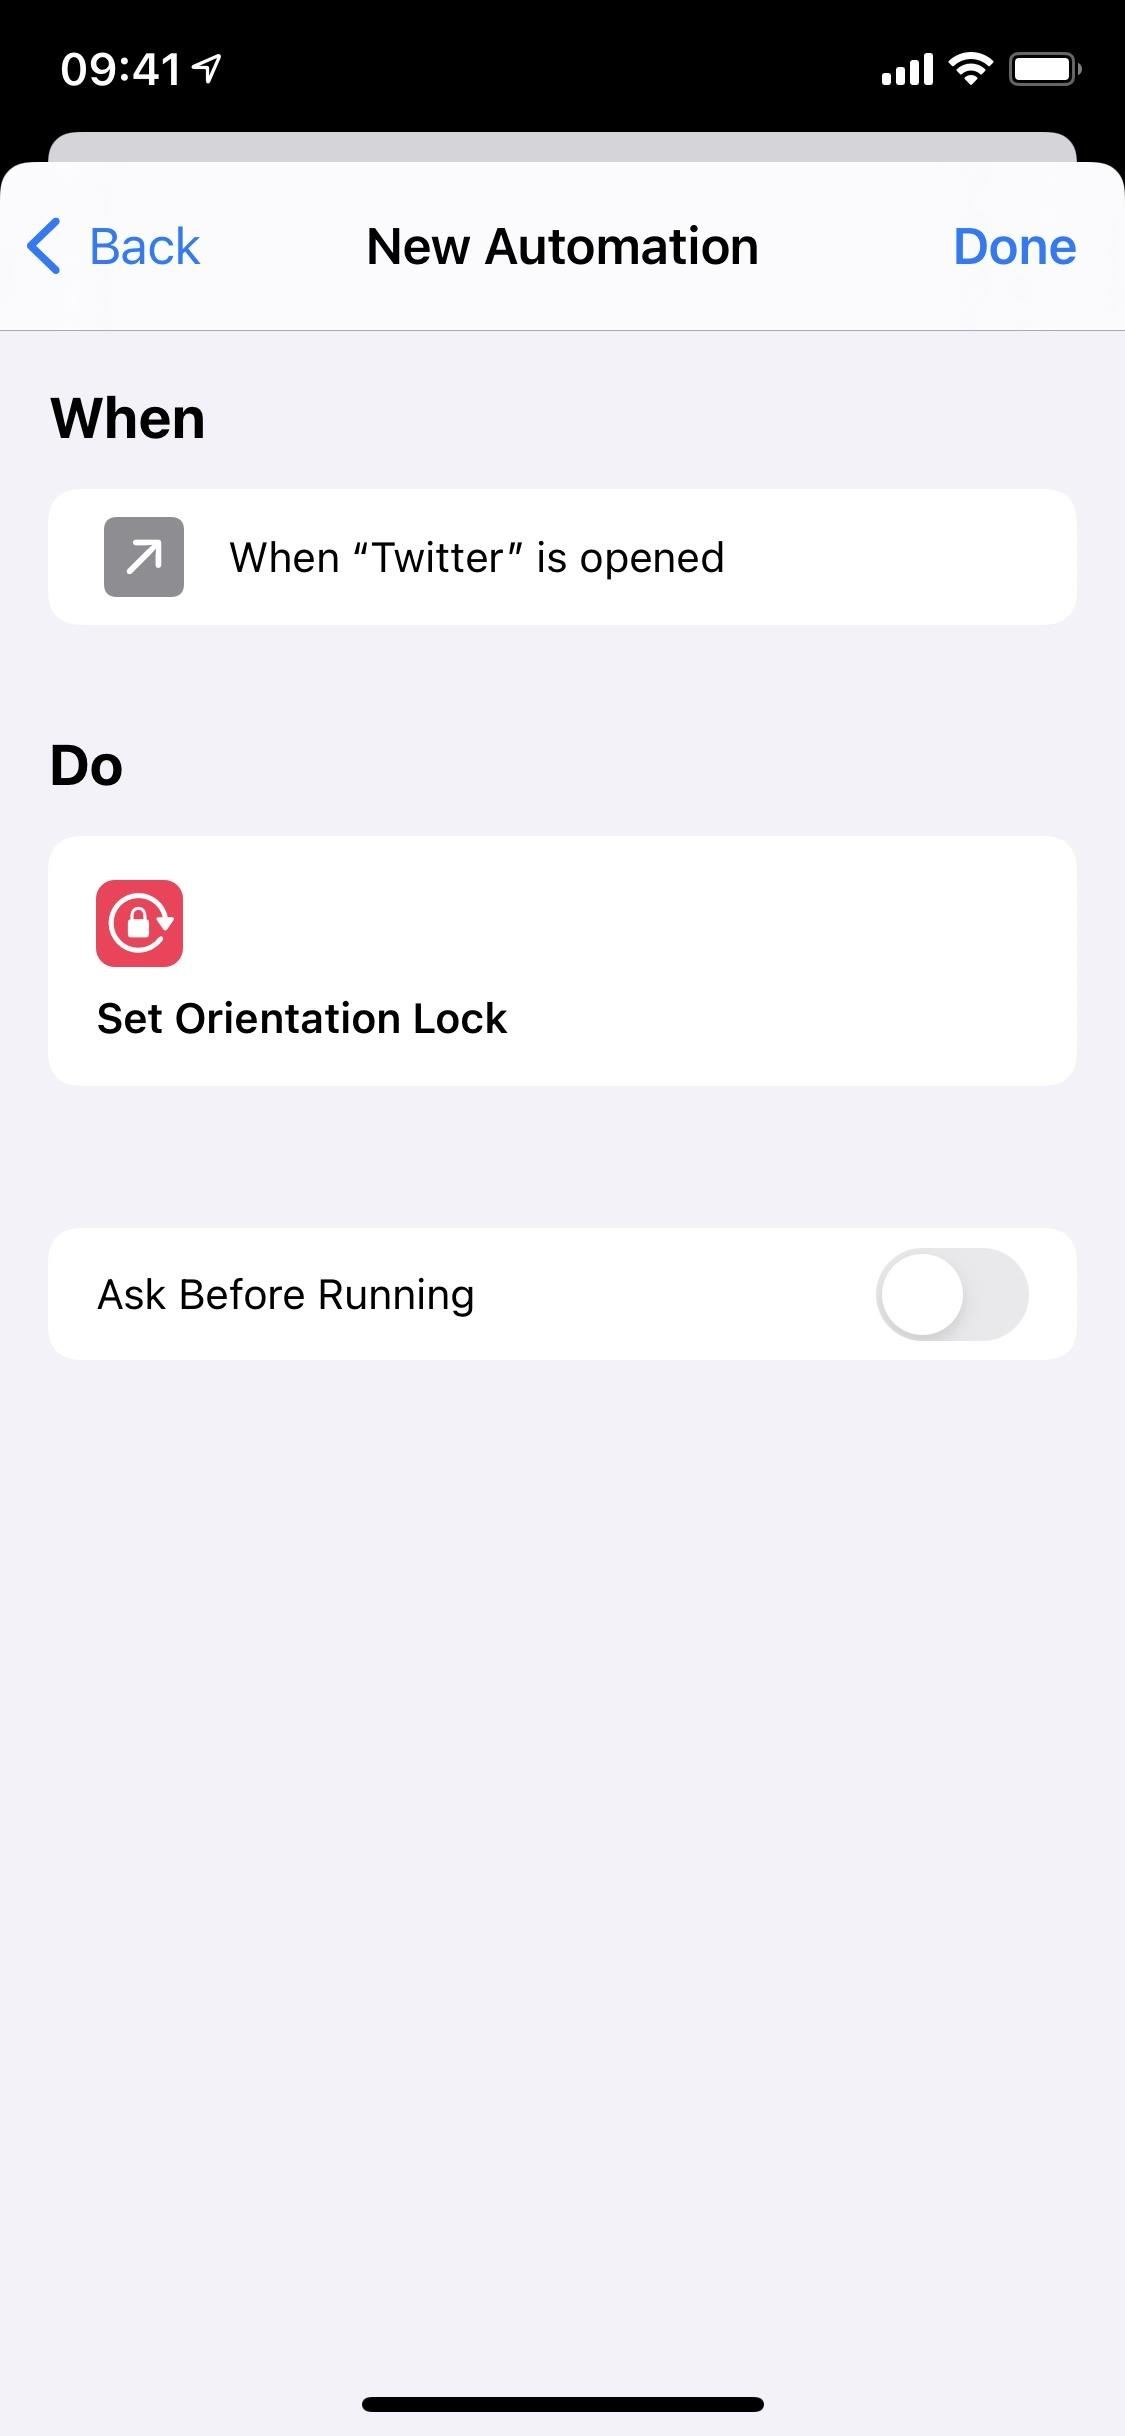
When that’s done, start the process all over again to create a second automation that does the opposite of what you selected the first time; “Is Opened” or “Is Closed” with “Turn” set to “On” or “Off.”
Step 6: Make Sure Your Automations Work
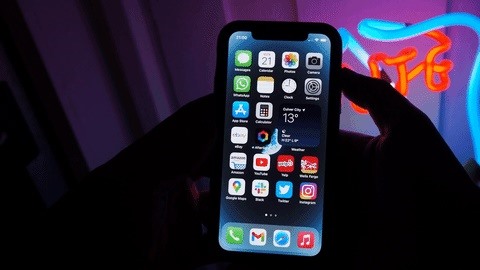
Once your one or two automations are complete, whichever route you went with, you can test things out by entering and exiting the app or apps you set. Below is a GIF of what happens when I open and close Twitter. You can tell the automation is running when the Shortcuts notification appears at the top of the screen.
Step 7: Disable Those Annoying Notifications (Optional)
If you don’t want to see a notification every time you open or close the app or apps you created automations for, there’s an easy way to disable them. It will disable most other automation notifications, so if you like seeing them for other automations, you may want to keep them on. If you want them gone, it’s as easy as turning them off in Screen Time.
Just updated your iPhone? You’ll find new emoji, enhanced security, podcast transcripts, Apple Cash virtual numbers, and other useful features. There are even new additions hidden within Safari. Find out what’s new and changed on your iPhone with the iOS 17.4 update.
“Hey there, just a heads-up: We’re part of the Amazon affiliate program, so when you buy through links on our site, we may earn a small commission. But don’t worry, it doesn’t cost you anything extra and helps us keep the lights on. Thanks for your support!”


