How to Use the Terminal to Solve Wi-Fi Problems in Linux
Linux & macOS Terminal
Key Takeaways
- Linux users can resolve most Wi-Fi issues using terminal commands, without needing software downloads.
- Resetting your IP address or network interface with terminal commands can fix common Wi-Fi problems.
- If issues persist, reach out to your internet service provider for assistance.
If you’re having issues with your Wi-Fi, chances are it’s an easy fix. If you’re using a Linux machine, it’s easier still as you can fix most common Wi-Fi problems with some quick terminal commands, no software downloads required.
If you’re new to the terminal, or even to Linux as a whole, don’t worry as you can’t do any permanent damage to your systems. In fact, you shouldn’t be scared of the terminal as this is where the power of Linux lies, as you’ll soon see.
Releasing and Renewing Your IP Address
Often when you’re having Wi-Fi issues, this is because there are issues with your IP address, the set of numbers that identifies your location online. The reasons for this can be any of dozens, but thankfully the fix is always the same, namely resetting your IP address.
To do so, you first need to know your current IP address. You can do so using the following command:
ip address
Alternatively, some Linux distros will allow you to do this within the desktop environment, check out our article on how to find your IP address in Ubuntu.
Though it’s not necessary, you may want to take note of this IP address as after we’re done we need to check that it’s been changed.
Next, we need to request a new IP address through your DHCP server. We have a full explainer on what DHCP is, but the short version is that it’s a protocol that handles IP assignments. It usually does this on a daily basis, so your network gets a new IP every 24 hours. What we’re going to do is ask if we can renew it now.
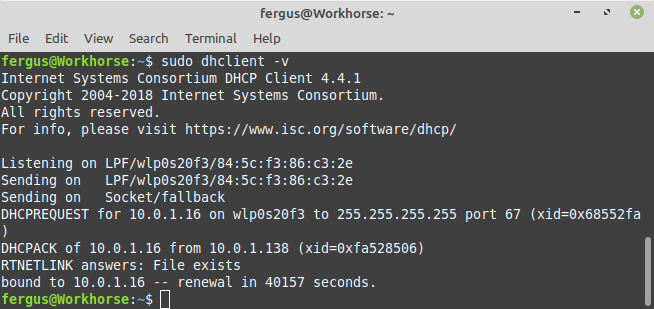
To do so you need a program called dhclient, which is installed by default on Linux systems. Run it to find out what your system is running now, using the “verbose” command (-v) to make sure you get some output:
sudo dhclient -v
This lets you know what IP was requested (DHCPREQUEST) and when it will expire, in my case 40157 seconds from now, which is about 11 hours.
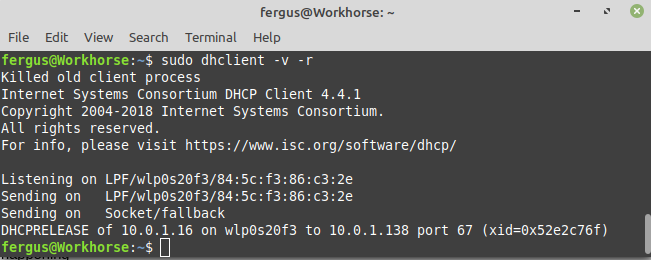
Now, we need to release the IP address, which means we ask dhclient to trash it. This is done with the -r command, and I recommend you add another “verbose” command to see what’s happening:
sudo dhclient -v -r
With that done, now request a new IP address, with the same command as before:
sudo dhclient
All you need to do now is enjoy your new IP address.
Resetting Network Settings
Sometimes renewing the IP address isn’t enough, though. The next thing you can try is to reset your network interface entirely in the hope that whatever setting is causing the issue is returned to its default state.
To do so, we’re going to use a program called ip. This is a very powerful tool that lets you control networking on your device. We have a full guide on using the ip command, though for now we only need three commands.
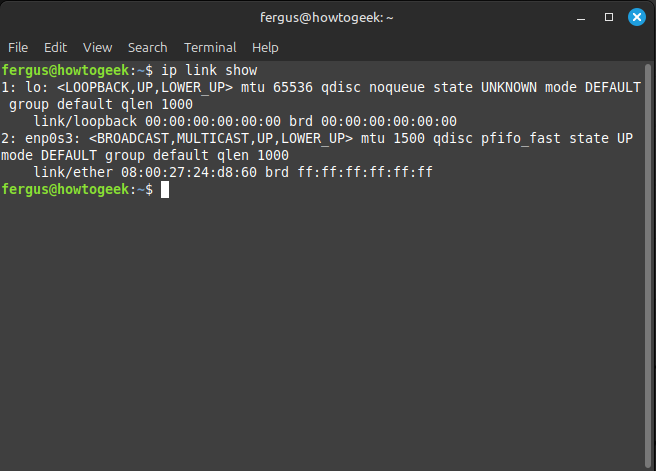
The first is to show the interfaces present on your device. For that, type this:
ip link show
You’ll get a list of interfaces. For most people it’s the second one (enp0s3 in my case), so let’s try resetting that first. To do so, you need to switch the interface off:
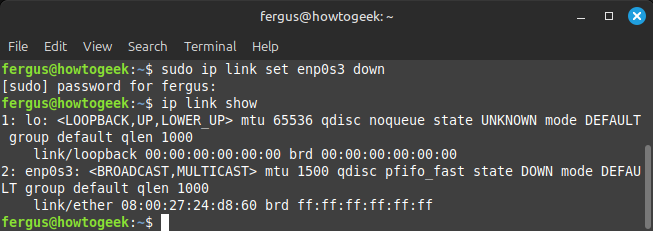
sudo ip link set <interface_name> down
That turns it off, you can check with the “link show” command from earlier.
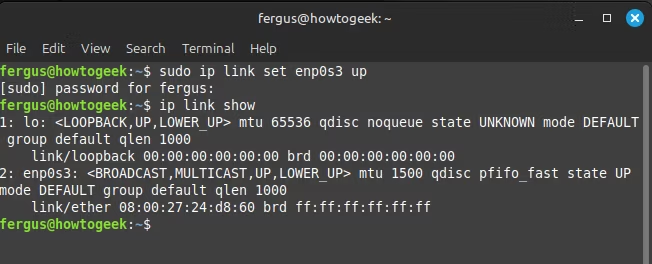
Now you can turn the interface back on again:
sudo ip link set <interface_name> up
Still Can’t Fix Your Wi-Fi Issues?
In most cases, these two fixes should spell the end of any issues you may be having with your Wi-Fi connection. However, if this isn’t the case the problem may be on the end of your internet service provider (ISP). We recommend you reach out to them and check if there are any issues with the internet at your location.


