The Xposed Framework is an incredibly powerful tool. But because of this power, there’s a chance that something could go wrong when installing a broken or incompatible module, which can cause bootloops or even soft-brick your phone.
Depending on how bad the situation is, the only way to get things back up and running might be to disable the Xposed Framework itself, which renders any broken modules powerless. There are two ways to disable Xposed — either using a safe mode button combination, or by flashing the Xposed disabler ZIP.
Regardless of which method you use, you should be able to recover from a bootloop long enough to uninstall the broken module. Once you’ve done that, you can re-enable Xposed to get all of your old modules back the way they were, and your phone should have no problem booting up again.
Method 1: Use the Button Combination
As I mentioned, there are two methods to temporarily disable Xposed. This first method is by far the easiest, so you should try this before doing anything else if you suspect that an Xposed module is causing your phone to bootloop. This doesn’t work with every phone, but it works with the vast majority of devices.
The short version of these instructions is simple: Press any hardware button repeatedly while your phone is booting to disable Xposed. But in case you need more details, I’ll outline the whole process.
To start, press and hold your phone’s power button for ten seconds, which will trigger a hard reboot. As soon as the screen goes black (before any pre-boot splash screens appear), start clicking any hardware button on your phone repeatedly. Any physical button should work, but we recommend pressing the power button repeatedly in case your phone uses other button combinations to boot into recovery mode, for example.
Eventually, you’ll feel two short buzzes from your phone’s vibration motor — this is Xposed acknowledging that you’re trying to enter safe mode. From there, press the same button four more times in quick succession, and with each press, you’ll feel another vibration. After the fourth button press is acknowledged, you’ll feel a long vibration — at this point, you can stop pressing the button, because your phone will now boot up with the Xposed Framework disabled.
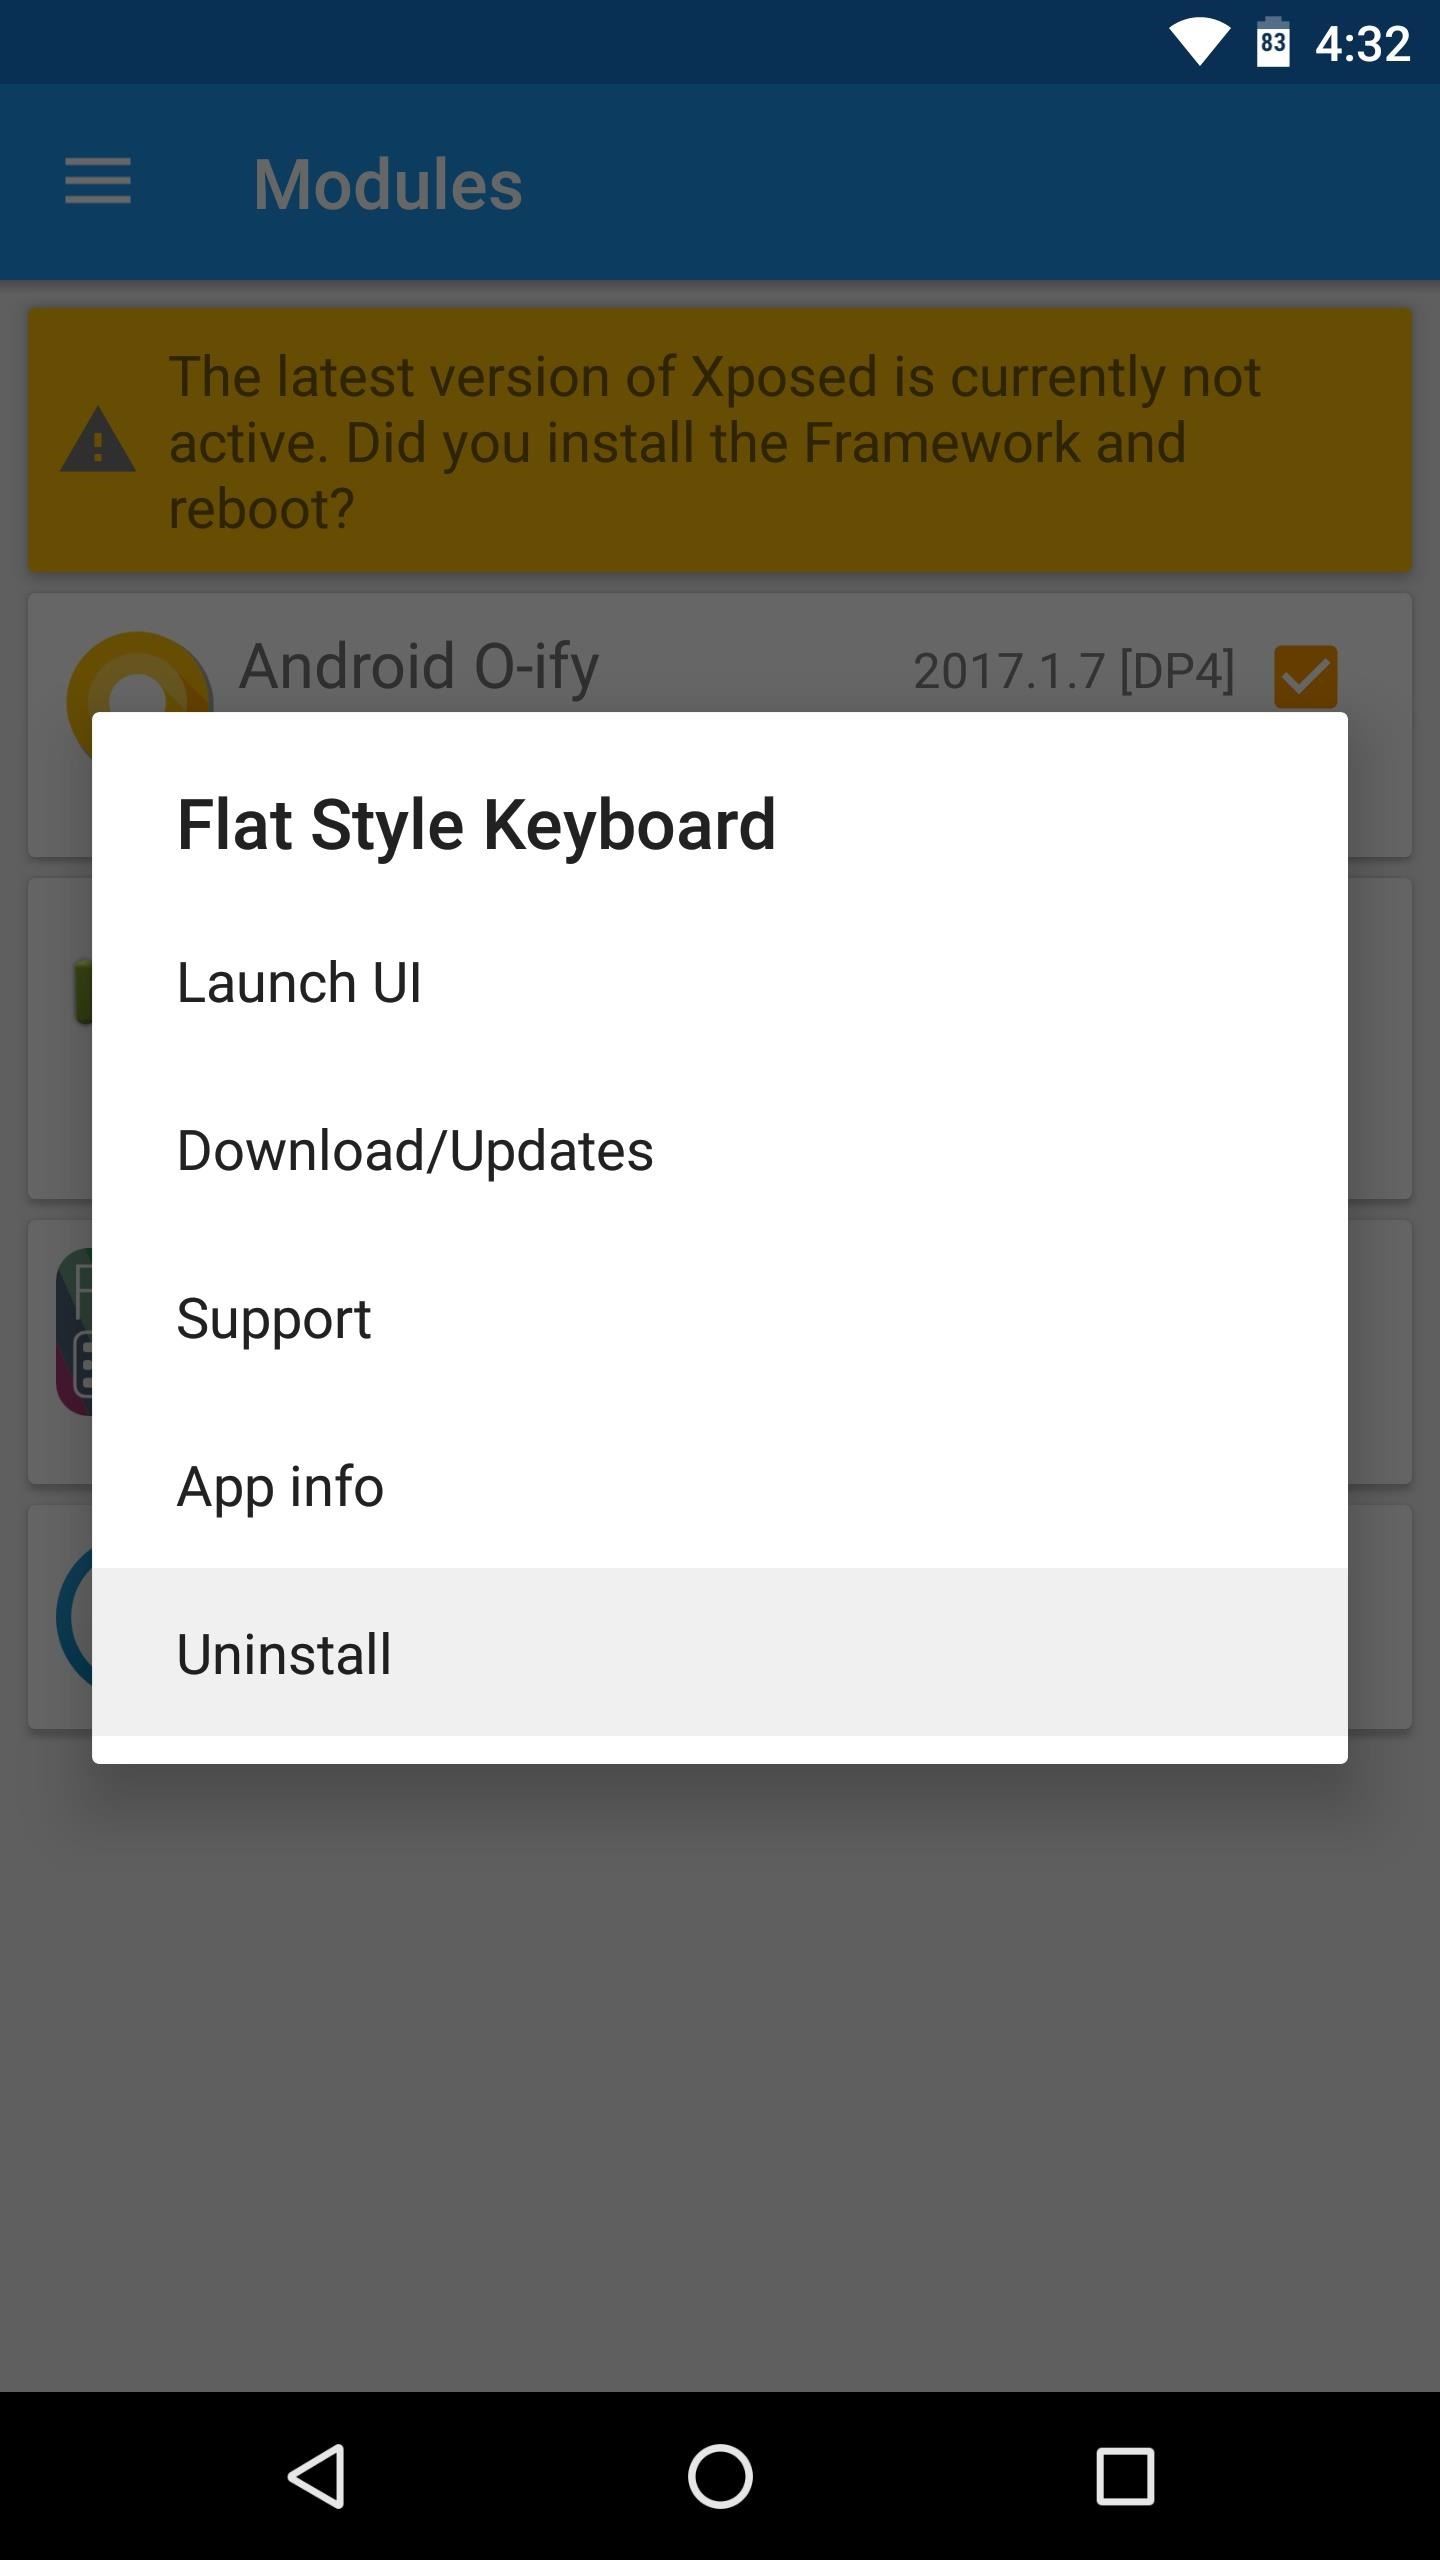
When your phone boots up, open your Xposed Installer app and you’ll notice that the framework is disabled. From here, just head to the Modules section, then long-press the broken module and choose “Uninstall” on the popup to remove it.

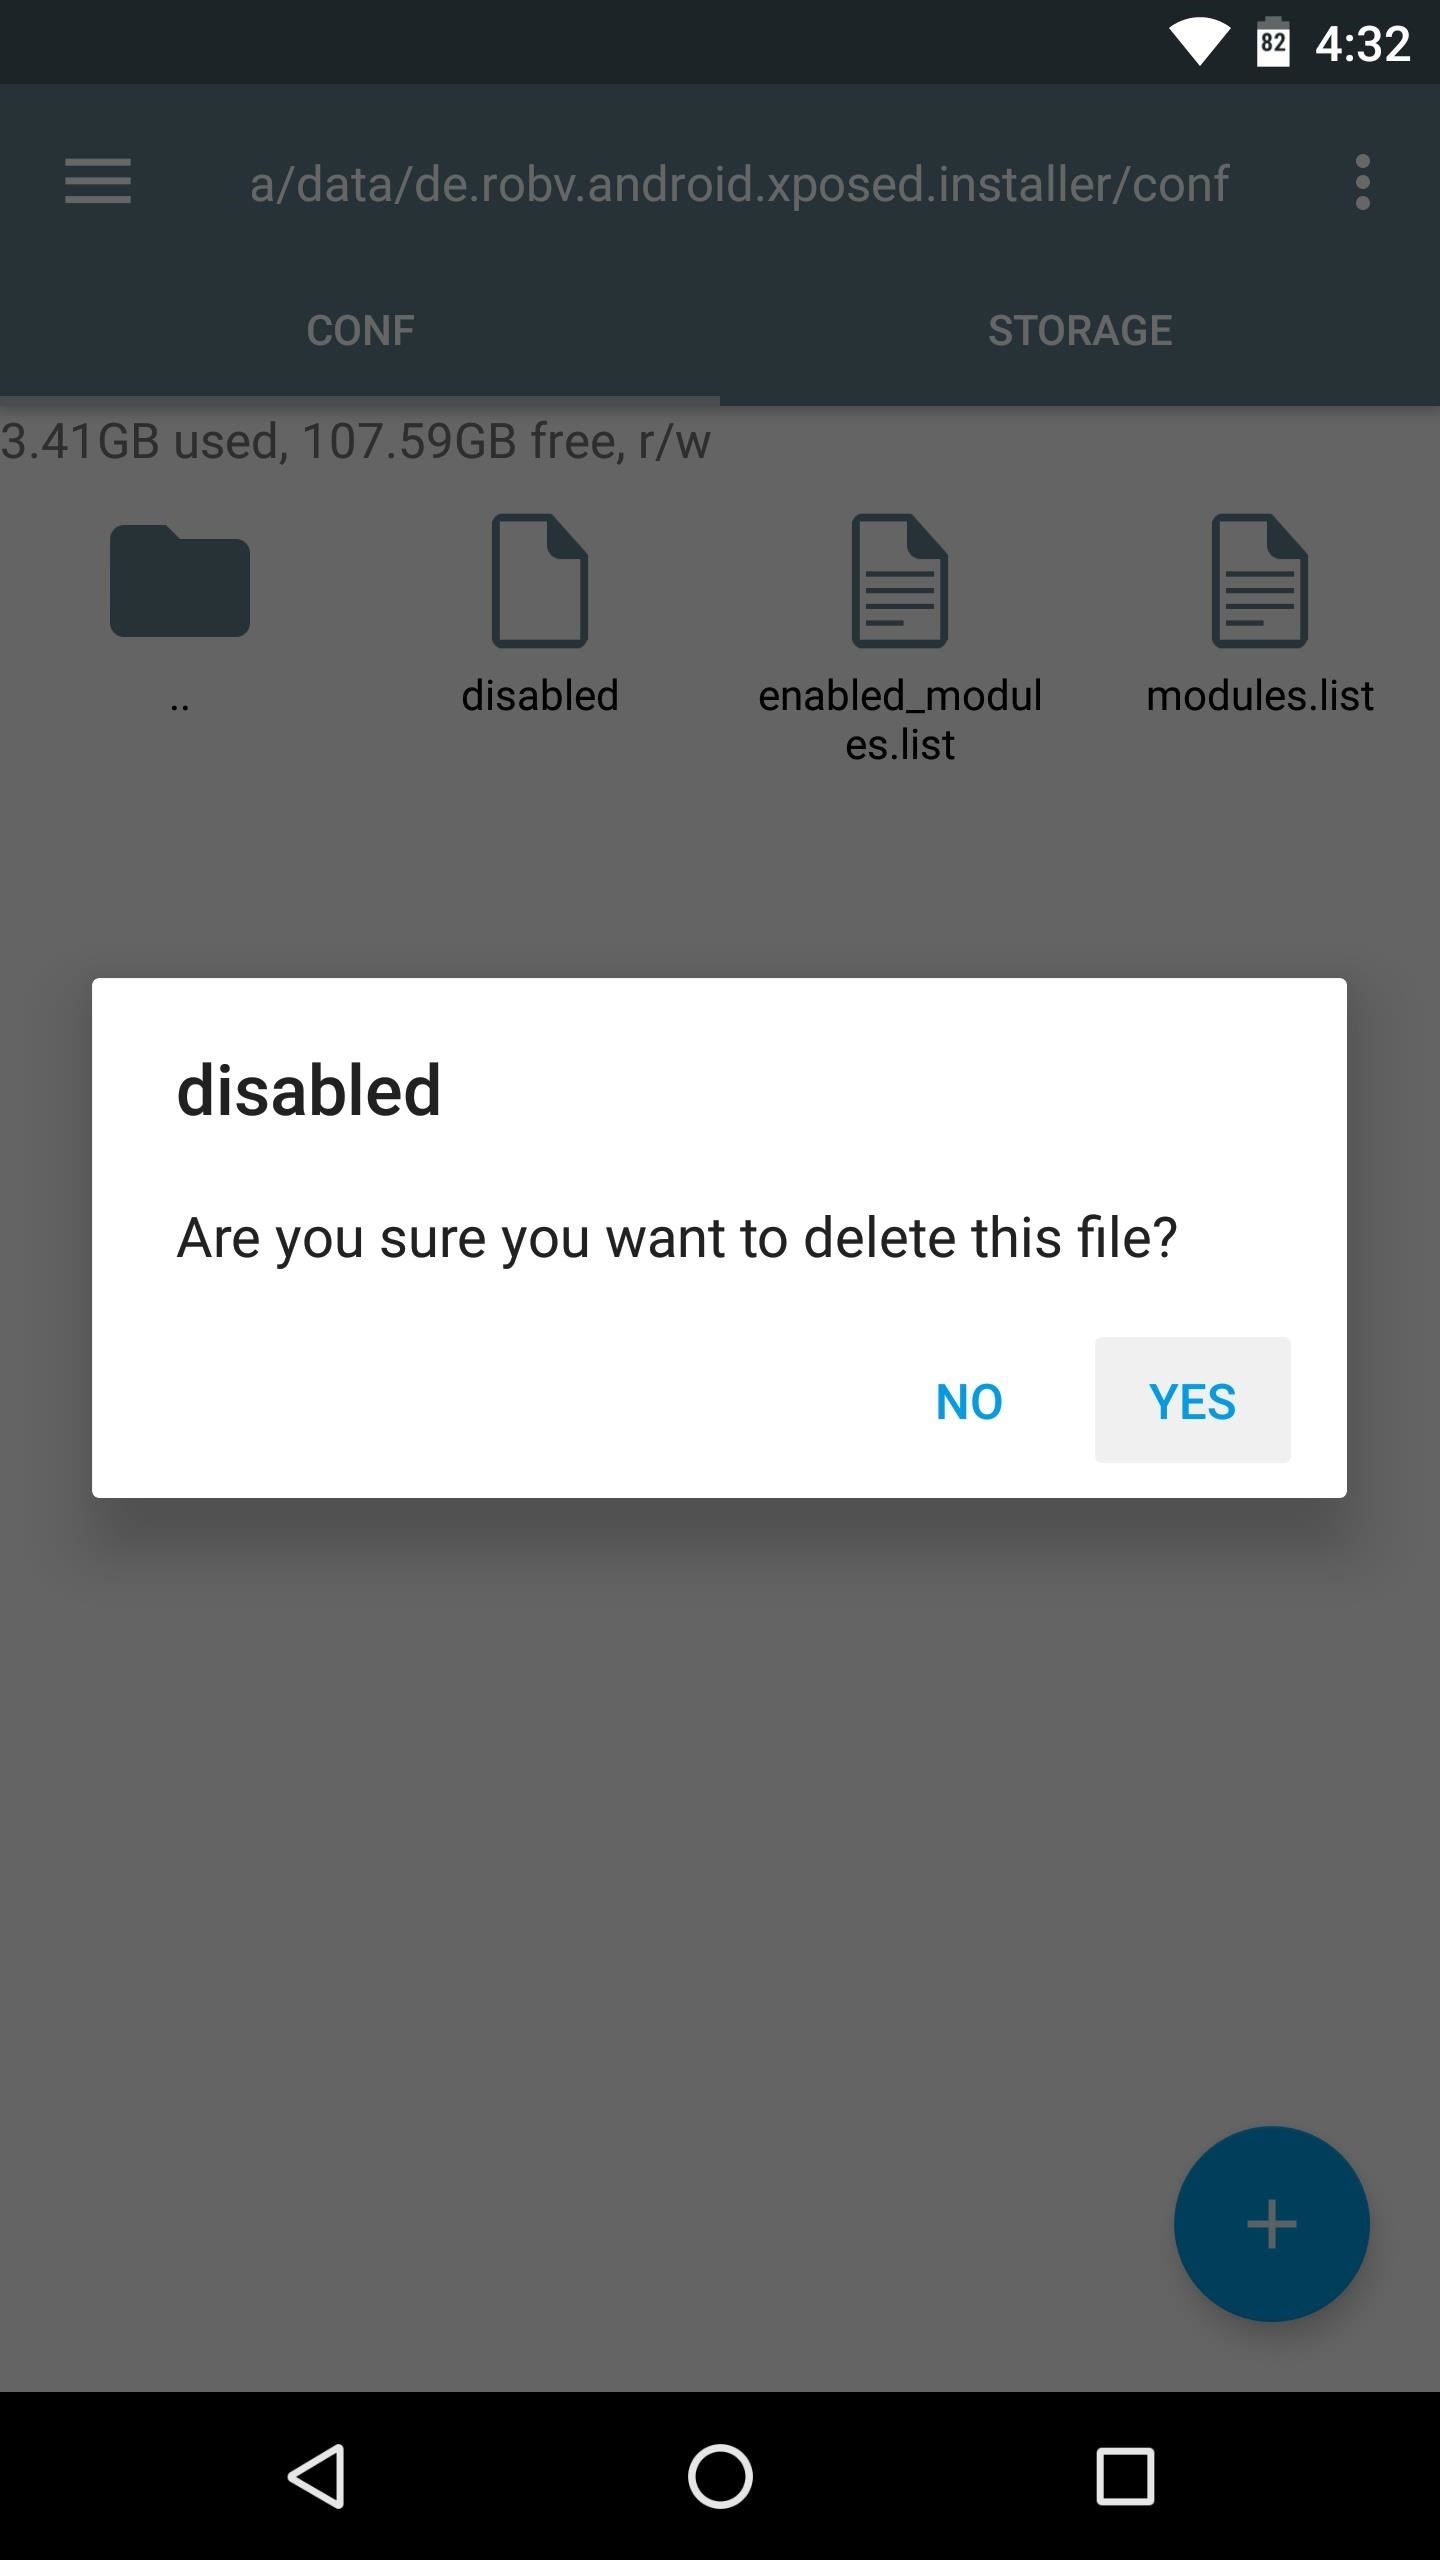
Next, you’ll probably want to re-enable Xposed. To do that, open your favorite root file browser and navigate to the following directory:
/data/data/de.robv.android.xposed.installer/conf/
Once you’ve found this folder, locate the file named “disabled” and delete it. After you’ve done that, just restart your phone, and when you get back up, Xposed will be enabled again. All of your modules will still be enabled (with the exception of the broken one you uninstalled), so it’ll be like nothing ever happened.

Method 2: Sideload the Xposed Disabler ZIP
If the above method didn’t work, you’ll have to sideload the Xposed Disabler ZIP using TWRP recovery. If you don’t already have TWRP recovery installed, a last resort option is to factory reset your phone.
But to start with this second method, make sure you have ADB and Fastboot installed on your computer. From there, you’ll need to boot your phone into recovery mode, which is a process that will vary depending on your device. So if you don’t know the button combo for entering recovery mode on your model, we suggest googling “boot into recovery mode <device name>” and following one of the instructional videos.
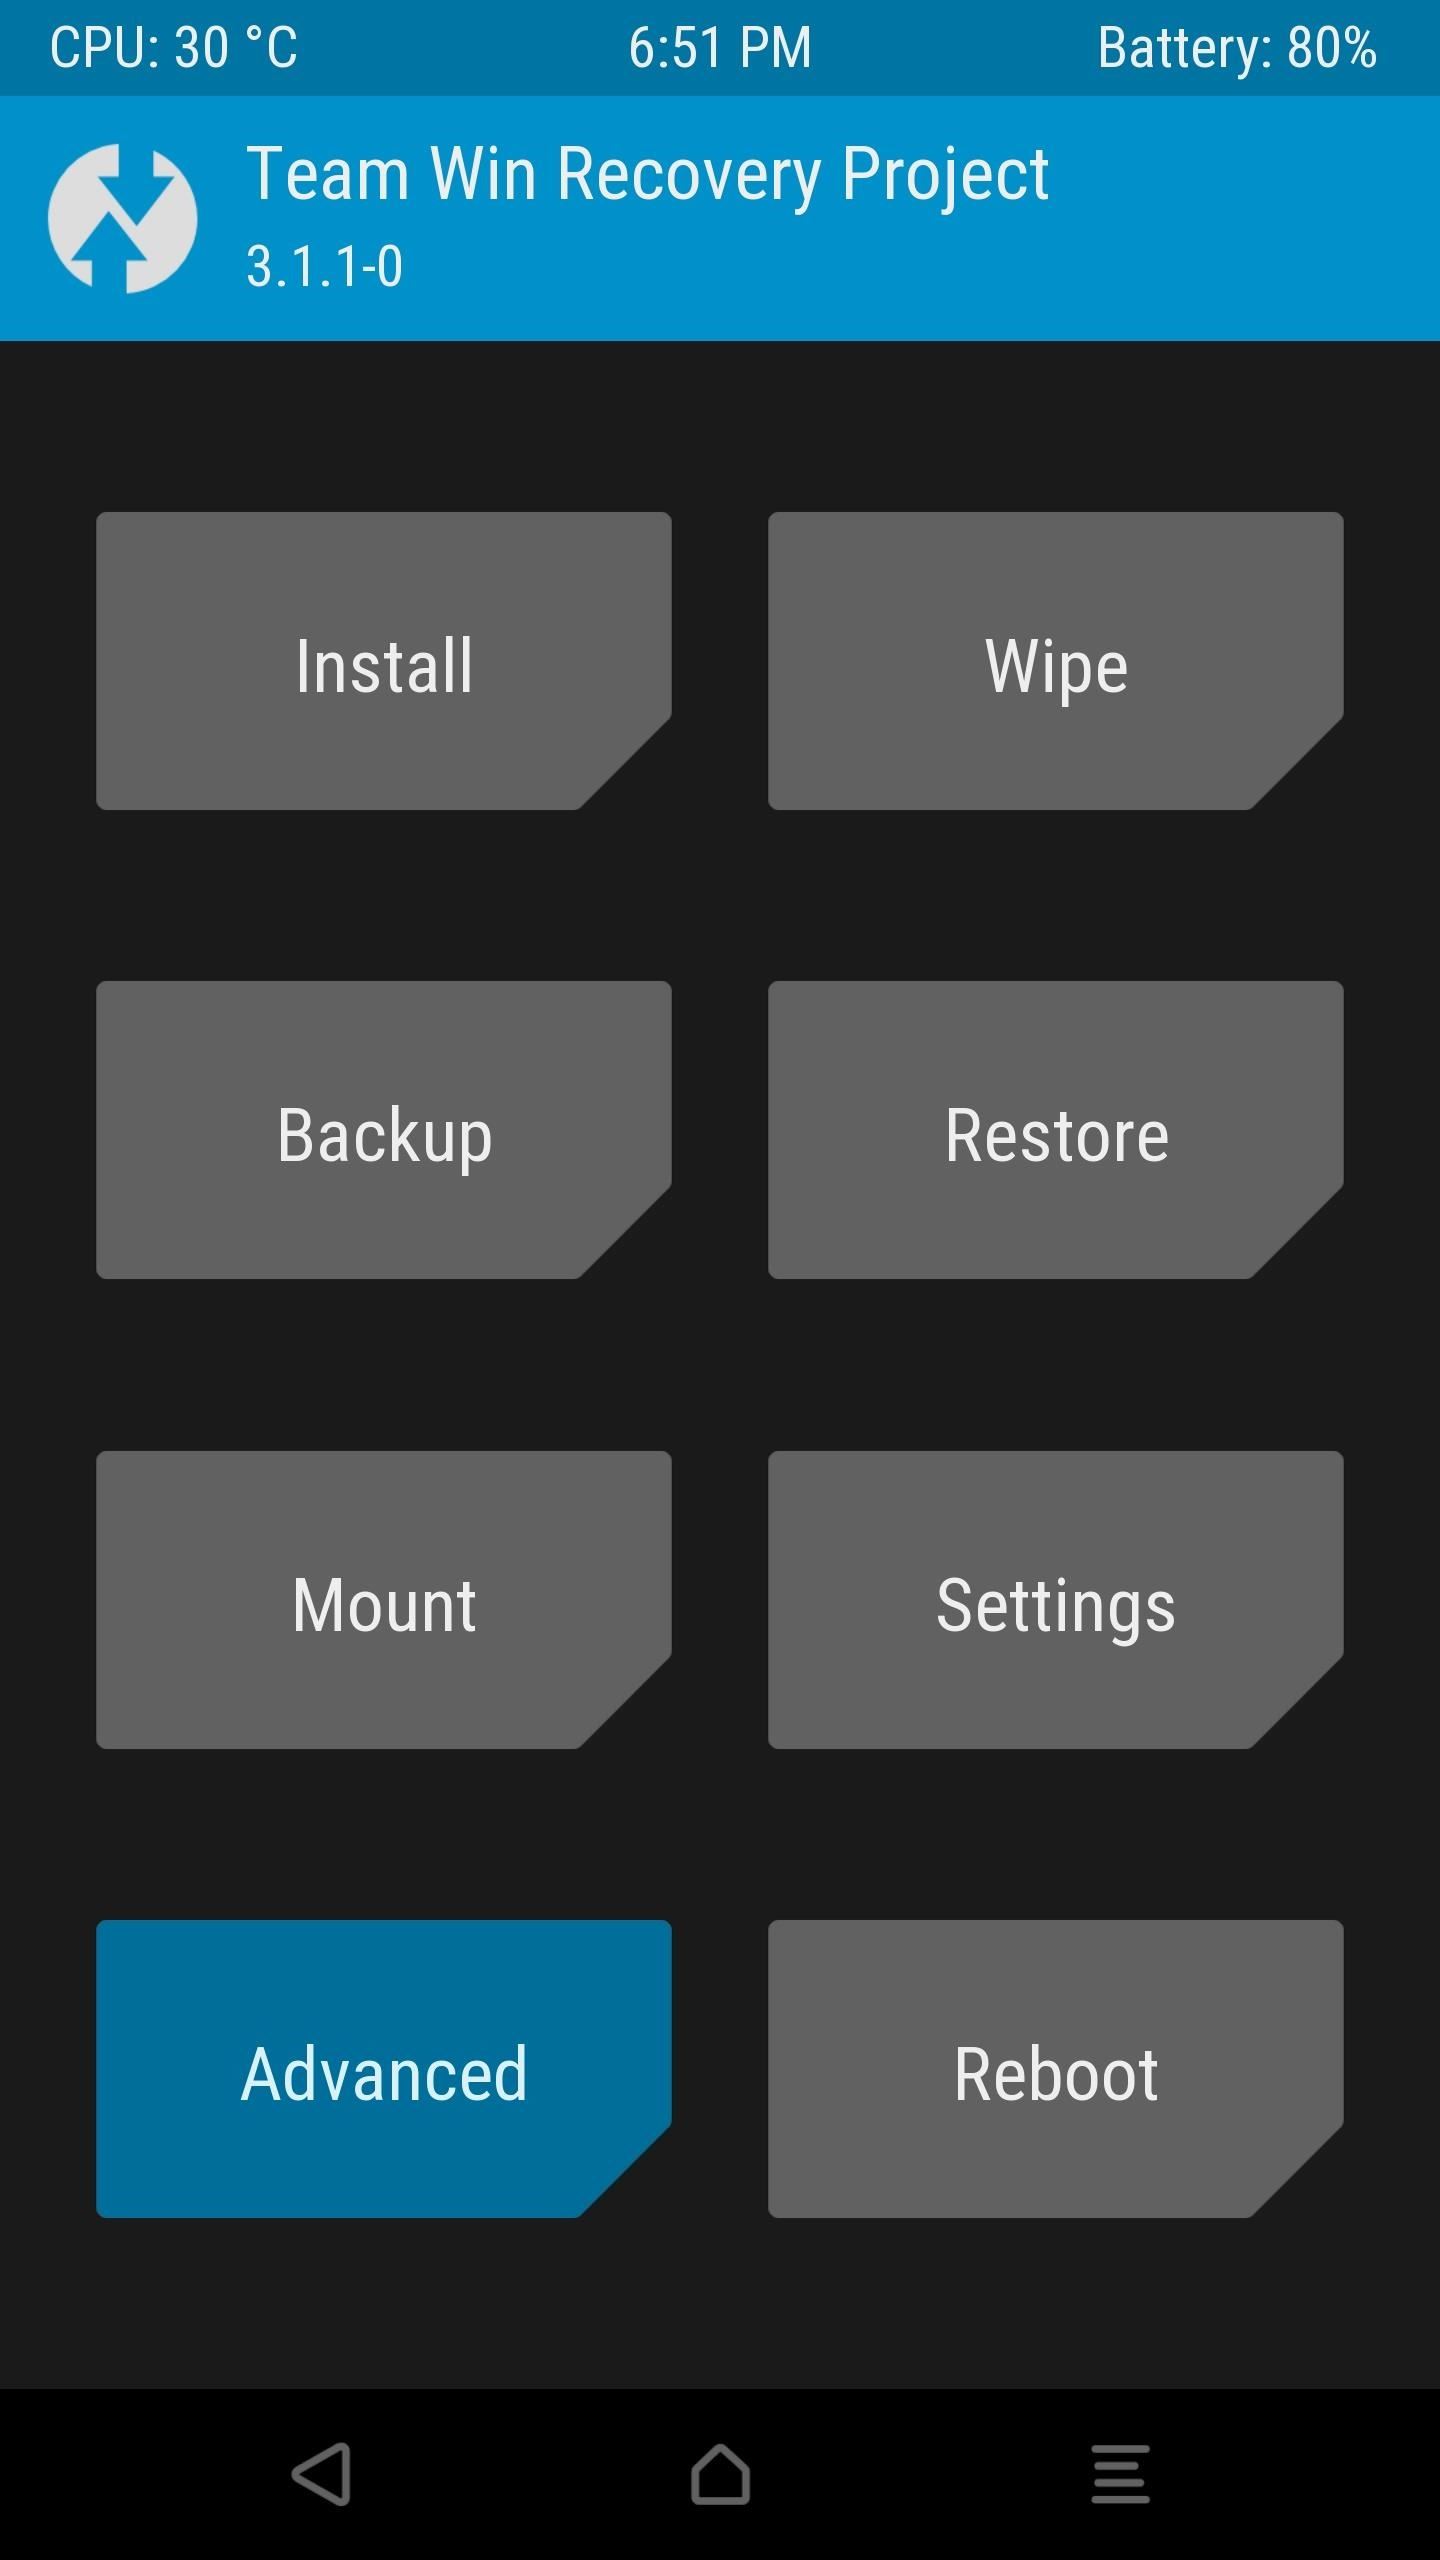
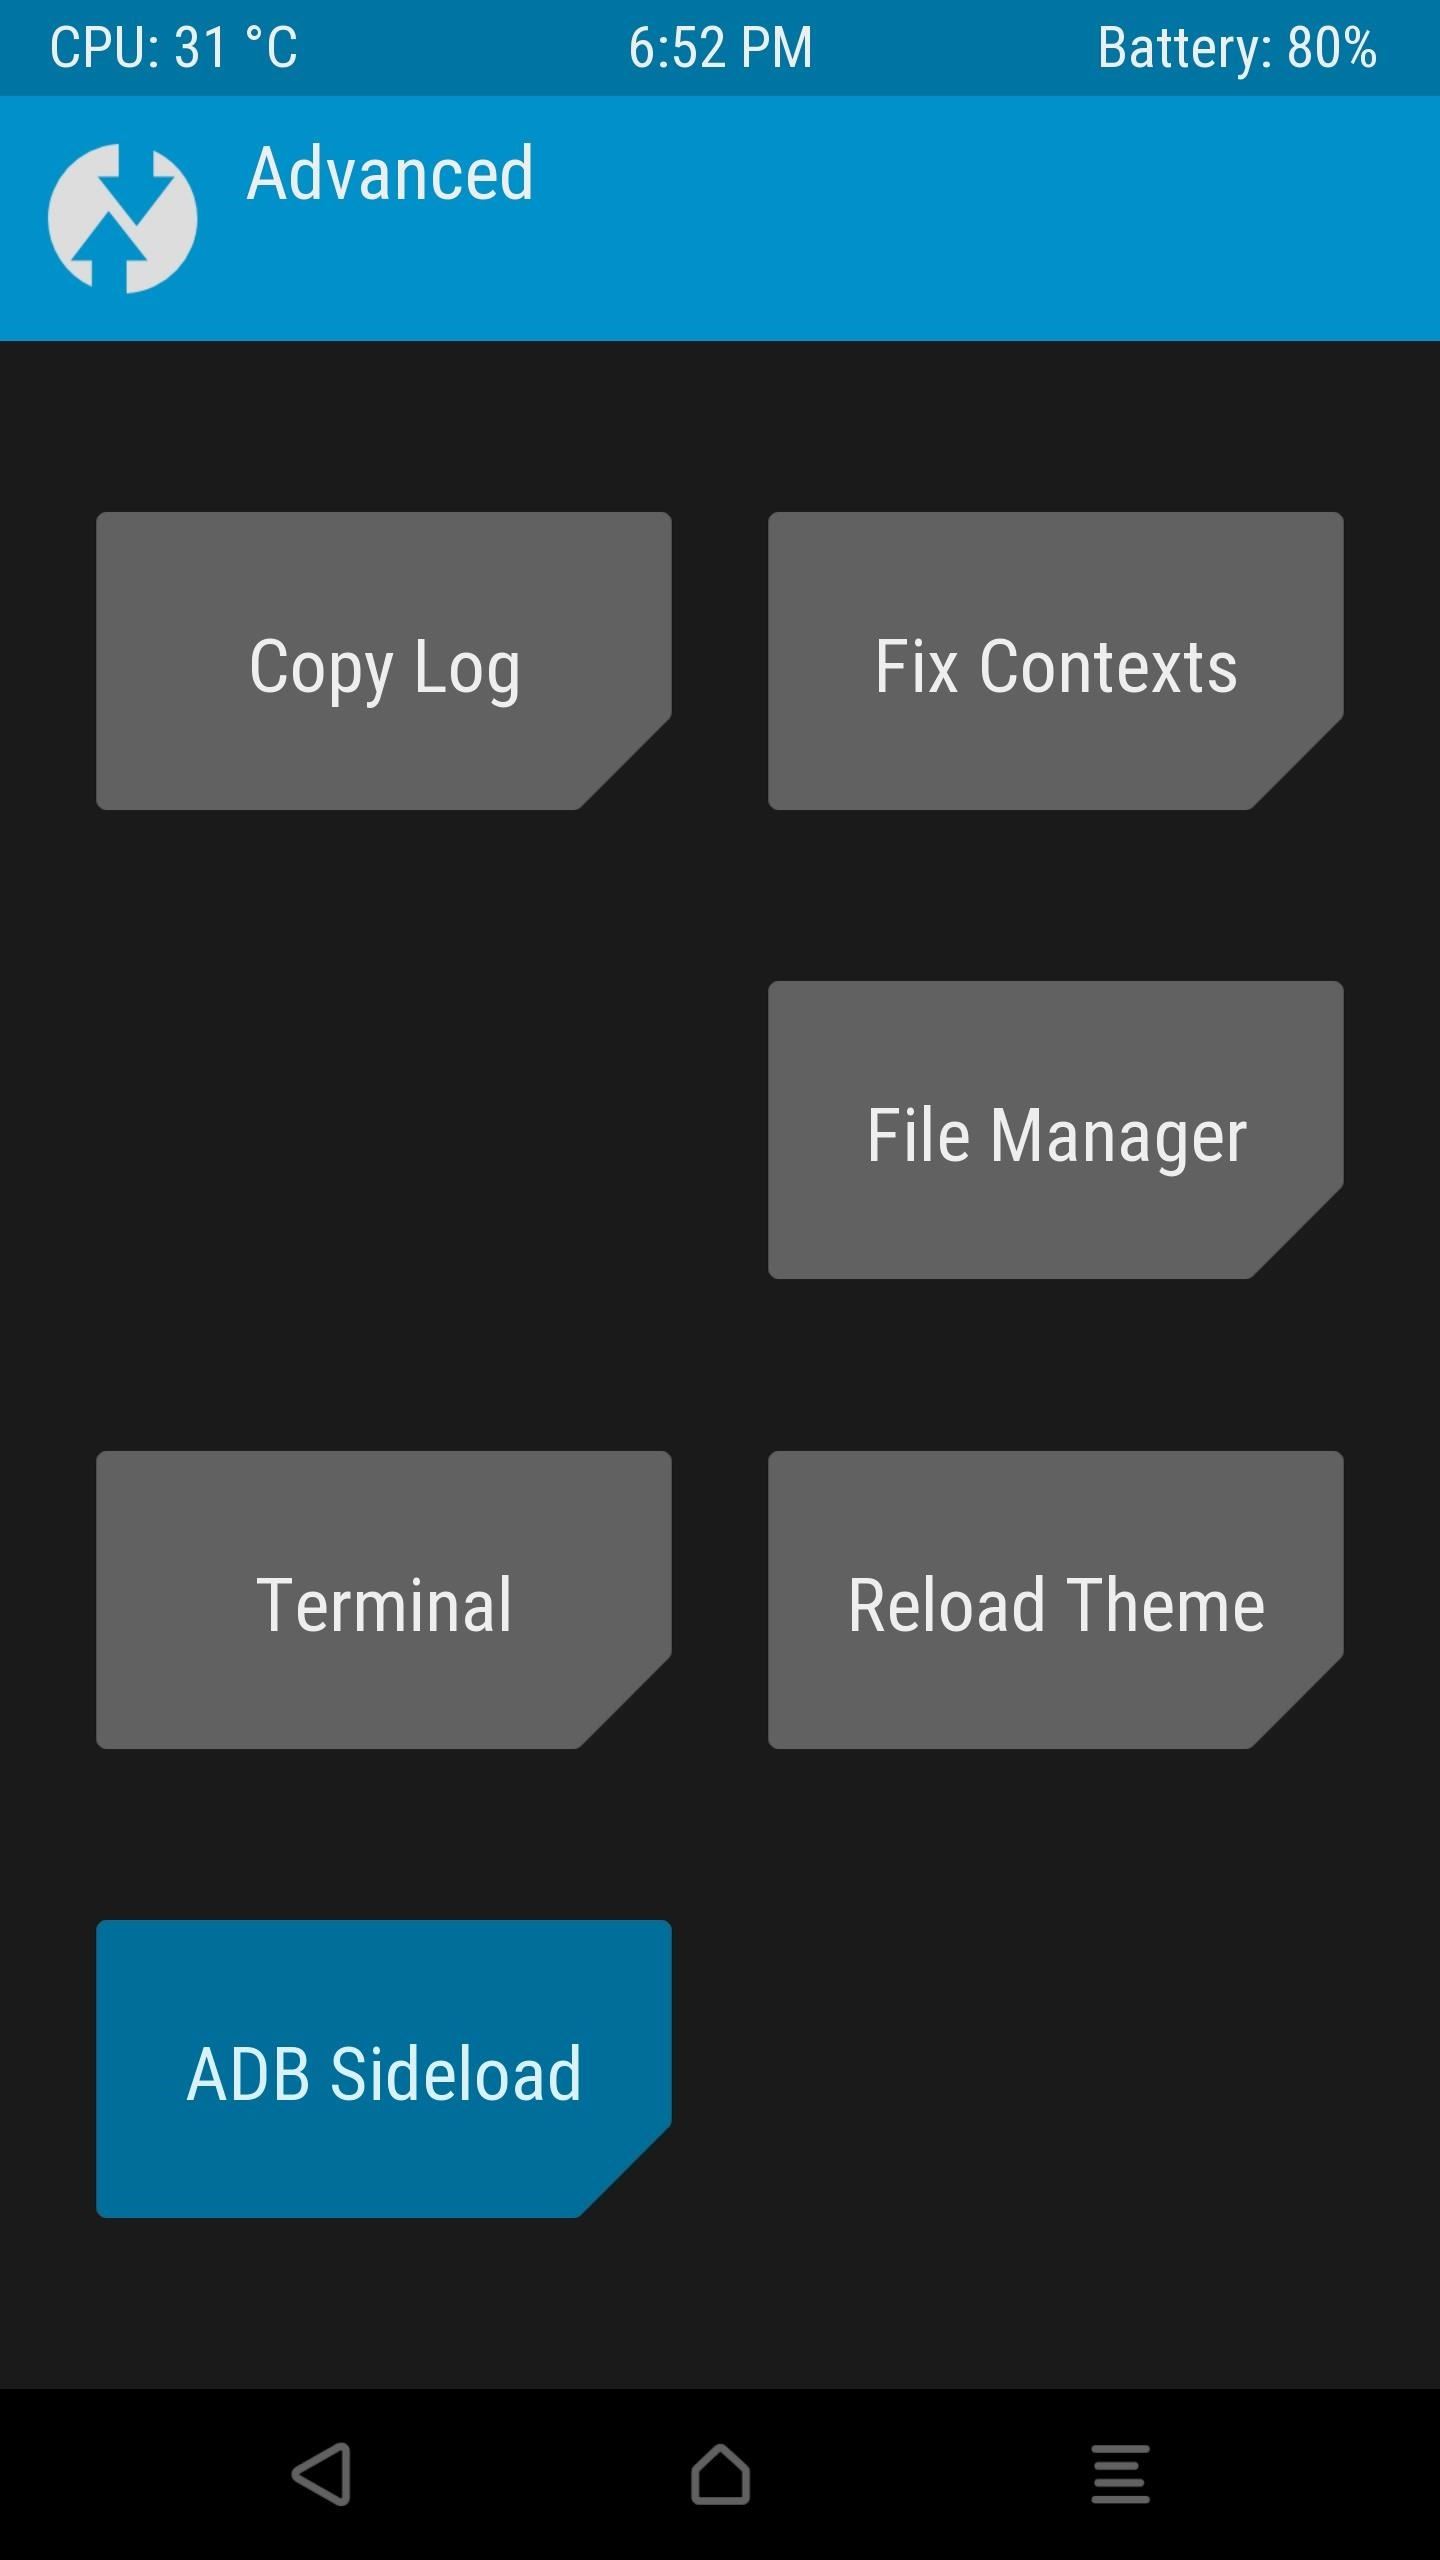
Once you’ve put your phone into recovery mode, tap the “Advanced” button on TWRP’s main menu, then select “ADB Sideload.” From there, swipe the slider at the bottom of the screen to initiate the sideload process.
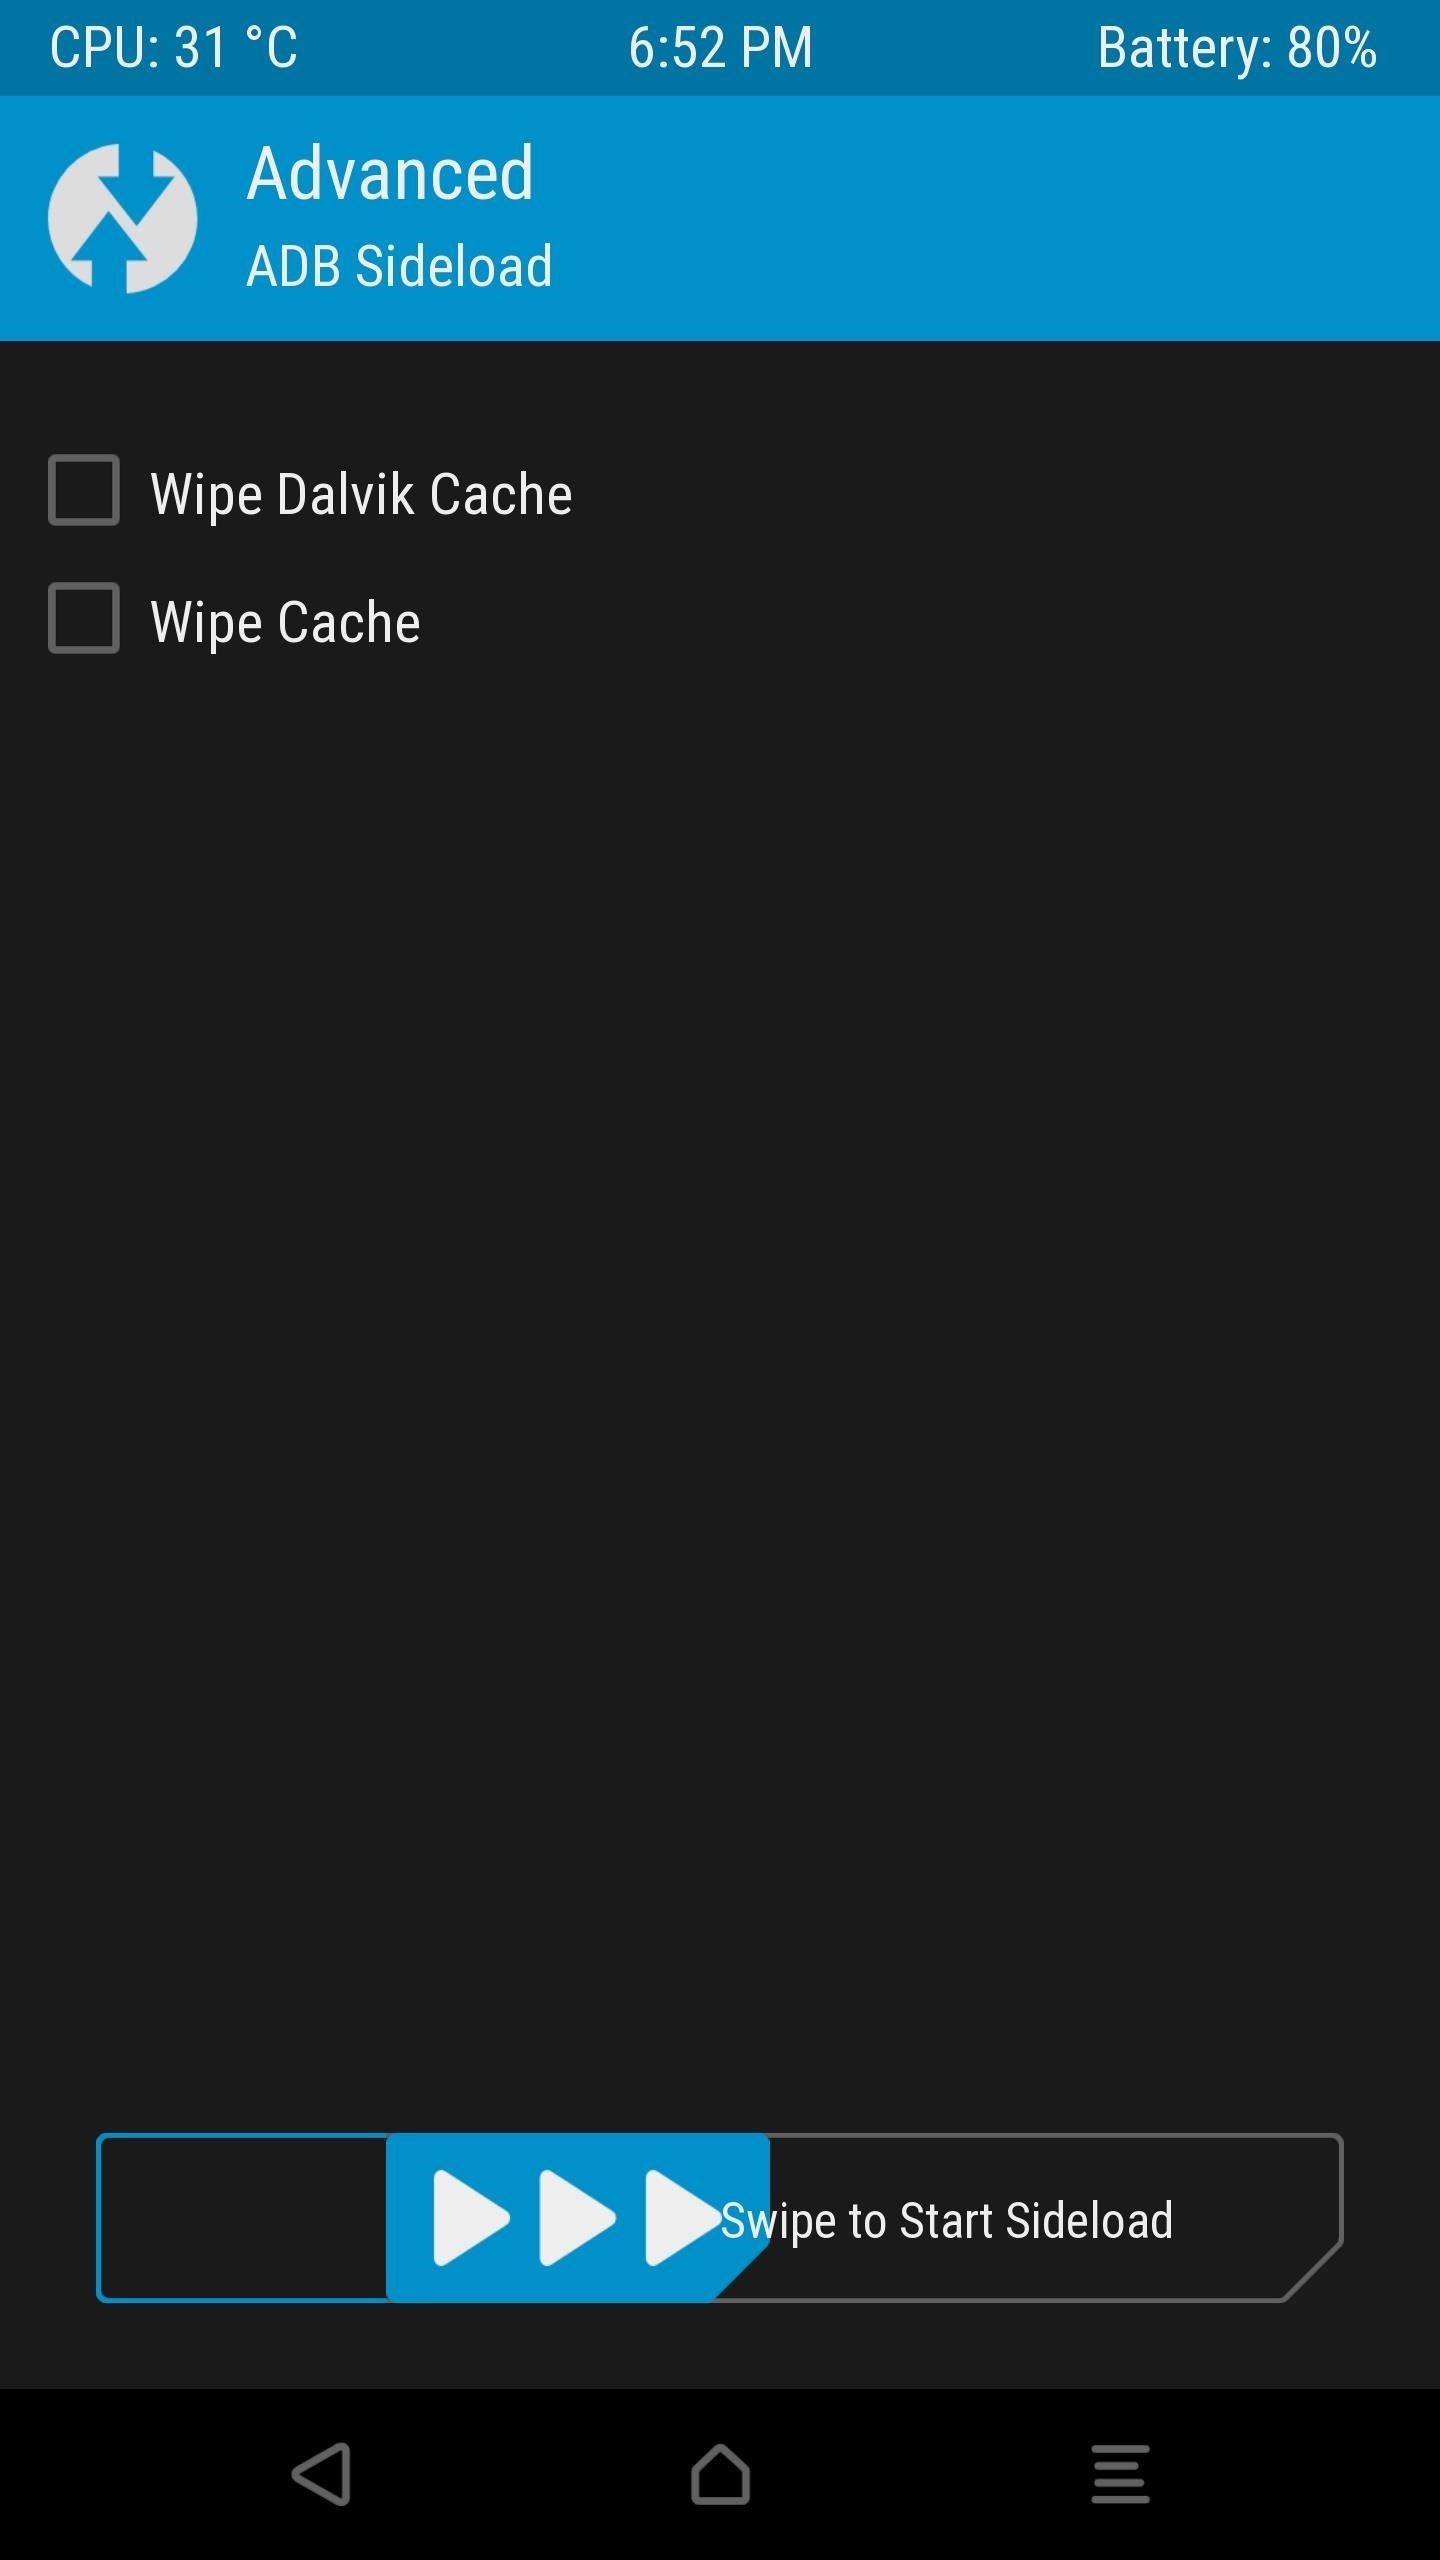
After that, connect your phone to your computer with a USB cable. Next, open a command window on your computer and change directories to the platform-tools folder inside of your ADB and Fastboot installation directory (using “cd <folder location>”). If you don’t know where this folder is, search your computer’s hard drive for “platform-tools.”
Note: For Windows users who followed these steps to install ADB, this command will be as follows:
cd C:Program Files (x86)Androidandroid-sdkplatform-tools
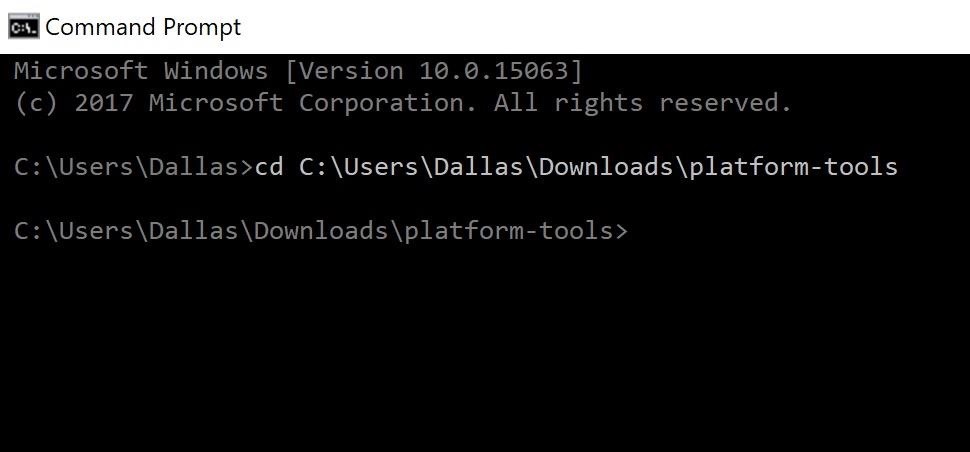
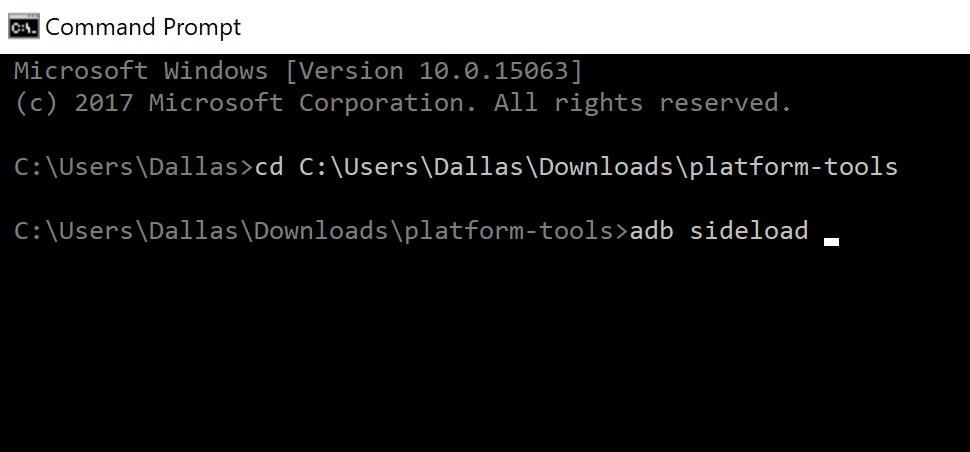
Next, type “adb sideload” into the command prompt (without the quotes), then add a space after the word “sideload,” but don’t hit enter just yet.
Note: Linux, Mac, and Windows PowerShell users will likely have to add a period and a slash (./) to the beginning of the above command (i.e., “./adb sideload “).
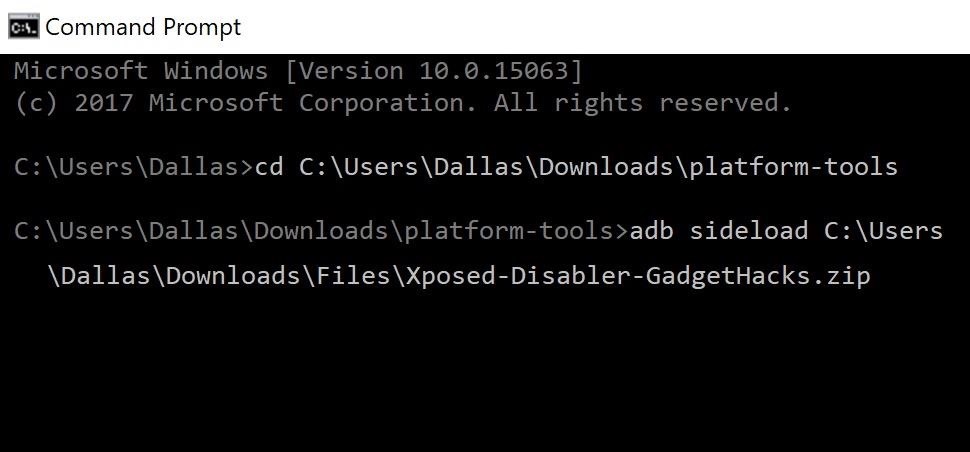
From there, download the Xposed Disabler ZIP to your computer. Once the file has finished downloading, drag it into the command prompt window and let go.

This will auto-populate the file’s location and finish the “adb sideload” command you started entering earlier. So go ahead and press the enter button on your keyboard to sideload the ZIP.
When that’s finished, tap “Reboot System” on your phone, and when you get back up, Xposed will be disabled. So, again, just uninstall the broken module from the Modules section in your Xposed Installer app, then delete the disabler file as depicted at the end of Method 1 above.
Which of these two methods ultimately got you back up and running? What module did you install that soft-bricked your device in the first place? Tell us all about it in the comment section below, and don’t hesitate to ask any questions you might have!
- Follow Gadget Hacks on Facebook, Twitter, Google+, YouTube, and Instagram
- Follow WonderHowTo on Facebook, Twitter, Pinterest, and Google+
Hot Deal: Set up a secure second phone number and keep your real contact details hidden with a yearly subscription to Hushed Private Phone Line for Android/iOS, 83%–91% off. It’s a perfect second-line solution for making calls and sending texts related to work, dating, Craigslist sales, and other scenarios where you wouldn’t want to give out your primary phone number.
“Hey there, just a heads-up: We’re part of the Amazon affiliate program, so when you buy through links on our site, we may earn a small commission. But don’t worry, it doesn’t cost you anything extra and helps us keep the lights on. Thanks for your support!”


