For most carriers, “unlimited” data plans aren’t really unlimited, and they still cost more than data limited plans. So while subscribing to music streaming services and storing your own music library in the cloud may be more convenient, it may eat your data up like candy. To keep that from happening, try downloading tracks from Apple Music for offline playback.
By subscribing to a paid Apple Music subscription, you’re not just opening the door for millions of tracks the service offers, you automatically receive iTunes Match, which is also available as a standalone paid service for those who don’t want to subscribe to Apple Music. Match analyzes the songs you have in your iTunes library, then gives you access to corresponding tracks on Apple’s servers, allowing you to download that content straight to your iPhone or Android device.
This article dives into how to save and download your personal music collection to your device using Apple Music. If you’re curious about downloading Apple Music content to your iPhone or Android device, make sure to check out our guide below.
How iTunes Match Works
When you import a CD or buy an album from another seller like Amazon, as long as you add that music to your iTunes library, you’ll also see it remotely on your iPhone or Android device after Match finds a compatible version. There’s a 100,000-song limit but purchased iTunes music doesn’t count against it.
For any tracks that Apple cannot find on its own servers, they will upload those songs to the cloud. ALAC, WAV, and AIFF formats get converted to AAC 256 Kbps versions so they are compatible on all devices, while AAC and MP3 formats are uploaded as is as long as their quality is good enough.
None of this counts toward your overall iCloud storage, so you can max out Apple’s 100,000 song limit without worrying about your iCloud data plan overloading.
What this all means is you will be able to see your personal music library on your phone just as you would with any Apple Music songs you’ve added to your library. You’ll then be able to download those songs to your iPhone or Android device for offline listening.
Step 1: Enable iCloud Music Library in iOS
For all of the steps below, iCloud Music Library must be enabled. To check if this setting is enabled on your iPhone, open the Settings app, tap “Music,” then enable “iCloud Music Library.” On Android, you won’t find iCloud Music Library, but it will already be enabled by default.
Step 2: Sign into Your Apple ID in iTunes
For this to work, you’ll need to make sure you’re signed into iTunes using the Apple ID that’s connected to Apple Music. To check, click “Account” in the menu bar at the top of the display (Mac) or at the top of the iTunes window (Windows). If the account matches, you’re all set. If not, click “Sign Out” if another account is signed in, then “Sign In.” Enter your Apple ID and password, then click “Sign In” once more.
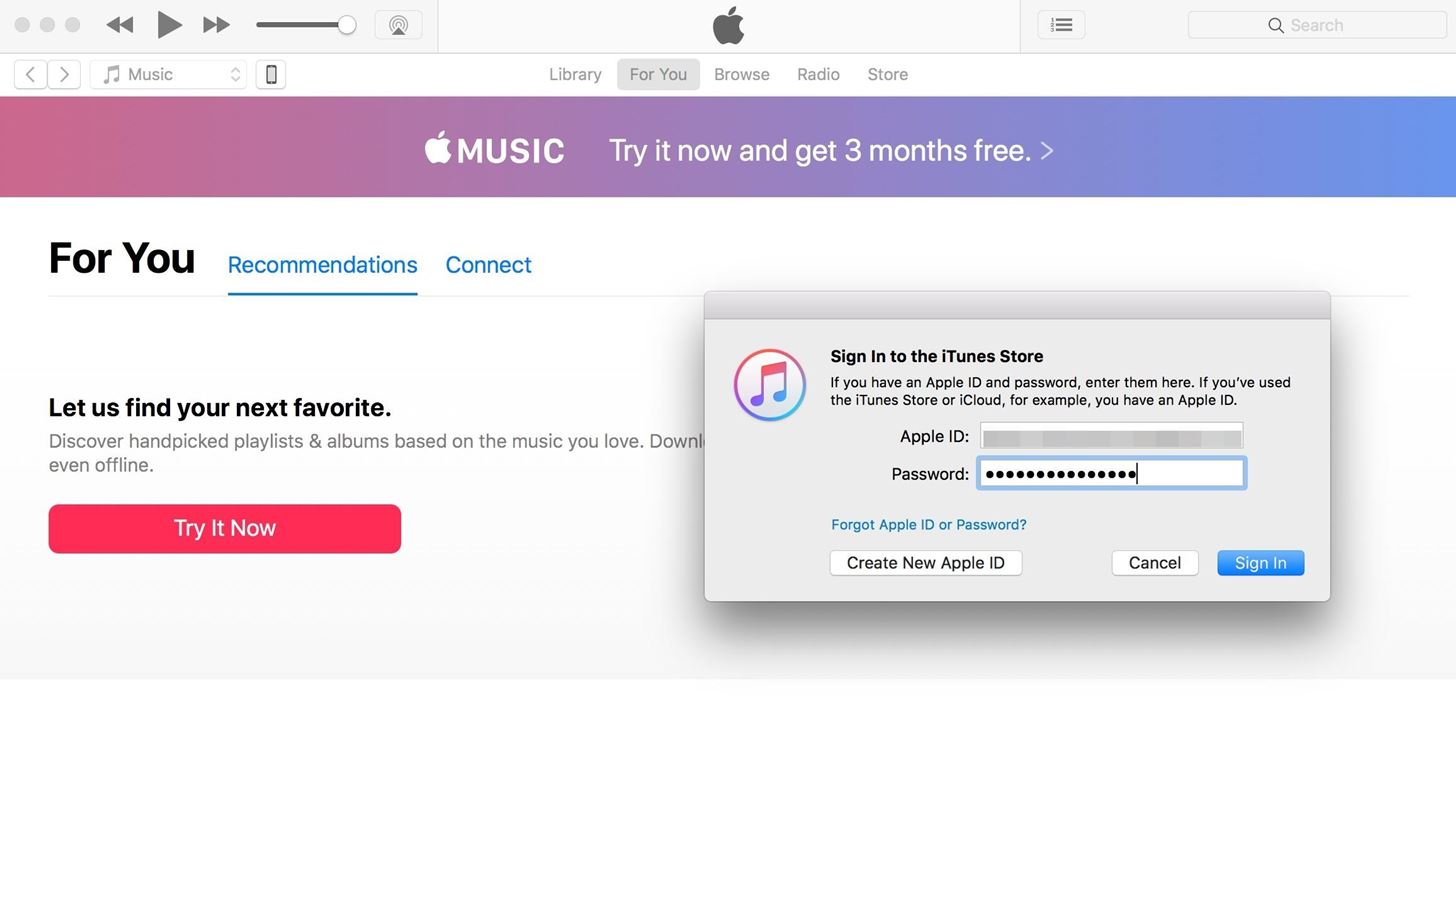
Step 3: Enable iCloud Music Library in iTunes
You may have to enable iCloud Music Library in iTunes, as well. Choose either “iTunes” (Mac) or “Edit” (Windows), then click on “Preferences.” On the “General” tab, make sure “iCloud Music Library” is checked.
Step 4: Add Music to Your iTunes Library
Now, any music that’s already in your iTunes library will be matched or uploaded to iCloud Music Library, if possible. You can drag and drop new music into iTunes to add and, if connected to the internet, it will attempt to match or upload the tracks. If you added music to iTunes while you were offline, you can select “File,” then “Library,” followed by “Update iCloud Music Library” to sync everything up.
When viewing the music in iTunes as “Recently Added,” “Artists,” “Albums,” or “Genres,” after iCloud Music Library scans the tracks, it should say “Downloaded” next to the album. When in “Songs” view, you can enable the “iCloud Status” column to see what was matched, uploaded, etc. The original files that you dropped into iTunes will still remain.
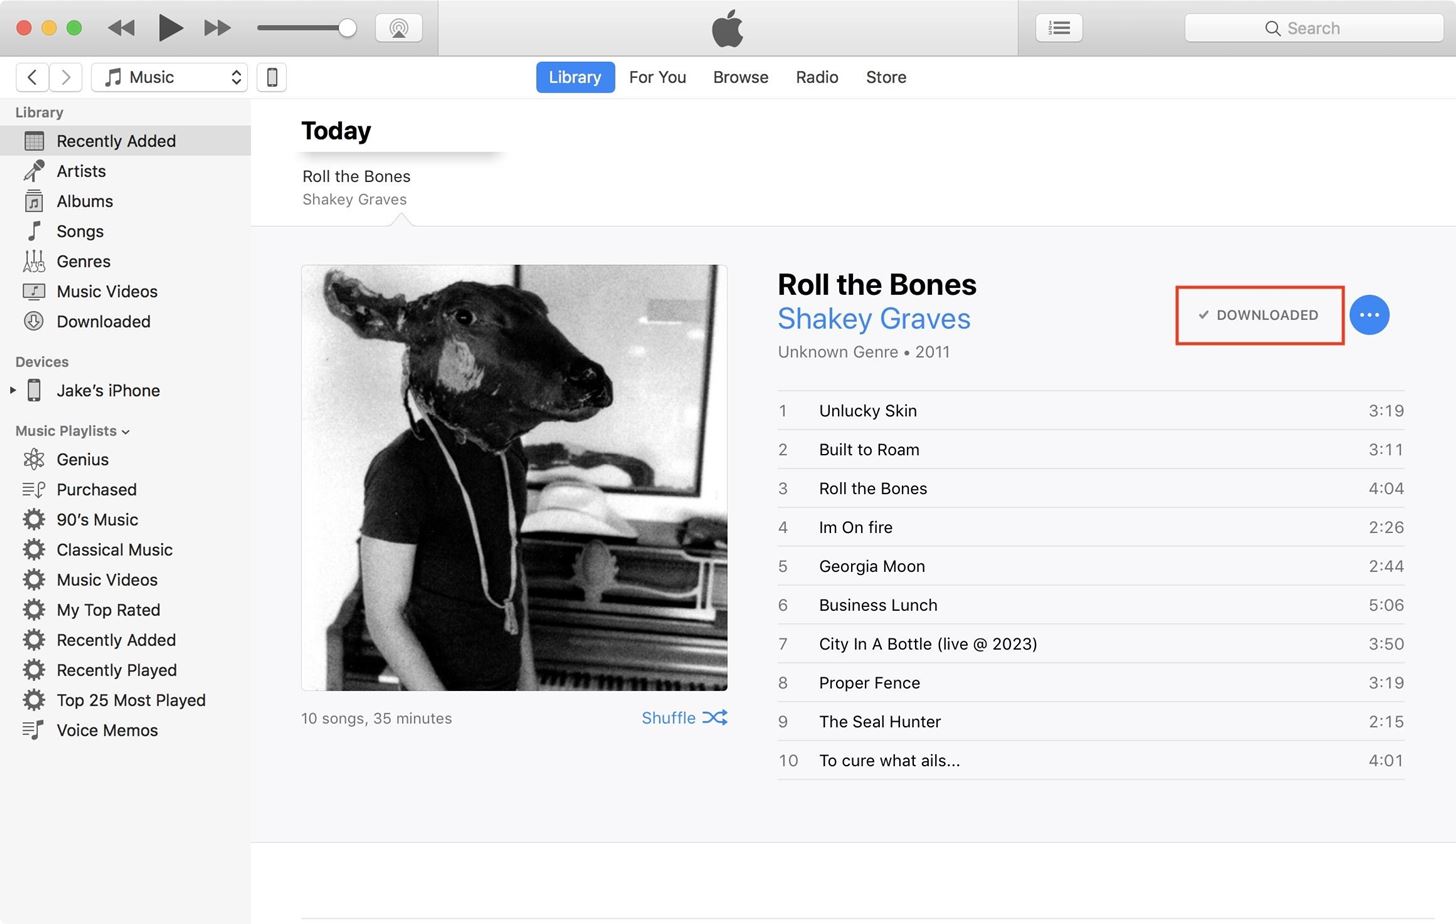
Organizing Your iTunes Library Files
If you have “Copy files to iTunes Media folder when adding to library” checked in your iTunes advanced preferences, then any files you dropped in will be in the iTunes Media folder as well as wherever they were originally. If it’s not checked, iTunes will just use the original file location as its location.
Music that was matched may actually be of higher quality on iTunes’ servers than on your computer, so if your tracks are lower than 256 Kbps, you may want to select them, then right-click on them and select “Remove Download.” This will remove the files off your computer that iTunes was using. Then, you can click on the “Available for download” button (the download cloud) next to each track or album to get the AAC 256 Kbps version on your computer.
Any music that was “uploaded” instead of matched will download at the same quality and format as it was uploaded, so a 128 Kbps or 320 Kbps MP3 song will downlload as a 128 Kbps or 320 Kbps MP3 song, respectively.
Step 5: Download Your Added Music to Your Phone
Once your music has been added to iCloud Music Library, you will have access to it across all connected and enabled devices. On your phone, you will see anything that was recently matched or uploaded to iCloud Music Library under Recently Added in Apple Music, which is what you see when first opening the app.
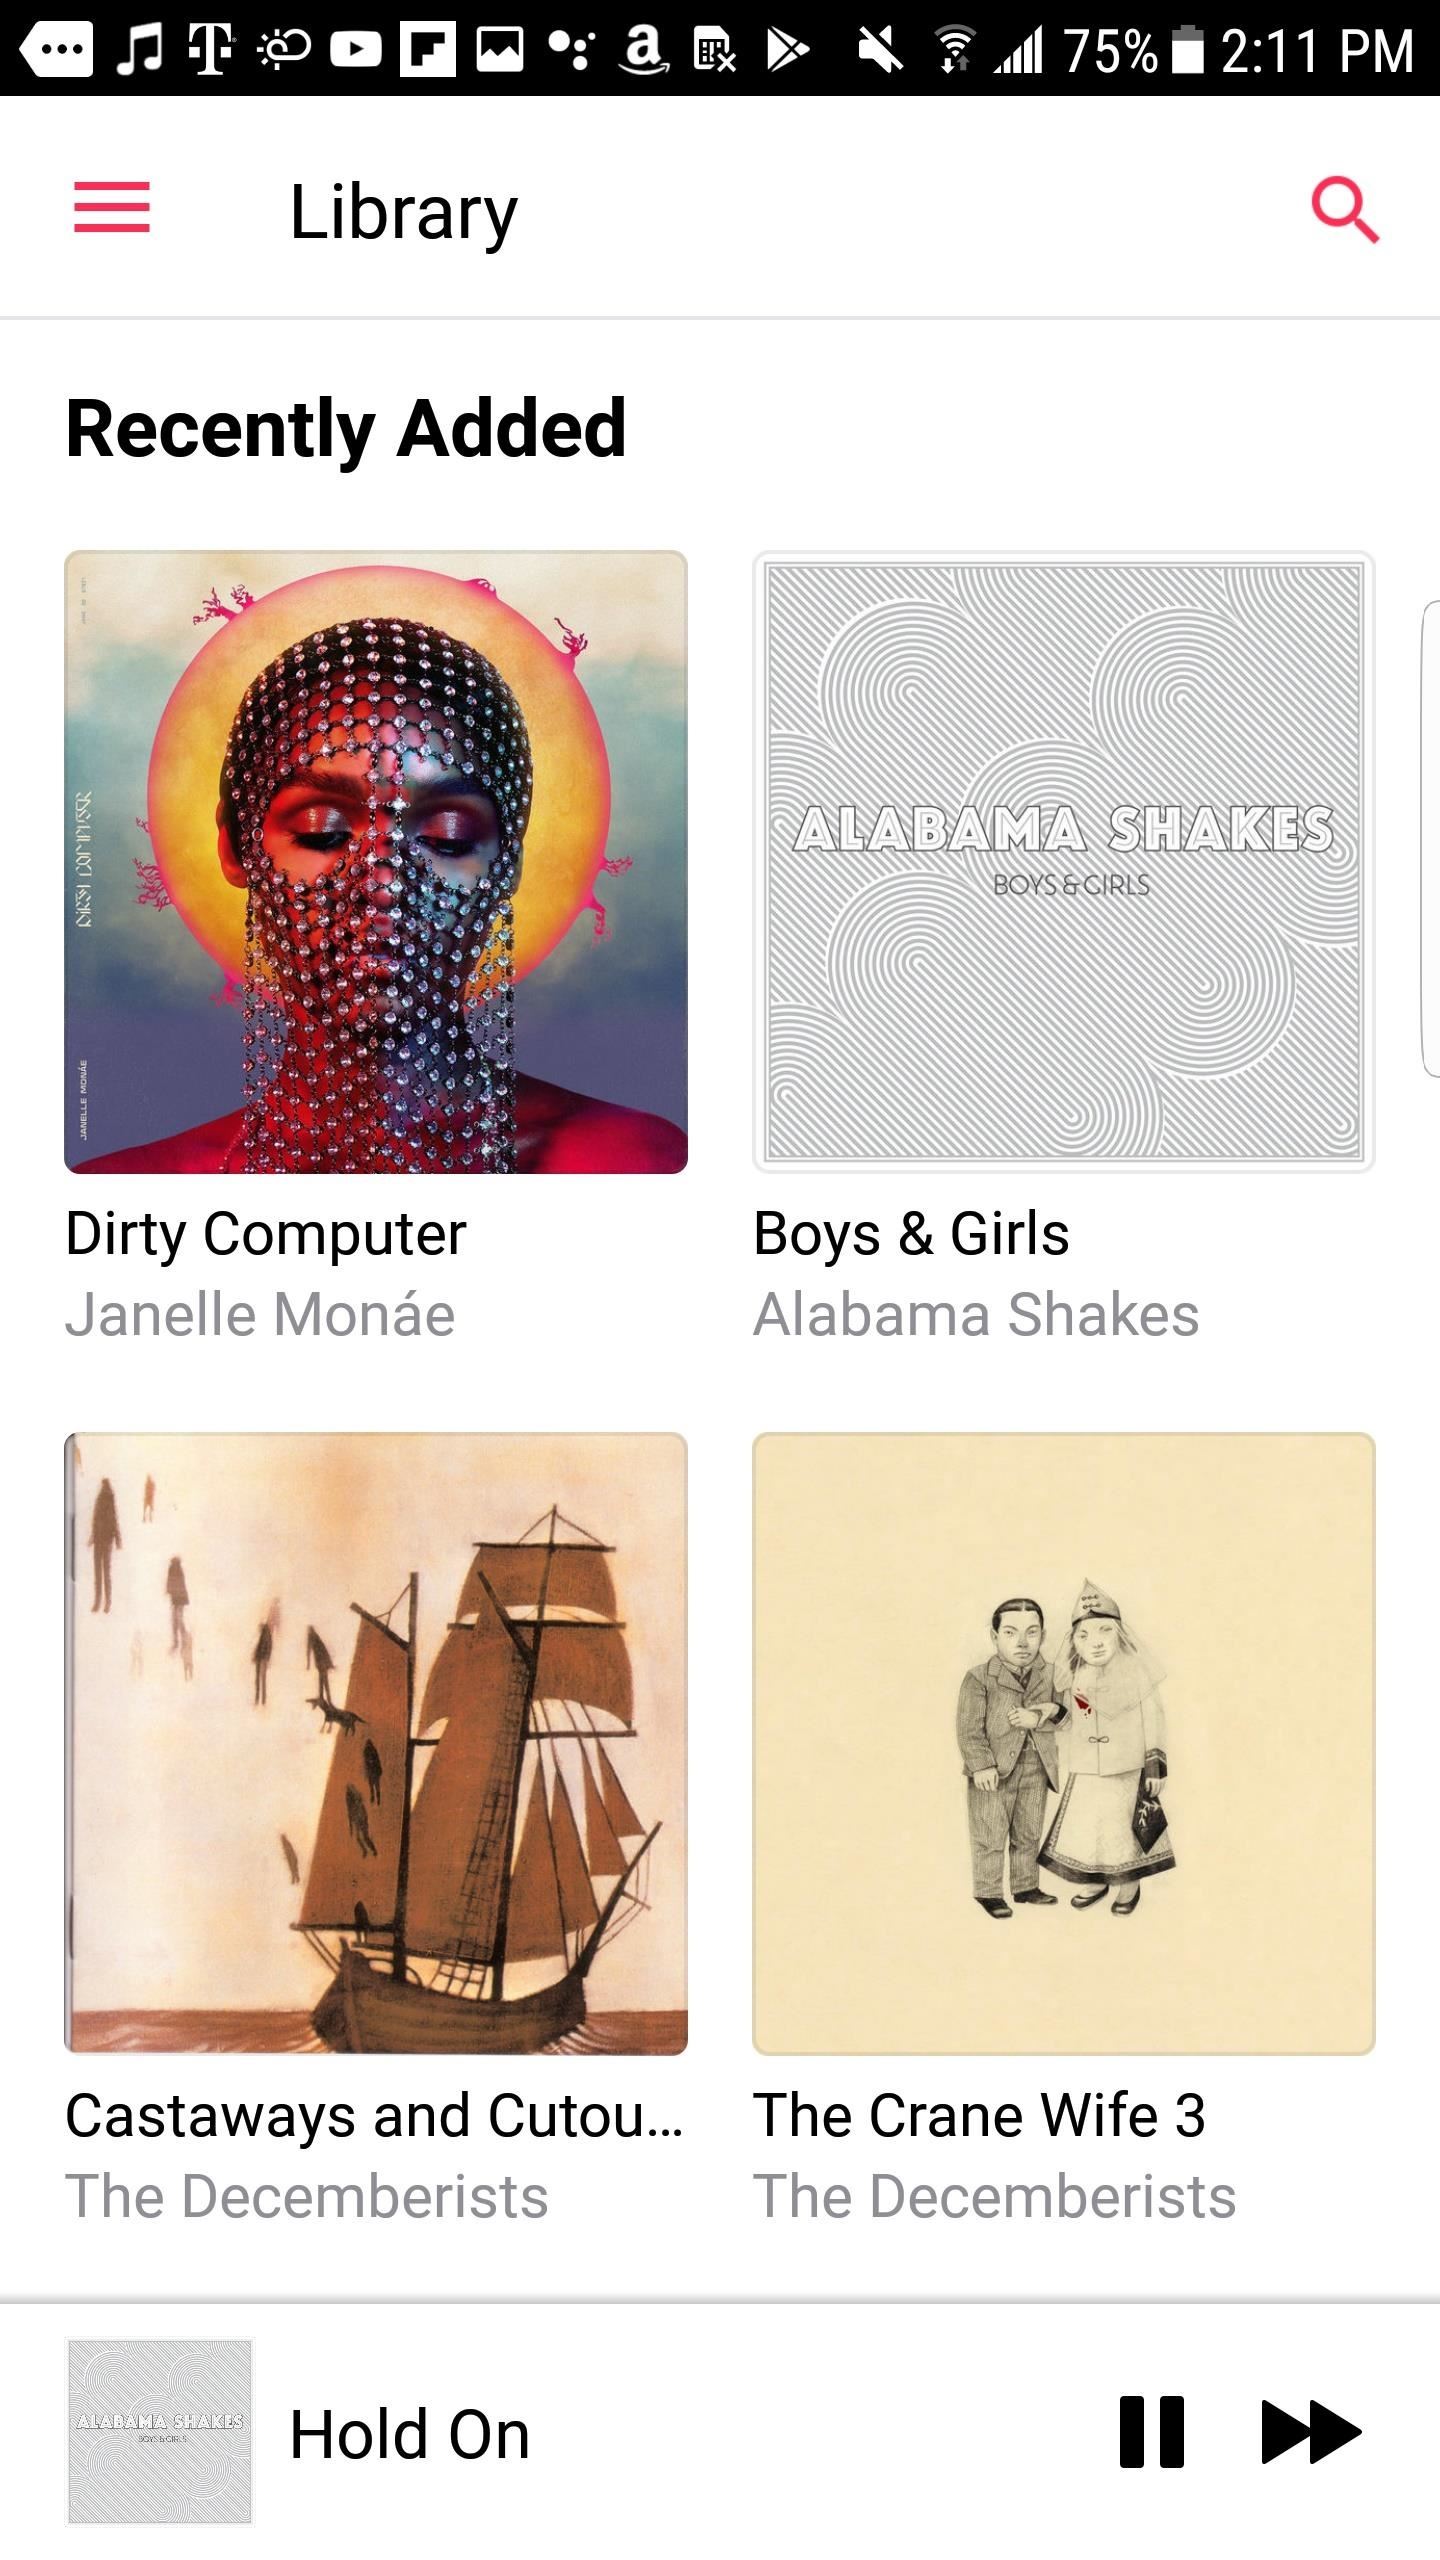
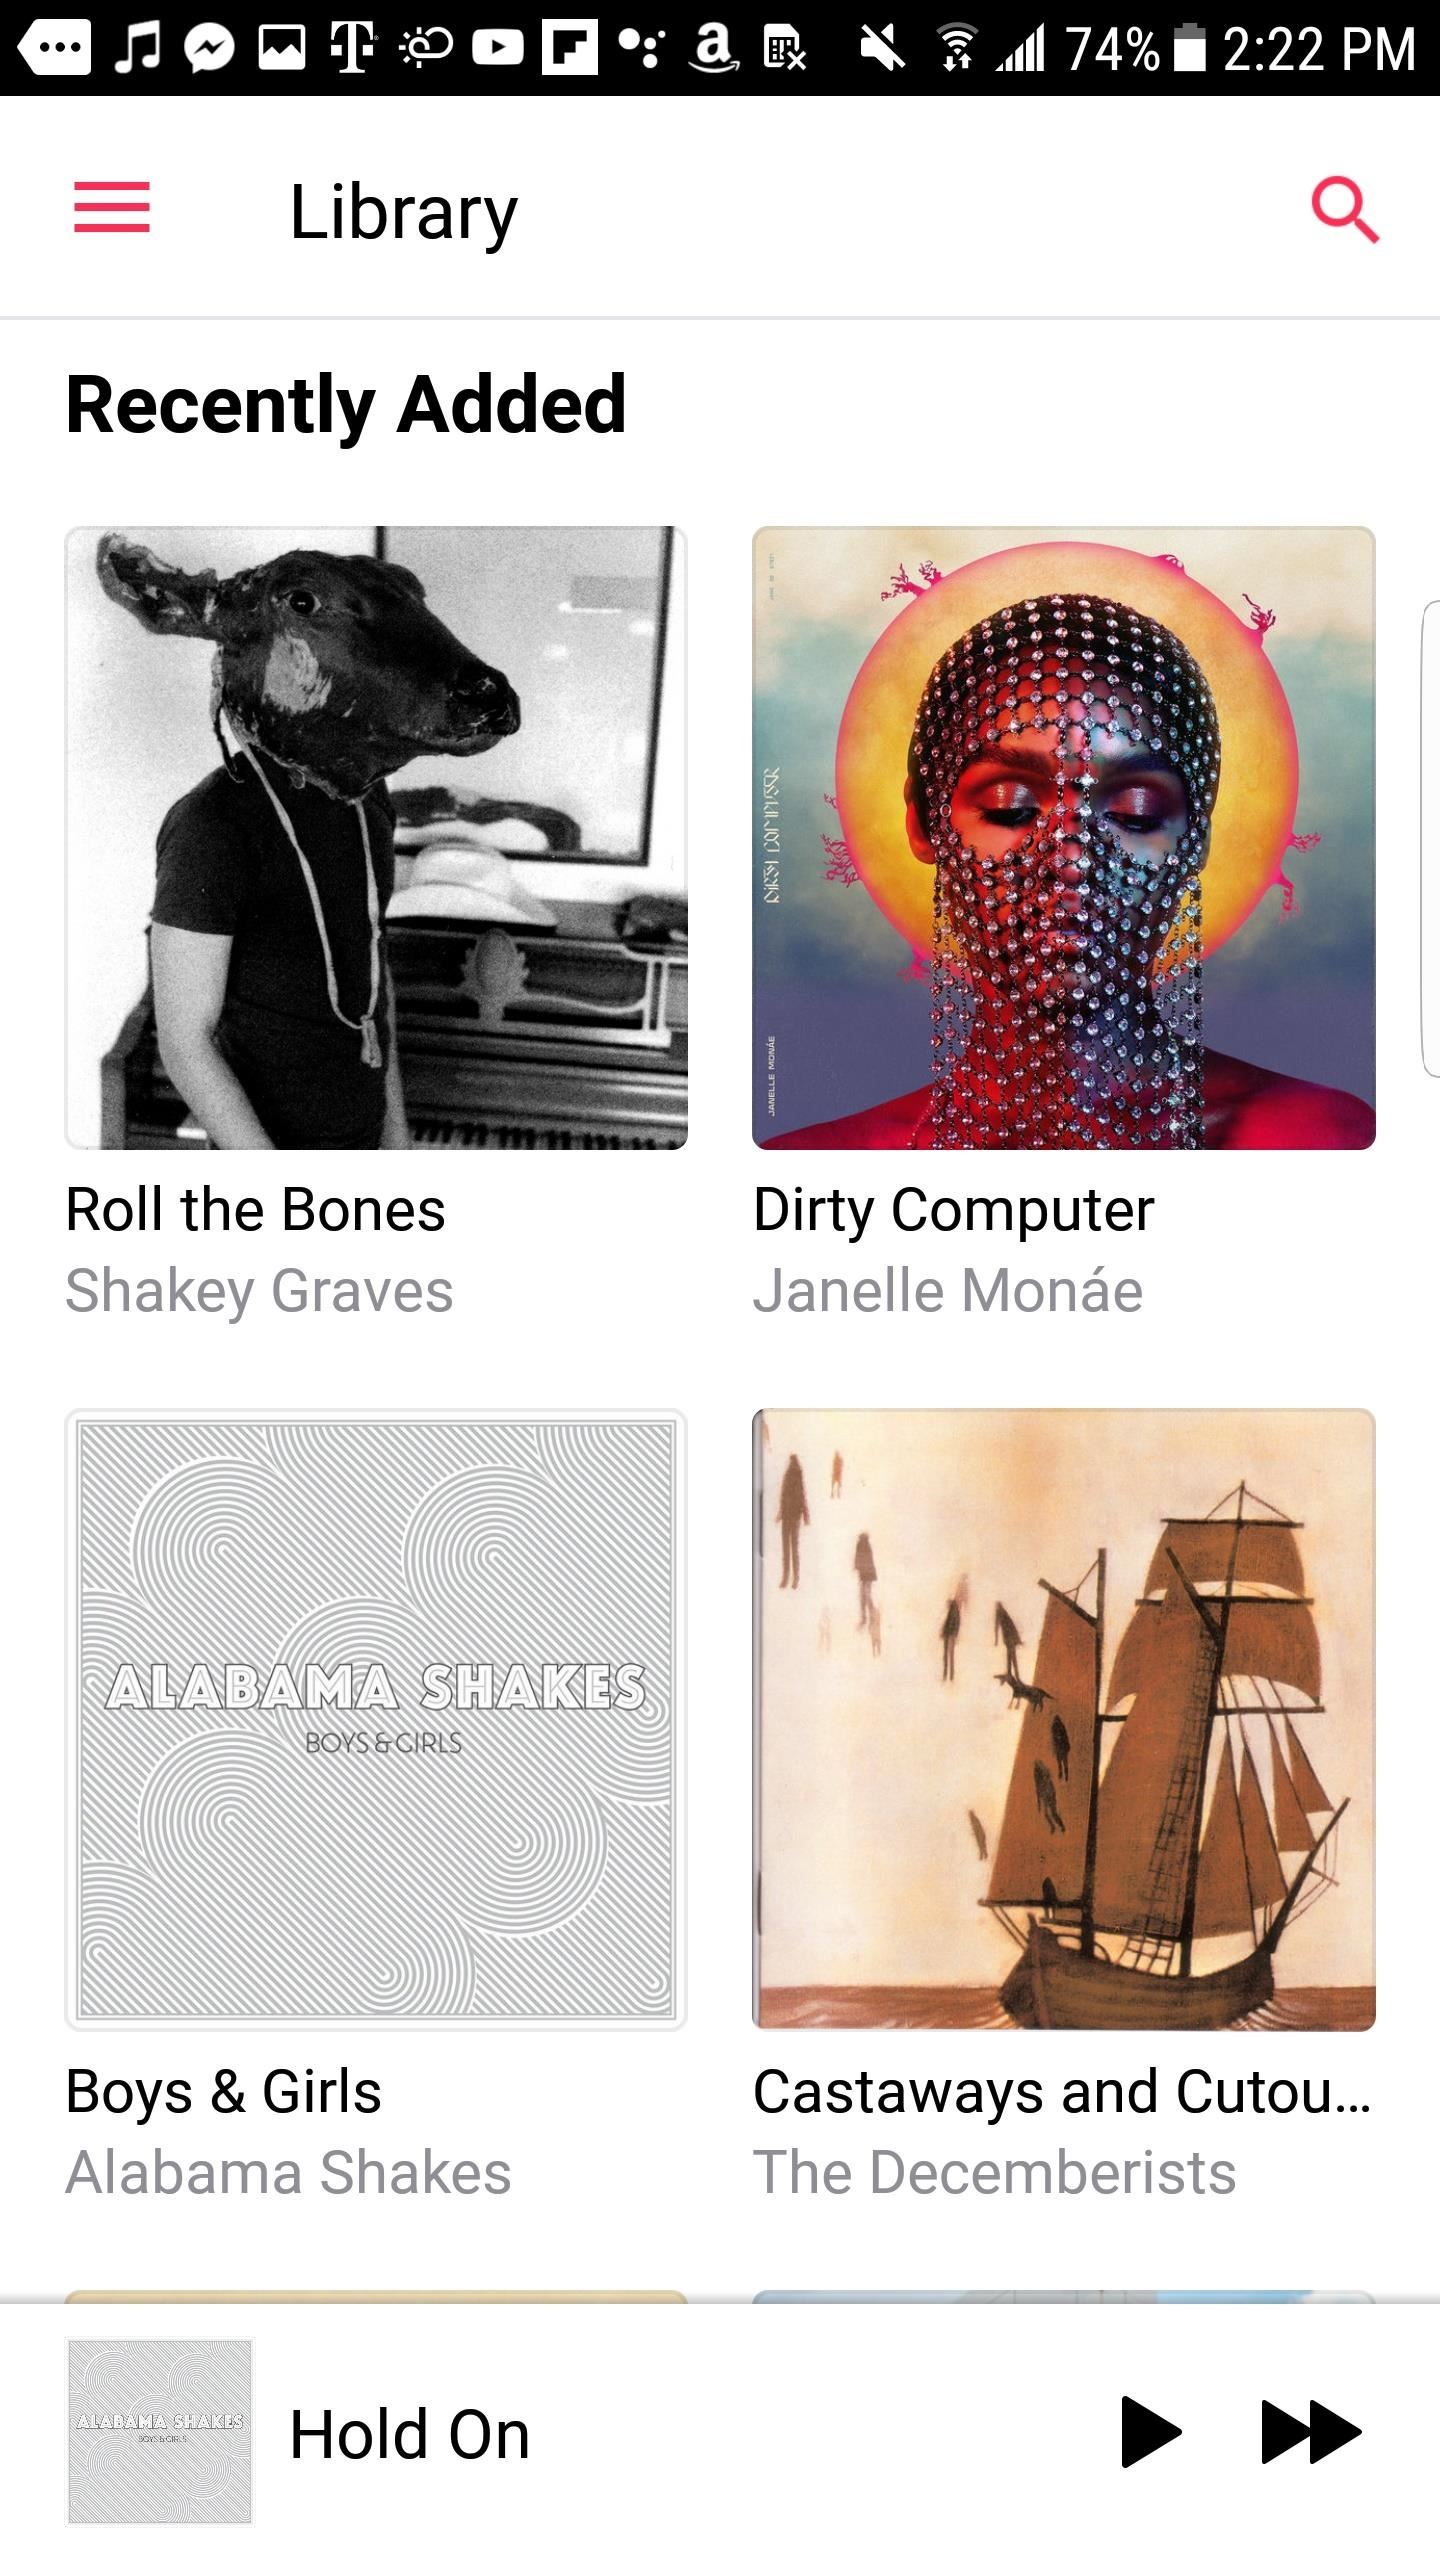
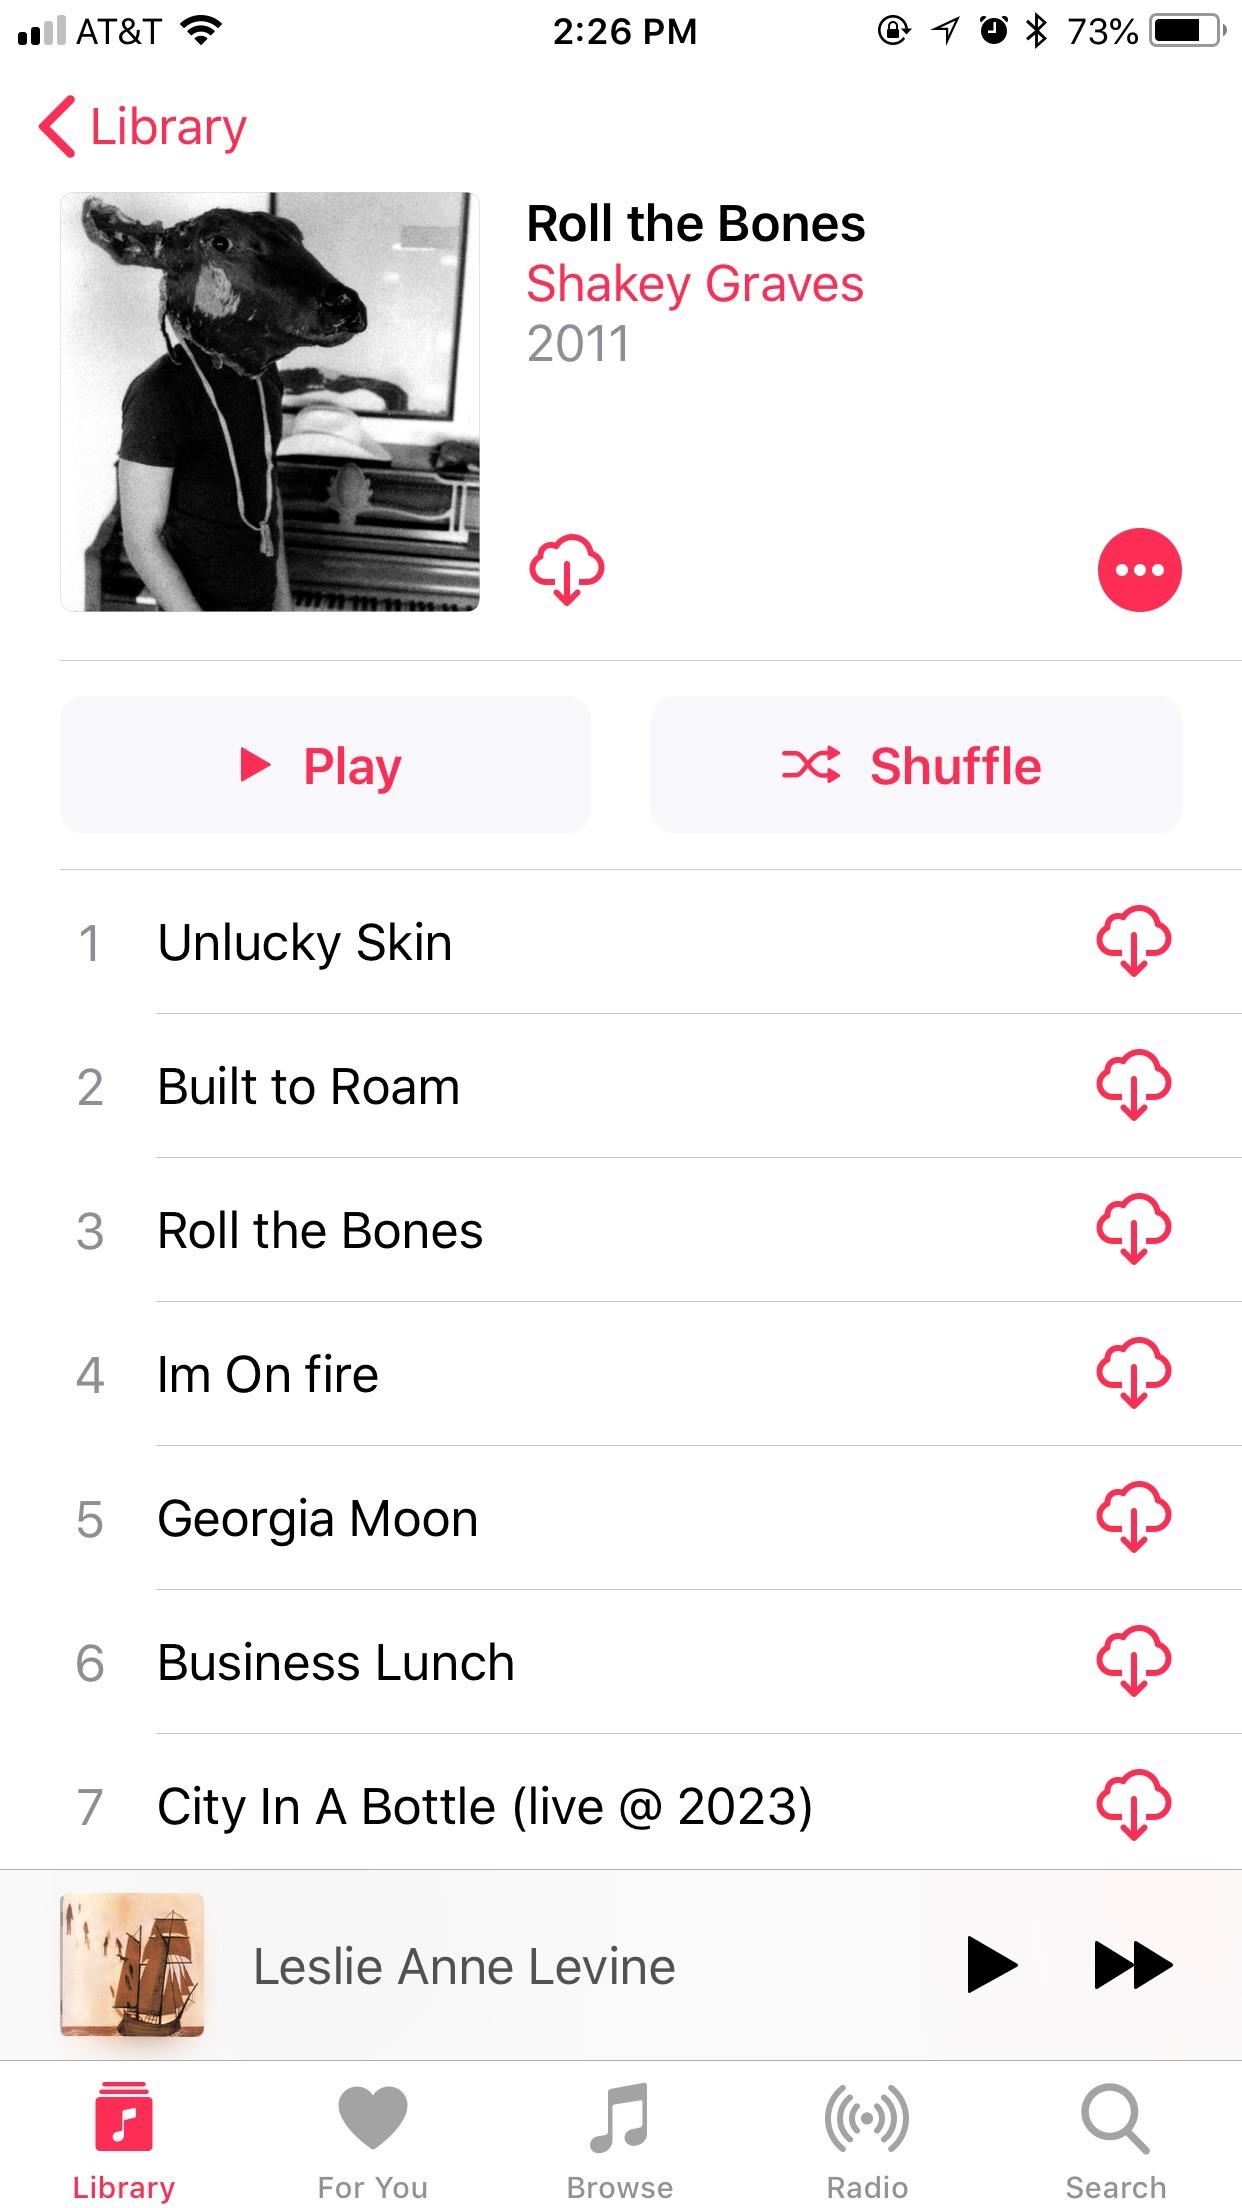
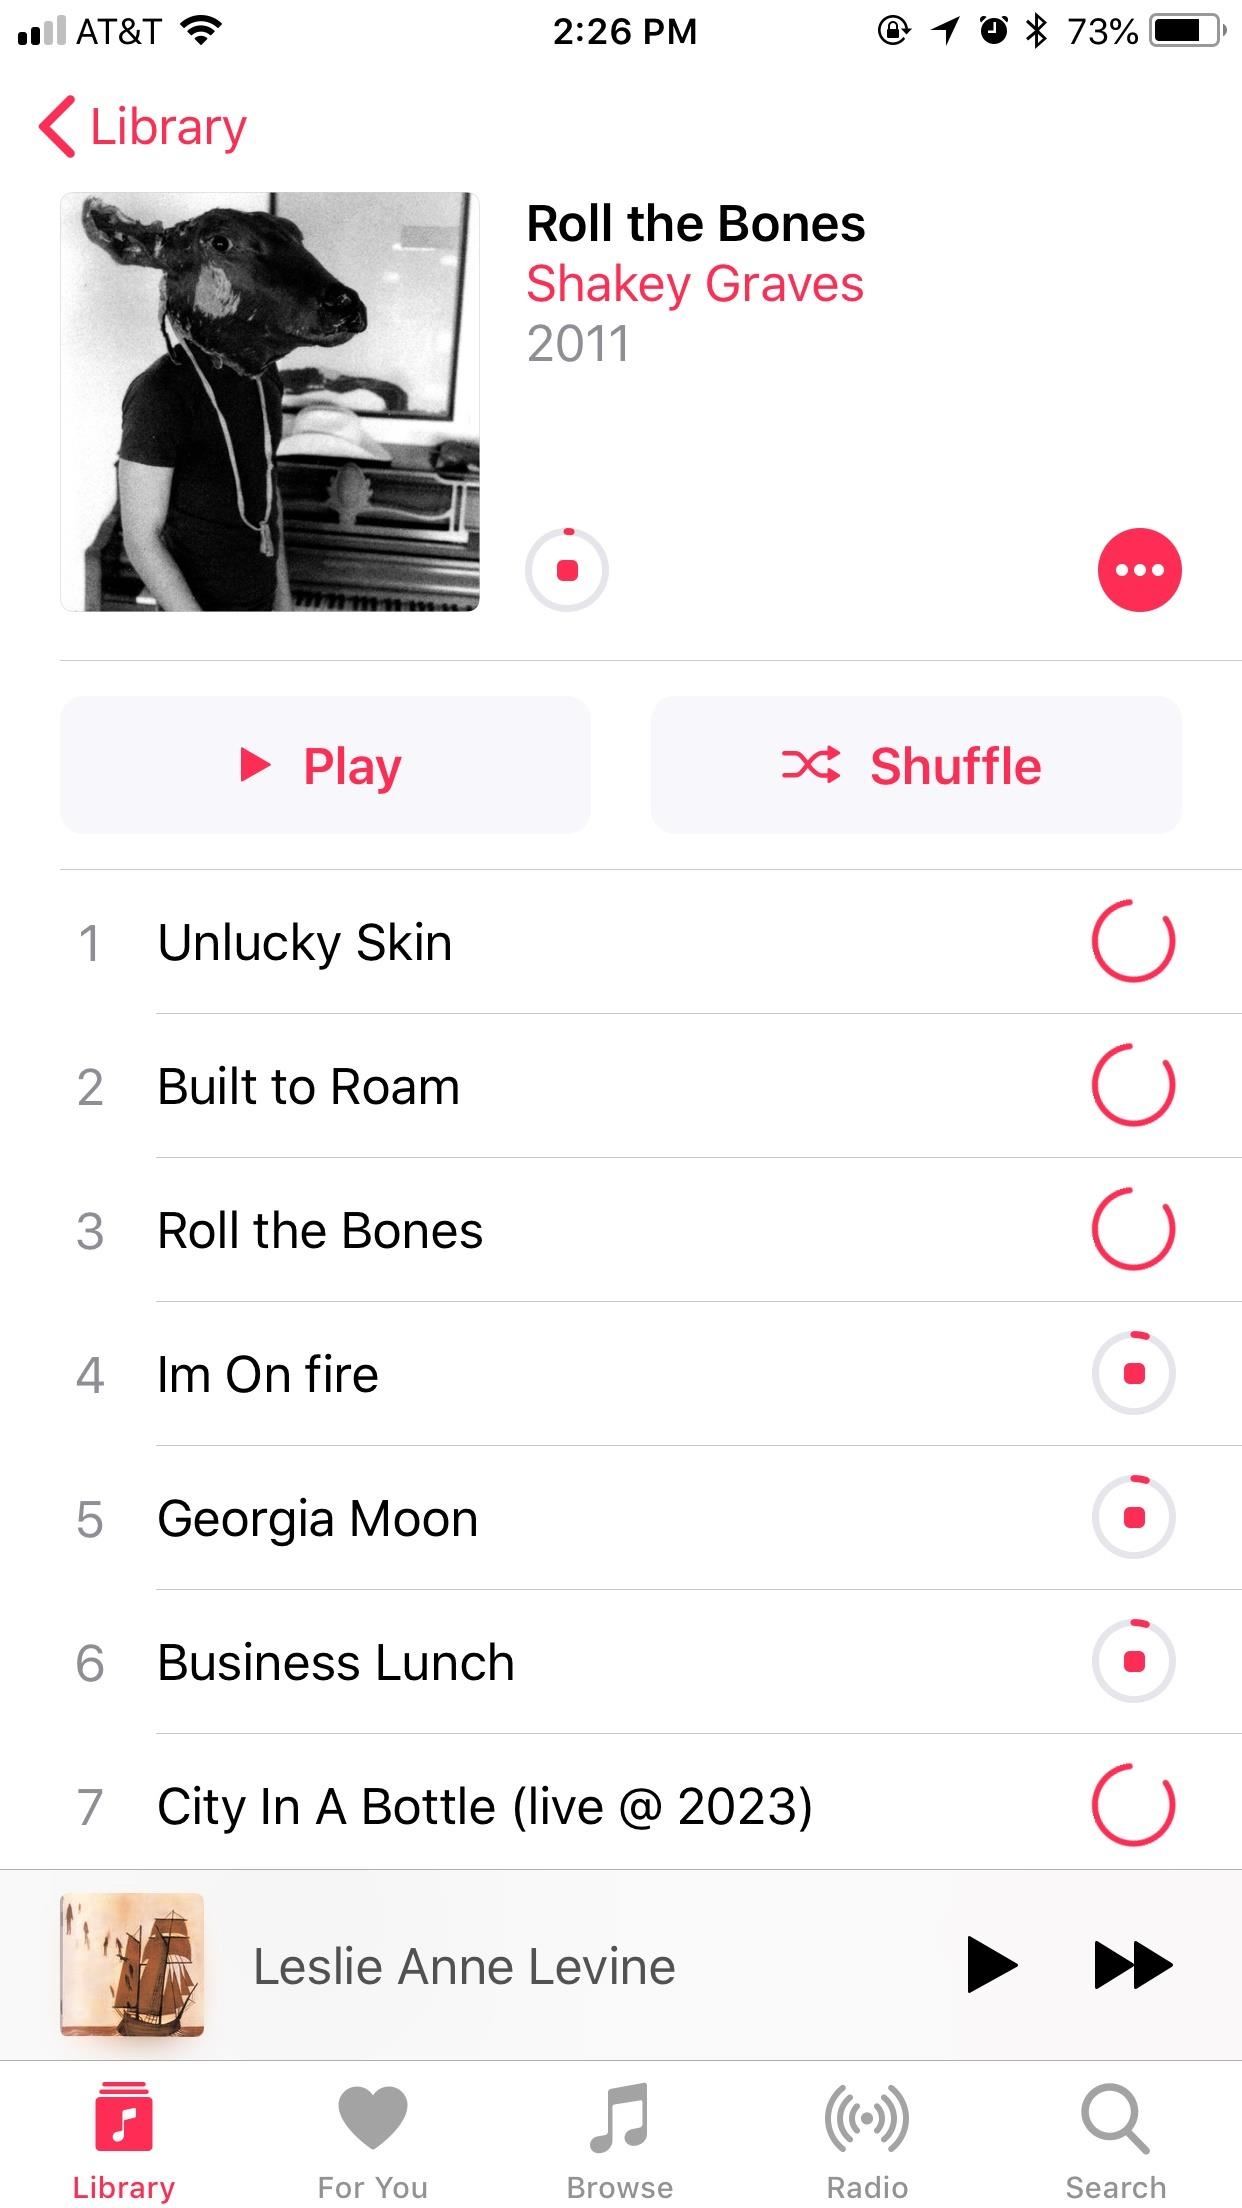
To download tracks to your iPhone, simply tap on the song or album, then select the “Available for download” button, (the download cloud) on the following screen. Matched music will be saved as AAC 256 Kbps versions on your device, even if the original file wasn’t that quality. However, any song that was uploaded rather than matched will be downloaded in its original quality and format, which may or may not be 256 Kbps.
Canceling Apple Music? What Happens to Your Tracks?
Whether your free trial has run out or you decide Apple Music (or iTunes Match itself) is no longer worth your money, the time might come where you want to cancel your subscription. Of course, that leads to a tricky question — what happens to your downloaded music?
Any of the music you own — whether it came from CDs, the iTunes Store, other digital stores, etc. — is yours before and after Apple Music. When your subscription is canceled, you will still hold on to any of this music you’ve downloaded to your iPhone or Android device, as well as whatever is stored on your Mac or Windows computer.
However, any of this music that you’ve uploaded to iCloud Music Library via iTunes Match will no longer be accessible. Any songs not downloaded before canceling your subscription will, unfortunately, be lost. Make sure you have digital copies of anything you’ve uploaded via iTunes Match before canceling Apple Music.
If the iTunes Match version is of higher quality than the files you had in iTunes, it might be worth removing your originals and downloading the Match versions before unsubscribing from Apple Music (or Match).
Just updated your iPhone? You’ll find new emoji, enhanced security, podcast transcripts, Apple Cash virtual numbers, and other useful features. There are even new additions hidden within Safari. Find out what’s new and changed on your iPhone with the iOS 17.4 update.
“Hey there, just a heads-up: We’re part of the Amazon affiliate program, so when you buy through links on our site, we may earn a small commission. But don’t worry, it doesn’t cost you anything extra and helps us keep the lights on. Thanks for your support!”


