In response to the success of Apple Pay and an attempt to stave off the appealing Samsung Pay service, Google is completely revamping Android’s mobile payments system. Instead of just using Google Wallet as an app to make payments with your phone, a new service called Android Pay, with an extensive underlying framework and API, will soon make its debut—and maybe even sooner than you’d think.
Android Pay’s official launch date is unknown, but the underlying elements that make it all tick are already starting to roll out to Android devices. In fact, Android Pay is so far along in its development that you can give it a test drive right now.
Step 1: Make Sure You’re Running Play Services 8.1 or Higher
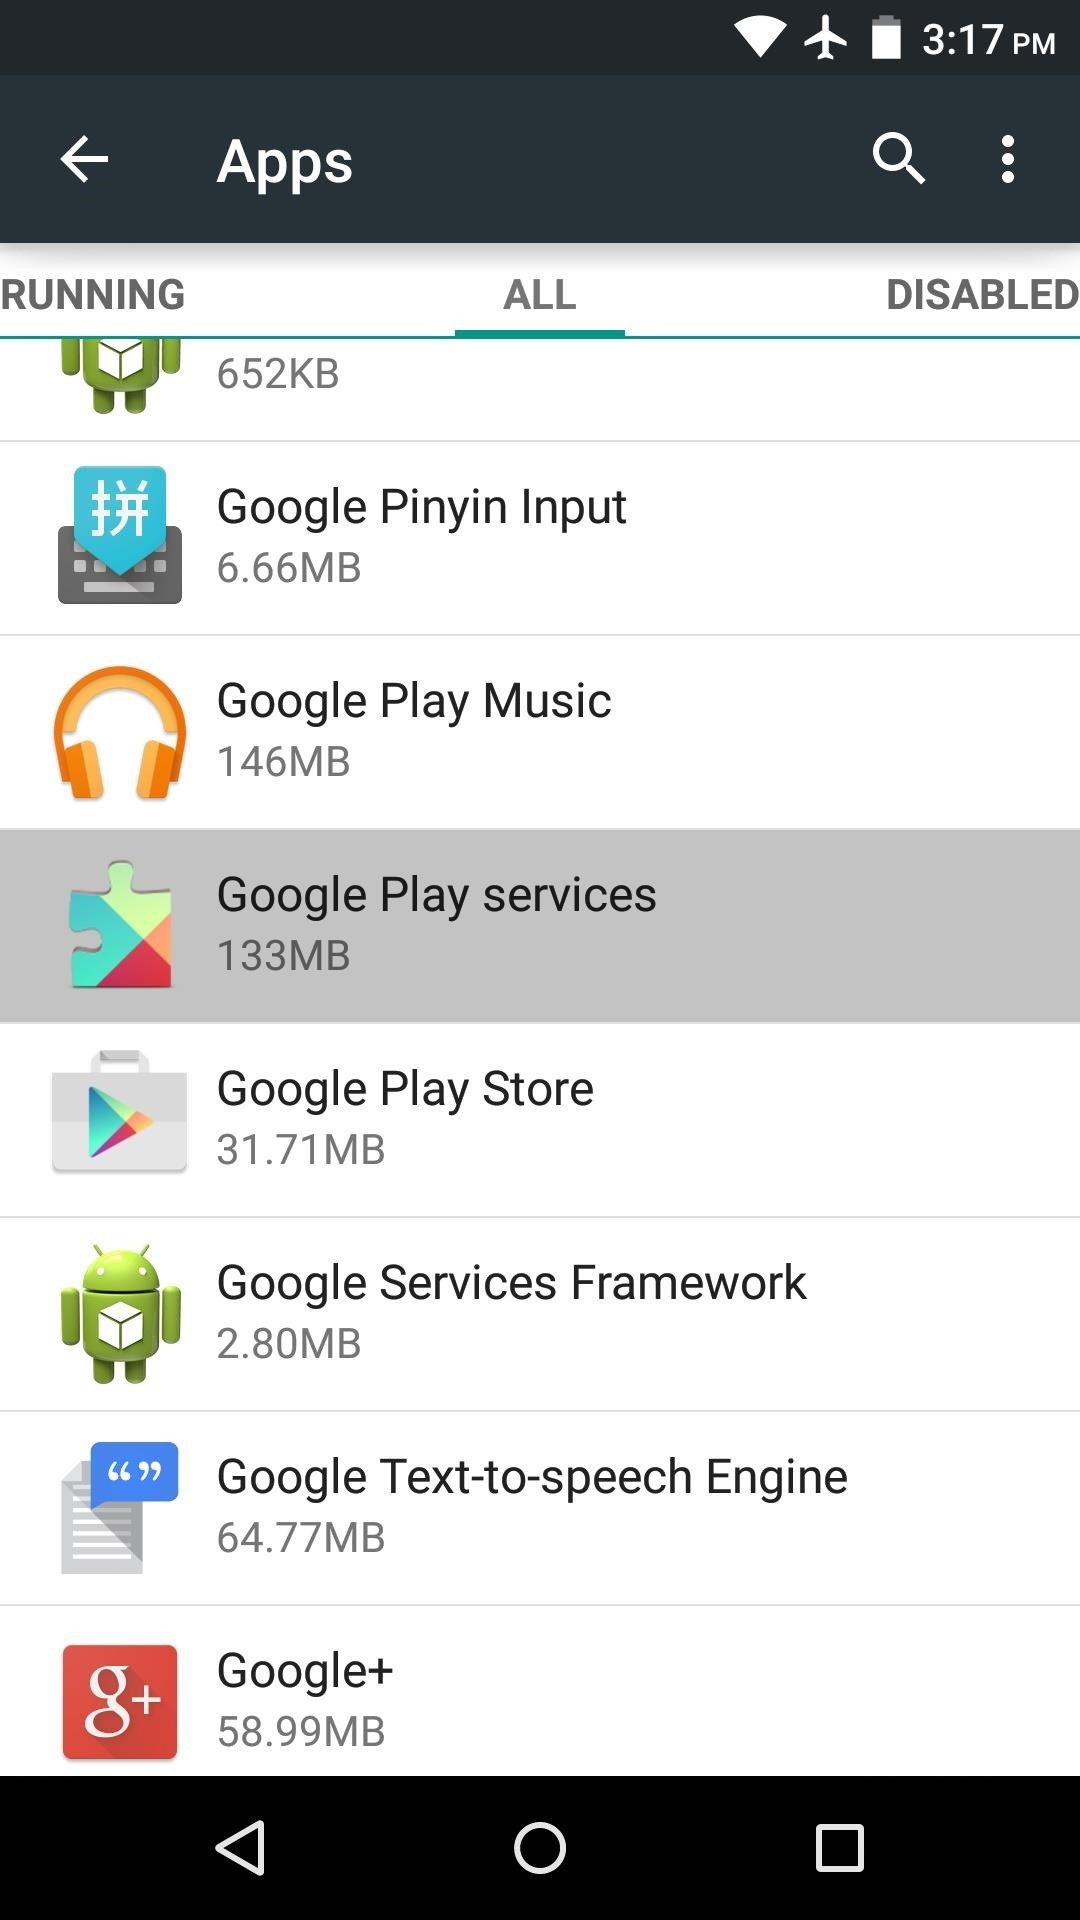
Android Pay functionality is built into the latest version of the Google Play Services app, which gets updated silently in the background on Android devices. This means you may already have the latest version, so to check, head to Settings -> Apps -> All, then select Google Play Services and verify that the version number is at least 8.1.03.
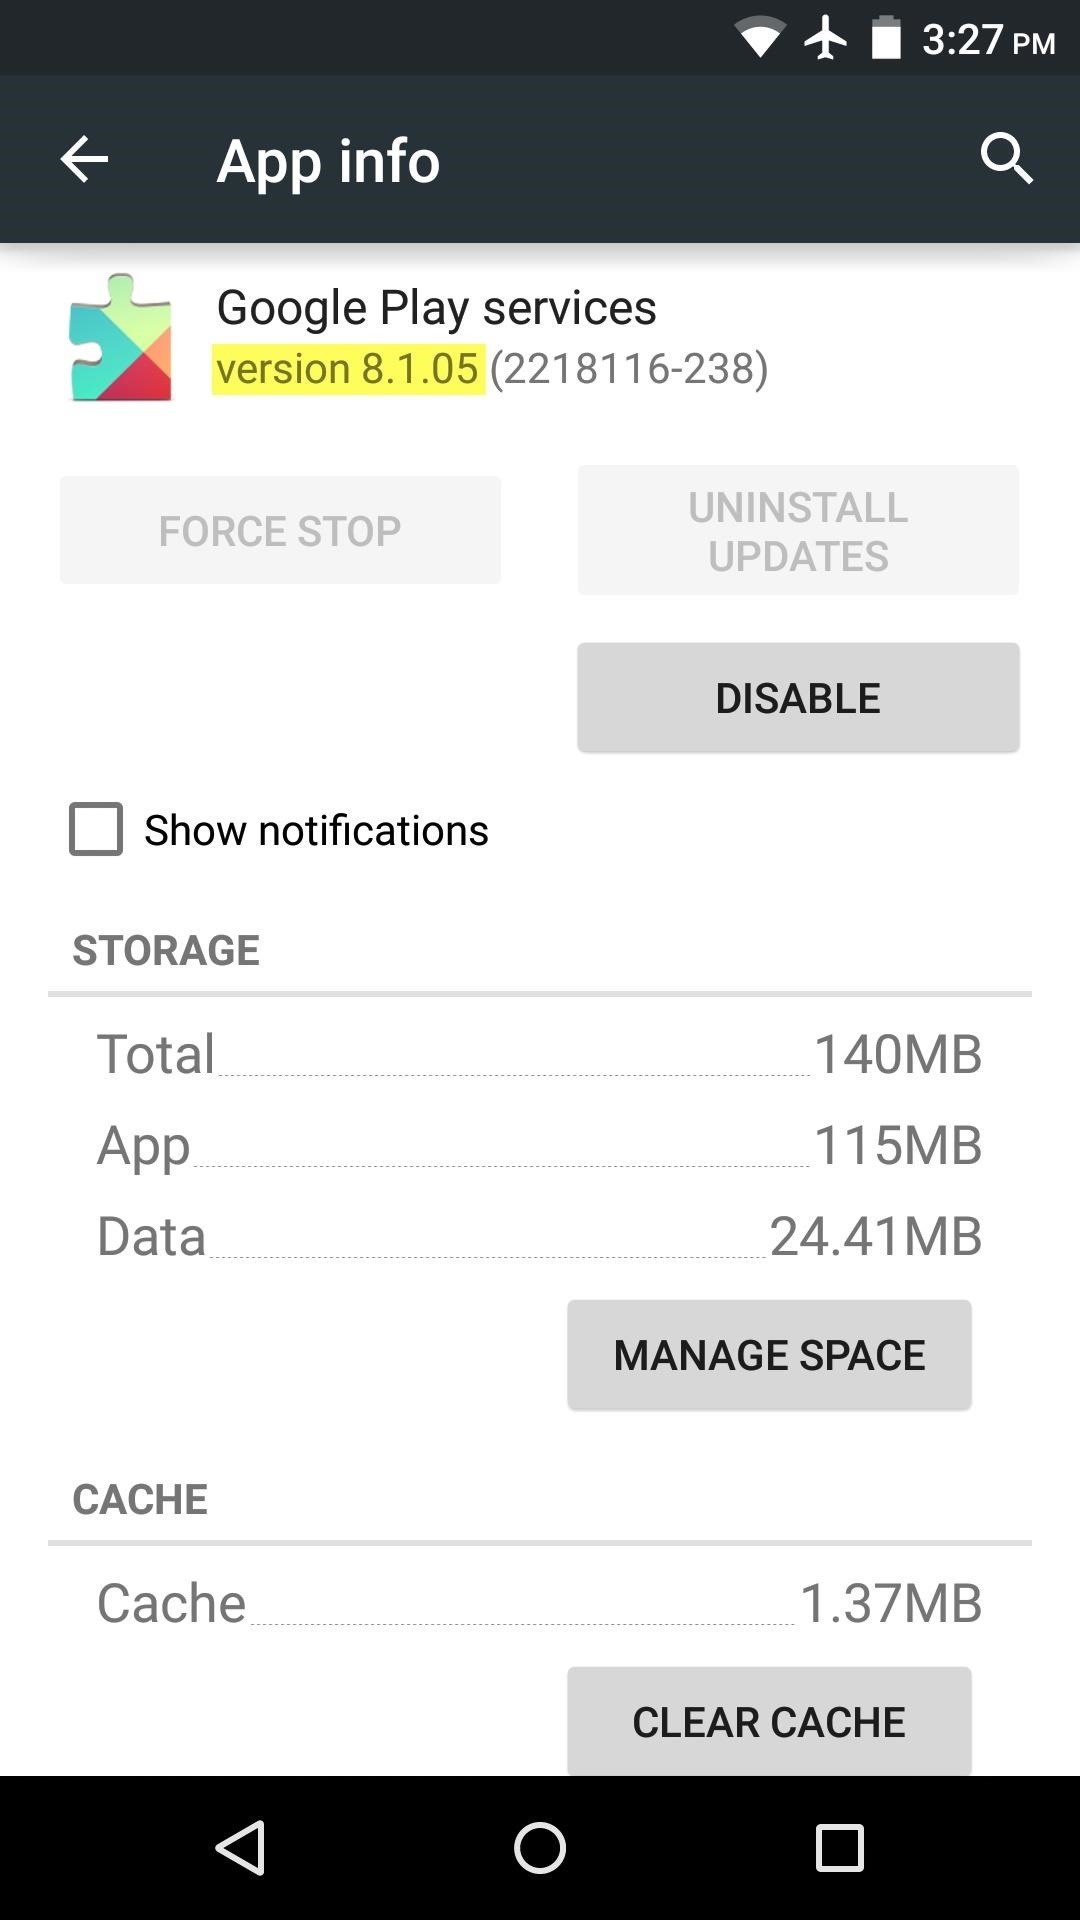
If you don’t already have the latest version of Google Play Services, you can sideload the update from APKMirror at this link. Understand, though, that there are different variations of the Play Services app, and it’s very important that you install the right one for your particular device. The last three digits (after the hyphen inside the parenthesis) indicate the variant of Play Services, where the first digit signifies your Android version, the second indicates your processor architecture, and the third represents your device’s DPI value.
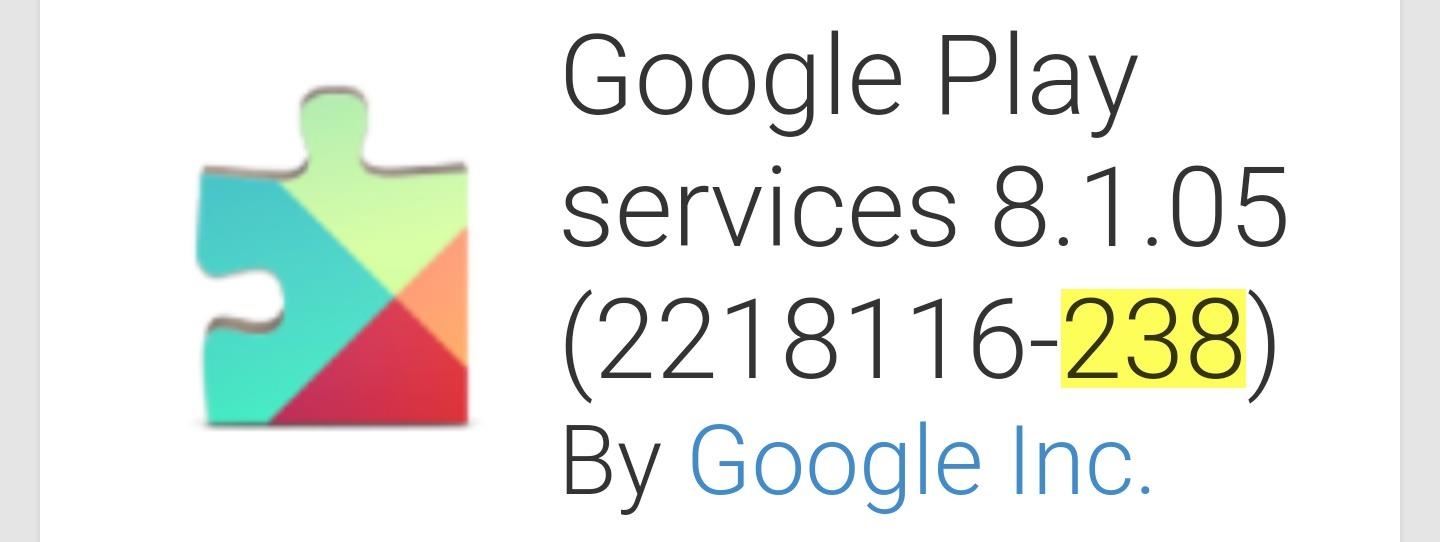
For a list of the meanings behind each number in the three-digit code, see the download page for any Google Play Services 8.1+ version on APKMirror. But as an easy way to tell, check the last three digits of the version you have now, and simply match it (though if your current version is “-4xx” now, the new version will likely be “-2xx”).
Step 2: Install Activity Launcher
Android Pay functionality is hidden inside of the latest version of Google Play Services as an activity, so to try it out, you’ll need an app that is capable of launching activities. A great option is Activity Launcher, which can be installed for free on the Google Play Store.

Though if you use Apex, Nova, or another third-party launcher, you may already have this functionality—but to keep this guide as broad as possible, we’ll show a method utilizing the app above.
Step 3: Launch the Android Pay Activity
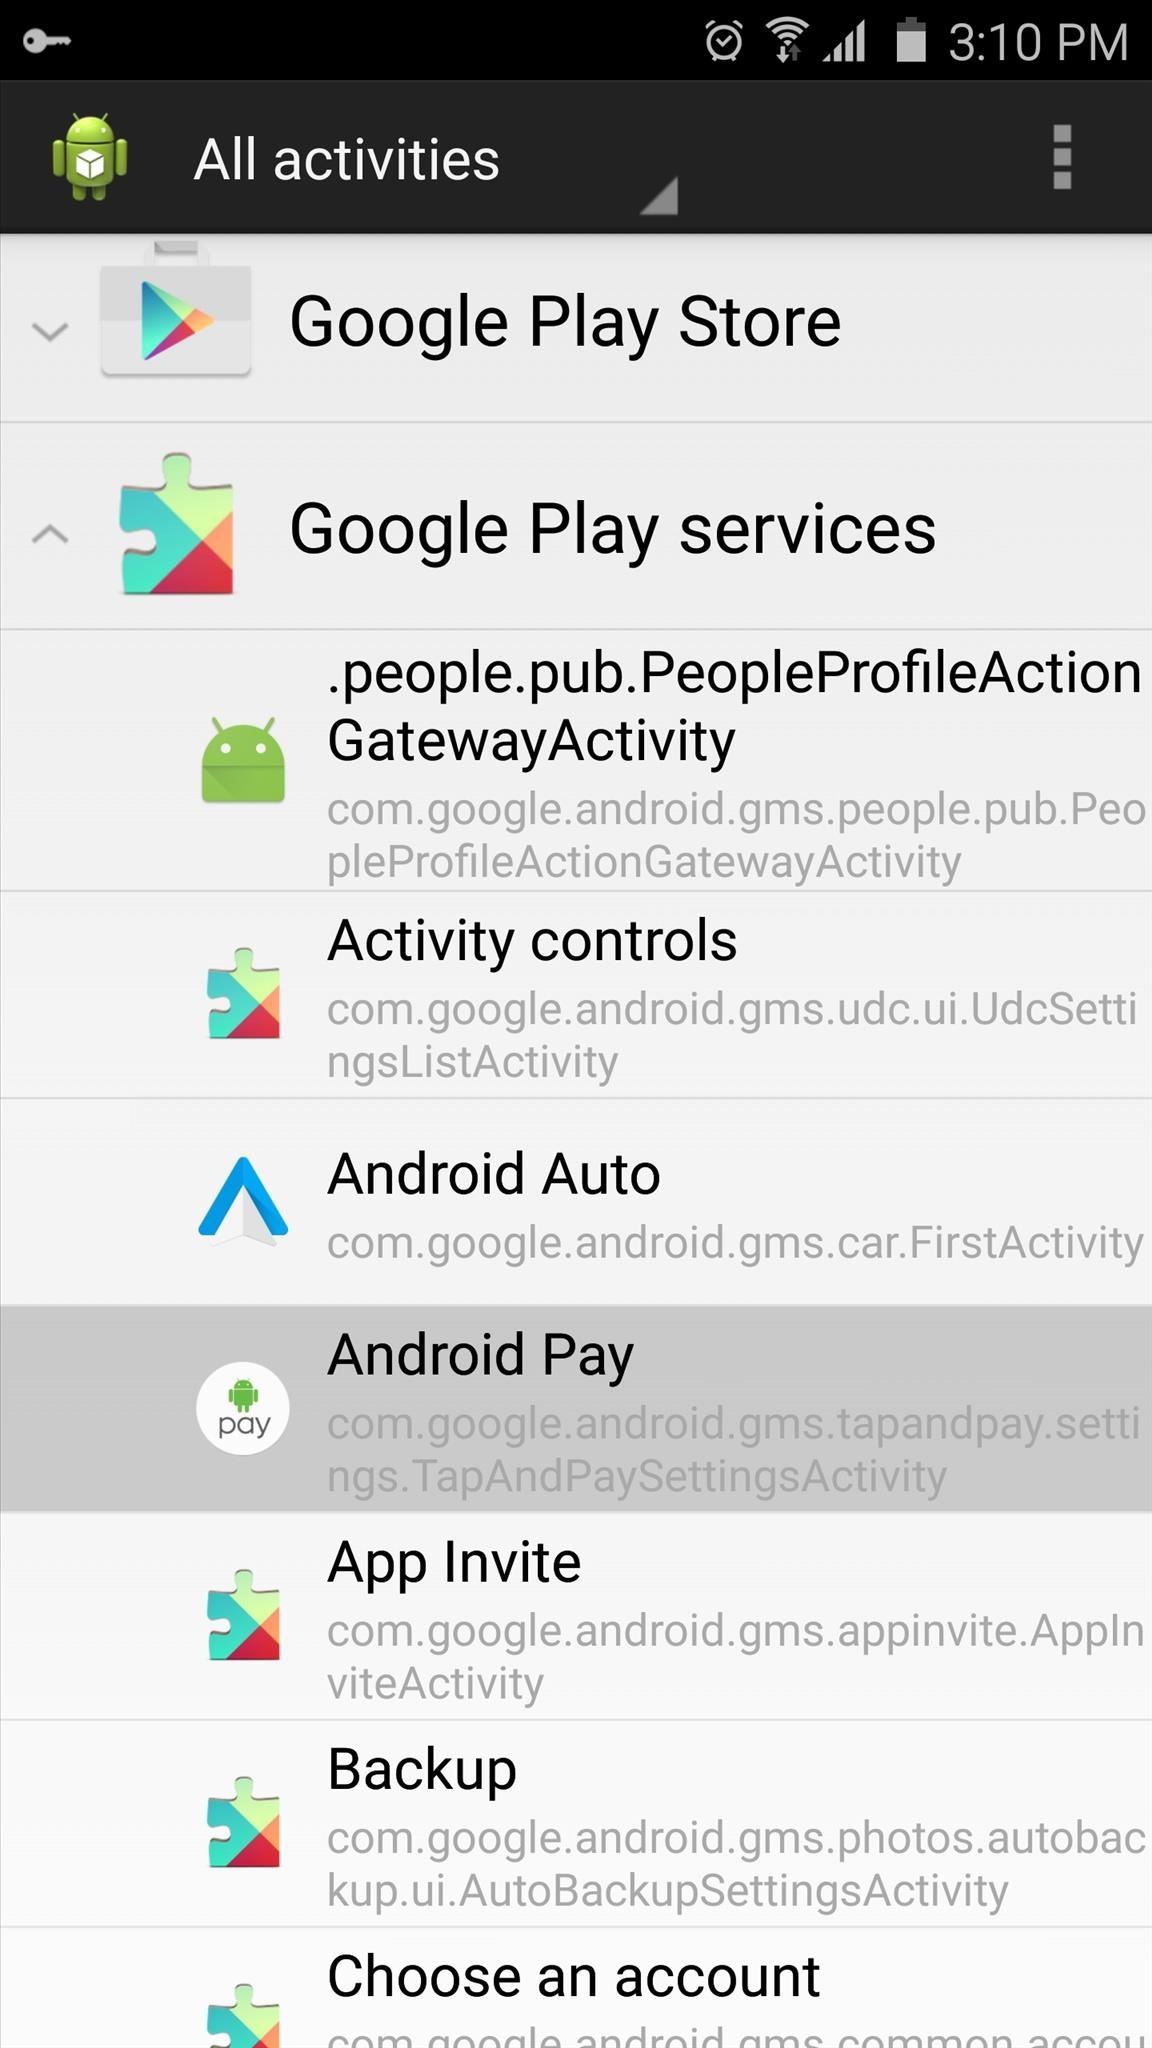
Once you have Activity Launcher installed, go ahead and open the app. From here, use the drop-down menu at the top of the screen to select “All activities,” then scroll through the list and expand the Google Play Services entry. This is where you should find an “Android Pay” listing, so go ahead and tap it.

Step 4: Set Up Android Pay & Add a Credit or Debit Card
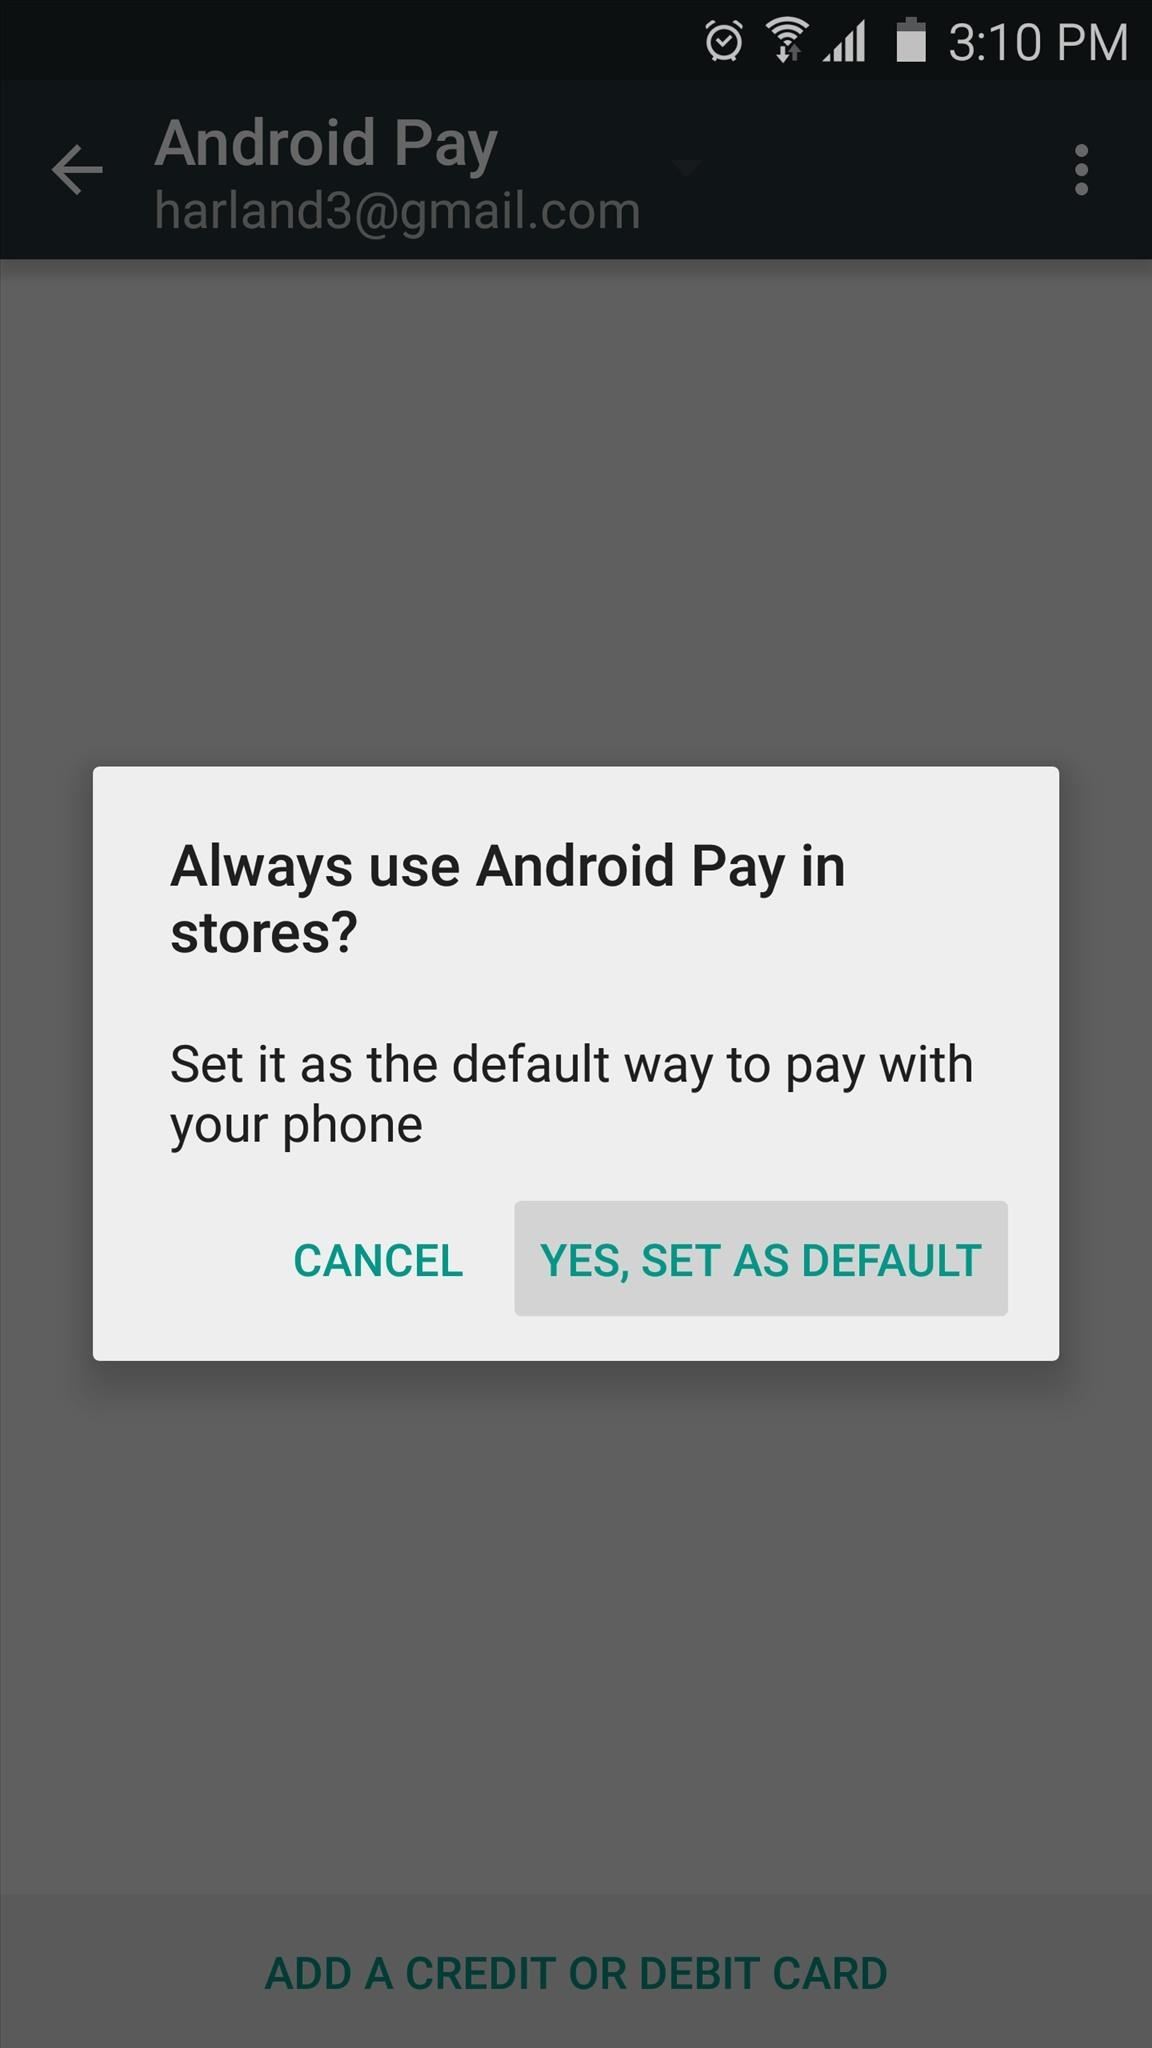
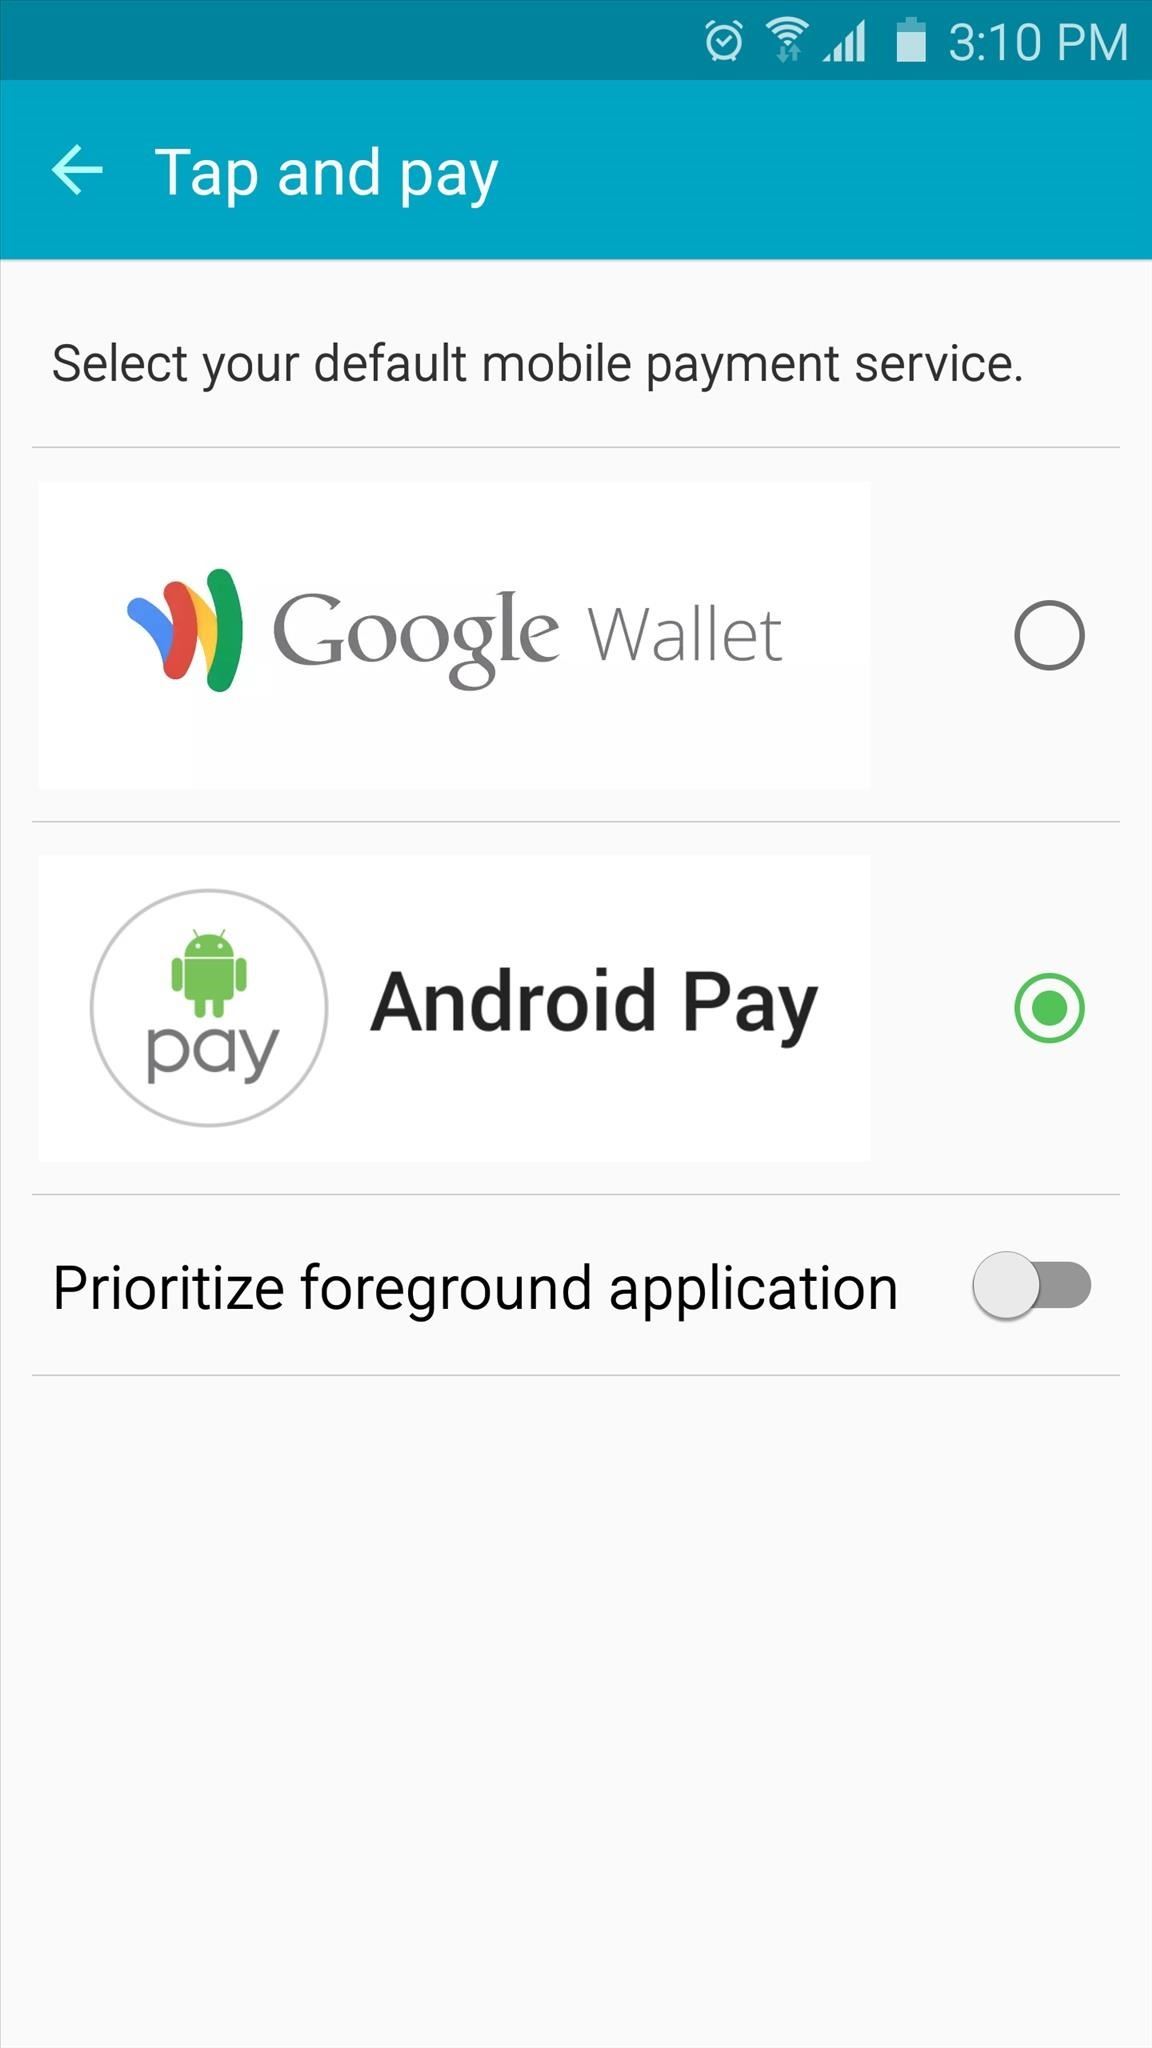
From here, Android Pay will ask if you’d like to set it as your default Tap and Pay payment method. Press “Yes” on this popup, then select Android Pay from the following menu. When you’re done here, hit your device’s back button to head back to Android Pay setup.
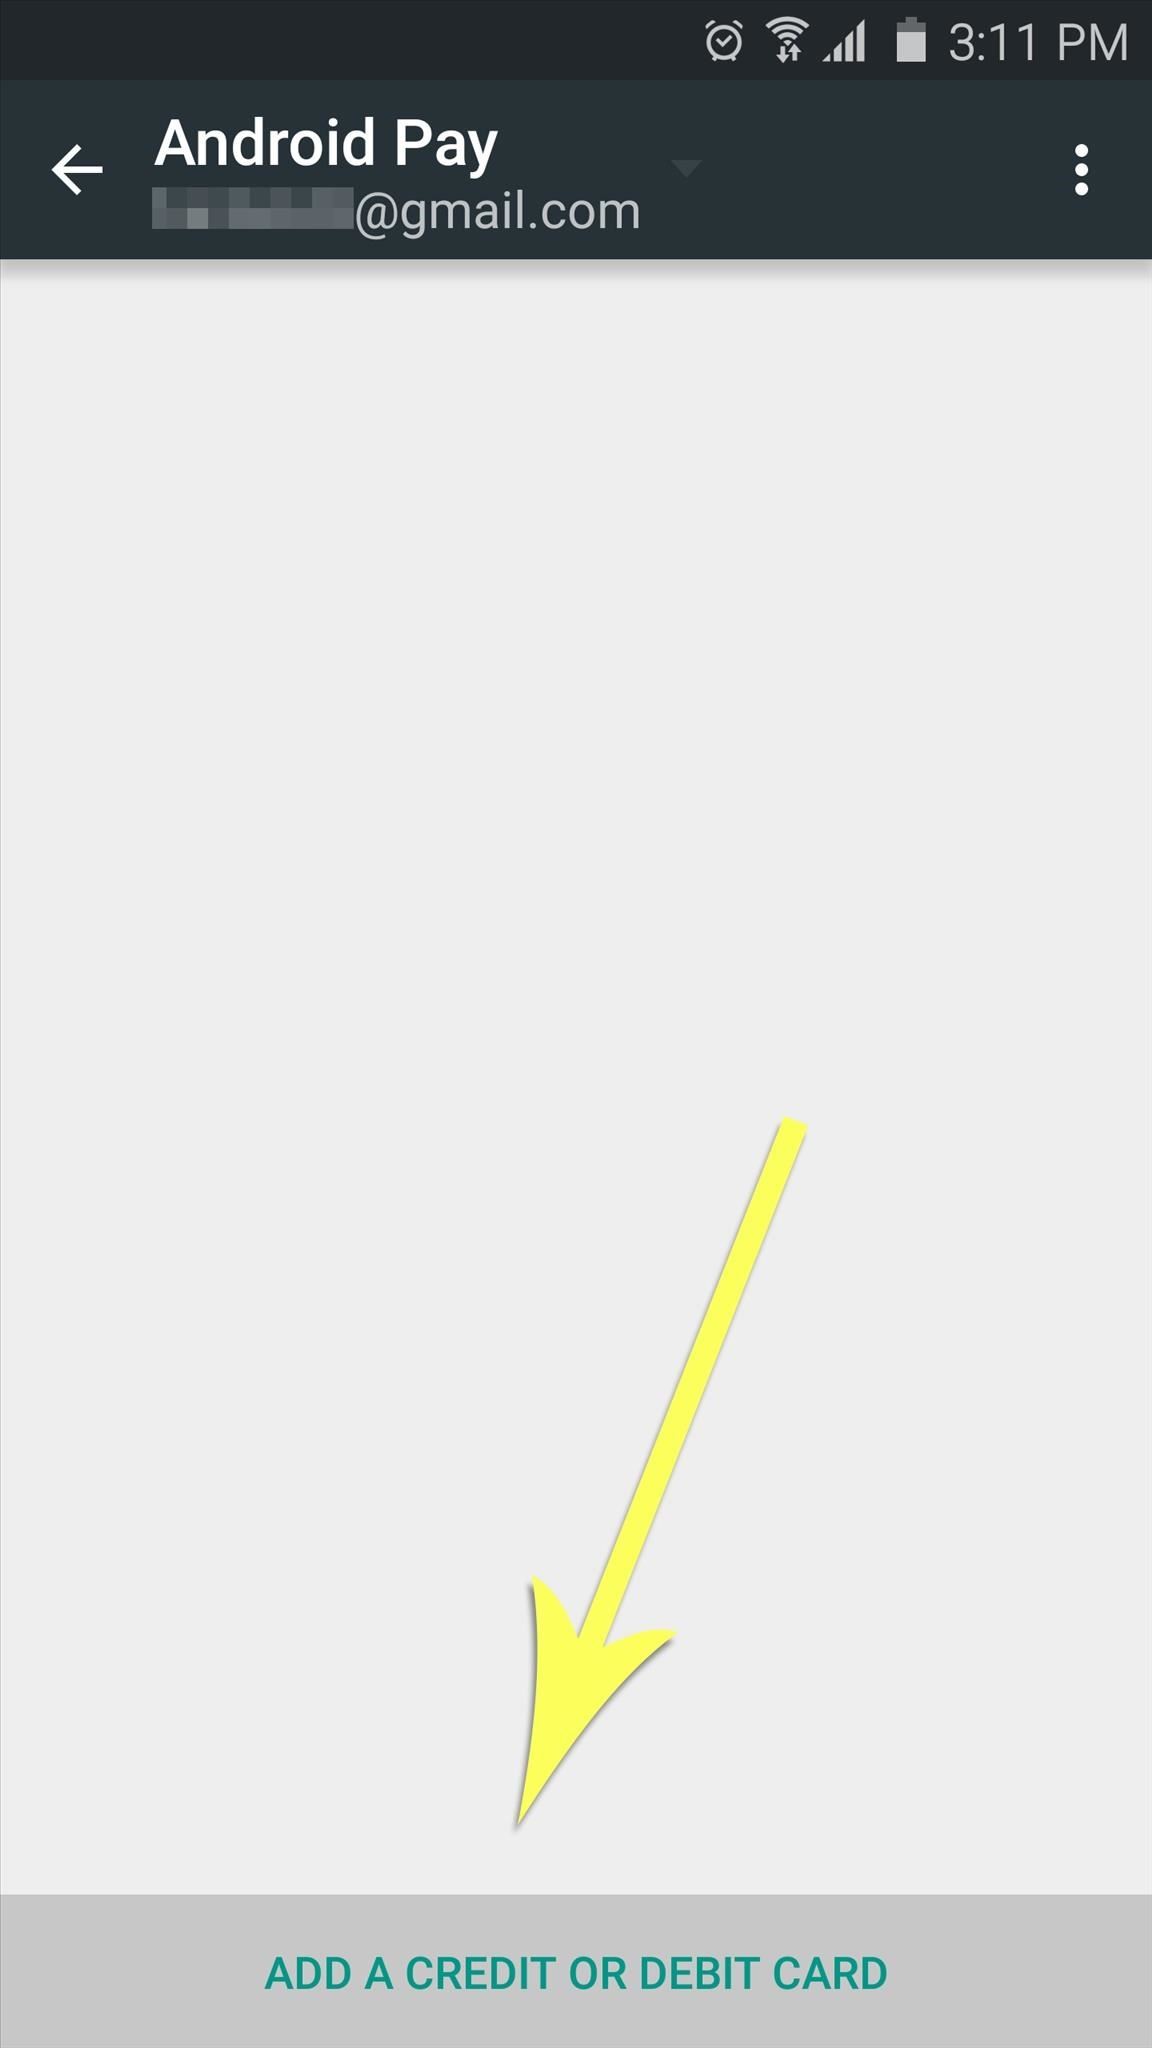
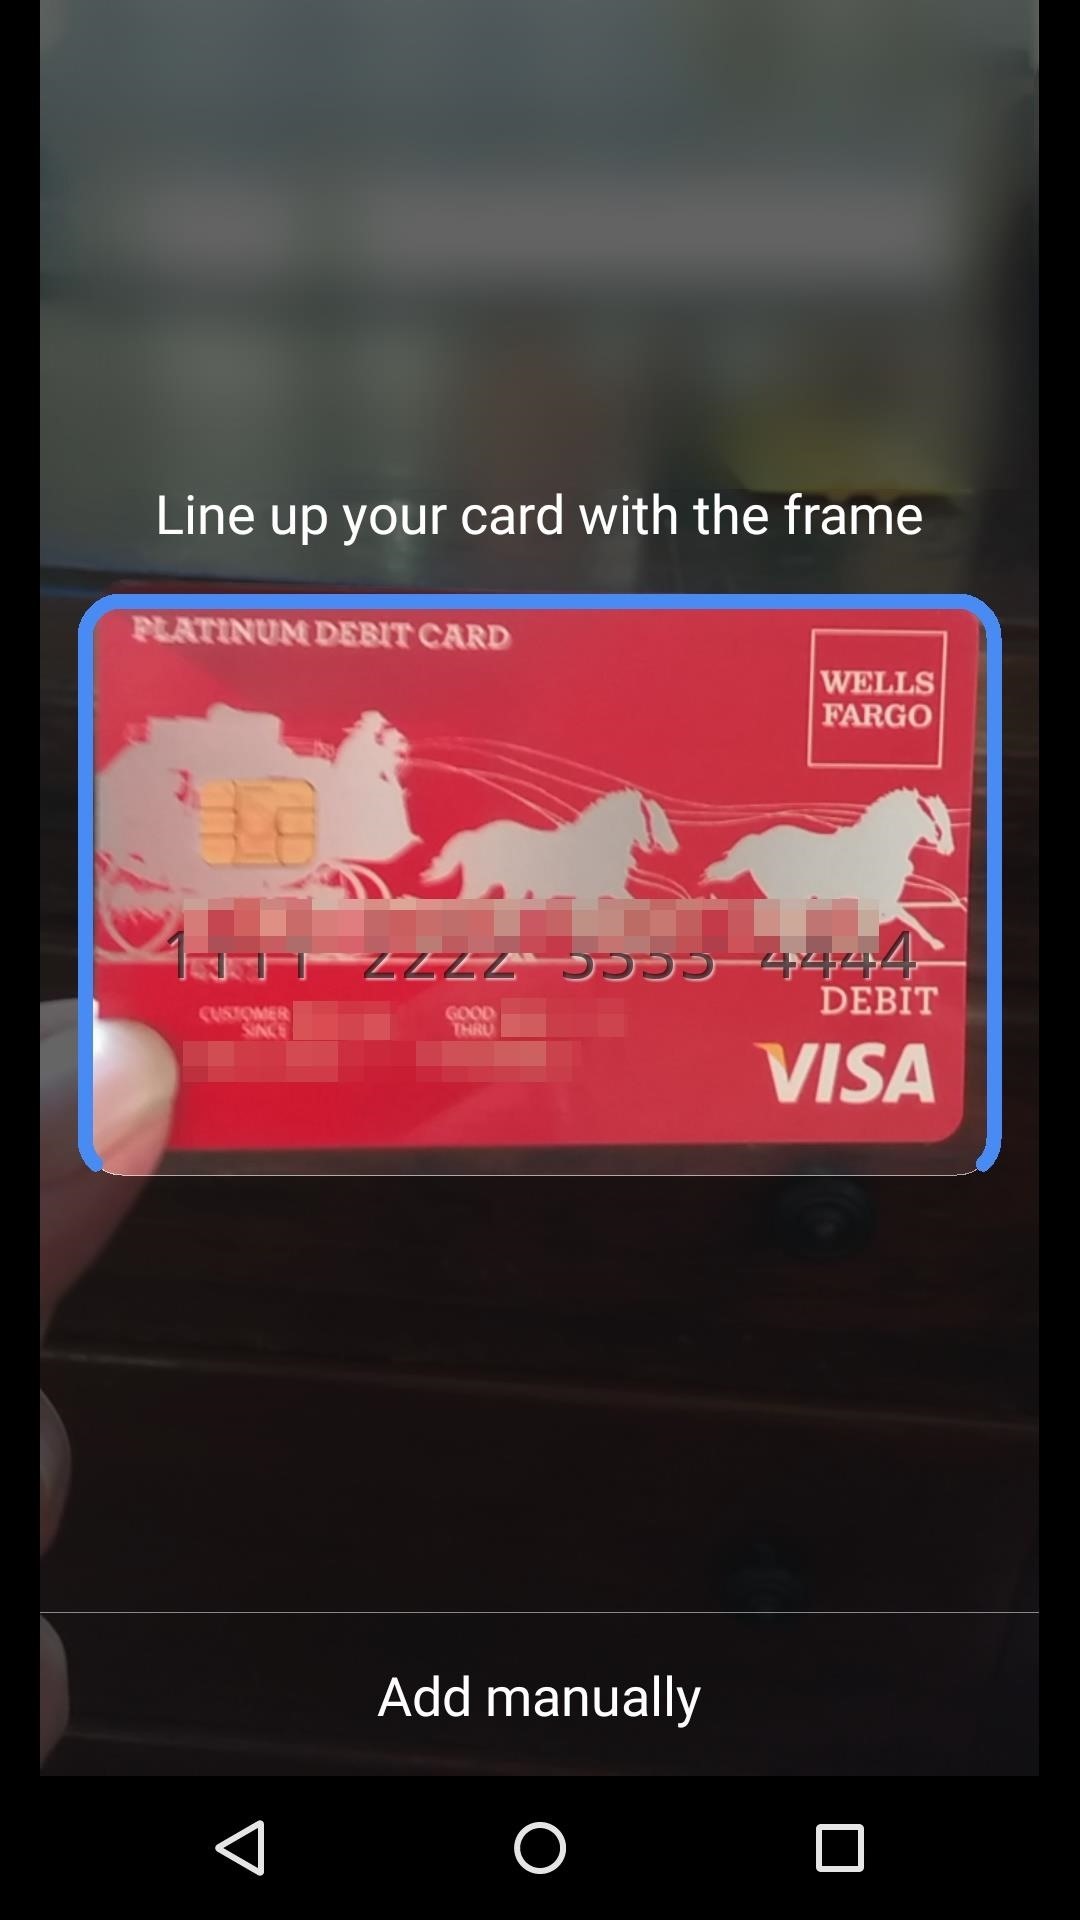
Next, tap the “Add a credit or debit card” button at the bottom of your screen, then if you’ve already added a card in Google Wallet, you can select it from the following menu. Otherwise, tap “Add new card,” then use your phone’s camera to scan a credit or debit card.

From here, enter in any missing information, then press “Continue” to confirm your card details. When that’s done, read through the terms and conditions, then press the “Accept” button at the bottom of the screen.
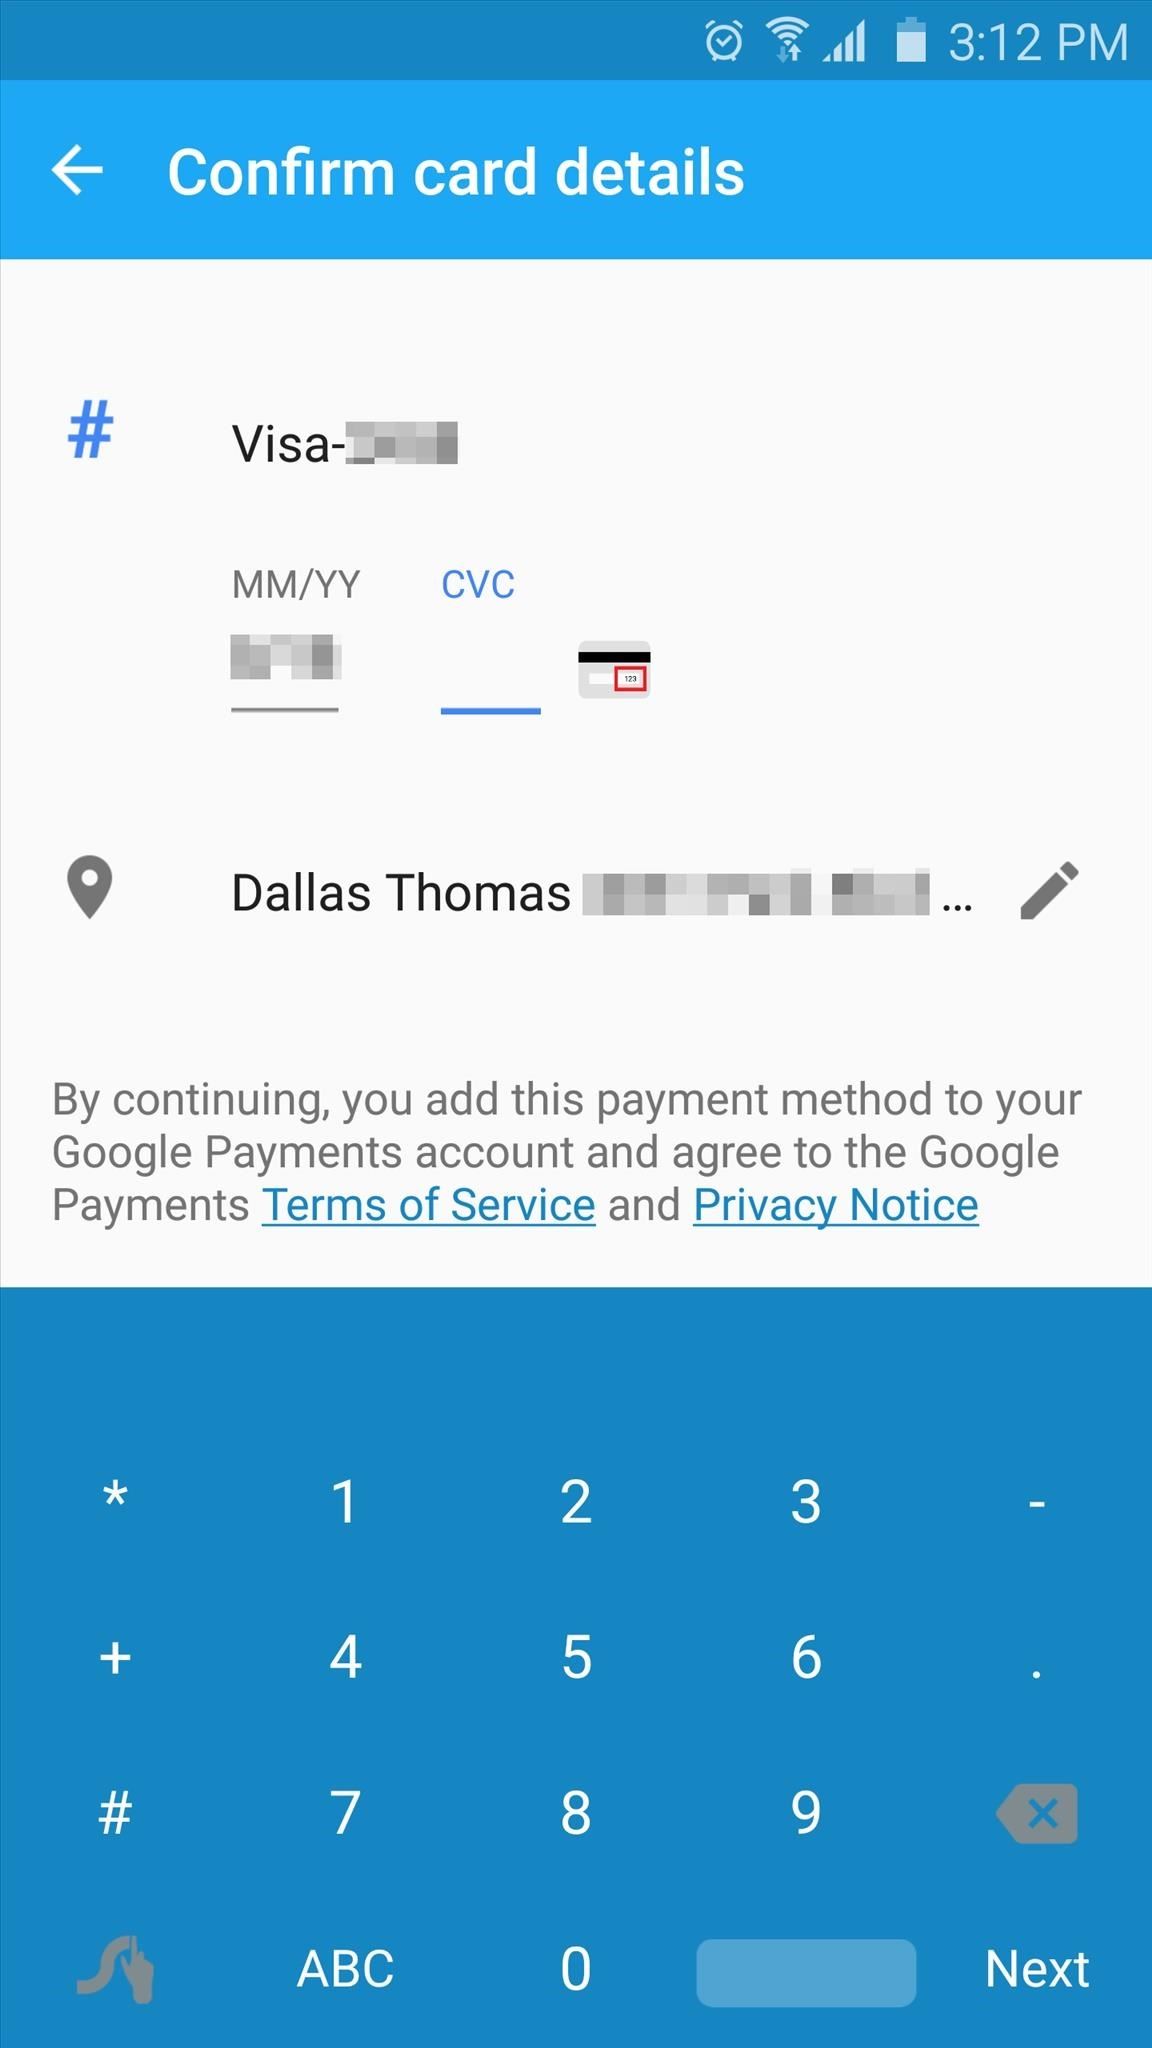
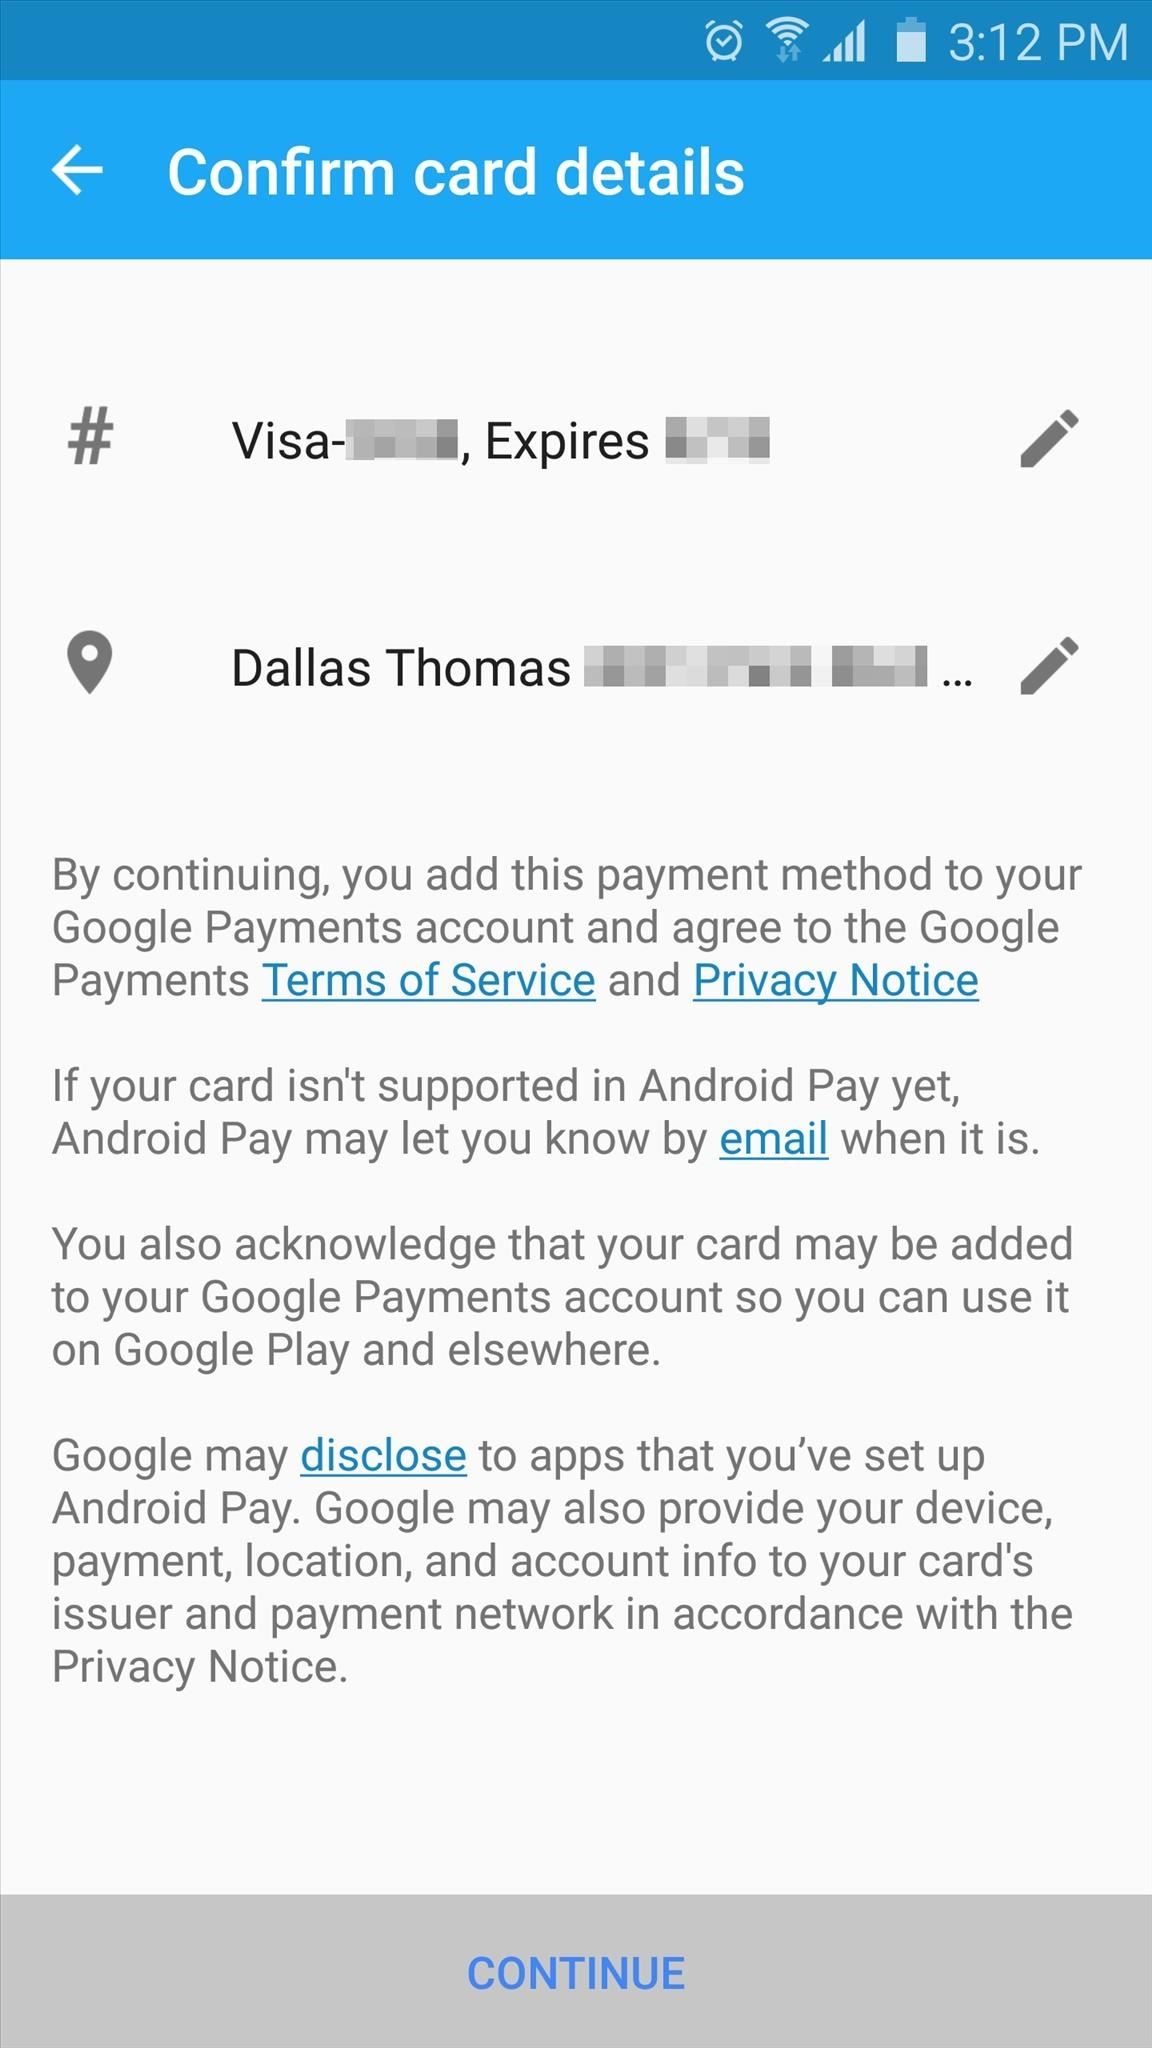
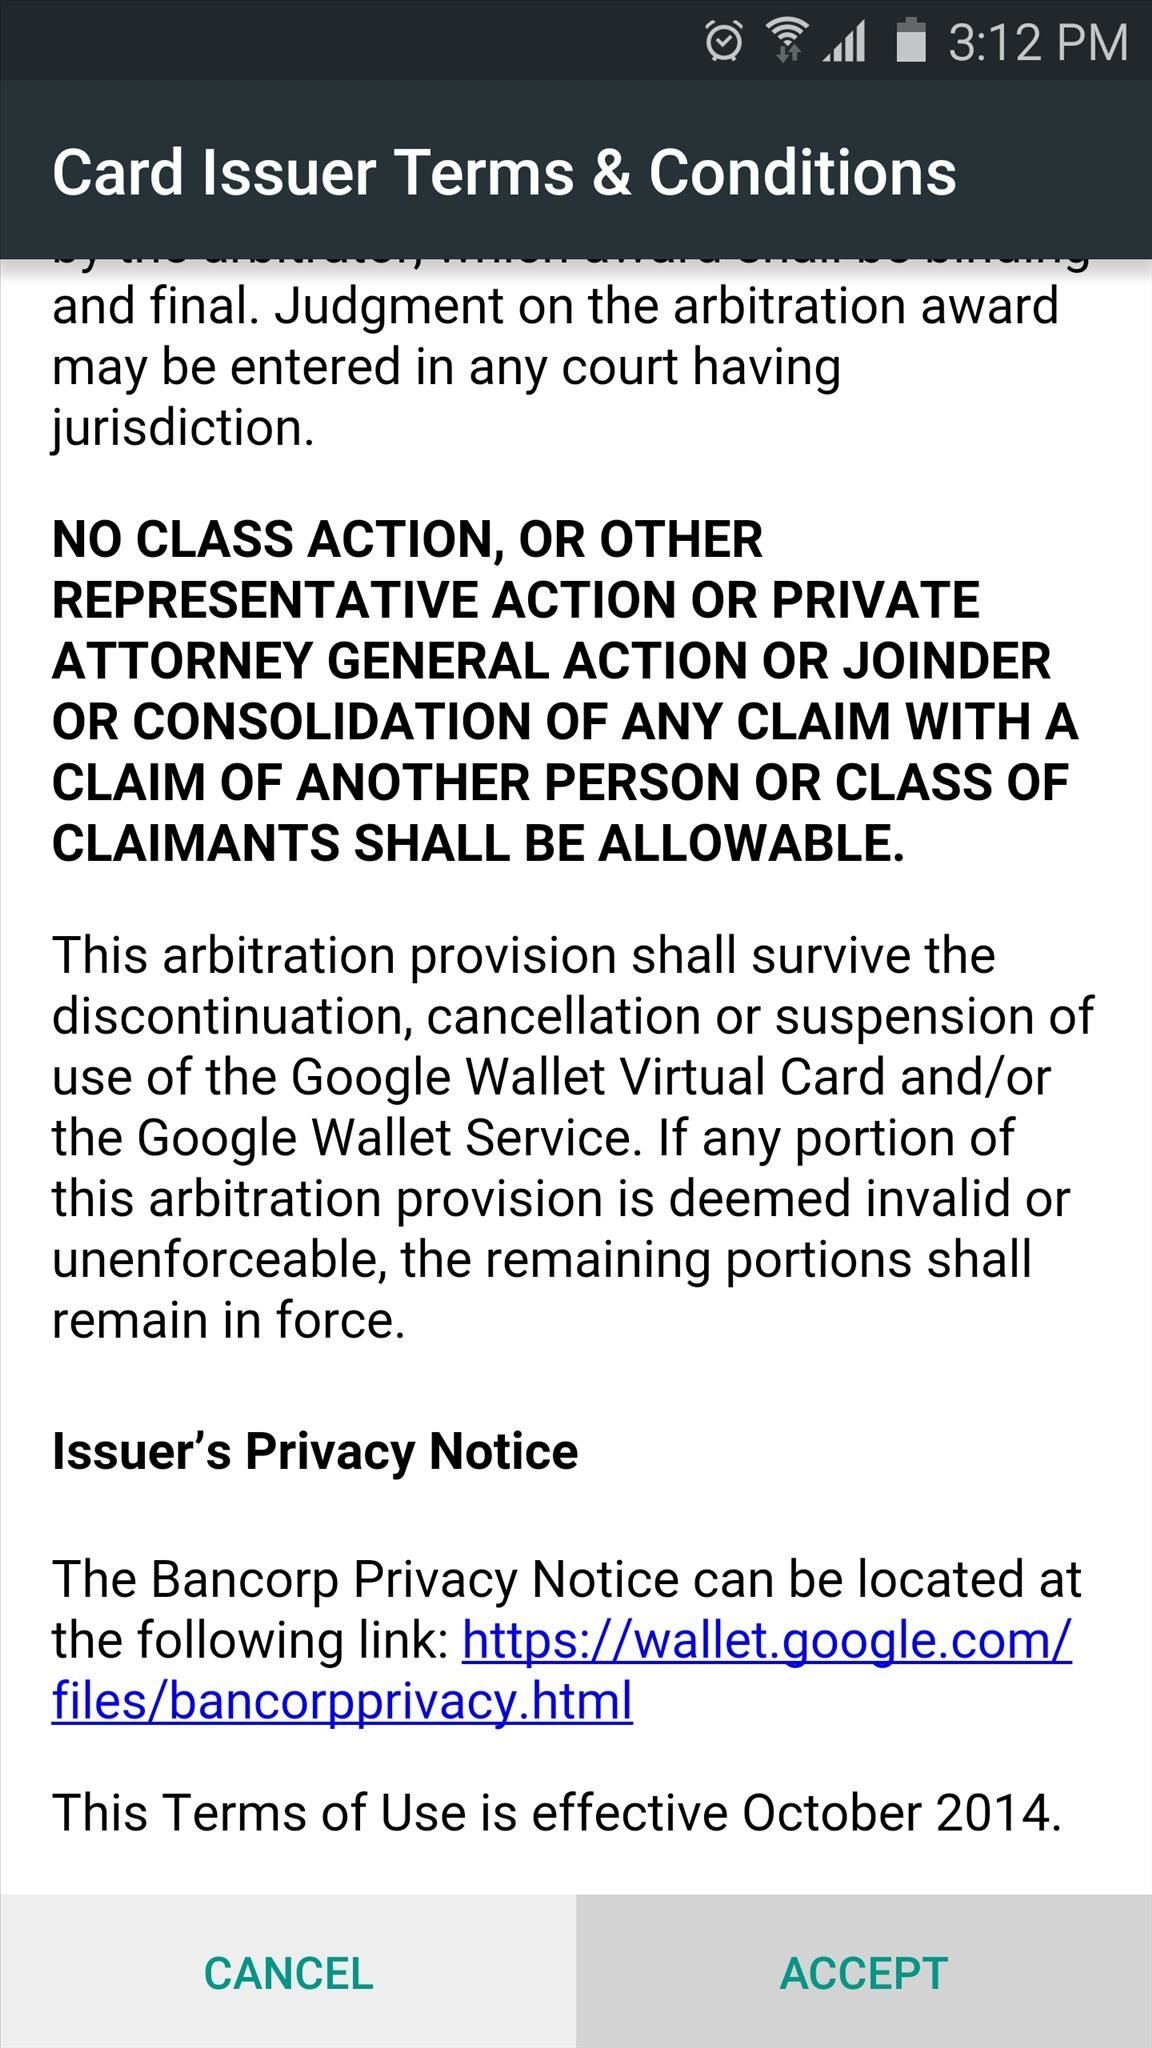
It’s at this point where you’ll know if you can use Android Pay right now, or if you’ll have to wait until the official rollout. If it’s working on your device, you should see a message saying “Card Added,” in which case you can start using Android Pay right away. Just make sure you have lock screen security enabled on your device, then scan your fingerprint or enter your PIN, and you’ll be able to make payments by tapping the back of your phone to a compatible terminal.
So far, I haven’t been able to get Android Pay working on either of my devices, but they’re both rooted and running custom ROMs. Did Android Pay work for you? Let us know in the comment section below, or drop us a line on Android Hacks’ Facebook or Twitter, or Gadget Hacks’ Facebook, Google+, or Twitter.
Hot Deal: Set up a secure second phone number and keep your real contact details hidden with a yearly subscription to Hushed Private Phone Line for Android/iOS, 83%–91% off. It’s a perfect second-line solution for making calls and sending texts related to work, dating, Craigslist sales, and other scenarios where you wouldn’t want to give out your primary phone number.
“Hey there, just a heads-up: We’re part of the Amazon affiliate program, so when you buy through links on our site, we may earn a small commission. But don’t worry, it doesn’t cost you anything extra and helps us keep the lights on. Thanks for your support!”


