Samsung Experience (better known as TouchWiz) can take some time to get used to when you switch to a Galaxy from another Android device. It’s a bit heavy-handed with the features, and many consider the UI theme to be a little over the top. Thankfully, there are several stock settings that can dial this back.
Most phones these days run a flavor of Android that isn’t too far off from AOSP or “stock Android.” If that was the case with your old phone, you’ll find that the options outlined below can go a long way towards making your Galaxy’s interface more like what you’ve grown accustomed to. These tips require no special mods or apps, and should work on most Galaxy devices. And while they center around Nougat and Oreo, some may work on older versions as well.
1. Tweak Lock Screen Clock
If you’ve made the switch from another Android phone to a Galaxy device, chances are, you’ve gotten used to being greeted by the stock Android style clock on the lock screen. Though not exactly the same, TouchWiz still features a lock screen clock that looks similar to the one that you’ve grown accustomed to.
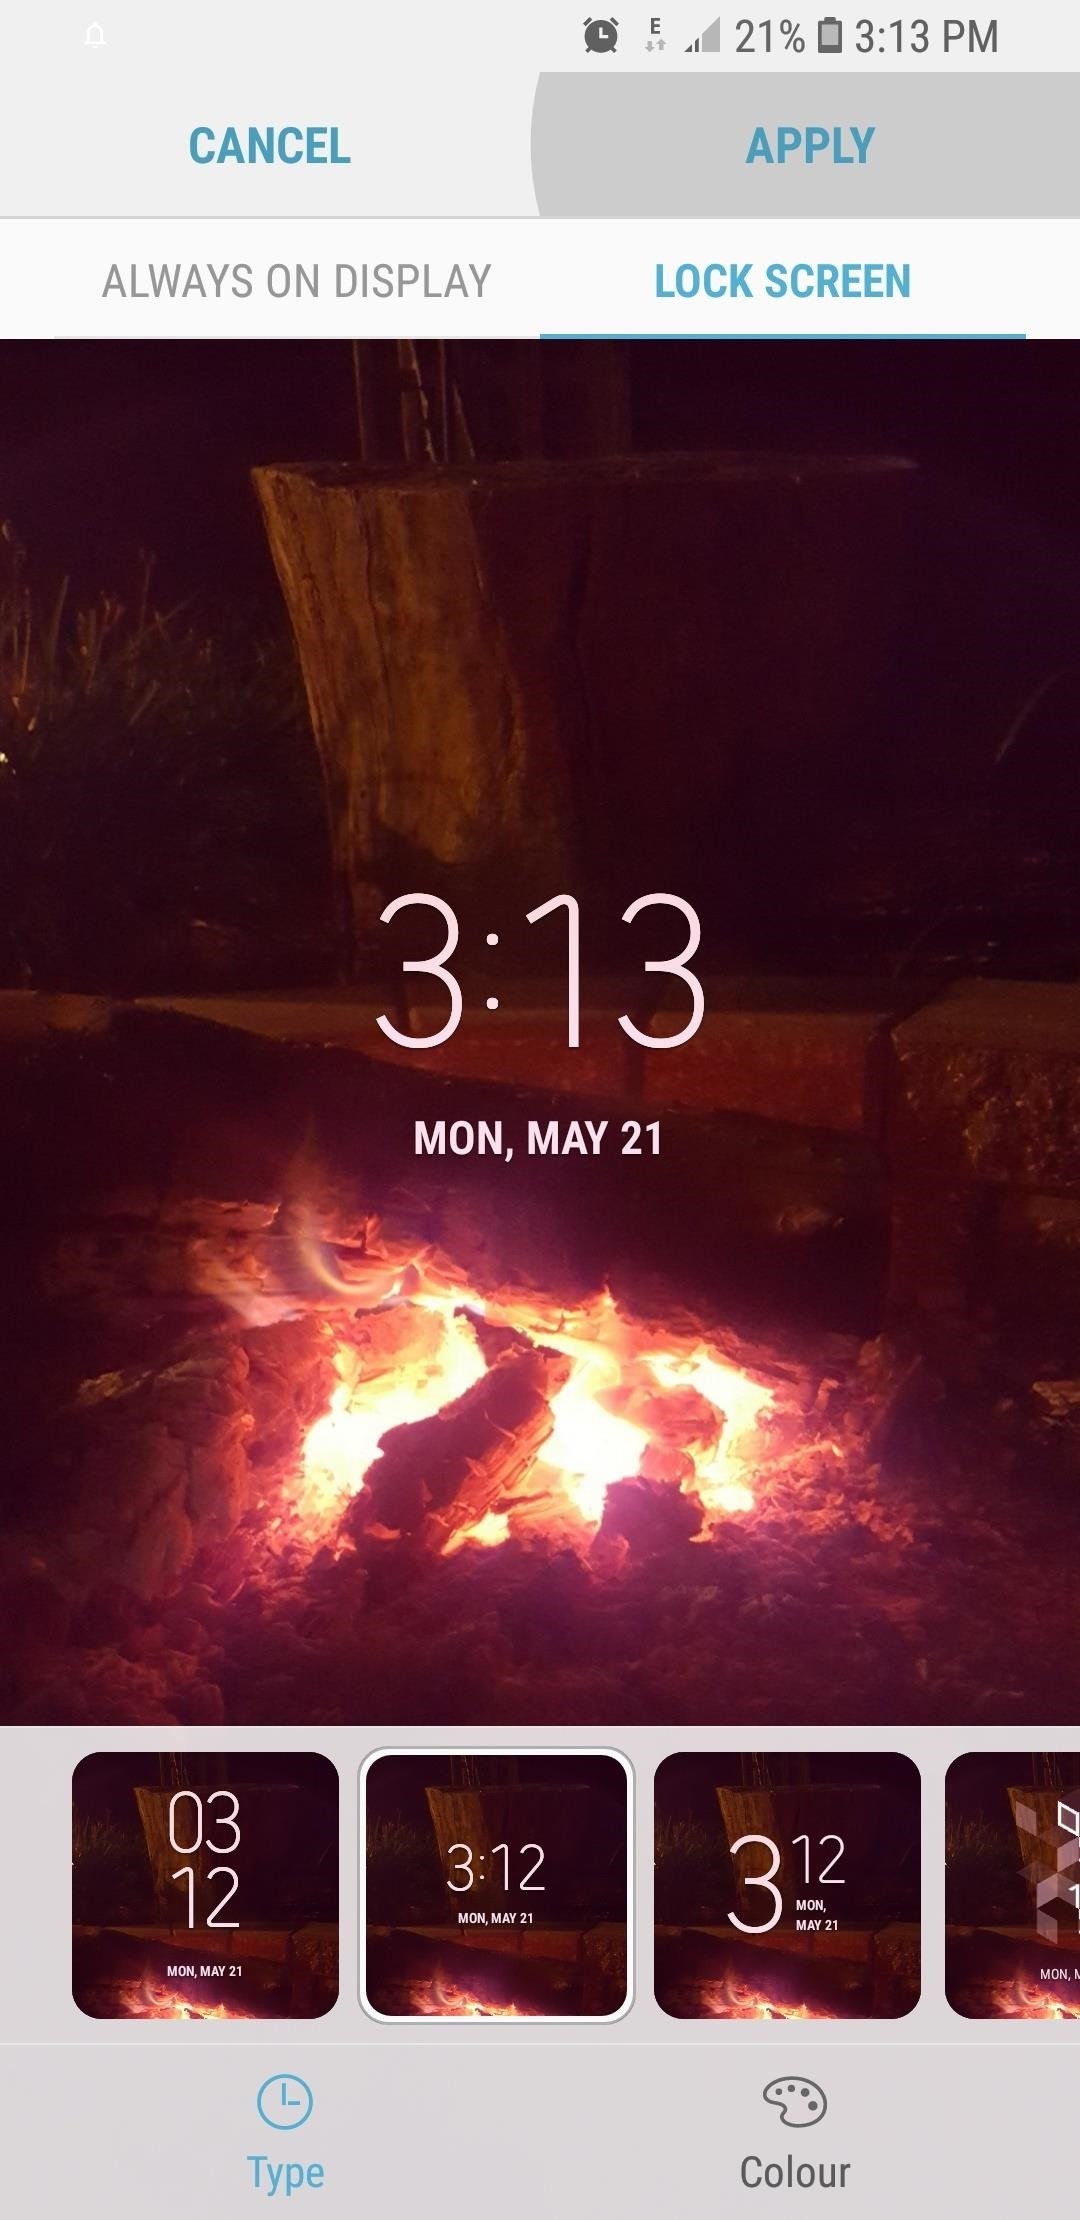
To change the clock on your Galaxy’s lock screen, open the settings app and select “Lock Screen.” From there, tap on “Clock and FaceWidgets,” then select “Clock Style” on the following page.
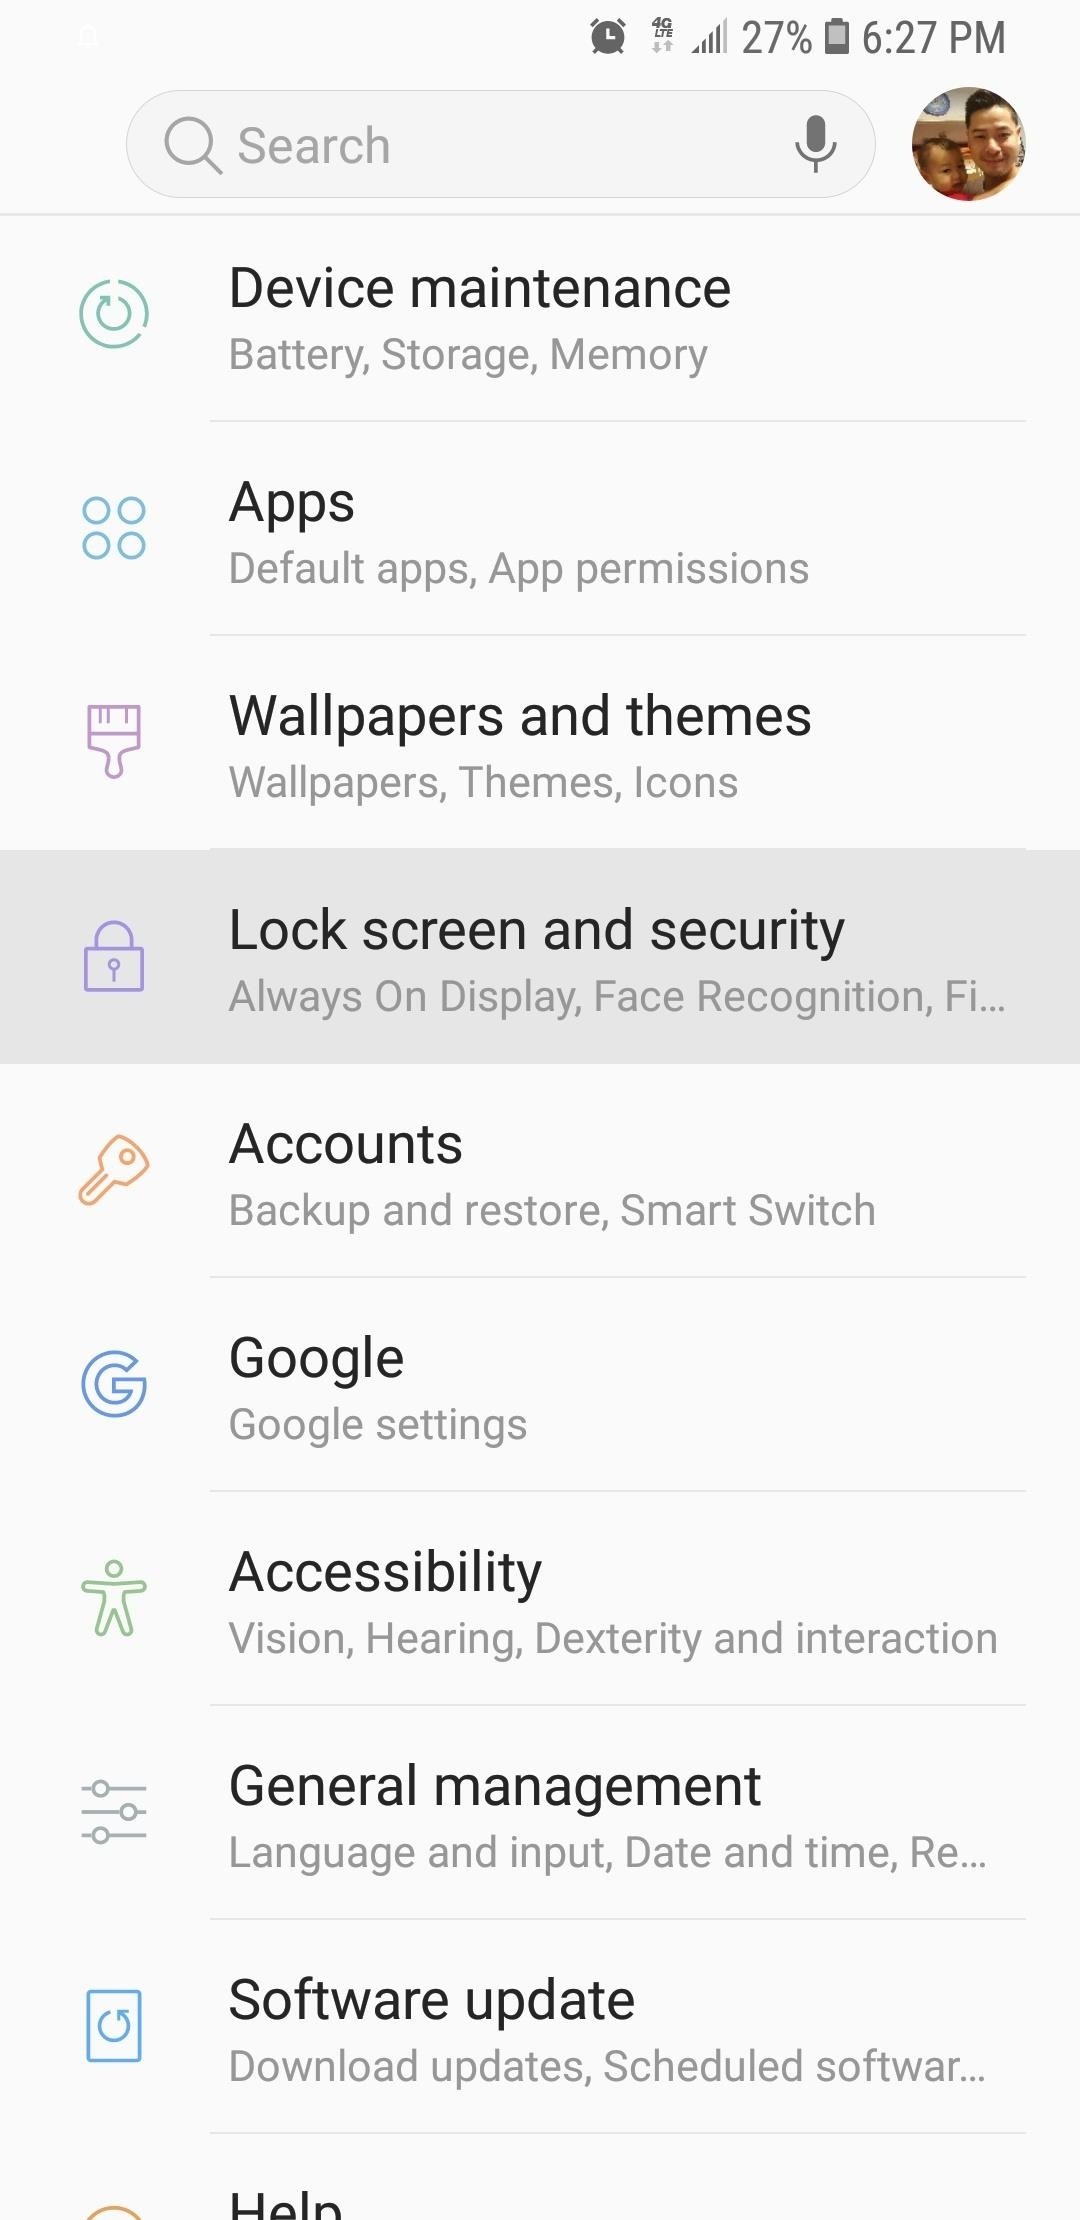
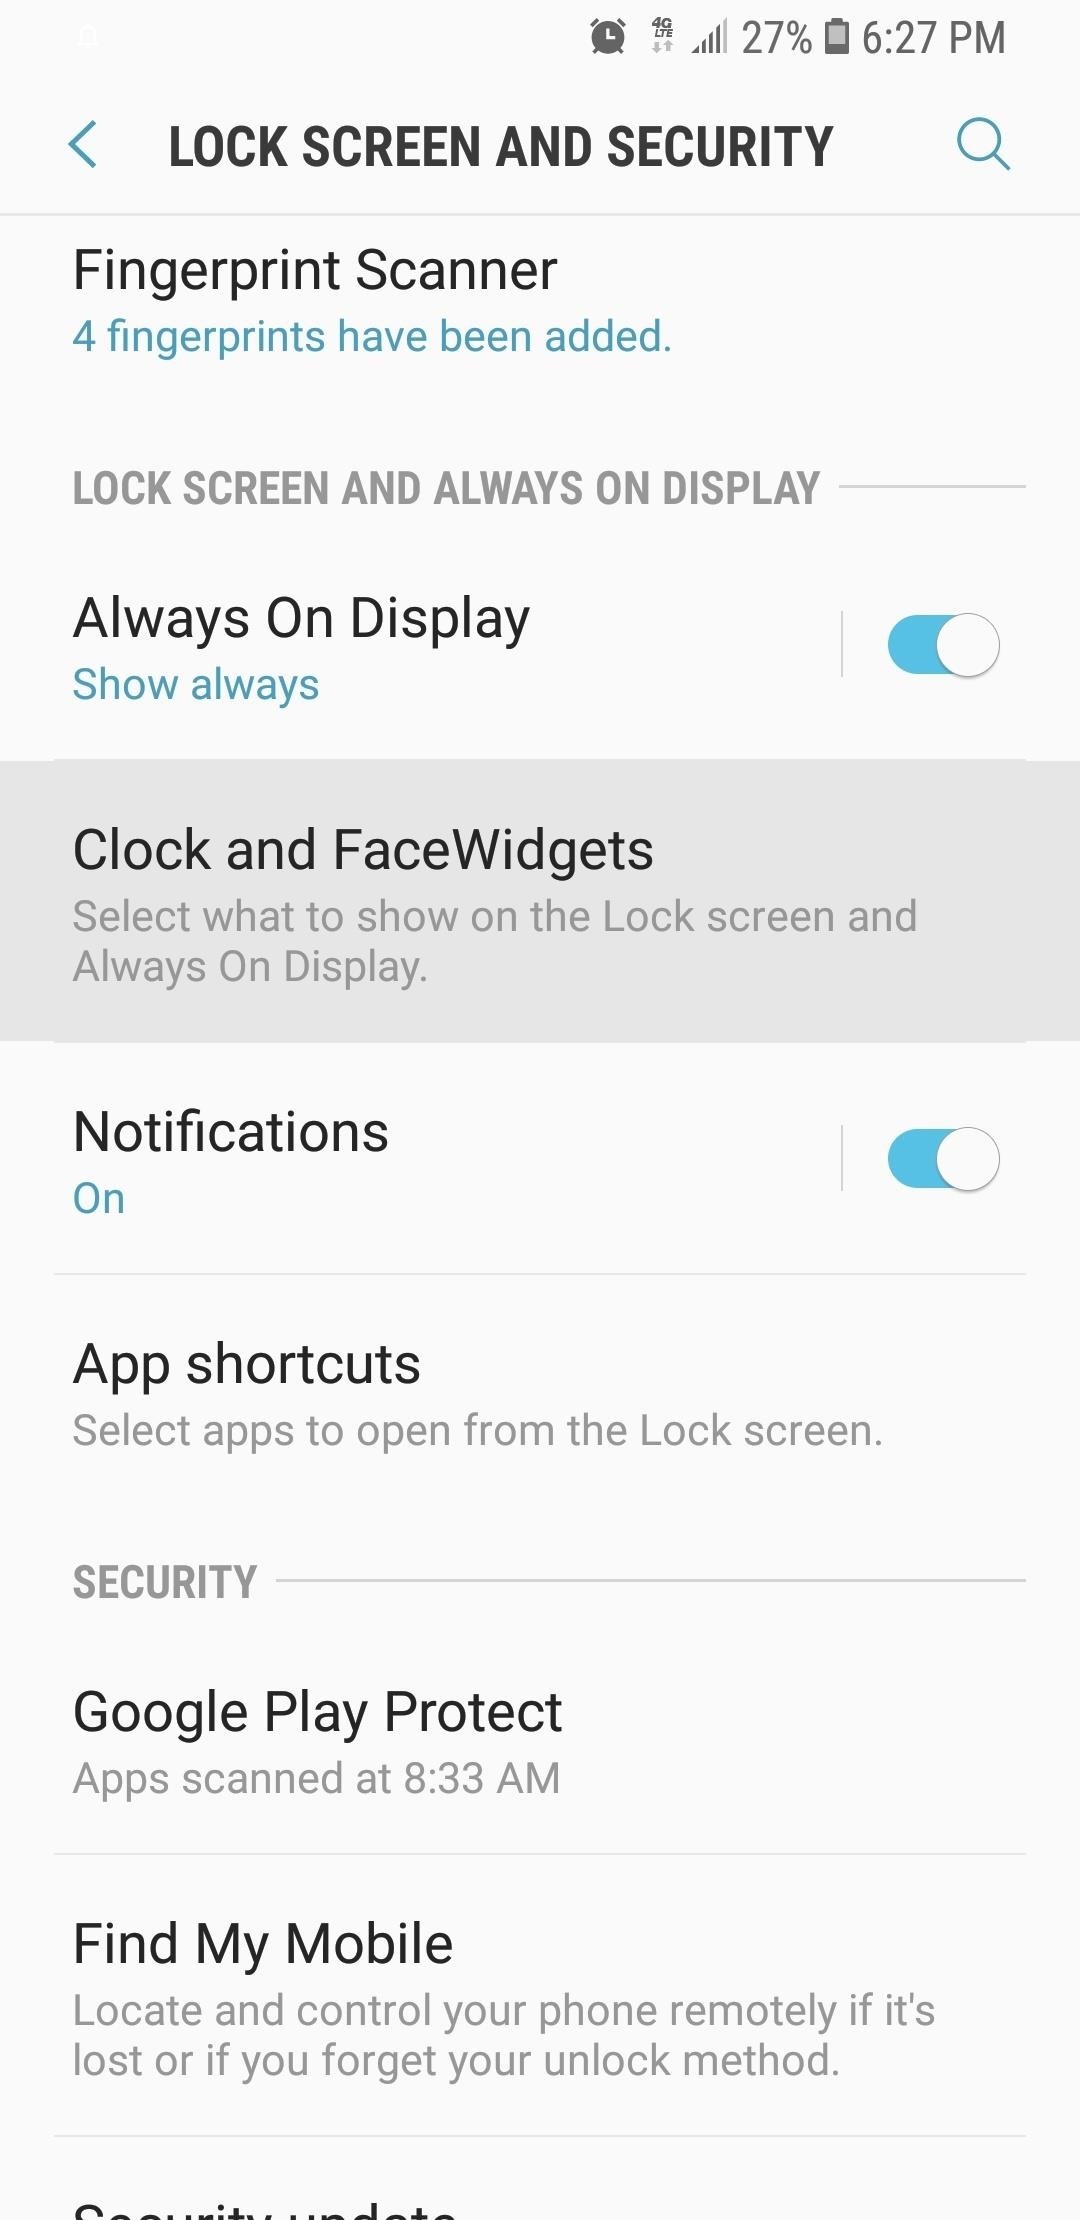
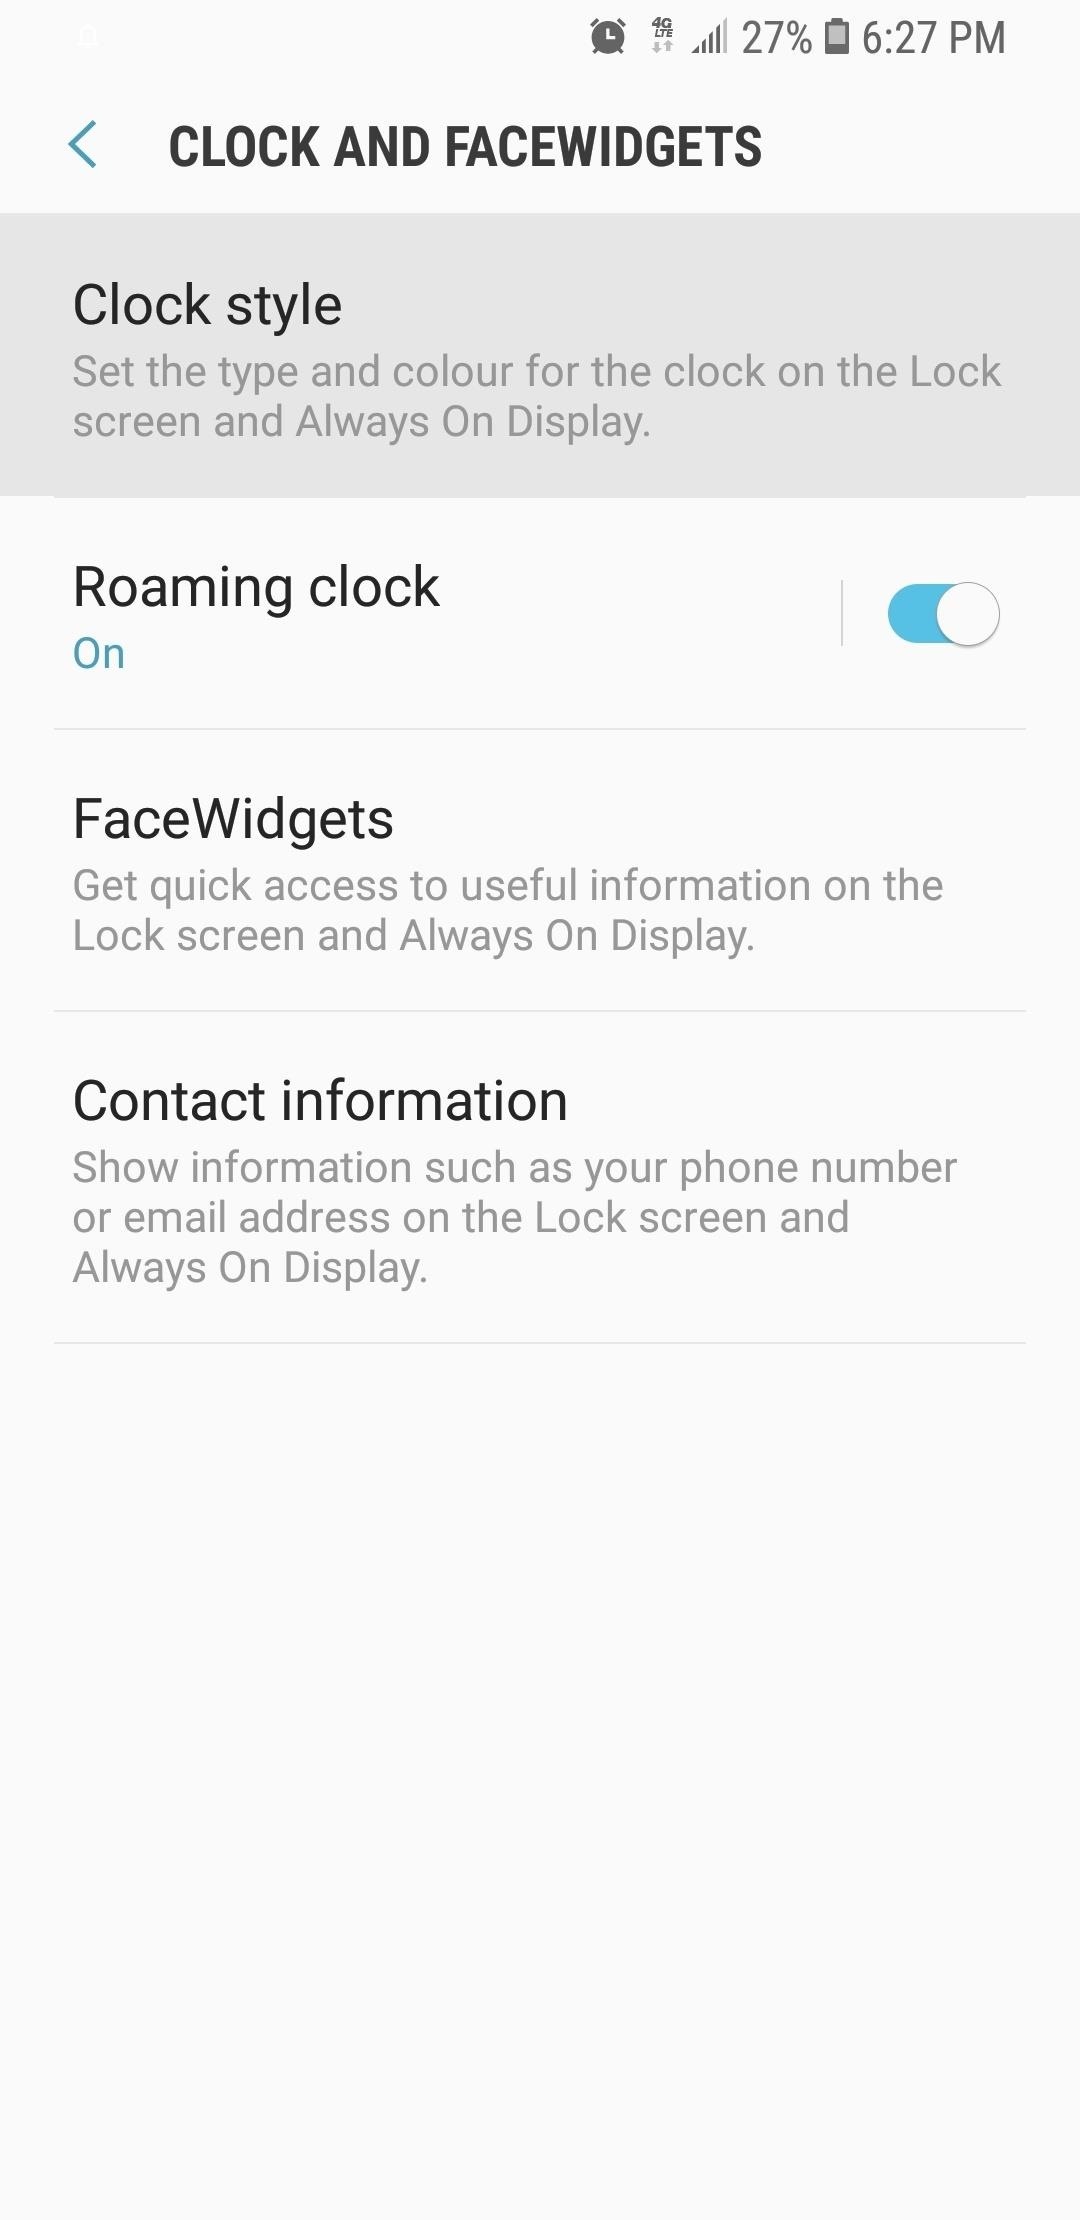
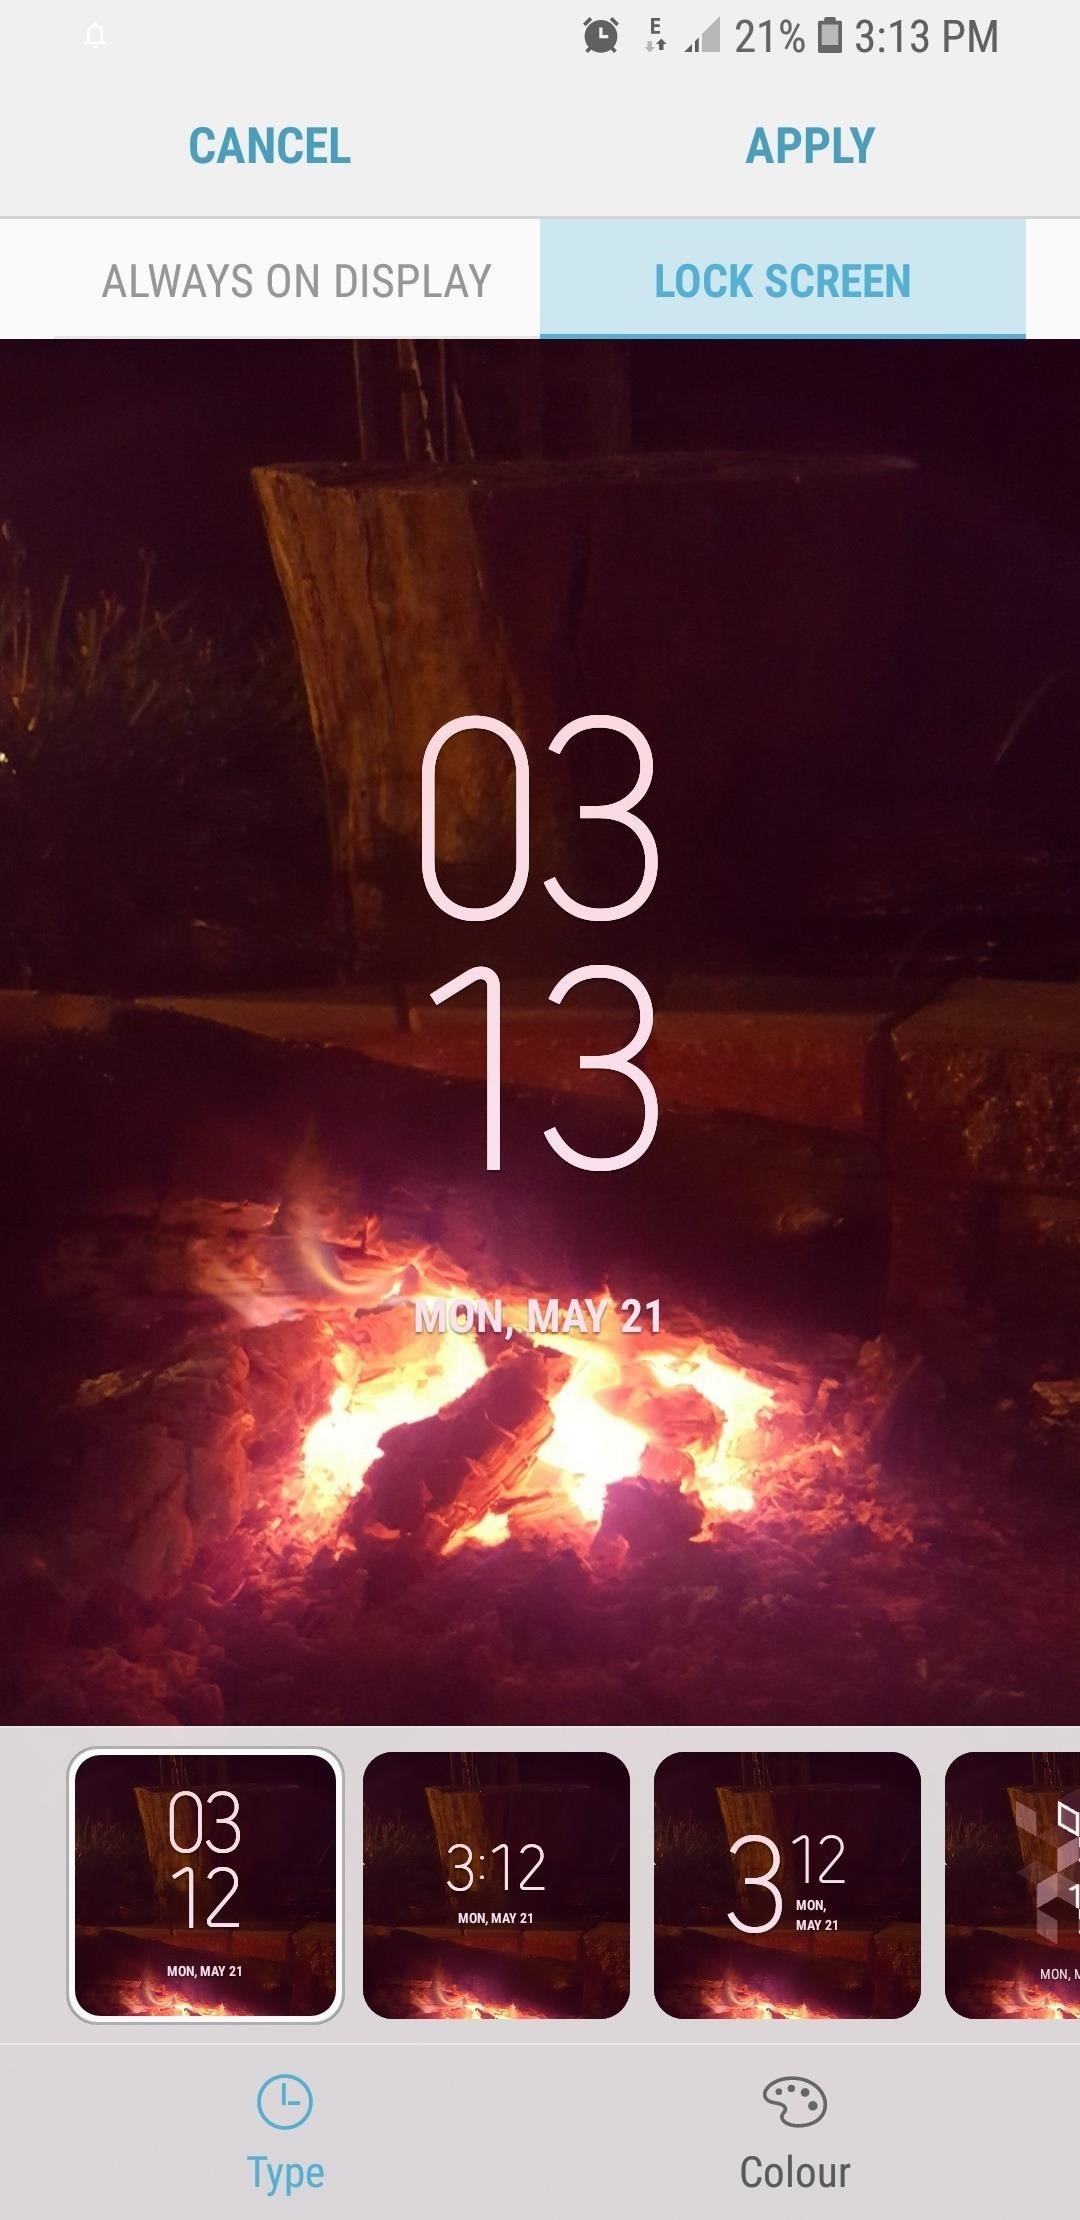
Tap on the “Lock Screen” tab within the “Clock Style” page, and select the second clock from the left. Tap “Apply” once you’ve made your selection, and you’ll now be greeted by a simple horizontal clock that’s easier to read from the lock screen. This also changes the Always On Display clock if your phone supports this feature.

2. Tweak Navigation Bar
To make way for a larger screen, Galaxy devices from the S8 onwards now have virtual buttons instead of the old physical and capacitive keys. These new virtual buttons now have the added benefit of being fully customizable. So if you’re new to TouchWiz, this is sure to help you adapt to your new Galaxy when switching from another Android device, which probably had a different button layout.
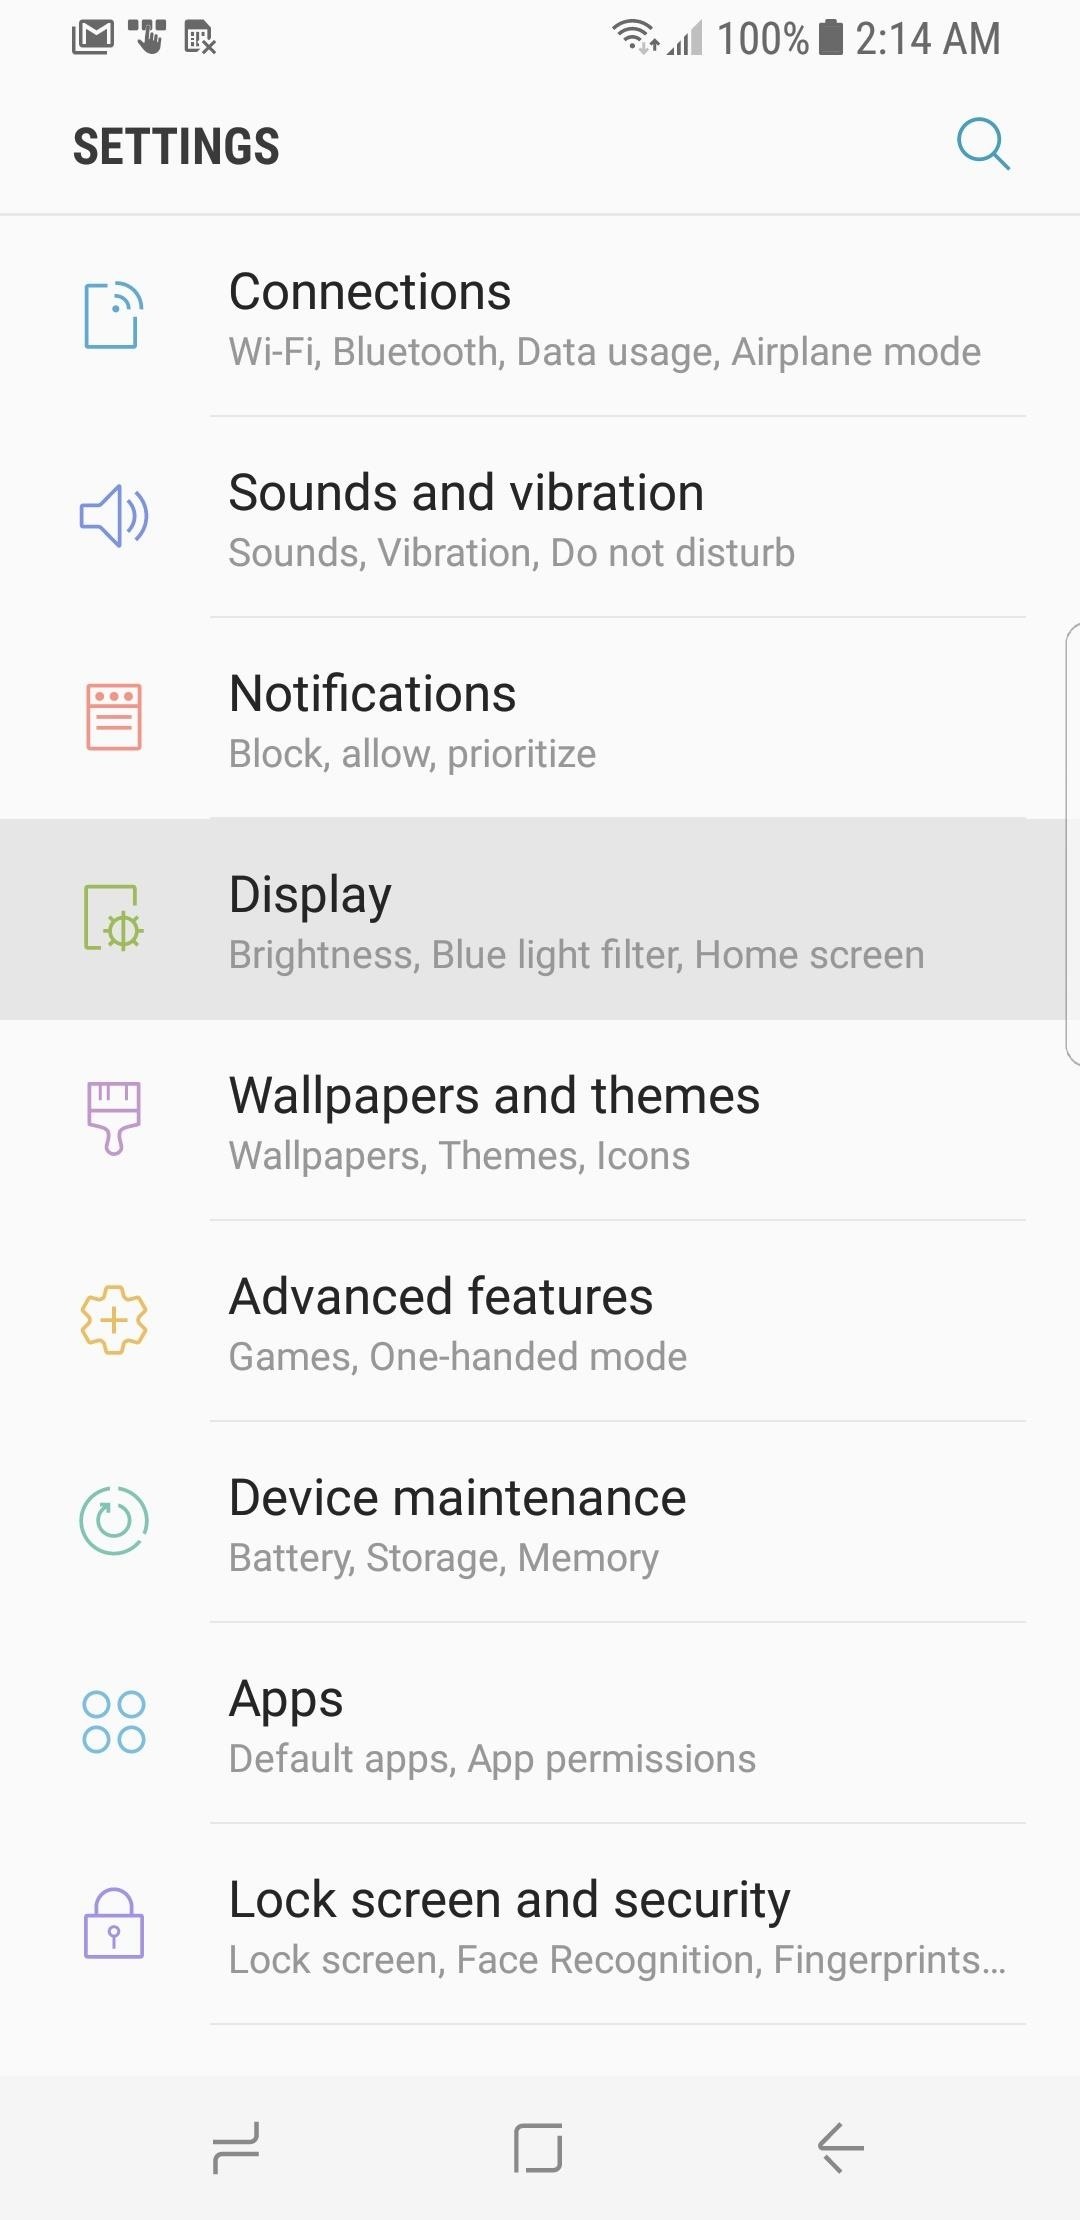
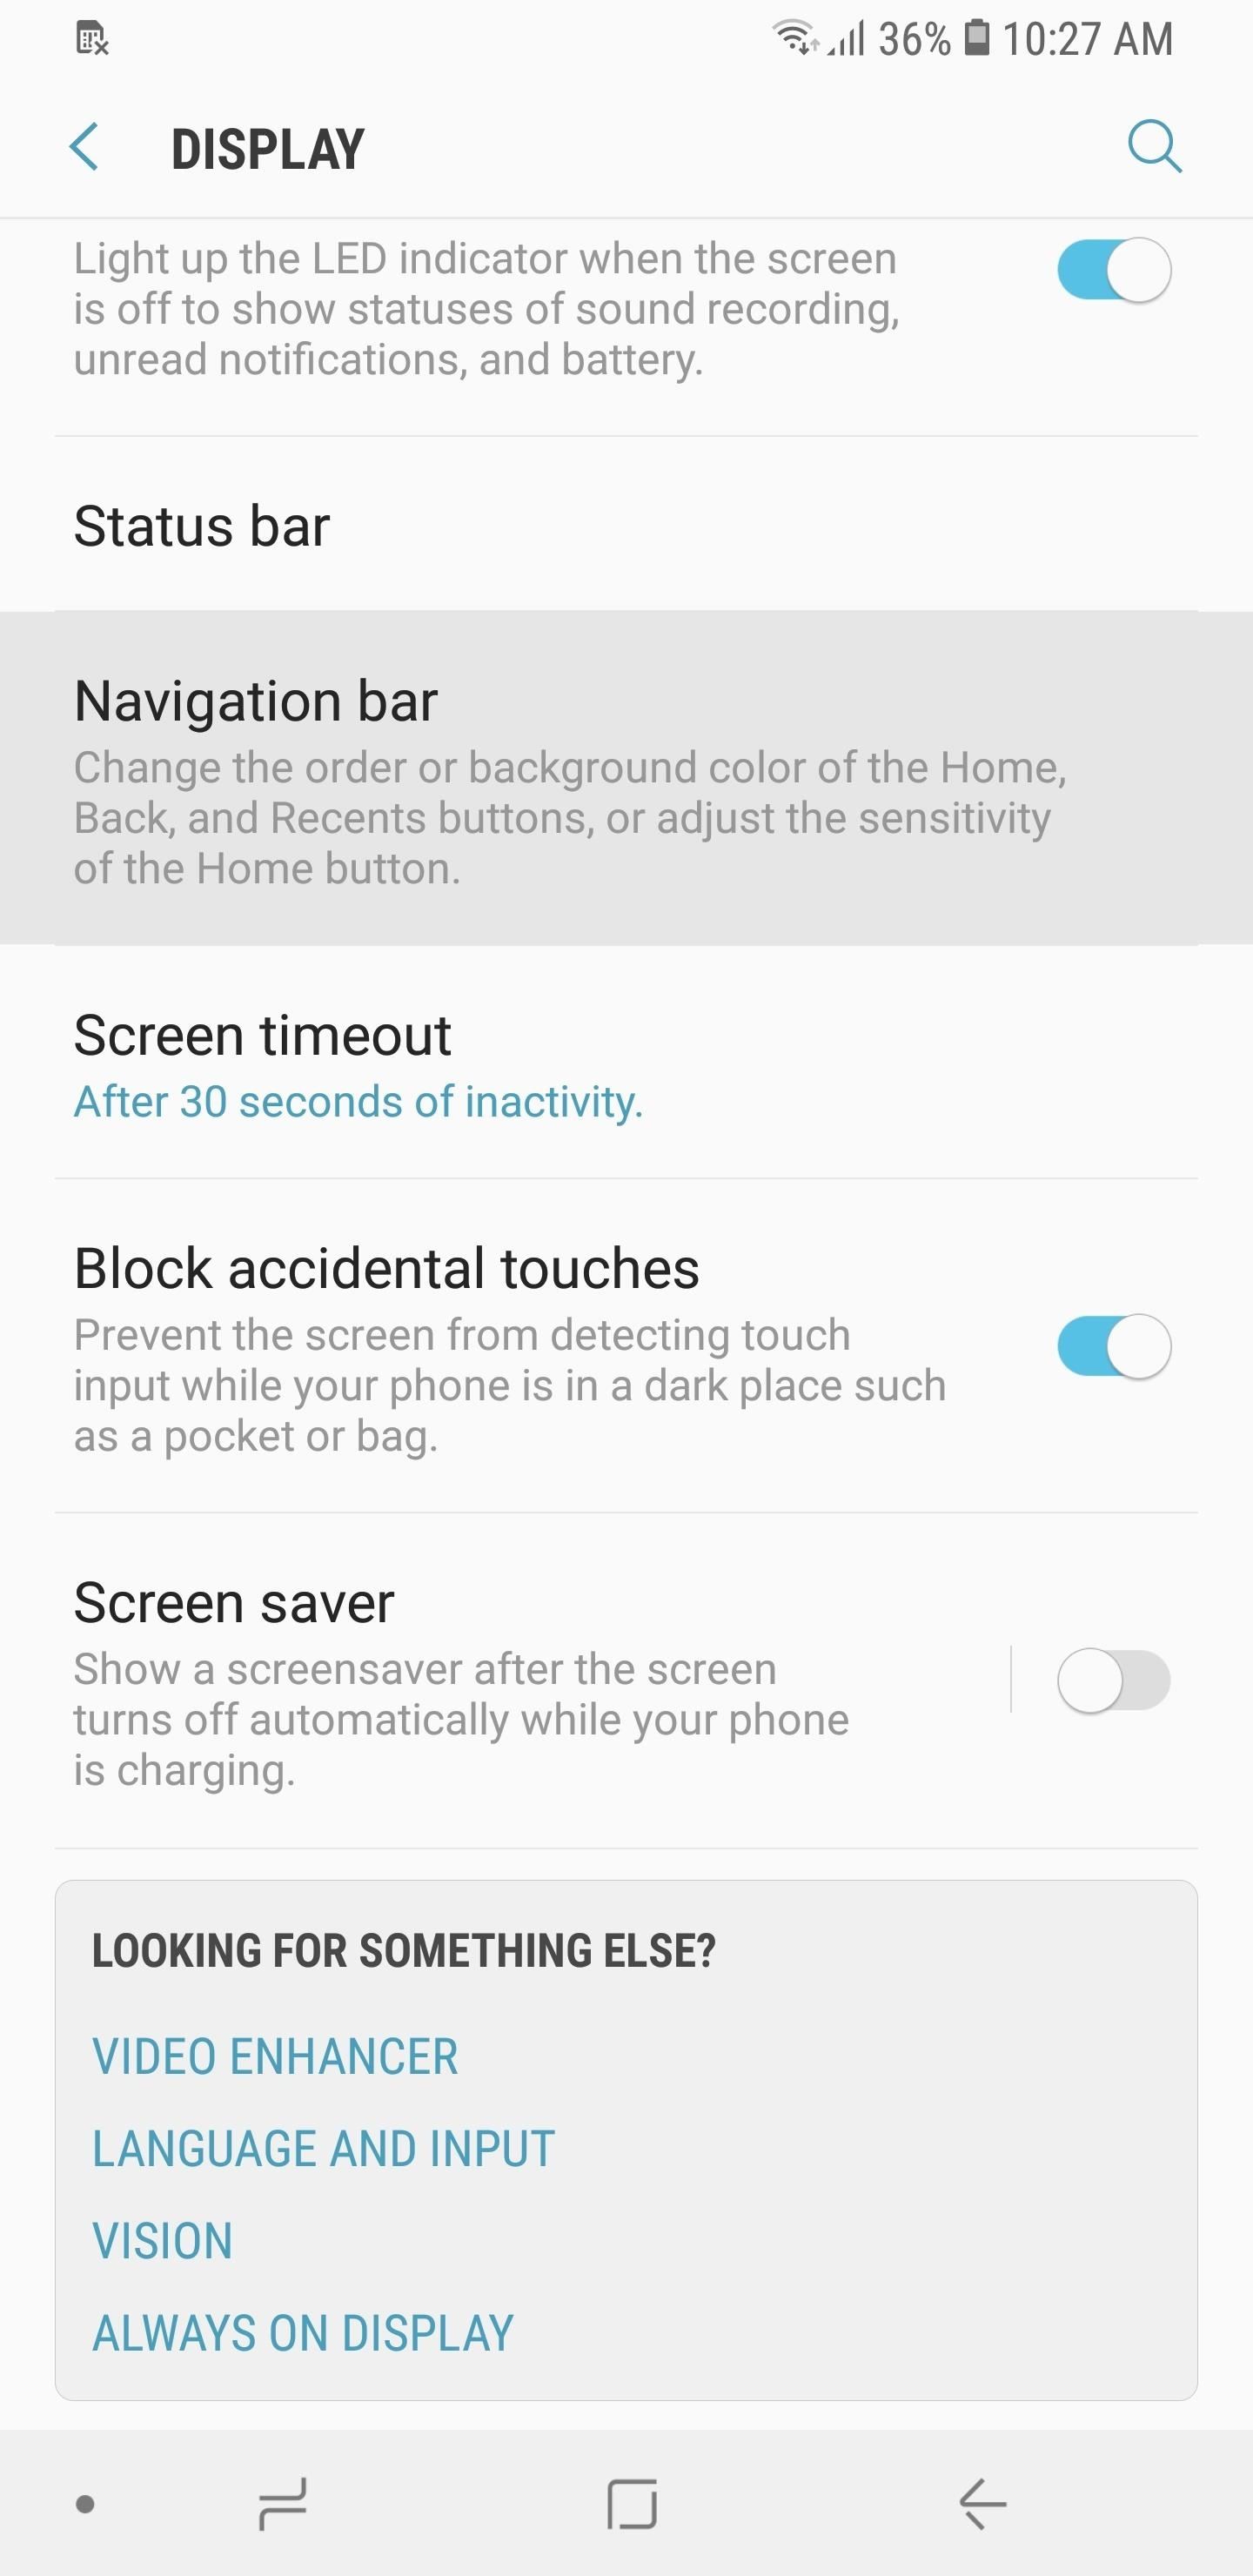
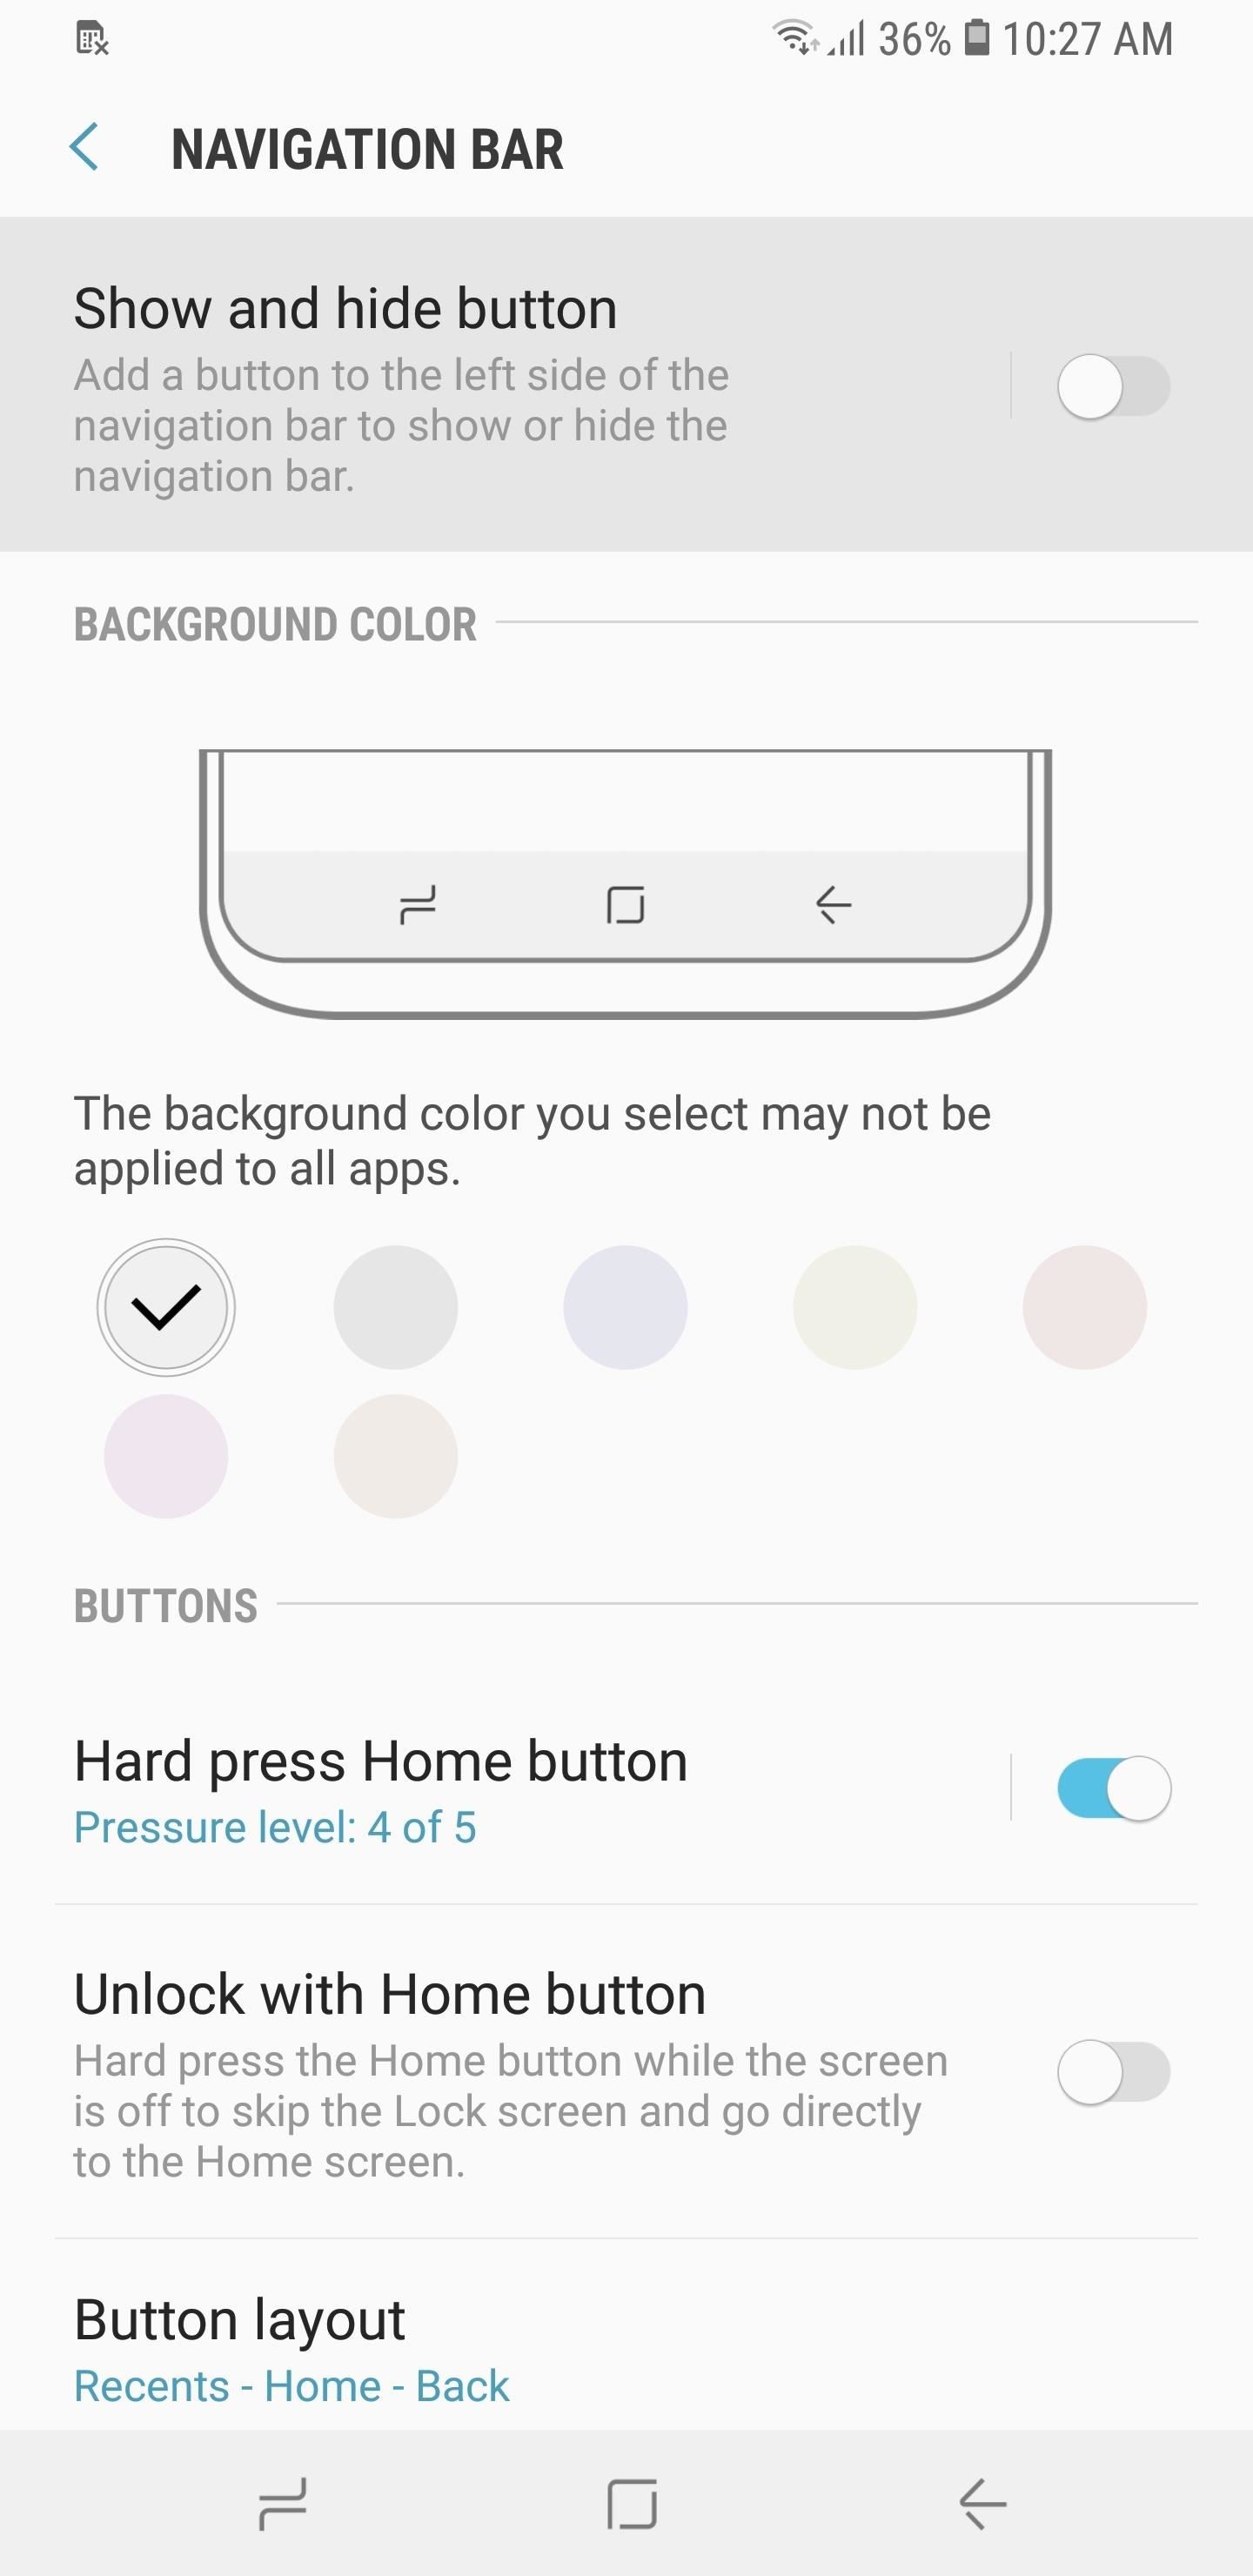
To change your navigation bar layout, go to the Settings menu, select “Display,” and choose “Navigation bar” on the following screen. From there, tap on “Button layout,” then choose either Back-Home-Recents or Recents-Home-Back, depending on which you’re accustomed to. You can even toggle the home button’s wake feature on or off to better suit your preference.


3. Lock the Navigation Bars
As great as Samsung’s Infinity Displays are for viewing content, many may find the need to constantly swipe up to access the navigation bars a little off-putting. If your device is running on Oreo, however, you can lock the navigation bars in place on your Galaxy flagship. Simply double tap the tiny button on the left-hand side within the navigation bar itself.
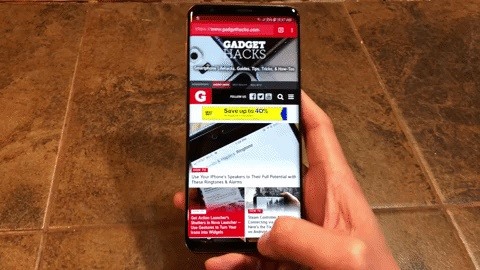
From there, if you want to keep your navigation bar locked in place for good, you can disable the lock button all together and reduce clutter. To do so, head over to your phone’s settings, select “Display,” and tap on “Navigation Bar” on the following page. From there, tap on “Show and hide button” to toggle the feature off.
4. Turn Off Edge Screen
The Edge Screen feature found on Galaxy devices featuring a curved display gives you the ability to add your favorite apps, contacts, and other tools to a drawer for quick access. If you’re used to using an AOSP-based UI, however, you’ll probably find the feature redundant, not to mention that unsightly tab that protrudes from the side of the display.
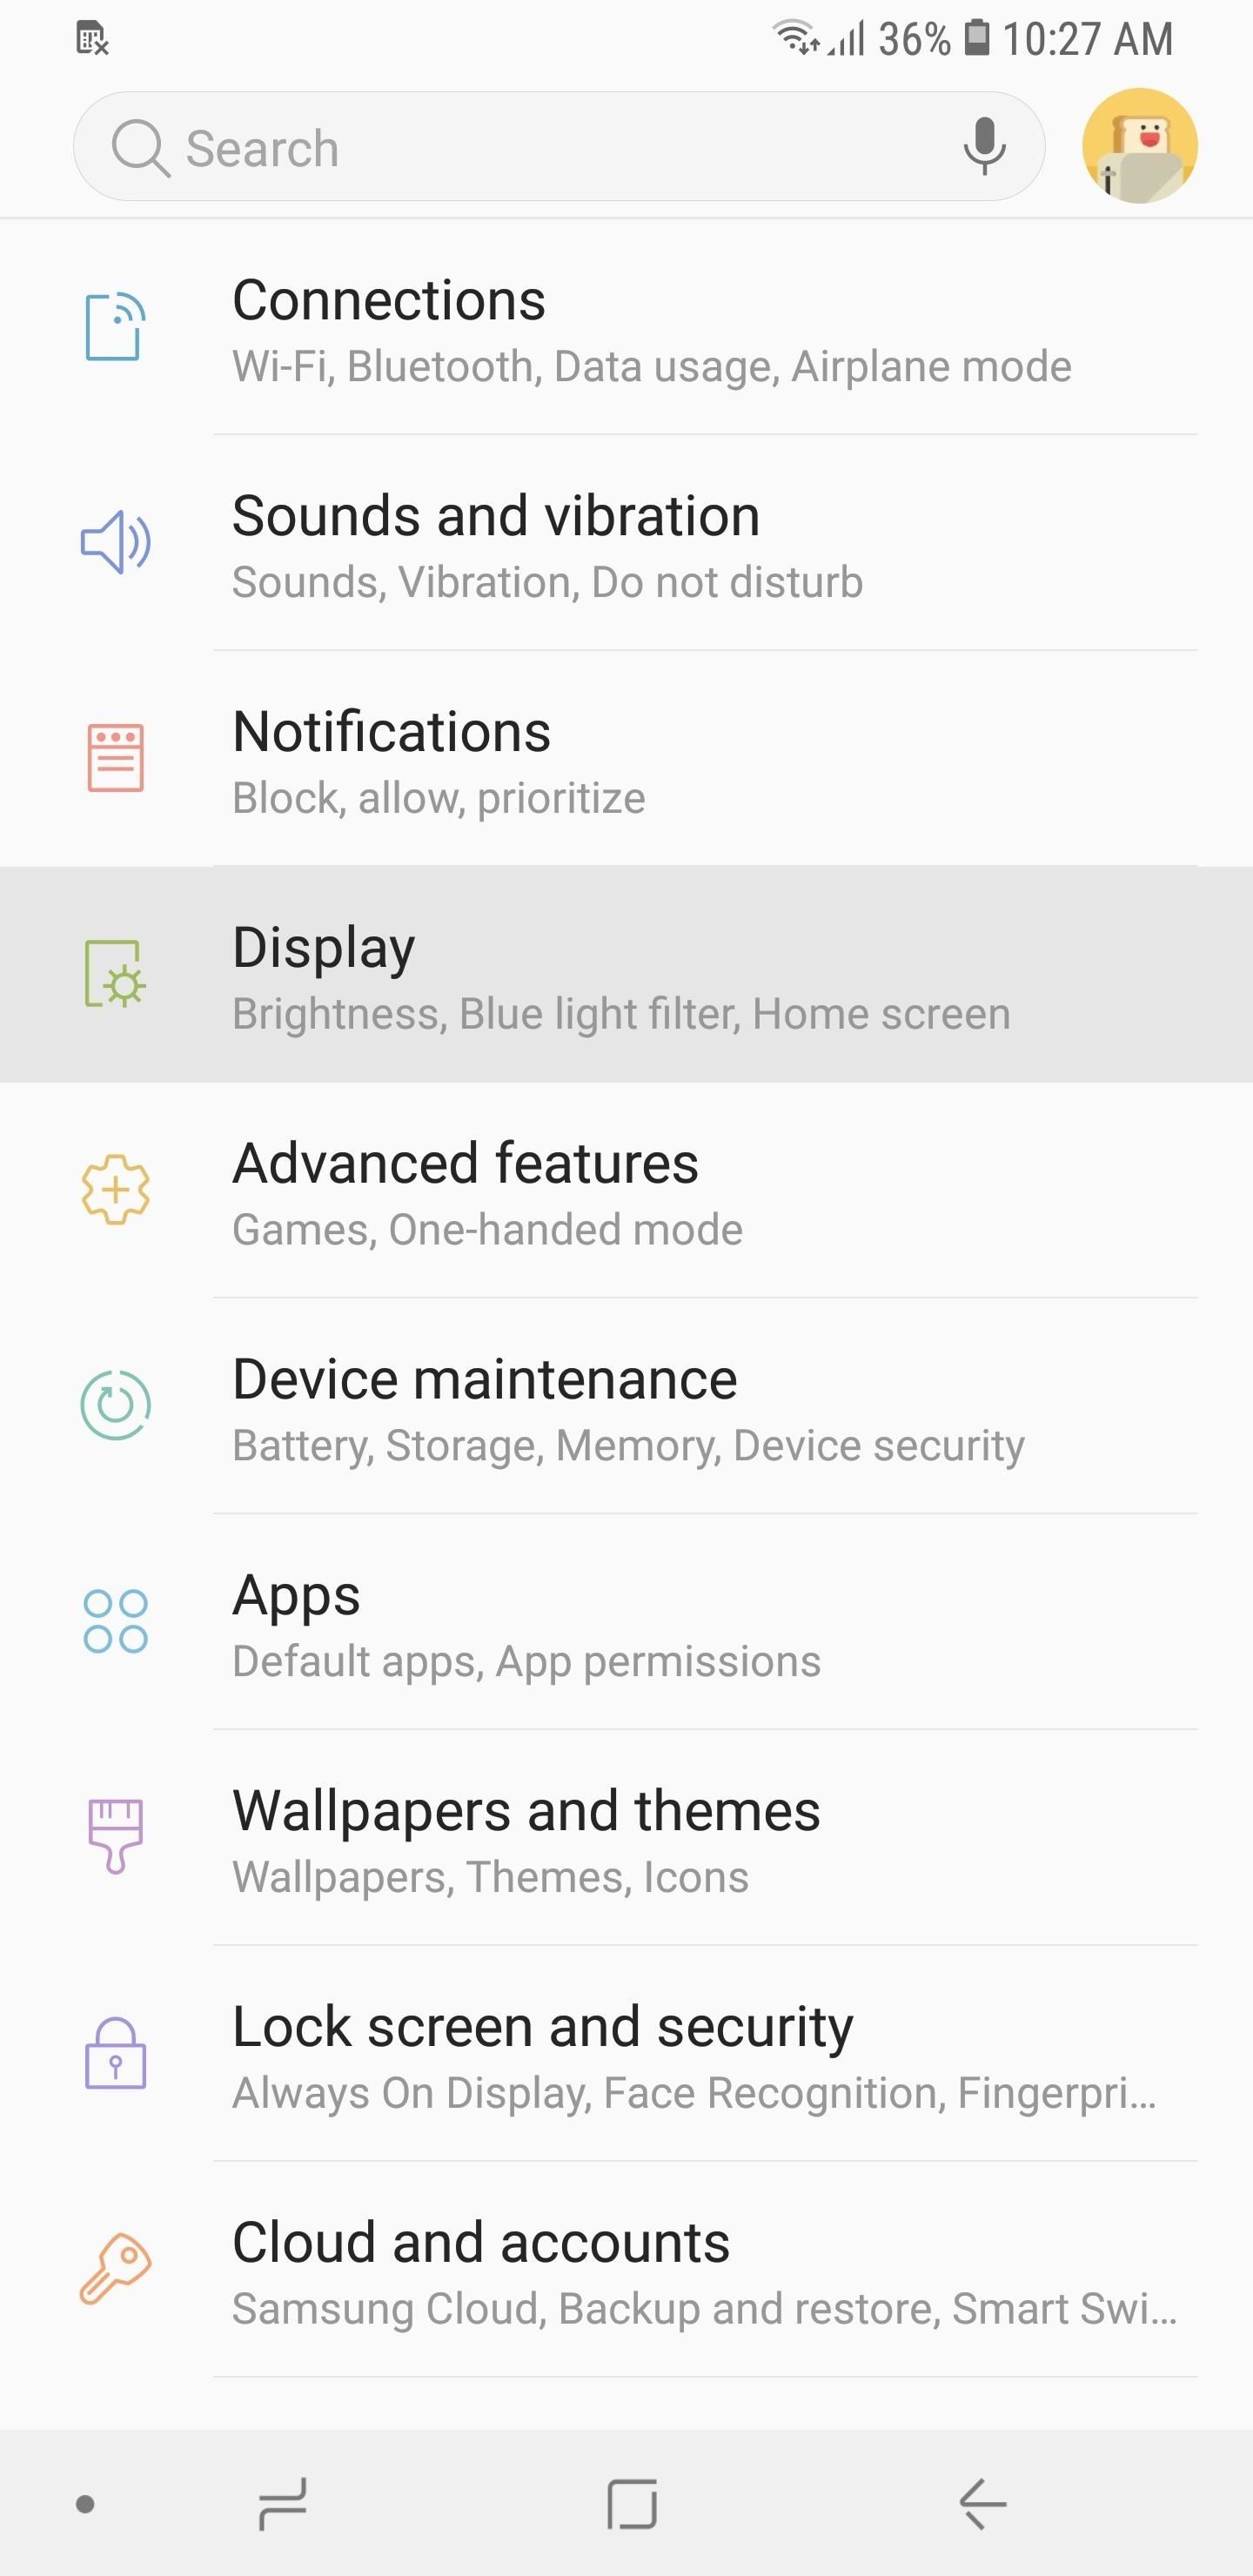
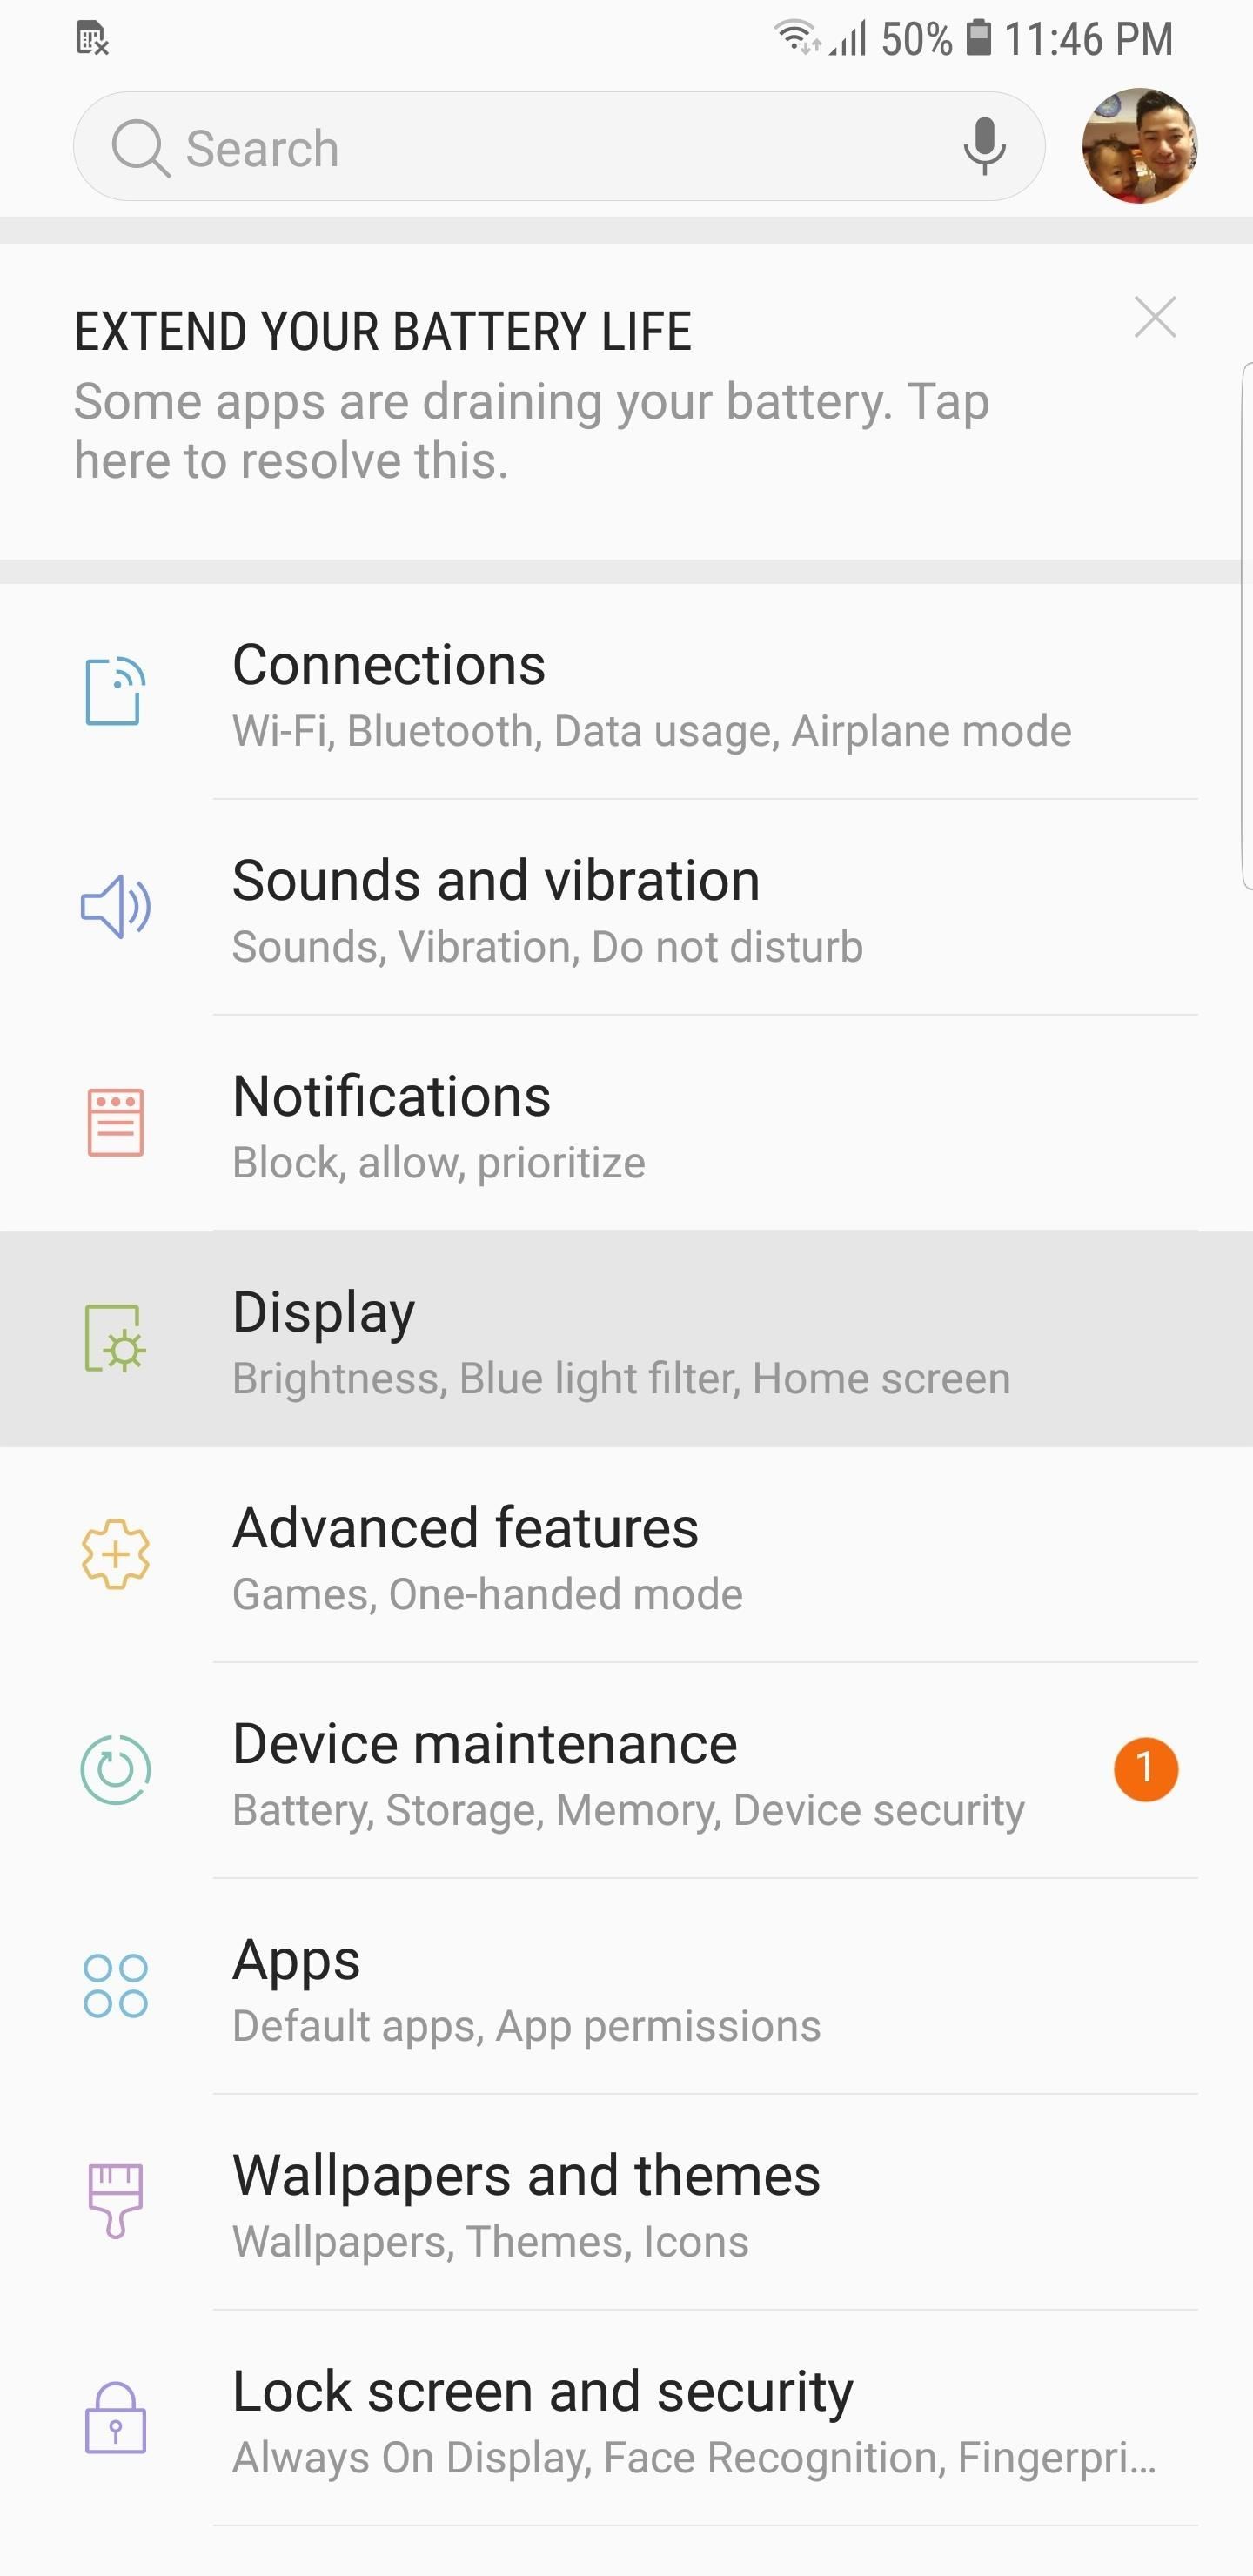
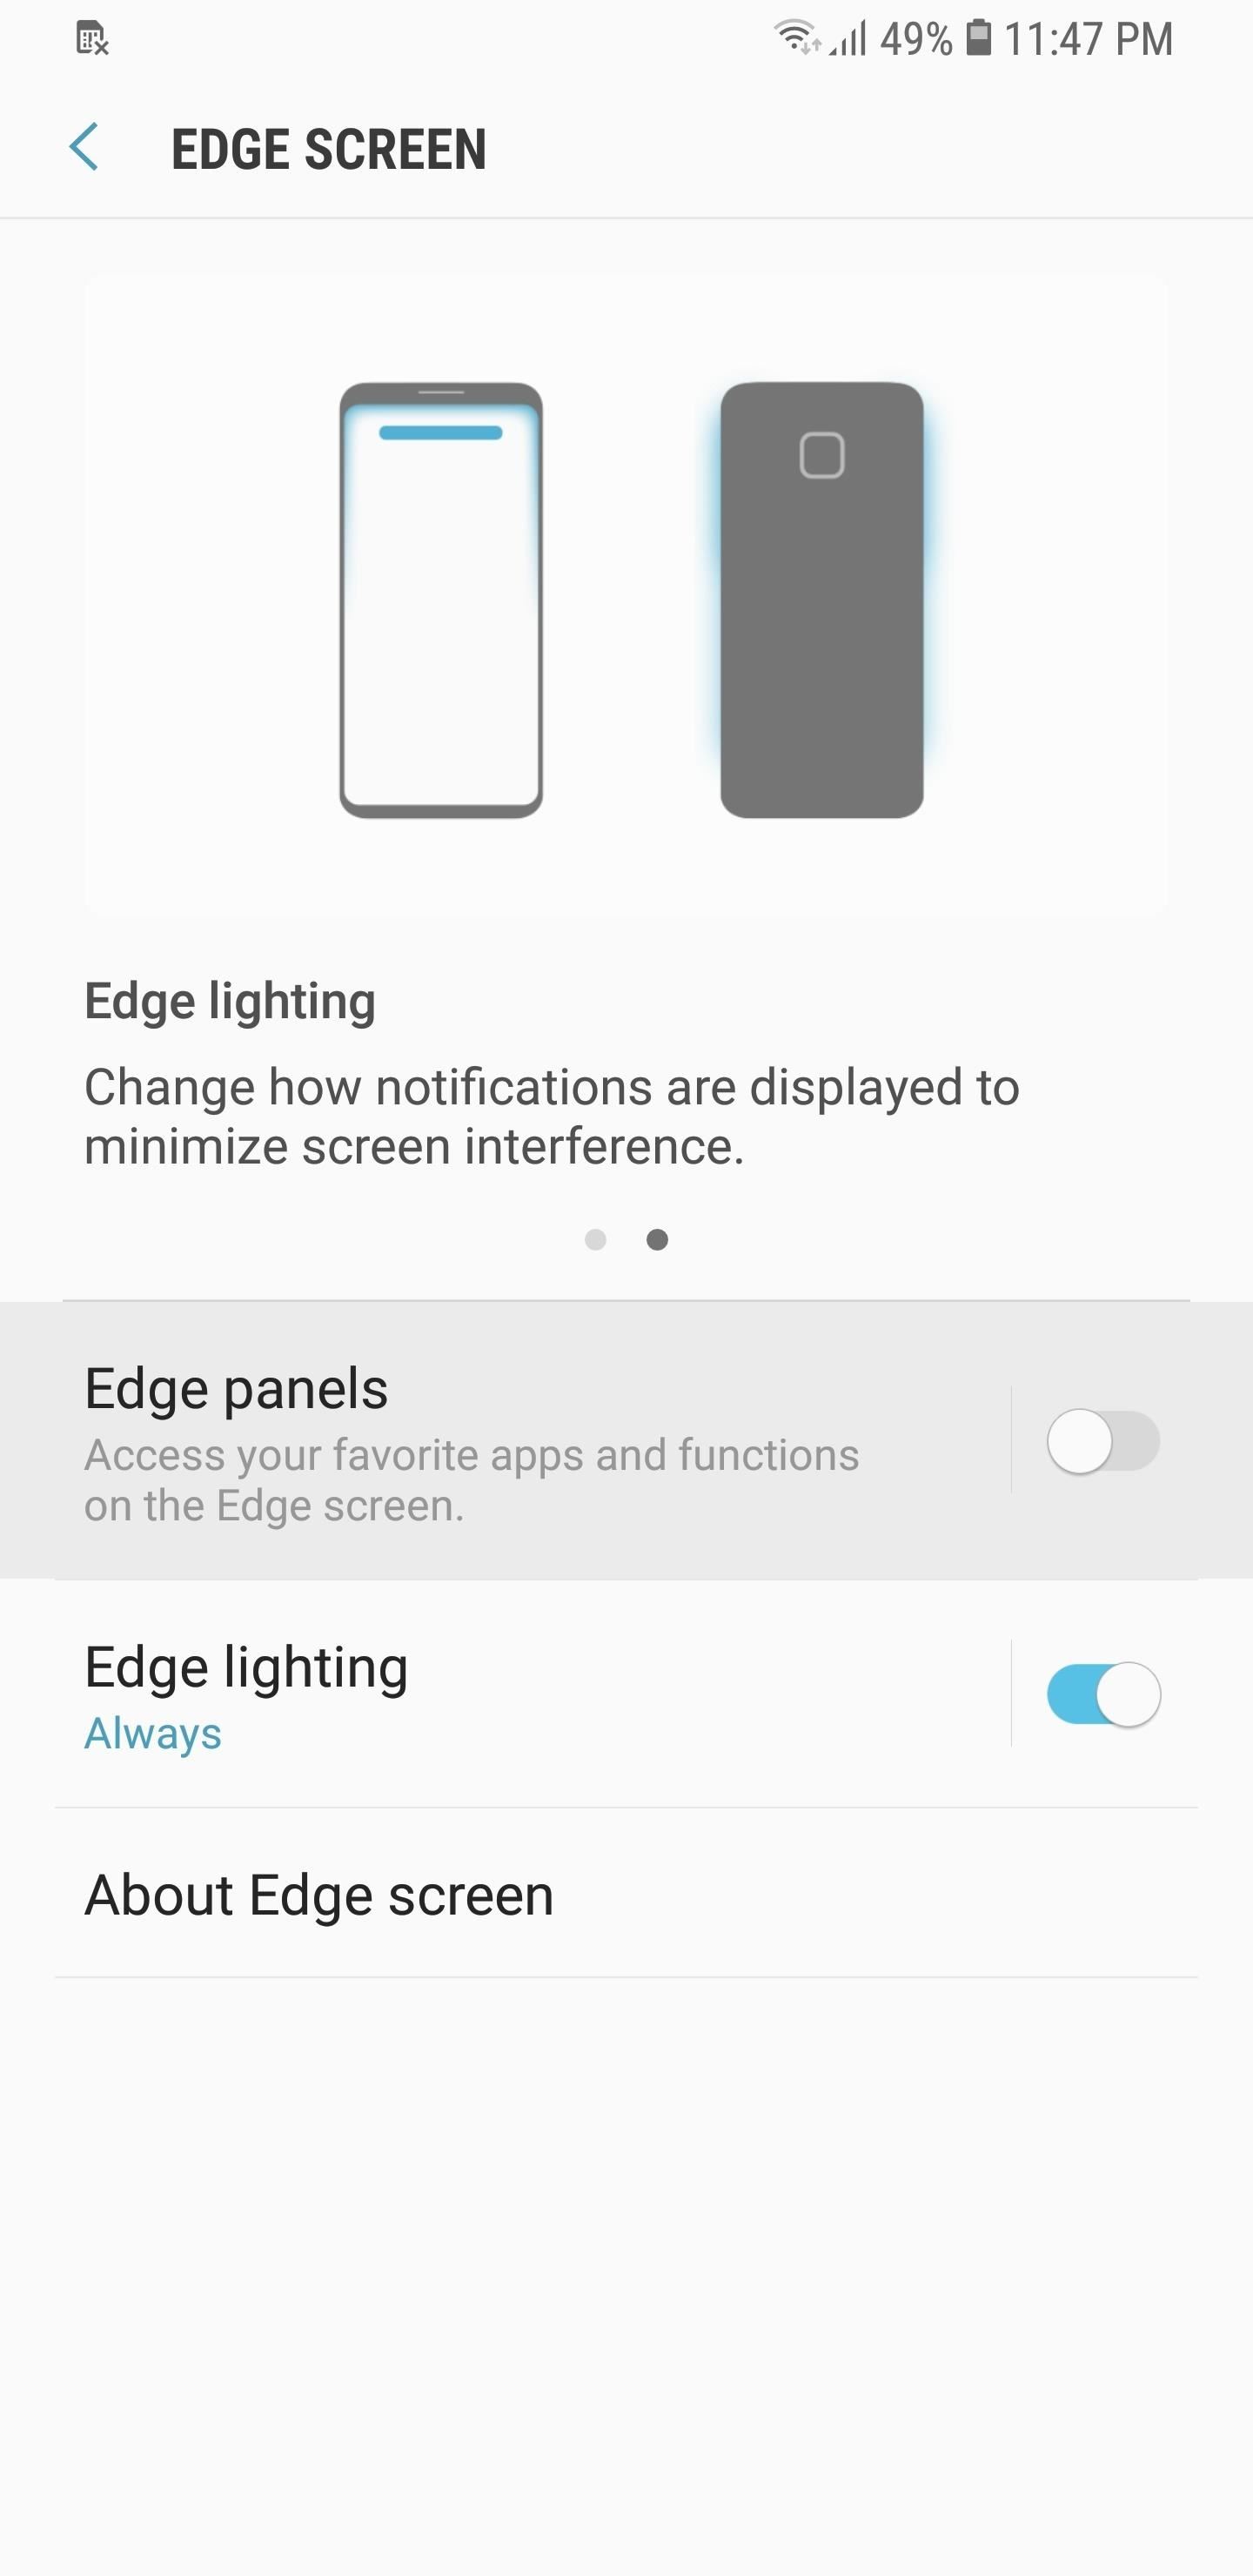
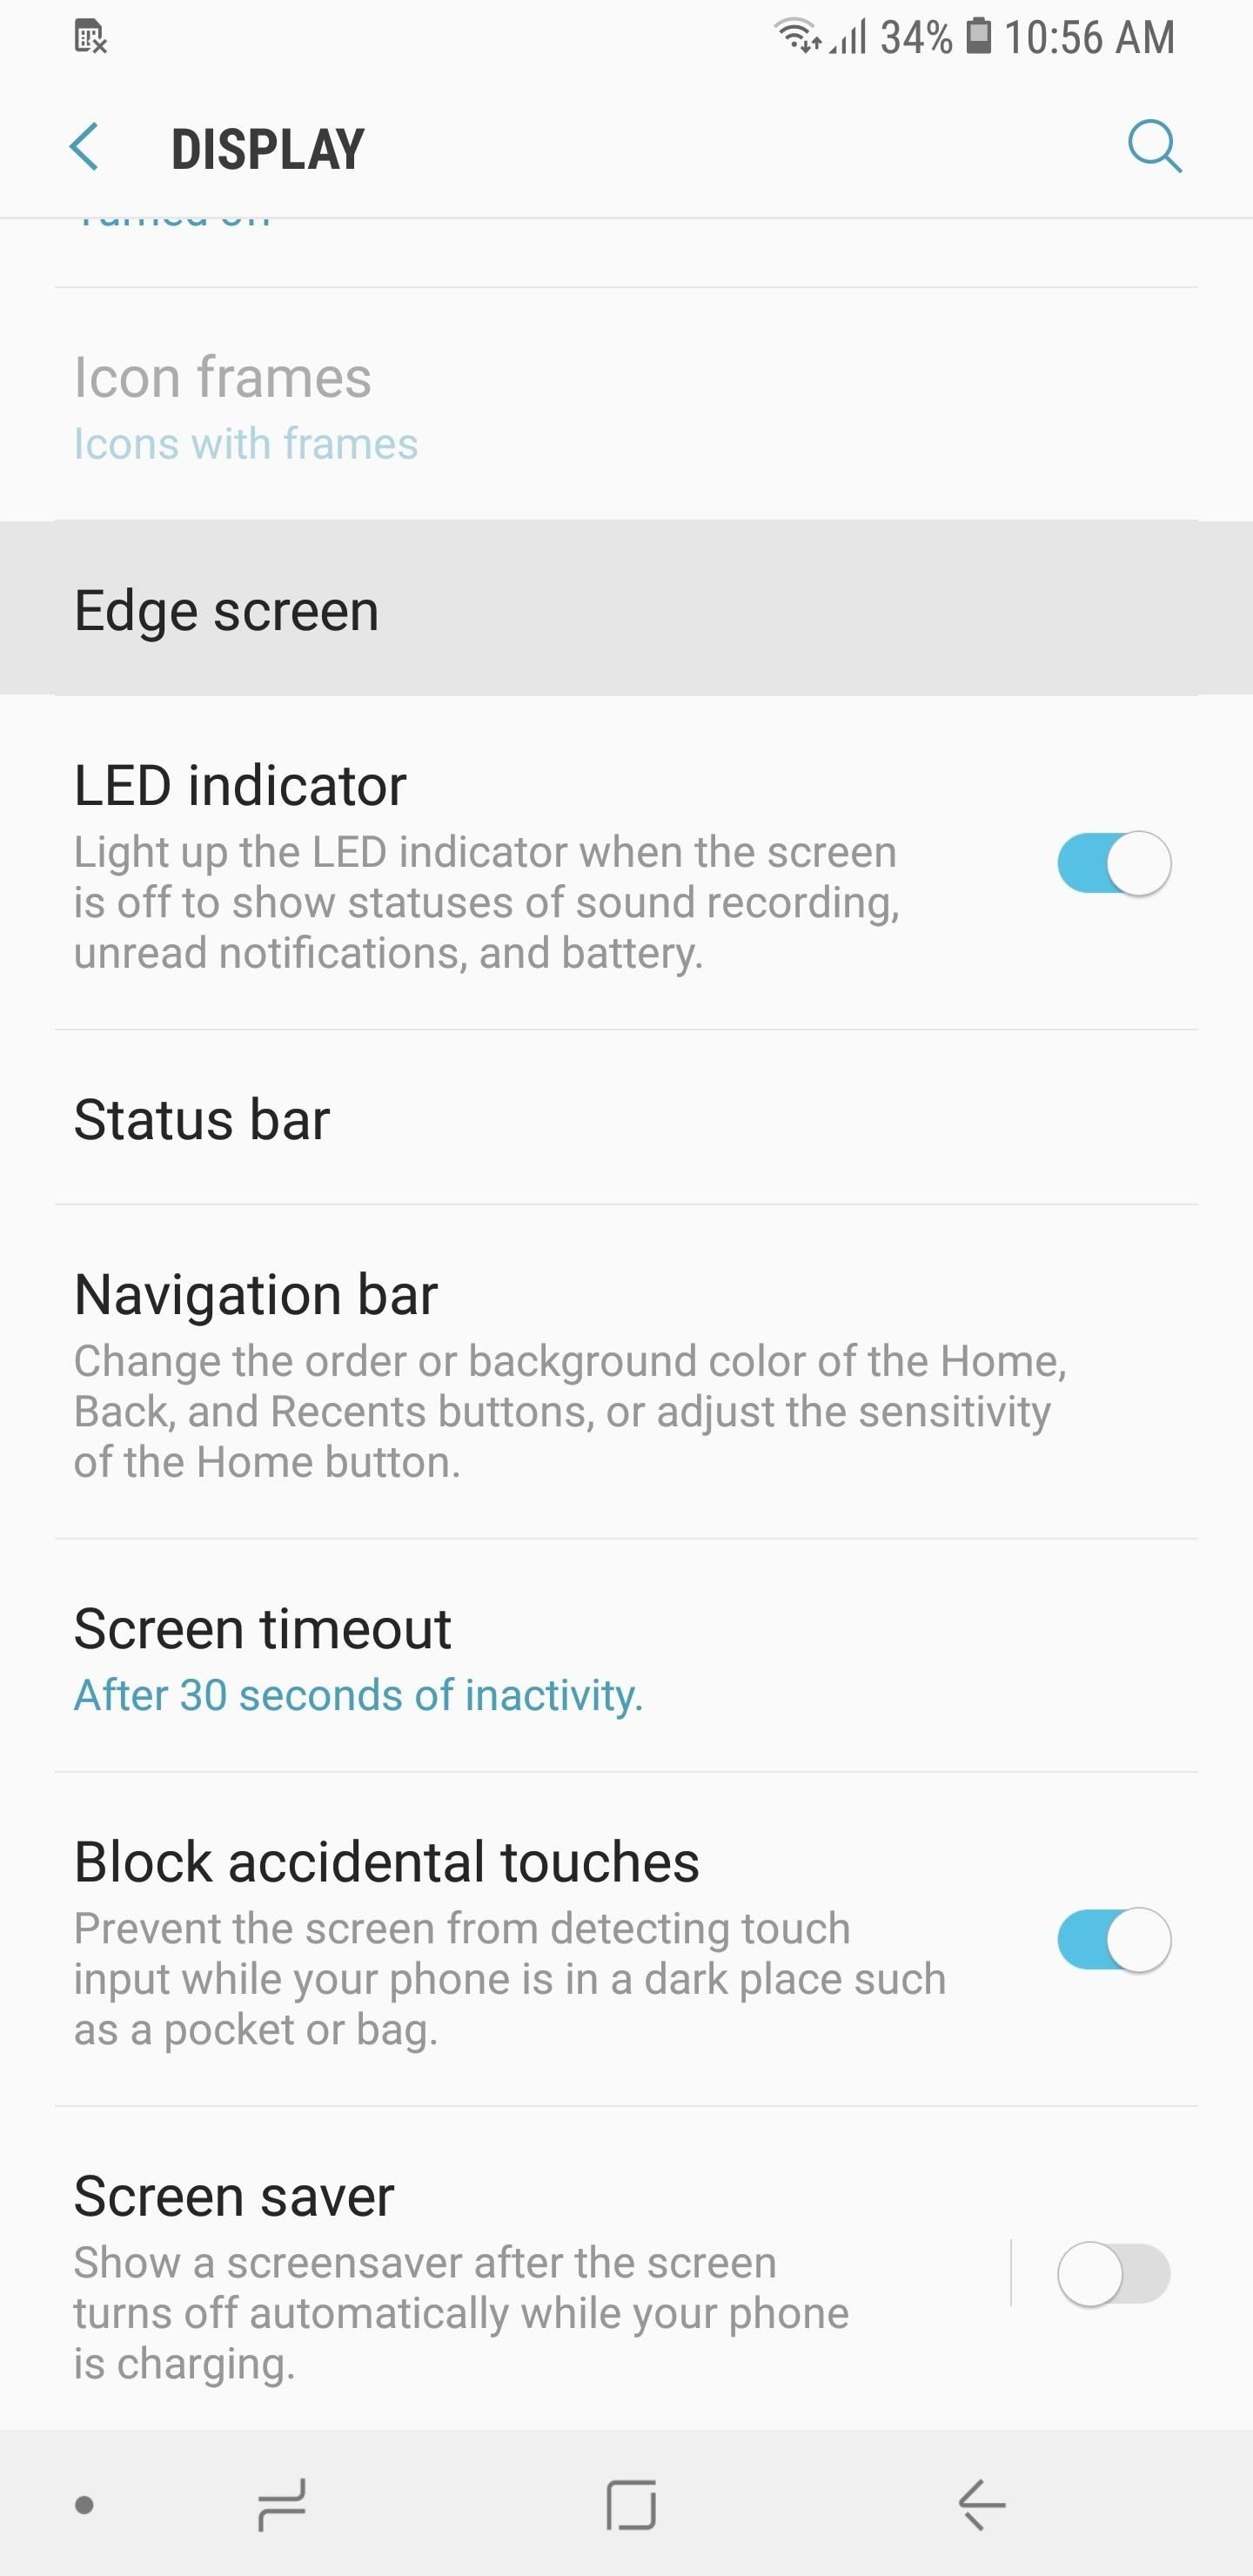
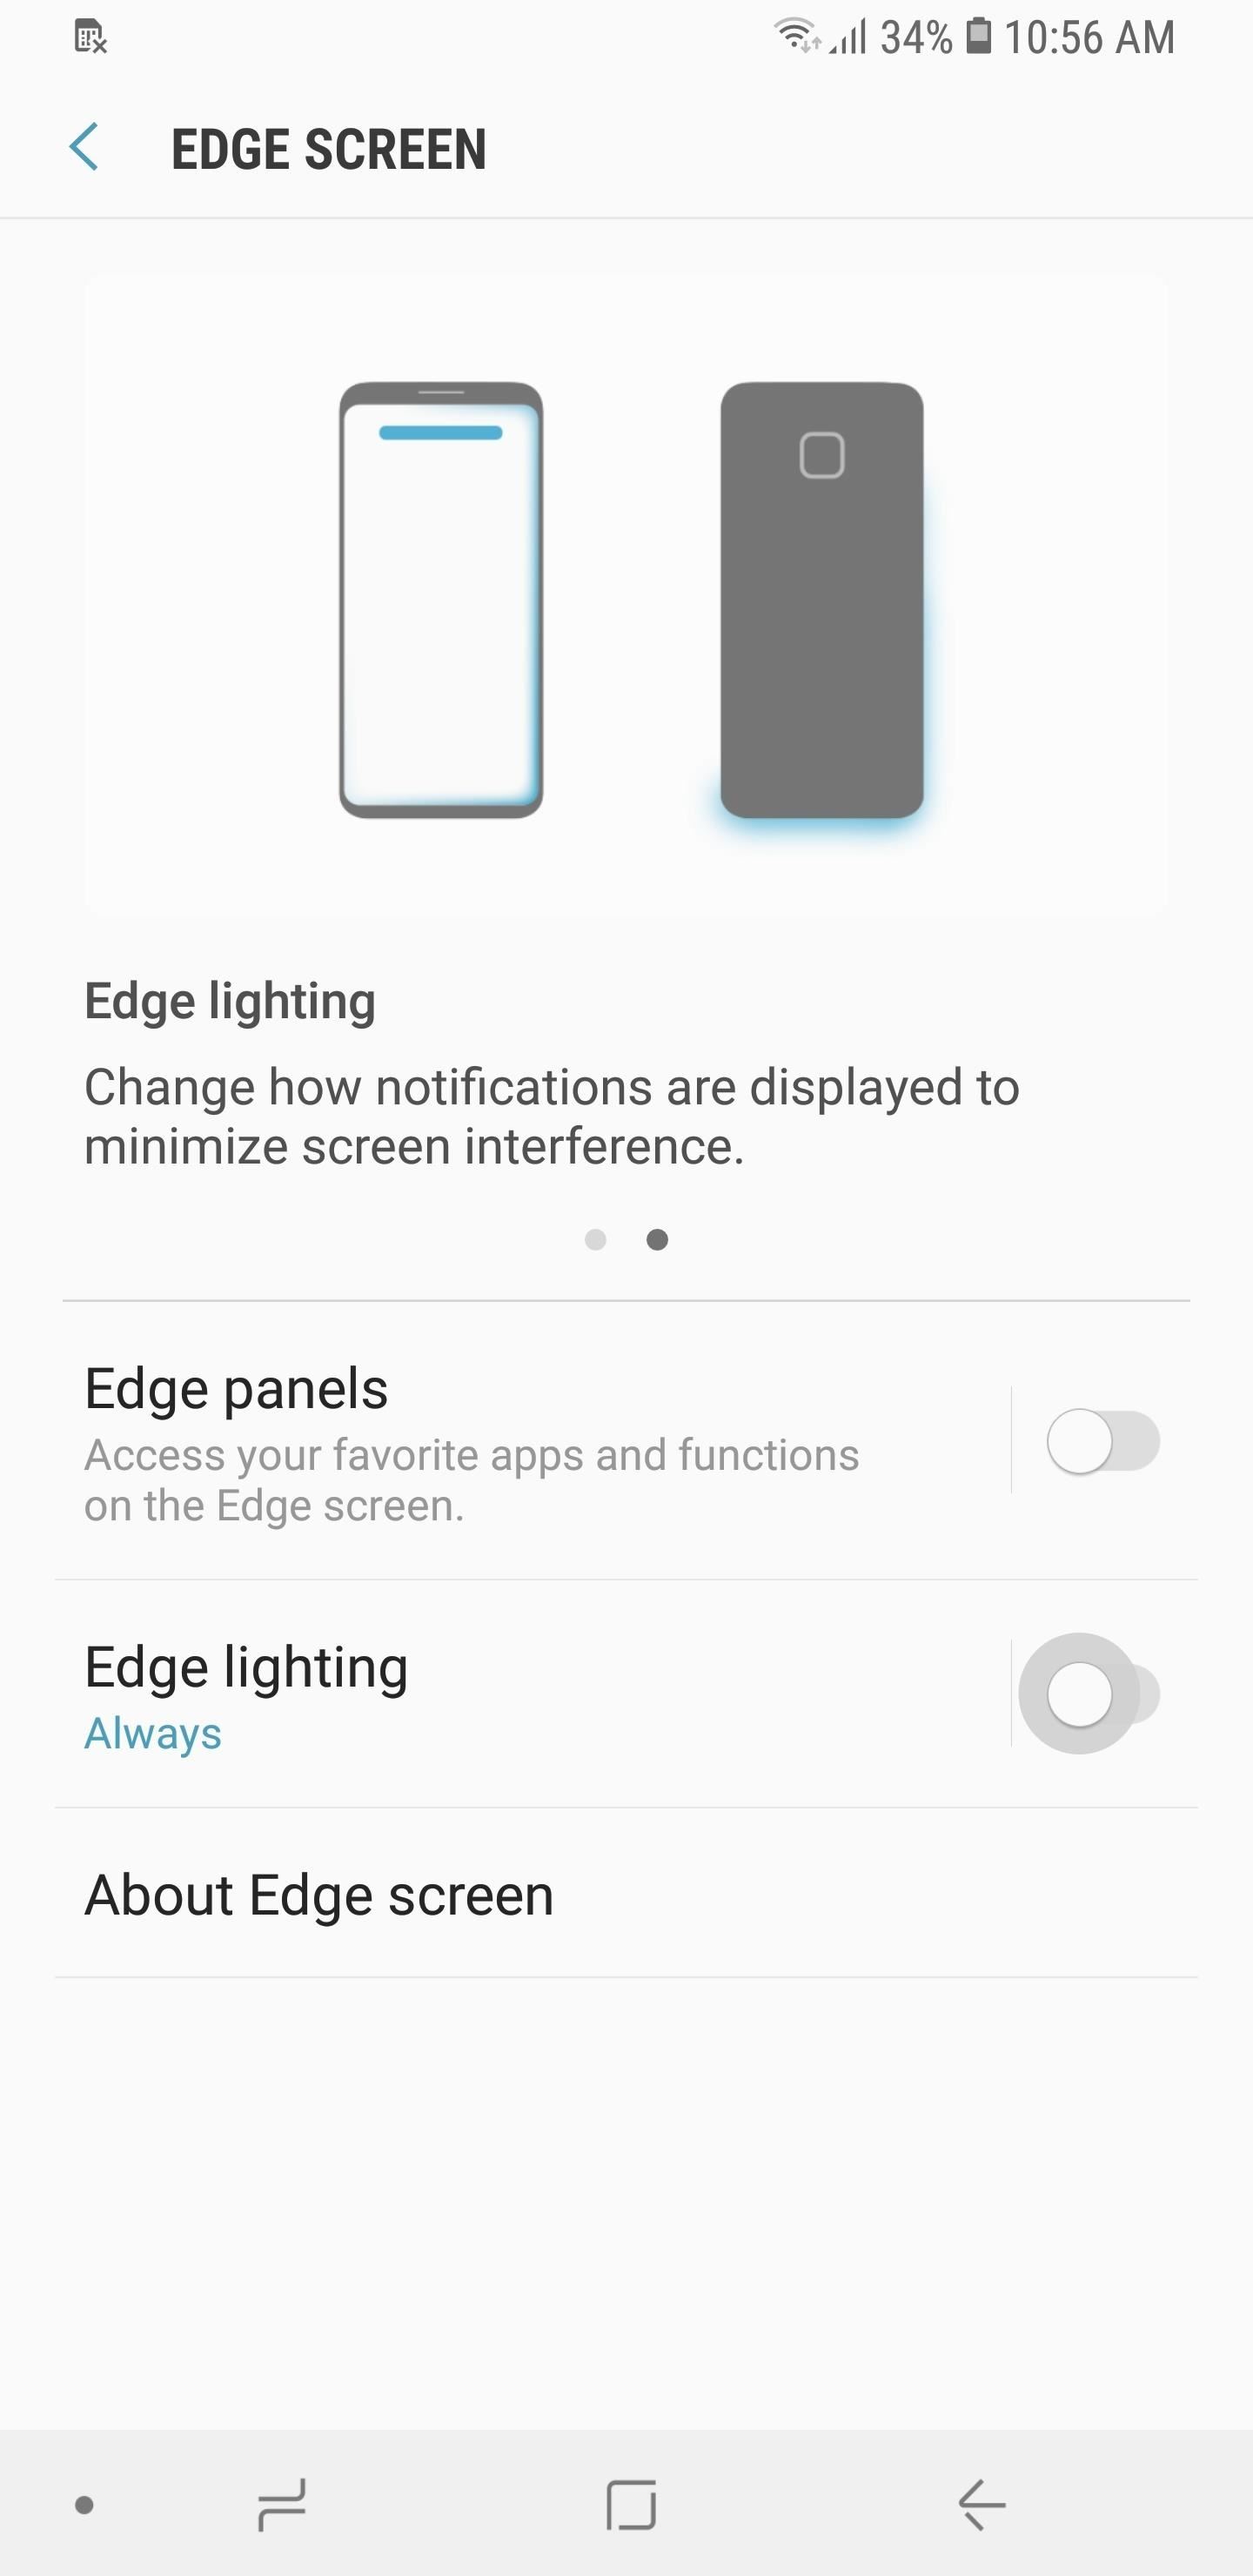
Fortunately, Edge Screen is pretty easy to turn off if you want to simplify your home screen — just tap on “Display” within your phone’s settings, then select “Edge screen” on the following page. From there, tap on the toggle next to “Edge panels” to disable the quick access feature and remove the Edge Screen tab from your display.

5. Disable Edge Lighting
Edge Lighting is primarily used to quietly alert you of notifications while your device is lying on its screen. However, the notification lights are fleeting and easy to miss, along with the fact that we only place our devices face-down on rare occasions, making its overall usefulness questionable at best.
So if you want to turn this feature off, go to your phone’s settings and hit “Display.” Once inside, select “Edge screen,” then tap on the toggle to the right of “Edge lighting” on the following page to turn the feature off. Your device will no longer light up like a disco ball every time you receive notifications.

6. Disable Bixby Home
As feature laden as Samsung’s Bixby assistant may be, it’s hard for a majority of us to justify its usefulness — especially now that the more intuitive Google Assistant is available on Galaxy devices. Fortunately, Samsung has given us the ability to disable Bixby Home in a few easy steps.
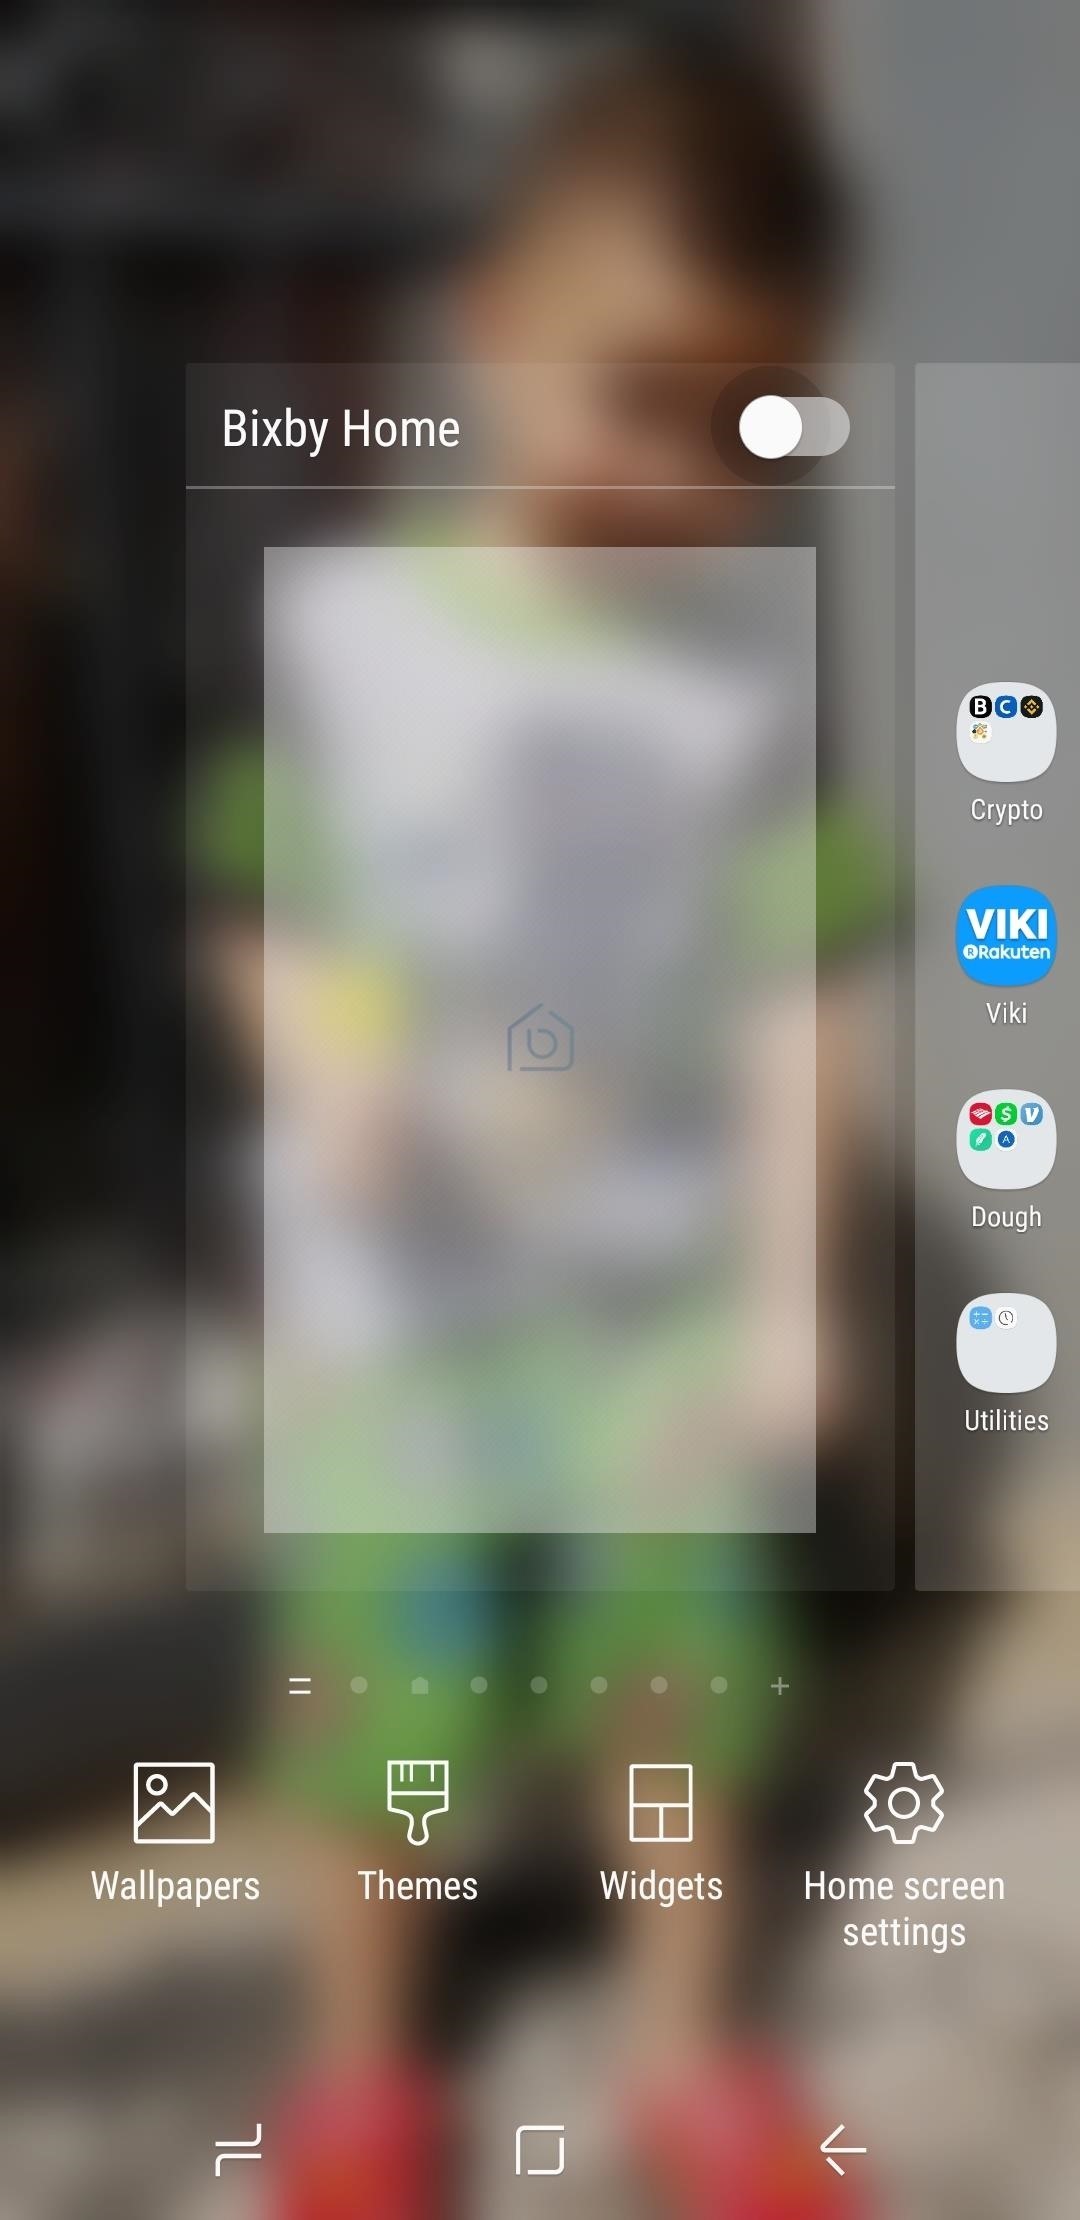
To start, long press on an empty area within your home screen to pull up its menu screen. Once you’re on the menu screen, swipe sideways to the left until you reach the left-most home screen panel containing the toggle for Bixby Home. From there, simply tap on the toggle to the right of “Bixby Home” to disable the AI.

7. Disable Direct Share
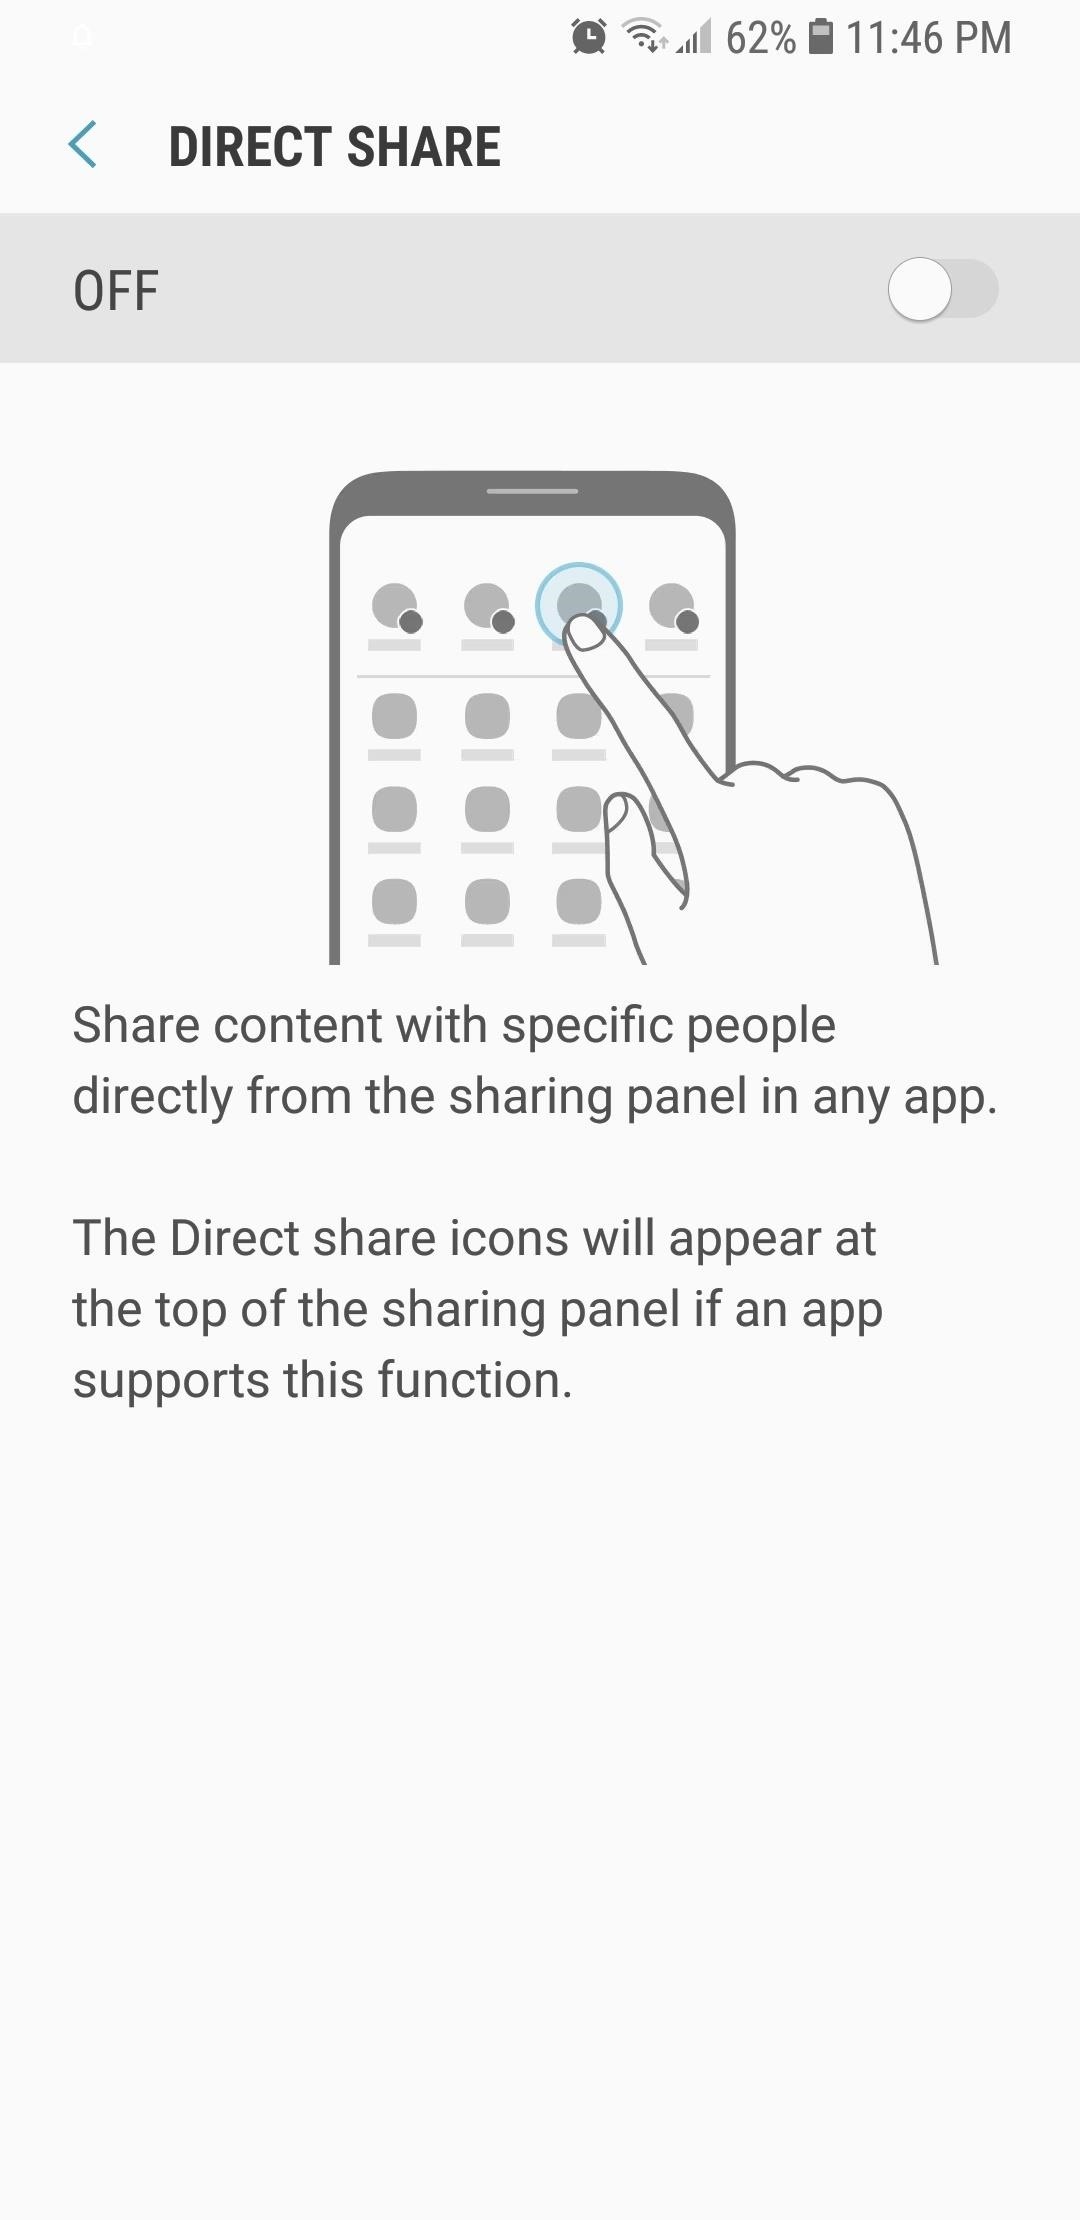
The share menu on TouchWiz appears a little more convoluted when compared to its AOSP-based counterparts. It contains more options such as “Link sharing” and “Share to device” at the top of the menu, which now takes up almost the entire screen.
While you can’t remove the two aforementioned Samsung extras in the share menu, you can slim it down considerably by removing the Direct Share targets that appear towards the middle of the menu.
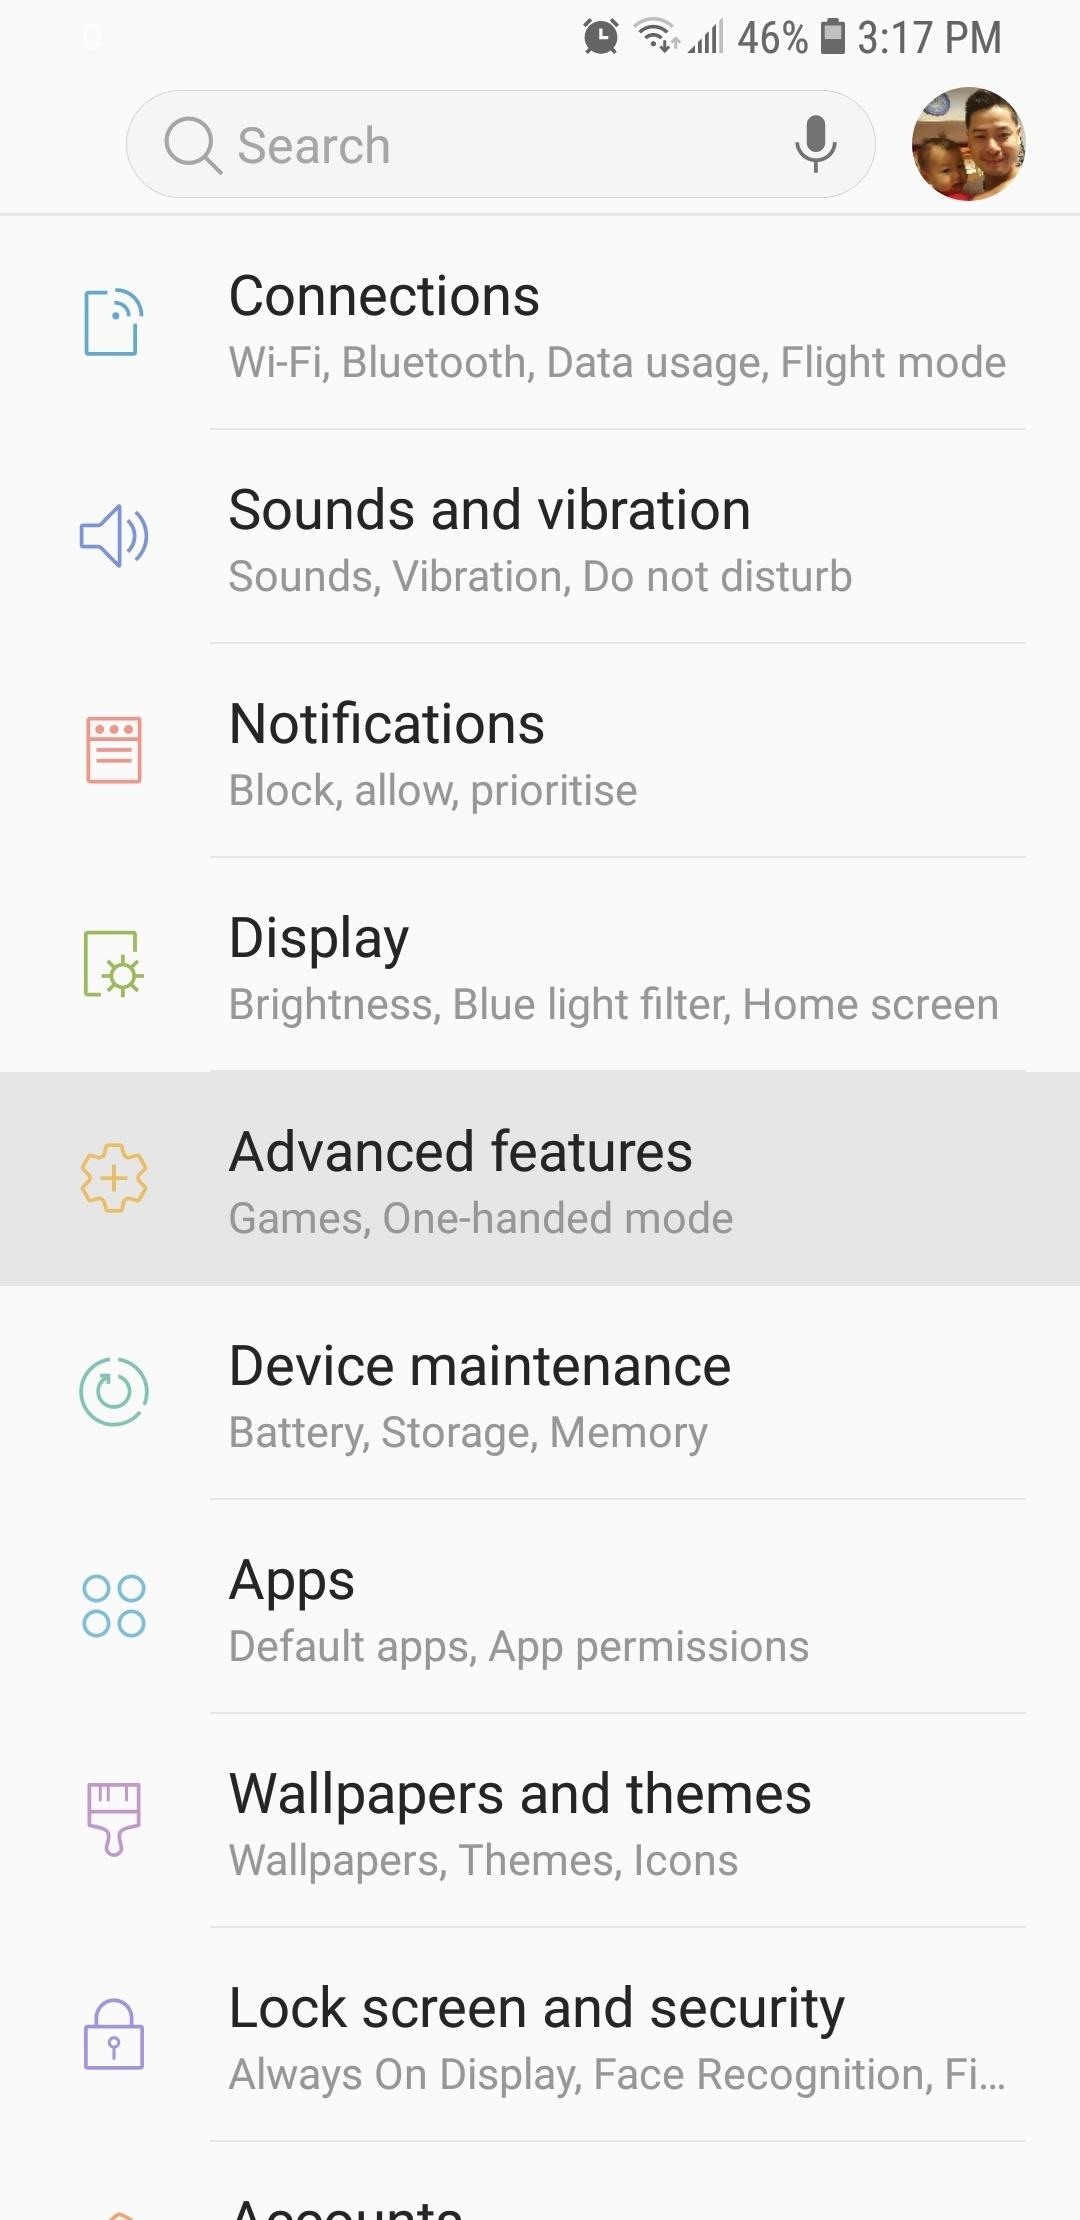
To disable this feature, select “Advanced Features” from within your phone’s settings, then tap on the toggle next to “Direct Share” on the following page to turn the feature off. Once done, your share menu will appear less cluttered and will no longer show contacts directly from various messaging and social media apps.

8. Control Media Volume by Default
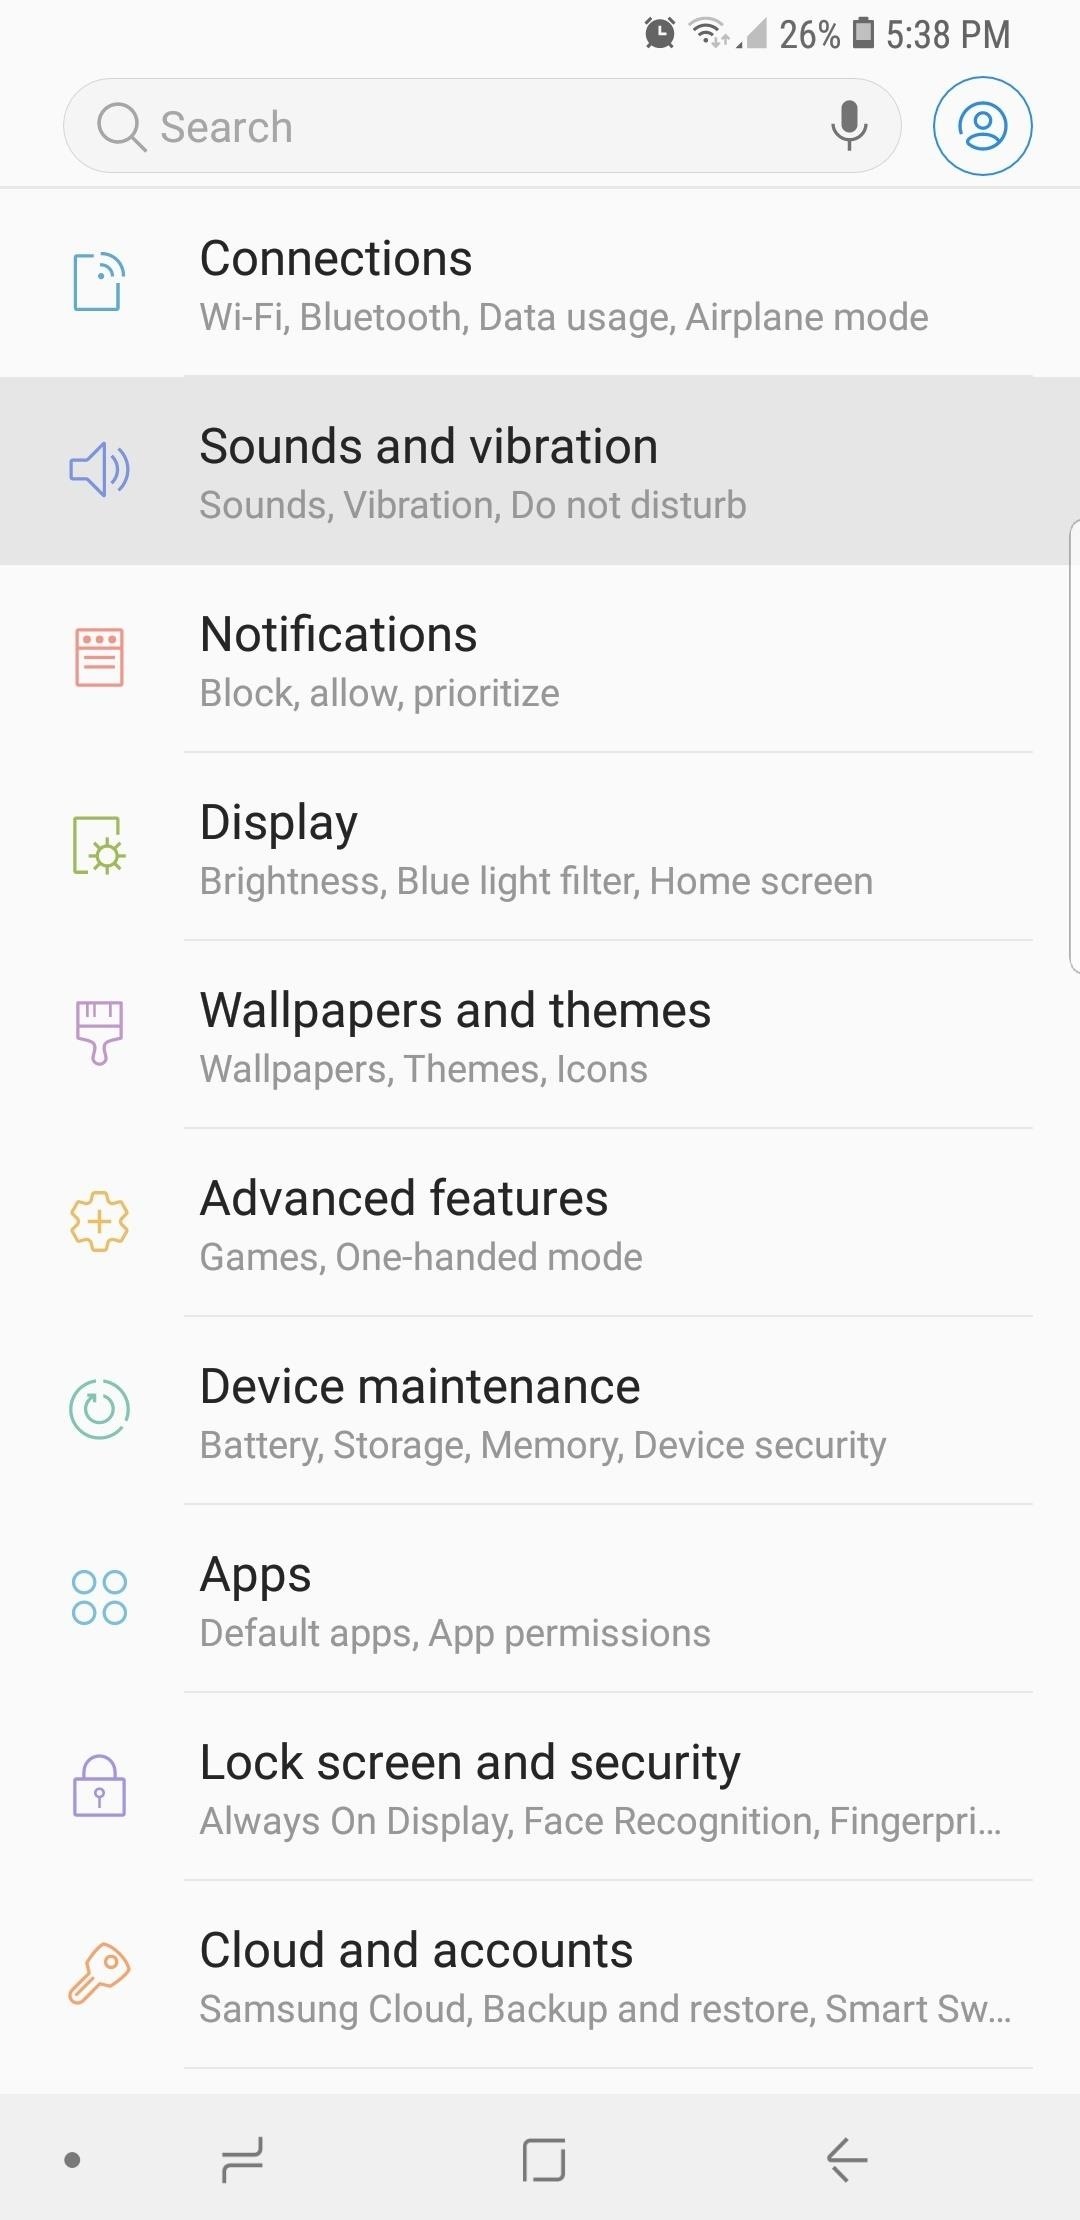
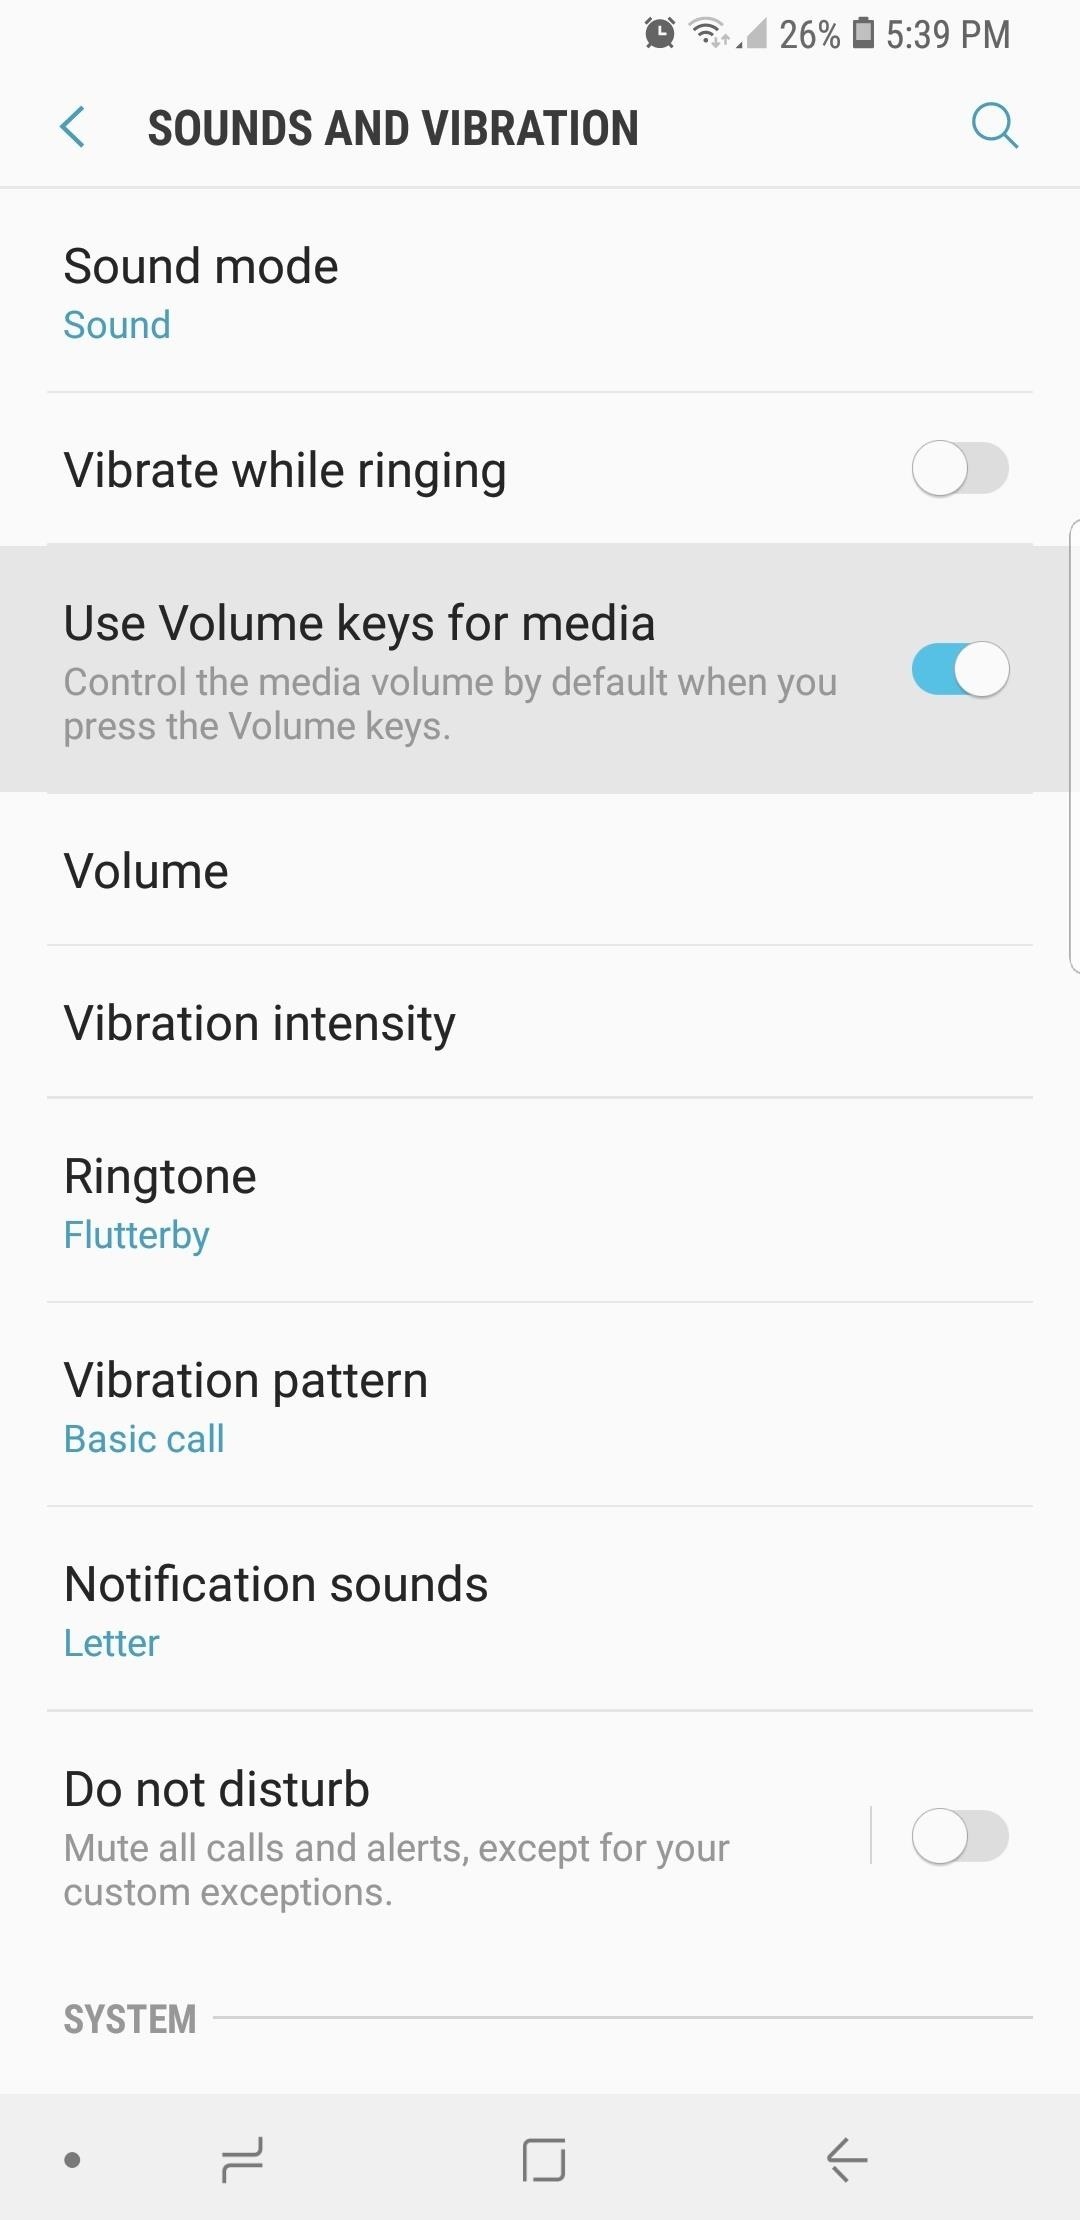
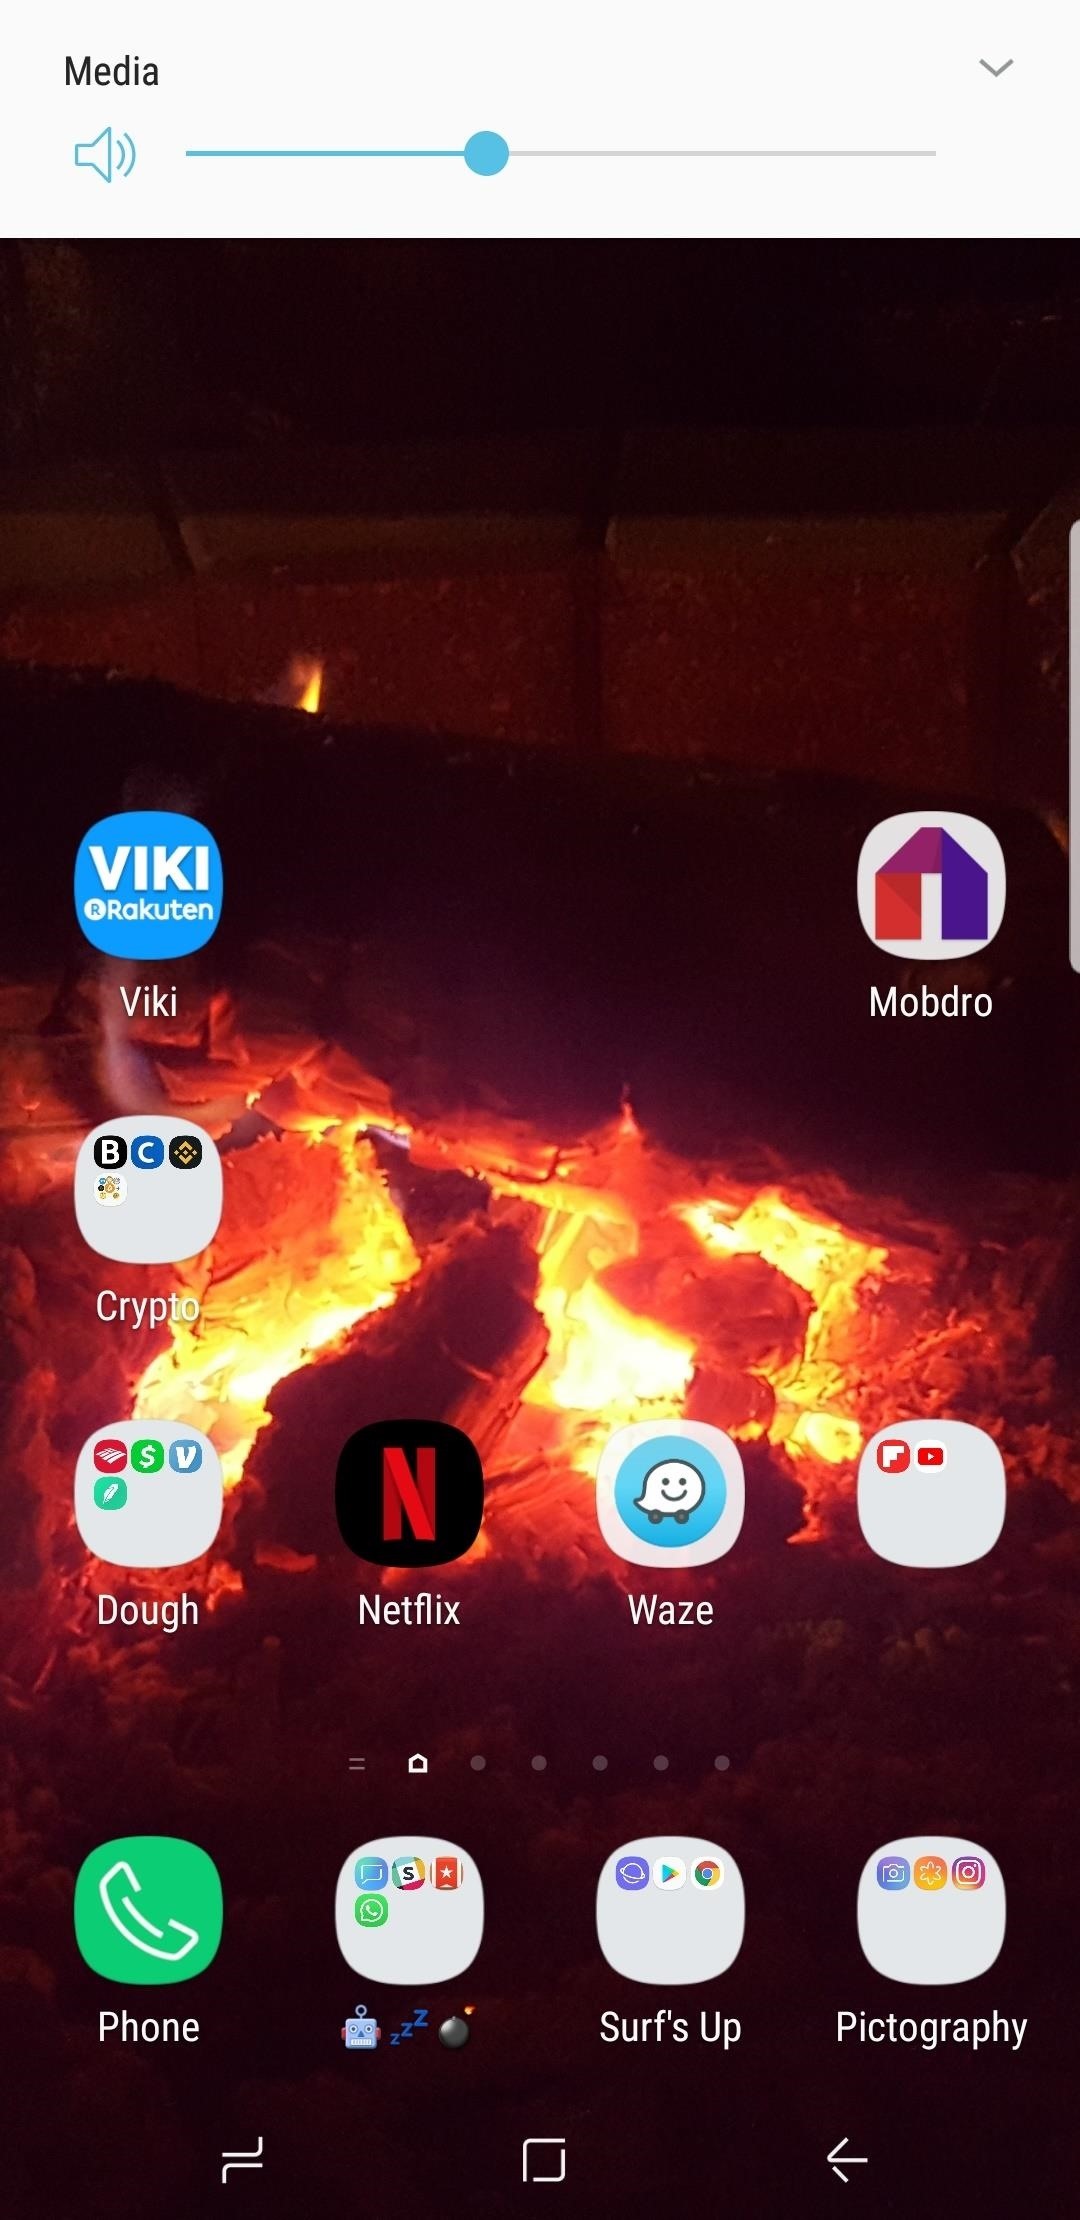
TouchWiz has beaten Android P to the punch and now lets you set your volume keys to control media volume by default, so you’ll no longer have to wait for a video to kick in to toggle its audio output. Best of all, the feature is really easy to enable — simply head to settings and select “Sounds & Vibrations.” From there, enable the switch next to the “Use volume keys for media” setting, then you’re all set!
- Don’t Miss: 5 Android P Features the Galaxy S9 Already Has
9. NFC
In general, most Android devices will let you enable NFC without polluting your status bar with unnecessary clutter. Though some unlocked Galaxy models have recently caught up with the times, the same can’t be said for older TouchWiz devices, which still display an NFC “N” icon on the top of your screen when the feature is enabled.
Fortunately, you can quickly disable the feature by swiping down from the top of the screen to reveal your Quick Settings panel, and tapping on “NFC” if you’re on Nougat on up. This will turn off NFC, but since most Galaxy phones have Samsung Pay (which uses MST instead of NFC), it’s not much of a loss.

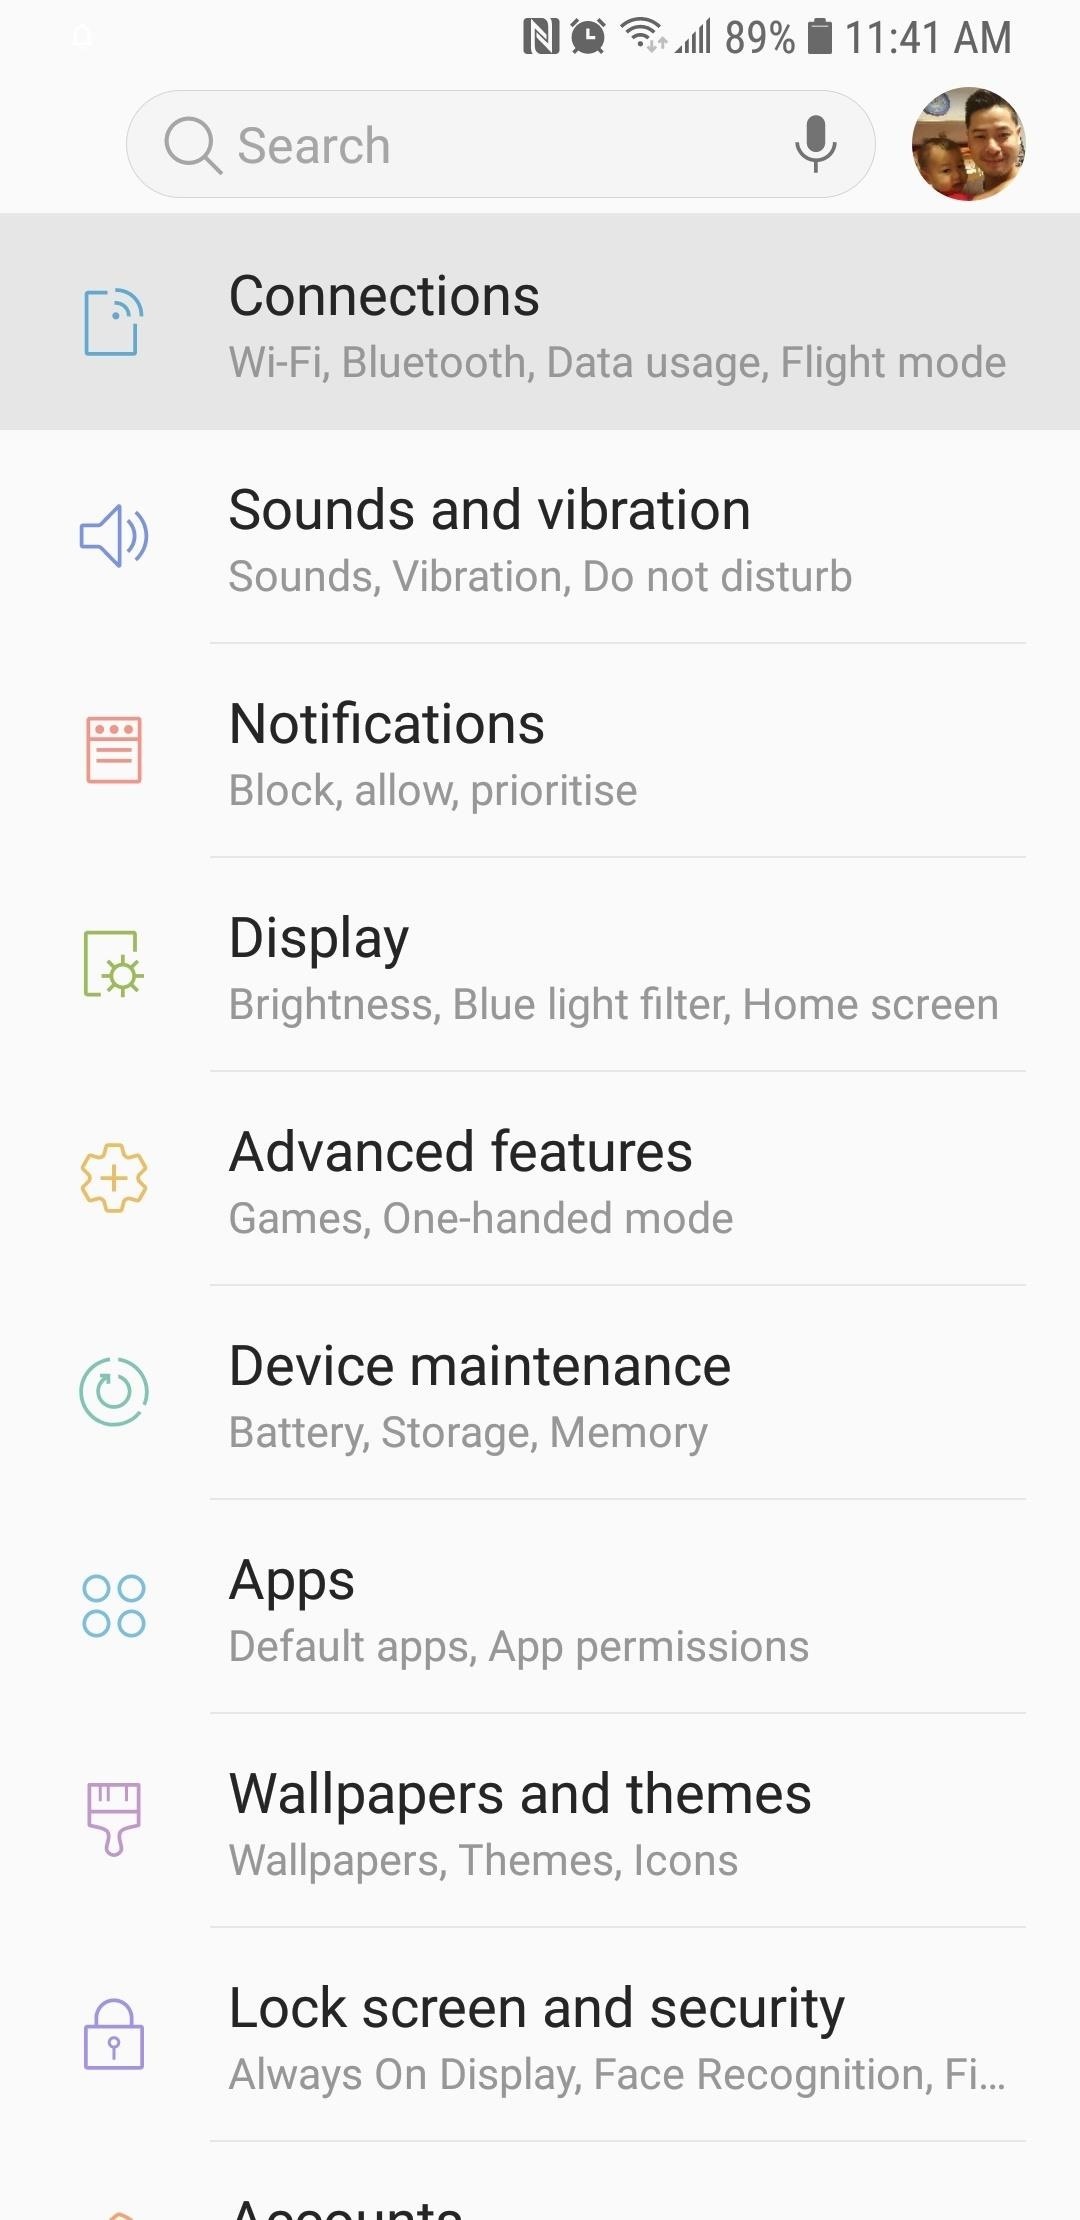
If your phone doesn’t have an NFC Quick Settings toggle, you’ll need to go to your device’s settings, select “Connections,” and tap on the toggle next to “NFC” on the following page to turn the feature off.

10. Face Correction
To help beautify your already gorgeous selfies, the S9 and S9+ come standard with a face correction feature that automatically enhances the shape of your face. The feature seems more like a gimmick than anything, however, and often yield photos that are almost indistinguishable from ones where the auto-correct has been disabled.
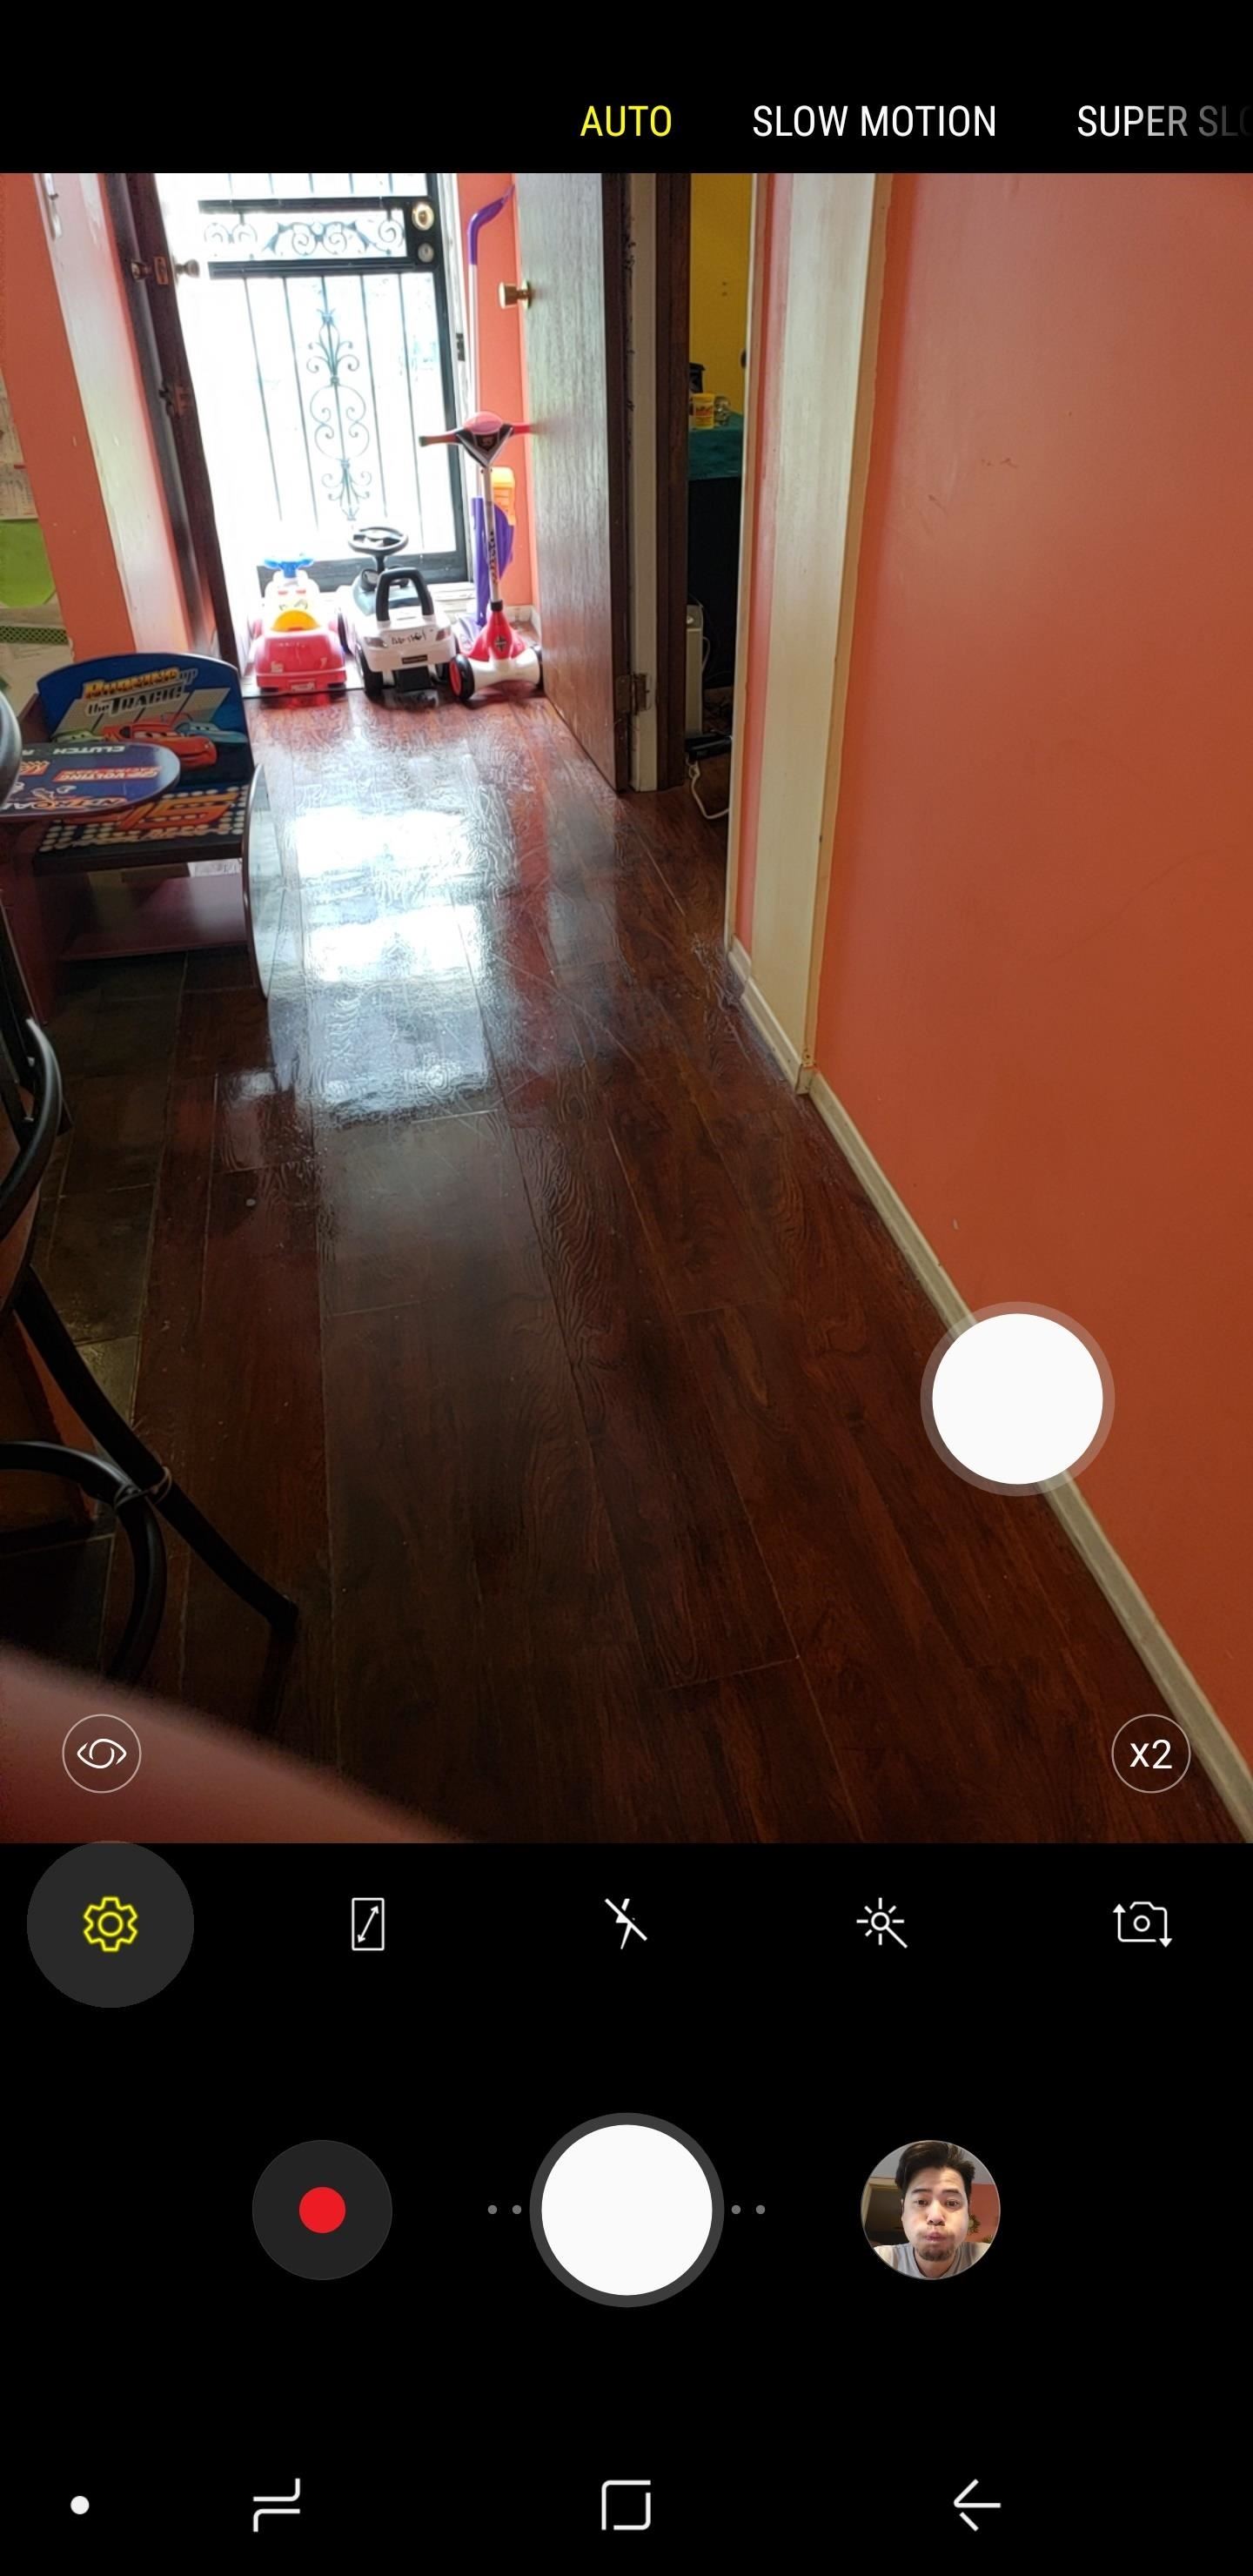
So if you want to turn your front camera’s face correction feature off, first open your Camera app and tap on the cog icon to access its settings. Next, scroll down until you hit the “Front Camera” section, then tap on “Face shape correction” to toggle it off.

Of course, there’s tons of other TouchWiz features out there that will make daily use a lot more bearable, so check out our roundup of general TouchWiz tips to learn more. How does your new Galaxy compare to your old Android device? Be sure to share your thoughts in the comment section below.
Hot Deal: Set up a secure second phone number and keep your real contact details hidden with a yearly subscription to Hushed Private Phone Line for Android/iOS, 83%–91% off. It’s a perfect second-line solution for making calls and sending texts related to work, dating, Craigslist sales, and other scenarios where you wouldn’t want to give out your primary phone number.
“Hey there, just a heads-up: We’re part of the Amazon affiliate program, so when you buy through links on our site, we may earn a small commission. But don’t worry, it doesn’t cost you anything extra and helps us keep the lights on. Thanks for your support!”


