Samsung’s latest flagship devices—the Galaxy S7 and S7 edge—both sport an interesting new feature called Always On Display, or simply AOD. When enabled, this feature keeps the clock, date, and other bits of information visible at all times—even when the screen is off.
Samsung is using hardware and software optimizations to ensure that AOD doesn’t waste too much battery. Obviously, the hardware aspect of that would be impossible to emulate on any other device, but thanks to a battery-friendly app from the development team at THSoftware, we can now get Samsung’s Always On Display feature on virtually any device.
- Don’t Miss: A Better Option for Getting an Always-On Display
AMOLED vs. LCD Displays
Before you get started with this one, you should be aware that the type of display your phone uses is a big factor here. The widget this app displays is simply white on a black background, which means that if you have an AMOLED screen, only the white pixels will use any battery.
On the other hand, if you have a traditional LCD display, these types of screens require that the entire backlight be lit up before they’ll display anything. This will use a lot of extra battery power, so as a result, we only recommend that you use this app if your device has an AMOLED screen.
Step 1: Install Glance Plus
The app that will give you Samsung’s Always On Display feature without killing your battery is called Glance Plus, and it’s available for free on the Google Play Store.

Step 2: Enable Glance Plus
When you first launch Glance Plus, you’ll be asked to give the app permission to modify system settings. So enable the toggle switch on this screen, then relaunch the app. From here, enable the toggle switch at the top of Glance Plus’ main menu to turn the Always On Display feature on.


Step 3: Add Content to Your Always-on Display
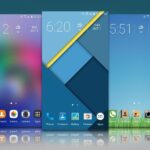
From here, the first thing you should do is set the Position option to “Random” to ensure that there isn’t any screen burn-in. Aside from that, you can choose between analog and digital clocks, you can change the calendar style, and you can add a background image—though I’d recommend against that last one.
Beyond that, if you’d like to see notifications in your Always On Display, toggle the switch next to the “Show notification” option. From here, simply enable the “Glance Plus” option on the following screen.


Step 4: Adjust Power-Saving Options
With the main elements added to your Always On Display widget, the next thing you should do is adjust battery-saving options, which you’ll find under the Features section.
By default, Glance Plus will come on when your screen is turned off, then it will fade away after 2 minutes. If you’d like this to last longer under certain circumstances, select the “Always on” option, then set it to “When charge.” Aside from that, you can set Glance to not display its widget at certain times using the “Inactive hours” option, and you can have it use your device’s proximity sensor as an automatic on/off switch by enabling the “Detect phone in pocket” option.


Step 5: Adjust Appearance Options
Next, you can adjust some of the Glance Plus widget’s font size and brightness under the Other settings header. From here, I’d recommend leaving the “Background brightness” slider alone, as raising this one can cause additional battery drain. Instead, if you’d like the widget to be brighter, raise only the “Content brightness” slider.


Step 6: Enjoy Your Always-on Display
With everything set up now, all that’s left to do is to check out your Always On Display. At any time, just turn your screen off, then you’ll see the widget appear. From there, just tap the screen anywhere, and you’ll be greeted by your stock lock screen—pretty useful, right?

Follow Android Hacks on Facebook or Twitter, or Gadget Hacks on Facebook, Google+, or Twitter, for more Android tips and tricks.
Hot Deal: Set up a secure second phone number and keep your real contact details hidden with a yearly subscription to Hushed Private Phone Line for Android/iOS, 83%–91% off. It’s a perfect second-line solution for making calls and sending texts related to work, dating, Craigslist sales, and other scenarios where you wouldn’t want to give out your primary phone number.
“Hey there, just a heads-up: We’re part of the Amazon affiliate program, so when you buy through links on our site, we may earn a small commission. But don’t worry, it doesn’t cost you anything extra and helps us keep the lights on. Thanks for your support!”