Sometimes, stock just doesn’t cut it. When you’re sick of the limitations in Sense on your HTC One, a new ROM can be a ray of sunshine. By installing a custom ROM, you can add or unlock new features in Sense, or you can get a pure Android experience instead. It’s all up to you.
Though installing a custom ROM is fairly easy, it’s intimidating if you’ve never done it before, even if it’s just a ROM based off of AOSP (Android Open Source Project), which is the pure vanilla version of Android before carriers get a chance to muck it up. However, installing new ROMs is also a staple in the softModder handbook, so let’s get to it.
XDA is full of developers who tailor their ROMs specifically to the HTC One. For the most part, all they require is for you to have an unlocked bootloader and custom recovery to install them, so most of you already fit the bill.
Step 1: Prep Your HTC One
Before you get a custom ROM, make sure your HTC One is ready for it.
- Root, unlock your bootloader, and have a custom recovery installed on your HTC One. You can find instructions for doing so right here for the HTC One M7 and HTC One M8.
- Back up all of your app data, since this will wipe almost everything on your device—it will not wipe your internal storage, so your music and pictures will remain intact.
Step 2: Pick the ROM That’s Right for You
Going into XDA’s ROM section is like being a kid in a candy store, so take your time and find the one that is right for you. Once you have made your choice, download it make sure to to grab a GApps package if needed.
GApps, or Google Apps, are the stock Google apps that come preinstalled on most devices and make up the “Google Experience” (think Chrome, Gmail, and Google Play Store). Generally, you will only need GApps if you download a non-Sense based ROM.
For this how-to, I will be flashing the AICP Team‘s ROM, called AICP, or Android Ice Cold Project, which combines many of the features that softModders have come to enjoy from AOKP, ParanoidAndroid, OMNI, and of course, CyanogenMod—all into one.

Because this is an AOSP-based ROM, I will also need a GApps package to accompany it, and you will too if this is your choice. The full GApps package for AICP can be found here.
Step 3: Download Your ROM
After picking the ROM that fits all of your needs, download it (and possibly a GApps package) directly onto your HTC One.

GApps packages are just about always listed with the ROM in its thread, but if you’re having trouble locating the right one, let us know in the comments and we’ll point you in the right direction.
You can also download these files to your PC and transfer them over, which is the recommended method if you are not on WiFi and cannot get a reliable data signal on your device (i.e. 3G).
Step 4: Prepare Your HTC One
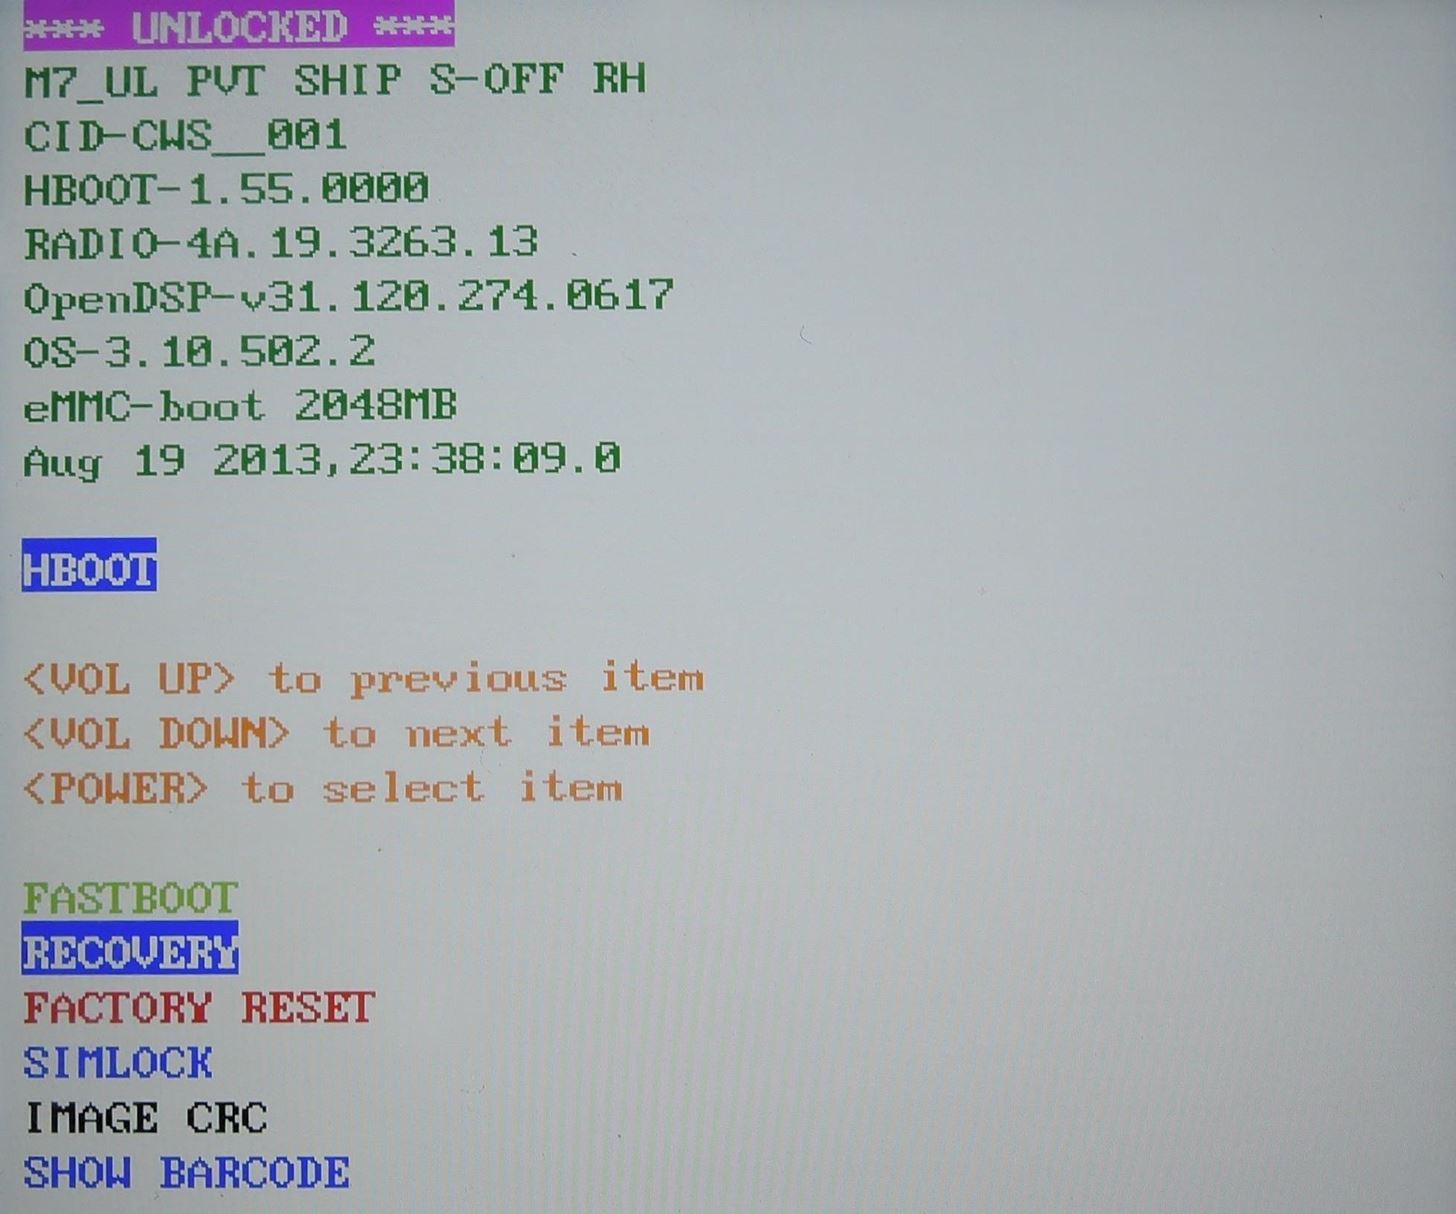
With the ROM and GApps downloaded, place your phone into Recovery mode by pressing and holding the Power and Volume Down button for about ten seconds. When you see the white bootloader menu, select Recovery by pressing the Power button—I’ll be using TWRP for this tutorial.

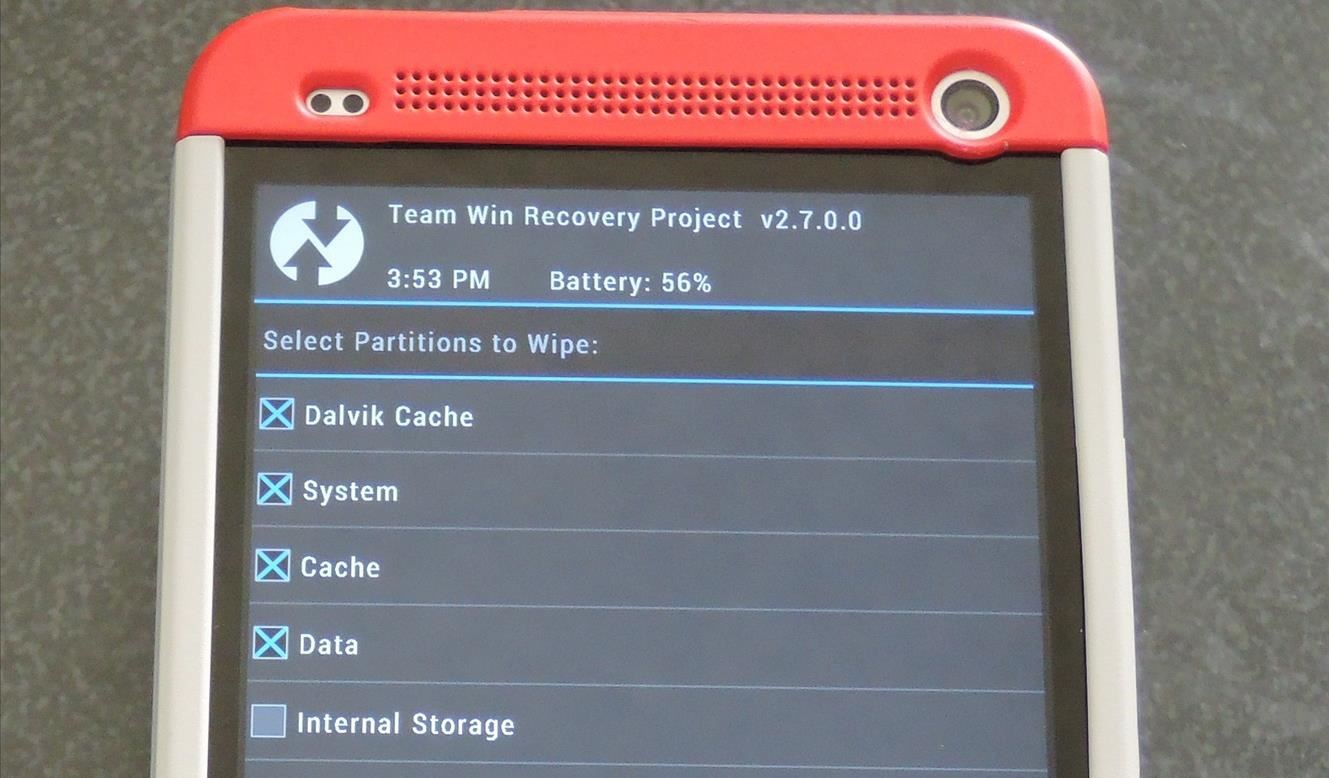
Before flashing the ROM, you’re going to need to Wipe the old one off your phone. To do that, select Wipe from the TWRP menu, then select the Advanced Wipe option. Make sure that Dalvik Cache, System, Cache, and Data are all checked, then Swipe to Wipe.

Step 5: Flash the ROM
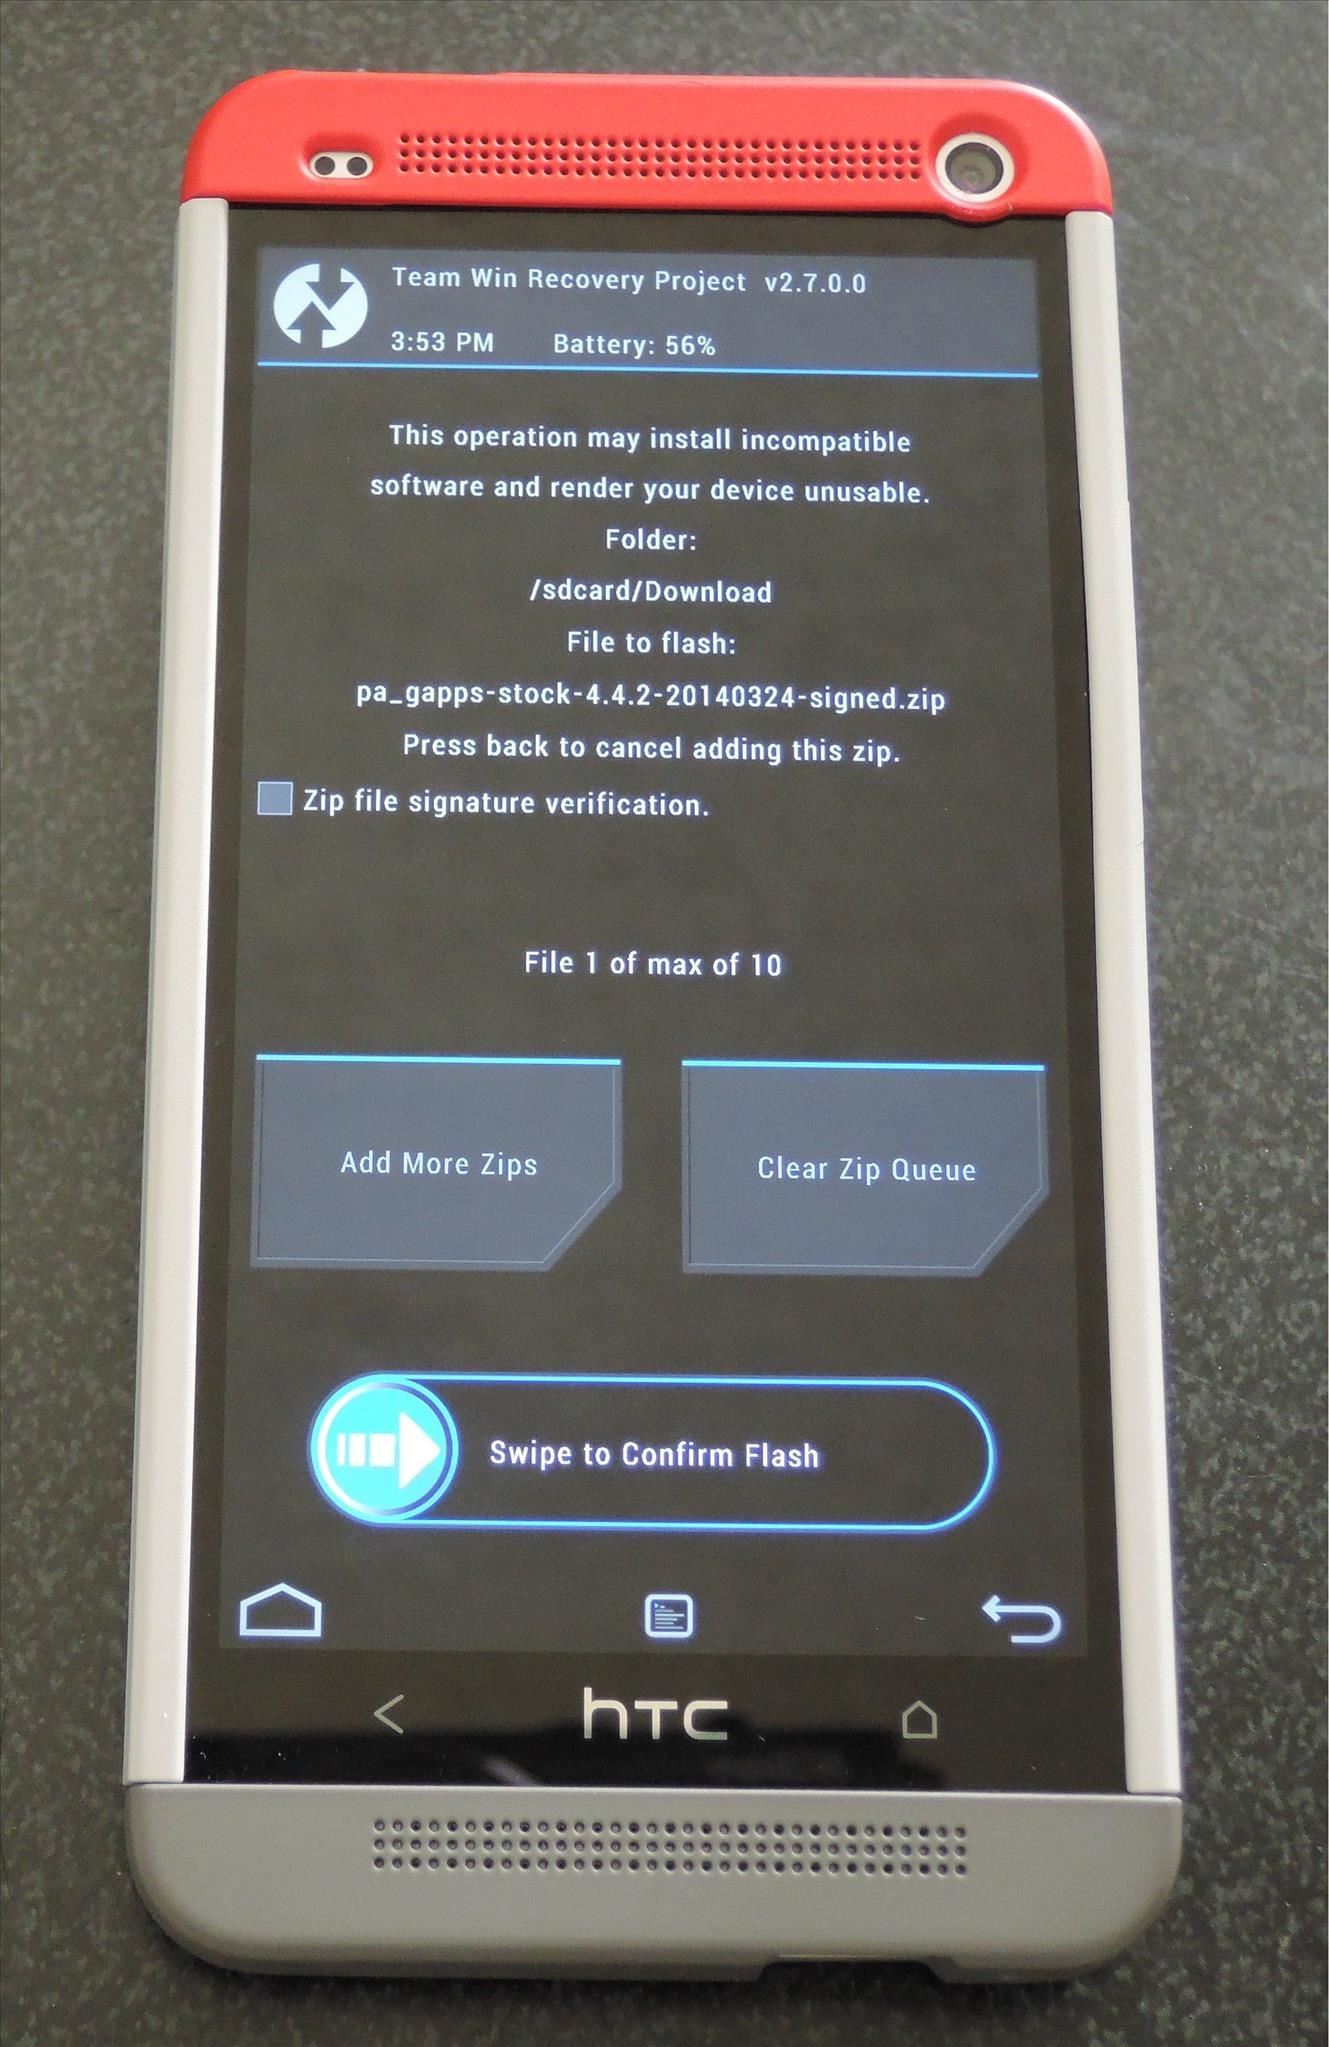
Now that your One is free of the old ROM, hit the Home button and select Install from the TWRP menu. Select your ROM from the list, then Swipe to Confirm Flash. The file size of your ROM determines how long the flashing process takes, but it normally shouldn’t take more than five minutes.


Step 6: Flash the GApps Package (Optional)
If your new ROM requires a GApps package, you will have to flash that directly after flashing the custom ROM. Hit the Home button once more in TWRP and tap Install, then select the GApps package you downloaded. You can also hit the Add More Zips button and add the GApps package when initially flashing your ROM.
Step 7: Reboot & Explore!
Now, that your ROM and GApps are flashed to your phone, you can tap the Reboot option in TWRP and restart your device. Usually the first boot takes a little longer than normal, but that is expected.
When your device has finished booting, you’ll need to set up for phone like it’s fresh from the factory. Enter your Google credentials, and all your contacts will begin automatically syncing, as well as your apps from Google Play.
What to Do if You’re Stuck on the Boot Screen
If you find that you’re stuck at the bootscreen during the first boot, check the ROM’s XDA thread to see if it requires Super CID. The CID of your device determines which carriers are allowed to utilize it, and by default, your device is tied to a single carrier.
Super CID enables any carrier to be tied to your One, just as long as they are using the same radio frequencies. If you have already S-Offed your M7 or M8, this is a simple fix.
Make sure USB debugging is enabled, plug your phone into your computer and open a command line, then enter these commands to change the CID:
adb reboot bootloader
fastboot oem writecid 11111111
fastboot reboot
Now all you have to do is wipe your device one more time and re-flash the ROM and GApps. After you finish up the initial ROM setup, you’re all set to go!
There are many ROM options out there, so keep flashing to find the one that is right for you (I know I still am). Let us know what ROM you’re running and share your experience with it in the comments!
Just updated your iPhone? You’ll find new emoji, enhanced security, podcast transcripts, Apple Cash virtual numbers, and other useful features. There are even new additions hidden within Safari. Find out what’s new and changed on your iPhone with the iOS 17.4 update.
“Hey there, just a heads-up: We’re part of the Amazon affiliate program, so when you buy through links on our site, we may earn a small commission. But don’t worry, it doesn’t cost you anything extra and helps us keep the lights on. Thanks for your support!”


