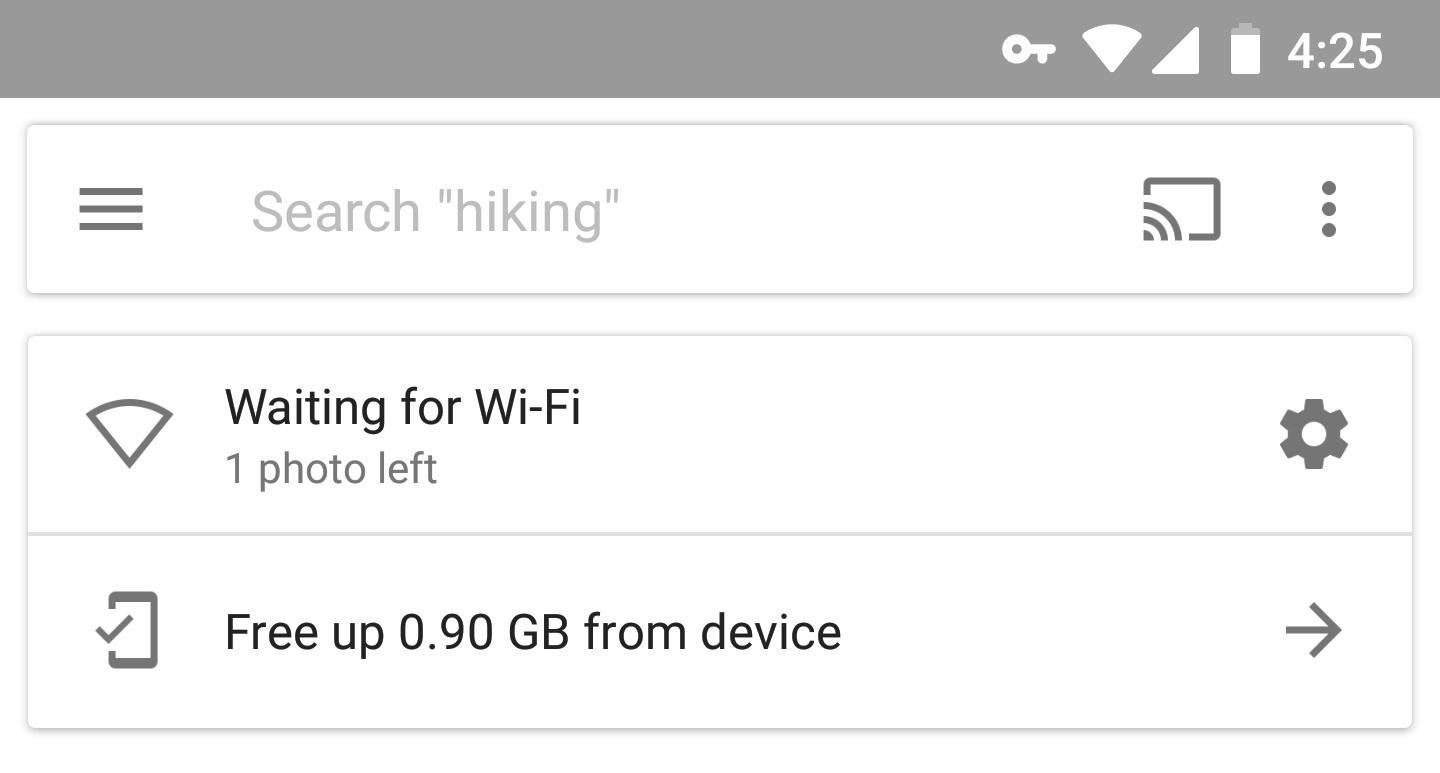
If you’re on a limited data plan, you no doubt set Google Photos to only back up over Wi-Fi on your Android device. In recent months, however, there have been many complaints that Photos won’t actually back up your pictures when you get back home and connect to your network. Thankfully, the fix is fairly simple.
I started noticing this issue sometime around late 2017/early 2018. After being out and about and taking some pictures, I’d get home and connect to Wi-Fi, but Google Photos would have a small “refresh” icon in the top-right corner. When I tapped this icon, it would expand to show that Photos was “Waiting for Wi-Fi” even though I’m clearly connected to Wi-Fi. As it turns out, it was my ad blocker’s fault.

The Problem & Solution
Ultimately, it appears that several common ad blockers now have the Google Photos uploader service blacklisted. This means that your phone can’t connect to Google’s servers to let Photos know that you’re back on Wi-Fi, so the app thinks you’re still on mobile data and refuses to back up your media.
There’s a super-simple solution to this: Disable your ad blocker. But that’s a bitter pill to swallow, so I’ll outline a better method below.
Instead of outright disabling your ad blocker to fix Google Photos, you can simply whitelist Google Photos in most ad blockers to get things back to normal. I’ll outline the process for the most popular ad blockers below, but if yours isn’t listed, a quick and dirty alternative is to simply batch-select the troublesome files in Photos, then press the menu button and select “Back up now” while you’re on Wi-Fi.
Whitelisting Google Photos in Your Ad Blocker
Below are the steps for whitelisting Google Photos in several popular ad blockers. After performing these steps, you may need to force-stop Google Photos or restart your phone before the app will start backing up on Wi-Fi again.
- AdGuard: Go to the side menu, then “Apps Management,” and sort by “All-time.” Select Google Photos, then un-tick the “Enabled” box under General.
- Blokada: Tap “X in whitelist,” hit the + button, search for Google Photos, then hit “Save.”
- DNS66: Head to Apps tab, enable “Show system apps.” Scroll down and disable the switch next to Google Photos.
- NetGuard: Go to menu –> Settings –> Advanced options, enable “Manage system apps.” Tap the down arrow next to Photos in the main list, then disable “Apply rules and conditions” setting.
And that’s all there is to it — Google Photos should be working properly now! If you’re using an ad blocker that isn’t listed here, let me know in the comment section below and I’ll try to find the whitelisting process for that specific app.
Hot Deal: Set up a secure second phone number and keep your real contact details hidden with a yearly subscription to Hushed Private Phone Line for Android/iOS, 83%–91% off. It’s a perfect second-line solution for making calls and sending texts related to work, dating, Craigslist sales, and other scenarios where you wouldn’t want to give out your primary phone number.
“Hey there, just a heads-up: We’re part of the Amazon affiliate program, so when you buy through links on our site, we may earn a small commission. But don’t worry, it doesn’t cost you anything extra and helps us keep the lights on. Thanks for your support!”


