One of the most exciting features in iOS 11 was the fully revamped Control Center, which improved the overall interface visually, made it one page only, and finally made it possible to customize what controls actually appear within it. Customizable controls was previously only available to jailbreakers, but now it’s available to anyone running iOS 11 or iOS 12.
Since its introduction in iOS 7, the Control Center has remained a drab staple on the iPhone and other iOS devices. The only way to fully customize it was through tweaks that were only available if you were lucky enough to catch a stable jailbreak.
Now, any iPhone running iOS 11 or iOS 12 comes with a customizable Control Center by default, something that was long overdue. Better late than never, and it’s one of the many features Apple is using to successfully dissuade many towards the risky proposition of jailbreaking, thus keeping the iOS ecosystem more secure as a whole.
- Don’t Miss: 100+ Coolest New iOS 12 Features You Didn’t Know About
What’s Different in Control Center
The Control Center in iOS 11 and iOS 12 is markedly different from the other versions that came before. On iPhone models with Touch ID, it’s accessed via a swipe up from the bottom of the screen just like before, but on Face ID models, you swipe down from the top-right corner of the screen.
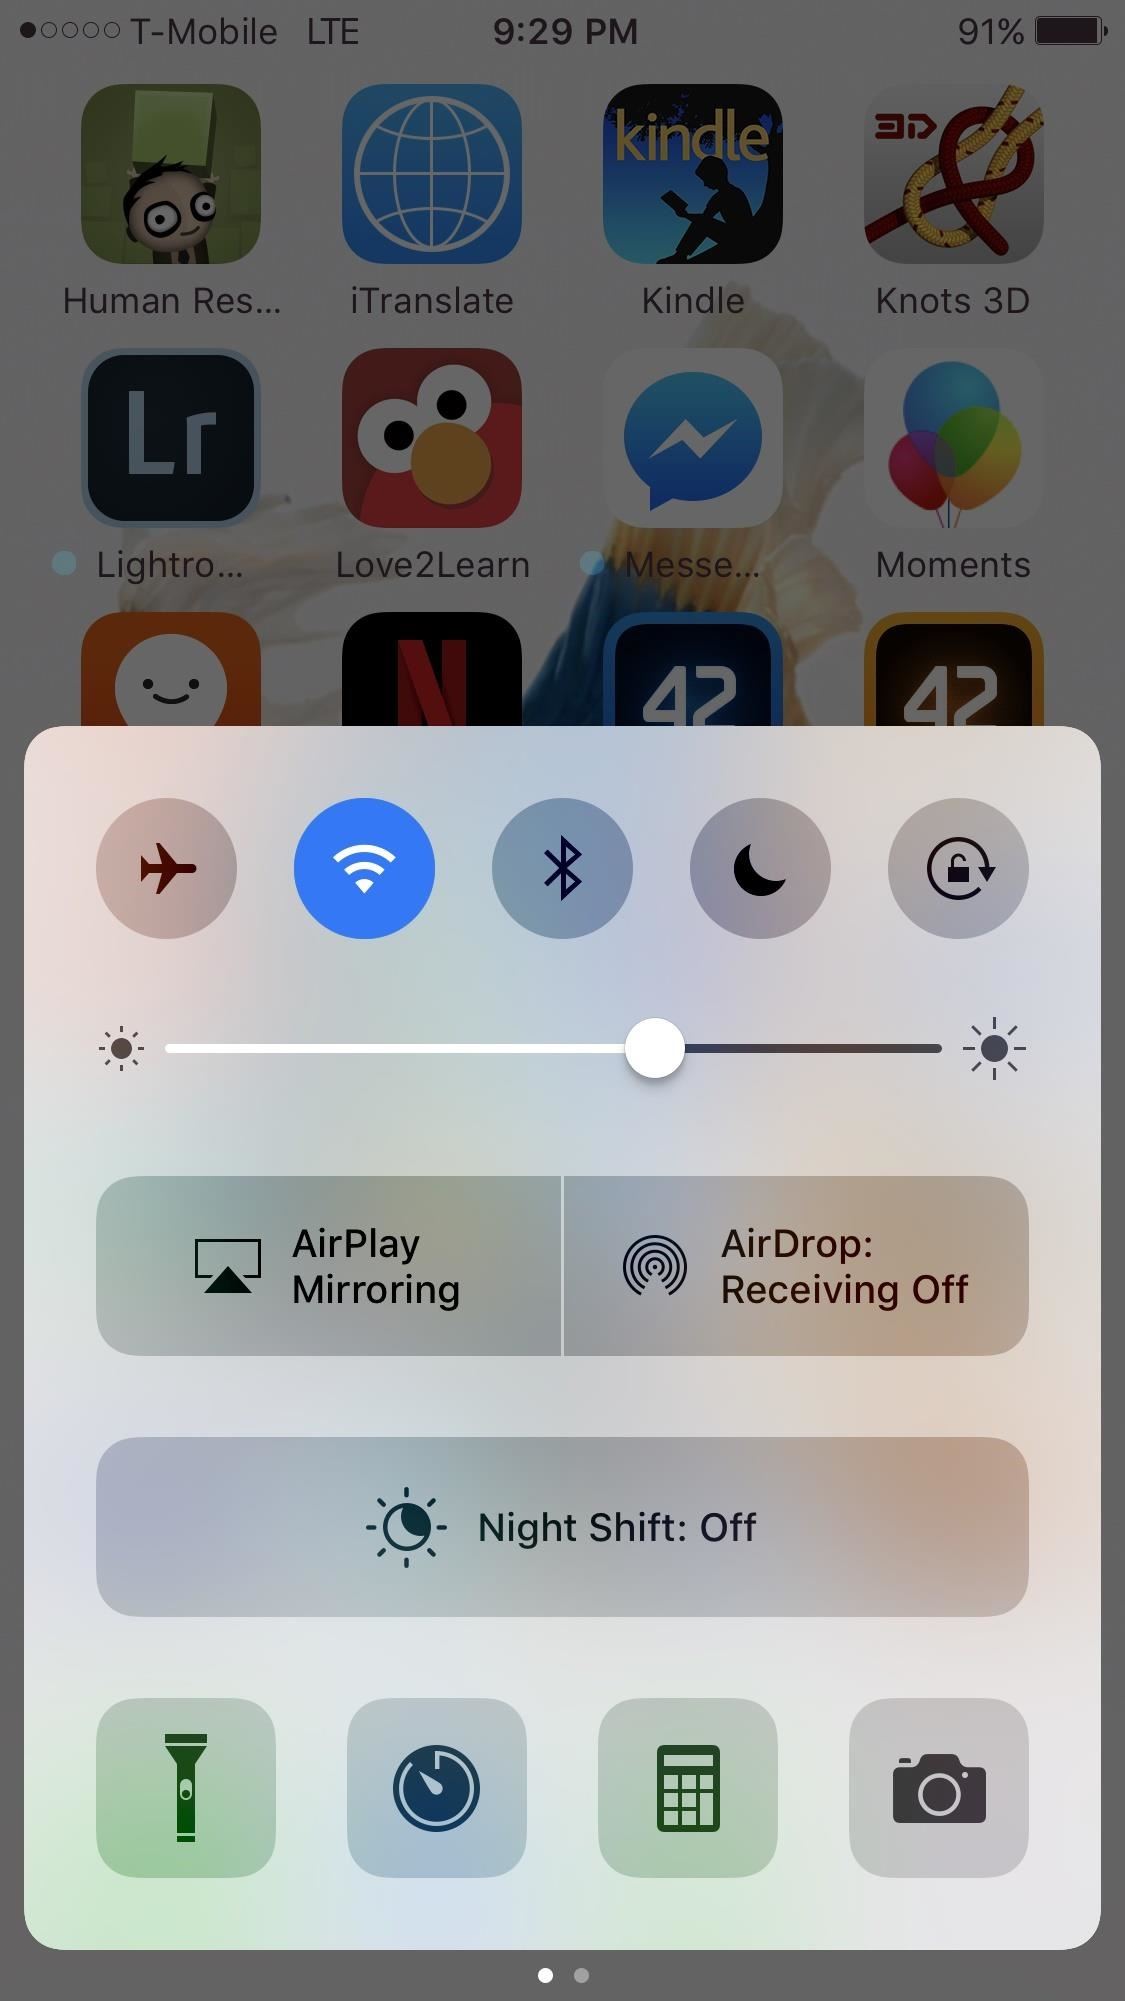
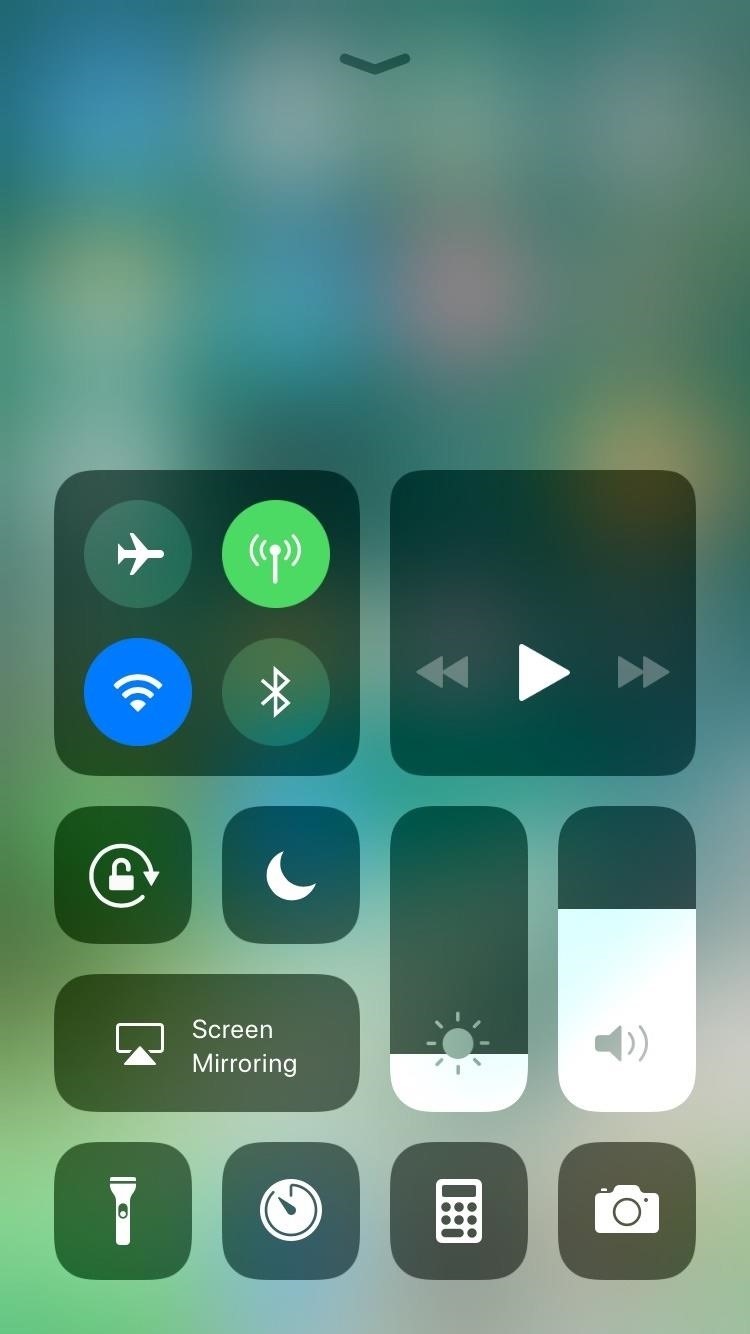
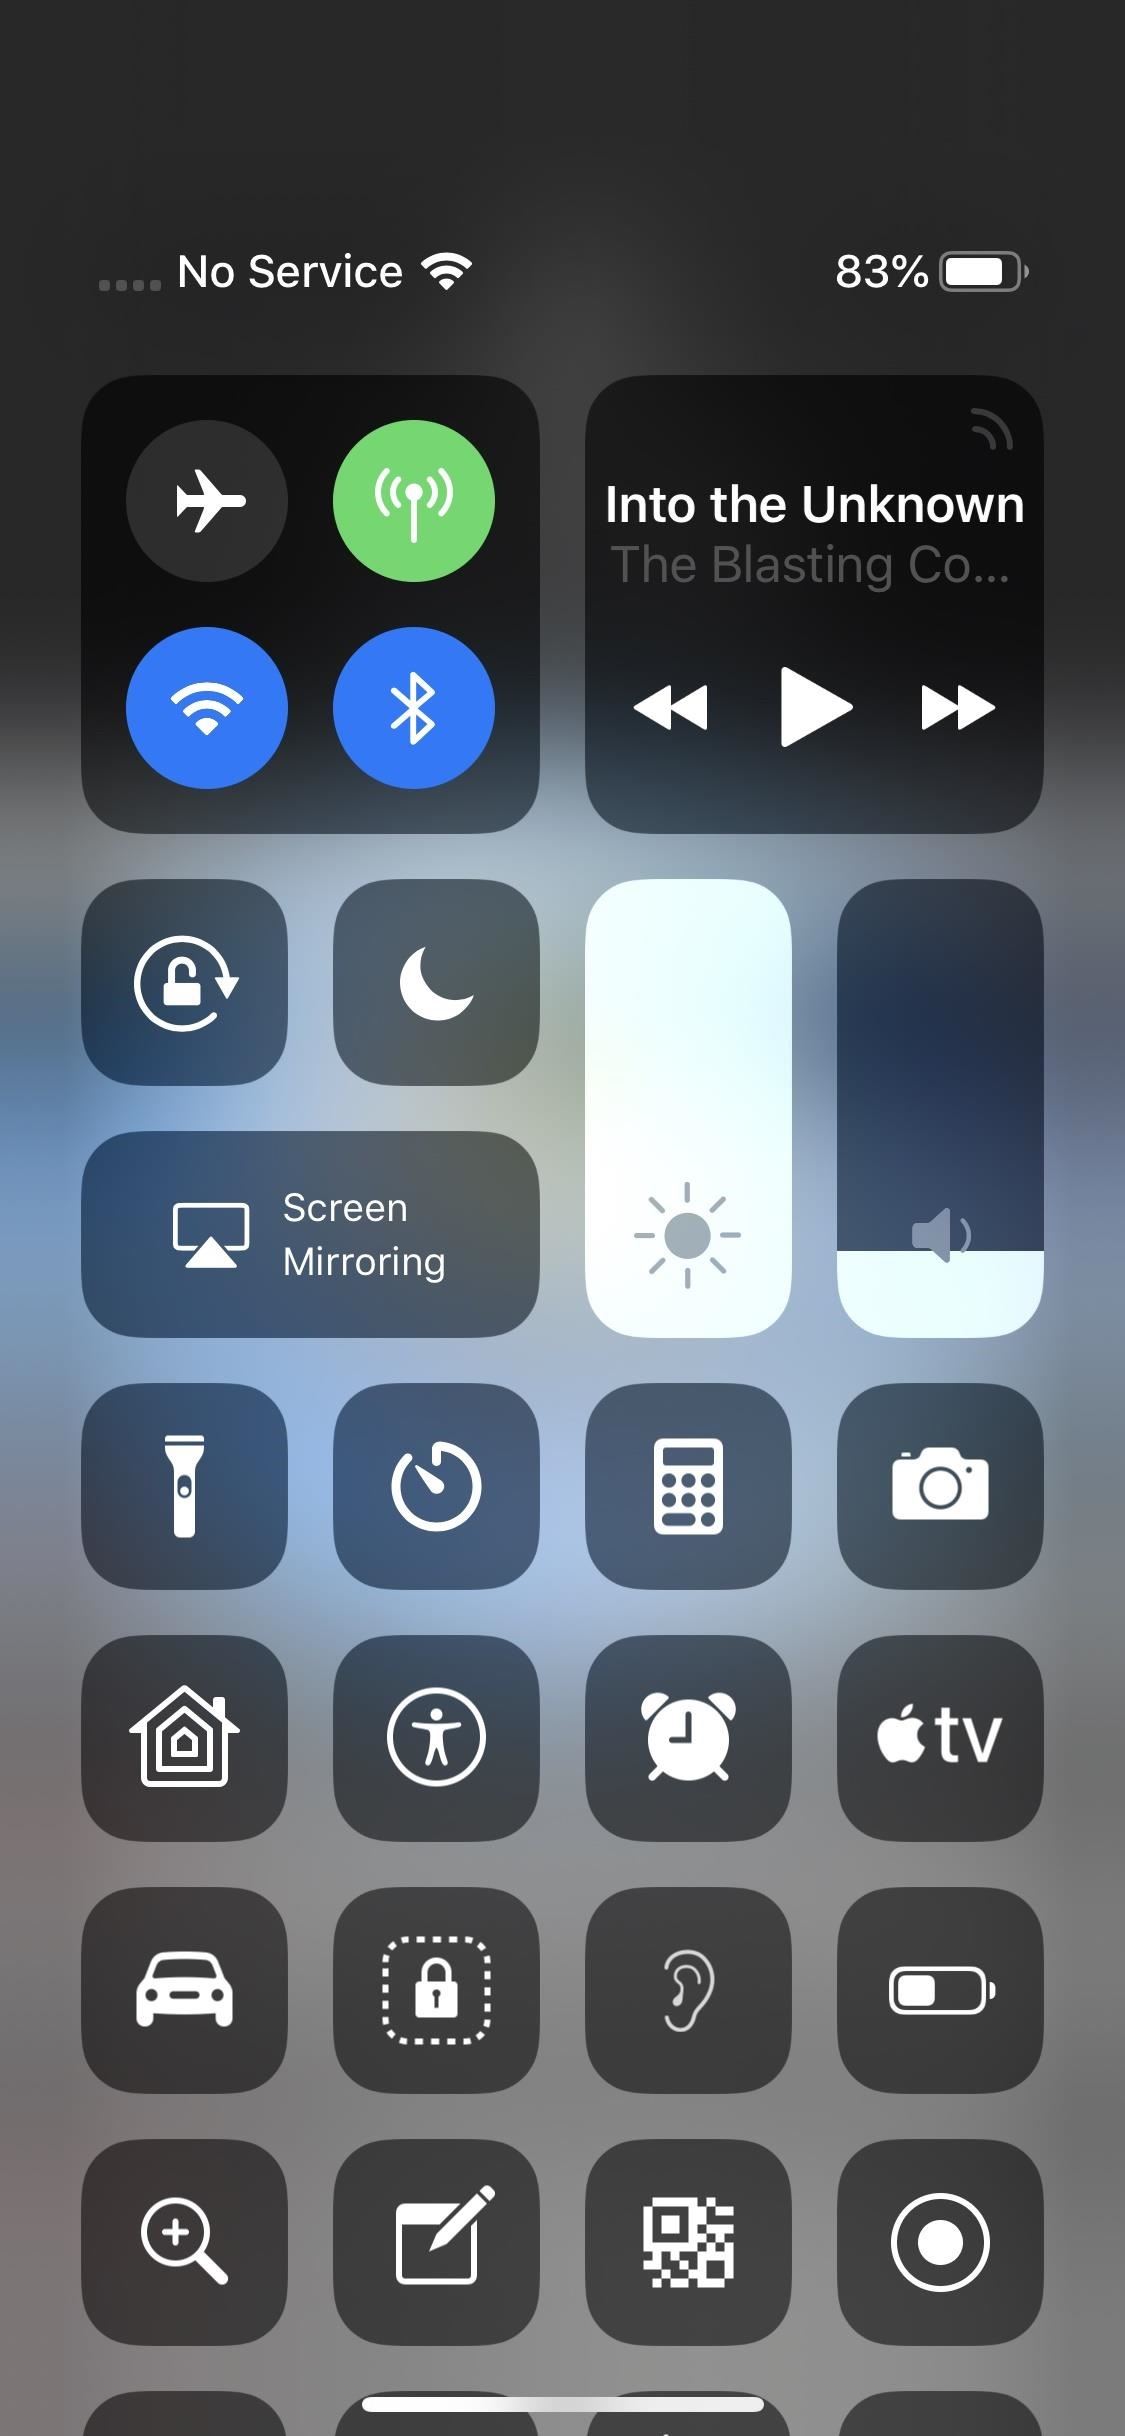
First thing that catches the eye is its overall dark theme and more compartmentalized layout. The second thing you’ll notice is that it’s only one page, which is way less clunky than the two-page Control Center from iOS 10. That means the Music player is now a tile you can long-press or 3D Touch on to expand, versus being on a separate page.
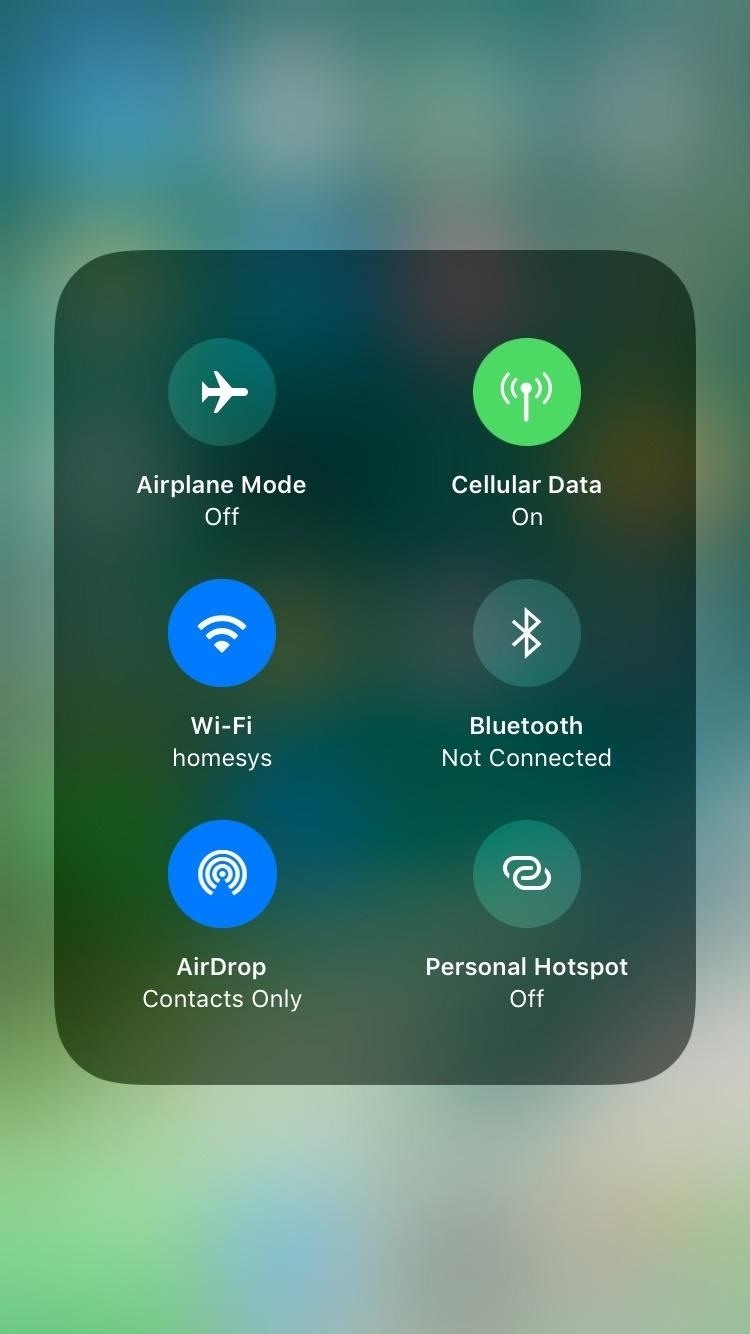
And for the first time, you are now presented with many more custom tiles that let you toggle, adjust, and access a variety of applications that were absent in iOS 10 and lower. The most notable standard additions are the Volume, Cellular Data, and Personal Hotspot, which can now be switched on and off on the fly.
As you can see below, the new Control Center (middle) looks way better overall than the iOS 10 version (left). Doing a long-press or 3D Touch on the upper-left box opens it up to more tiles that you can toggle on and off (right). And yes, you heard that right … long-pressing actually works for non-3D Touch devices.
And it doesn’t end here. You can add more tiles to the bottom of the Control Center to tailor your device to your needs as never before, so let’s go over that next.
Customizing Your Control Center
It’s incredibly easy to add shortcut tiles (or quick setting tiles, to steal from Android) into your iPhone’s Control Center. Simply head over to the Settings page, choose “Control Center,” then “Customize Controls.” From there, you can freely choose which tiles you’d like to add in, then just exit once you’re done.
There are some options you can’t remove or reorganize, though, including Airplane Mode, Cellular Data, Personal Hotspot, Bluetooth, Wi-Fi, AirDrop, AirPlay, Volume, Do Not Disturb, Rotation Lock, and the Music player.
The ones you can add/reorganize include Flashlight, Timer, Calculator, Camera, Home, Accessibility Shortcuts, Alarm, Apple TV Remote, Do Not Disturb While Driving, Guided Access, Hearing, Low Power Mode, Magnifier, Notes, Scan QR Code, Screen Recording, Stopwatch, Text Size, Voice Memos, and Wallet. Hopefully, this list grows to third-party apps one day.
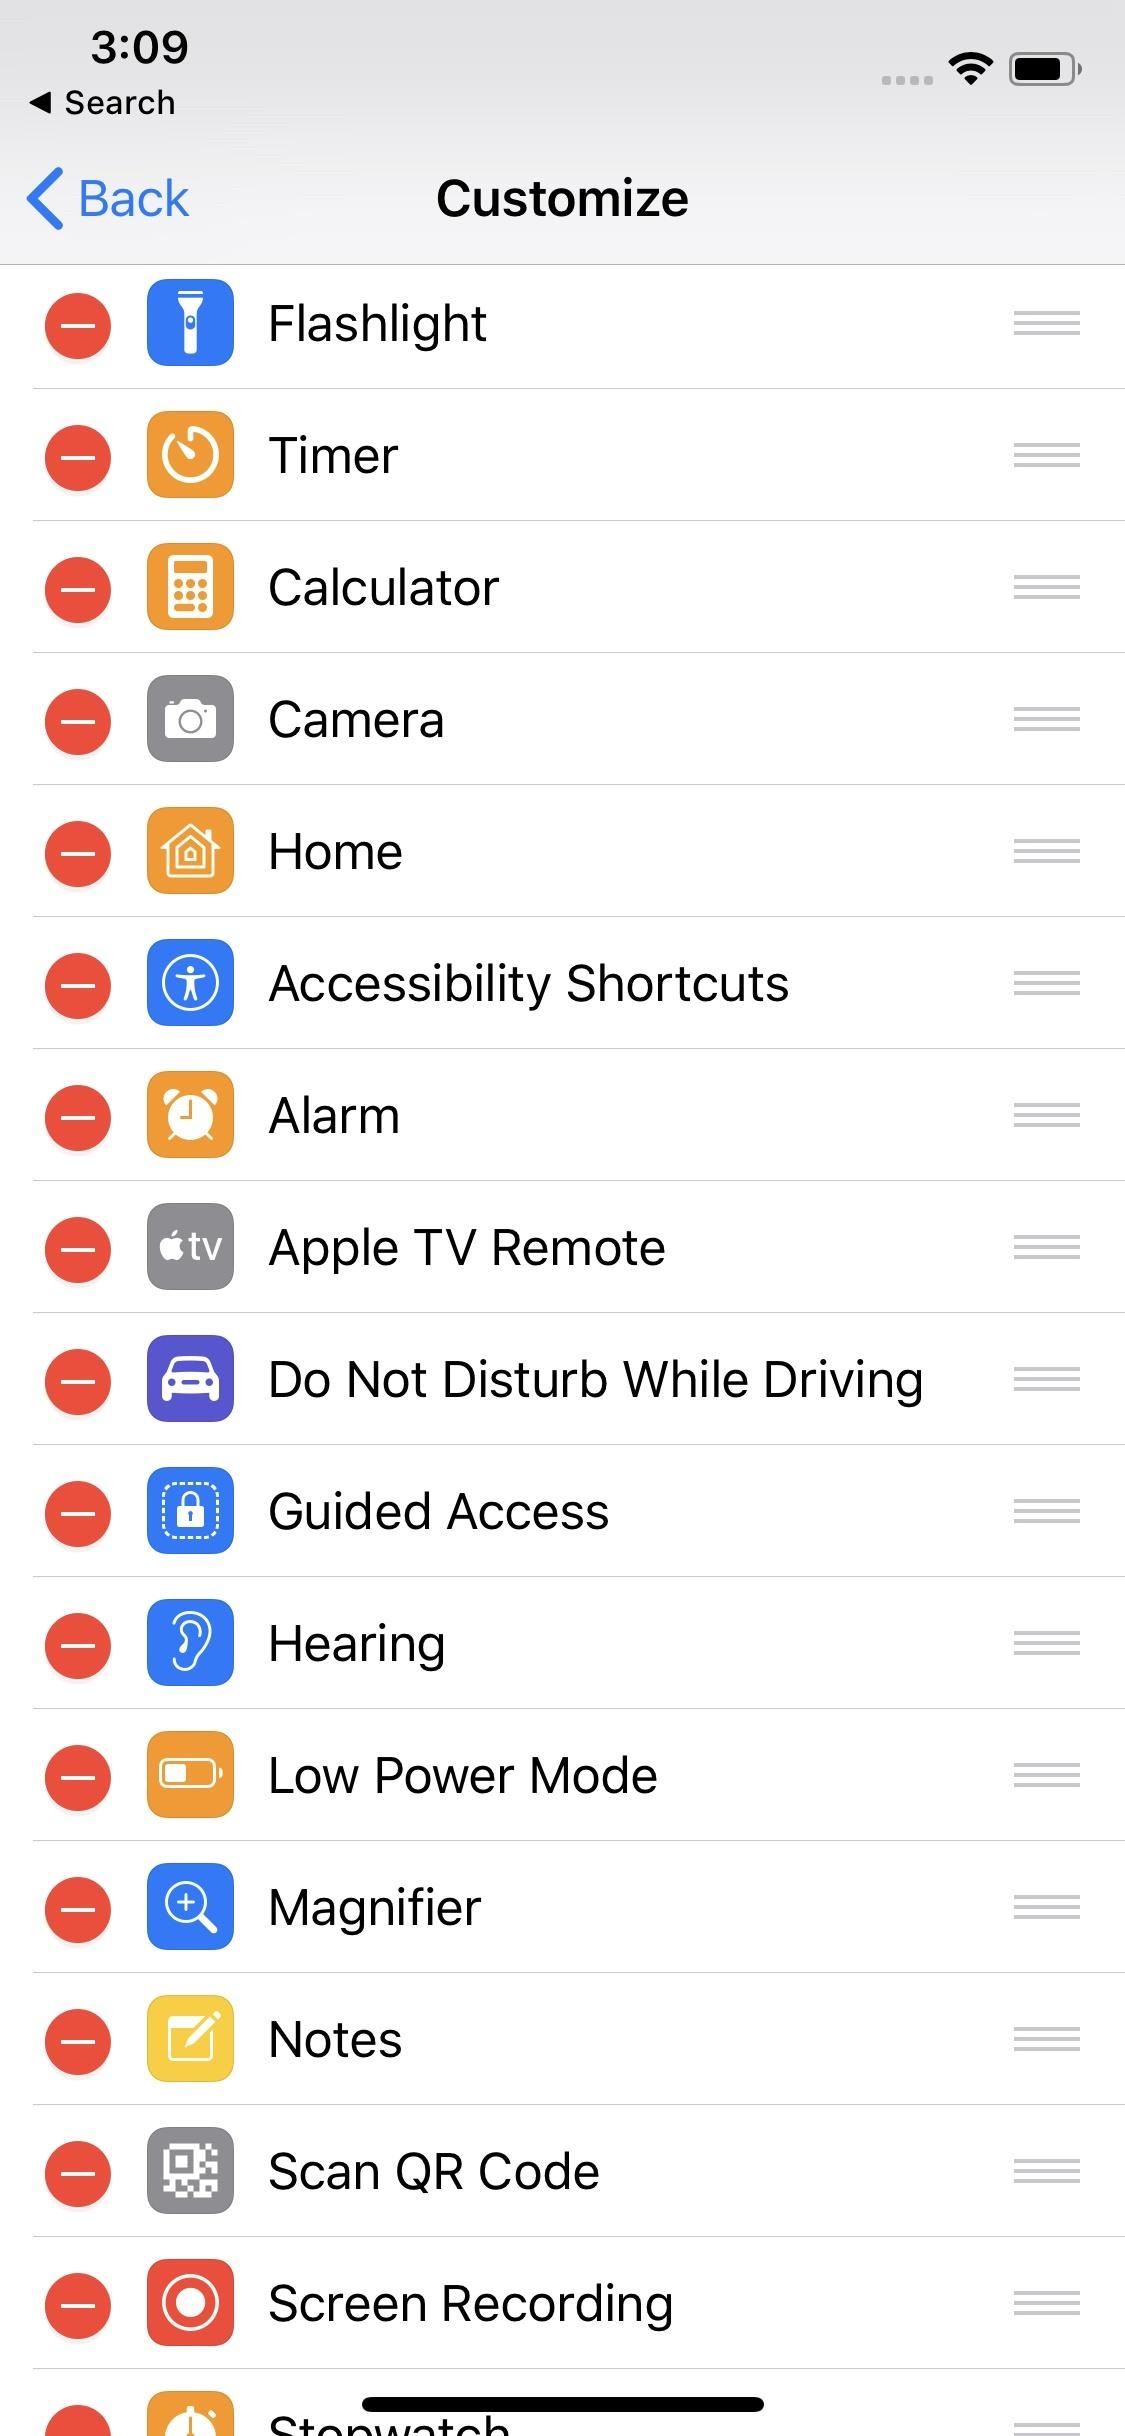
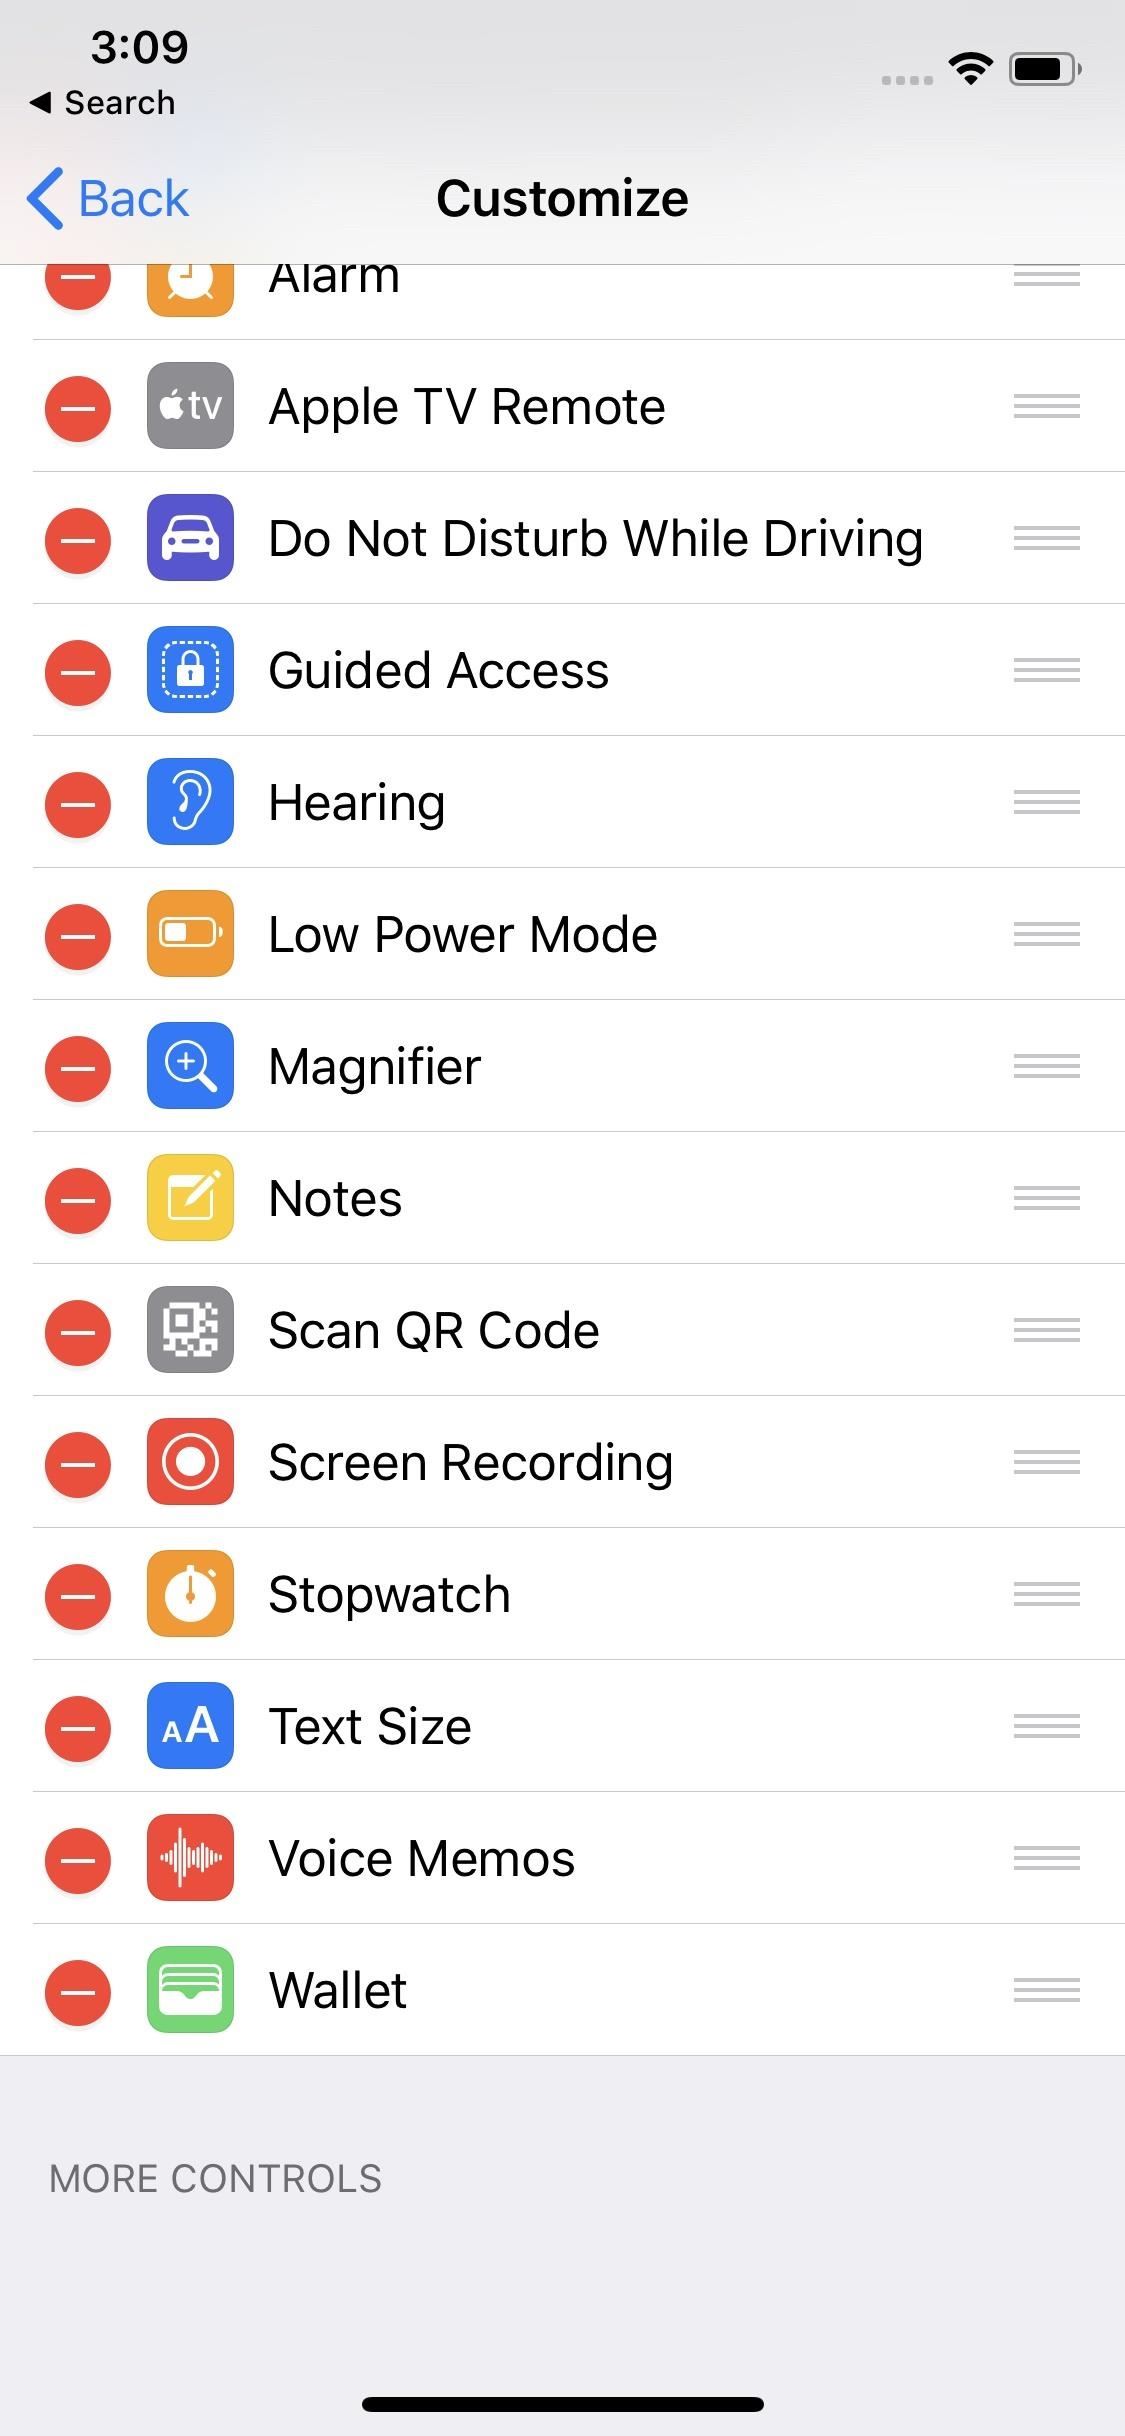
To add controls, just tap the green plus (+) icon next to the control name from the More Controls section. To remove a control, under the Include section, tap the red minus (–) button. To rearrange items in the Include section, tap-and-hold on the three-lined icon next to a control, then move it up or down on the list, then repeat for any other controls you want to move.
Using Quick Actions in the Control Center
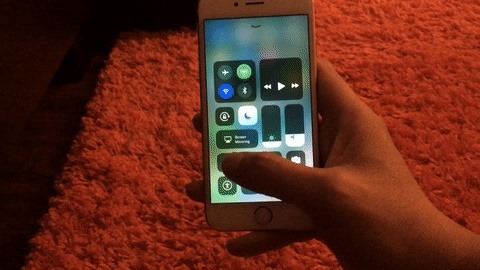
As briefly mentioned before, quick actions are not limited to just 3D Touch-enabled devices. For instance, doing a long-press on the Flashlight tile paves the way for an adjustment bar that in turn lets you fine-tune its brightness.
- Don’t Miss: How to Unlock Apple’s Official ‘Dark Mode’ for iPhone
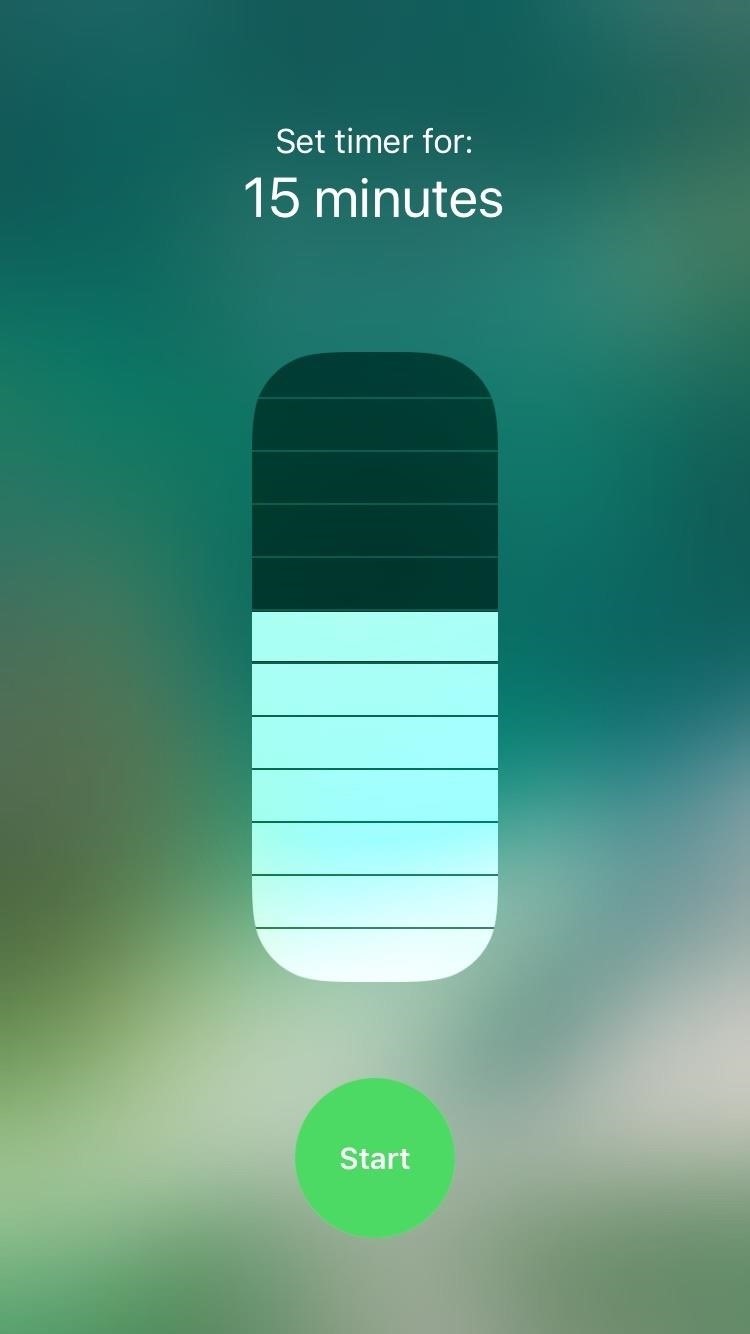
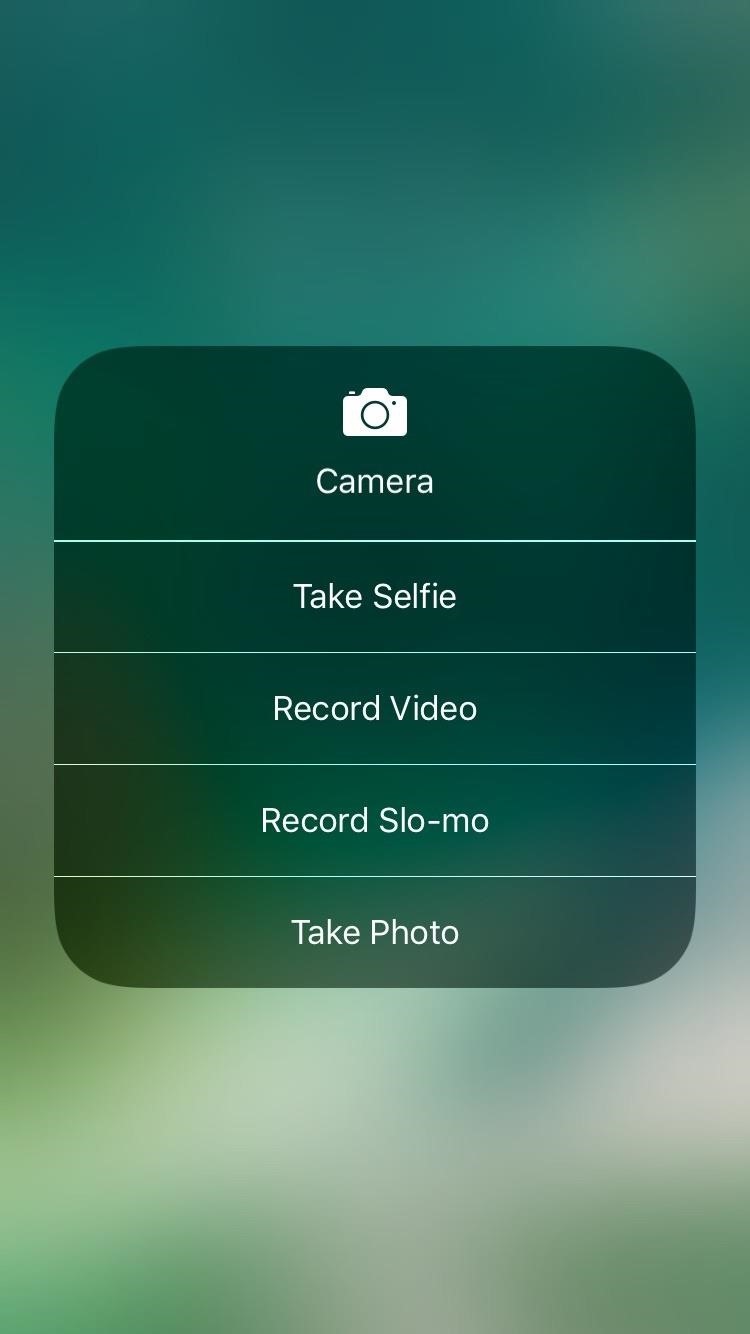
A long-press or 3D Touch on other icons like the Timer and Camera gives you more quick options that you can choose from. For the Timer, examples include adjusting the time limit and quickly starting the timer with a tap of a button. For the Camera, you can choose to open it up in a specific shooting mode and save you from the hassle of scrolling through within the app itself.
And there’s more too, so go ahead and explore. We won’t ruin all the fun for you!
- Follow Gadget Hacks on Pinterest, Reddit, Twitter, YouTube, and Flipboard
- Sign up for Gadget Hacks’ daily newsletter or weekly Android and iOS updates
- Follow WonderHowTo on Facebook, Twitter, Pinterest, and Flipboard
Just updated your iPhone? You’ll find new emoji, enhanced security, podcast transcripts, Apple Cash virtual numbers, and other useful features. There are even new additions hidden within Safari. Find out what’s new and changed on your iPhone with the iOS 17.4 update.
“Hey there, just a heads-up: We’re part of the Amazon affiliate program, so when you buy through links on our site, we may earn a small commission. But don’t worry, it doesn’t cost you anything extra and helps us keep the lights on. Thanks for your support!”


