The release of iOS version 8.1.1 brought some much needed bug fixes to Apple’s mobile operating system, but with it came a patch for Pangu’s jailbreak method, which worked on iOS 8.0 to iOS 8.1 using a Mac or Windows computer. Luckily, it didn’t take very long for a new team of developers to come up with a method for jailbreaking iOS 8.1.1 devices, and much like its predecessor, the process is a cinch.
- Don’t Miss: How to Jailbreak iOS 8.0-8.4 (& Install Cydia)
Jailbreaking with TaiG
The new tool is brought to us by the TaiG team, and works for any iOS device running versions 8.0 to 8.1.1. So while you can continue to utilize Pangu up to version 8.1 (scroll down below the TaiG guide for the Pangu how-to), this new tool works for iOS 8.1.1, as well as all older iOS 8 versions.
How to Jailbreak iOS 8.0 to iOS 8.1.1 with TaiG
The TaiG tool, while stable in its third iteration, has a couple of drawbacks. The first isn’t a huge deal: the program and its host site haven’t been translated from Chinese, so navigation can be a little tricky, but that’s what we’re here for.
The second is a bigger deal: the tool is currently only available for Windows computers. It’s conceivable that a Mac version, or an independent port, will be released in the near future, and we’ll have that update for you when it’s here. However, for the time being, if you use a Mac, find a friend with a PC and borrow it for 10 minutes.
Step 1: Download TaiG
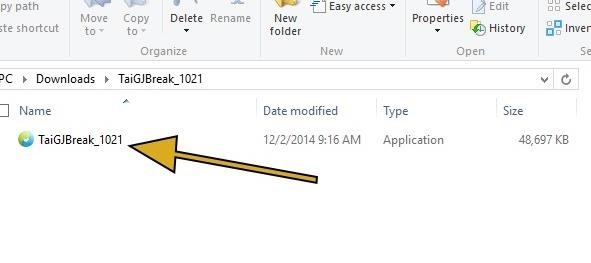
With that out of the way, download the TaiG app from here, then extract the ZIP to reveal a single TaiG executable file.
Step 2: Prep Your iPad, iPhone, or iPod Touch
TaiG is compatible with the following devices:
- iPad (2, 3, 4, Air, Air 2, Mini, Mini 2, Mini 3)
- iPhone (4s, 5, 5c, 5s, 6, and 6 Plus)
- iPod touch (5th gen)
No matter which device(s) you’re using, make sure to have a current backup in iTunes, and be sure to turn off any passcodes or Touch ID security, as well as disabling Find My iPhone.
Also, for the smoothest experience, you should restore your device to iOS 8.1.1 via iTunes. This isn’t a necessary step, but if the jailbreak doesn’t take for whatever reason, restoring via iTunes and running TaiG again will fix any issues.
Step 3: Perform the Jailbreak
With your device prepped and the TaiG software on your Windows PC, it’s time to jailbreak! Run the TaiG program (don’t mind the Chinese) and uncheck the second box, which installs TaiG’s own app store platform.
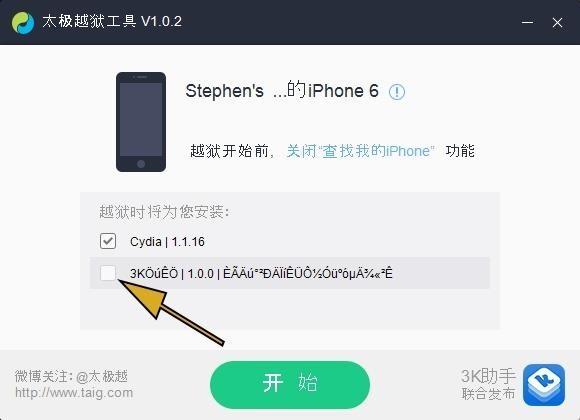
Now just hit the green button—the process takes at most 5 minutes, and you’ll see a progress indicator to let you know that things are moving along accordingly.
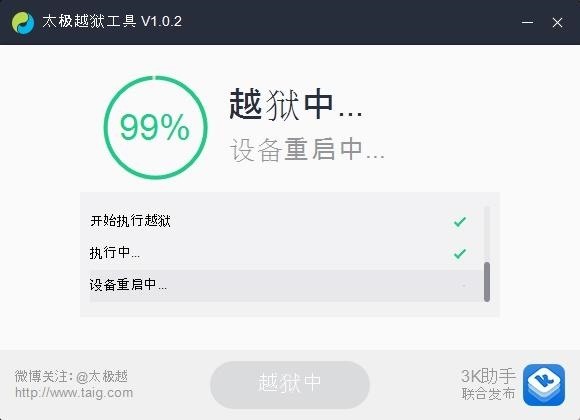
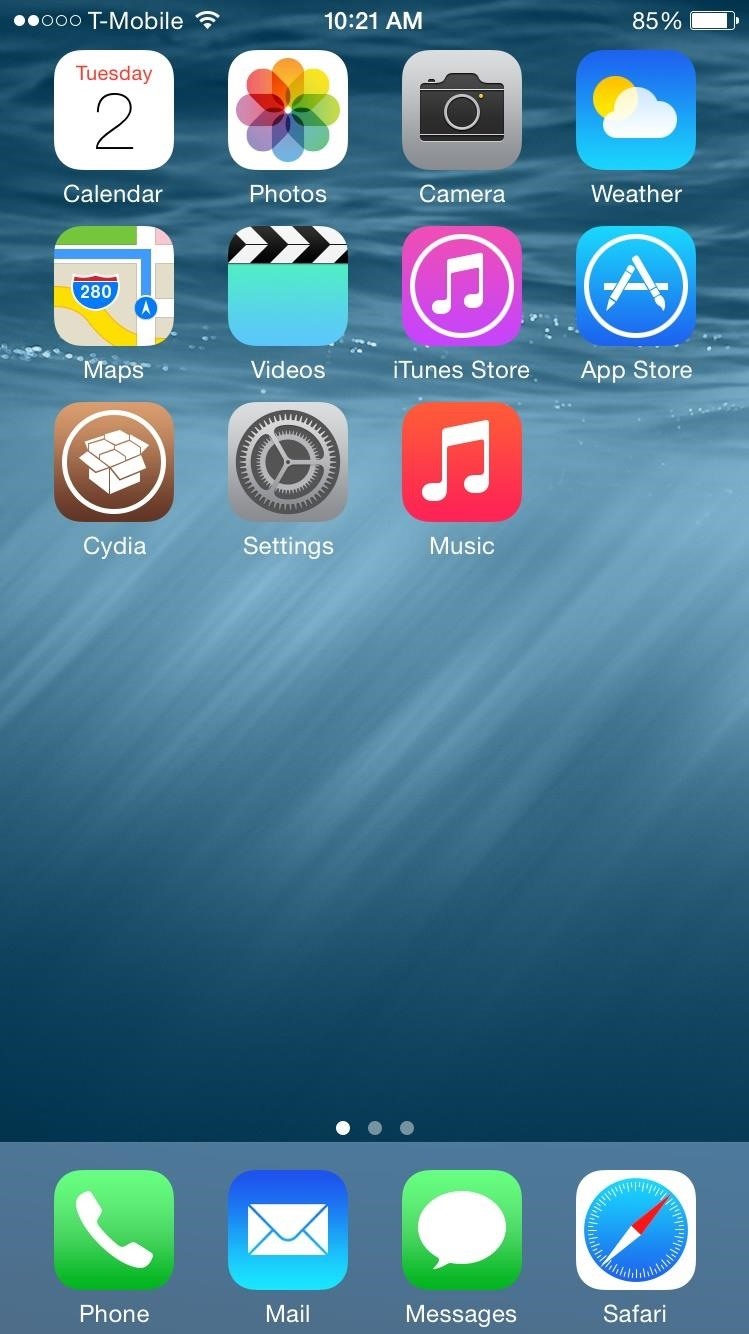
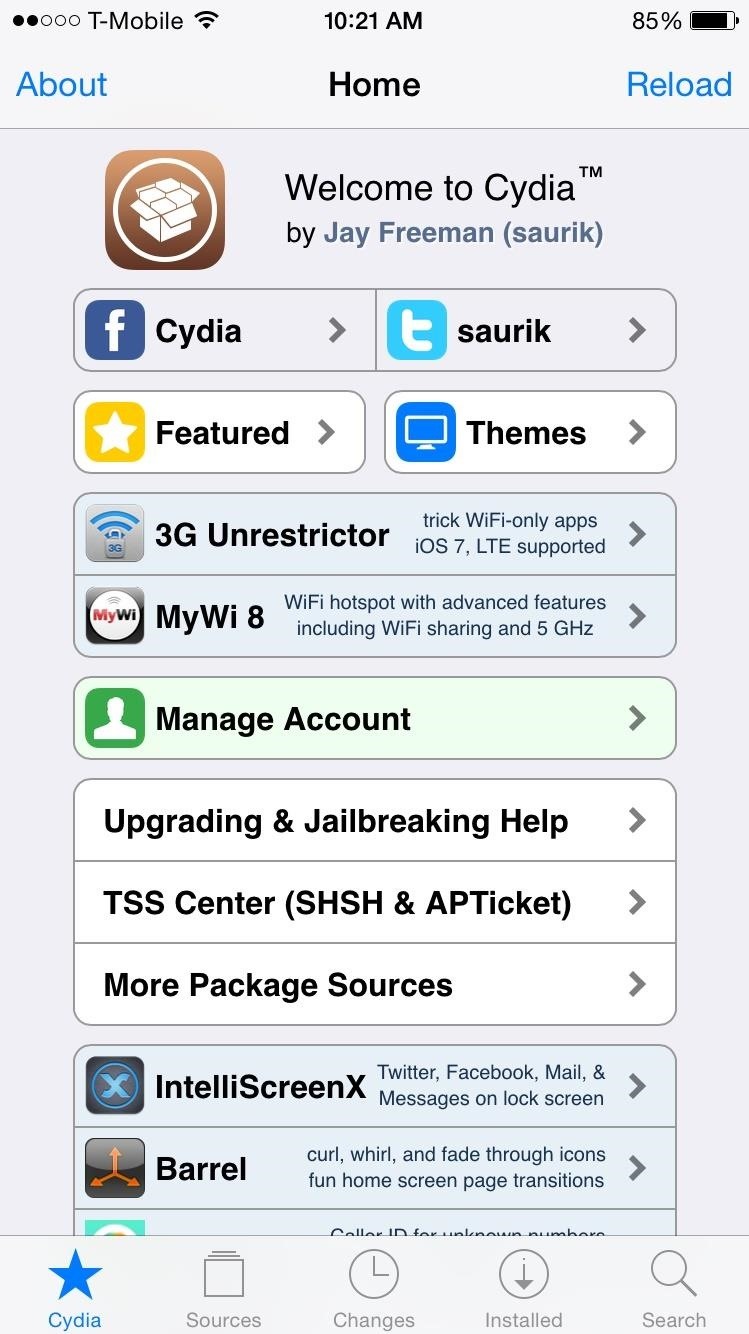
When the process has completed, your iOS device will restart, and you’ll see Cydia on your home screen; open it up and let the filesystem install itself. Afterwards, your device will reboot and then you are done!
If you have not updated to iOS 8.1.1 and only have access to a Mac, you can use the process outlined below to jailbreak with Pangu.
Jailbreaking with Pangu
You may recall that Pangu was the software behind the iOS 7.1.X jailbreak, a program that took months to flesh out. Now they’re back, less than a month after the release of iOS 8, with a similarly easy method.
Be aware that jailbreaking by itself won’t do you much good—you’ll also need to install Cydia on your iPad, iPhone, or iPod touch. On the first version of Pangu, you needed to install Cydia separately, but newer versions do it for you.
How to Jailbreak iOS 8.0 – iOS 8.1 with Pangu
The latest version of Pangu (1.2.1 for Windows and 1.0.0 for Mac) now installs Cydia automatically, so all you have to do is run the Windows app and go! That means you can skip the Cydia installation steps below after the Pangu part, cause you’ll already have it.
- Pangu version 1.2.1 (Windows)
- Pangu version 1.0.0 (Mac)
NOTE: This will not work on iOS 8.1.1, as Apple has patched the jailbreak exploit that Pangu used. If you update to iOS 8.1.1, you will lose jailbreak. To maintain jailbreak, make sure to stay on iOS 8.1 or lower.
The above video outlines the full process using Windows.
Step 1: Get Your Device & Computer Ready
You should also have a current backup of your device, just in case, and disable any lock screen security as well as the “Find my iPhone” feature in the iCloud settings. Finally, make sure that you have iTunes (version 12.0.1 or higher) installed on your PC.
Step 2: Download Pangu for iOS 8
Once you’ve got the prerequisites out of the way, simply download the Pangu software for your specific operating system below.
- Pangu version 1.2.1 (Windows)
- Pangu version 1.0.0 (Mac)
We’re going to use the Windows version for our instructions below.
Step 3: Open Pangu as Administrator
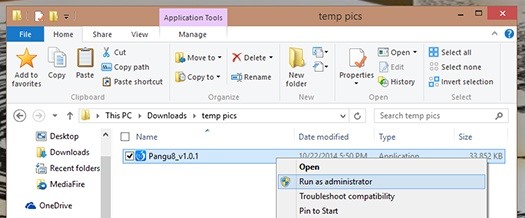
Once you’ve downloaded the file, right-click on it and select “Run as administrator” to launch the app. Once it’s open, go ahead and plug in your iPhone.
Step 4: Run Pangu to Jailbreak
You’ll notice a lot of gibberish and what looks like Chinese characters—luckily, you won’t need to decipher or translate anything here. Simply remove the checkmark from the only checkbox (with the “PP” in it) and hit the big blue button.
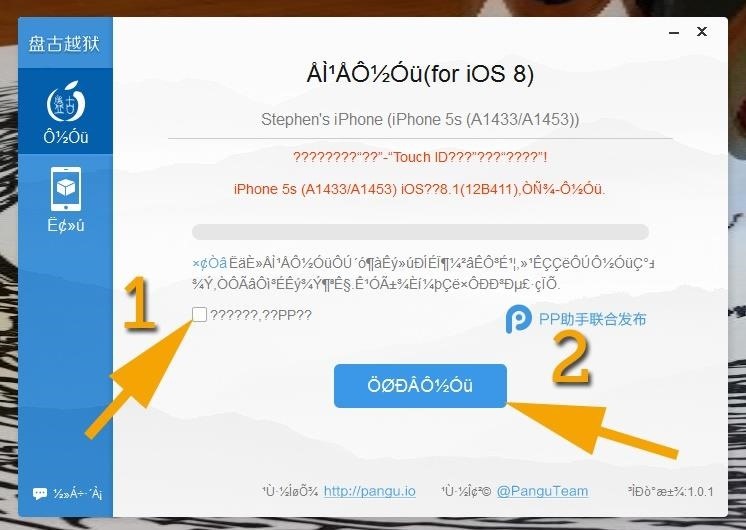
The process will take a few minutes and your device will reboot a couple of times. When it’s done, you’ll need to go through the setup steps again on your iOS device, and once you’re on the home screen, verify jailbreak by locating the Pangu app. If you see it, you’re jailbroken.
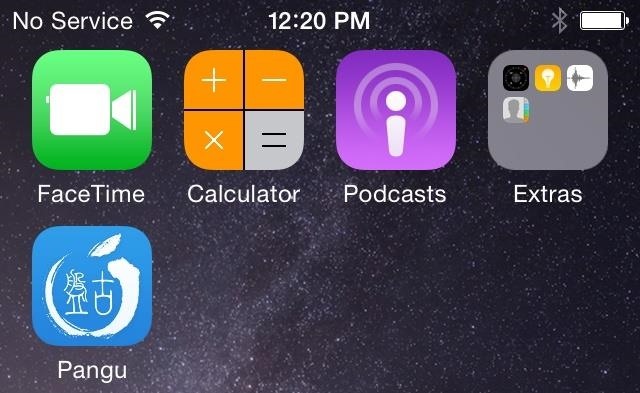
Cydia should be installed by default, but on older versions of the Pangu software, you had to do it separately, and we’ll cover that now. If you have Cydia already, you can skip the section below—you’re done.
How to Install Cydia (For Older Versions of Pangu Only)
As of Pangu 1.1, Cydia is installed automatically, so you do not need to do this process. If you used an older version for some reason, this is how you’d get Cydia on your freshly jailbroken iPad, iPhone, or iPod touch.
Step 1: Download the Necessary Apps & Files
Prep by downloading the two Cydia files you’ll need and placing them in an easy-to-access directory. While you must jailbreak on a Windows PC, you can use Windows or Mac to install Cydia.
You’ll also need an SFTP client. For Windows, I’d suggest WinSCP (the program I’m using for this tutorial), and for Mac, I’d suggest Cyberduck. Install the app once downloaded.
Lastly, ensure that your iPhone and computer are on the same Wi-Fi network, then head to Settings -> Wi-Fi and hit the “i” button next to the network. From here, simply jot down the IP address.
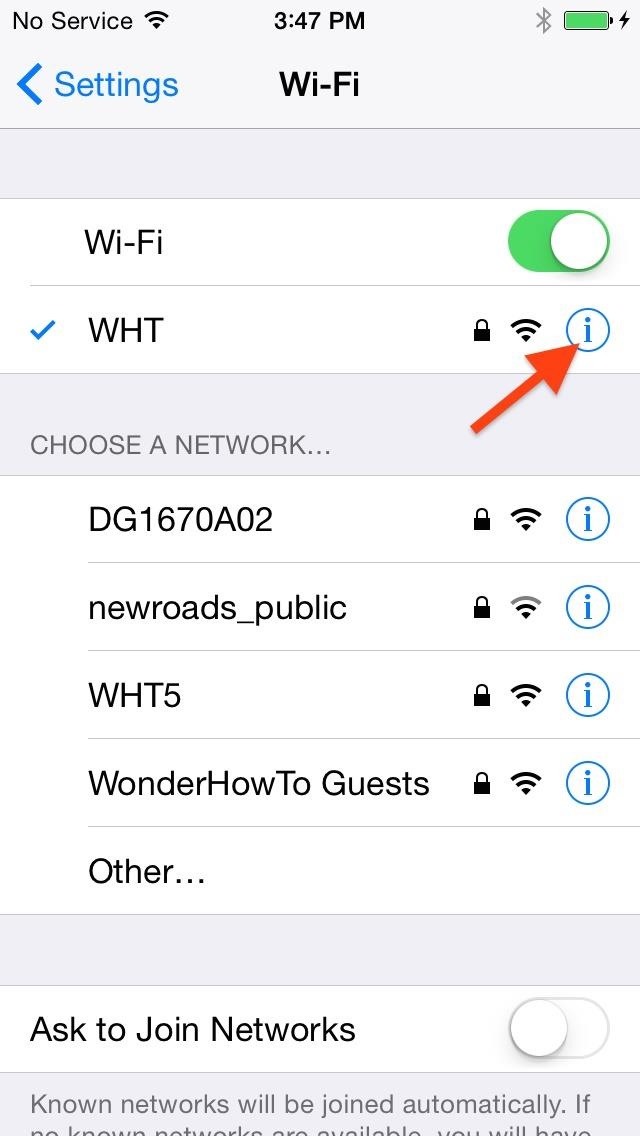
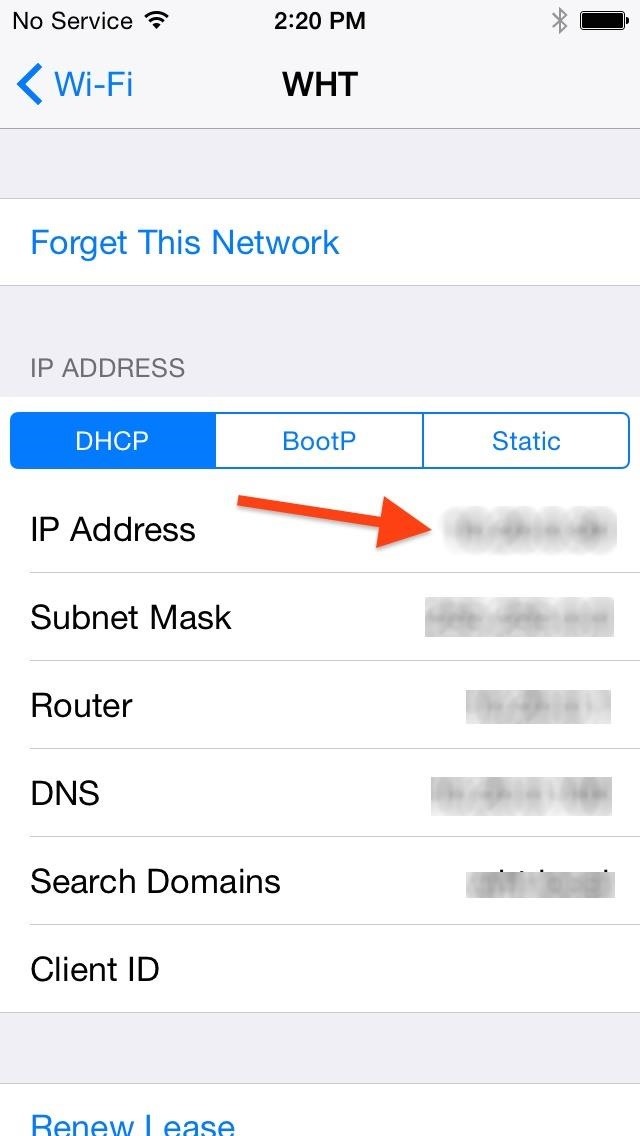
Step 2: Install OpenSSH on Your iOS 8 Device
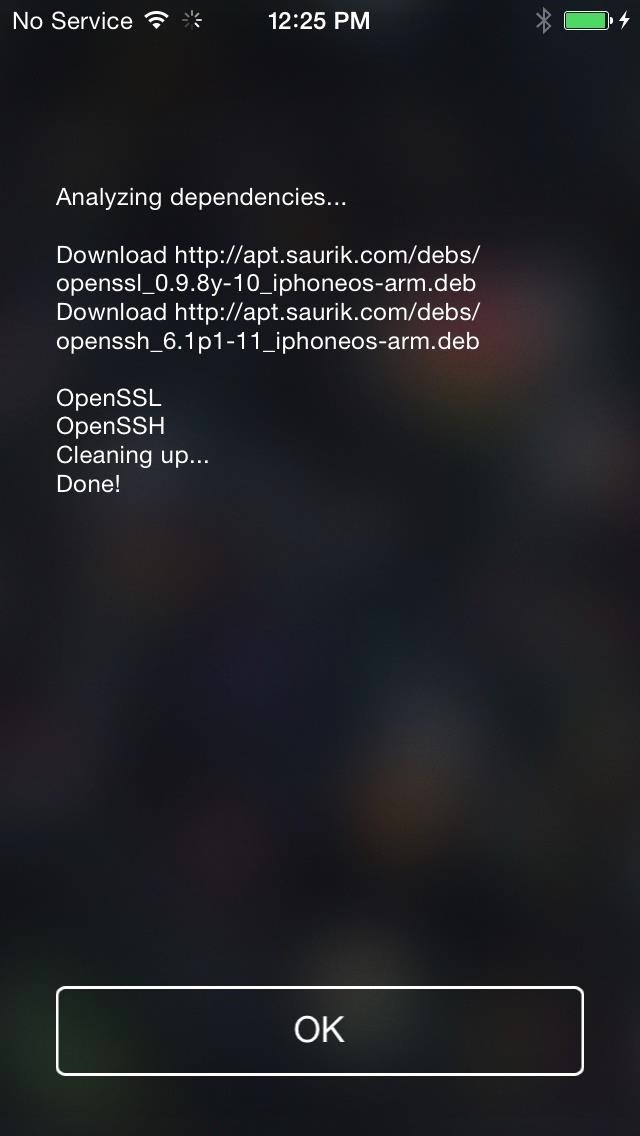
Open the Pangu app and select OpenSSH, then hit the “Install” option on the top right. Let the app do its thing, then hit “OK” when you see the “Done!” message.
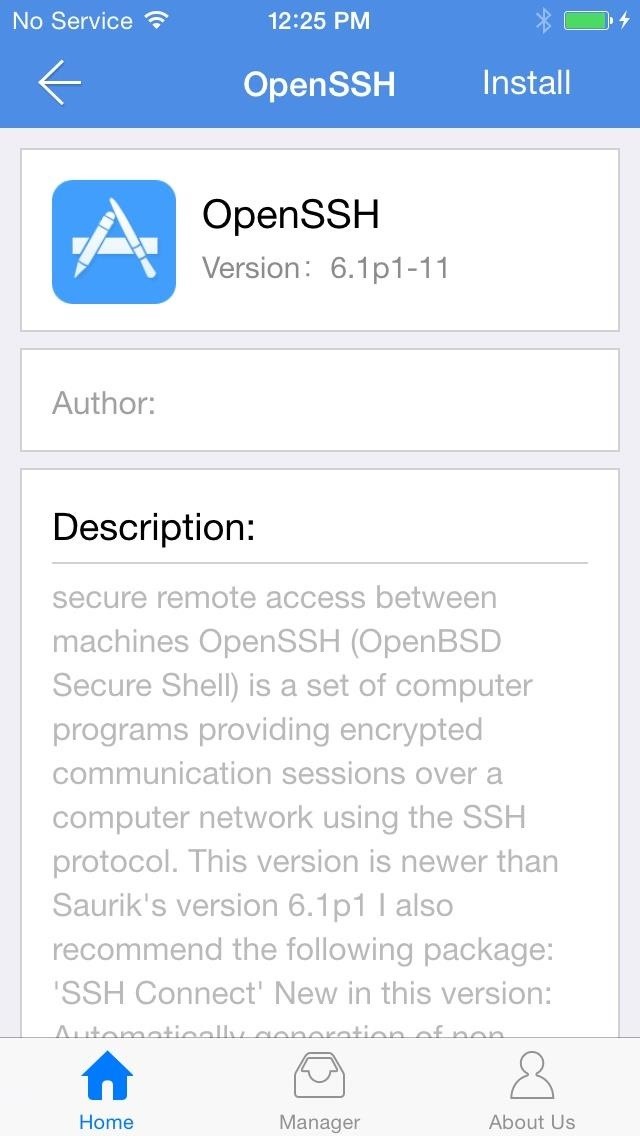
Step 3: Move Cydia Files to iPhone
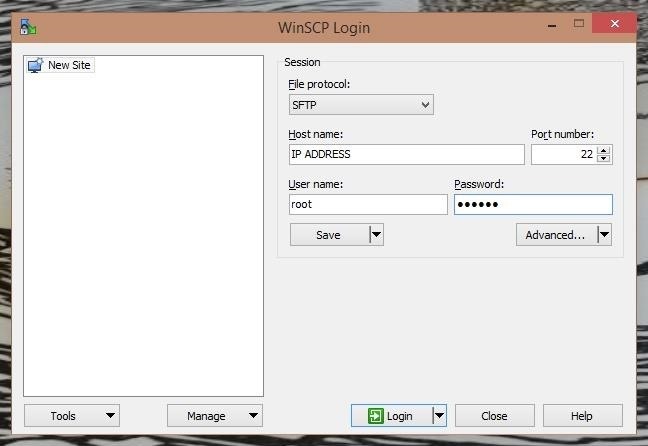
Open the SFTP app you installed and input the following for each section in the form, then hit the button to “Login” or “Connect,” depending on your program.
- Host: (your IP address)
- Port: 22 (if the connection cannot be made, try port 23)
- User name: root
- Password: alpine
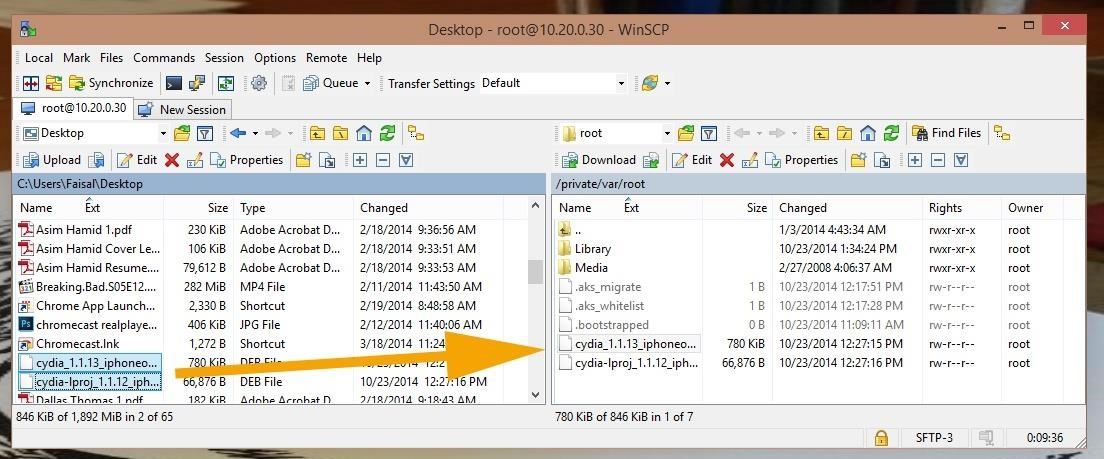
Once the connection is made, you’ll be taken to a file explorer with your computer on the right and the root of your iOS 8 device directory on the left. From here, simply locate the two Cydia files and drag (or copy/paste) them over to your jailbroken device.
Step 4: Issue SSH Commands
Now that the files are on your iOS 8 device, you’re pretty much done. These SFTP apps will just about always have a method of using a secure SSH terminal window. With WinSCP, simply go to Commands -> Open Terminal, then click “OK” on the popup.
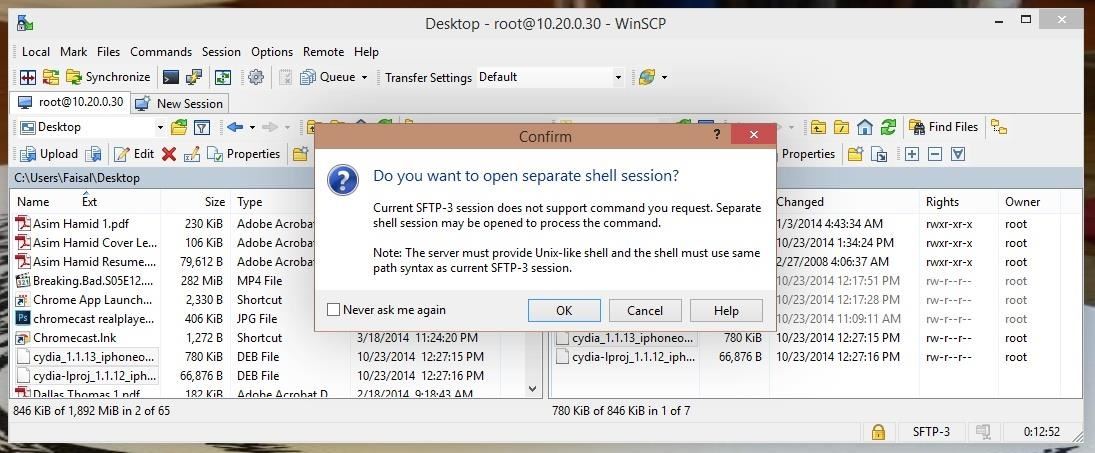
In the terminal window that comes up, you’ll want to paste in the following two commands, one after the other.
- dpkg -i cydia-lproj_1.1.12_iphoneos-arm.deb
- dpkg -i cydia_1.1.13_iphoneos-arm.deb
Simply paste them in the “Enter command” field, then hit “Execute”—the command window will show errors; ignore them. Again, run each command individually—paste the first one in, wait for it to run (less than 5 seconds), then paste the second one in.

When these are done, disconnect your jailbroken iOS 8 device, shut it off, then turn it back on.
Step 5: Configure Cydia
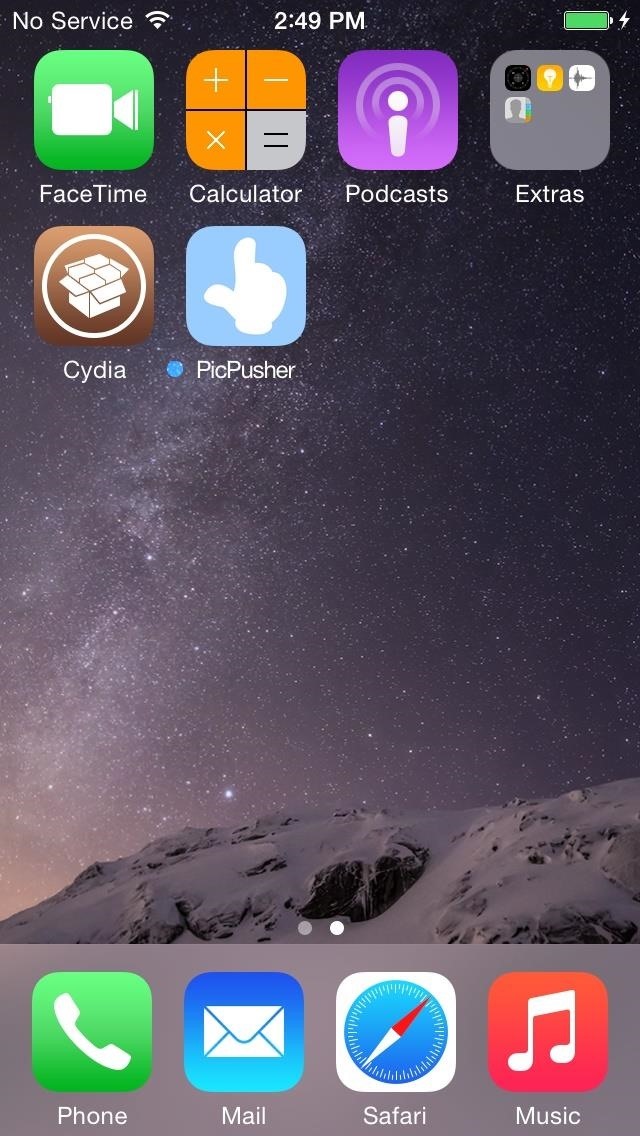
When your device is back up, you’ll now have the Cydia app on your home screen. Open it up and let it prepare the file system (this can take a little while).
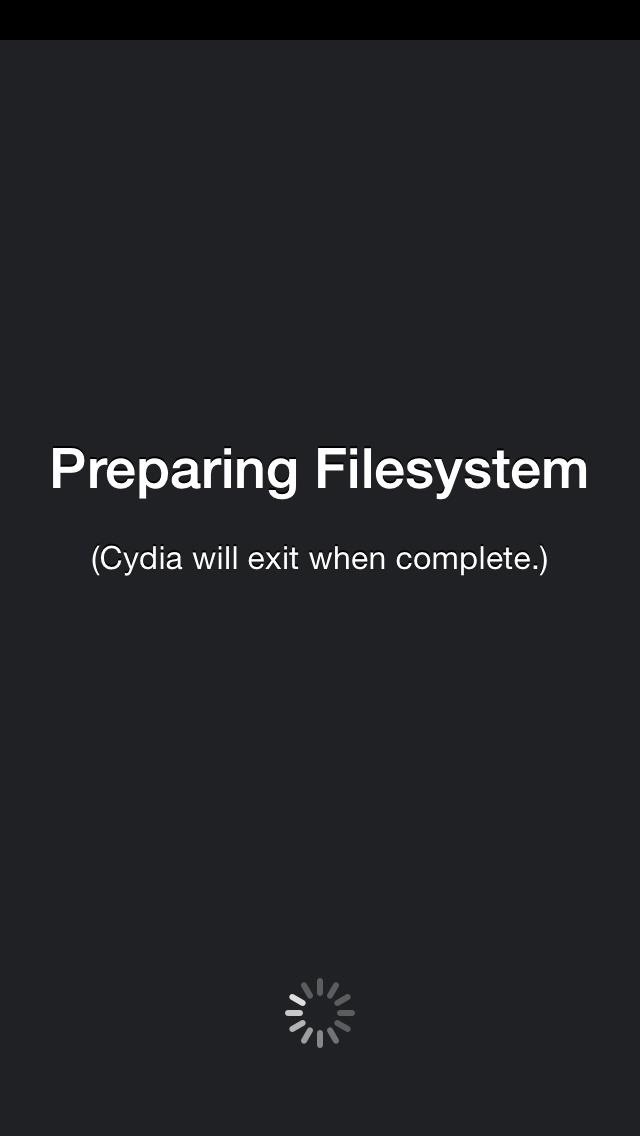
Once that’s done, open the app again and pay attention to the big red block of text.
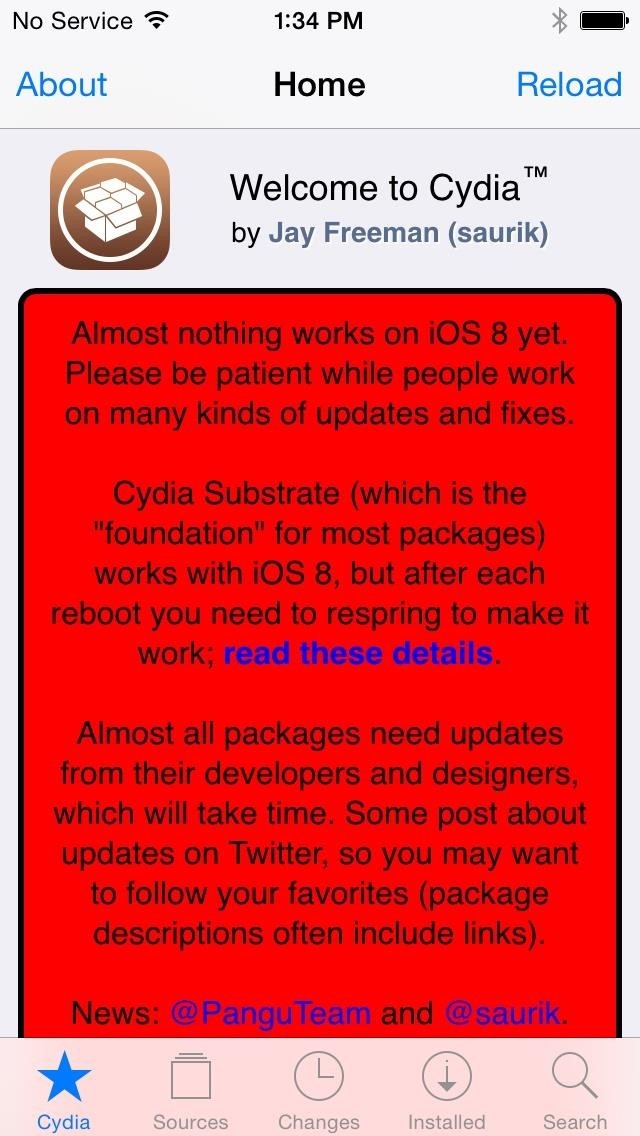
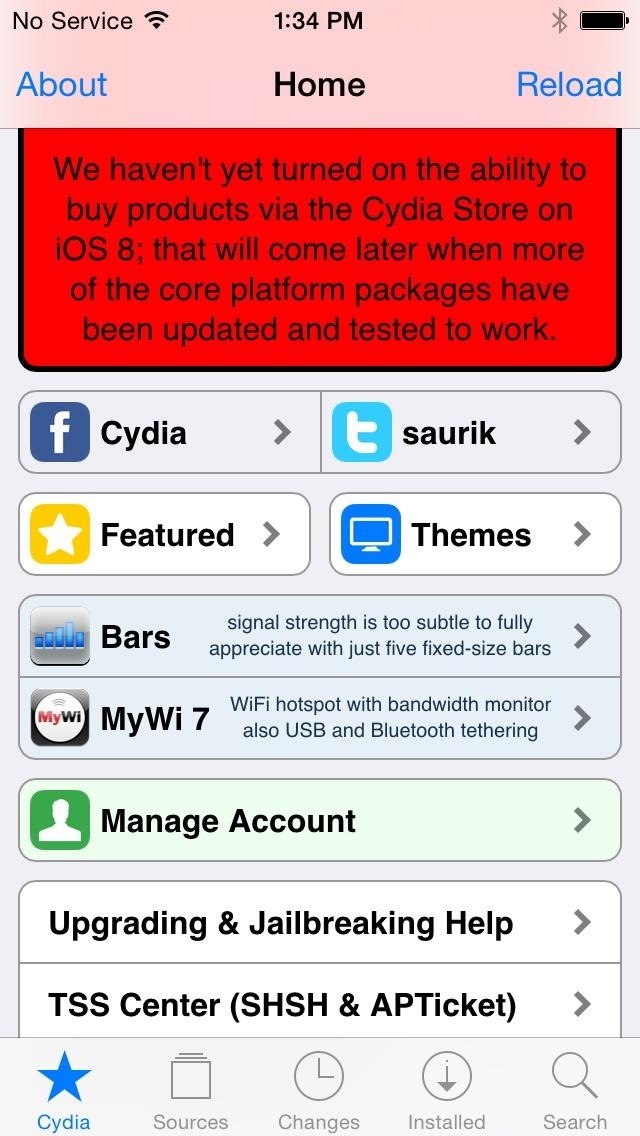
So, you’re jailbroken and you have Cydia, but as of this time, there isn’t a whole lot you can do with it. But, you will be ready to roll when devs update their jailbreak apps to work with iOS 8 versions.
How’d the process go for you? If you have an comments, concerns, or questions, drop us a line below or over on our Facebook or Twitter feed.
Just updated your iPhone? You’ll find new emoji, enhanced security, podcast transcripts, Apple Cash virtual numbers, and other useful features. There are even new additions hidden within Safari. Find out what’s new and changed on your iPhone with the iOS 17.4 update.
“Hey there, just a heads-up: We’re part of the Amazon affiliate program, so when you buy through links on our site, we may earn a small commission. But don’t worry, it doesn’t cost you anything extra and helps us keep the lights on. Thanks for your support!”


