In the iOS 13.4 update, Apple added folder-sharing capabilities in the Files app. That means you can share multiple documents at the same time instead of doing it one by one. But that’s not all — you can share folders with numerous contacts and even enforce access and permission settings.
The new sharing feature for iCloud Drive folders is similar to how you would share Pages, Numbers, and Keynote documents for collaboration — which can also be done right from inside the Files app. And just like with Apple’s office suite, you can let others add to folders and edit the documents within, or you could make them for viewing only. Collaborators will need an iCloud account, but you can also send a ZIP file that anyone can open.
- Don’t Miss: 30+ New Features & Changes for iPhone in iOS 13.4
Folders You Can & Can’t Share
Before iOS 13.4, there were no “Share” options at all for folders in the Files app, but now there is — just not for every folder. For instance, while a new “Share” option comes up for folders in Google Drive, Box, Dropbox, and other connected cloud storage services, you can’t add collaborators, and regular sharing to contacts in Messages, Mail, Messengers, etc. will only produce errors.
While there are bugs to work out, sharing was never intended for non-iCloud Drive folders. But in iCloud Drive, only folders you have created manually can be shared and collaborated on. Any folders created by apps themselves, such as Pages, Numbers, and Shortcuts, as well as default folders like Documents, cannot be shared in any capacity.

Share a ZIP of the Folder to Anyone
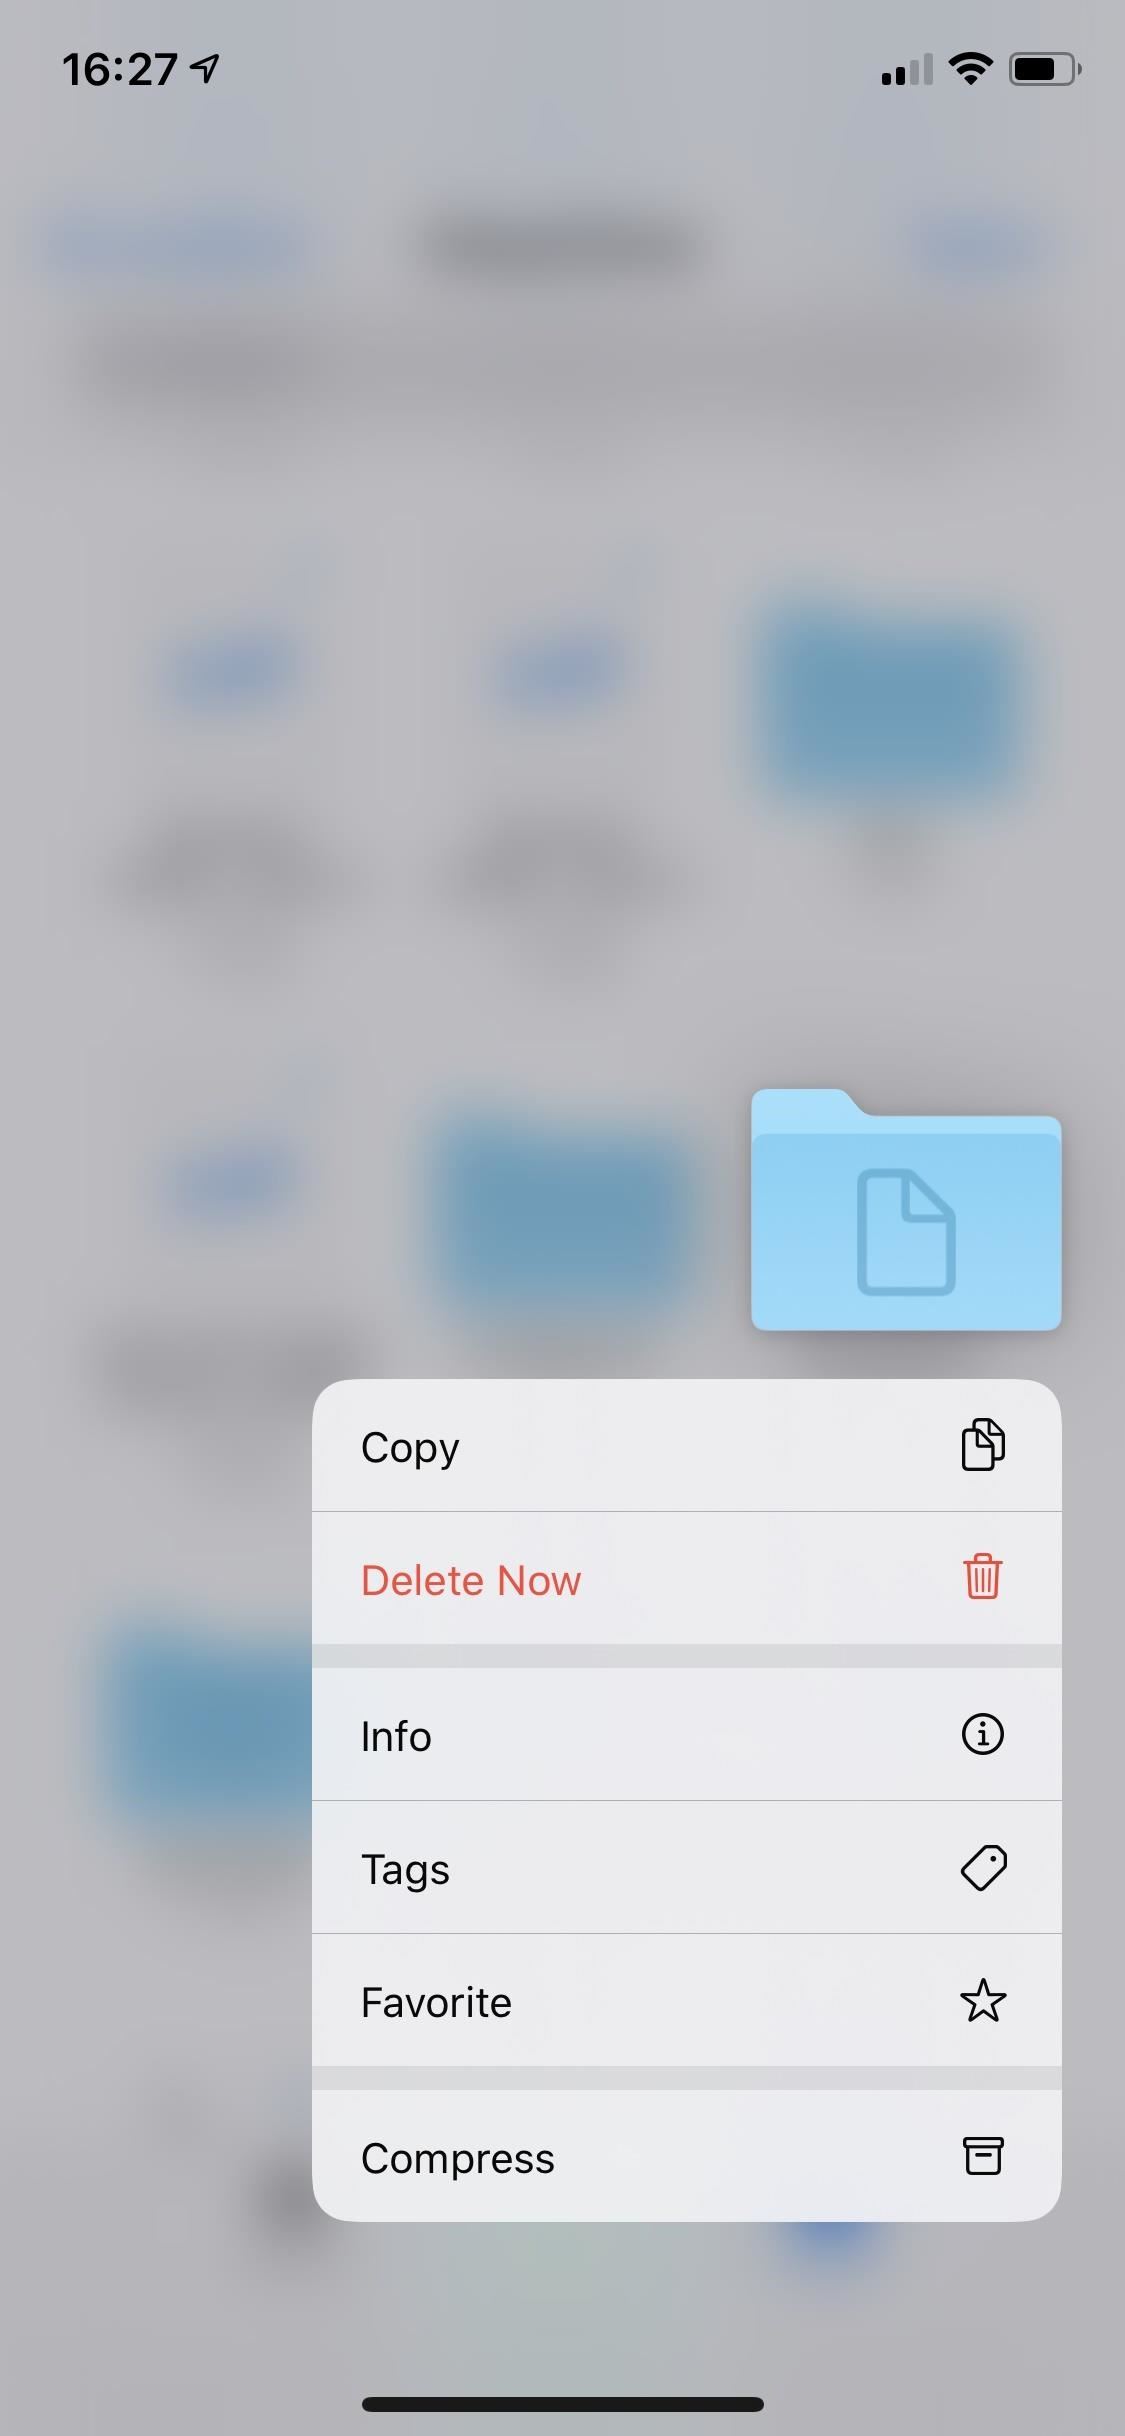
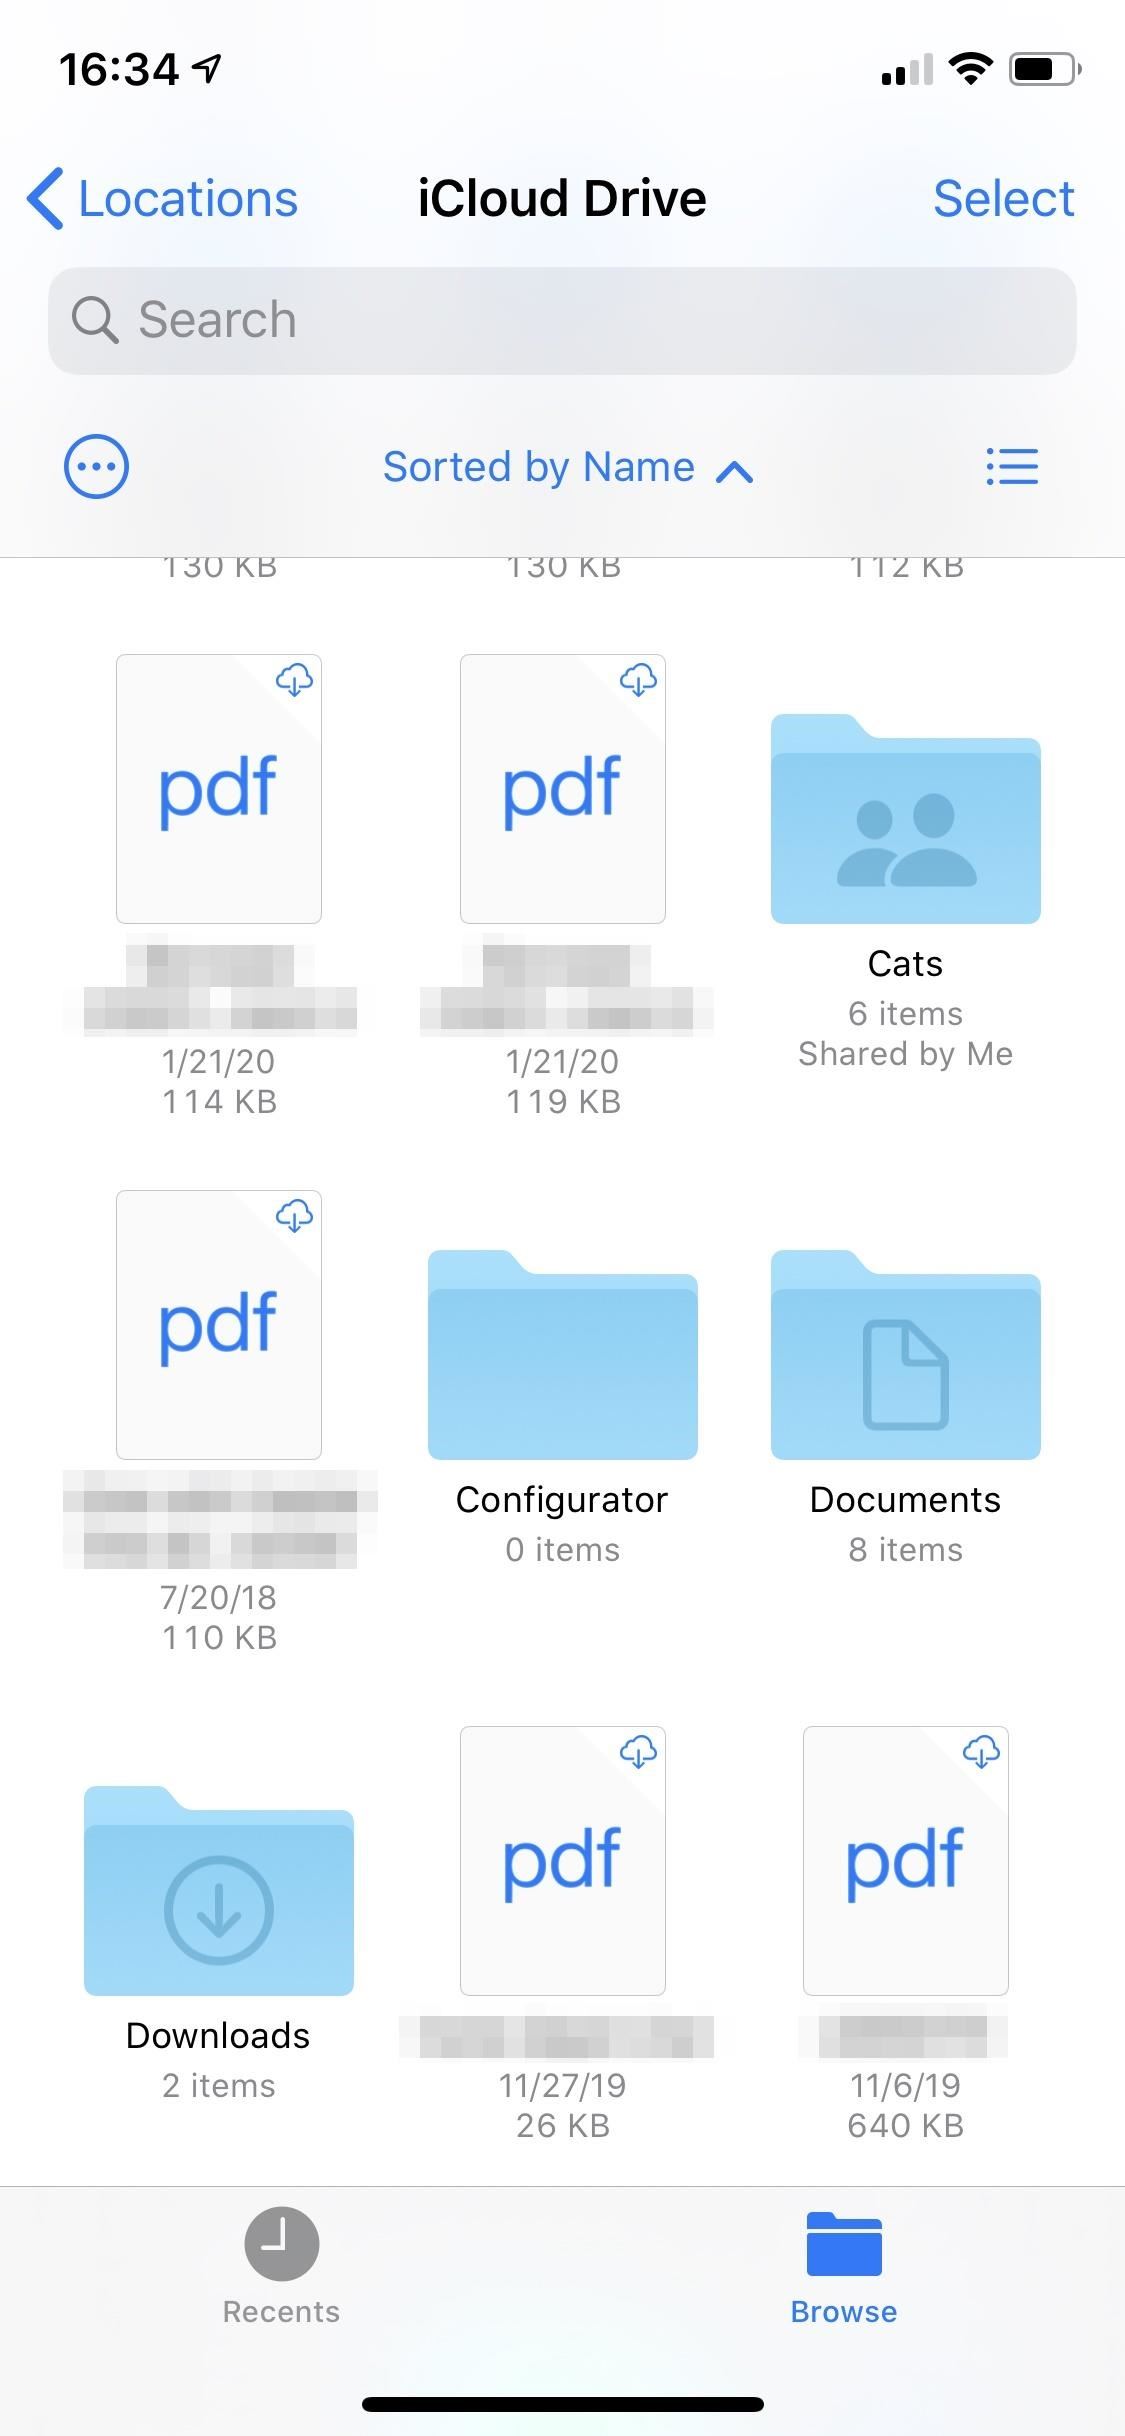
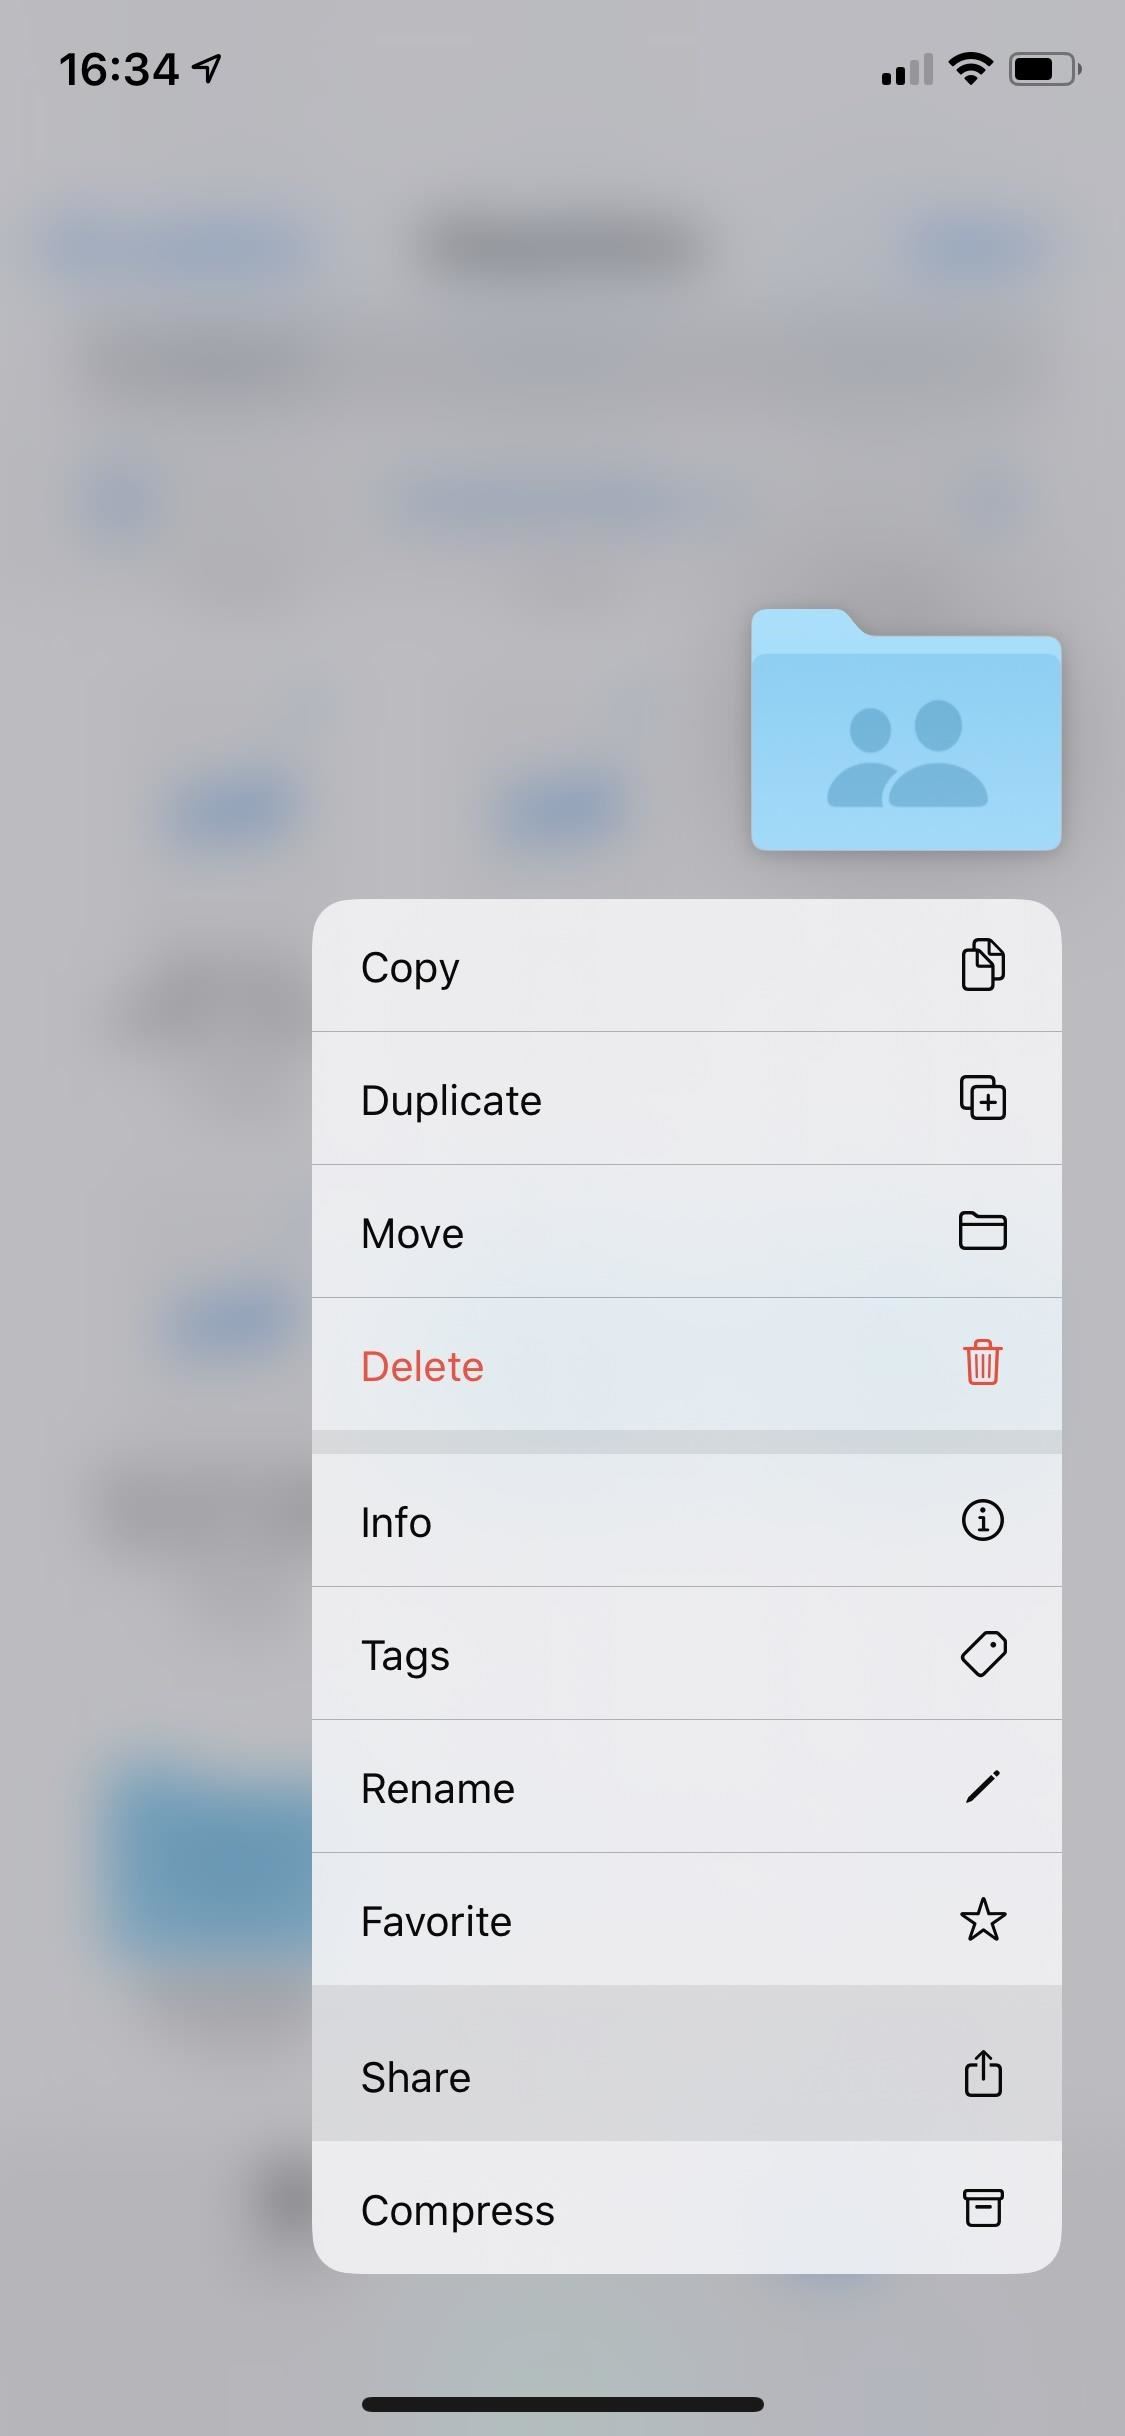
Before getting into the collaboration side of things, know that any folder that you’ve manually created for iCloud Drive in Files can be shared as a ZIP file to anyone. To do so, open the “Browse” tab in Files, select “iCloud Drive,” then long-press on a folder icon in the list or thumbnail view that you want to share. (You can also do so from the “Recents” tab if it’s a compatible folder.) When the quick actions menu appears, select “Share.”
Next, just pick your poison. You can AirDrop it, send it to recent contacts, add it to Notes or Google Drive, or send it via apps like Messages or Mail. However, not all apps that show up in the sharing row will work; Messenger, Slack, Telegram, Outlook, and many others will only produce errors.
- Don’t Miss: How to Create a ZIP Archive Using the Files App on Your iPhone

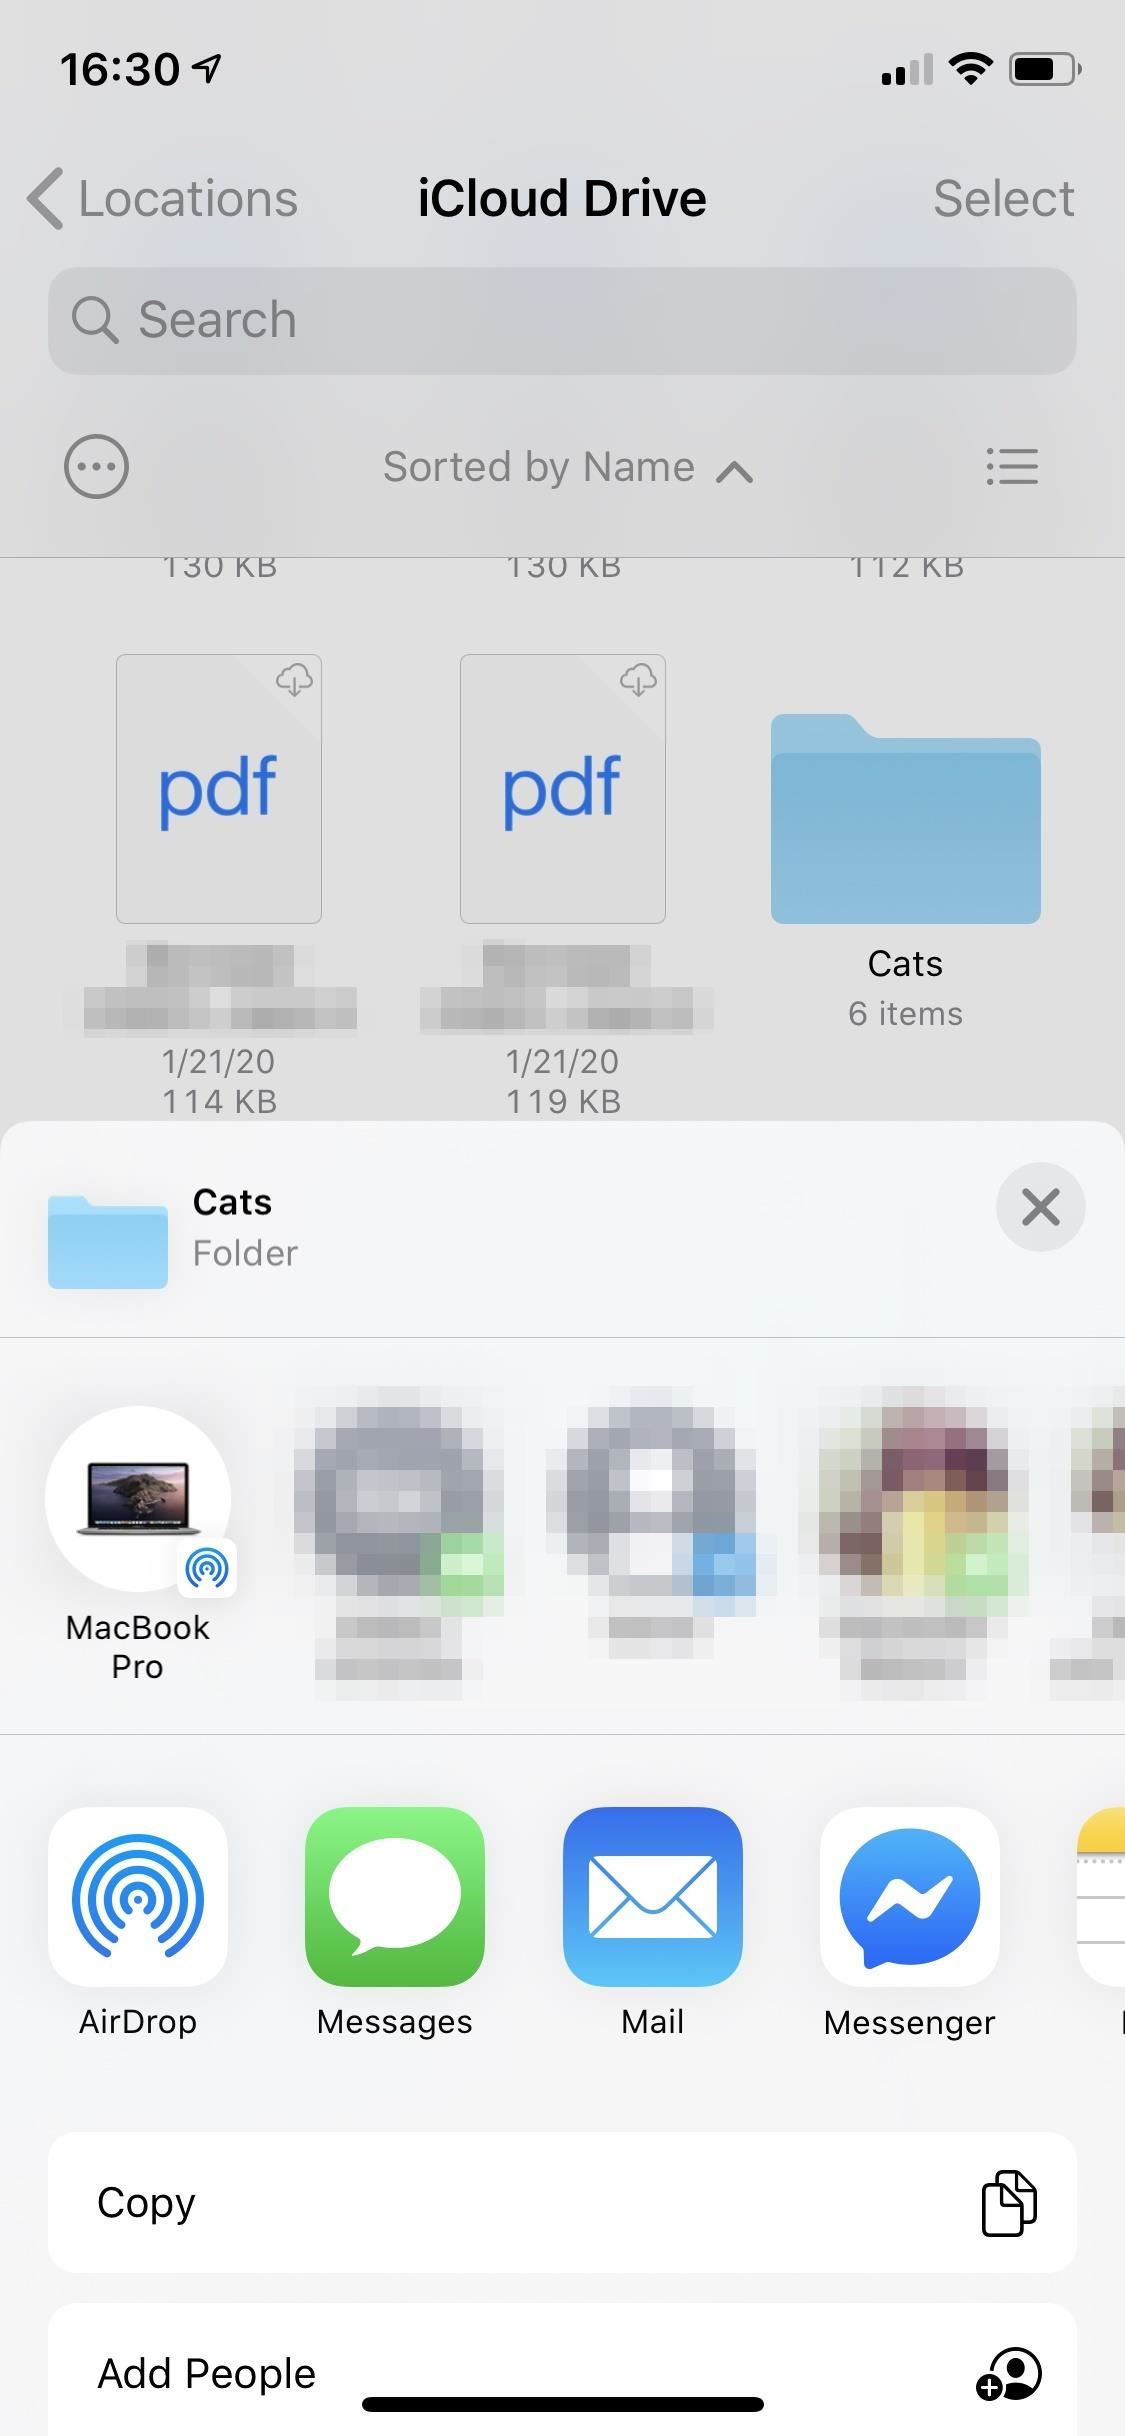
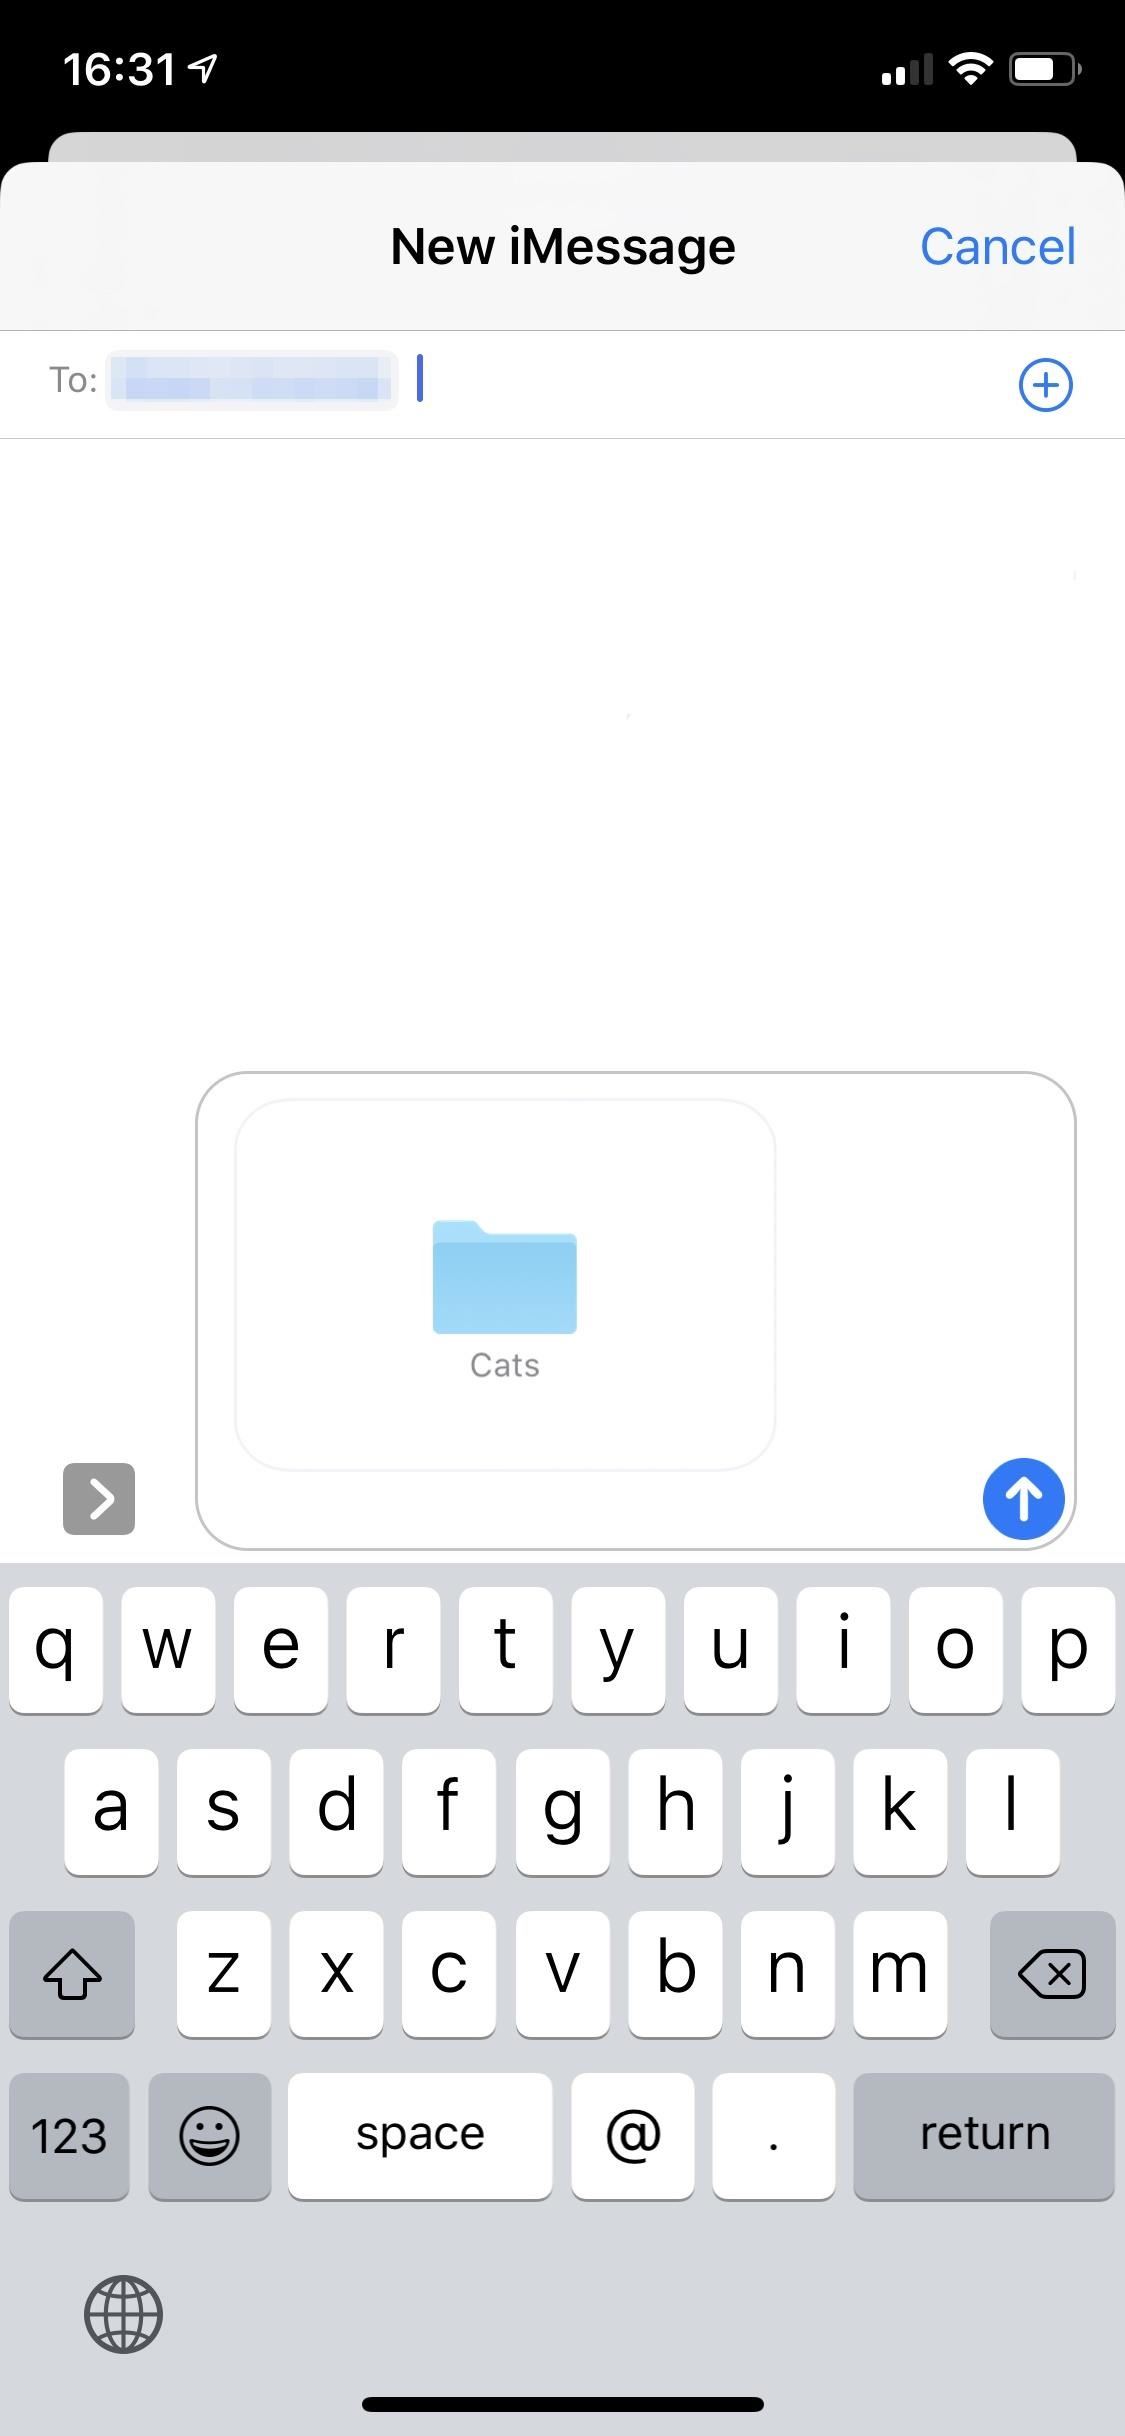
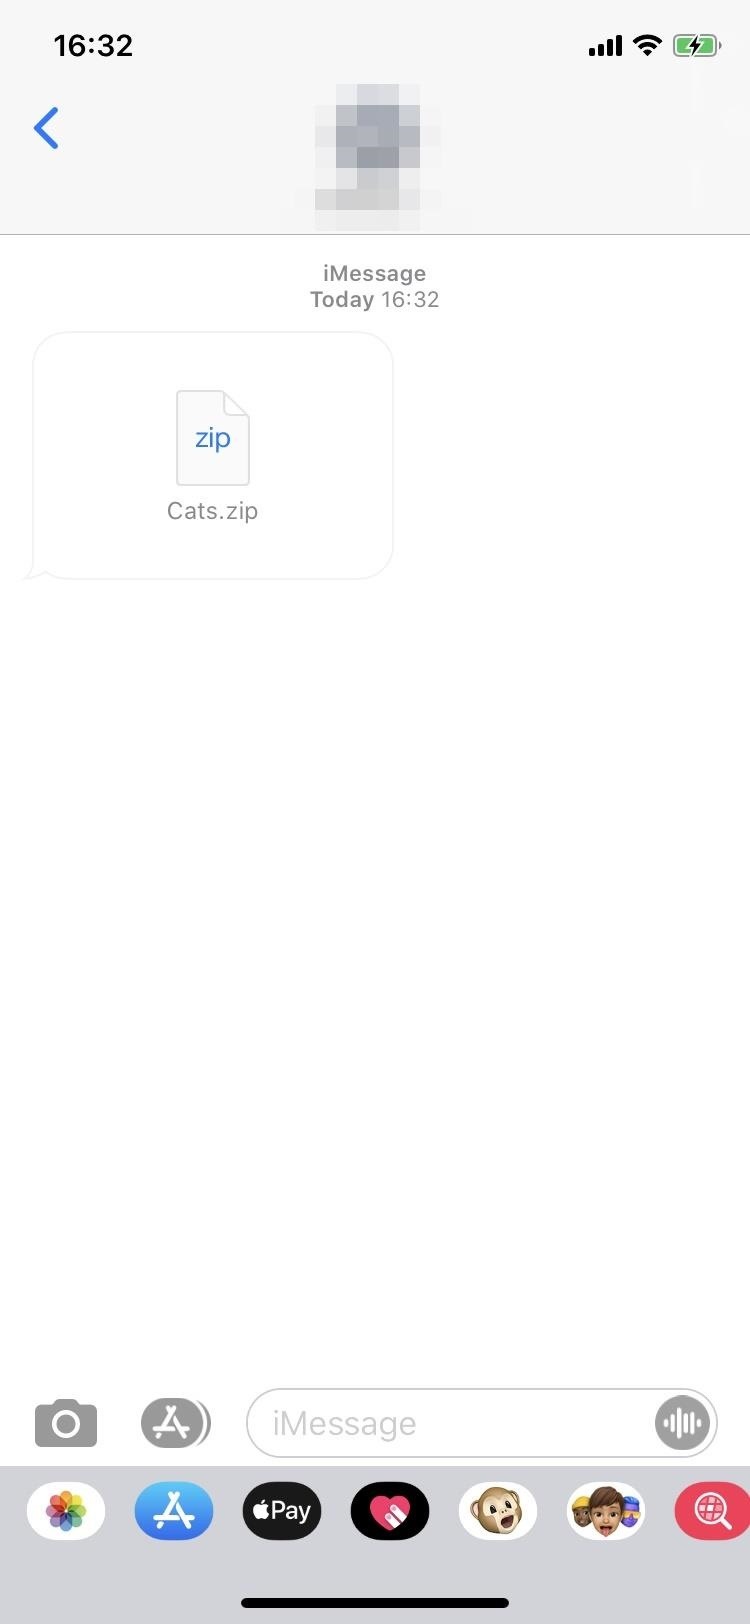
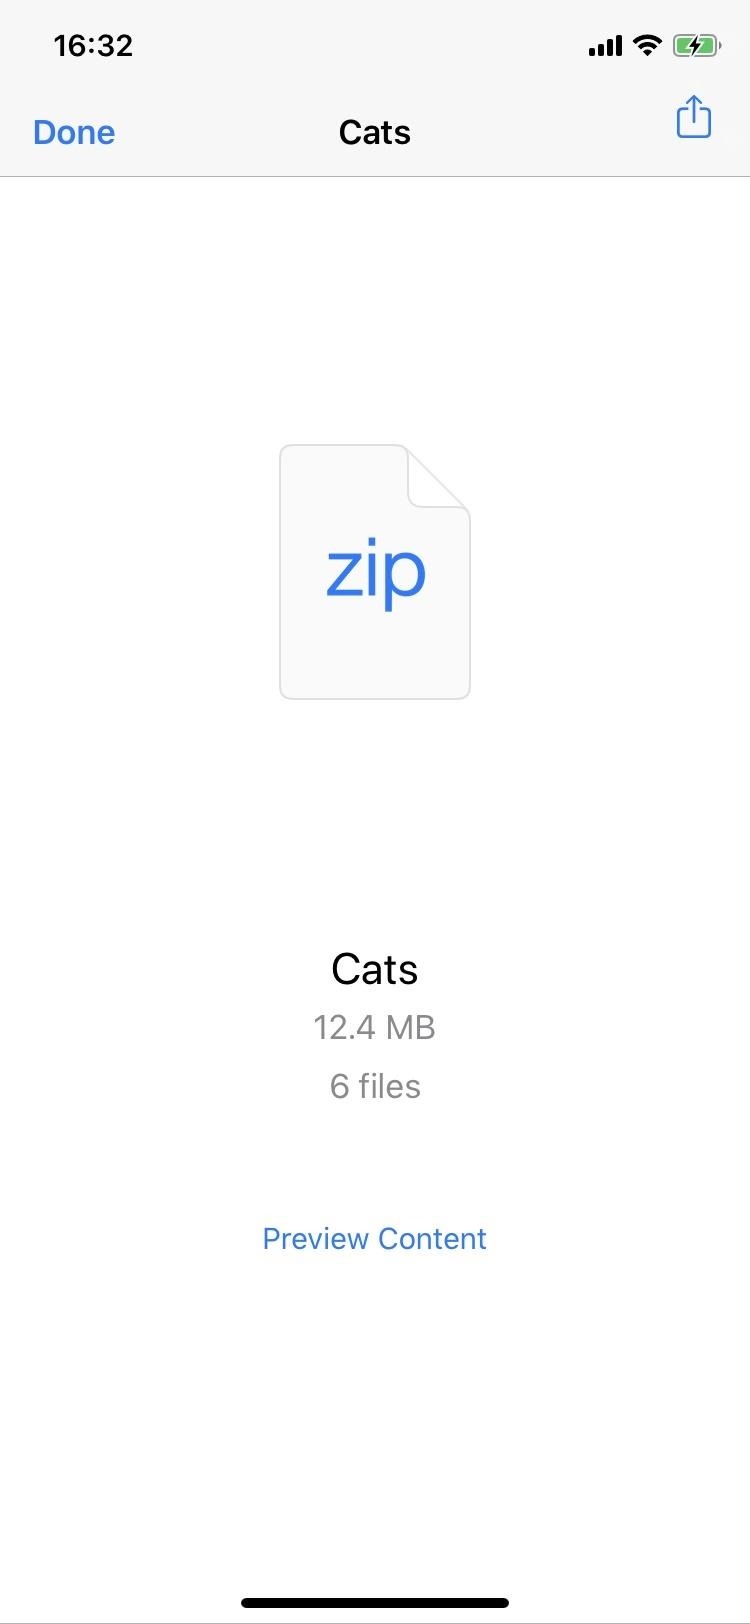
When added to Notes, it will be included in a new note as a folder, but you will only be able to access it by sharing it somewhere else again or saving it back into the Files app, so it’s not very useful. When using Messages, Mail, AirDrop, Google Drive, and the like, the result will be a ZIP file, which the other person can uncompress to view its contents, as seen below.

Share the Folder for Collaboration
If you want others to be able to add documents or edit and make changes to files within the folder, you’ll have to add them as collaborators. You can also add collaborators for view-only access.
Open the “Browse” tab in Files, select “iCloud Drive,” then long-press on a folder icon in the list or thumbnail view that you want to share. (You can also do so from the “Recents” tab if it’s a compatible folder.) When the quick actions menu appears, select “Share.”
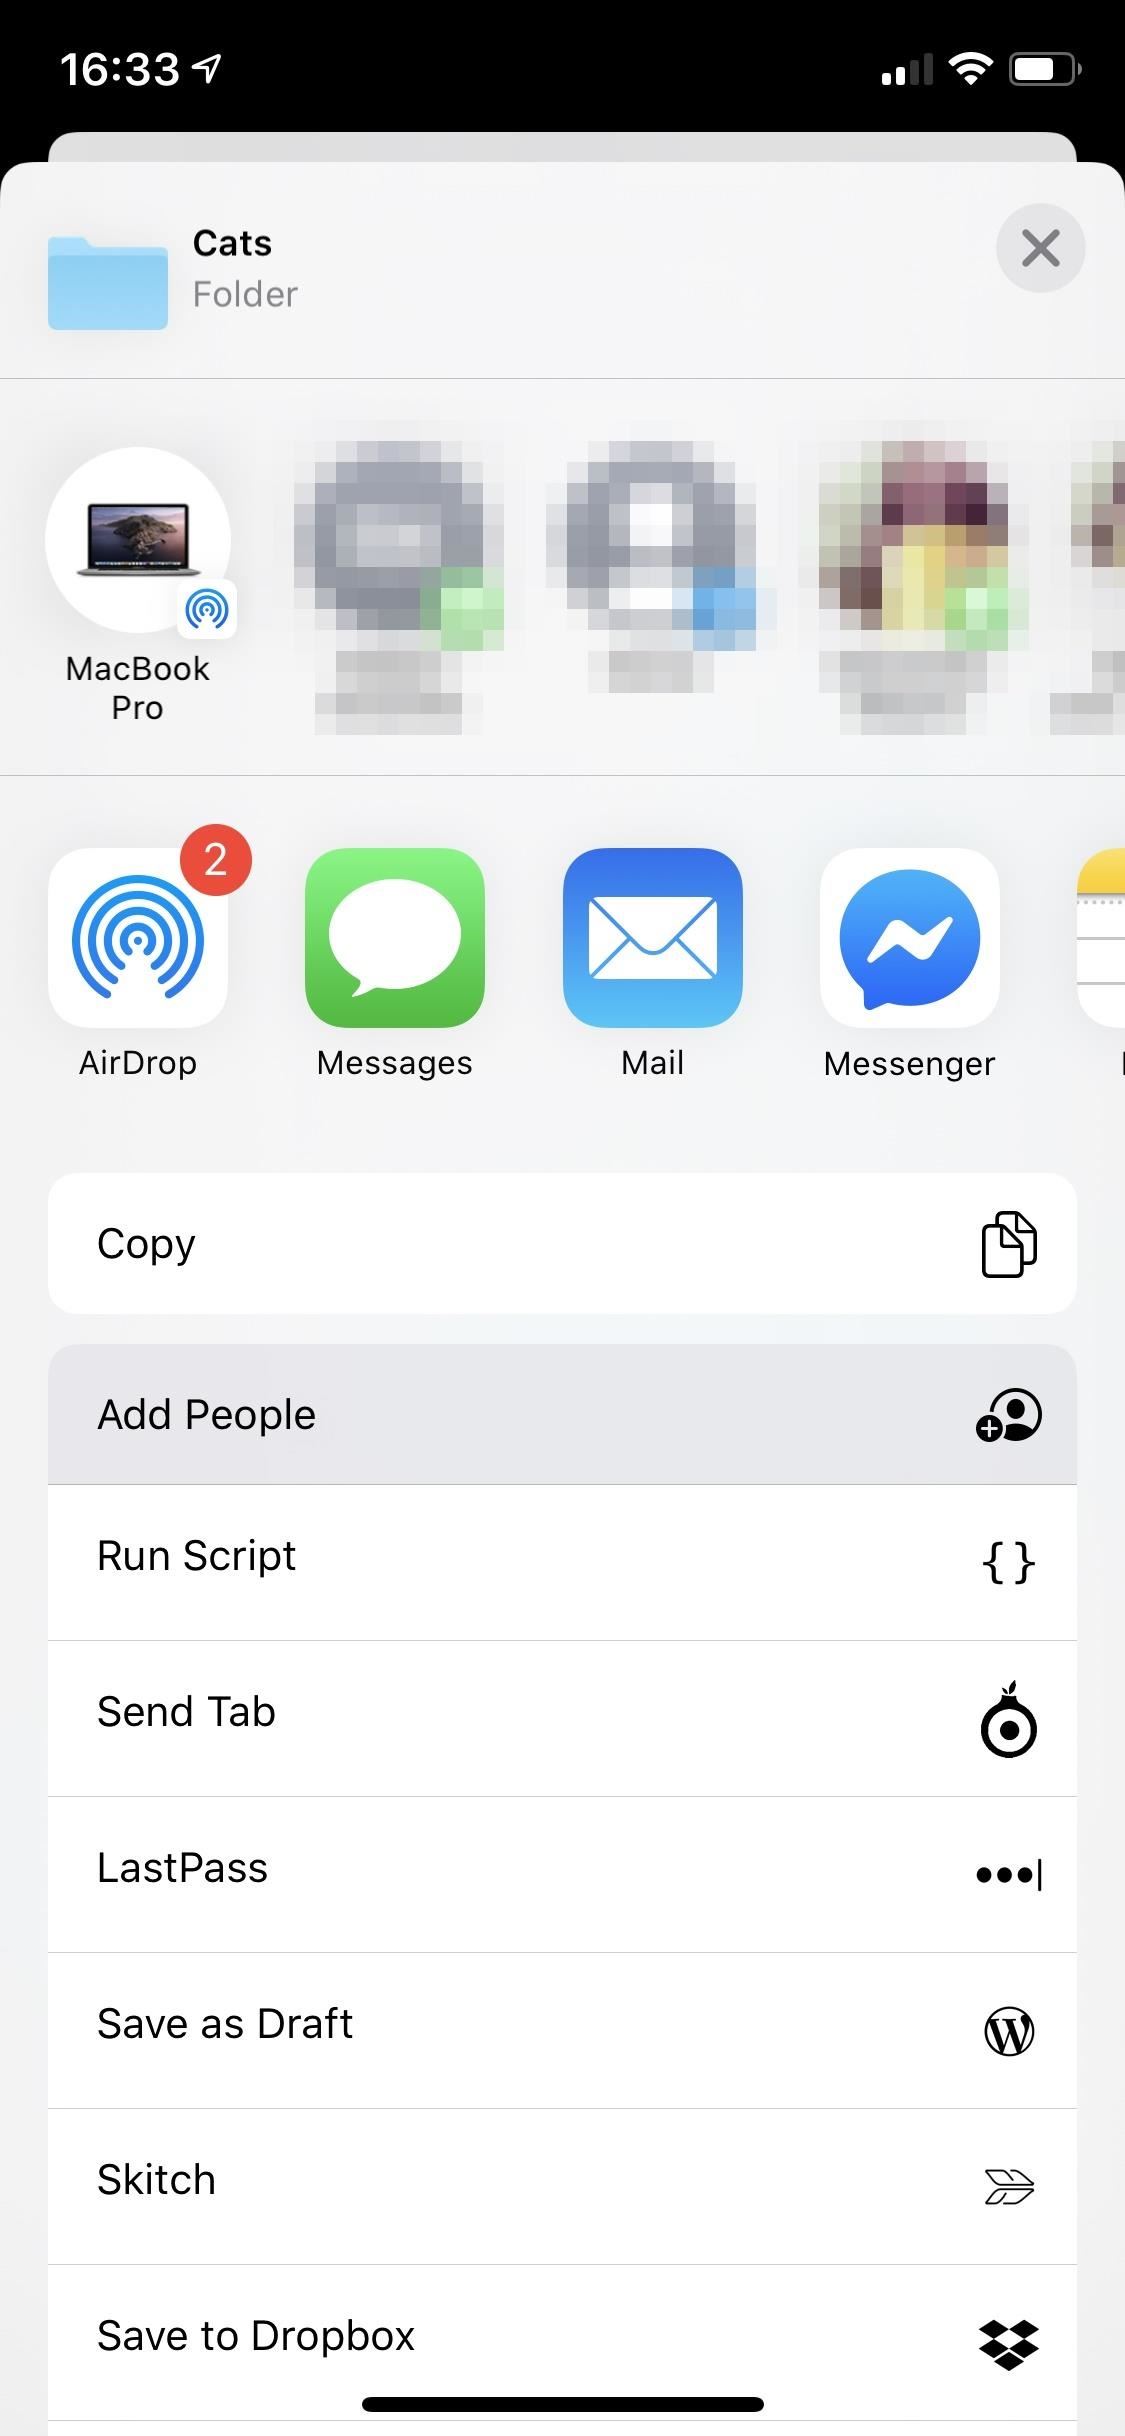
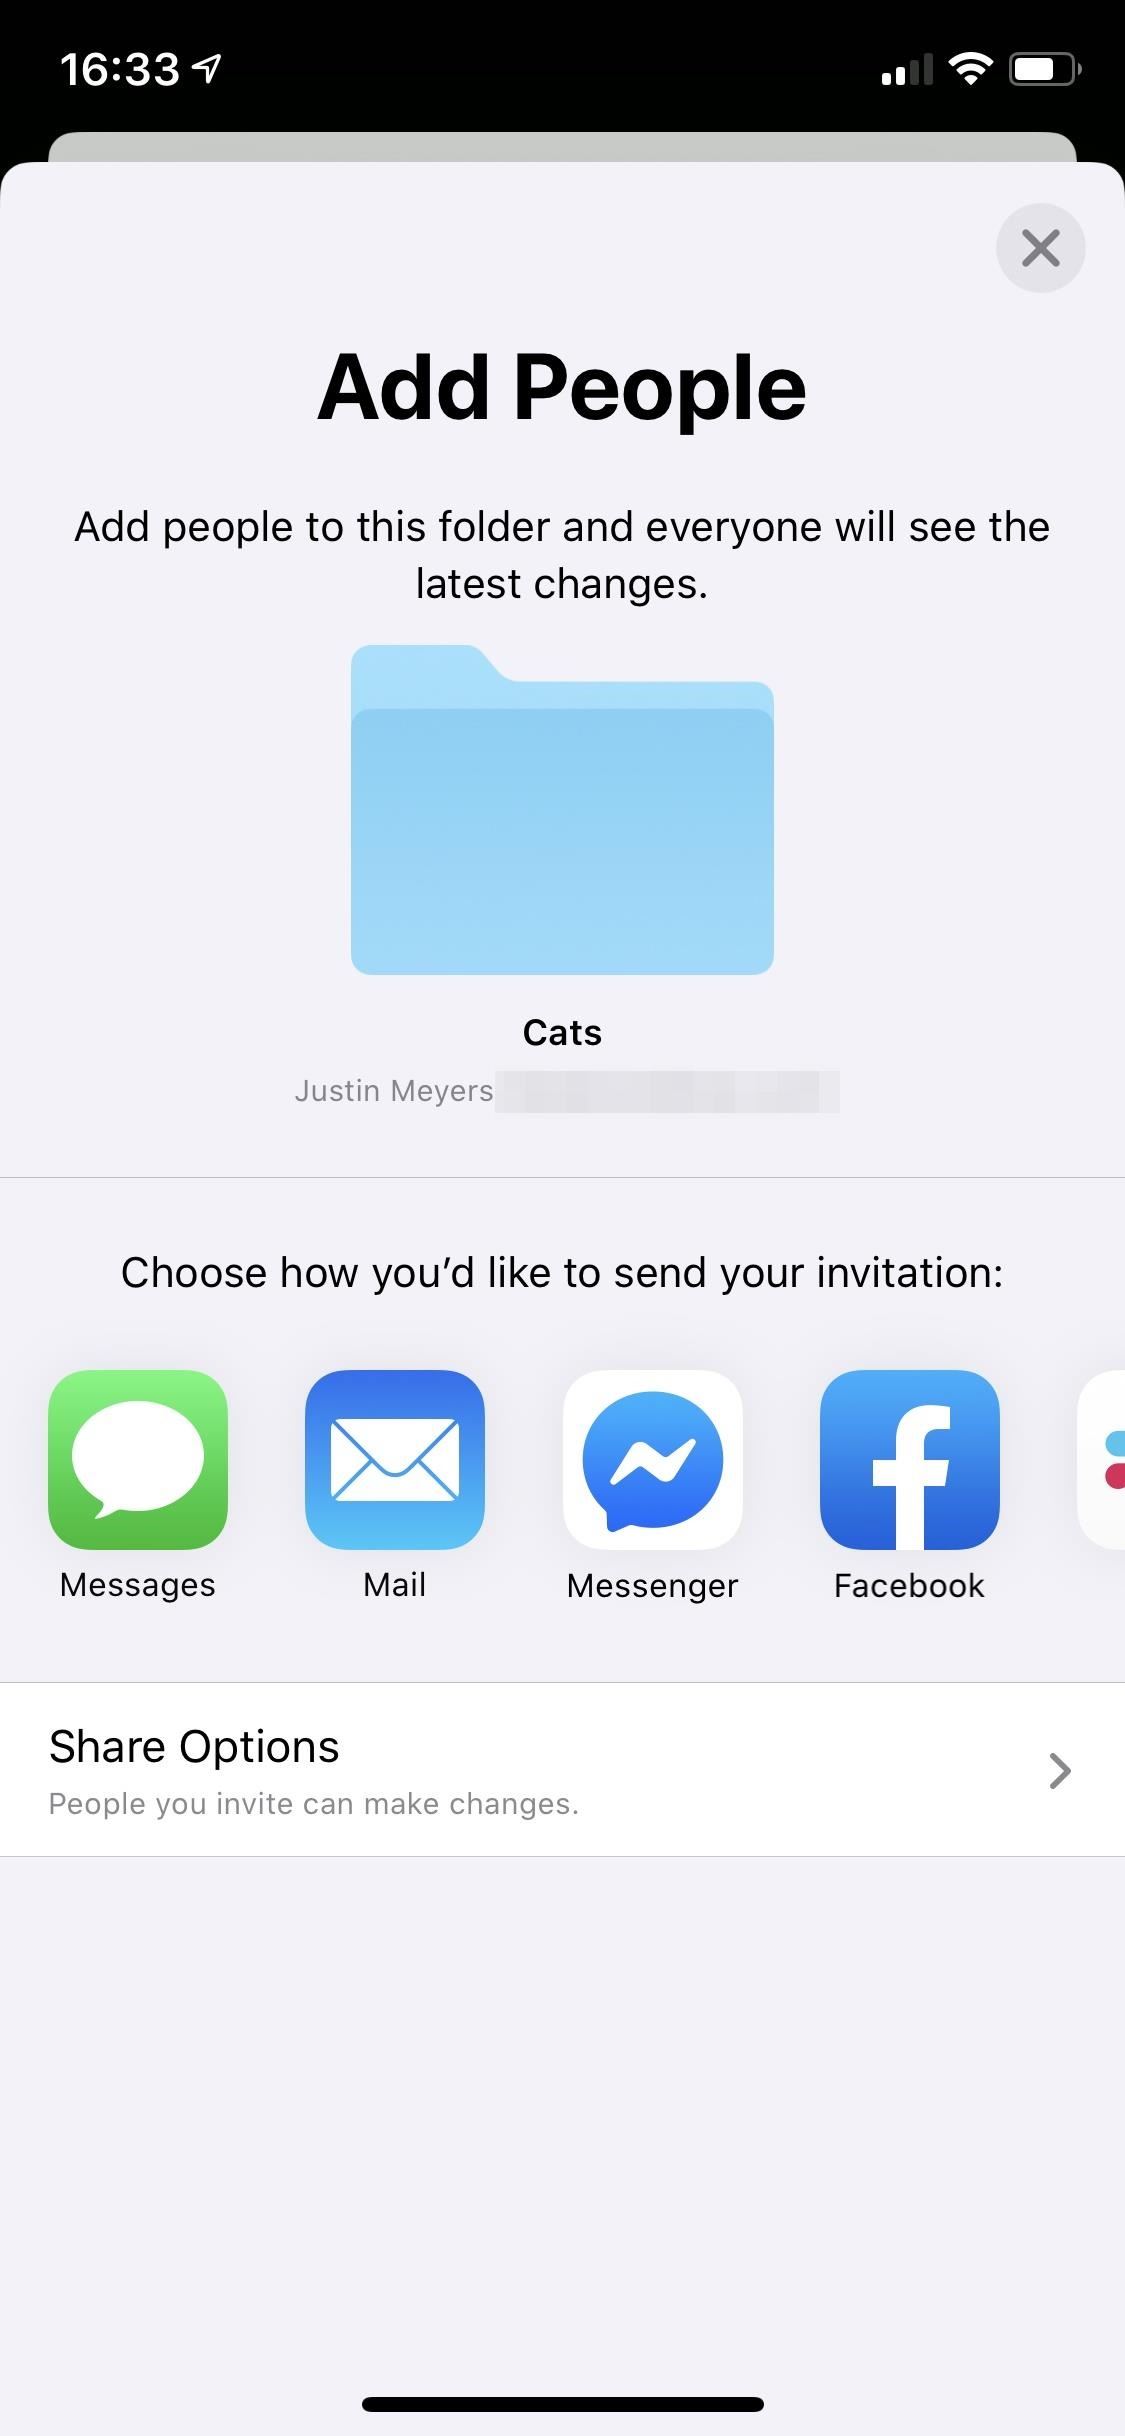
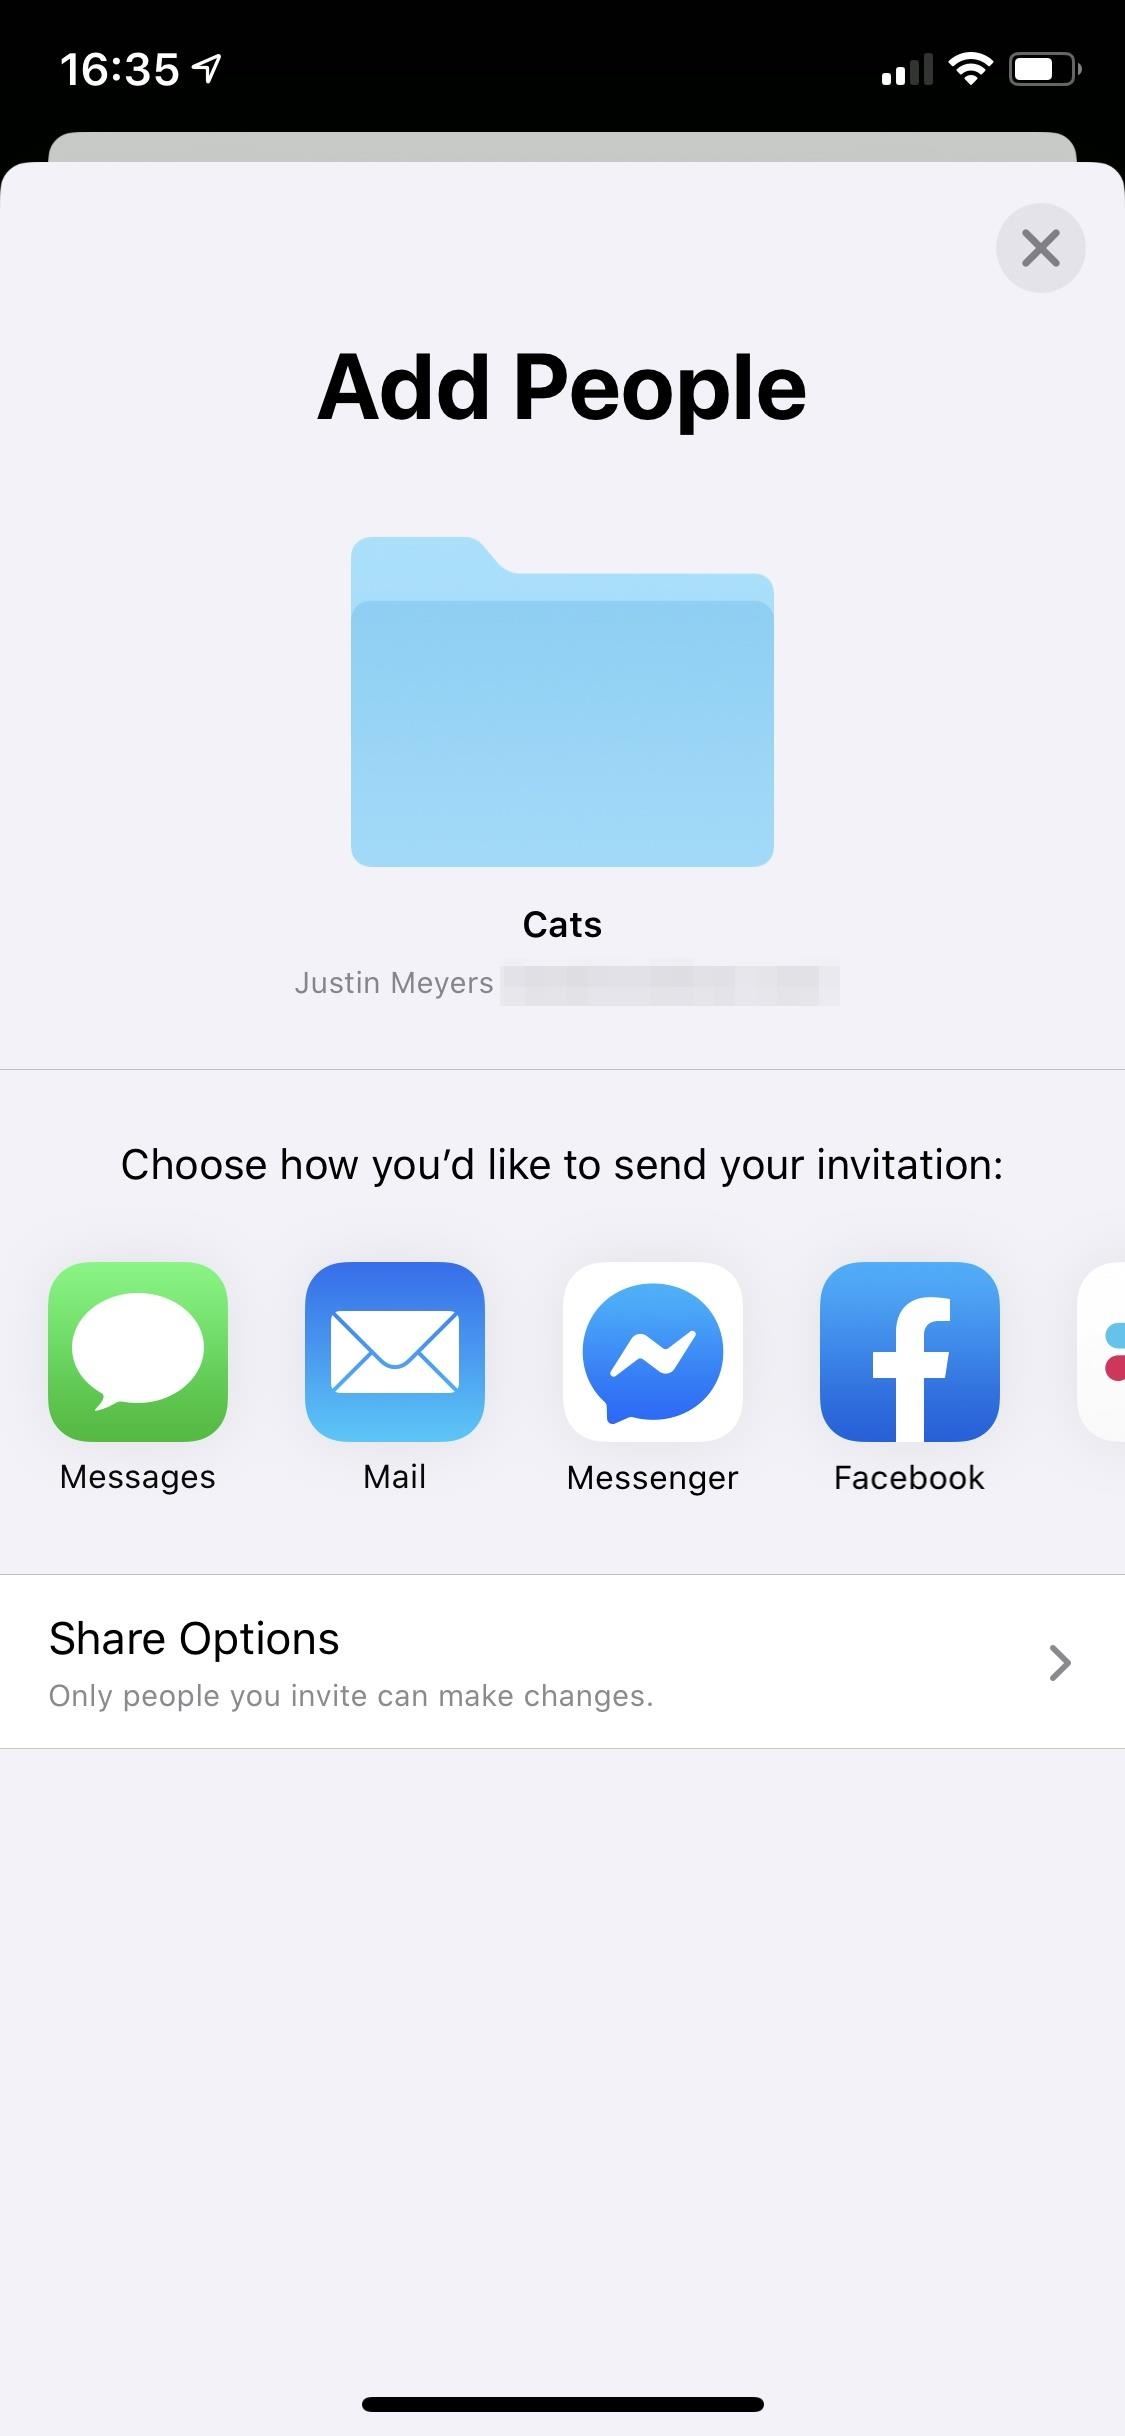
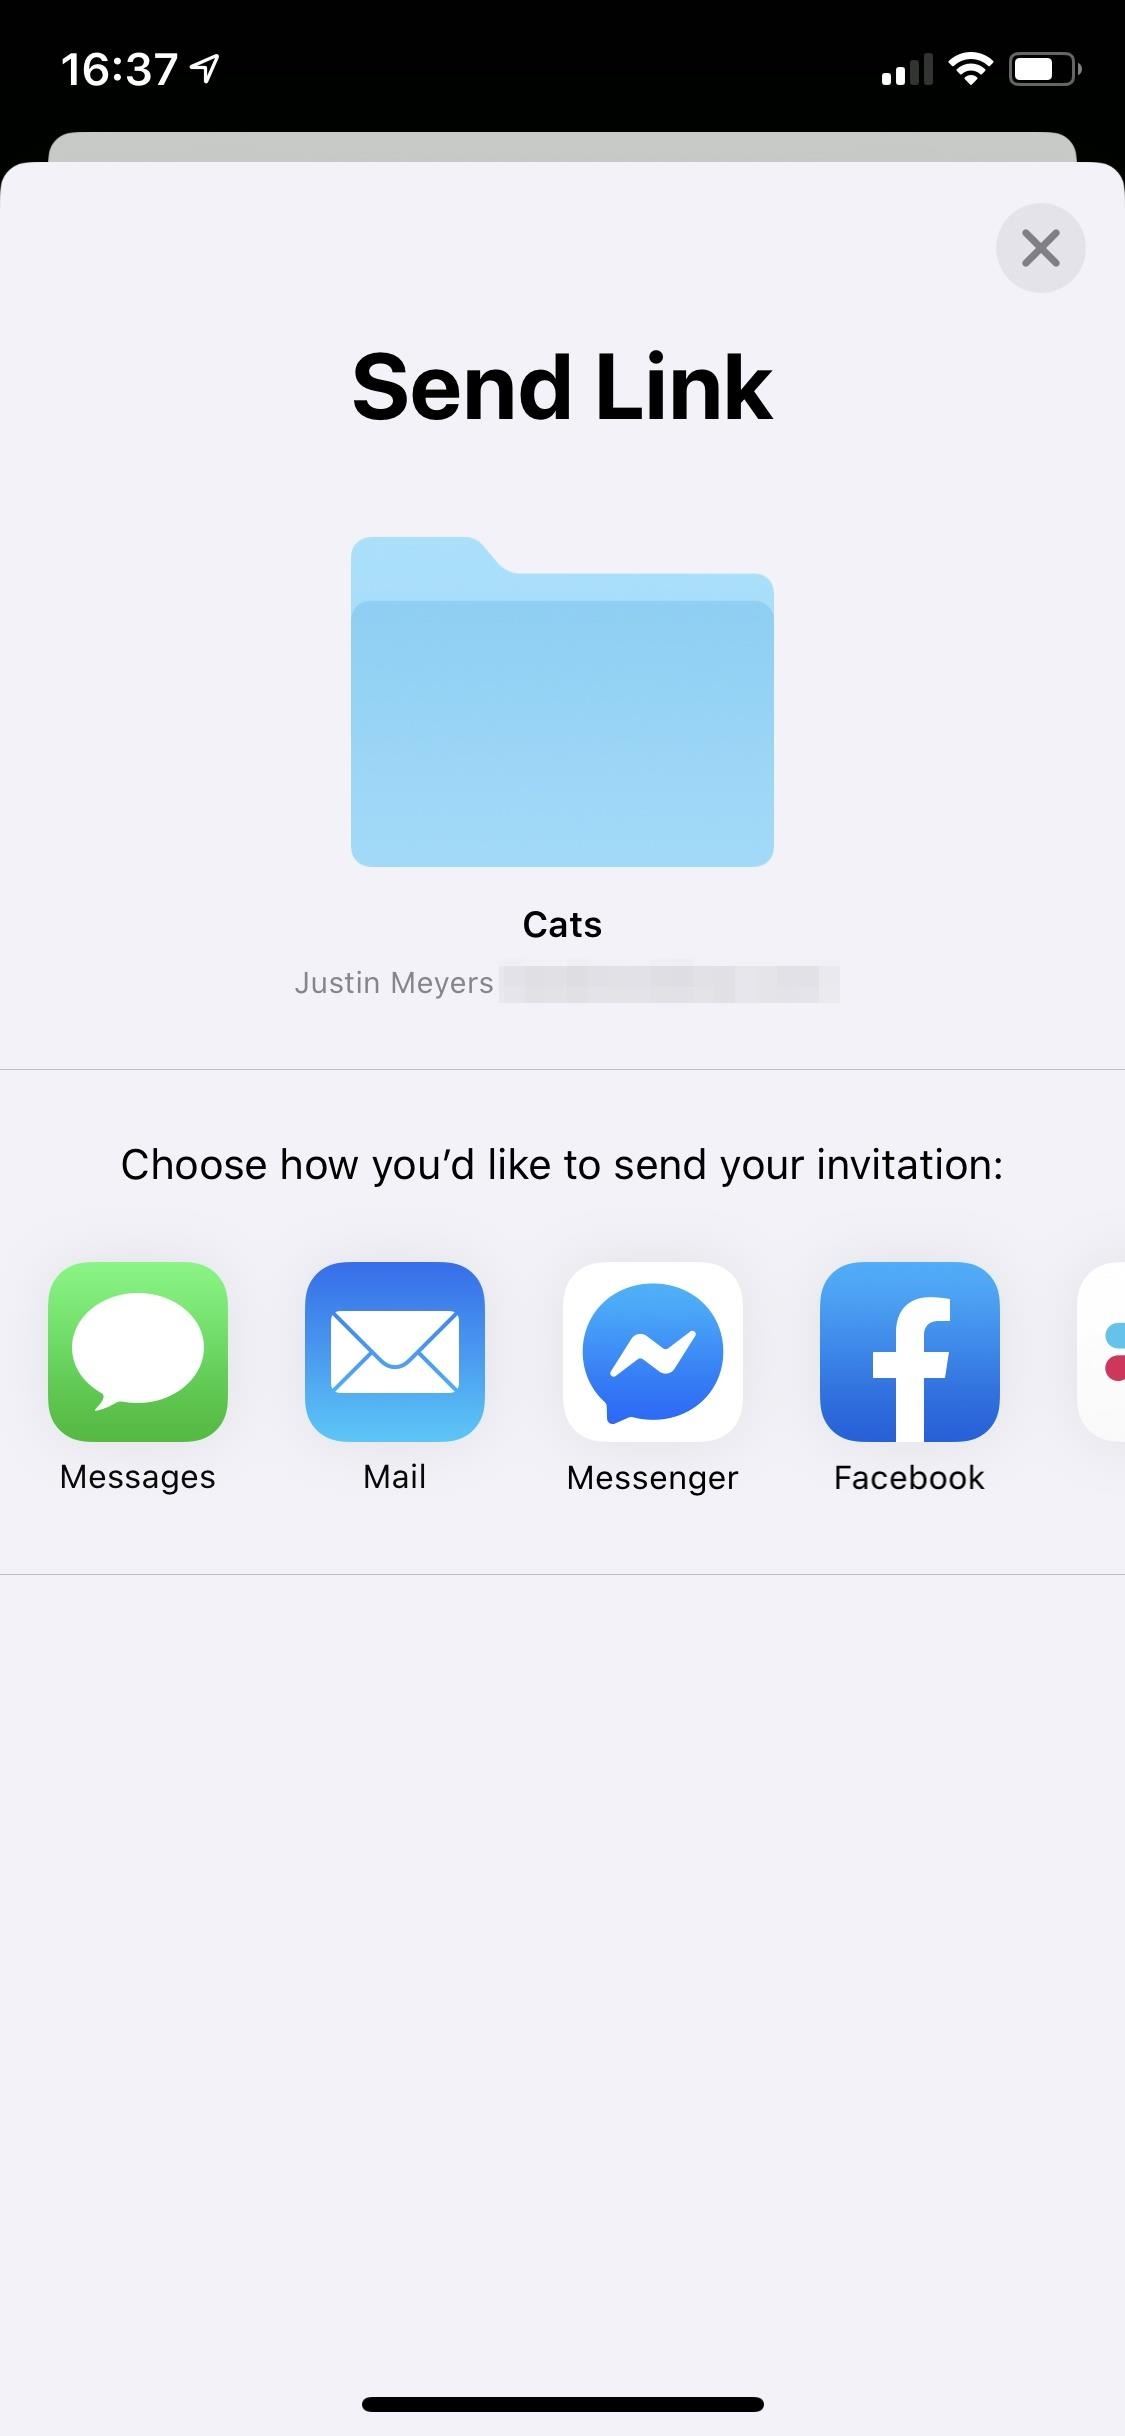
Now, instead of choosing a method to share the folder, select “Add People” from the list of action extensions. To share the folder right away using the default settings, choose Messages, Mail, or another app to send the access link to. Anyone you send it to must have an iCloud account, as they’ll need to log into it to open the folder.
Note that if you move a folder to another location after sharing it in any way, any links to the folder will break, and everyone that had access will be kicked out of it.
Change the Folder Settings Before Sharing
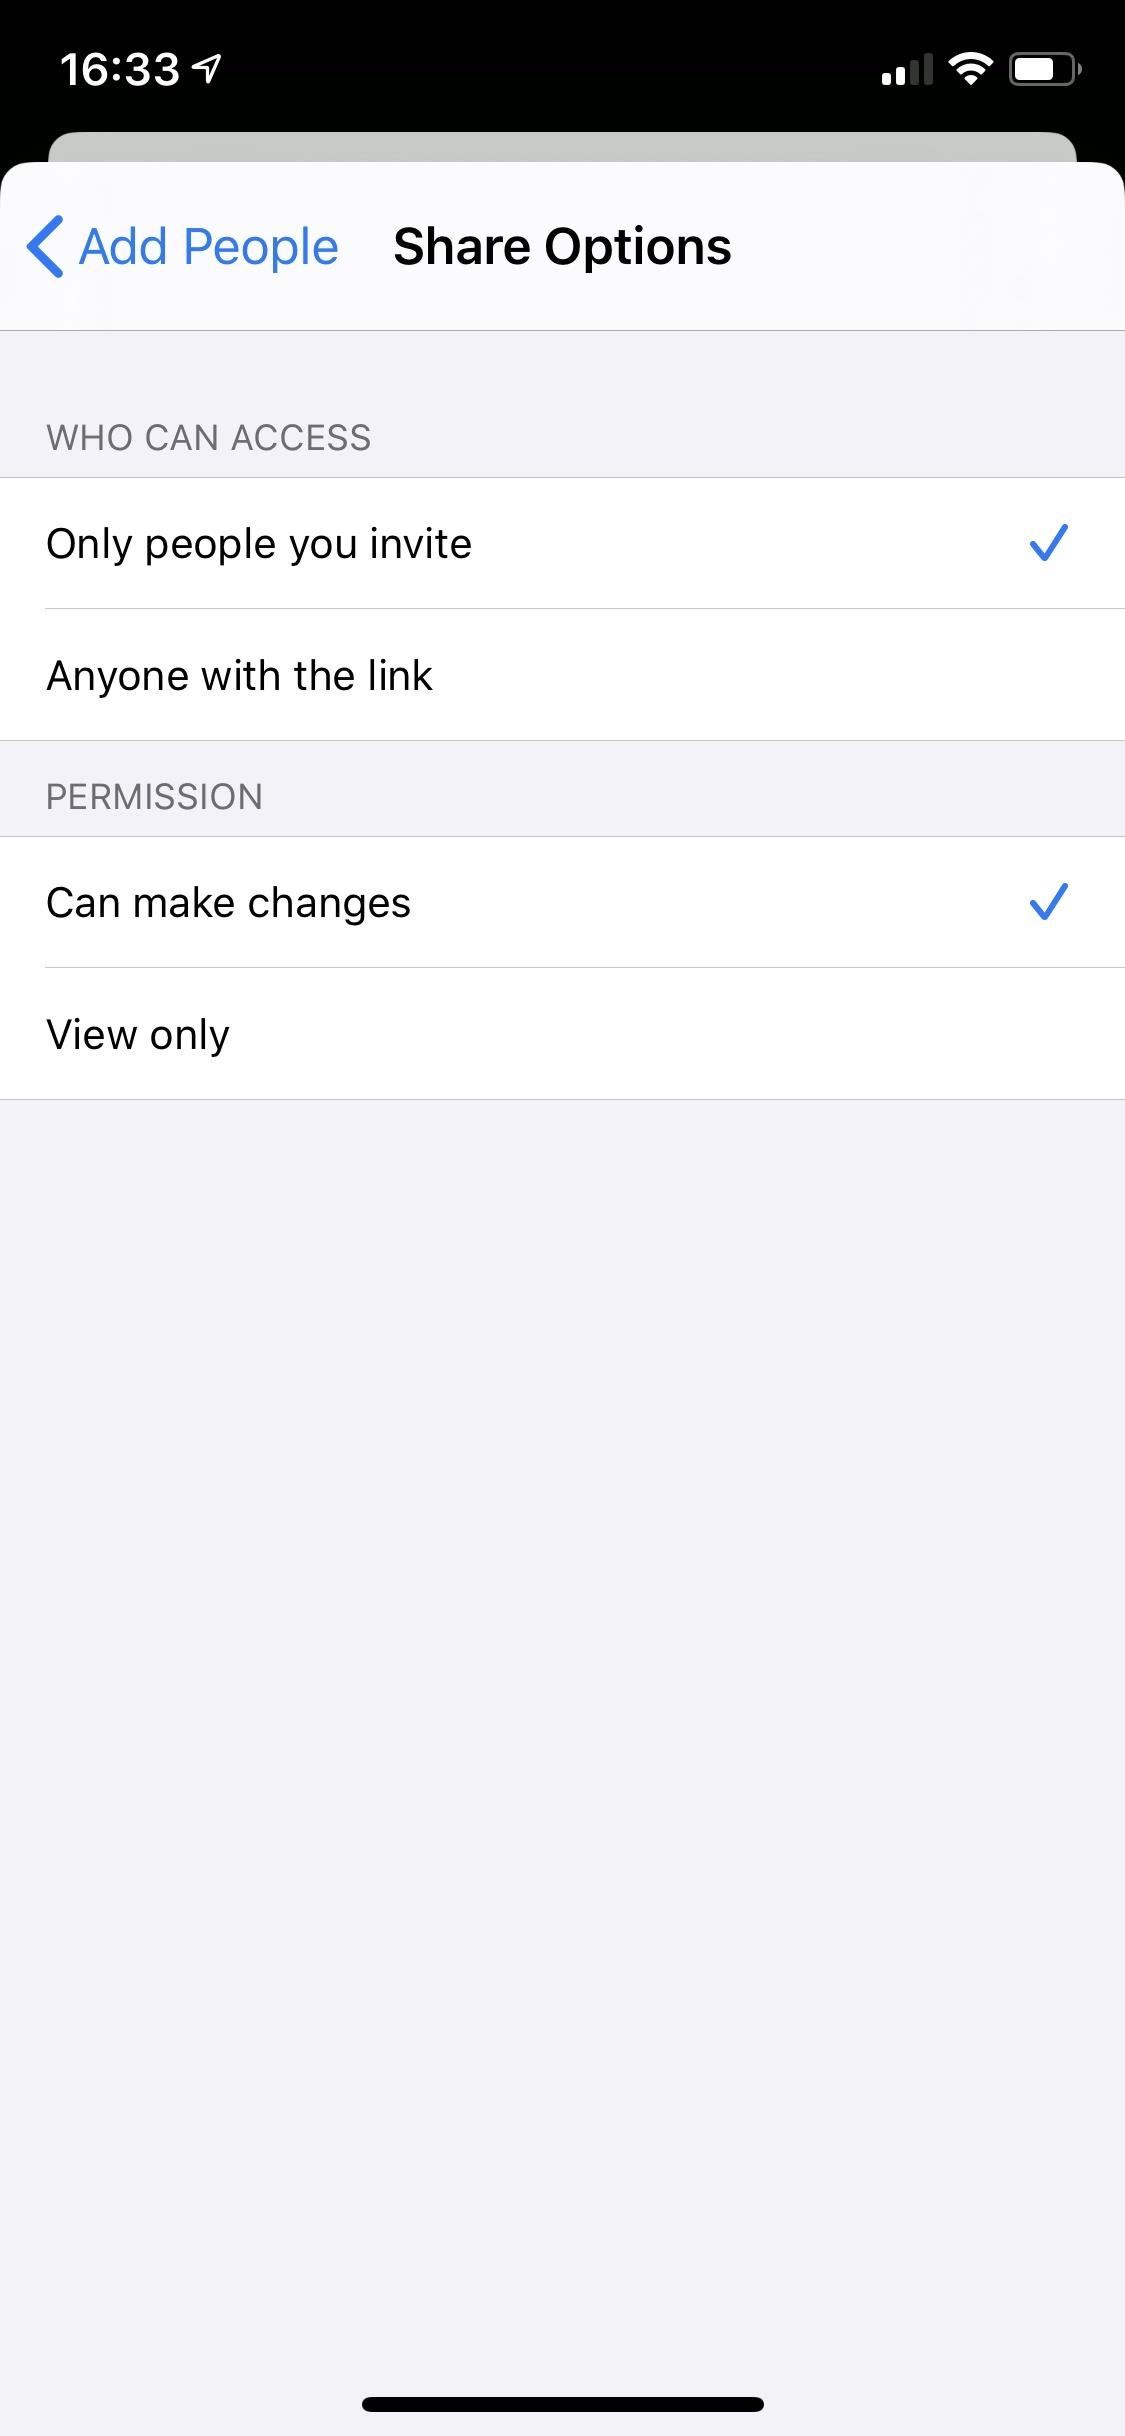
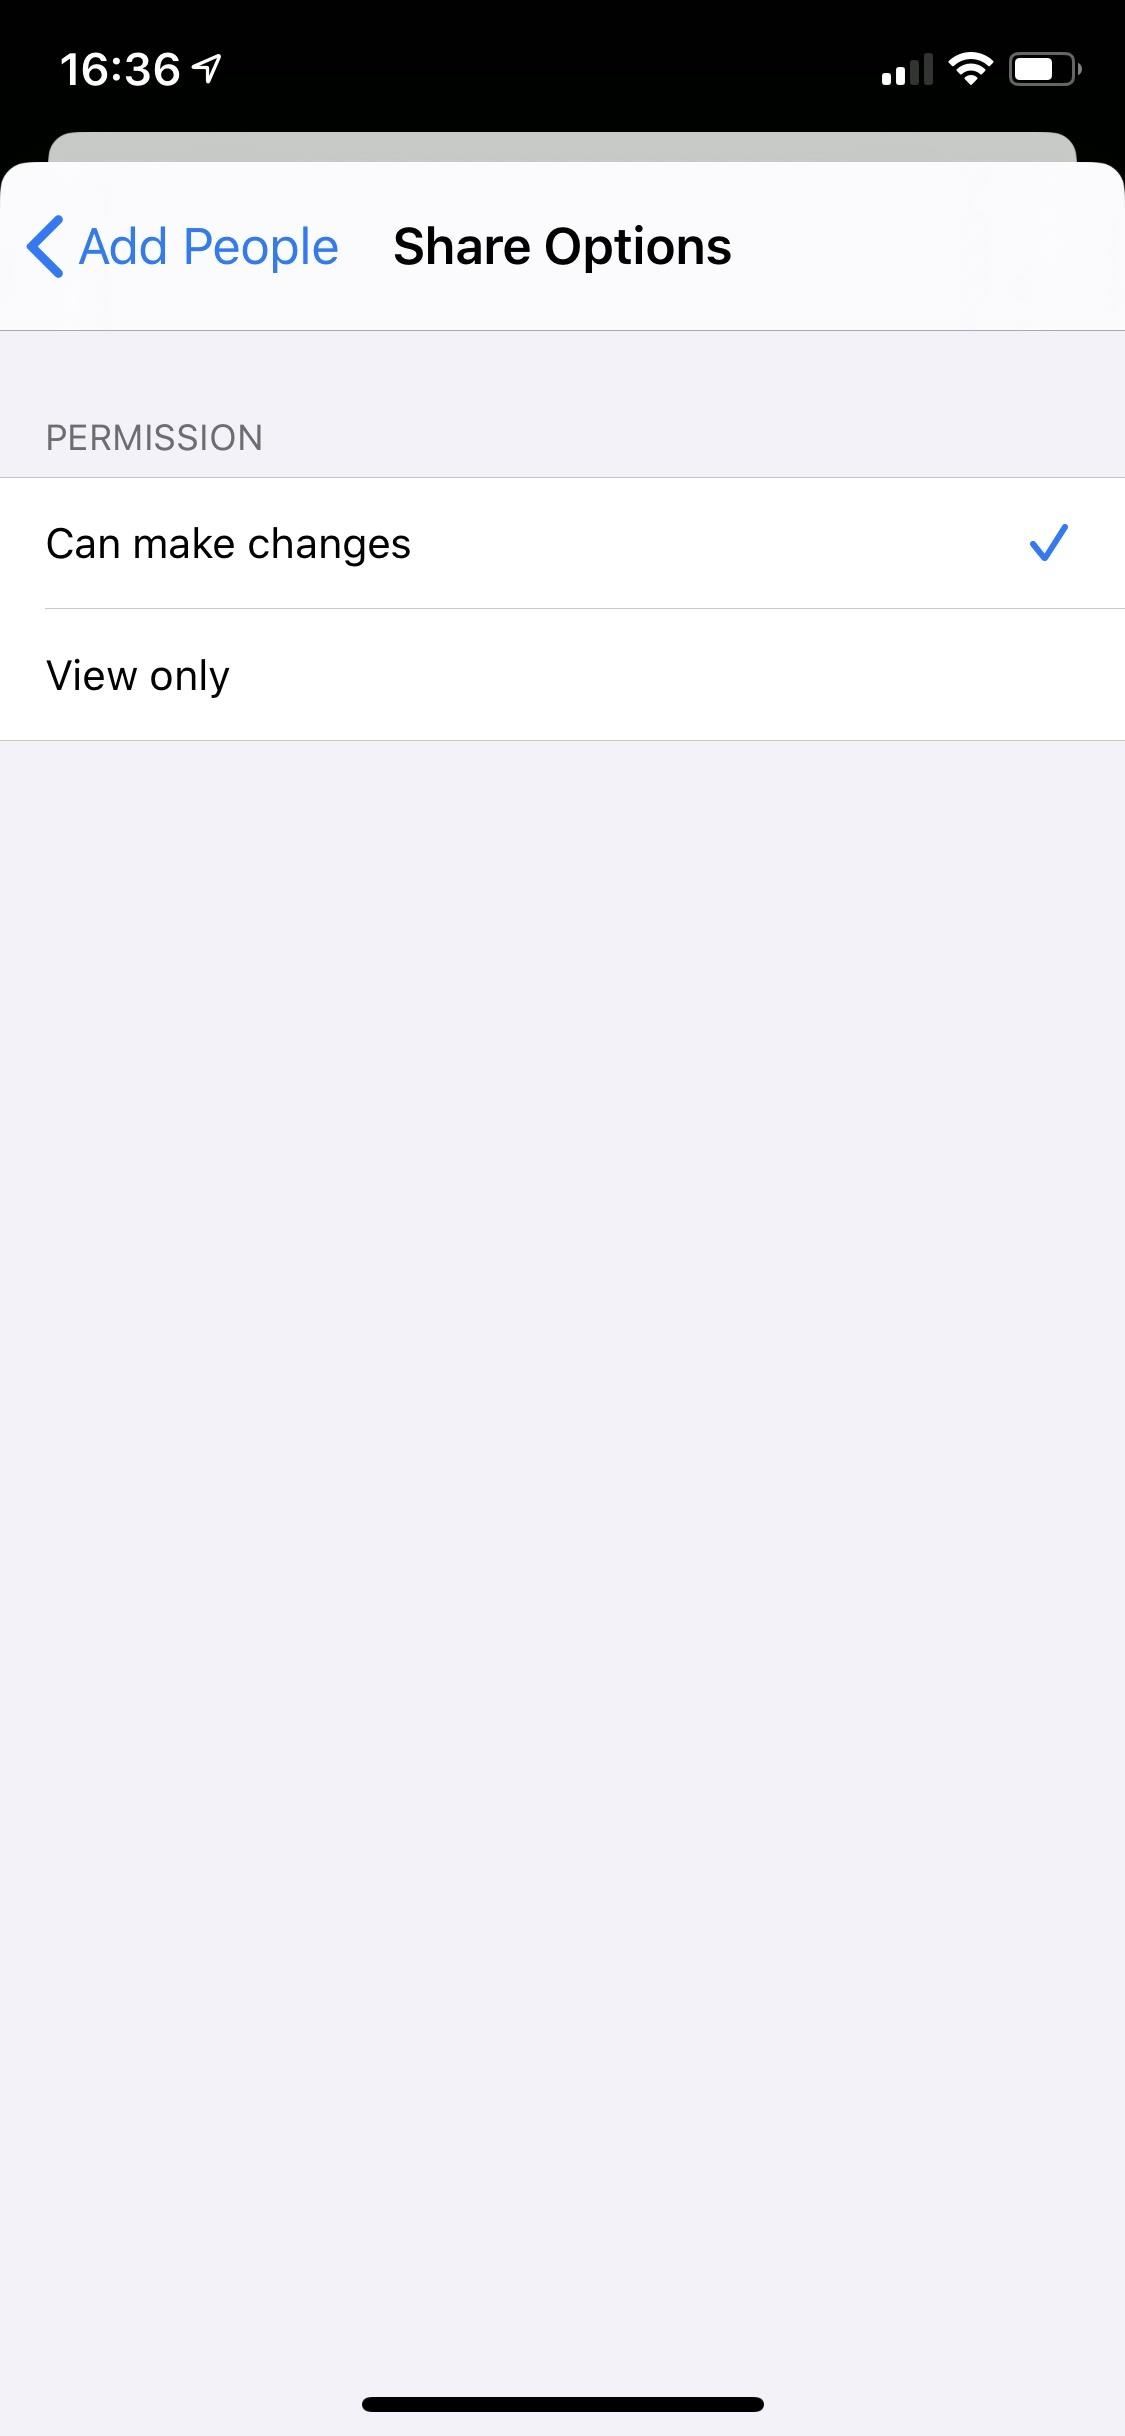
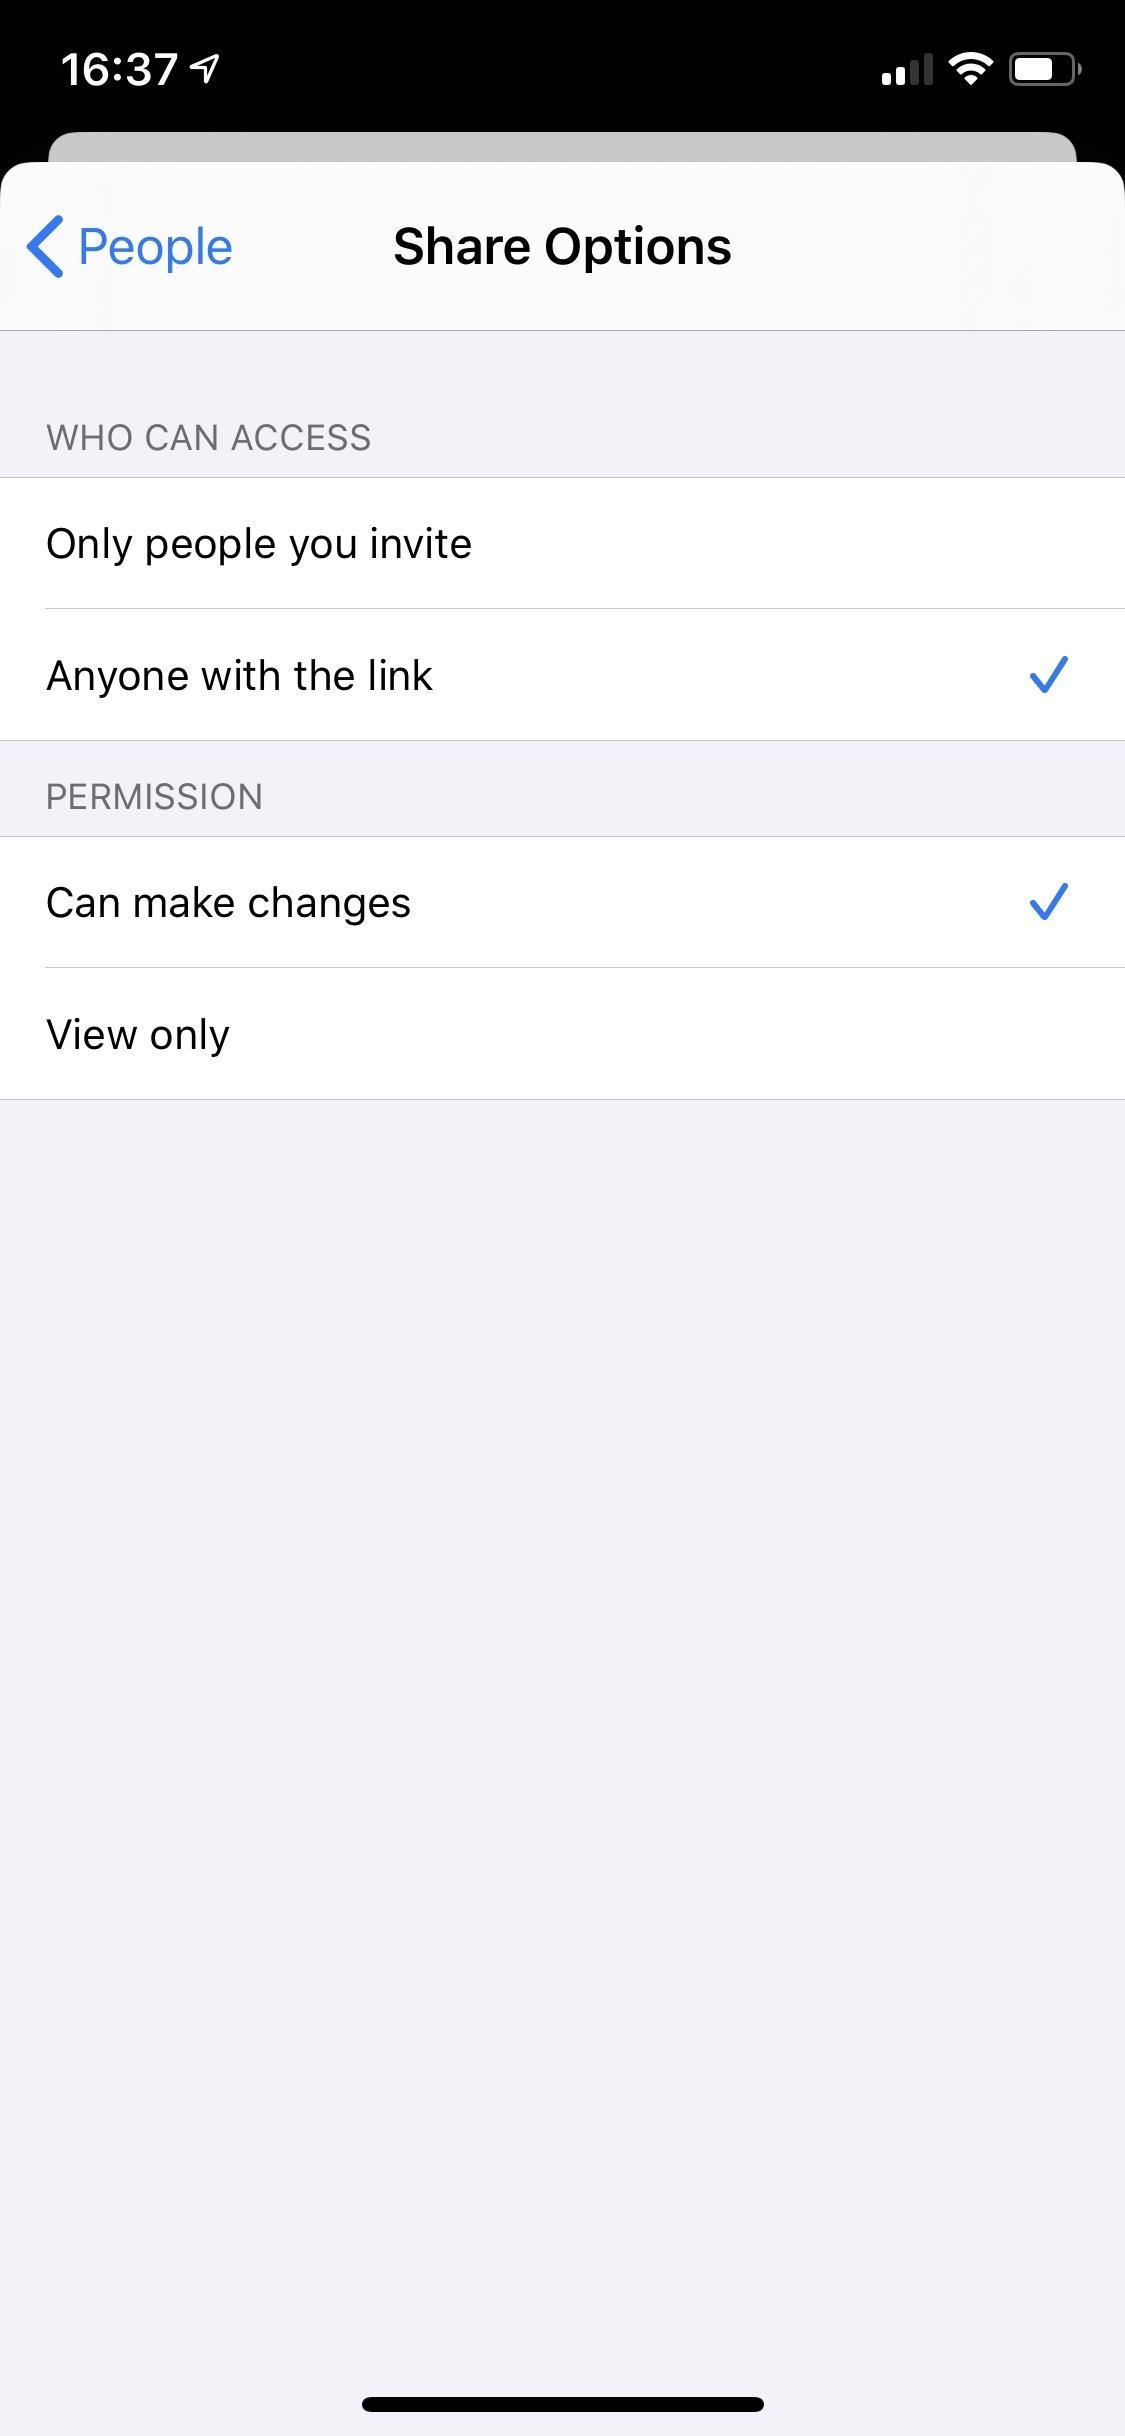
To change the access settings before sharing, tap “Share Options” below the row of apps. Here, you can choose to give access to “Only people you invite” or to “Anyone with the link.” With the former, only the people you pick can gain access to the folder in their iCloud account. With the latter, virtually anybody with an iCloud account can gain access as long as they have the folder’s link.
No matter which option you choose there, you can select to give them “View only” access or unrestricted access with “Can make changes.” When you use “Can make changes,” those people can add to the folder, delete content from the folder, and edit items within the folder. Changes appear in real-time and sync across everybody else’s iCloud; that way, everyone’s always on the same page. If you choose “View only,” any changes you make to the folder will be synced to everyone who has access, only they won’t be able to make any changes themselves.
Once ready, hit “Add People” and choose your method to share the link.

Add More People to the Shared Folder
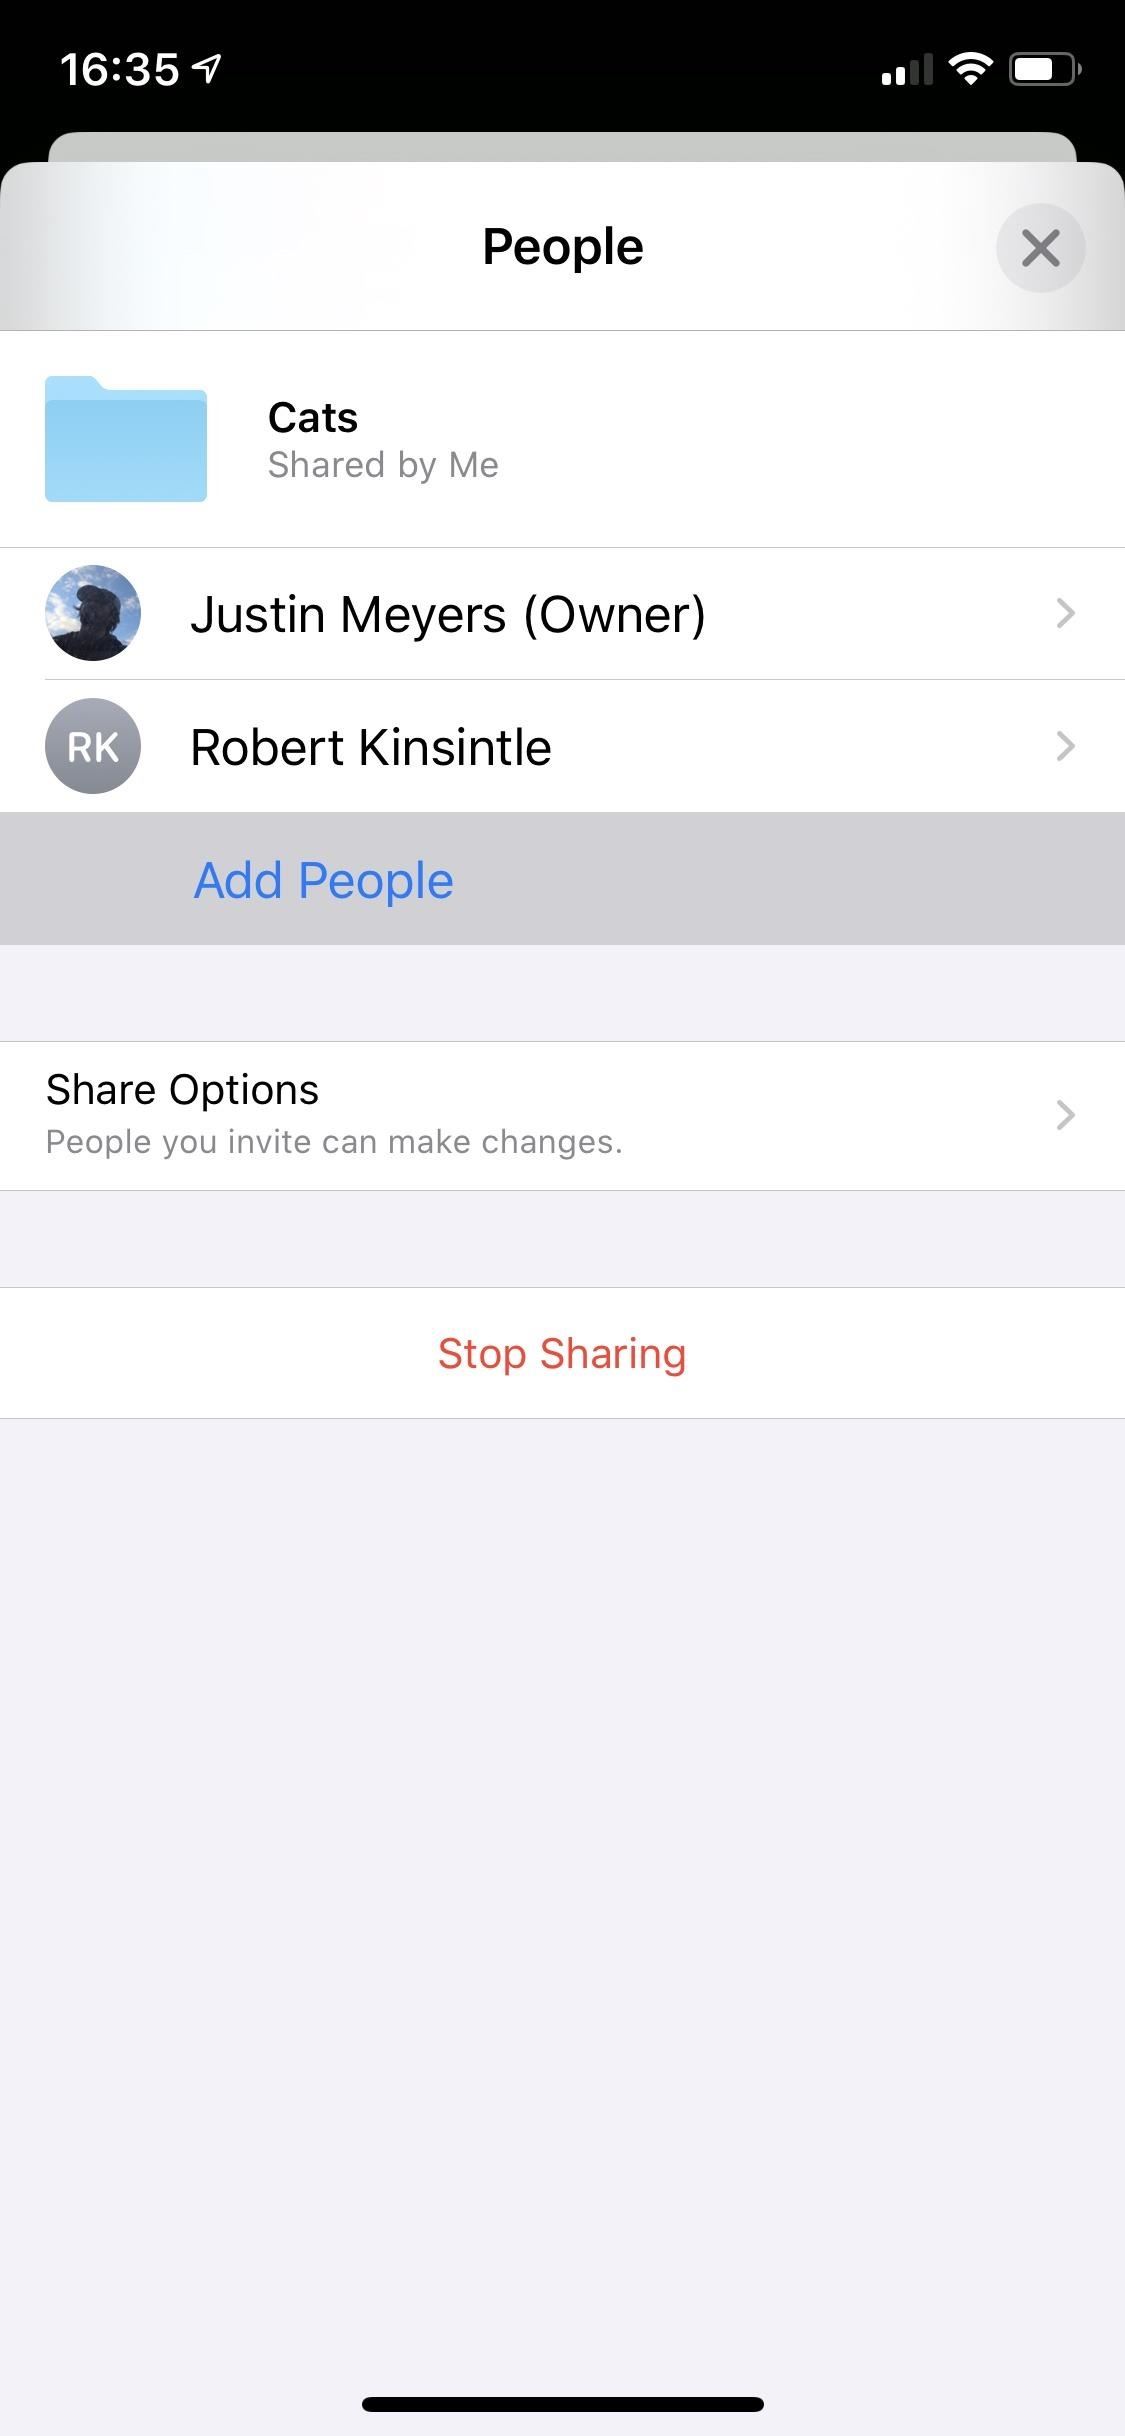
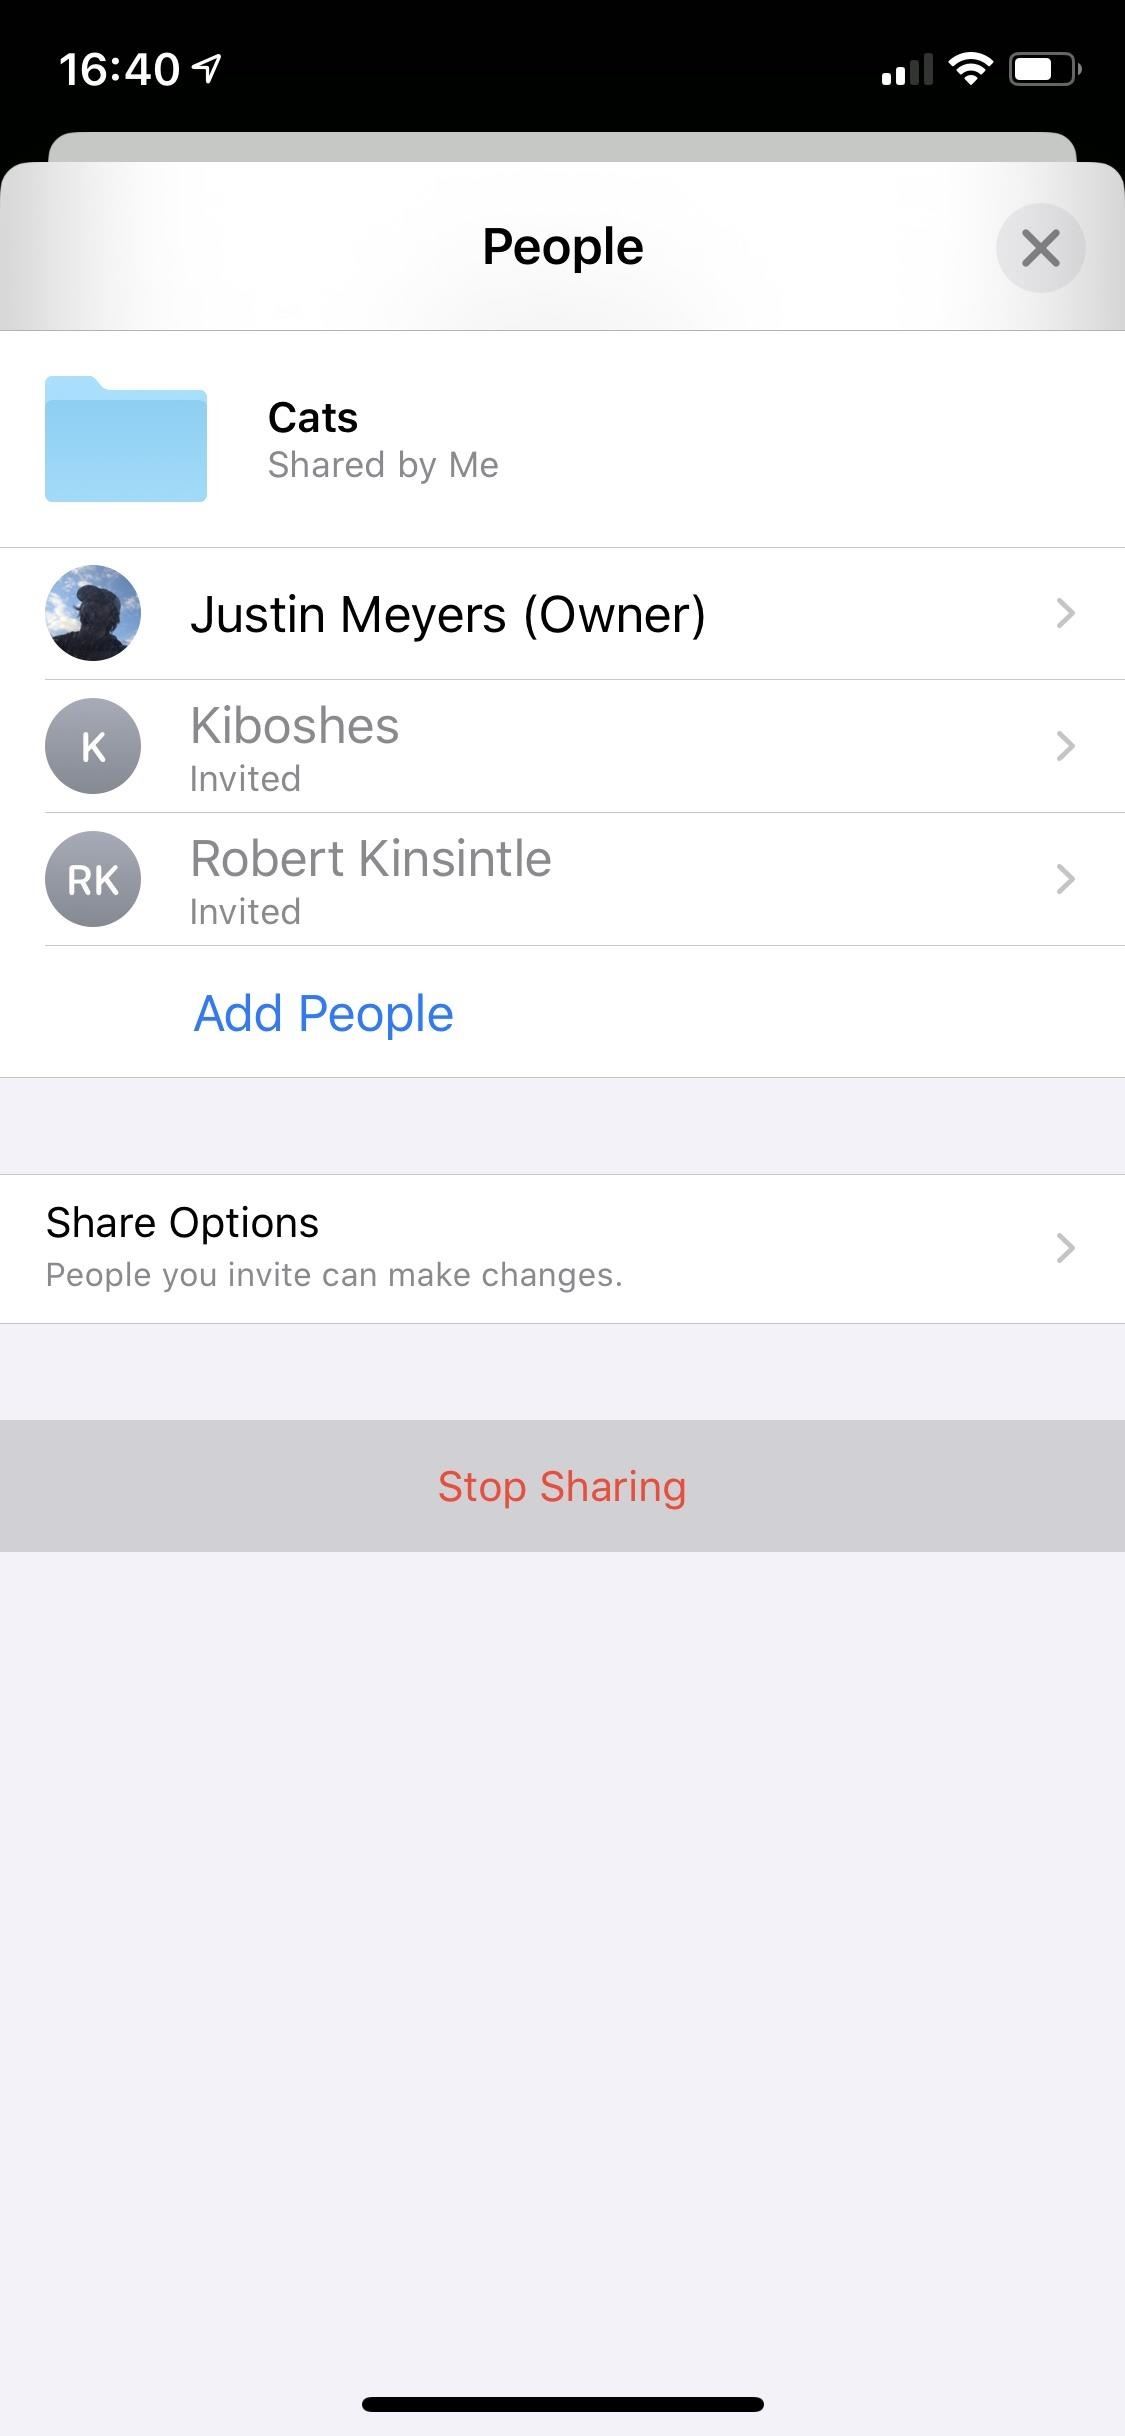
If you need to add another person, long-press on the folder icon again in the iCloud Drive folder in Files. Folders that are shared will say “Shared by” next to them, the folder icon will have a two-person icon. Again, select “Share,” but this time, hit “Show People.”

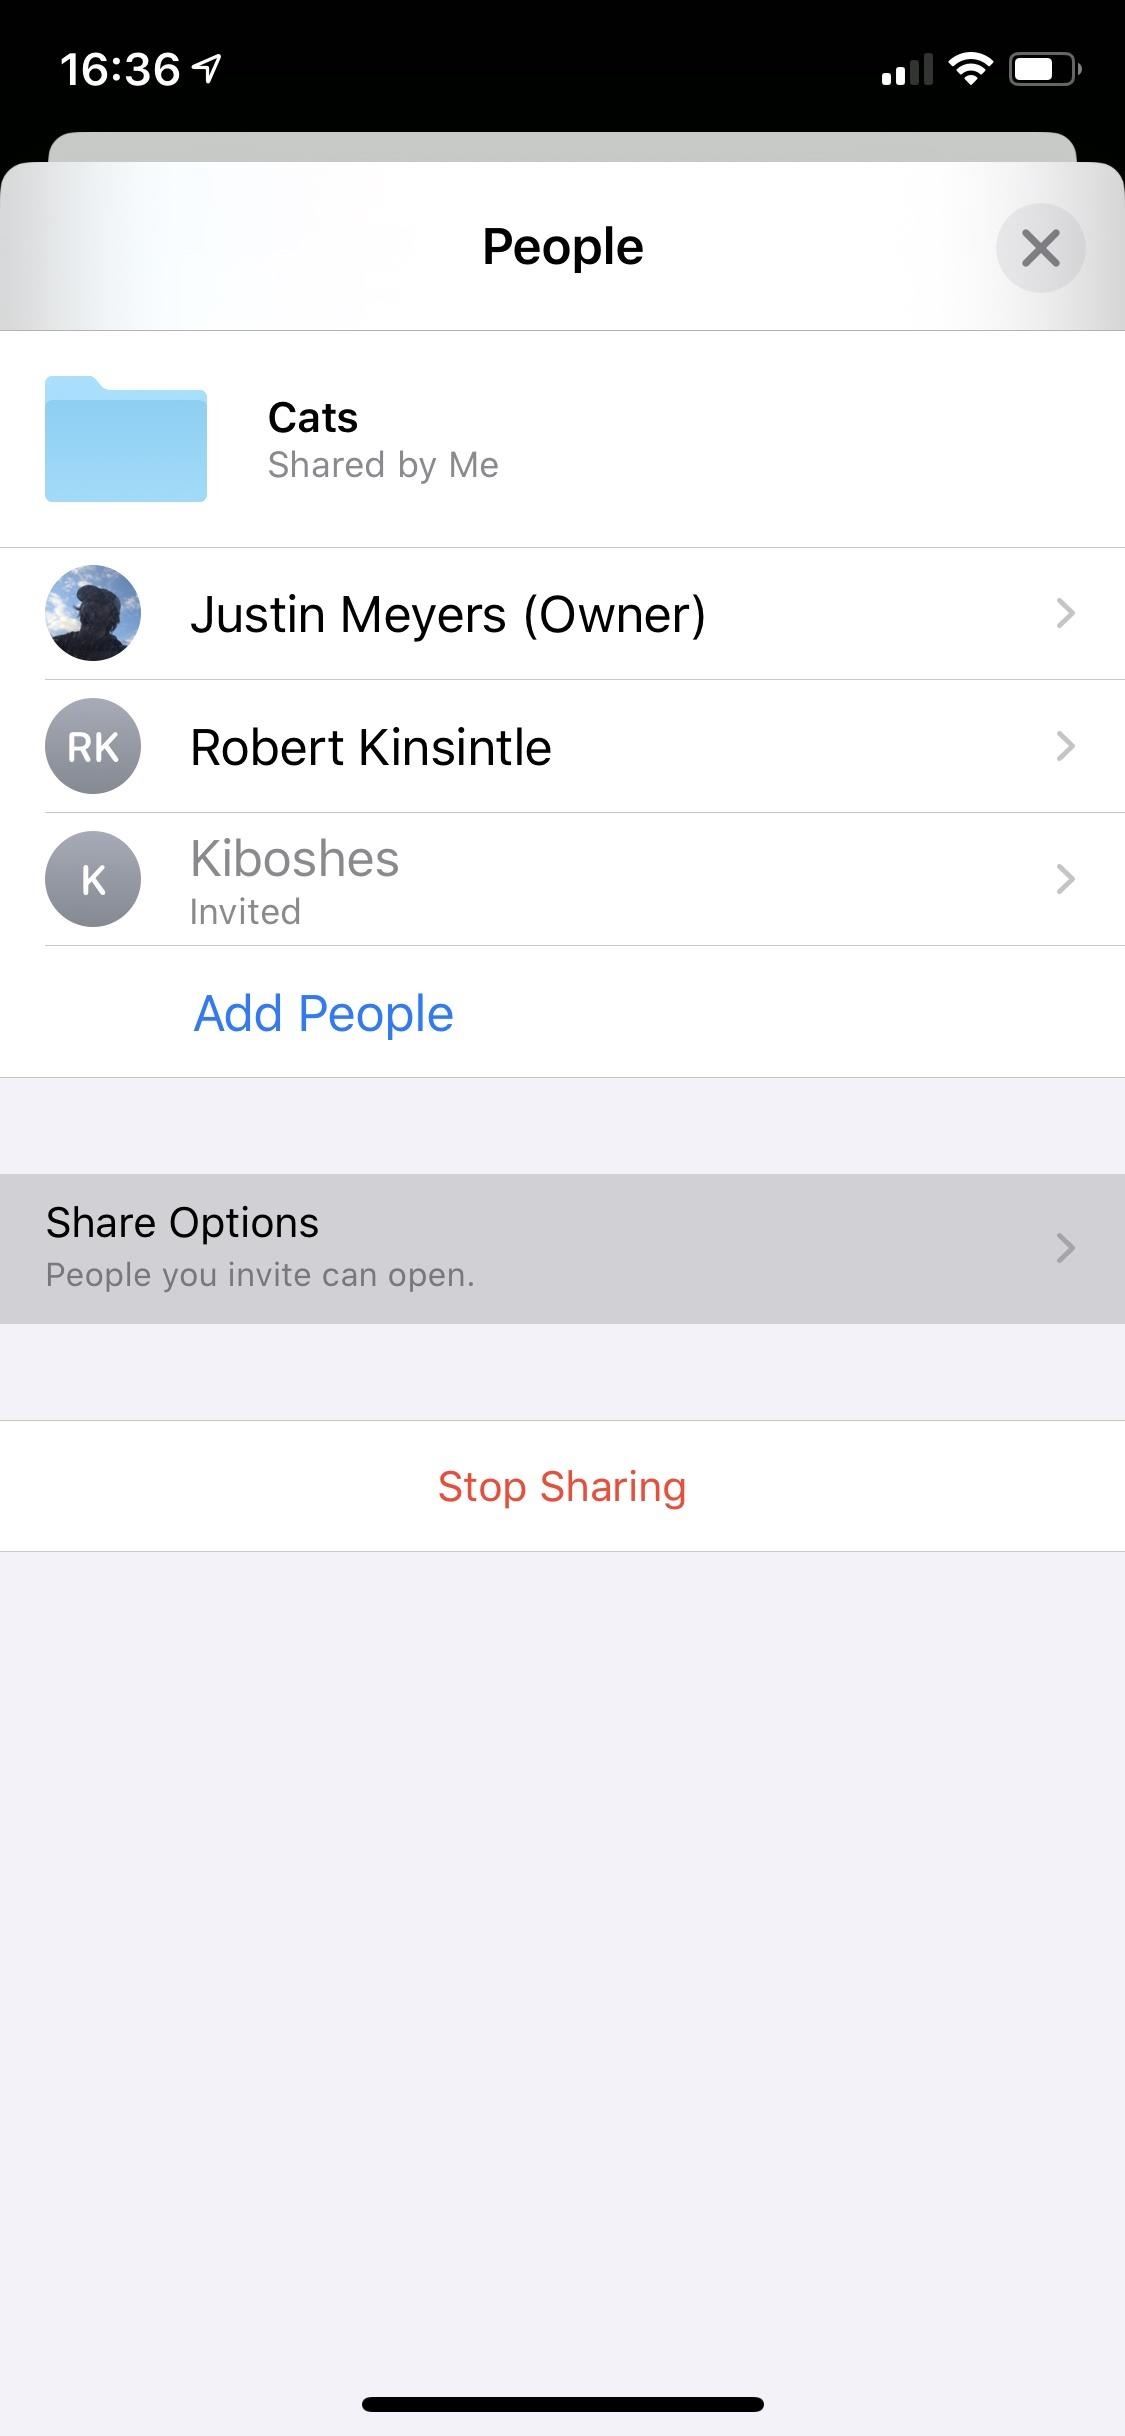
On the next page, you can see all of the current participants of the folder. If they have yet to accept the invite, they will be grayed out with an “Invited” note next to them.
Tap “Add People” and choose “Share Options” if you wish to make changes for that user. Anyone you invite can have different permissions. Then, back on the sharing screen, tap the app you’d like to use to share the link to the user or users.
Share a Link to the Folder Quickly
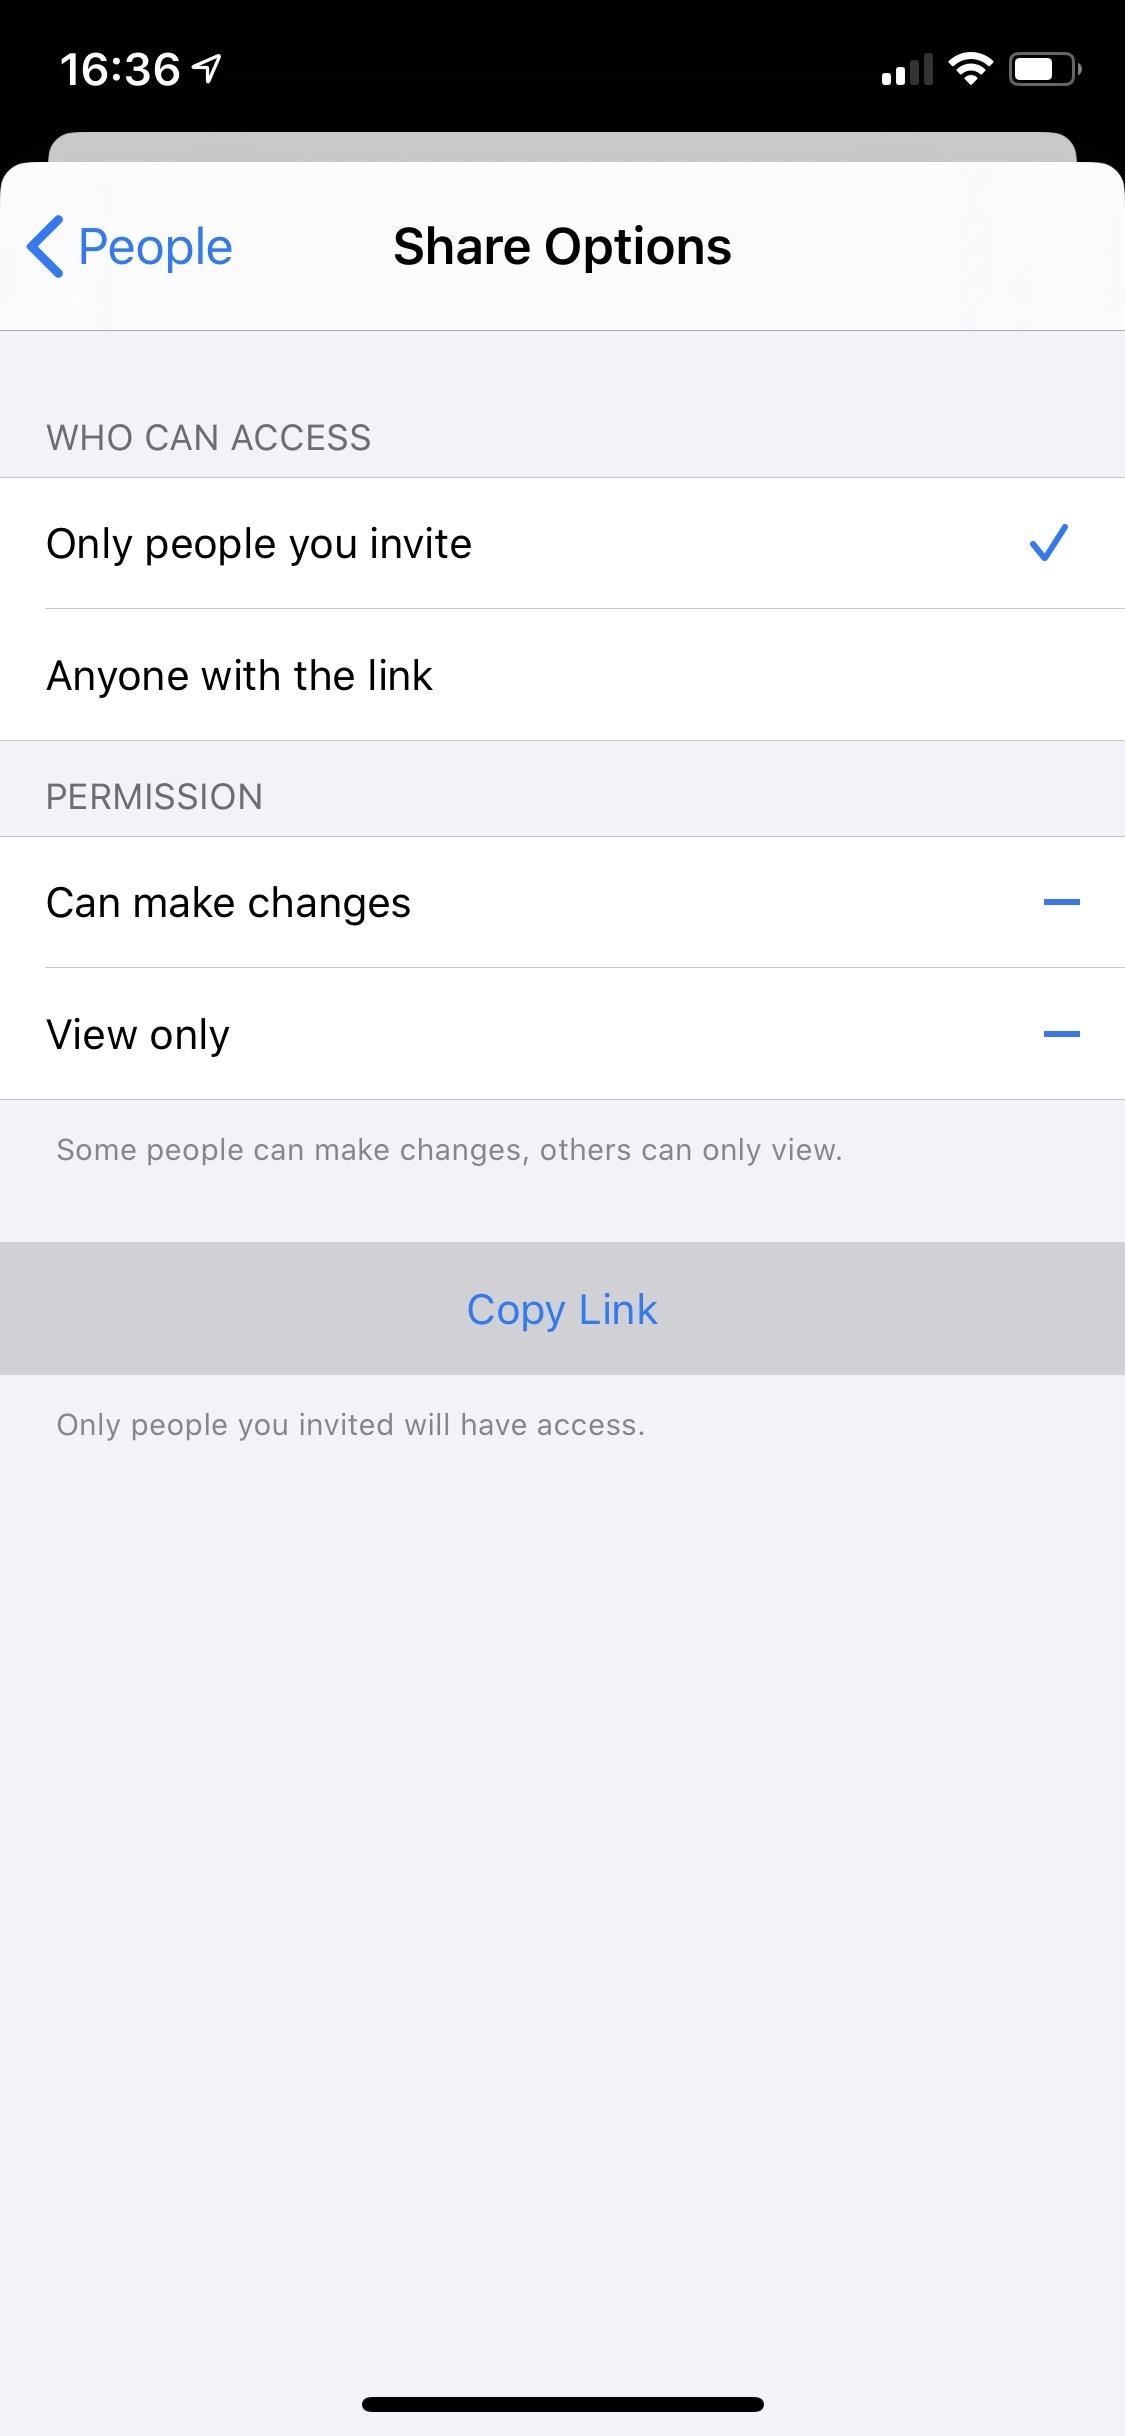
If you just need the link, you can copy it from the “Share Options” after selecting “Show People.” Just tap “Copy Link” at the bottom, then share it via a text or whatever. This is useful if a person you already invited lost the invite, so you don’t have to invite them again the long way.
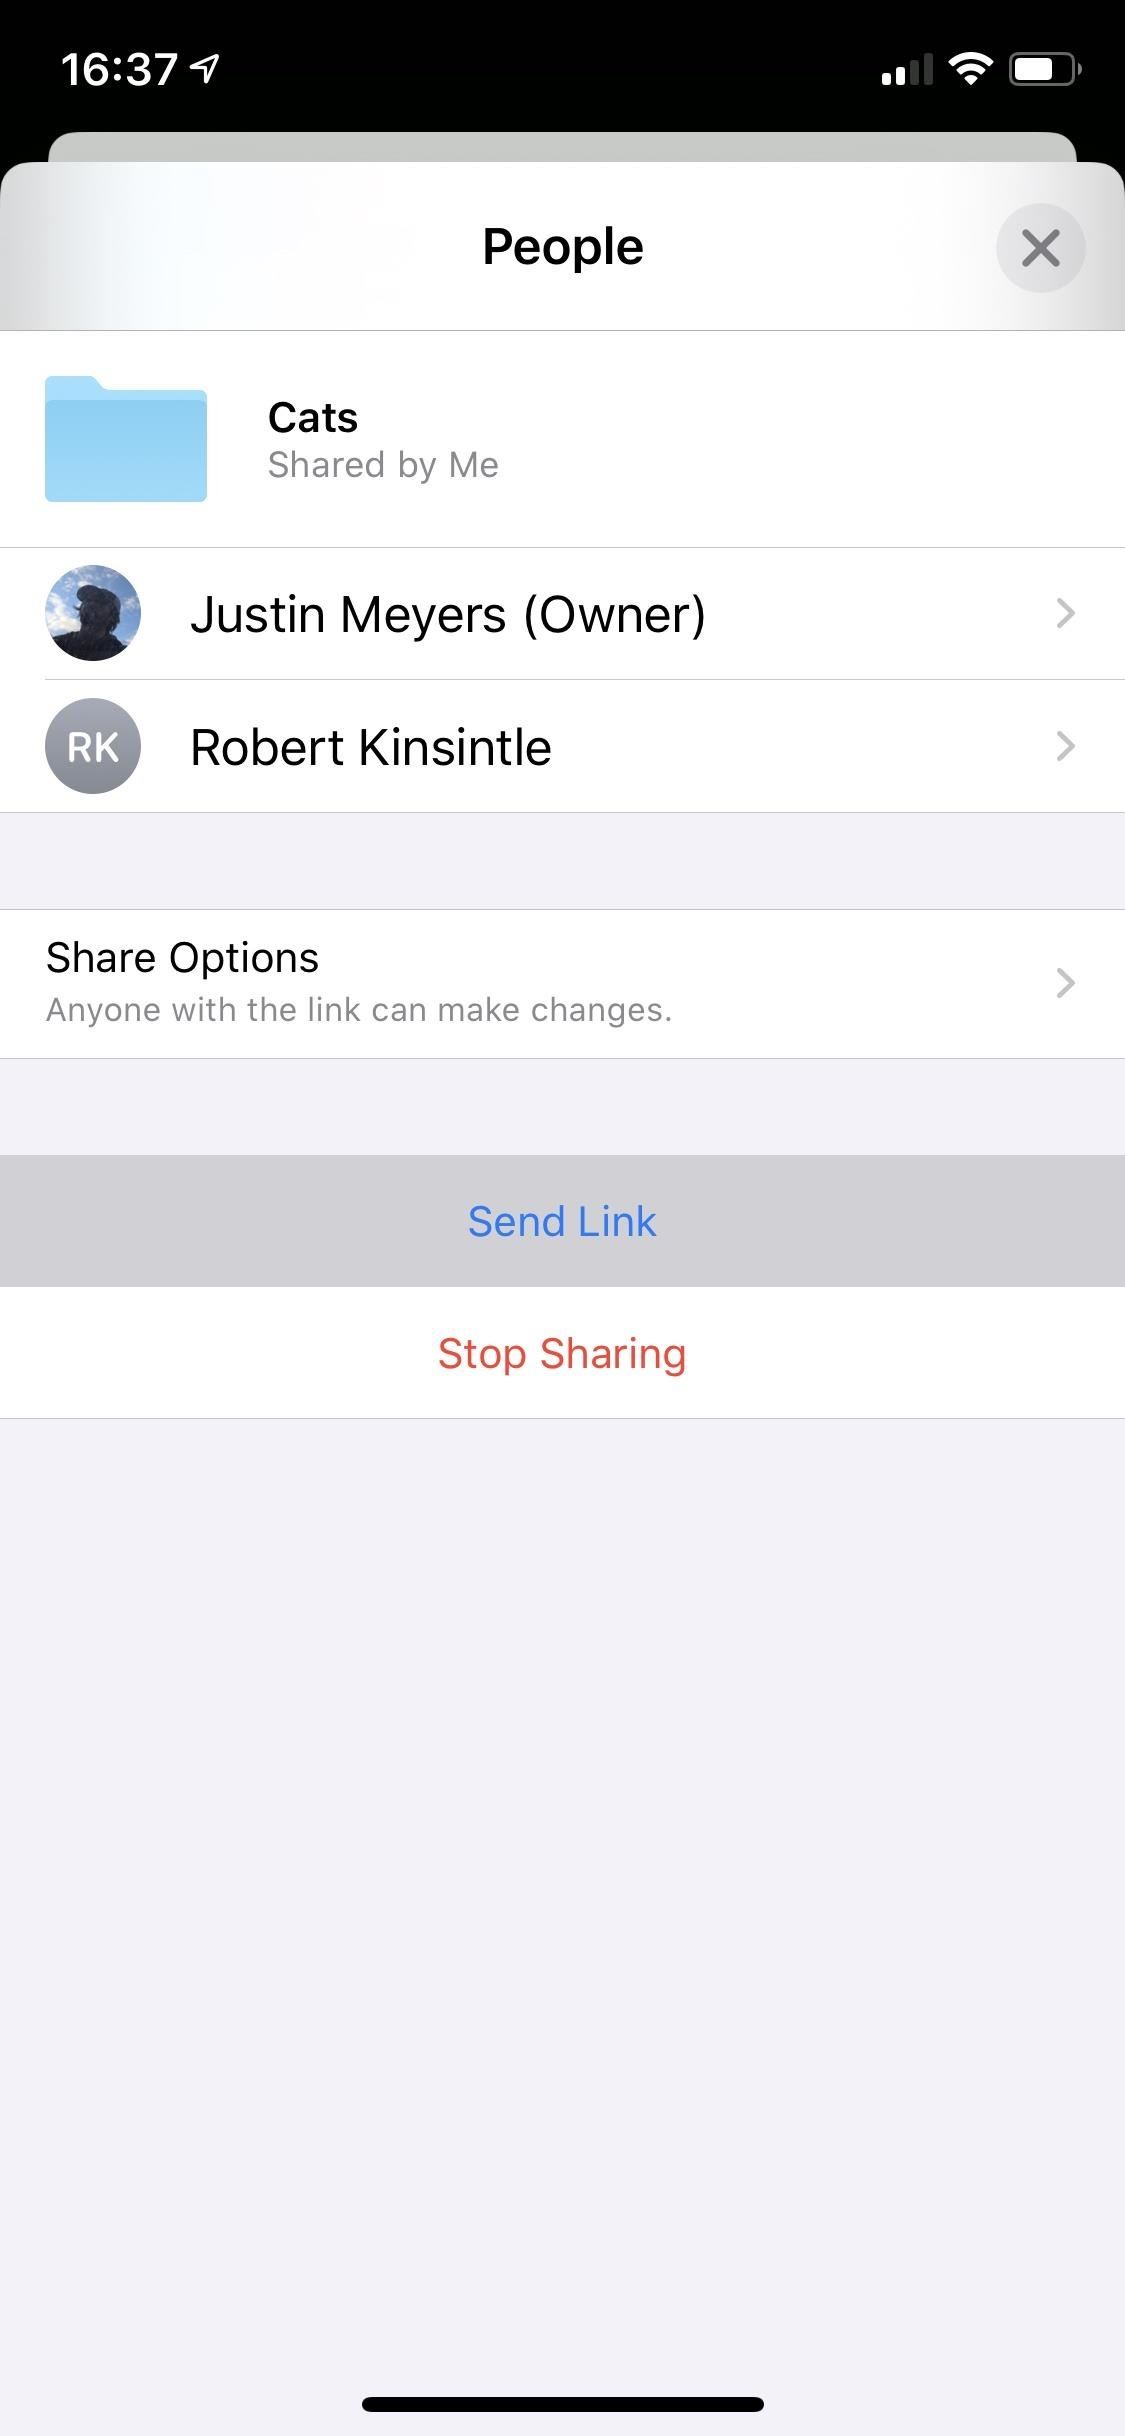
You can also get a quick link to copy whenever you have Who Can Access set to “Anyone with the link.” With that setting, there will be a “Send Link” option in the “Show People” menu. Tap that, then choose the method to share it.

Change the Sharing Settings for Individuals
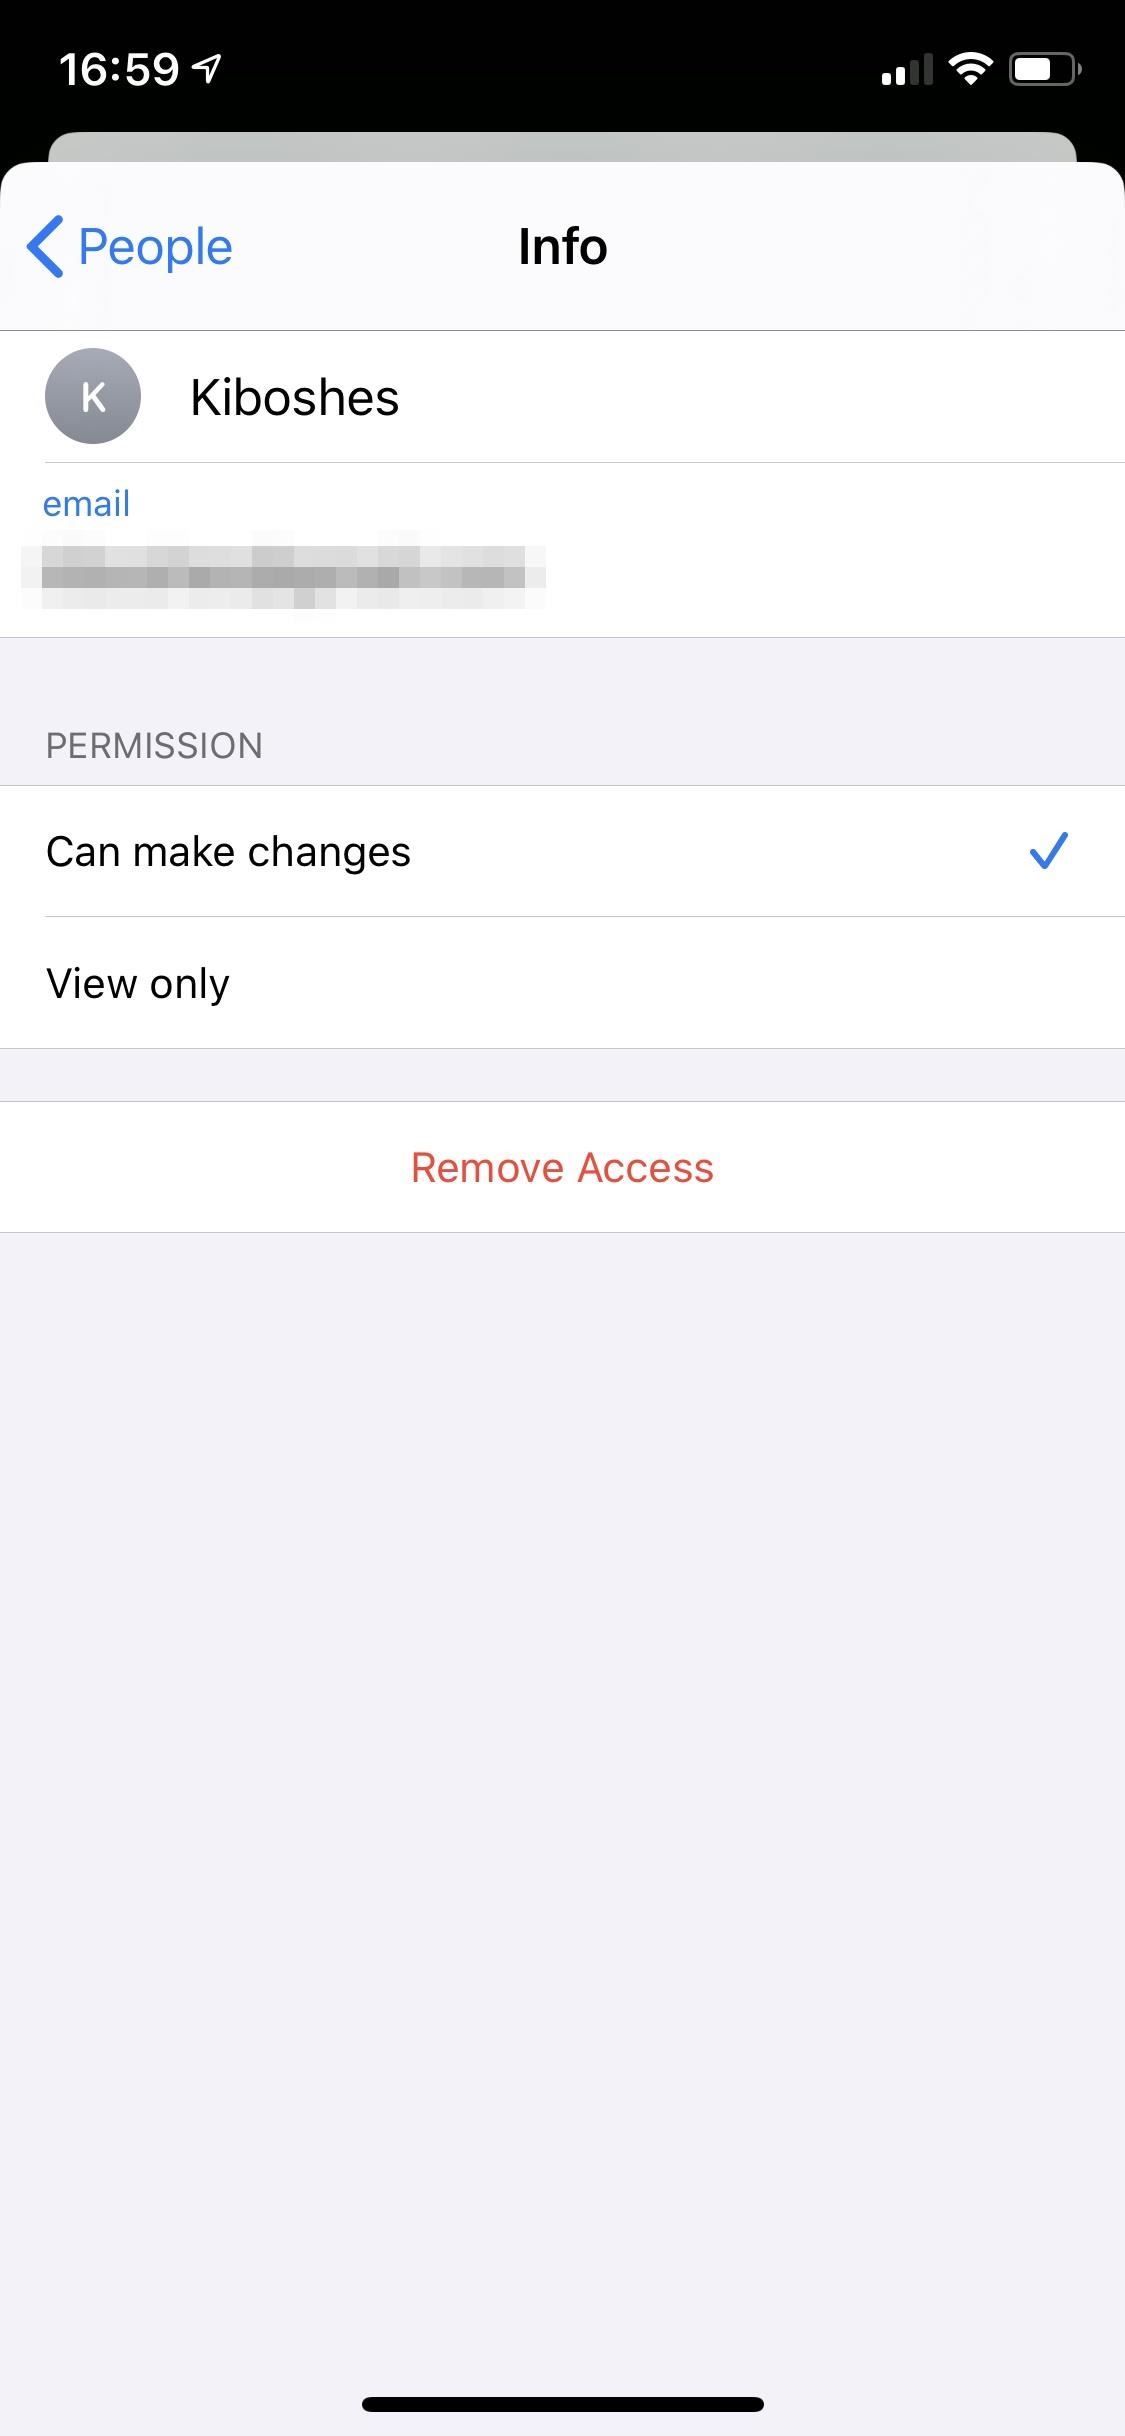
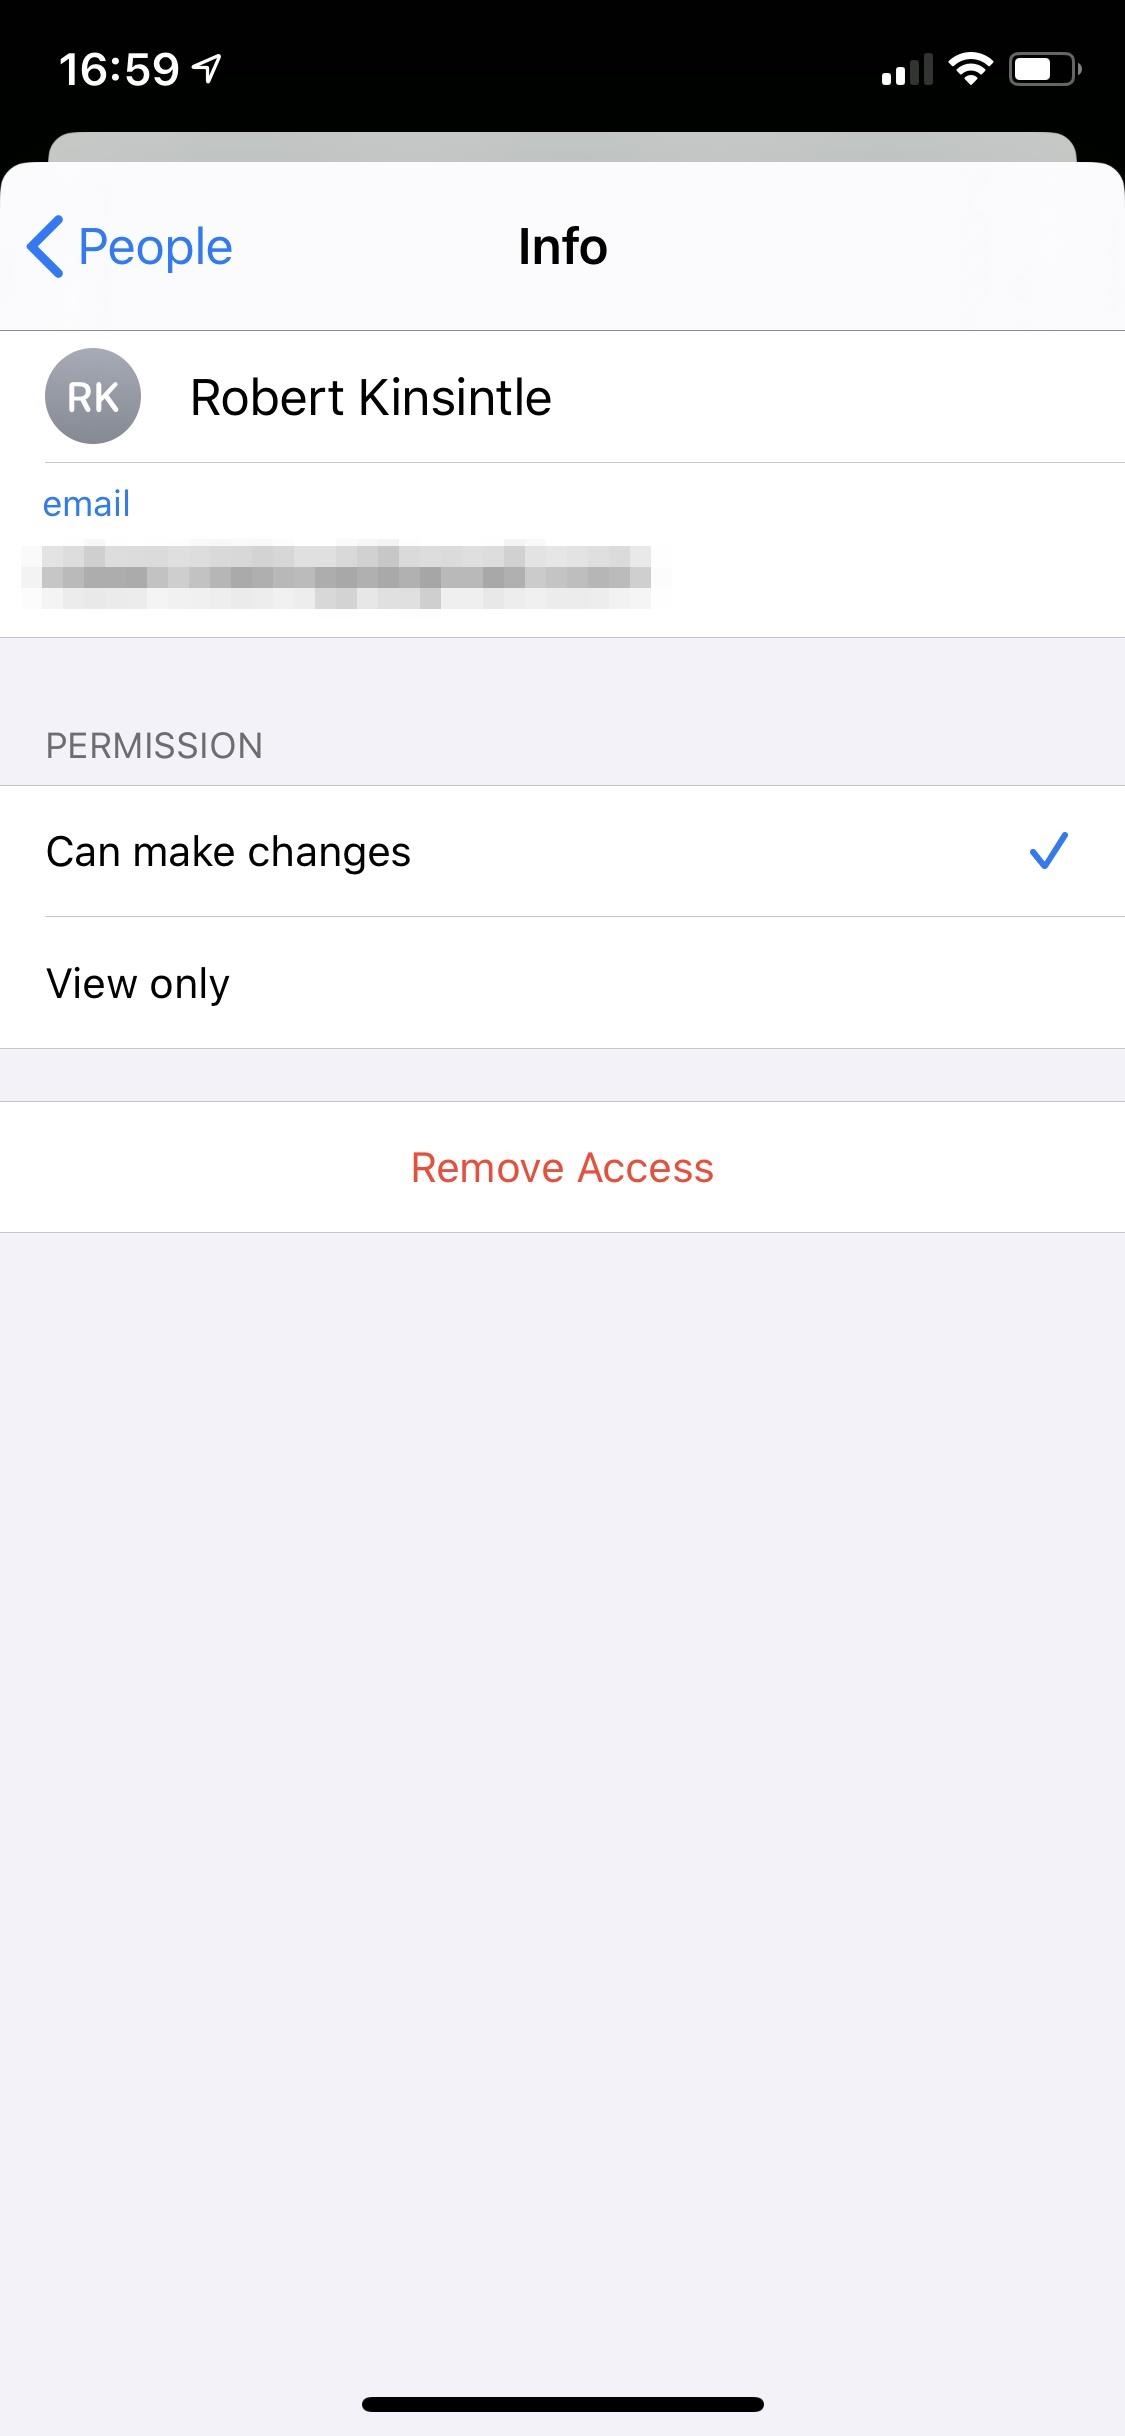
When it comes to user permissions, participants can have different settings. That way, you can let some users edit the folder contents but keep others restricted to view-only access. Just tap on a participant’s name from the “Show People” menu, and change their permissions accordingly. You can also “Remove Access” from here if you don’t want them checking out the folder at all anymore.
Change the Sharing Settings for the Folder
If you want to switch who can access the folder or what the default permissions are for users in the folder, from the “Show People” menu, hit “Share Options.” If people in the folder have different permissions, there will be dashes next to both options to indicate it. If you switch to “Can make changes” or “View only,” the choice will override any previous settings for collaborators.
When it comes to who can access the folder, if it’s currently invite-only, switching to “Anyone with the link” will let anyone with the link join. If it’s now open to anyone, but you switch to “Only people you invite,” everybody who had access to the folder will lose access, and you’ll need to invite them again.

Stop Sharing the Folder
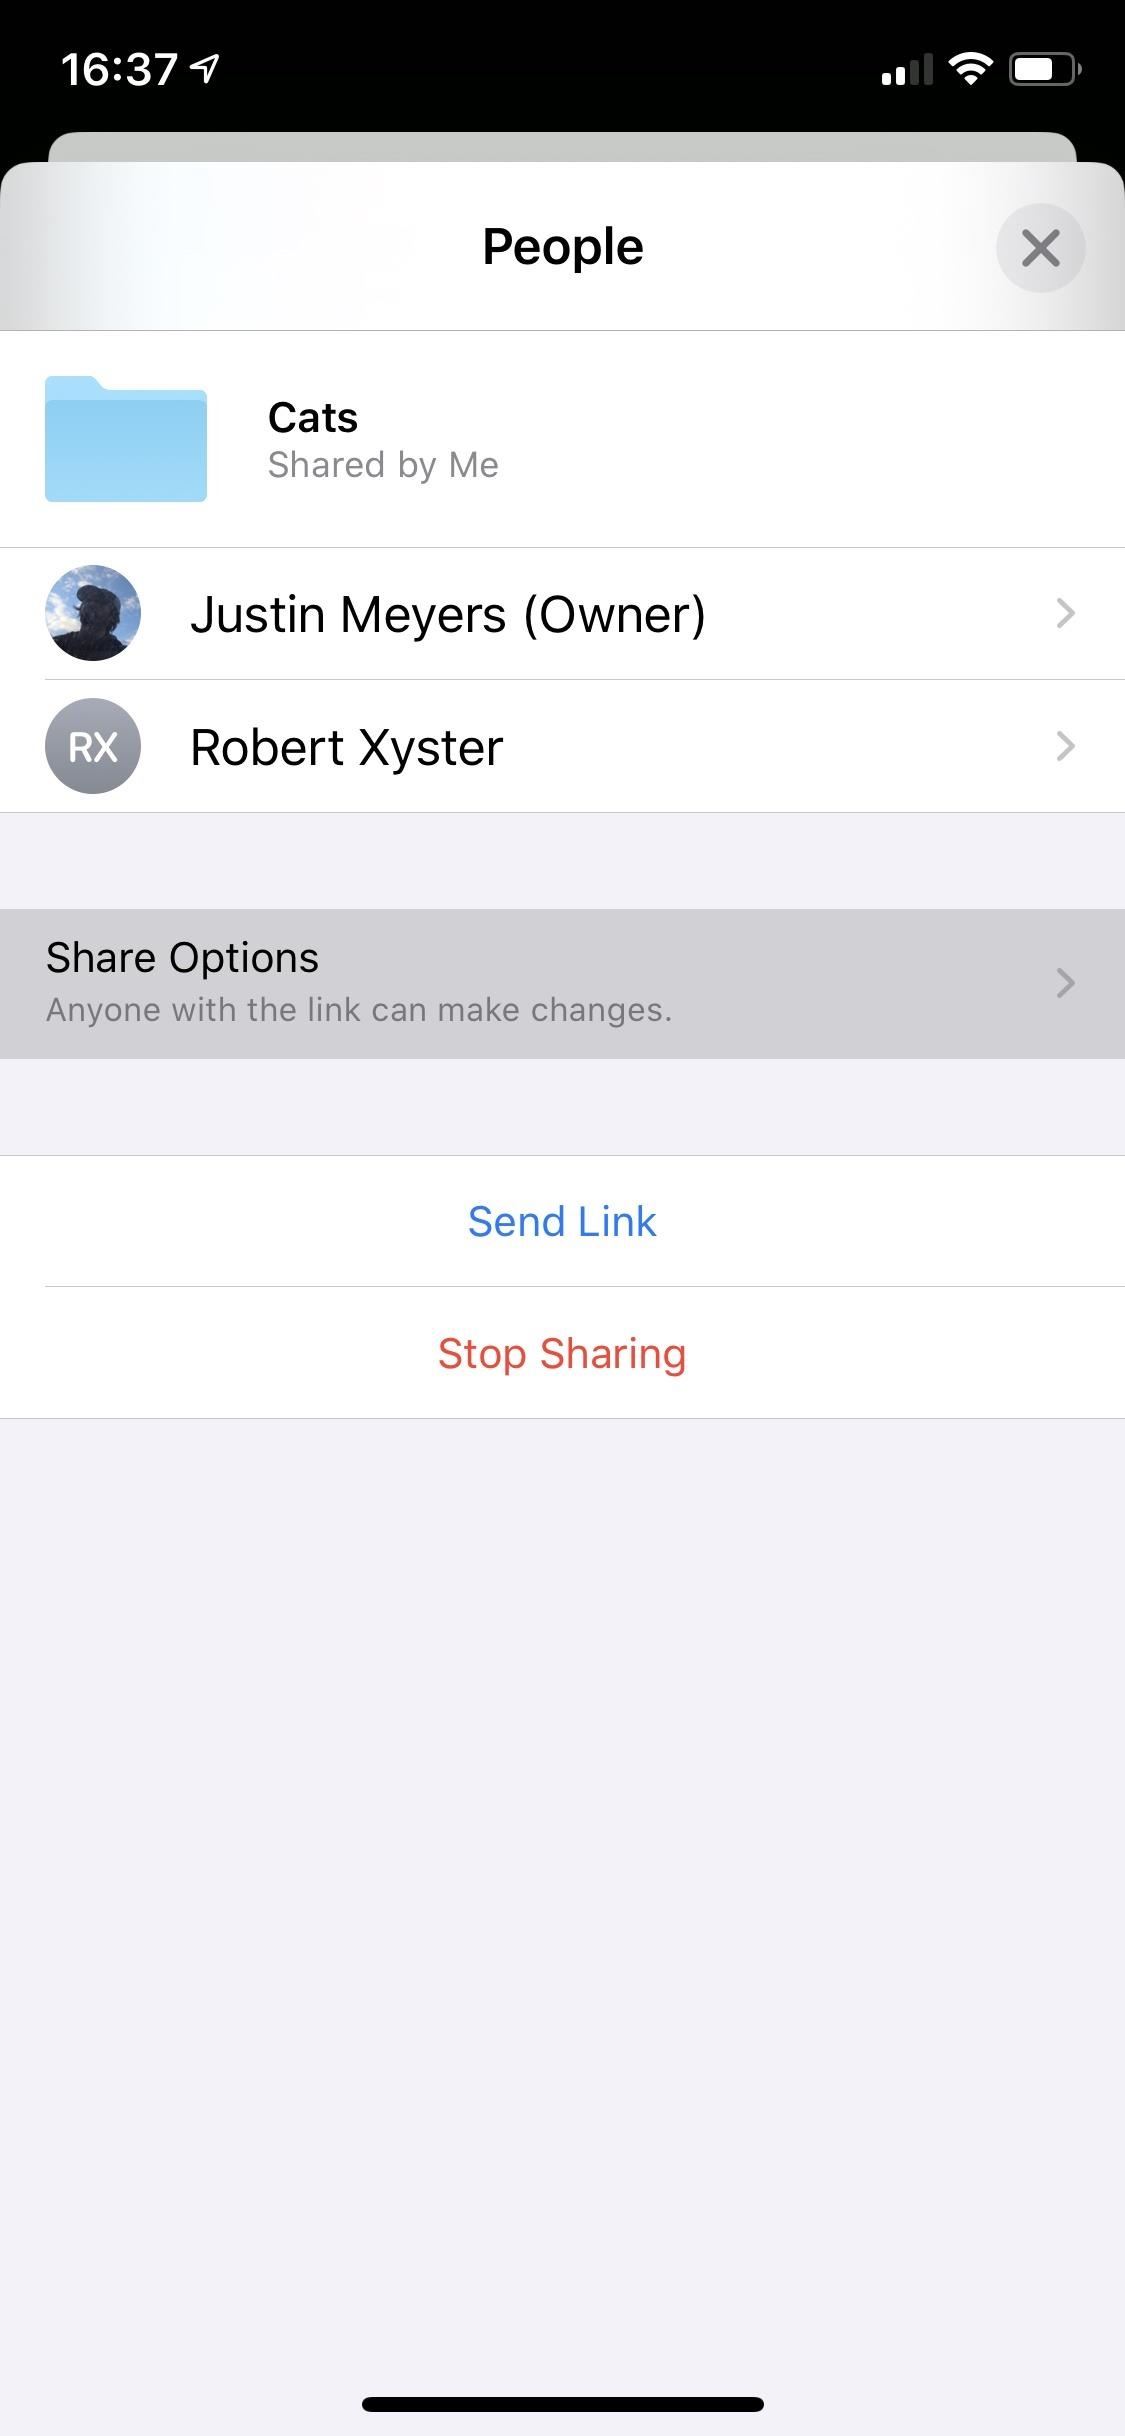
If you no longer want anyone to access the shared folder, you can stop sharing altogether. From the “Show People” menu, you can select individual users and hit “Revoke Access” to ban just them. Alternatively, you can left-swipe on the names and tap “Remove” to do the same.
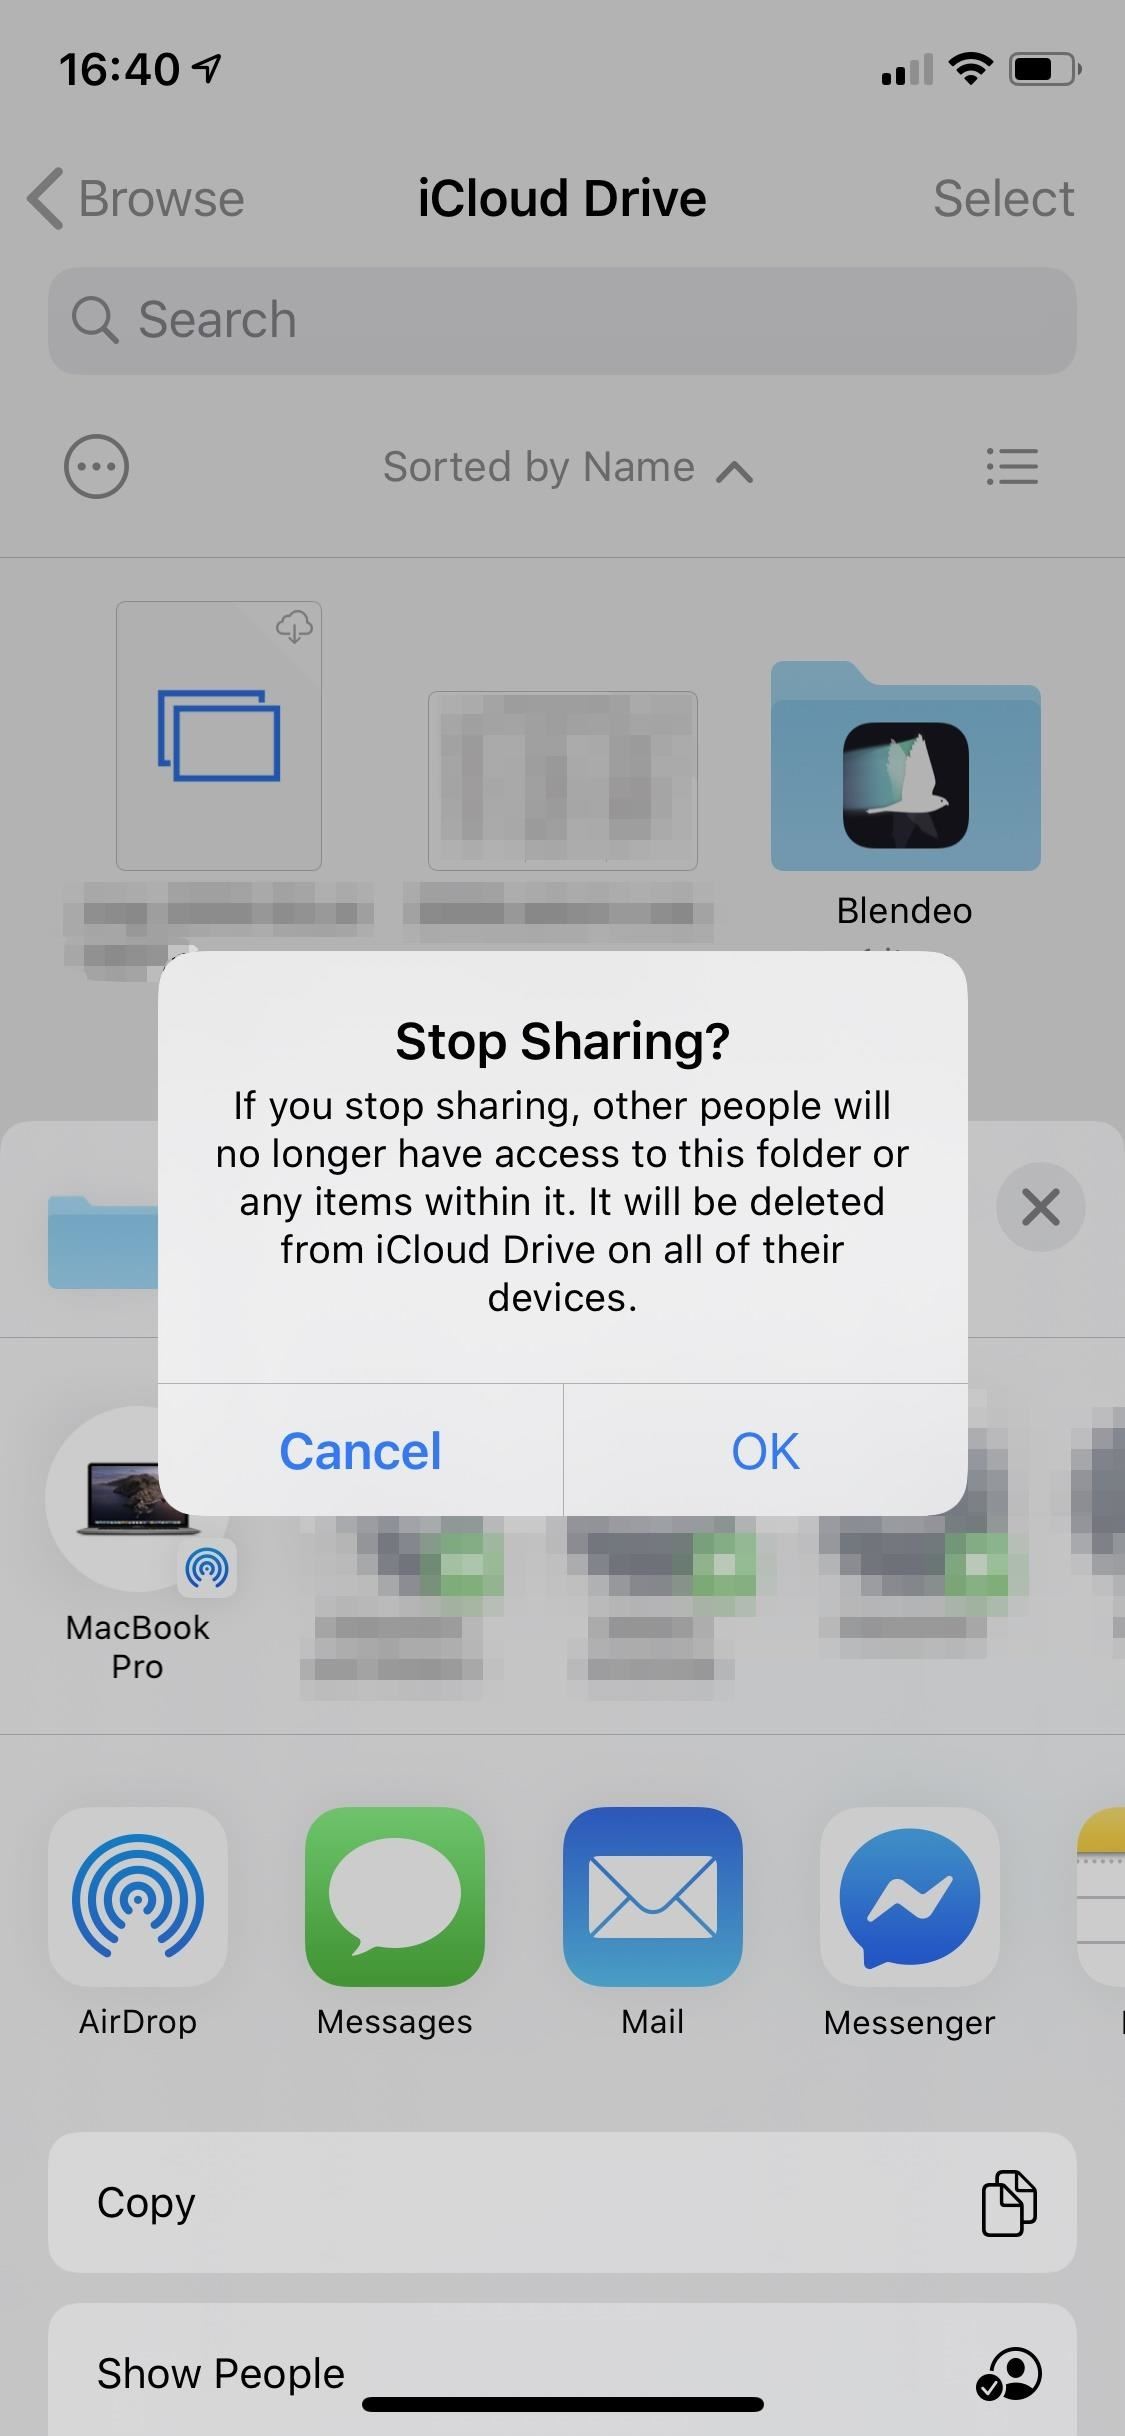
To drop access for all participants, hit “Stop Sharing” instead, then “OK” on the confirmation prompt. Alternatively, you can move the folder to another location in the Files app to do the same.
Just updated your iPhone? You’ll find new emoji, enhanced security, podcast transcripts, Apple Cash virtual numbers, and other useful features. There are even new additions hidden within Safari. Find out what’s new and changed on your iPhone with the iOS 17.4 update.
“Hey there, just a heads-up: We’re part of the Amazon affiliate program, so when you buy through links on our site, we may earn a small commission. But don’t worry, it doesn’t cost you anything extra and helps us keep the lights on. Thanks for your support!”


