When it comes to customizing Android, there’s nothing quite like Magisk. You can potentially combine dozens of modules to create a one of a kind user experience tailored to you, but not all modules will work well together. You might run into a bootloop by accident once in a while, which could cause some issues on its own.
Whether a single module itself has bugs and caused a bootloop to occur or just general compatibility issues between multiple sources, it’s certainly something to keep in mind when stringing together more than one module. Although a much lower chance now, primarily because Magisk modules work systemlessly, there’s still a slight chance you can run into a bootloop that can stop you in your tracks.
What happens when you can’t get back into your device to remove the module that’s causing you to bootloop in the first place? Normally, you’d need to either re-flash your phone’s factory images or wipe all data on the device. But thanks to a new mod by XDA developer VR25, there’s now an easier way. With this module installed, you’ll able to manage all of your Magisk modules directly from the custom recovery environment at any time, such as TWRP.
Requirements
Step 1: Install Magisk Manager for Recovery Mode
Note: If you’re currently in a bootloop, skip past the next two paragraphs.
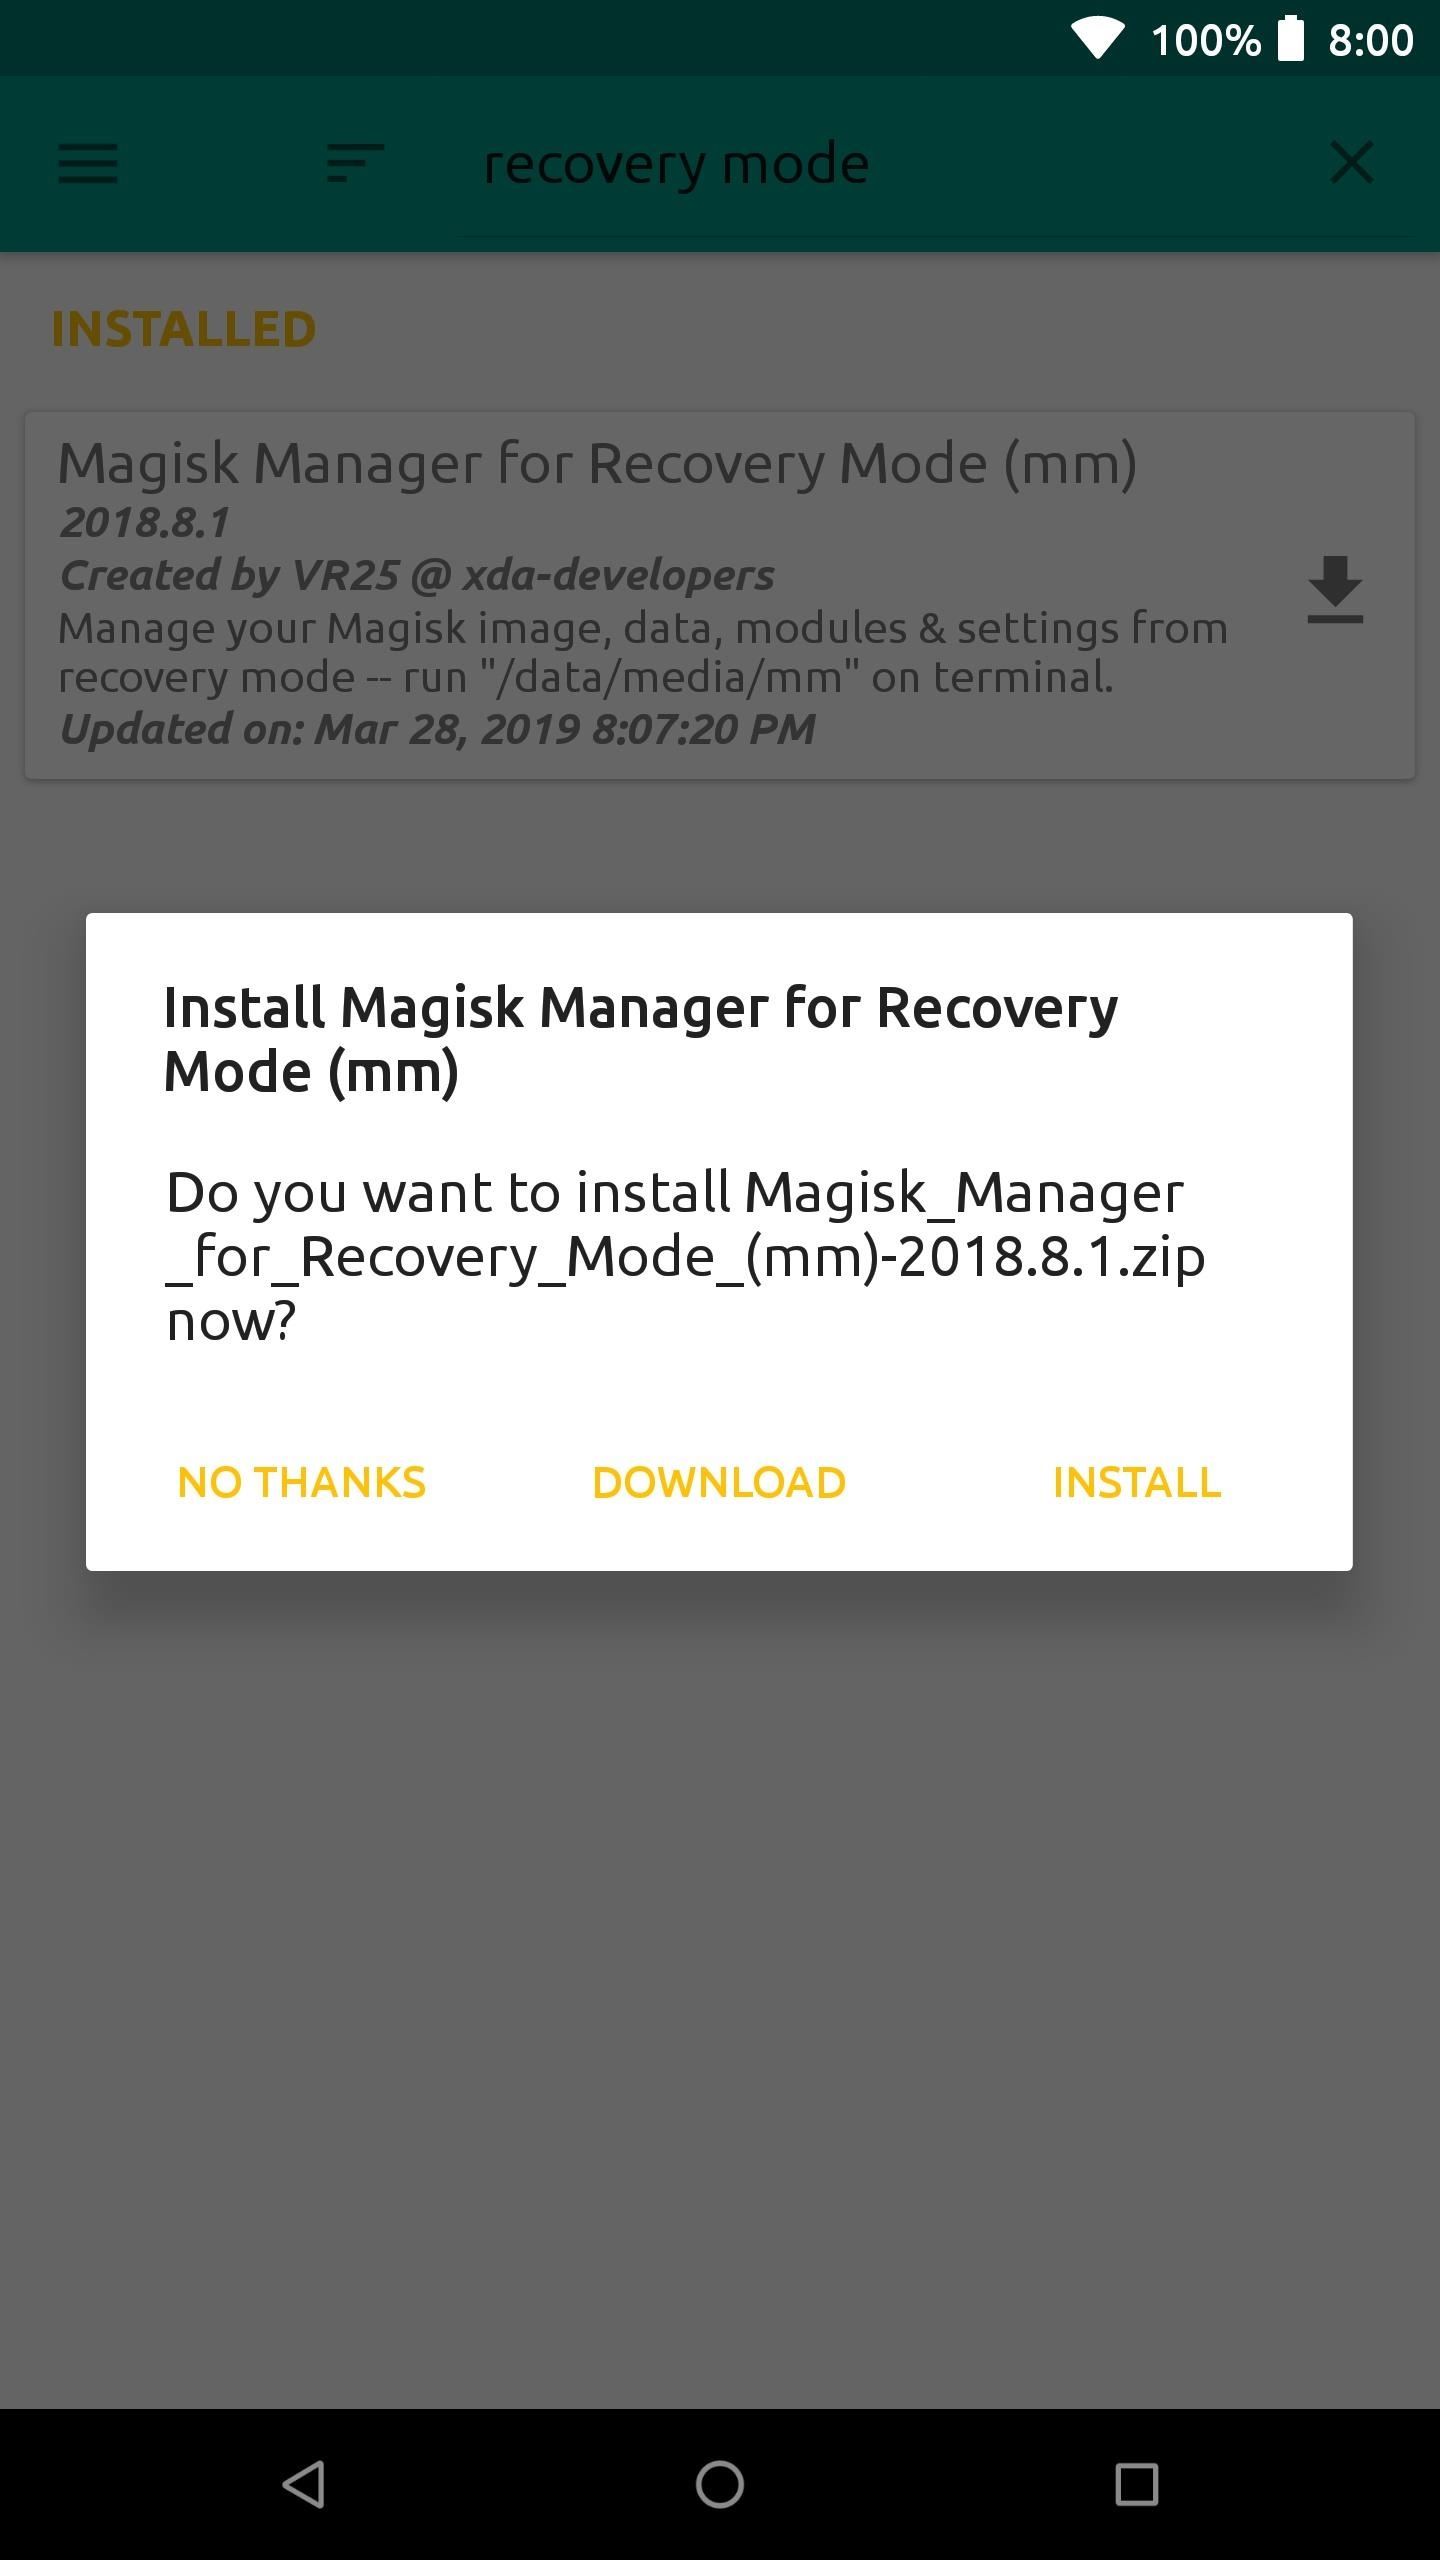
Start out by opening the Magisk Manager app, tap the menu on the left, and then head to the “Downloads” section. In the search bar type in “recovery mode” and you’ll find the module you need to install — it’s called Magisk Manager for Recovery Mode.
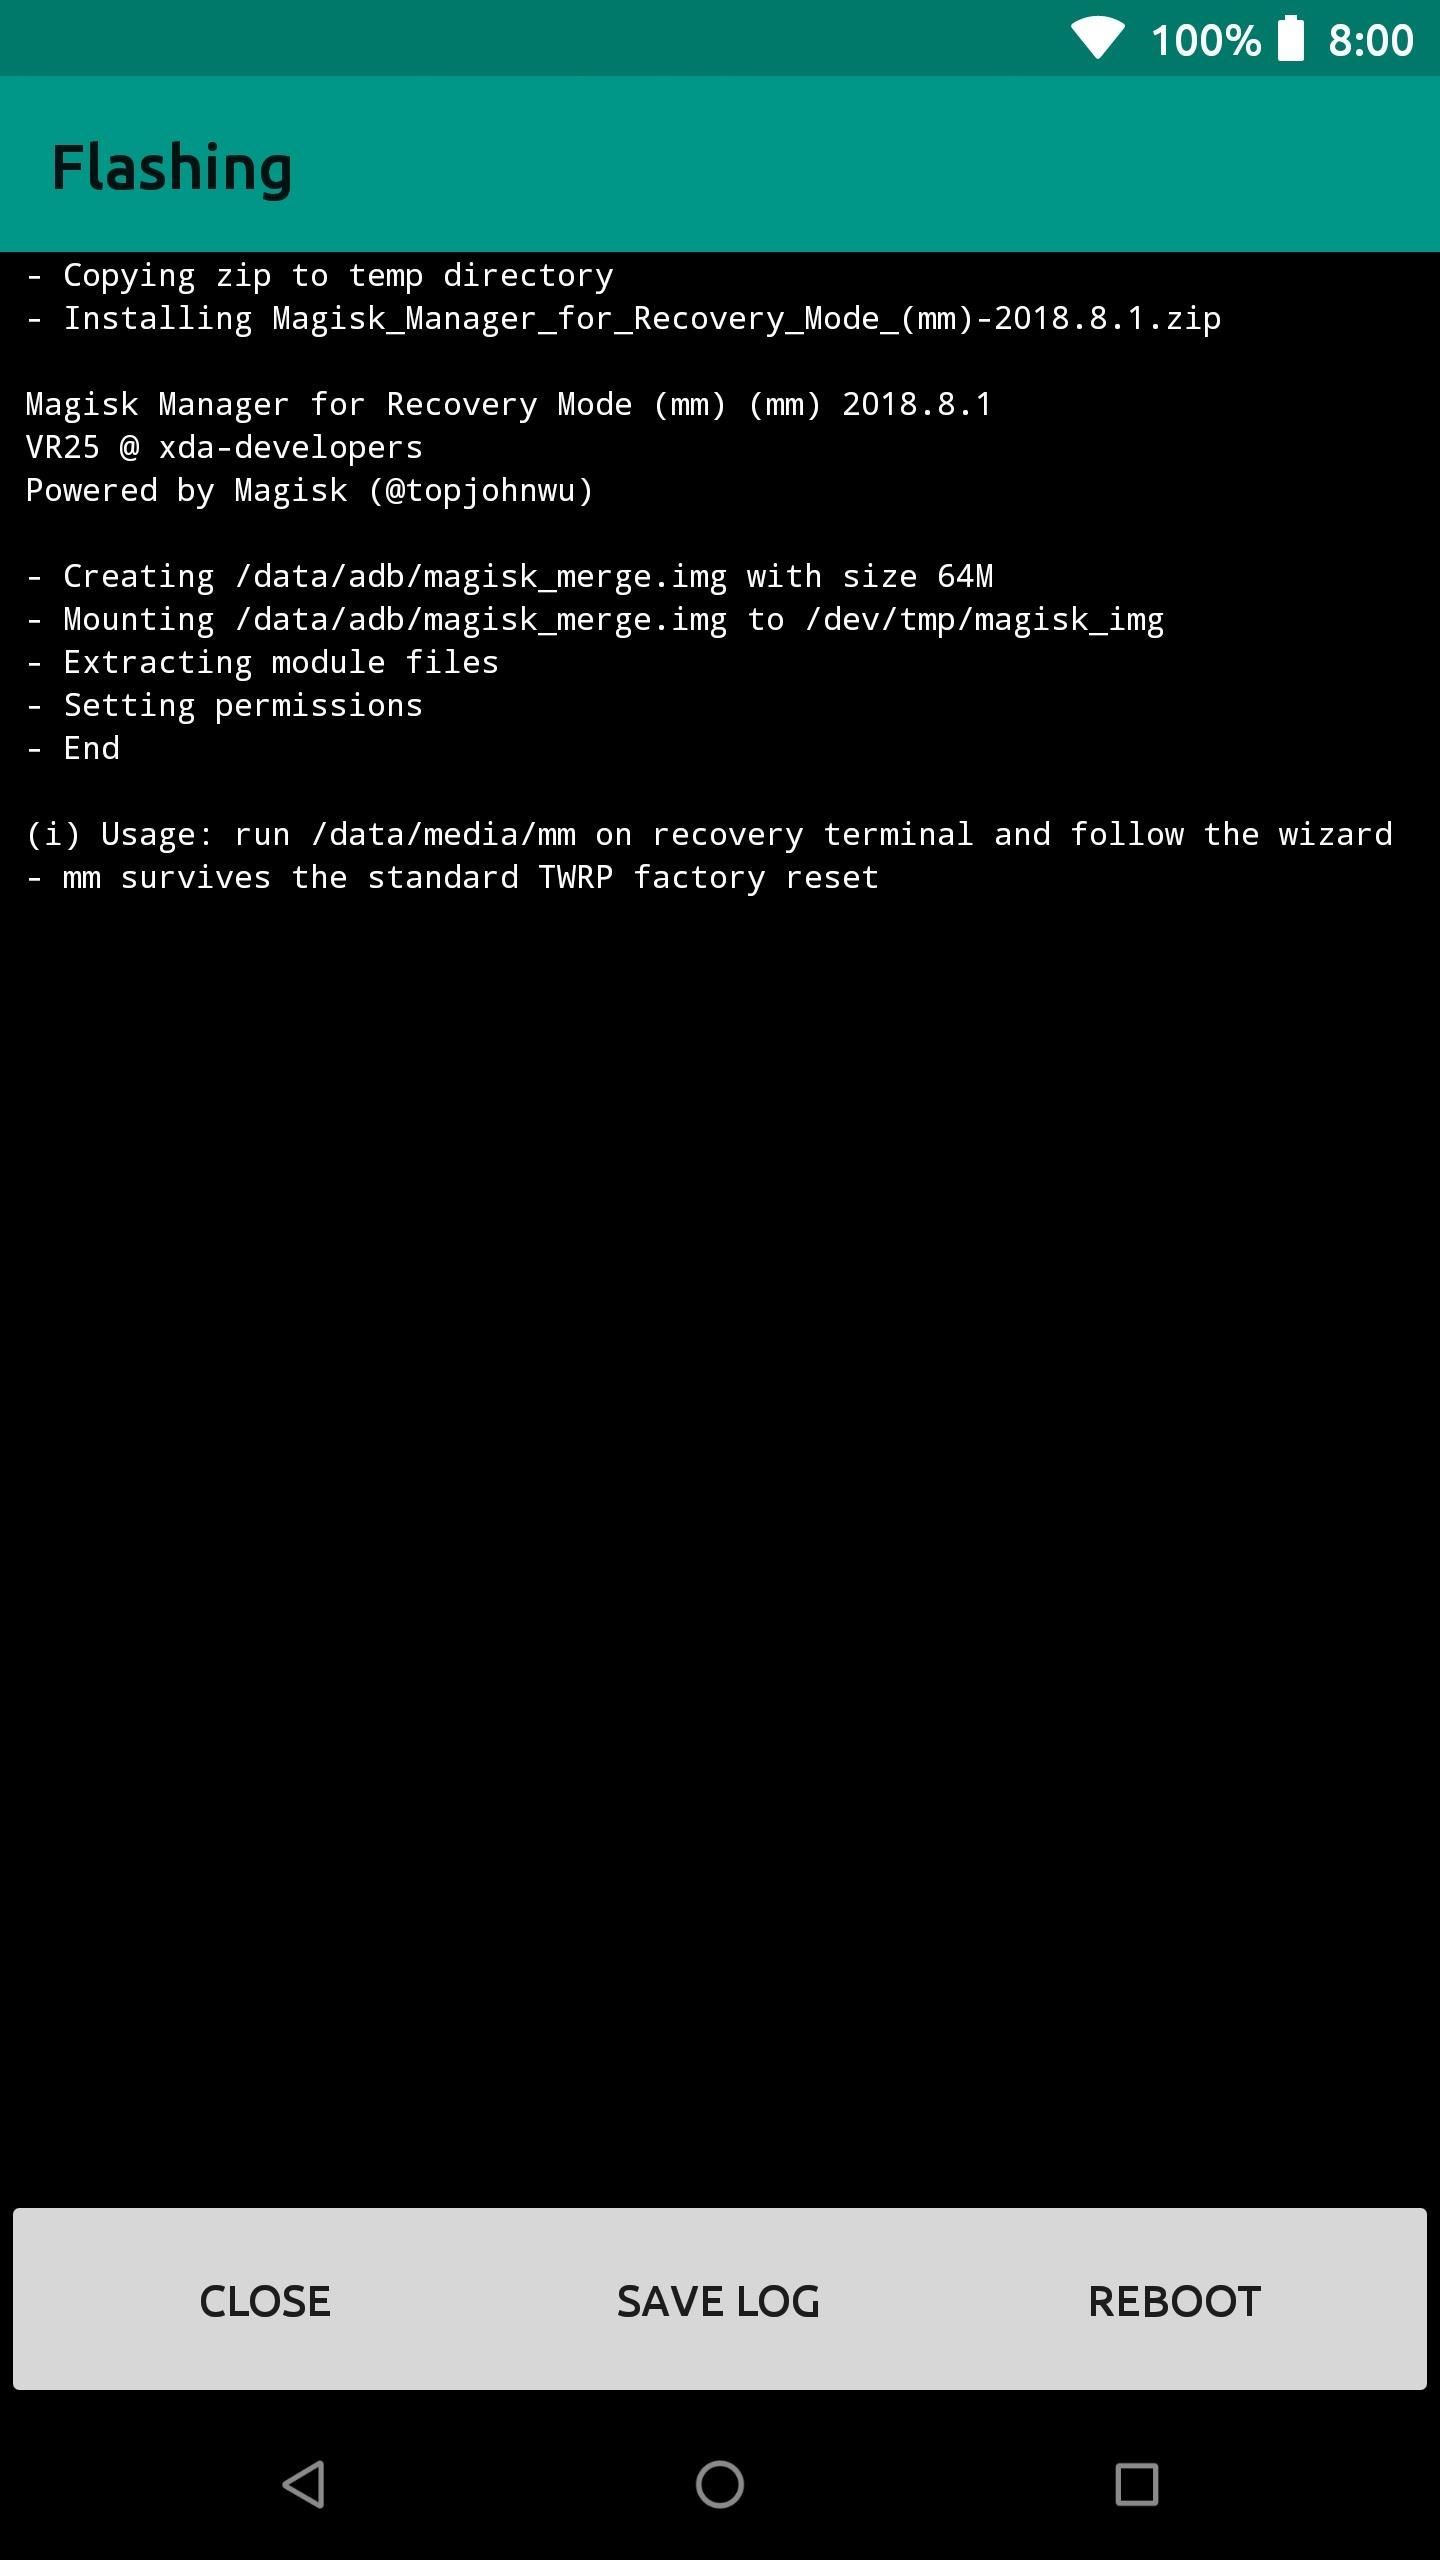
Tap the download arrow next to the module, then hit “Install” to begin the process. Once the module finishes installing, you want to tap “Close” to exit the file flashing screen. There’s no need to reboot the system at this point since the module is being used in the recovery environment anyway.

If your phone is currently in a bootloop and you’re unable to access Magisk Manager, start by booting into TWRP. You can do this on most phones by holding the volume down button between bootloops — i.e., when the screen goes black. That will take you into bootloader mode, where you can use the volume keys to highlight “Recovery Mode,” then press the power button to enter TWRP.
Once you’re in TWRP, download the latest ZIP version of Magisk Manager for Recovery Mode from this link. Save the file to your computer, then connect your phone to your PC with a USB data cable. From there, you’ll need to use the “ADB sideload” command to install the ZIP on your phone, and we’ve covered that process with a dedicated guide, so check out the link below:
- Don’t Miss: How to Sideload Flashable ZIPs with TWRP
Step 2: Boot into Recovery Mode
From here, if you sideloaded the ZIP using ADB, you can skip ahead to Step 3. Otherwise, you’ll need to reboot your system to the TWRP main menu.
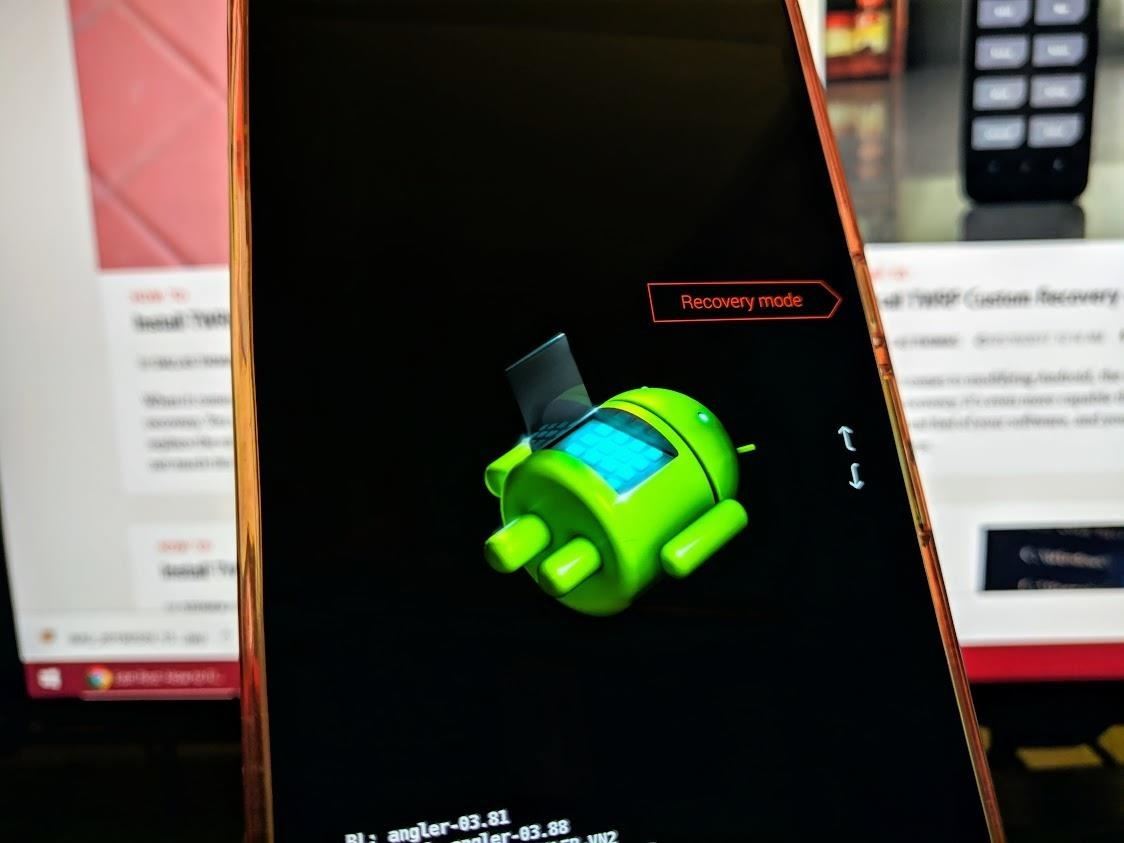
There’s more than one way to get your device into recovery mode, so you can pick whichever method works best for you. A universal way to achieve this across all devices is from your bootloader menu — you can use the volume rocker keys to highlight “Recovery mode,” then confirm it with the power button to boot into TWRP.
Step 3: Launch Magisk Manager for Recovery
From the main menu of TWRP select “Advanced,” “Terminal,” and then you want to enter the following command:
/data/media/mmYou should now see a list of options you can perform using the Magisk Manager for Recovery module. Since you’re potentially looking to recover from a bootloop caused by a module issue, you want to select the “uninstall modules” option by typing the letter “u” followed by the enter key.
To uninstall a module, you must type in its name on the list exactly how it appears followed by hitting enter two times. If you mess up a single letter, you’ll have to exit the uninstaller with Ctrl+C and then try it again. Do be careful when doing this and take your time so you won’t have to repeat any unnecessary steps.
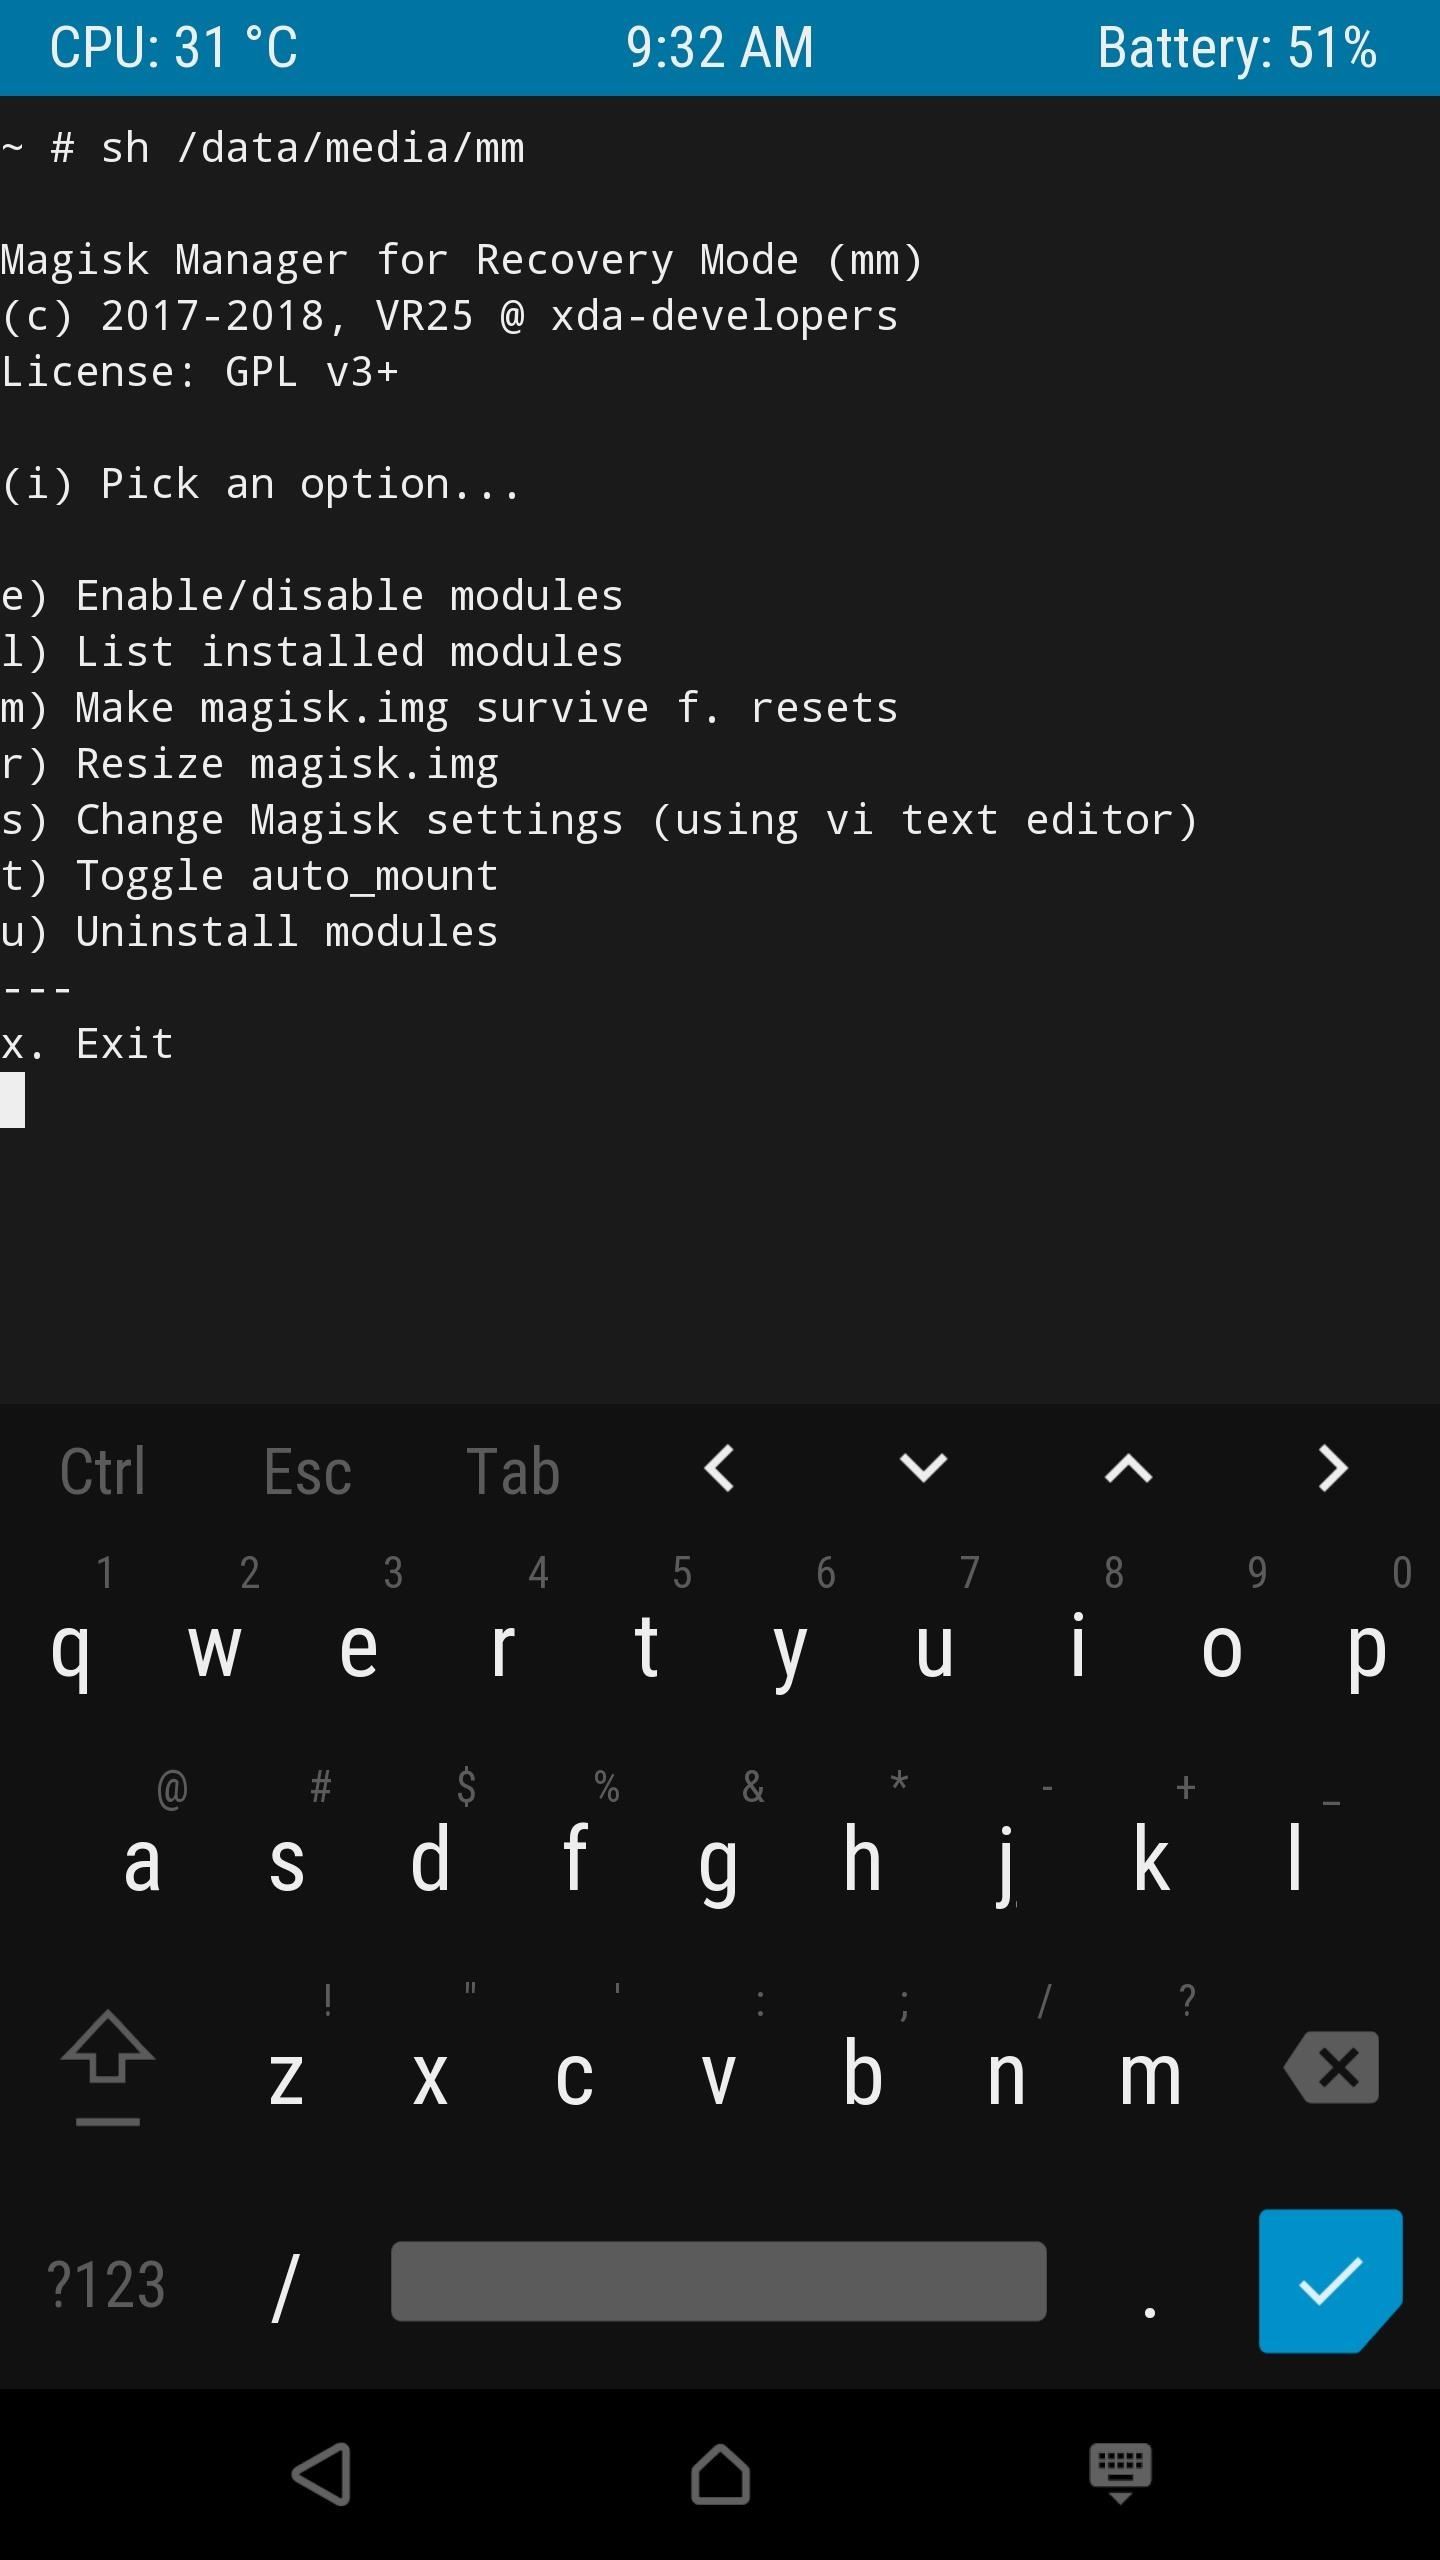
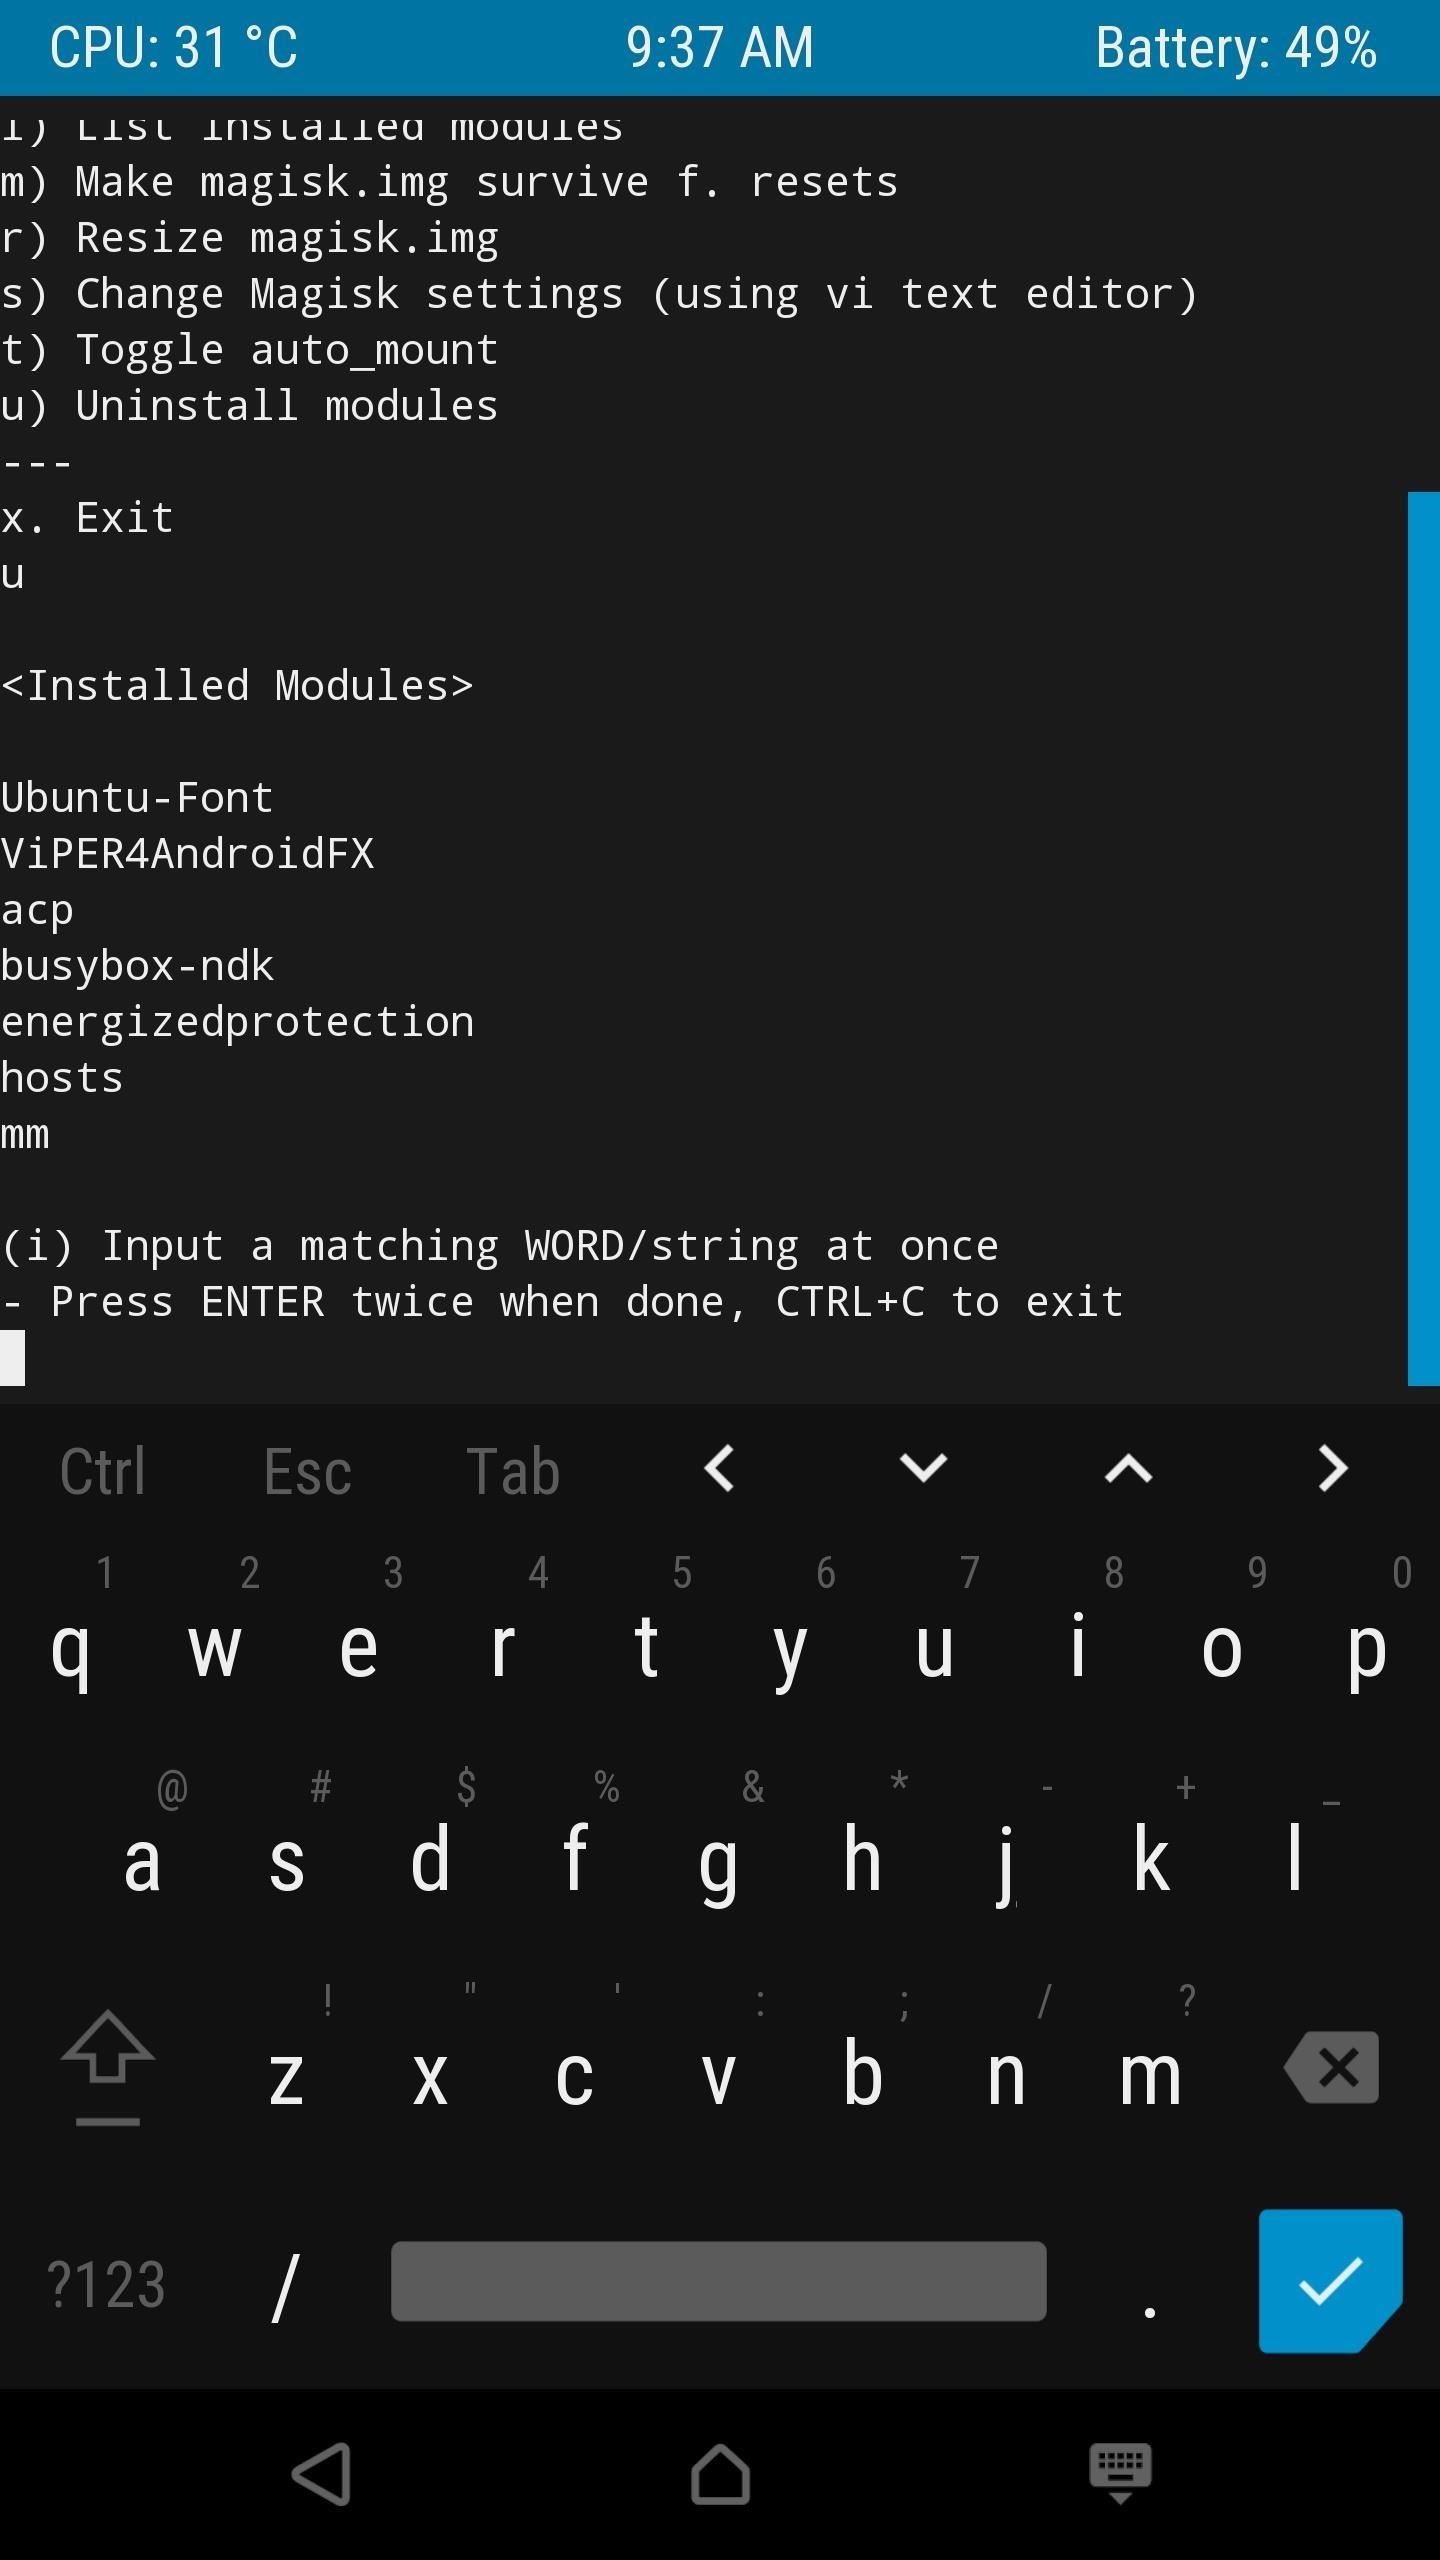
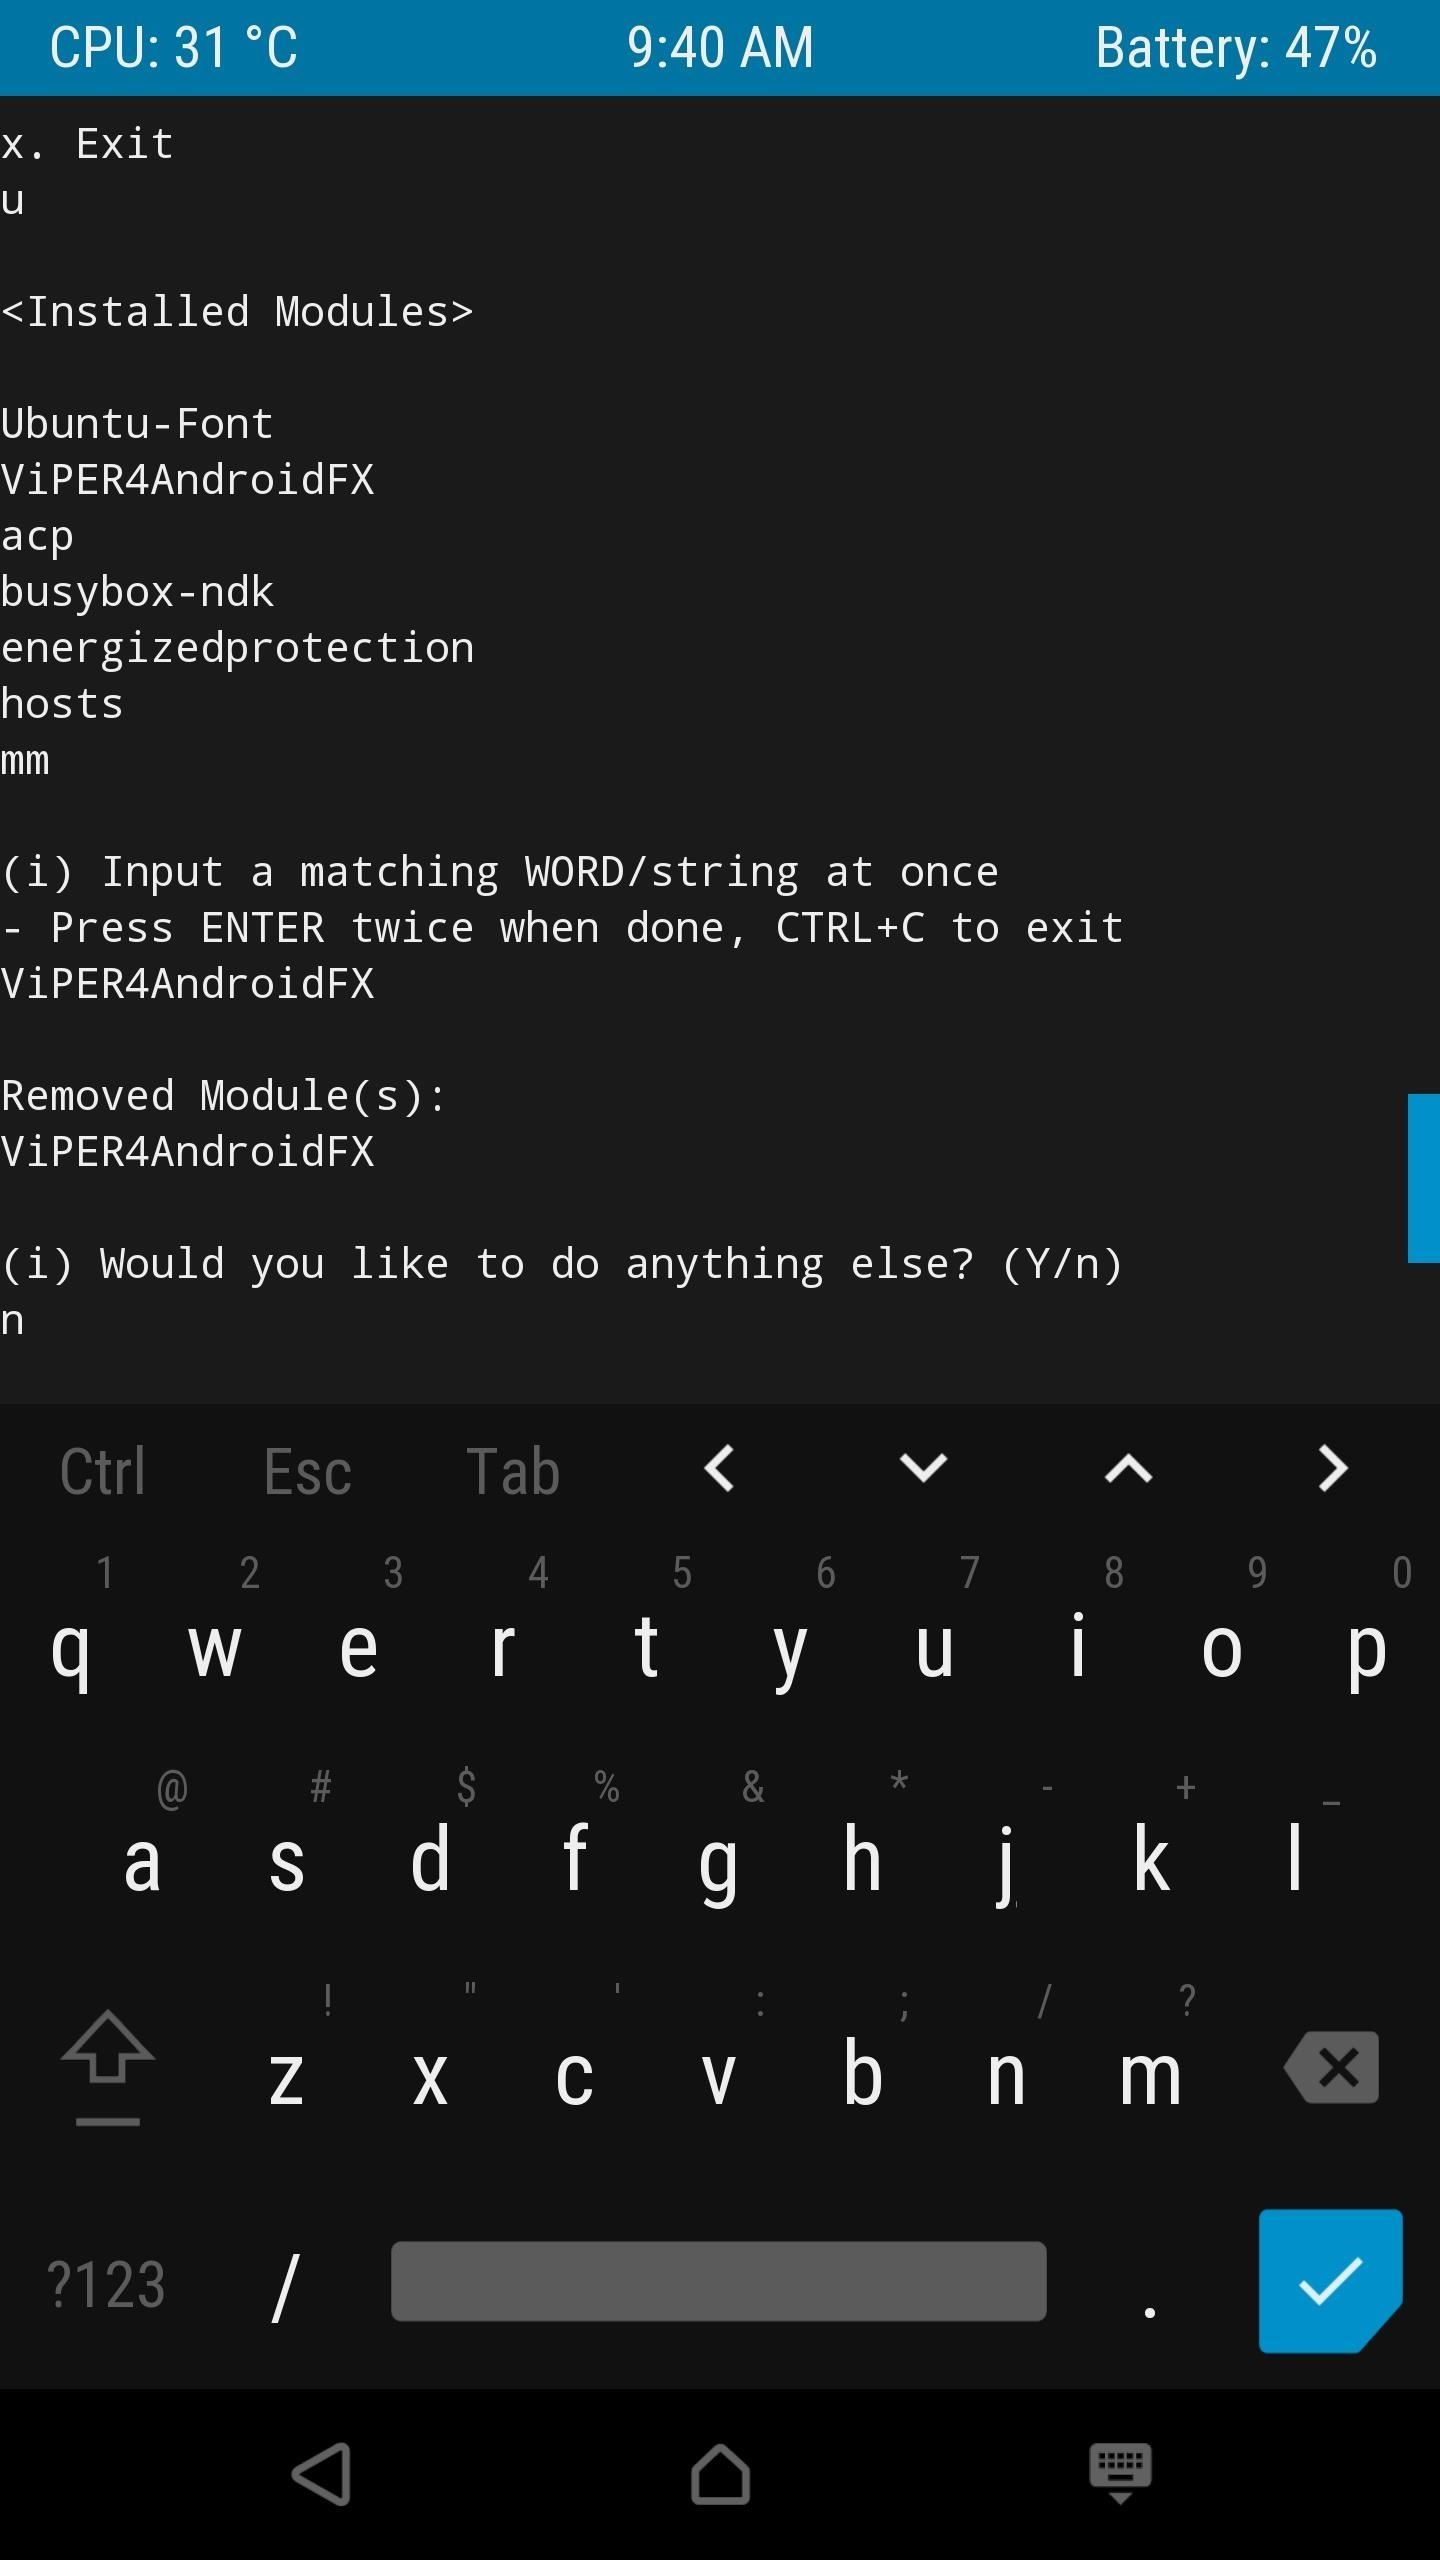
Once you typed the module name correctly (case sensitive) and pressed enter twice, it will immediately be removed from your system. Type in the letter “n” (when it asks if you want to do anything else) to close this session down, then reboot your phone like usual. If all is well and the module you just removed was the actual culprit, you shouldn’t be bootlooping any longer.
If you’re still having issues, the best thing to do is to repeat the process, but this time choosing the “Enable/disable modules” option in the Magisk Manager for Recovery main menu. One by one, disable the modules in the same manner as you would if you were uninstalling them like before. You can uninstall all of the modules to start fresh or just disable them to help you find what’s causing the problem — it’s entirely up to you on how you want to handle it.
- Follow Gadget Hacks on Pinterest, Reddit, Twitter, YouTube, and Flipboard
- Sign up for Gadget Hacks’ daily newsletter or weekly Android and iOS updates
- Follow WonderHowTo on Facebook, Twitter, Pinterest, and Flipboard
Who needs a wand? Unlock your magical powers and transform yourself from a Muggle into a Wizard or Witch just by using your Android phone. See how:
“Hey there, just a heads-up: We’re part of the Amazon affiliate program, so when you buy through links on our site, we may earn a small commission. But don’t worry, it doesn’t cost you anything extra and helps us keep the lights on. Thanks for your support!”


