How to Add a Watermark to Images on Windows 11
Windows 11
Quick Links
-
Use Paint to Add a Text Watermark to Your Image
-
Add a Drawing as a Watermark to Your Image Using Photos
-
Apply a Text or Image-Based Watermark to Your Image Using GIMP
-
Use a Web-Based Tool to Add a Text or Photo Watermark to Your Image
-
Add a Text or Photo Watermark to Multiple Images at Once Using a Free App
Watermarking your images allows you to tell people your pictures belong to you. You can add both text-based and image-based watermarks to your photos. I’ll show you how to do that on your Windows 11 PC.
Use Paint to Add a Text Watermark to Your Image
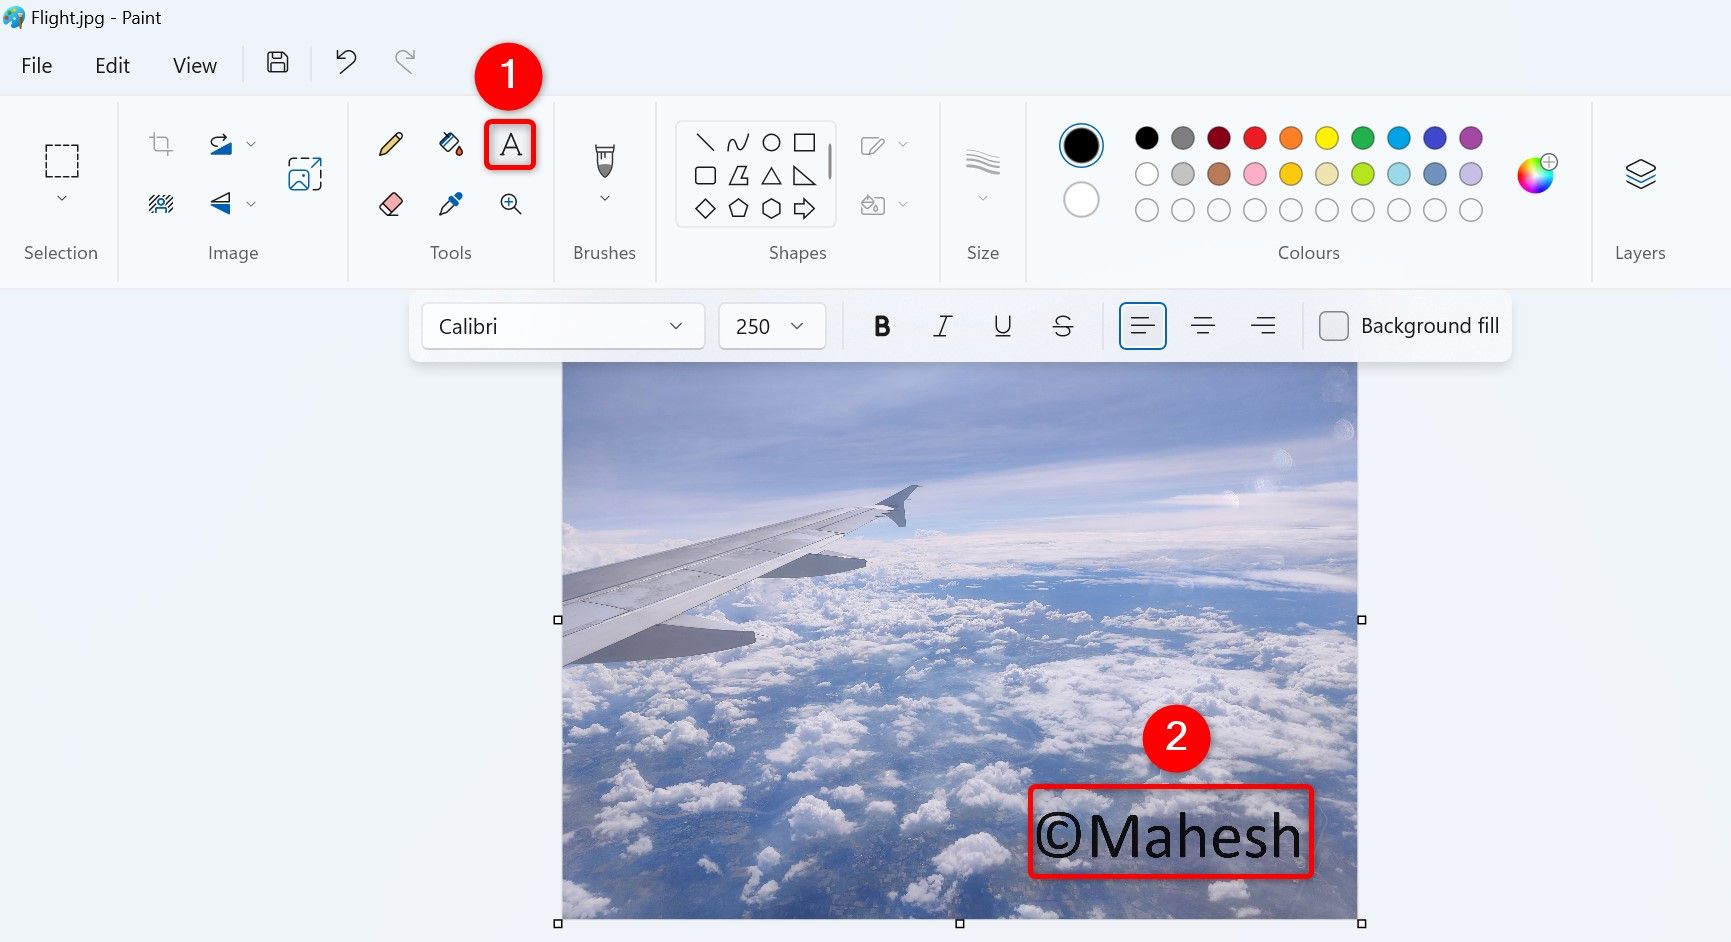
If you’re looking to add a text watermark to your images, Paint is the easiest way to do that. To use it, launch File Explorer (press Windows+E), find your image, right-click it, and select Open With > Paint. Alternatively, open the Paint app, select File > Open, and choose your image.
When your image opens, in Paint’s top bar, click the “A” icon to open Text options. Click the area on the image where you want to add a watermark and start typing. Use the formatting options to format your watermark.
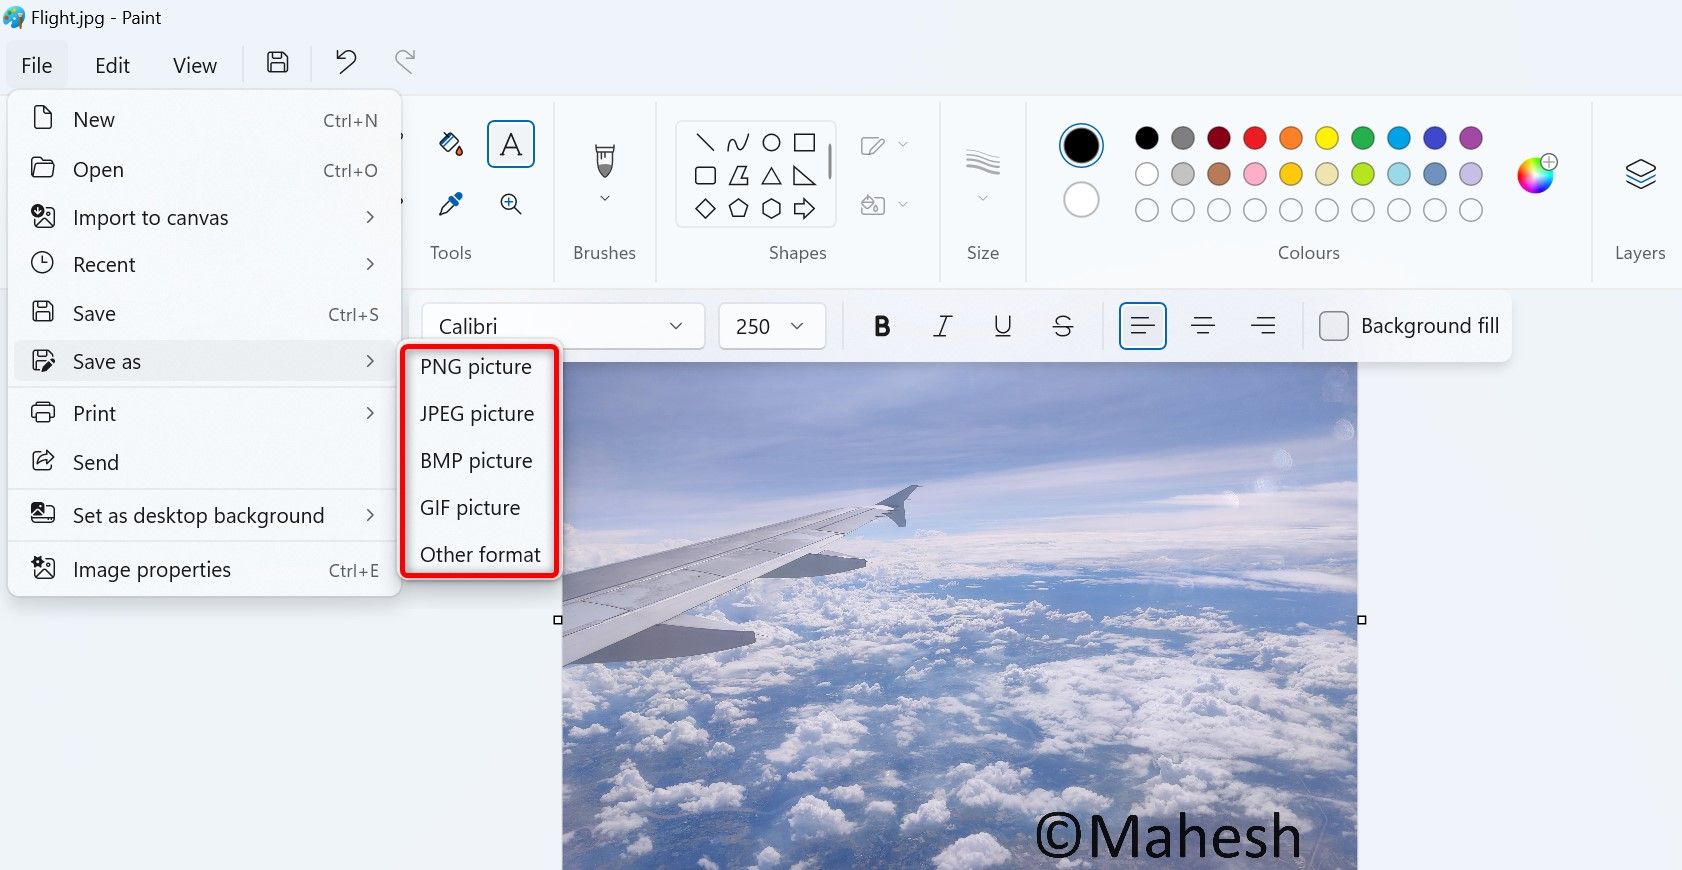
To save the watermarked image as a copy of the original, from Paint’s menu bar, choose File > Save As and select an image format.
In the Save As window, choose the folder to save your image in. Click the “File Name” field and type a name for the image. Then, choose “Save.”
Add a Drawing as a Watermark to Your Image Using Photos
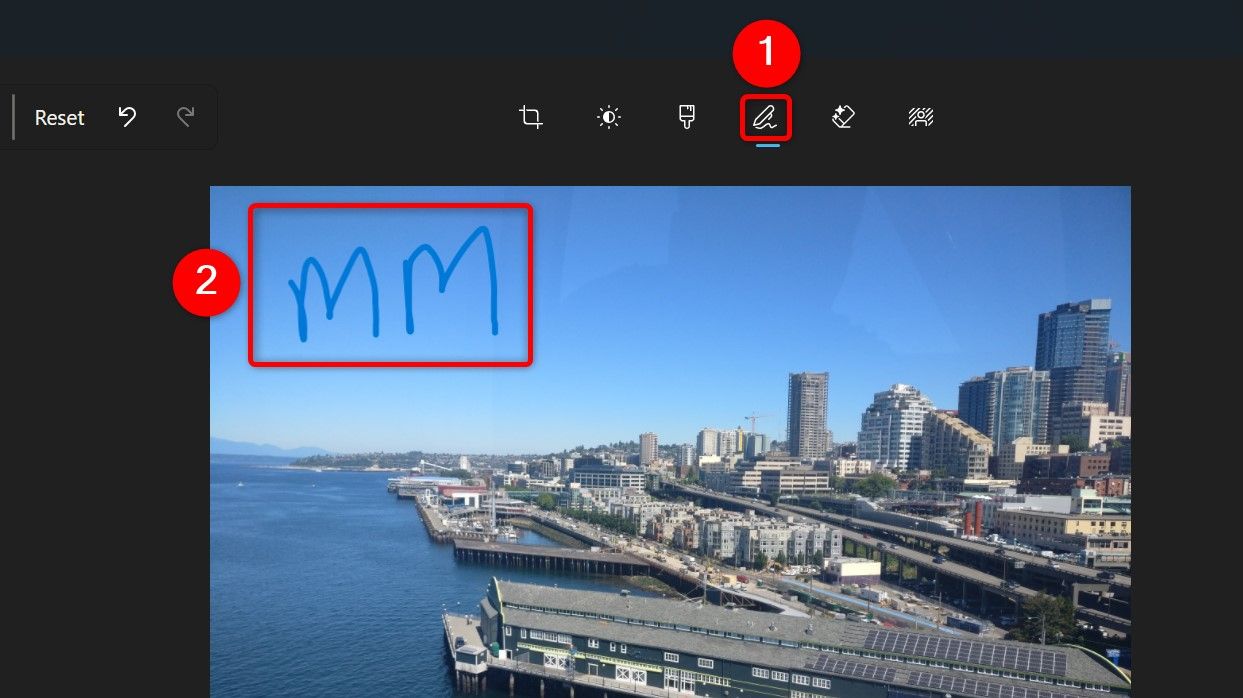
Windows 11’s built-in Photos app allows you to draw on your images, letting you add drawing-based watermarks to your images. To use it, open File Explorer (press Windows+E), locate your image, right-click it, and select Open With > Photos. In the app’s top-left corner, click “Edit” to access the app’s editing options.
From the editing tools at the top, click the “Mark-up” tool. At the bottom of your image, select the pen style you’d like to use. Then, start drawing on your image.
After you’ve added the watermark, to save the image as a copy of the original, click “Save Options” in the top-right corner and choose “Save as Copy.”
On the Save As window, select the folder to save your image in. Choose the “File Name” field and type a name for your image. Click the “Save as Type” drop-down menu and choose a format for your image. Then, click “Save.”
Apply a Text or Image-Based Watermark to Your Image Using GIMP
GIMP is a free and open-source image editing app, and it allows you to add both text-based and photo-based watermarks to your images. It offers advanced features, like the ability to set opacity levels for your watermarks.
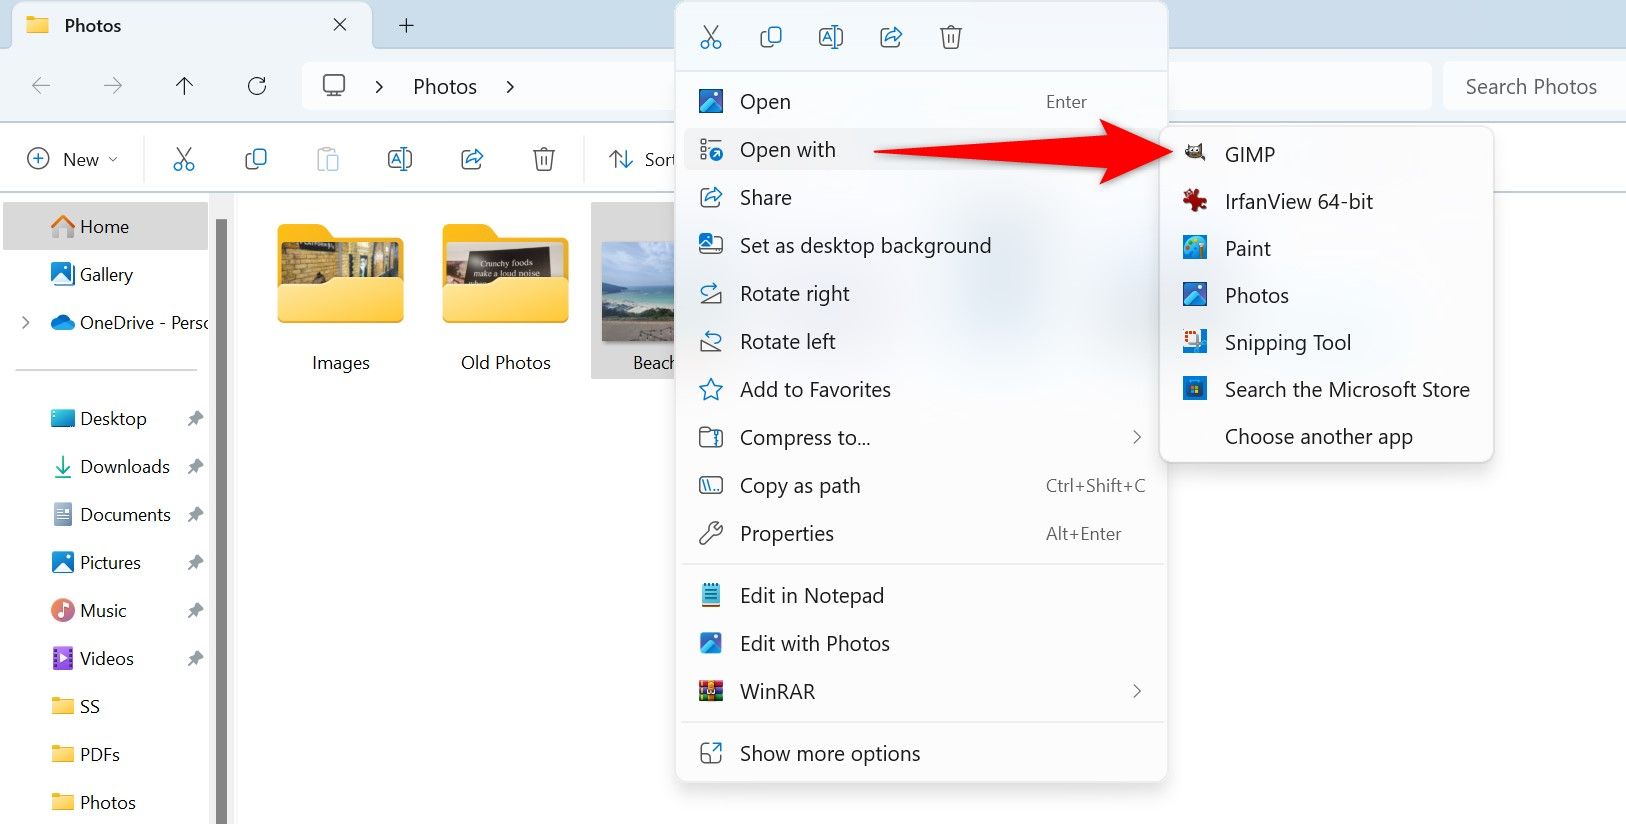
To use it, open the GIMP site and download and install the app on your PC. Then, launch File Explorer (press Windows+E), find your image, right-click it, and choose Open With > GIMP.
If you don’t see GIMP in the Open With menu, then give your Windows 11 PC a restart. This will refresh the items in the context menu.
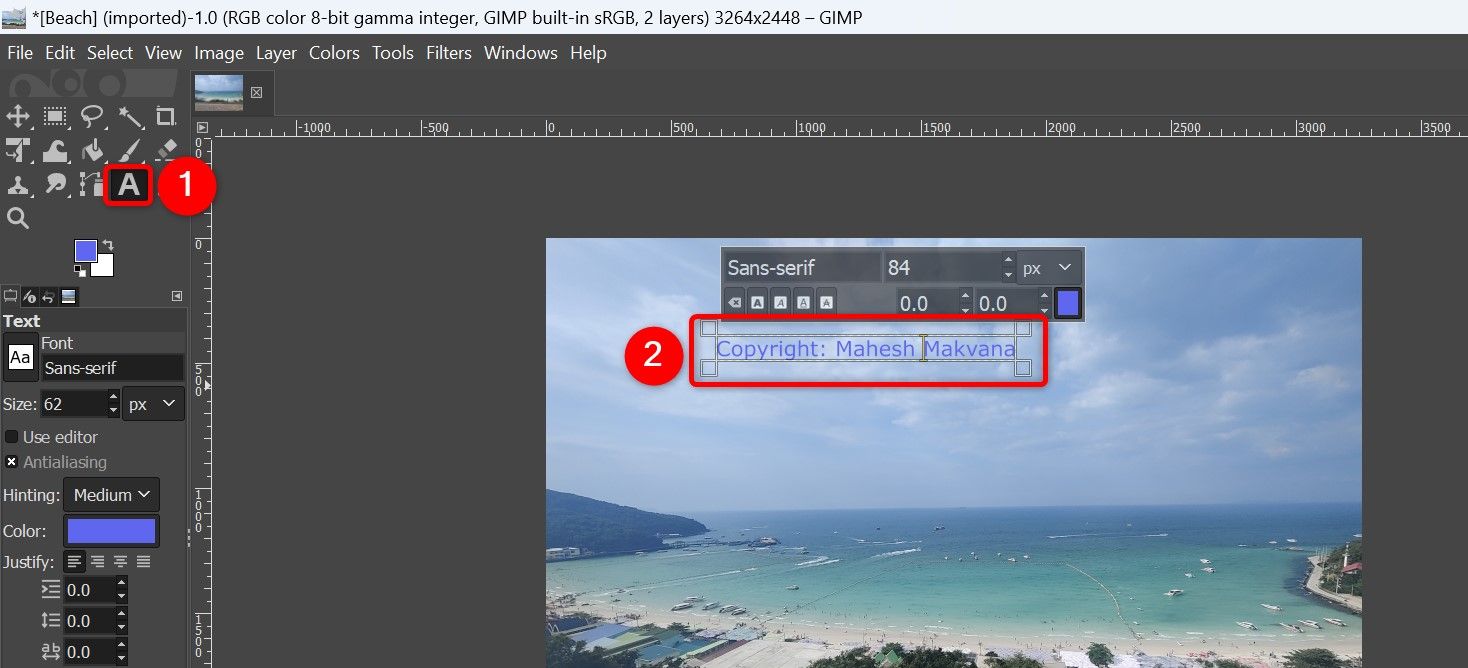
To add a text watermark to your image, in the tools section on the left, click “Text Tool” (or press T). Click on the part of the image where you want to add the watermark and start typing. Format the text using the available formatting options.
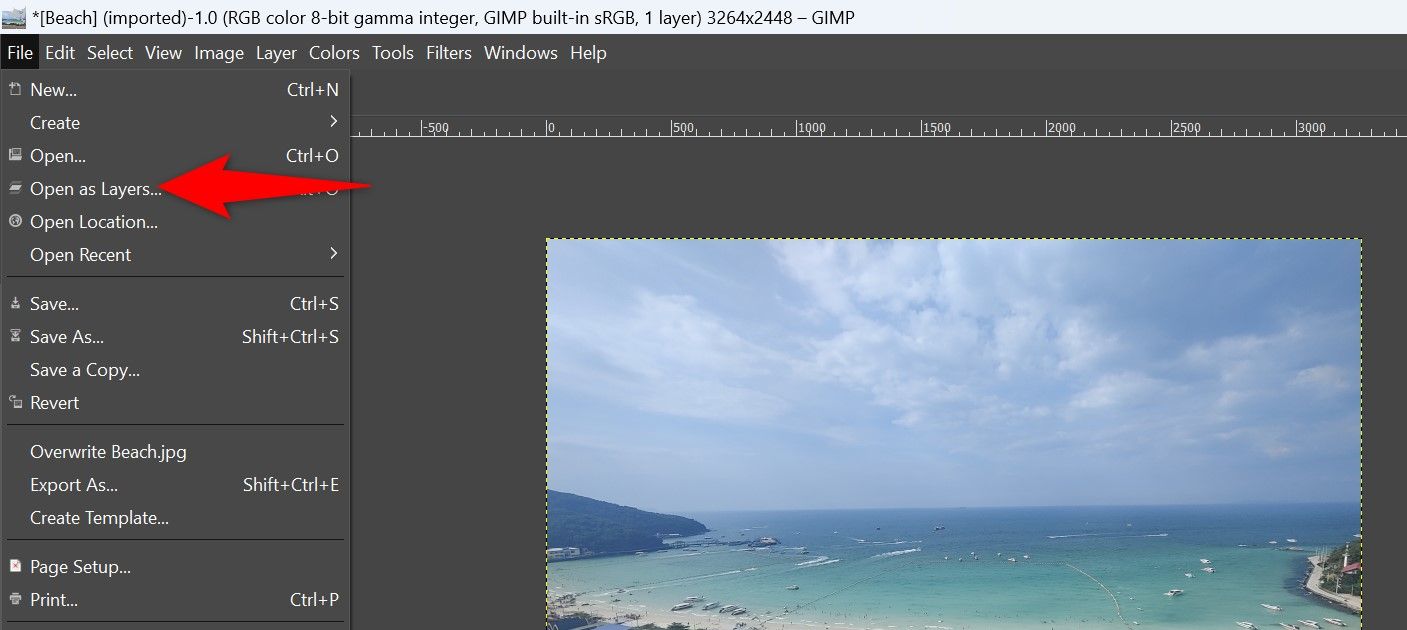
To add a picture-based watermark, from GIMP’s menu bar, select File > Open as Layers (or press Ctrl+Alt+O). Select the photo you’d like to add as a watermark to your image and choose “Open.”
You can move the added photo and place it where you want on the existing image. You can also resize your photo watermark.
To change your text or photo-based watermark’s opacity (transparency), in the layers panel on the right, click your watermark layer. Then, use the “Opacity” option to change the watermark’s opacity.
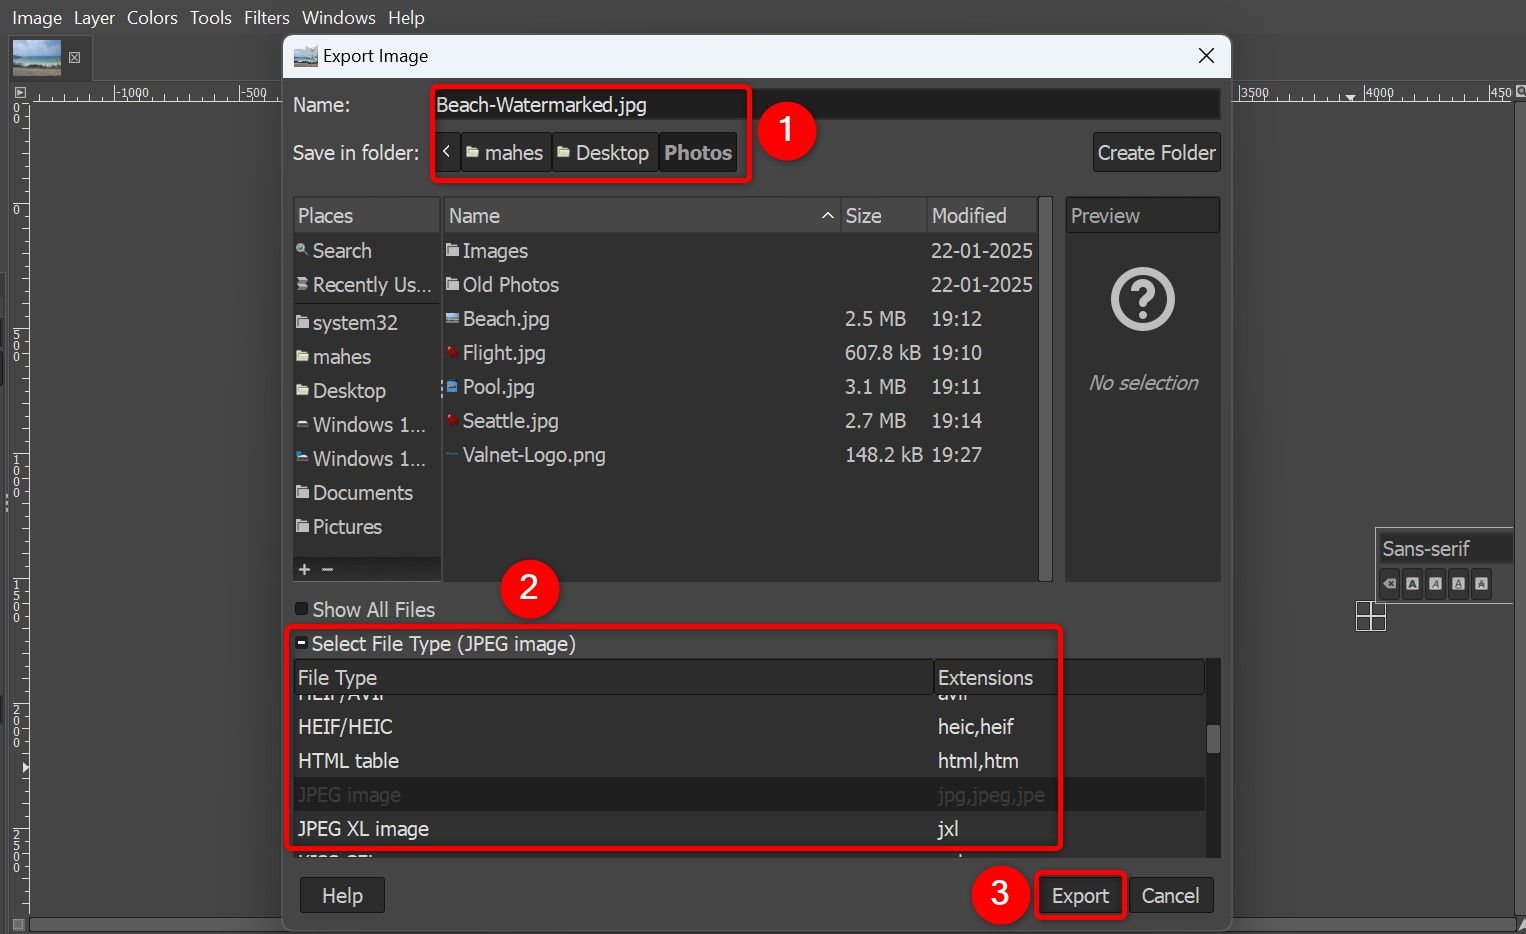
To save the edited image as a copy of the original, from GIMP’s menu bar, select File > Export As (or press Shift+Ctrl+E). On the Export Image window, click the “Name” field and type a name for the image. Choose a folder to save the image in. Click “Select File Type (By Extension)” and select a format for your image. Then, click “Export.”
Use a Web-Based Tool to Add a Text or Photo Watermark to Your Image
If you don’t want to use a desktop app or install an app to add a watermark, you can use one of the many web-based tools. These tools let you upload your image, add the kind of watermark you want, and save the resulting image to your PC. A couple of options you can use are iLoveIMG and Canva.
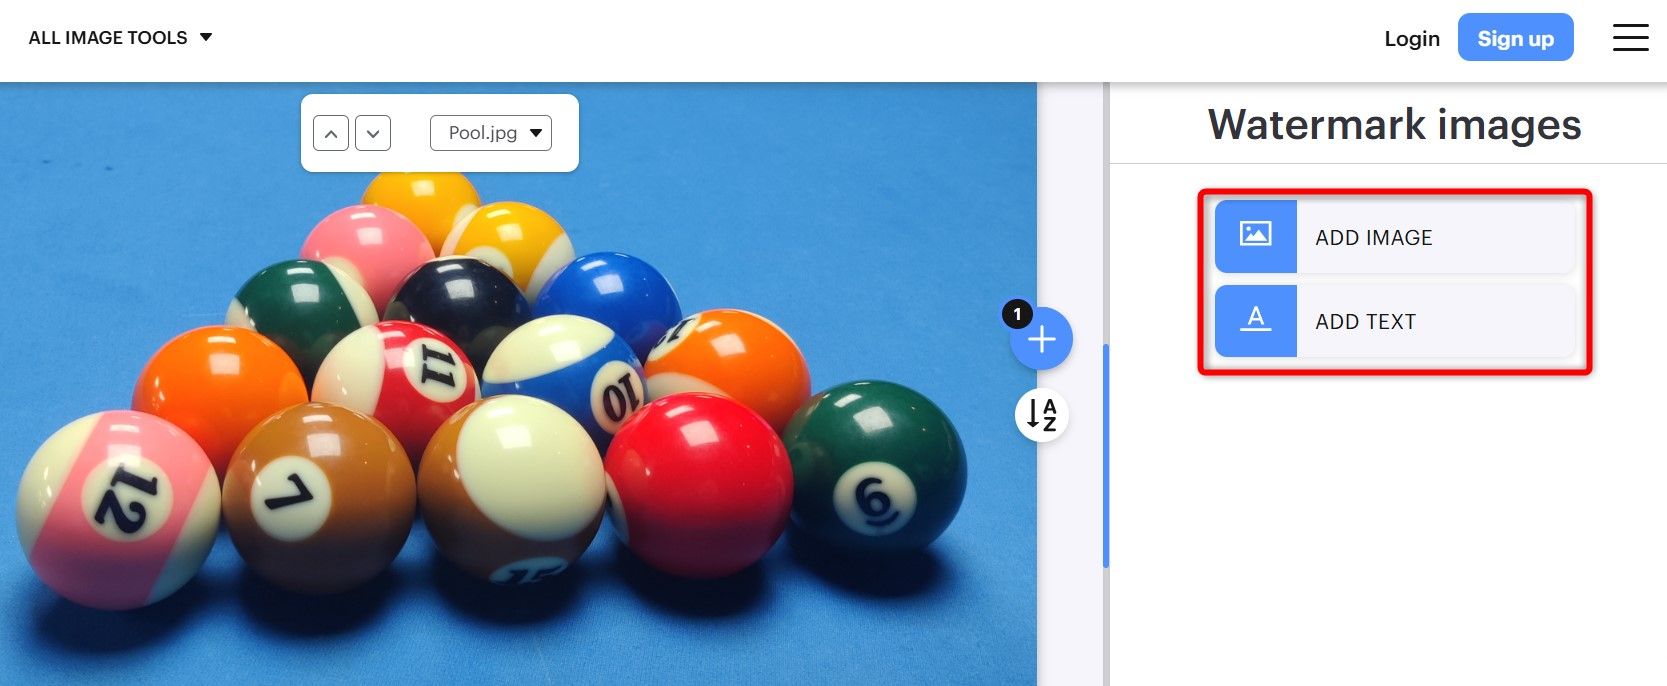
To use iLoveIMG, launch its site, click “Select Images,” and choose your image. When the image is uploaded, on the right side, click “Add Image” or “Add Text” (depending on the kind of watermark you want to use).
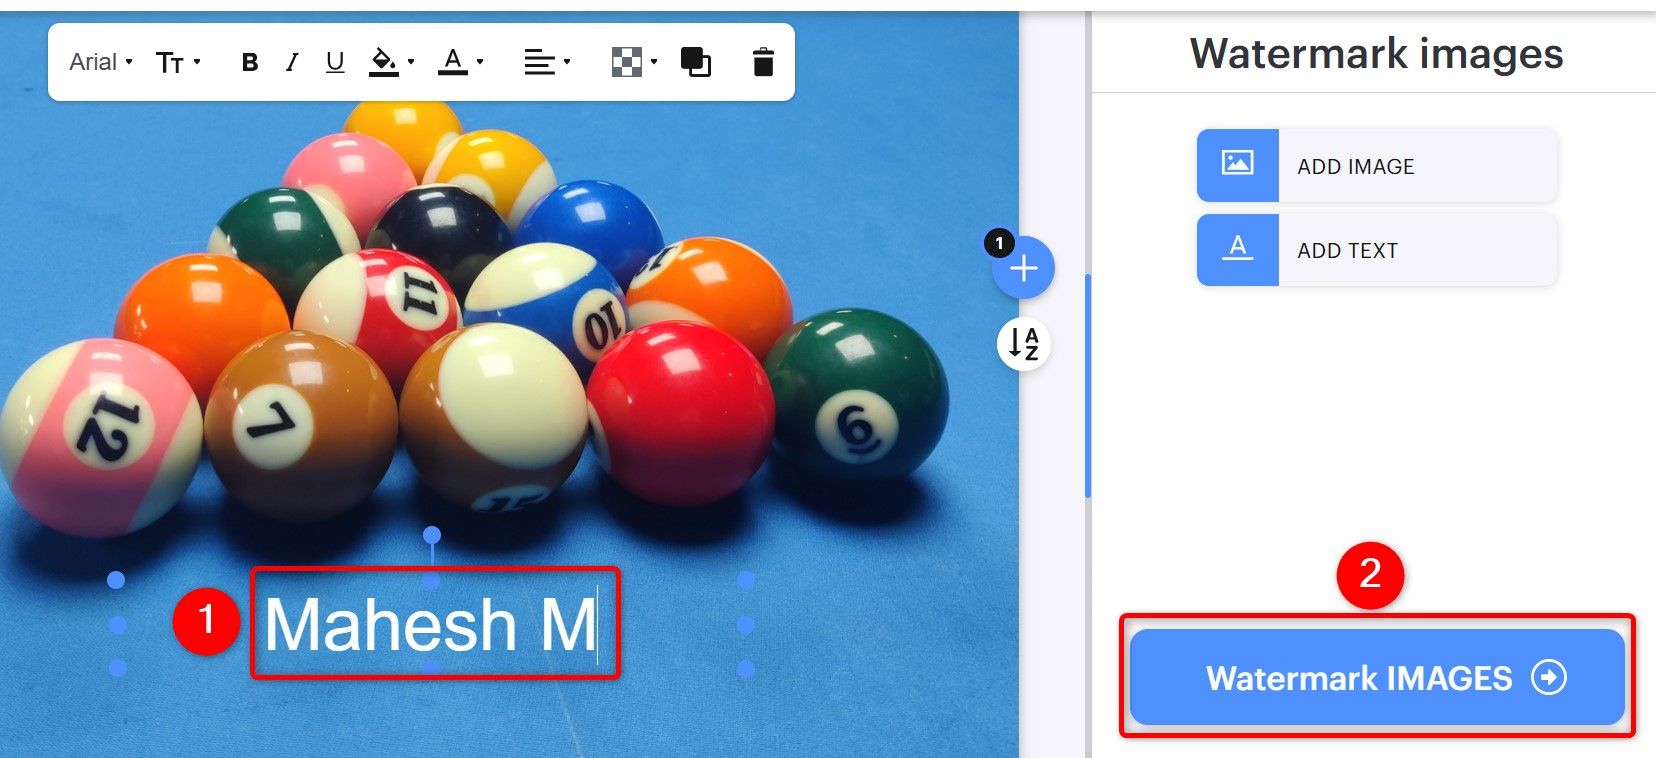
If you choose Add Image, select the photo you’d like to use as a watermark for your image. If you choose Add Text, type the text you want to add. Then, use the available formatting options to format your text.
Then, at the bottom of the right sidebar, click “Watermark Images.”
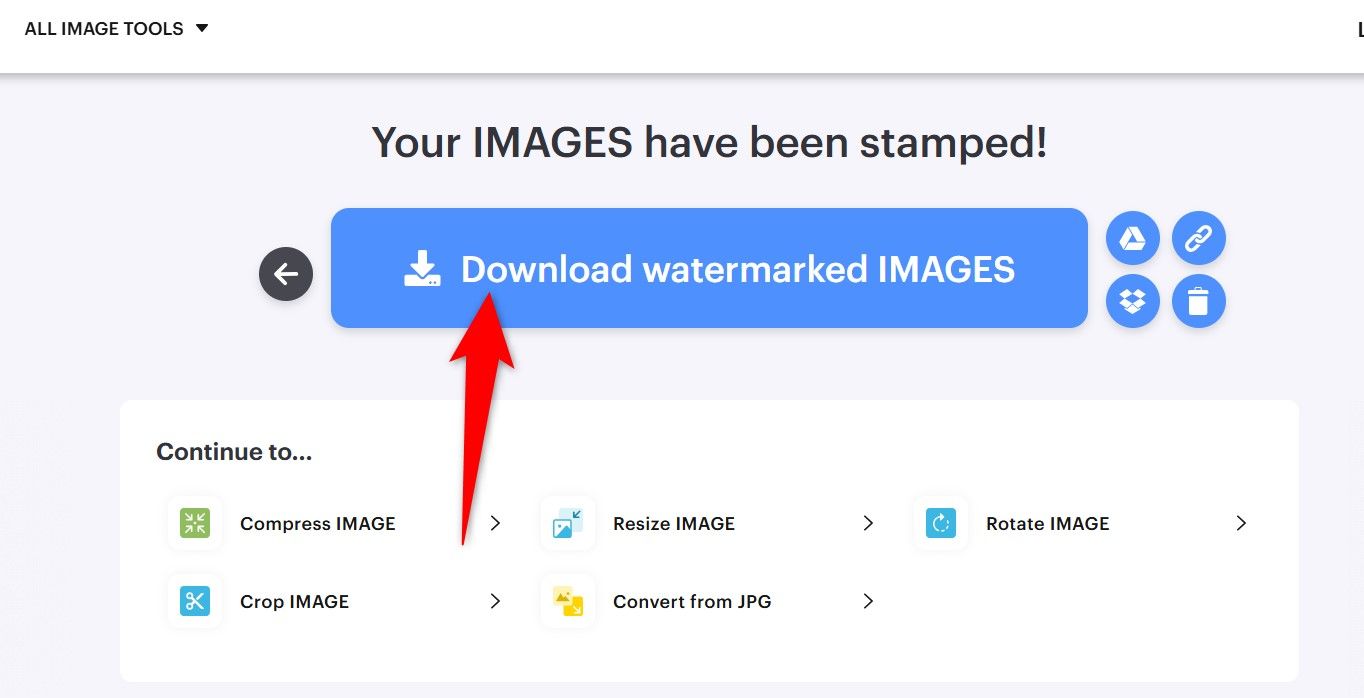
On the following page, click “Download Watermarked Images” to download the image to your PC.
Add a Text or Photo Watermark to Multiple Images at Once Using a Free App
If you have several images to be watermarked, use a free app like FastStone Photo Resizer or IrfanView. These apps let you add text or photo-based watermarks to multiple images at once.
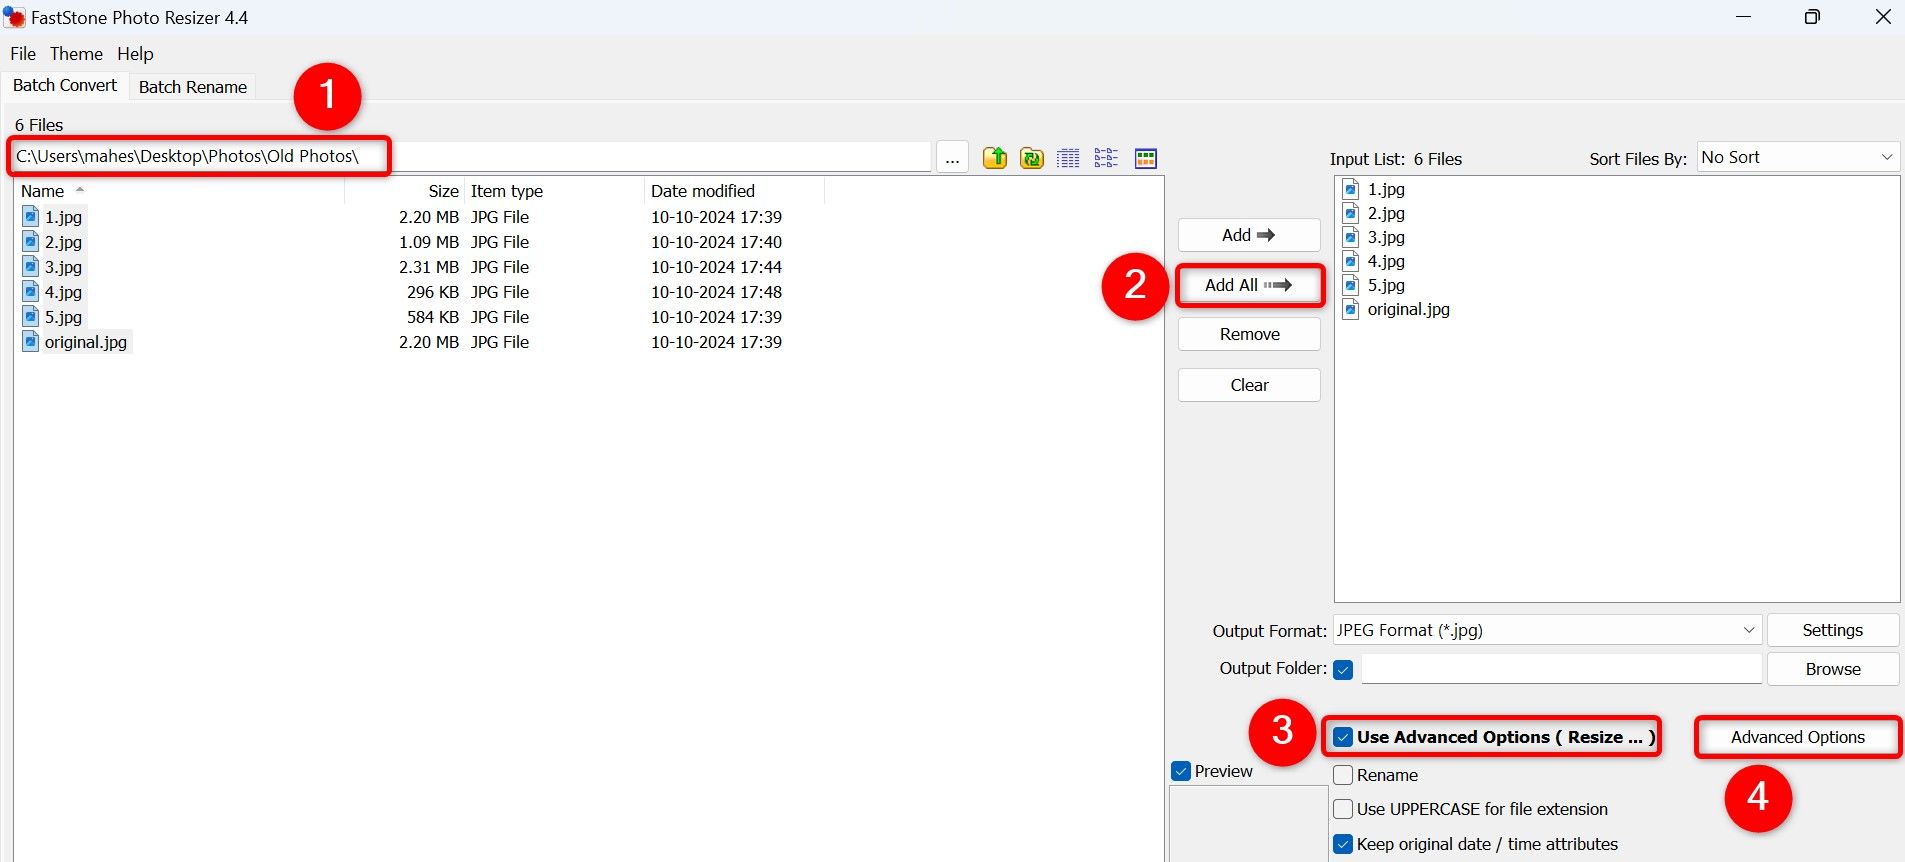
To use FastStone Photo Resizer, launch the app’s site and download and install the app on your PC. Then, open the app, select the folder containing your images on the left, and choose “Add All.” Turn on the “Use Advanced Options” option and click “Advanced Options.”
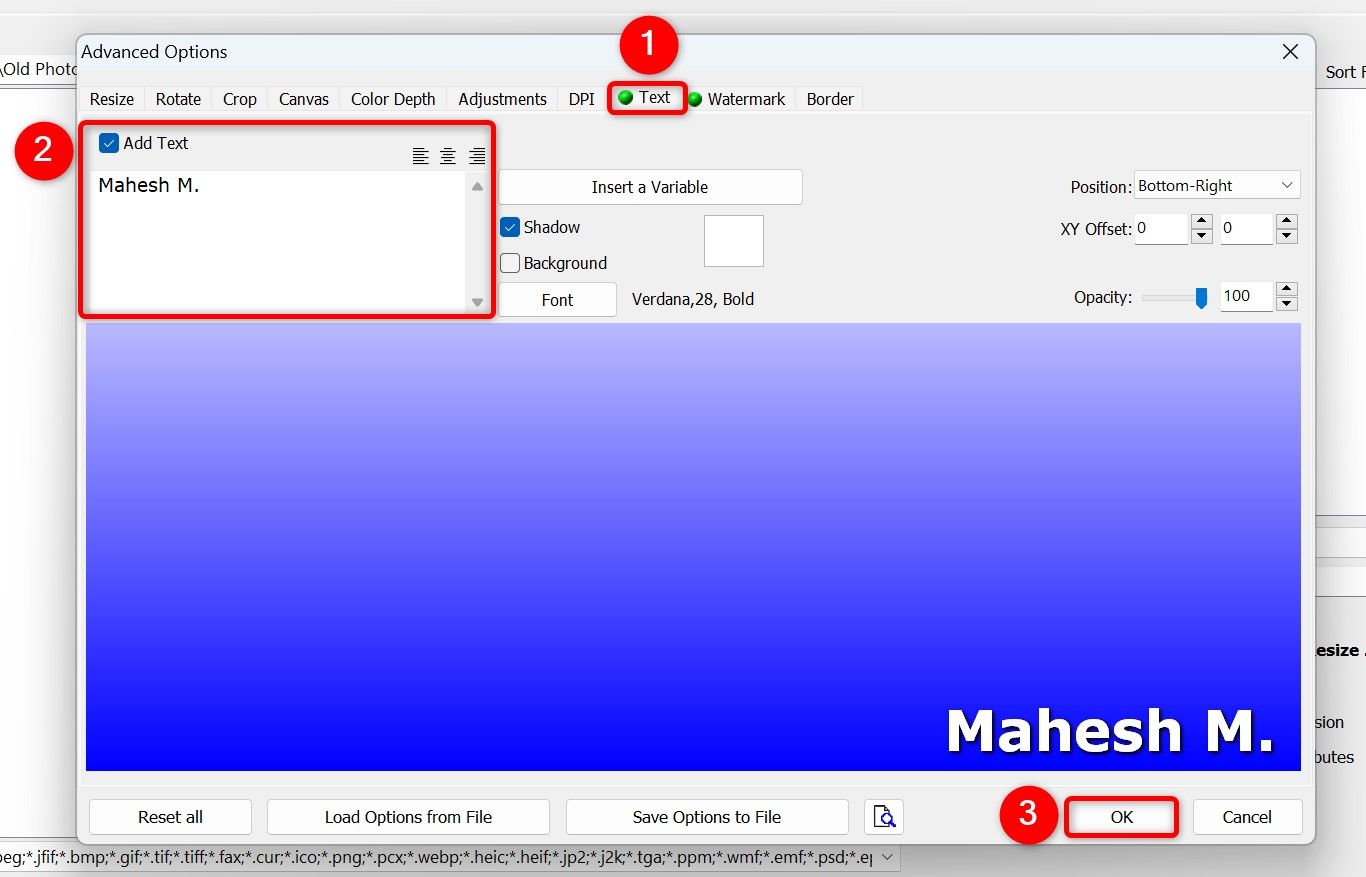
On the open window, to add a text-based watermark, access the “Text” tab. Enable the “Add Text” option, type desired text in the text field, configure formatting options, and click “OK.”
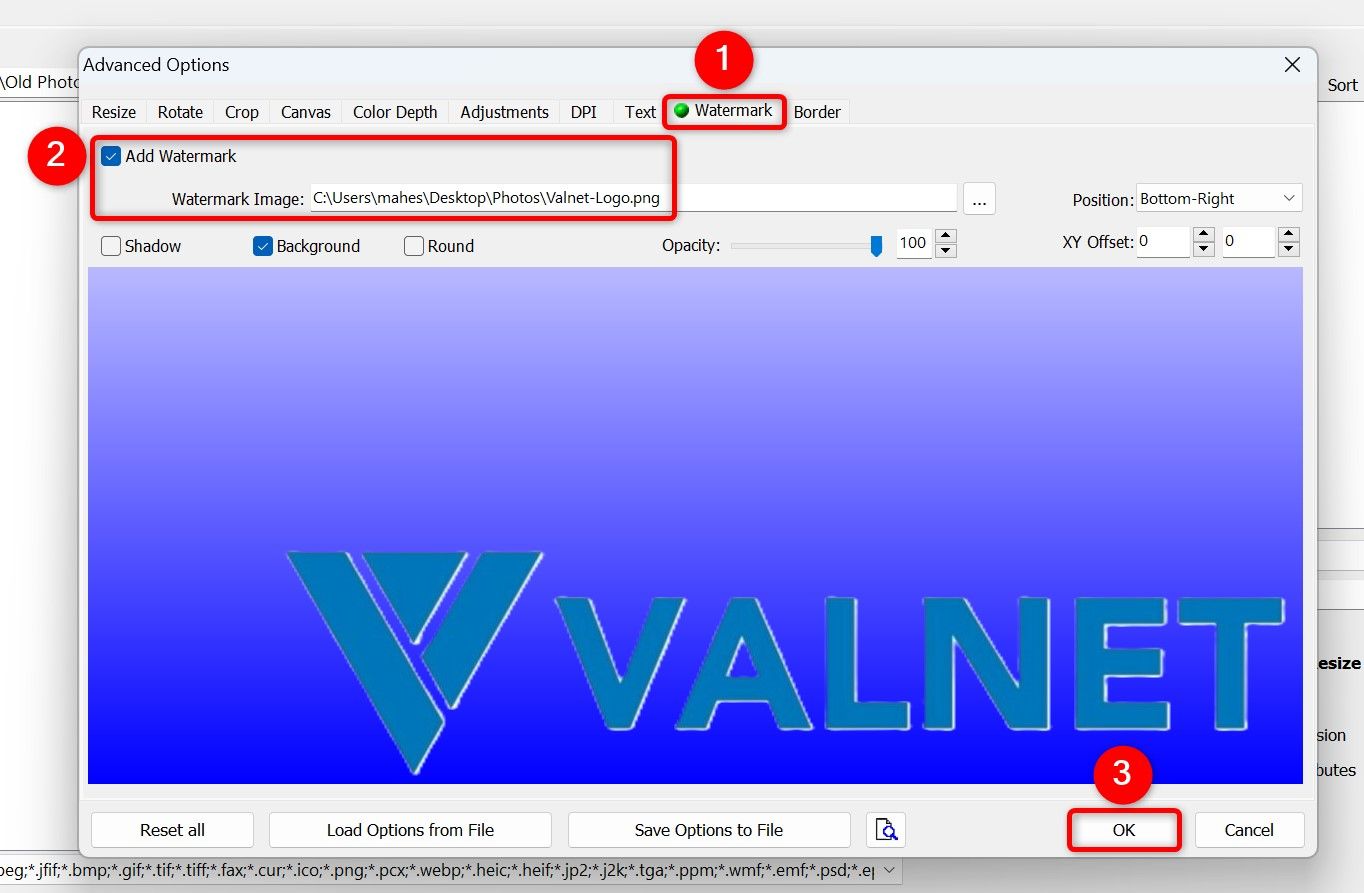
To add a picture-based watermark, open the “Watermark” tab. Turn on “Add Watermark,” click the “Watermark Image” field, and choose the picture you’d like to use. Configure the opacity and other options, then click “OK.”
Back on the main window, in the bottom-right corner, click “Convert.” This begins adding the selected watermark to all your images.
And that’s how you stamp your images with your text or picture-based watermarks on Windows 11. While you’re at it, consider stripping off EXIF data from your images to maintain your privacy.


