You no longer have to completely convert your default or primary system language to change the language of a single app on your iPhone. Thanks to iOS 13, each app can now have its own language settings: if you want Spanish for WhatsApp but English for Instagram & Twitter, you can do that.
However, you’ll first need to check if you already have multiple languages set up. If not, you’ll need to add an alternative language before you can set up languages on a per-app basis. We’ll also go through how to change languages per-app, what the feature looks like, and how to remove it.
- Don’t Miss: 22 New Features in iOS 13.1 for iPhone You Won’t Want to Miss
Step 1: Check if You Have Multiple Languages Set Up
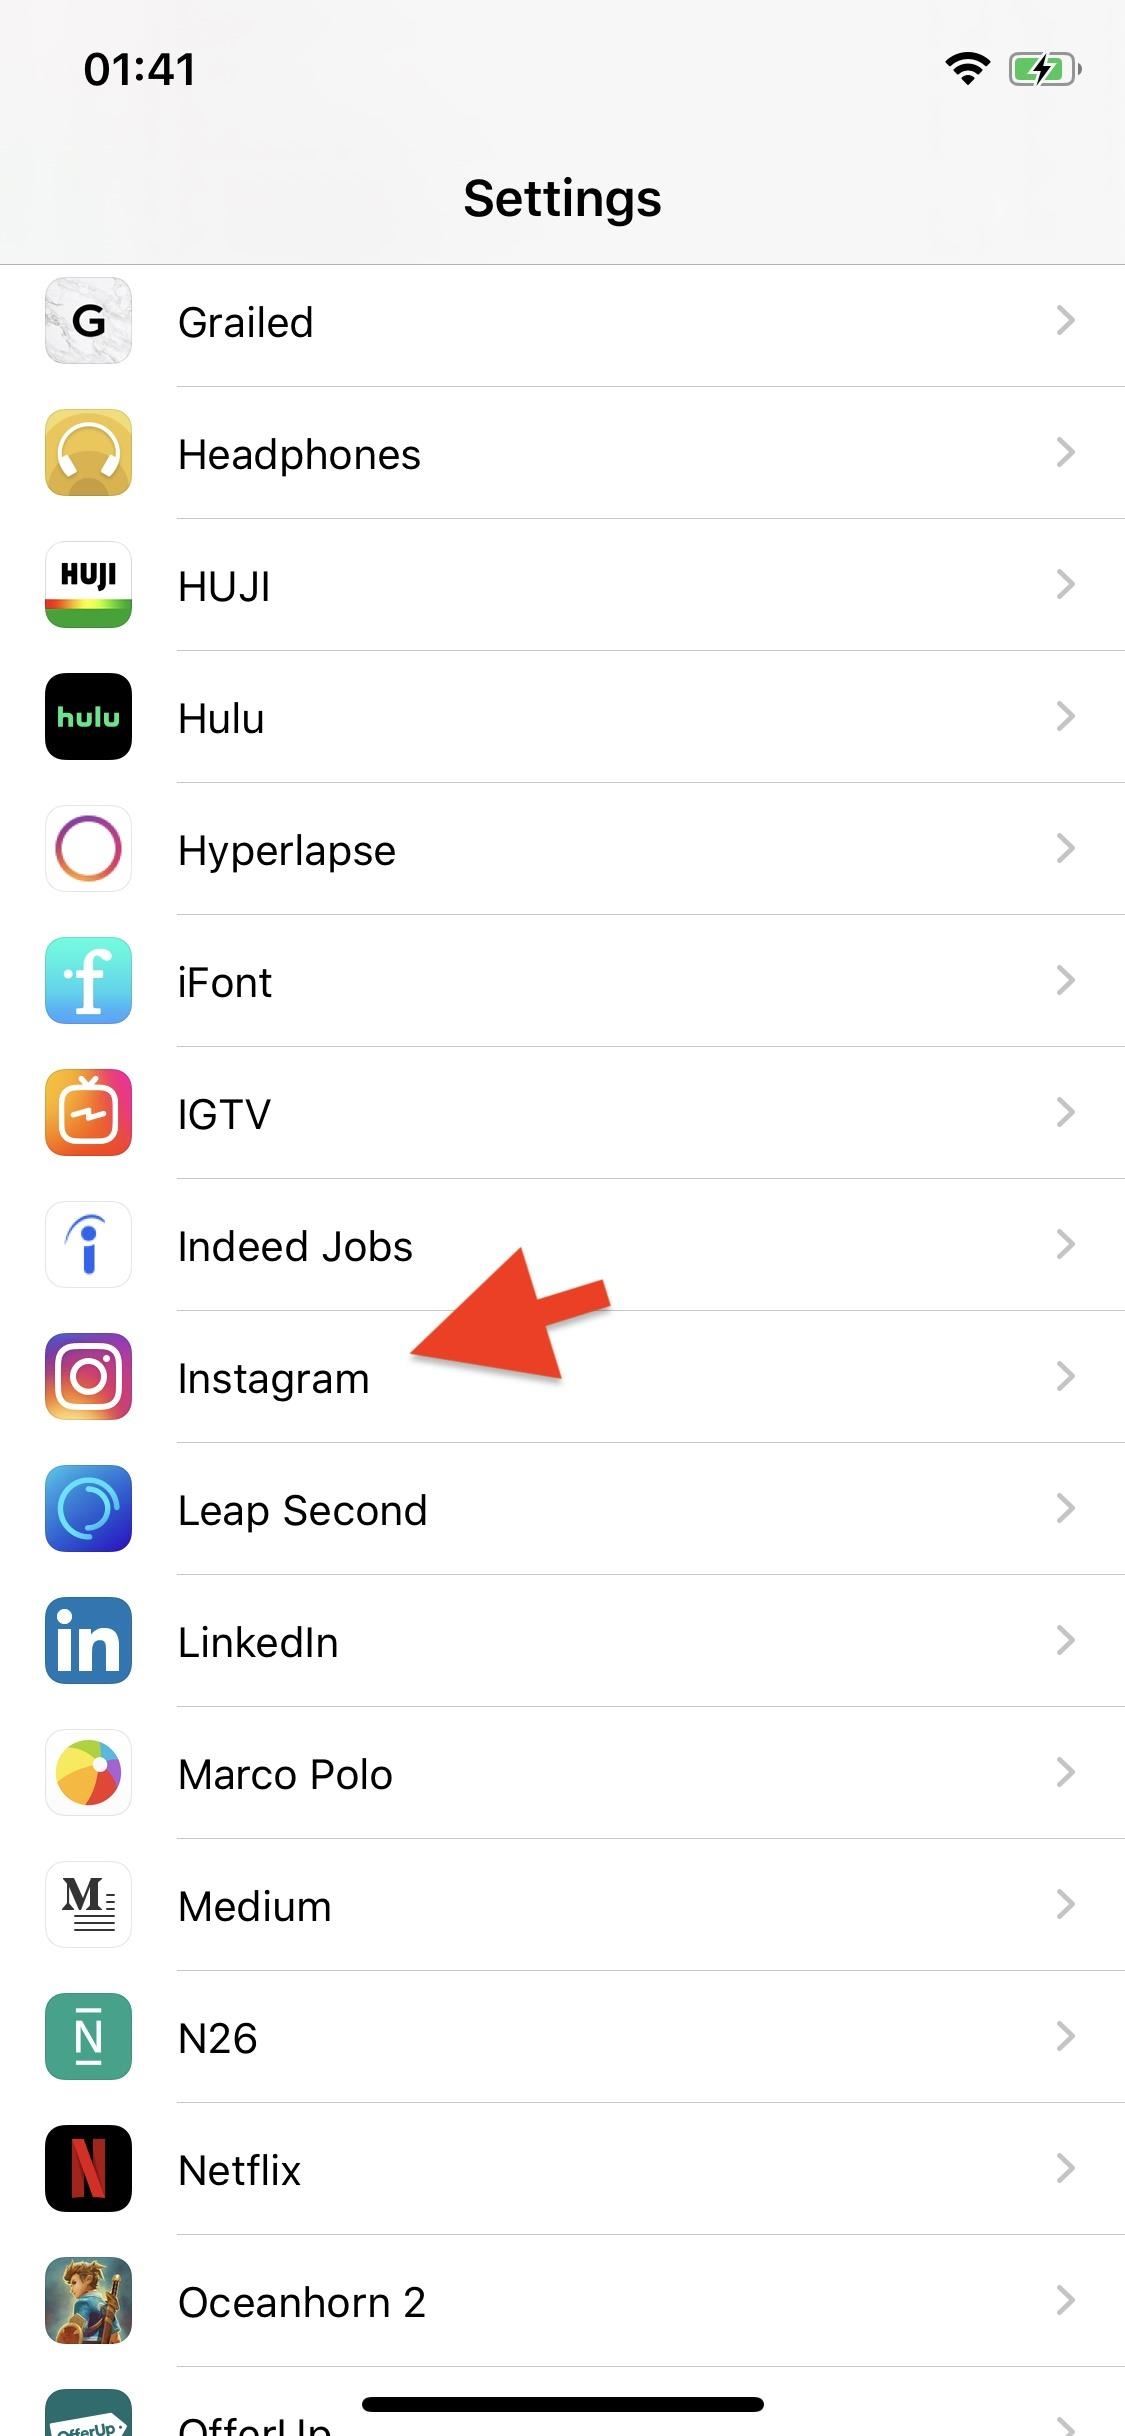
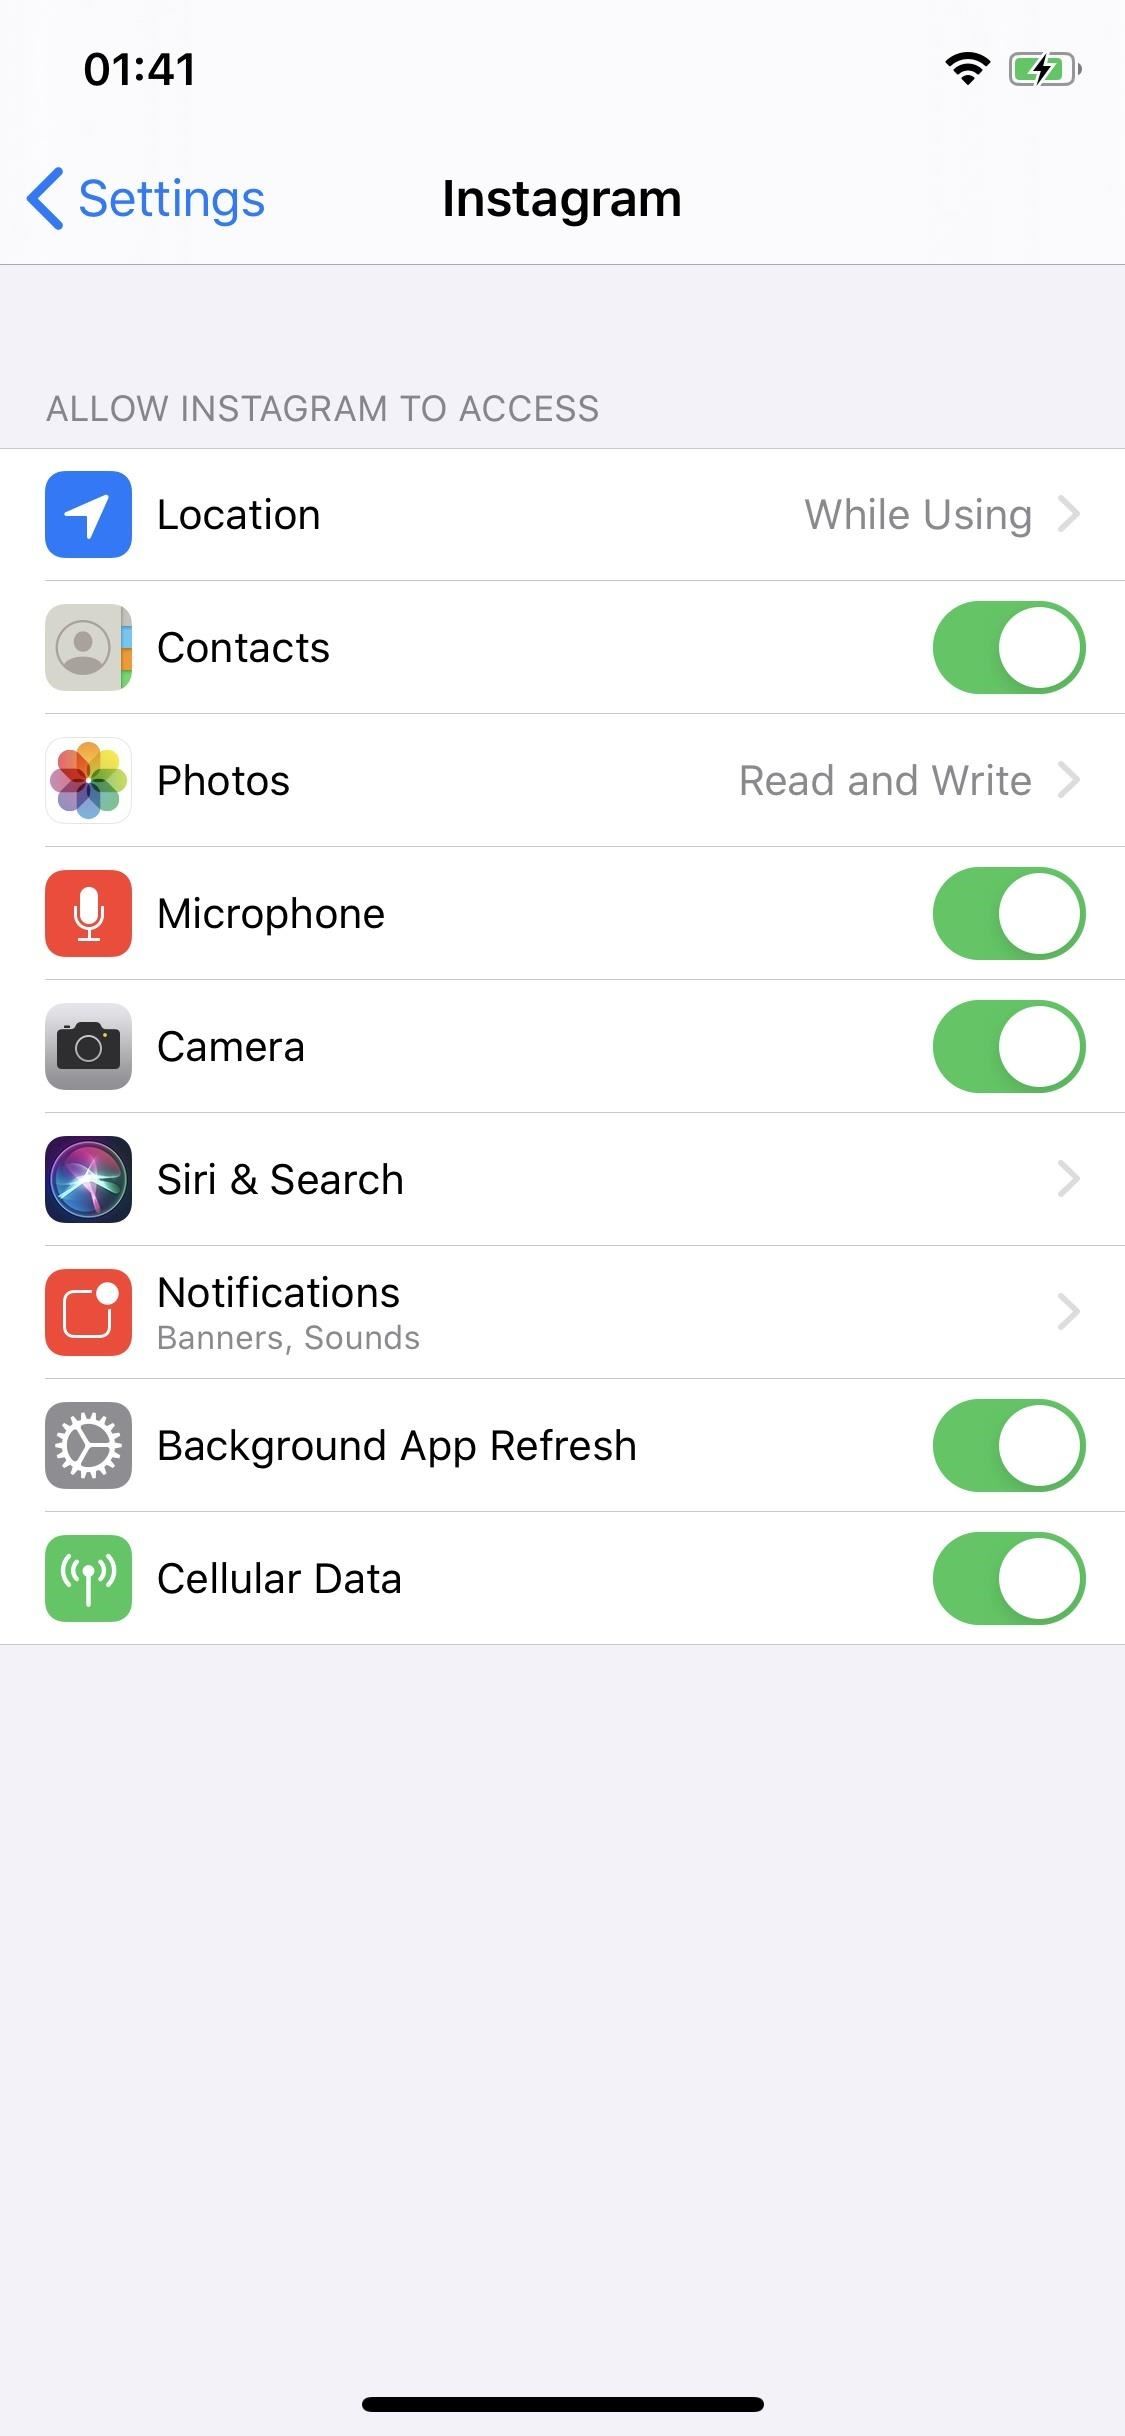
Unknowingly, you might have already set up a secondary, or even tertiary, system language for your iPhone. Luckily, there’s an easy way to check. Open the Settings app, scroll down, and tap on any third-party app you have on your device (in this example, we’re using Instagram). If there is no “Language” option at the bottom of the page, you only have one system language available; if you do see that option, skip to Step 3.
Step 2: Add Alternative System Language (If Necessary)
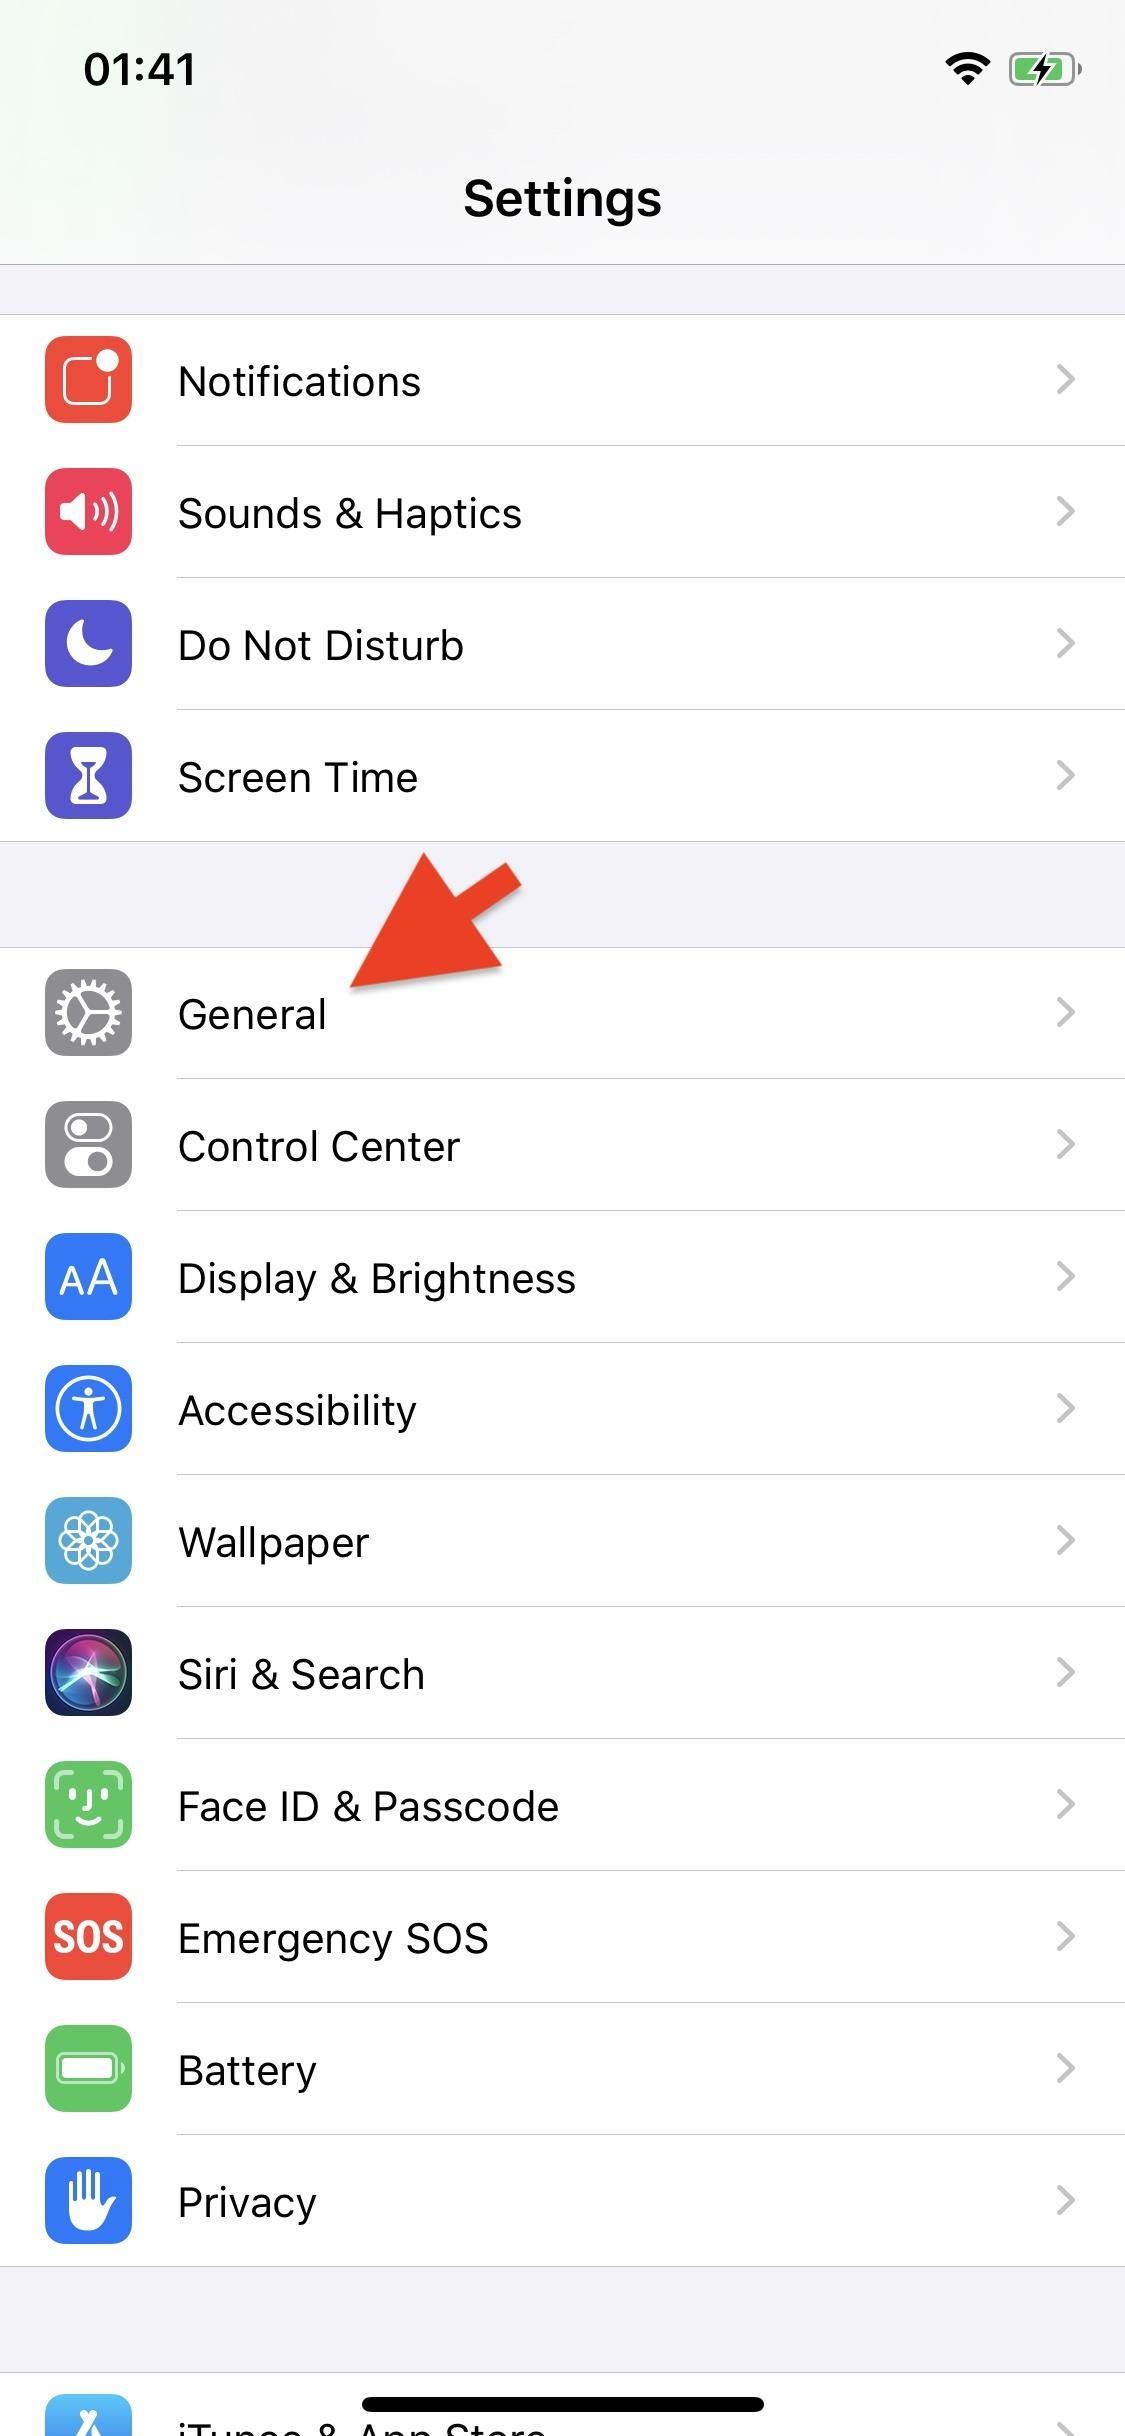
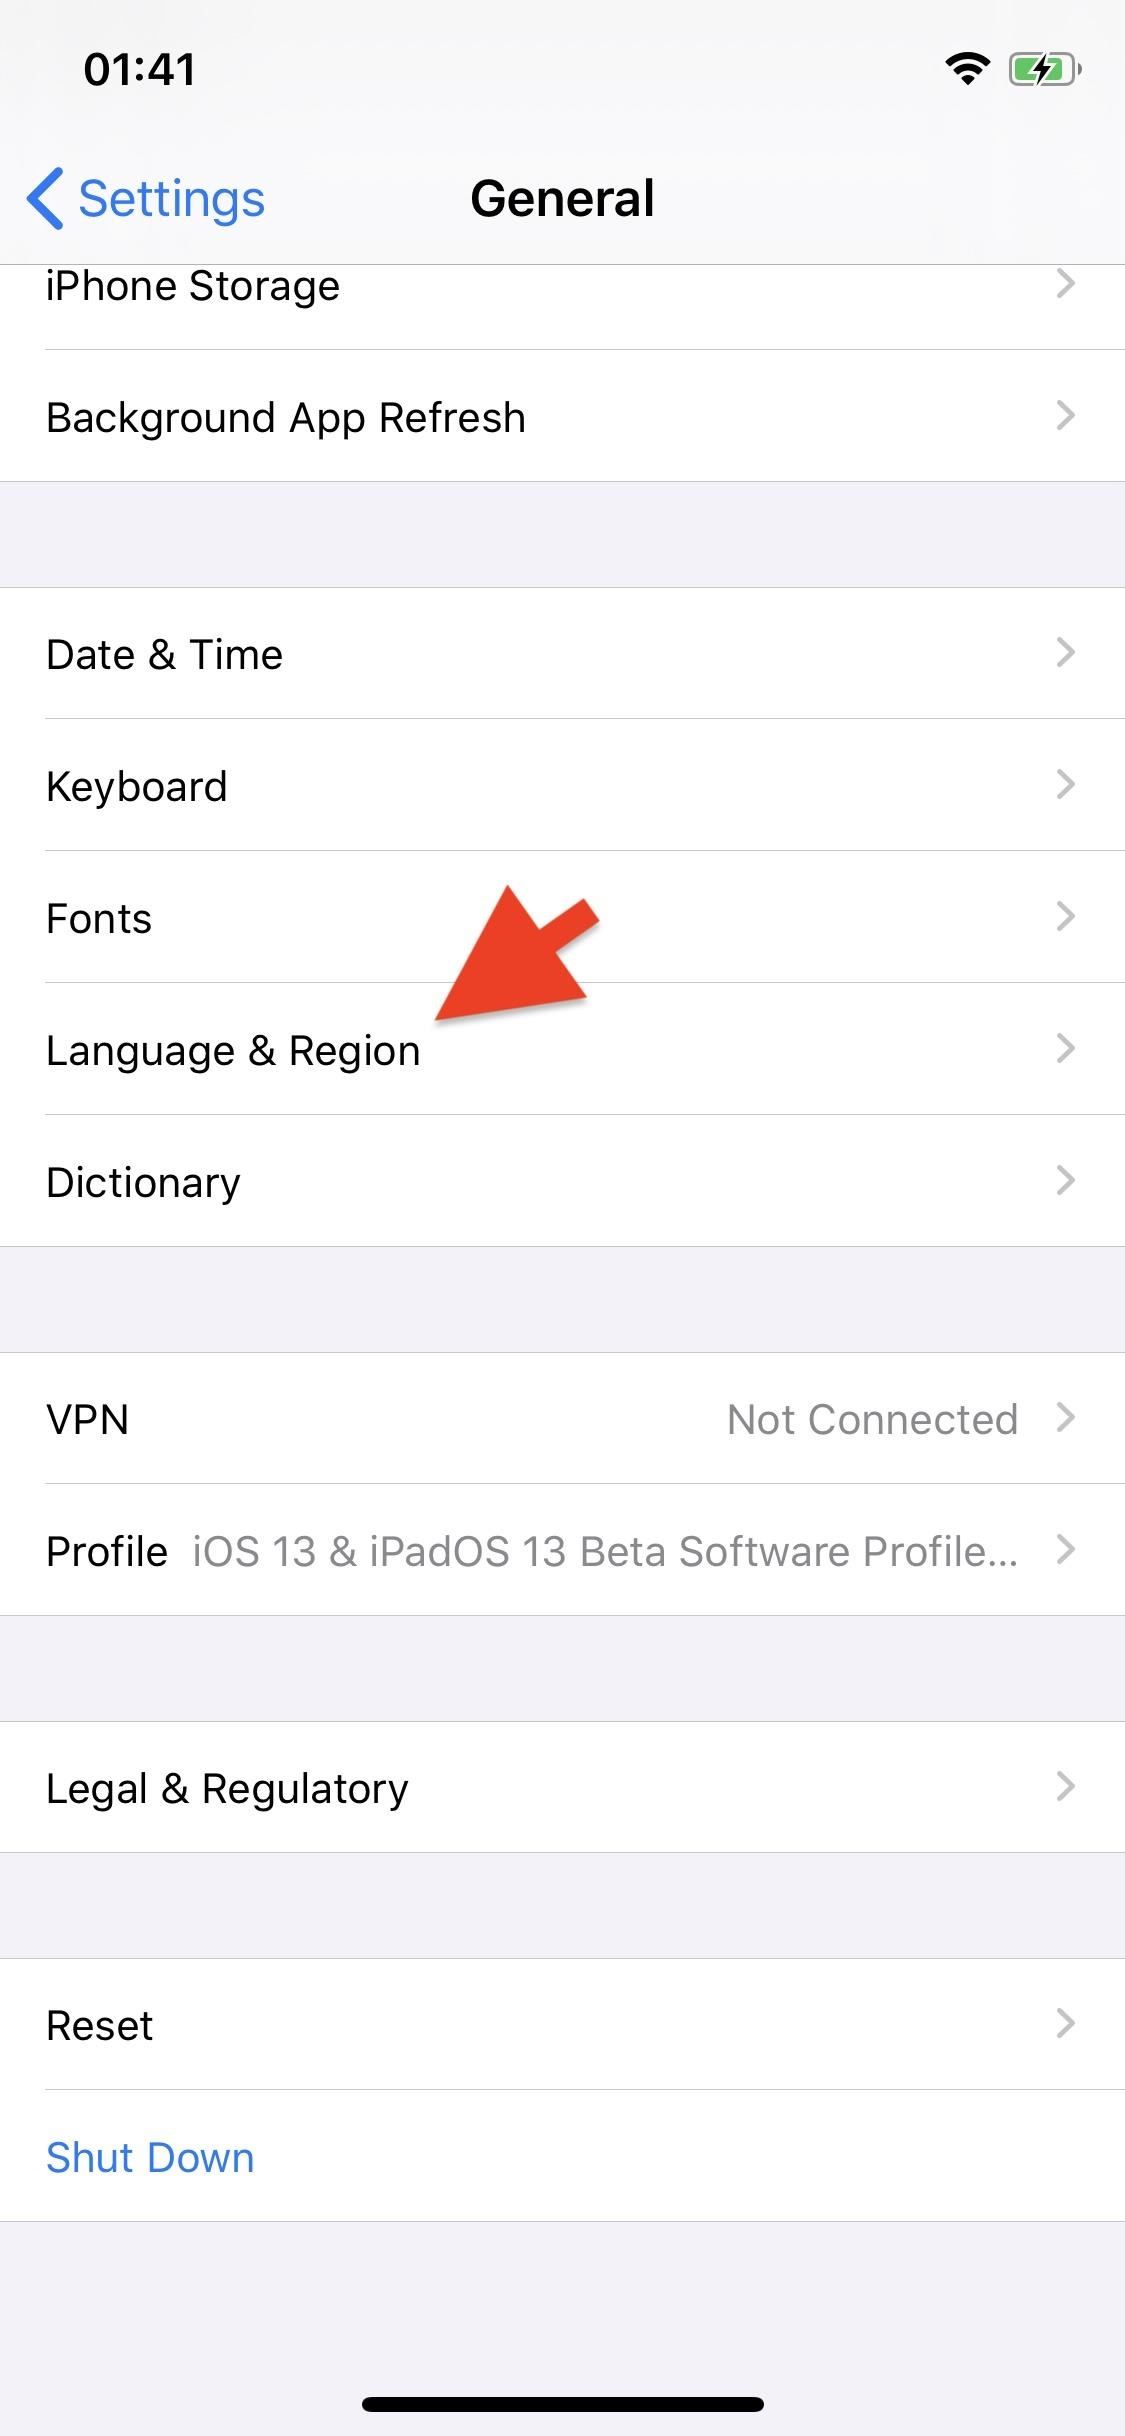
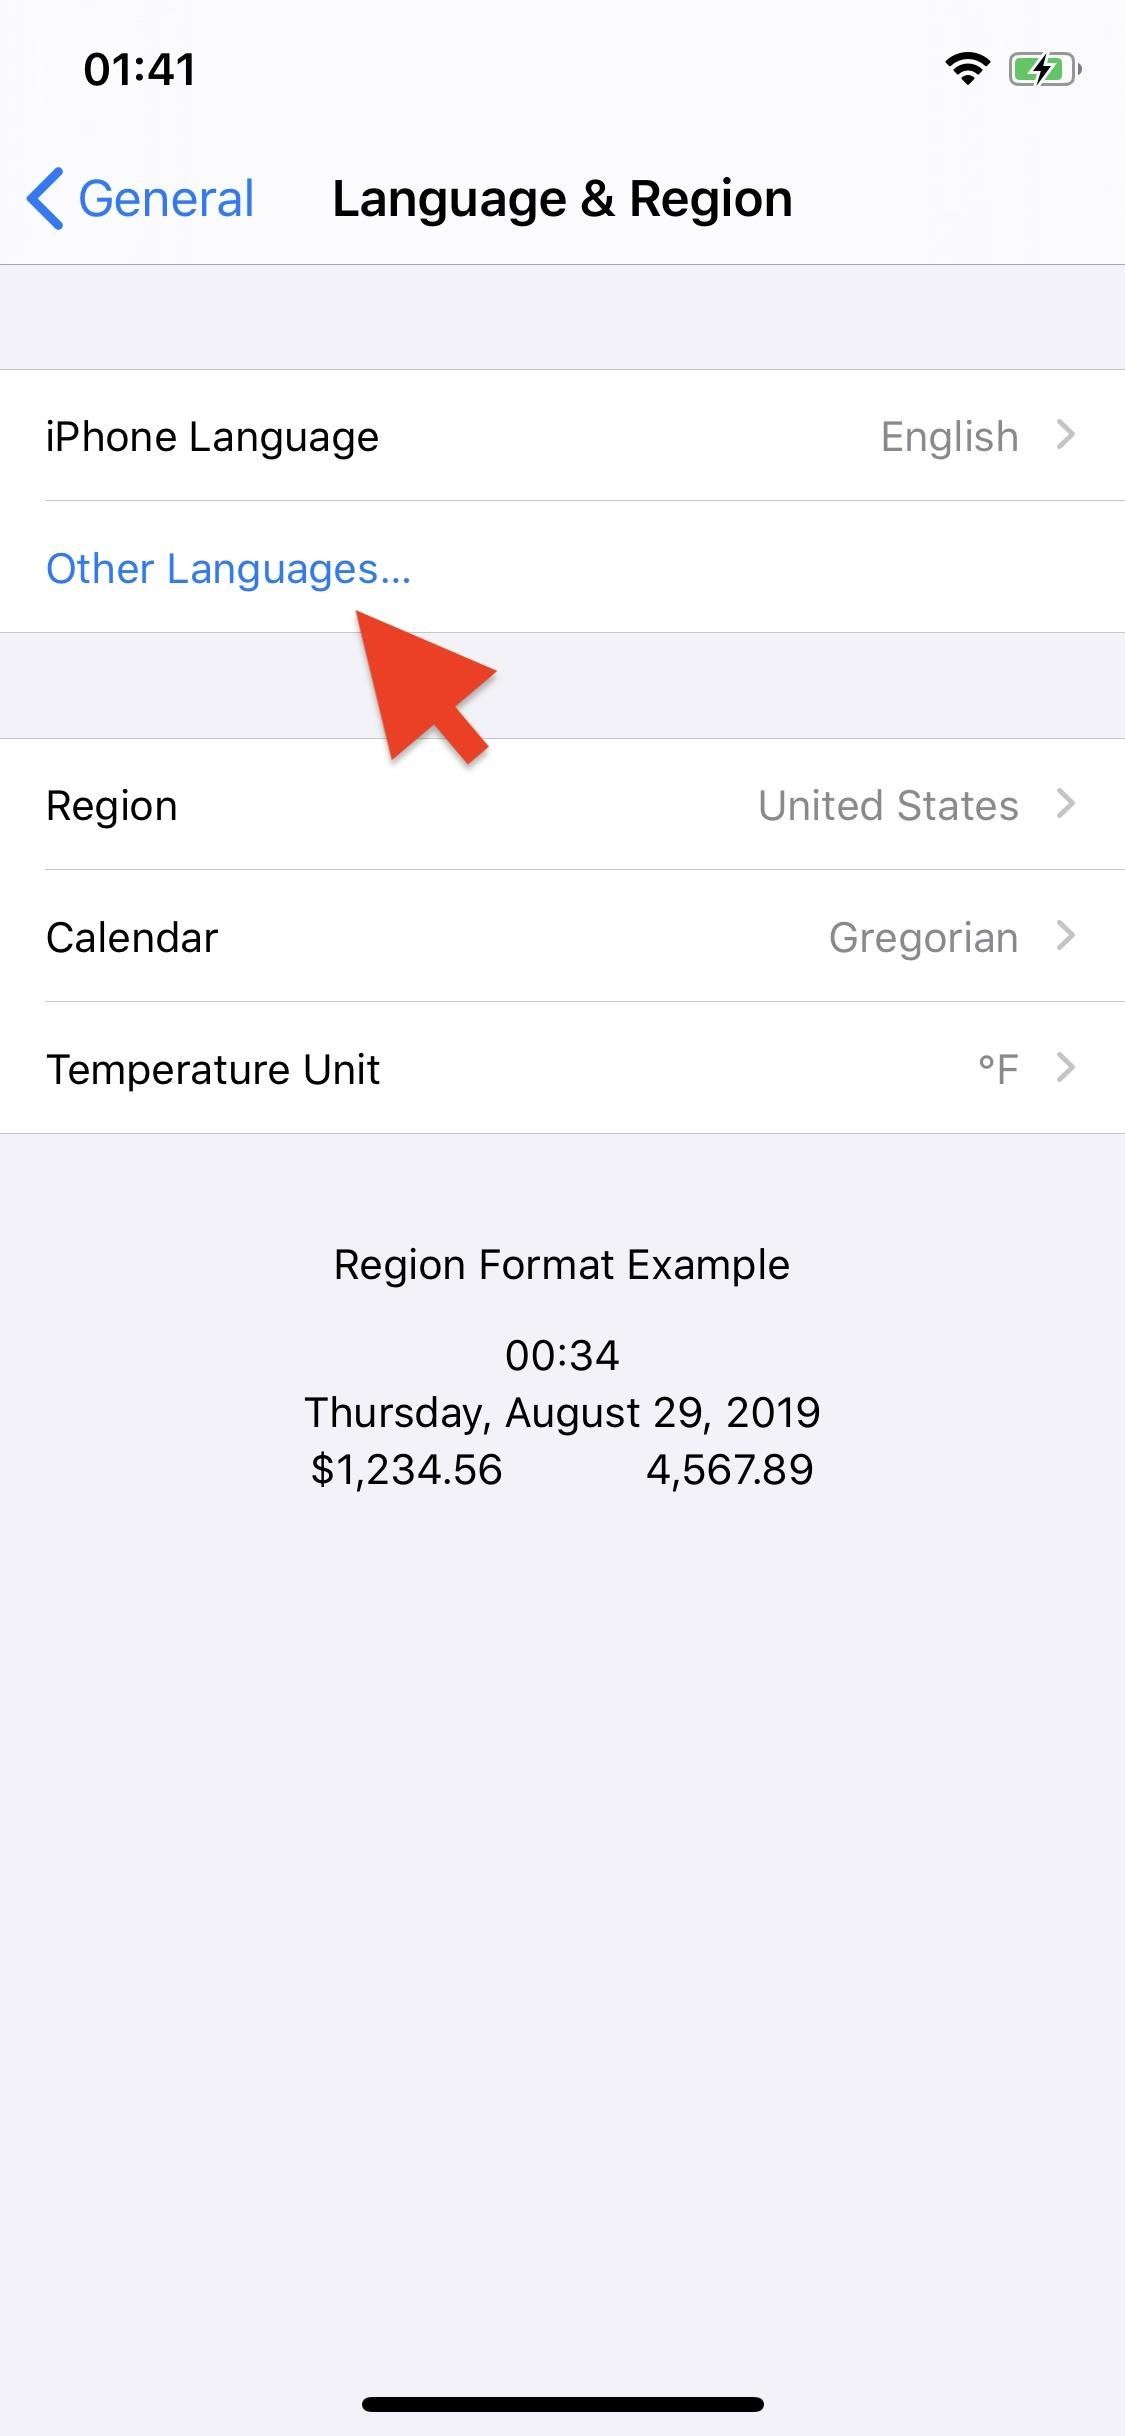
Don’t have the “Languages” option in your third-party apps? Not to worry, you can easily make it appear by adding another system language to your iPhone. Open the Settings app and go into General –> Language & Region. Next, tap on “Other Languages.”
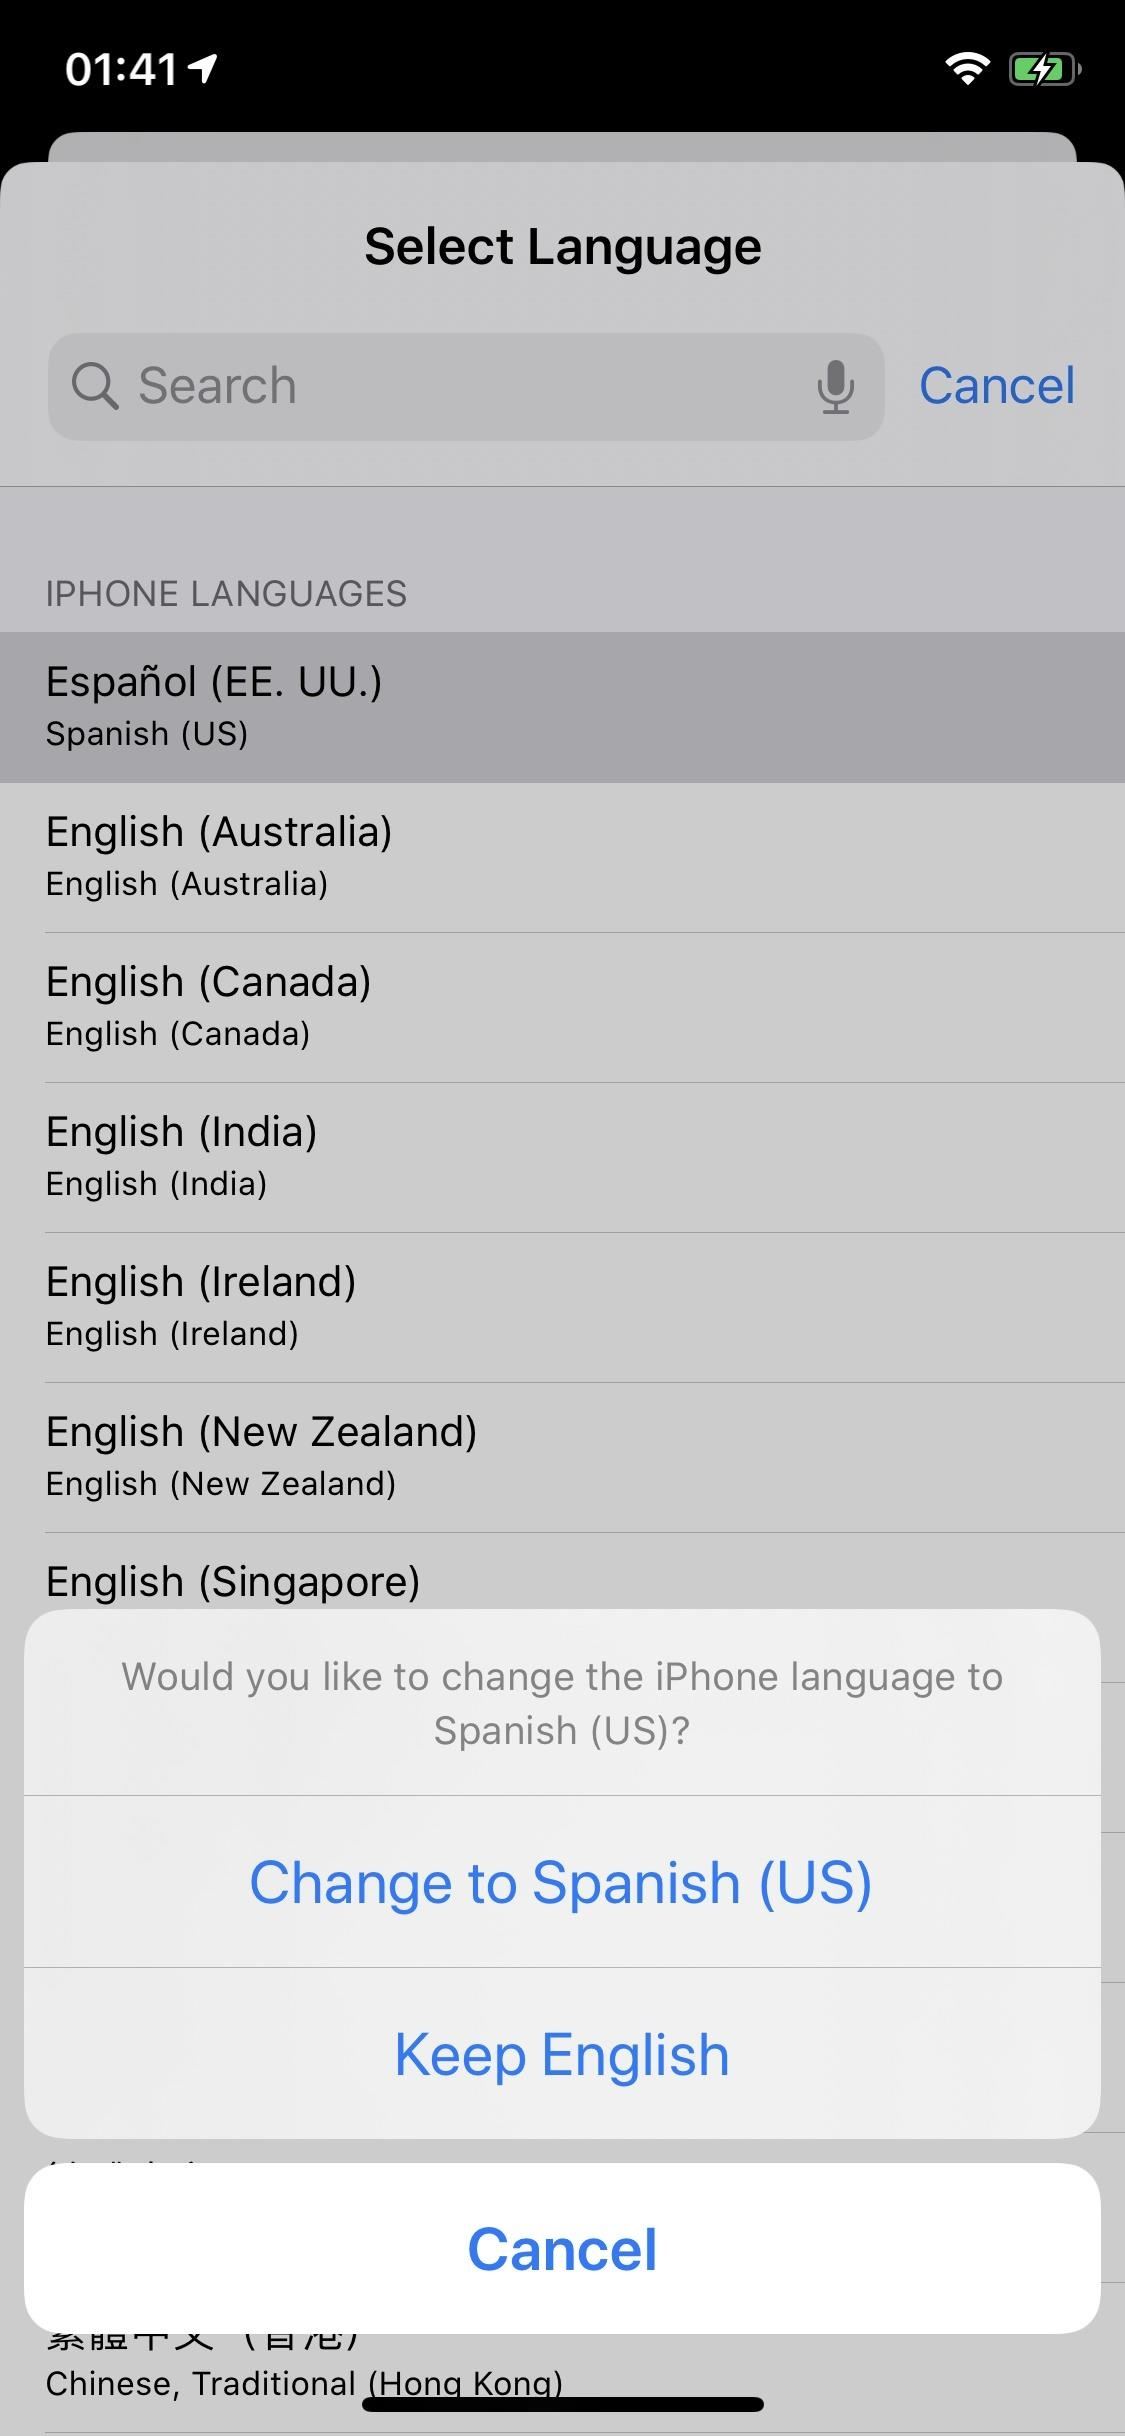
Select a language from the list (we chose Spanish) and then either tap on “Change to <language>” to switch your system language or “Keep <language>” to maintain your system language and set up the new language as secondary (preferred). You’ll then see a new Preferred Language Order header, under which all of your optional system languages will appear.
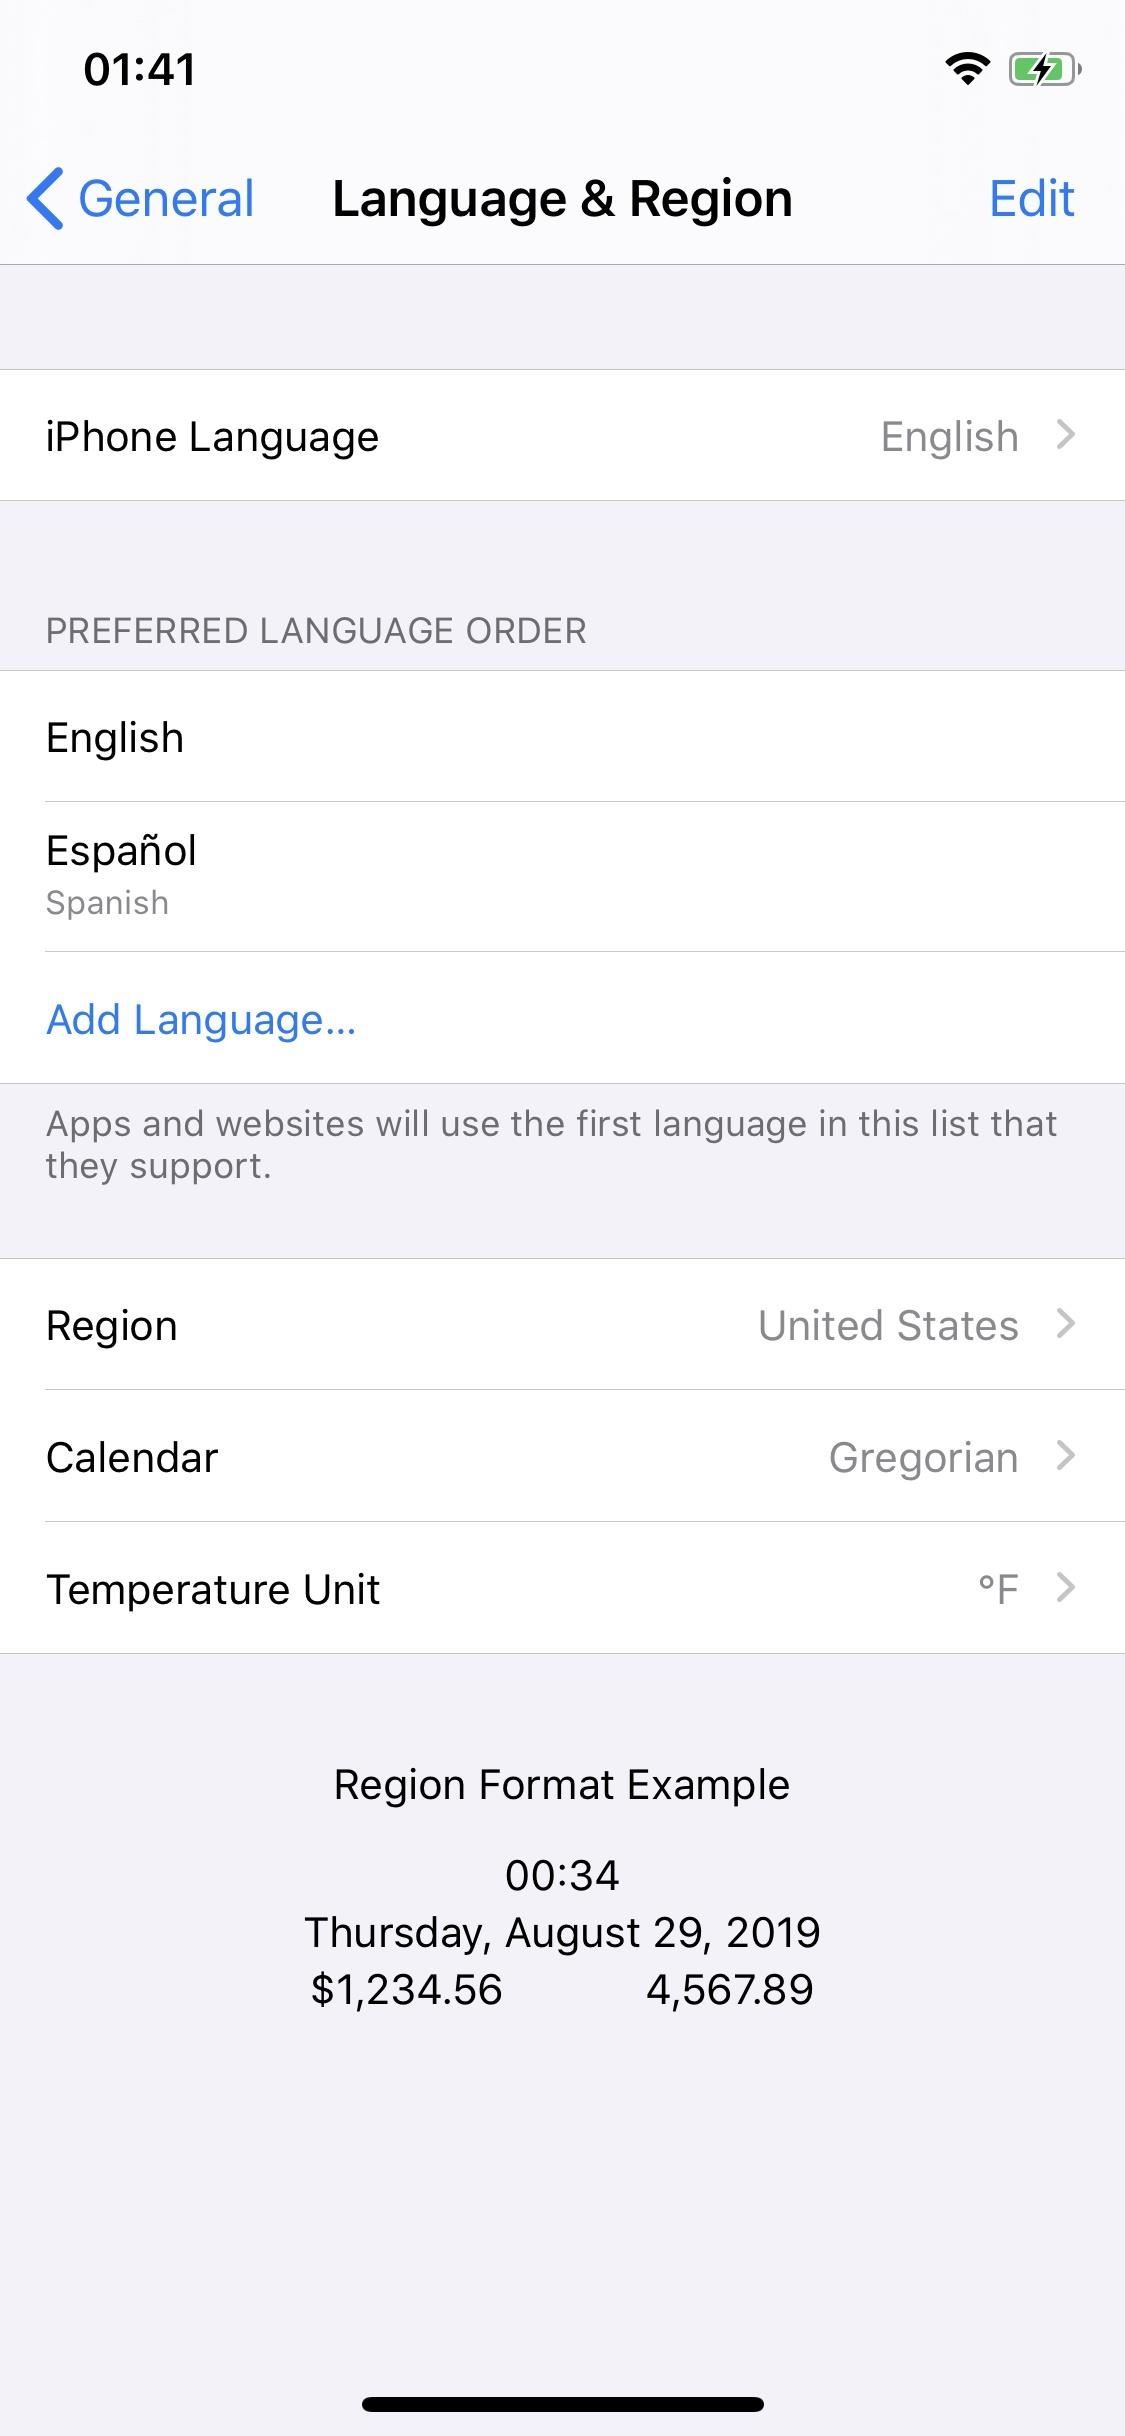
Note: You only need two system languages for the “Language” option to appear in the settings page for third-party apps. For example, if you have English and Spanish as the system languages, you can still choose Chinese from the third-party settings page; you don’t need to add it as a system language.
Step 3: Change App’s Preferred Language
Now that you have at least two system languages on your device, open Settings and select any third-party app from the list, or any native app that supports different languages (not all native apps will have the language option, whether you have two system languages or not).
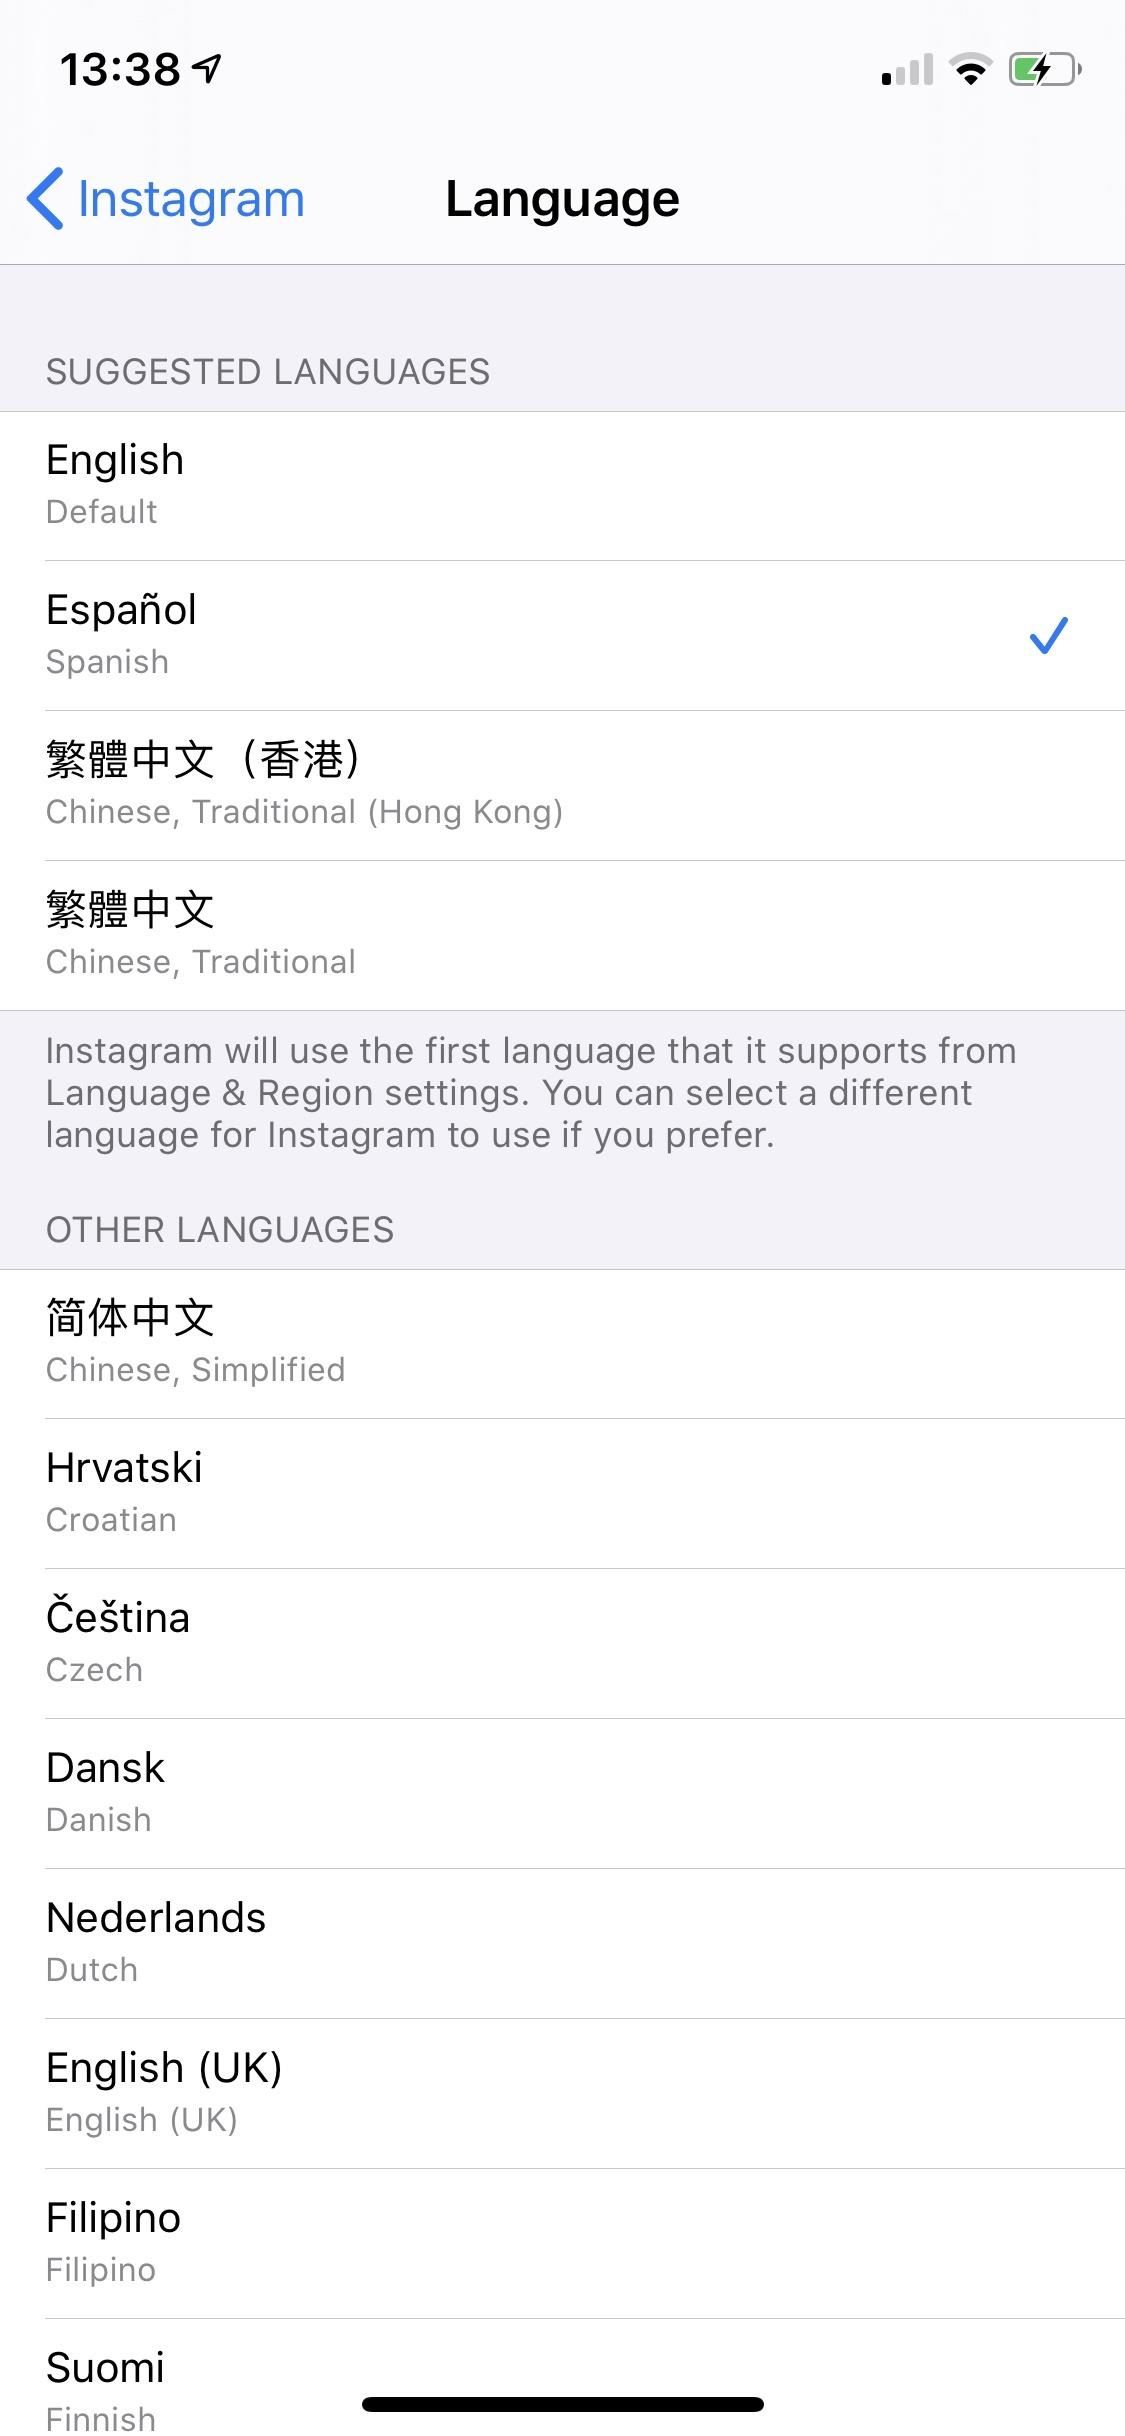
Tap on the Languages option in the settings page for the app and choose a different language. You can easily select any other system languages you have, or scroll through the list and find another. If you choose a language that isn’t a system language, it will be added as one. Change the preferred language for as many apps as you’d like.
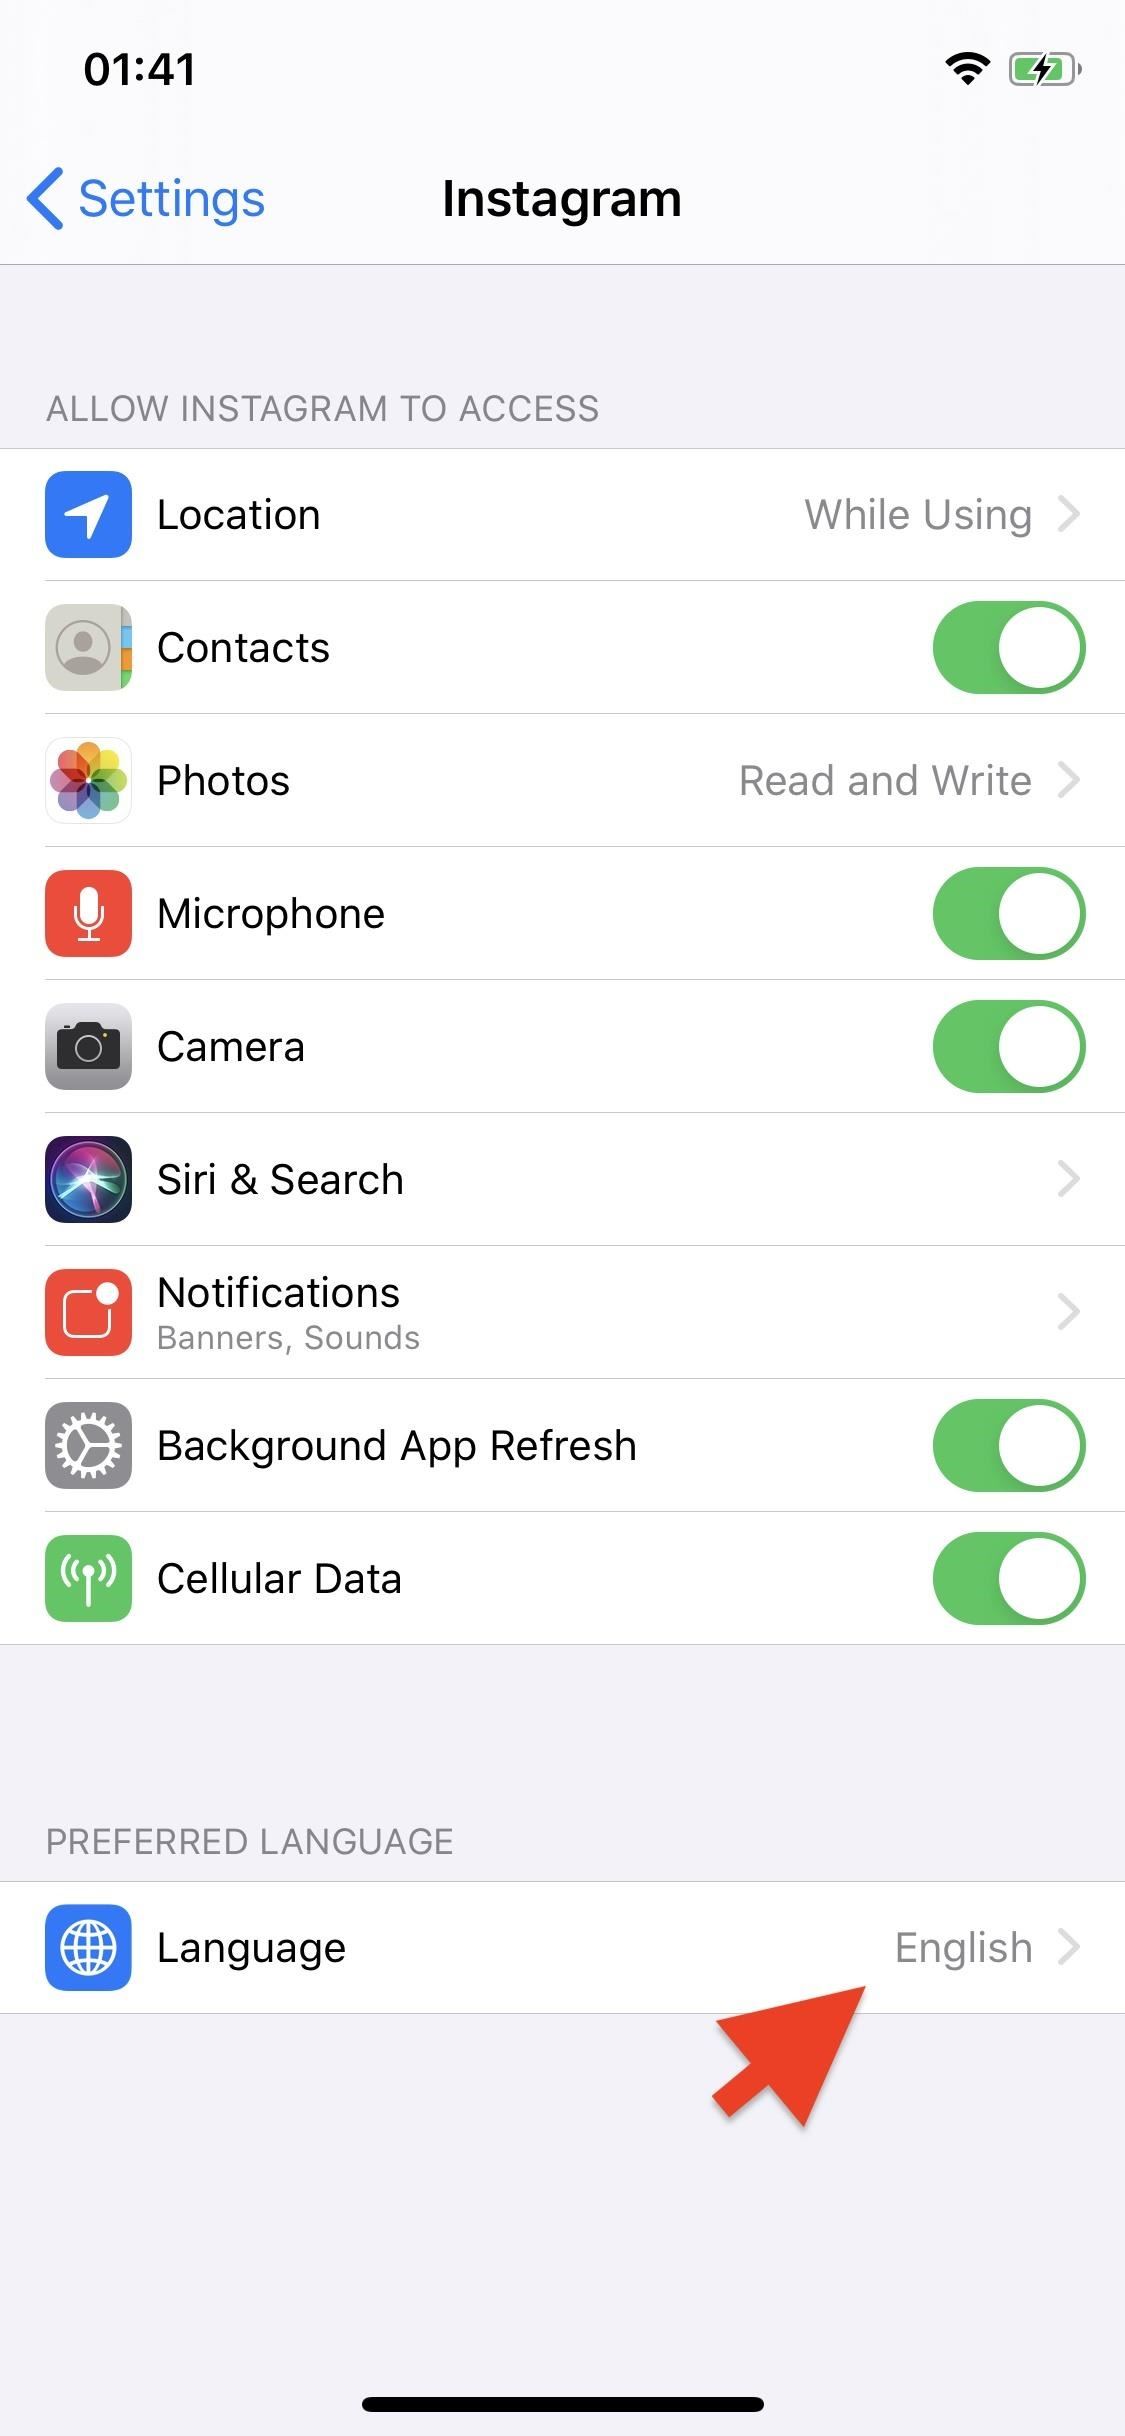
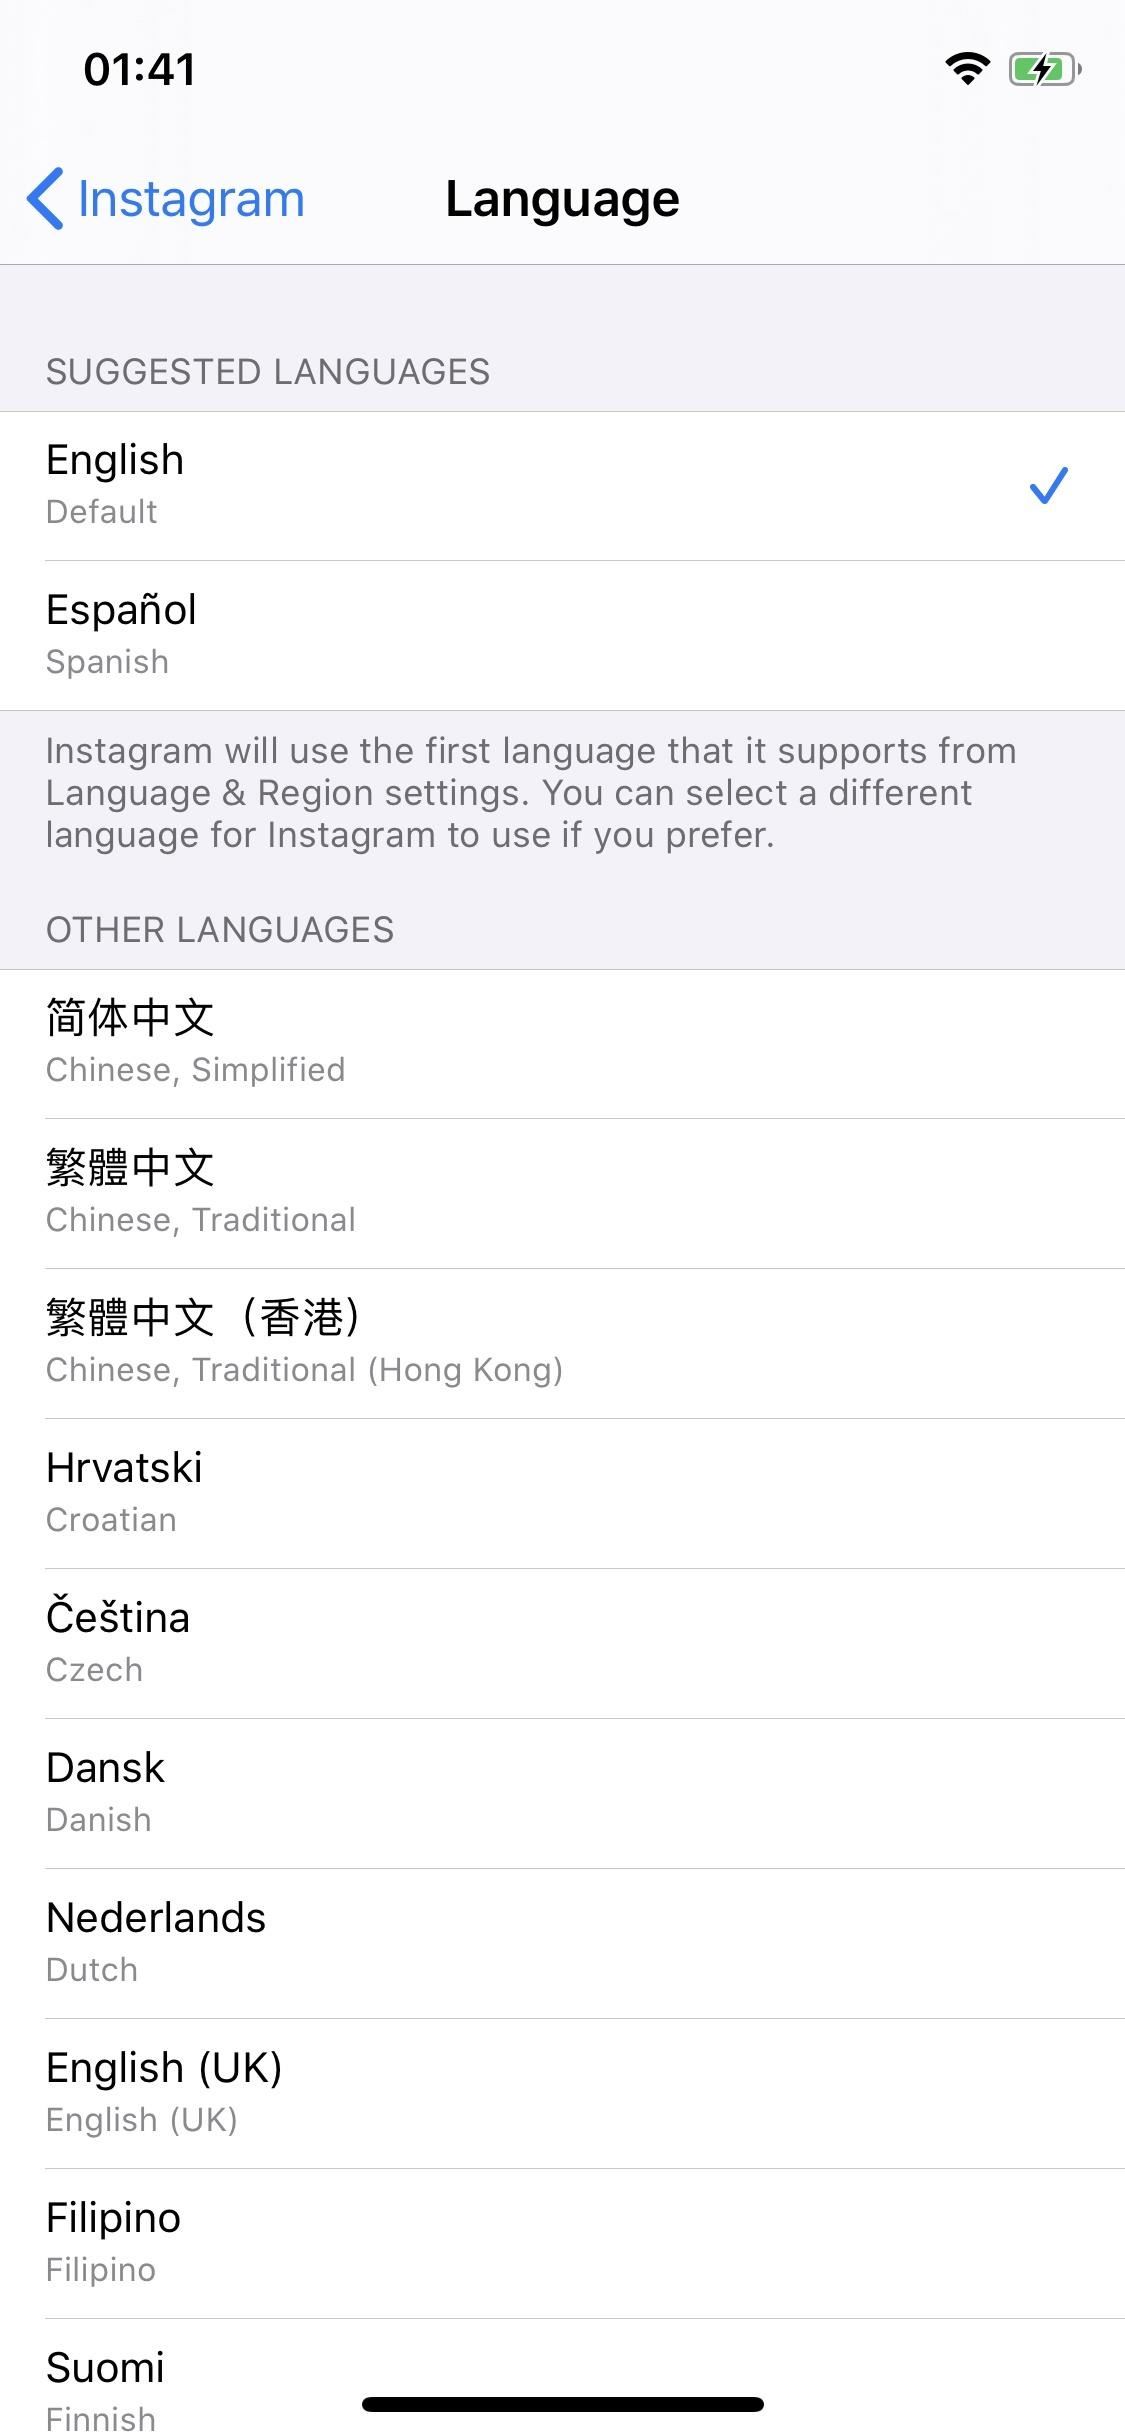
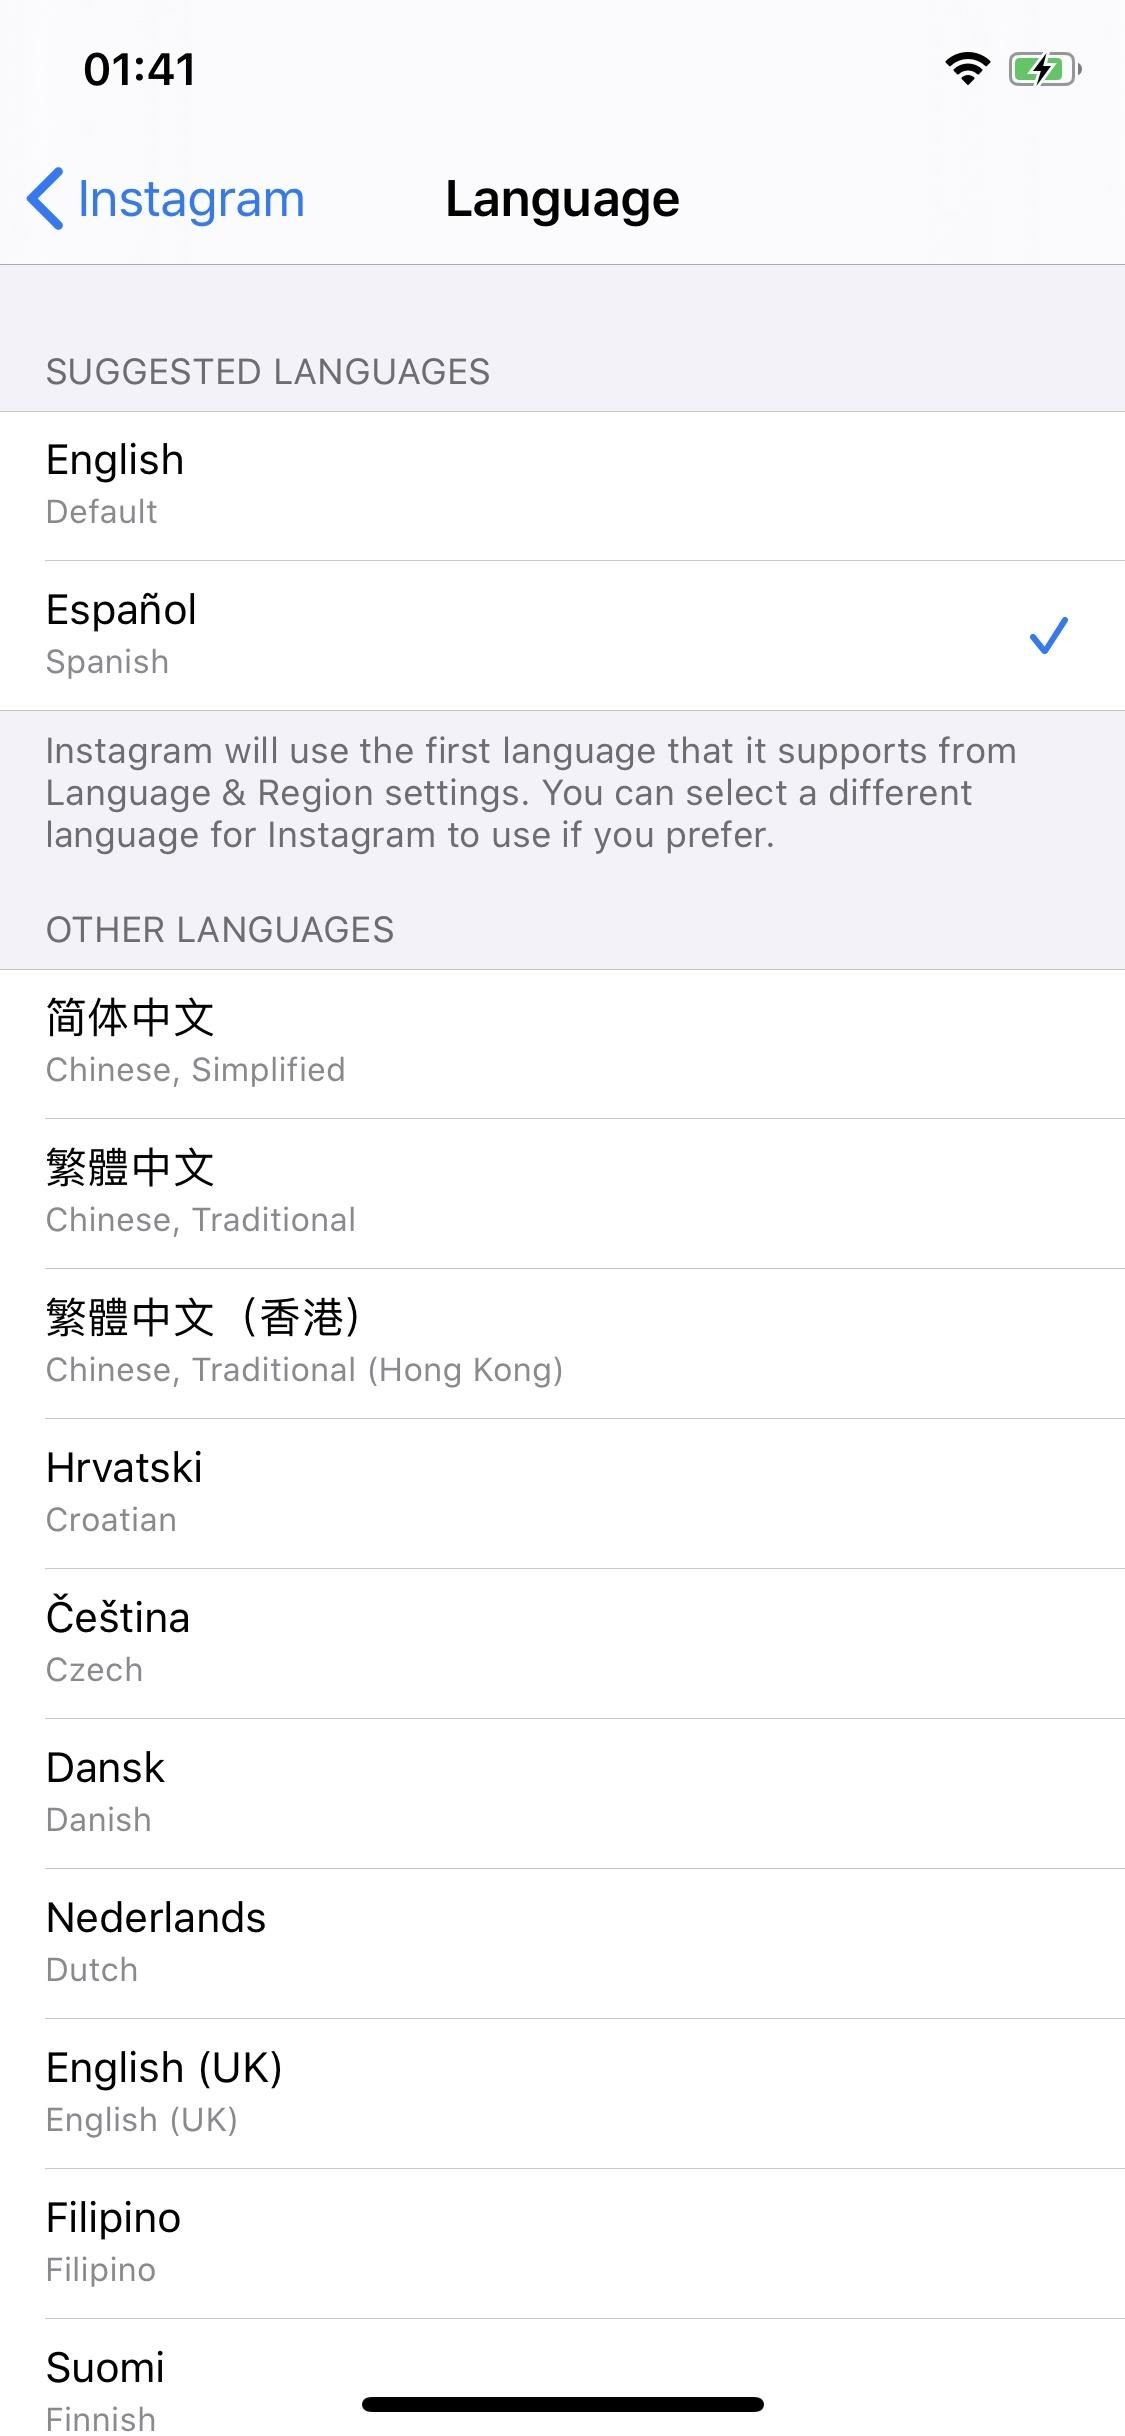
If you don’t want to go into the Settings app, third-party apps usually have a “Language” option within their own settings, which will then redirect you to the “Language” option in the Settings app. Both methods work the same.
Step 4: View Apps with Different Preferred Languages
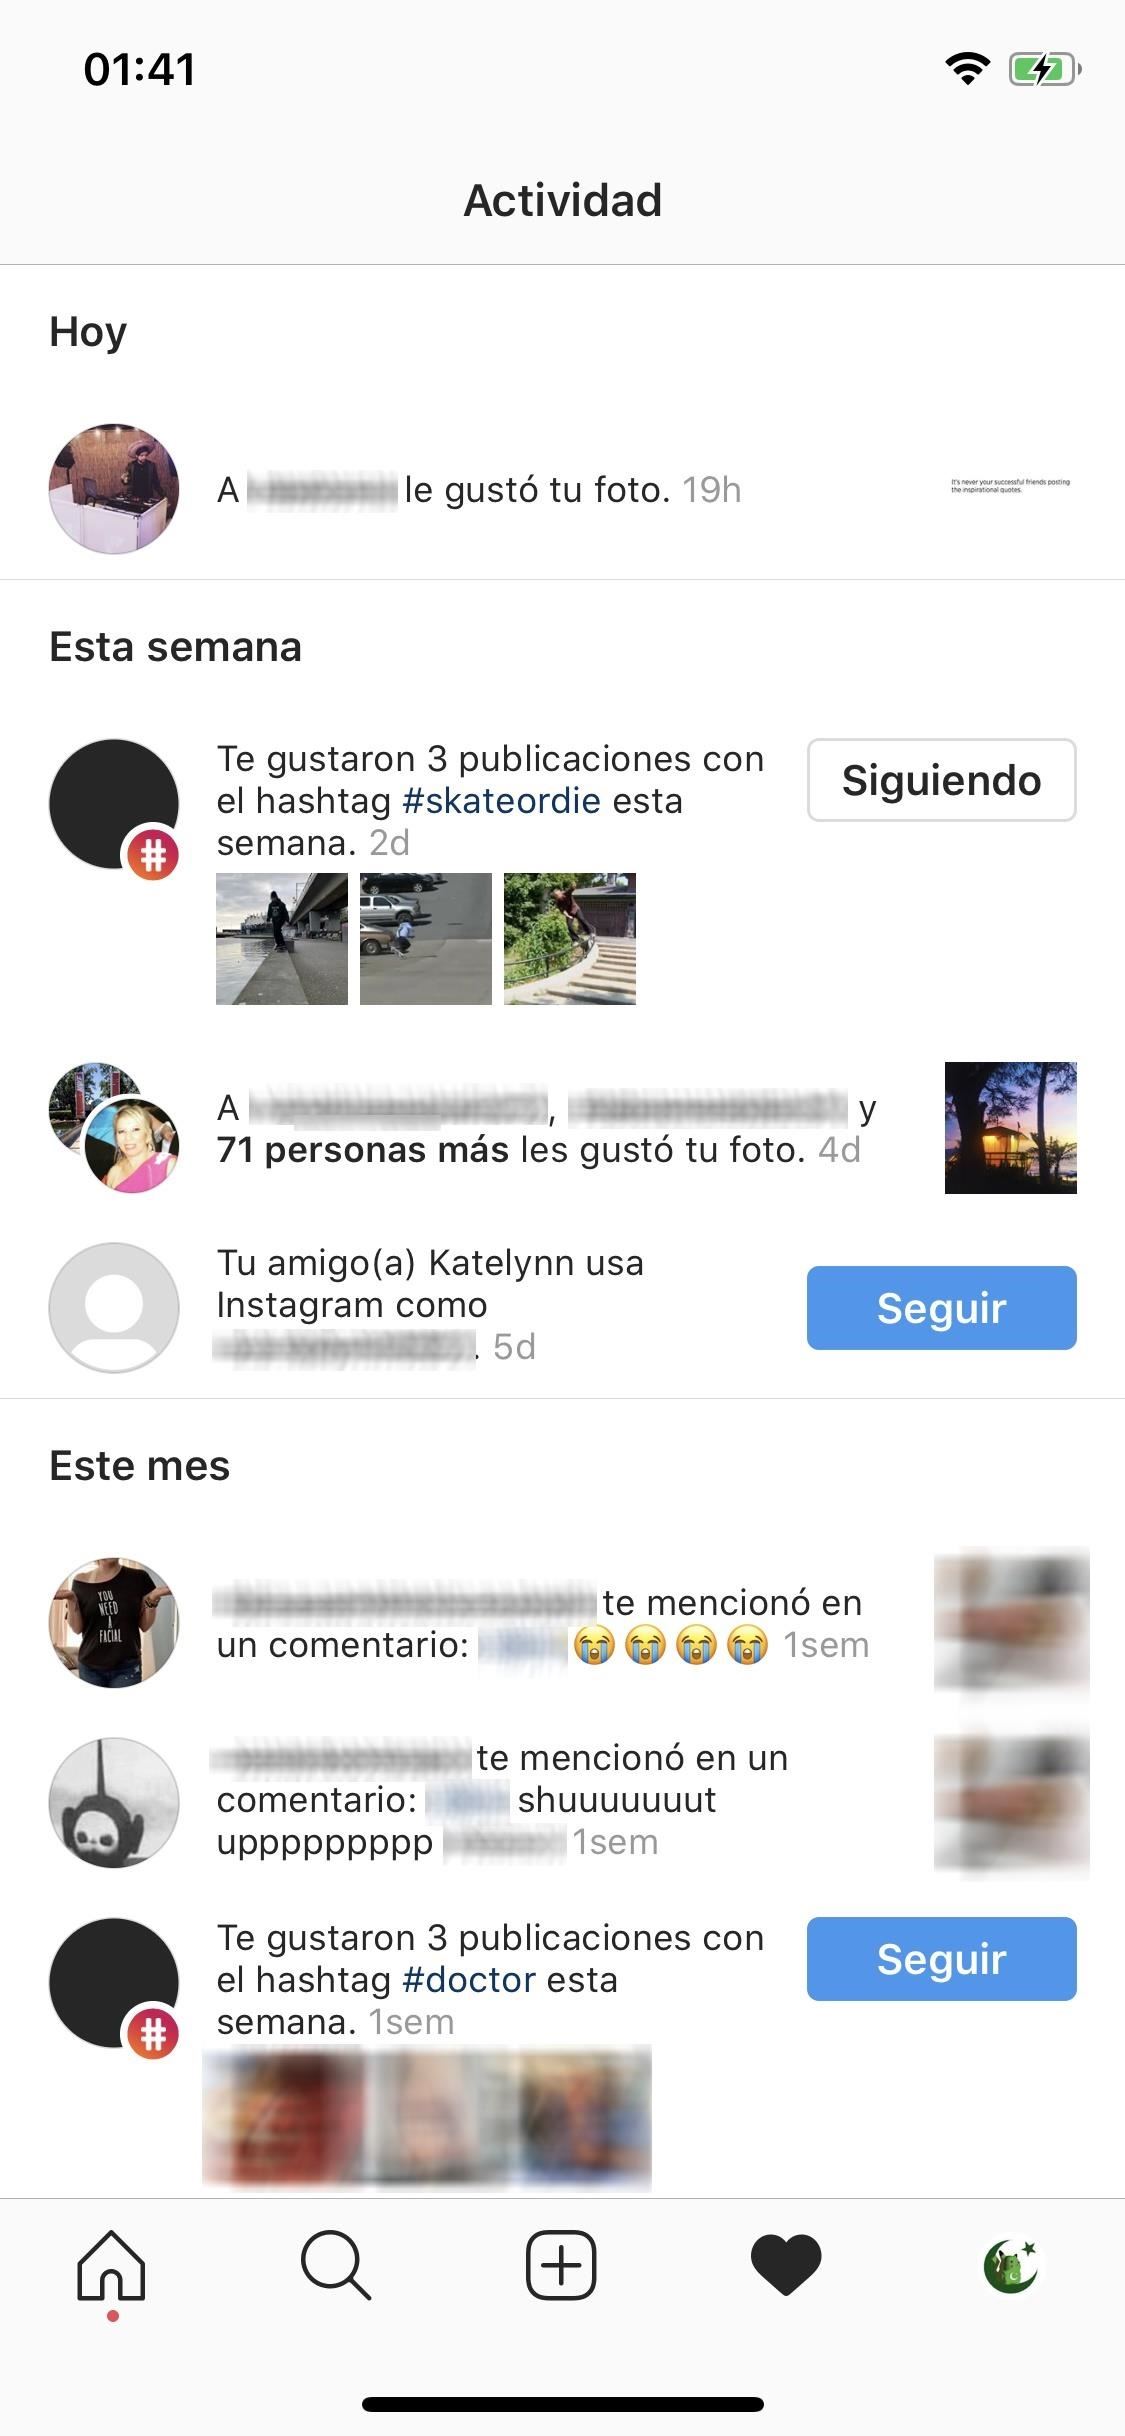
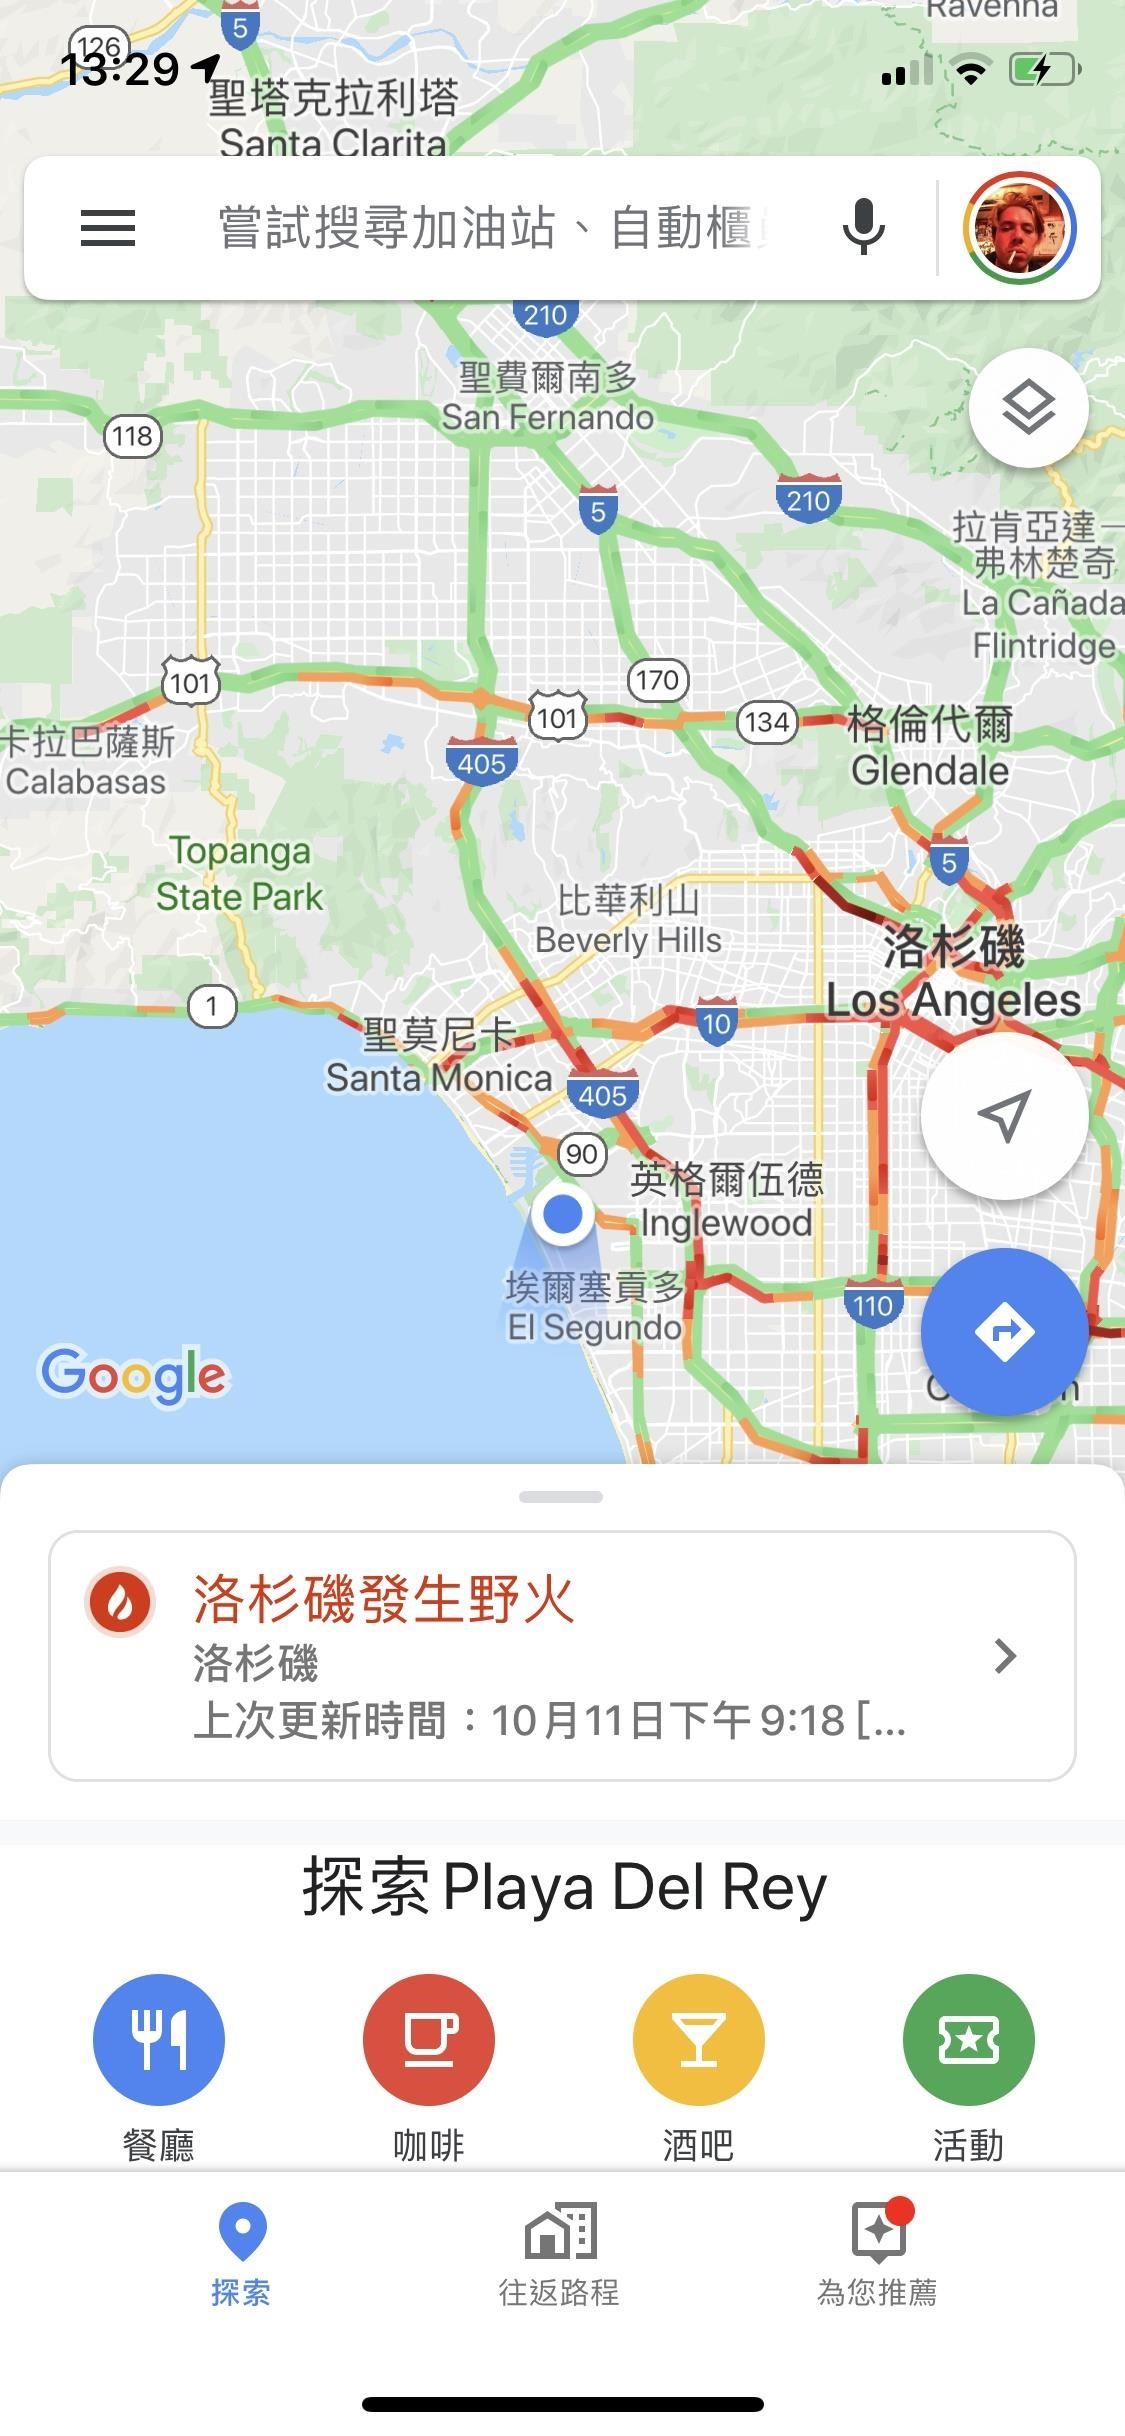
You can now check out all of the apps with different languages. Below, you can see that the preferred language for Instagram is Spanish, while it’s Chinese for Google Maps.
Step 5: Change Preferred Language Back to Primary (Optional)
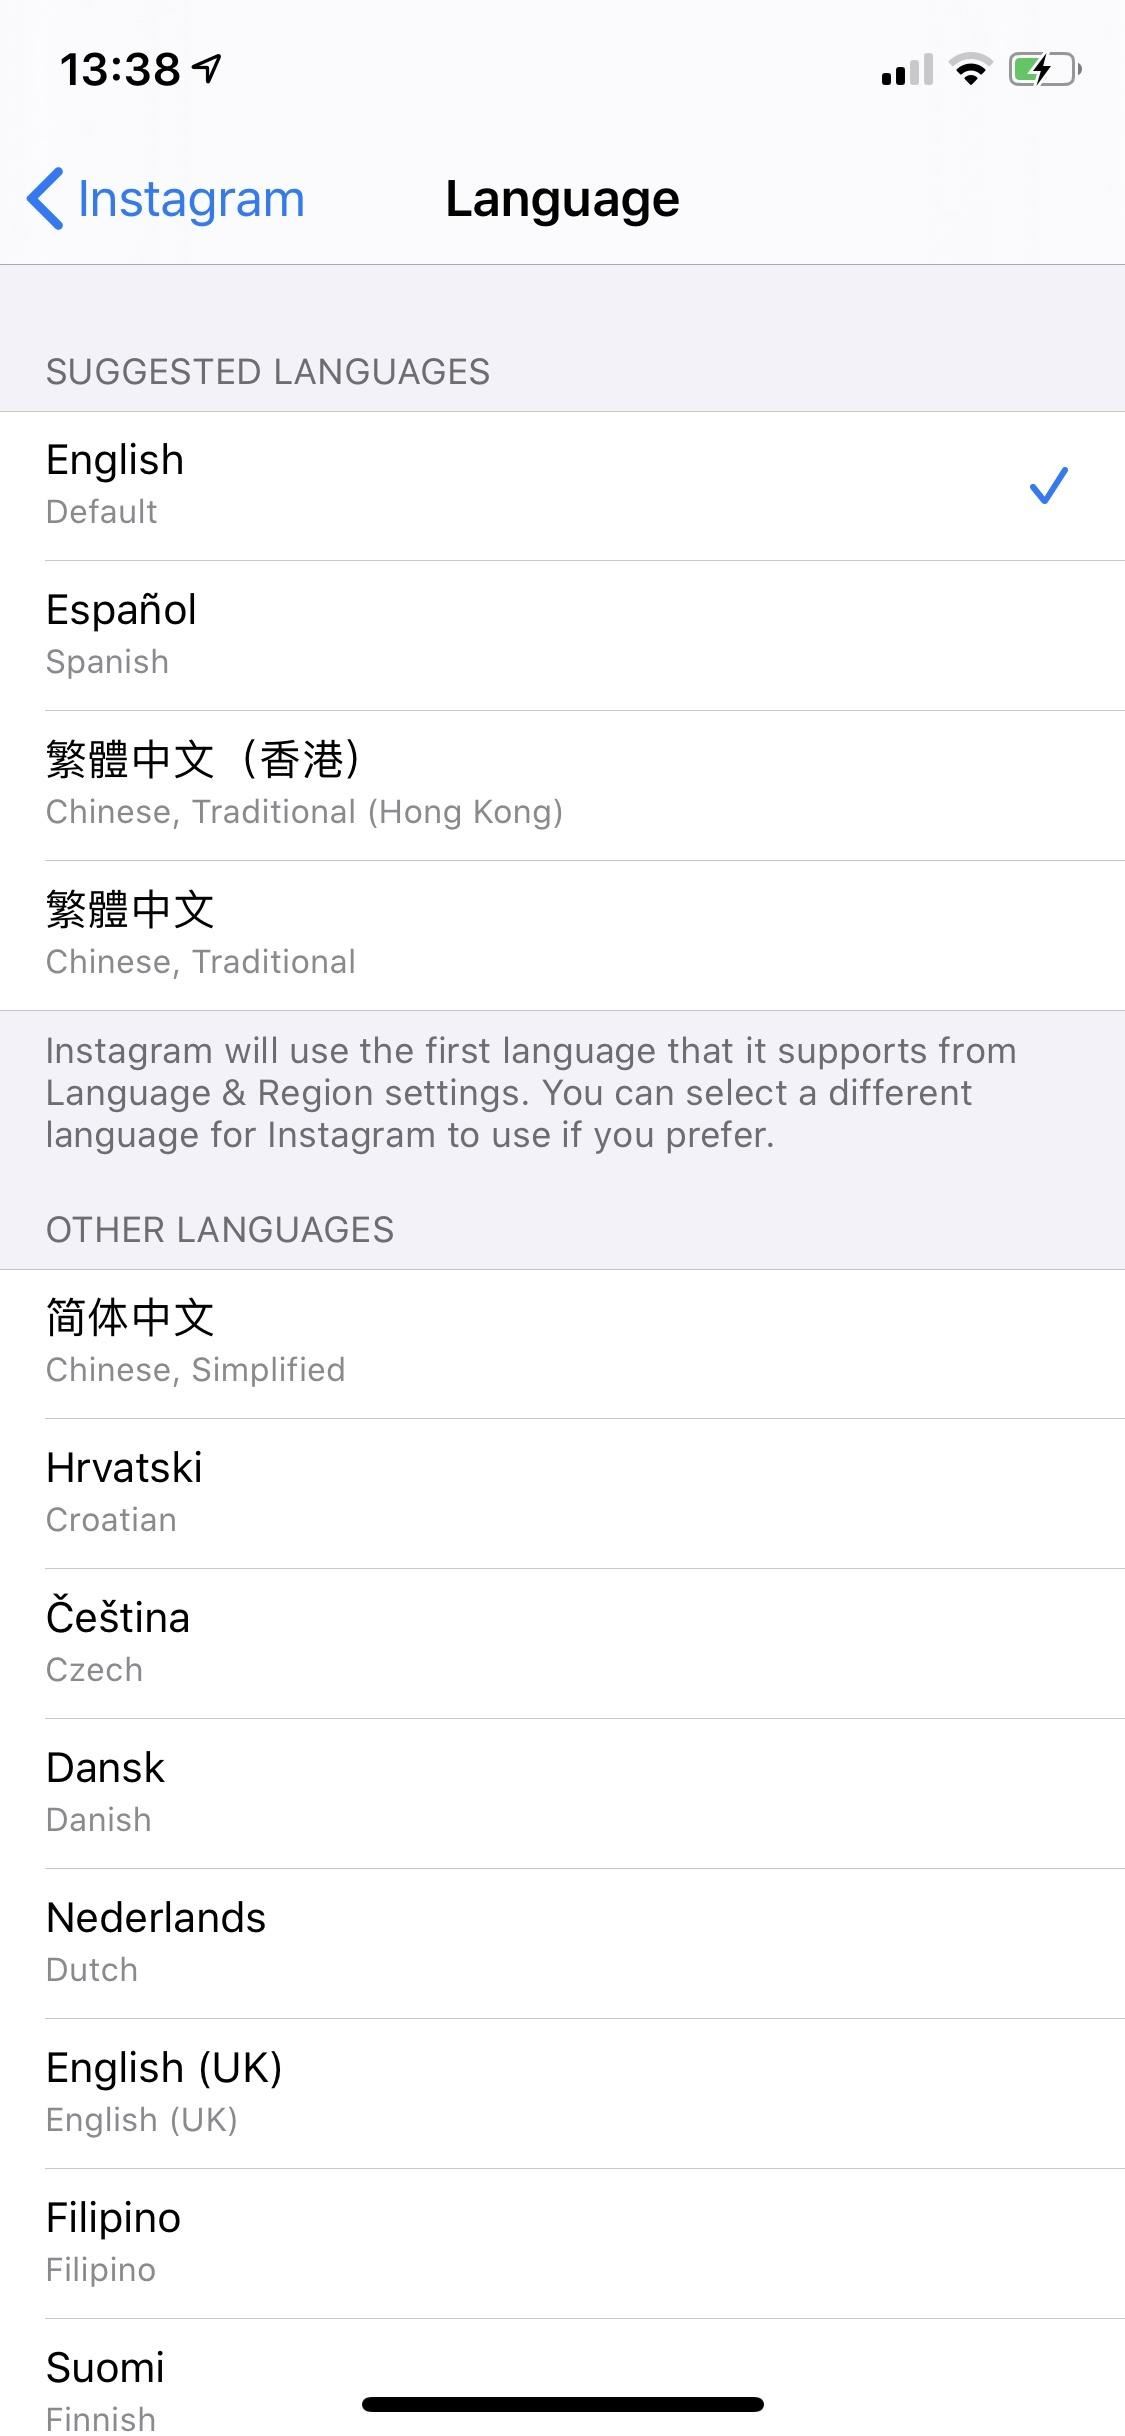
Unfortunately, there’s no way to change back all your apps to your default language at once. Instead, you’ll need to go back to the Settings app, go into the settings for each app with a different language, and manually change back the language to your default/primary one.
Just updated your iPhone? You’ll find new emoji, enhanced security, podcast transcripts, Apple Cash virtual numbers, and other useful features. There are even new additions hidden within Safari. Find out what’s new and changed on your iPhone with the iOS 17.4 update.
“Hey there, just a heads-up: We’re part of the Amazon affiliate program, so when you buy through links on our site, we may earn a small commission. But don’t worry, it doesn’t cost you anything extra and helps us keep the lights on. Thanks for your support!”


