When it works, Android’s Smart Lock feature is incredible. There’s no need to enter your PIN when your phone “knows” it’s in your hands — just unlock and go. But Smart Lock, particularly its Trusted Places feature, can be finicky sometimes.
Most of Smart Lock’s features are rock-solid. Trusted Face, Trusted Devices, On-Body Detection, and Voice Match almost never fail to work, but the most handy Smart Lock feature has the most problems. Trusted Places should keep your phone unlocked when you’re at home, but many users are complaining that it doesn’t.
The troubleshooting steps below are escalating — in other words, you should start with the first one, try Smart Lock again and see if Trusted Places is fixed, then only proceed to the next step if it isn’t. Each step is progressively more involved, but they all assume you’ve tried the previous steps, so make sure to follow them order.
Step 1: Make Sure GPS Is On
The first step is the simplest: Make sure you have GPS enabled. Other location reporting methods aren’t as precise as your phone’s actual GPS sensor, and Trusted Places only has a radius of roughly 50 meters, so your phone’s reported location needs to be fairly accurate for Trusted Places to work.
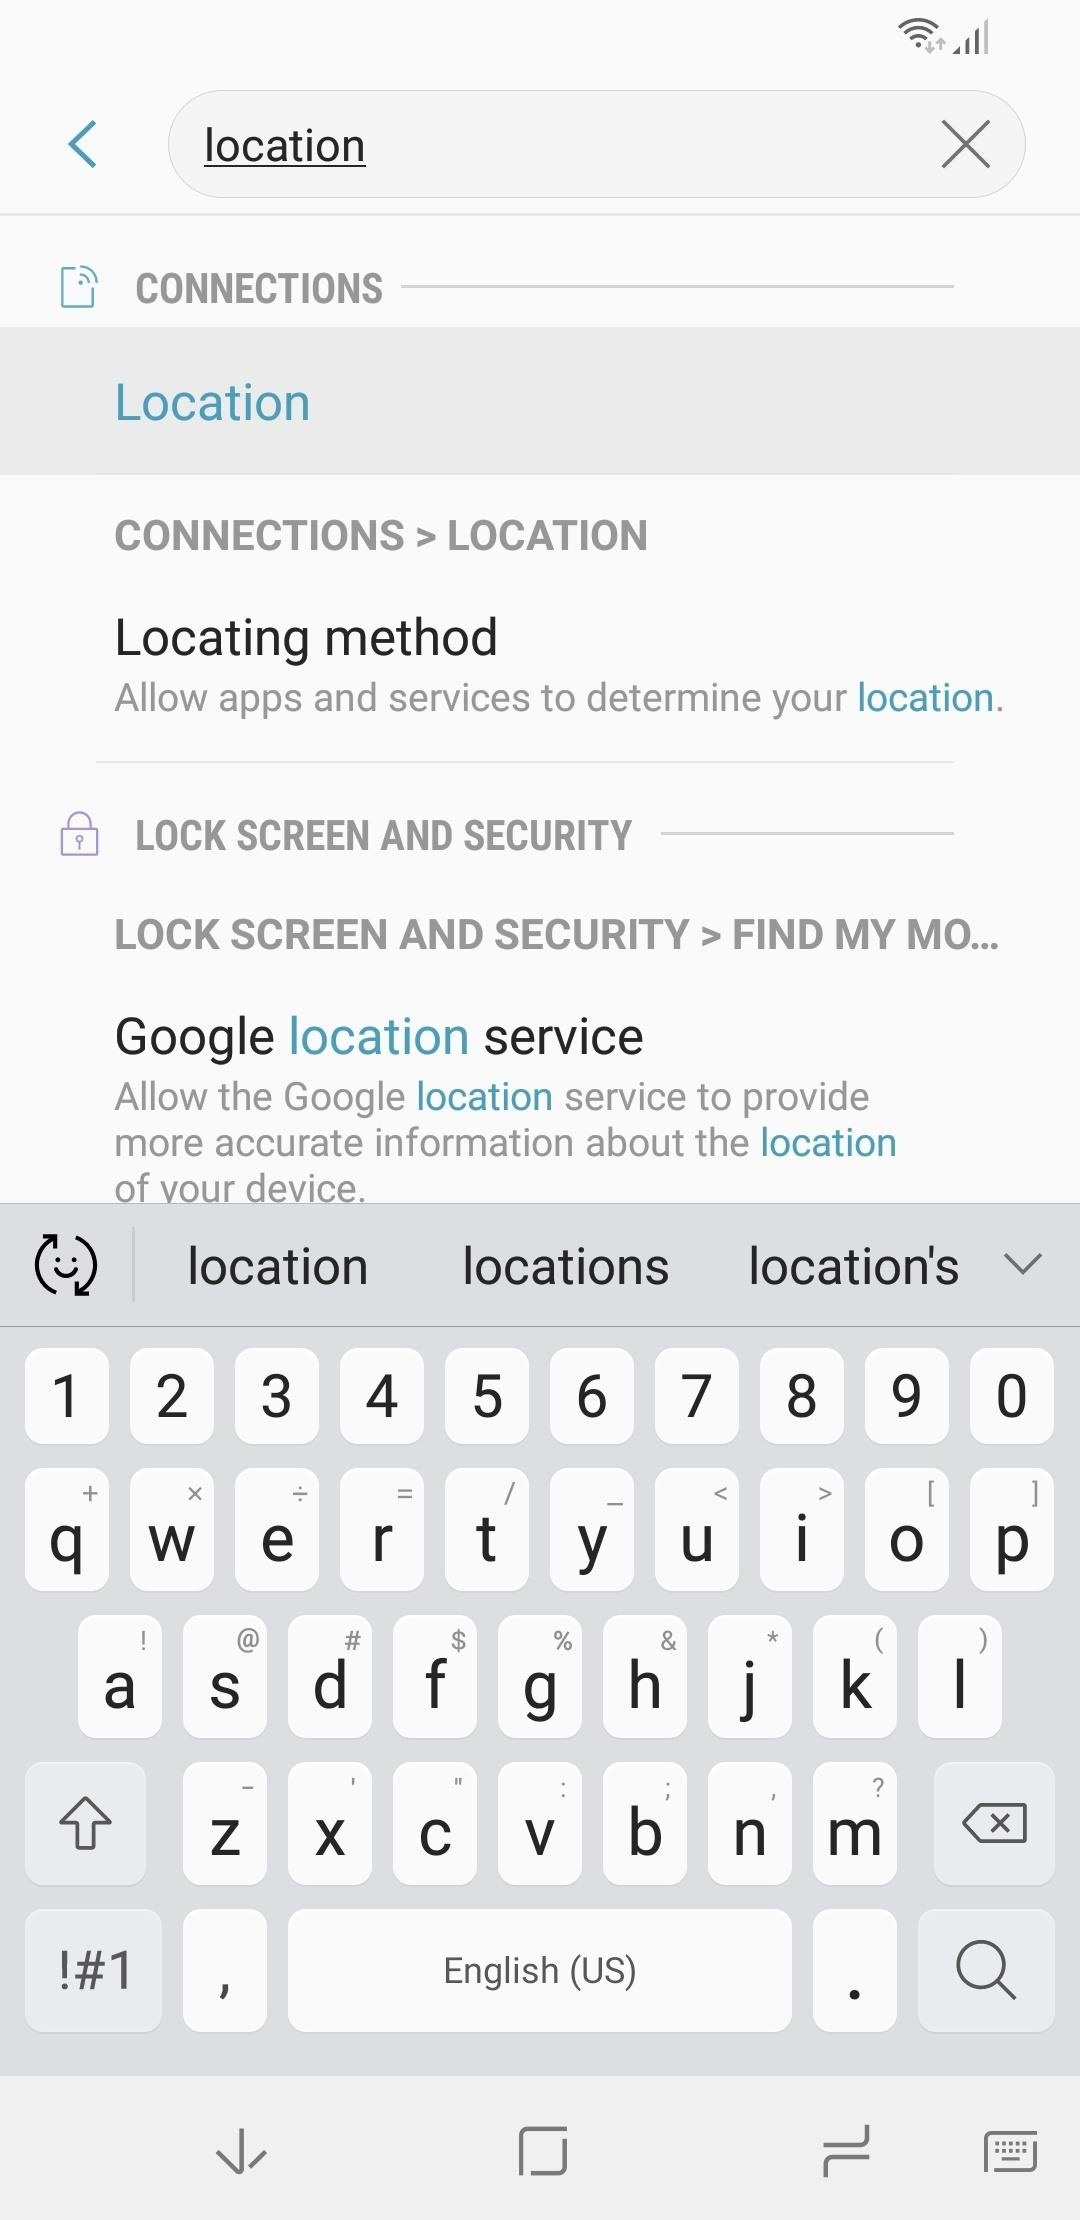
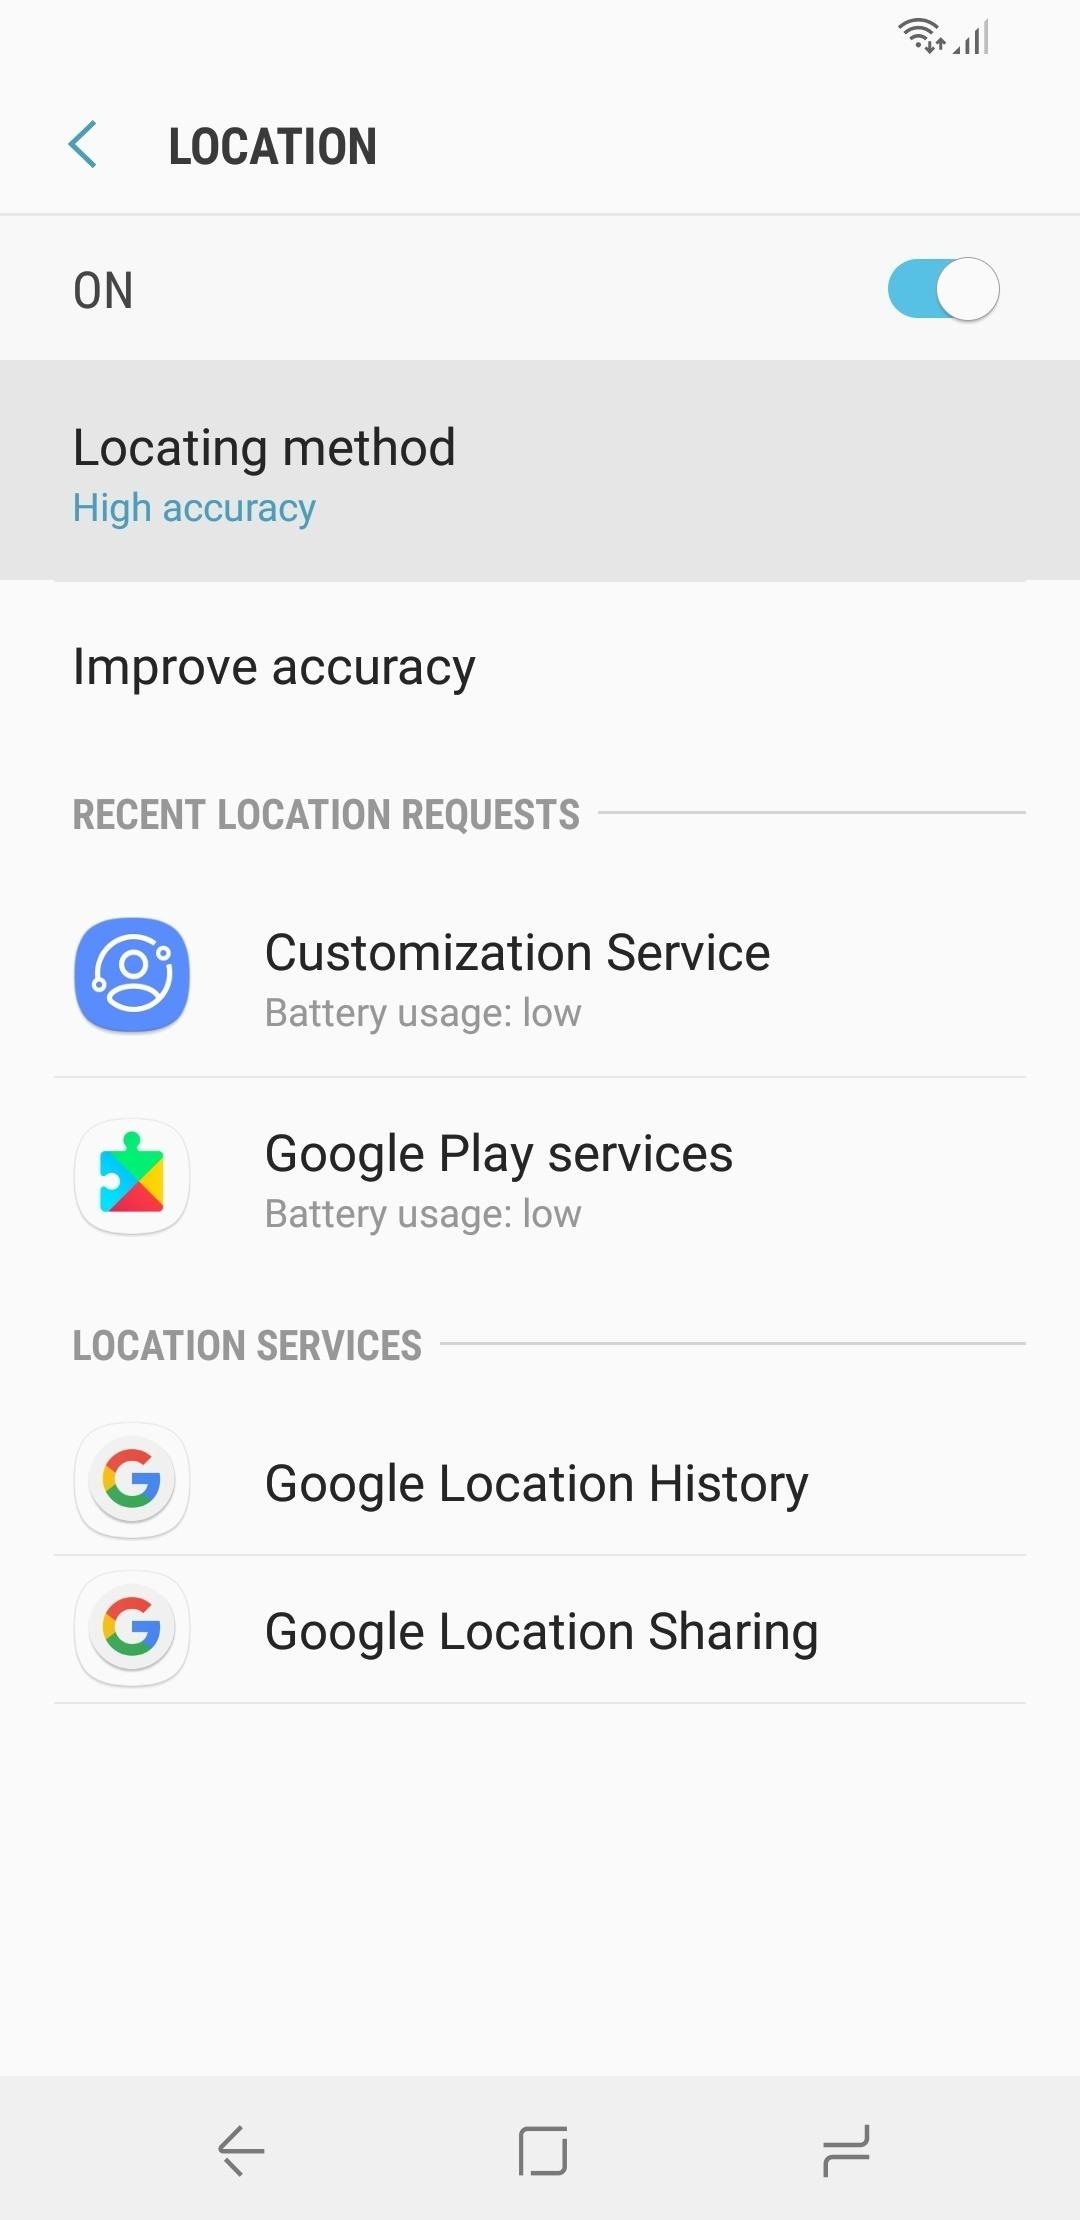
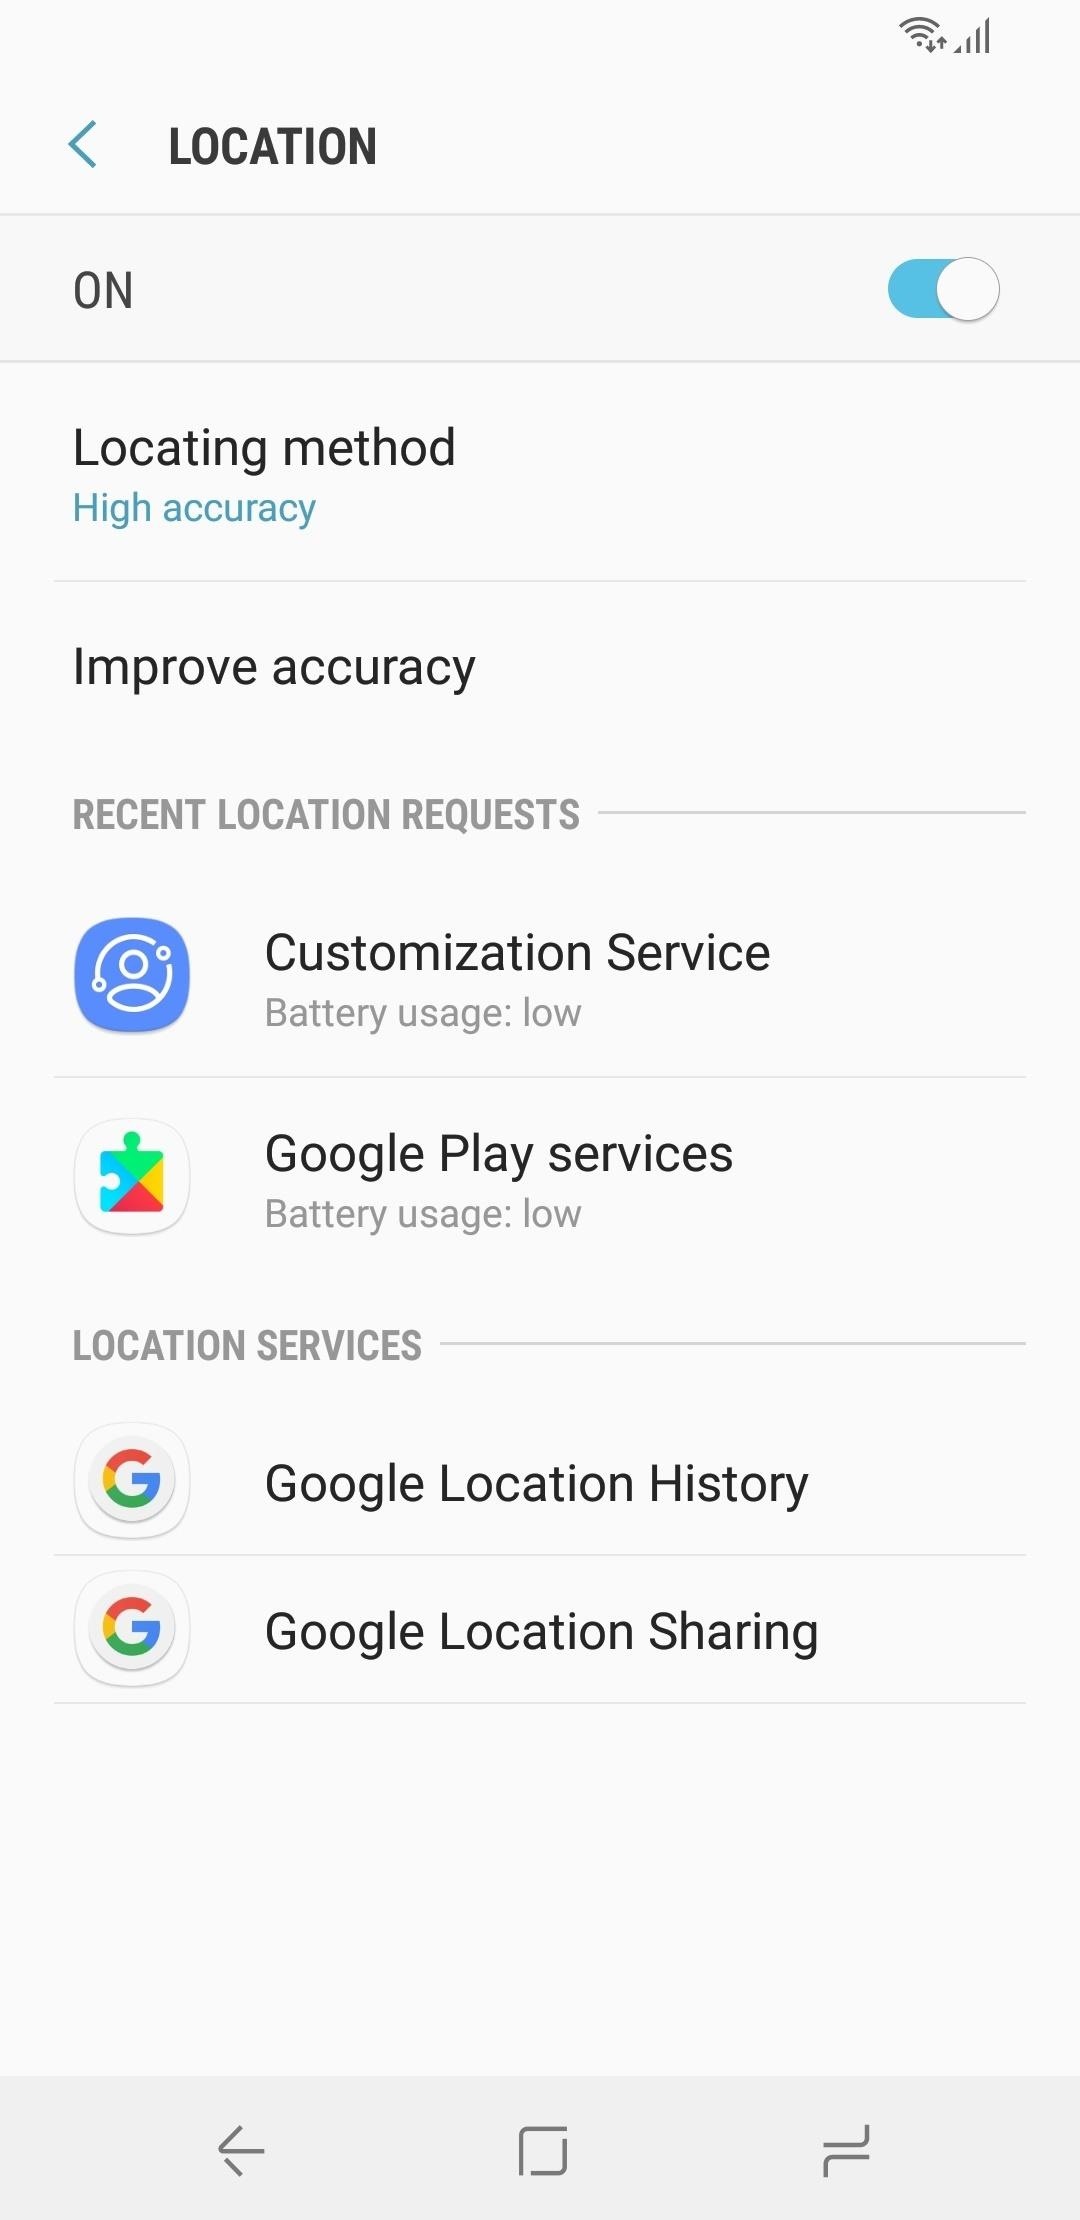
You can enable GPS by going to your phone’s main Settings menu. From there, the exact location may vary depending on your device, so use the field at the top of the main Settings page to search for “Location.” Once in the Location menu, select “Location Method” or “Locating Method,” then choose “High Accuracy” to ensure GPS is enabled.
Step 2: Make Sure Your Location Is Updated
There’s a chance that your phone simply hasn’t updated its location status in a while. If this is the case, Smart Lock will stop working, as Trusted Places needs a fairly recent location report before it will unlock your phone.
So to get lock on your location, open Google Maps and tap the compass icon near the bottom-right corner. When the screen zooms over your current location (the blue dot in Google Maps), your phone will have an updated location report.
Step 3: Disable Other Devices Under Google Location Reporting
If you have more than one Android device, or if you’ve recently changed phones, location data from the other device could be interfering with Trusted Places.
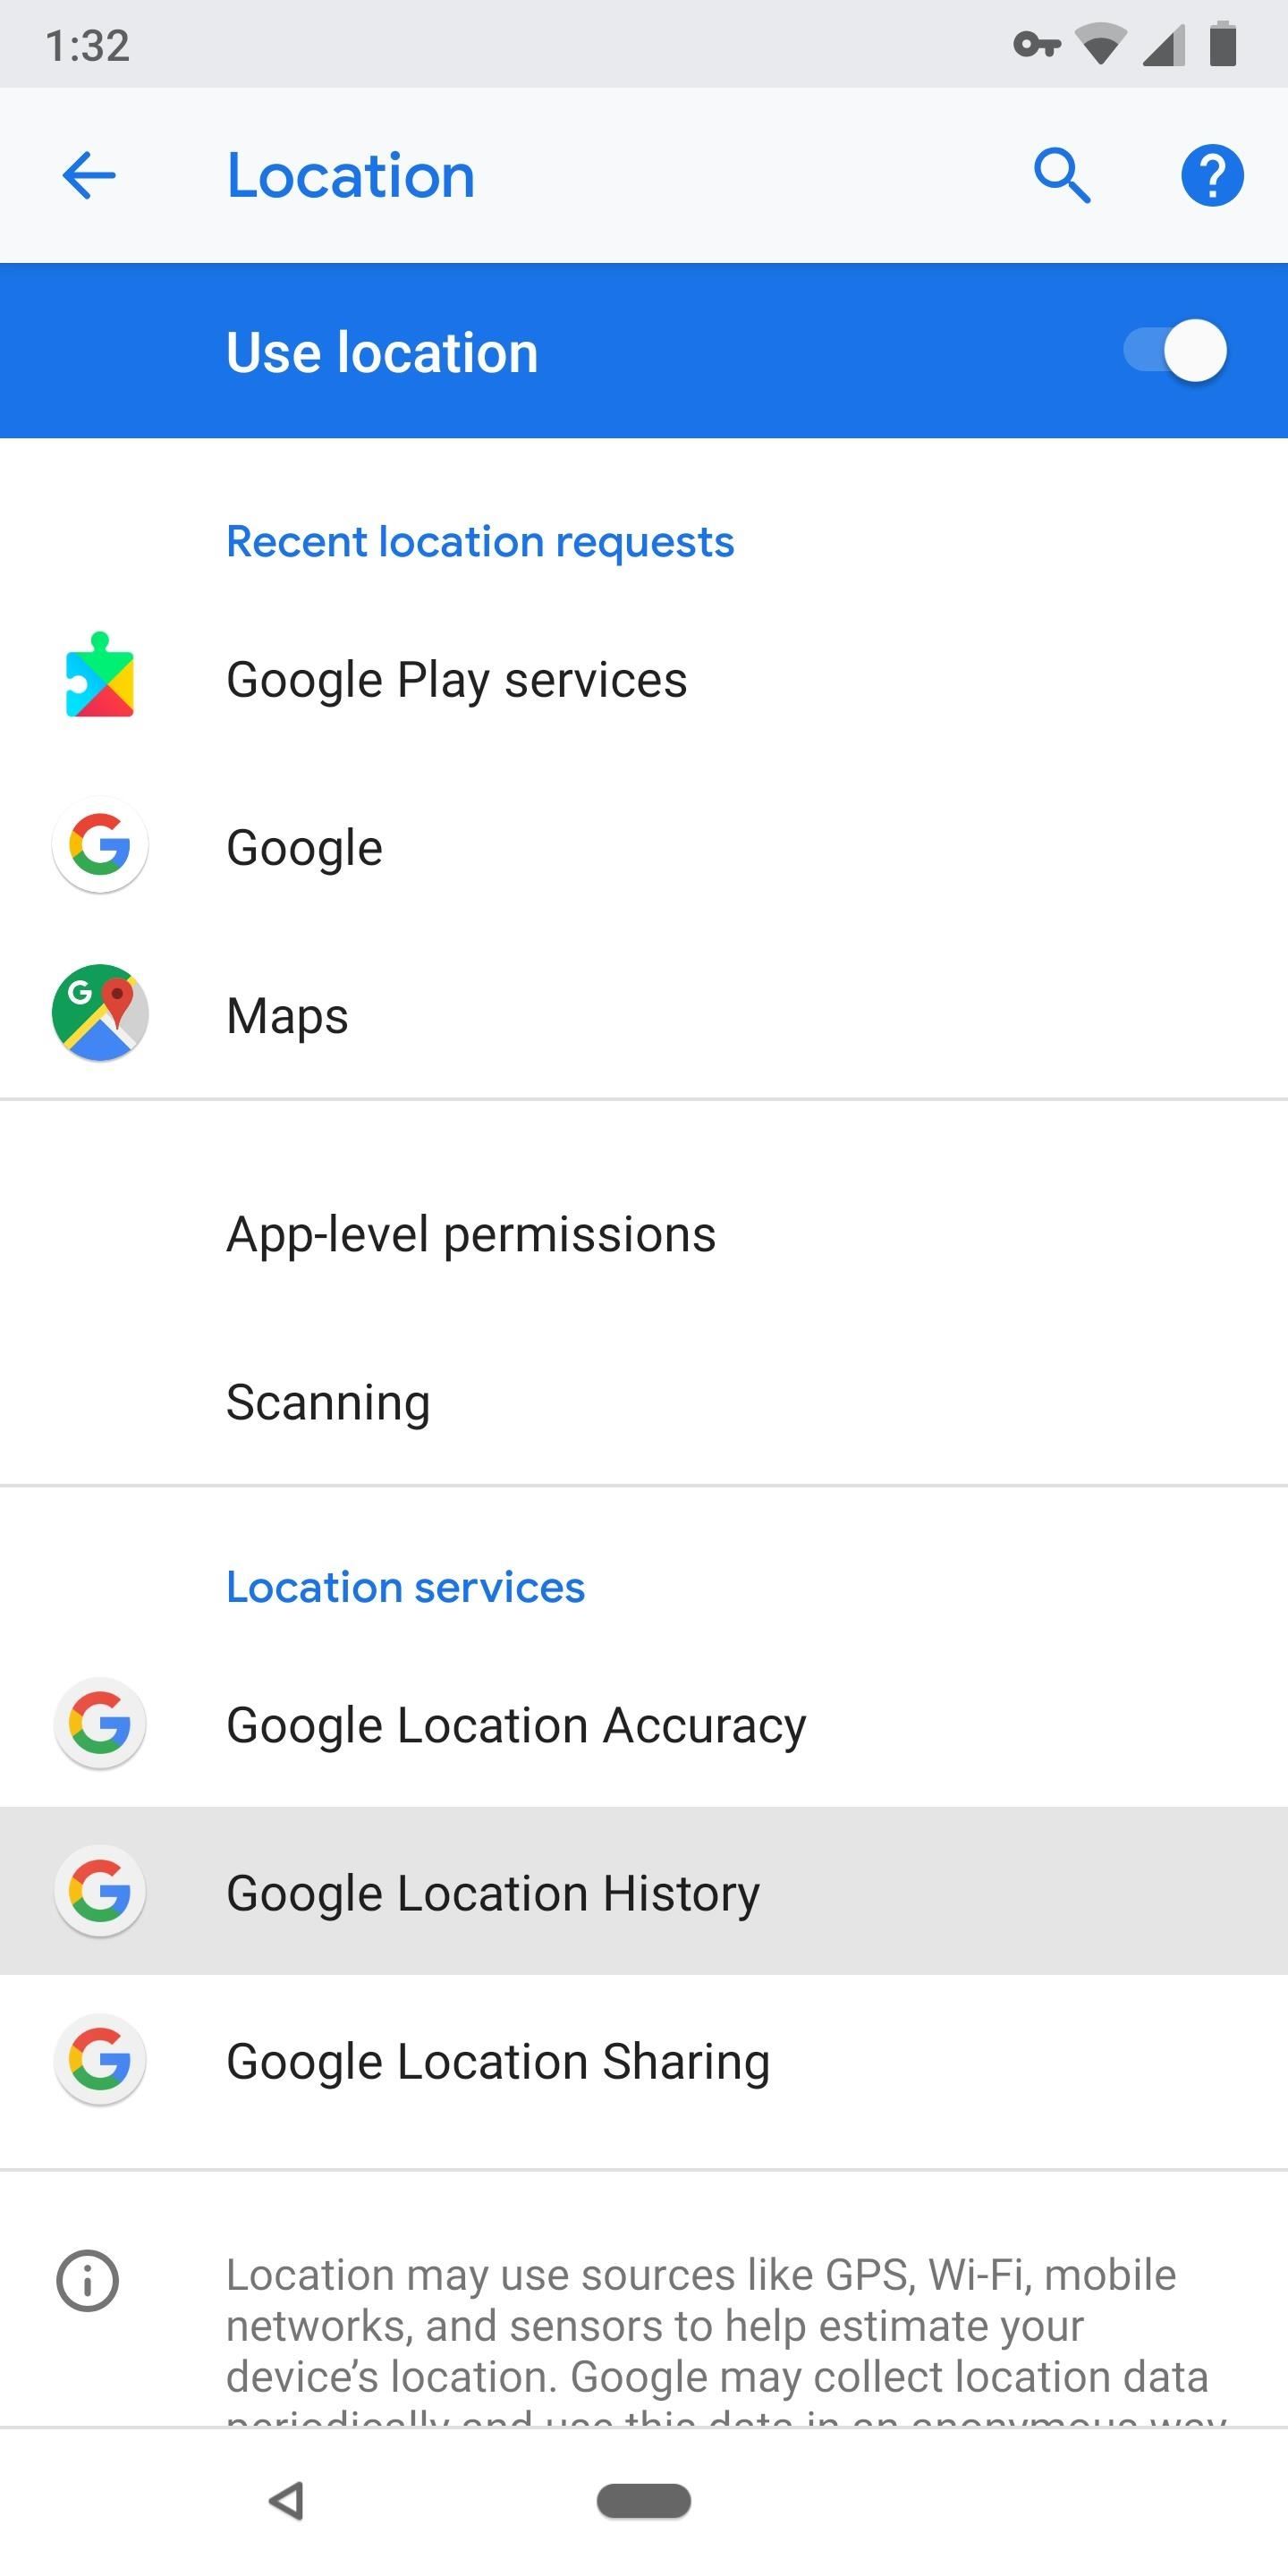
To fix this, head to Settings –> Google, then scroll down and select “Location.” From there, choose “Google Location History” (you may have to tap “Advanced” before you see this option), then make sure only your current device is enabled.

Step 4: Detach Other Google Accounts on the Device
In the same vein as Step 3 above, Trusted Places can stop working if the feature is pulling data from a different Google account, in addition to or instead of your primary account.
Smart Lock doesn’t let you choose which account to use with its features, so if you’re signed in with multiple Google accounts on the same phone, it could be pulling location data from the wrong account. There’s also the wrinkle of G Suite accounts or “Google Apps” accounts — many of these will outright disallow Smart Lock features, depending on your account administrator’s settings.
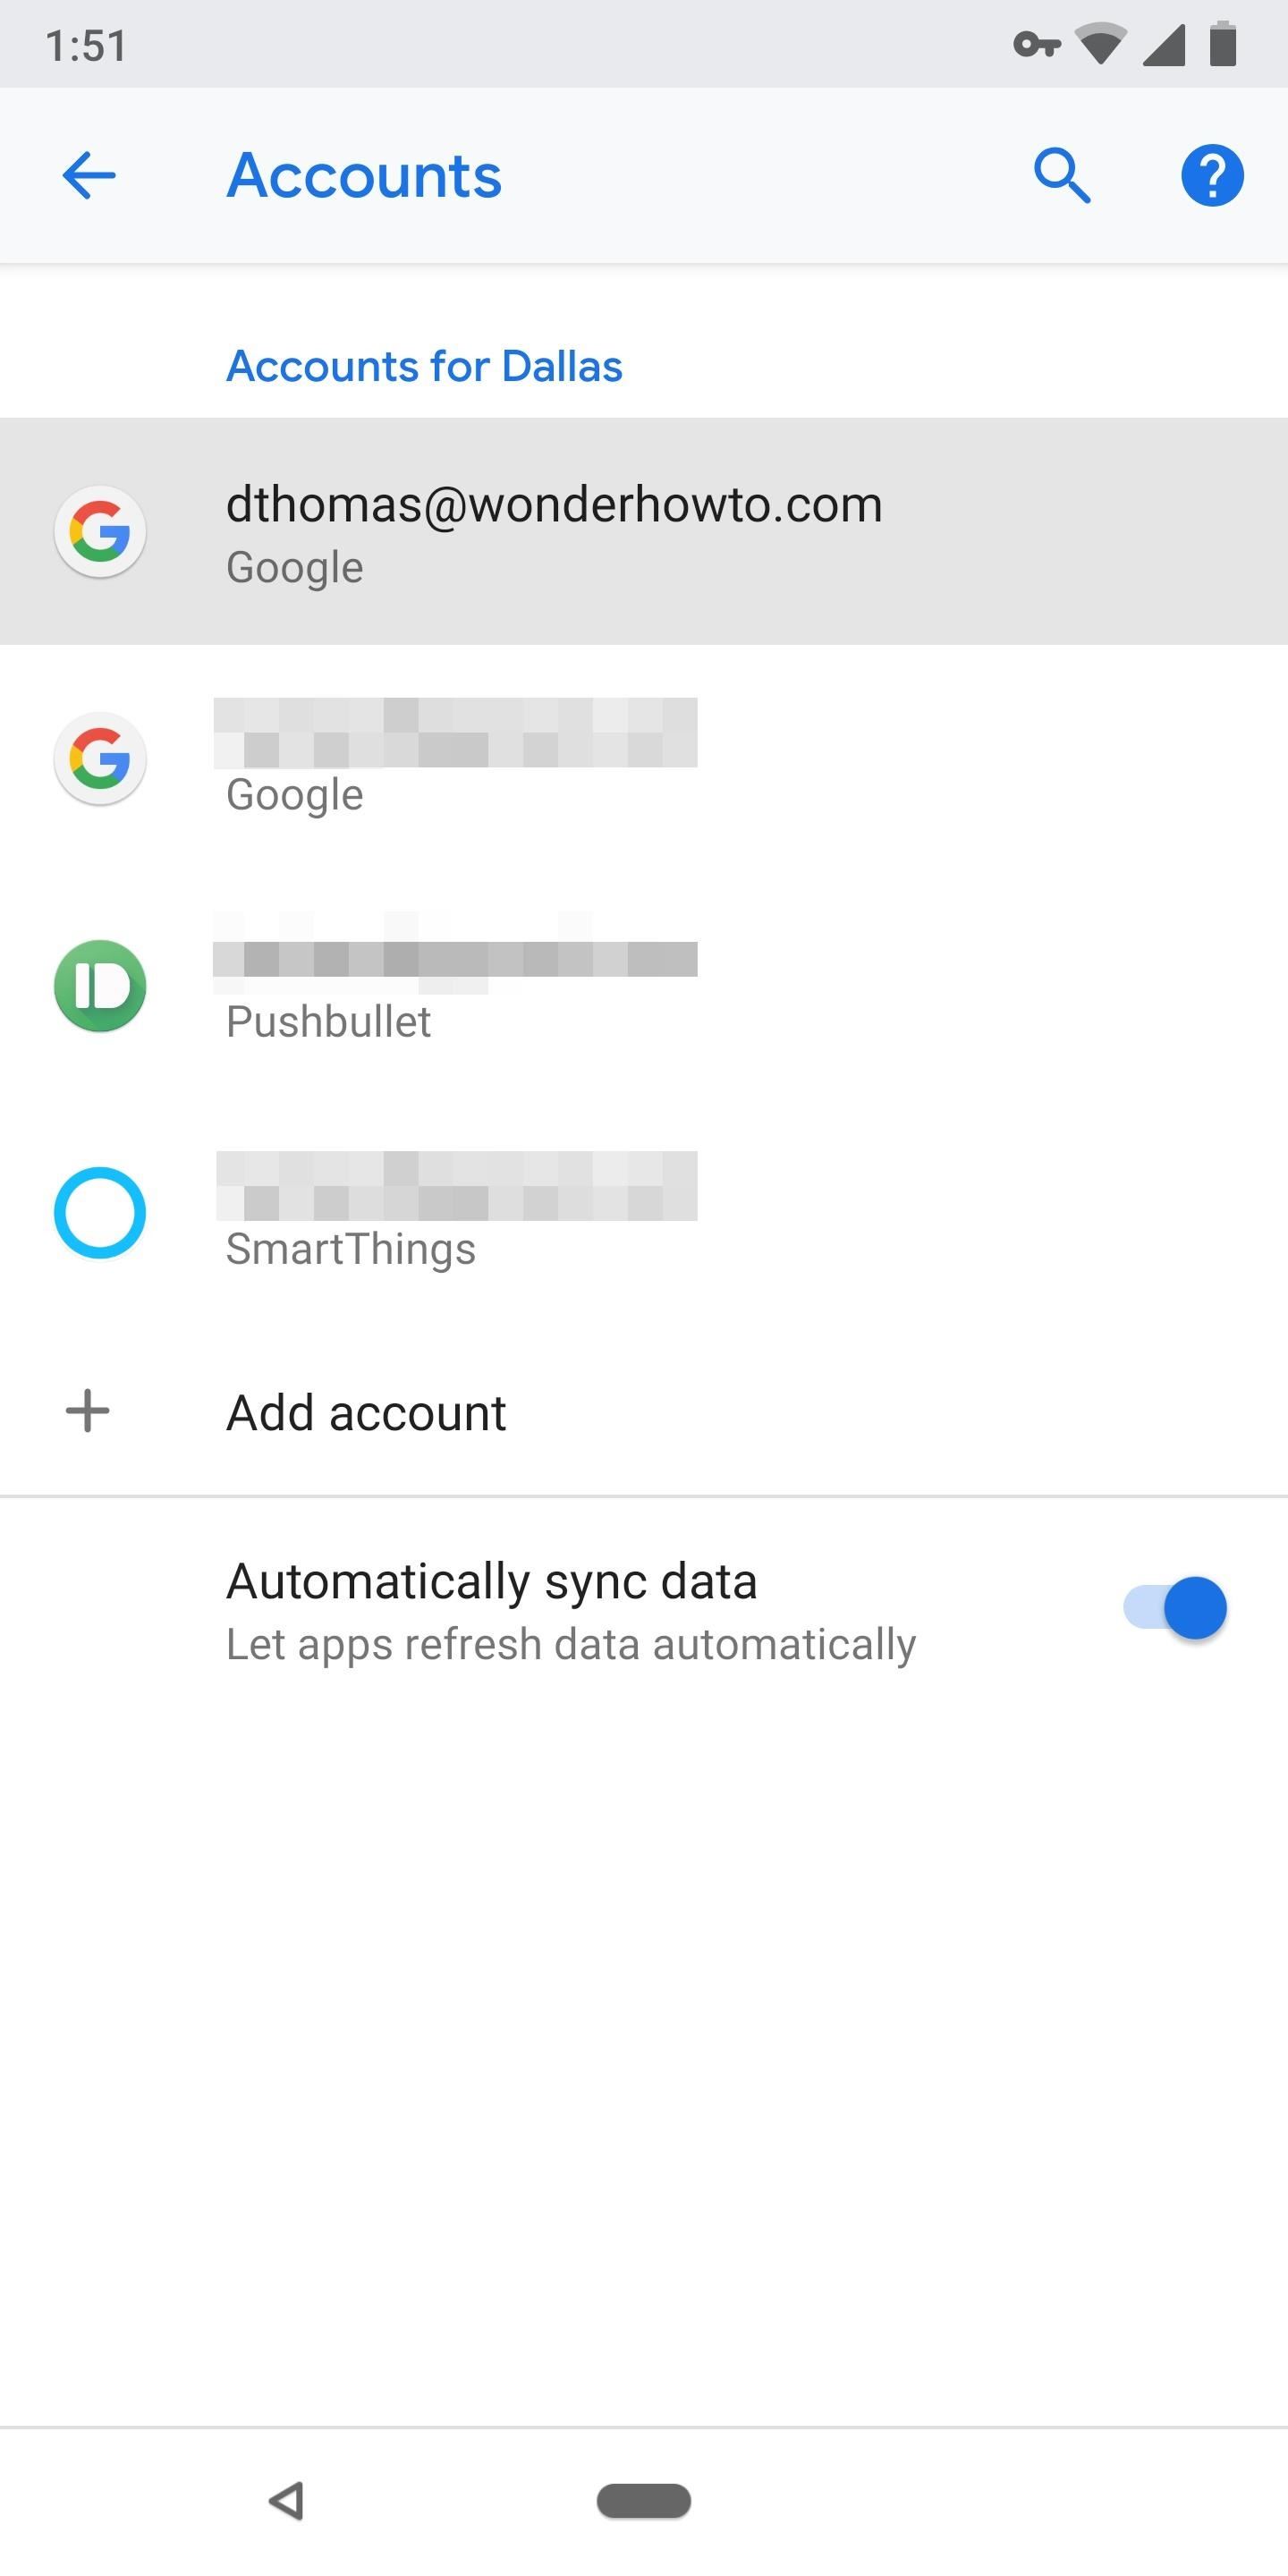
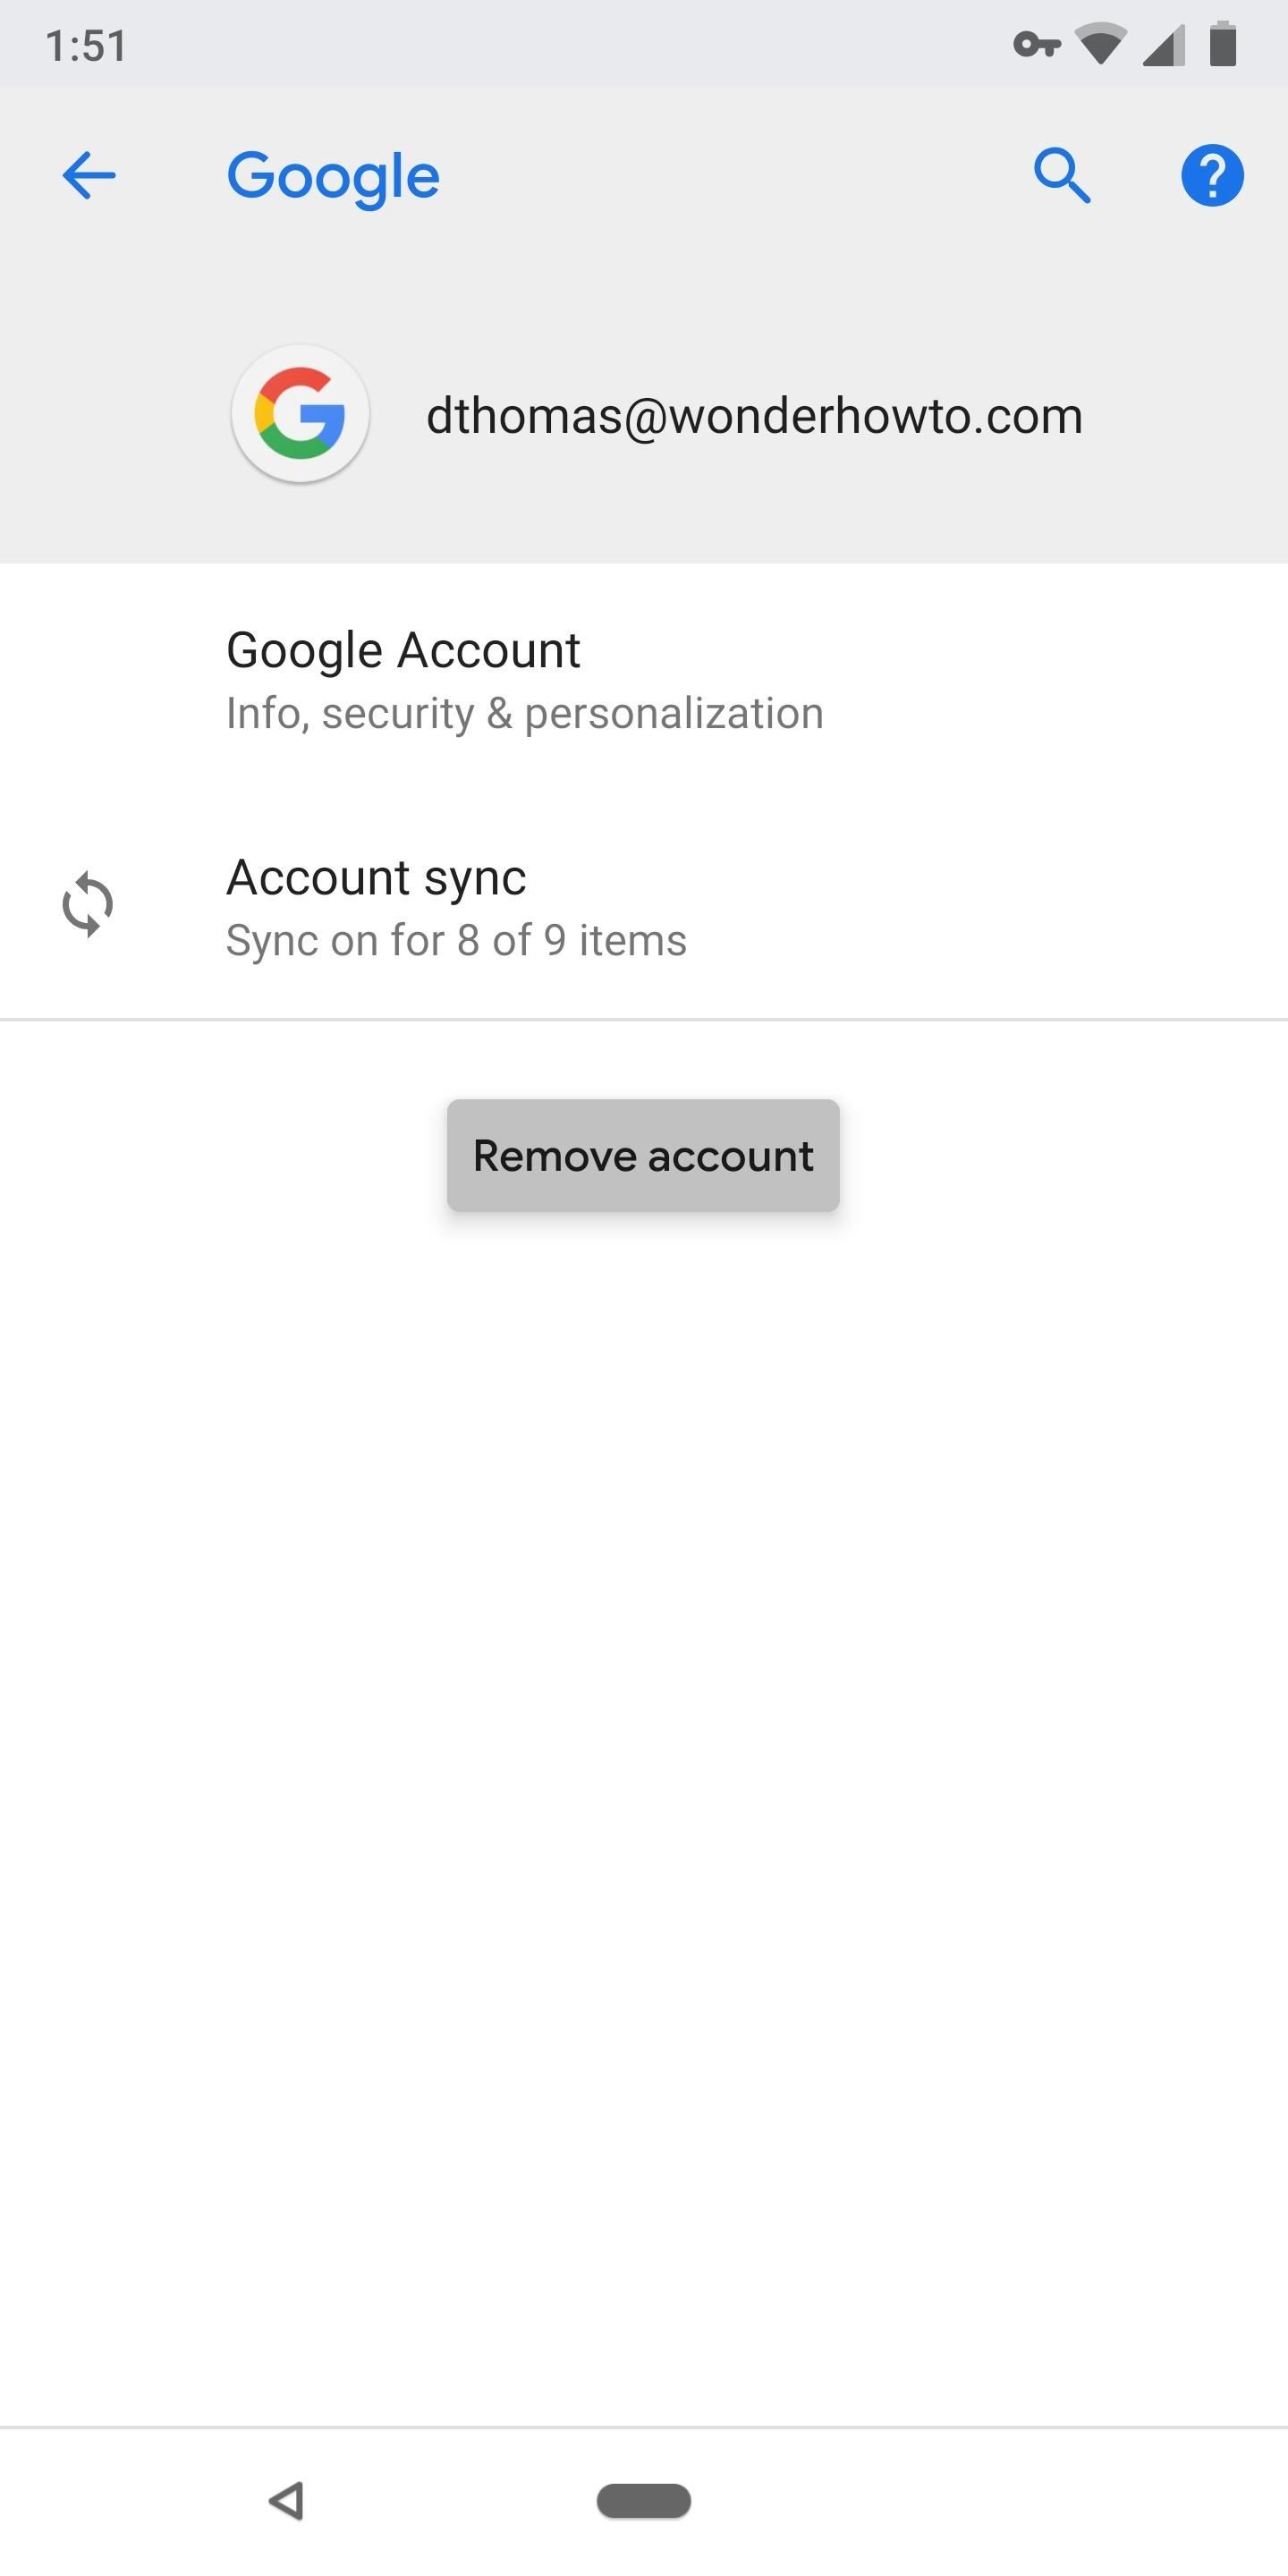
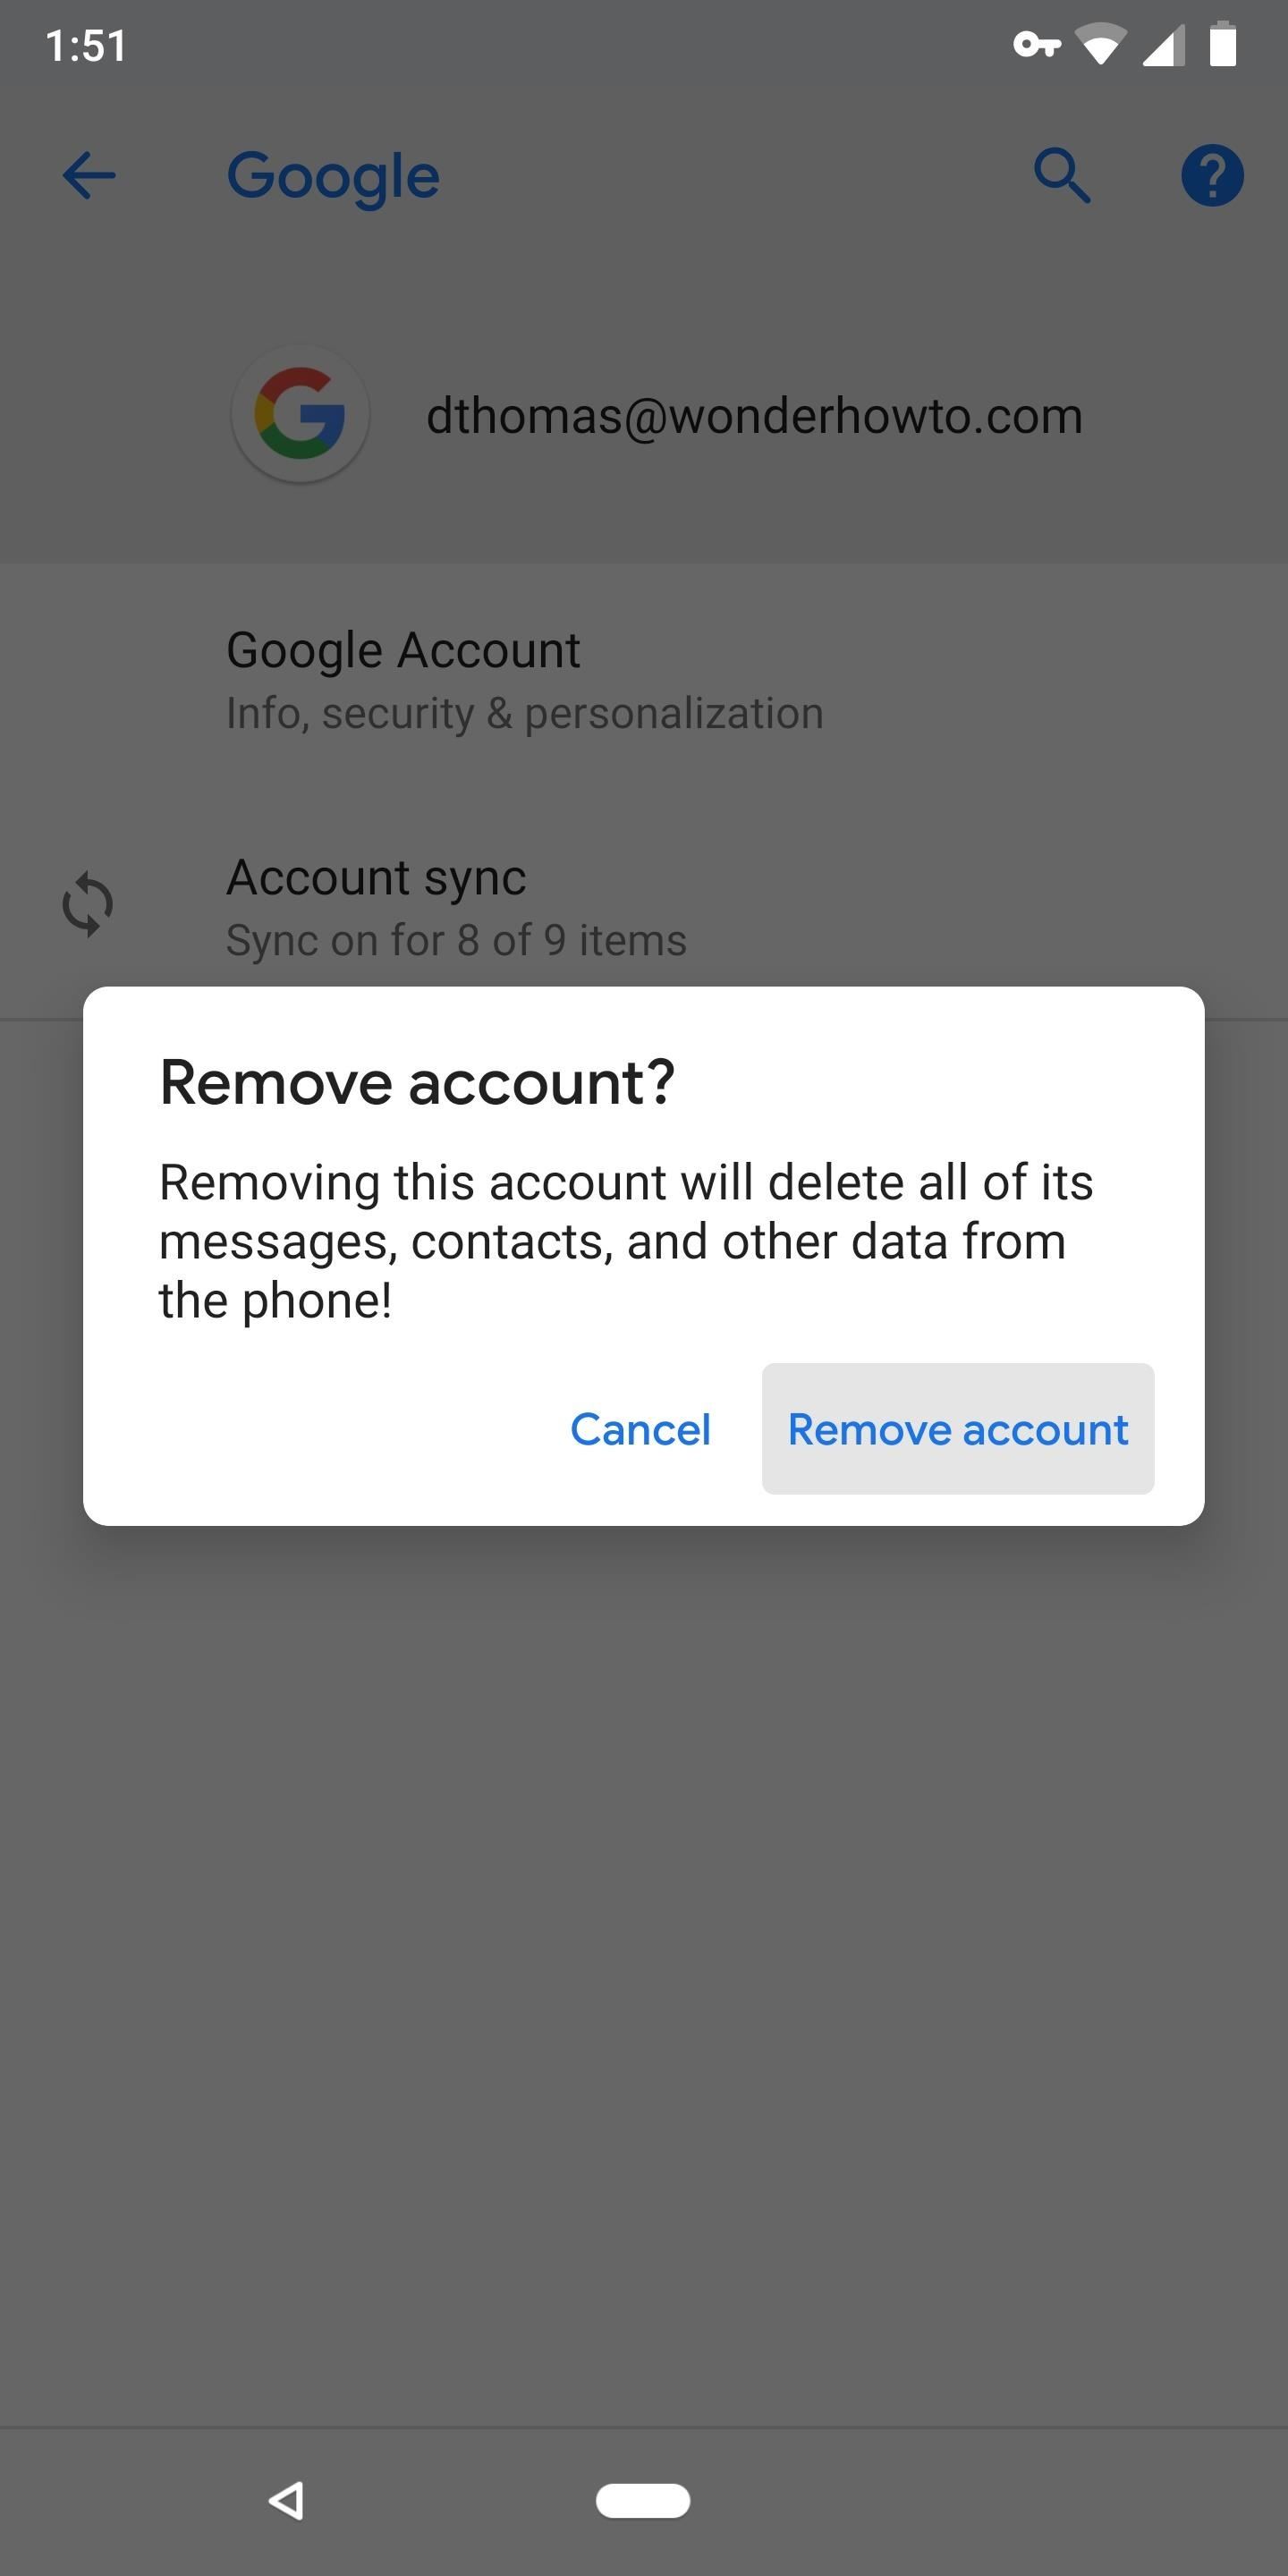
The only course of action here is to remove all additional Google accounts from your phone. Head to Settings –> Accounts, then select any non-primary Google account. Tap “Remove account” on the next screen, then confirm your choice on the prompt. Repeat this step for any other non-primary Google accounts.
Step 5: Make Sure Play Services Has Location Permission
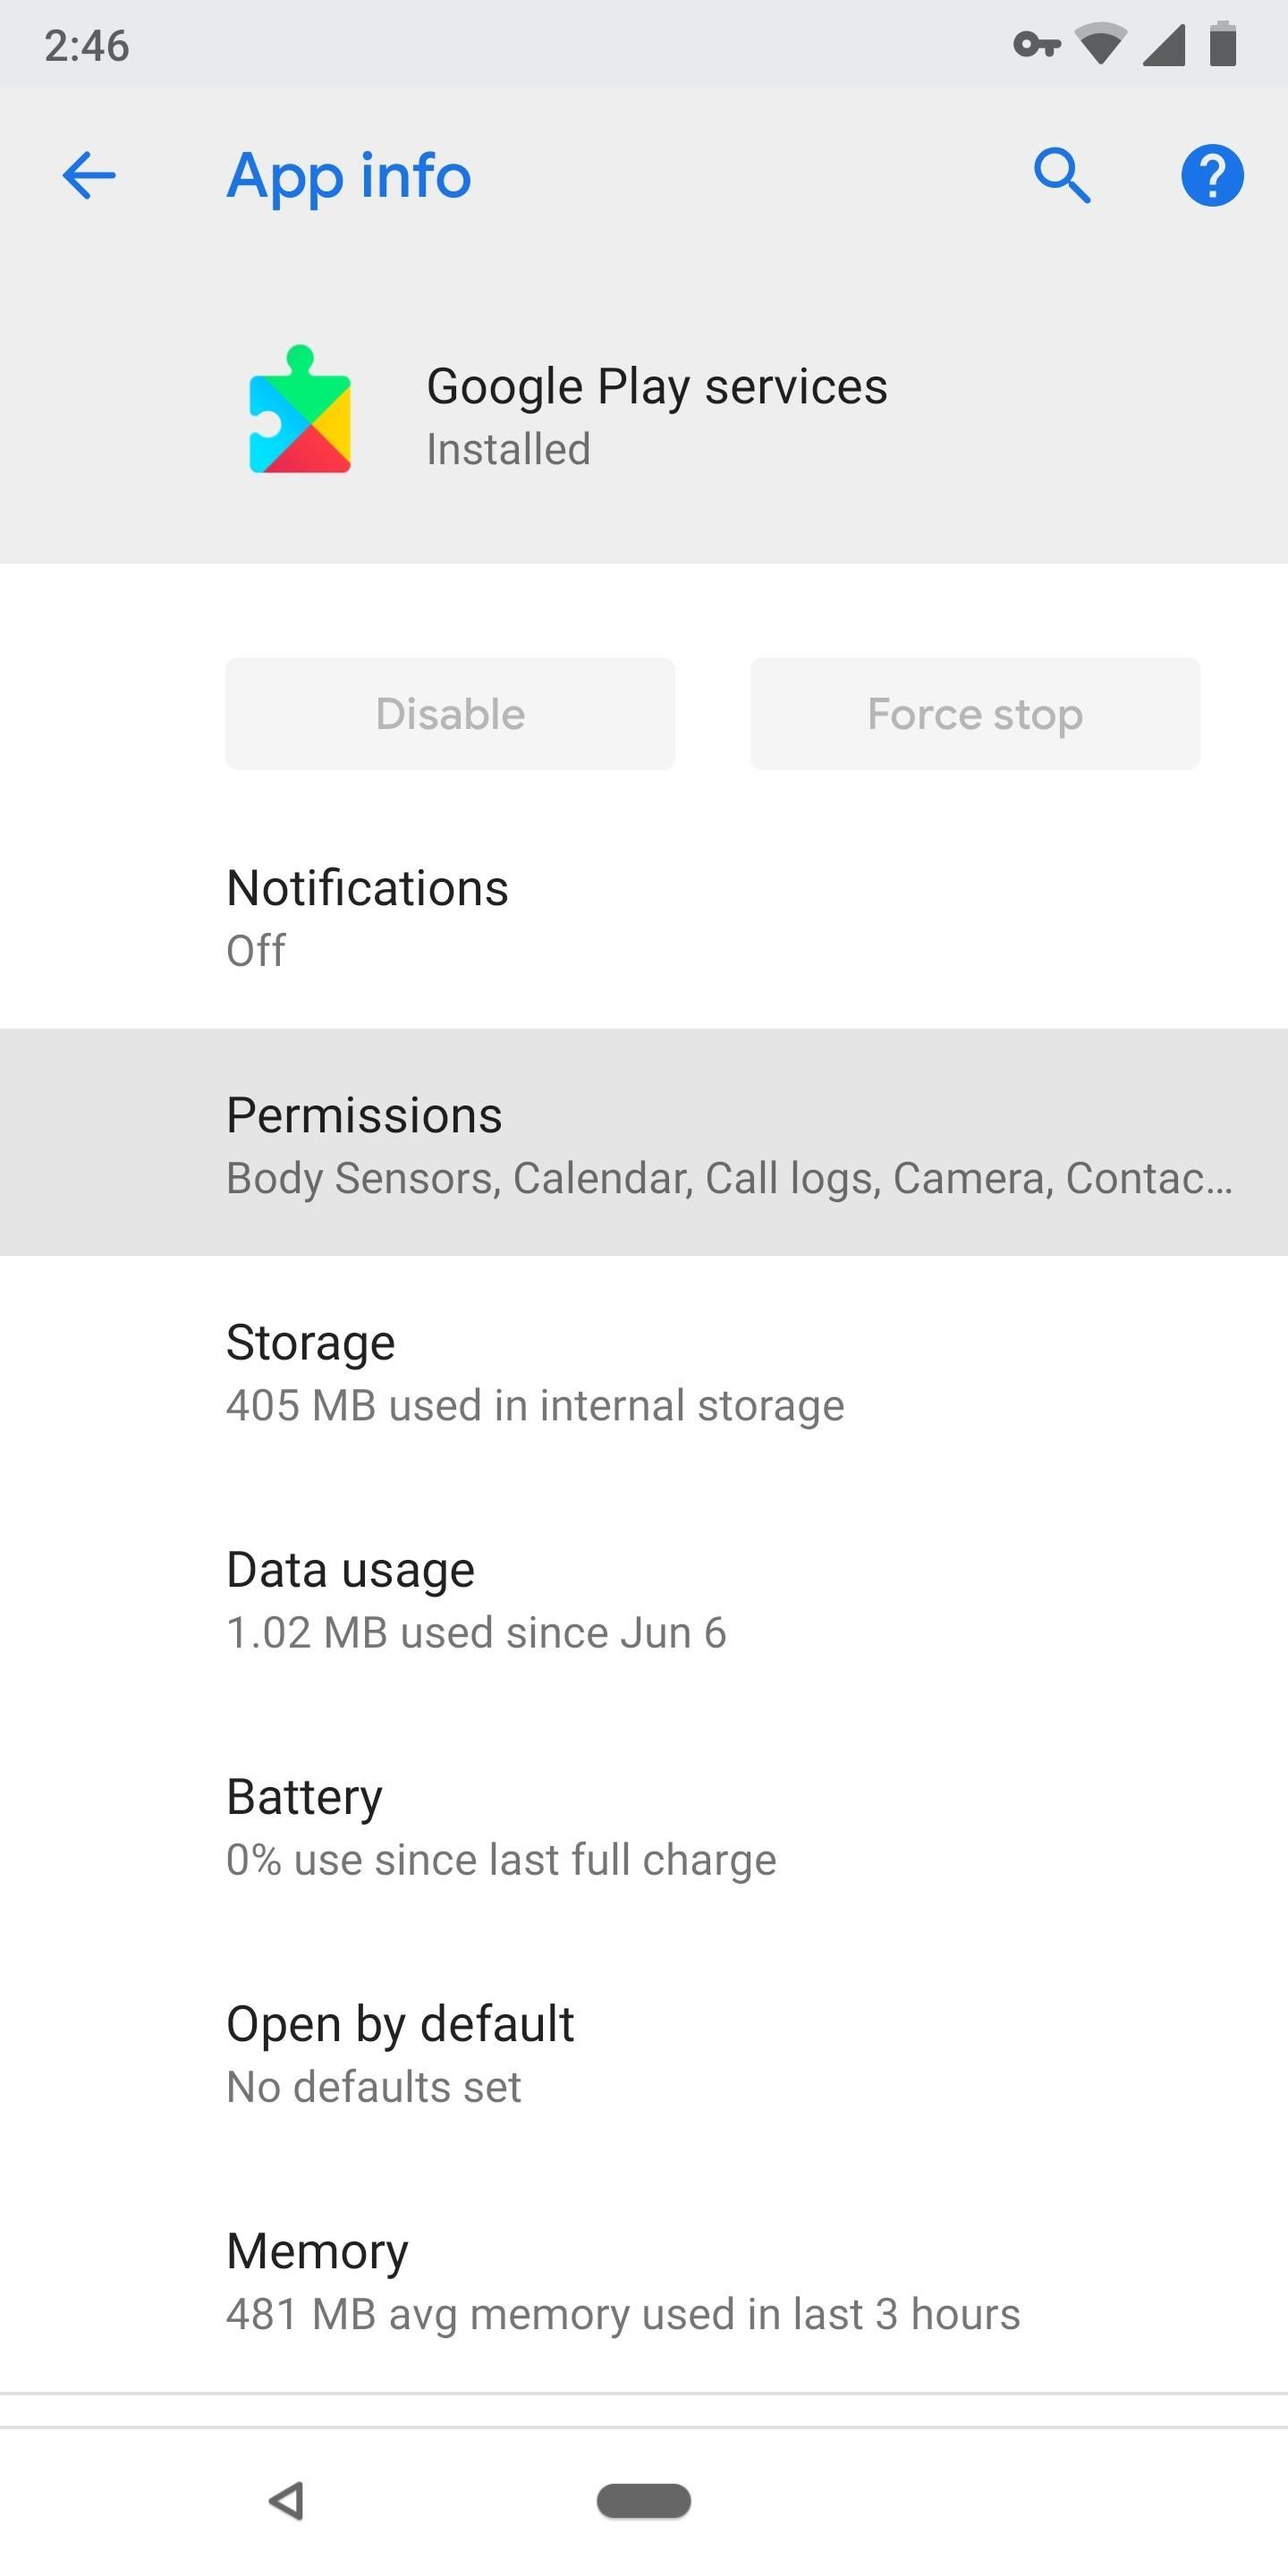
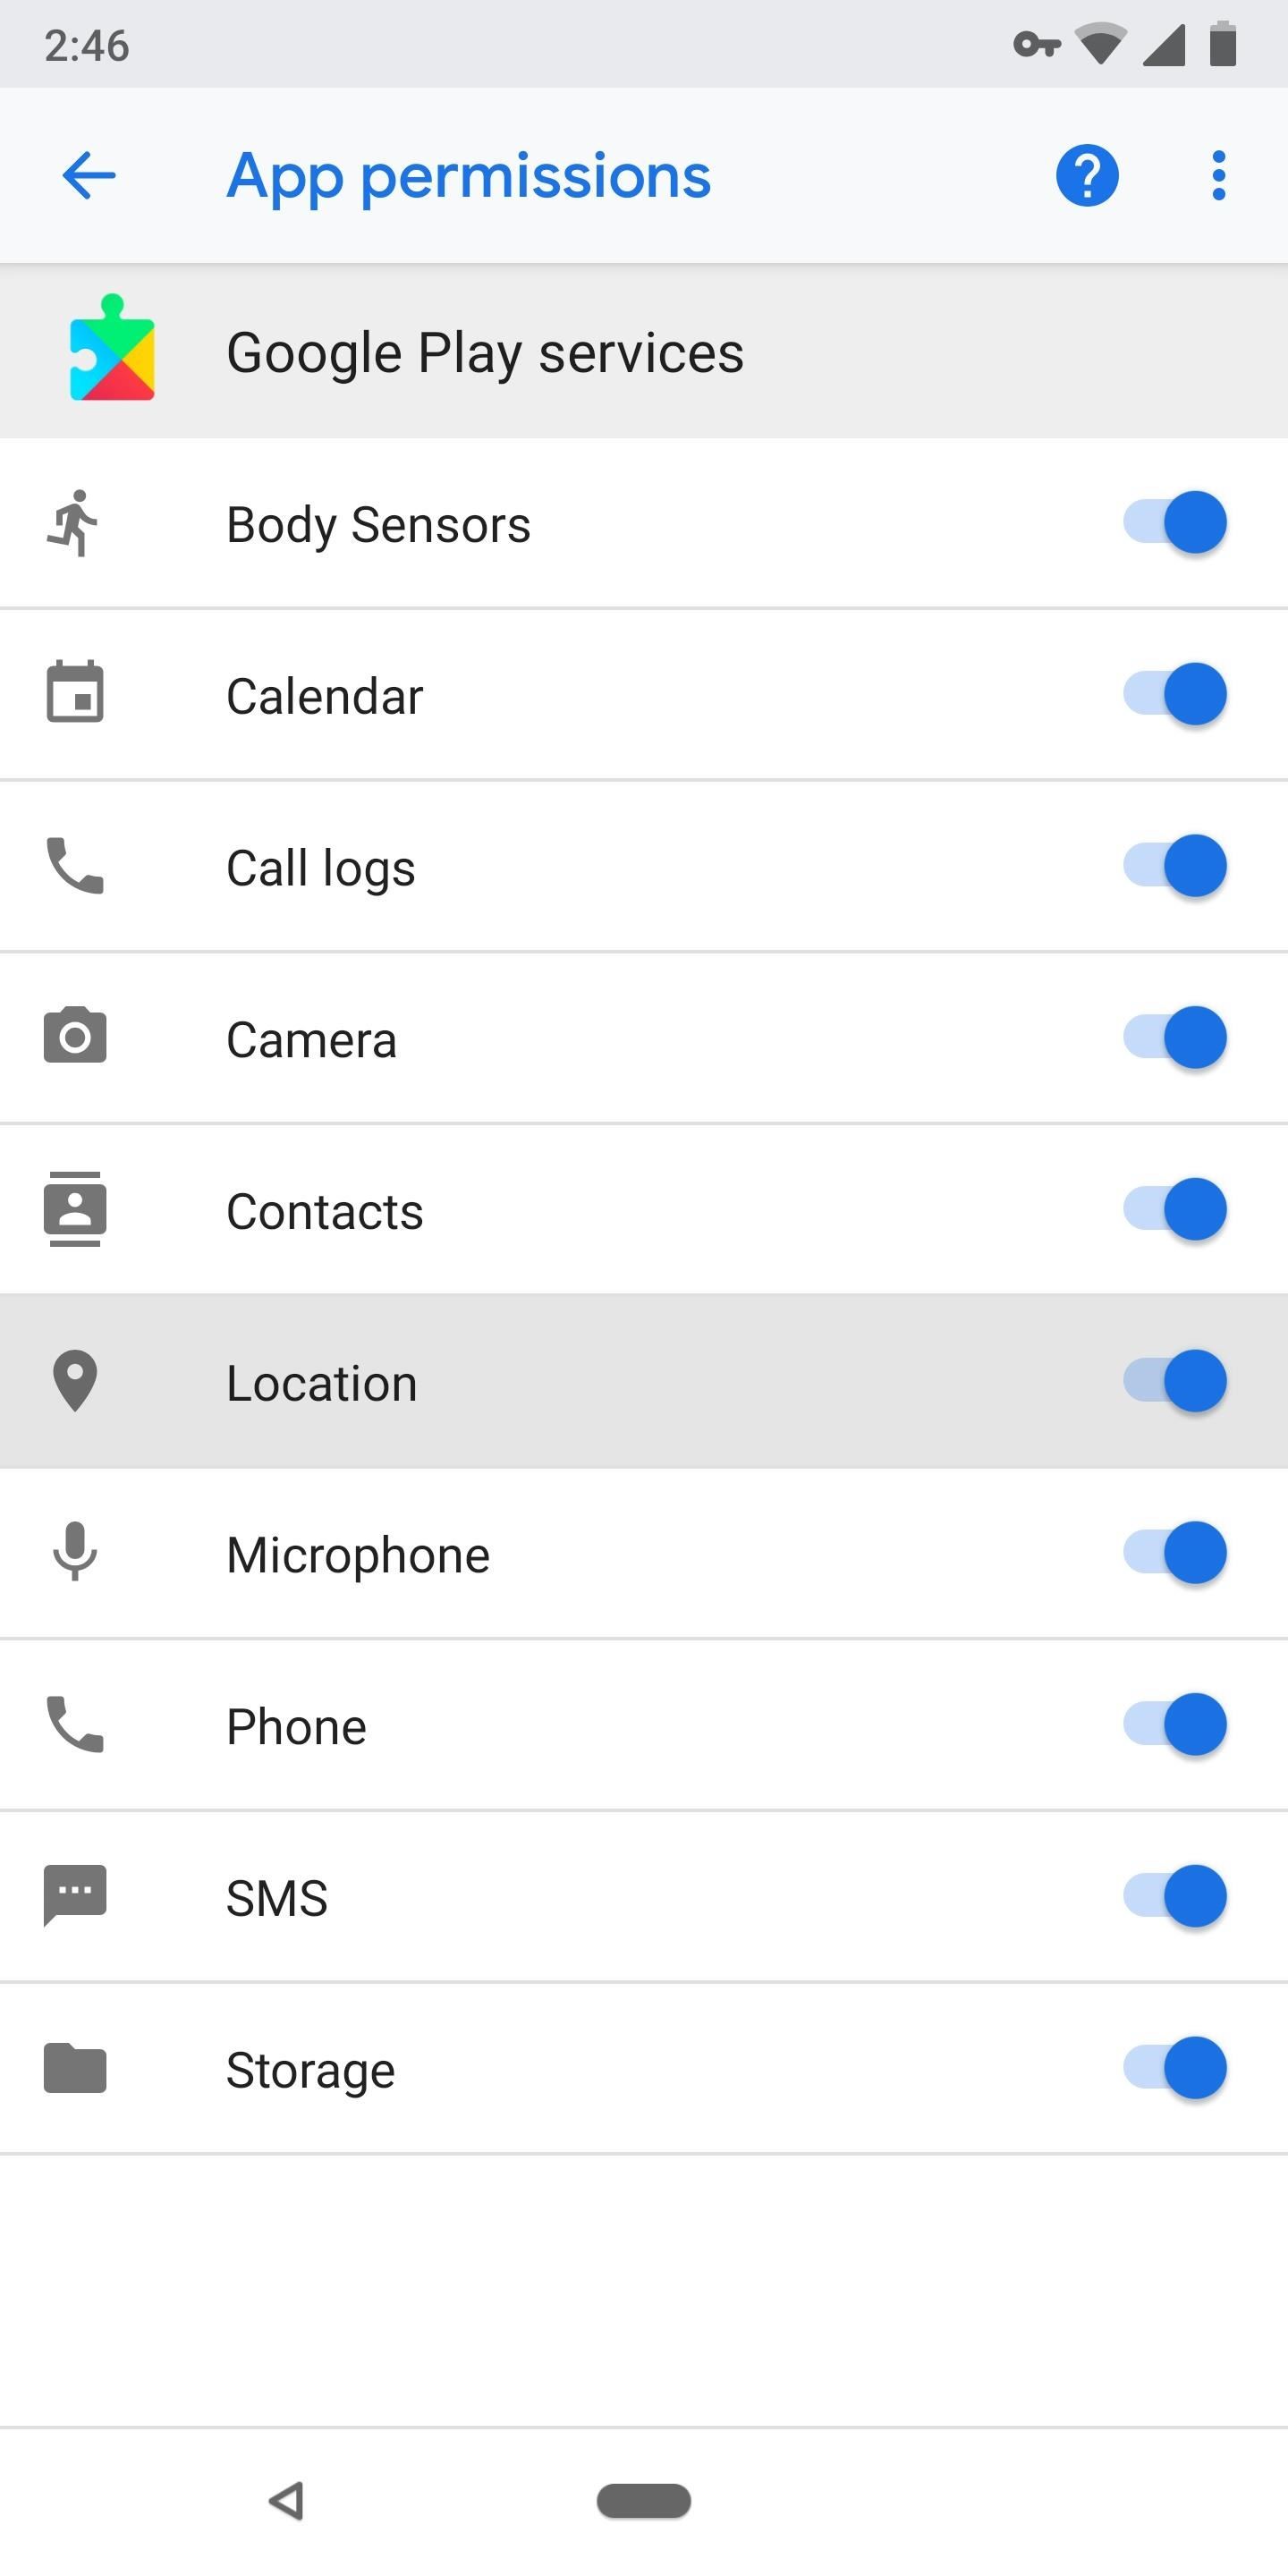
The backbone of all Smart Lock features is a system app called Google Play Services. This app needs to be able to see your device’s location in order for Trusted Places to work.
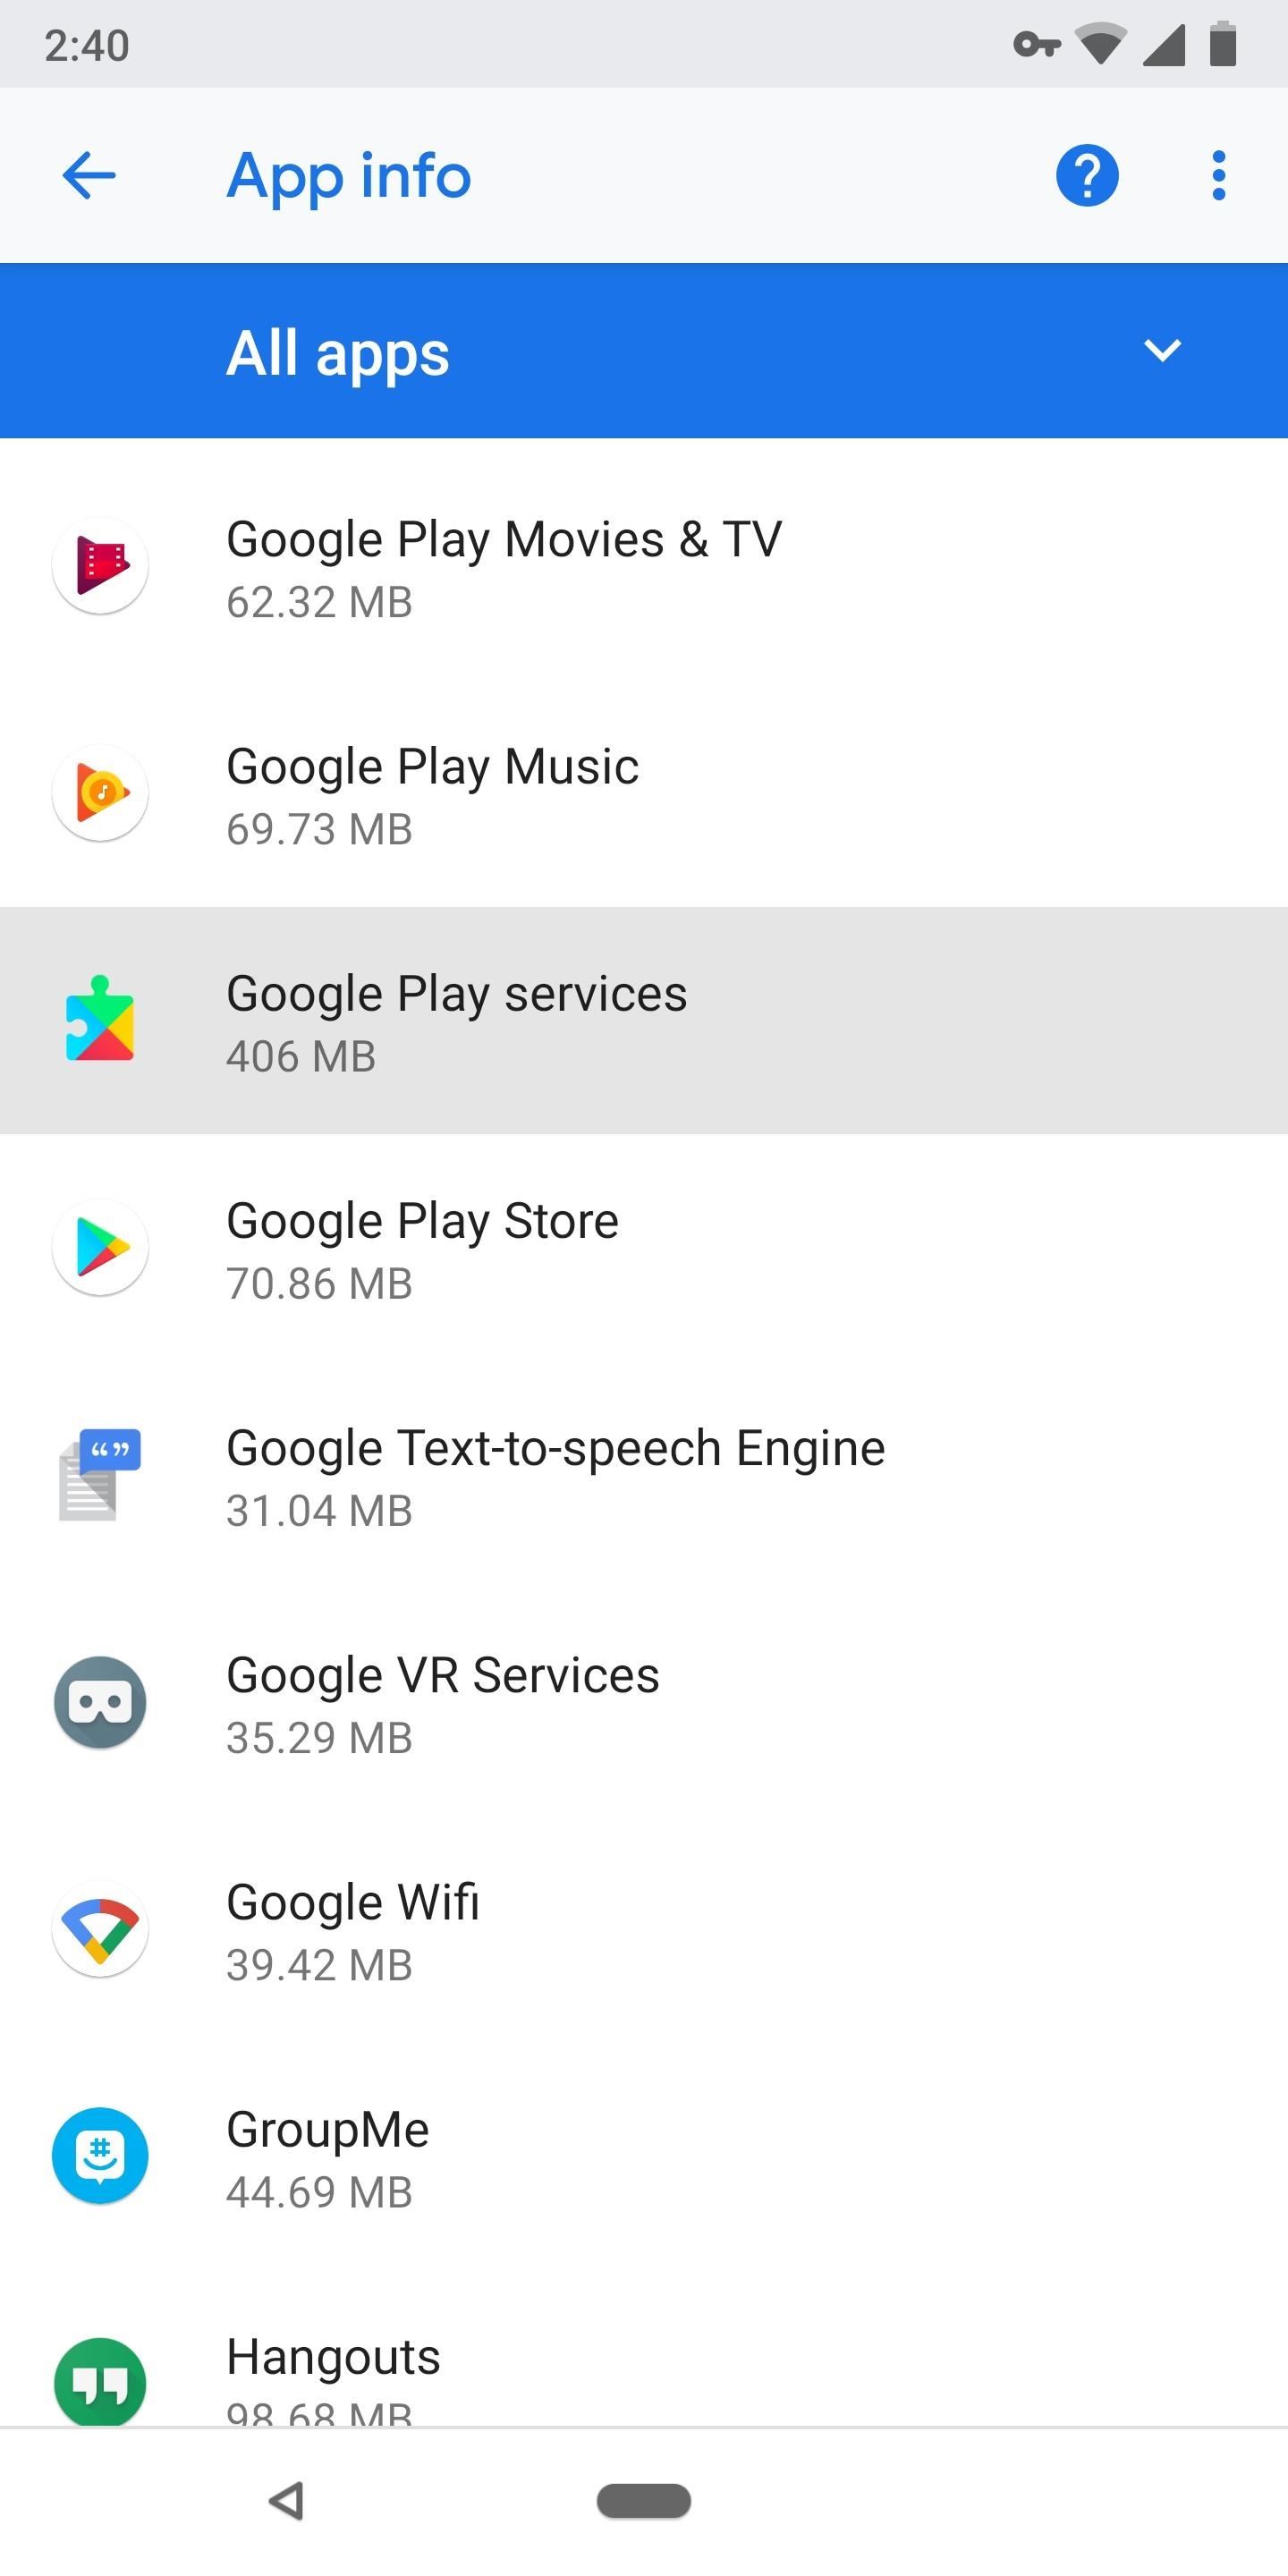
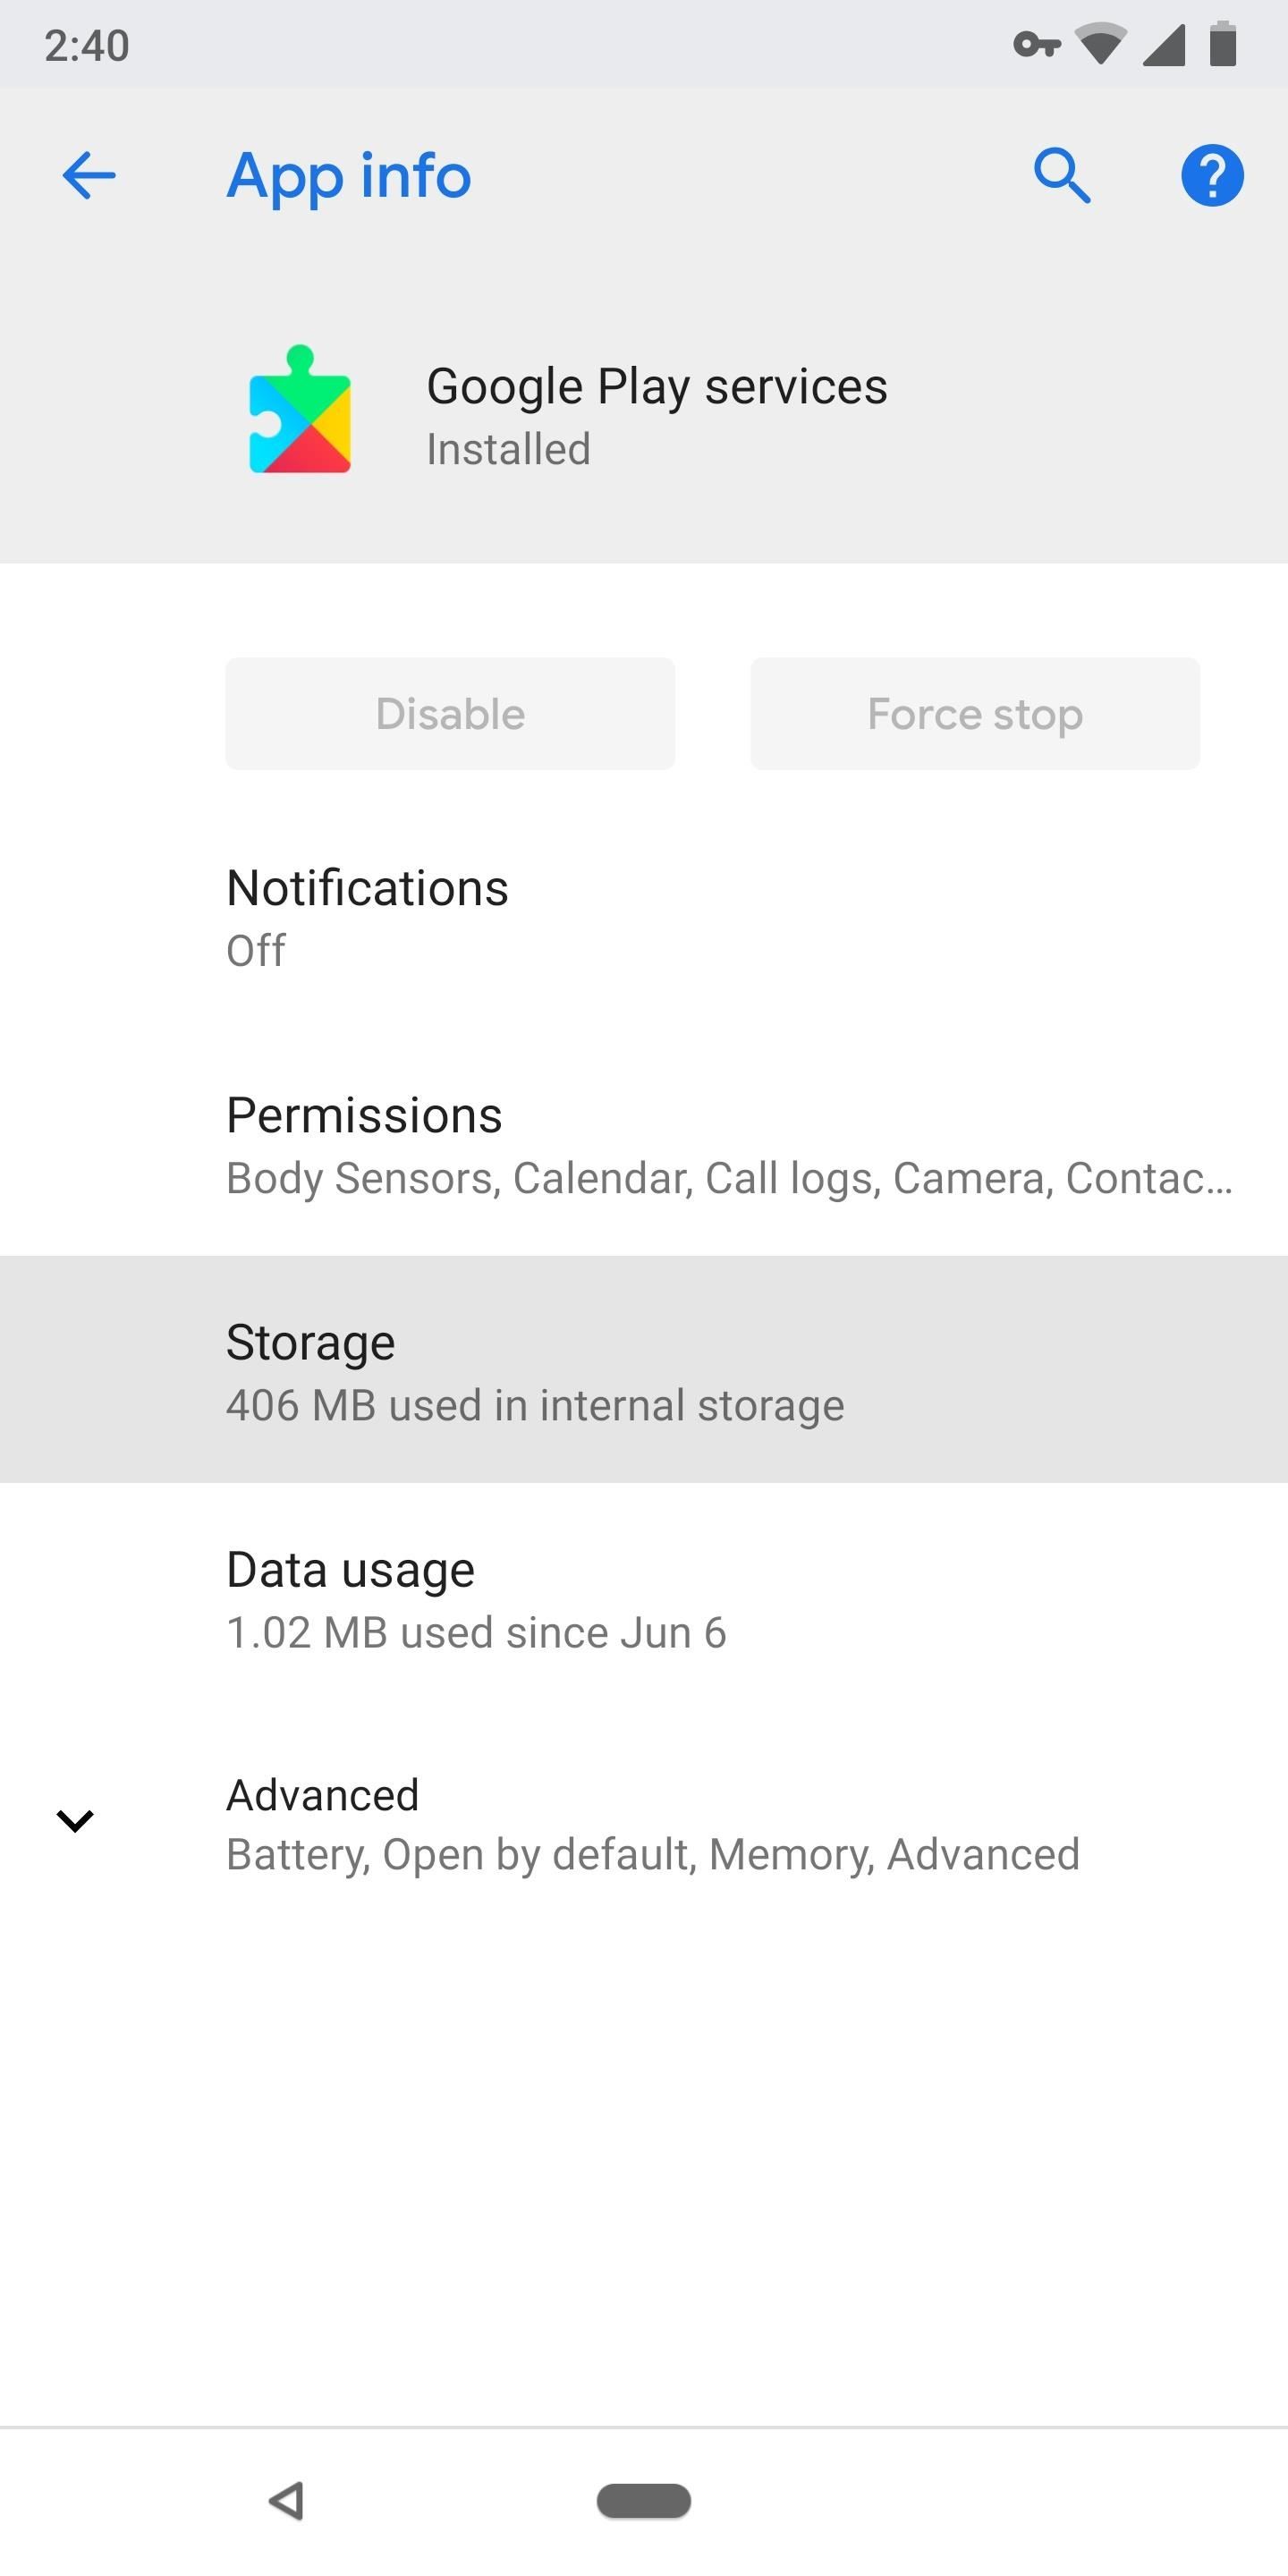
To verify that Play Services can access your device’s settings, head to Settings –> Apps, then select “All Apps” from the drop-down menu. Scroll down and choose “Google Play Services,” then tap “Permissions” and make sure the “Location” toggle is enabled.
Step 6: Make Sure Play Services Can Modify System Settings
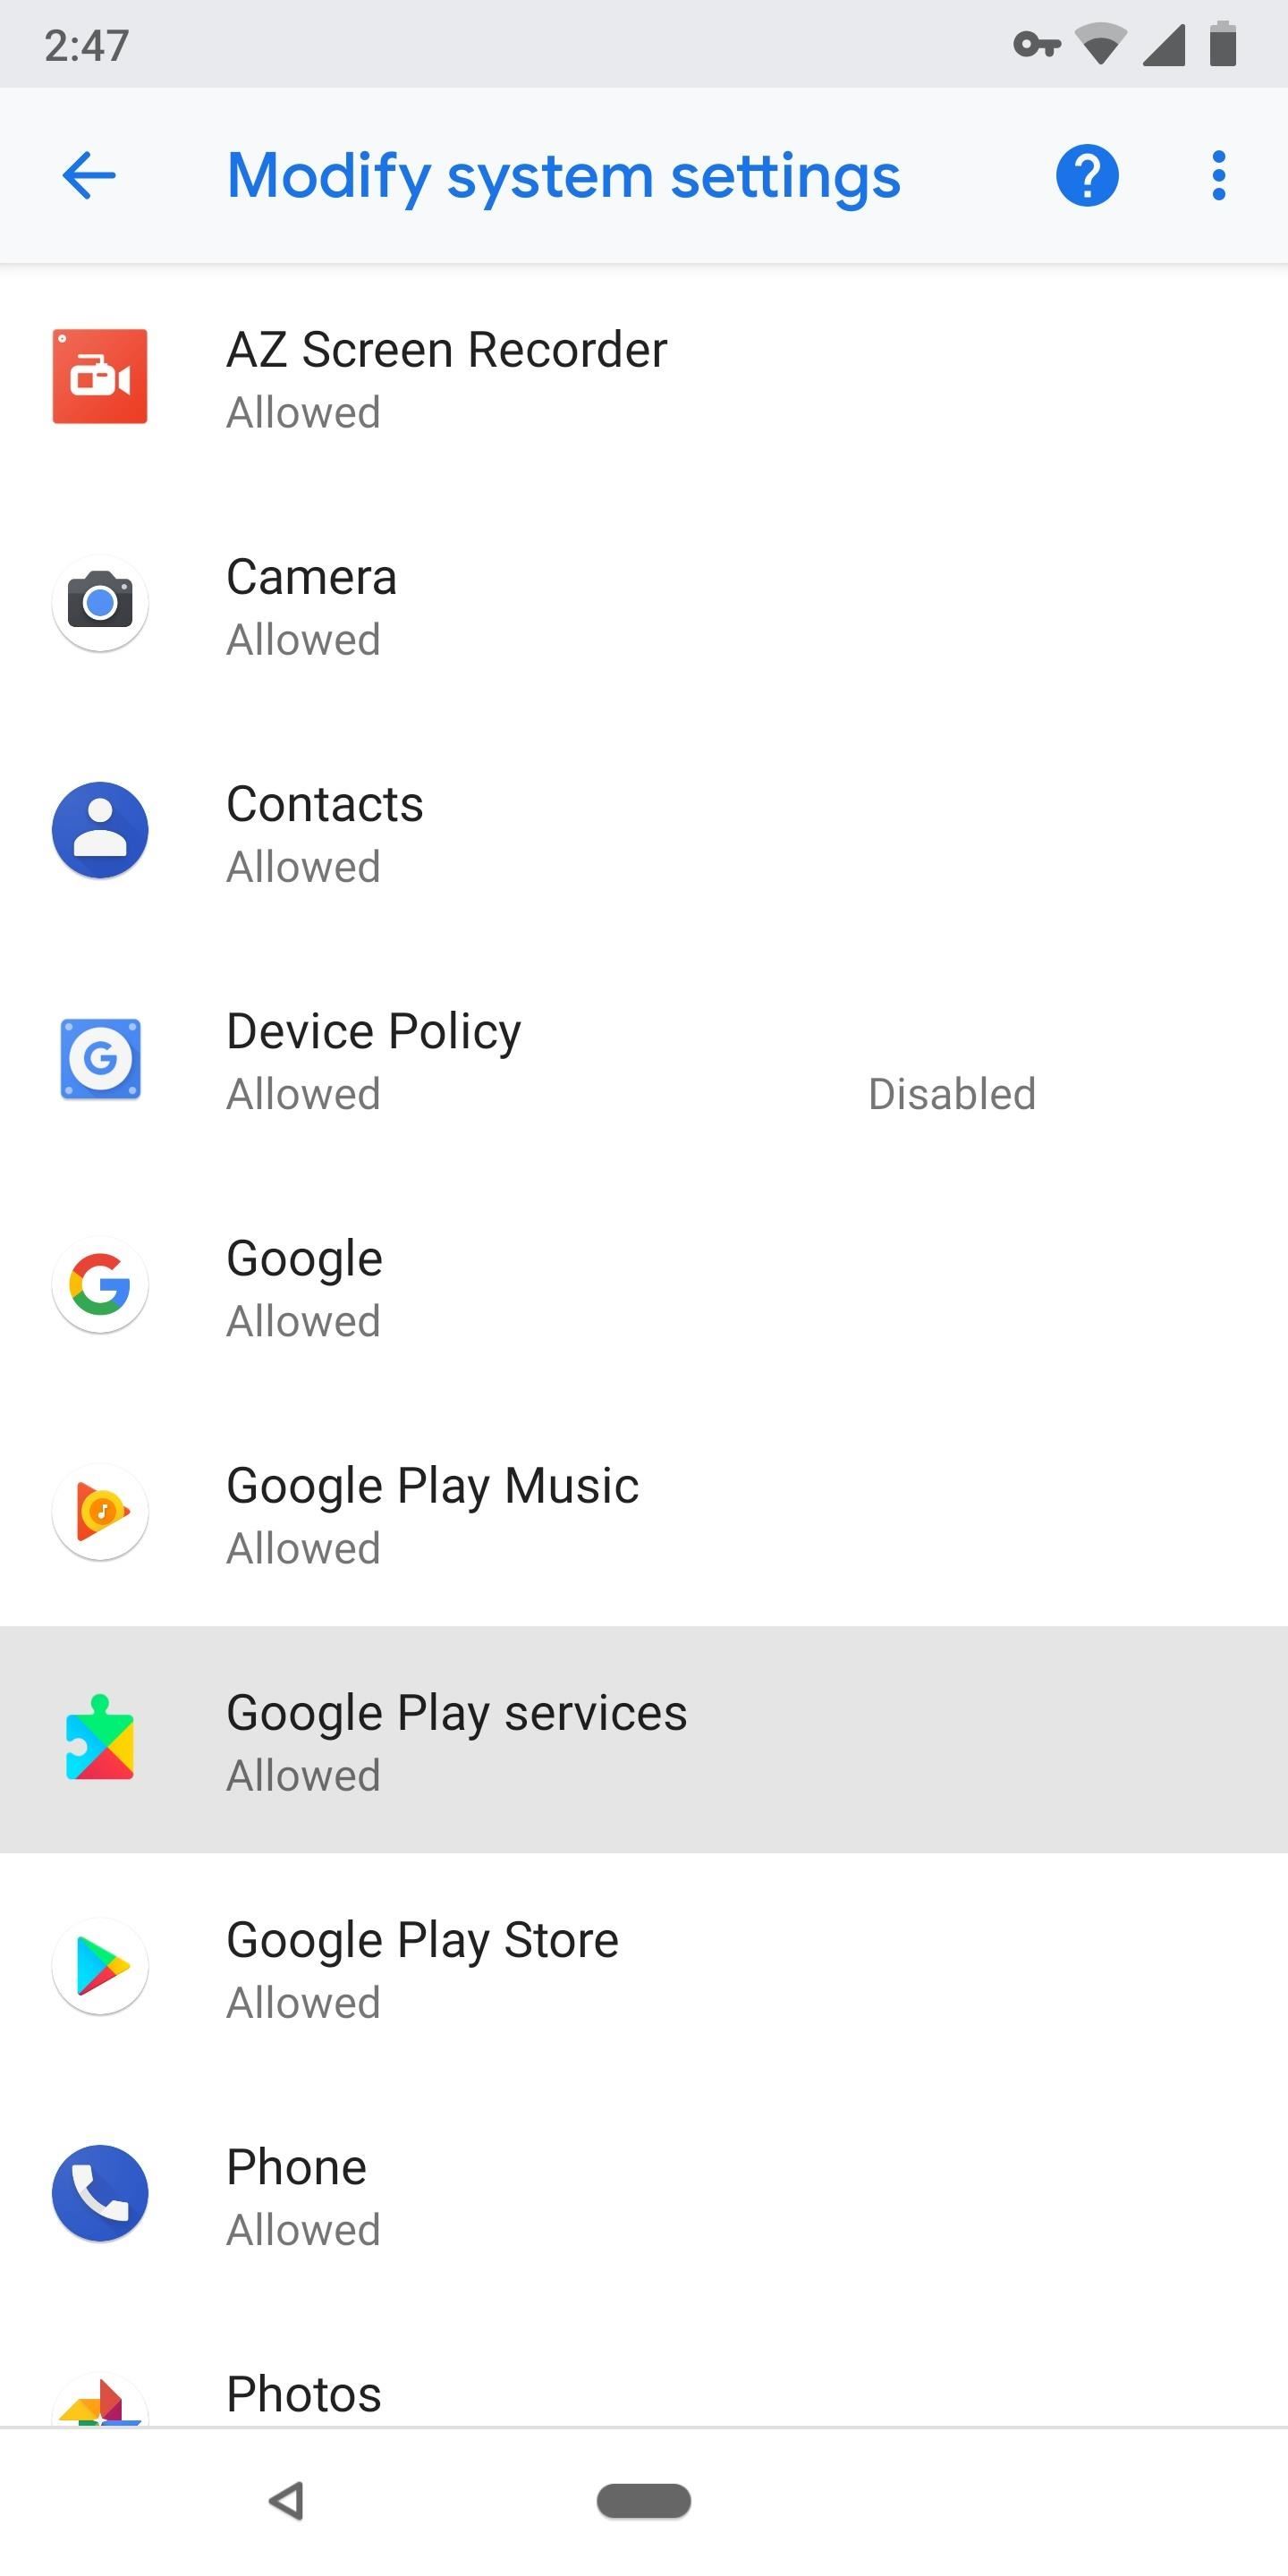
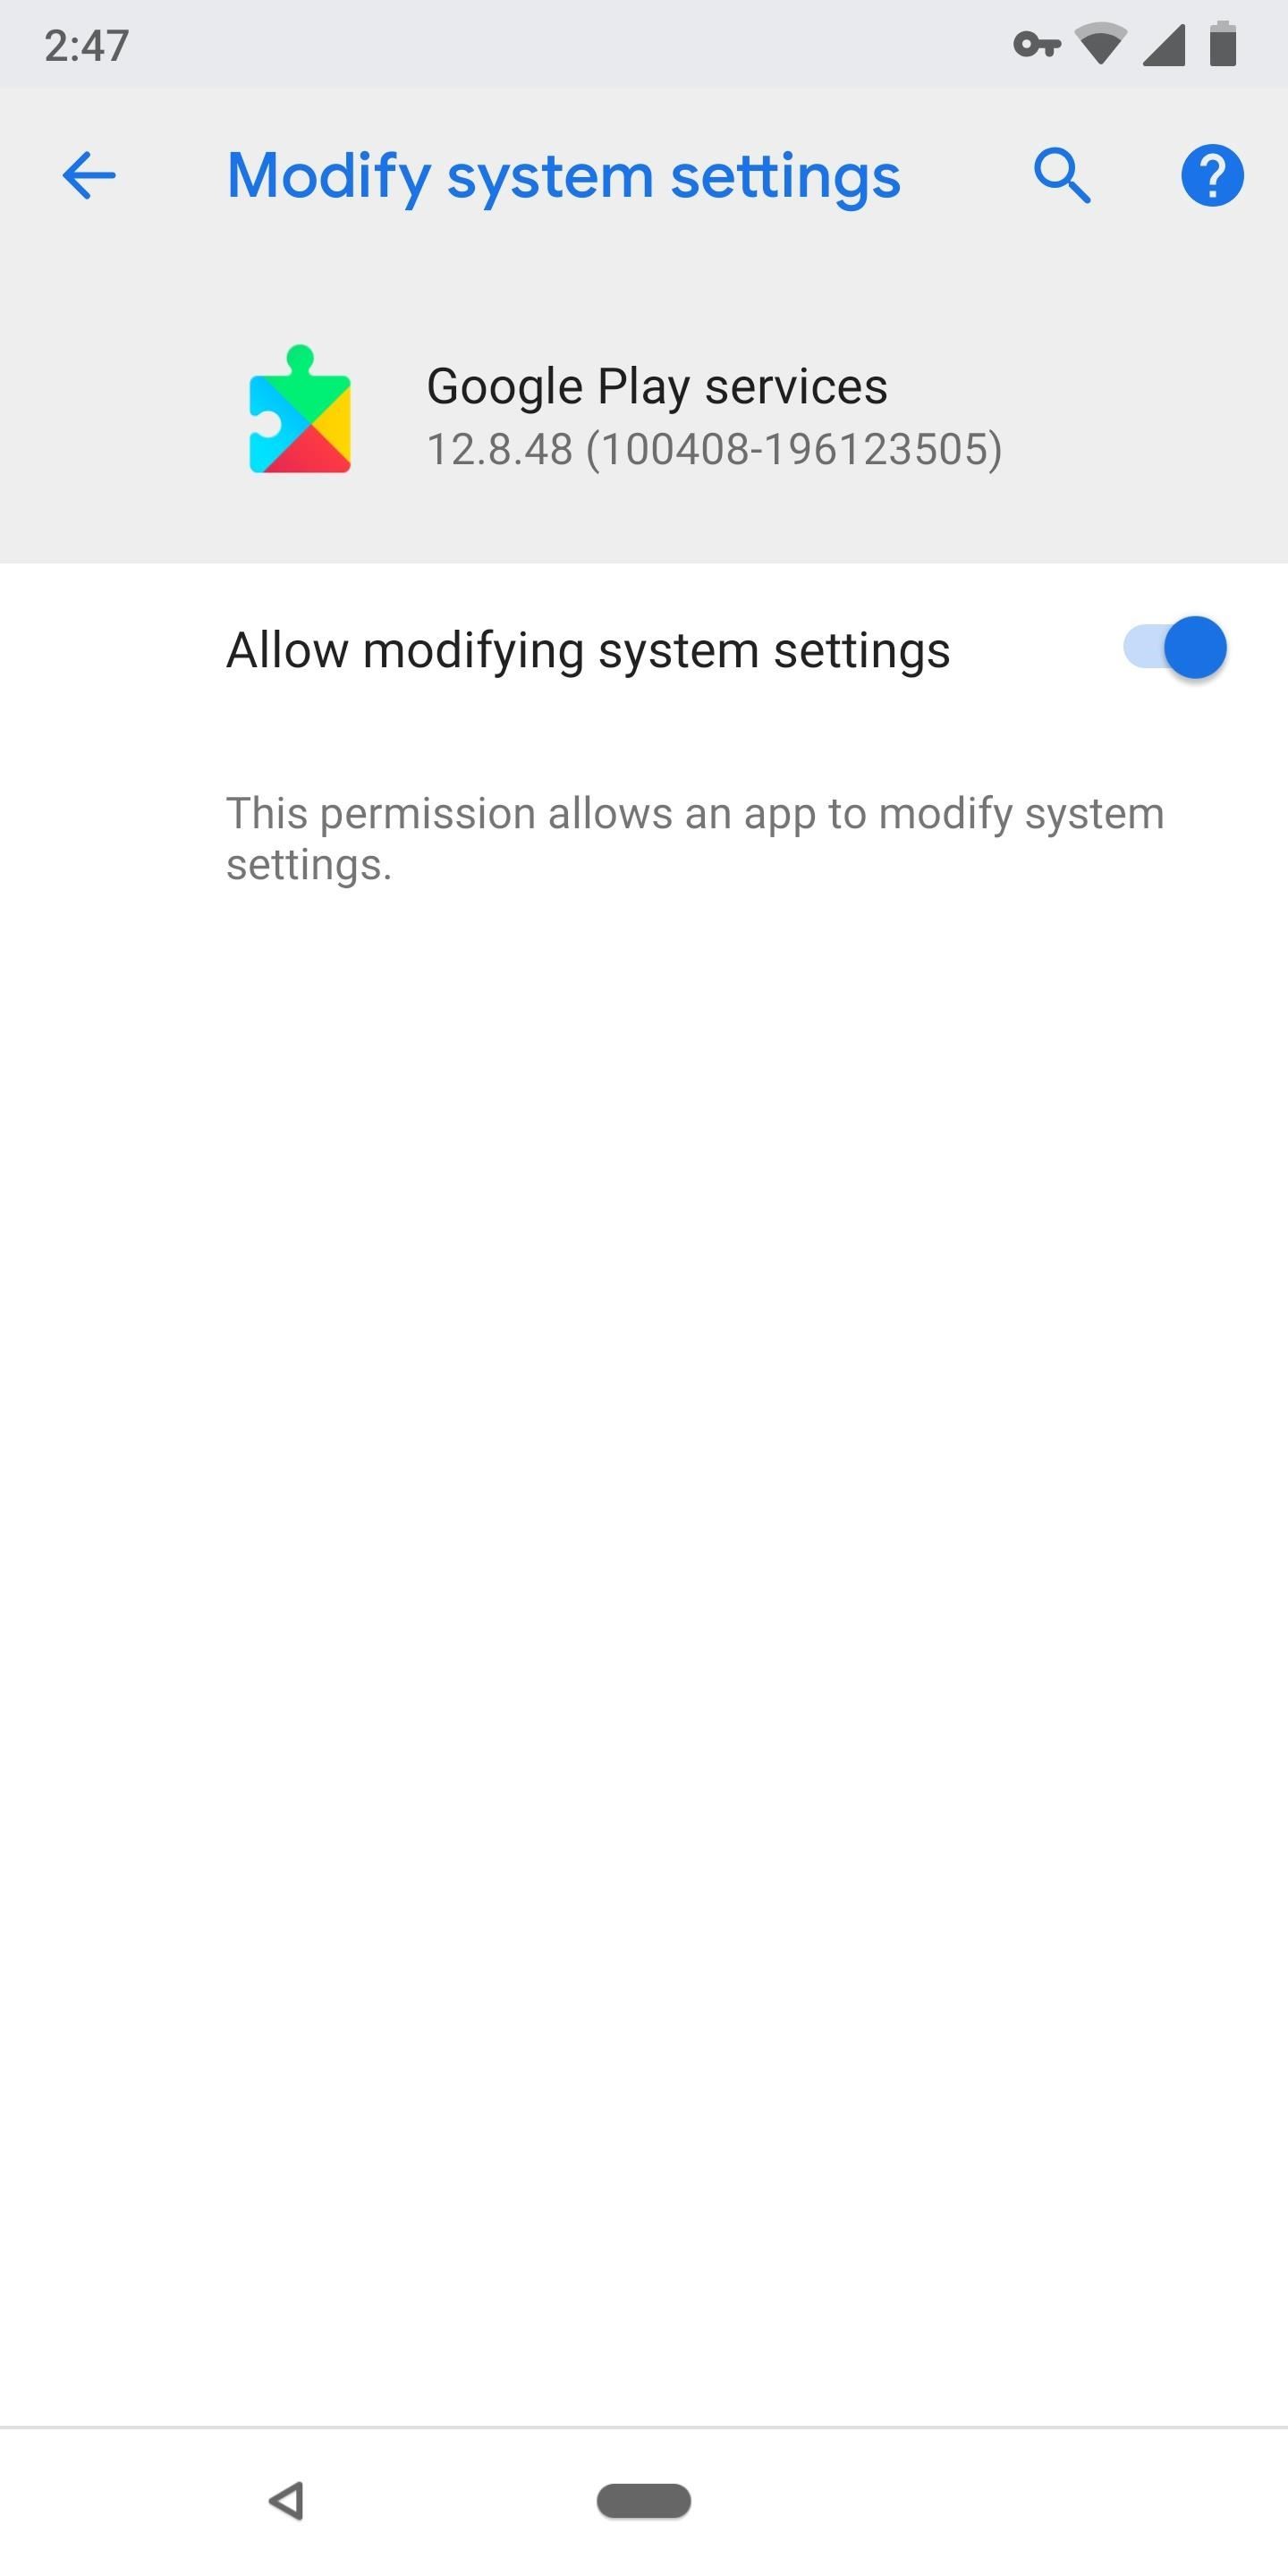
The way Play Services can unlock your device when Smart Lock is enabled is by using a special permission called “Modify System Settings.” Make sure Play Services has this permission by searching your Settings app for “Modify System Settings” and choosing the top result. From there, select Google Play Services from the list and make sure the toggle is enabled on the following screen.

Step 7: Make Sure Play Services Isn’t Battery Optimized
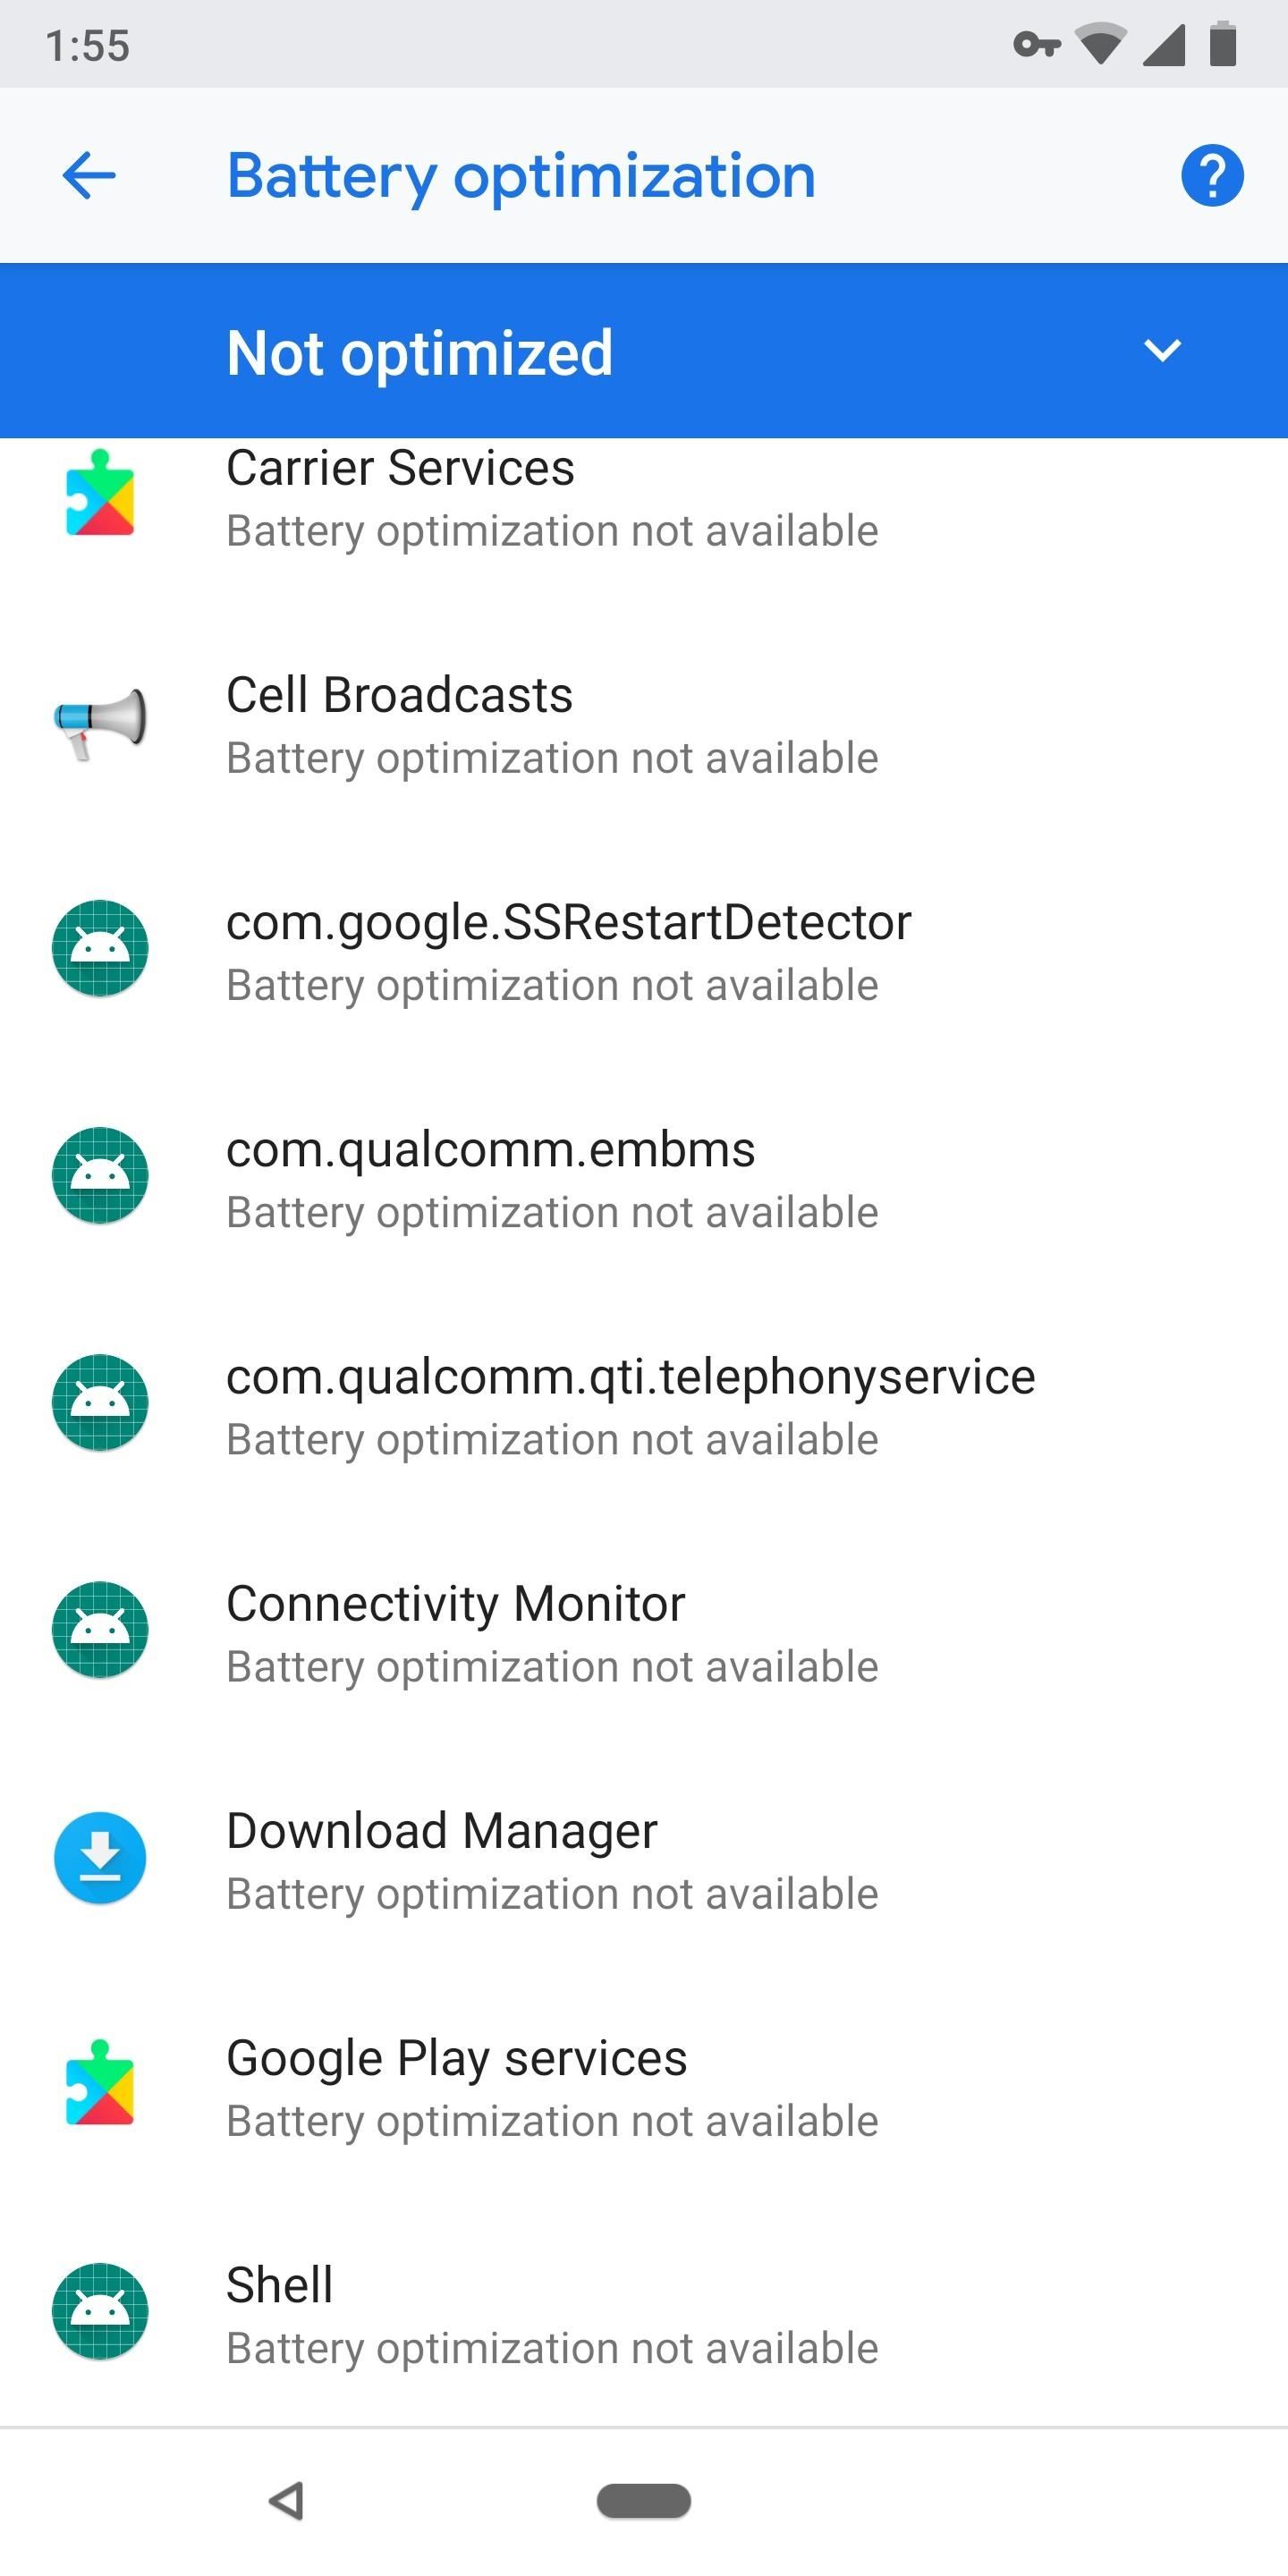
This next troubleshooting step won’t apply to most users, but if you’ve used a mod like this one to dial back Play Services battery drain, Trusted Places may be failing because its backbone (Google Play Services) is in Doze Mode.
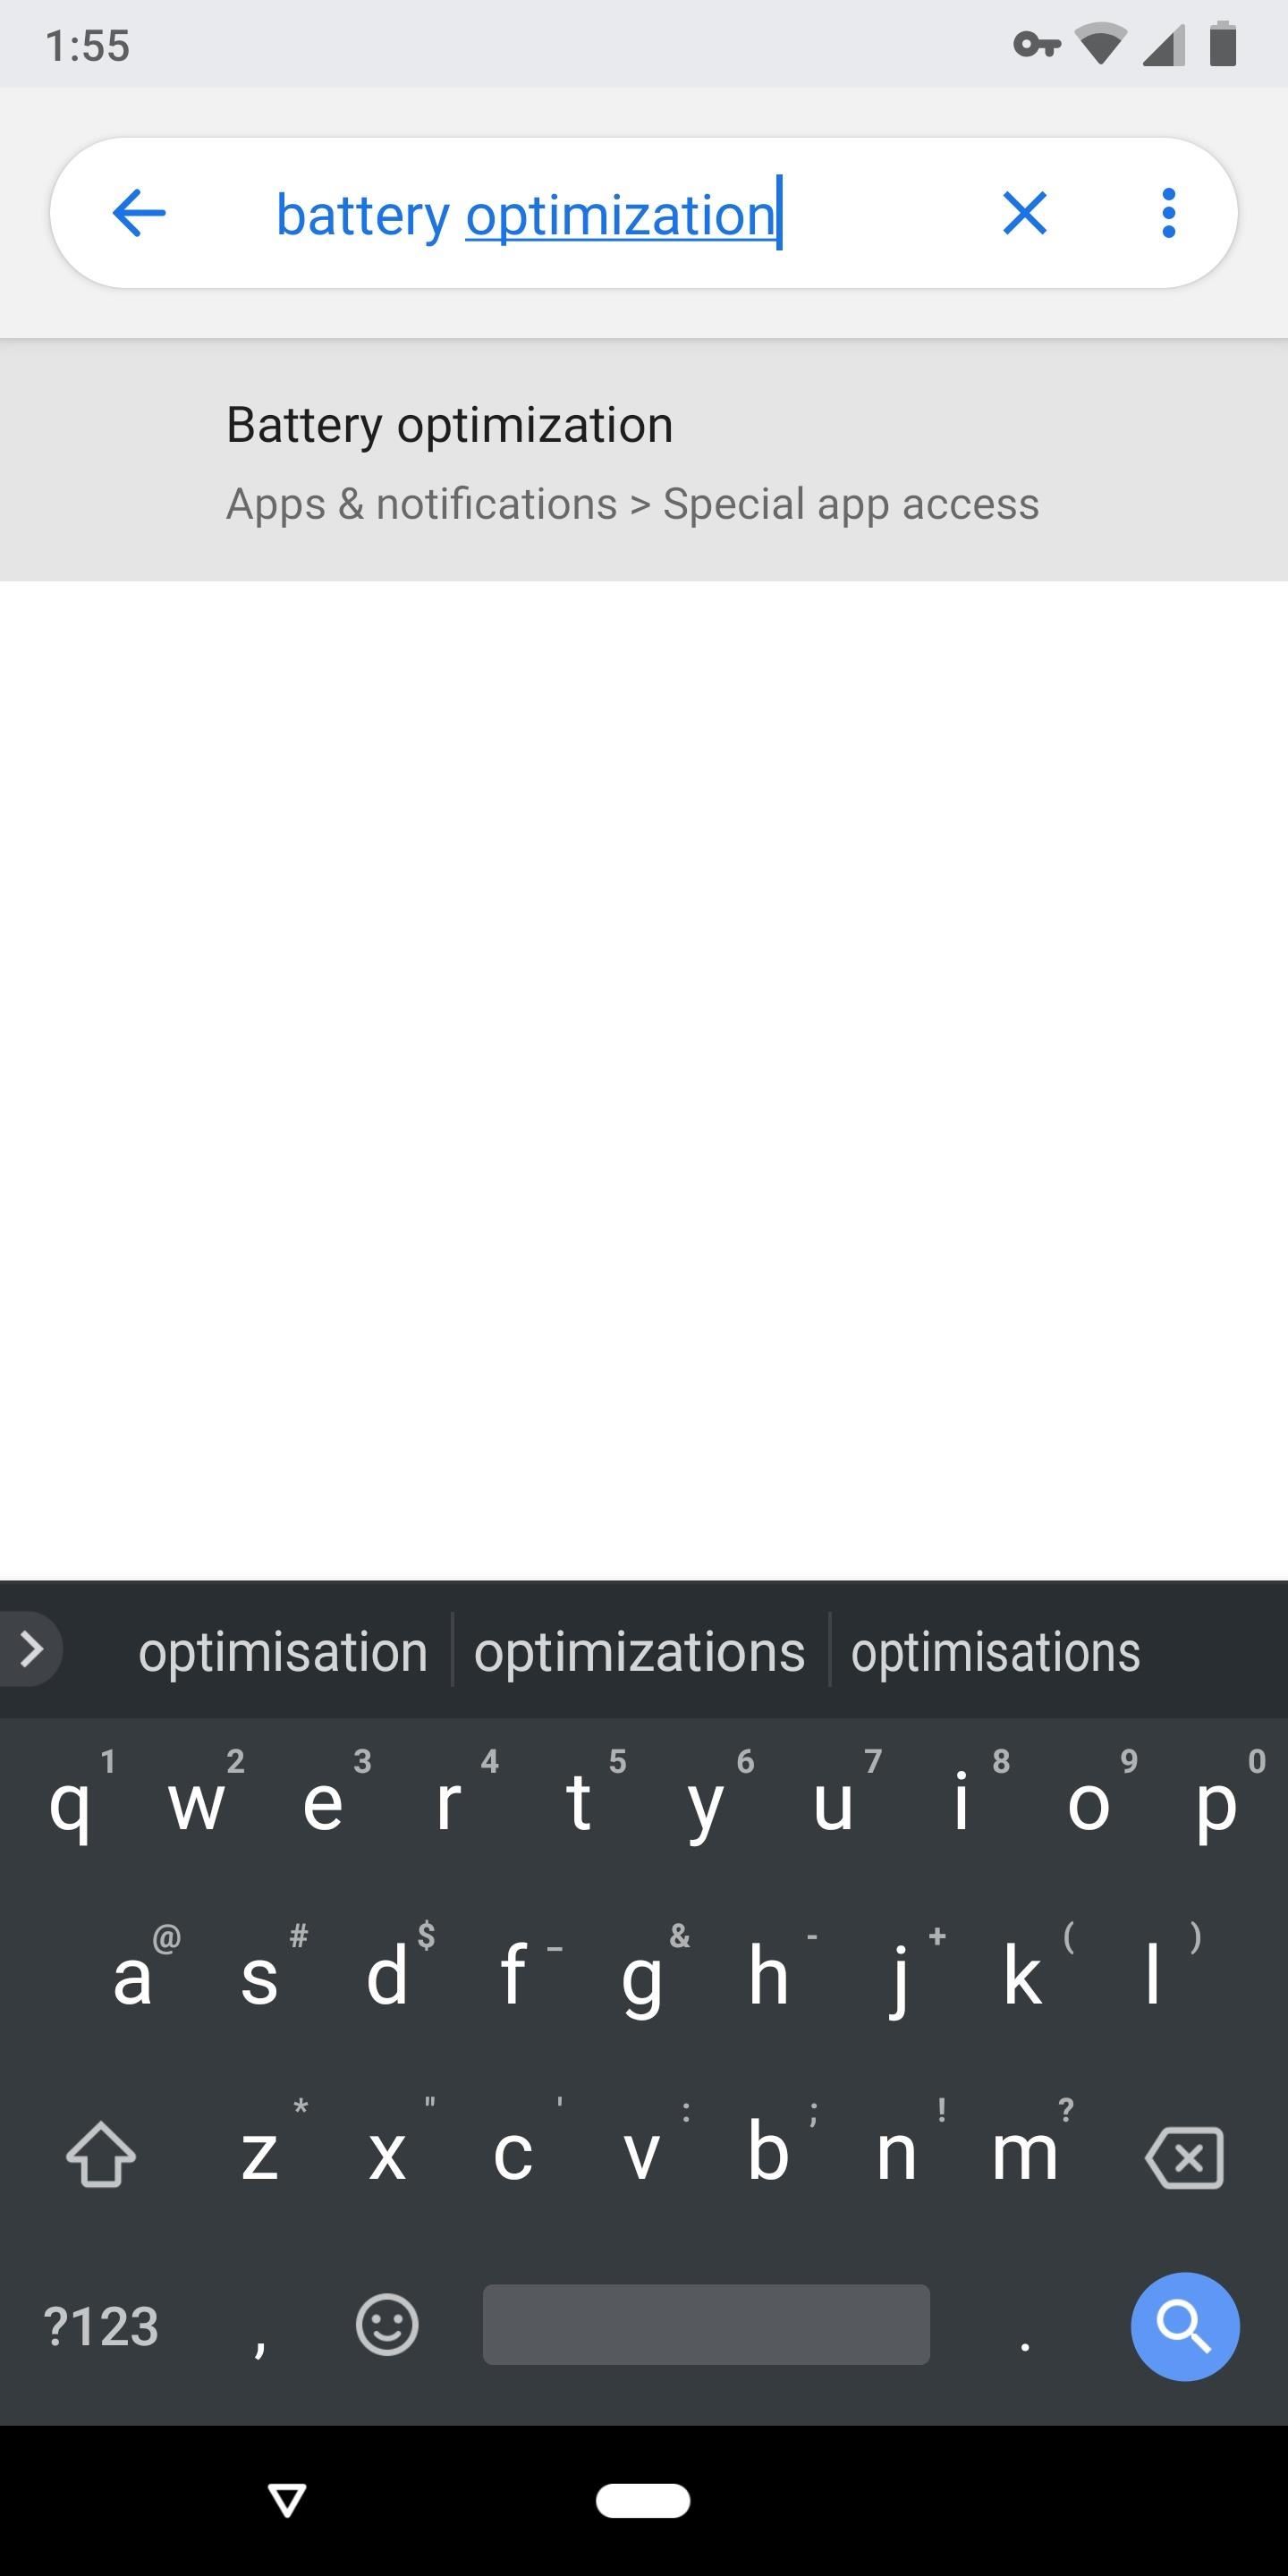
To verify, head to Settings and search for “Battery Optimization” and tap the top result. From there, scroll through the list and look for Google Play Services — if it’s listed on the main menu, you’re all set. If it’s not, tap the drop-down menu at the top of the screen and choose “All Apps,” then find Play Services and set it to “Not Optimized.”
Step 8: Delete Trusted Place & Add It Again
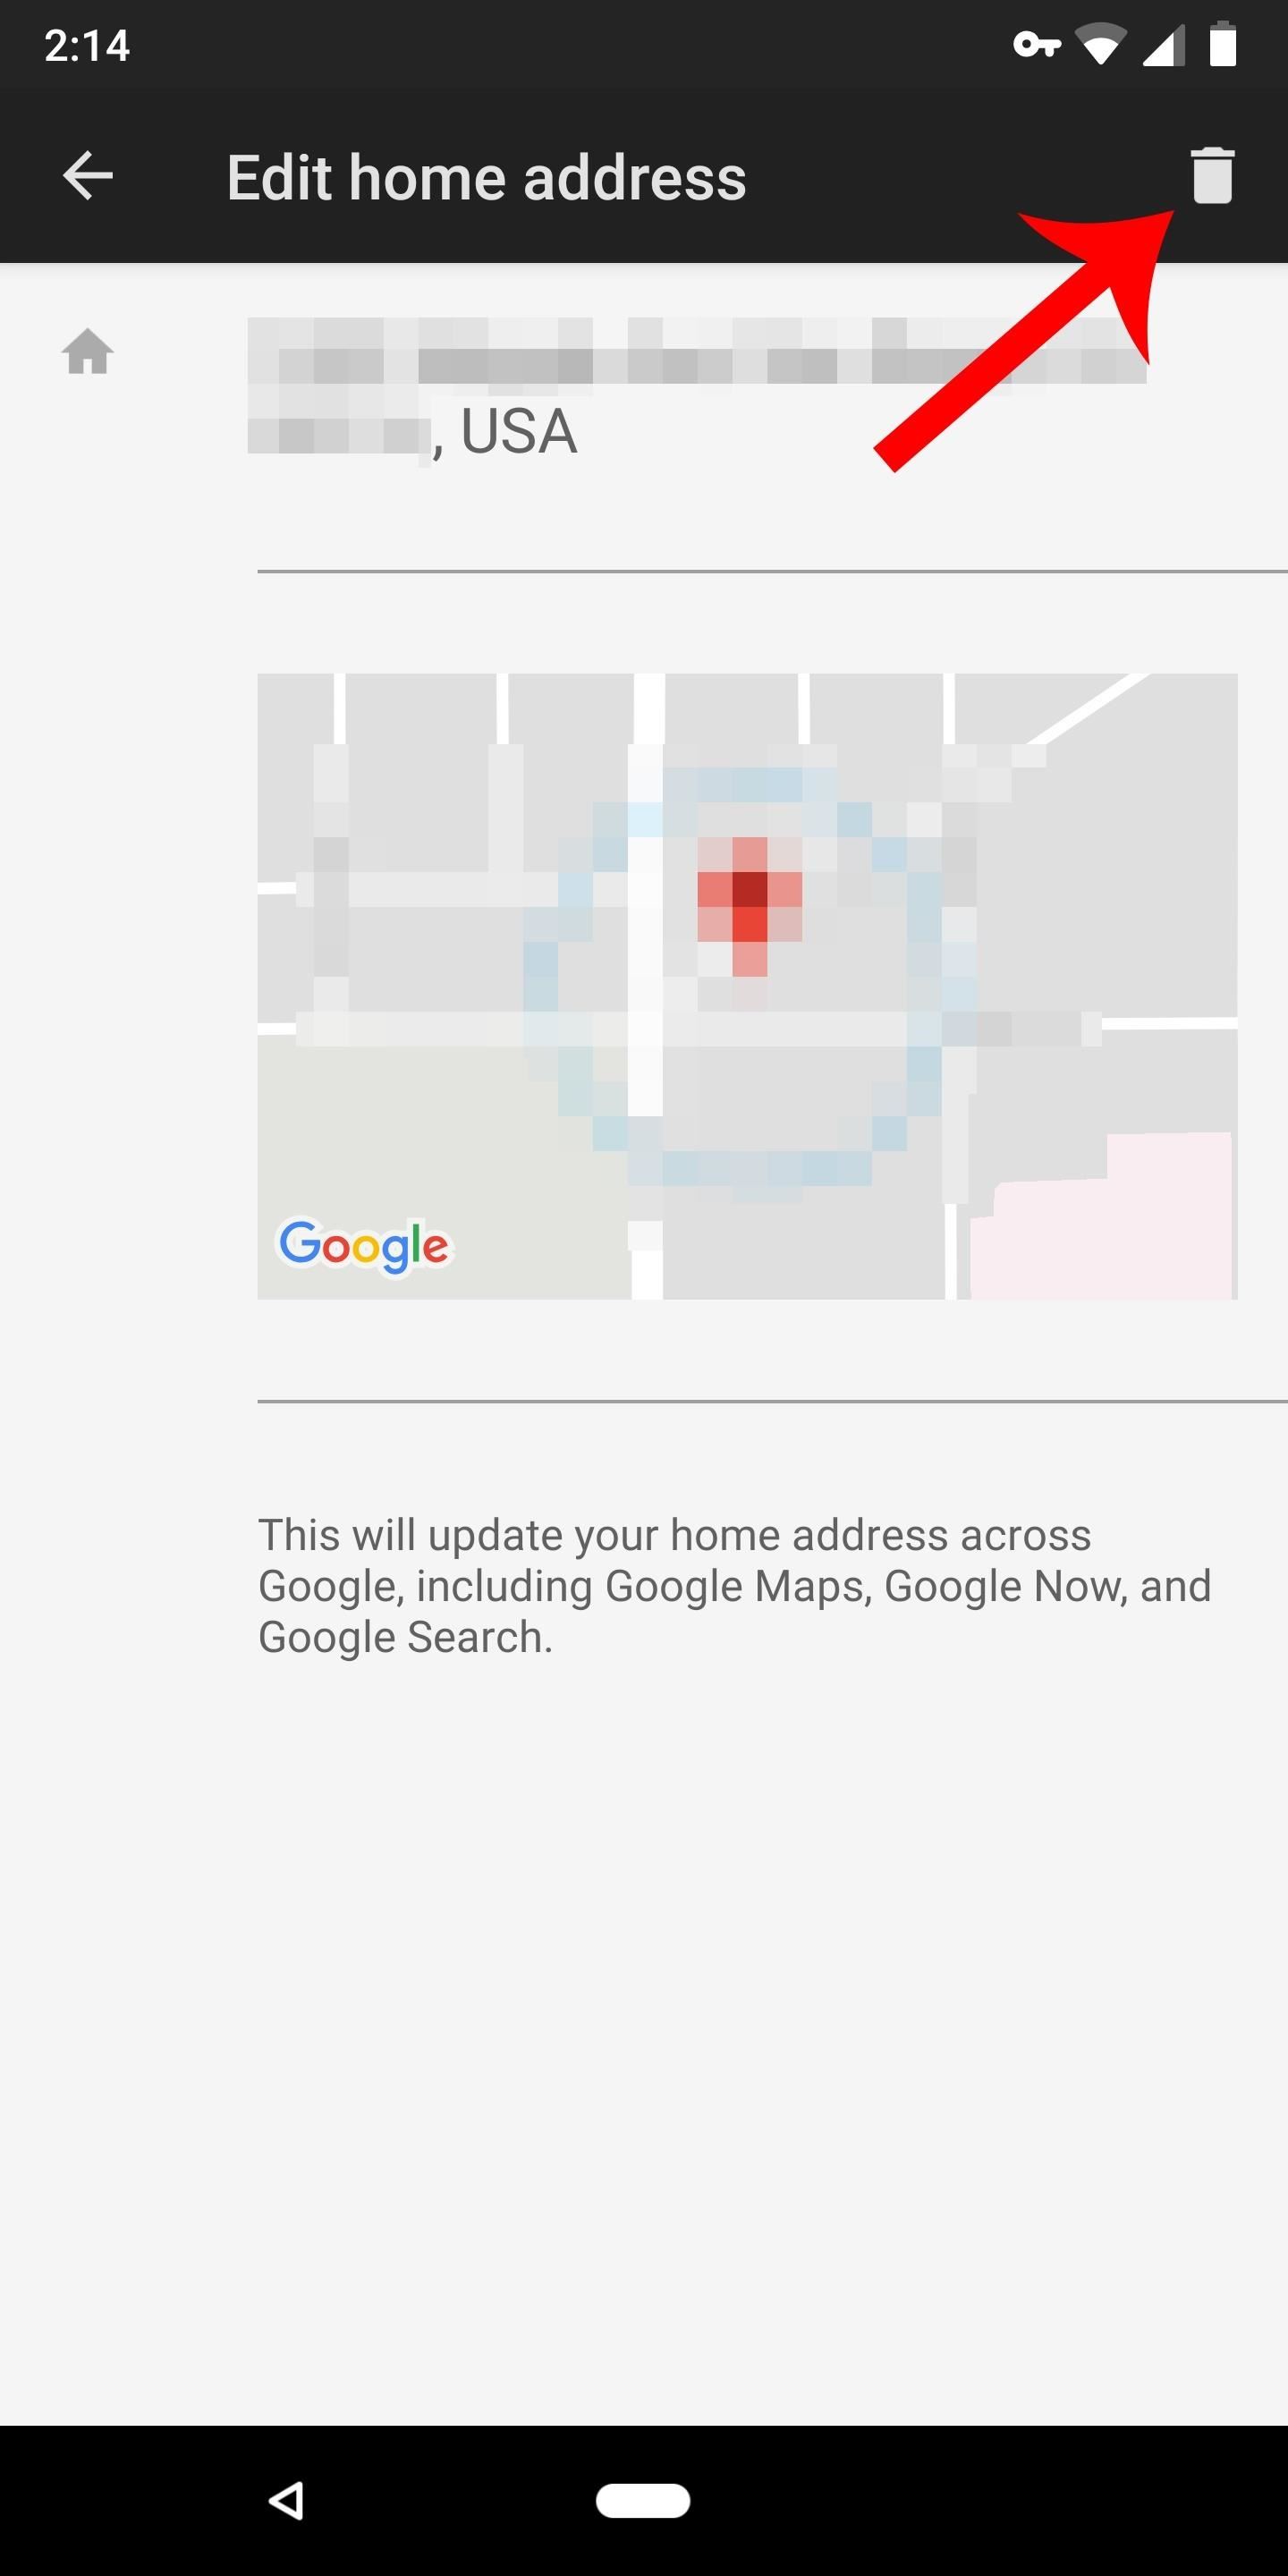
Head to Settings –> Security –> Smart Lock –> Trusted Places, then tap the address you’re having trouble with. From there, select “Edit” from the menu, then tap the trash can icon in the top-right corner of the next screen to remove this address. Confirm your choice on the prompt.
When you’re done there, restart your phone. When you get back up, head back to the Trusted Places menu and tap “Home,” then enter the address again.

Step 9: Disable the Home Location & Add a Nearby Address
Most of us have let Google automatically determine our home and work addresses through Google Maps location data. If your trusted place is labeled as “Home” or “Work,” this is where the address came from, and there’s a chance that Google just has bad metadata for that specific address in its mapping system. As a workaround, head to Settings –> Security –> Smart Lock –> Trusted Places, then tap your default address and choose “Turn off this location.”
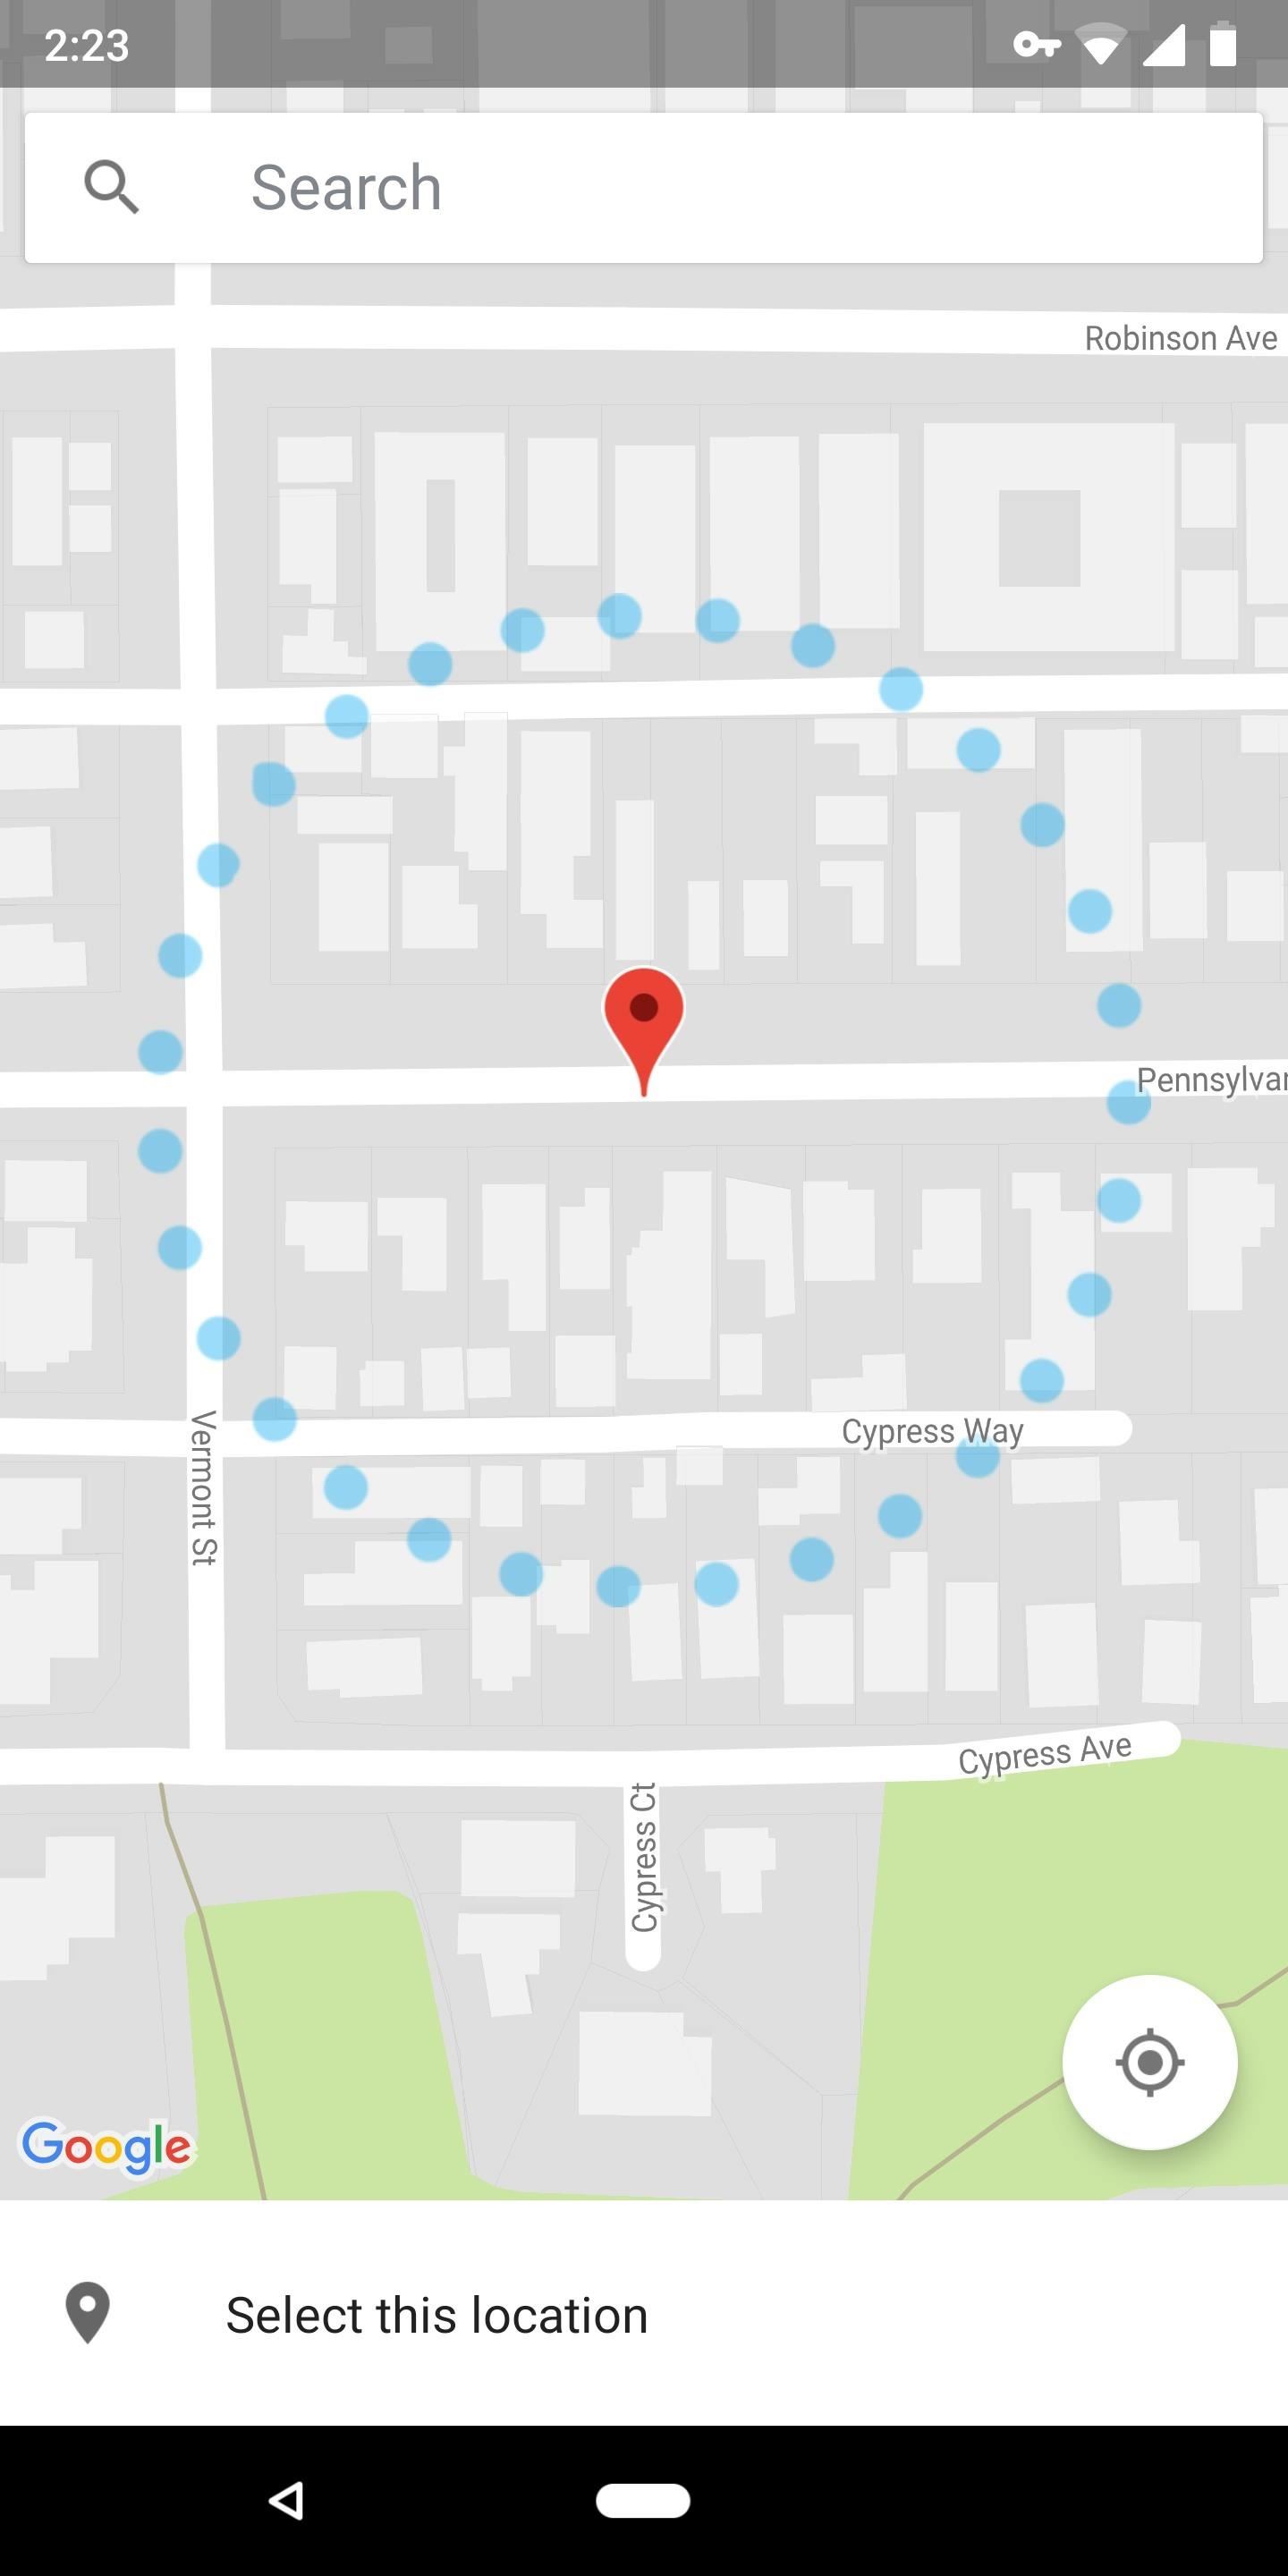
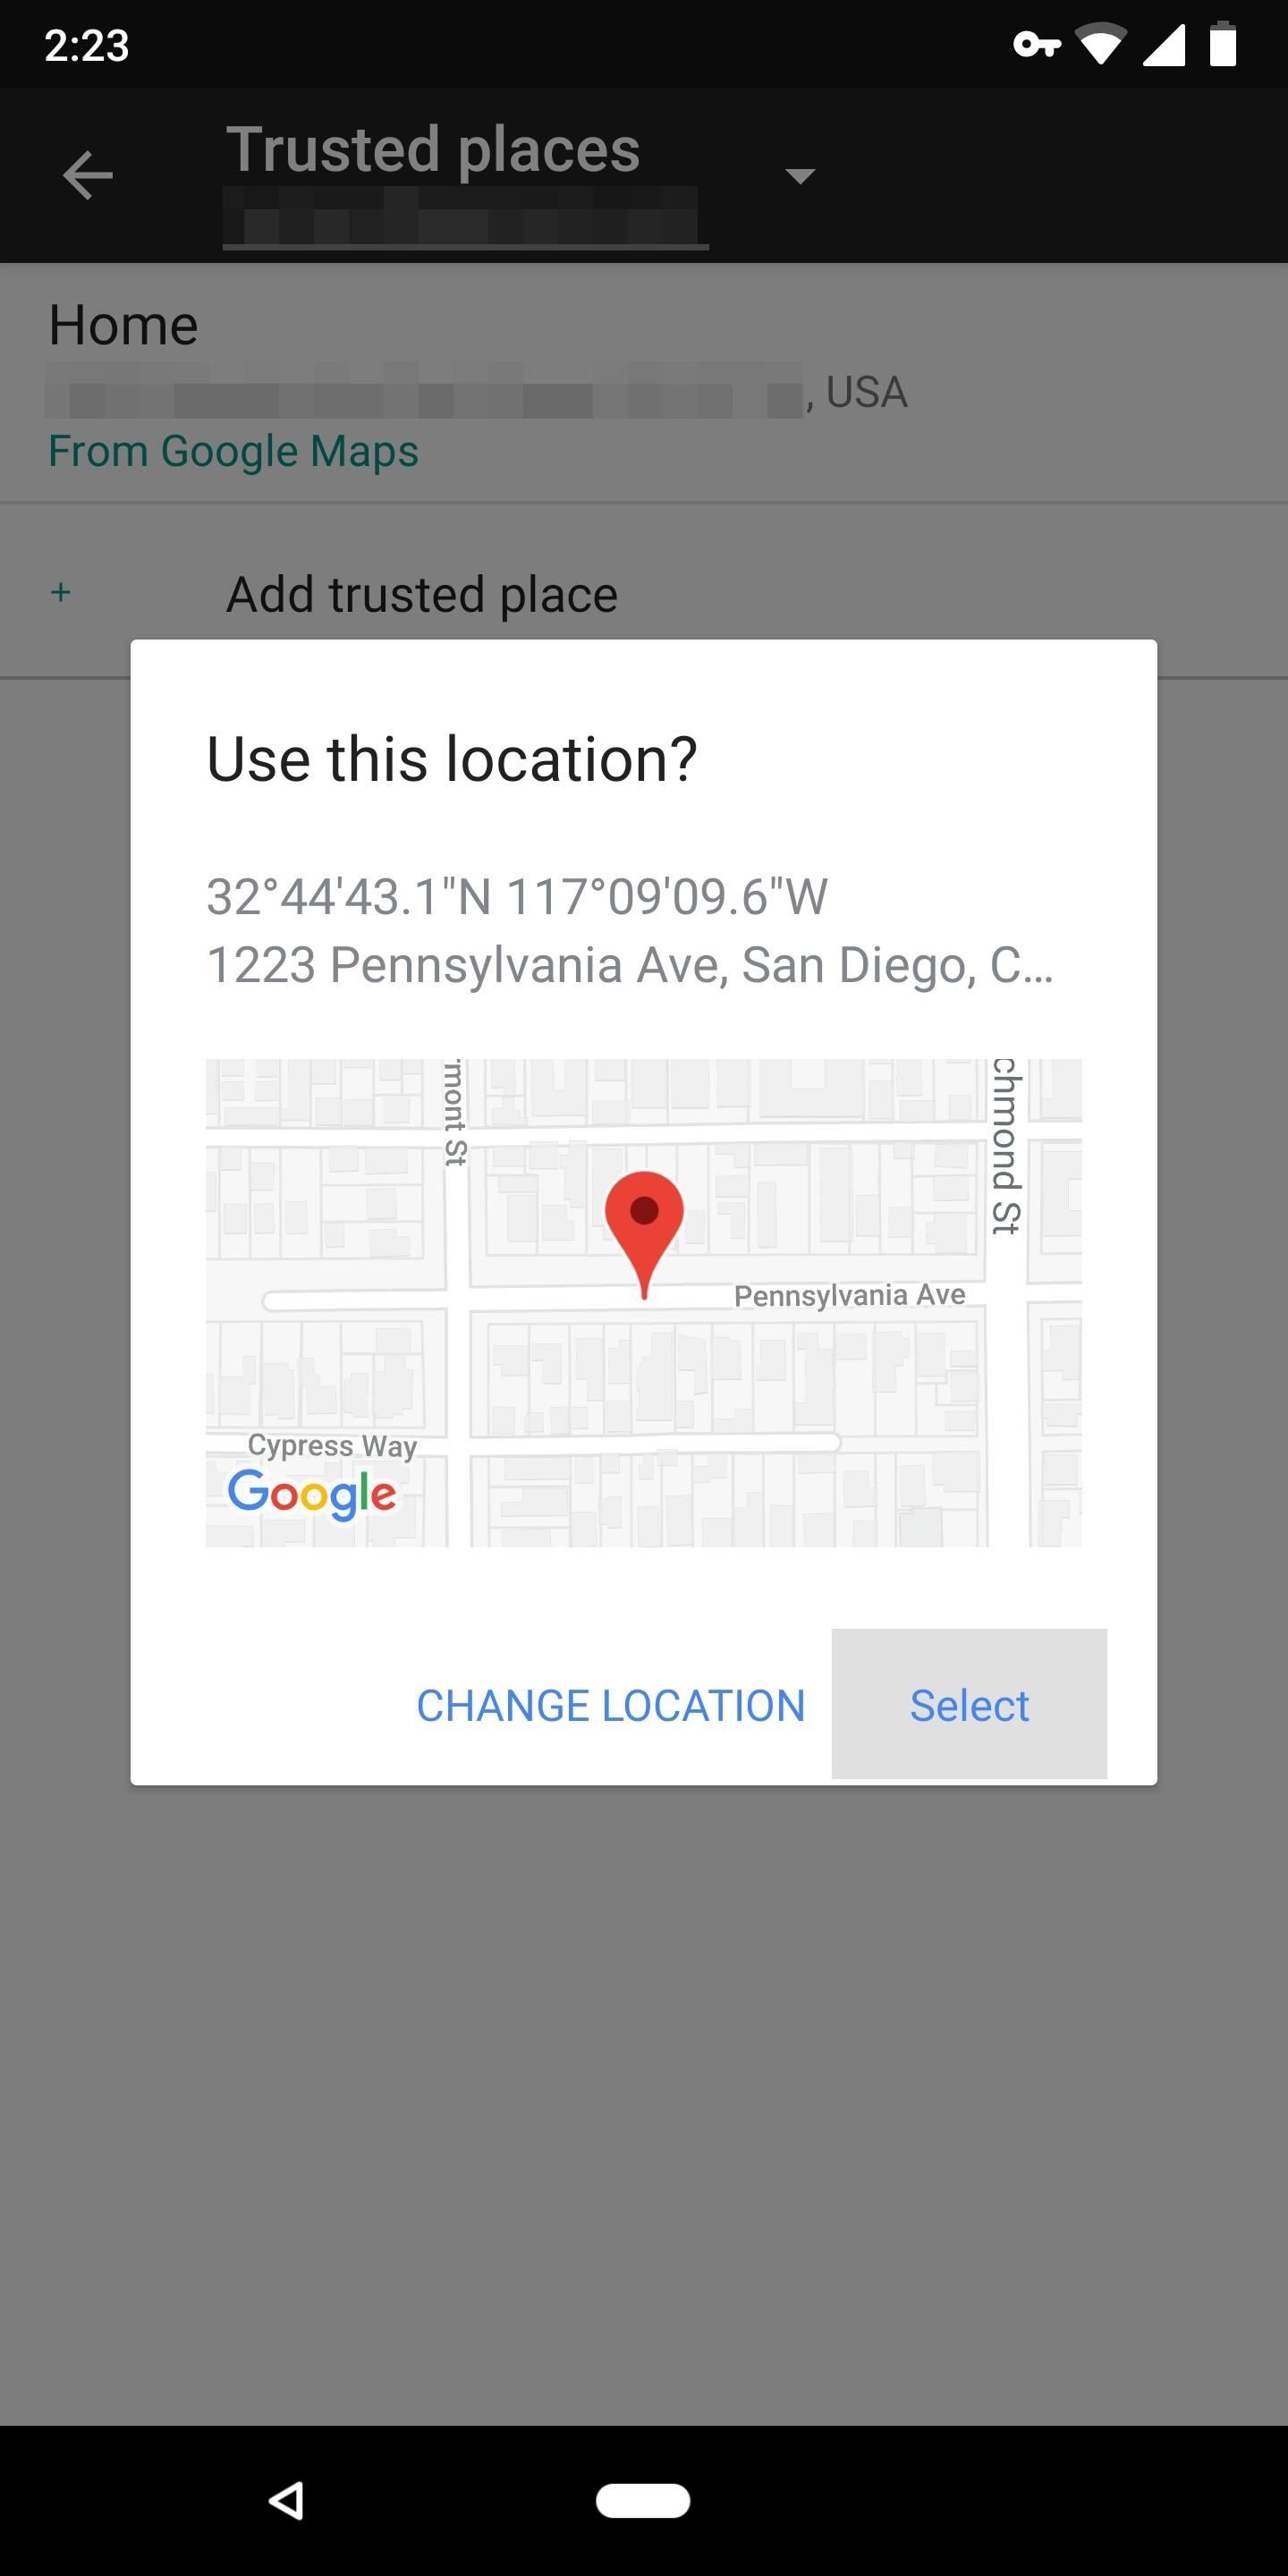
Next, tap “Add trusted place,” then pan and zoom around the provided map until the location indicator is hovering over a spot very close to the address where you want Smart Lock to kick in. As long as your target address is within the blue dotted circle, Trusted Places will still work when you’re there. Tap “Select this location” and then “Select” to make it a trusted place. Doing this manually will append coordinates to your trusted place, which is more reliable than just a street address.
Step 10: Clear Data on Google Play Services
The last troubleshooting step is the nuclear option. Start by heading to Settings –> Security –> Smart Lock, then go through each menu item and disable all Smart Lock features. Make sure your Trusted Places are disabled as well.
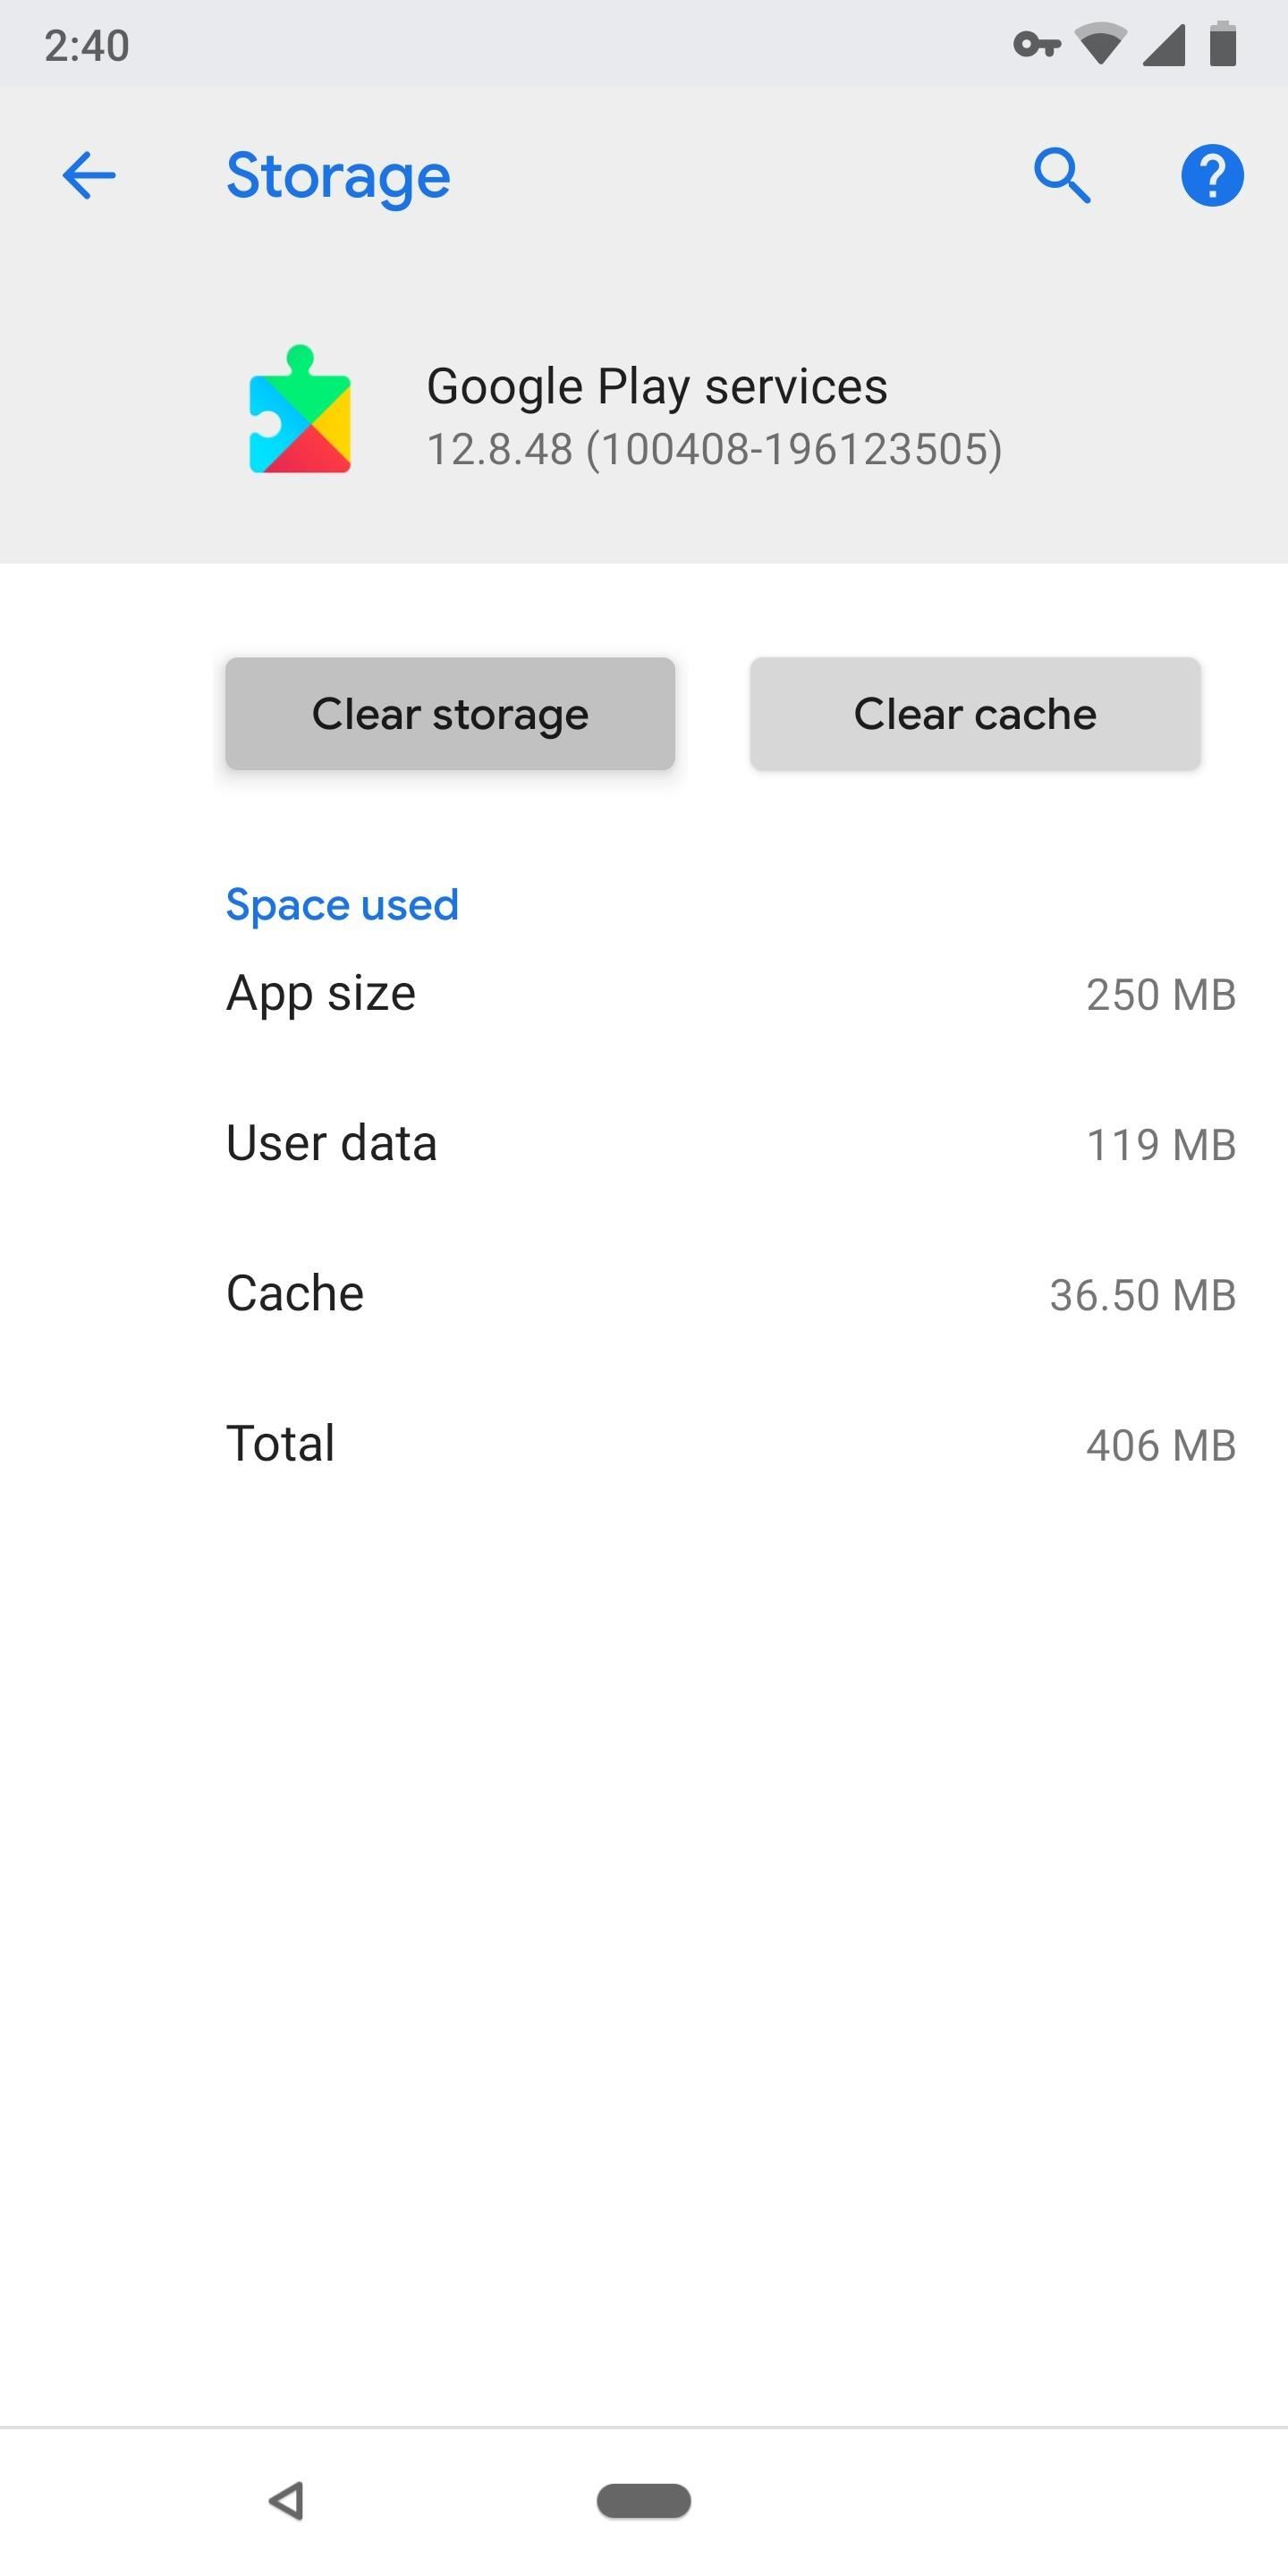
Next, head to Settings –> Apps. Select “All Apps” from the drop-down menu, then scroll through and find Google Play Services. Tap it, then choose “Storage.” On the next screen, tap “Clear Storage” (or “Clear Data”), then confirm your choice on the prompt. As soon as you can, restart your phone. When you get back up, enable your Smart Lock features again and they should finally be working.
If none of these troubleshooting tips worked for you, let me know in the comment section below. I want this guide to be as complete as possible, so I’ll do my best to help you through any other potential troubleshooting steps we can find.
Hot Deal: Set up a secure second phone number and keep your real contact details hidden with a yearly subscription to Hushed Private Phone Line for Android/iOS, 83%–91% off. It’s a perfect second-line solution for making calls and sending texts related to work, dating, Craigslist sales, and other scenarios where you wouldn’t want to give out your primary phone number.
“Hey there, just a heads-up: We’re part of the Amazon affiliate program, so when you buy through links on our site, we may earn a small commission. But don’t worry, it doesn’t cost you anything extra and helps us keep the lights on. Thanks for your support!”


